Honeywell 5100LP MINI COMPUTER, MOBILE COMPUTER User Manual rev
Honeywell International Inc MINI COMPUTER, MOBILE COMPUTER rev
UserManual.wiki
>
Honeywell
>
5100LP User Manual
user manual rev
Navigation menu
Upload a User Manual
Namespaces
Wiki Guide
HTML
PDF
Info
Views
User Manual
Discussion / Help
Navigation


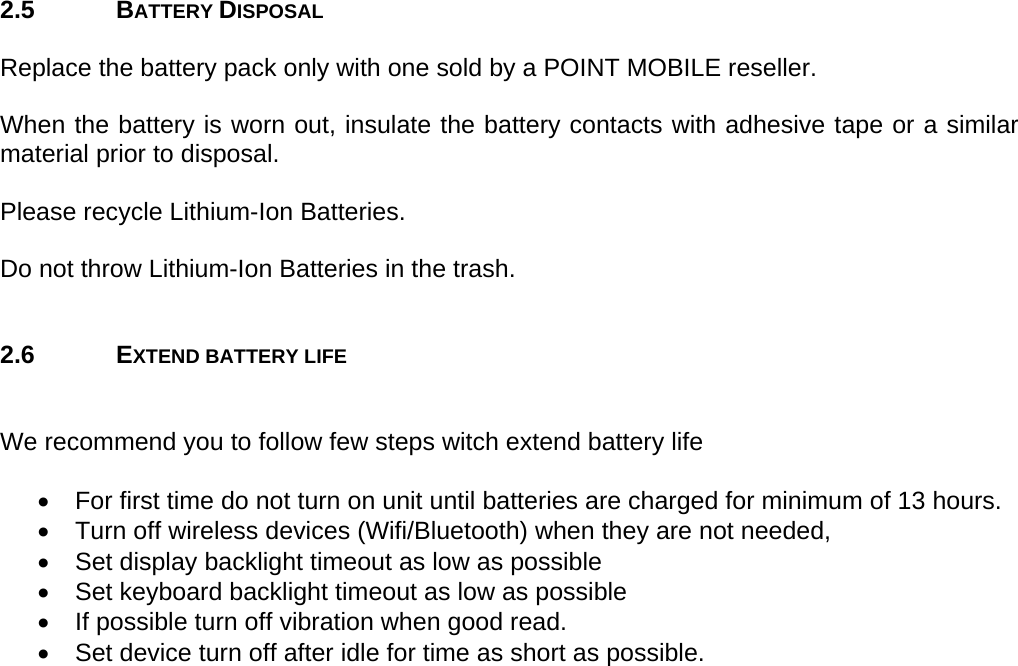
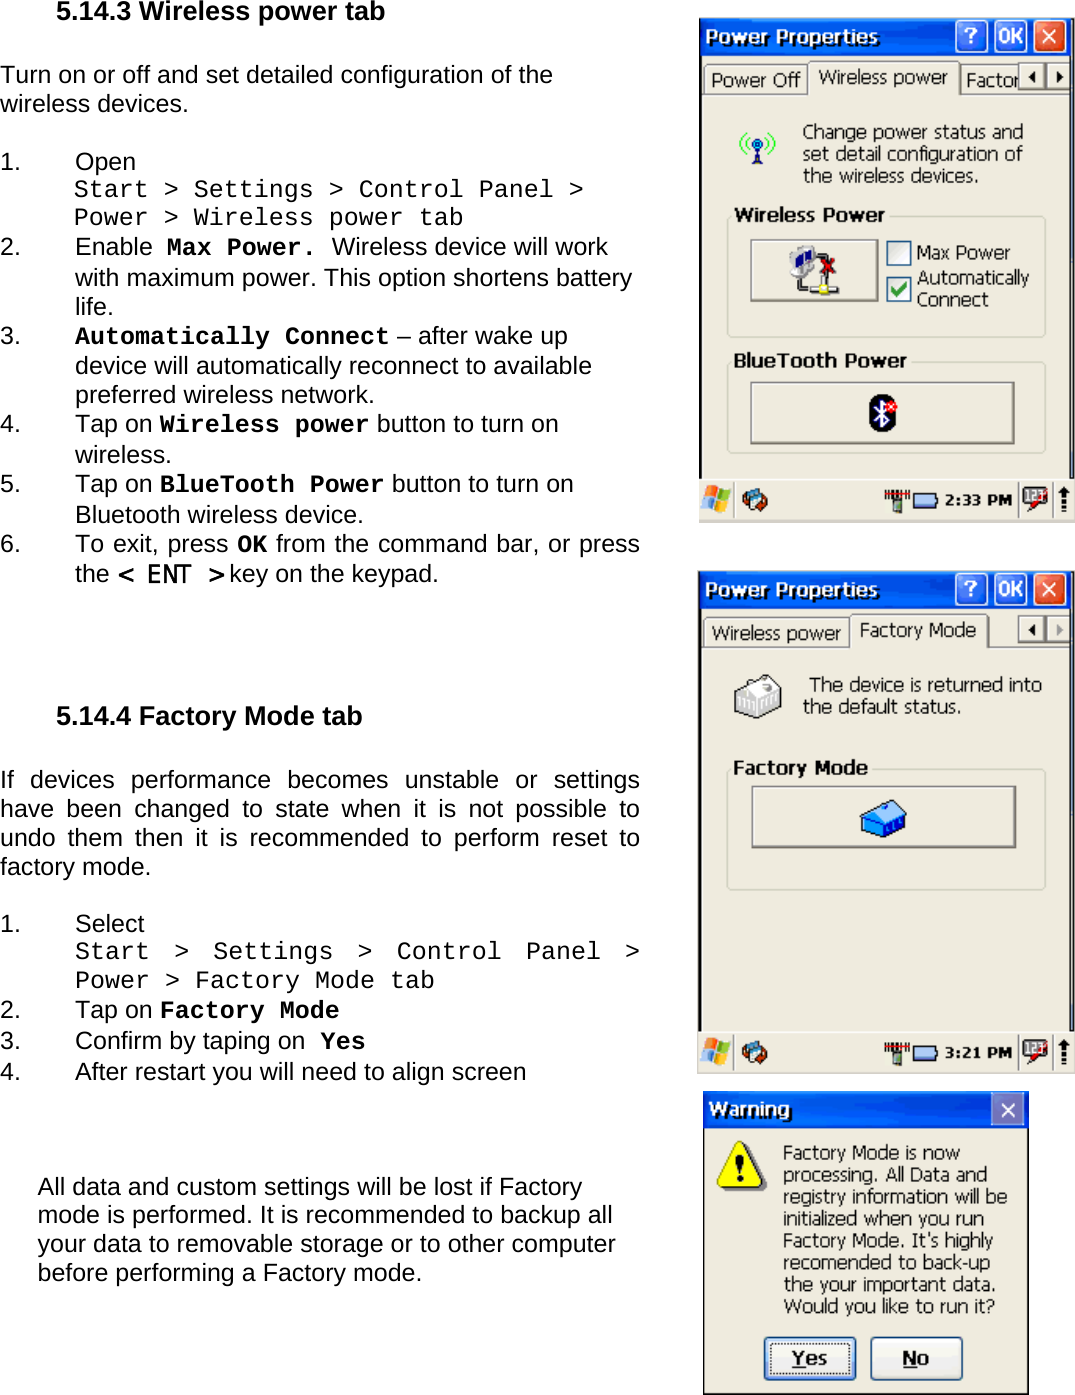
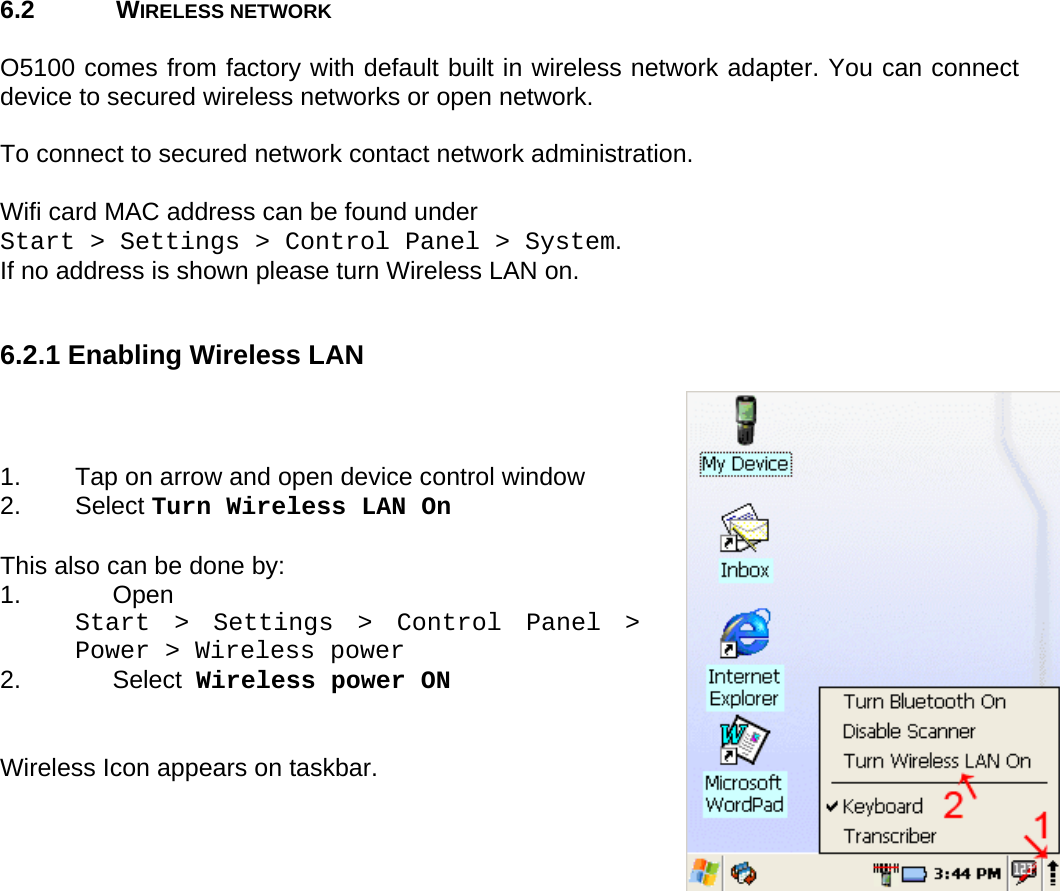
![User manual O5100 © All rights reserved. HONEYWELL 11 3.2 FACTORY MODE If devices performance becomes unstable or settings have been changed to state when it is not possible to revert them. It is recommended to perform reset to factory mode. Press the [Power button] and [Reset button] at the same time for Cold Reset and then release the [Reset button] only. After that, you can see boot menu If it shows boot log in the LCD, enter password key using keypad If you see boot menu screen, press key in order for entering download mode and press button [ 1 ] + [ 2 ] + [enter] in order. All data and custom settings will be lost if Factory mode is performed. It is recommended to backup all your data to removable storage or to other computer before performing a Factory mode.](https://usermanual.wiki/Honeywell/5100LP/User-Guide-1744119-Page-11.png)
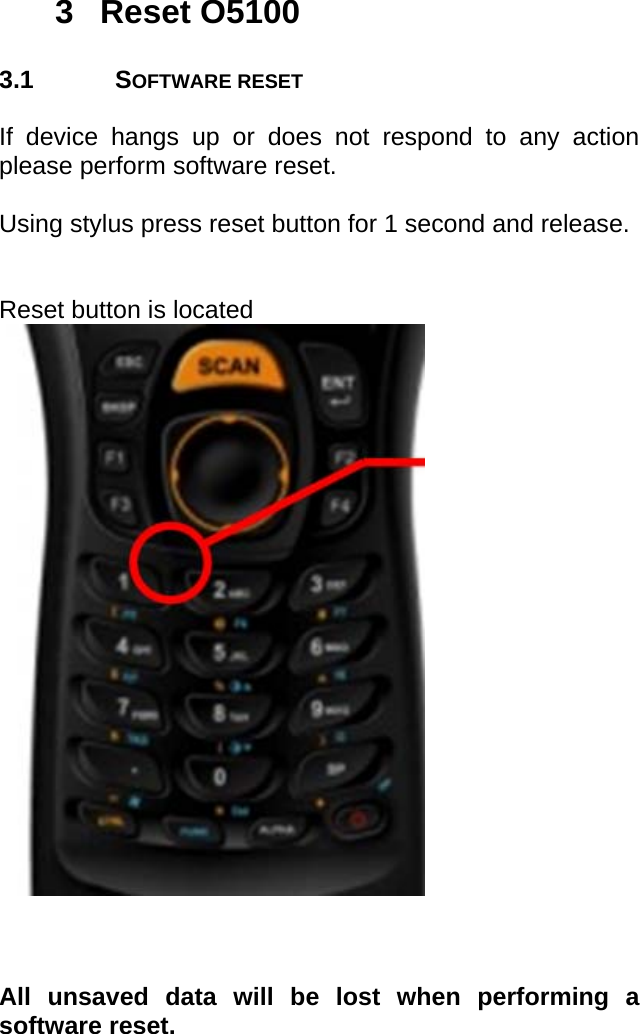
![User manual O5100 © All rights reserved. HONEYWELL 26 5.4 DATE AND TIME In the Date/Time options, you can change the year, month, date, time, time zone, or select automatic adjust for Daylight Savings Time. To set or change the date and time: 1. Open Date/Time Properties Start > Settings > Control Panel > Date/Time 2. Select month Tap on month name to open a pull down list of months or press the arrow buttons on either side of the month to increase or decrease the month. 3. Change the year Tap on the year to open a numeric dial. Select the up arrow to increase the value; select the down arrow to decrease the value. Or you can type a new value in the field. 4. Change the time, select the hour, minute, seconds, or AM/PM and select the up arrow to increase the value; select/tap the down arrow to decrease the value. You can also type a new time value in the field. 5. Select your correct time zone from the pull-down list. 6. To automatically adjust the clock for Daylight Savings Time, enable the checkbox at the bottom of the screen. 7. Select Apply to make save your changes [and make additional modifications] or select OK to exit the Date/Time settings.](https://usermanual.wiki/Honeywell/5100LP/User-Guide-1744119-Page-26.png)