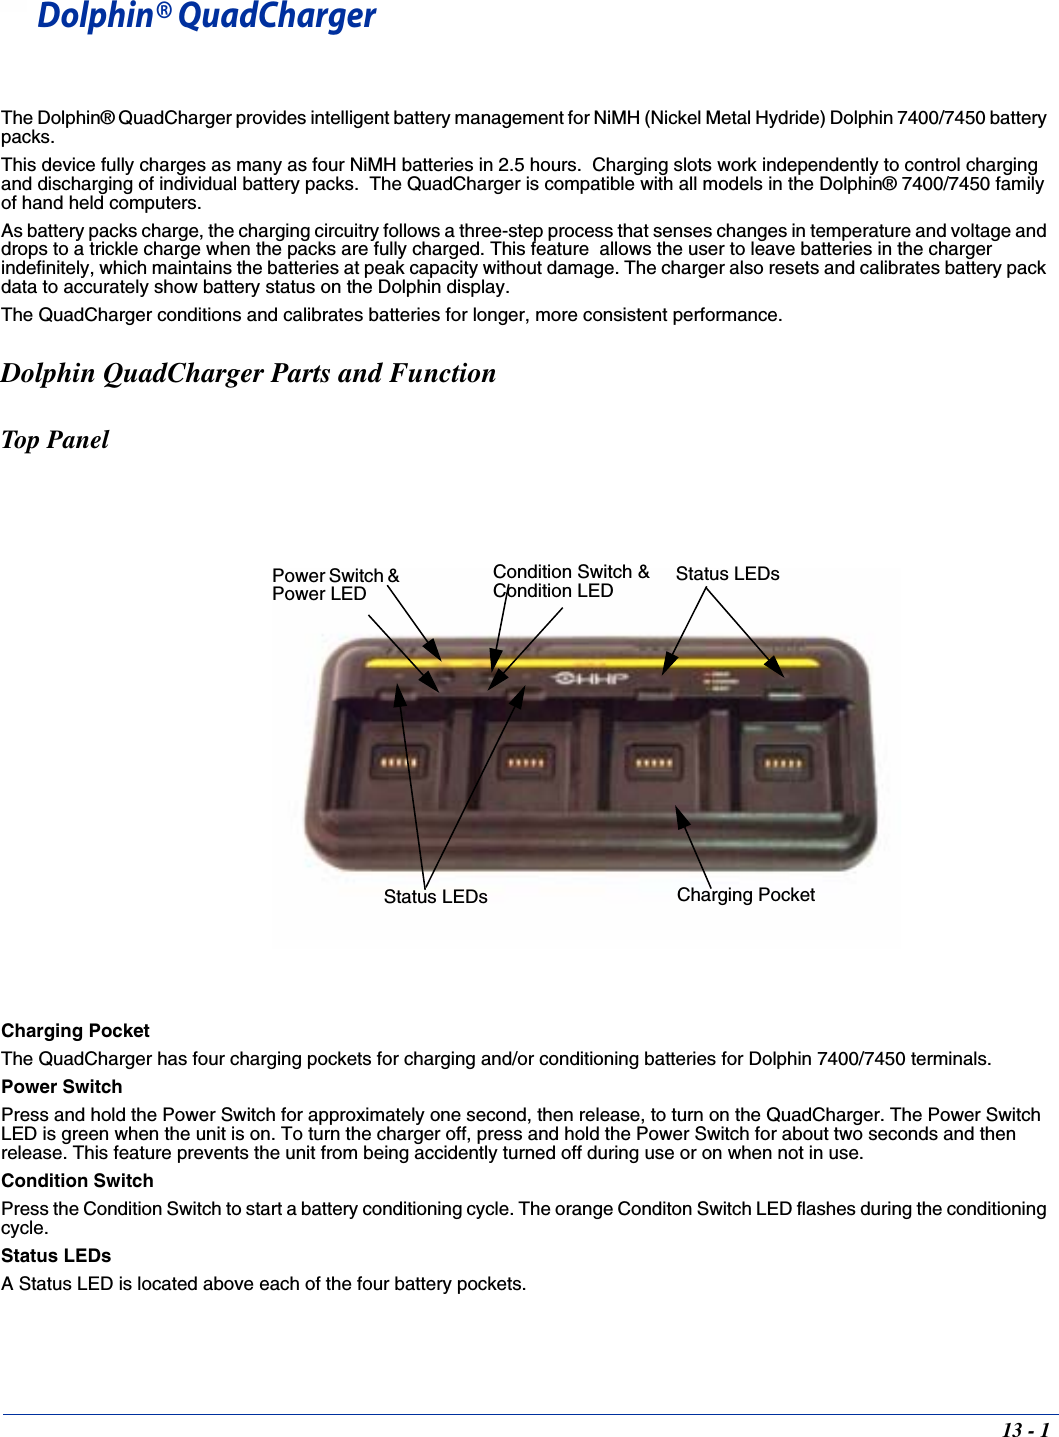
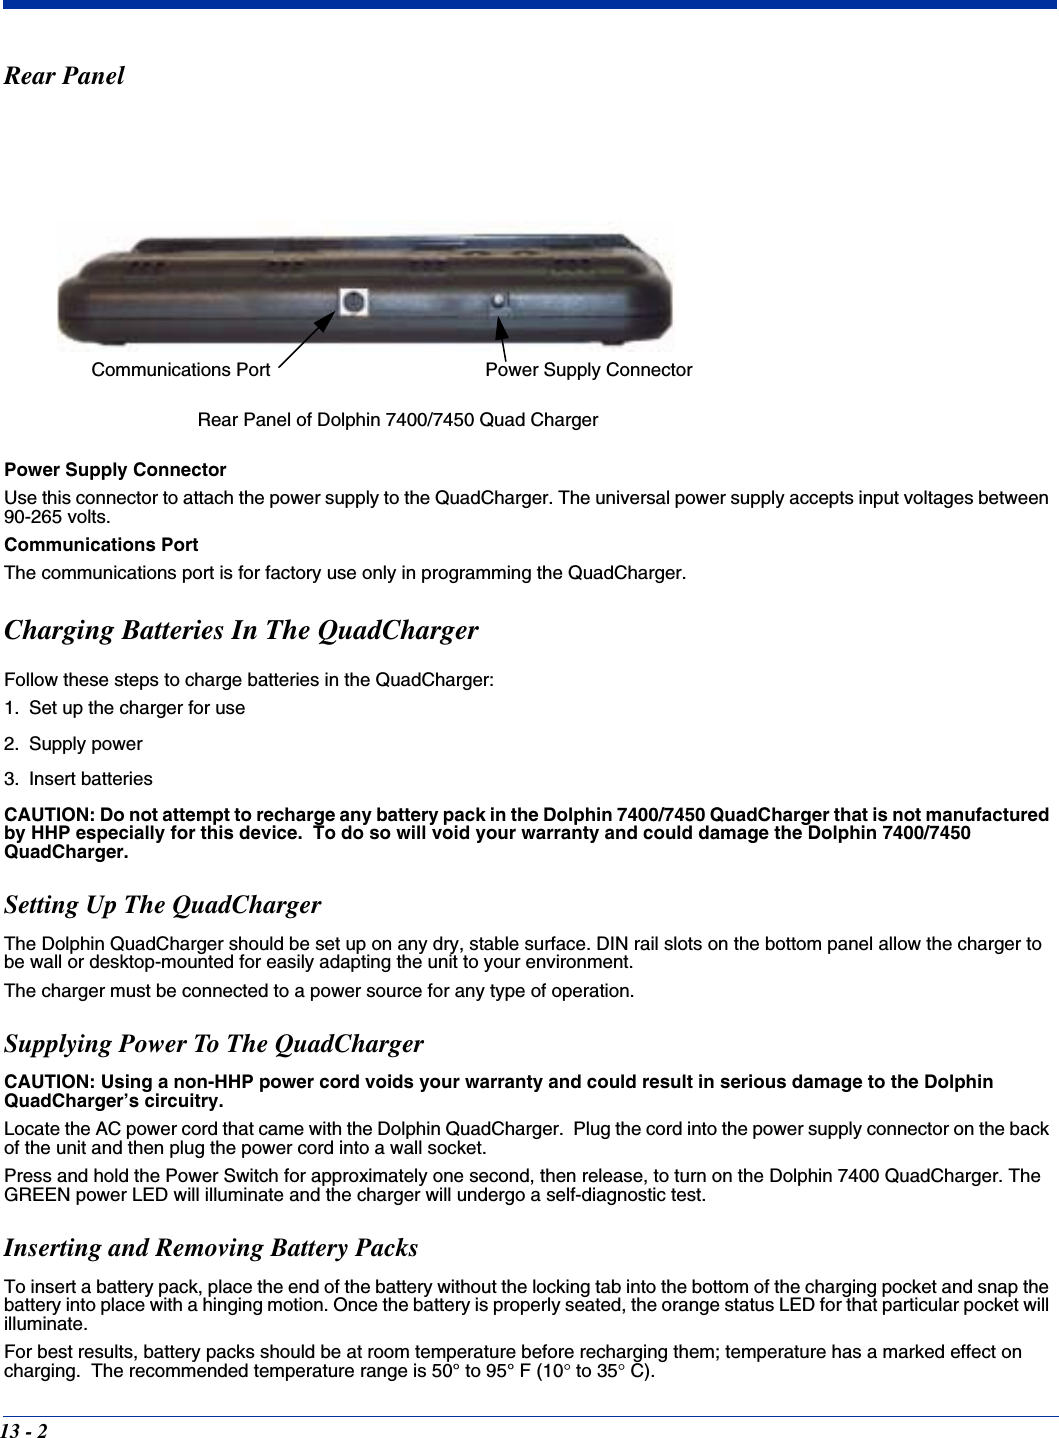
Honeywell 7400-476 Wireless Hand Held GSM/ GPRS terminal User Manual 7400PPC Reva
Honeywell International Inc Wireless Hand Held GSM/ GPRS terminal 7400PPC Reva
UserManual.wiki
>
Honeywell
>
7400 476 User Manual
Exhibit 8 user manual
Navigation menu
Upload a User Manual
Namespaces
Wiki Guide
HTML
PDF
Info
Views
User Manual
Discussion / Help
Navigation


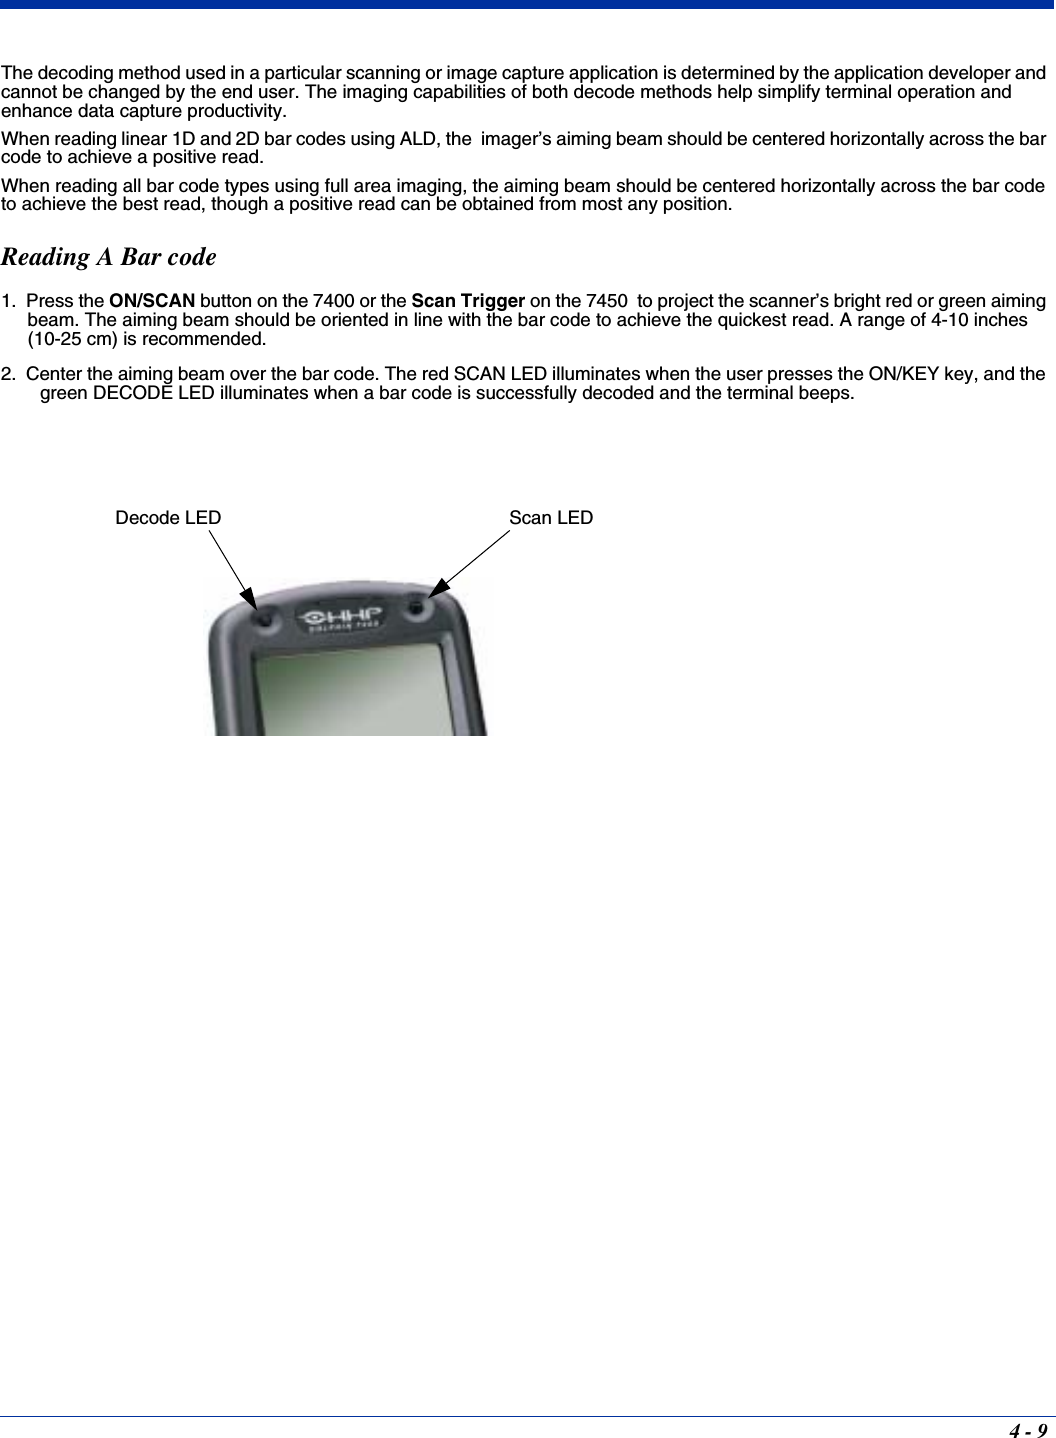
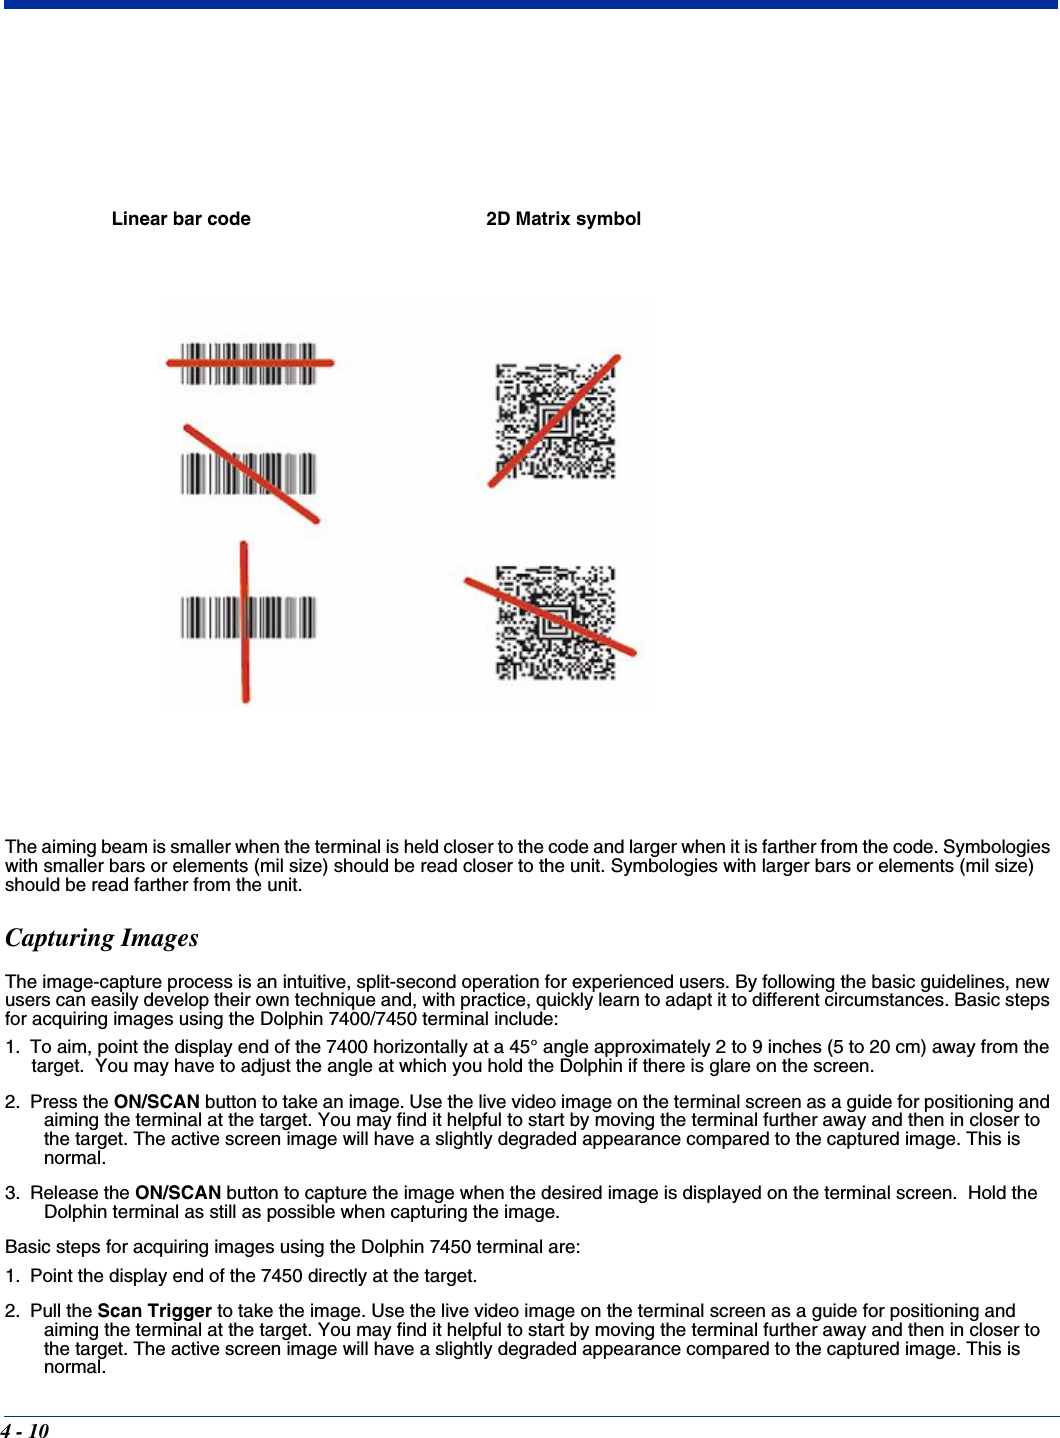
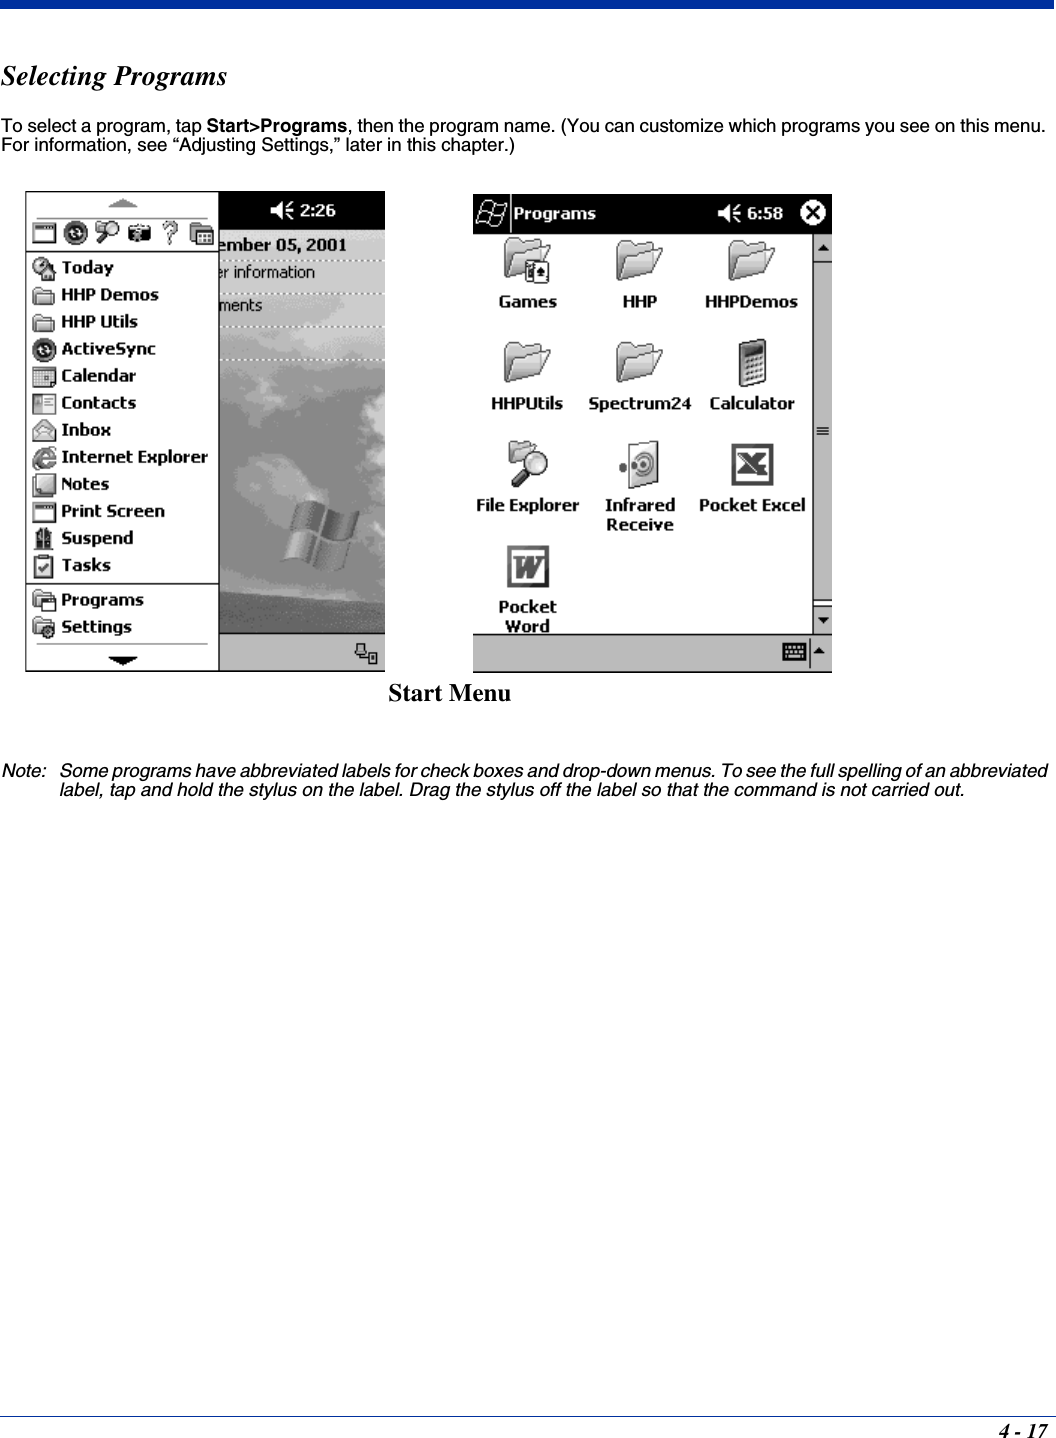
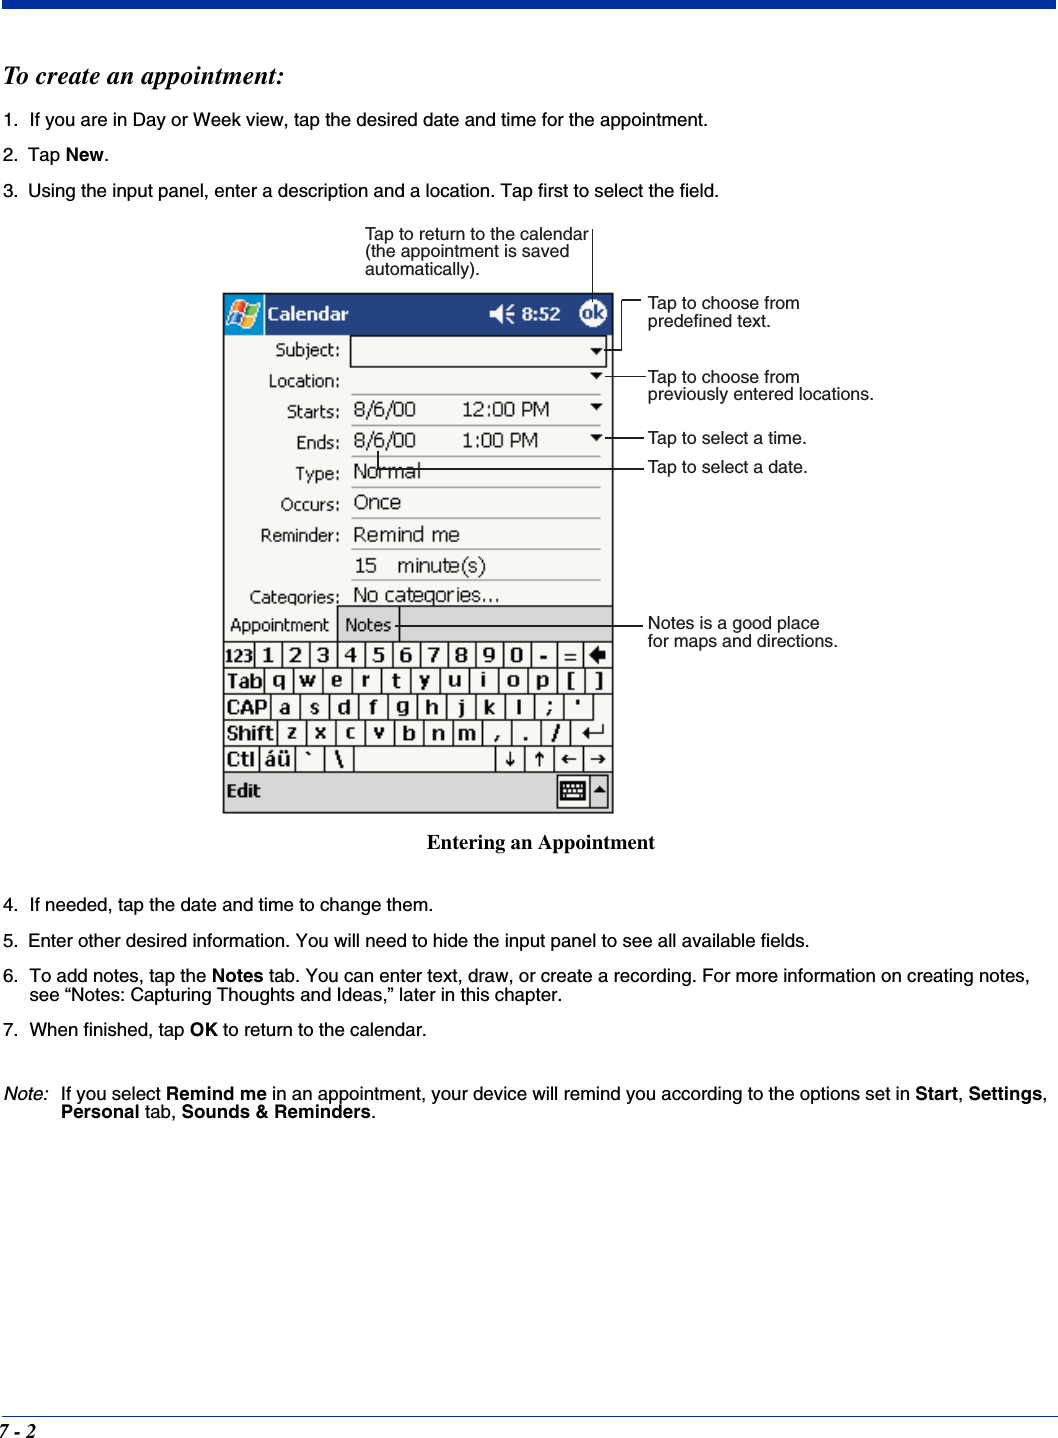
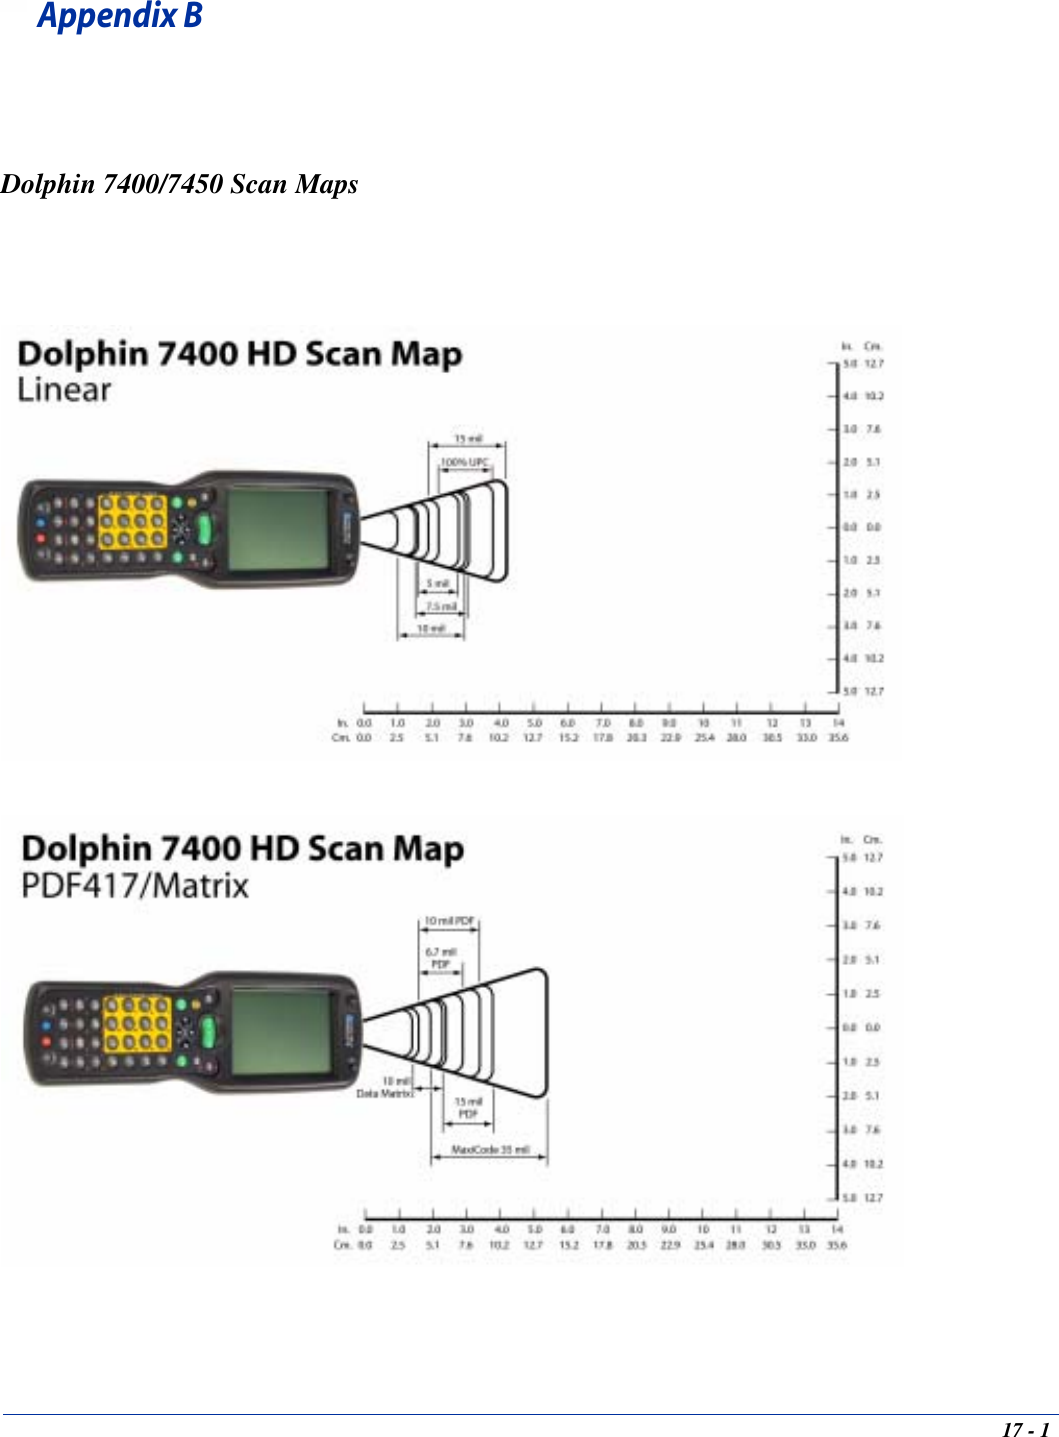
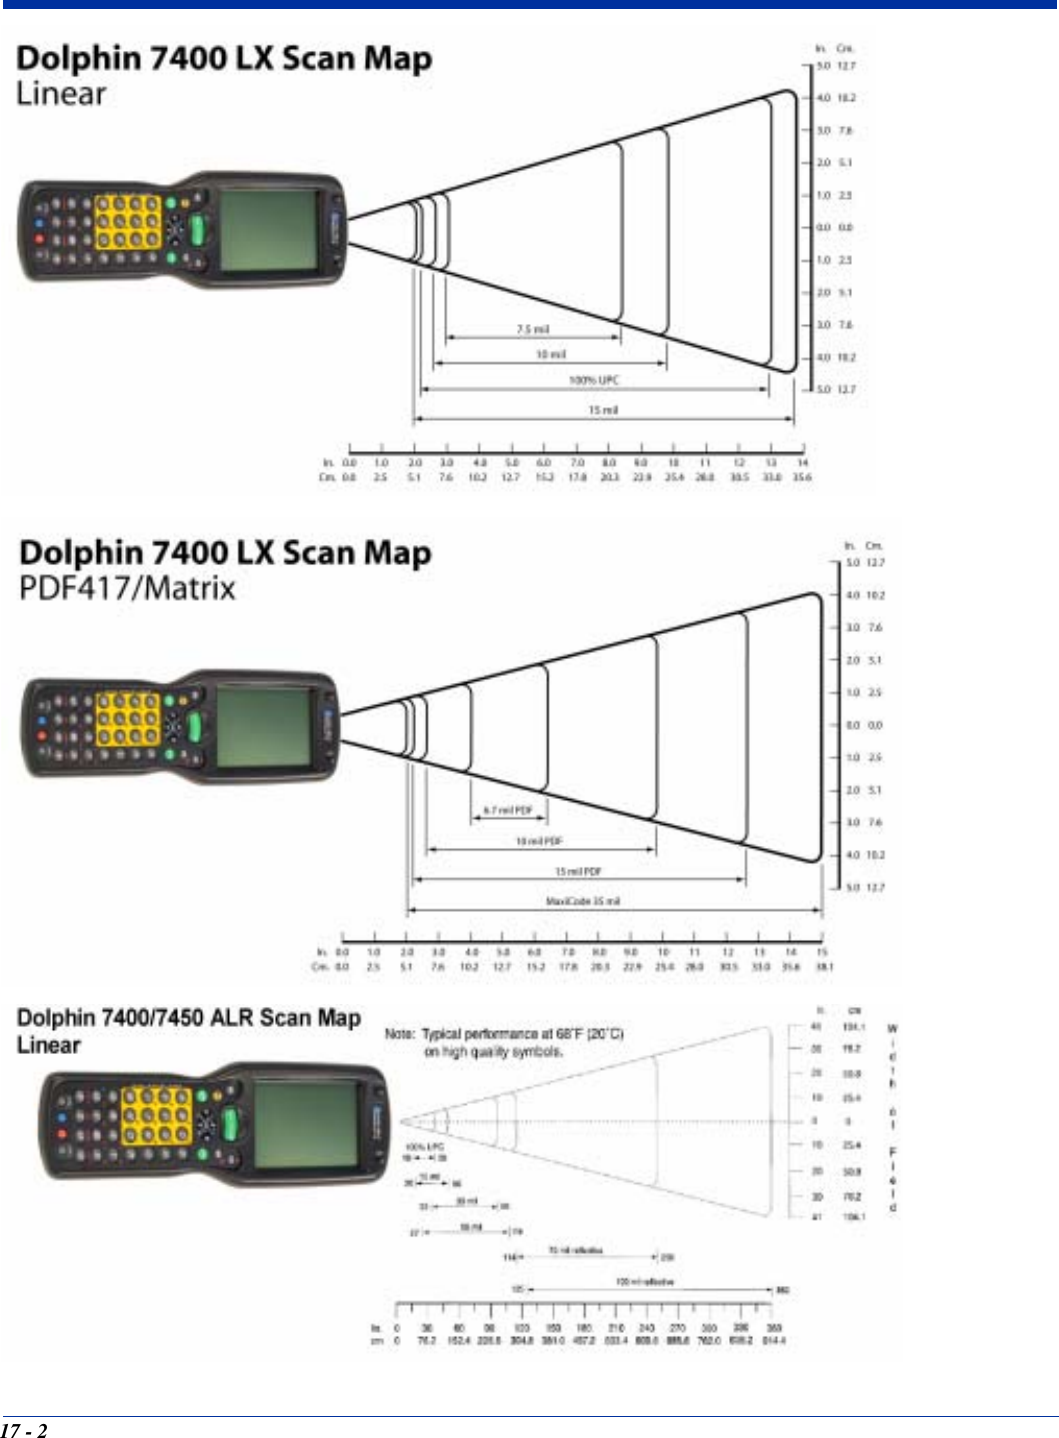
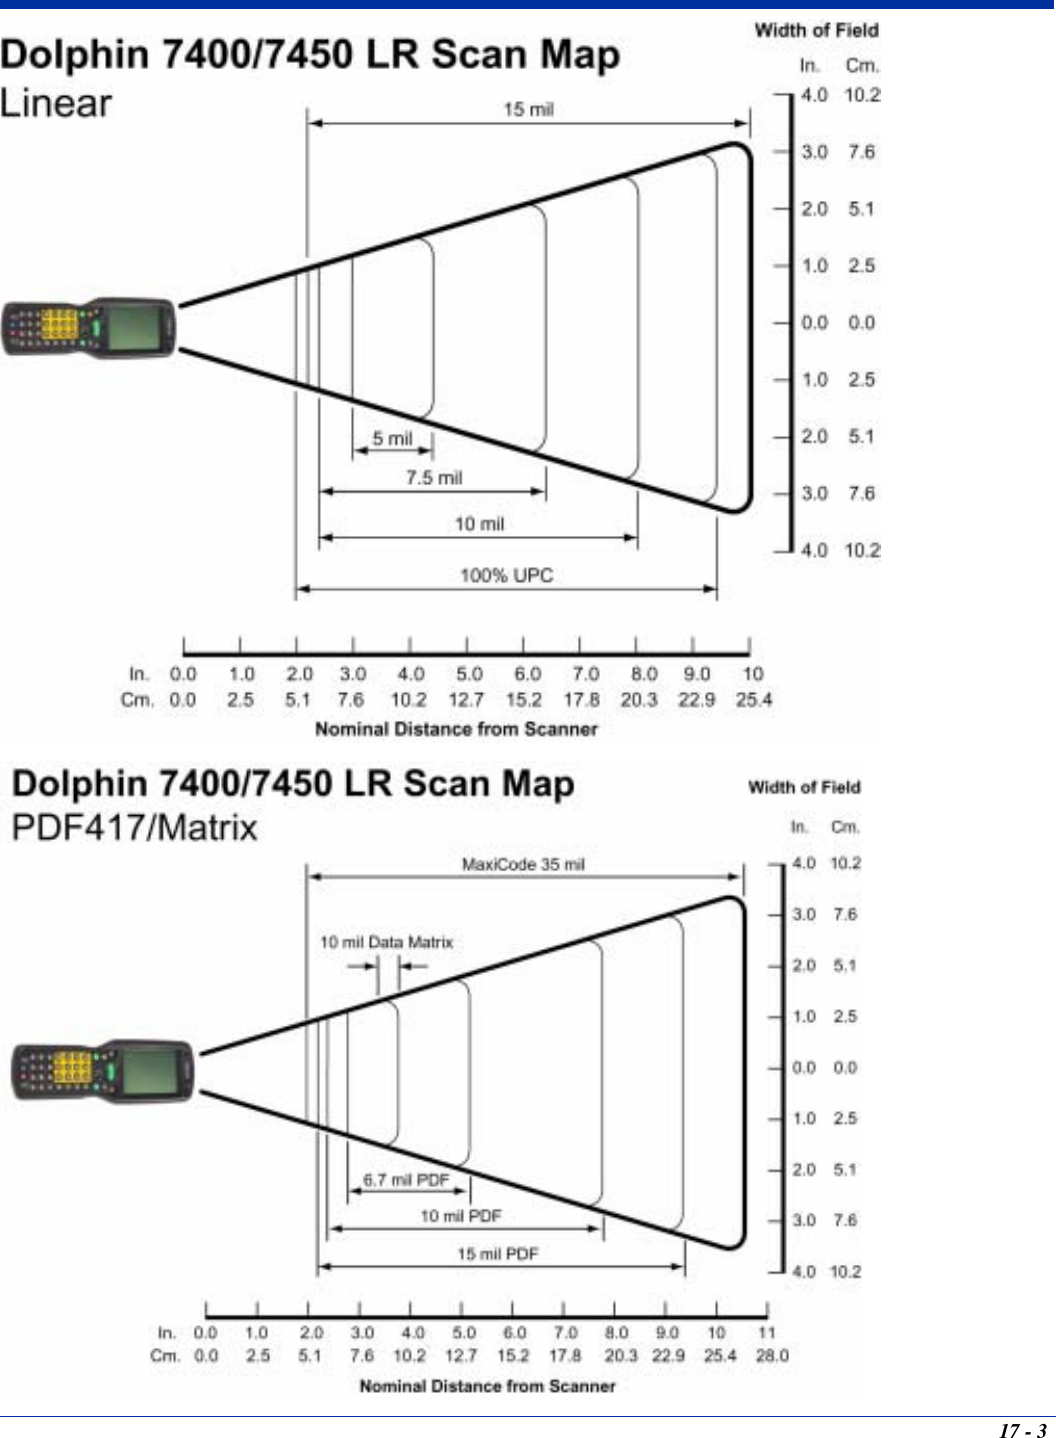
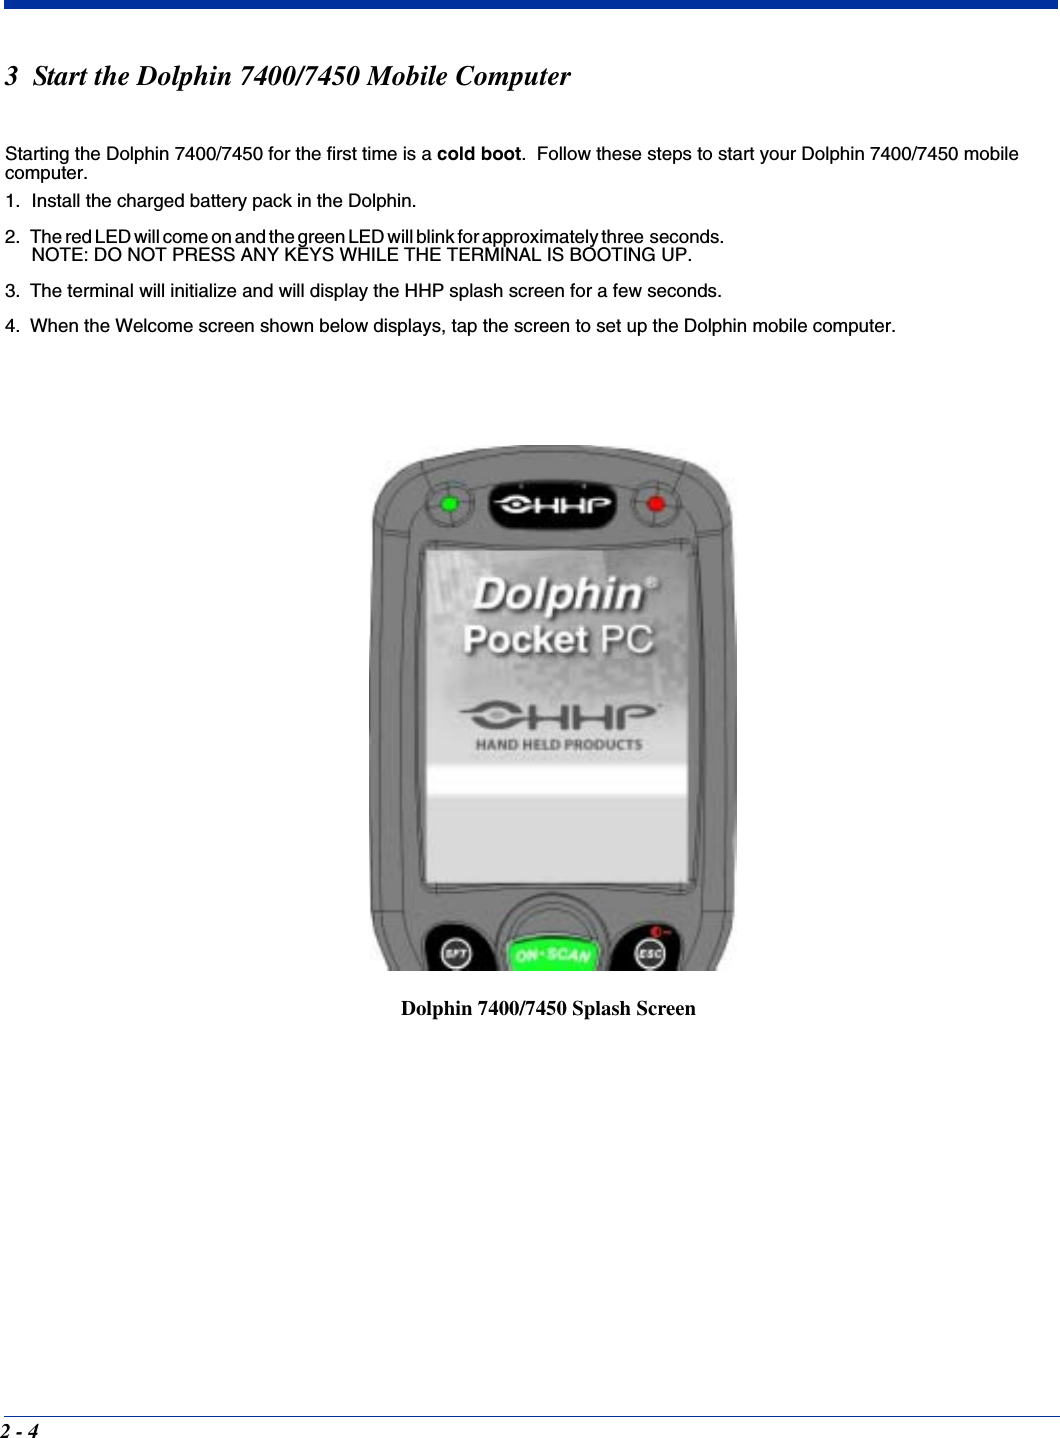
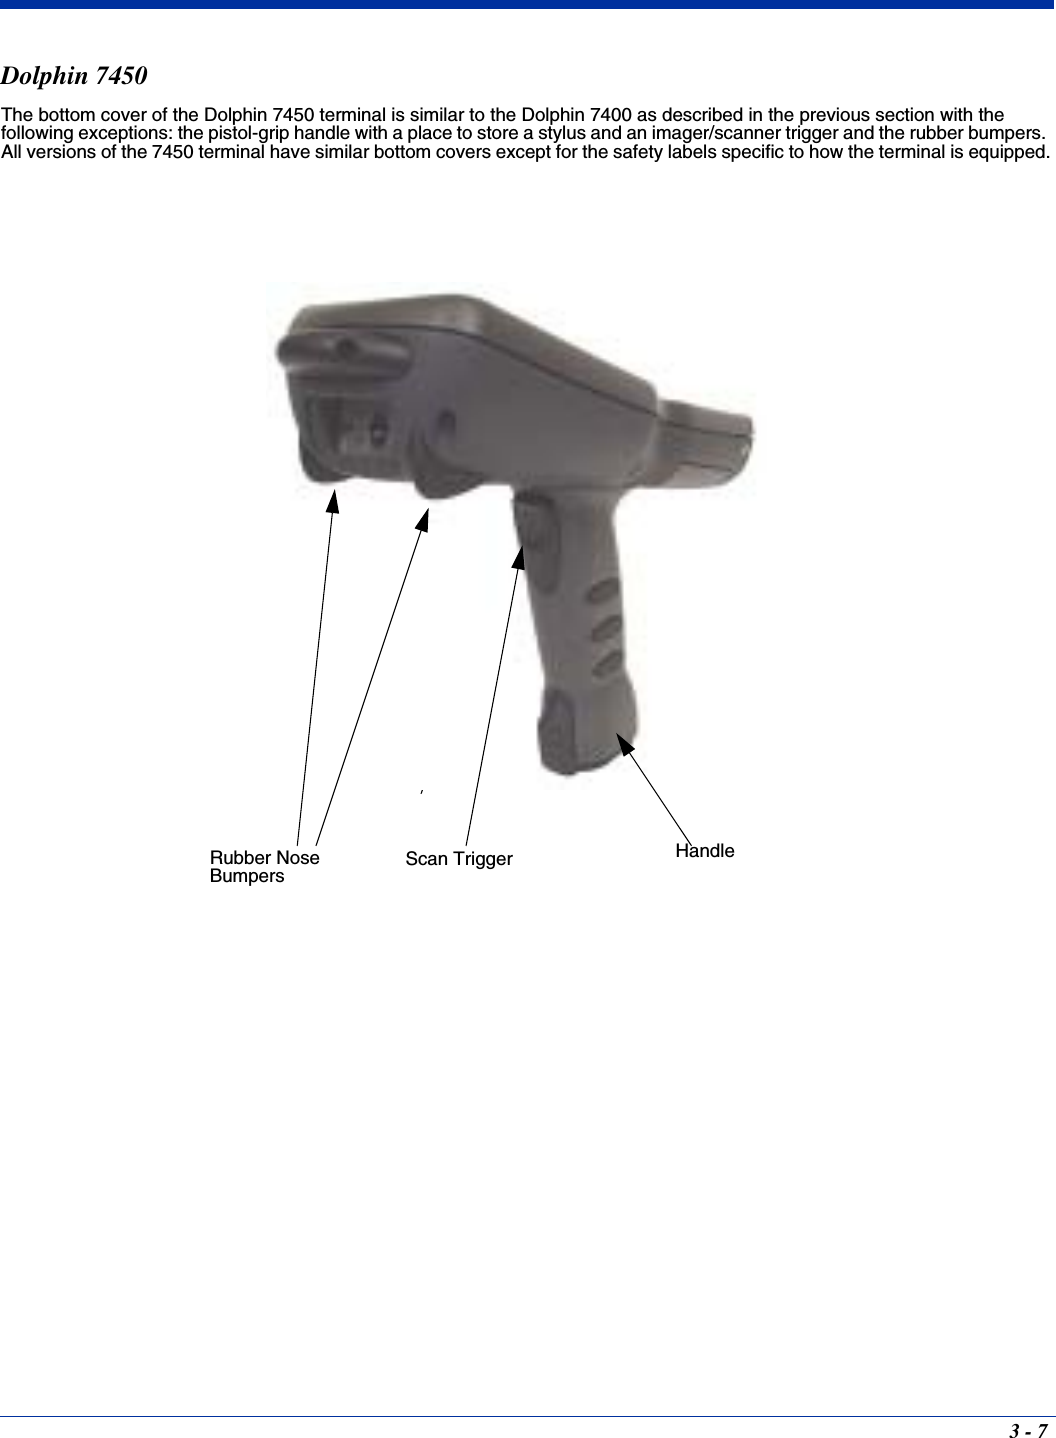
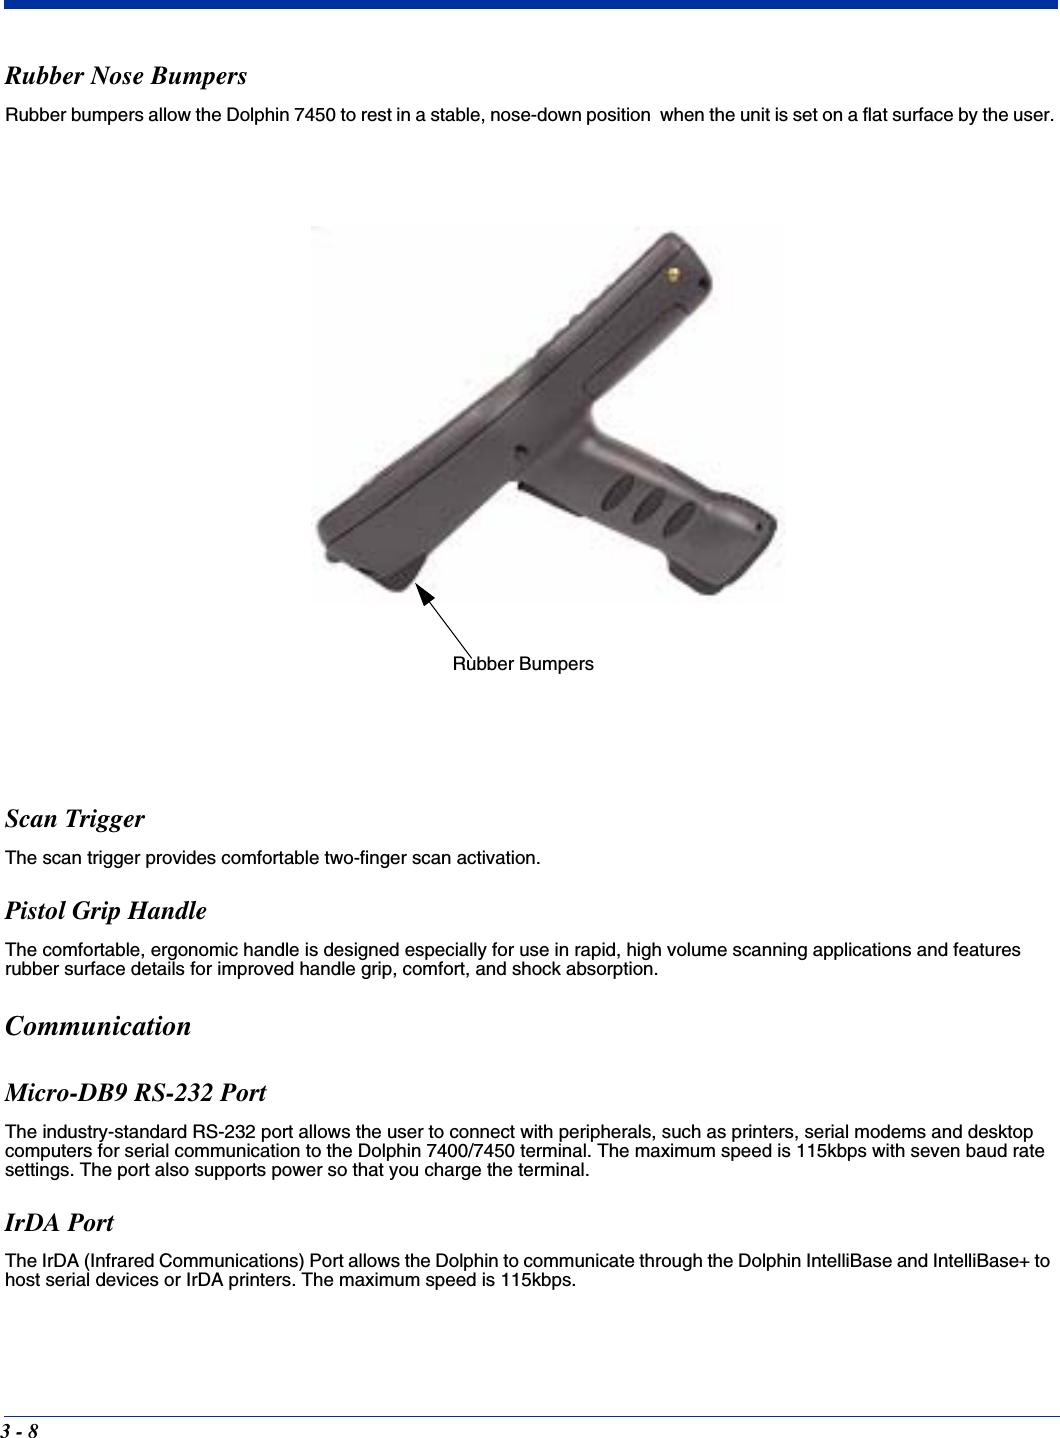
![2 - 2The Dolphin® 7450 Batch mobile computer offers the same enhanced productivity features of the Dolphin® 7400 terminal with the added convenience of a pistol grip-style form factor for high volume scanning applications. The Dolphin® 7400 RF and Dolphin® 7450 RF terminals integrate the basic functionality of the Batch terminals with the choice of an 802.11b or a Spectrum24™radio that allows the terminal to communicate with a host computer via a radio wireless local area network (WLAN).Image Engine Options and Bar Code Symbologies Supported Dolphin 7400/7450 terminals may be equipped with one of three image engines options: • LX: red or green aimer option scans from 2.0 to 15.0 in. (5.1 to 38.1 cm.) • LR: red or green aimer option scans from 1.9 to 9.4 in. (4.8 to 23.9 cm.) • HD: red or green aimer option scans from 1.6 to 3.9 in. (4.1 to 9.9 cm.)1D symbologies supported are: Code 3 of 9, Interleaved 2 of 5, EAN, Codabar, Code 11, Code 128, Code 93, TLC39, Universal Product Code (UPC), RSS. 2D symbologies supported are: PDF417, MaxiCode, Data Matrix, QR, EAN.UCC, Aztec, Code 49. Composite codes supported are: RSS-14, CODABLOCK, Aztec Mesa. OCR codes supported include: OCR A and OCR B.Postal codes supported include: Postnet and most international 4 state codes, PLANET CODE, BPO 4 STATE, Canadian 4 State, DUTCH POSTAL, AUSTRALIAN 4 STATE, JAPANESE POSTAL.Laser Engine Options and Symbologies SupportedDolphin 7400/7450 terminals may be equipped with an Advanced Long Range (ALR) laser engine. The ALR engine reads 30mil bar codes from 2.75 to 8 ft (0.83 to 2.4 m) and 100mil reflective bar codes out to 30 ft (9.1 m), making it ideal for use in warehouse applications. 1D symbologies supported are: UPC/EAN, Code 39, Interleaved 2 of 5, Codabar, Code 128, MSI, Plessey. Using Dolphin 7400/7450 for the First TimeFollow these steps to begin using your Dolphin 7400/7450 terminal.1. Unpack and check the terminal and documentation.2. Charge the main battery pack and internal back-up battery. 3. Start the Dolphin mobile computer. 4. Follow the Pocket PC set-up instructions to setup the mobile computer.5. Set up communications with Detectoid™.6. Verify that the Dolphin 7400/7450 terminal is working properly.1 Unpack the Carton and Check Its Contents Inspect the package to see that the following standard items and accessories (if ordered) are included: • Dolphin 7400/7450 mobile computer/imager/scanner• Battery (2700 mAh, Nickel Metal Hydride [NiMH])• Dolphin 7400/7450 Software Development Kit & User’s Guide CD-ROM•StylusNote:Be sure to keep the original packaging in the event that the Dolphin terminal or IntelliBase should need to be returned for service.](https://usermanual.wiki/Honeywell/7400-476/User-Guide-353730-Page-18.png)
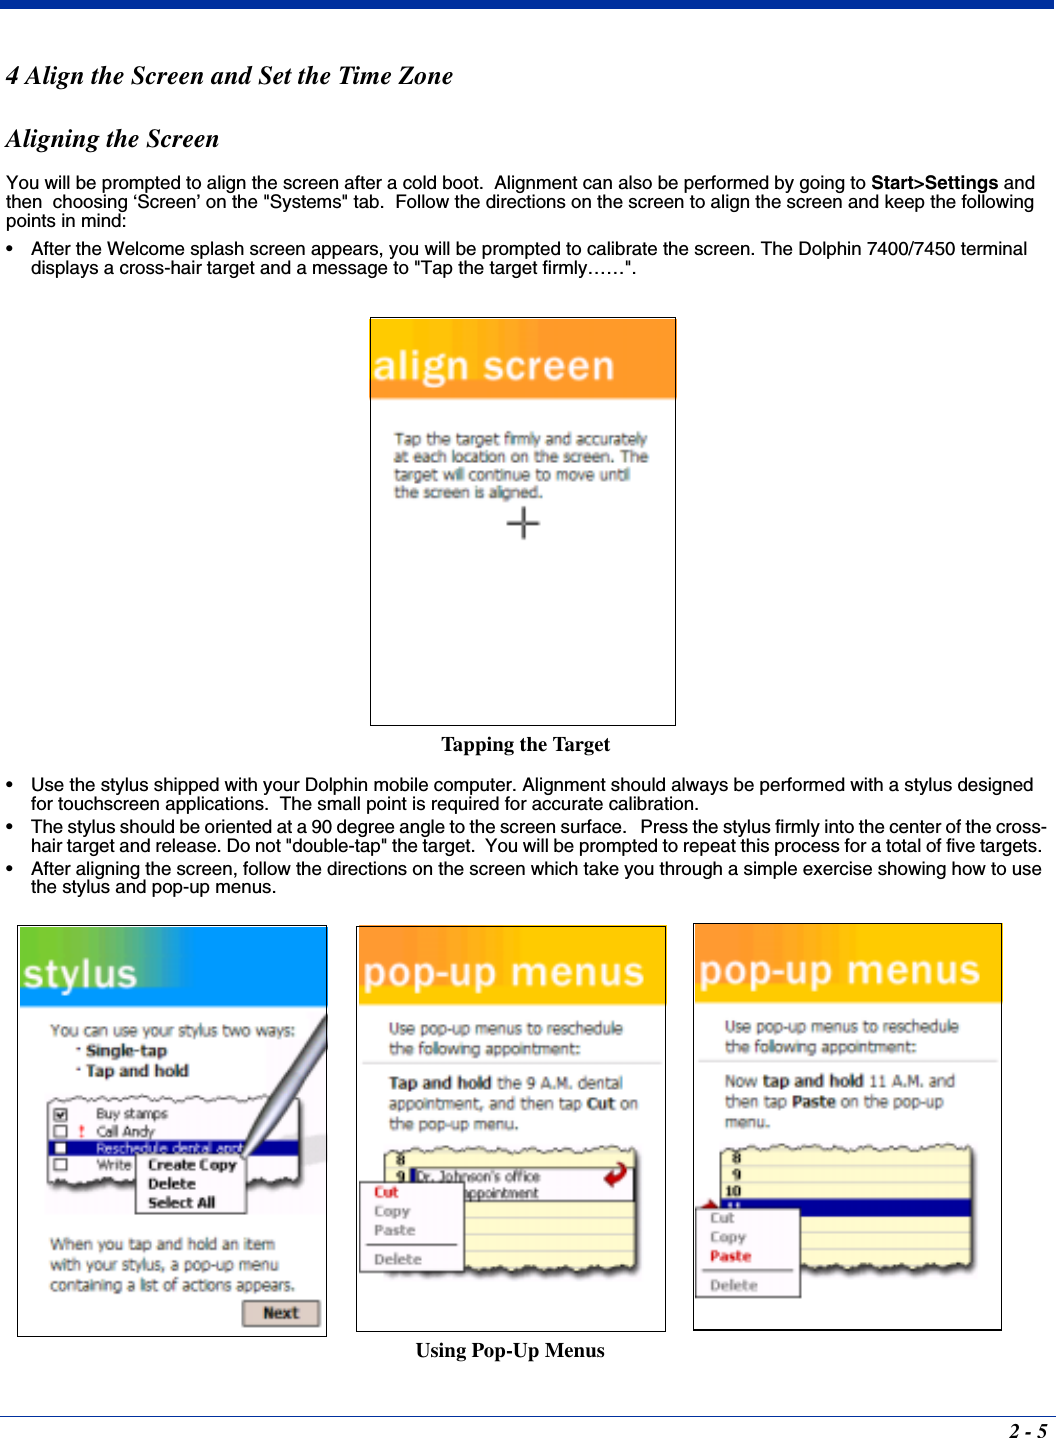
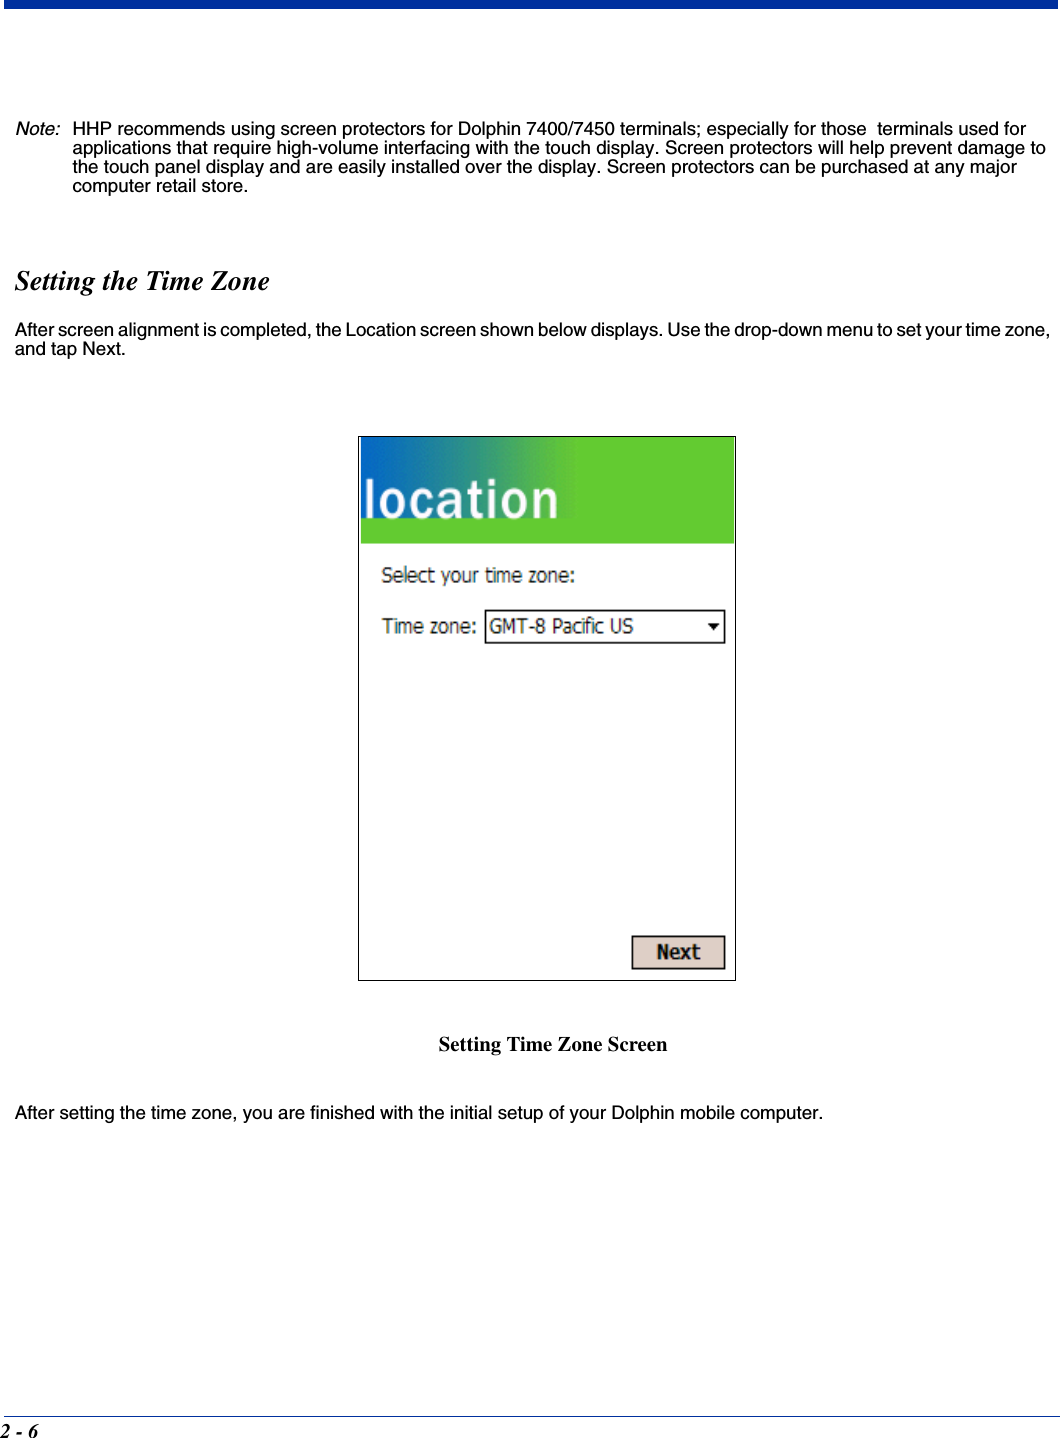
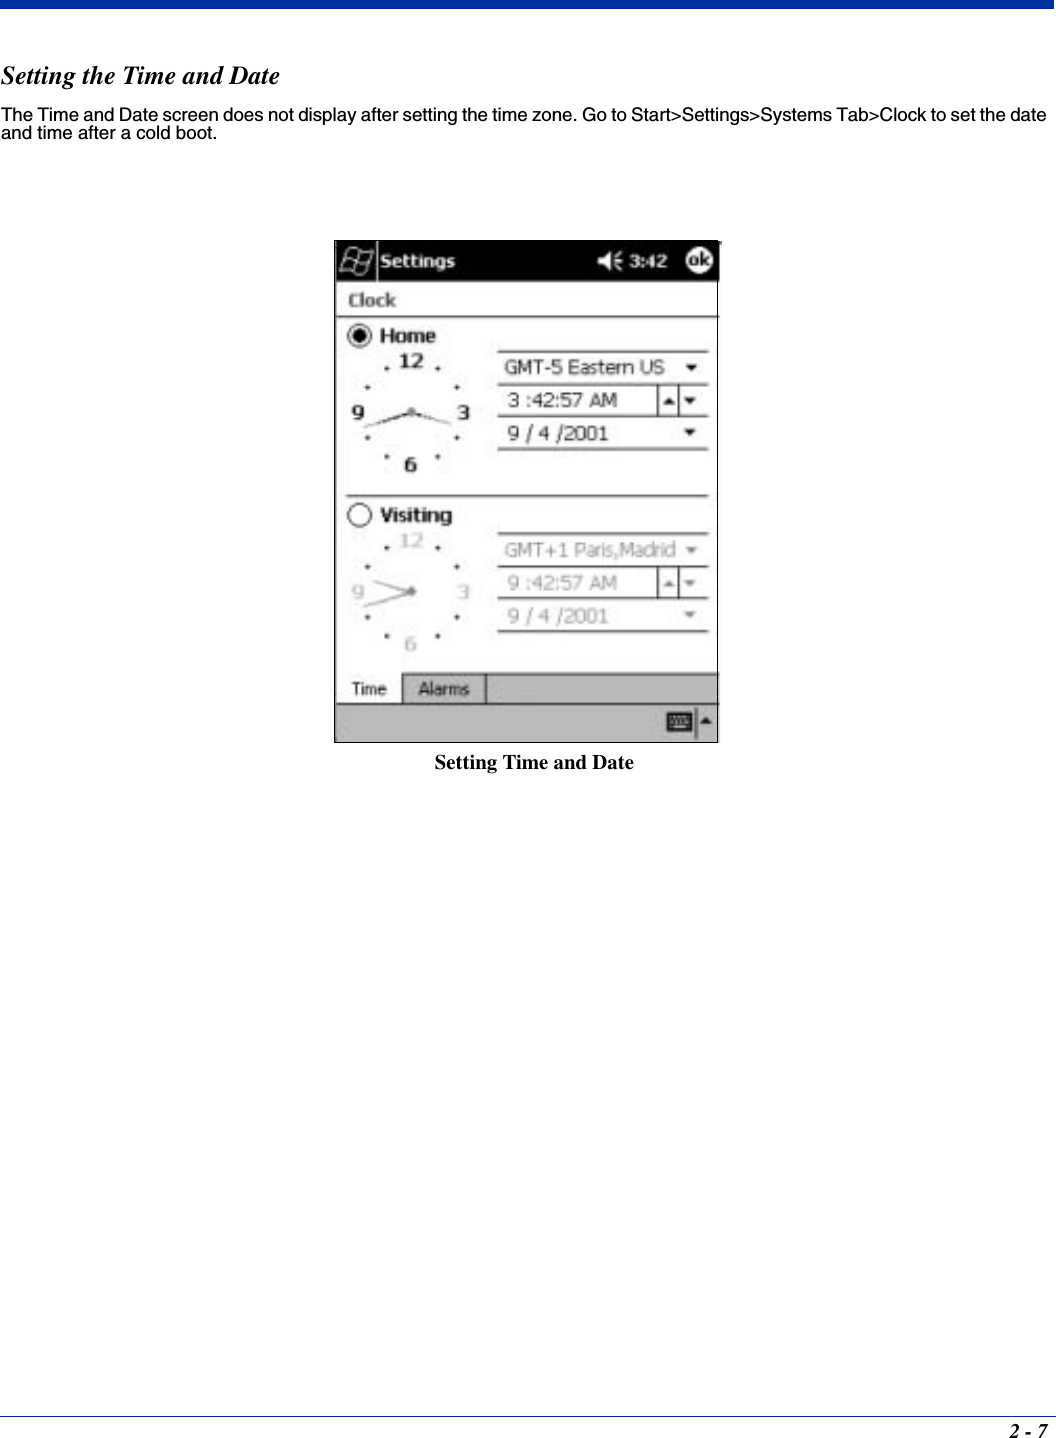


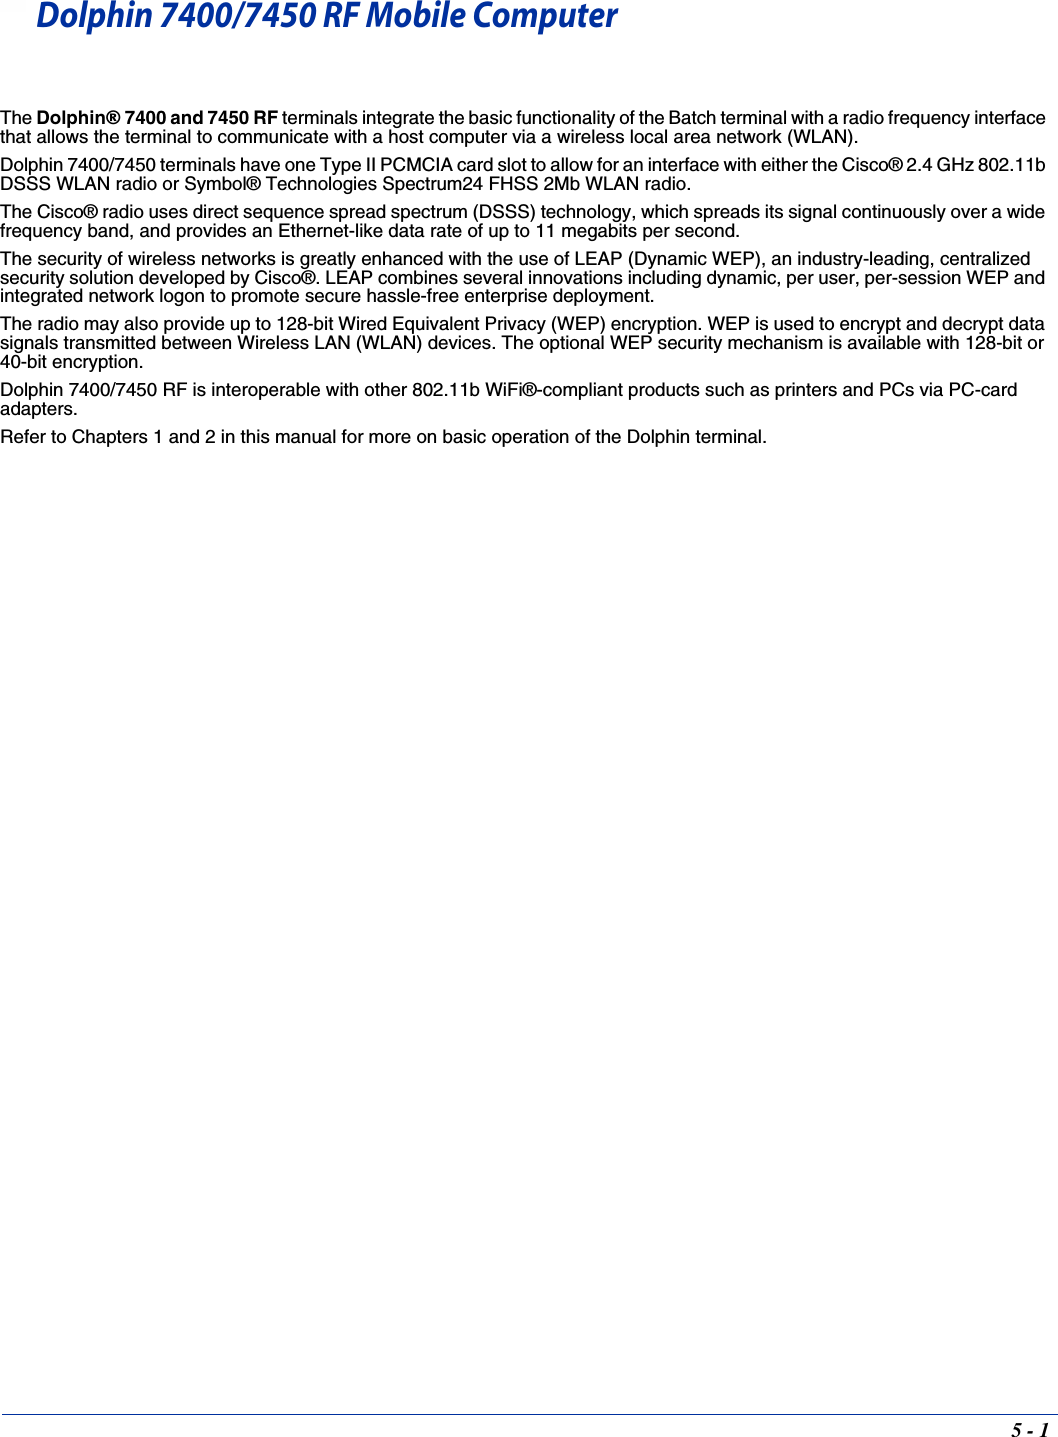
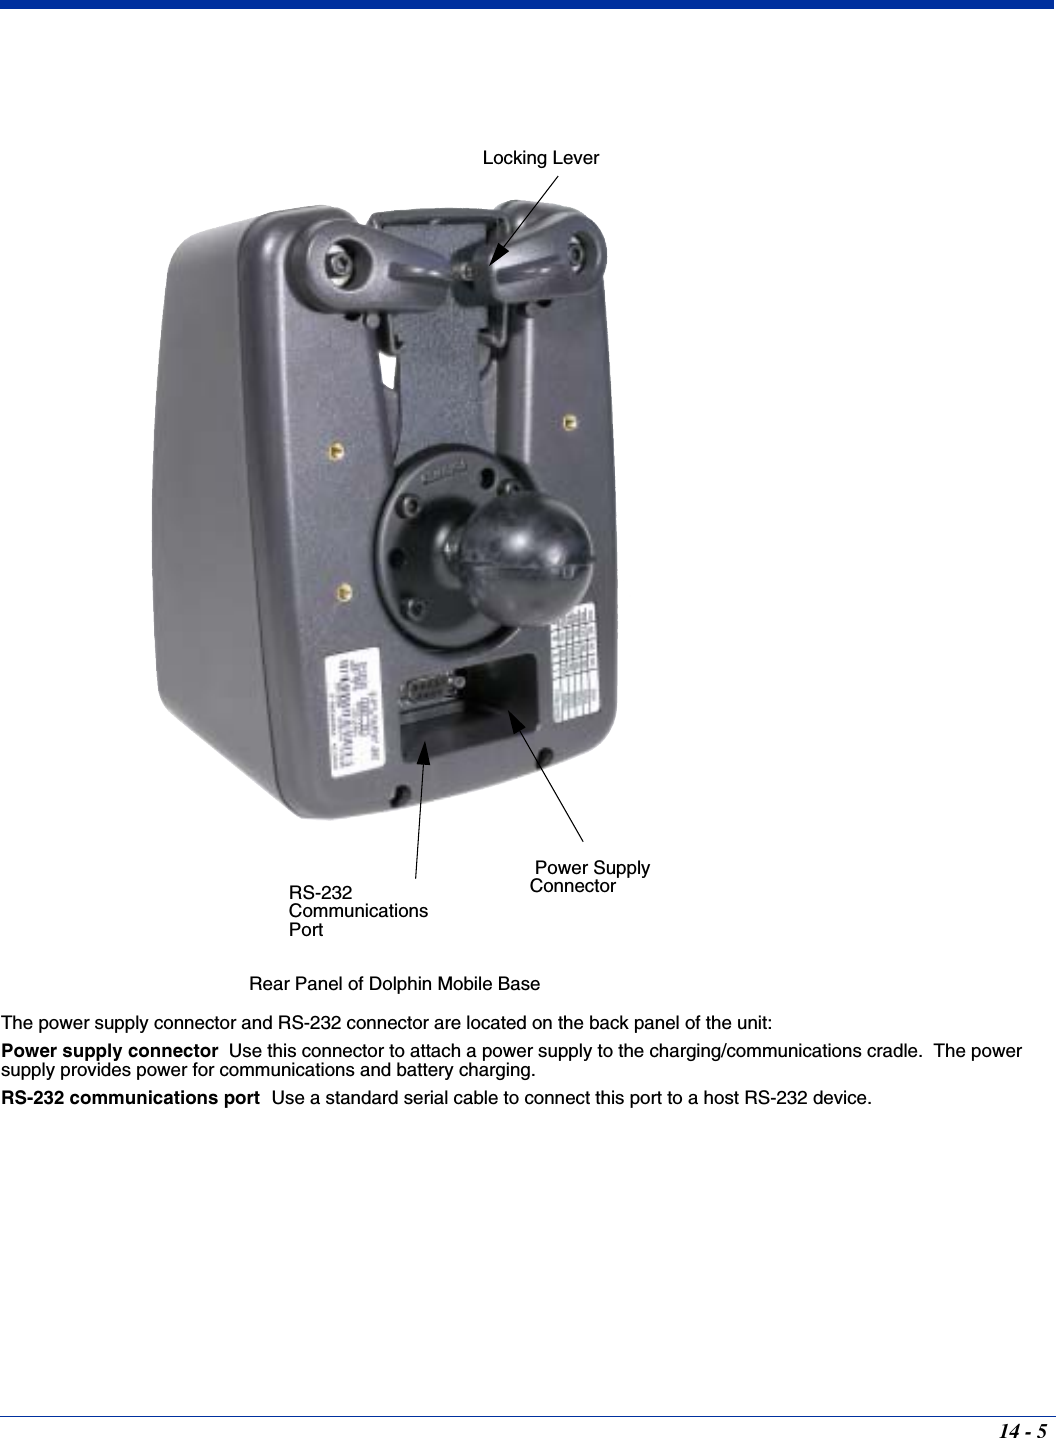
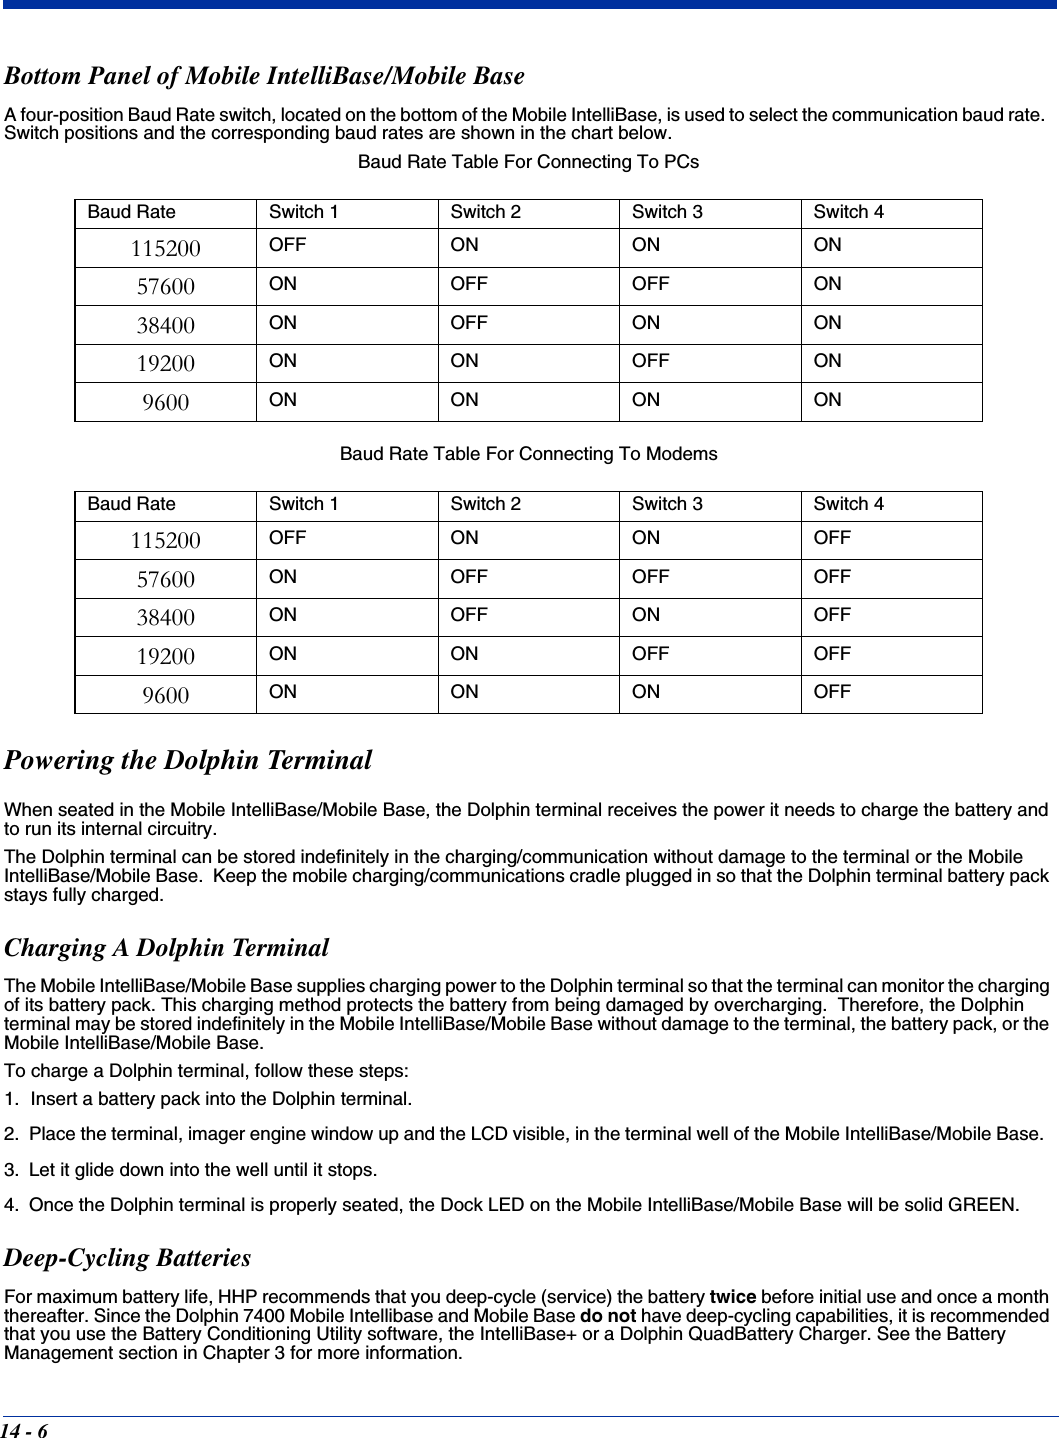
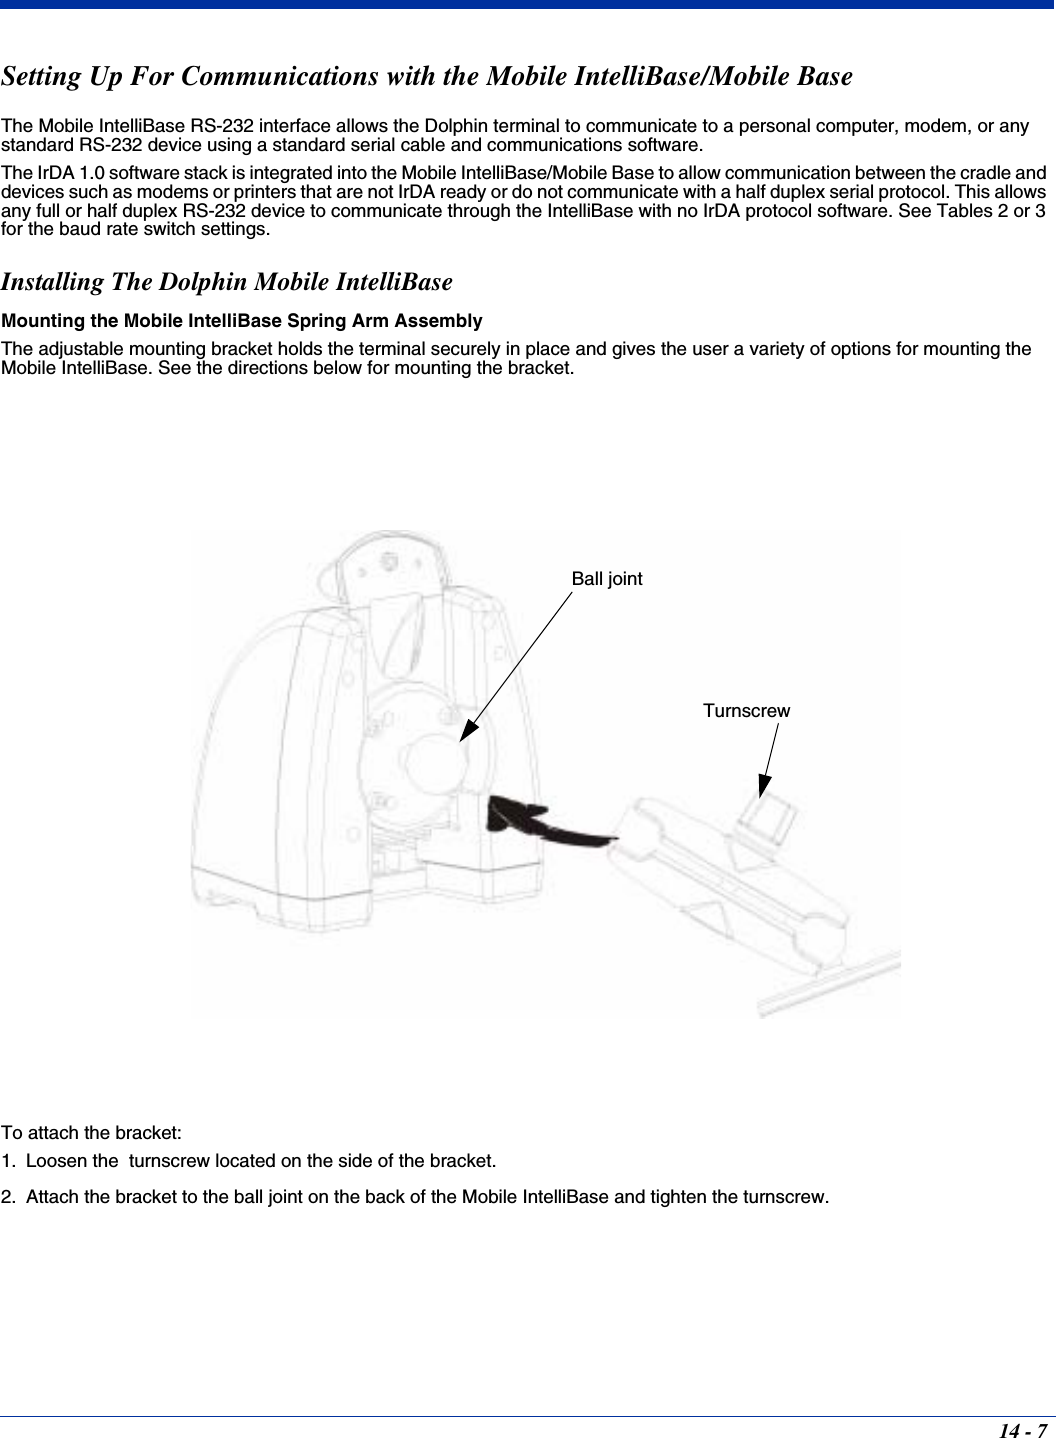
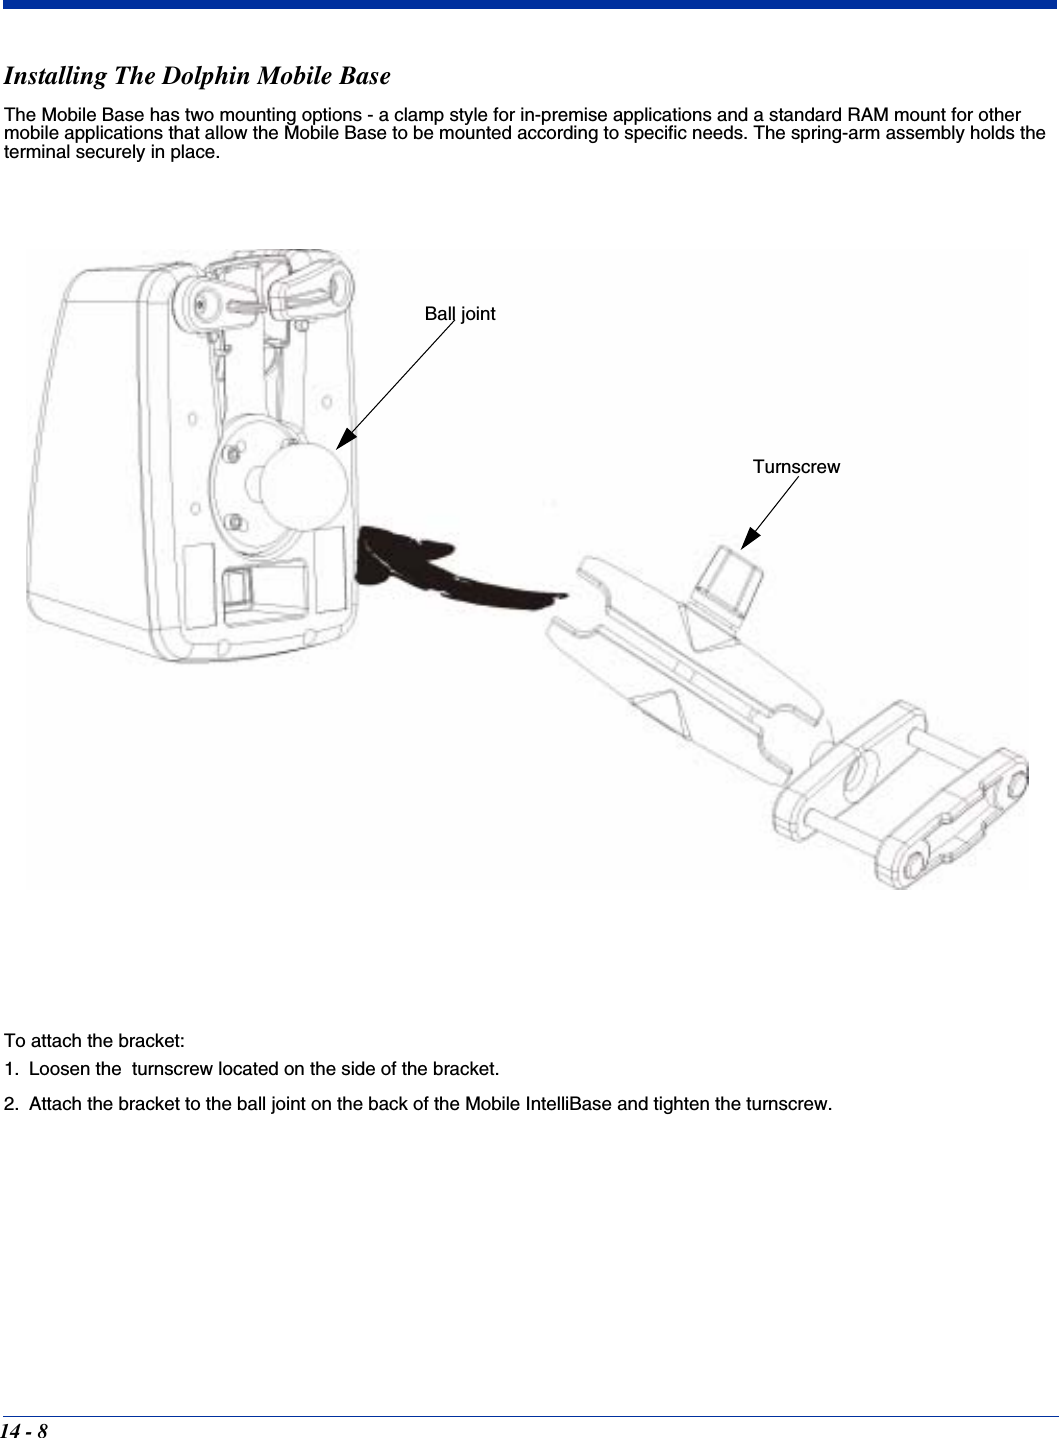
![3 - 10Setting Critical and Low Battery PointsThe Dolphin 7400/7450 may be programmed to display warnings when the battery reaches critical and low battery points. There are two entries defined in the registry. The specific settings are:[HKEY_LOCAL_MACHINE\System\CurrentControlSet\Control\Power]"CriticalBatt"=dword:a"LowBatt"=dword:19"CriticalBatt"=dword:F This sets the Critical Battery point to 15 percent (a hex = 15 decimal). The critical battery is the point at which the customer is warned that the battery charge is very low. This warning will be posted every 3 minutes until the situation is corrected."LowBatt"=dword:19This sets the Low battery point to 25 percent (19 hex = 25 decimal). The low battery setting is the point at which the user is alerted that the battery is low. The user is notified only once for a low battery.These are the default values. Developers can set these parameters from 0 (no warning at all) to 99 (would nearly always warn). The warnings do not appear when the terminal is on external power.Checking Battery PowerThe Battery Status screen displays information about current battery status and allows you to set options that can conserve battery power.To open the Battery Status screen:1. Select Start>Settings>System>Power. 2. Select your preferences.3. Tap OK to save the changes and exit. Servicing the Battery PackFor maximum battery life, you must service, or deep cycle, the battery twice before initial use. It is also recommended that you service the battery once per month. To deep cycle, insert the battery into the auxiliary well of the Dolphin Intellibase+ charging/communication cradle, Dolphin QuadCharger or use the Battery Conditioning Utility. See Chapter 12 for more information on using the IntelliBase+ and Chapter 13 for information on using the QuadCharger. Using the Battery Conditioning UtilityThe Battery Conditioning Utility is used to condition or deep cycle a battery in the Dolphin 7400/7450 terminal. The discharge/charge cycle minimizes battery memory effects and ensures the battery data is correct. A complete discharge/charge cycle may take up to 15 hours for a fully charged battery. The actual cycle time will vary depending on the battery state when the cycle was initiated. Follow these instructions to use the Battery Conditioning Utility to deep cycle the battery before initial use:1. Put the battery pack in the Dolphin terminal.2. Connect the Dolphin 7400/7450 terminal to external power or place the terminal in the IntelliBase. After starting the Battery Conditioning Utility, the Dolphin will beep and then indicate an error if the terminal is not on AC power.3. Select Start>Programs>HHPUtils>Battery Conditioning to start the Battery Conditioning Utility.4. Touch the ‘Start’ button on the screen (or the ‘S’ key) to start the battery conditioning process. The terminal will beep and the process will begin in approximately 60 seconds.To cancel battery conditioning, touch the ‘Abort’ button (or the “A” key). The terminal will beep and the process will be aborted.](https://usermanual.wiki/Honeywell/7400-476/User-Guide-353730-Page-38.png)