Honeywell 7900BU0E Handheld PC with GSM User Manual
Honeywell International Inc Handheld PC with GSM
UserManual.wiki
>
Honeywell
>
7900BU0E User Manual
>
08 user manual part 2
Contents
1.
08 user manual part 1
2.
08 user manual part 2
08 user manual part 2
Navigation menu
Upload a User Manual
Namespaces
Wiki Guide
HTML
PDF
Info
Views
User Manual
Discussion / Help
Navigation
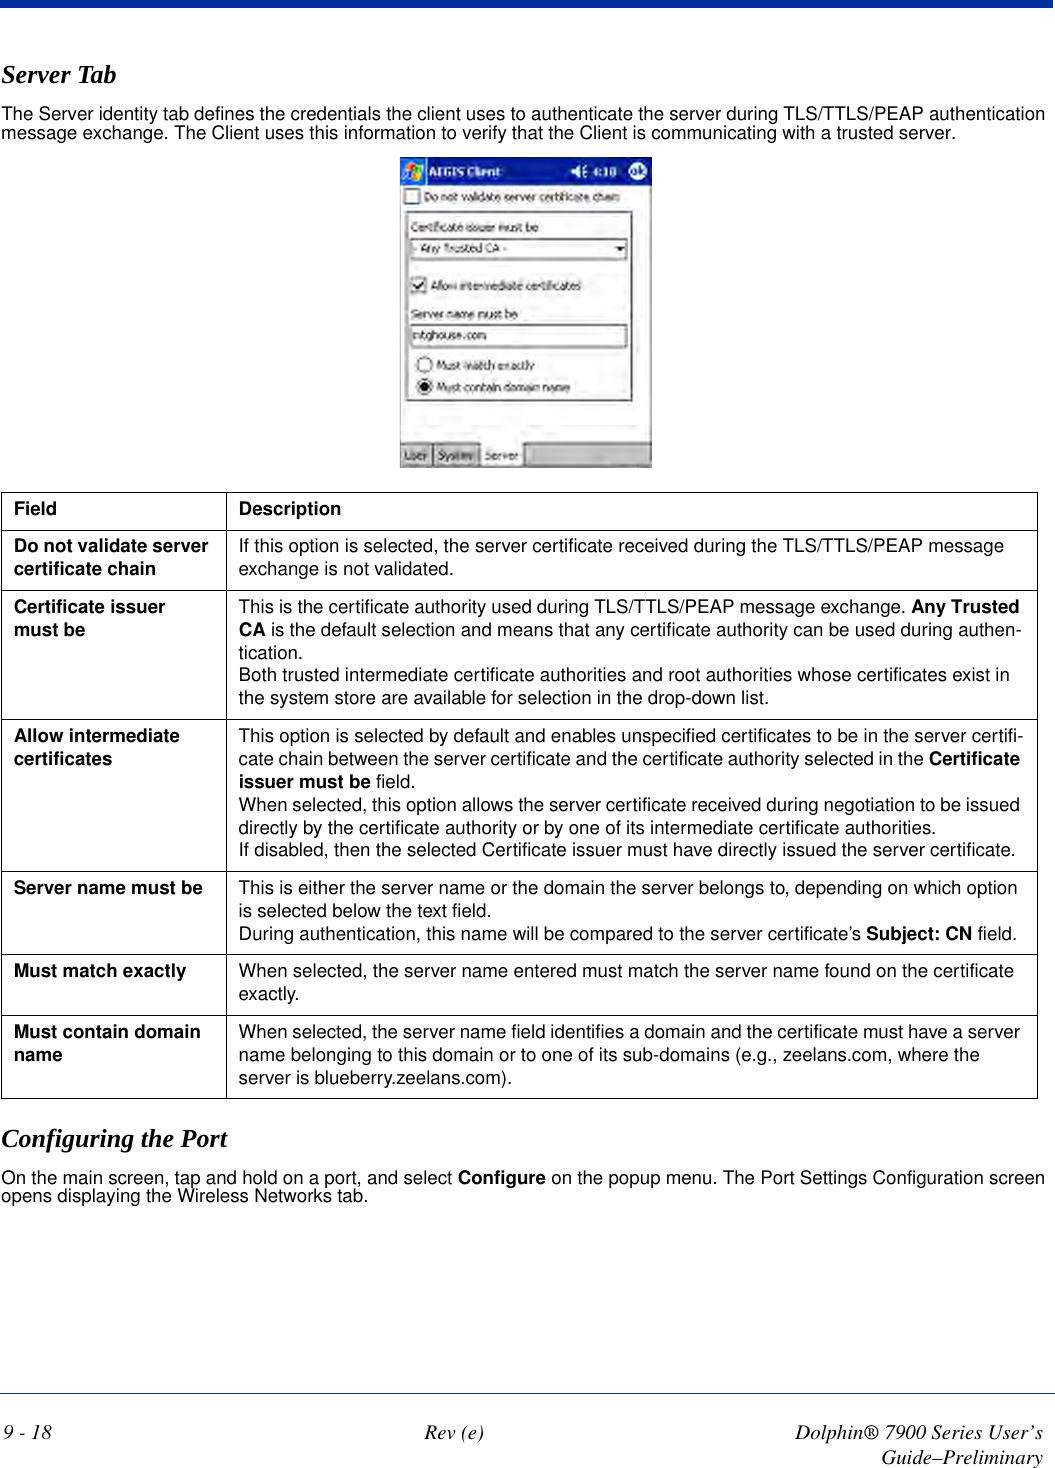
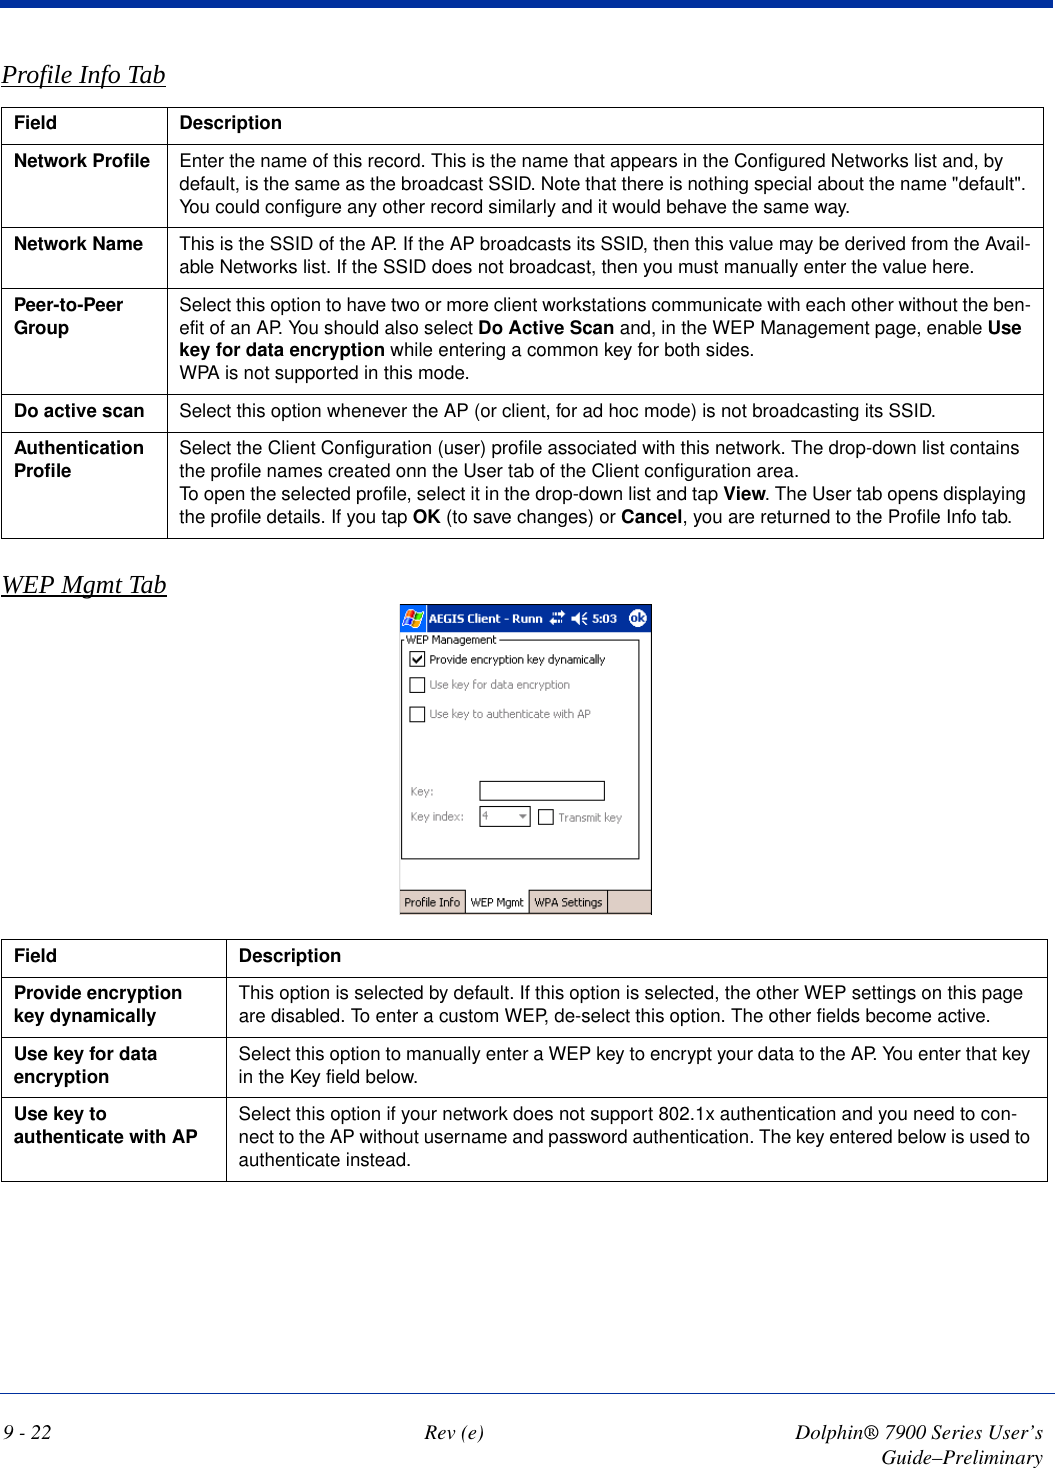
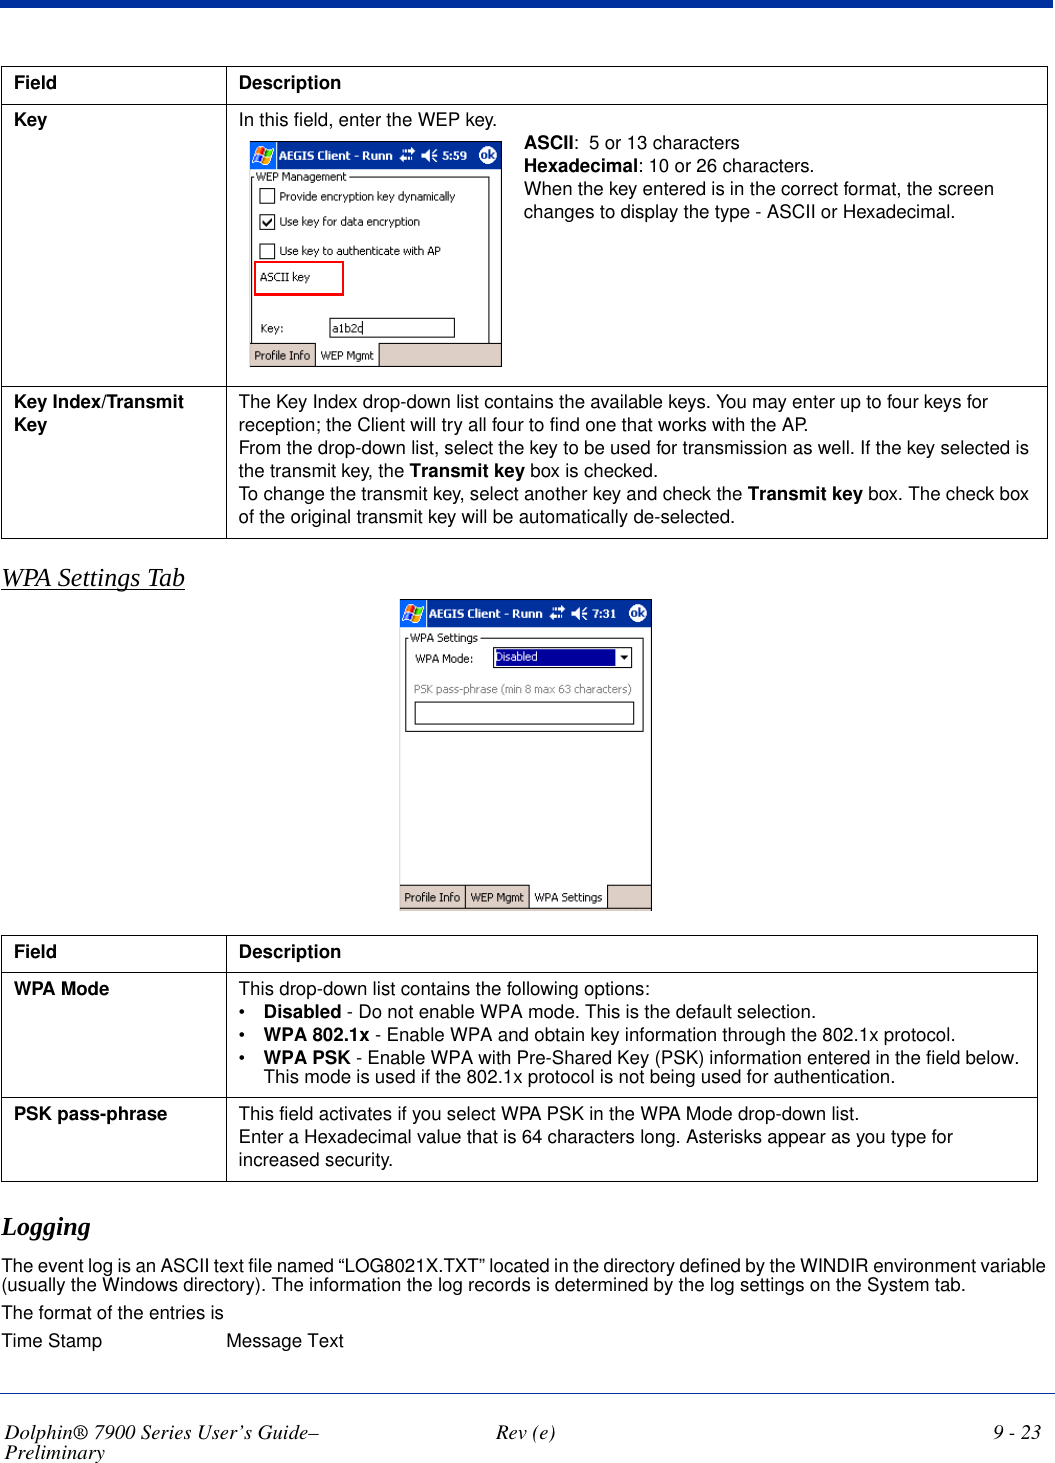
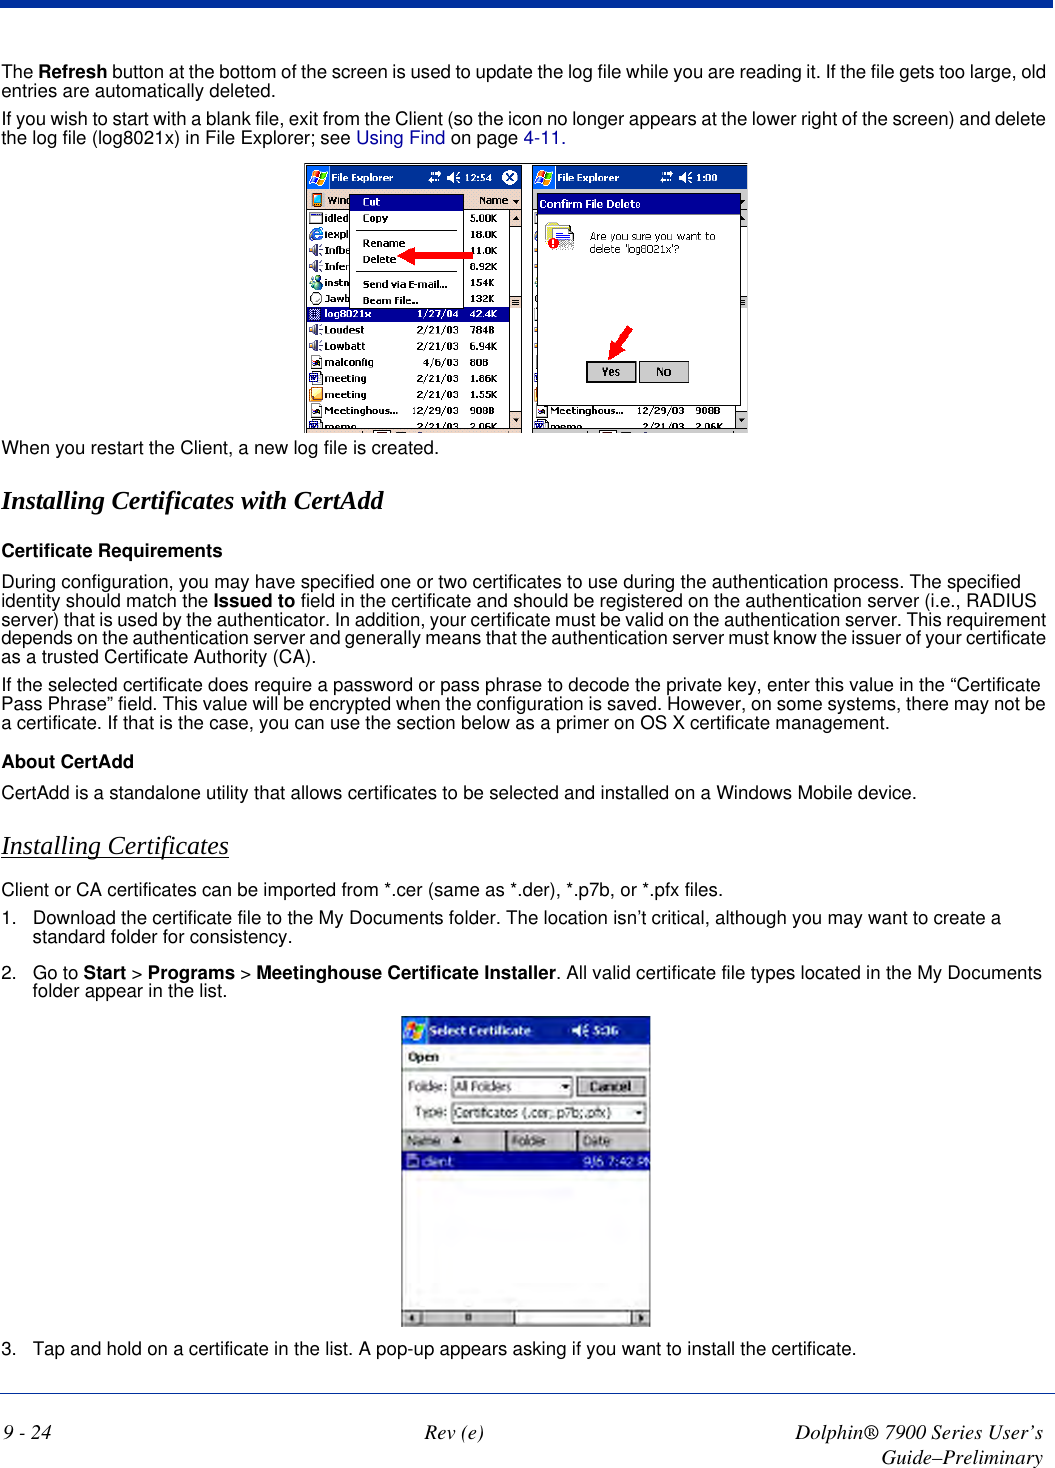
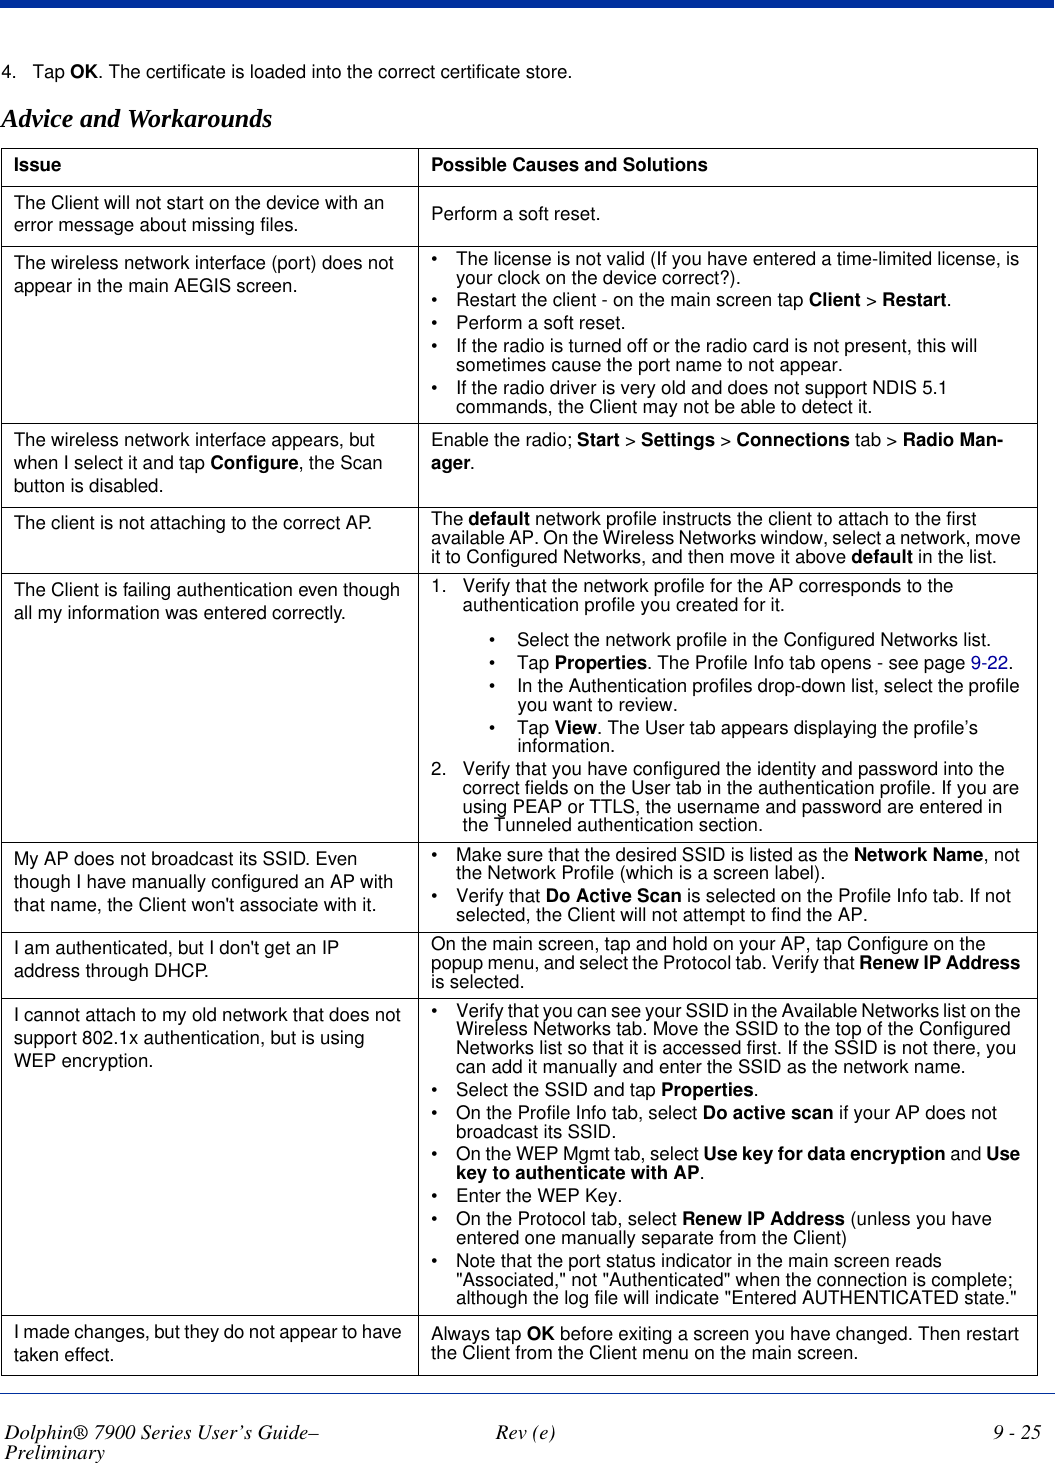
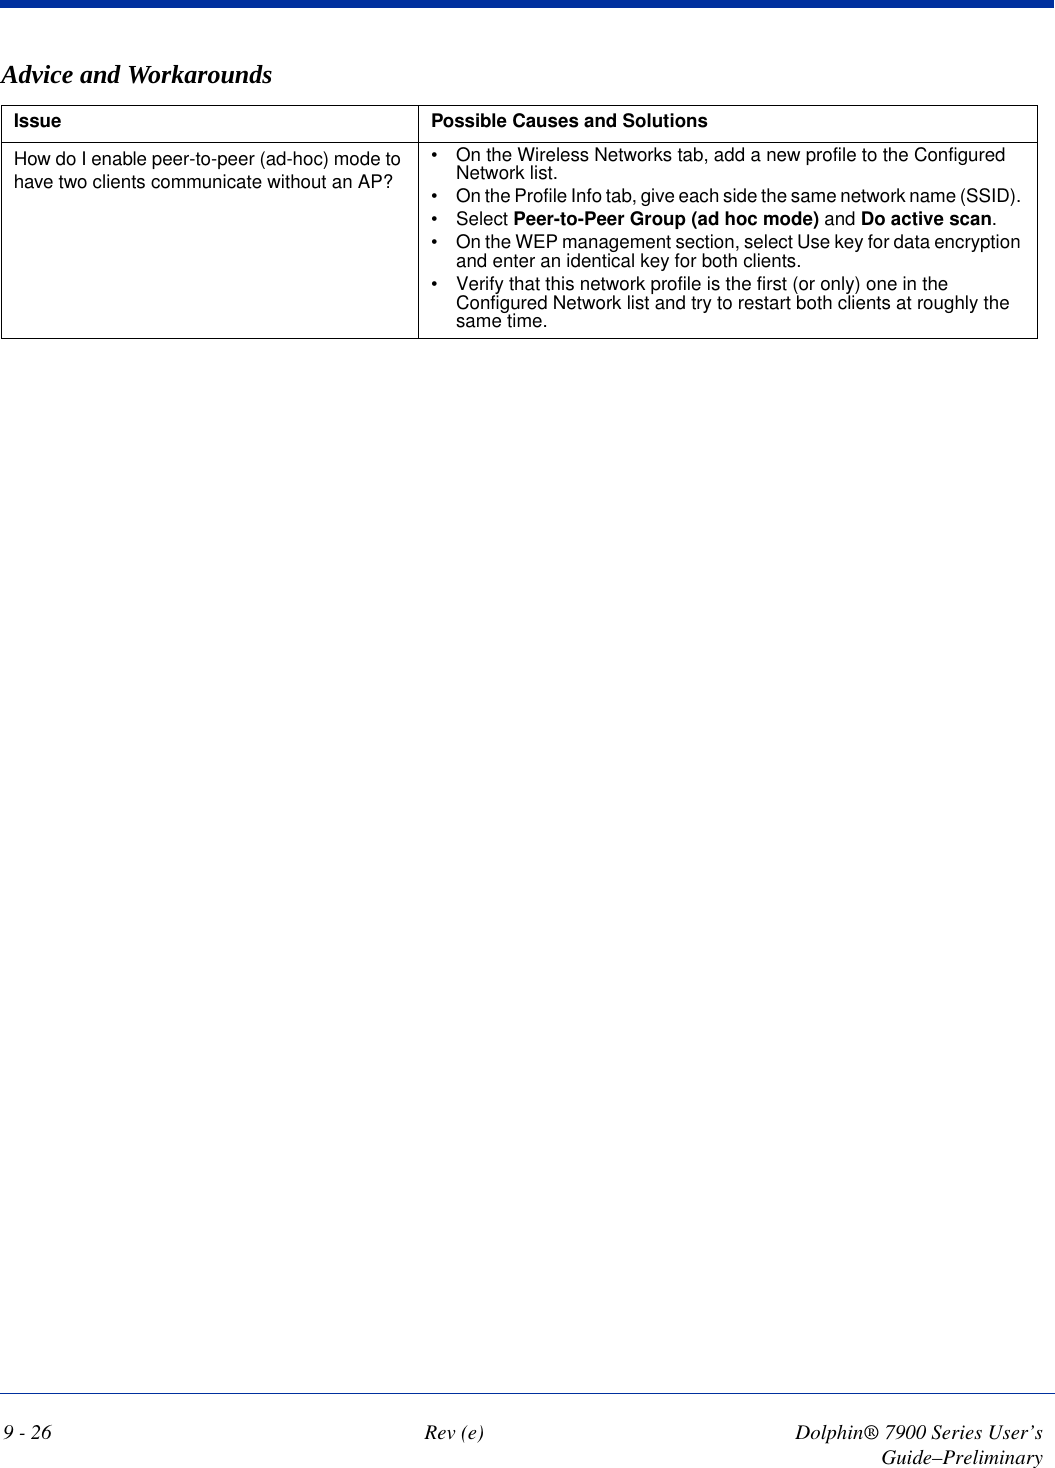
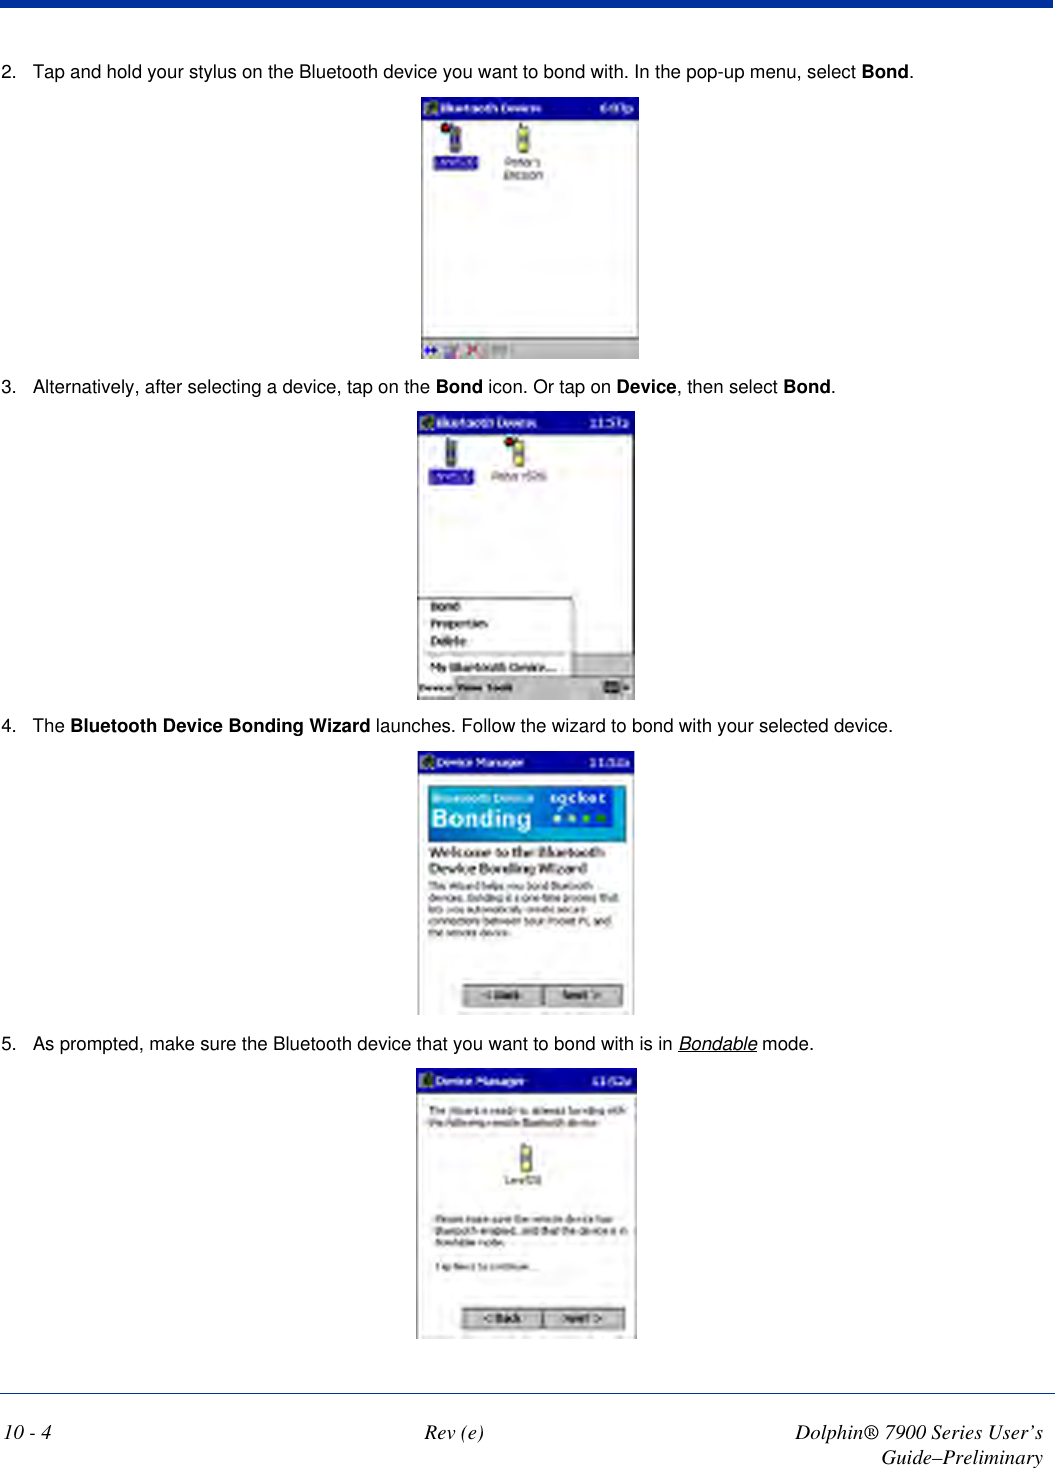
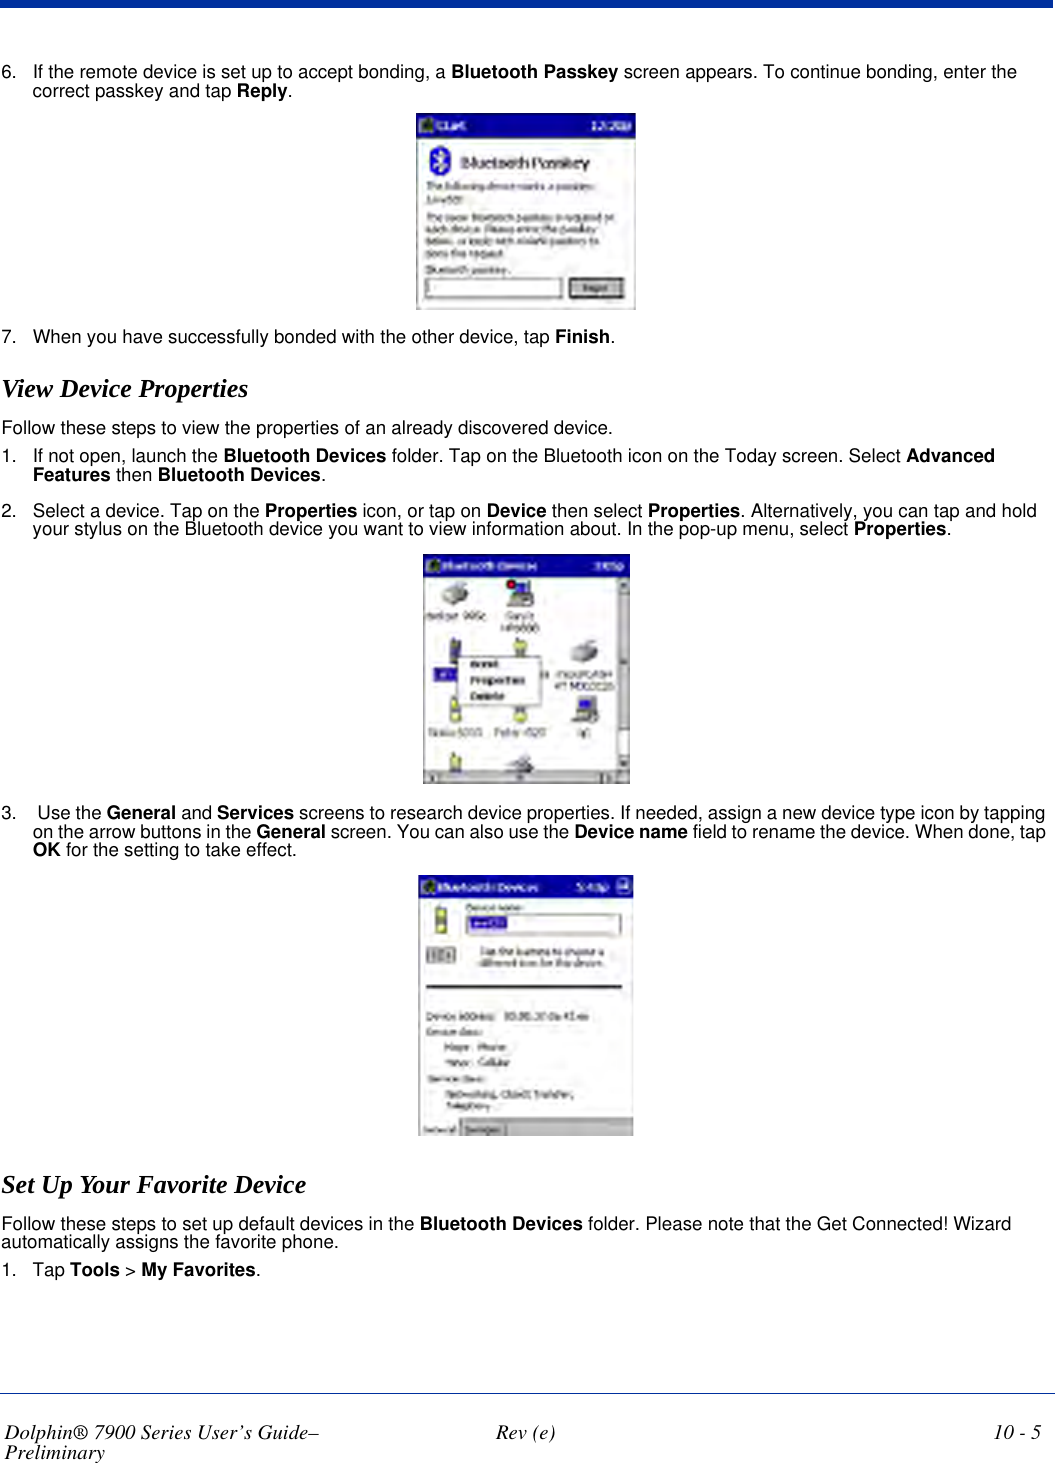
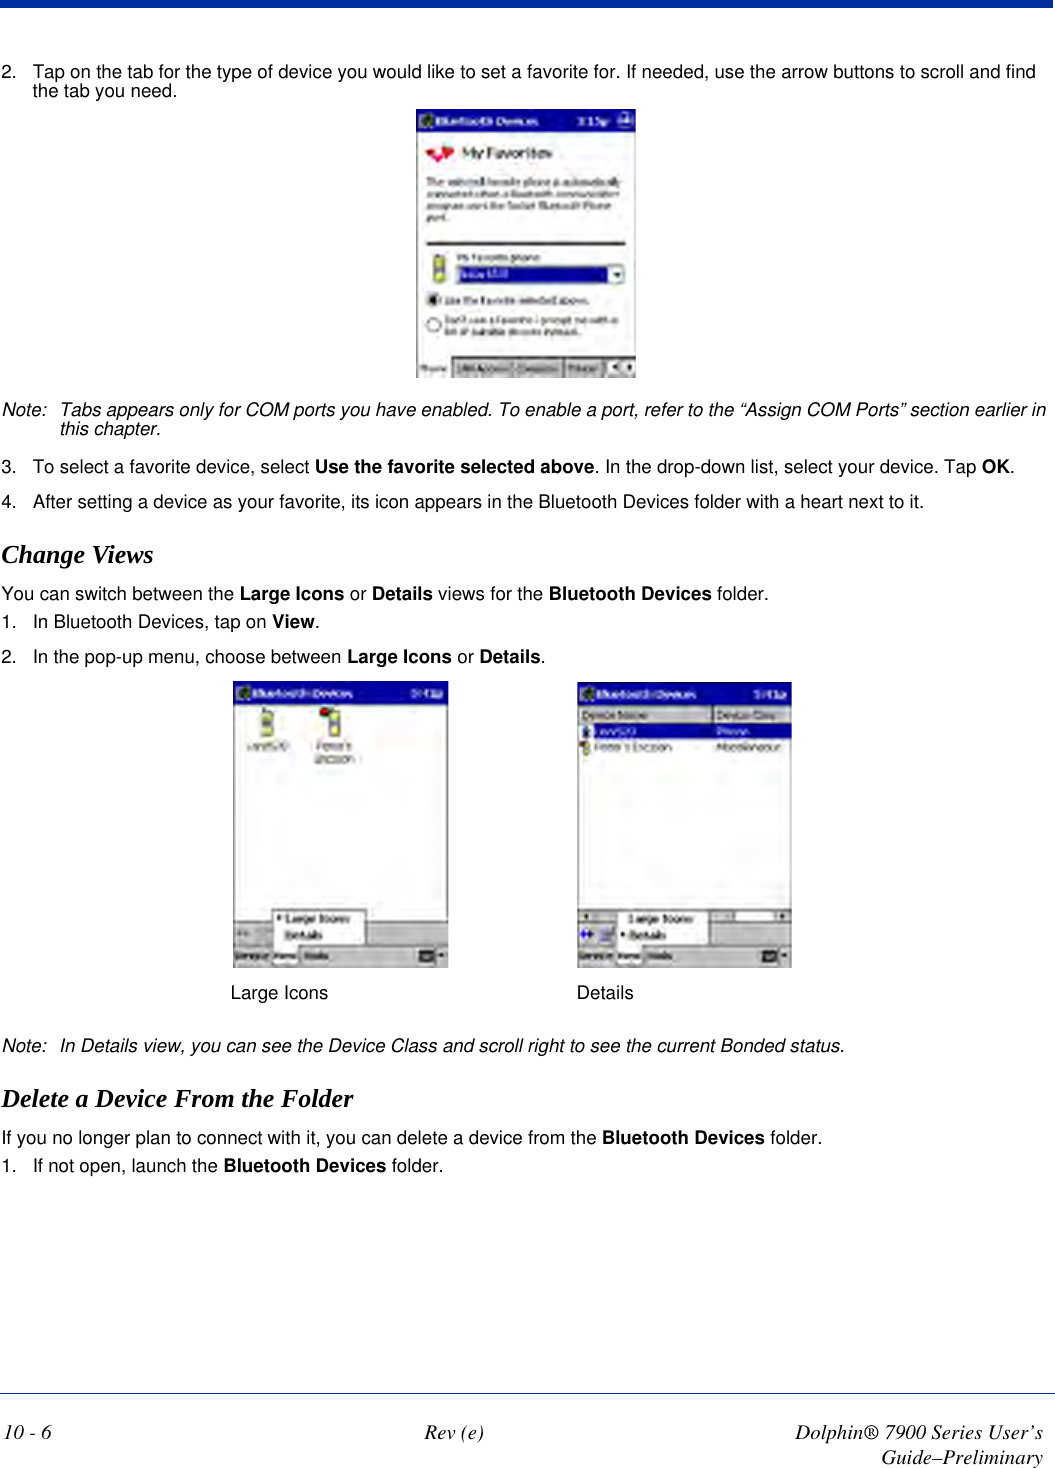
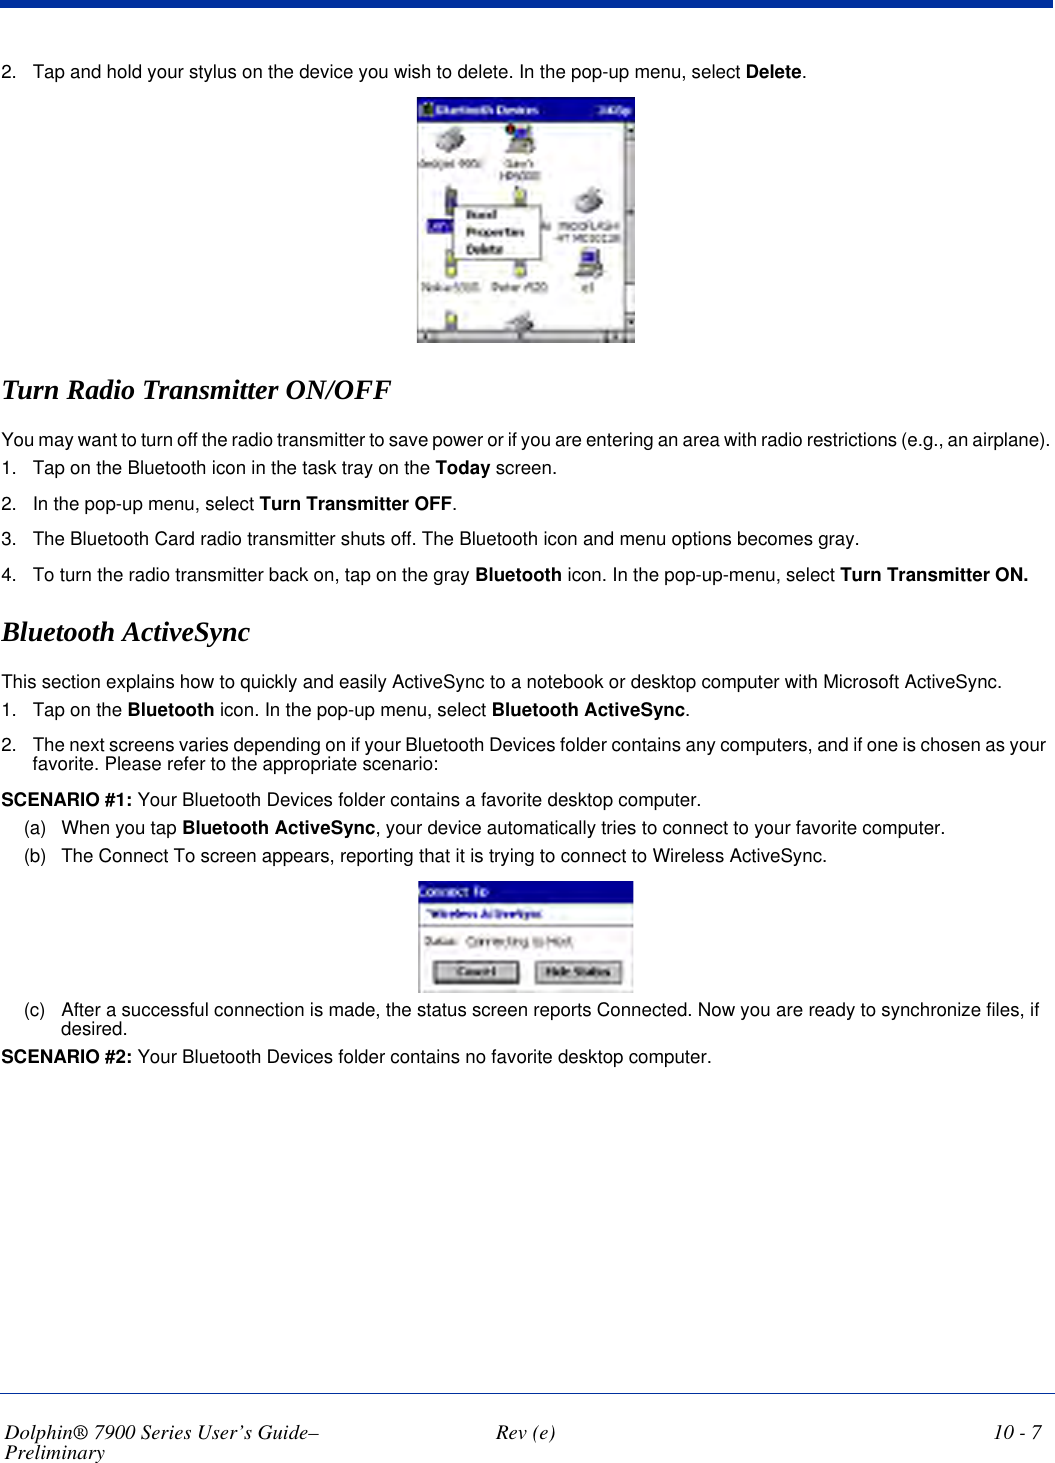
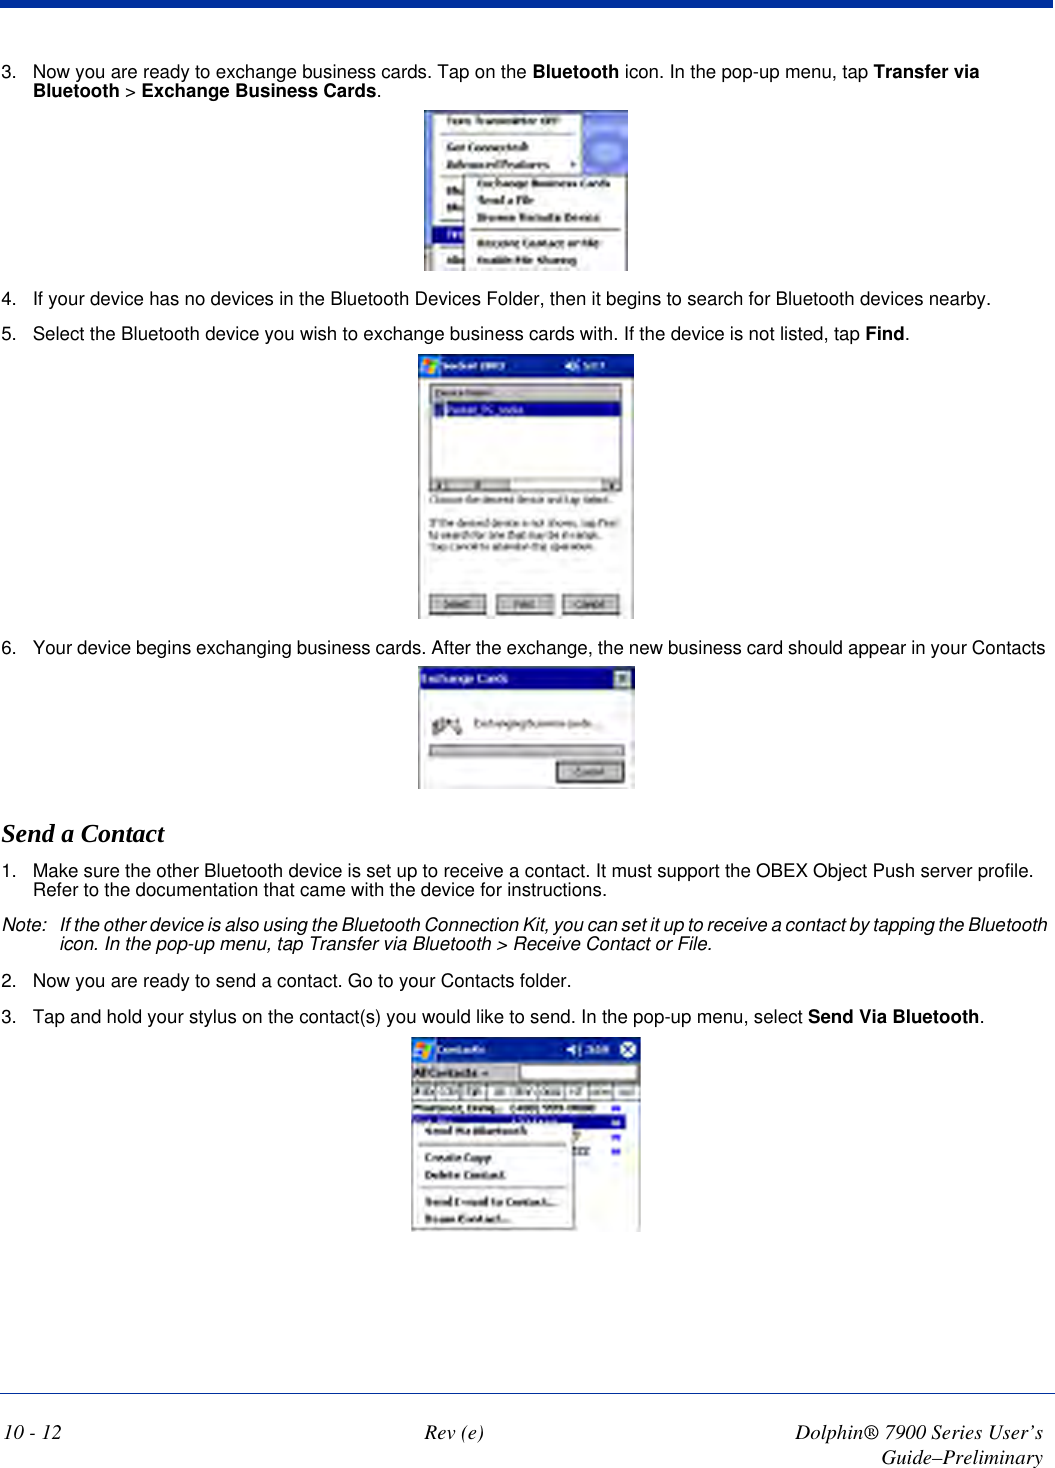
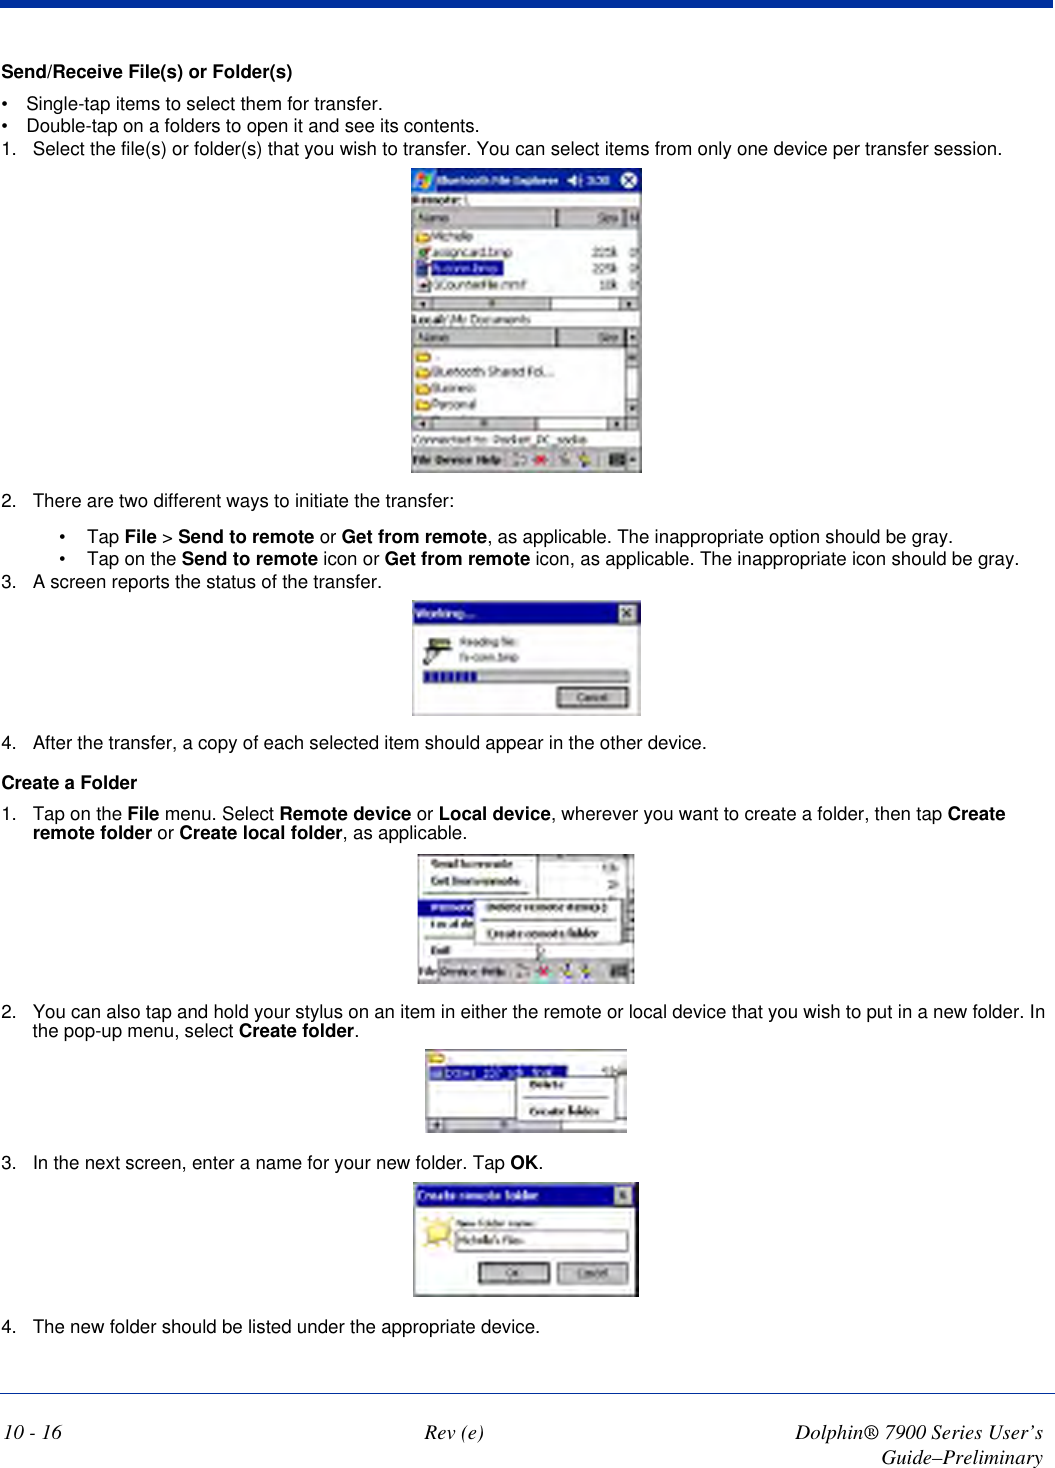
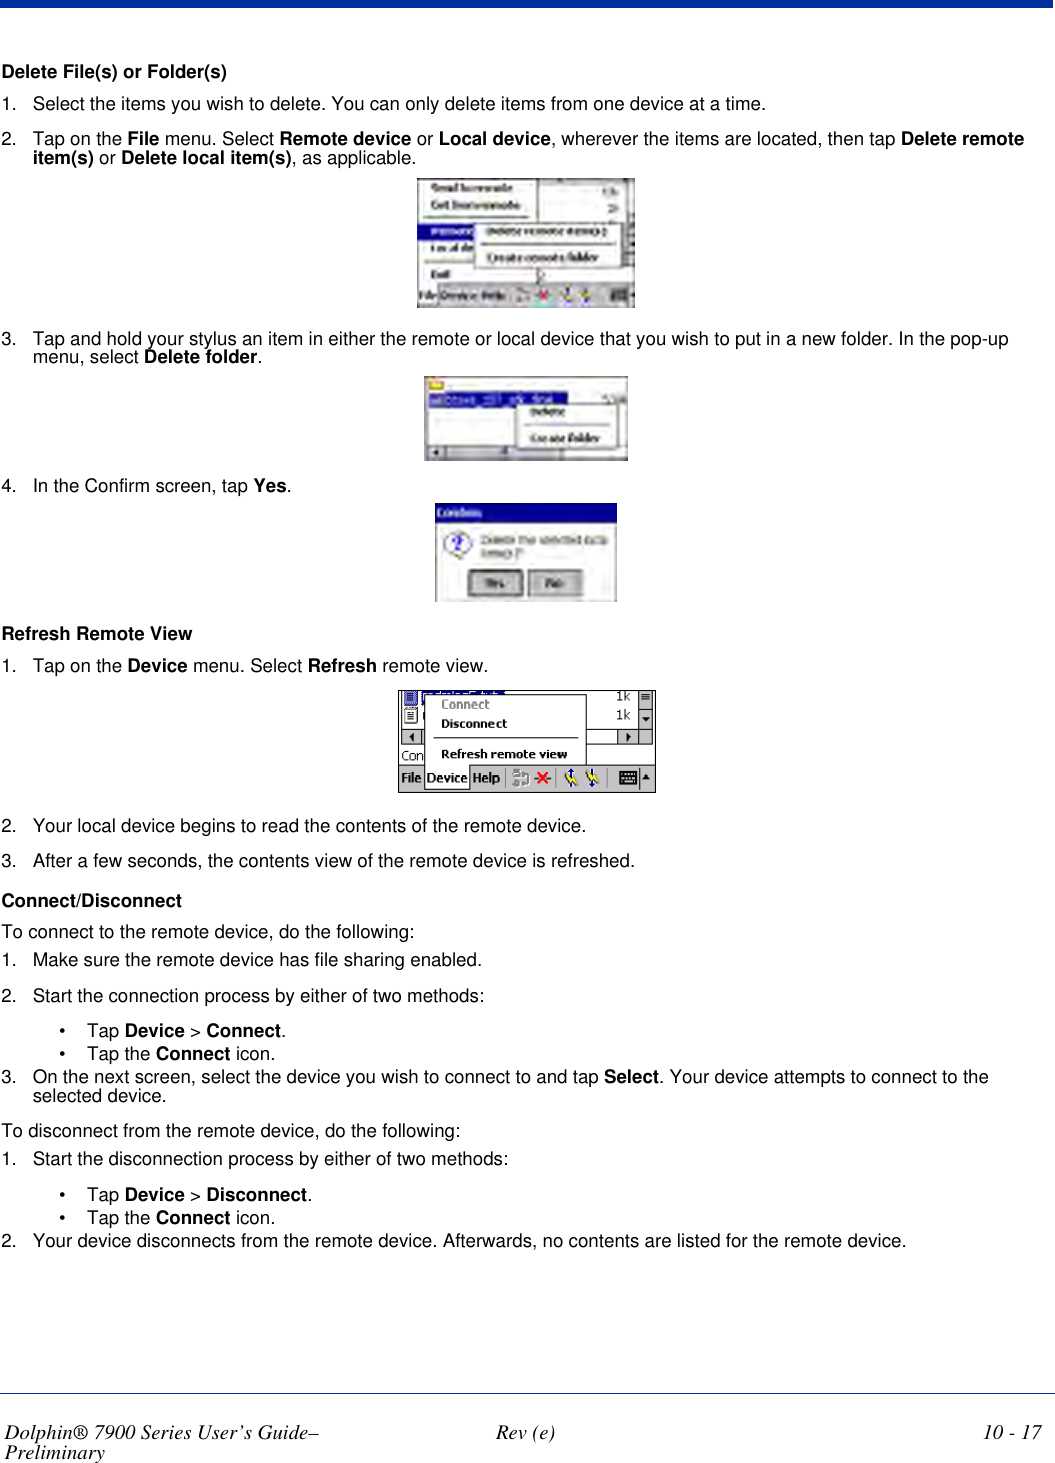
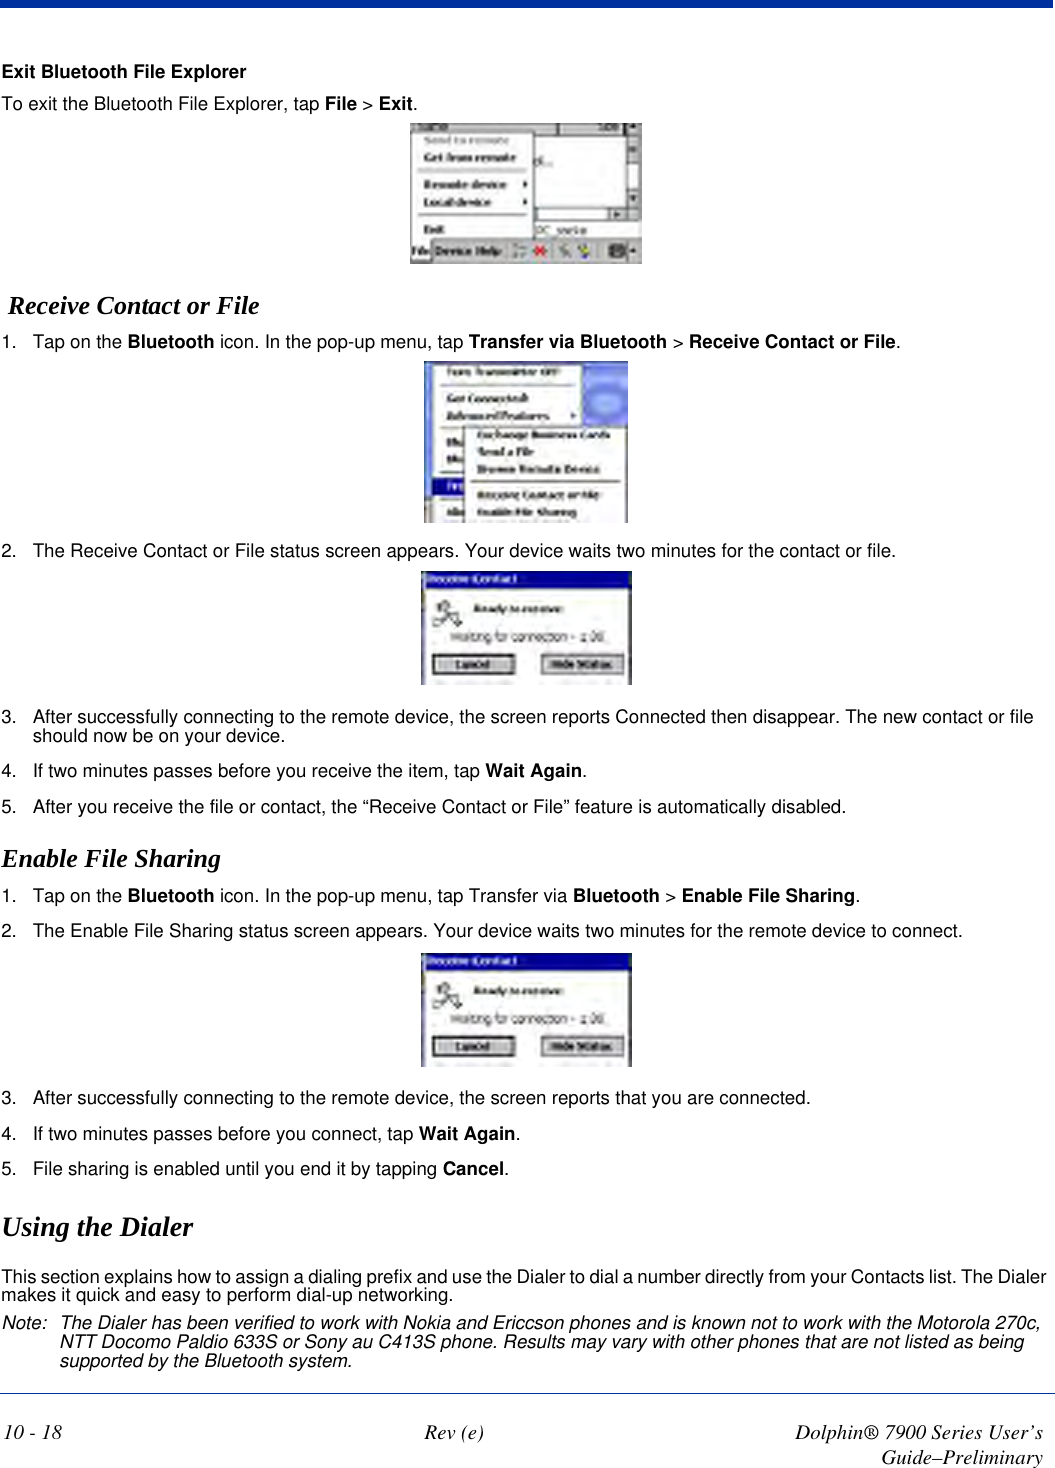
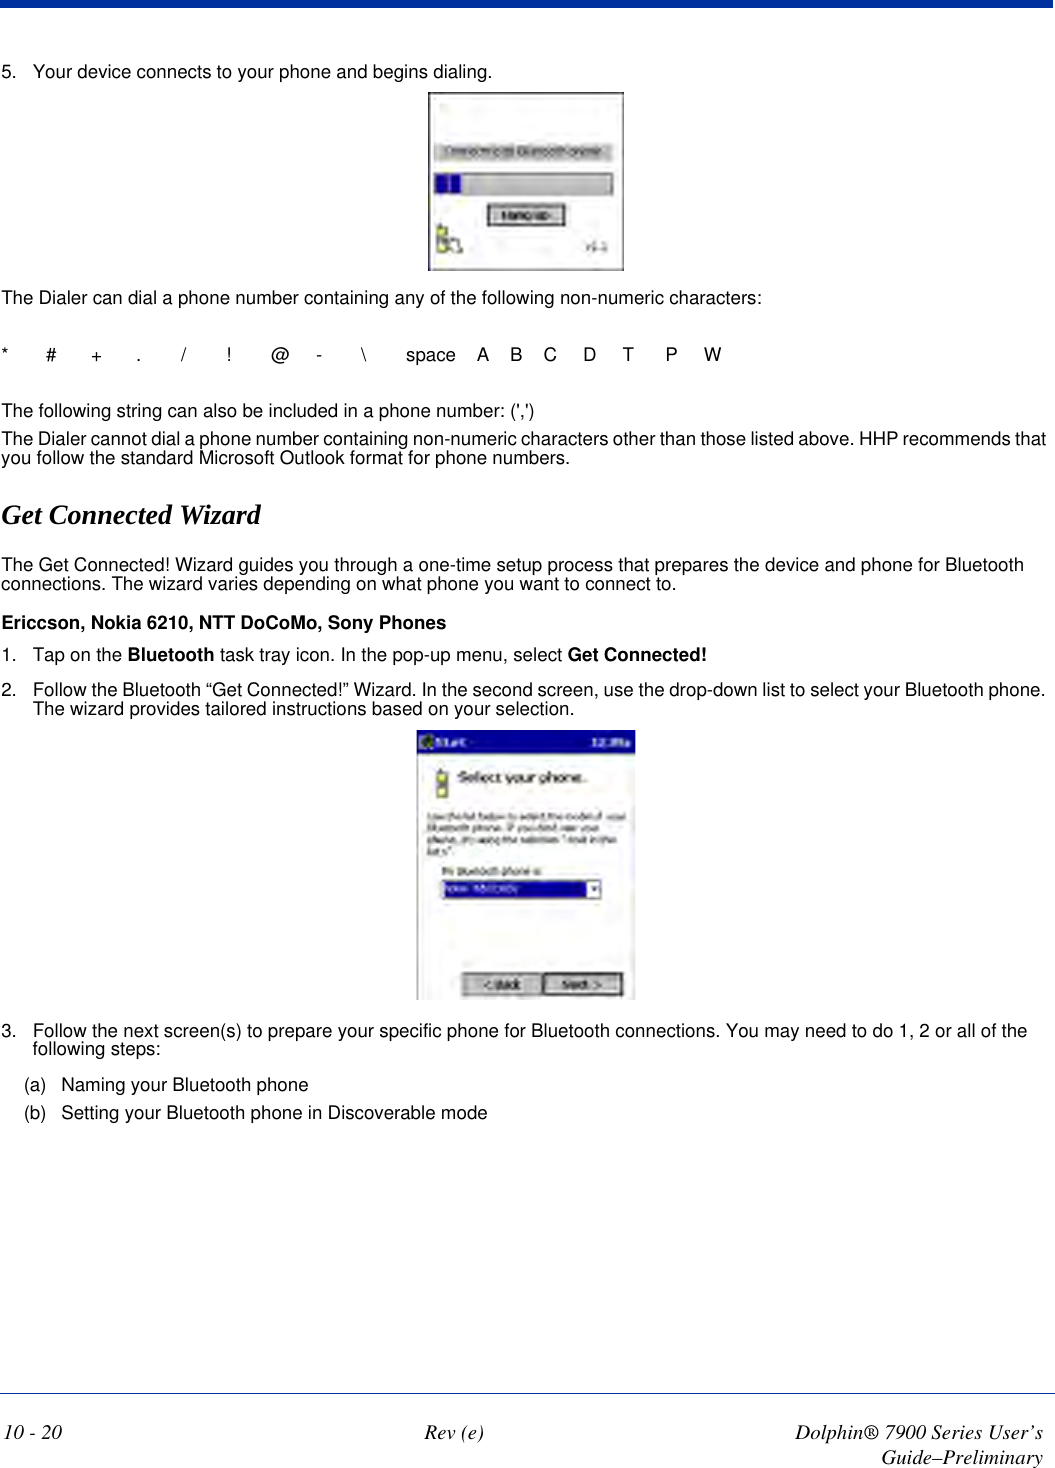
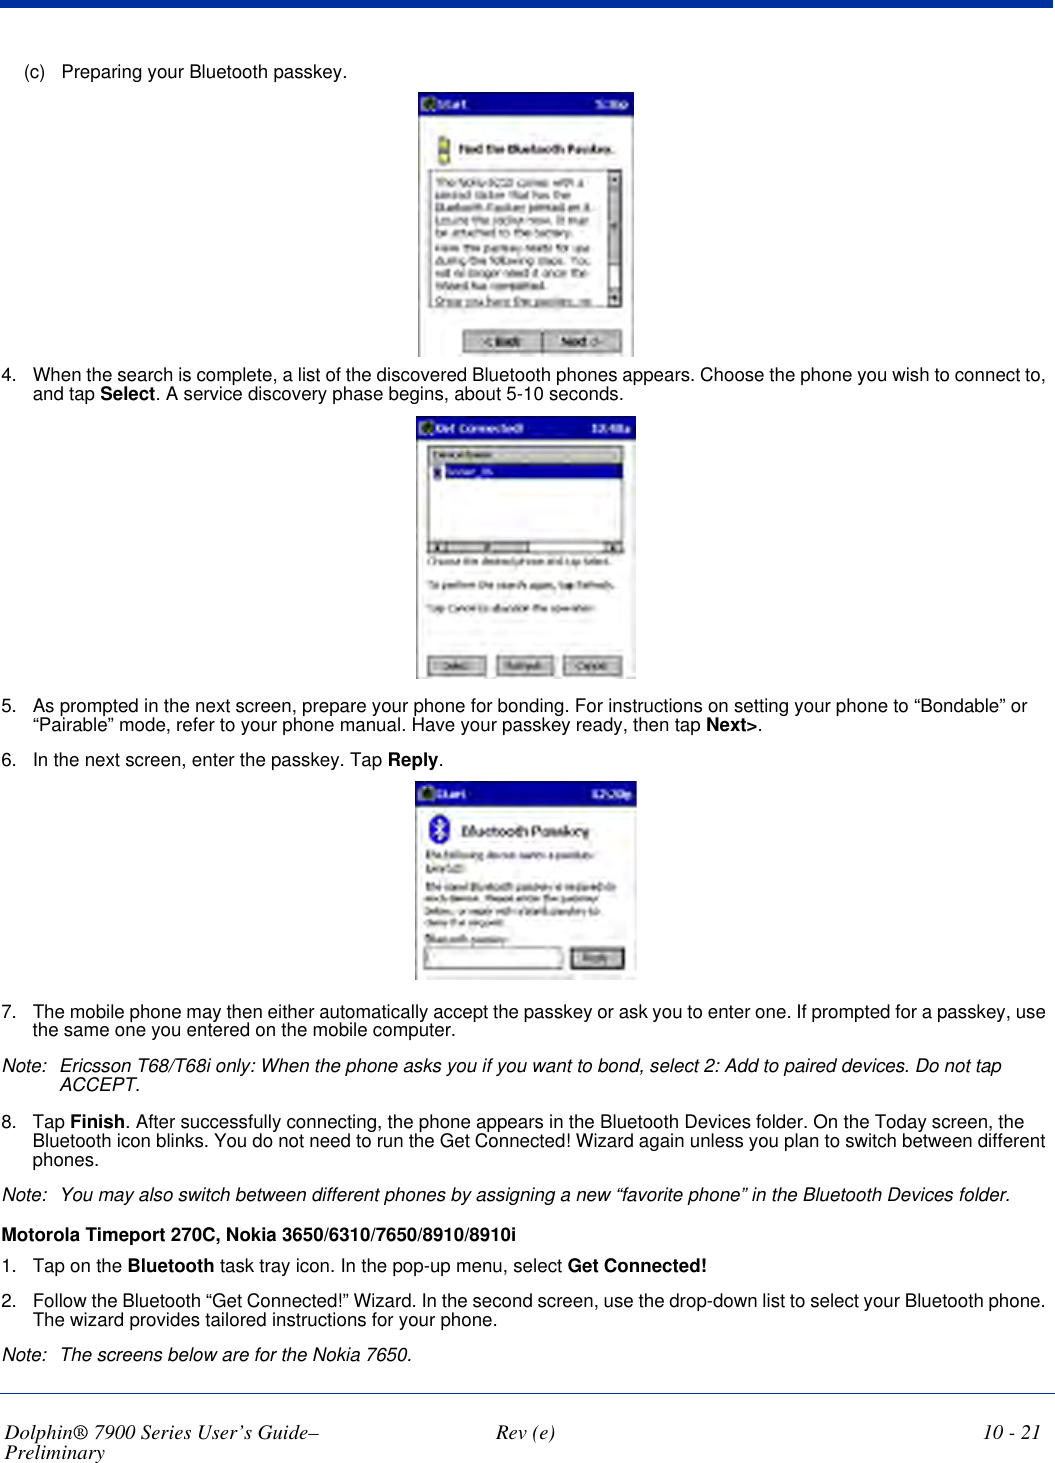
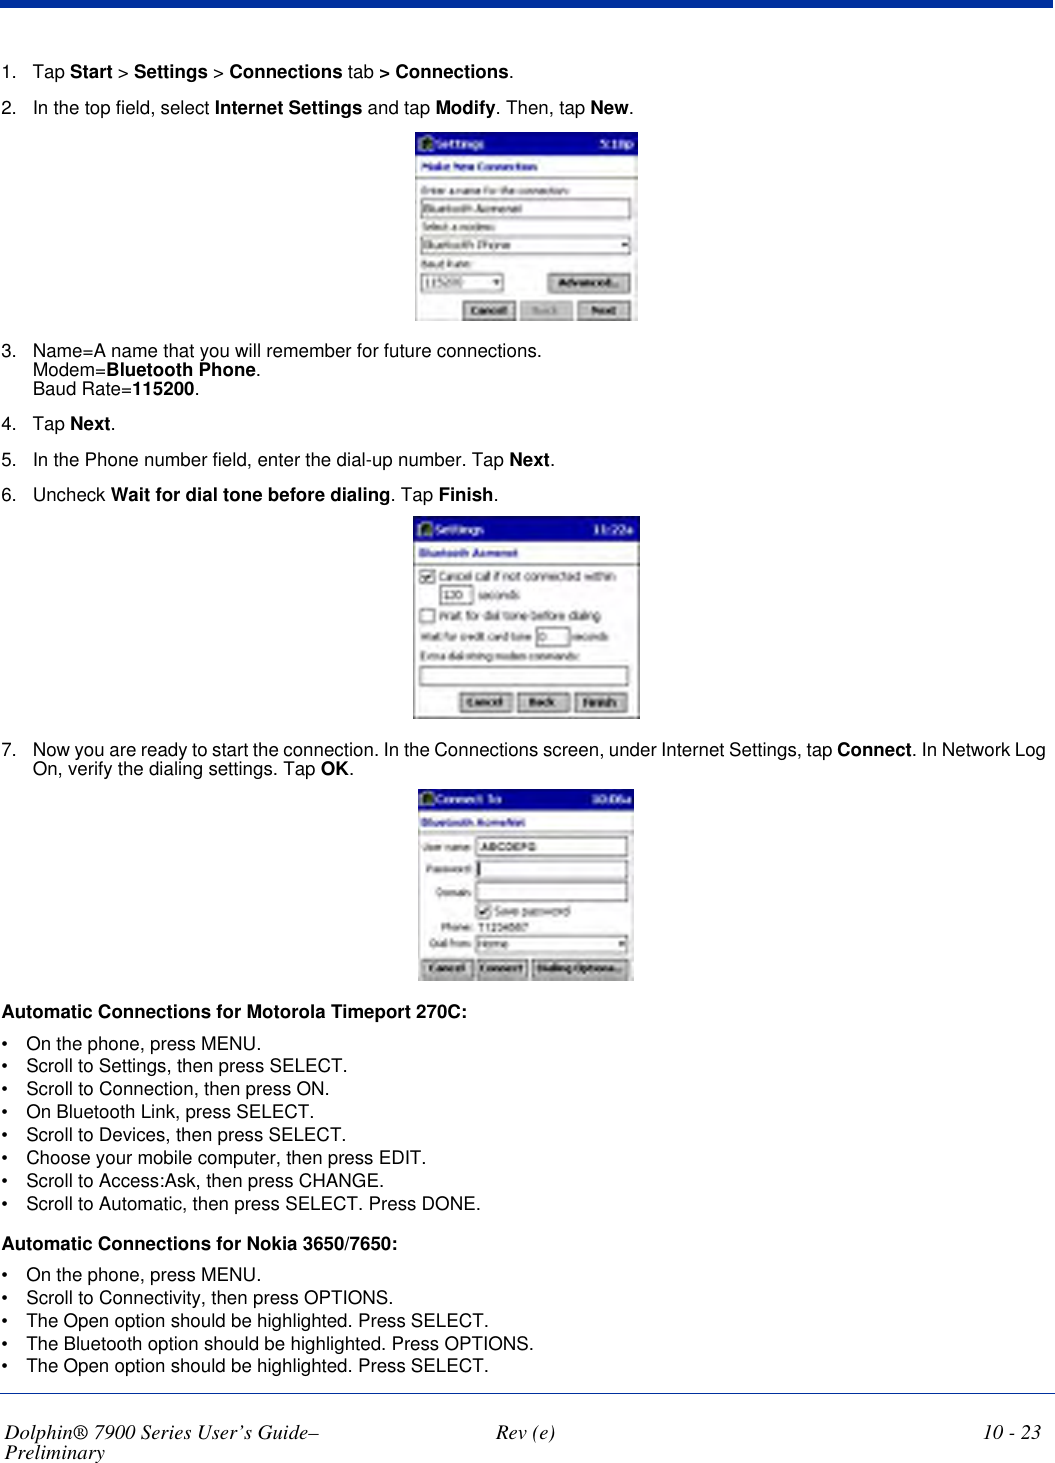
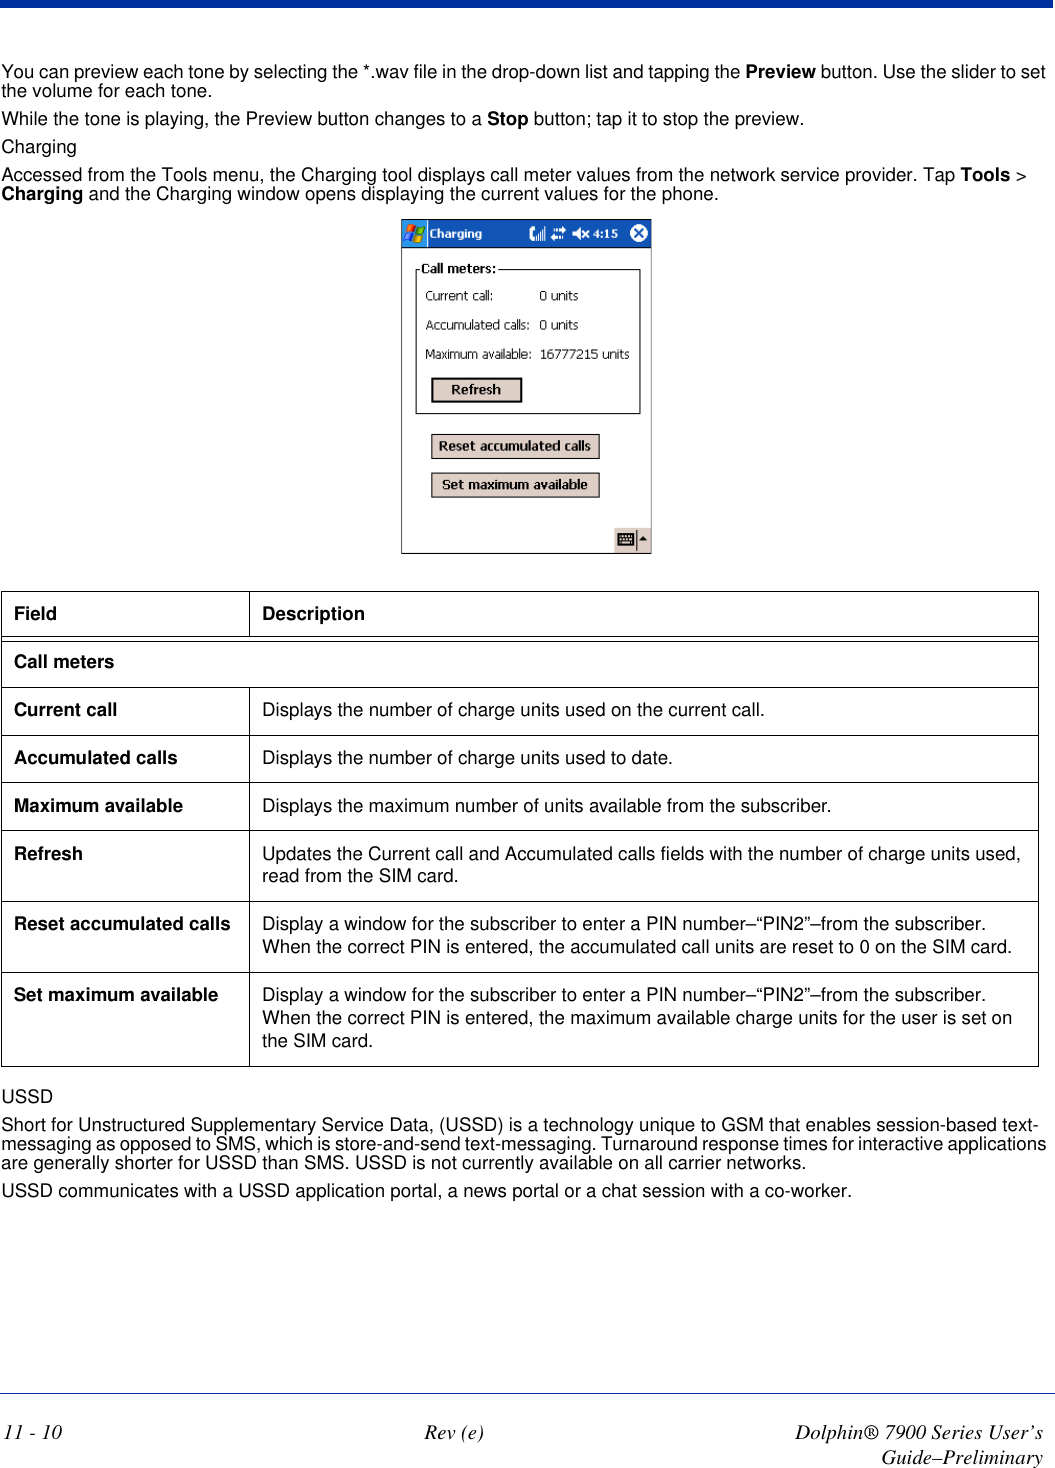
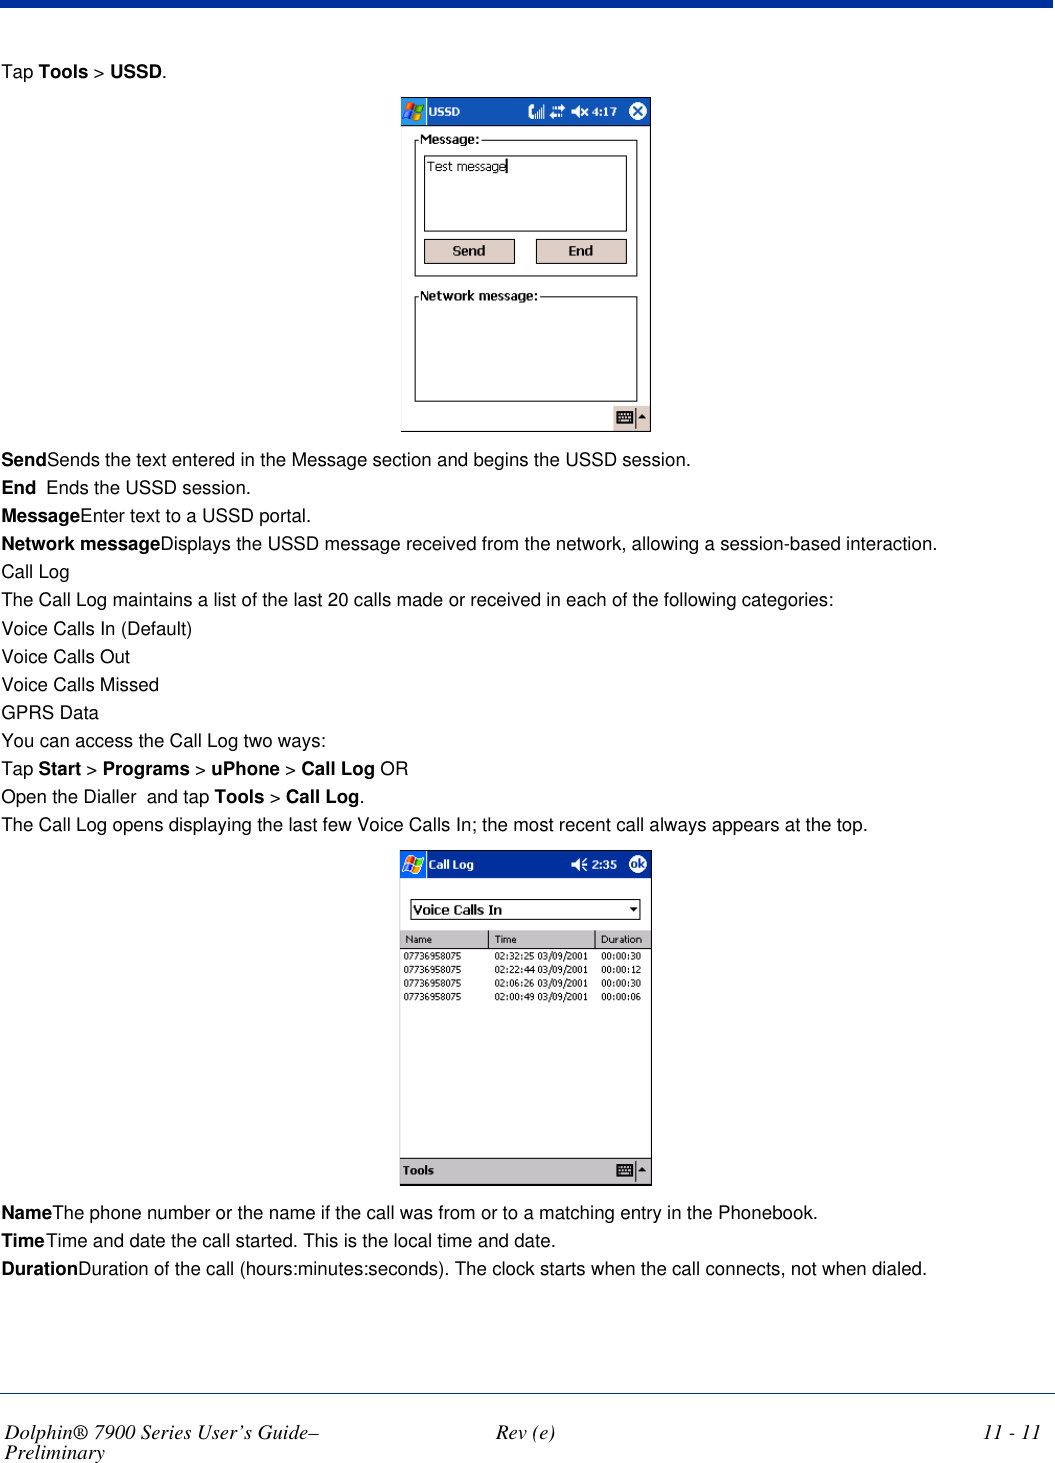
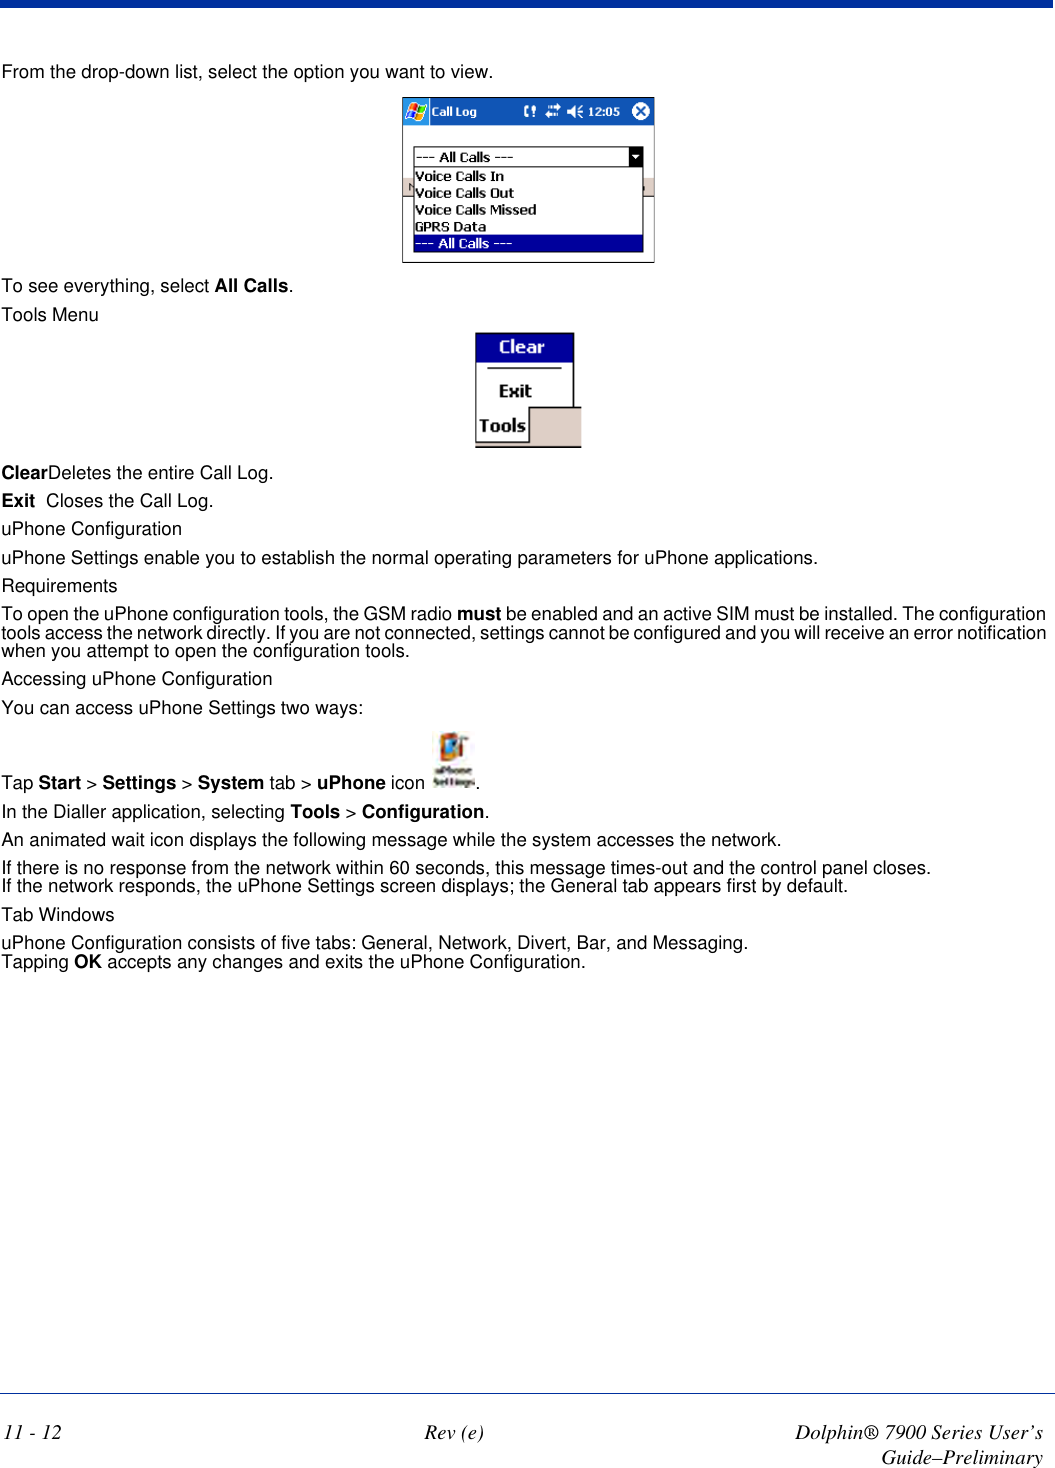
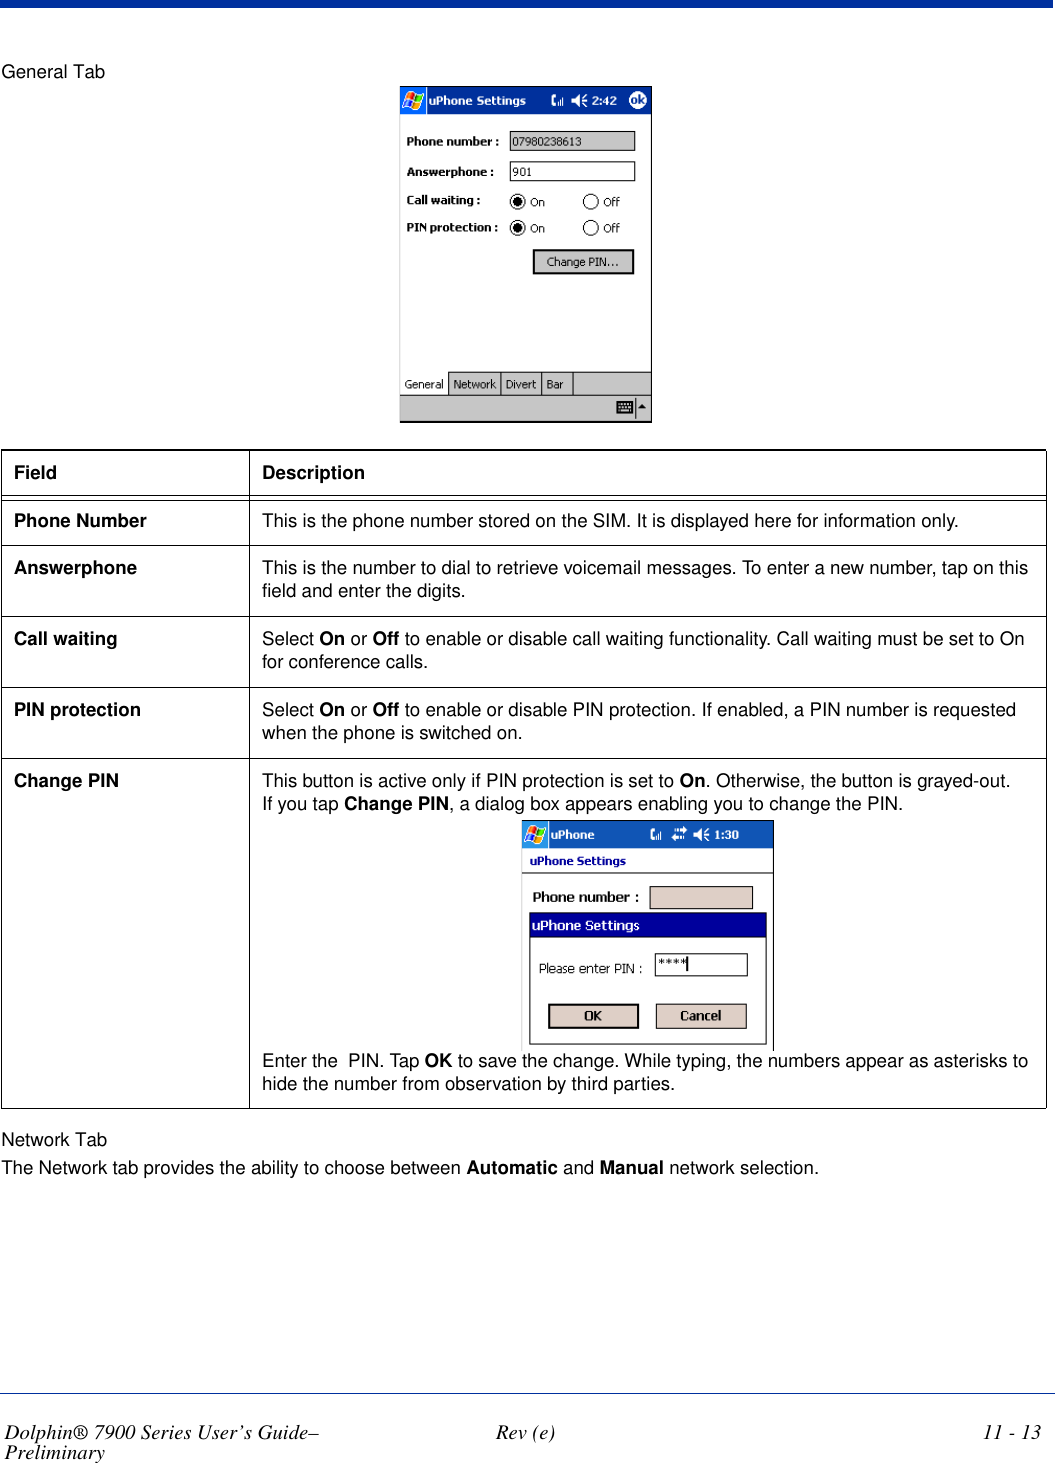
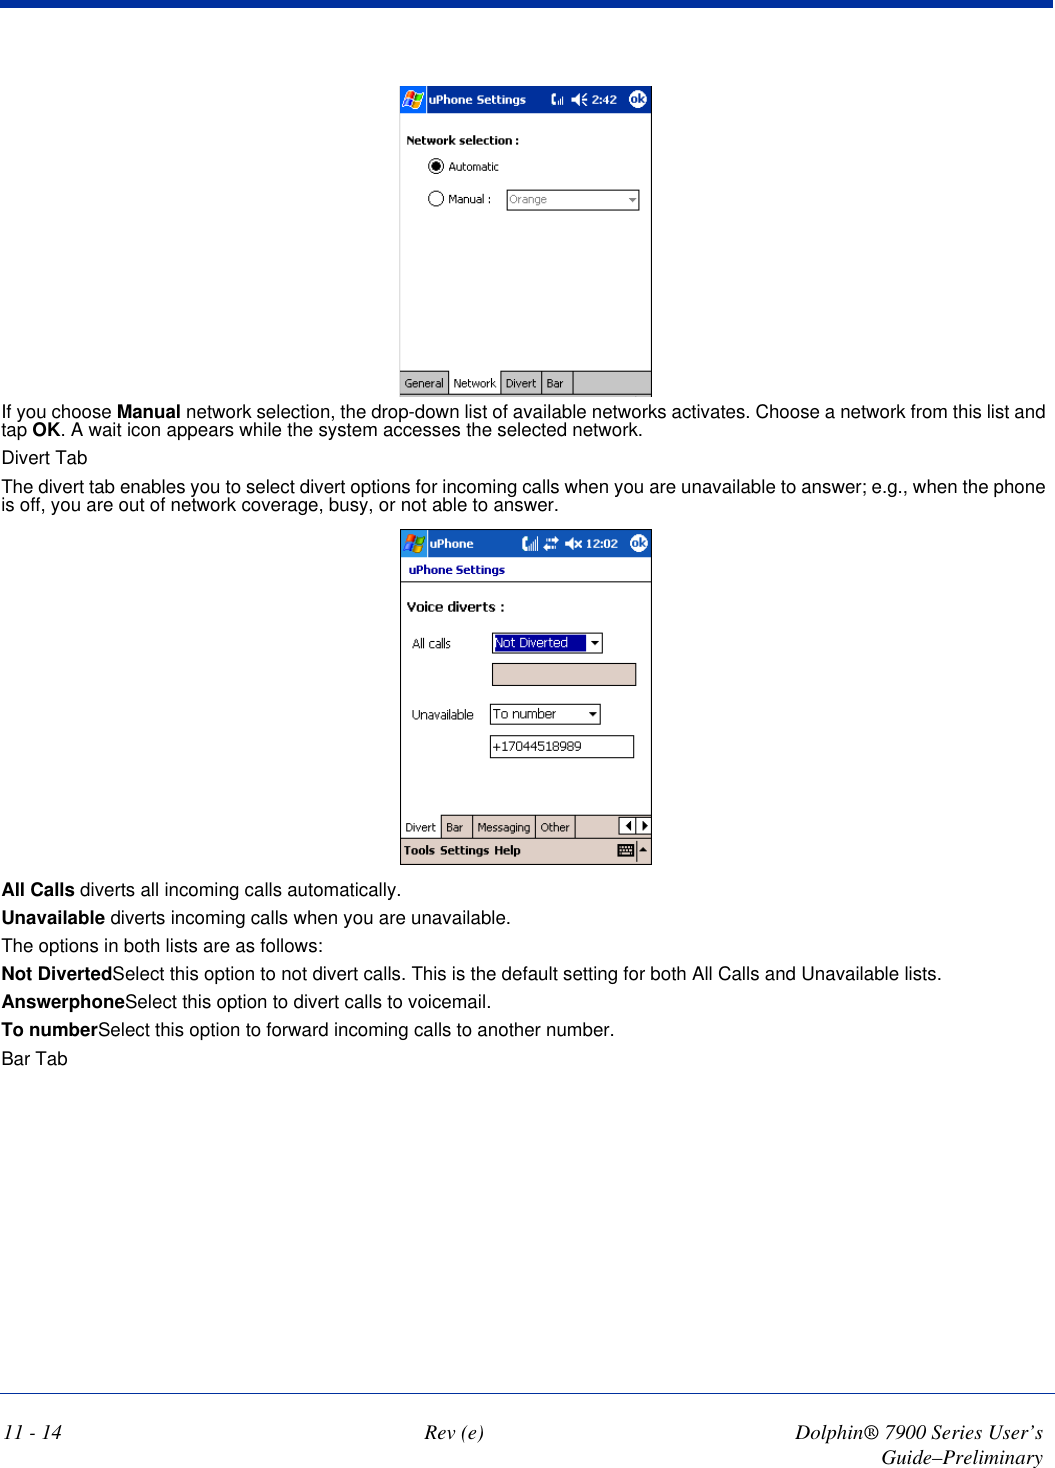
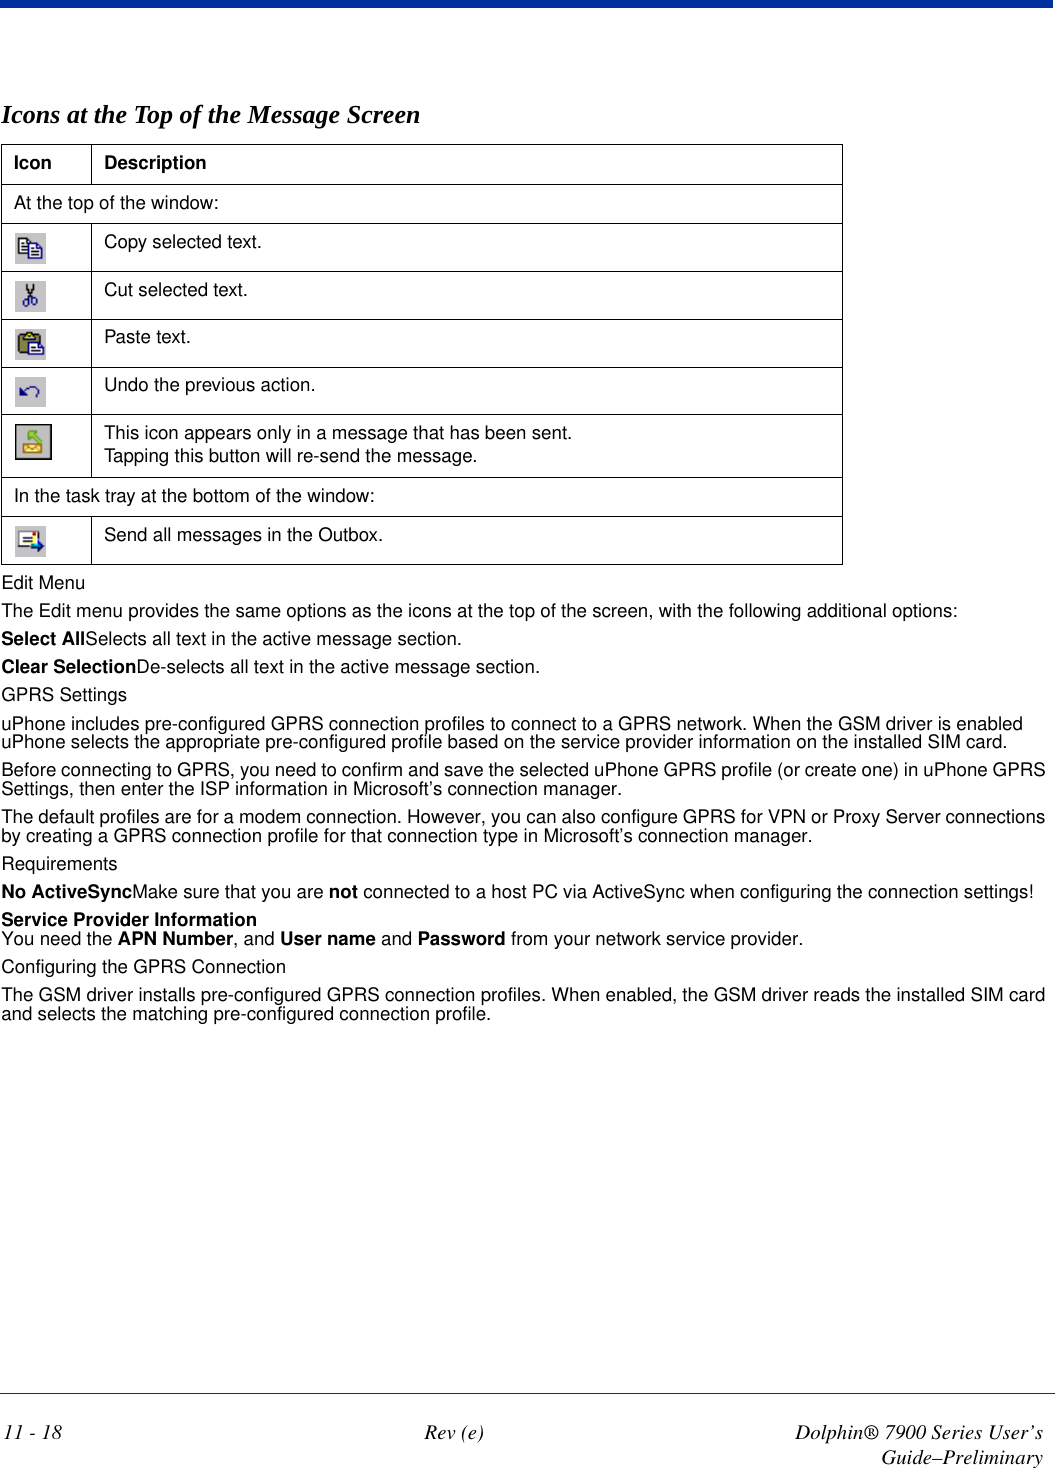
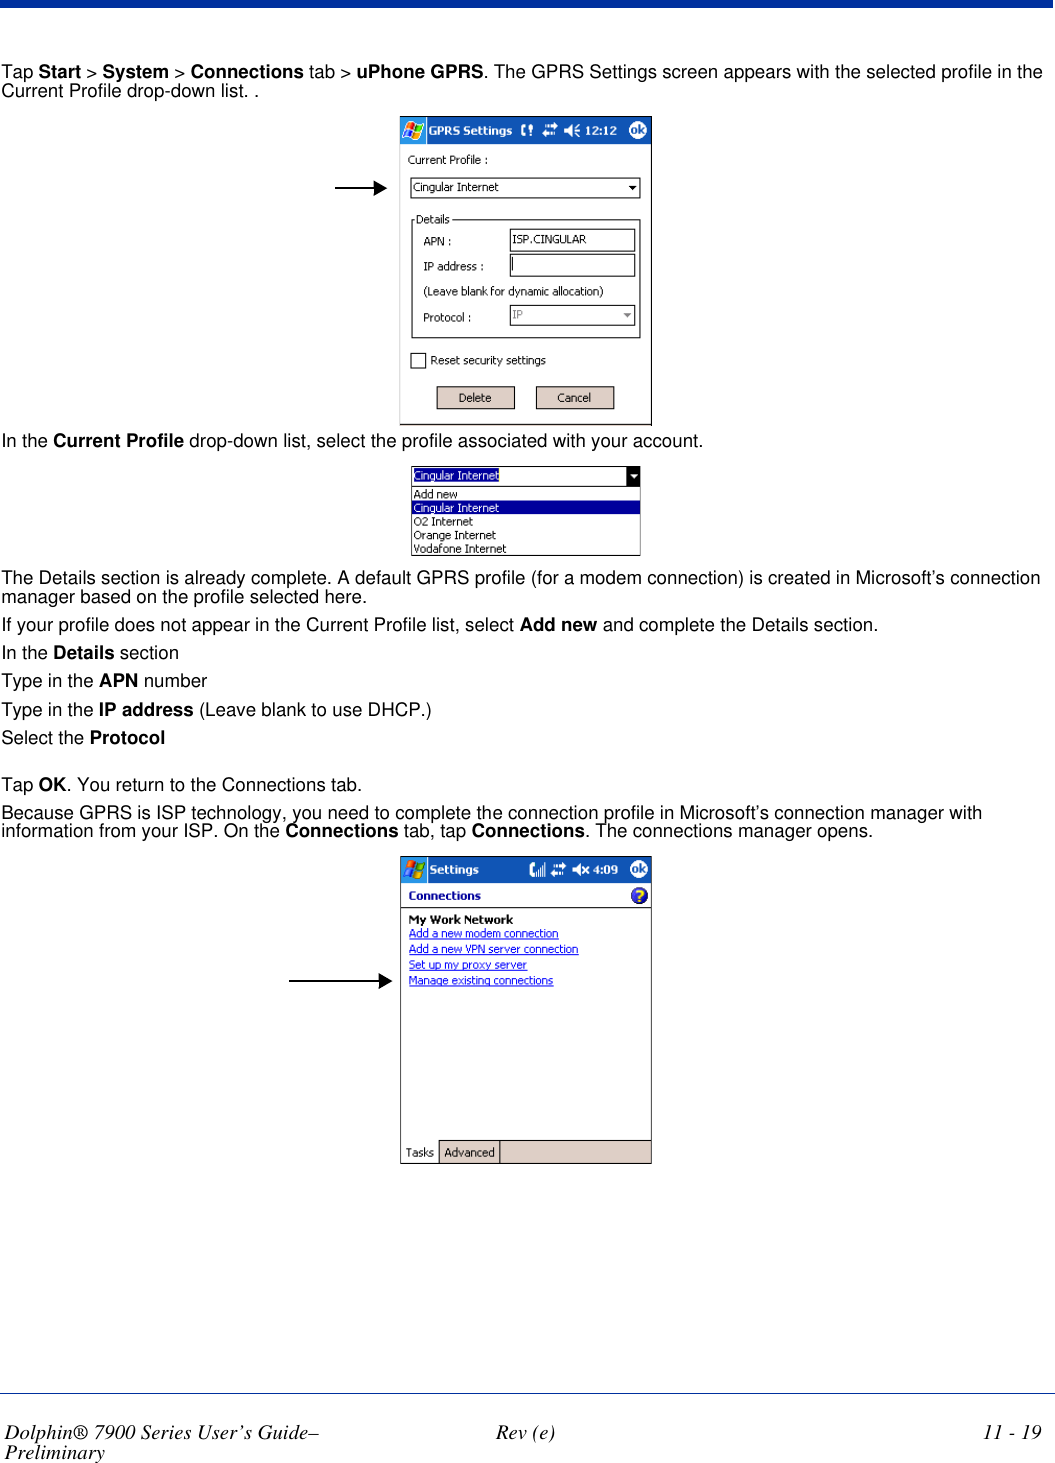
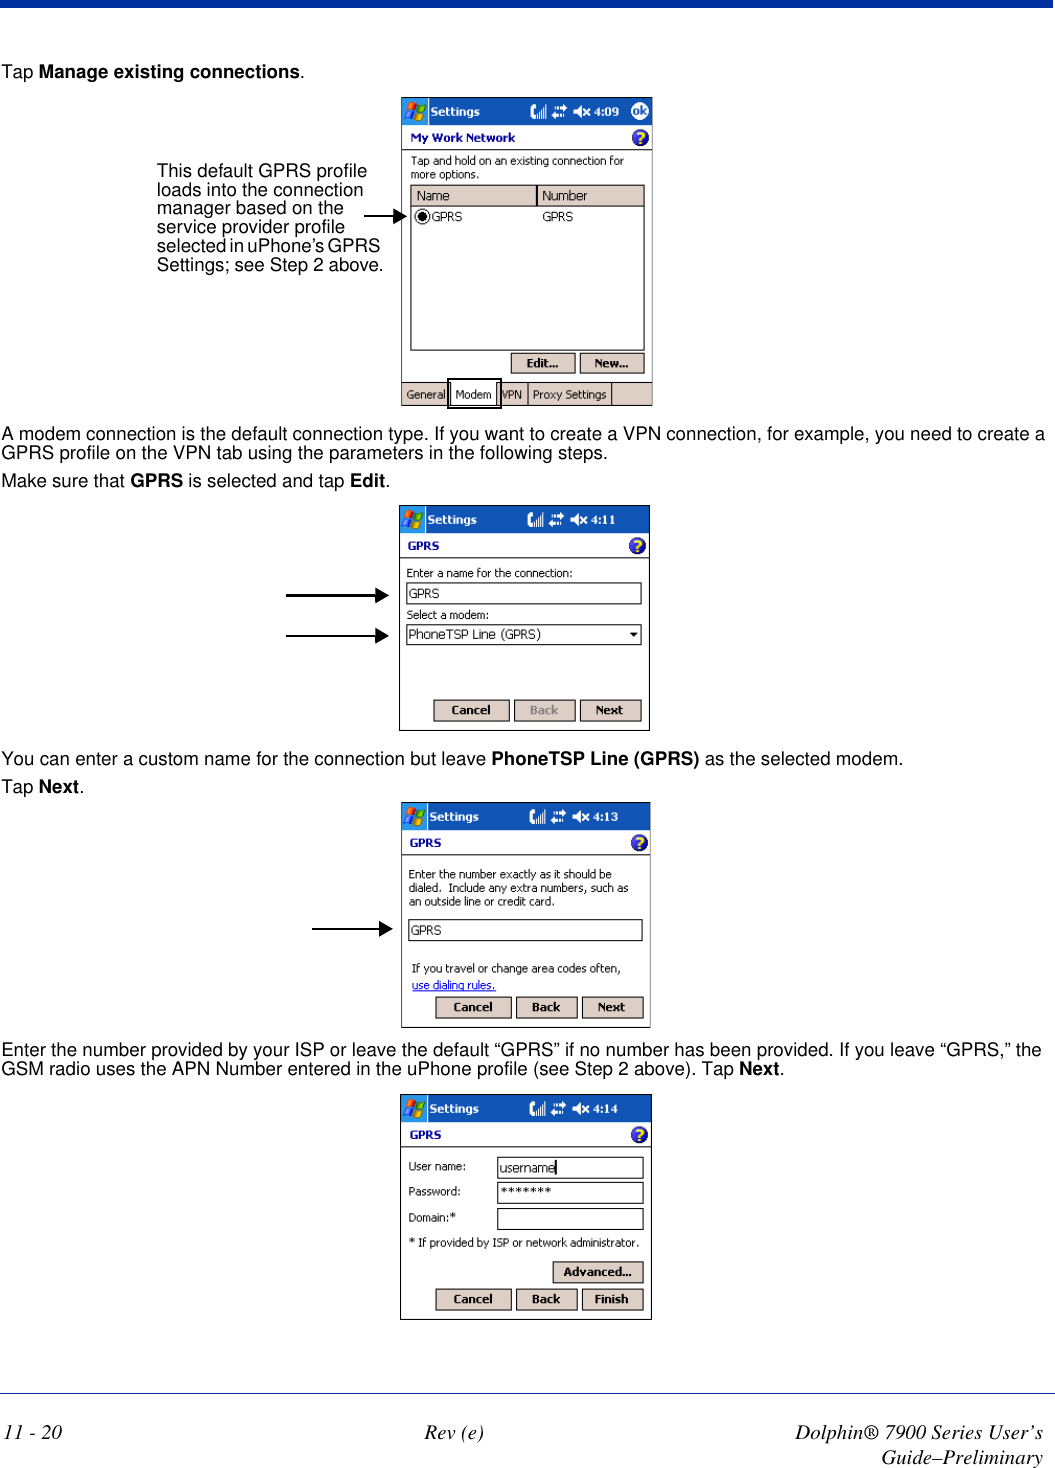
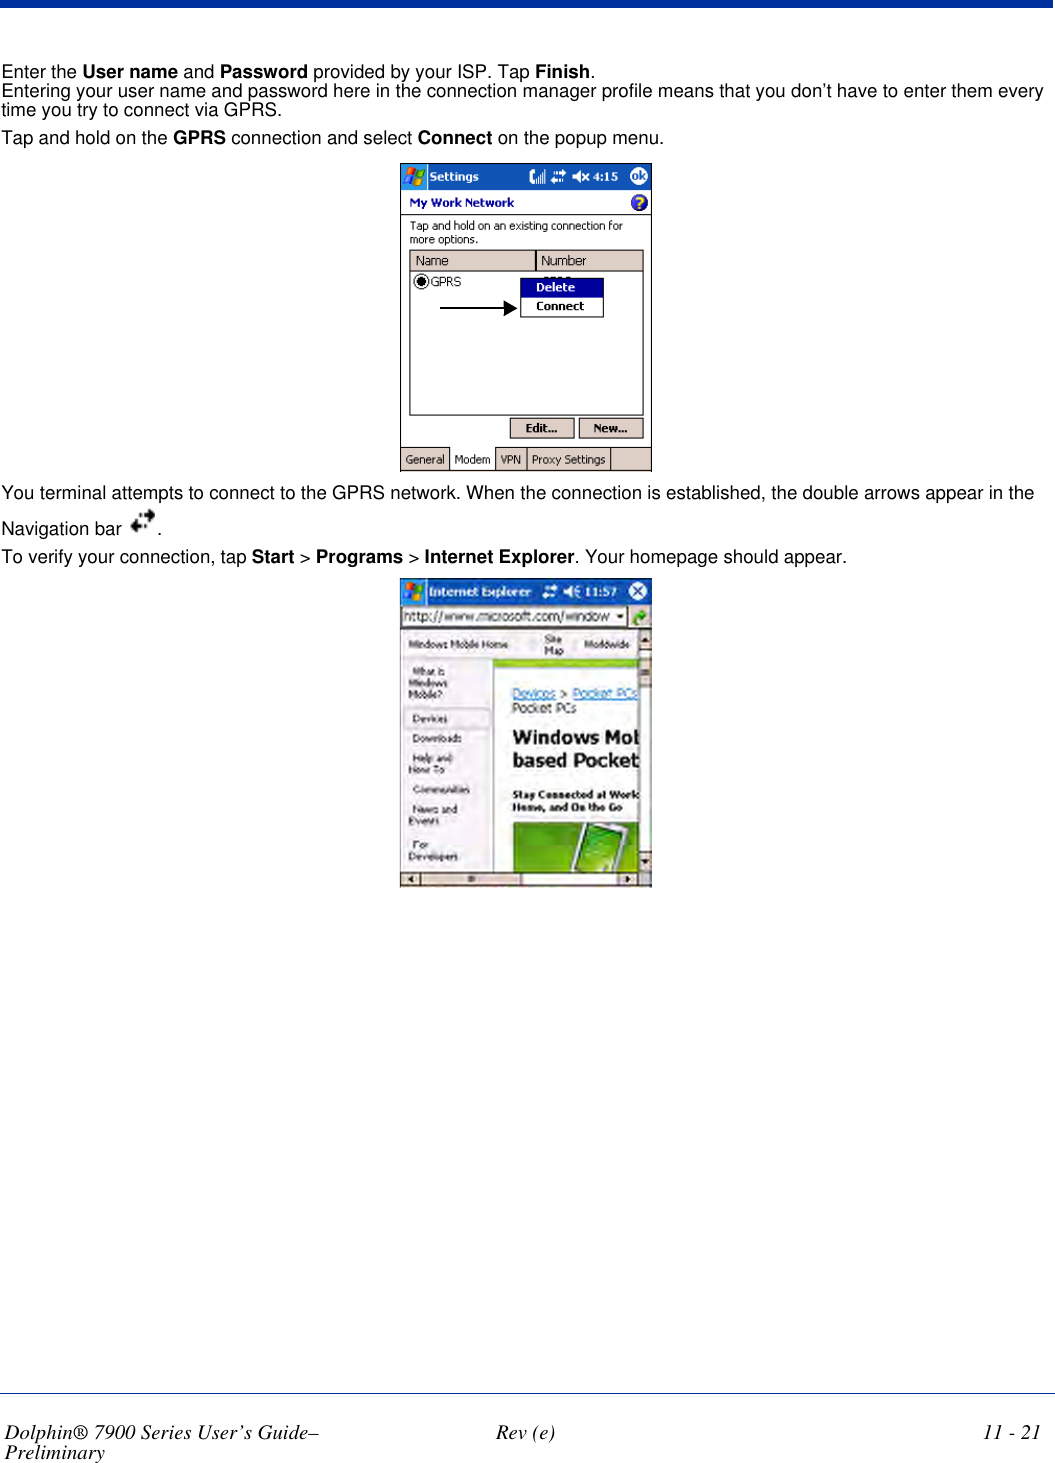
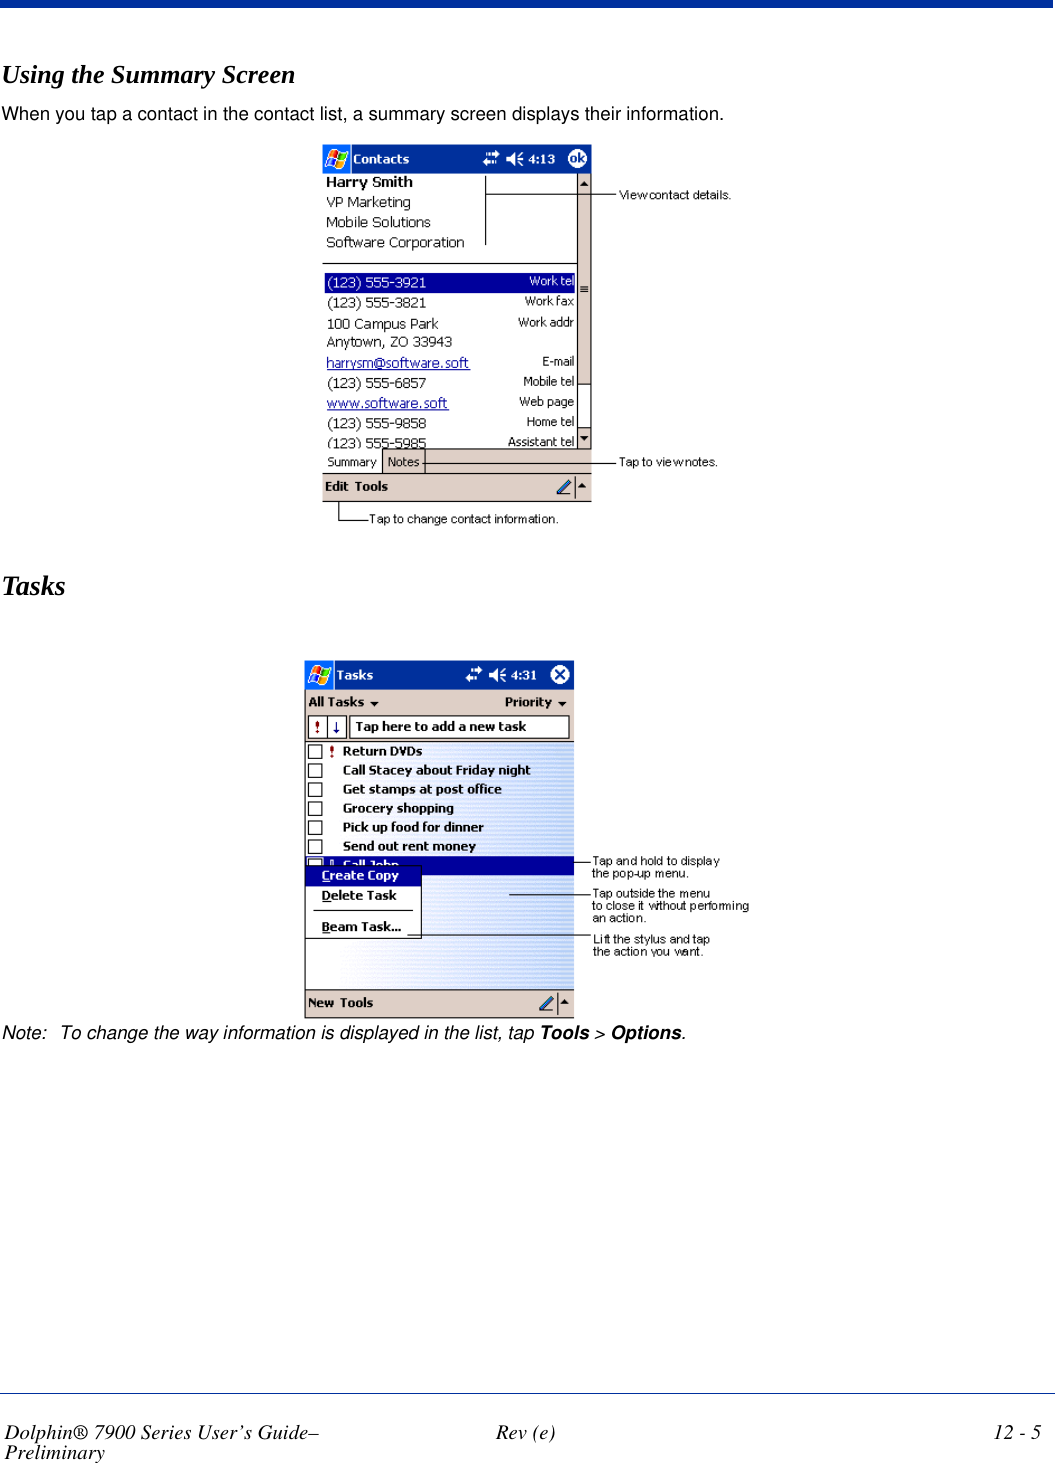
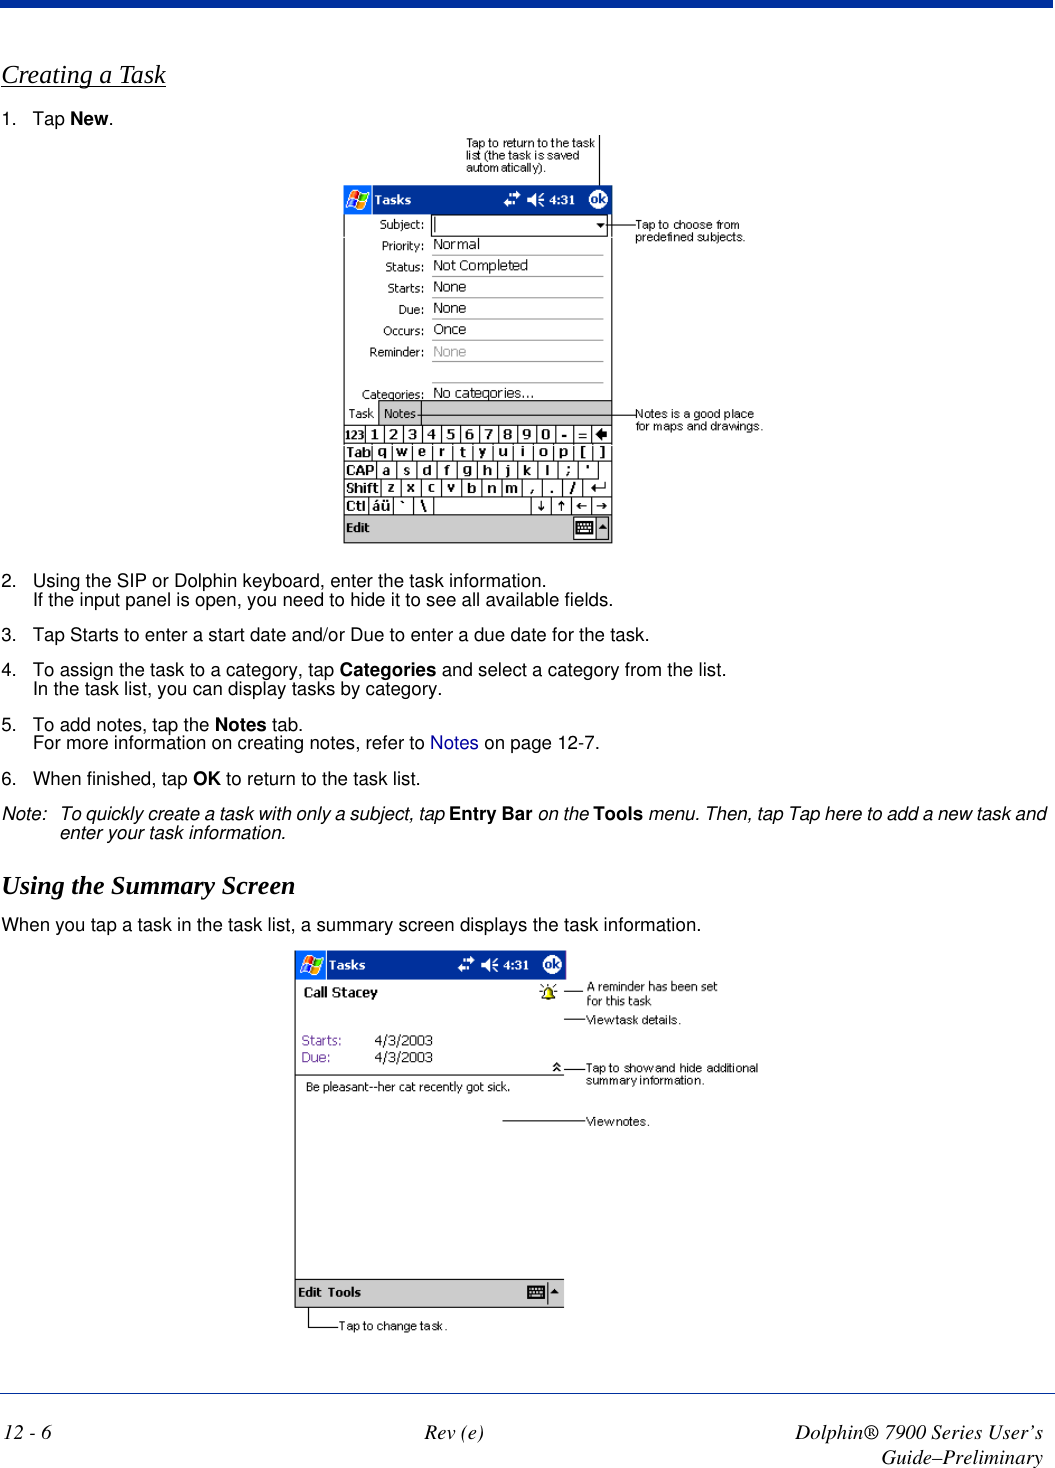
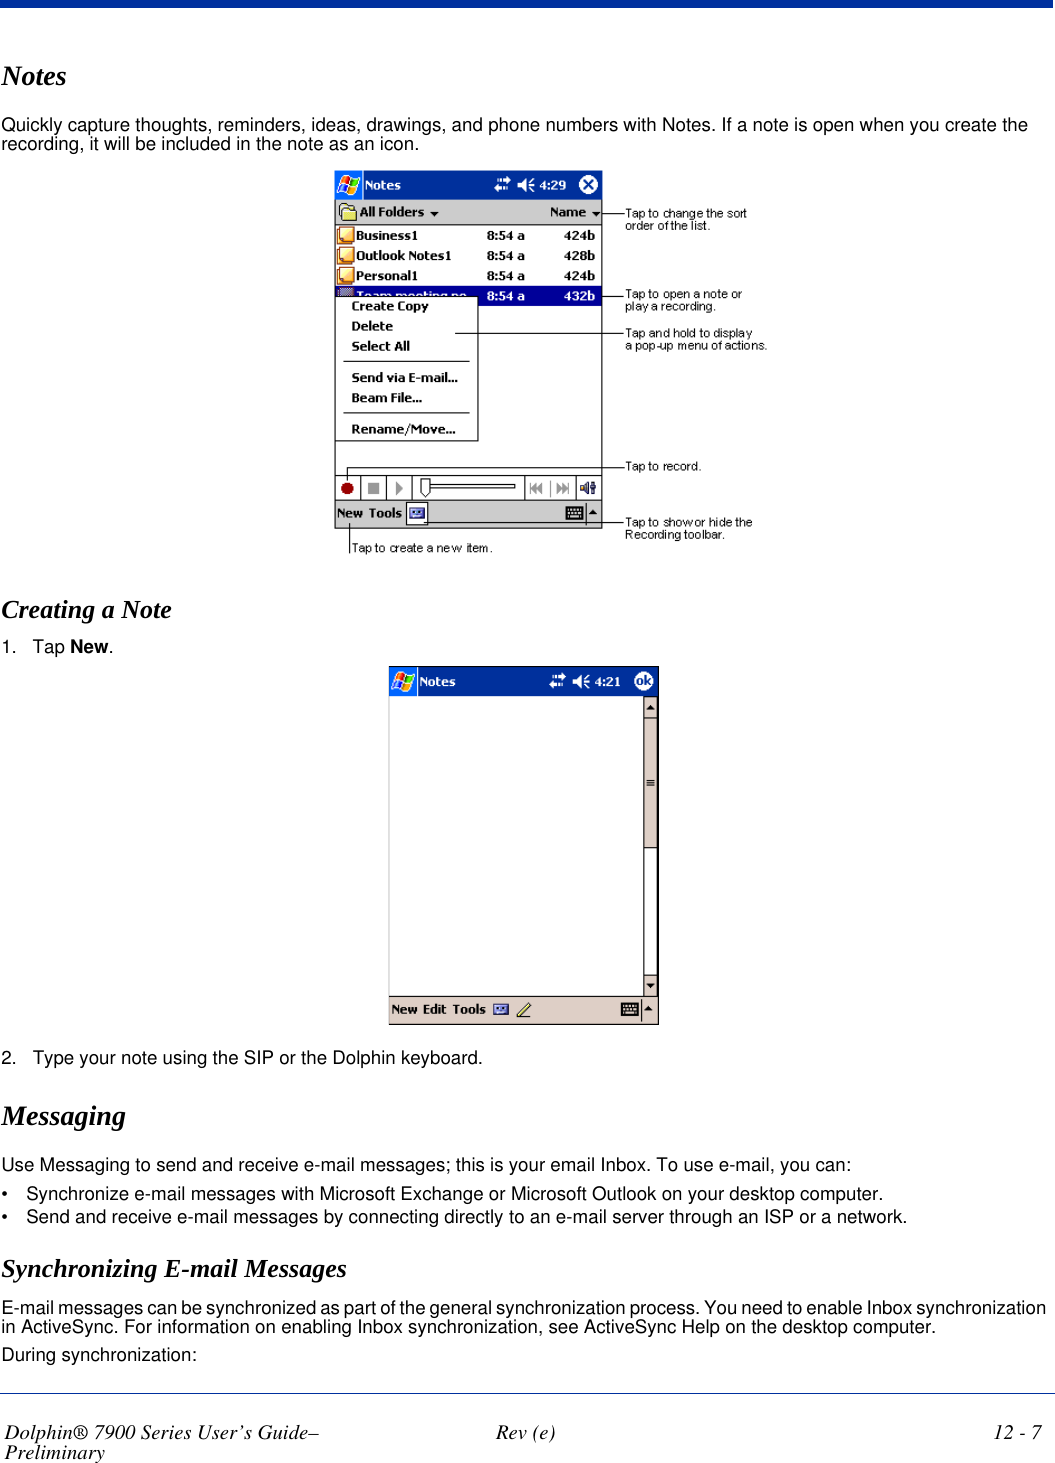
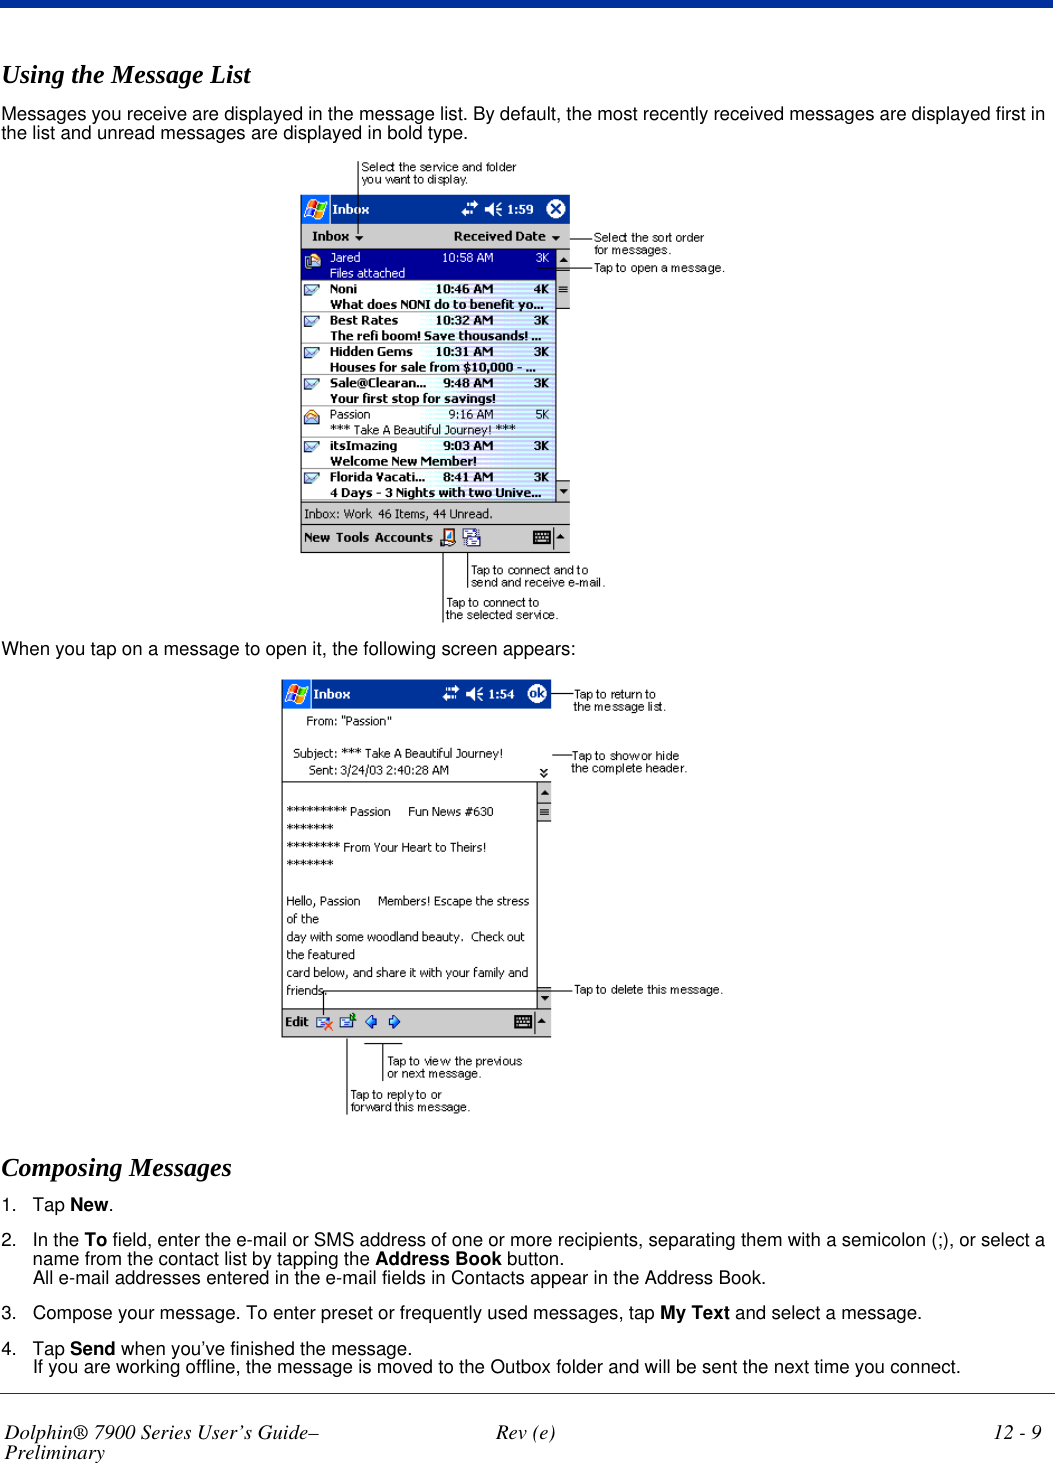
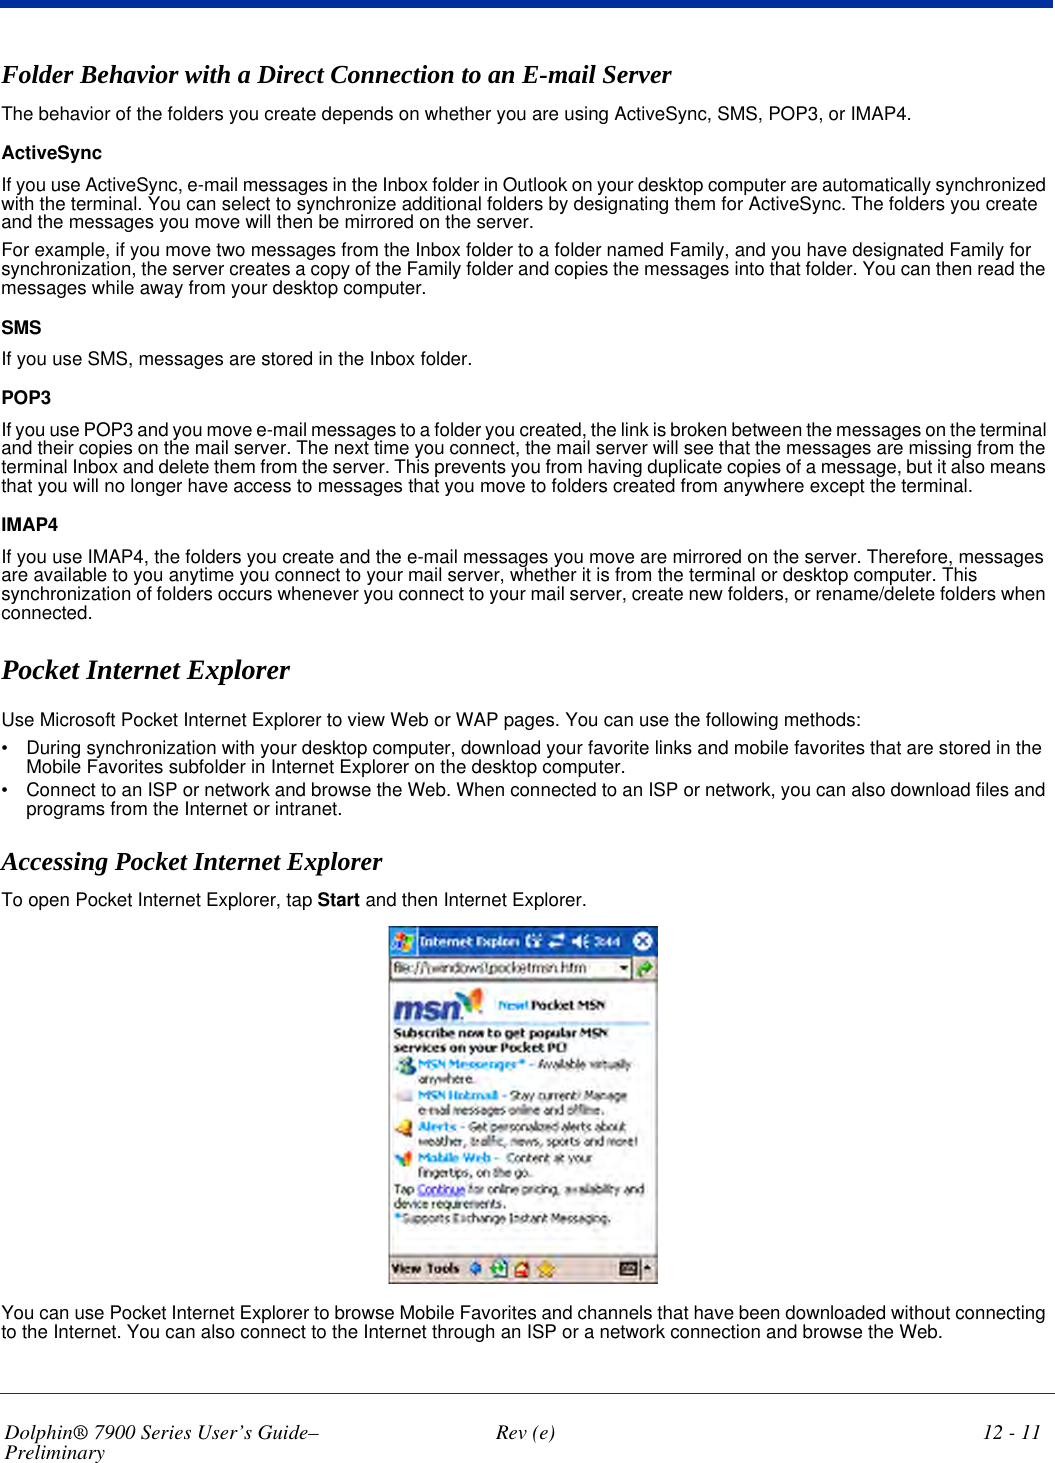
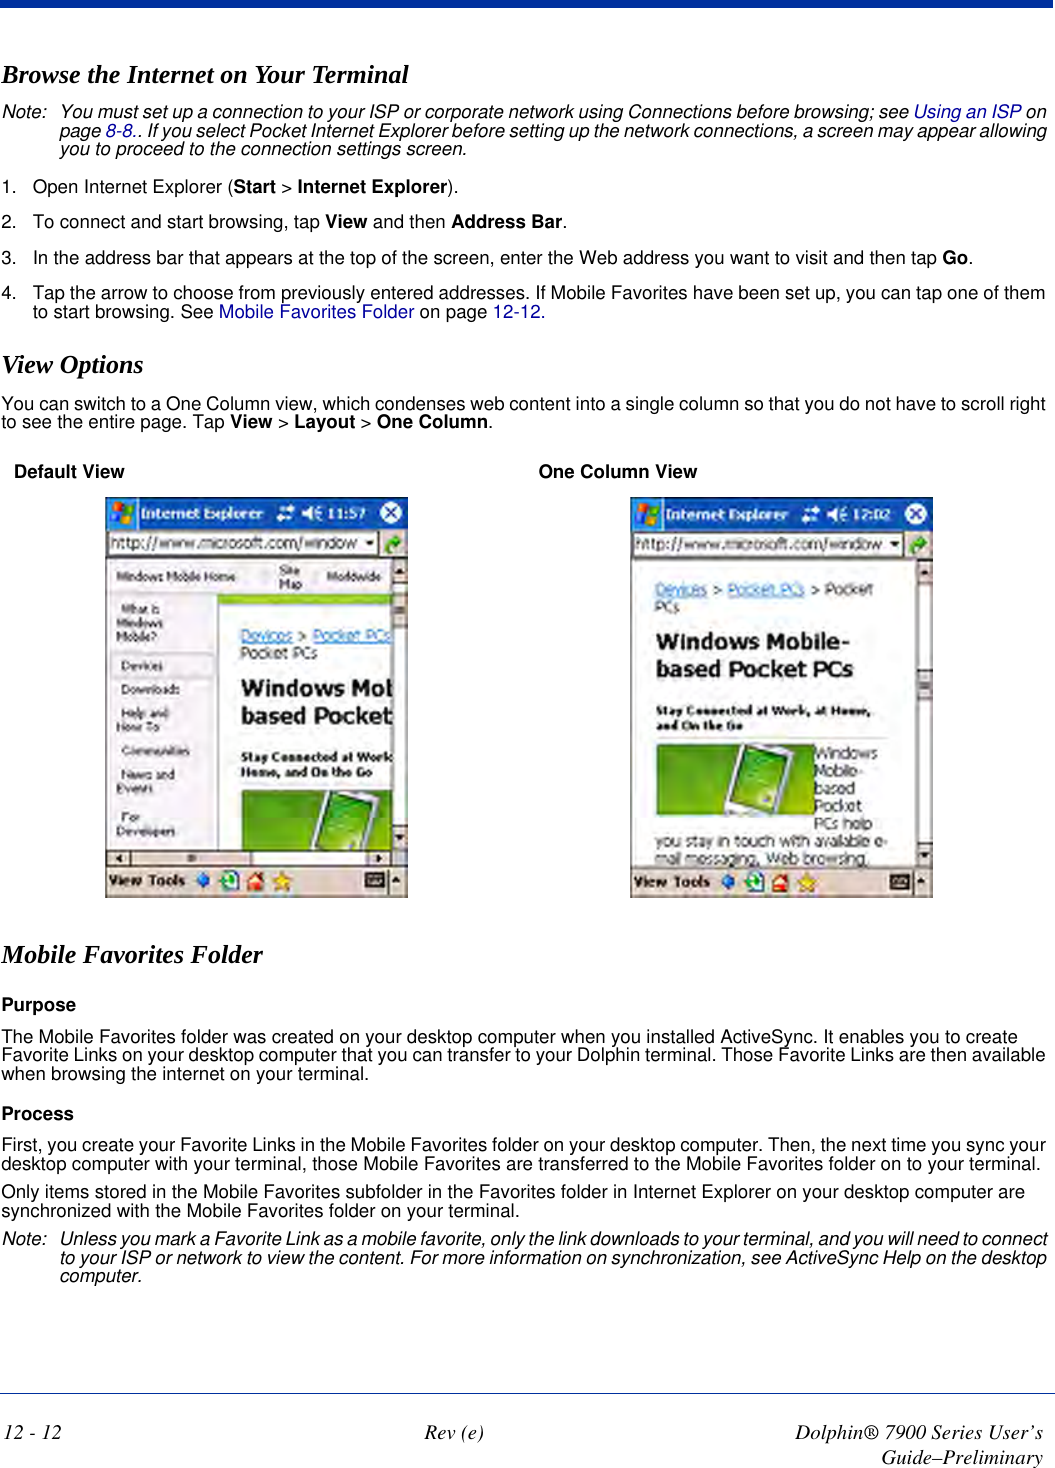
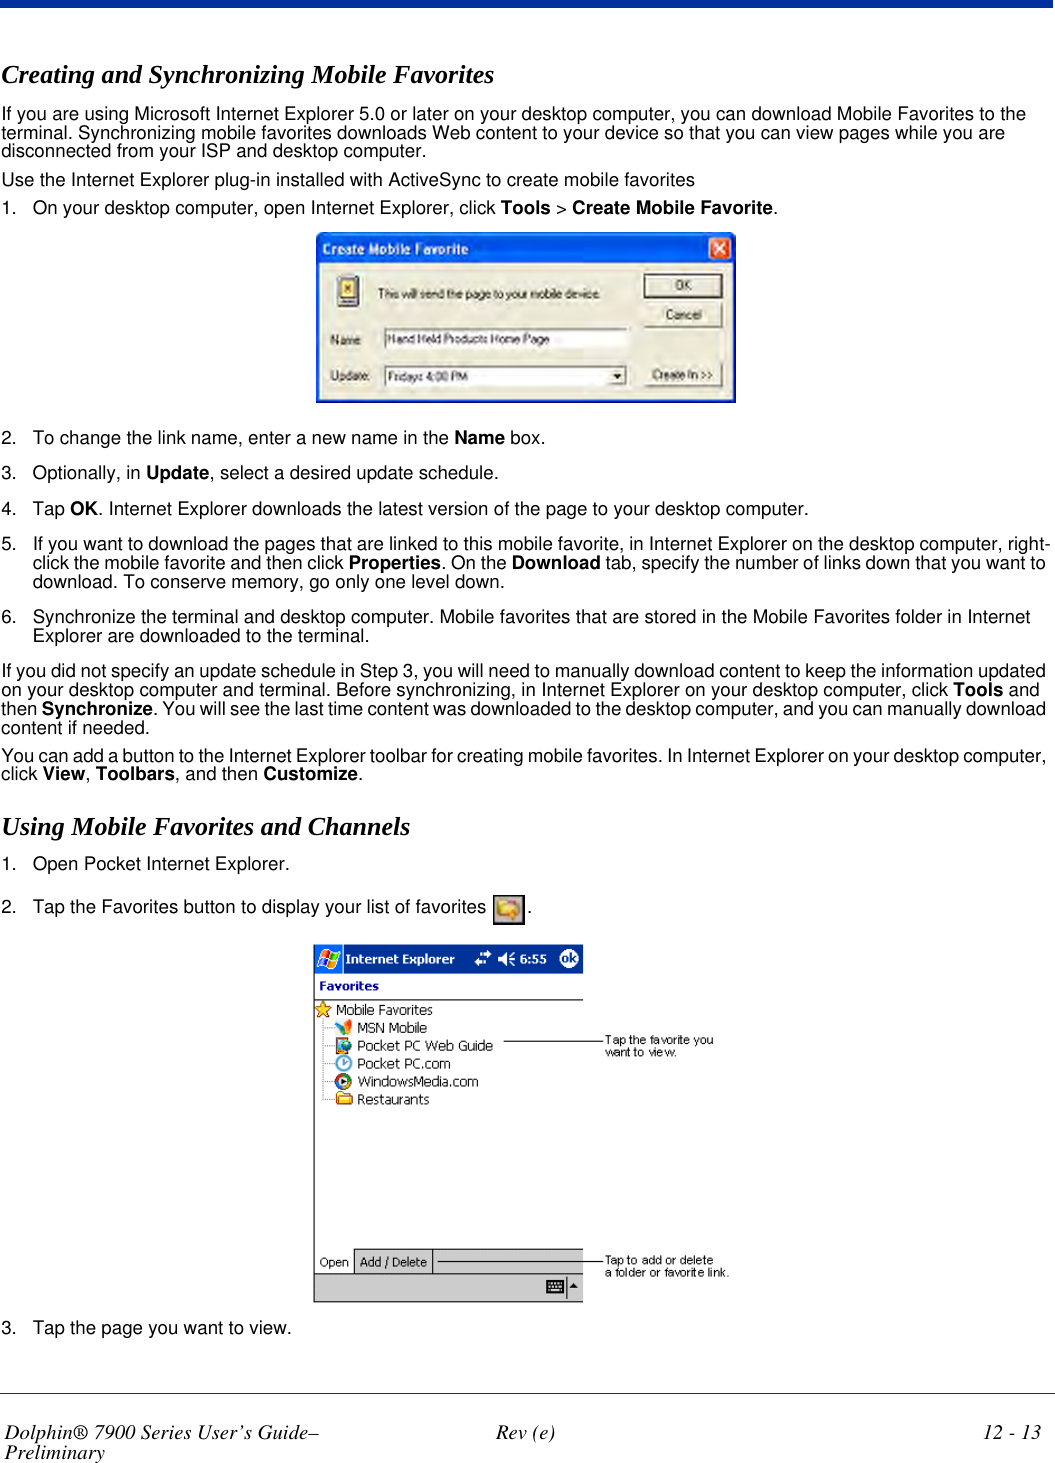
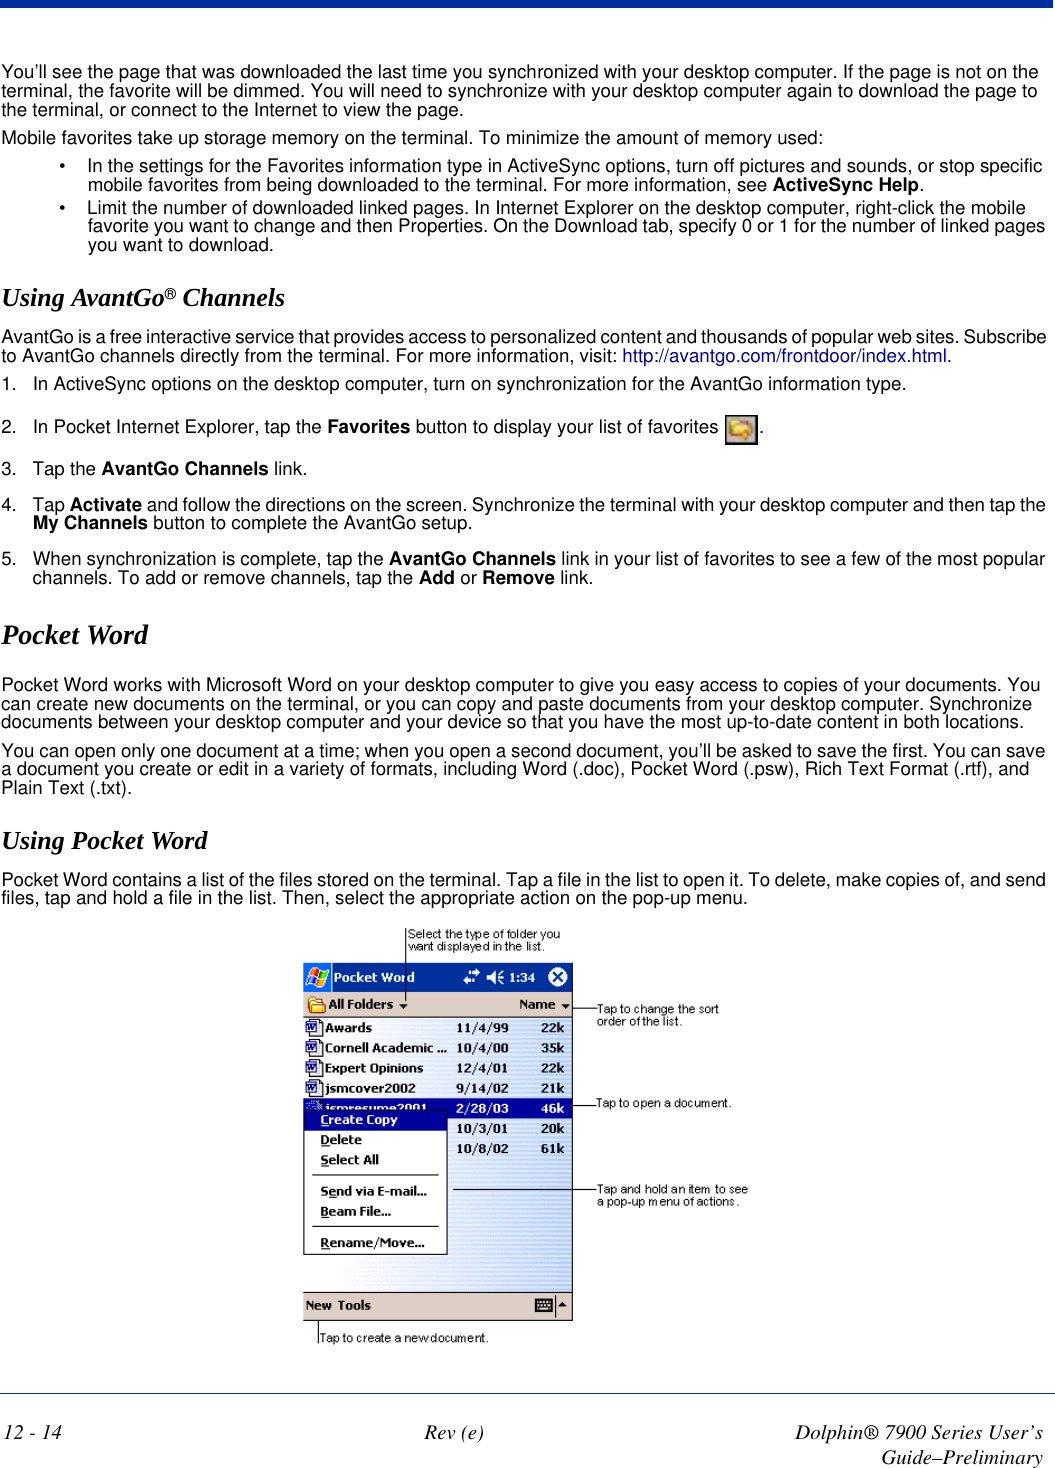
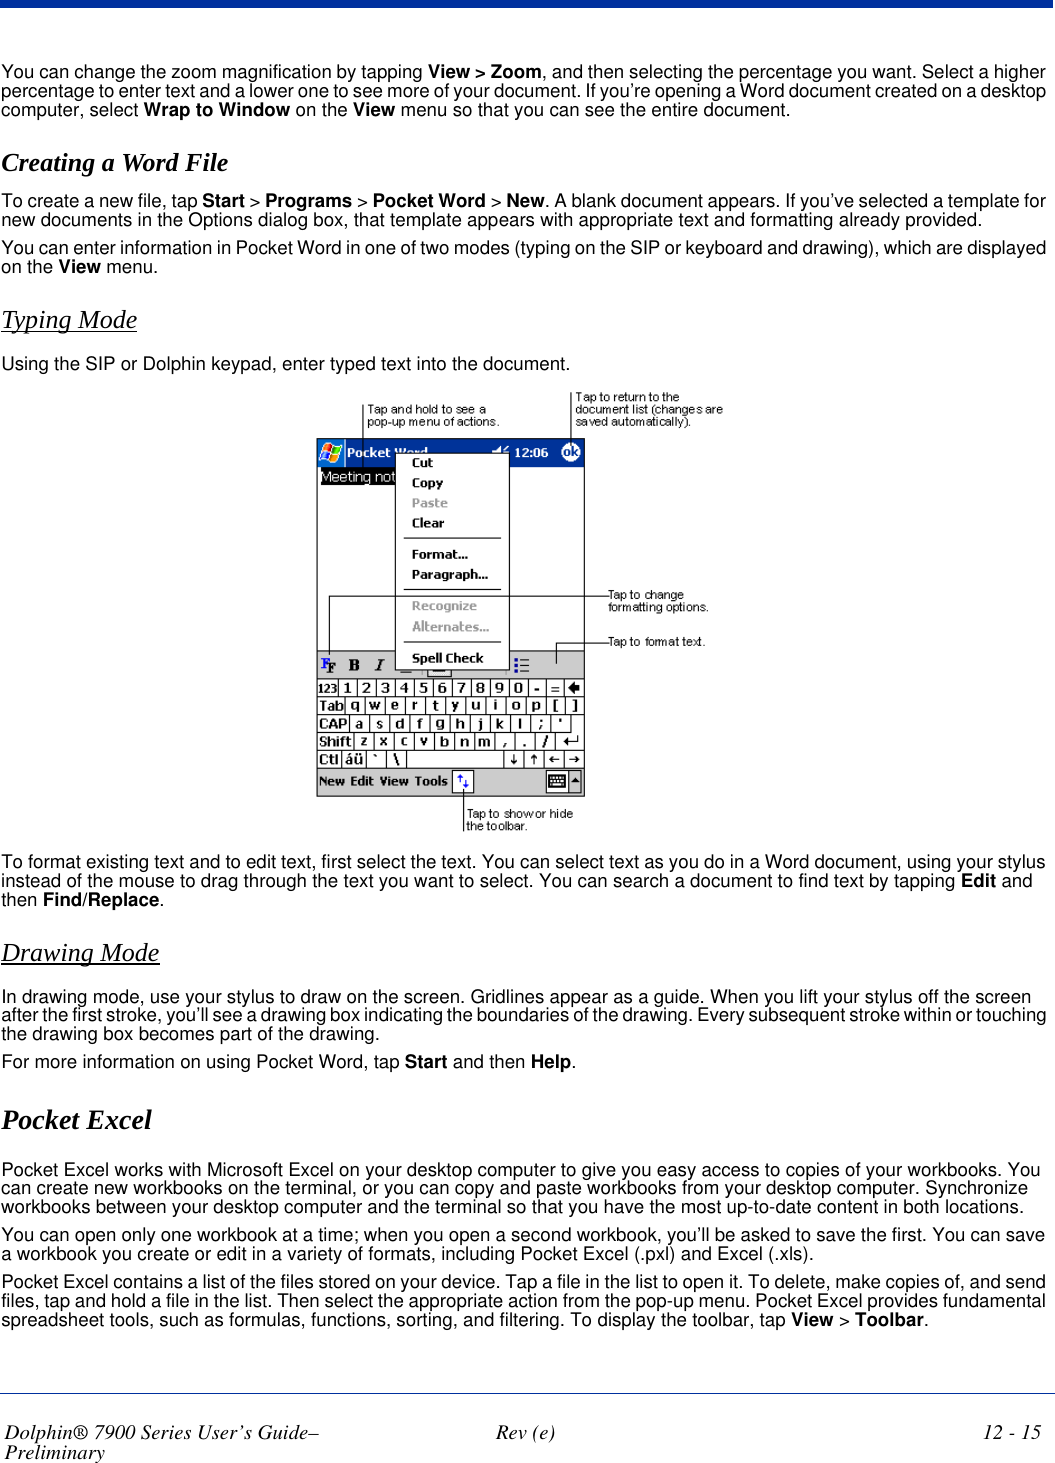
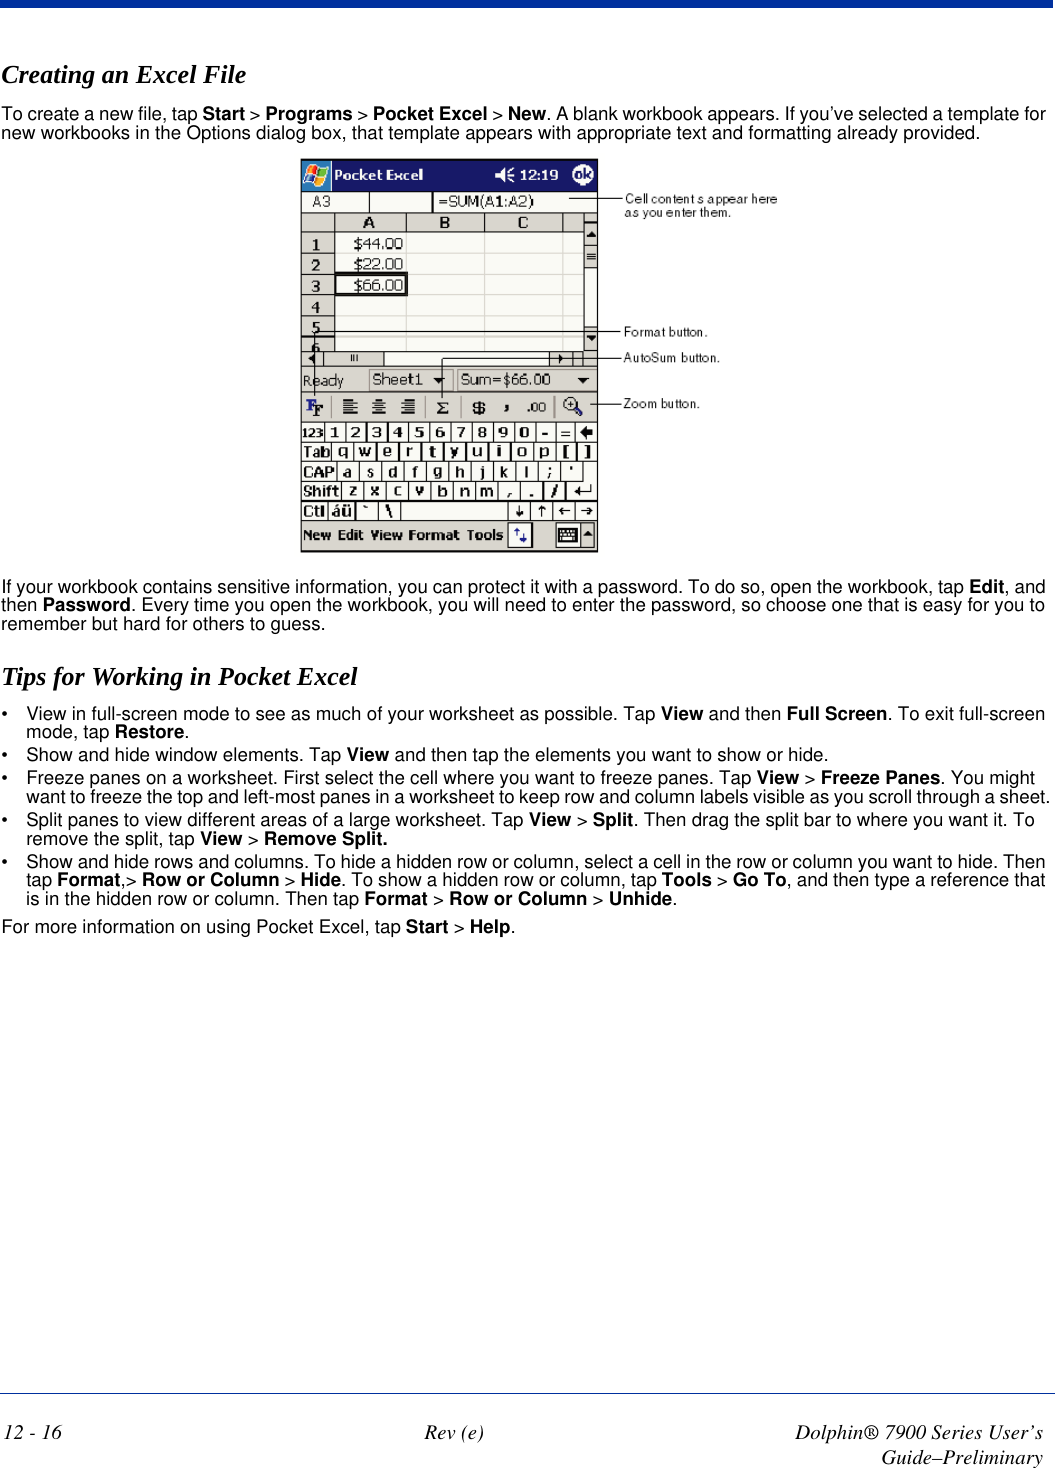
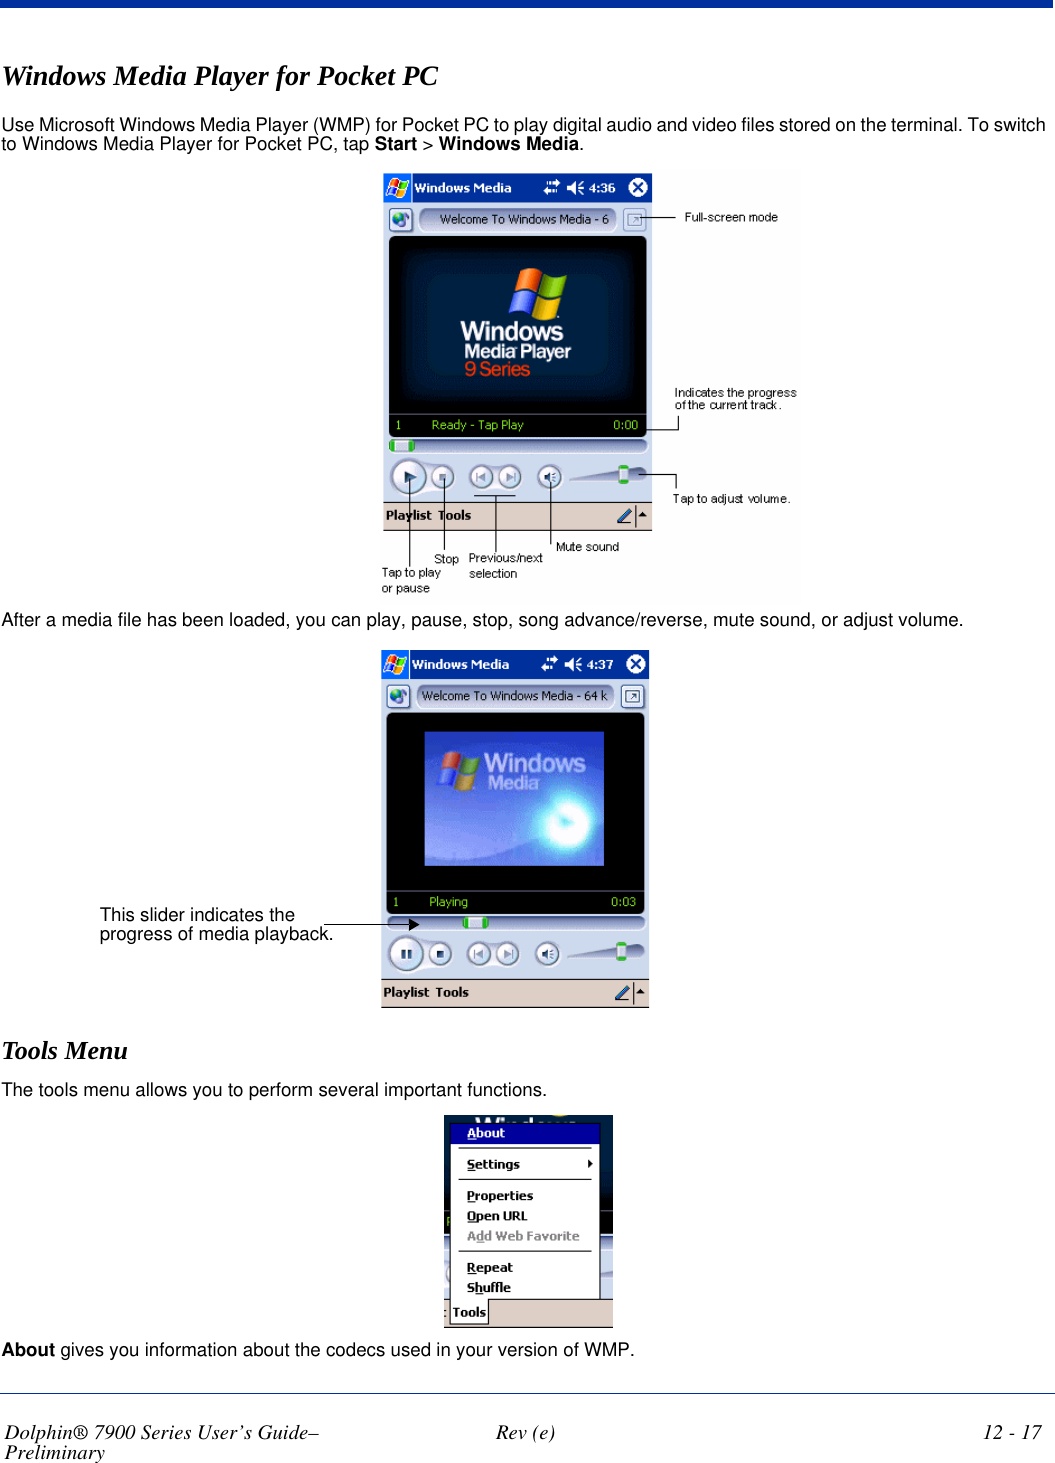
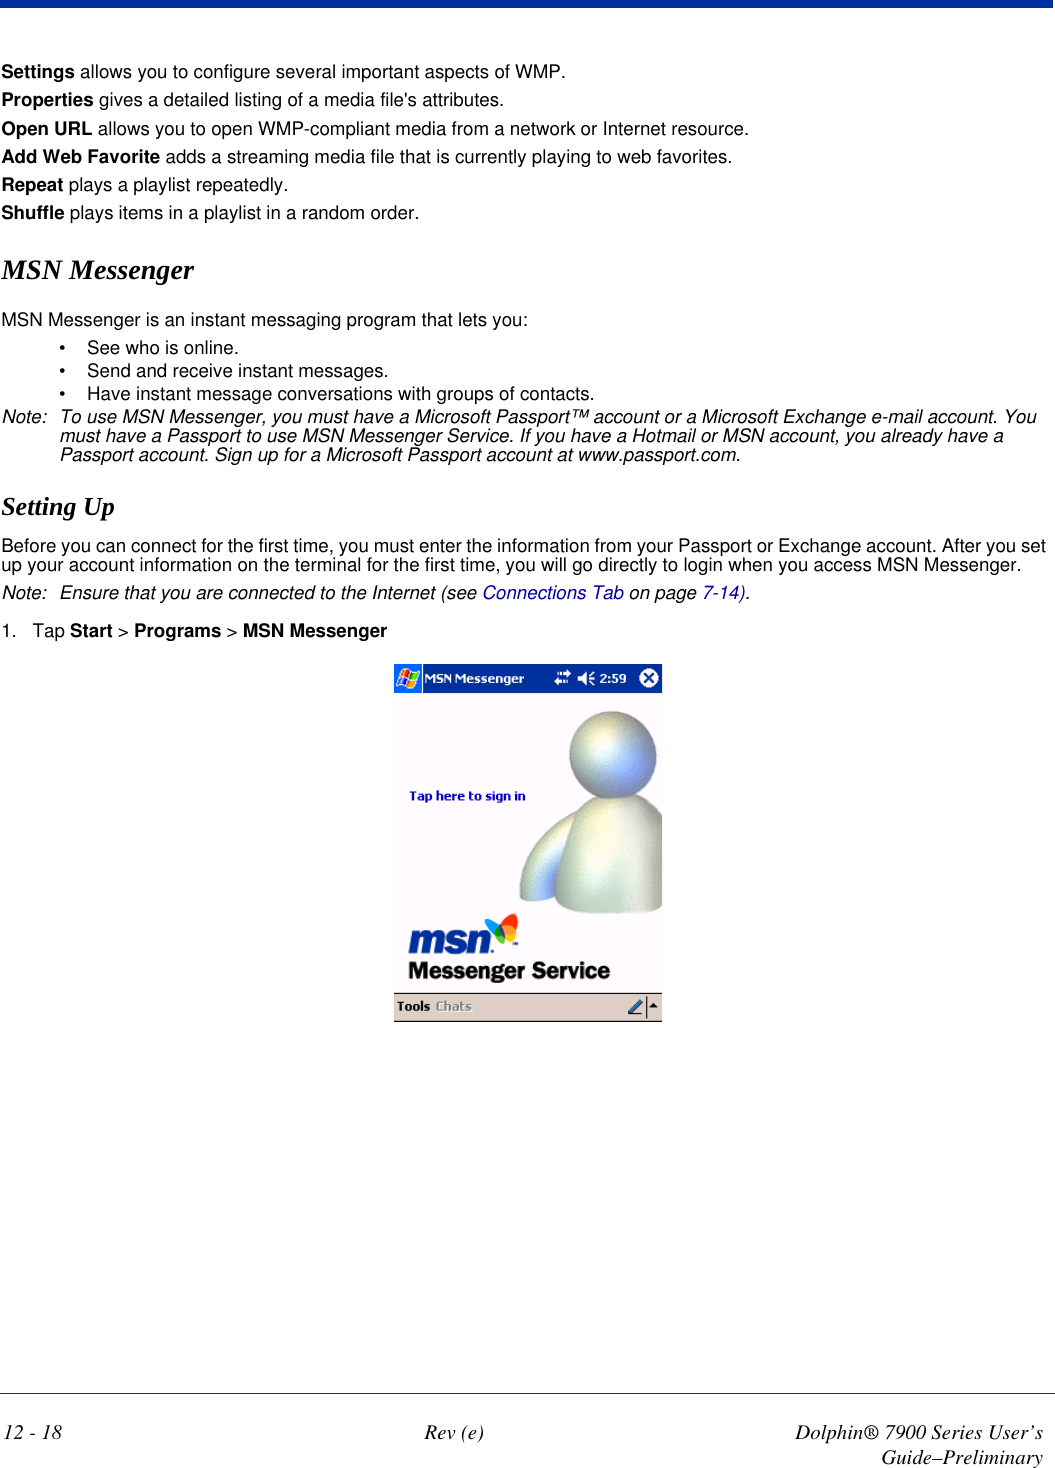
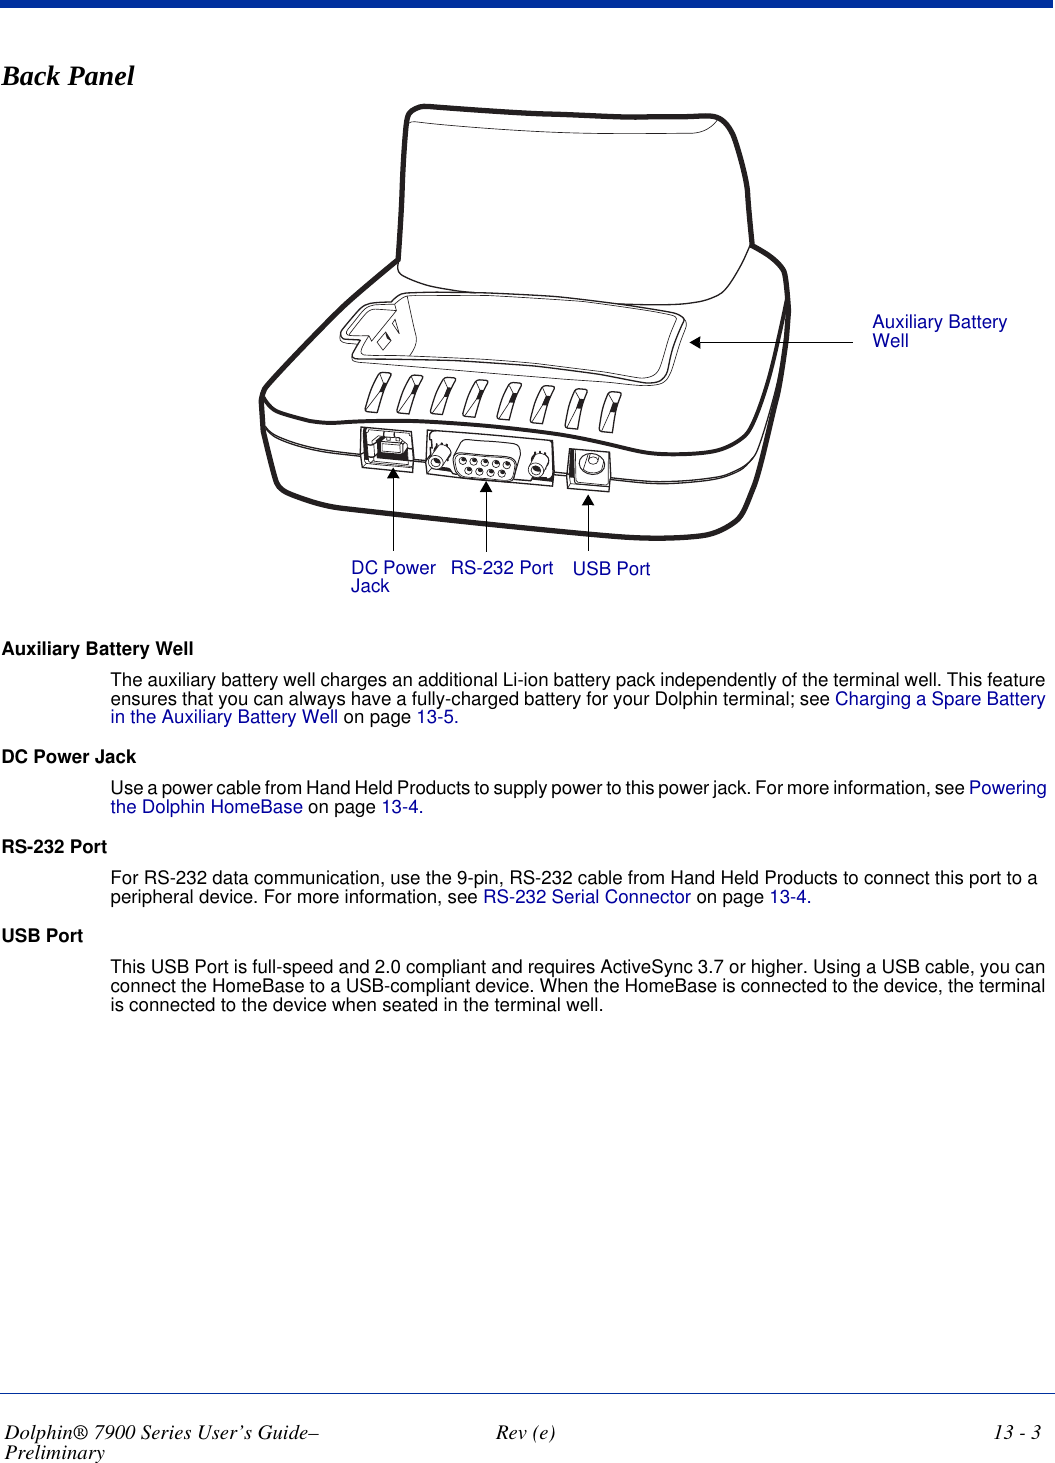
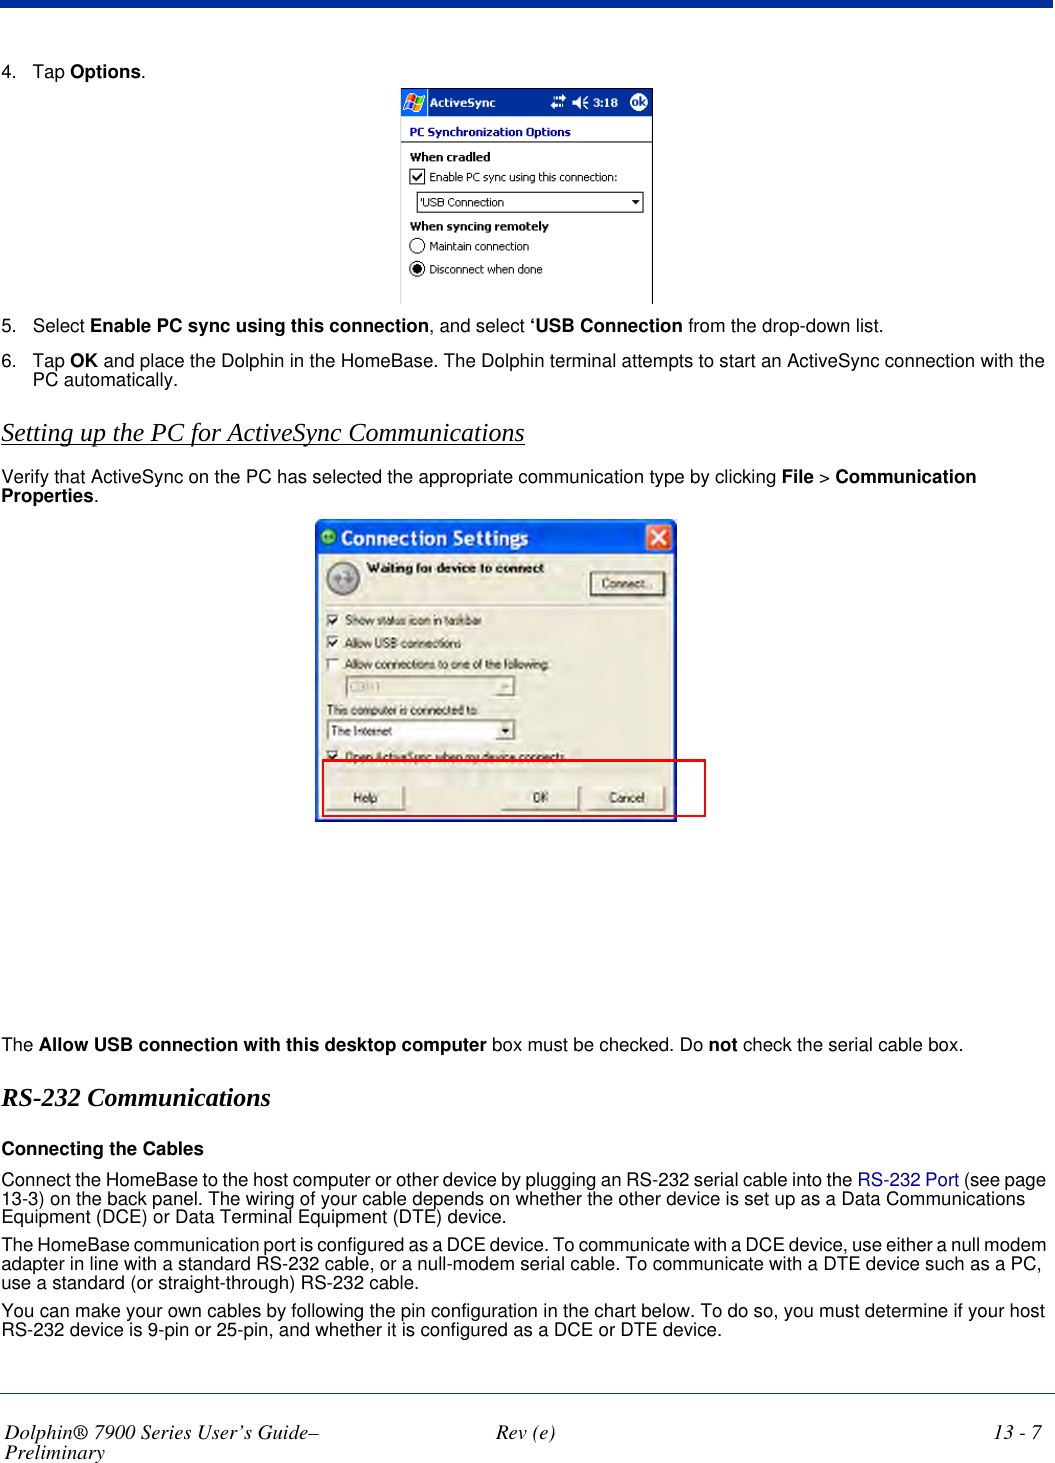
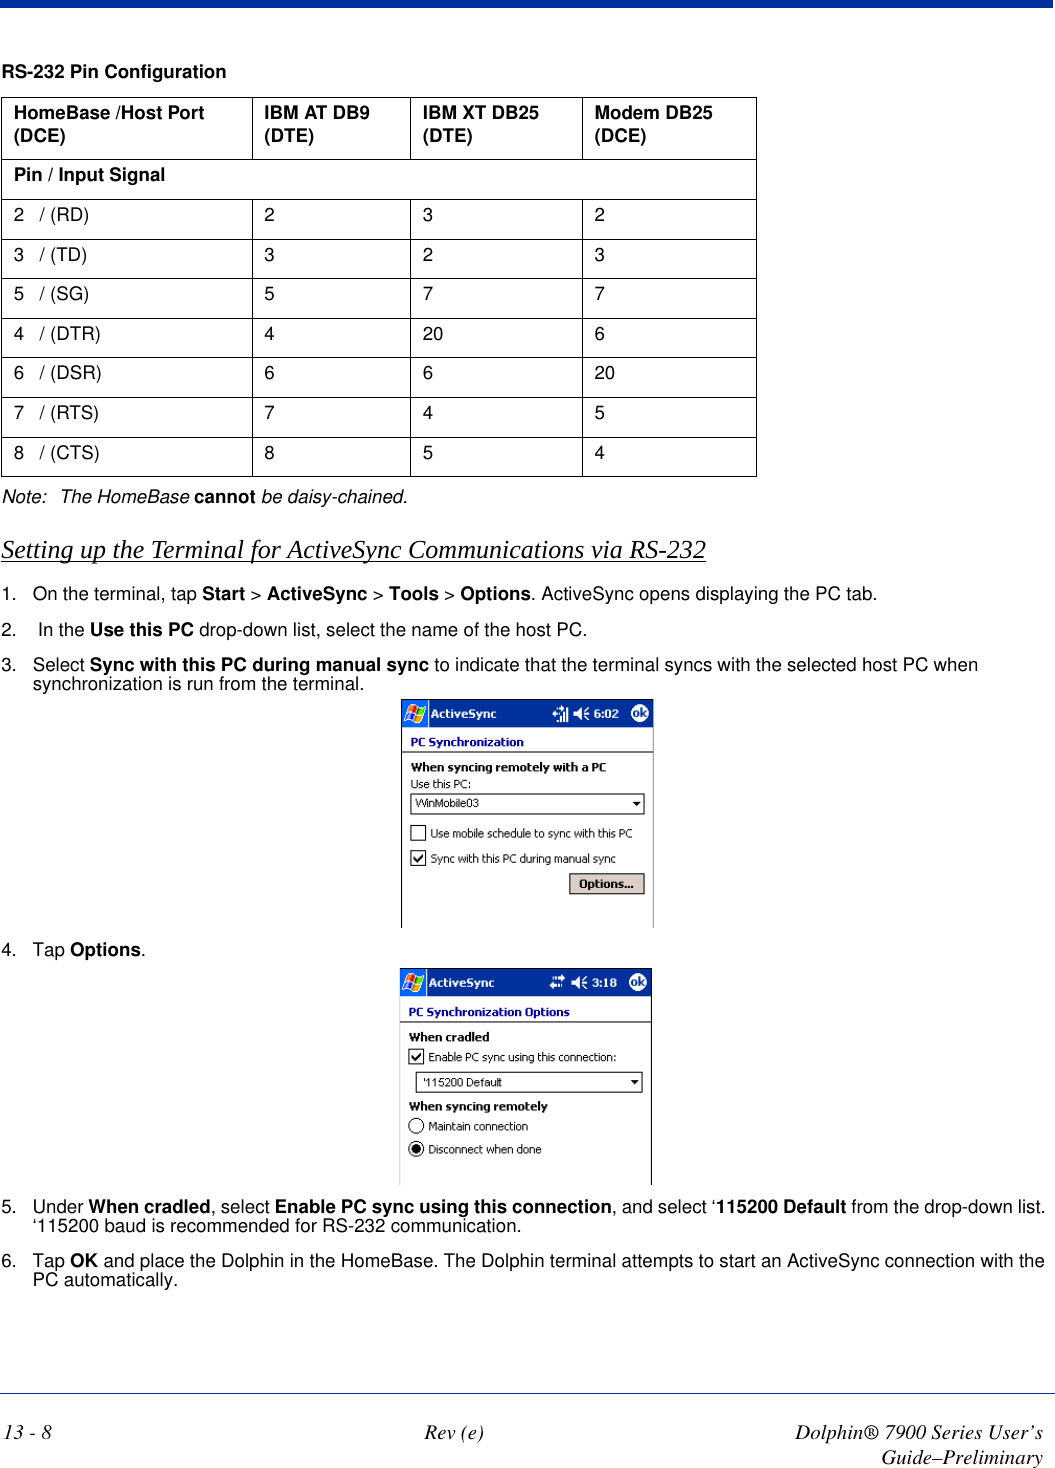
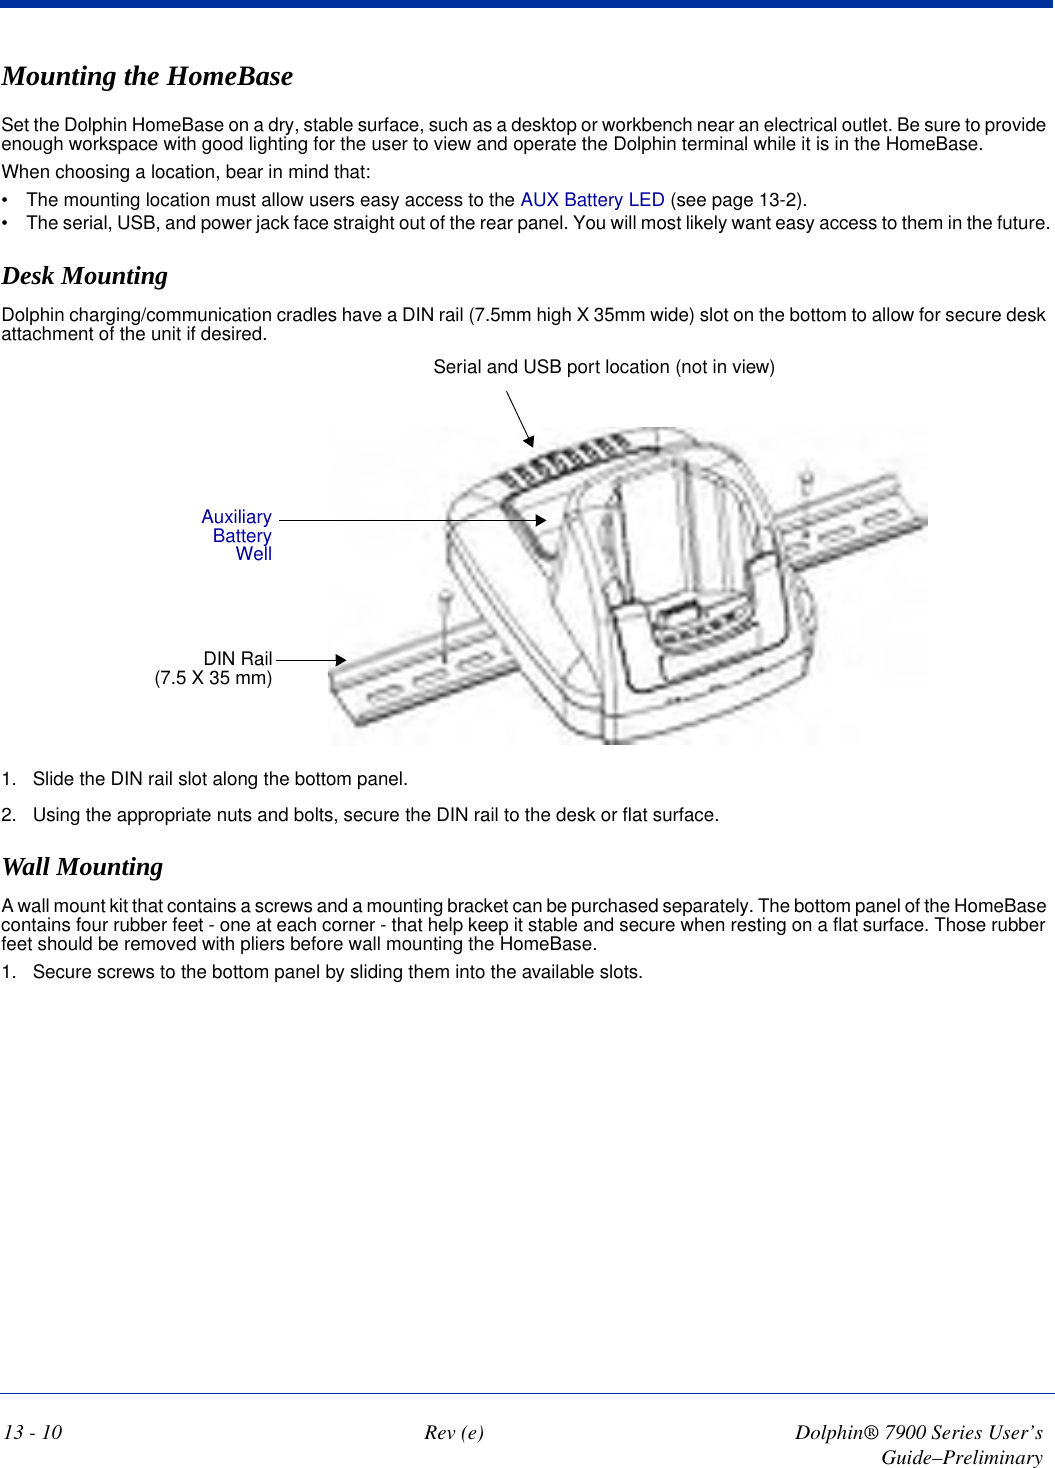
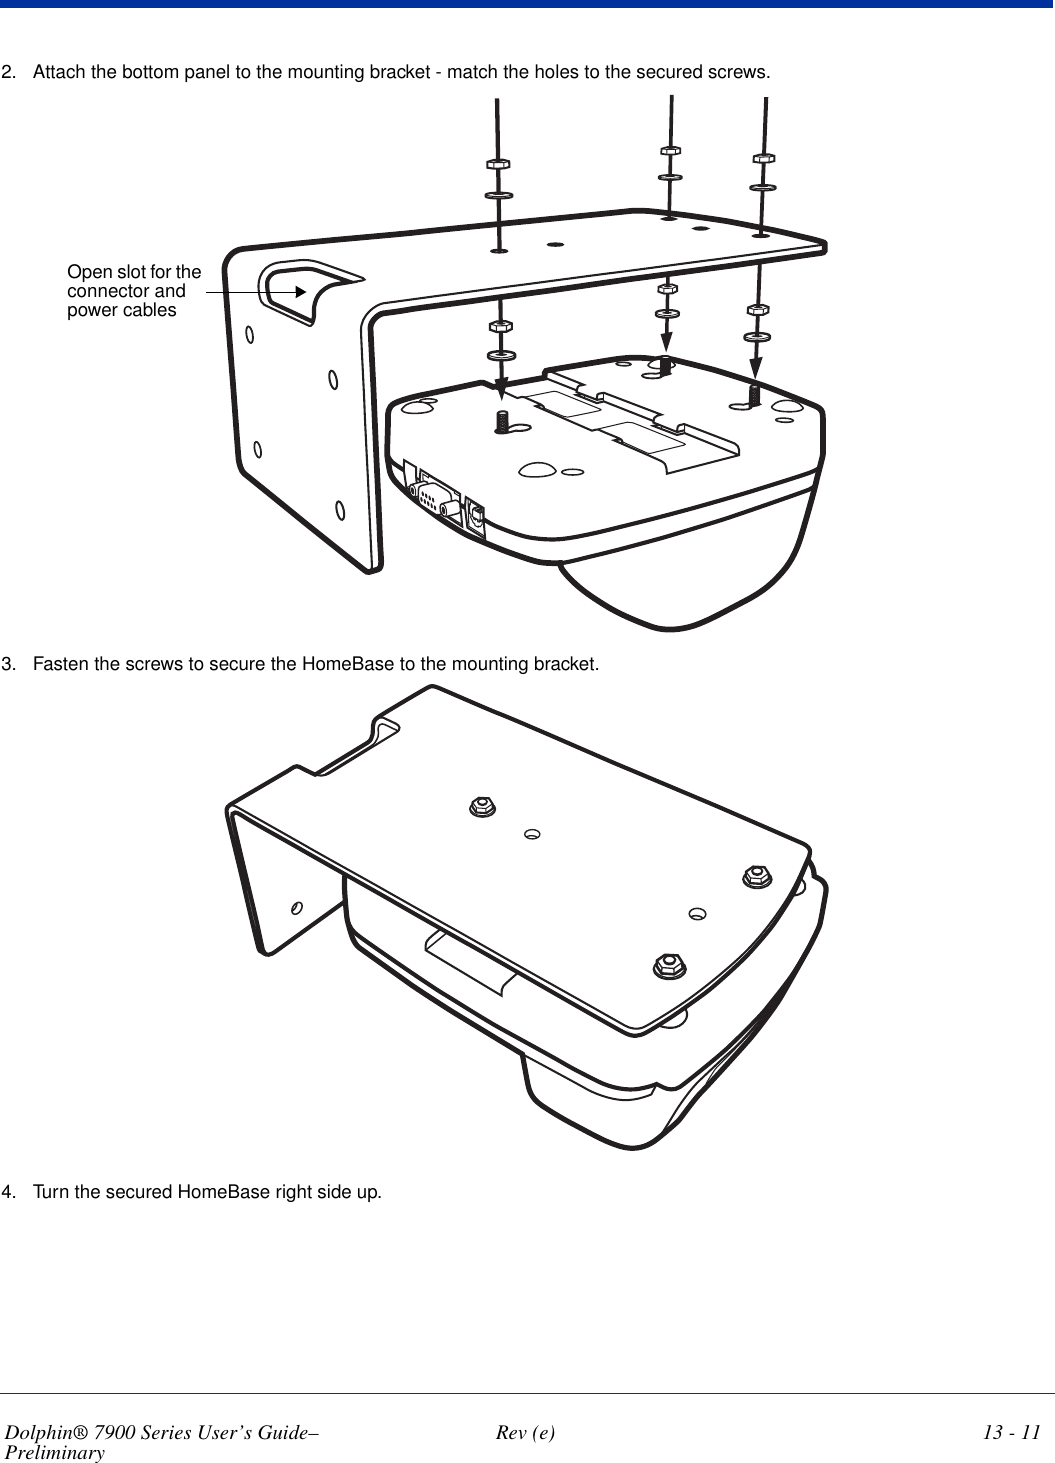
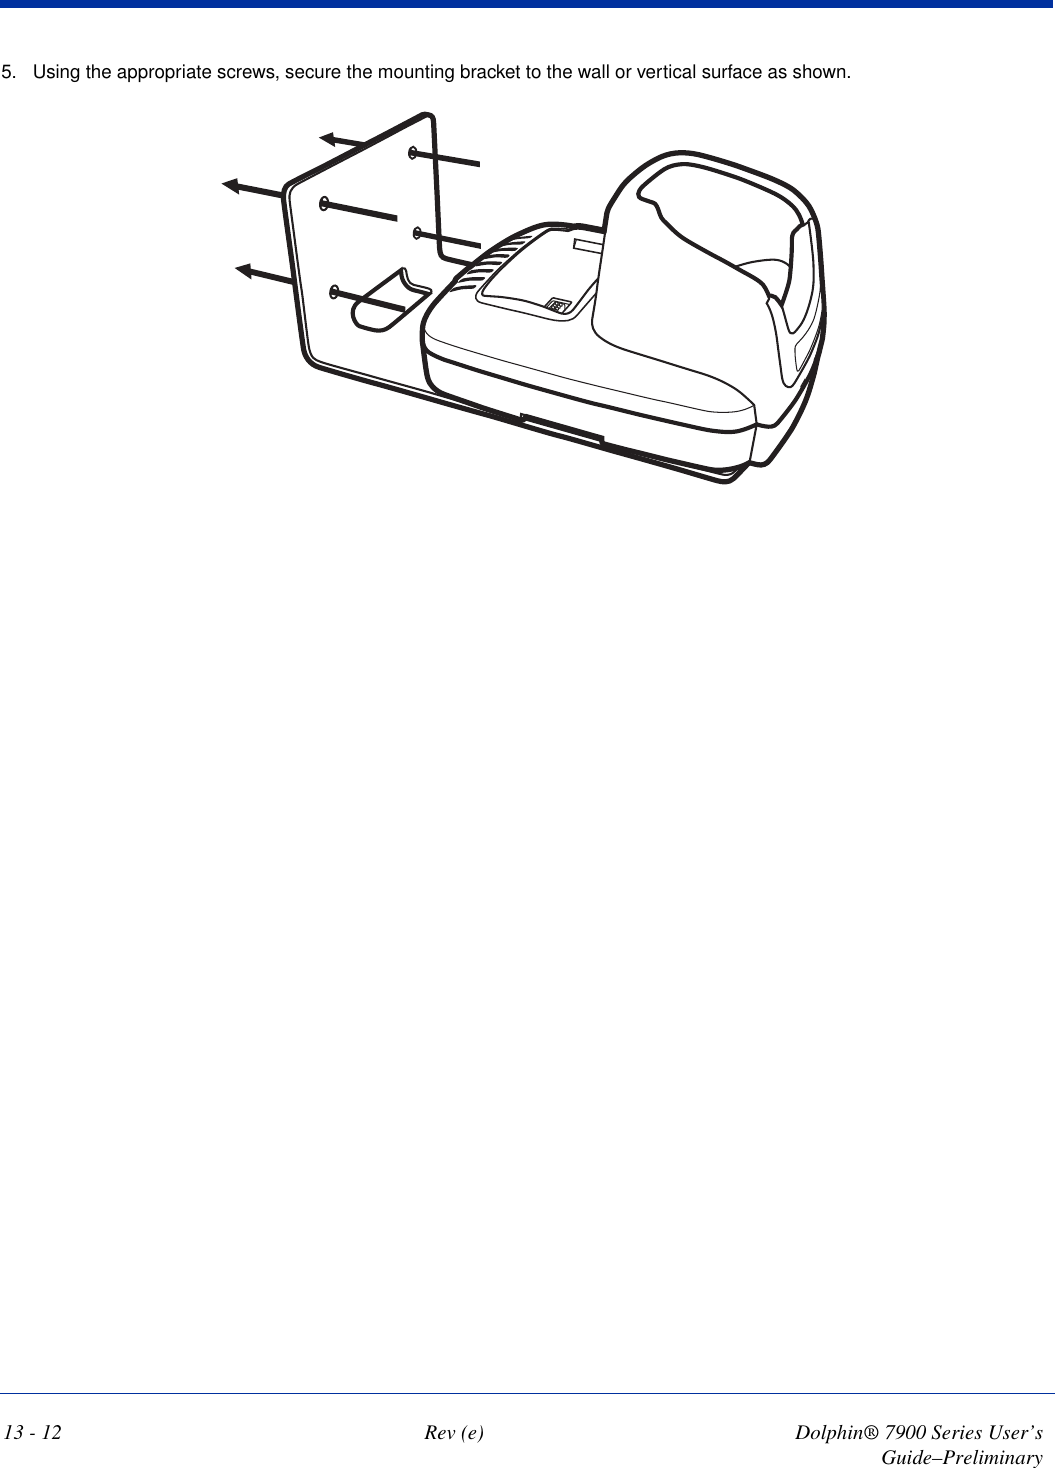
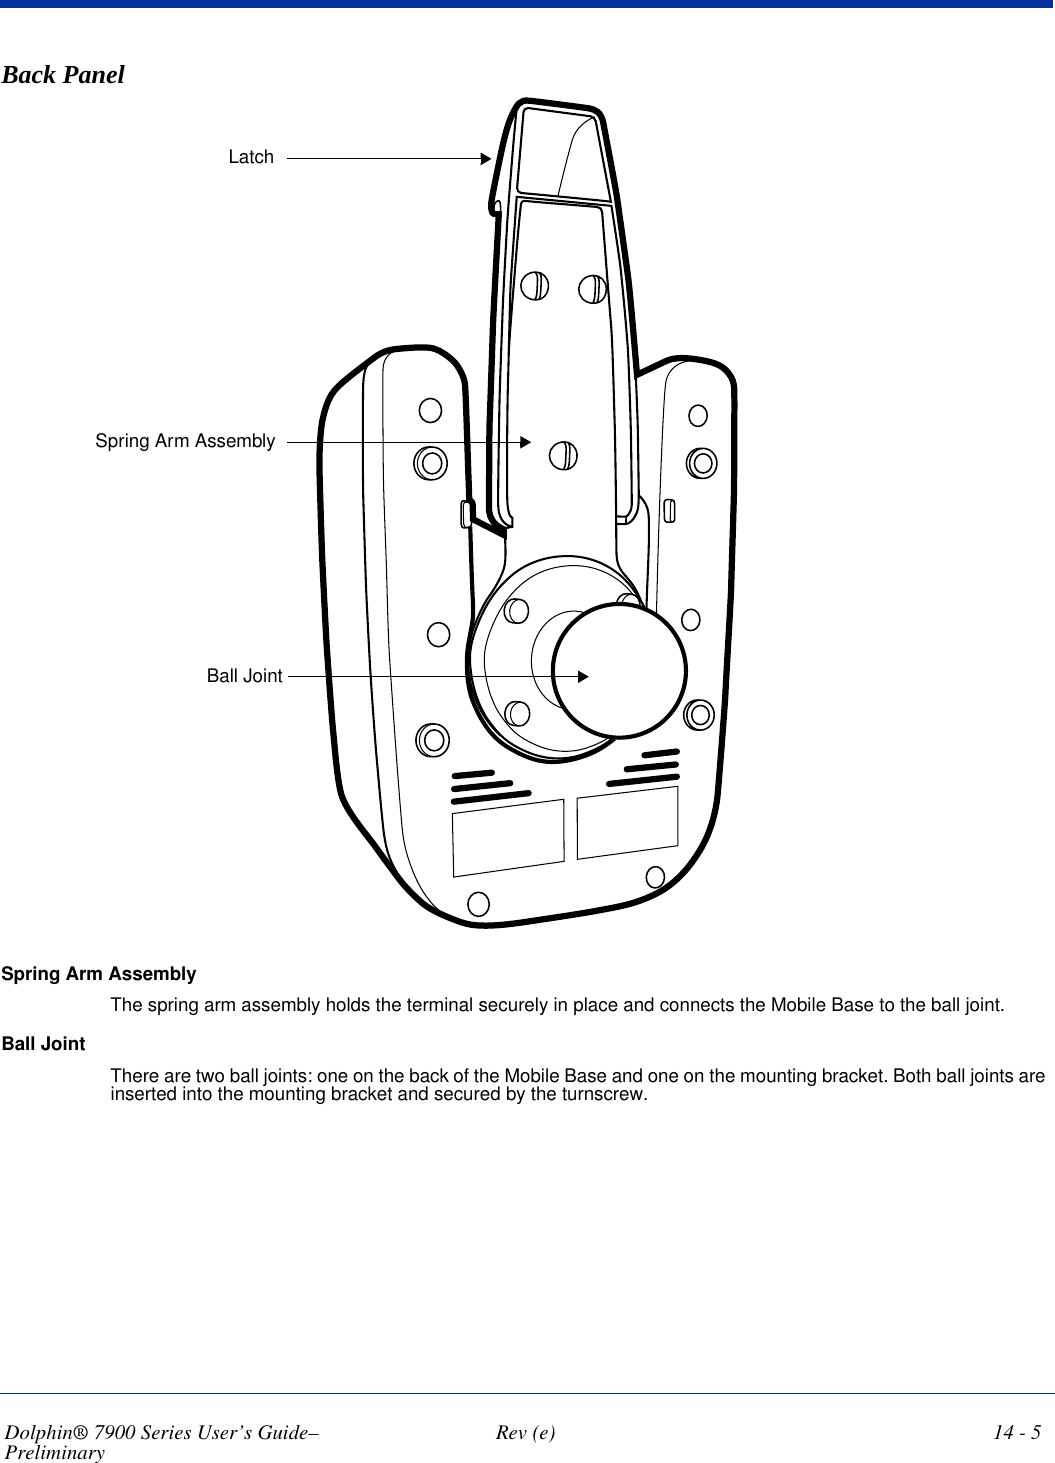
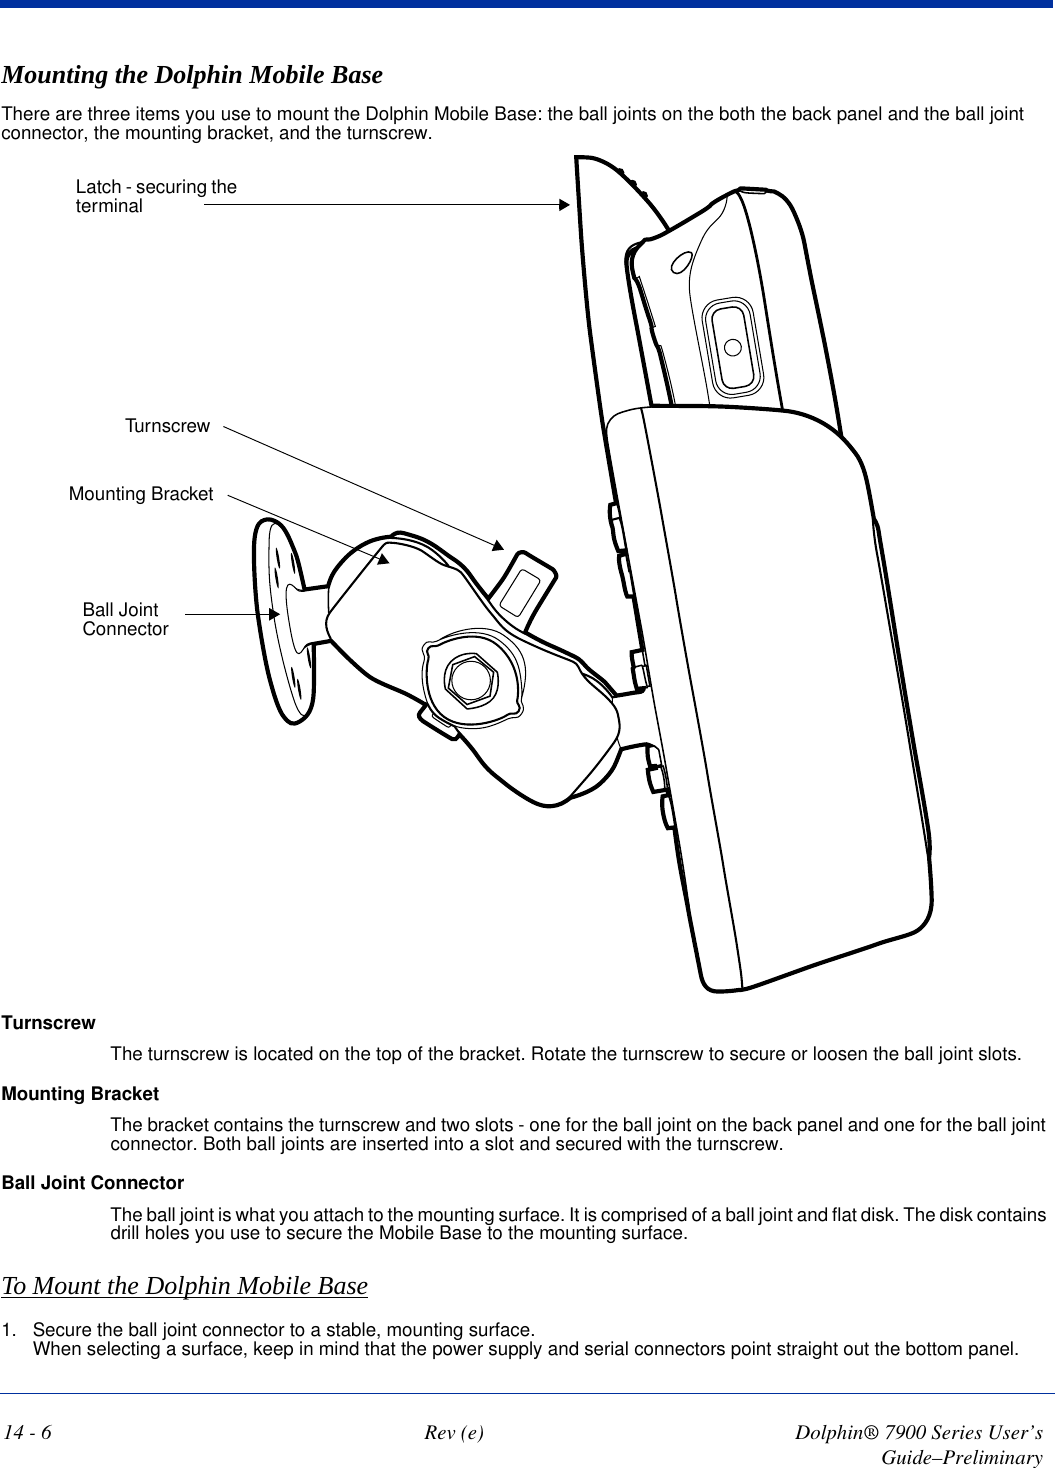
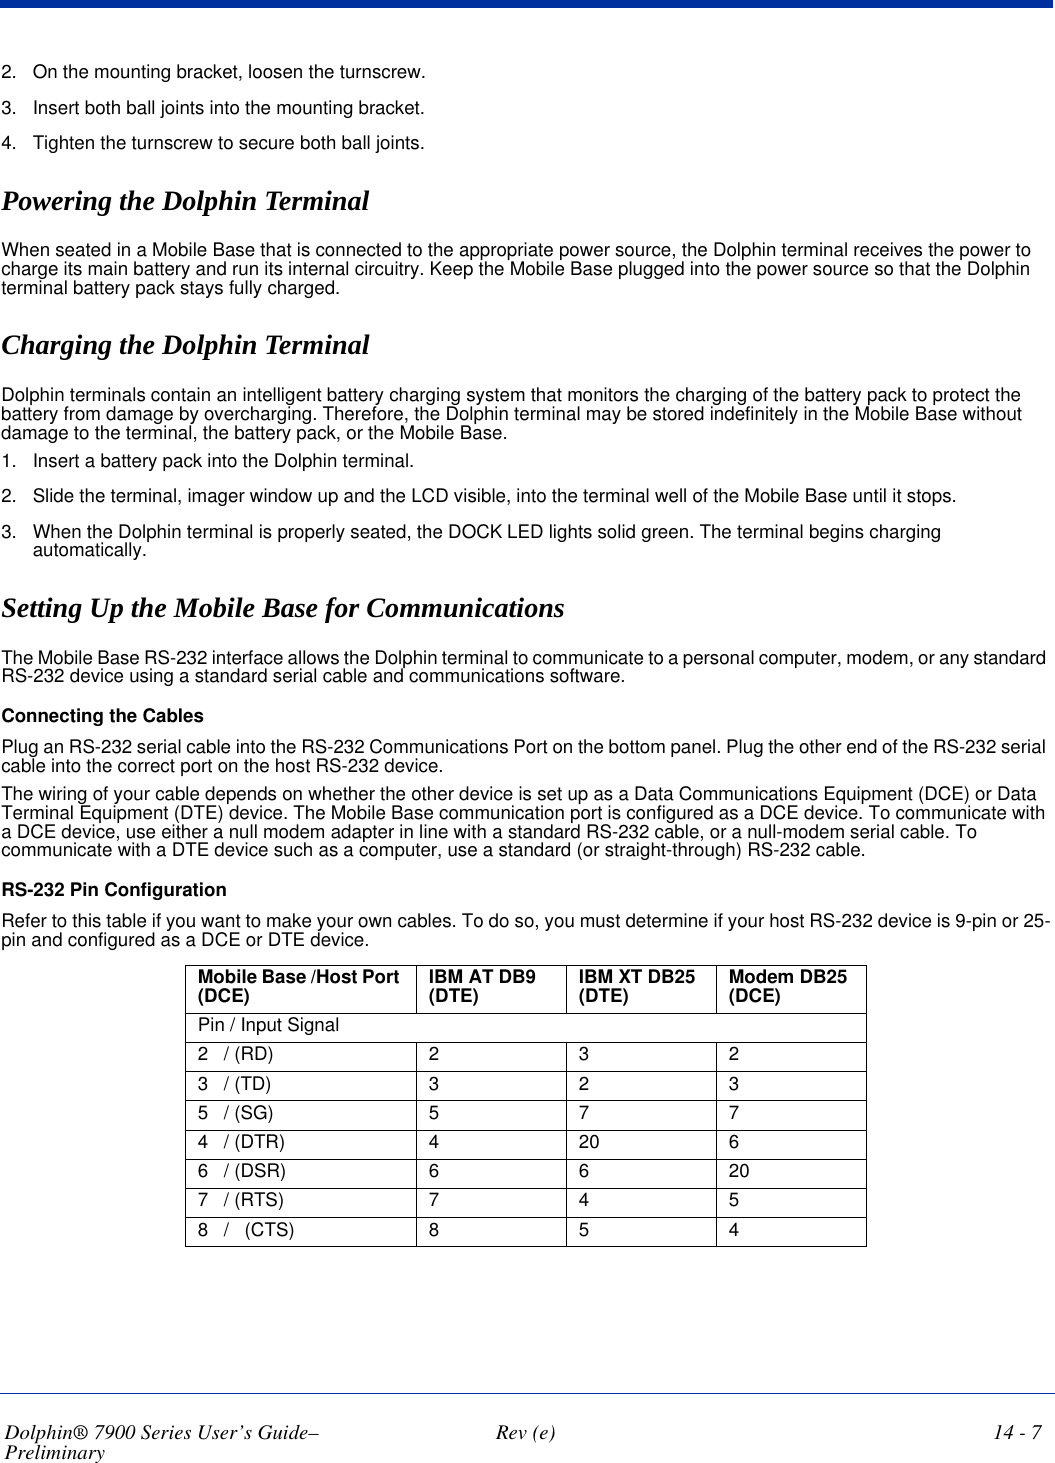
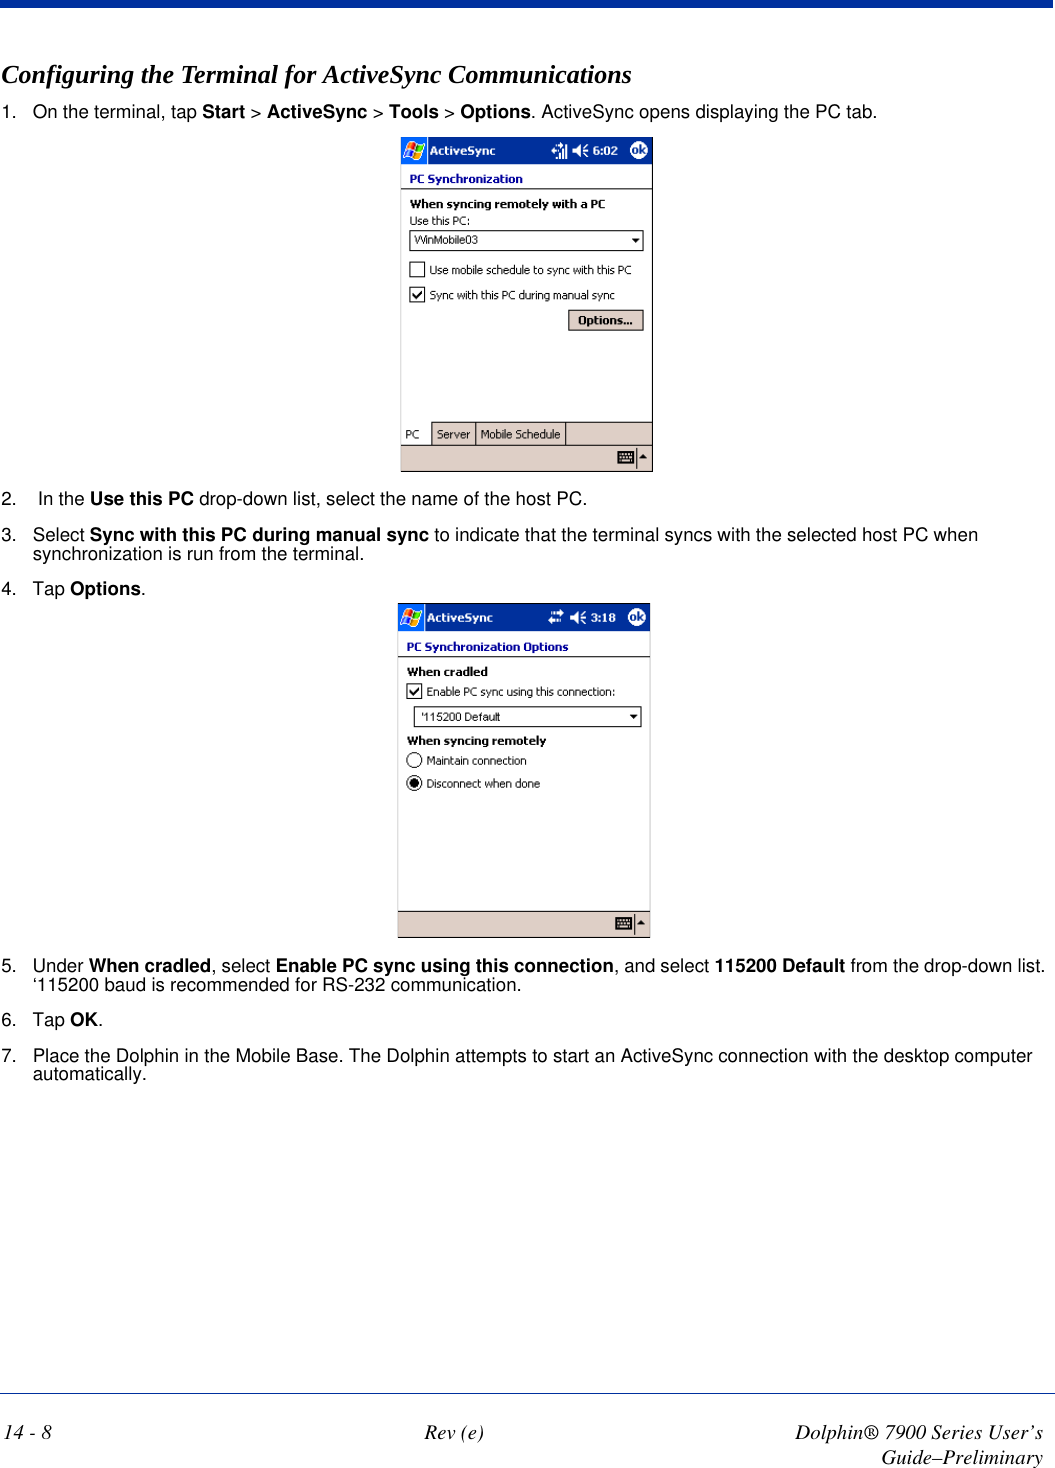
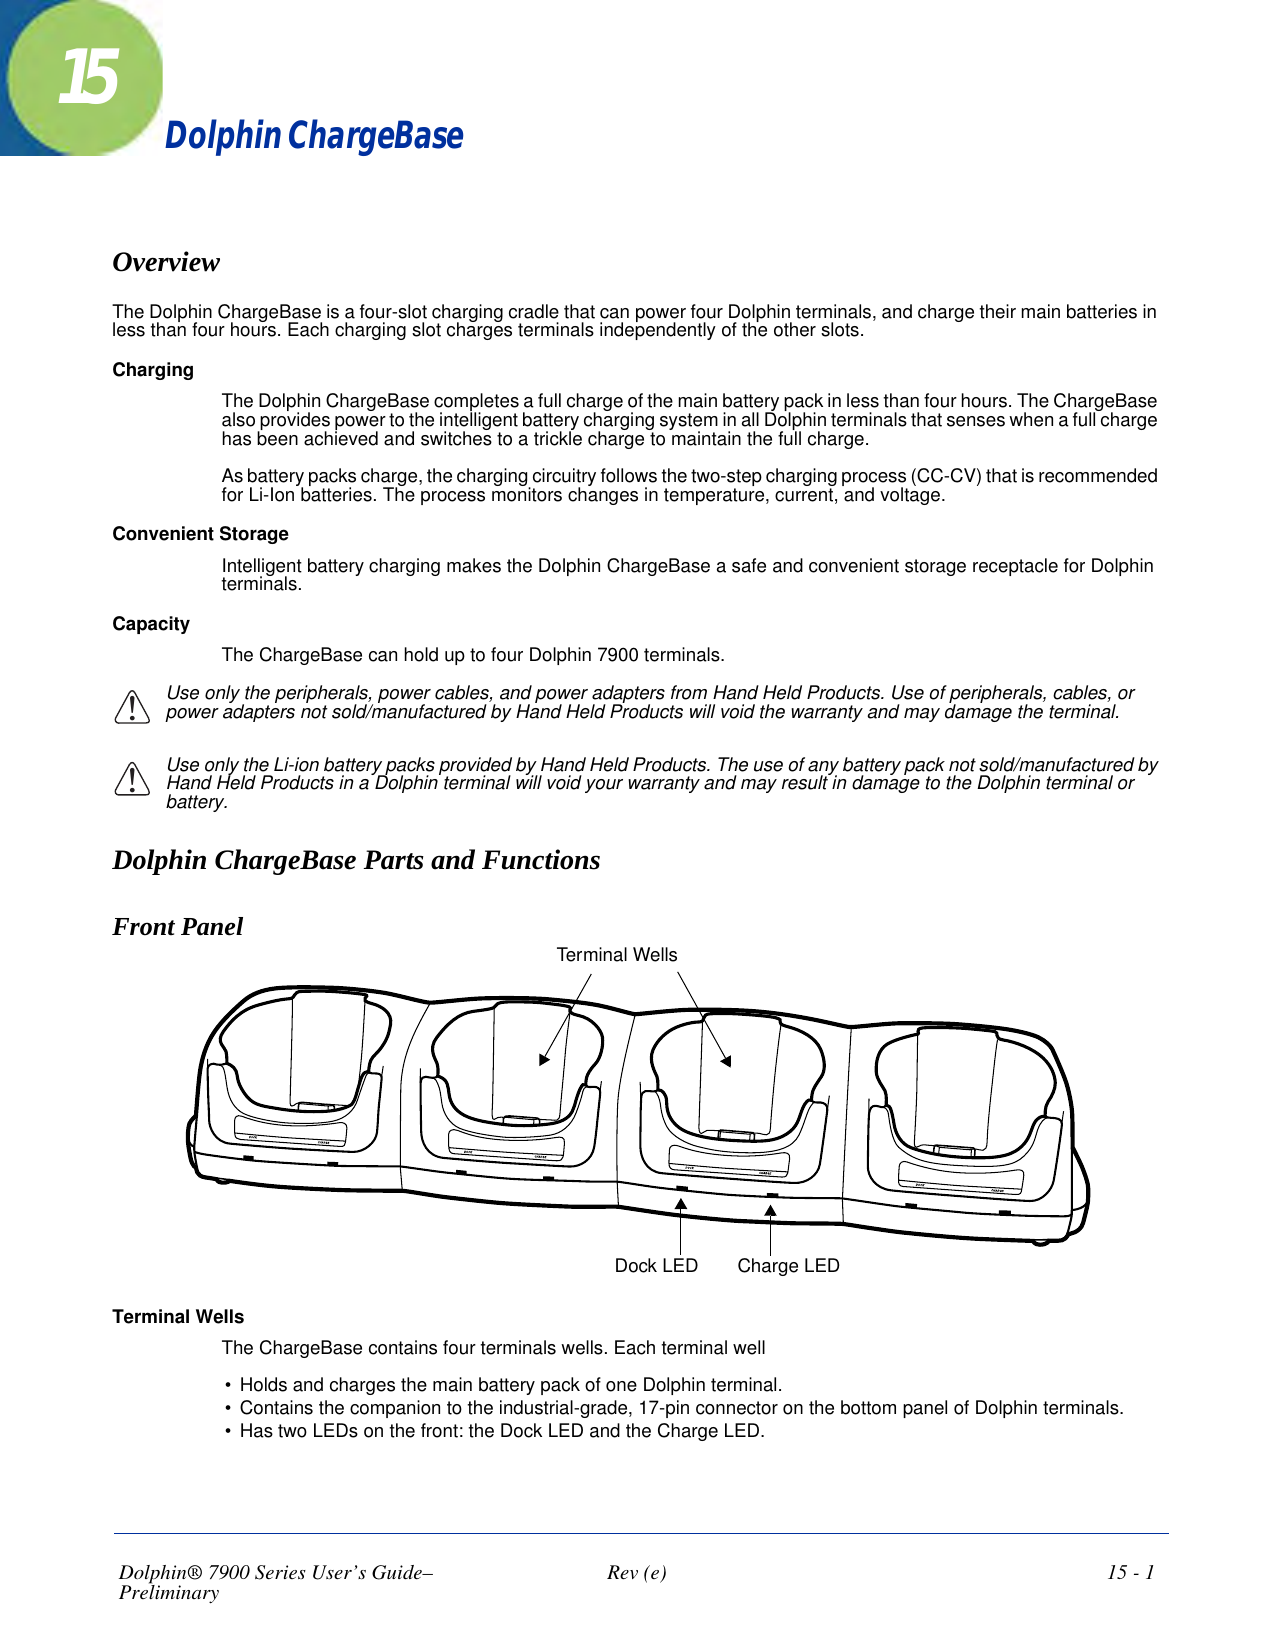
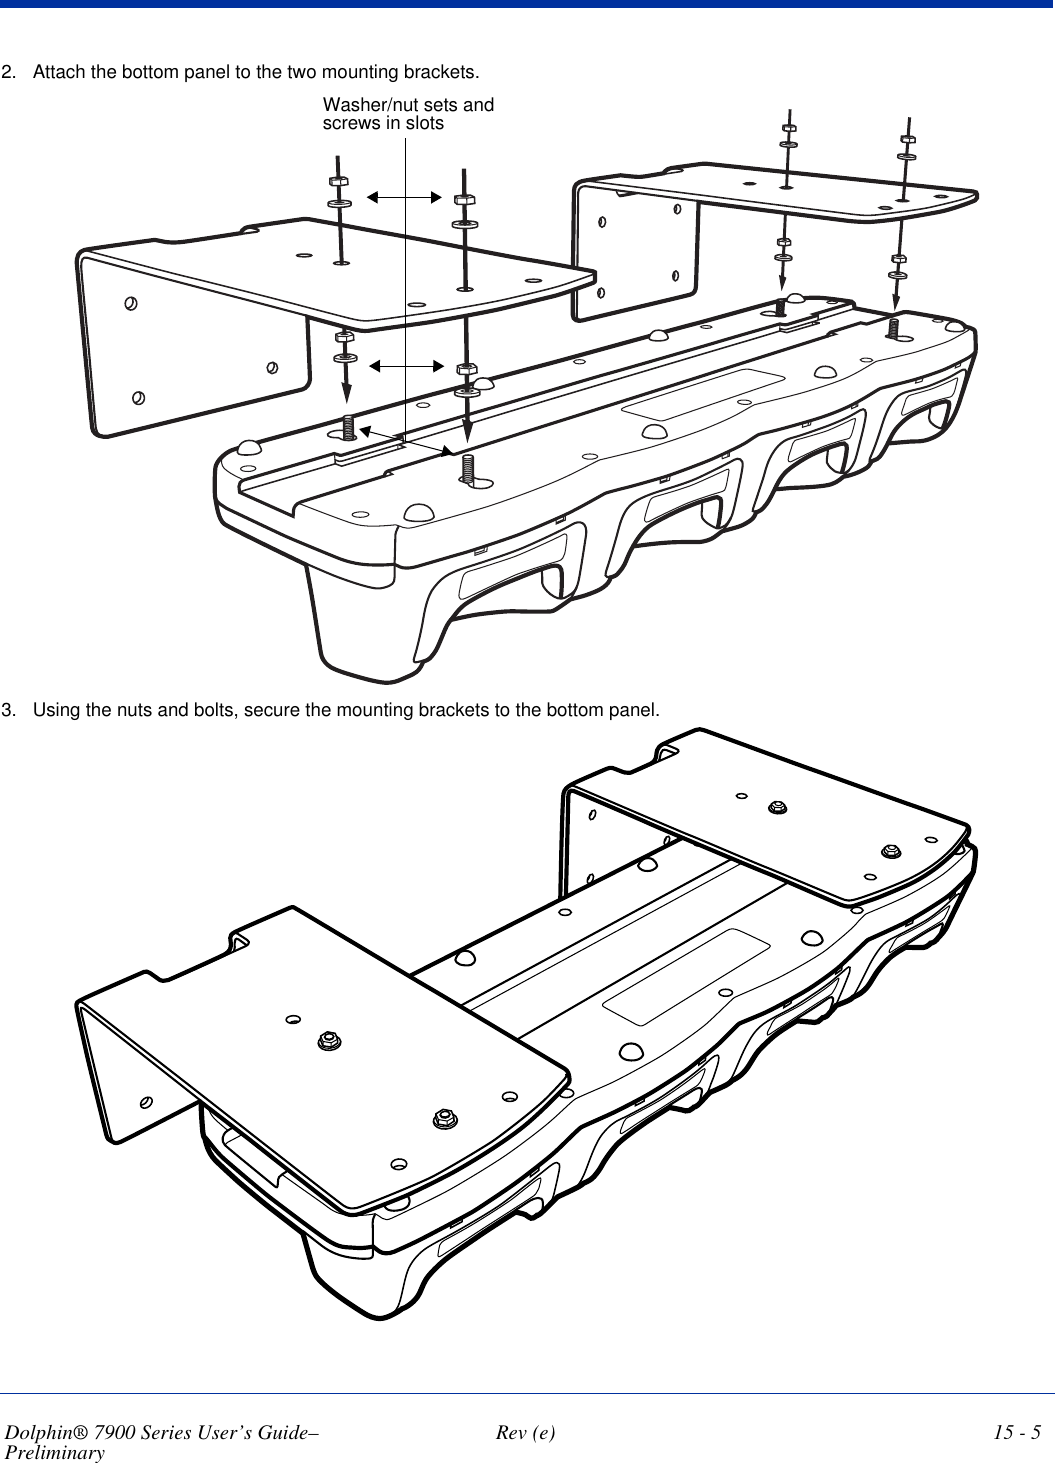
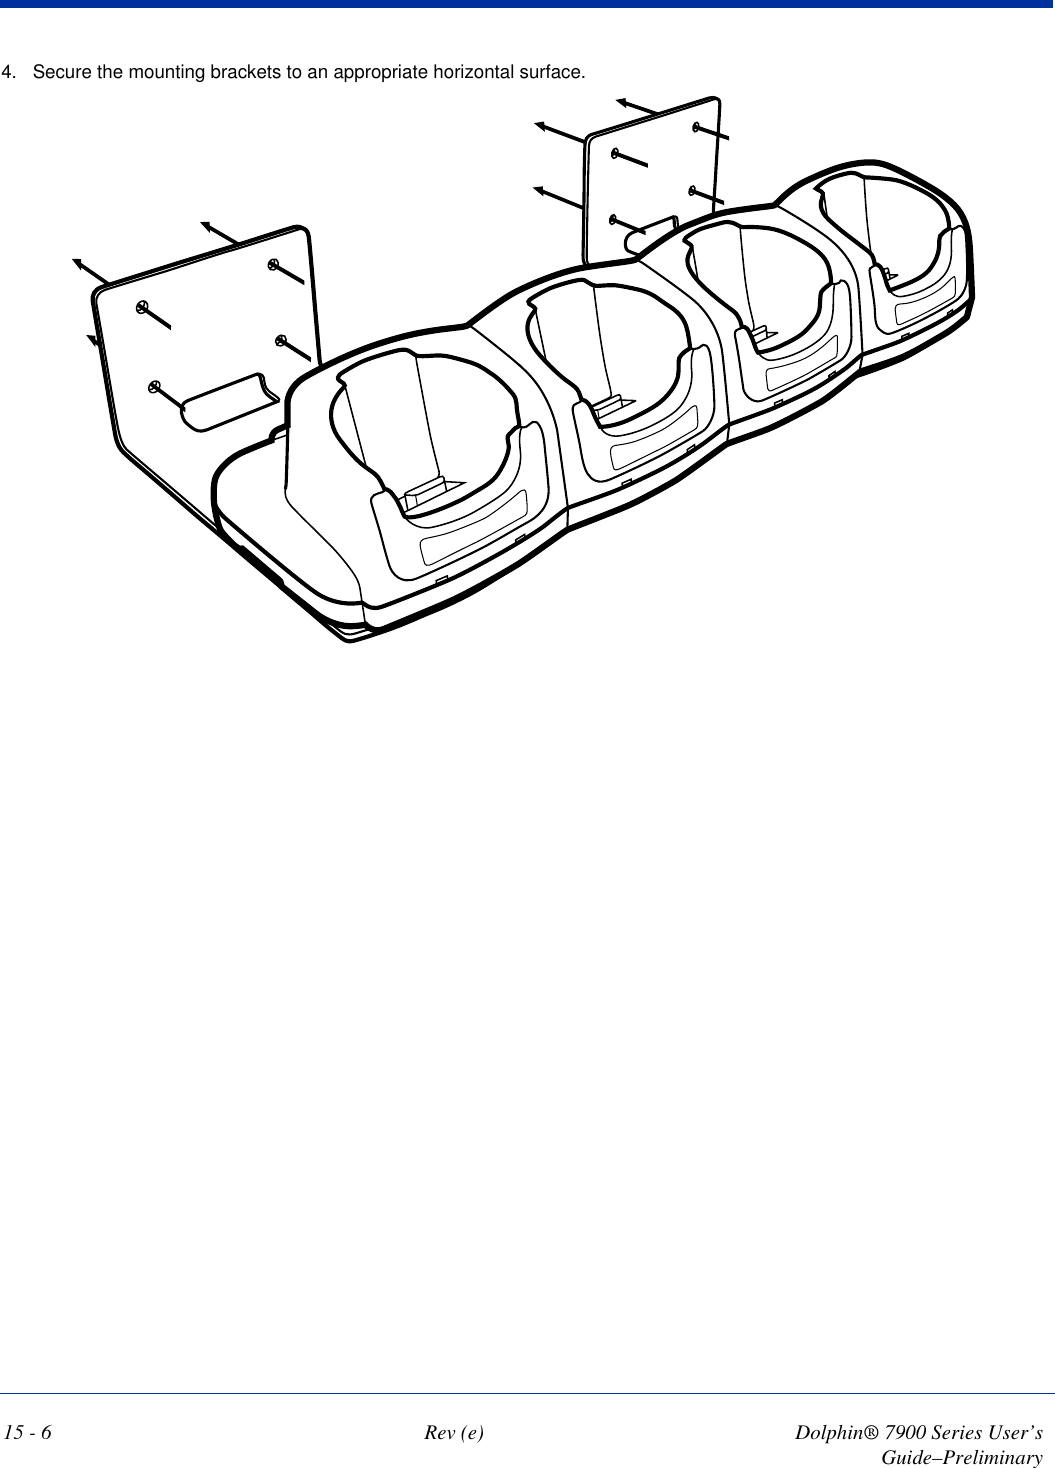
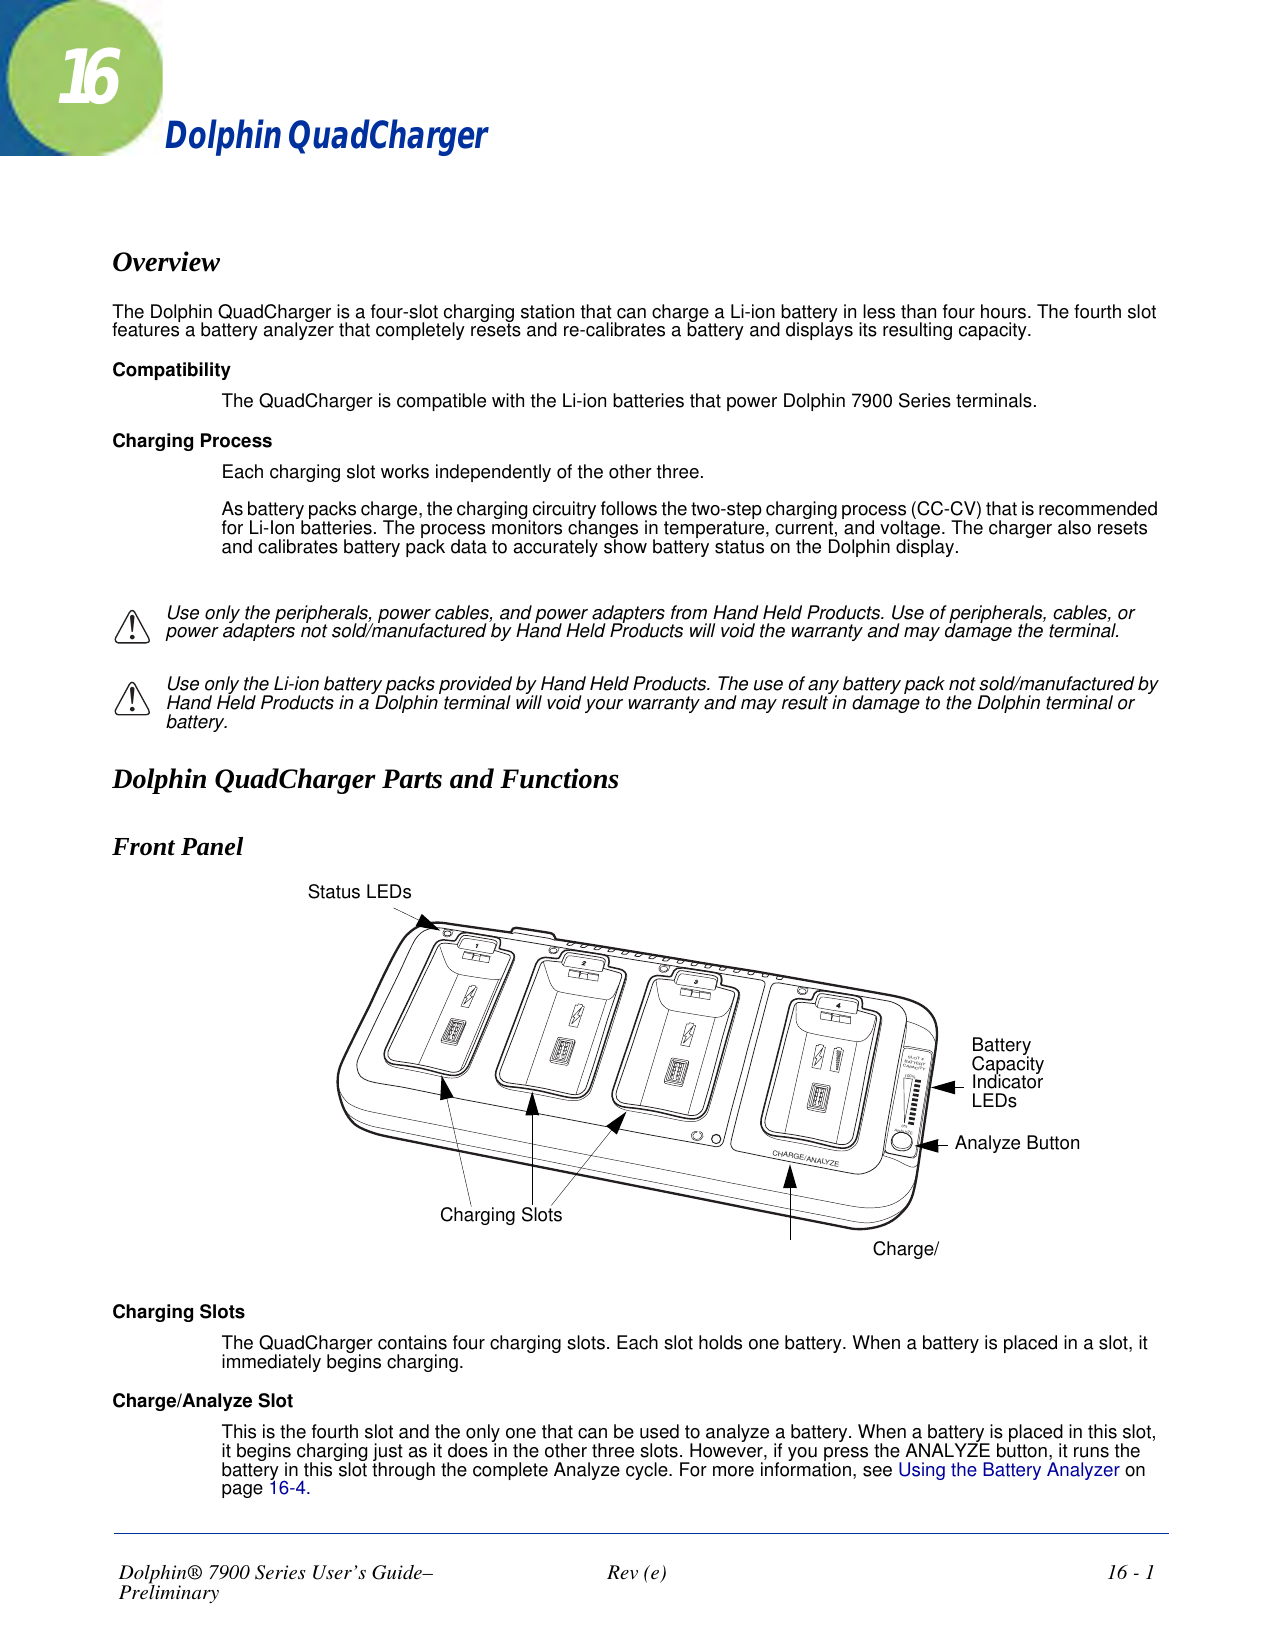
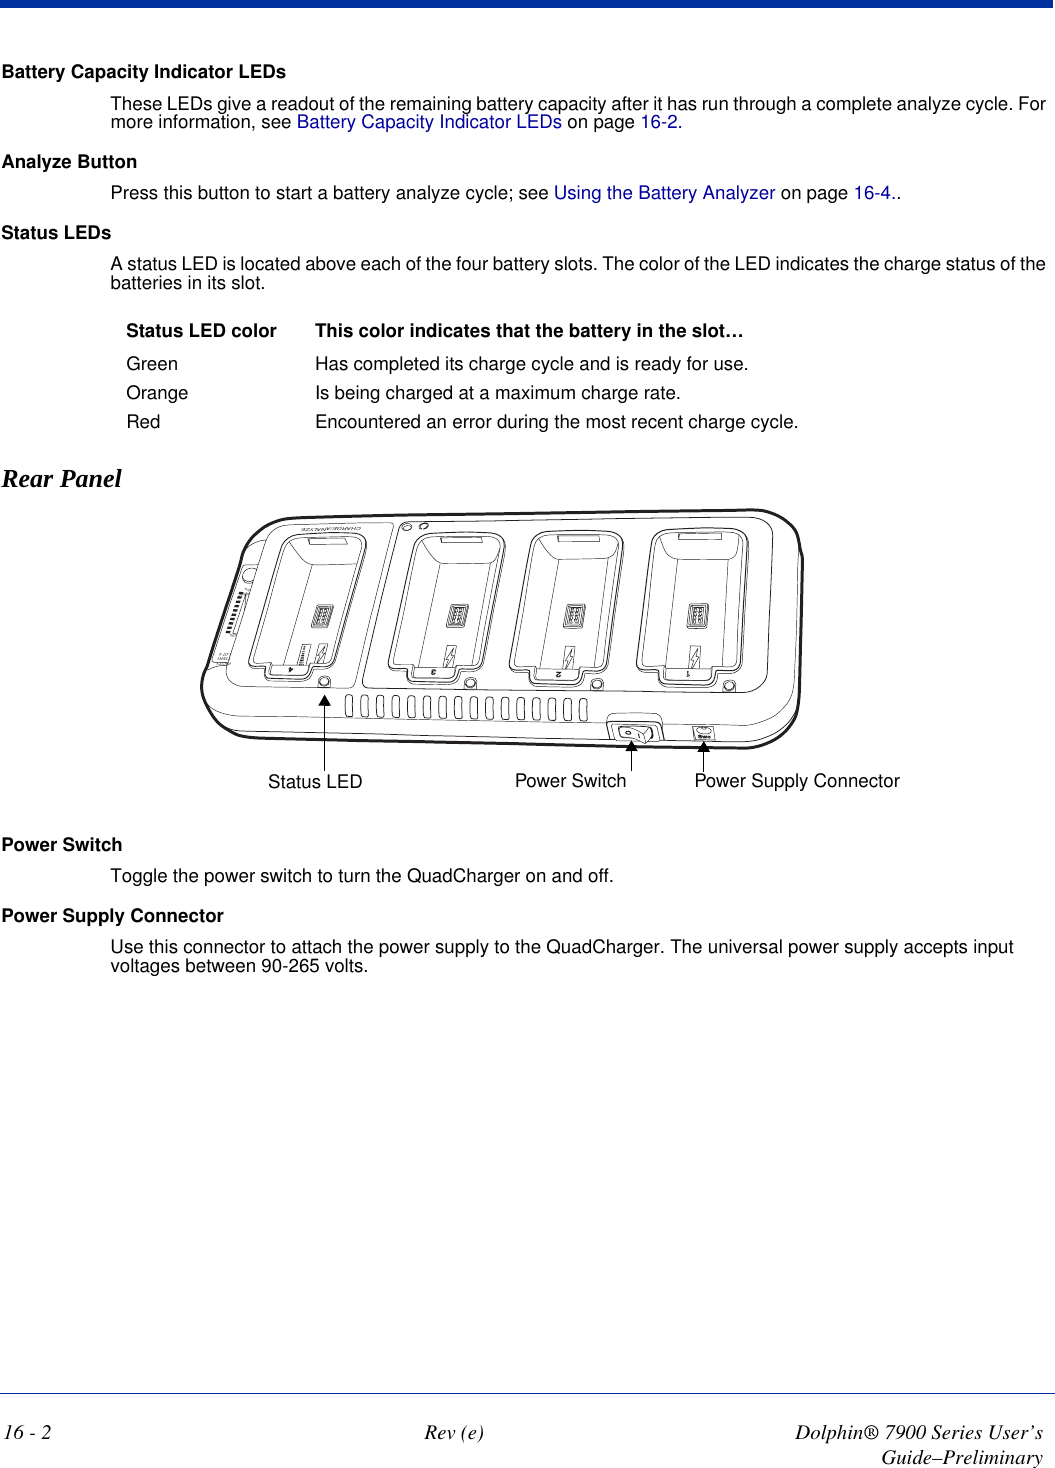
![Dolphin® 7900 Series User’s Guide–Preliminary Rev (e) 9 - 17System TabThe System Settings tab controls logging and the port manger timeout period.Field DescriptionLog Level These settings control the detail of the log messages generated by the Client. Each level is cumula-tive. By default, all errors, warnings, and information events are logged. Each entry records a severity code (of one [debug message] to four [error] asterisks), a time stamp, and a message.•Errors - only the most severe conditions are logged.•Warnings - less severe conditions are logged.•Information - all errors, warnings, and information events are logged. This is the default setting.•Debugging - creates a log message each time the Client detects or reacts to an event. Be advised that log entries fill memory quickly if the Debugging level is chosen. Do not use the Debugging option for a significant length of time because most internal operations generate messages.Defaults Tap this button to return log settings to the default settings.Disable Wireless Zero Config Use this option only as directed by technical support.Selecting this option disables other wireless utilities whether the Client is running or not. If not selected, other wireless utilities cannot apply their settings to the wireless card while the Client is run-ning (although their status displays are usually unaffected). You will need to perform a soft reset whenever this setting is changed. Port Manager Timeout The interval at which the client polls the ports. This is used under different circumstances, for instance after physical changes such as card removal or insertion have been detected. This value should not be changed from the 10-second default unless so advised by technical support.](https://usermanual.wiki/Honeywell/7900BU0E.08-user-manual-part-2/User-Guide-709412-Page-1.png)