Honeywell 85606065 802.11b Transmitter User Manual IK8560 UG
Honeywell International Inc 802.11b Transmitter IK8560 UG
UserManual.wiki
>
Honeywell
>
85606065 User Manual
User Manual
Navigation menu
Upload a User Manual
Namespaces
Wiki Guide
HTML
PDF
Info
Views
User Manual
Discussion / Help
Navigation

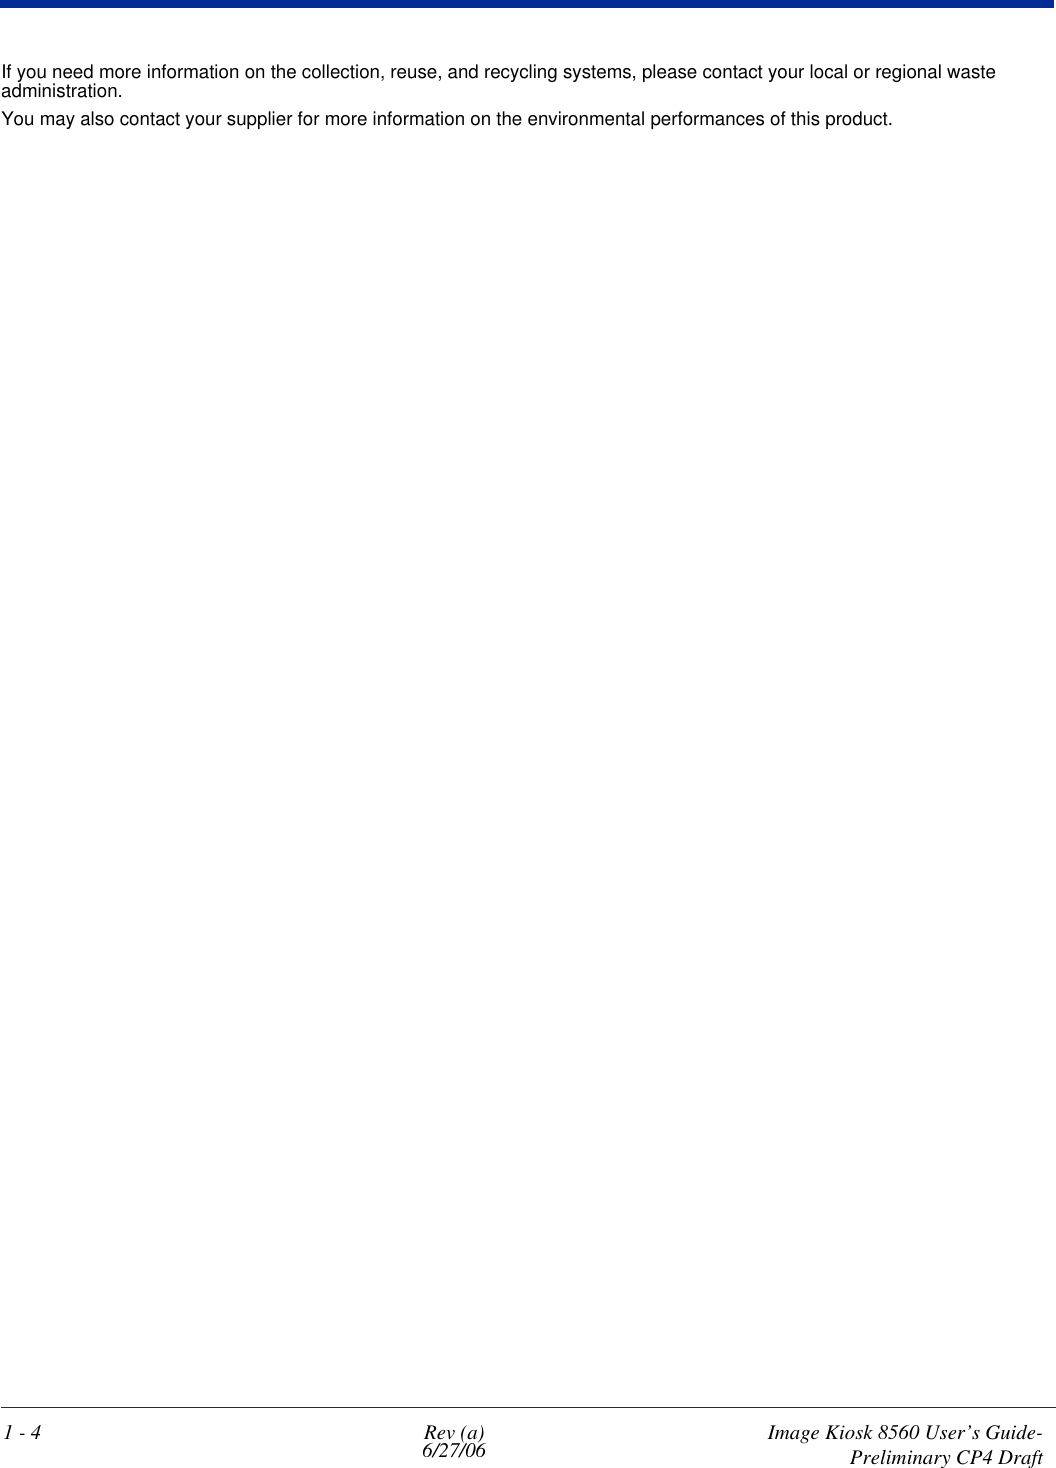
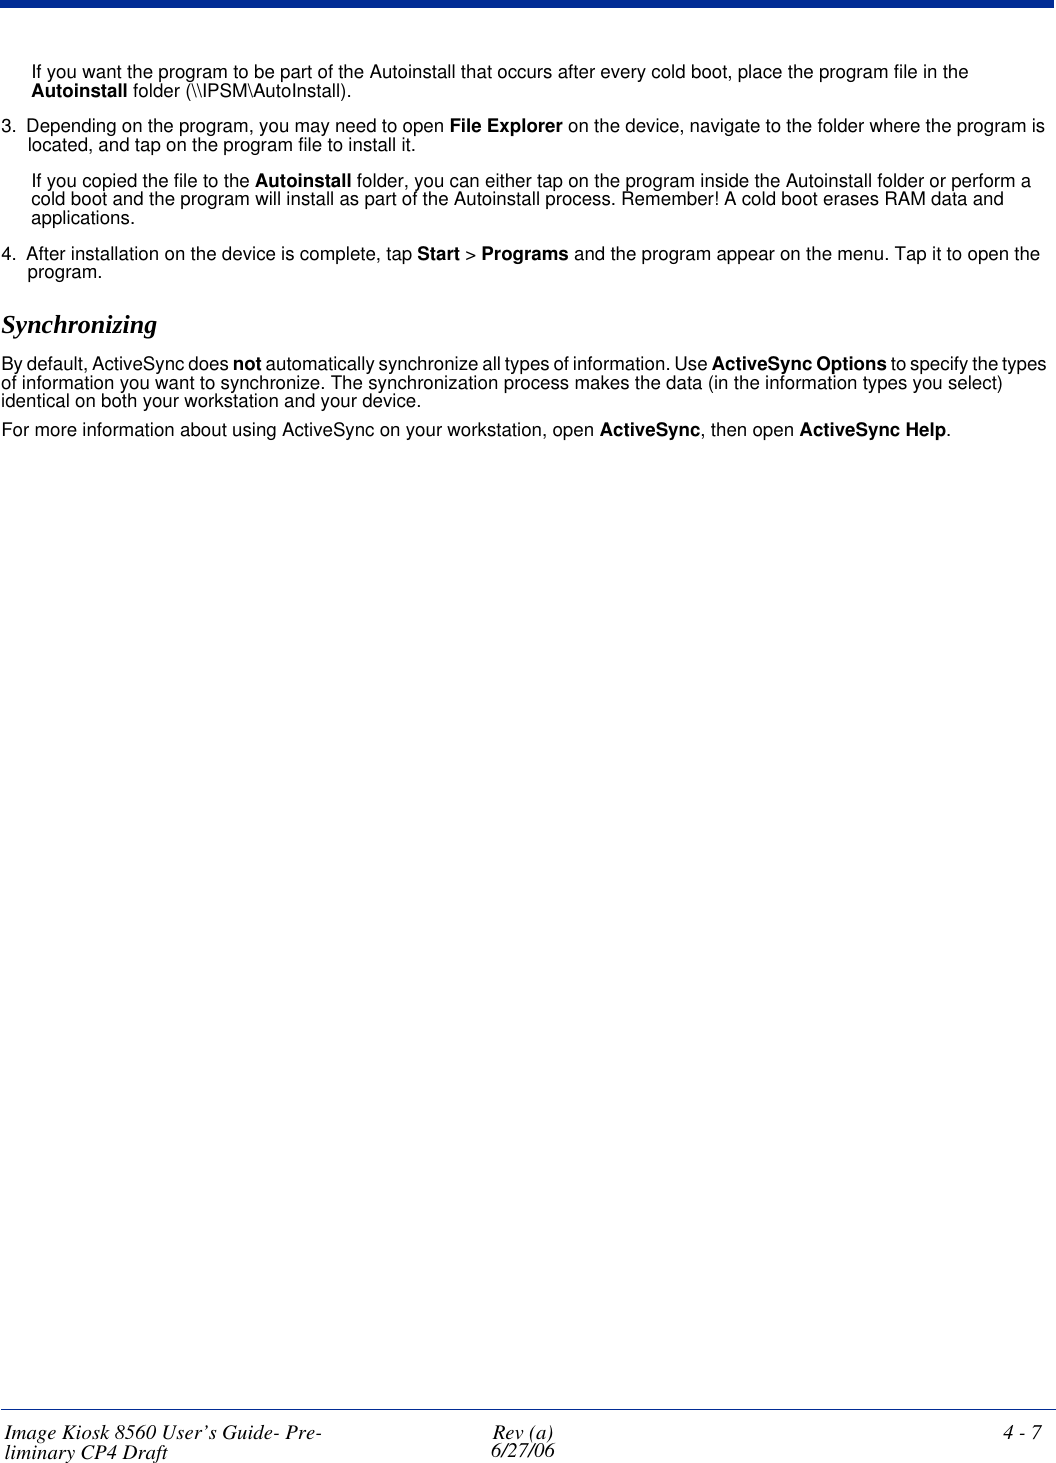

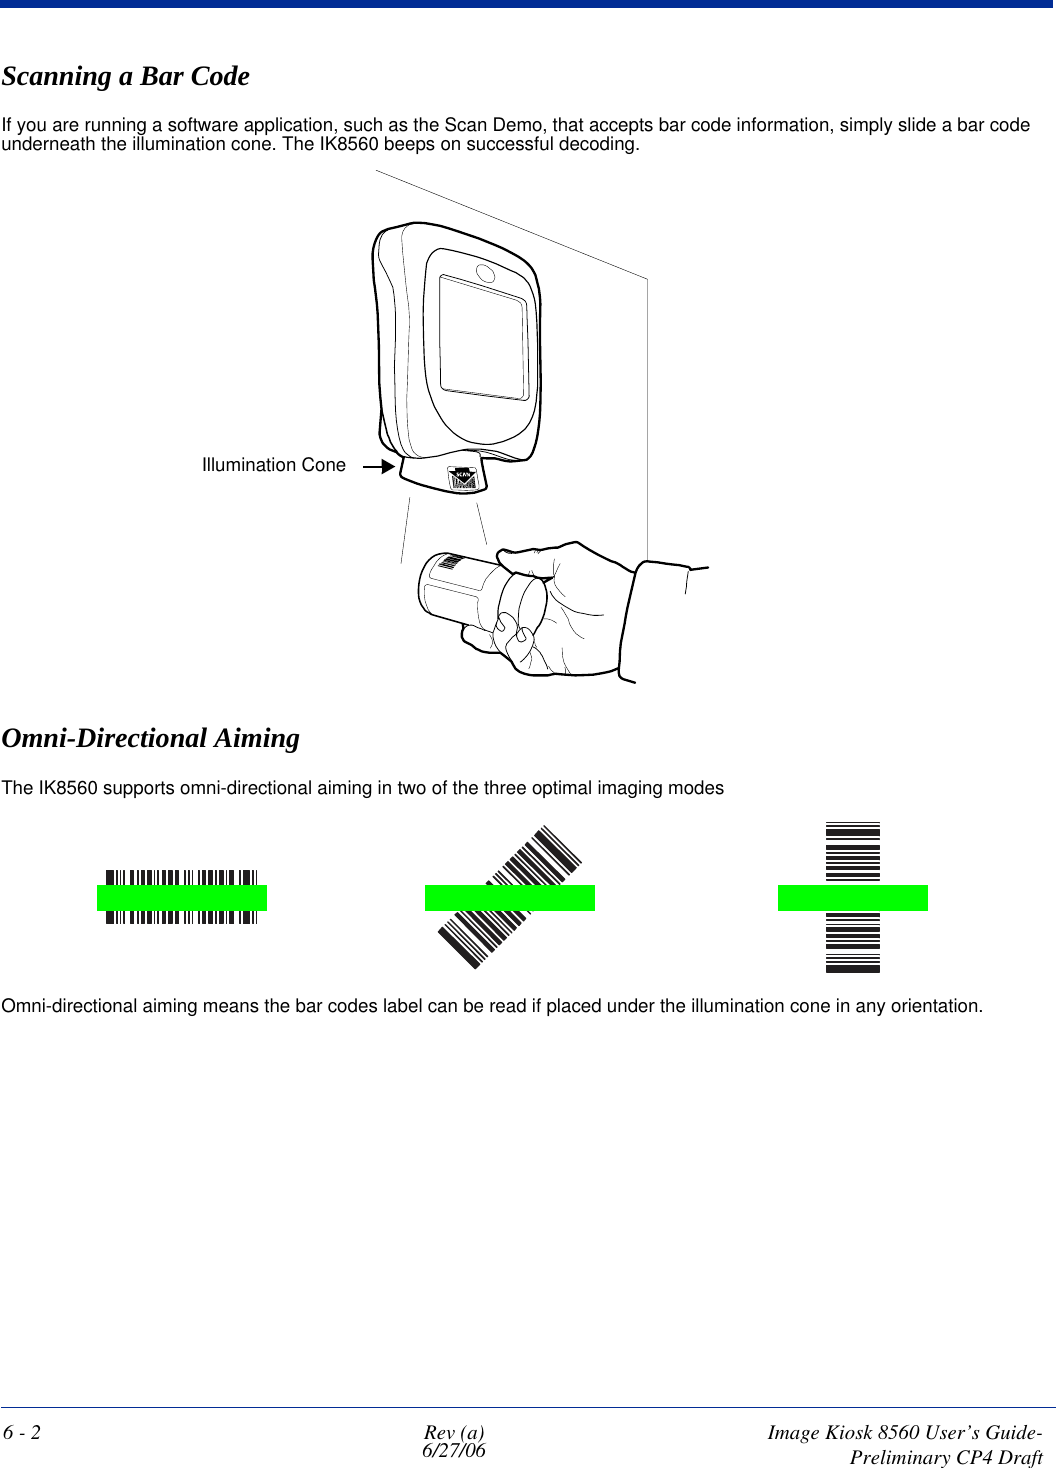
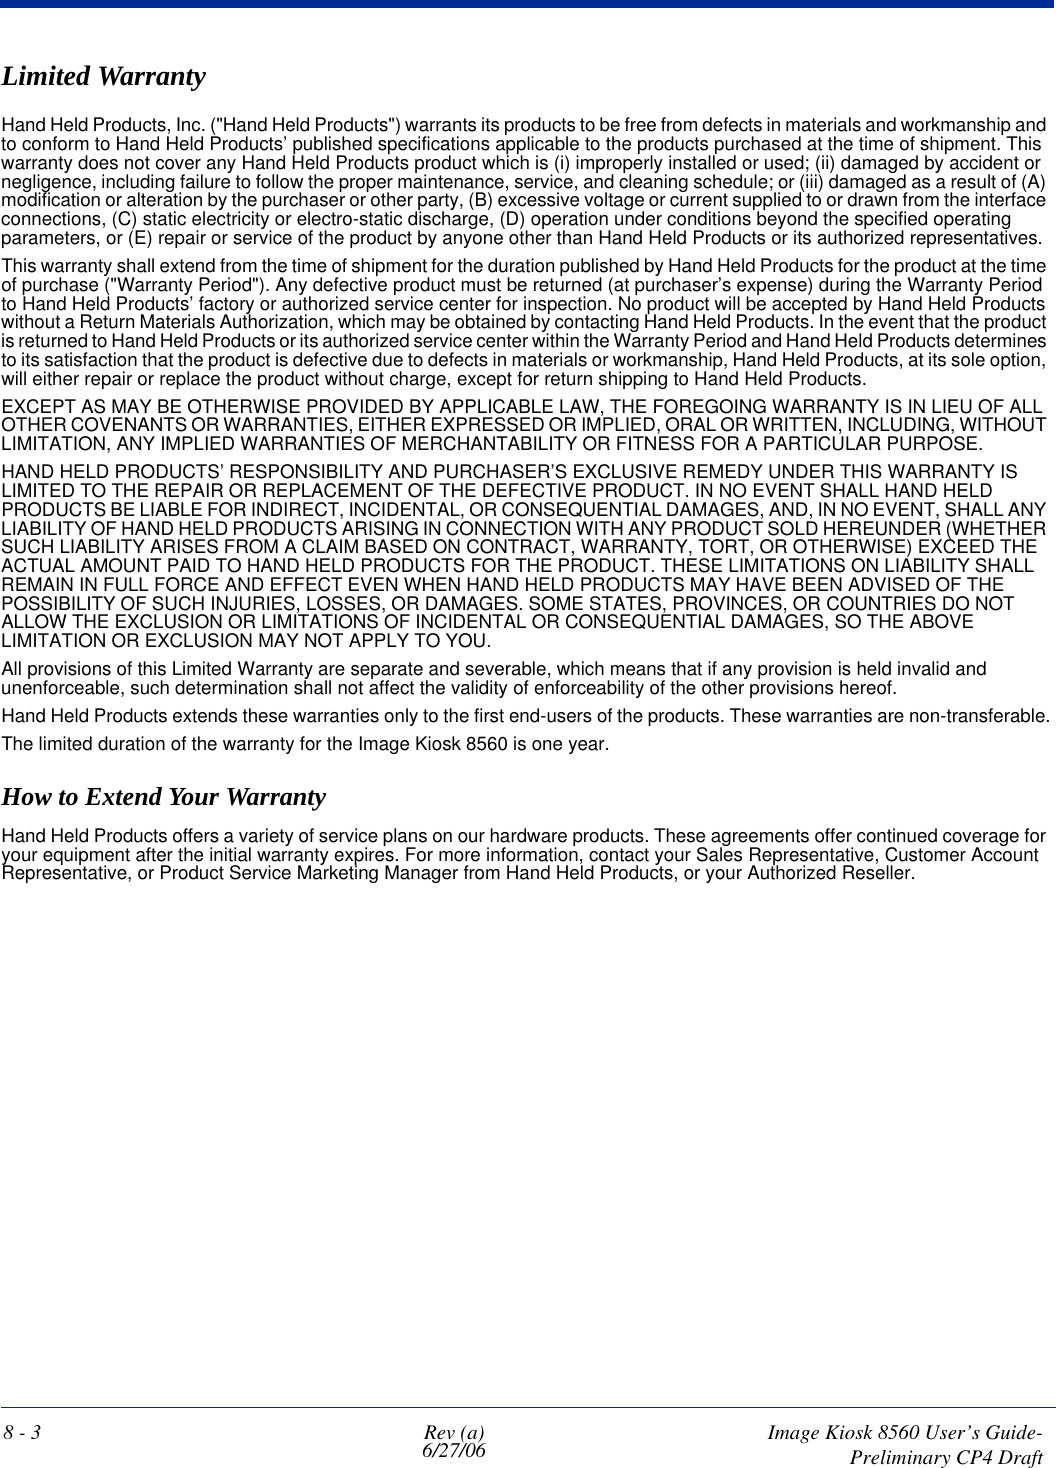
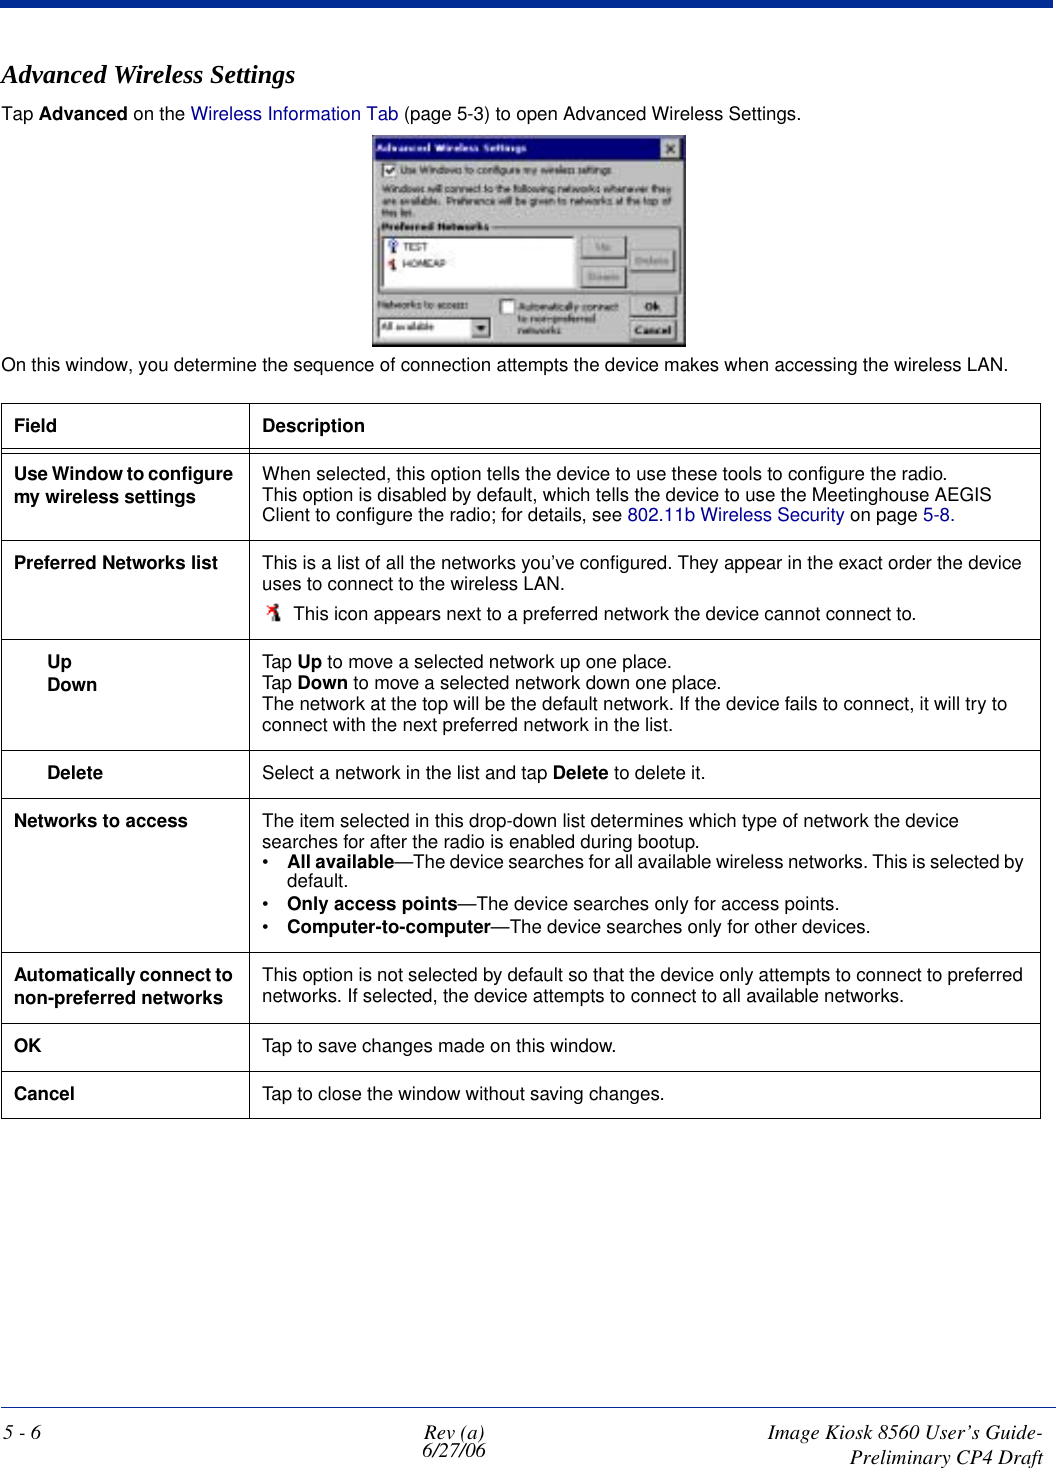
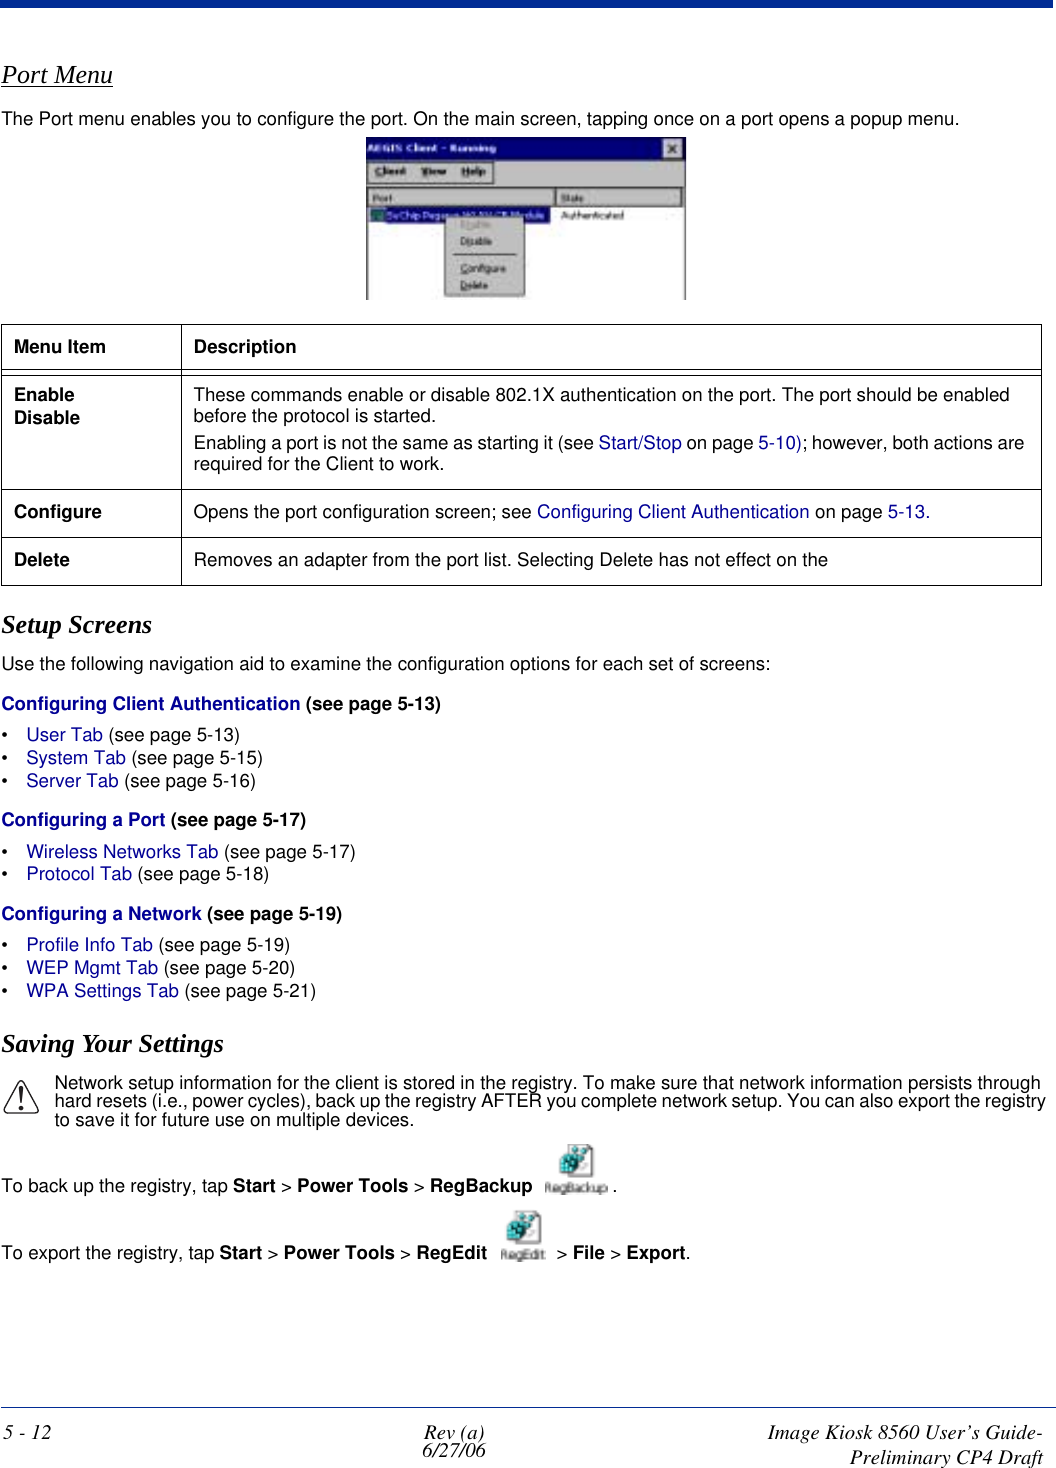
![Image Kiosk 8560 User’s Guide- Pre-liminary CP4 Draft Rev (a)6/27/06 5 - 3Wireless Information TabThe wireless information tab manages your 802.11 network connection. Field DescriptionNetwork List Because the 802.11b radio is enabled and transmitting by default, every time you open this window, the device searches for available networks and displays the results in this list.Networks with this icon have not been configured. To configure a network, double tap the name of the network connection. The Wireless Properties window opens with the name entered in the SSID field; see Wireless Properties Window on page 5-5. Networks with this icon have been configured. They will have “preferred” after the name as well. You determine the order of preferred networks on in Advanced Wireless Settings (see page 5-6).Status Displays the connection status of the device. •Scanning—Displays when the device is attempting to connect to a selected network.•Associating—Displays when the device is connecting to a selected network.•Failed to connect—Displays when the device fails to connect to a selected network. After failing, the device attempts to connect to the next preferred network. •Connected to [Network Name]—The device is connected to the network name listed.Signal Strength Indicates the strength of the signal.Notify when new networks available If you select this option, the device continually searches for networks. A popup window appears (in any open application) notifying you when the device finds a new network.Connect Select a network in the list and tap this button to manually connect the device to the network. If the network has not been configured, tapping this button opens the Wireless Properties Window (page 5-5) with the name entered as the SSID.Advanced Opens Advanced Wireless Settings (see page 5-6).Log Opens a log, which provides you with a list of radio activity since the last cold boot.](https://usermanual.wiki/Honeywell/85606065/User-Guide-681967-Page-35.png)
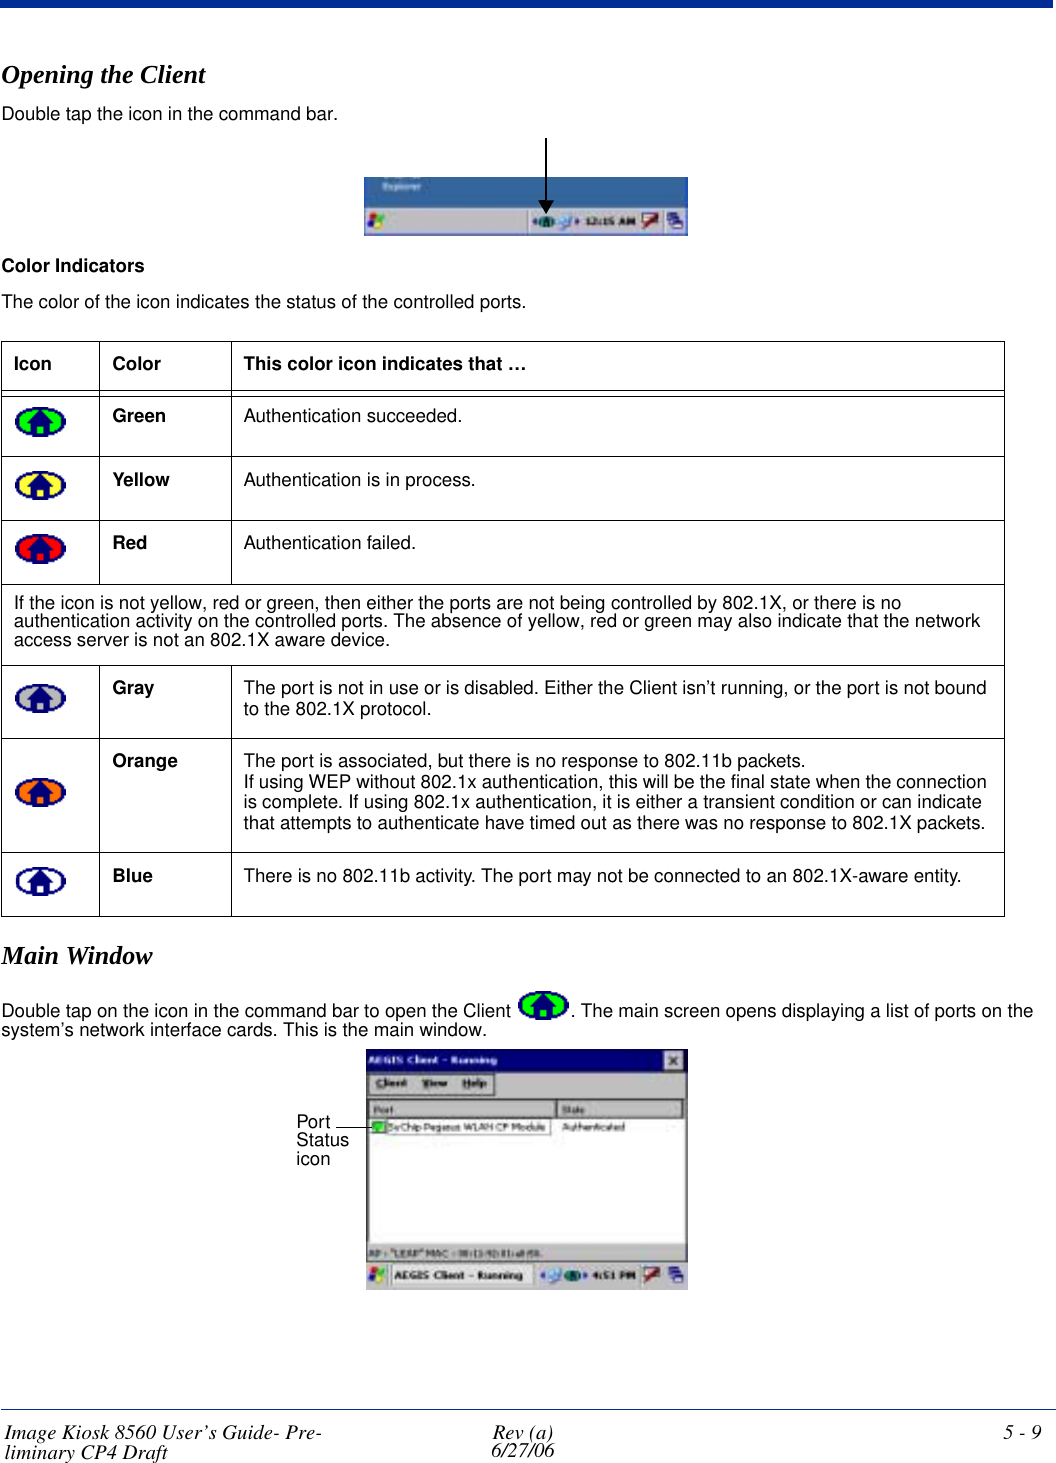
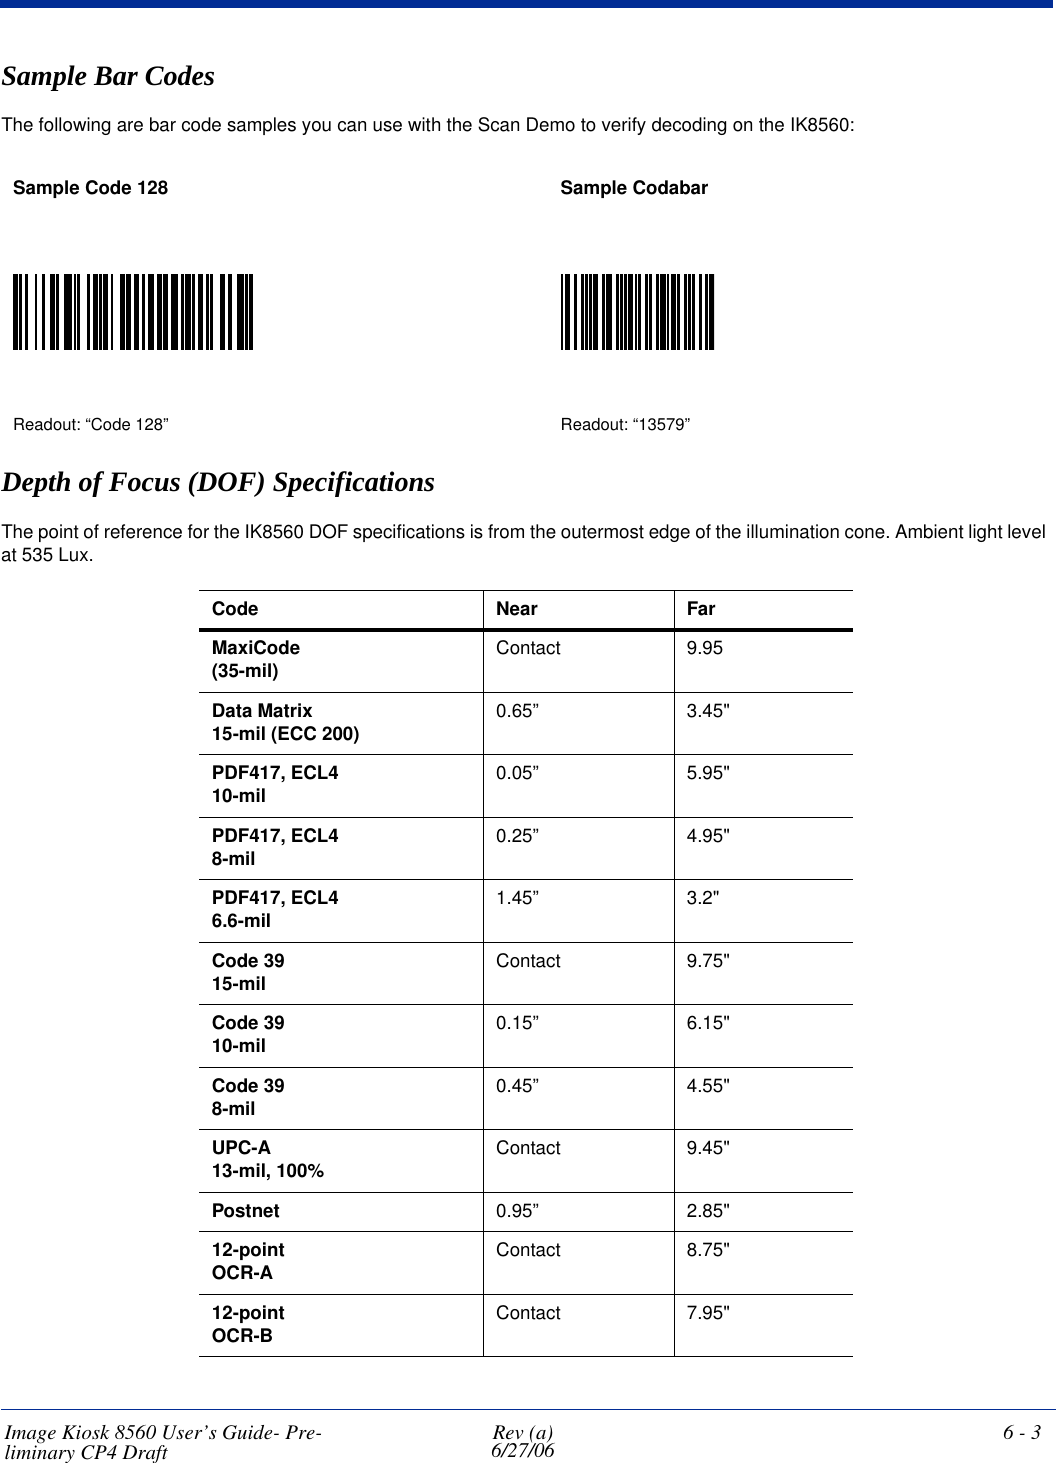
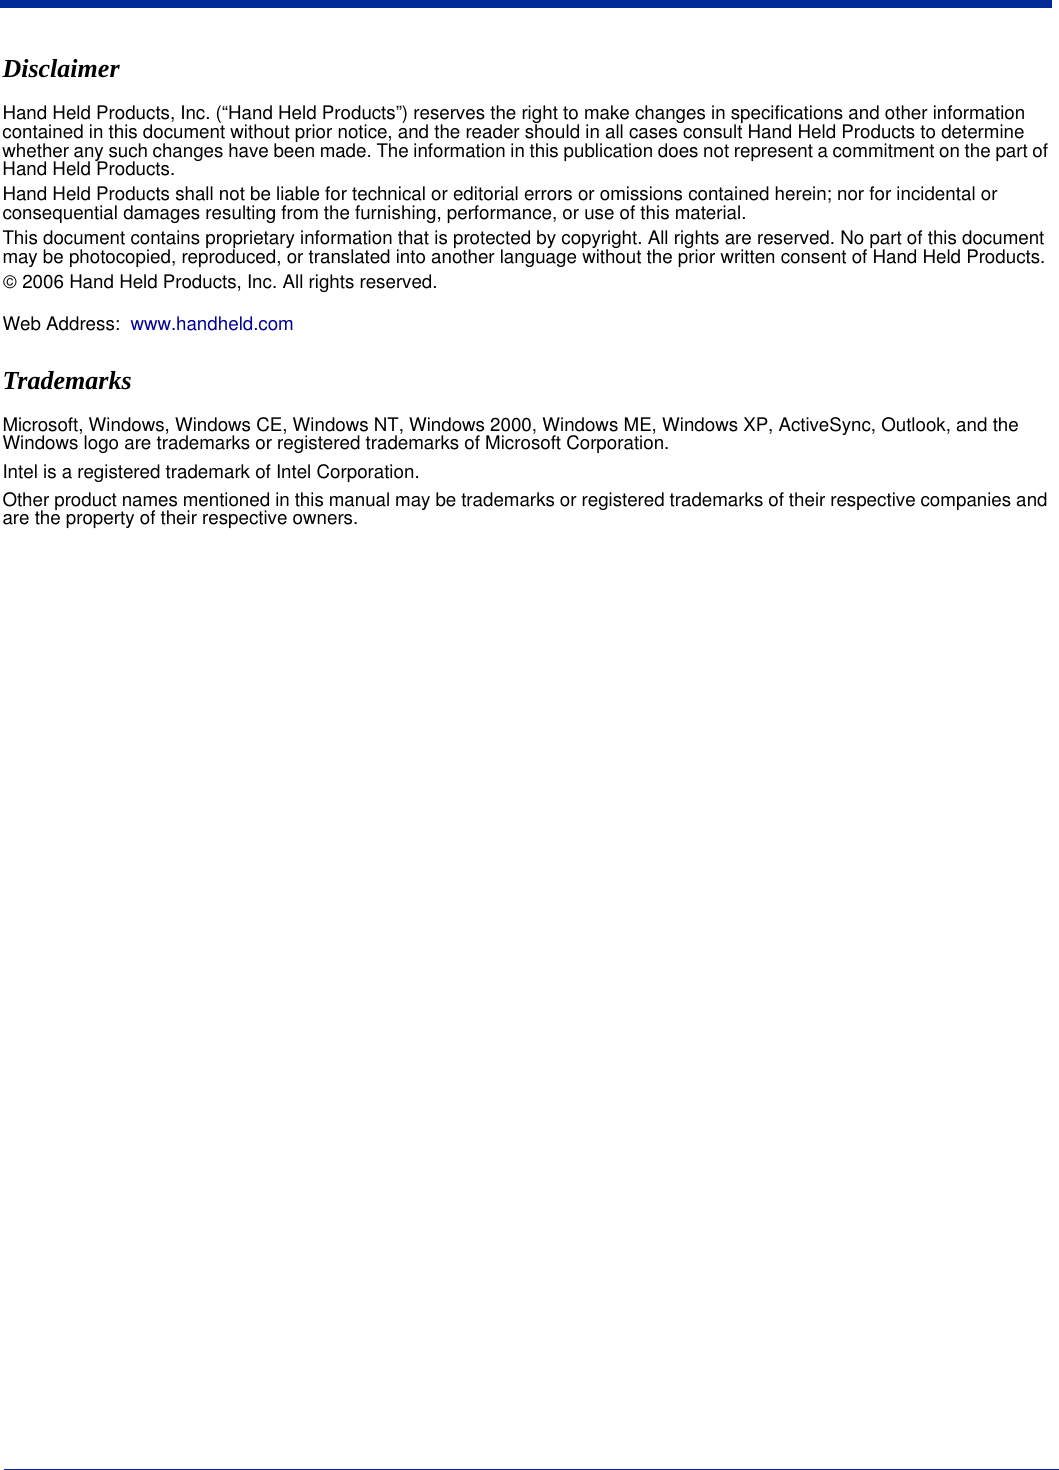
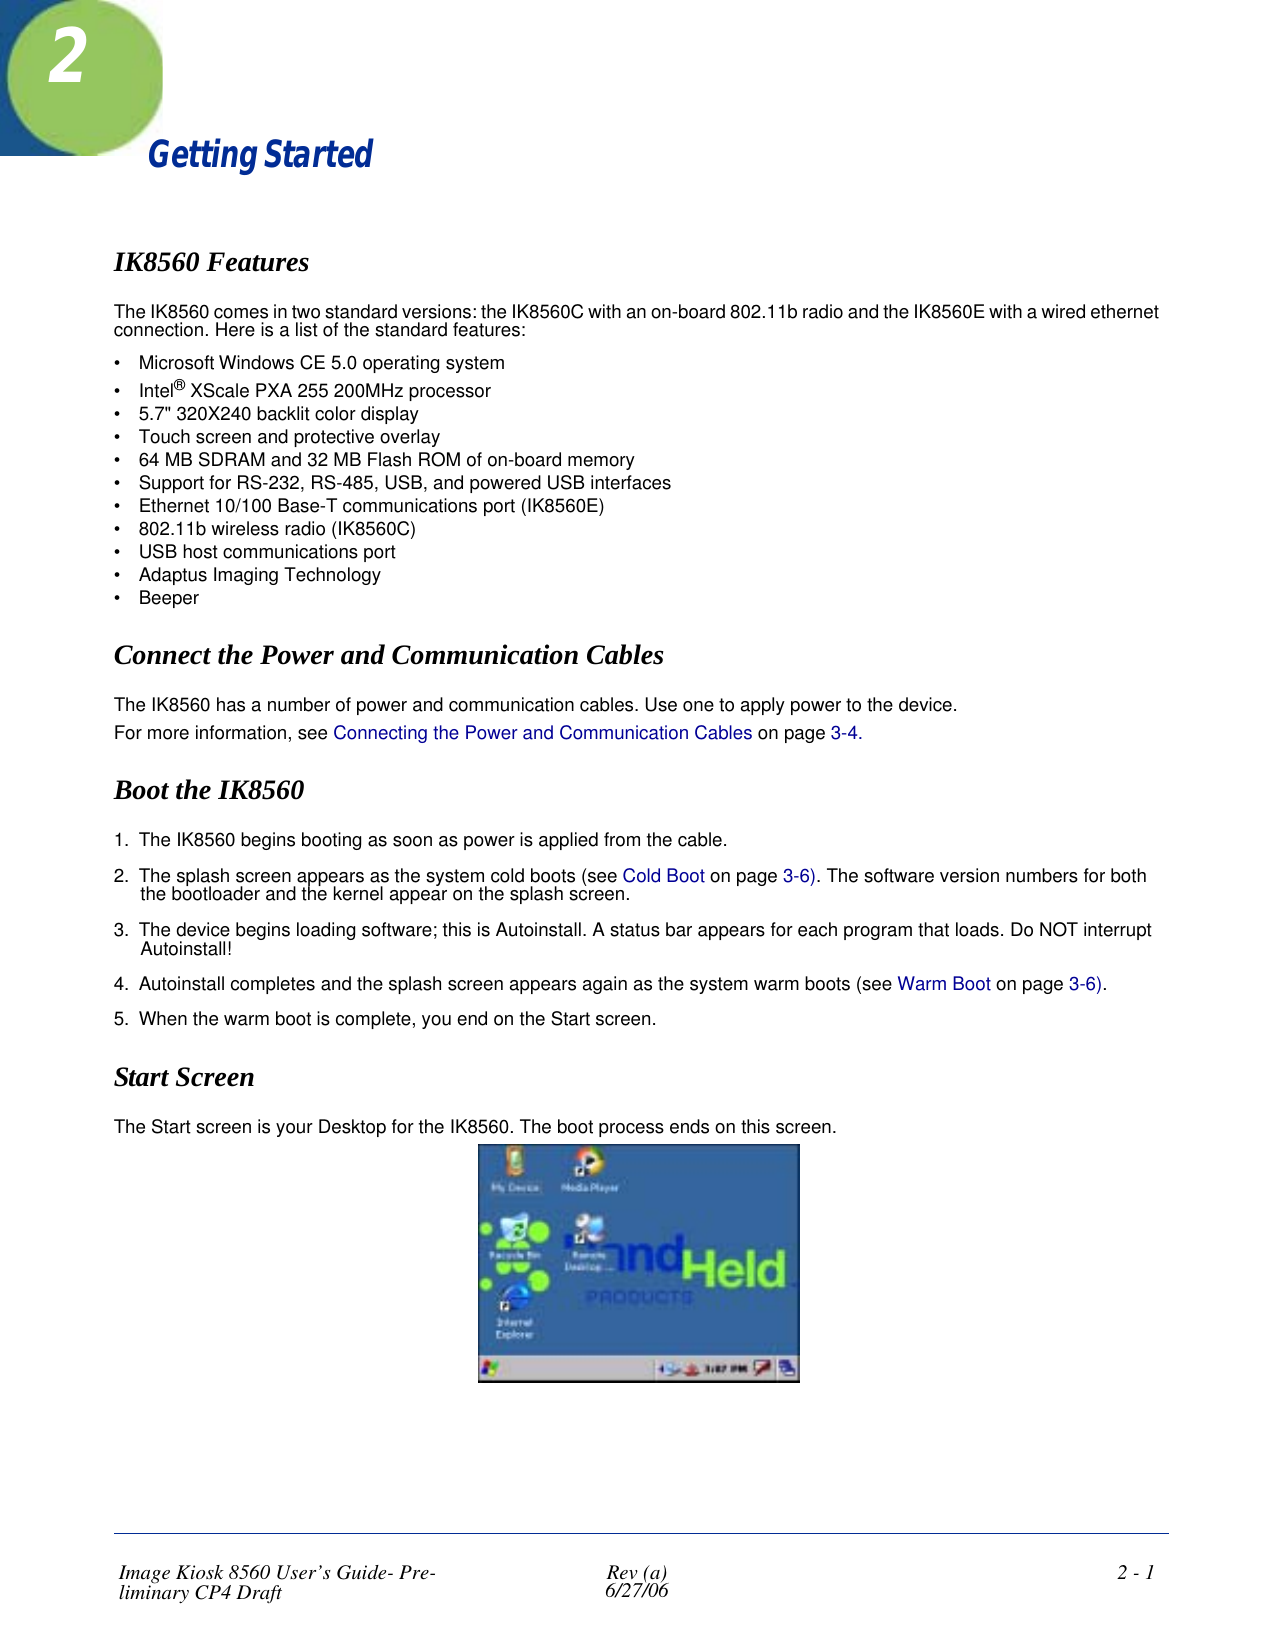
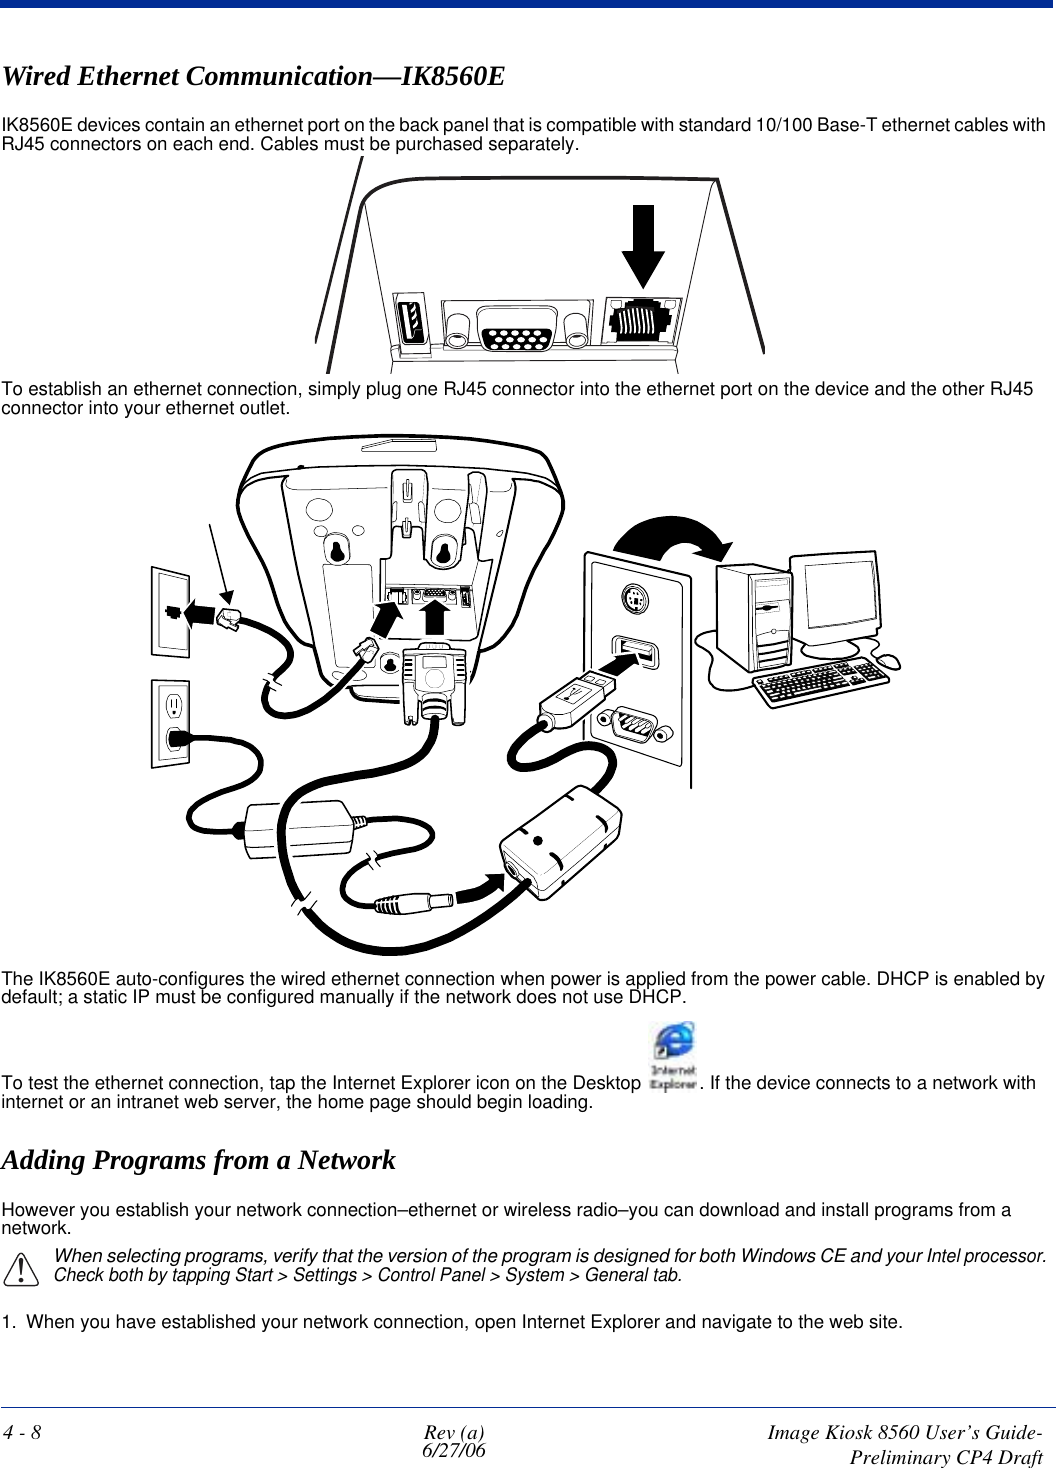
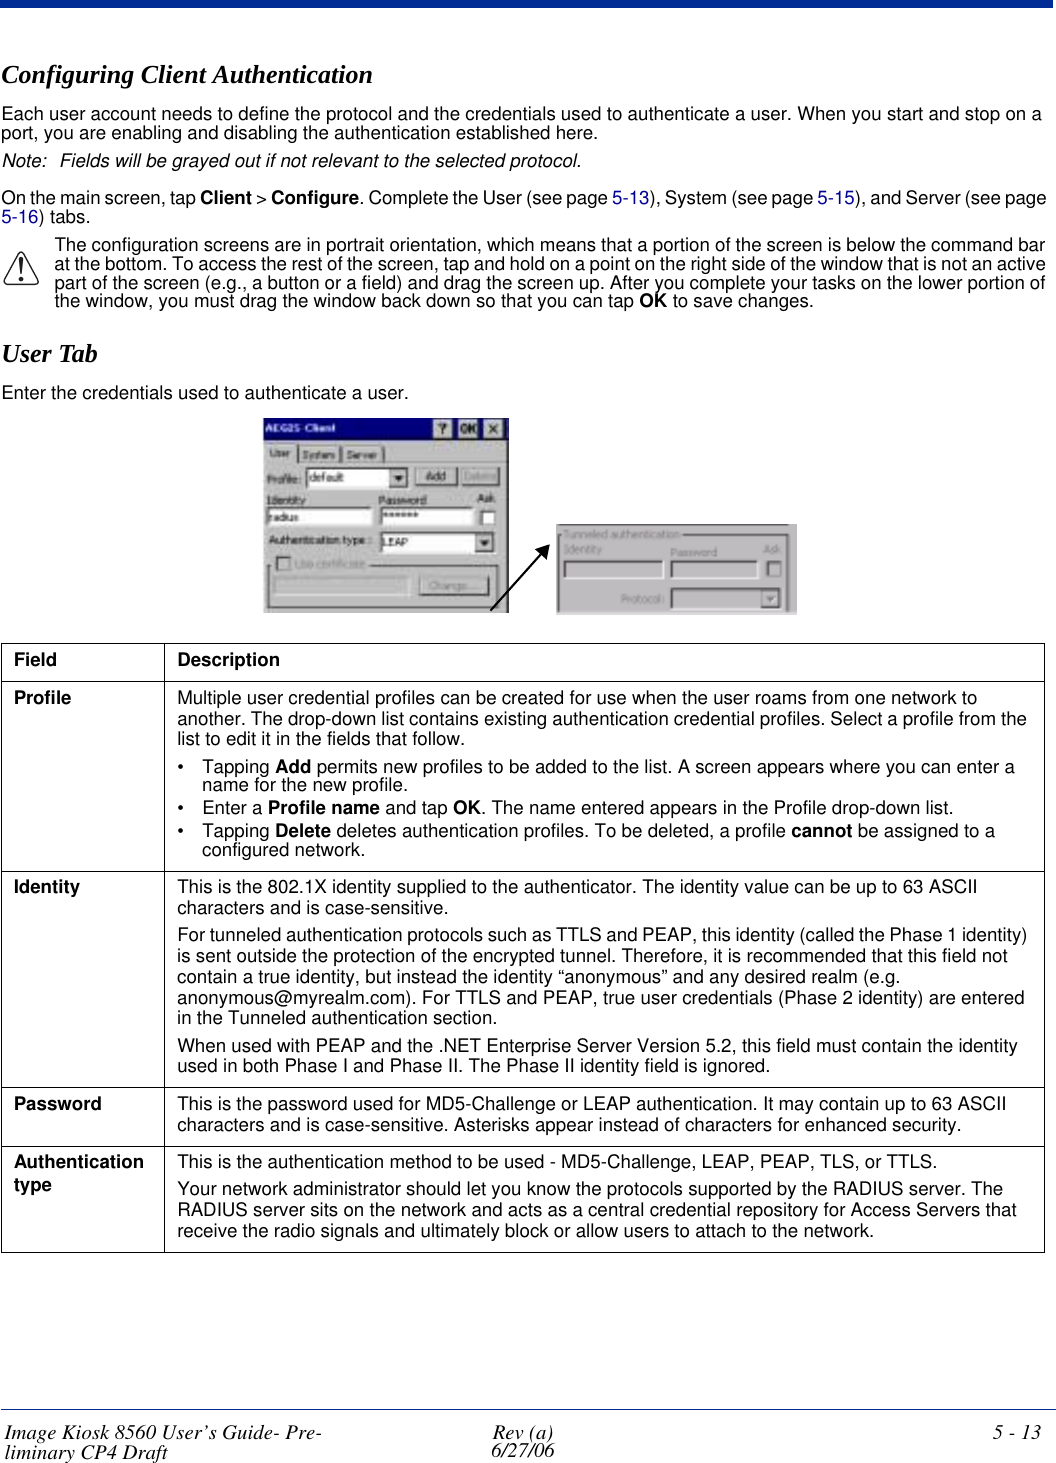
![Image Kiosk 8560 User’s Guide- Pre-liminary CP4 Draft Rev (a)6/27/06 5 - 11Status BarStatus BarThe status bar at the bottom of the main screen indicates the connection status between the network card and the AP.Depending on the status of connectivity, the status bar displays one of the following:• Not Associated• AP : [AP's SSID] MAC : [AP's BSSID].Event Log Displays the event log in a custom viewer. The Event Log is a text file that contains system information; each entry is listed sequentially with a time/date stamp and text message. Tap Refresh to query the system again and update the log file while you are reading it. If the file gets too large, old entries are automatically deleted. Logging parameters are set on the System Tab (see page 5-15)Menu Item Description](https://usermanual.wiki/Honeywell/85606065/User-Guide-681967-Page-43.png)
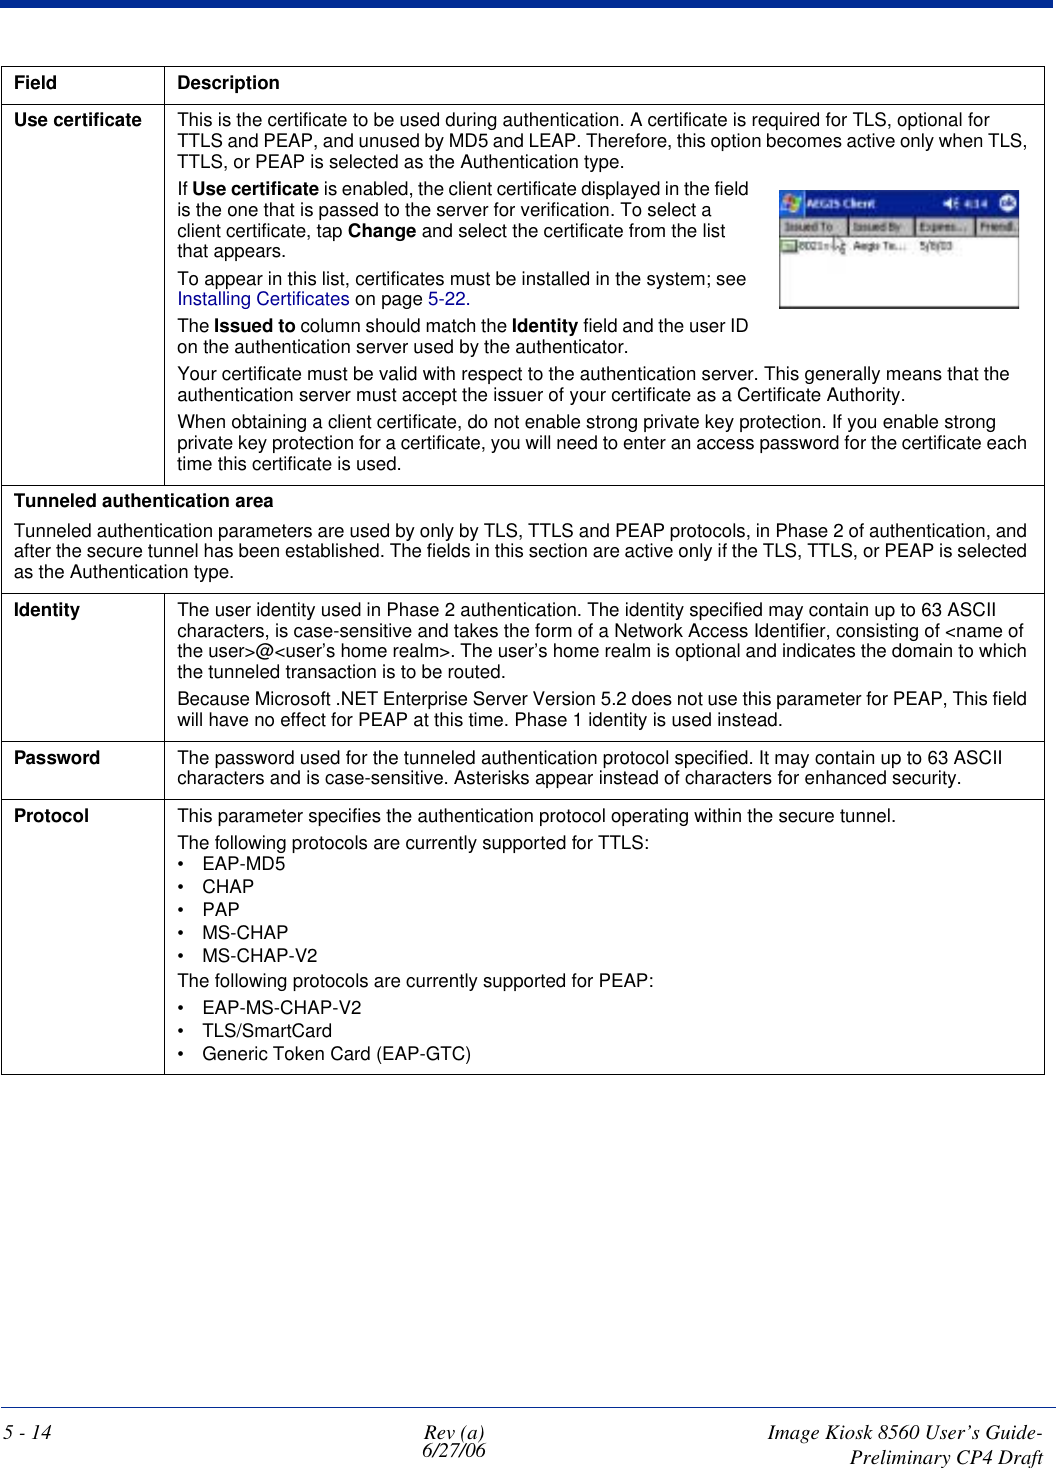
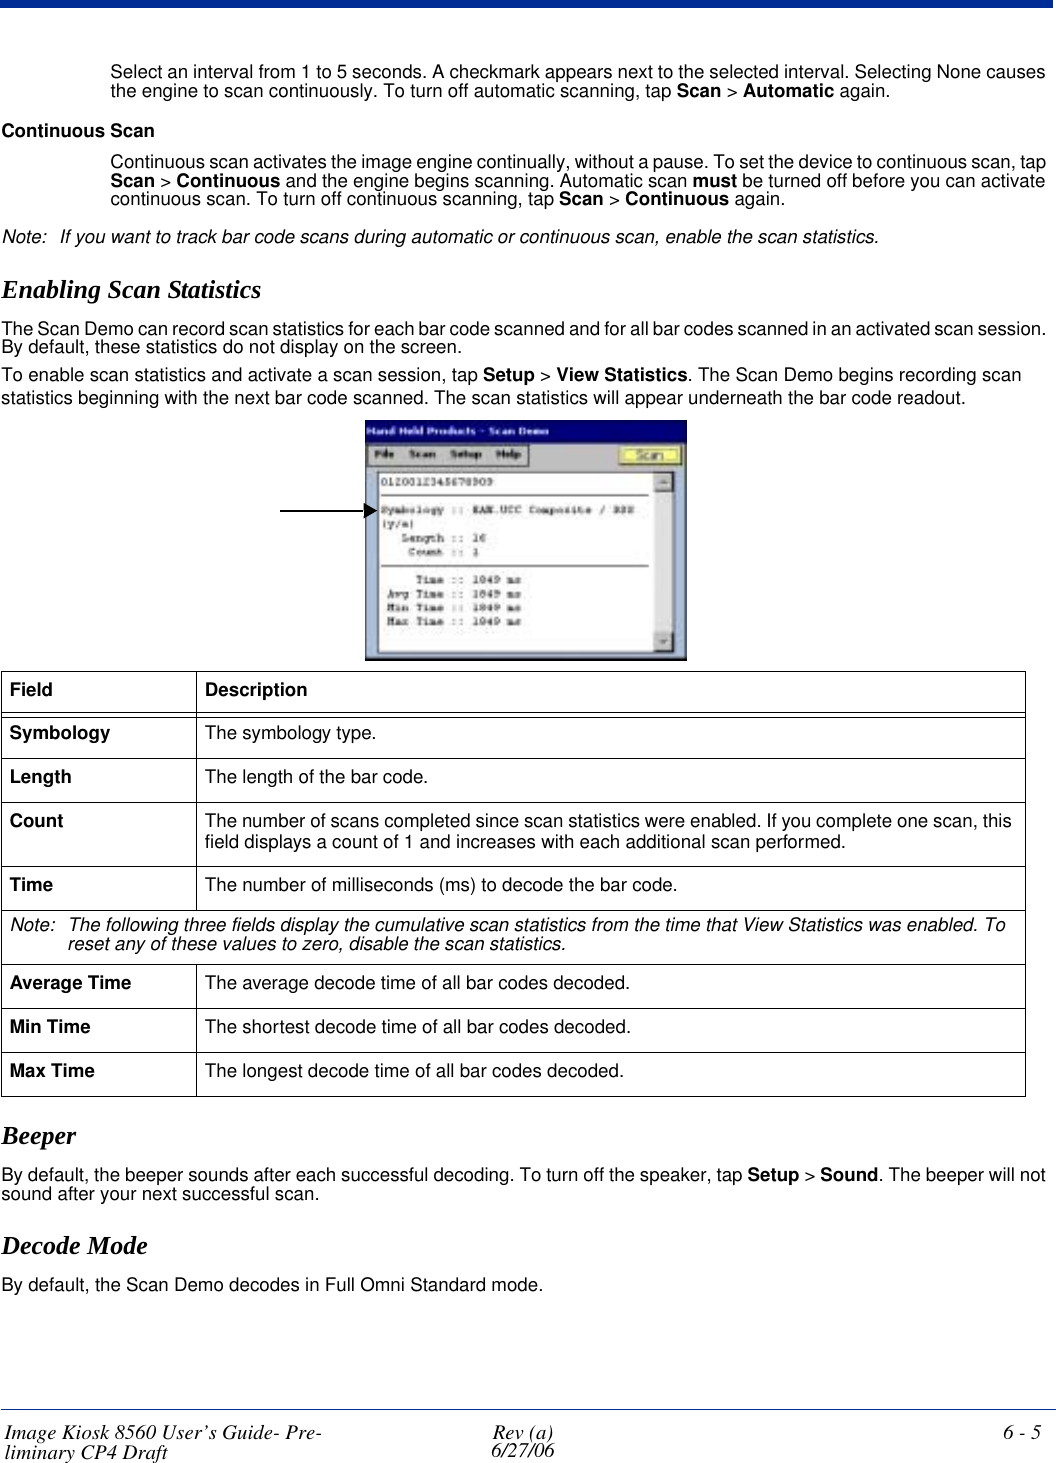
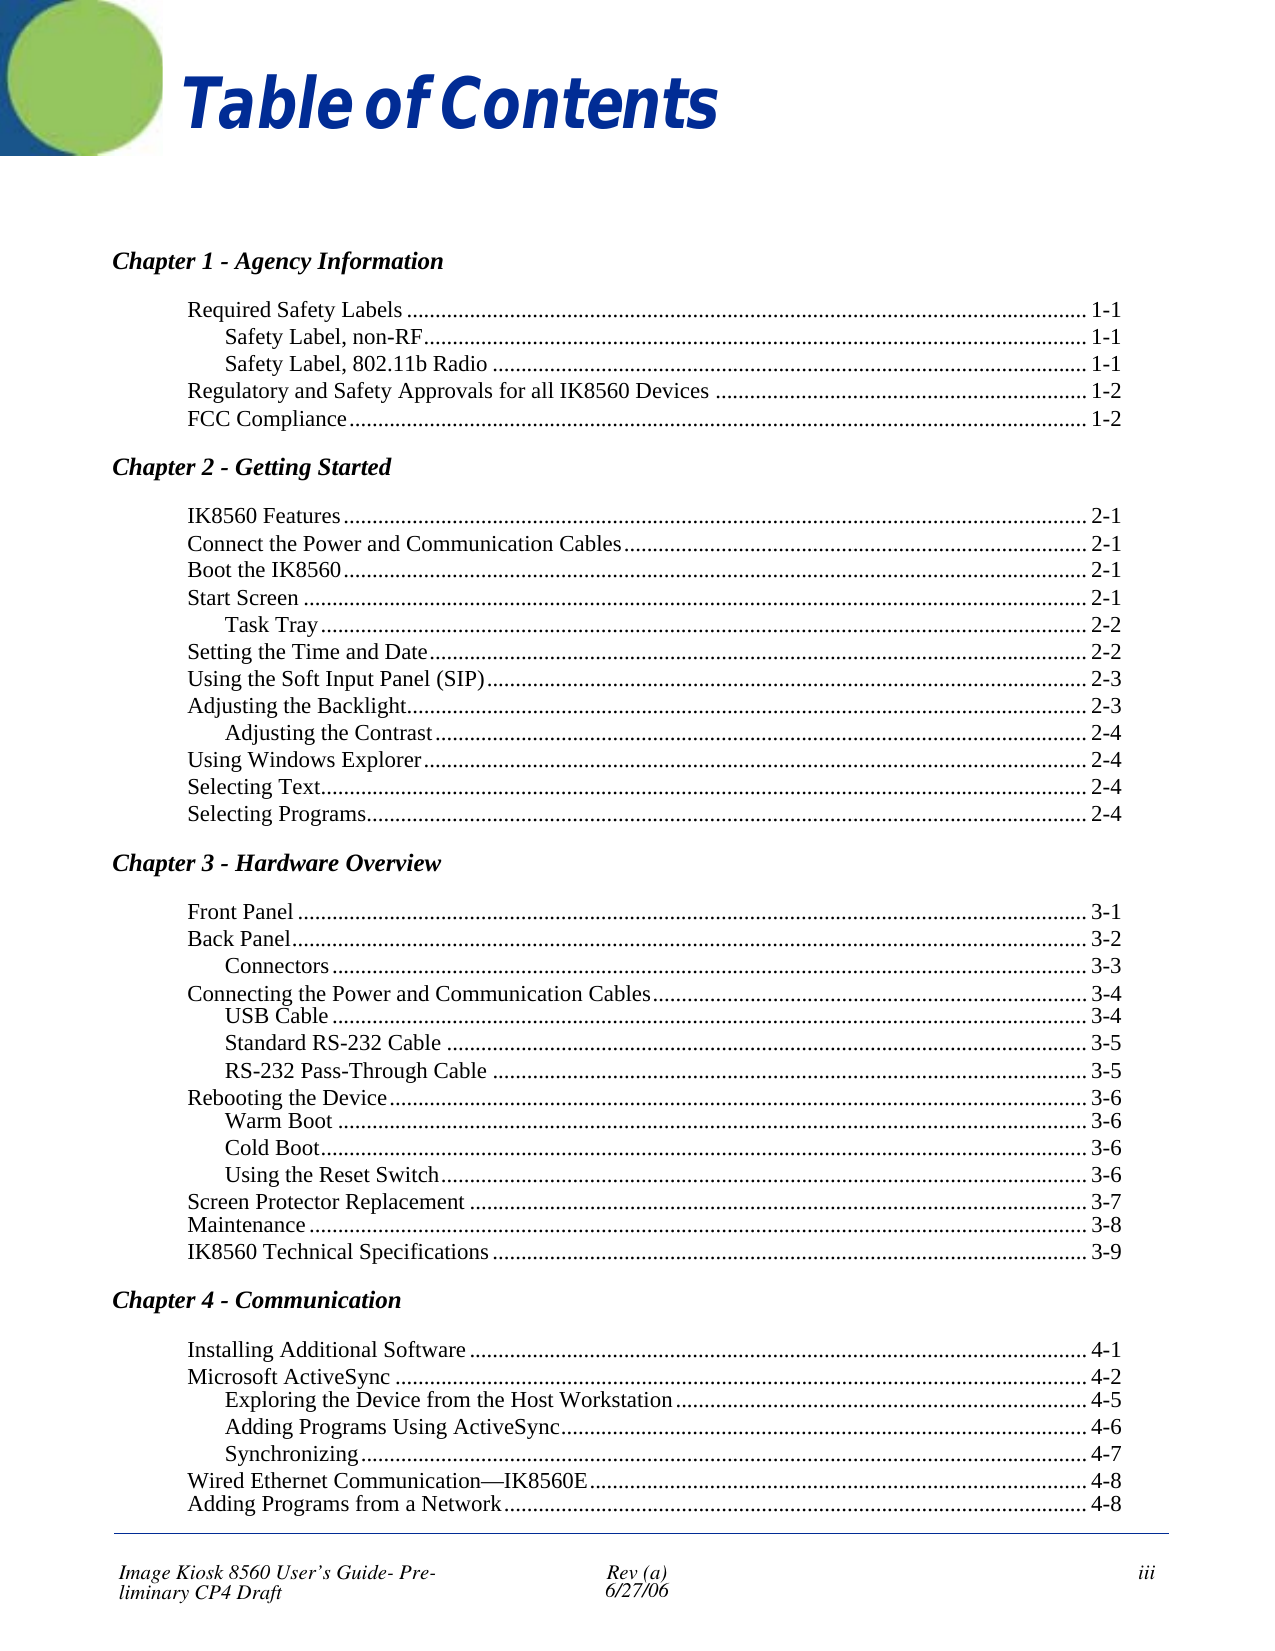
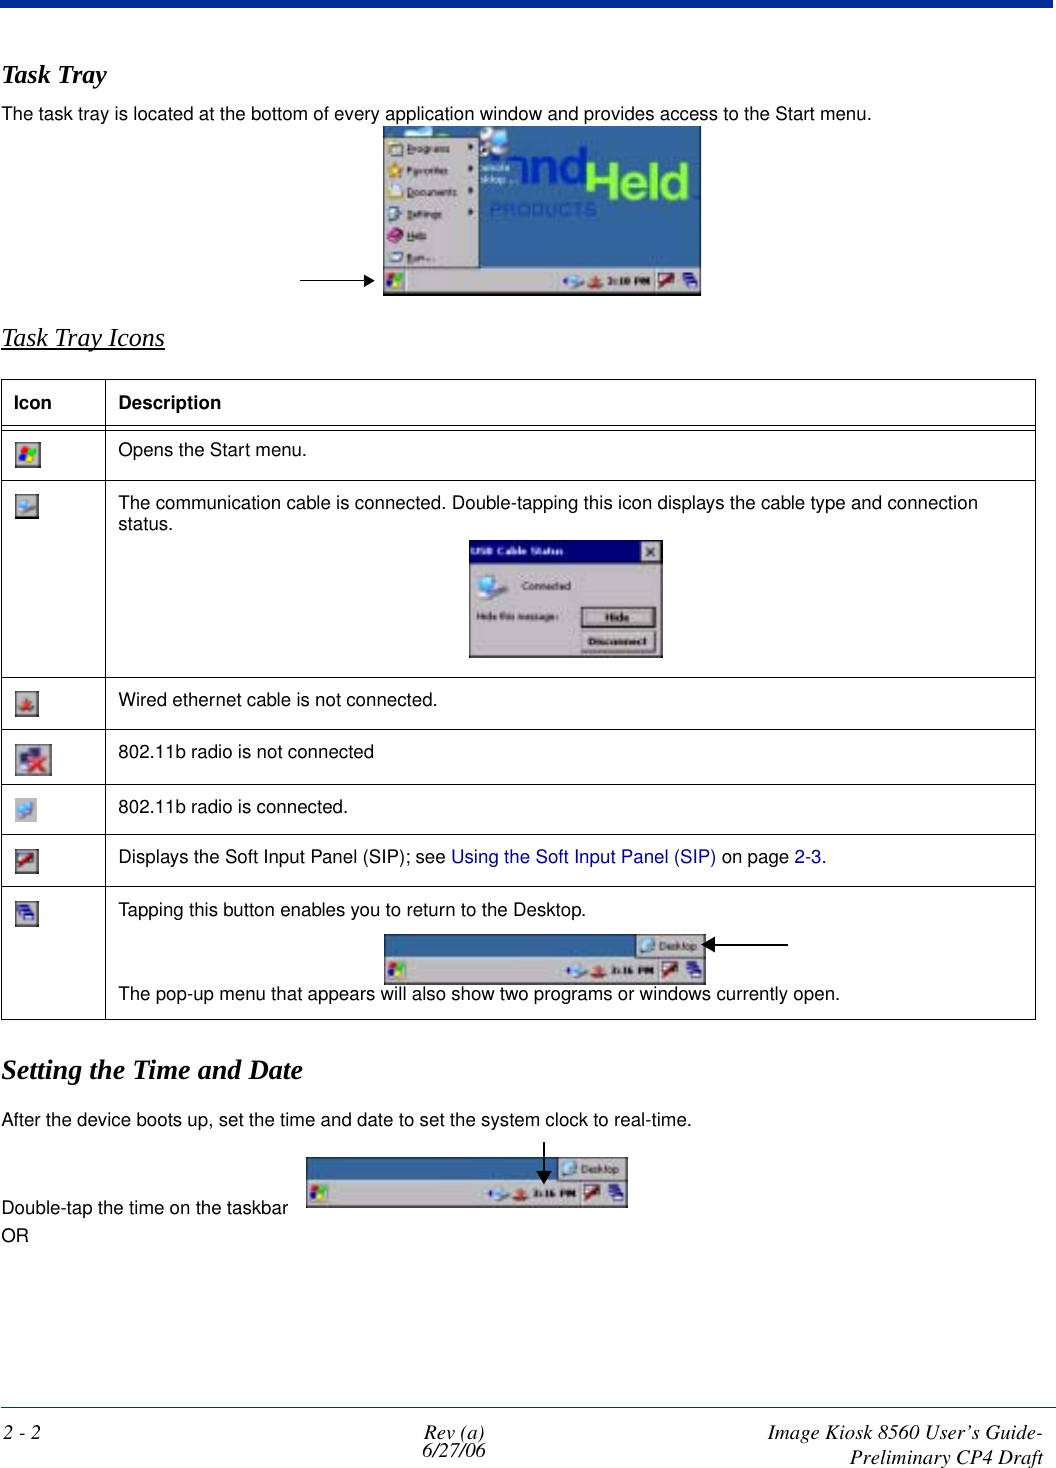
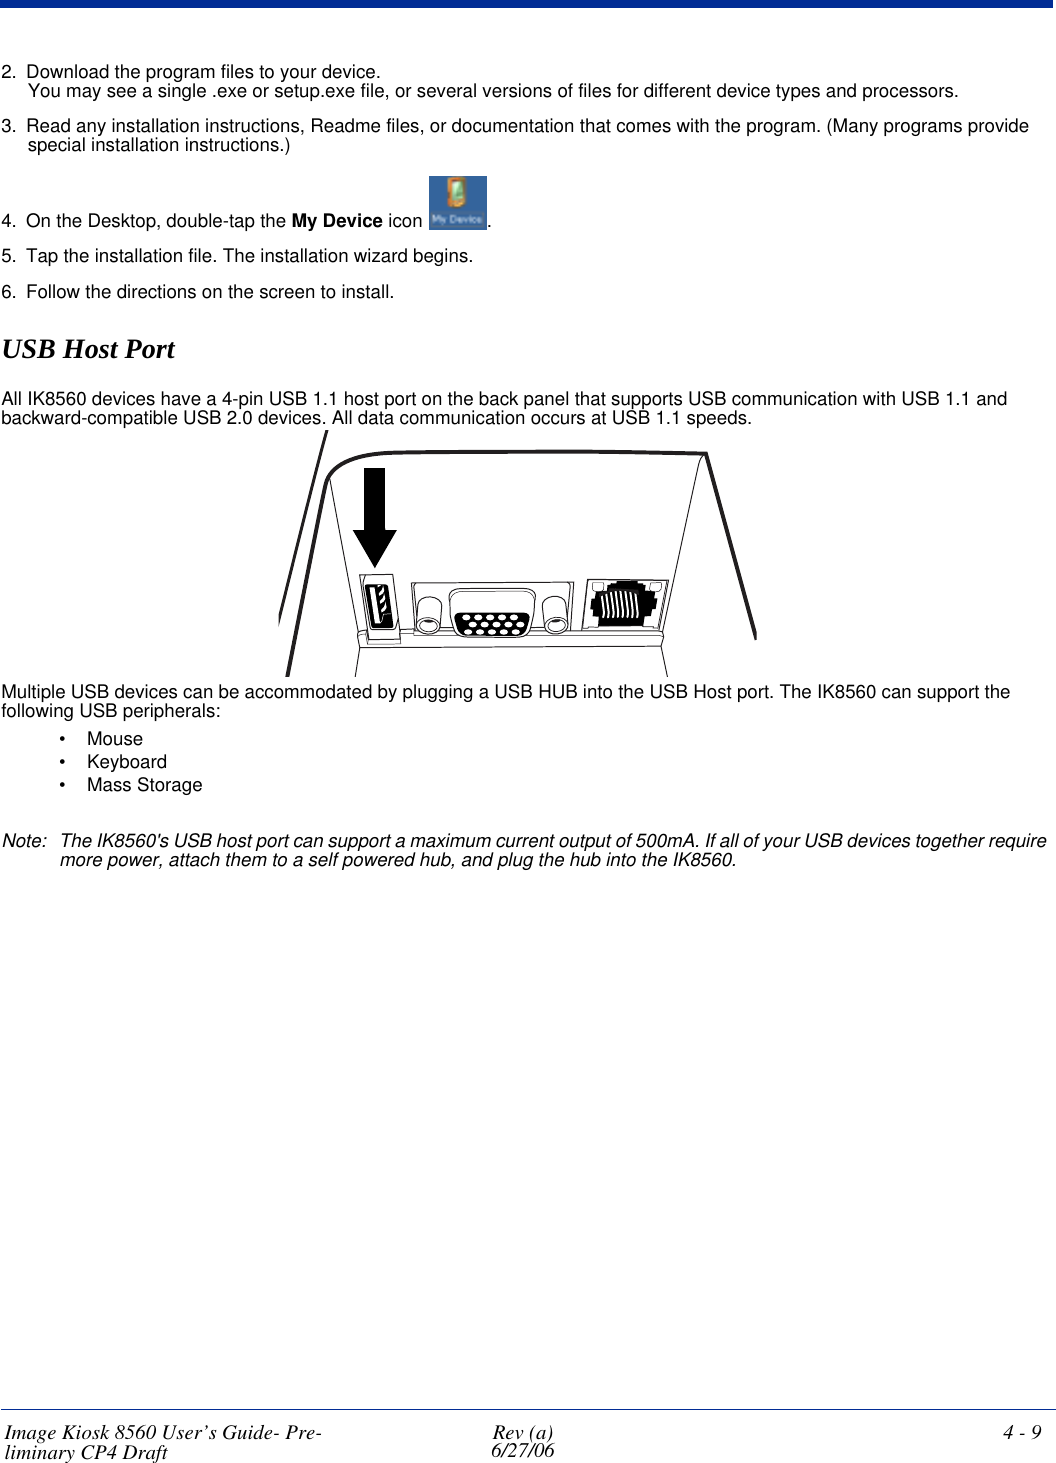
![Image Kiosk 8560 User’s Guide- Pre-liminary CP4 Draft Rev (a)6/27/06 5 - 15System TabDefine logging settings and the port manger timeout period.Field DescriptionLog Level These settings control the detail of the log messages generated by the Client. Each level is cumulative. By default, all errors, warnings, and information events are logged. Each entry records a severity code (of one [debug message] to four [error] asterisks), a time stamp, and a message.•Errors - only the most severe conditions are logged.•Warnings - less severe conditions are logged.•Information - all errors, warnings, and information events are logged. This is the default setting.•Debugging - creates a log message each time the Client detects or reacts to an event. Be advised that log entries fill memory quickly if the Debugging level is chosen. Do not use the Debugging option for a significant length of time because most internal operations generate messages.For more information, see Logging on page 5-15.Defaults button Tap this button to return log settings to the default settings.Scan List Timeout The time interval at which the Client polls the ports. This value should not be changed from the 10-second default unless technical support advises you to do so.Save Credentials for (min) The amount of time the Client saves credentials.Disable Wireless Zero Config Use this option only as directed by technical support.Selecting this option disables other wireless utilities whether the Client is running or not. If not selected, other wireless utilities cannot apply their settings to the wireless card while the Client is running (although their status displays are usually unaffected). You need to do a RegBackup and then power cycle the device whenever this setting is changed.LoggingThe event log is an ASCII text file named “LOG8021X.TXT” located in the directory defined by the WINDIR environment variable (usually the Windows directory). In the text file, the format of the entries is: Time StampMessage TextNote: To see an event log on the screen, tap View > Event Log (see page 5-11). If you wish to start with a blank file or clear the event log, close the Client (so that the icon no longer appears in the command bar) and delete the log file (log8021x) in WIndows Explorer. When you restart the Client, a new log file is created.](https://usermanual.wiki/Honeywell/85606065/User-Guide-681967-Page-47.png)