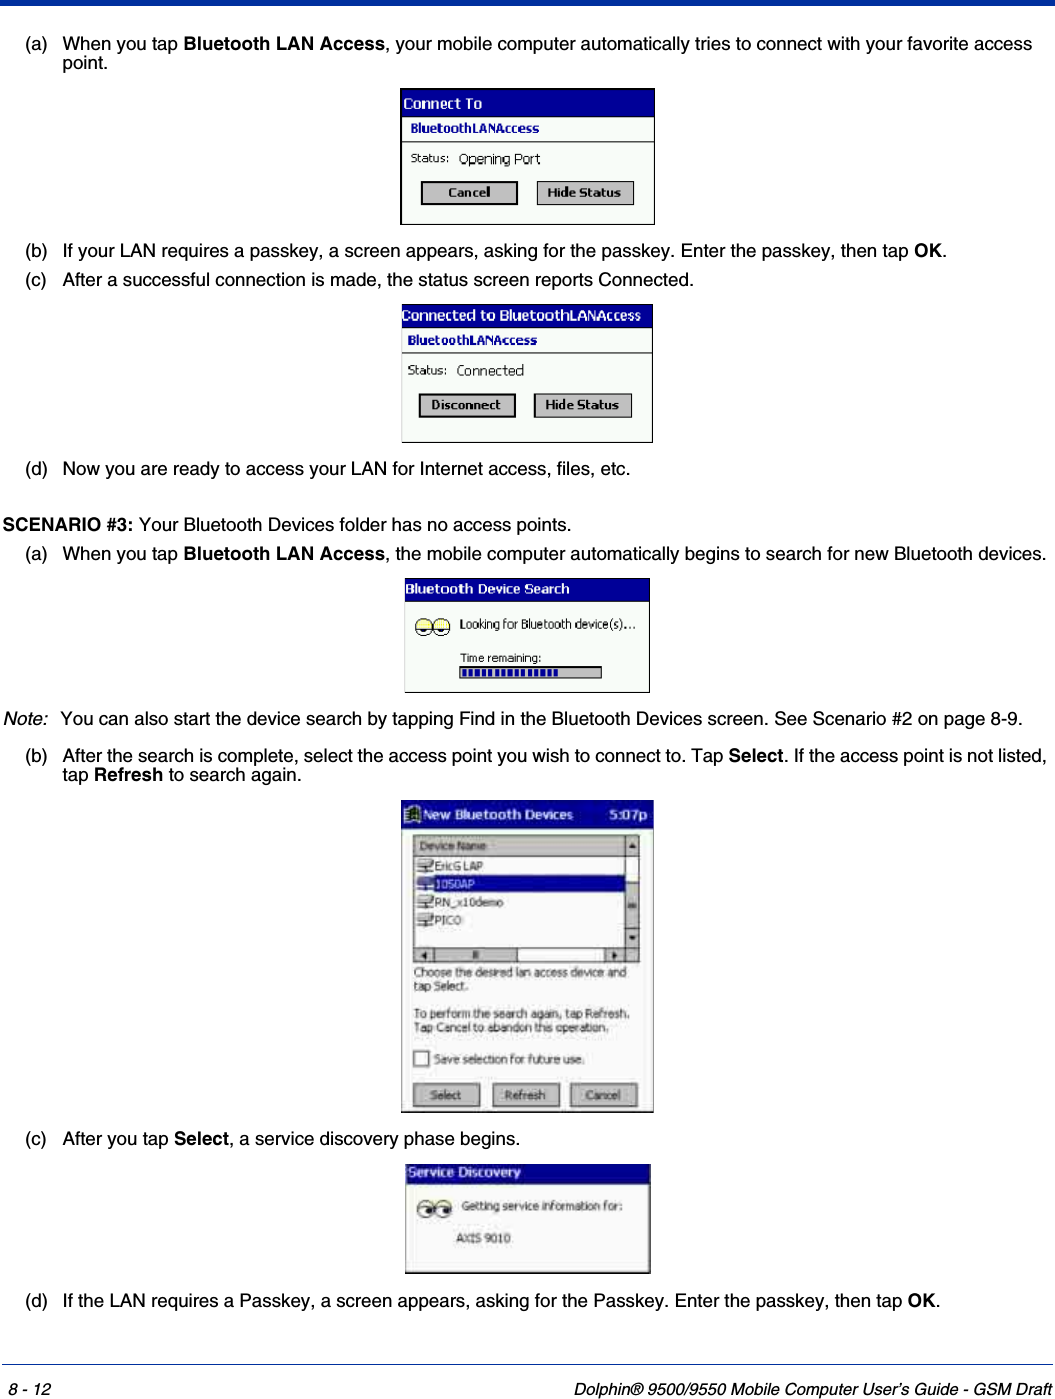
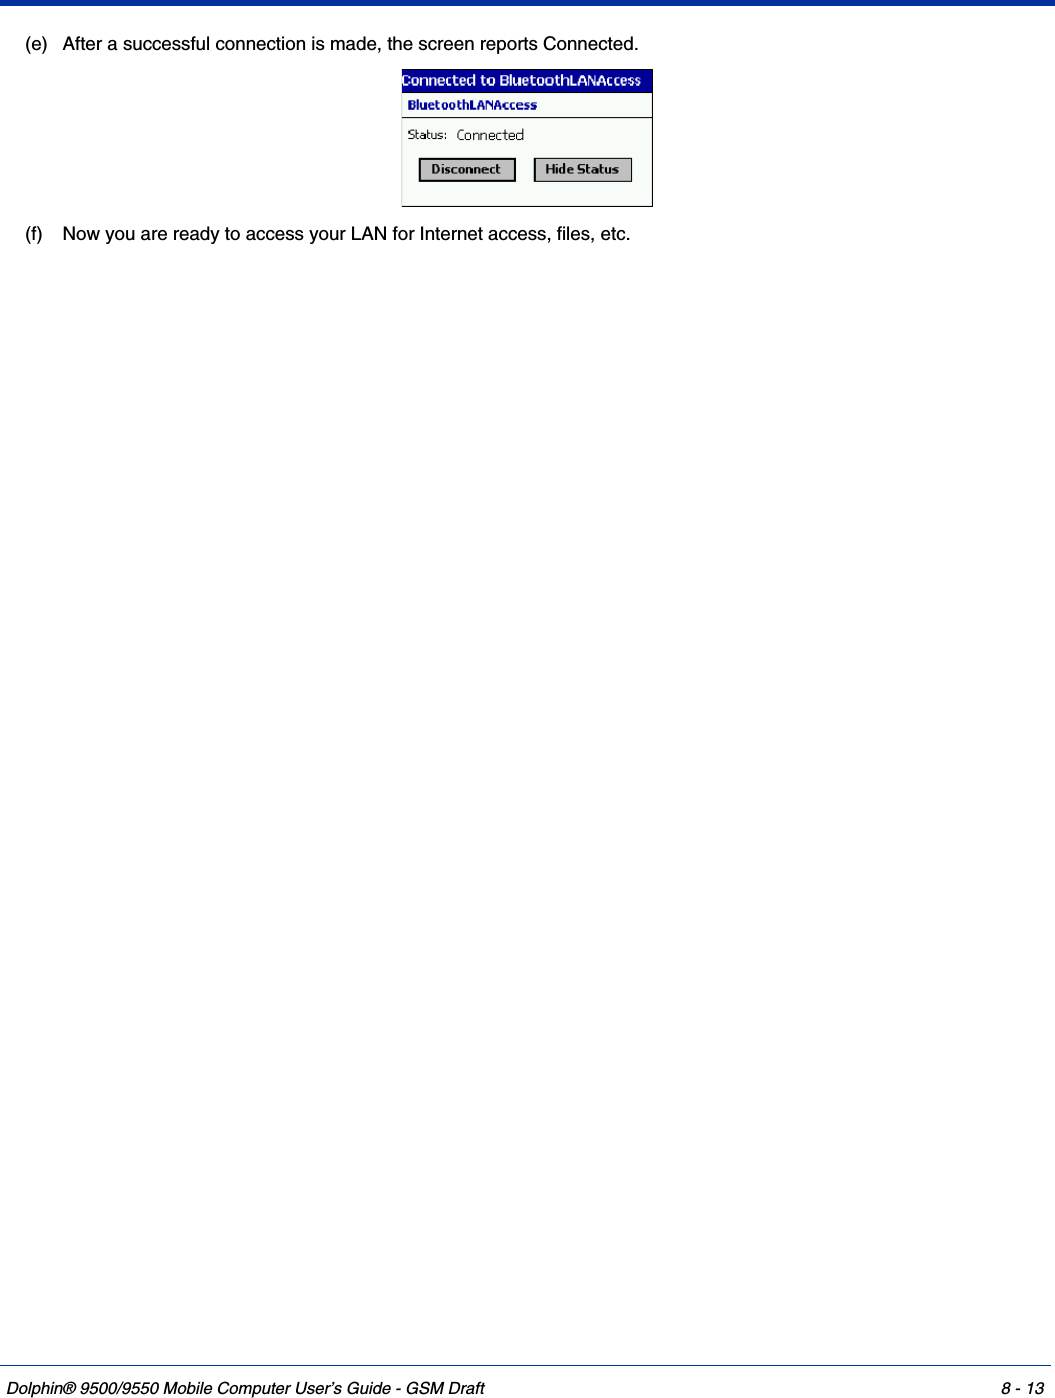
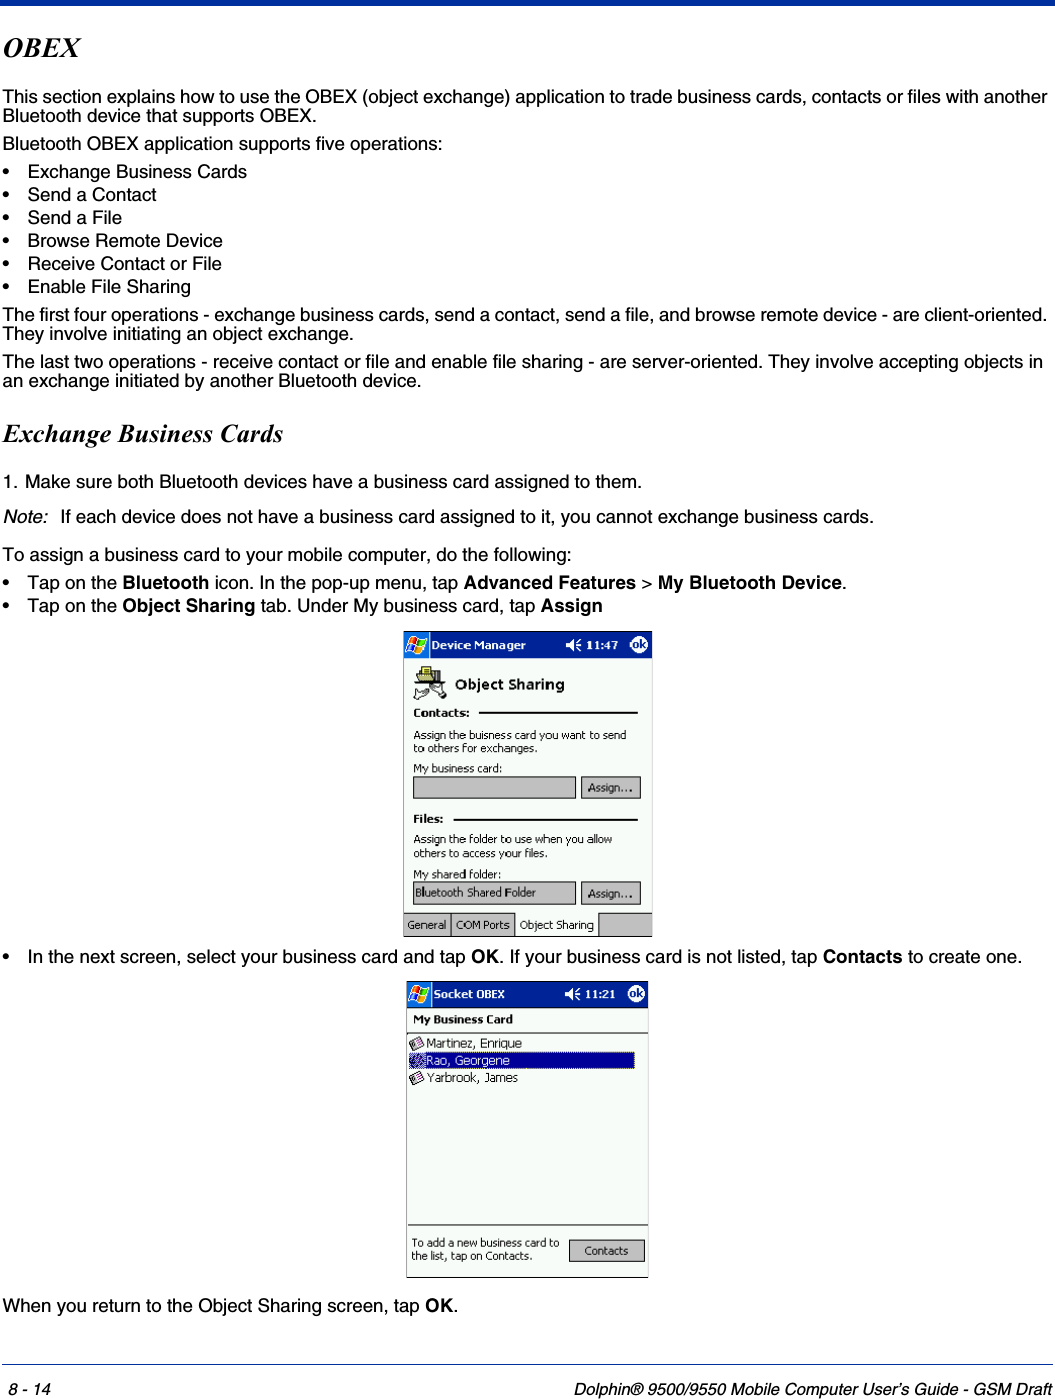
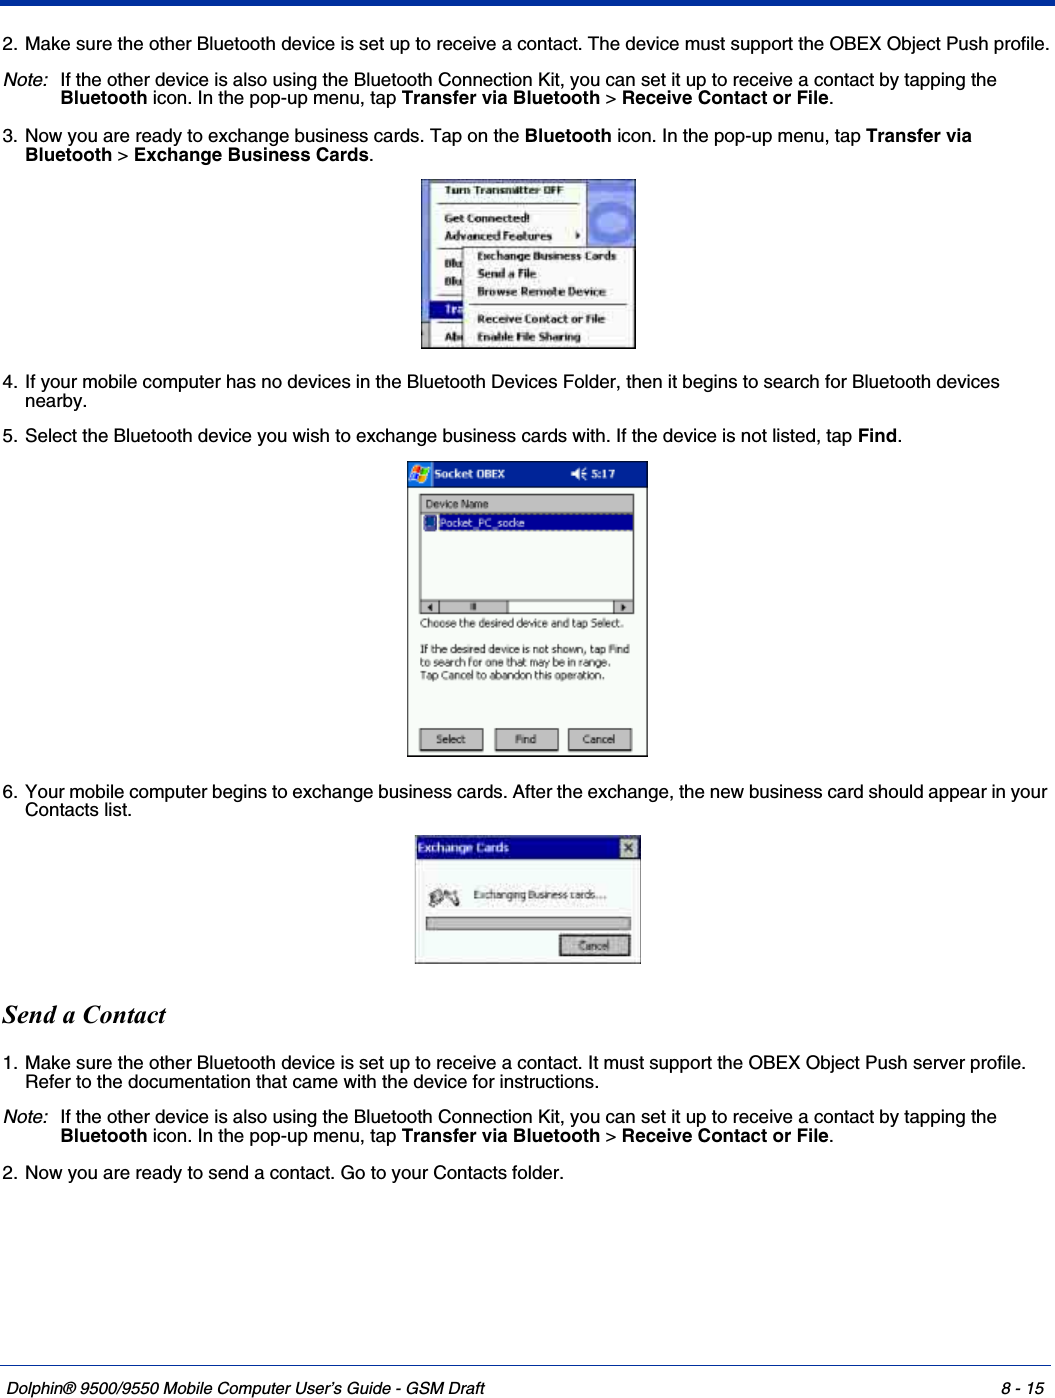
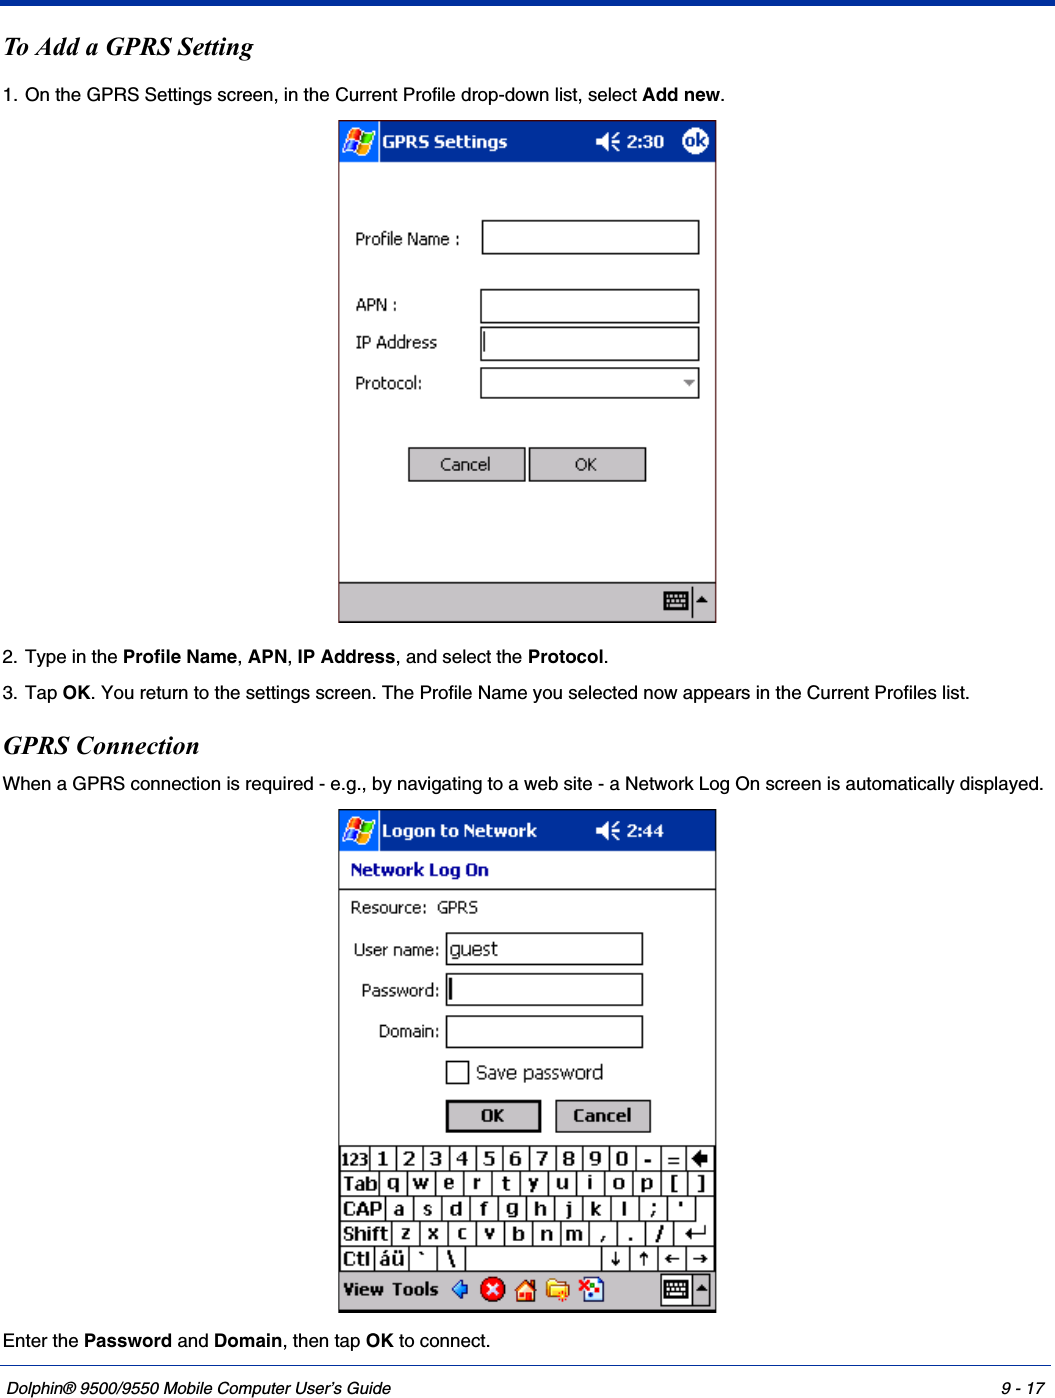
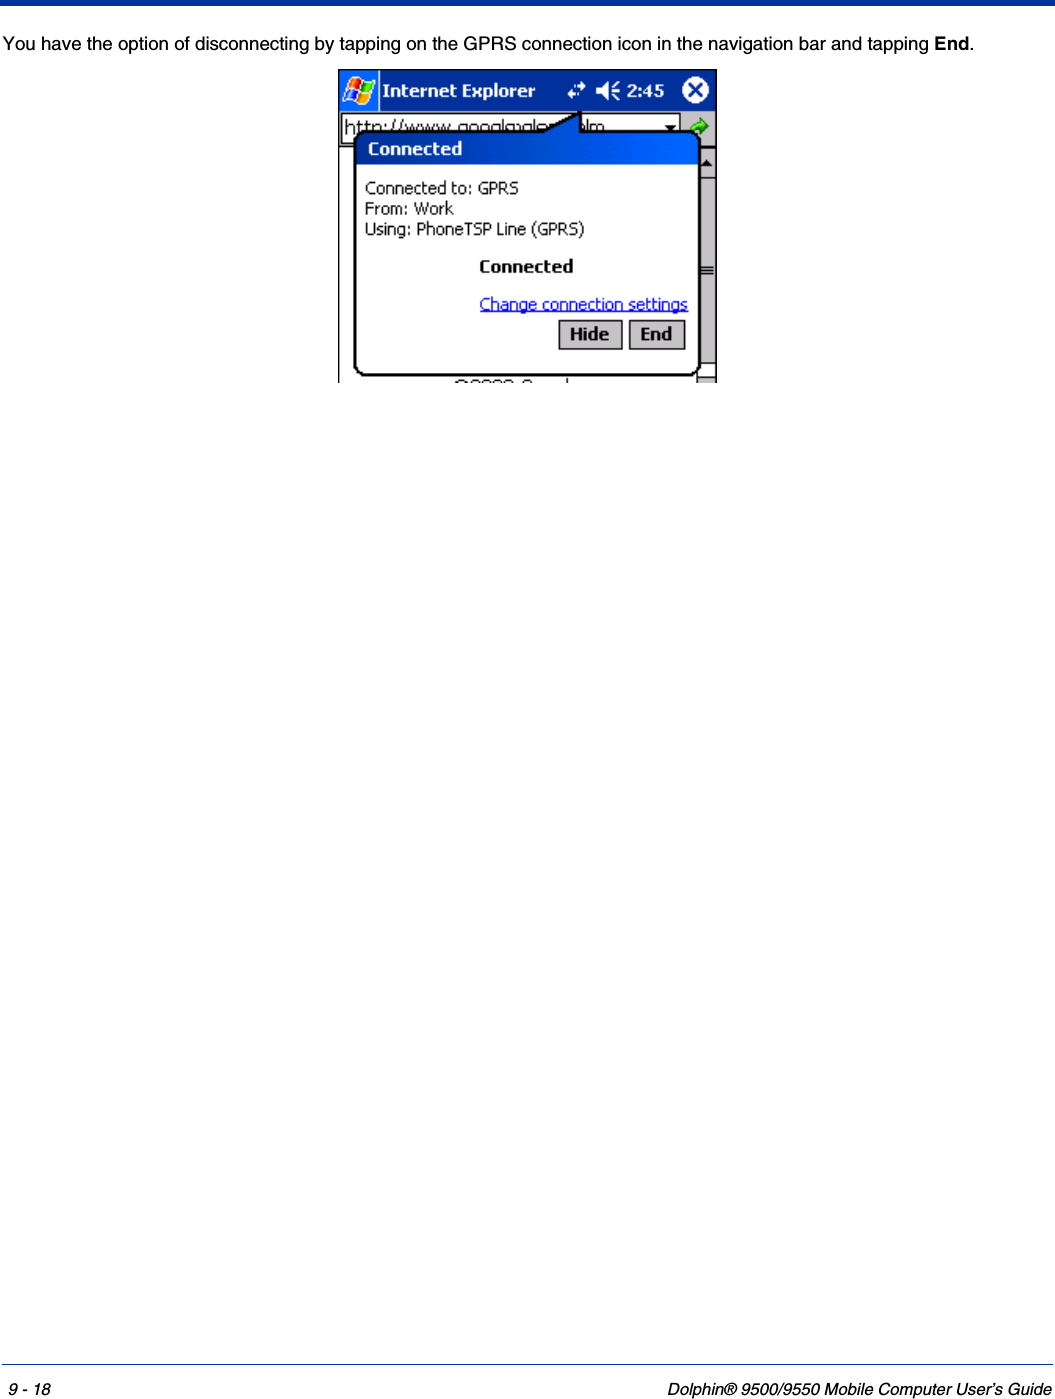
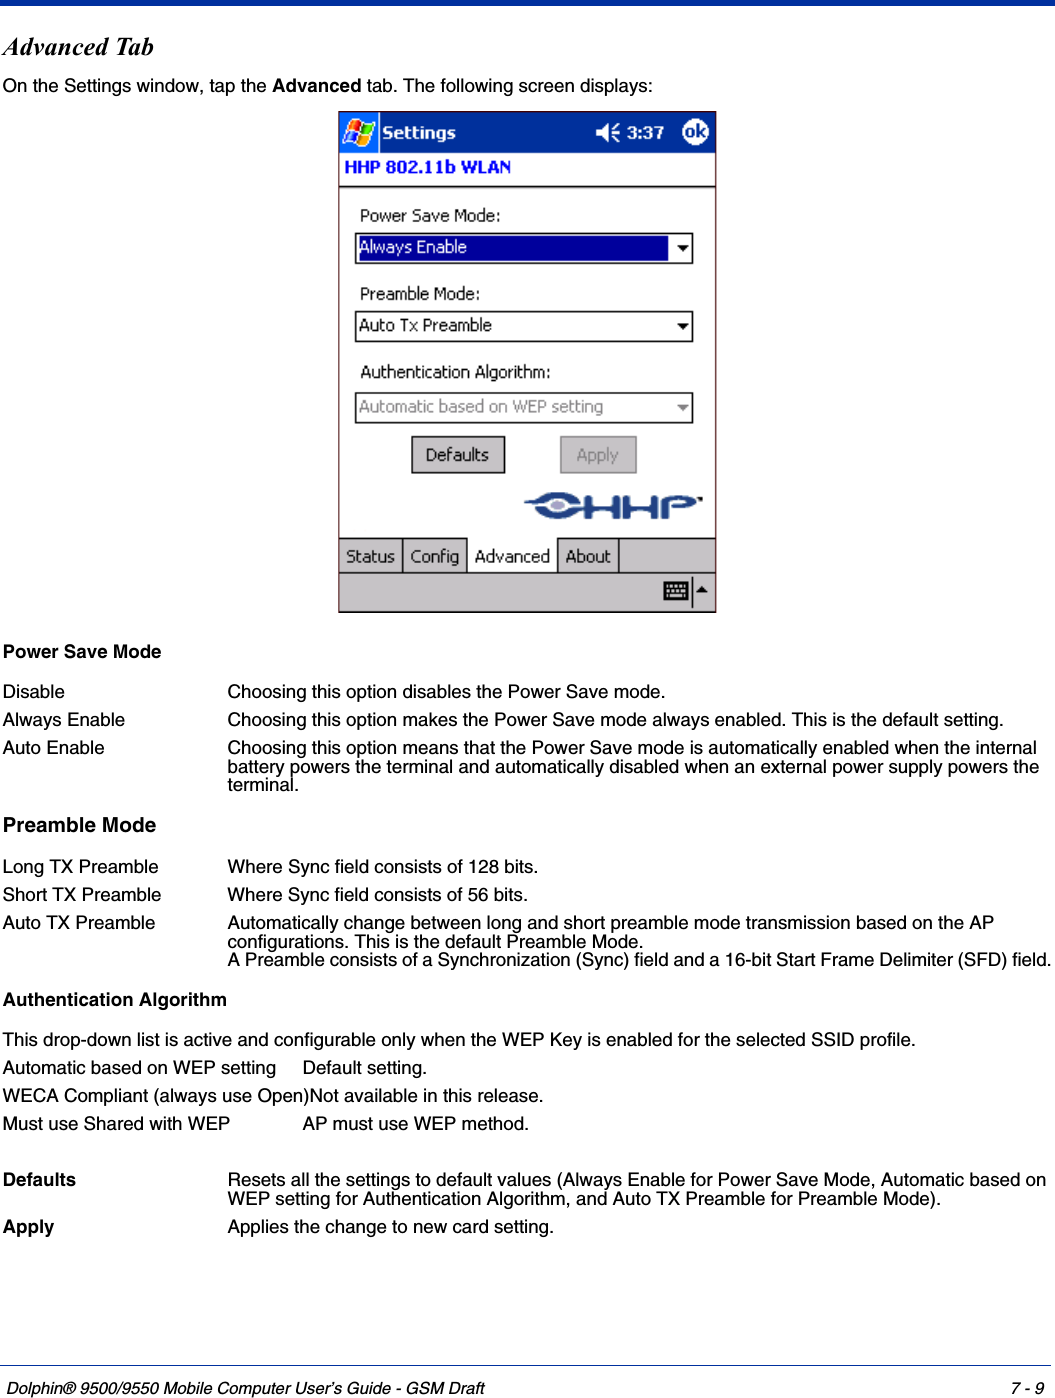
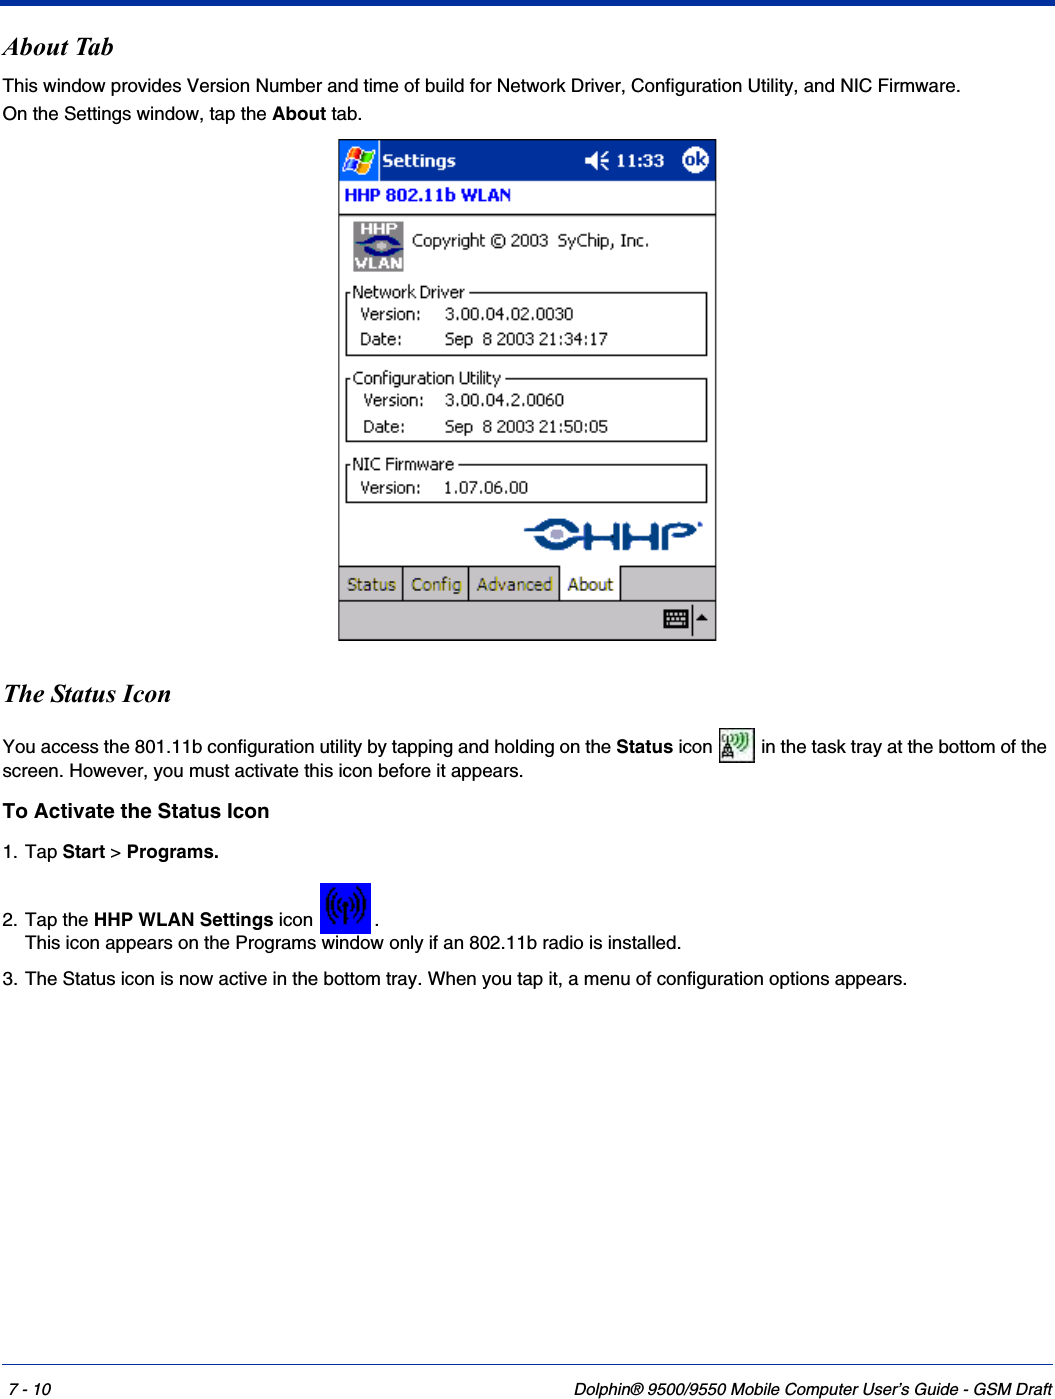
Honeywell 950009 Handheld computer with 3 radios User Manual 95XX UG
Honeywell International Inc Handheld computer with 3 radios 95XX UG
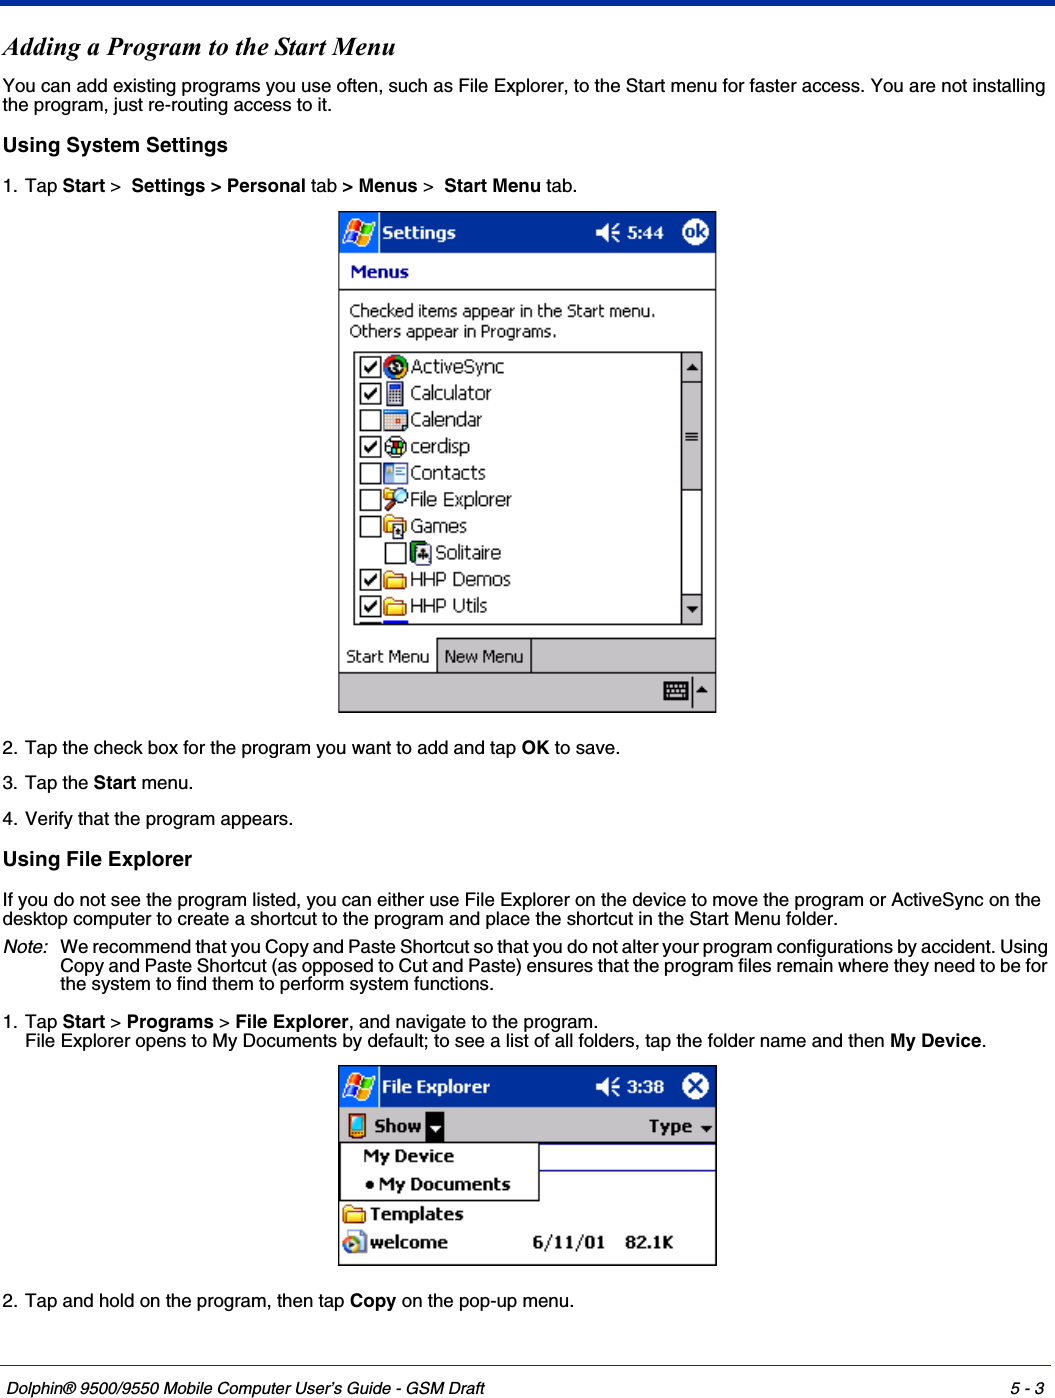
UserManual.wiki
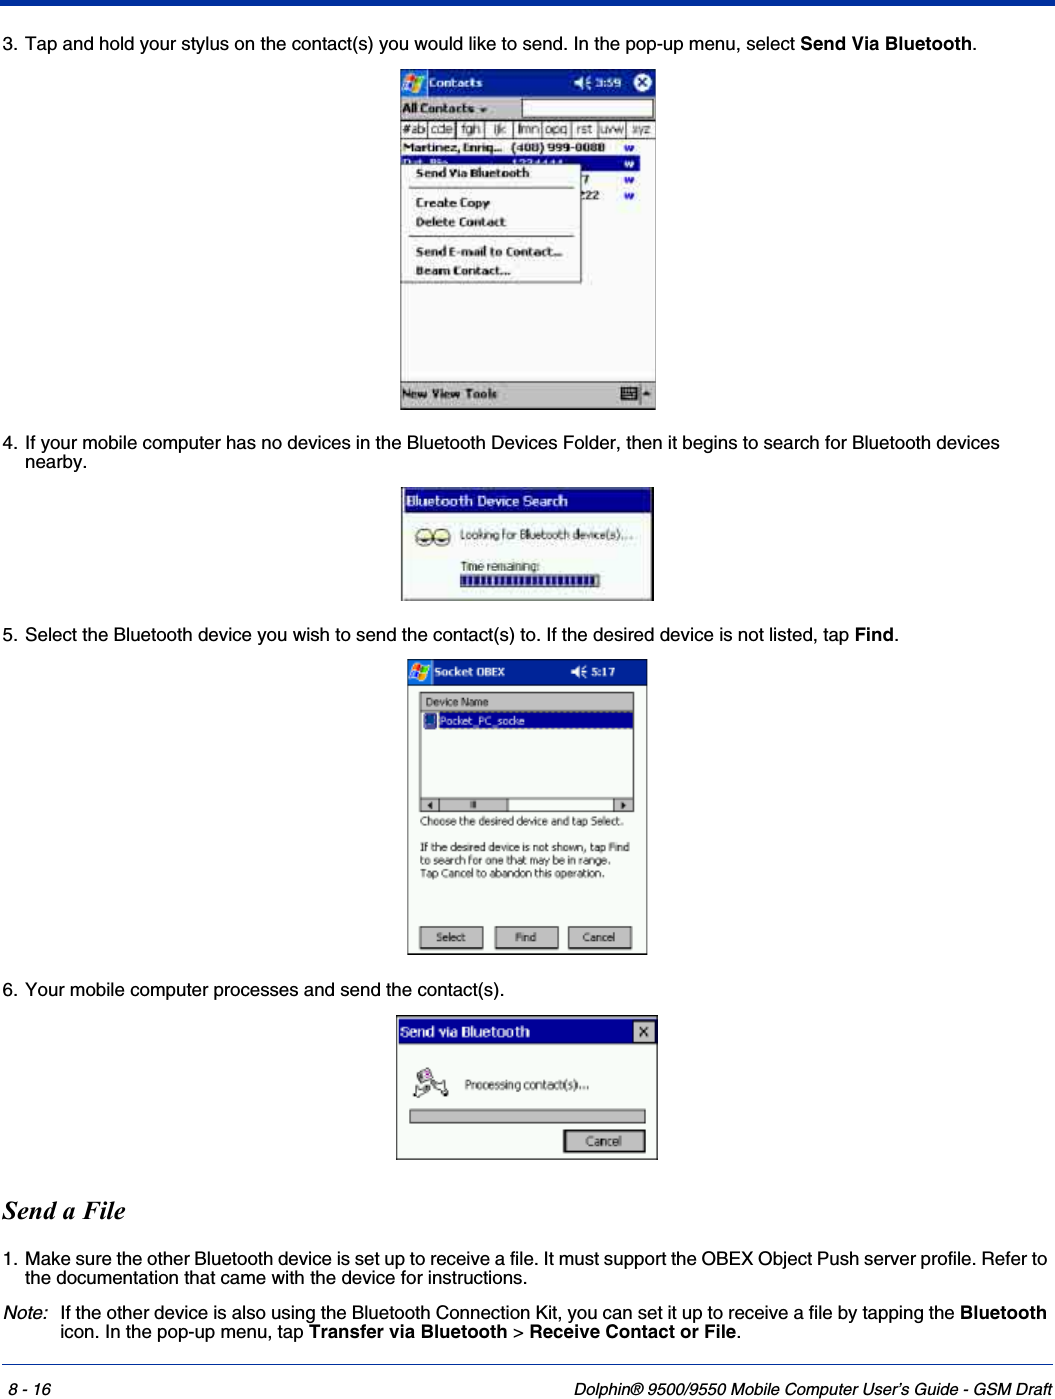
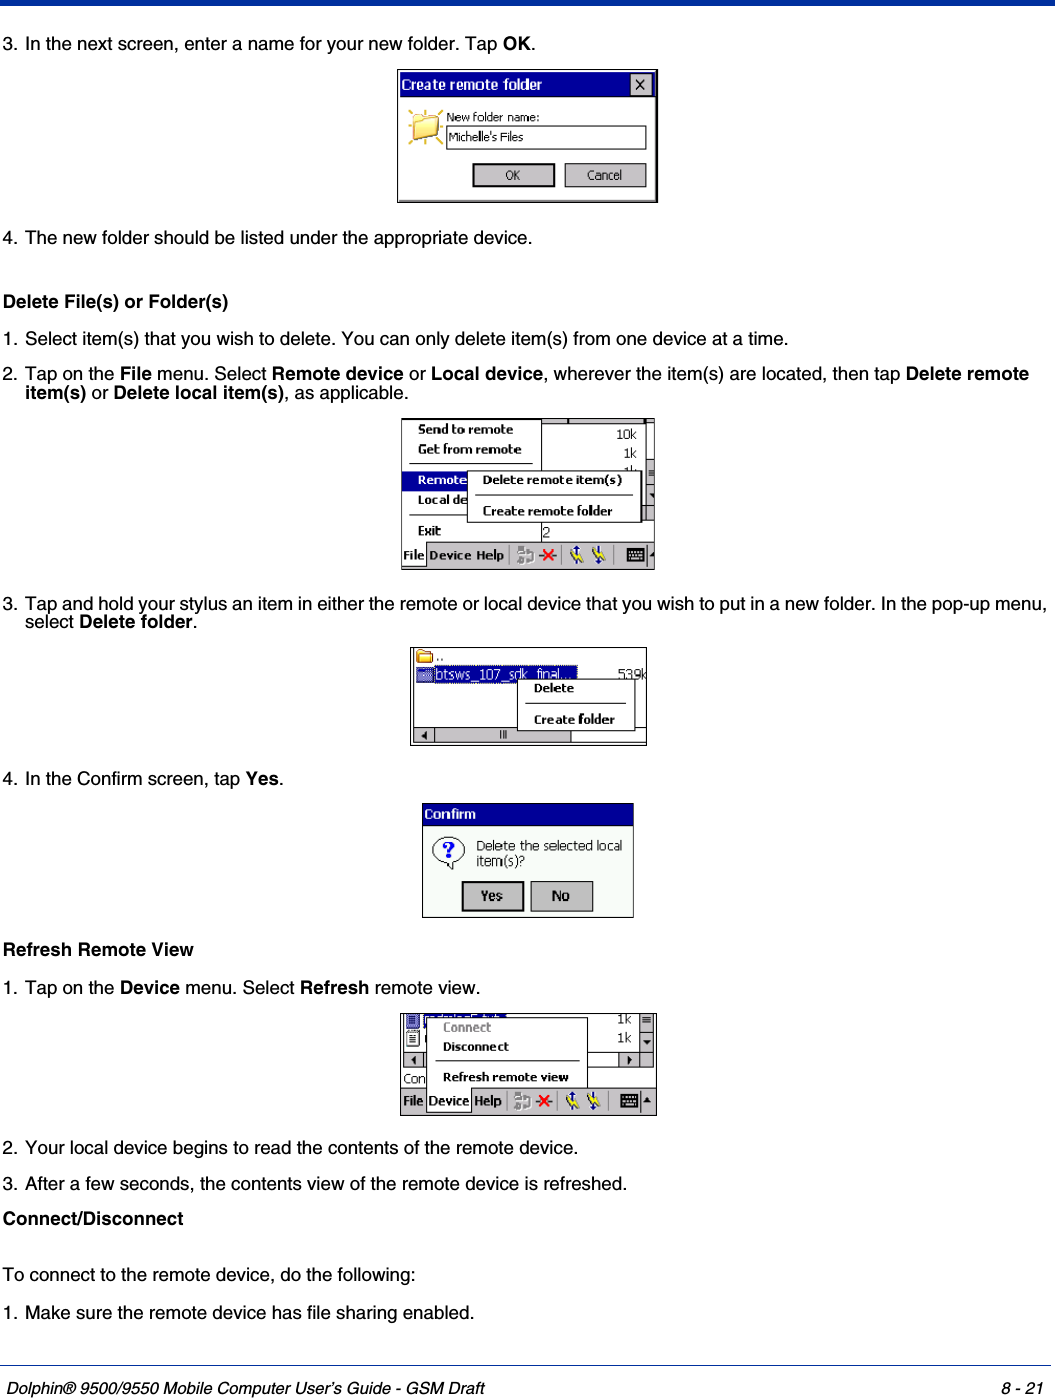
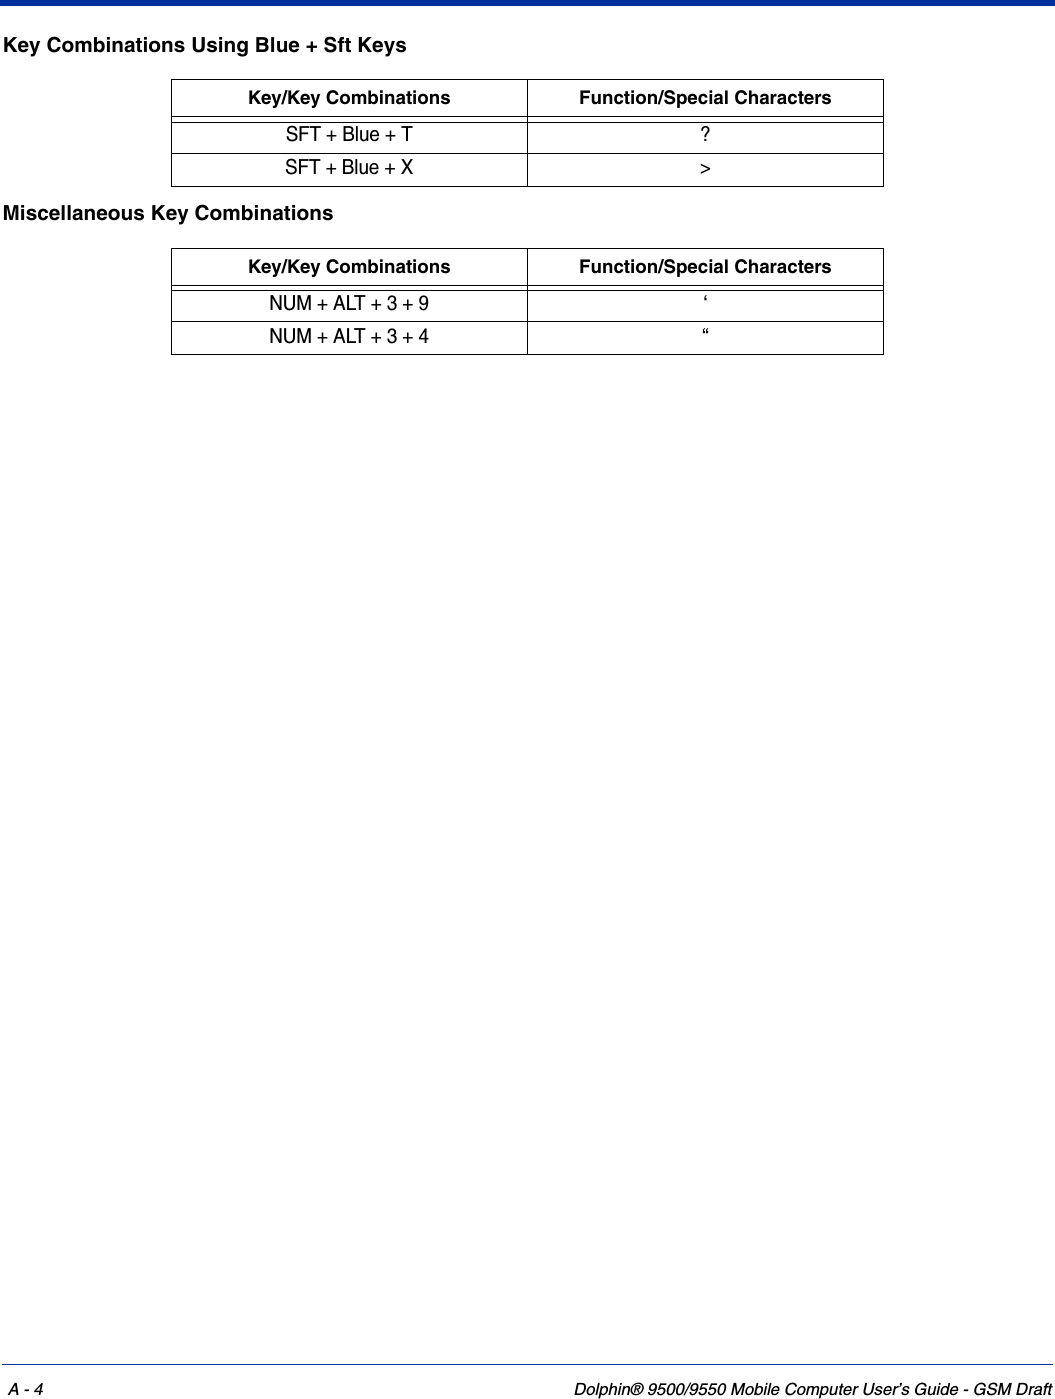
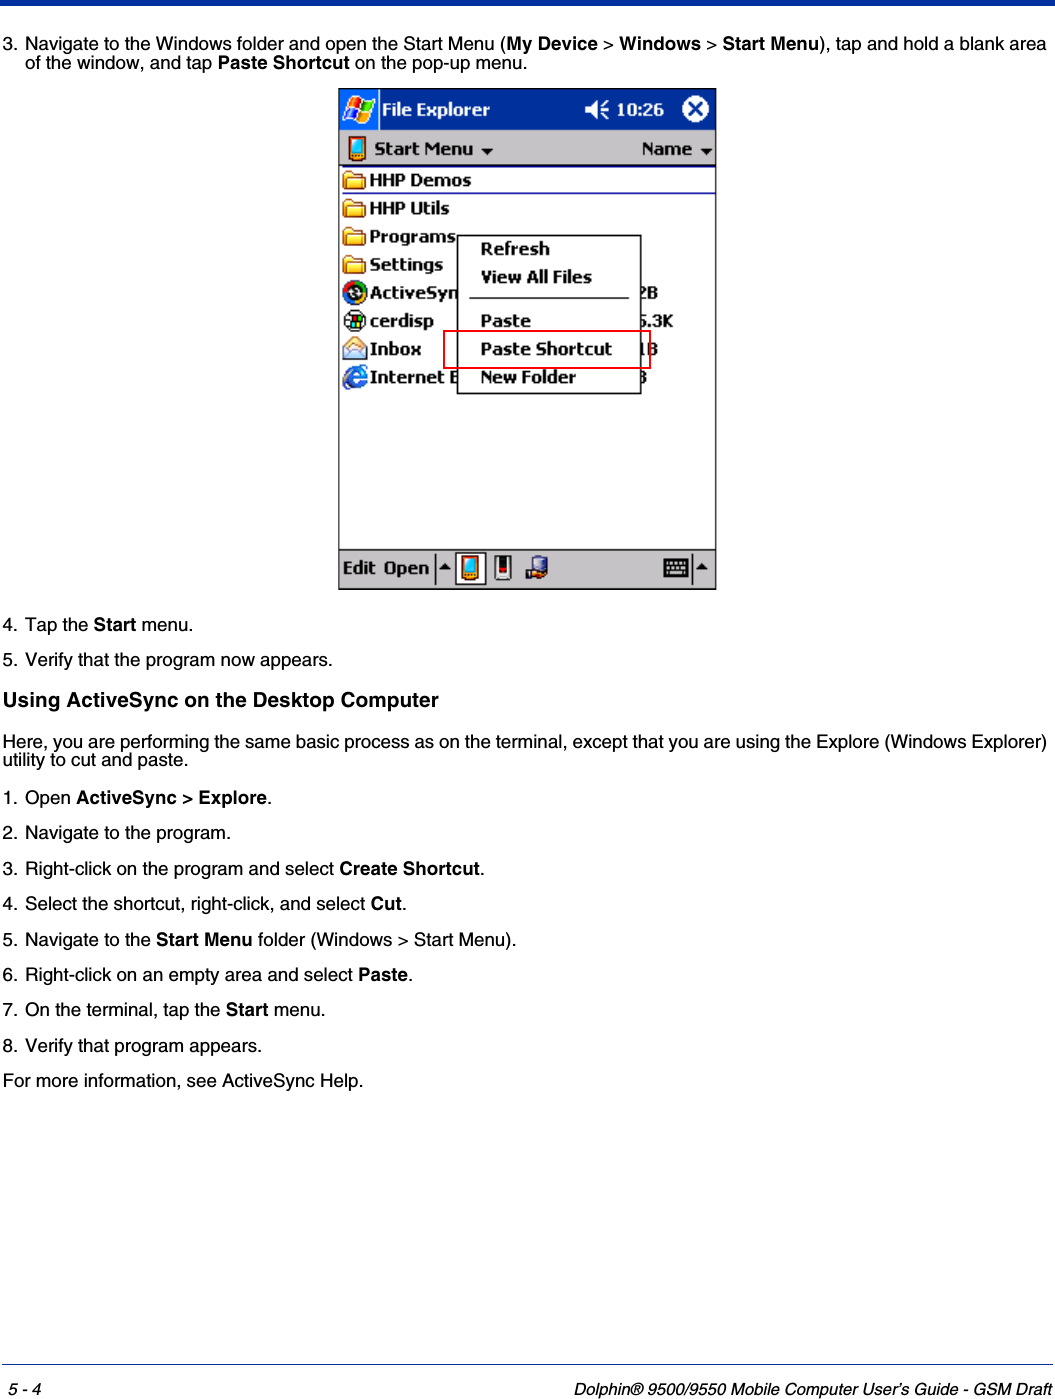
>
Honeywell
>
950009 User Manual
User Manual
Navigation menu
Upload a User Manual
Namespaces
Wiki Guide
HTML
PDF
Info
Views
User Manual
Discussion / Help
Navigation


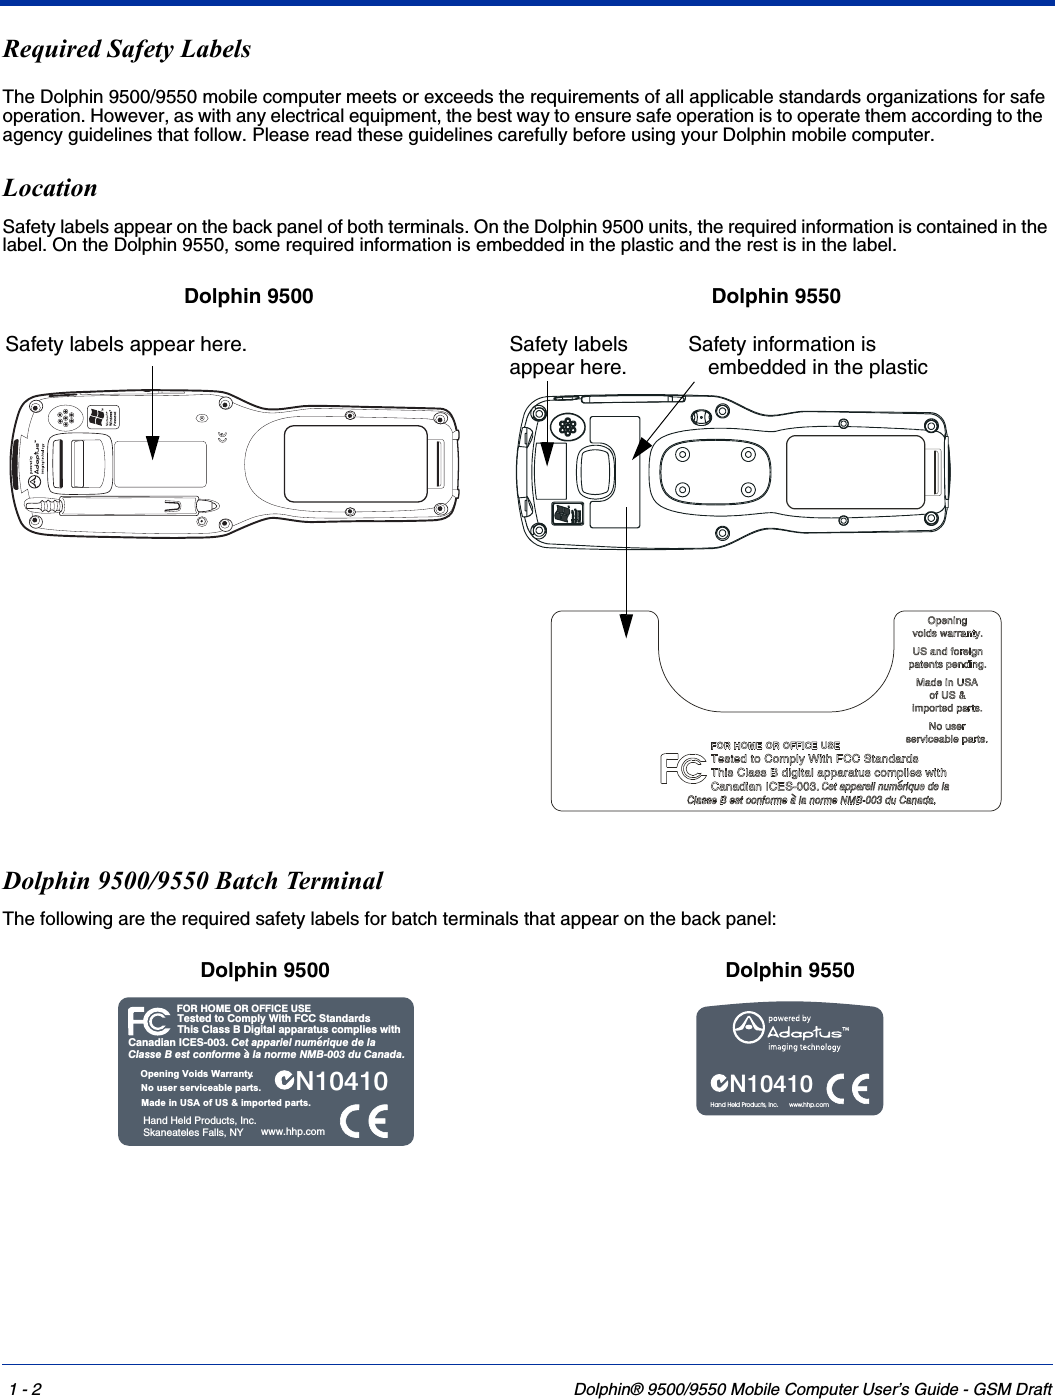


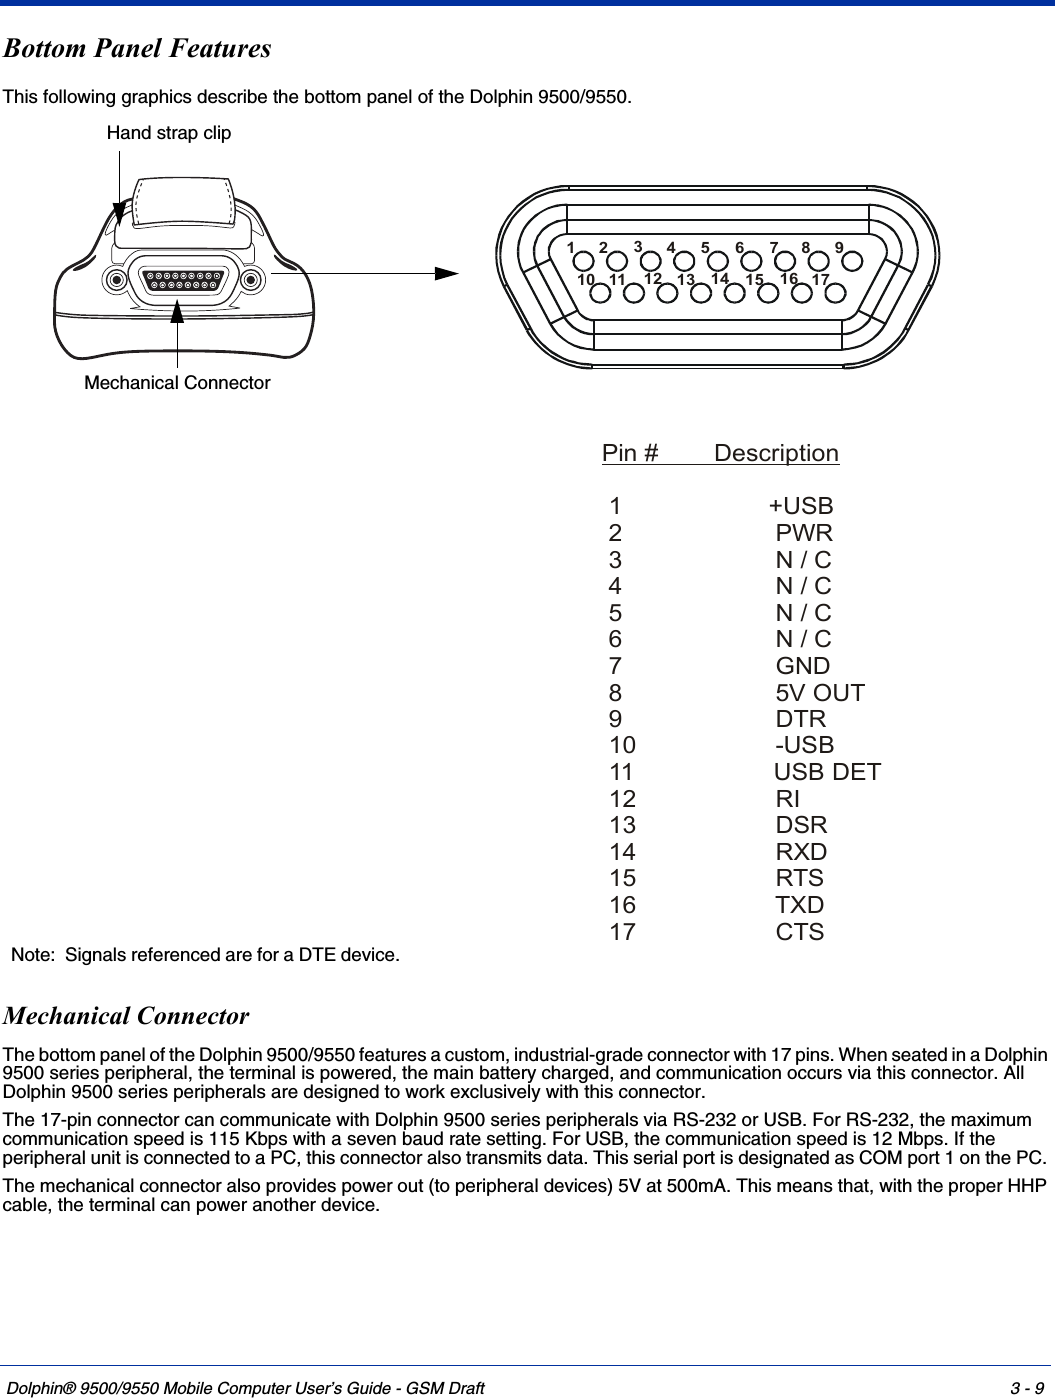
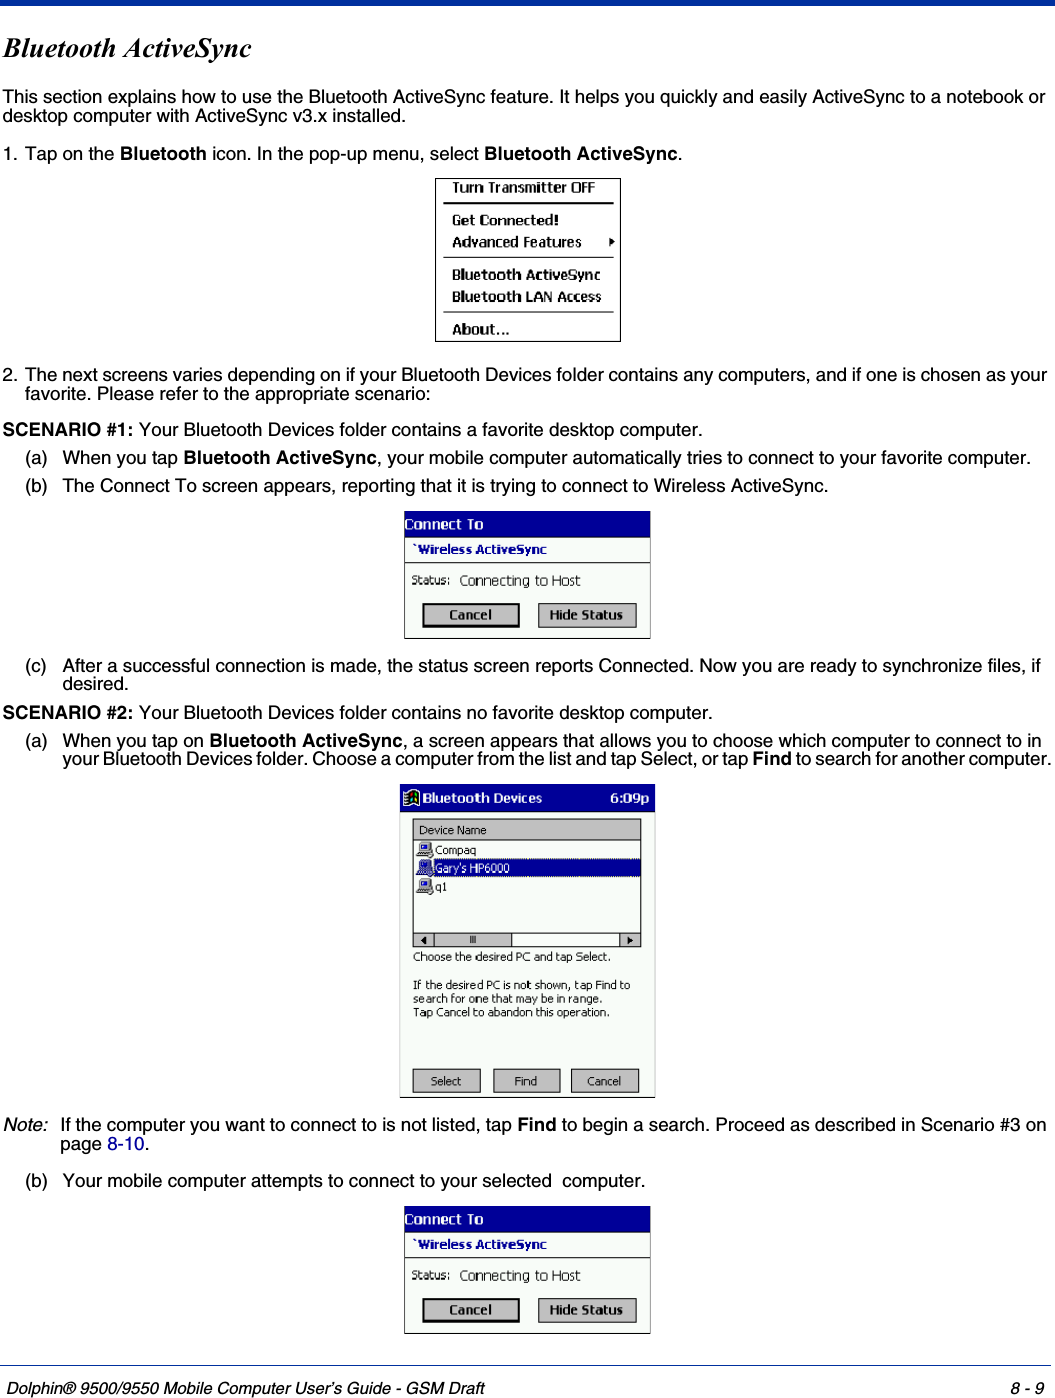
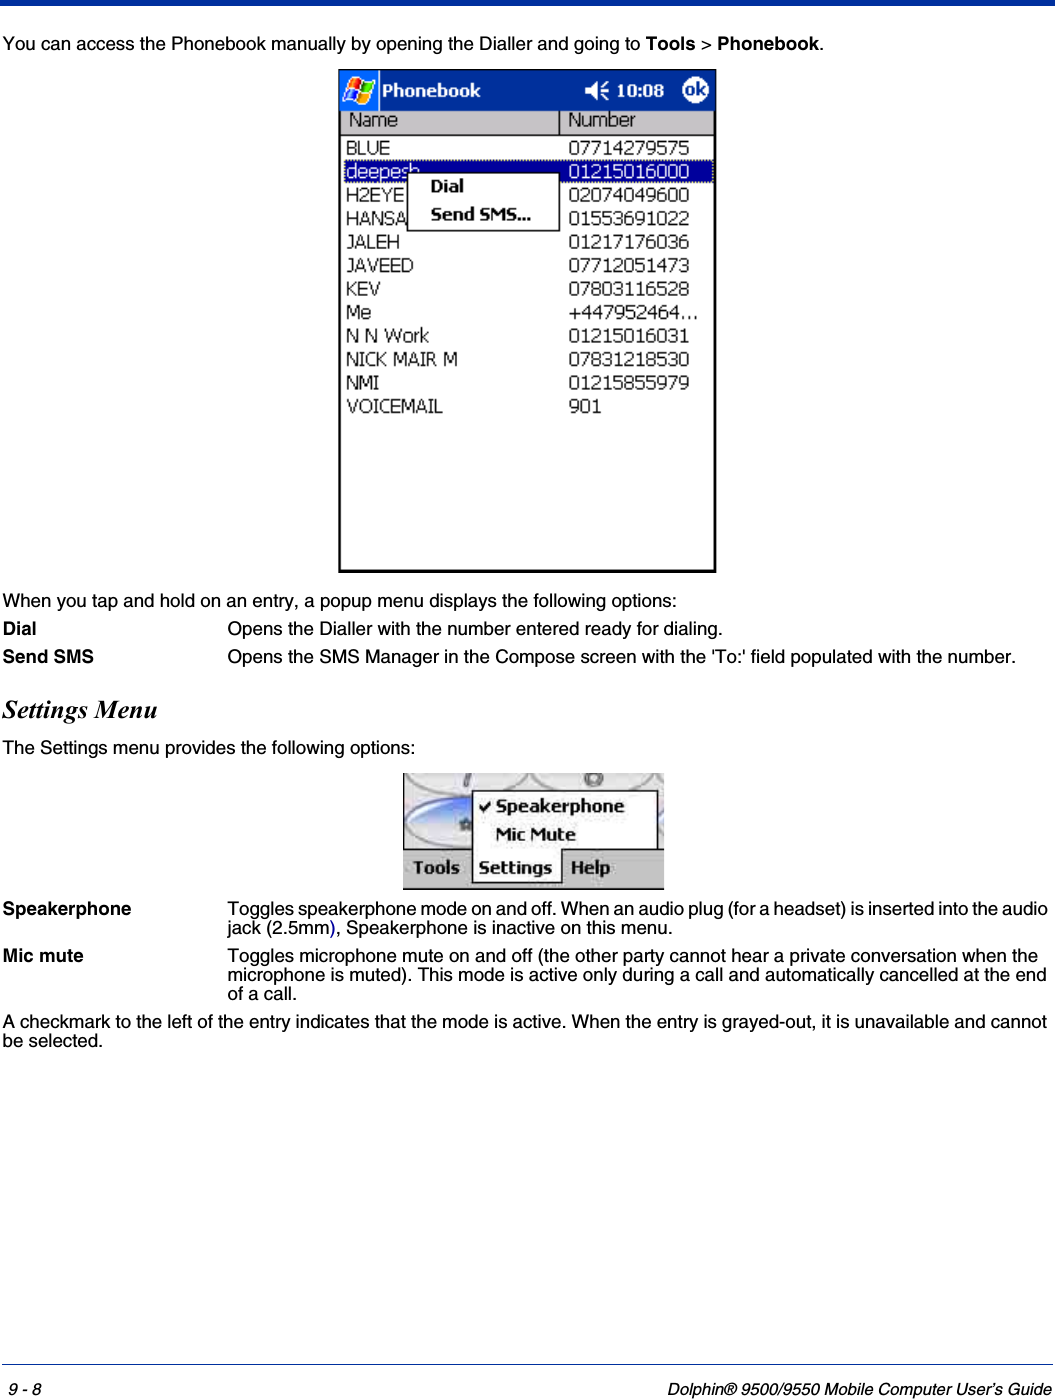
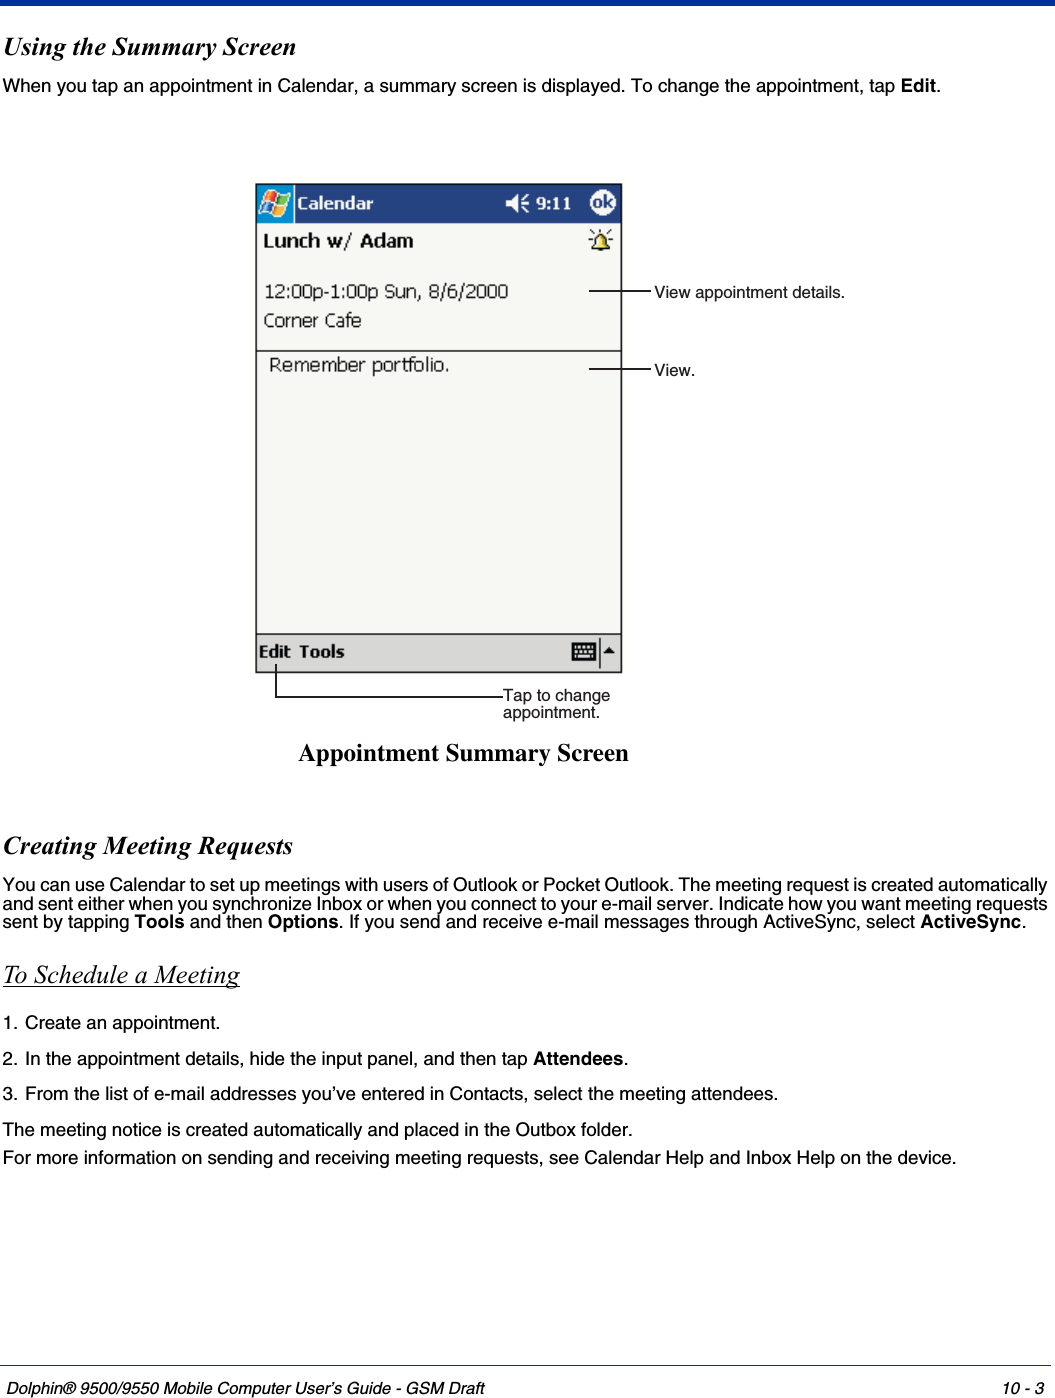
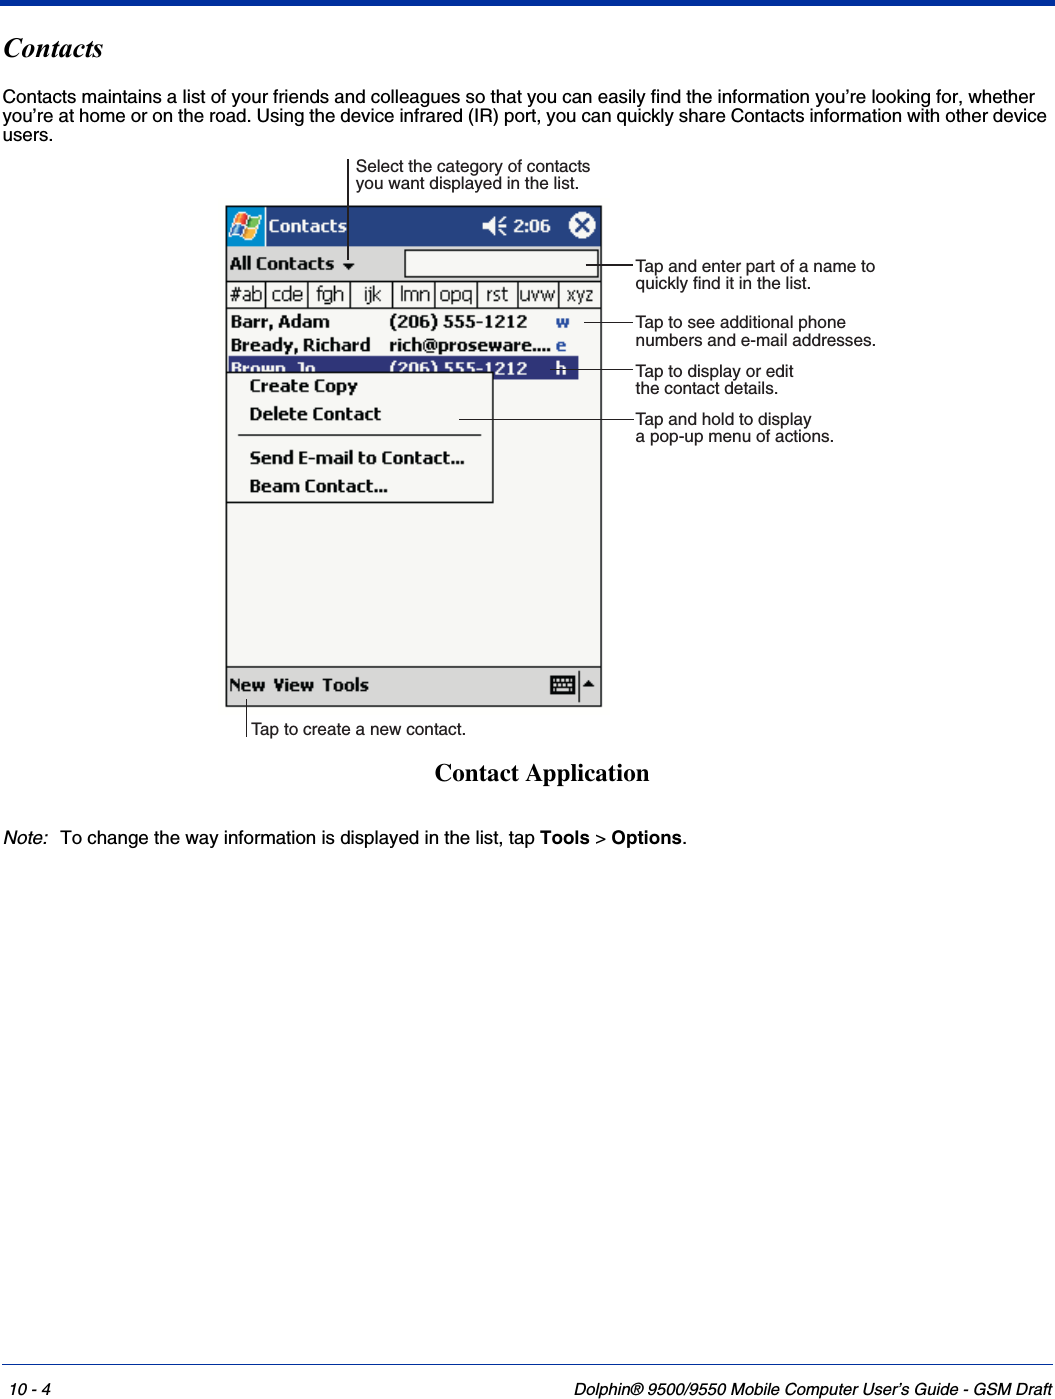
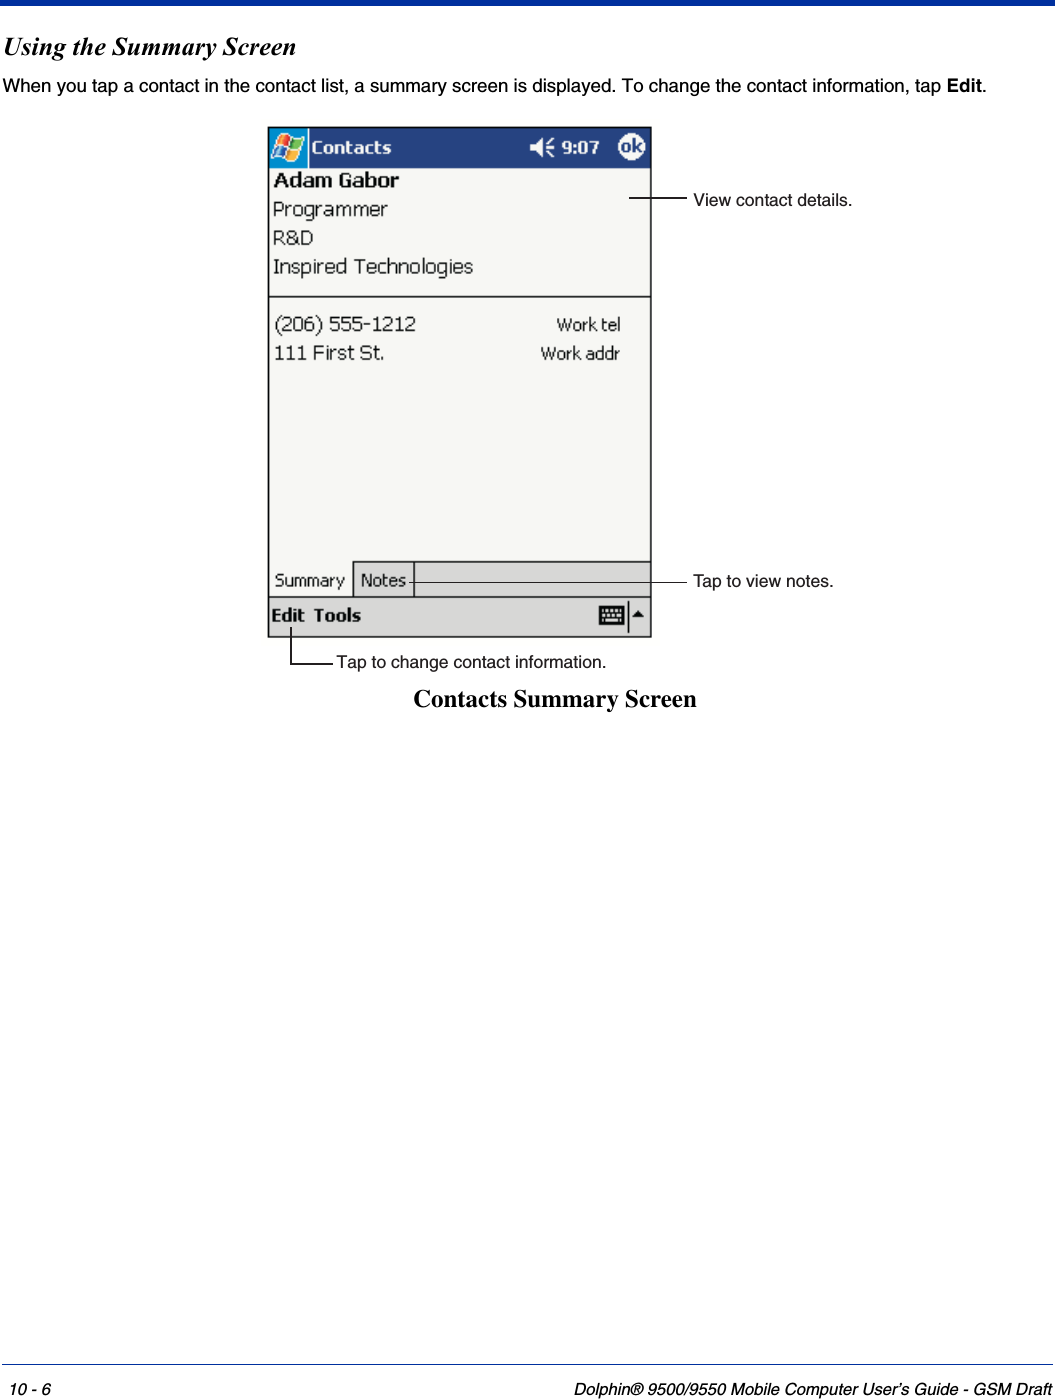
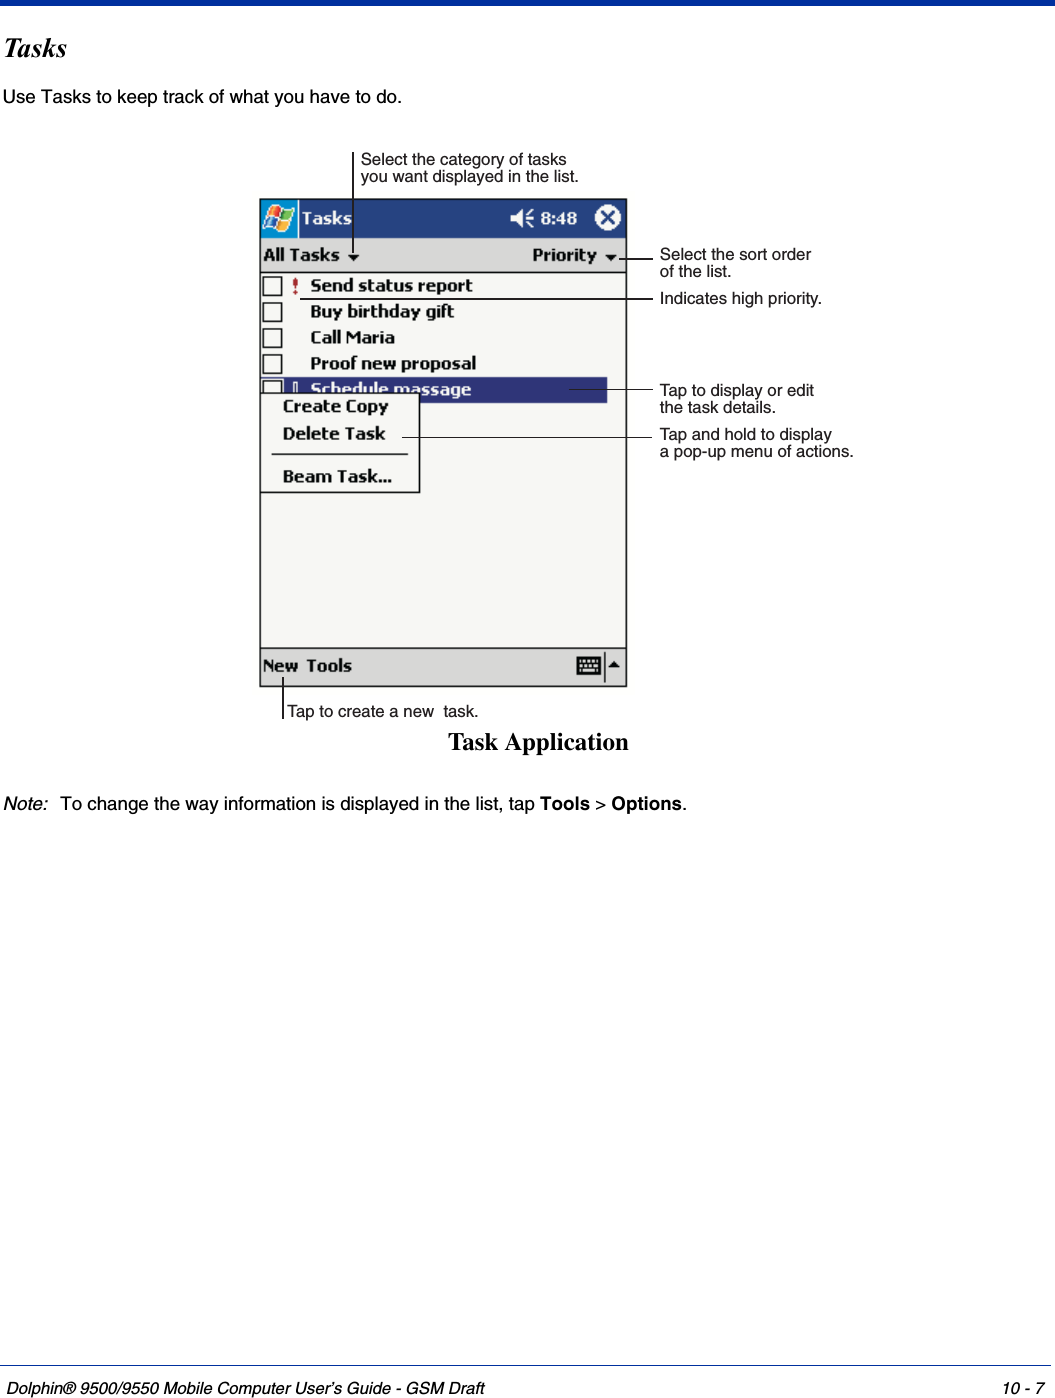
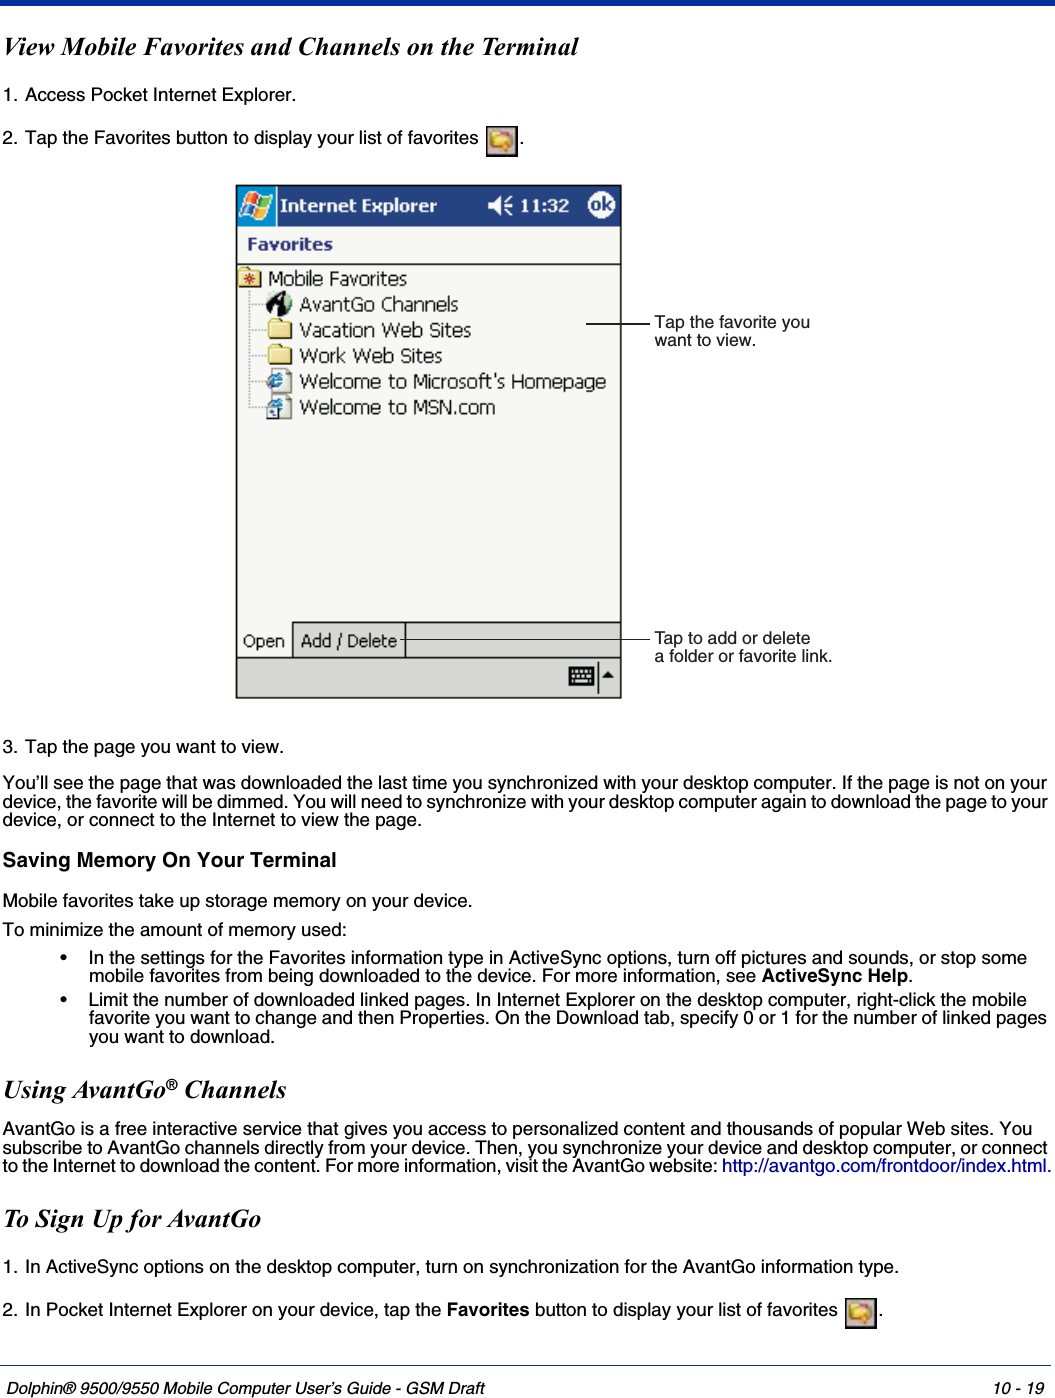
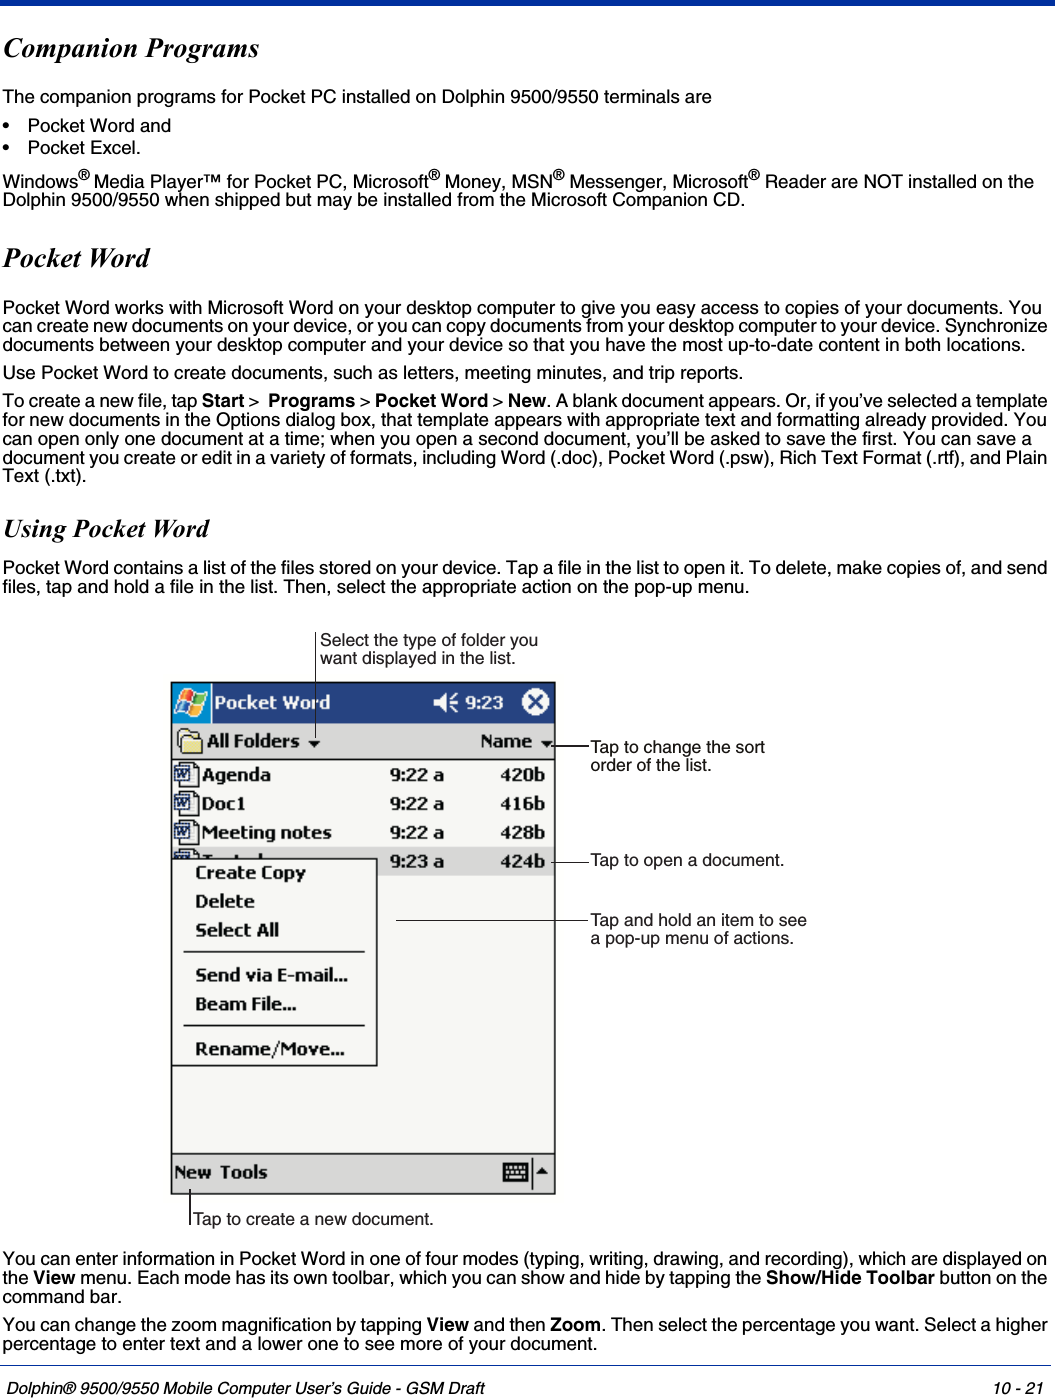
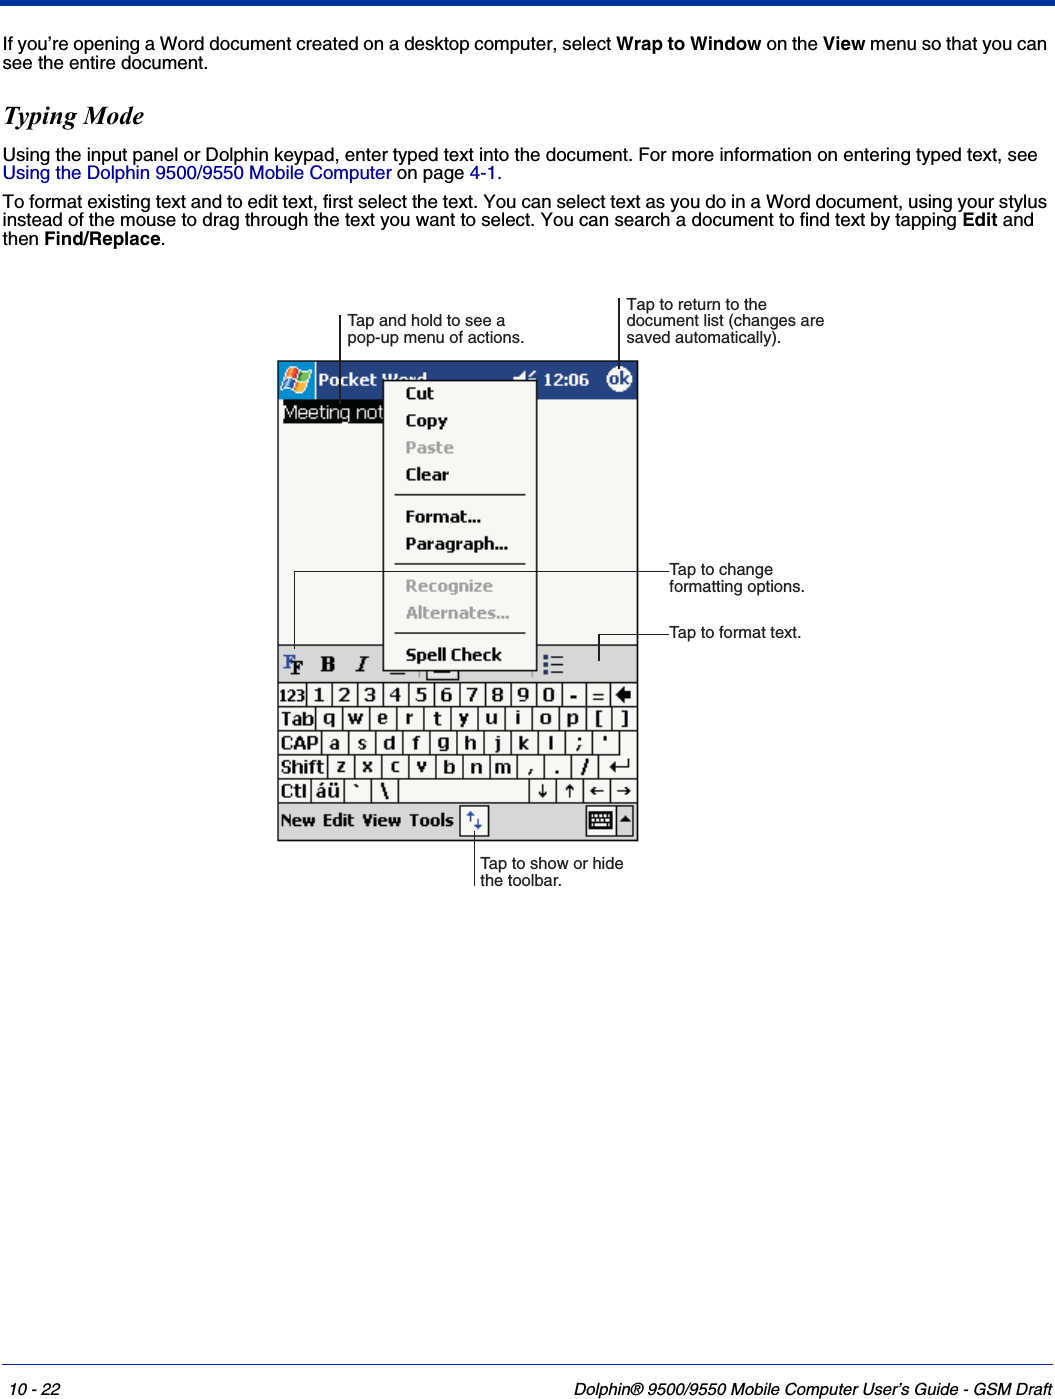
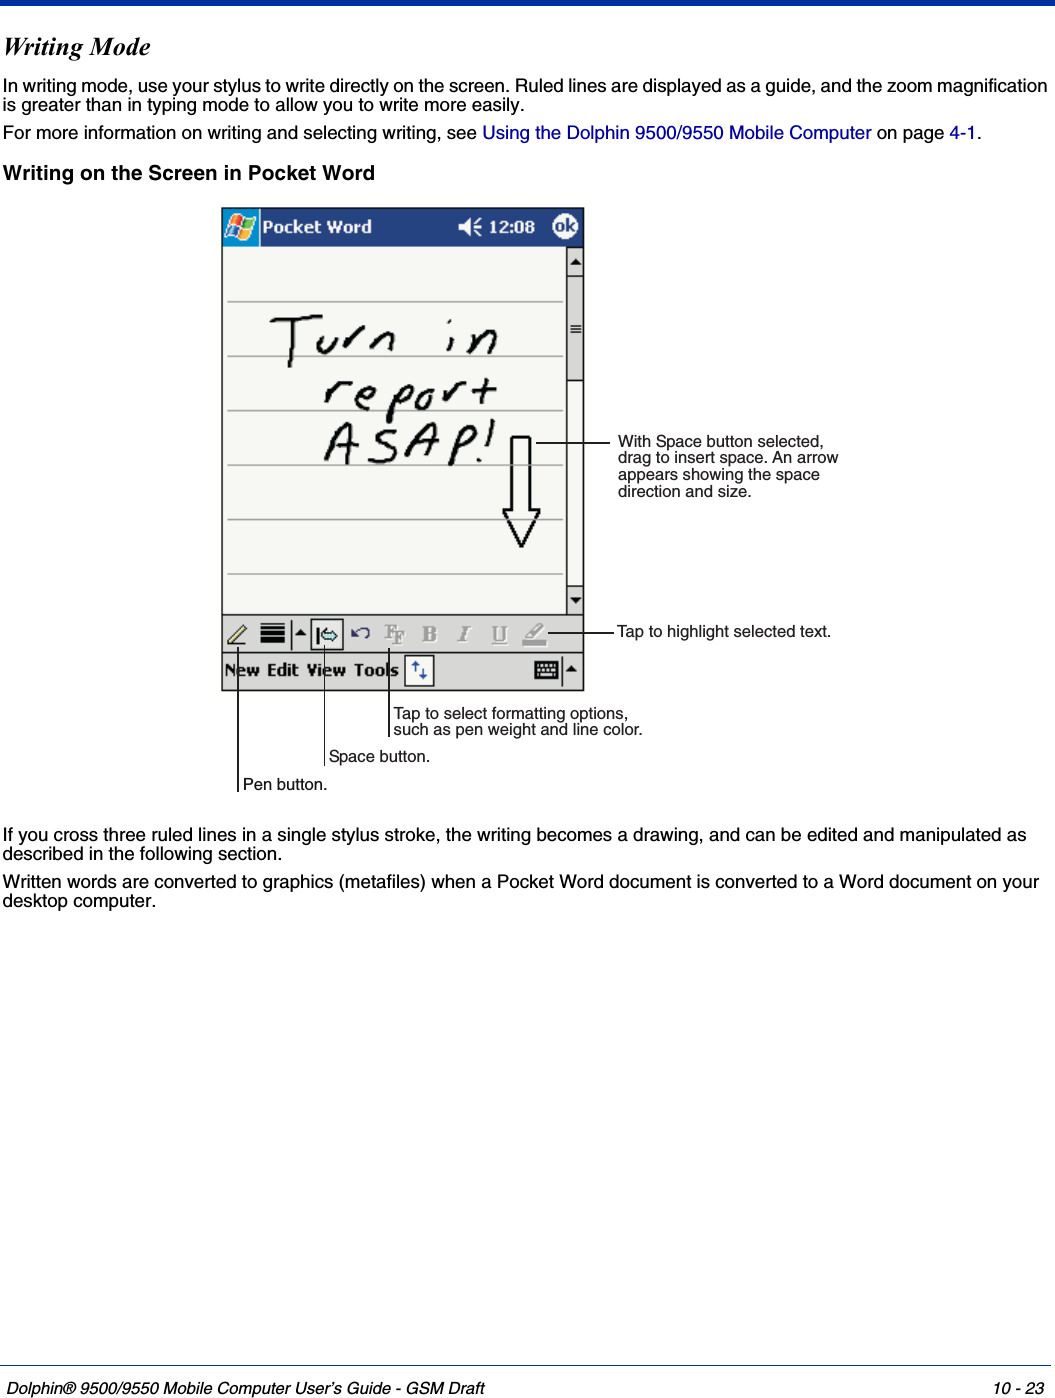
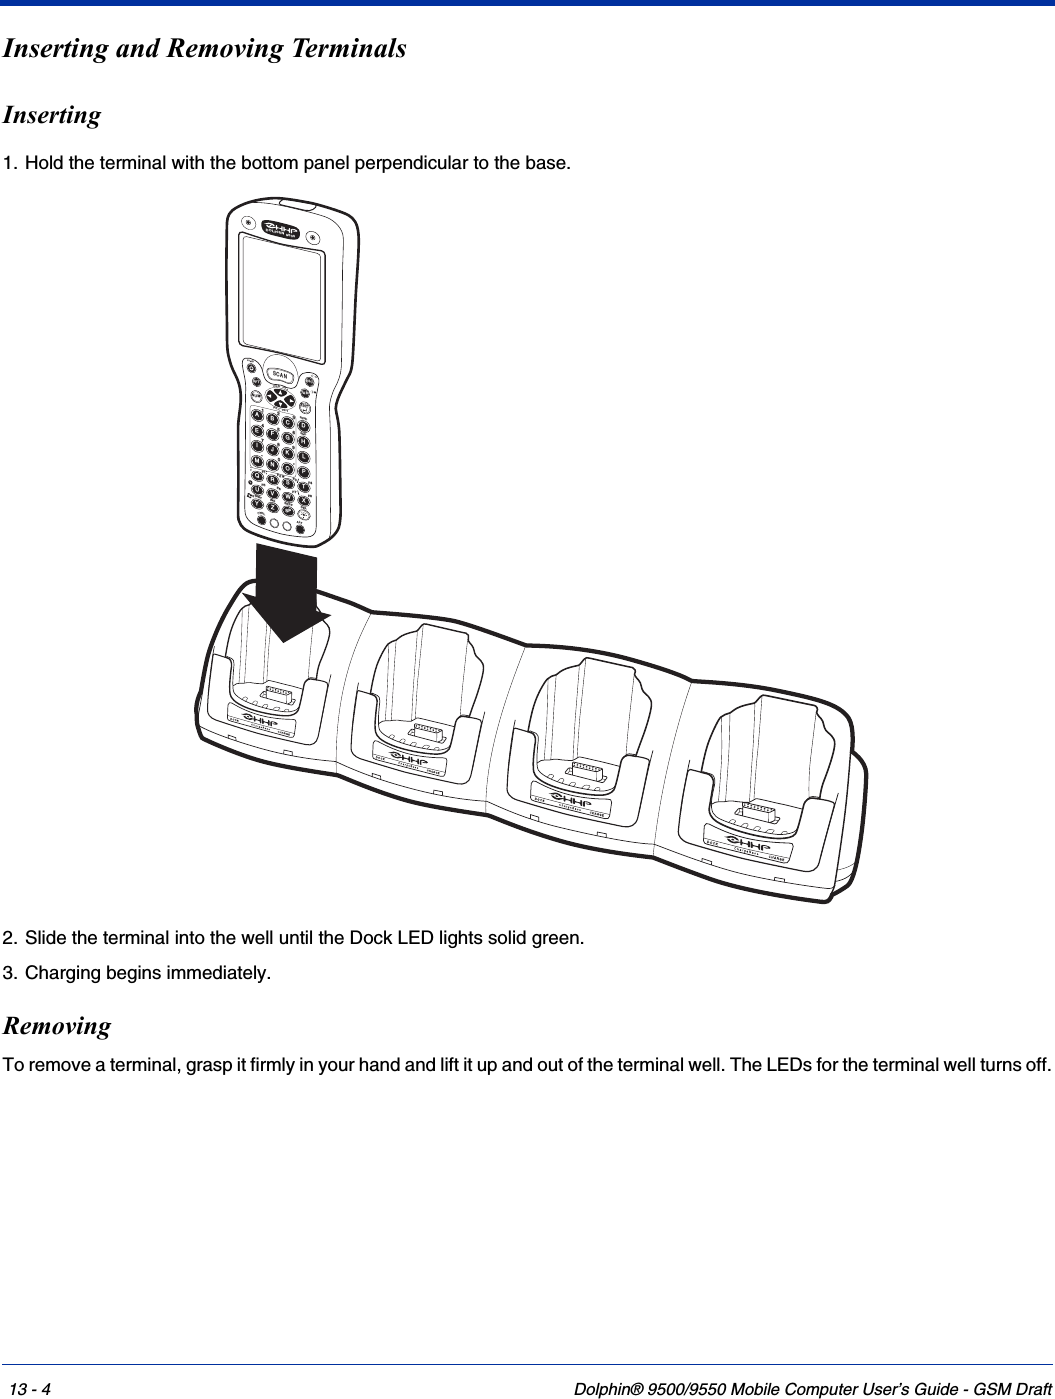
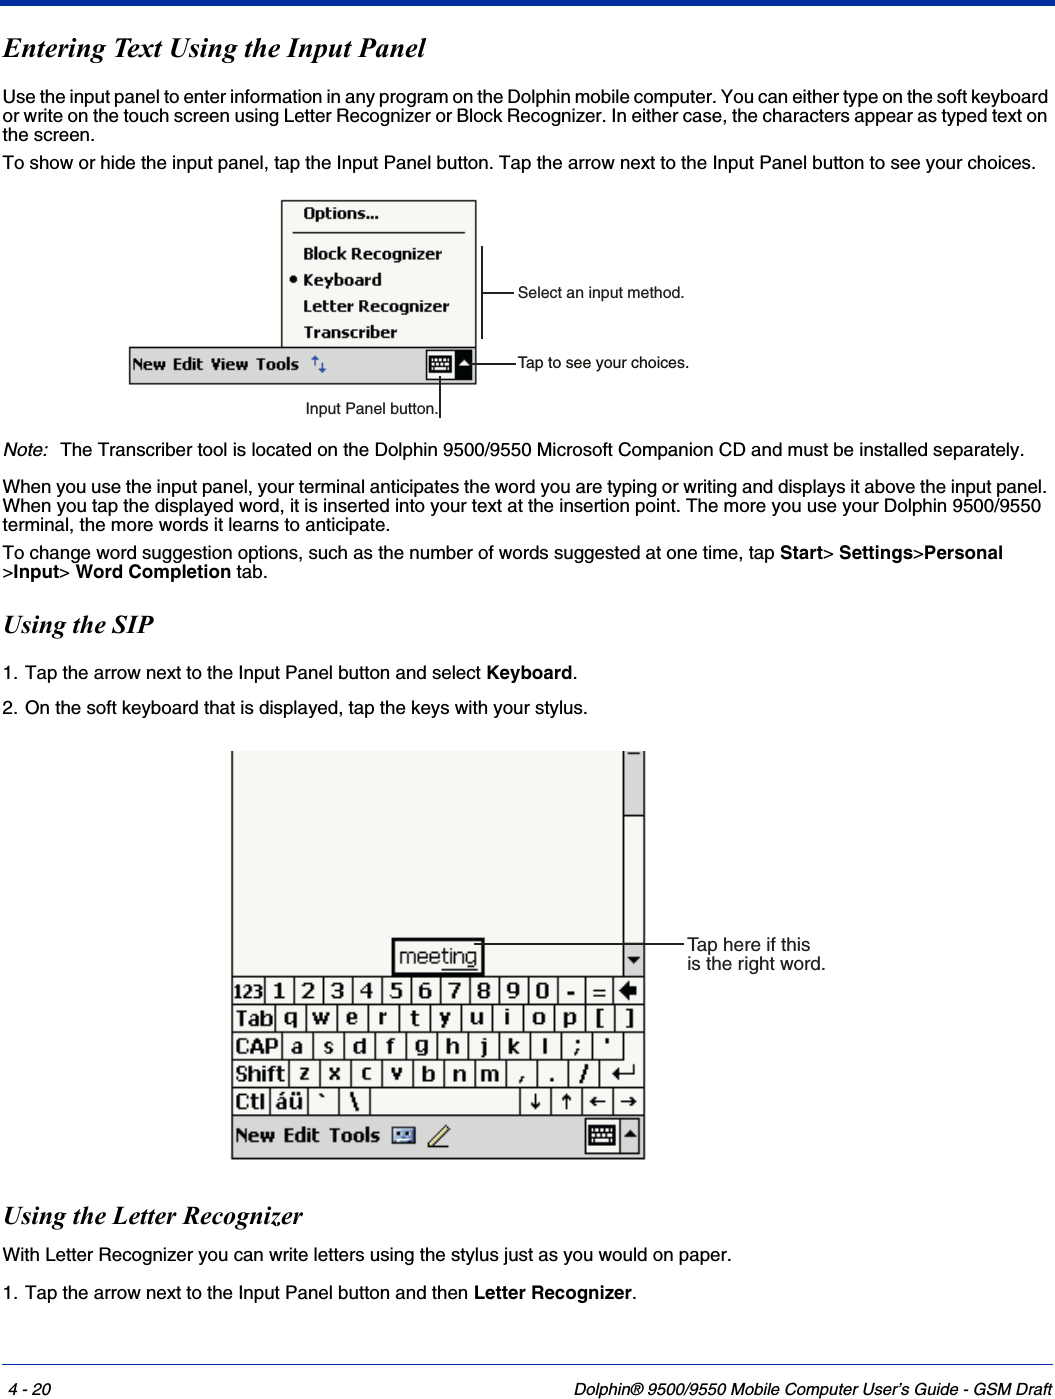
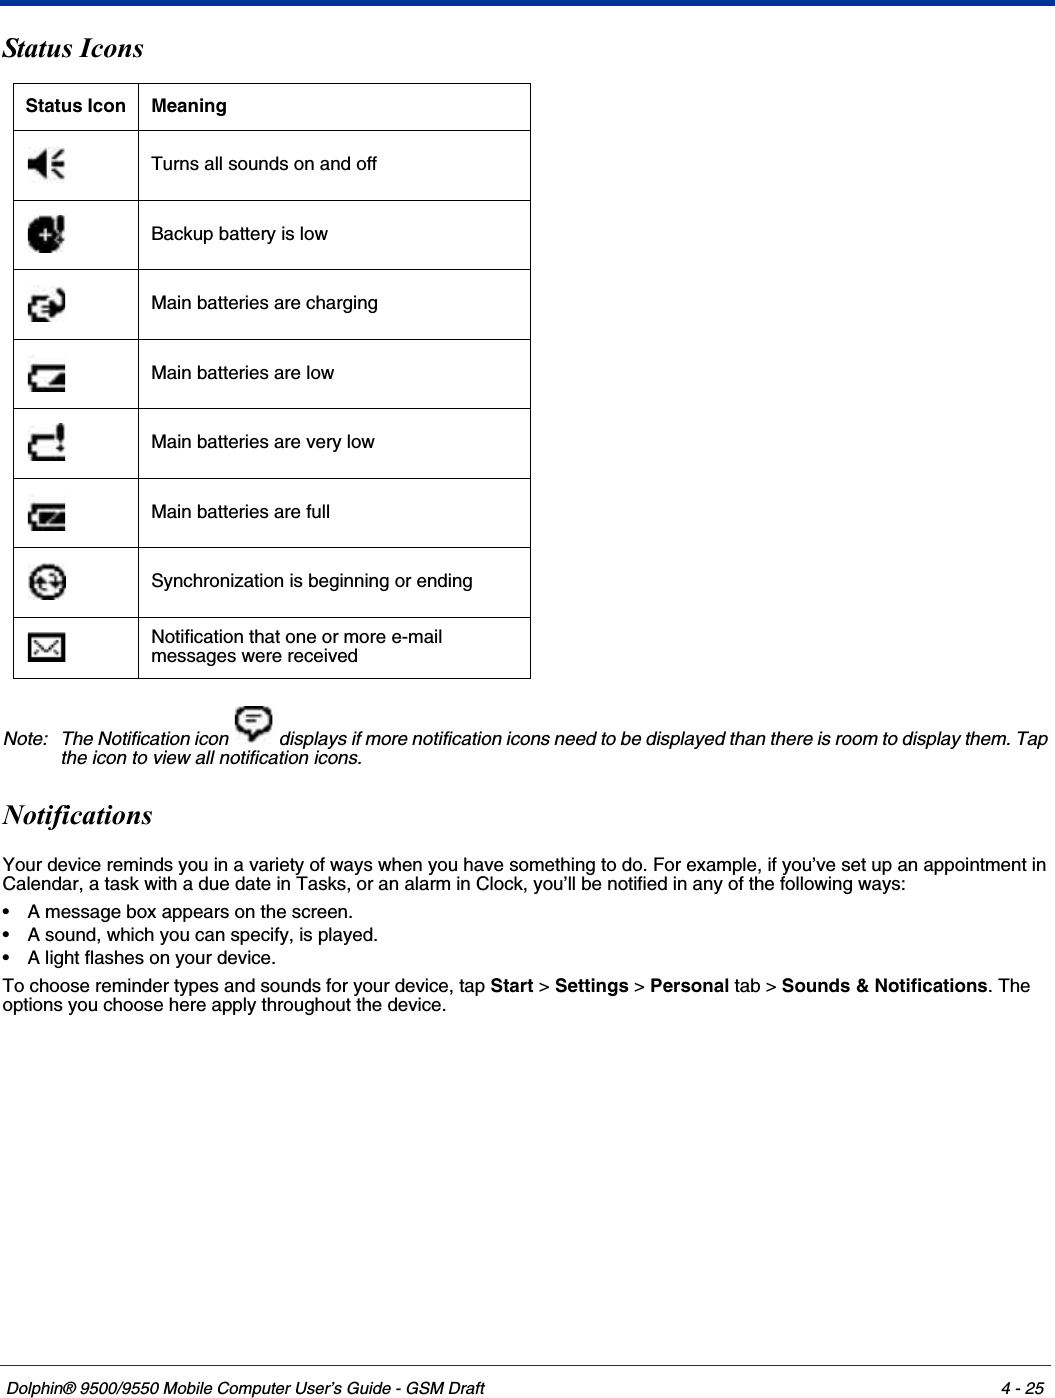
![Dolphin® 9500/9550 Mobile Computer User’s Guide - GSM Draft 3 - 11Managing Battery PowerData and files saved on the Dolphin 9500/9550 terminal may be stored in RAM, so it is important to maintain a continuous power supply to the terminal. When the main battery pack becomes low, the Low Battery Charge icon appears in the notification tray at the top of the screen. The Critical icon appears when the battery is critically low. There is also a Low Battery icon that appears when the backup battery is low. For details about these icons, see Status Icons on page 4-25.Letting the backup battery become fully discharged causes the terminal to lose all data in RAM. Therefore, you should keep a charged battery pack in the Dolphin at all times. The internal battery discharges prematurely if there is not at least a partially charged battery in the terminal. When you remove a battery pack, insert another charged battery pack in the Dolphin. The battery status indicator displays in the notification tray when the battery is low or critically low. If there is no indicator, the battery is adequately charged.If the main battery is low and the terminal is in suspend mode, pressing the SCAN or Power button does not wake the Dolphin 9500/9550 terminal; you must replace the discharged battery with a fully charged battery.Default Critical and Low Battery PointsThe Dolphin 9500/9550 is programmed to display warnings when the battery reaches critical and low battery points. There are two entries defined in the registry:[HKEY_LOCAL_MACHINE\System\CurrentControlSet\Control\Power]“CriticalBatt”=dword:a “LowBatt”=dword:19“CriticalBatt”=dword:a This sets the Critical Battery point to 10 percent (a hex = 10 decimal). The critical battery setting is the point at which the customer is warned that the battery charge is very low. This warning is posted every 3 minutes until the situation is corrected.“LowBatt”=dword:19This sets the Low battery point to 25 percent (19 hex = 25 decimal). The low battery setting is the point at which the user is notified that the battery is low. The user is notified only once for a low battery.Setting Critical and Low Battery PointsDevelopers can reset these parameters in the registry from 0 (no warning) to 99 (would nearly always warn). Warnings do not appear when the terminal is on external power.](https://usermanual.wiki/Honeywell/950009/User-Guide-410164-Page-41.png)

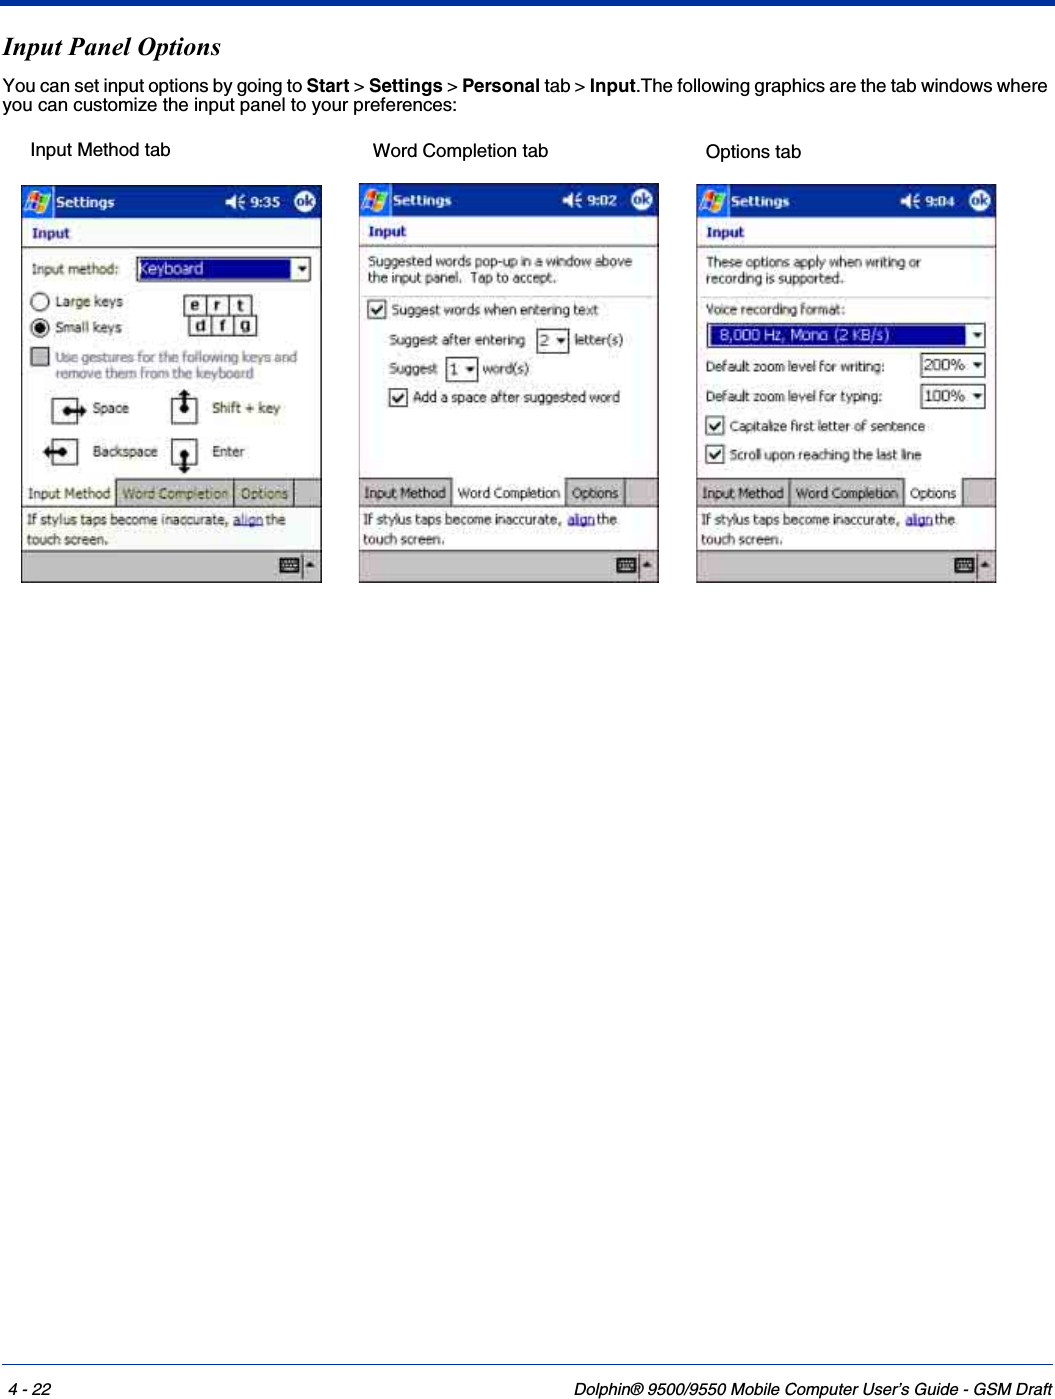


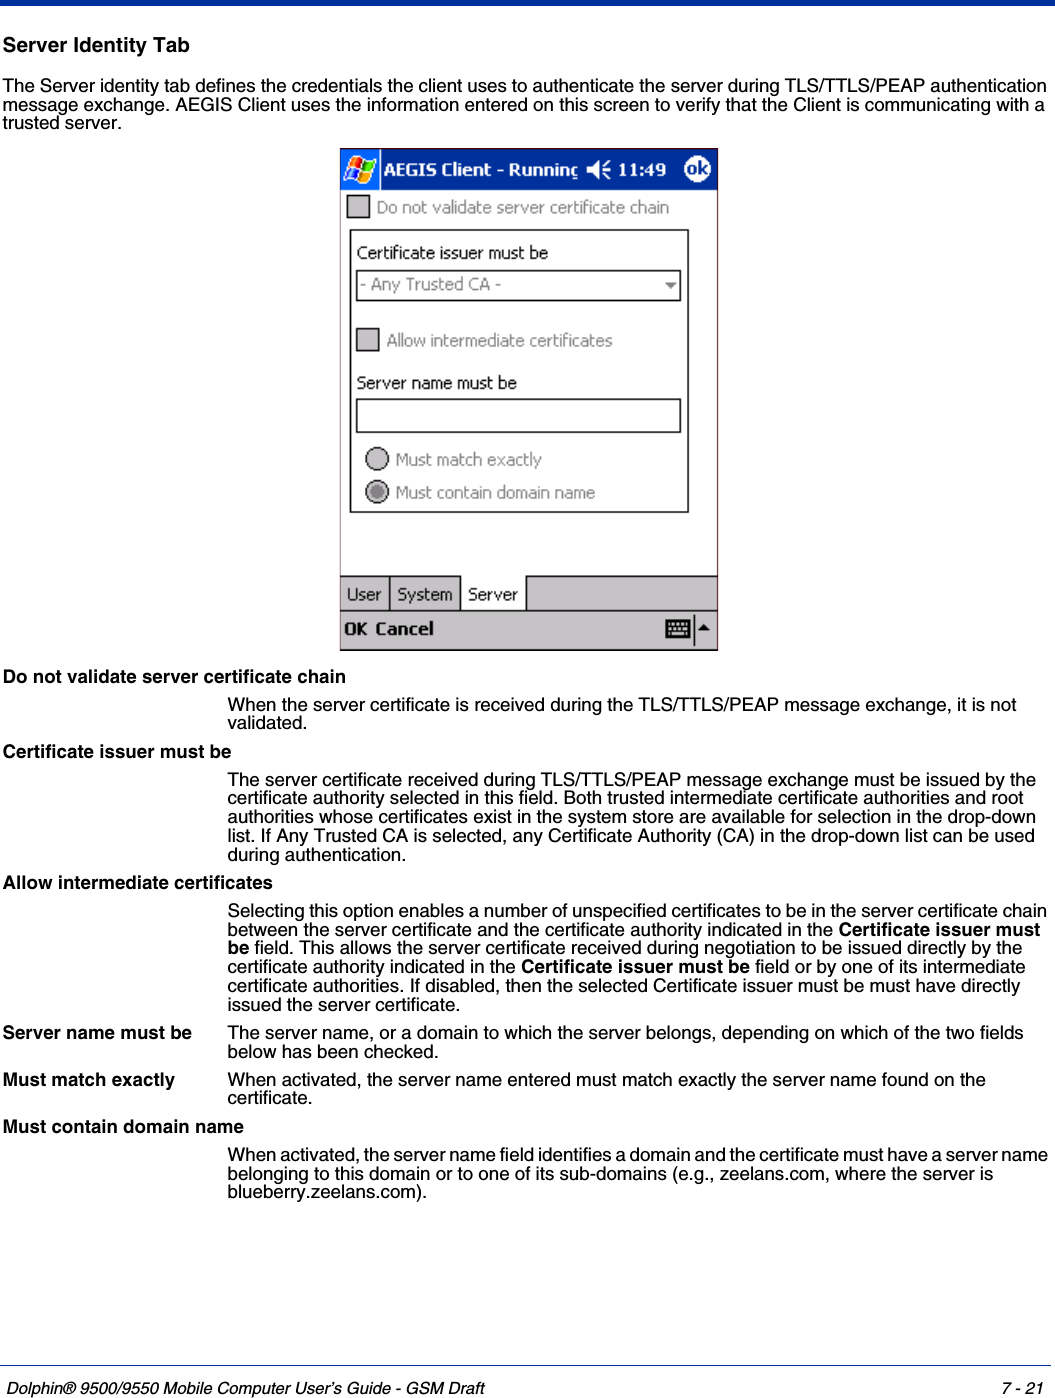
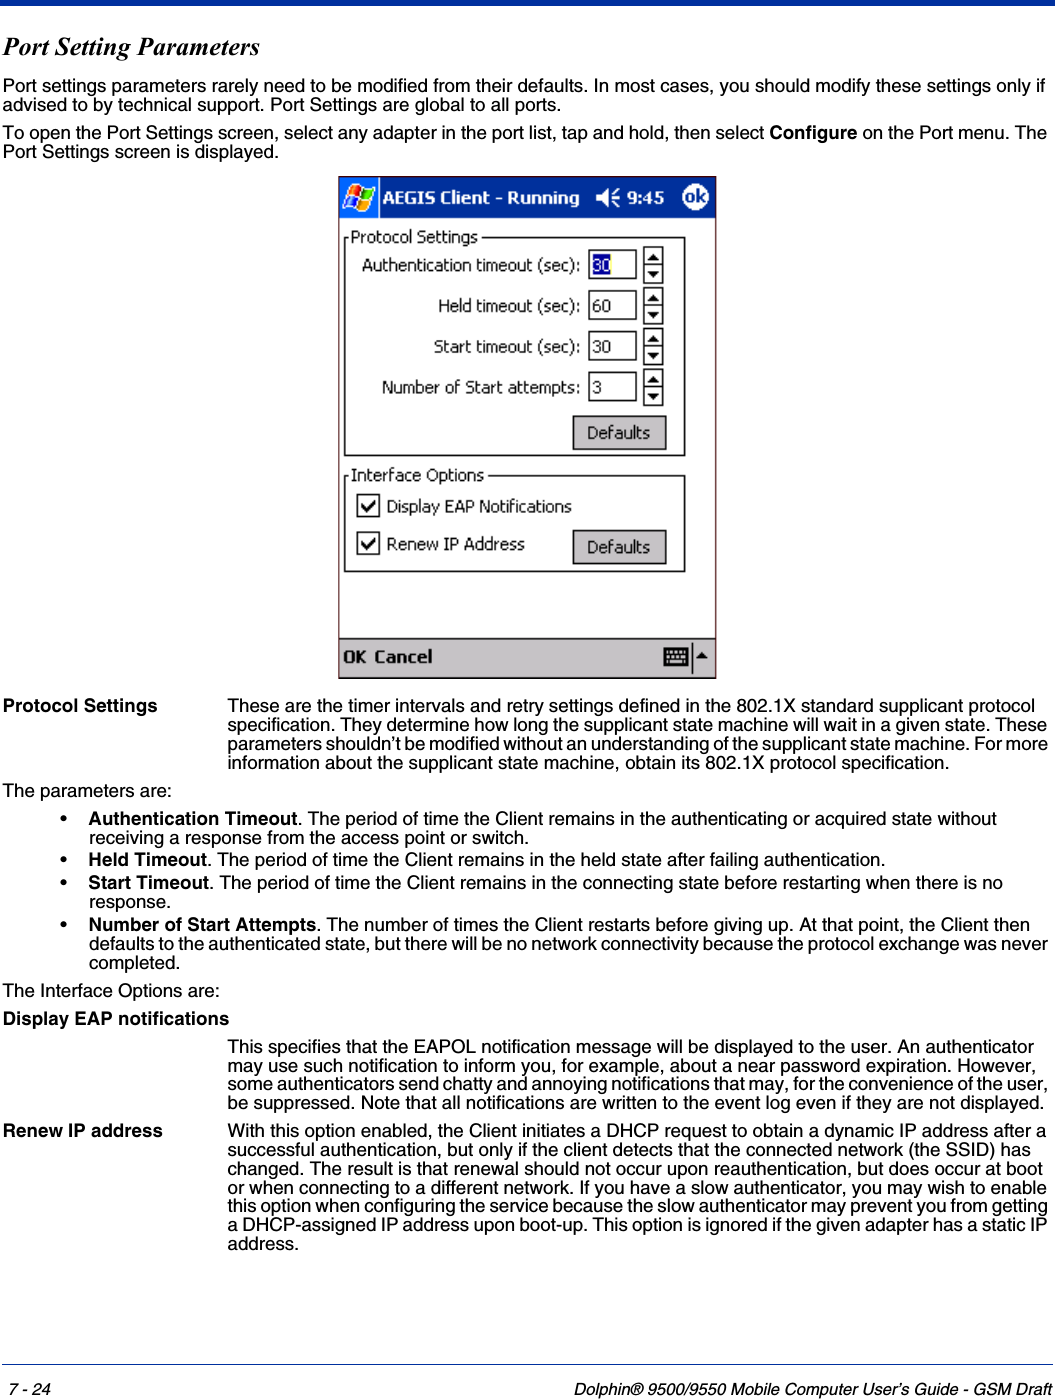
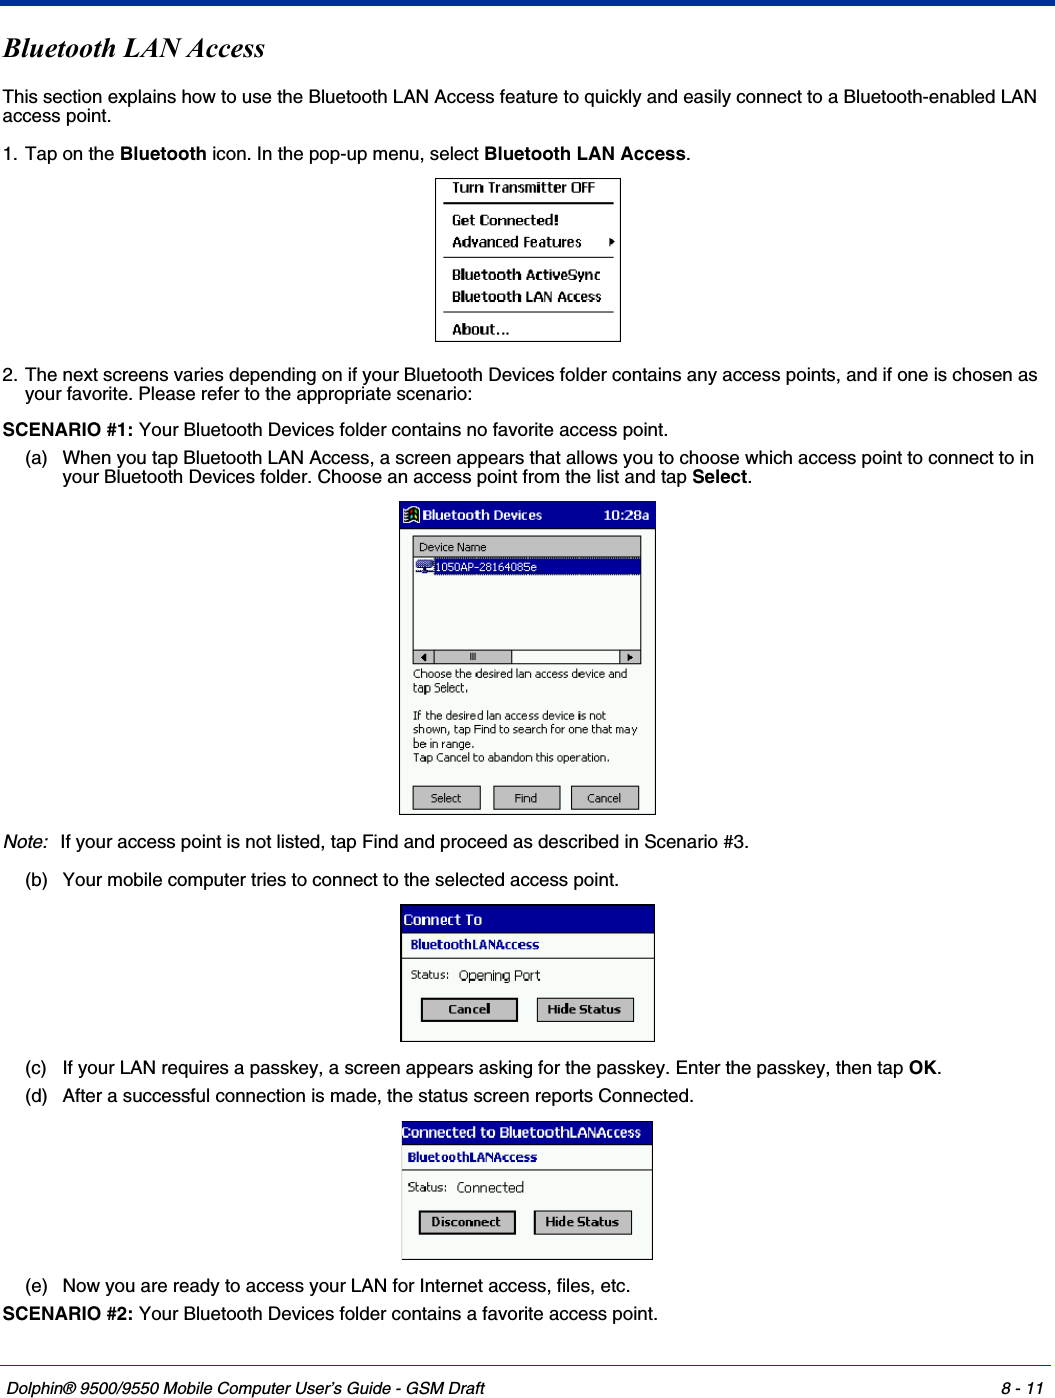
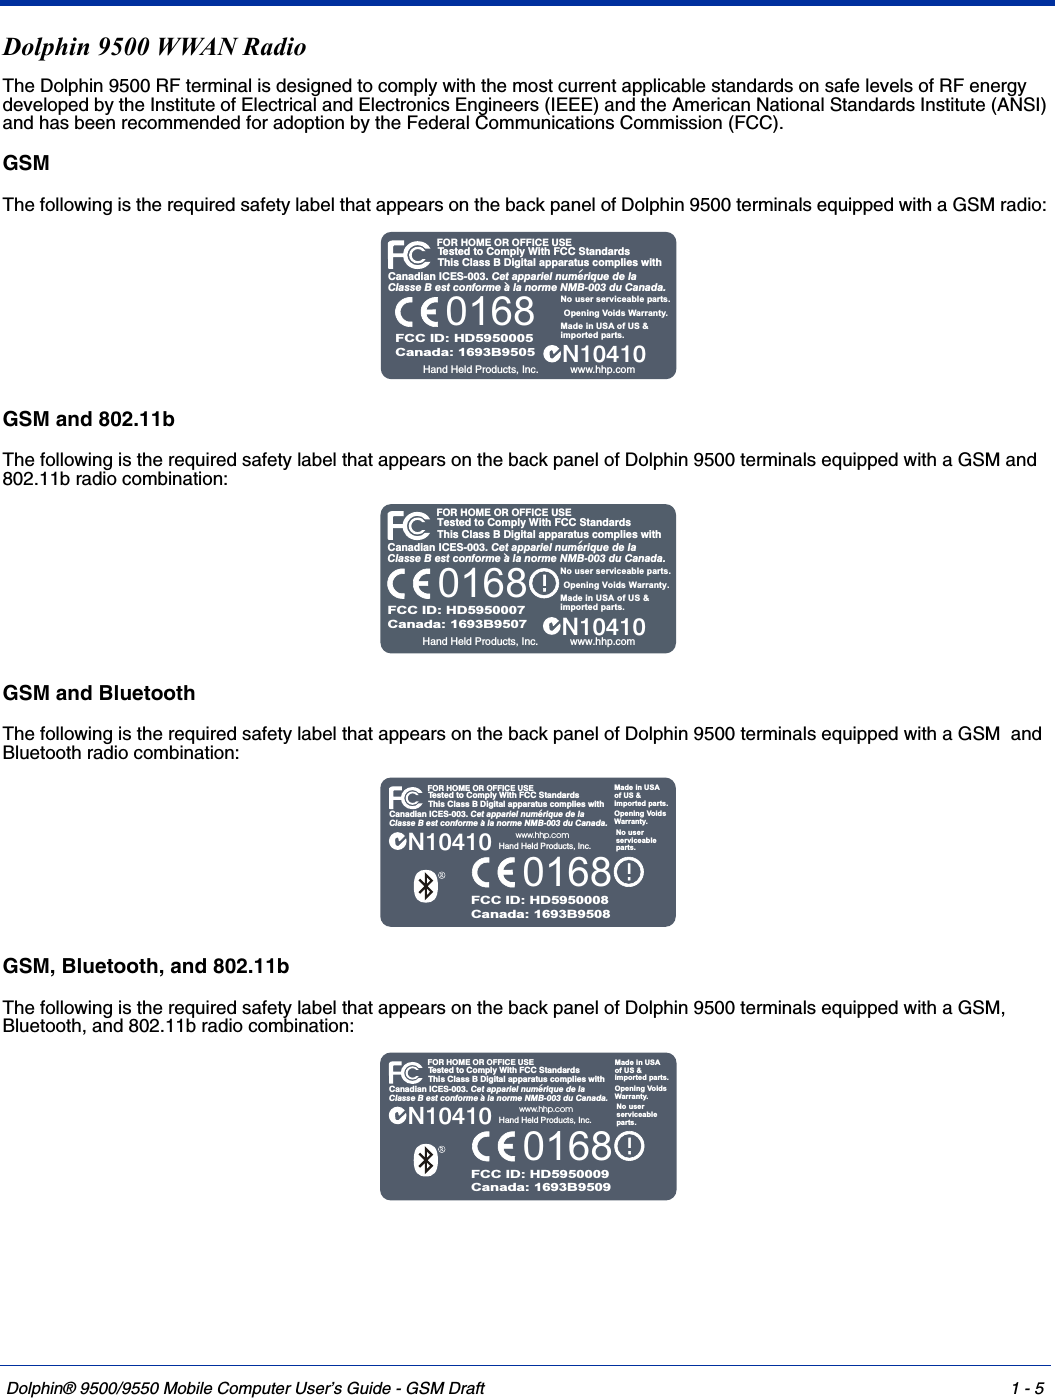
![7 - 20 Dolphin® 9500/9550 Mobile Computer User’s Guide - GSM DraftSystem Settings TabThe System Settings tab controls logging and the port manger timeout period.Log Level These settings control the detail of the log messages generated by the AEGIS Client. By default, all errors, warnings, and information events are logged. Each entry records a severity code (of one [debug message] to four [error] asterisks), a time stamp, and a message.Logs fill memory quickly, especially if the Debugging level is chosen. Do not use the Debugging option for a significant length of time because most internal operations generate messages.Port Manager Timeout The interval at which the client polls the ports. This is used under different circumstances, for instance after physical changes such as card removal or insertion have been detected. This value should not be changed from the 10-second default unless so advised by Meetinghouse technical support.](https://usermanual.wiki/Honeywell/950009/User-Guide-410164-Page-128.png)