Honeywell CS22A Next Generation Honeywell Access Point User Manual Acc Pt QS
Honeywell International Inc Next Generation Honeywell Access Point Acc Pt QS
User manual
©2010 Honeywell International Inc. All rights reserved. ACC-PT-QS Rev (a) 4/10
Preliminary Draft 4/28/10
Access Point Quick Start
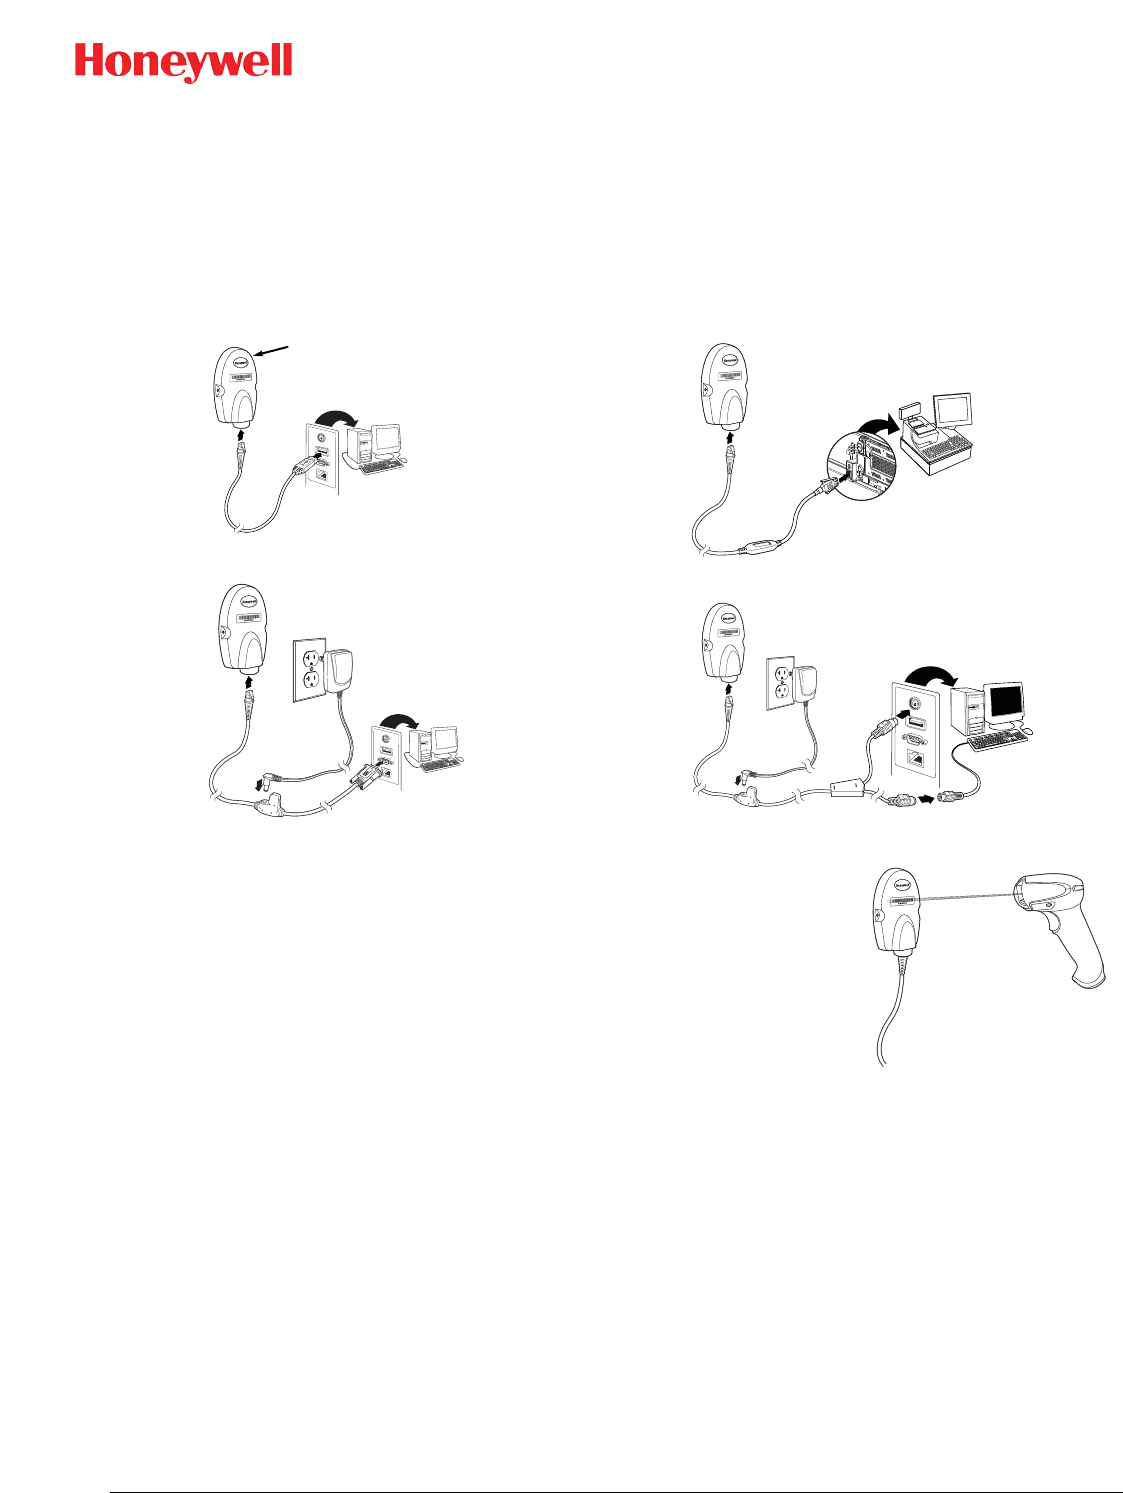
Connecting the Access Point
1. Turn on the computer (laptop/desktop).
2. Plug the interface cable into the Access Point first and then into the appropriate port on the computer. The Page button
lights up when the connection is made.
Managing Connections
Only one scanner may be linked to the Access Point at a time. To link a different scanner to the Access Point, use the new scan-
ner to scan the Linking bar code on the Access Point. That unlinks the first scanner and links the second one.
Connection Range
The scanner is in communication with the Access Point even if it is not transmitting bar code data. If you take the linked
scanner out of range of the Access Point, communication with the module will be lost and you will have to reconnect the
scanner to the Access Point. To reconnect the scanner, scan the Linking bar code.
Changing Batteries
If the scanner turns off due to a low battery, you can change the battery without losing the link with the Access Point, pro-
vided the scanner is in range. A few seconds after the scanner powers up, the scanner relinks to the module. Refer to your
User’s Guide at www.honeywellaidc.com for additional information about charging the batteries.
3. Scan the linking bar code on the top of the Access Point to establish a connection
between the Access Point and the scanner. The scanner emits a short beep and flashes
the green LED to confirm a connection with the Access Point. The Access Point’s Page
button remains blue.
USB Connection:
RS232 Connection:
RS485 Connection:
Keyboard Wedge Connection:
Page button
©2010 Honeywell International Inc. All rights reserved. ACC-PT-QS Rev (a) 4/10
Preliminary Draft 4/28/10
Low Power Mode
When there is no activity within a specified time period, the scanner enters a low power mode. The default time out period
is one hour. Pull the scanner’s trigger to power the scanner back up. If the scanner was linked to the Access Point when it
went to “sleep,” it will re-link as long as it is in range.
If multiple scanners use the same Access Point, it is possible to inadvertently unlink a scanner that is in “sleep” mode, that
has a dead battery, or is in the process of getting a new battery. To prevent this from happening, you can disable the sleep
mode (time out) by scanning the No Time Out bar code below.
Unlinking the Scanner from Access Point
If you know that your scanner is not going to be used for a while, you can unlink the scanner by scanning the Unlink Scan-
ner bar code below.
Page Button
When you press the Page button, the scanner associated with that Access Point will begin beeping (3
short and 1 long beep). If you pull the trigger on a scanner that is beeping in response, that scanner
will stop beeping. Pressing the Page button a second time will also stop the scanner’s beeping.
LED Dimmer
Scan a bar code to set the brightness of your Page button.
Adding Carriage Return Suffix
If you want a carriage return (CR) to display after the bar code data on your output scan the Add CR Suffix bar code below.
Scan the Remove Suffix bar code to remove the suffix.
Standard Product Defaults
This bar code resets all standard product default settings.
Note: Resetting standard defaults disconnects the scanner from the Access Point. Scan the Linking bar code to re-establish a
connection. Refer to your User’s Guide at www.honeywellaidc.com for additional information about product defaults.
No Time Out (0)
Unlink scanner
Page
button
LED Dimmer Off LED Dimmer - Dim
LED Dimmer - Bright
Add CR Suffix Remove Suffix
Standard Product Default Settings
©2010 Honeywell International Inc. All rights reserved. ACC-PT-QS Rev (a) 4/10
Preliminary Draft 4/28/10
Required Safety Labels
Product Specifications
Technical Assistance
Contact information for technical support and product service can be found at www.honeywellaidc.com.
Parameter Specification
Dimensions (Typical):
Height 1.1 inch (28mm)
Length 4.3 inches (109mm)
Width 2.8 inches (71mm)
Weight 2.3 ounces (66g)
Voltage Requirements 5 VDC + 0.5V
Current Draw 100mA @ 5 volts typical
Temperature Ranges:
Operating 32° F to +122° F (0° C to +50° C)
Storage -40° F to +158° F (-40° C to +70° C)
Radio:
Frequency 2.4 to 2.5 GHz (ISM Band) Frequency Hopping
Bluetooth v.2.1
Range 33 ft. (10 m) typical
Data Rate 3MBps (2.1 MBps)
Humidity Up to 95% non-condensing
Mechanical Drop
Operational after 50 drops from 3.28 feet
(1 m) to concrete
Vibration 5G Peak from 22Hz to 300Hz
ESD Sensitivity
Up to 15kV direct air
Up to 8 kV indirect coupling plane
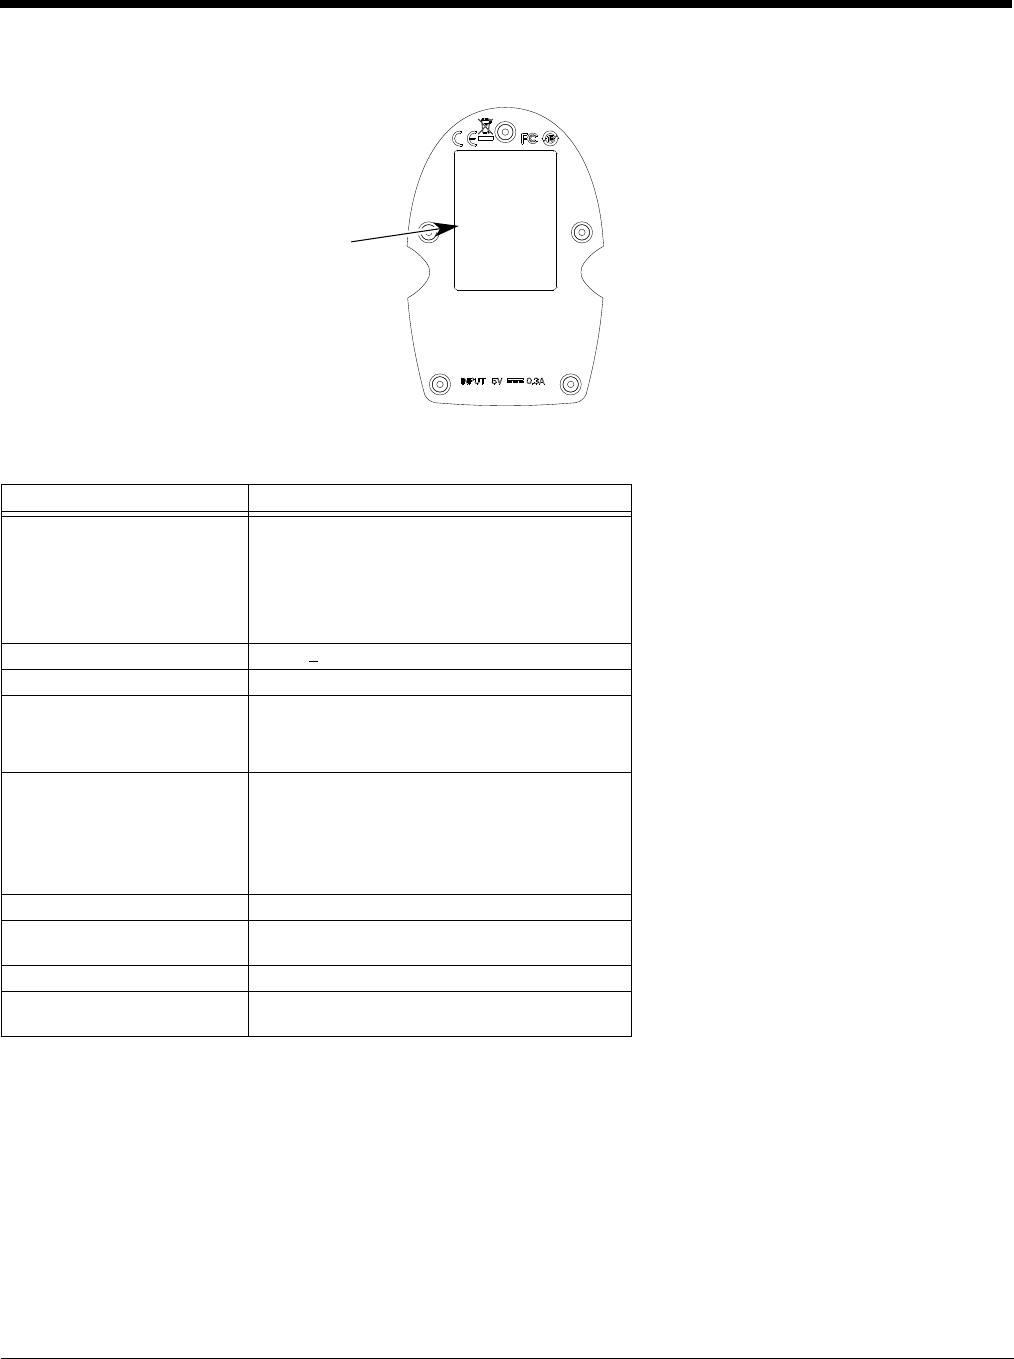
Label location for item number,
serial number, revision information,
compliance, and safety information

©2010 Honeywell International Inc. All rights reserved. ACC-PT-QS Rev (a) 4/10
Preliminary Draft 4/28/10
Product Agency Compliance
USA
FCC Part 15 Subpart B Class B
This device complies with part 15 of the FCC Rules. Operation is subject to the following two conditions:
1. This device may not cause harmful interference.
2. This device must accept any interference received, including interference that may cause undesired operation.
This equipment has been tested and found to comply with the limits for a Class B digital device pursuant to part 15 of the FCC Rules. These limits are
designed to provide reasonable protection against harmful interference in a residential installation. This equipment generates, uses, and can radiate radio
frequency energy and, if not installed and used in accordance with the instructions, may cause harmful interference to radio communications. However,
there is no guarantee that interference will not occur in a particular installation. If this equipment does cause harmful interference to radio or television
reception, which can be determined by turning the equipment off and on, the user is encouraged to try to correct the interference by one or more of the fol-
lowing measures:
• Reorient or relocate the receiving antenna.
• Increase the separation between the equipment and receiver.
• Connect the equipment into an outlet on a circuit different from that to which the receiver is connected.
• Consult the dealer or an experienced radio or television technician for help.
If necessary, the user should consult the dealer or an experienced radio/television technician for additional suggestions. The user may find the following
booklet helpful: “Something About Interference.” This is available at FCC local regional offices. Honeywell is not responsible for any radio or television
interference caused by unauthorized modifications of this equipment or the substitution or attachment of connecting cables and equipment other than
those specified by Honeywell. The correction is the responsibility of the user.
Use only shielded data cables with this system.
Caution: Any changes or modifications made to this equipment not expressly approved by Honeywell may void the FCC authorization to operate this
equipment.
UL Statement
UL listed: UL60950-1.
Canada
Industry Canada ICES-003
This Class B digital apparatus complies with Canadian ICES-003. Operation is subject to the following conditions:
1. This device may not cause harmful interference.
2. This device must accept any interference received, including interference that may cause undesired operation.
Conformité à la règlementation canadienne
Cet appareil numérique de la Classe A est conforme à la norme NMB-003 du Canada. Son fonctionnement est assujetti aux conditions suivantes :
1. Cet appareil ne doit pas causer de brouillage préjudiciable.
2. Cet appareil doit pouvoir accepter tout brouillage reçu, y compris le brouillage pouvant causer un fonctionnement indésirable.
cUL Statement
cUL listed: CSA C22.2 No.60950-1-03.
Europe
The CE marking indicates compliance to 2004/108/EC EMC Directive with Standards EN55022 CLASS B, EN55024, EN61000-3-2, EN61000-
3-3. In addition, complies to 2006/95/EC Low Voltage Directive, when shipped with recommended power supply.
For further information please contact:
Honeywell Imaging & Mobility Europe BV
Nijverheidsweg 9-13
5627 BT Eindhoven
The Netherlands
Honeywell International Inc. shall not be liable for use of our product with equipment (i.e., power supplies, personal computers, etc.) that is not
CE marked and does not comply with the Low Voltage Directive.
Waste Electrical and Electronic Equipment Information
Honeywell complies with Directive 2002/96/EC OF THE EUROPEAN PARLIAMENT AND OF THE COUNCIL of 27 January 2003 on waste electrical and
electronic equipment (WEEE).
This product has required the extraction and use of natural resources for its production. It may contain hazardous substances that could impact health and
the environment, if not properly disposed.
In order to avoid the dissemination of those substances in our environment and to diminish the pressure on the natural resources, we encourage you to
use the appropriate take-back systems for product disposal. Those systems will reuse or recycle most of the materials of the product you are disposing in
a sound way.
The crossed out wheeled bin symbol informs you that the product should not be disposed of along with municipal waste and invites you to use the
appropriate separate take-back systems for product disposal.
If you need more information on the collection, reuse, and recycling systems, please contact your local or regional waste administration.
You may also contact your supplier for more information on the environmental performances of this product.
Patents
Please refer to the product packaging for patent information.
Australia/NZ
C-Tick Statement
Conforms to AS/NZS 3548 EMC requirement
Mexico
Conforms to NOM-019.
Russia