Honeywell LXEBT001 MX9, FC300 Handheld computer User Manual PDF Output
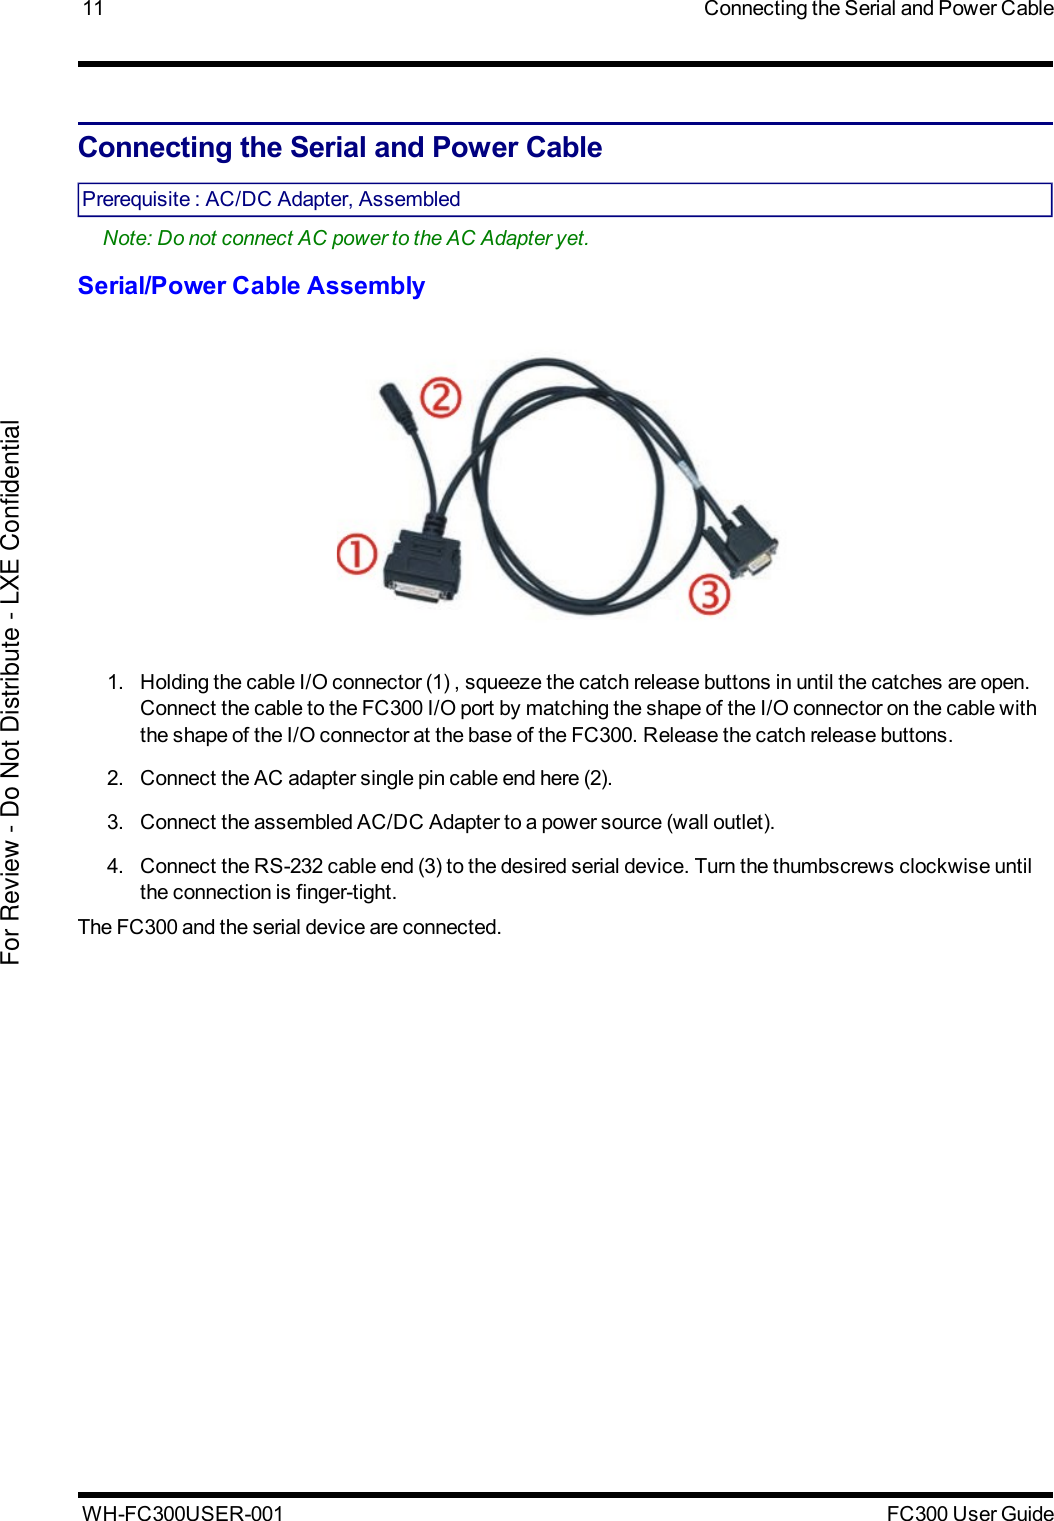
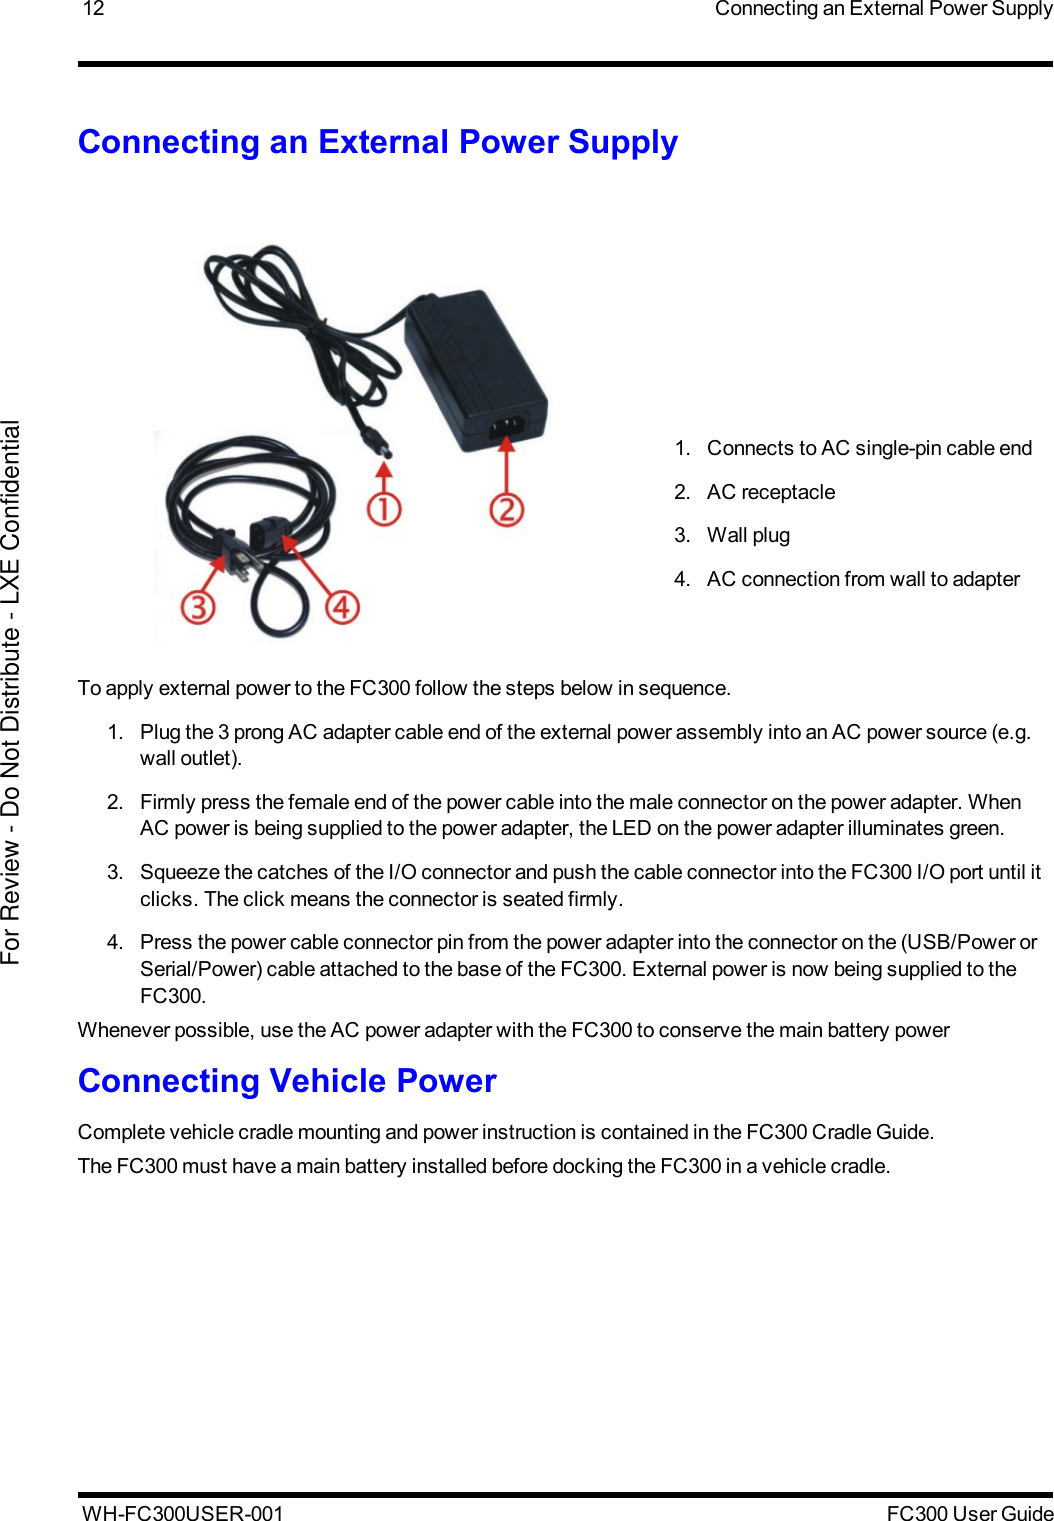
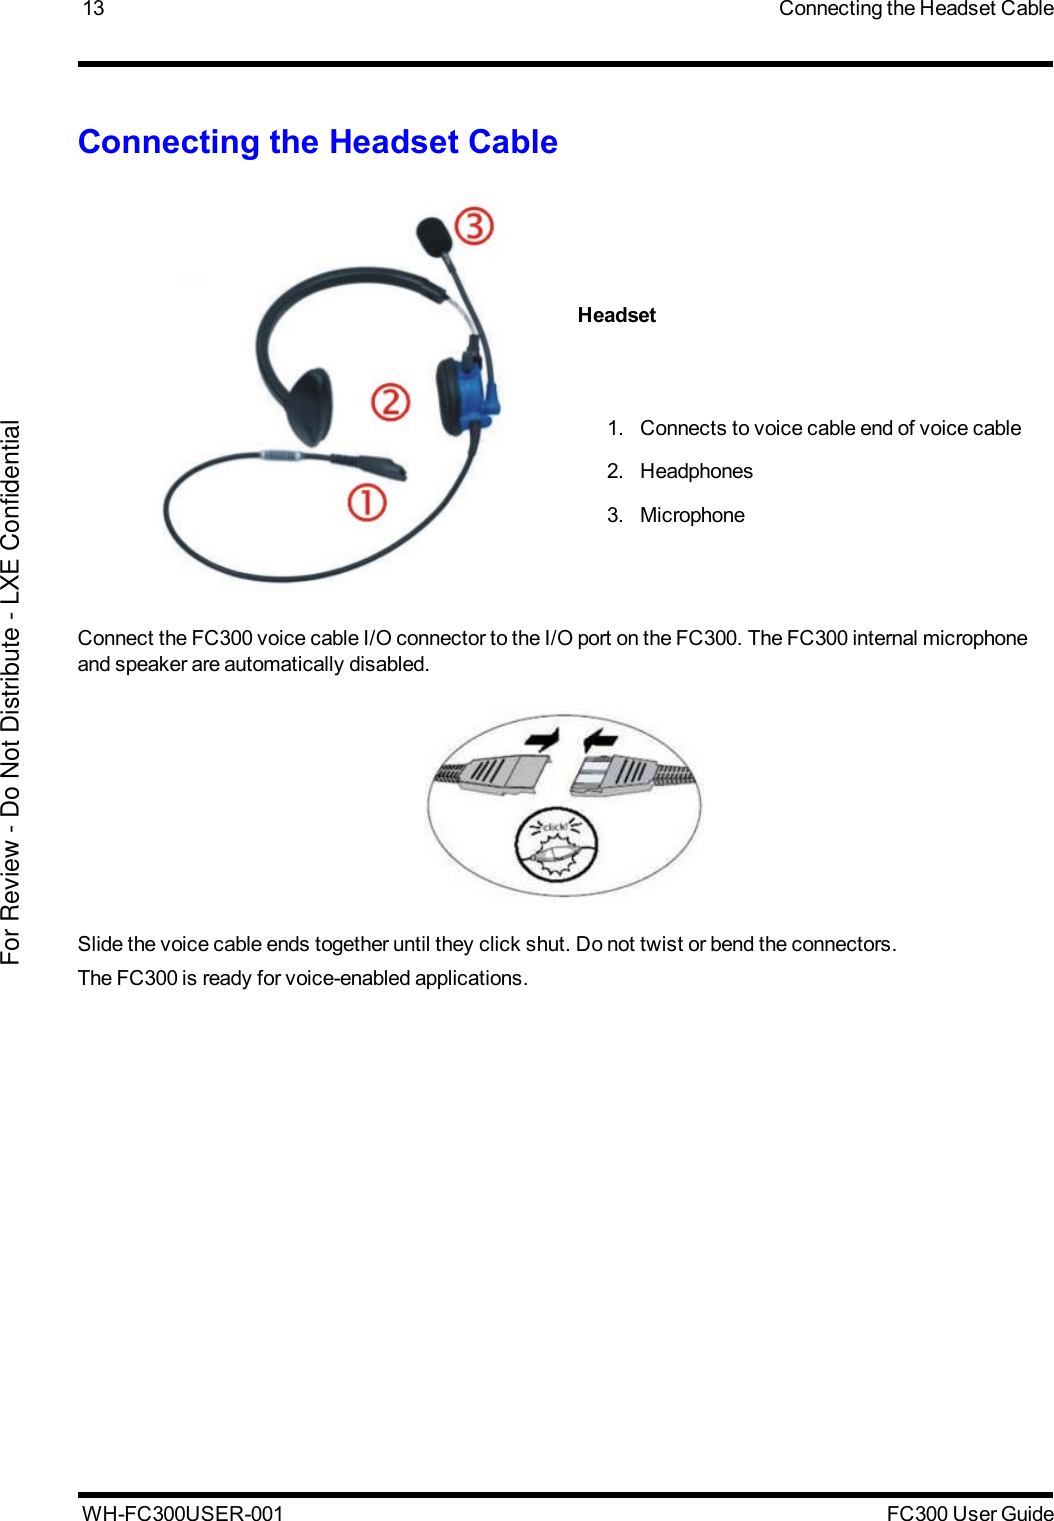
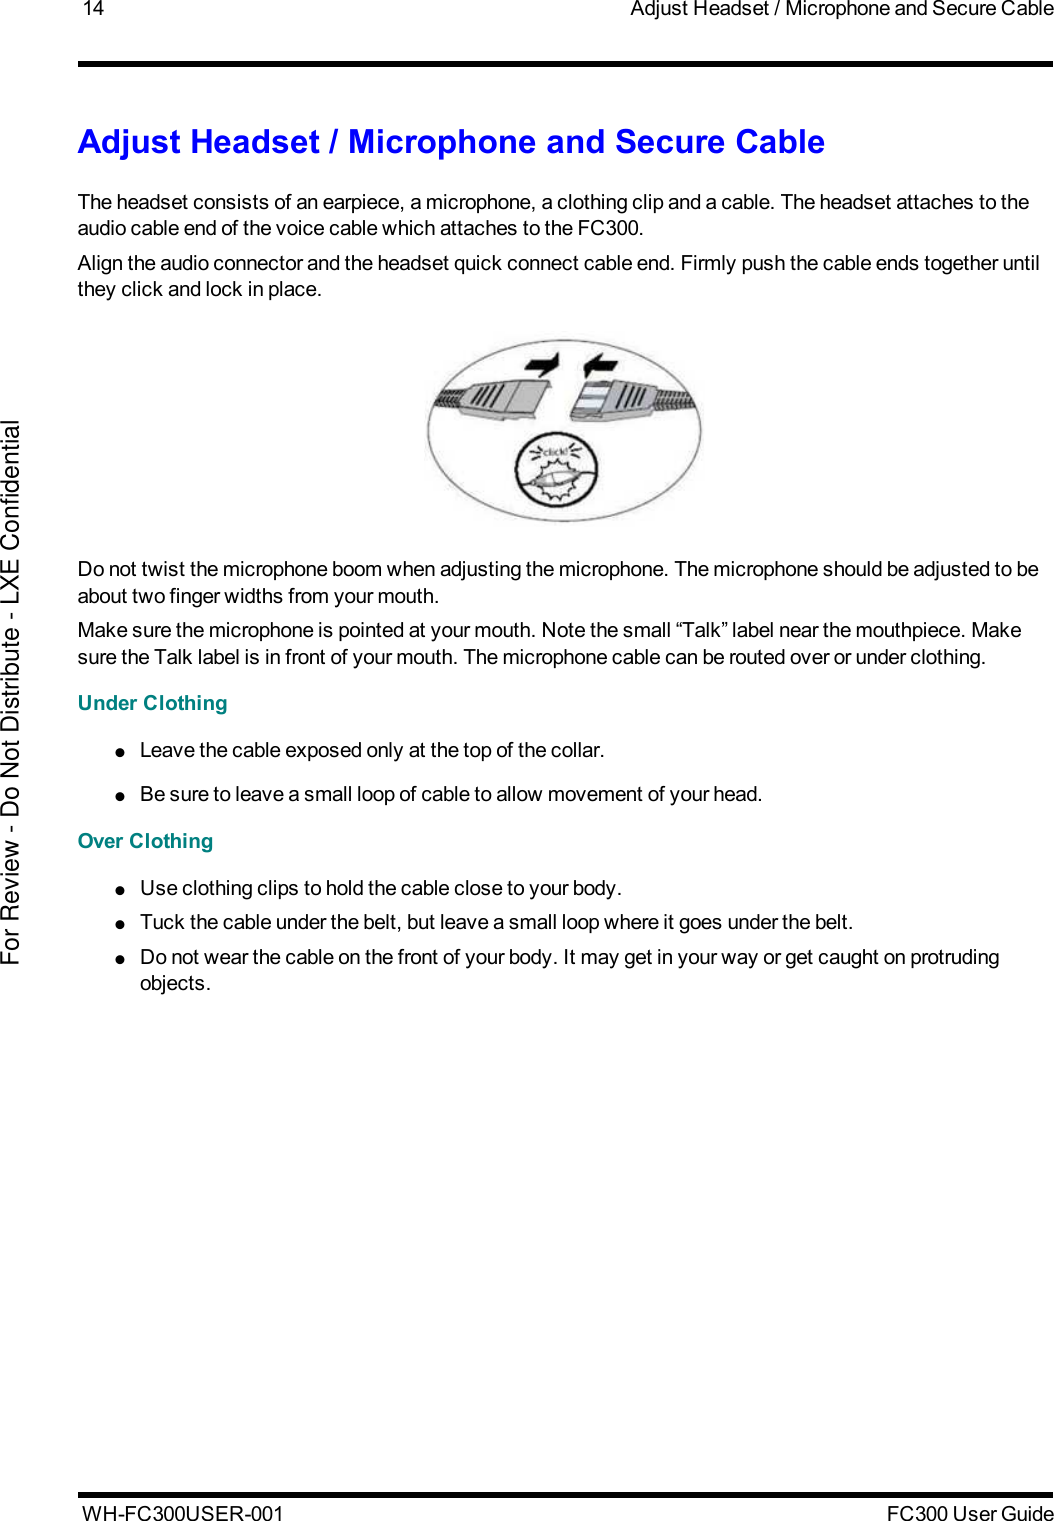
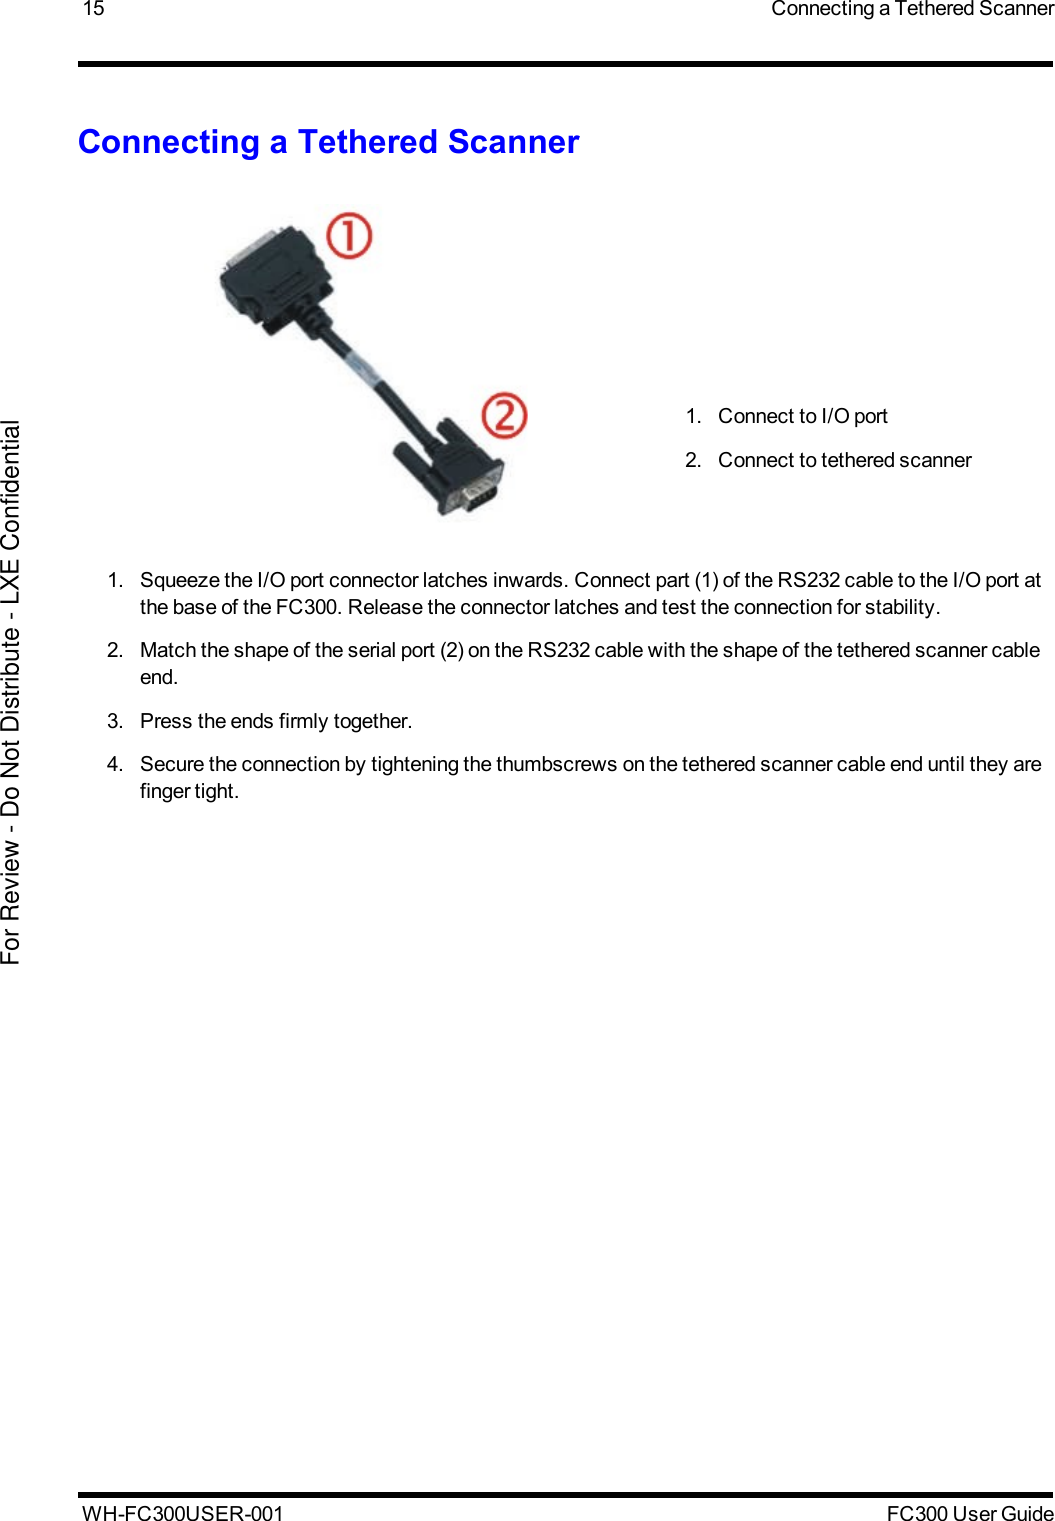
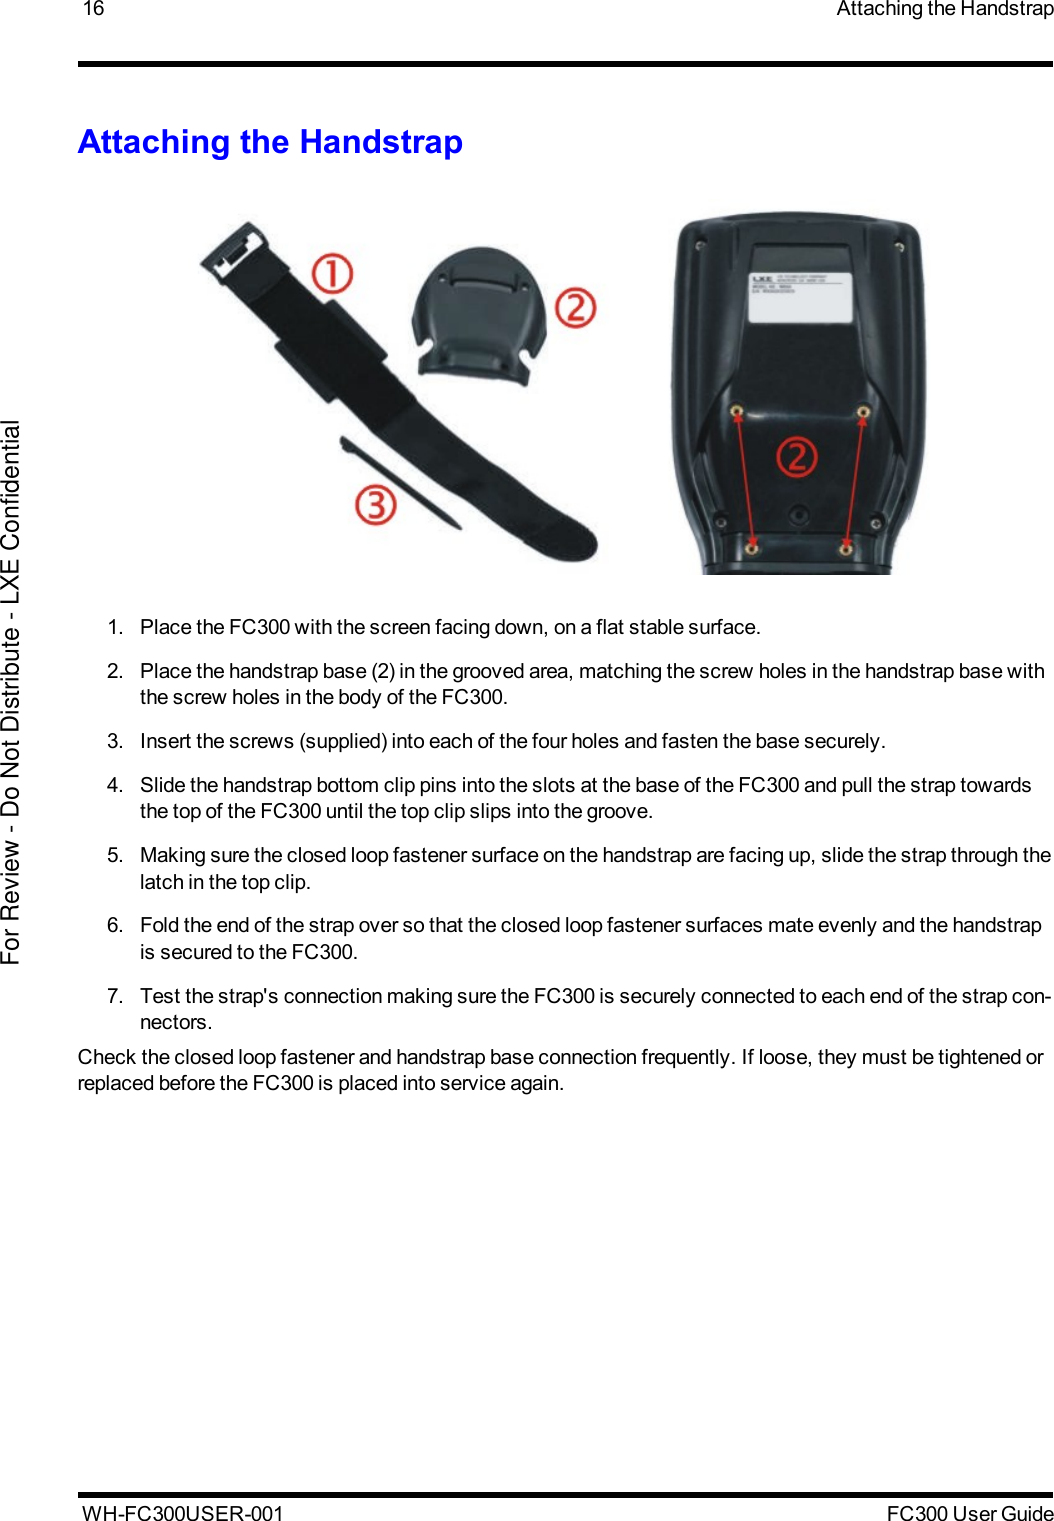
Honeywell International, Inc. MX9, FC300 Handheld computer PDF Output
UserManual.wiki
>
Honeywell
>
LXEBT001 User Manual
>
Users Manual F300
Contents
1.
Installation Guide
2.
Host Manual
3.
Users Manual F300
4.
Users Manual MX9
Users Manual F300
Navigation menu
Upload a User Manual
Namespaces
Wiki Guide
HTML
PDF
Info
Views
User Manual
Discussion / Help
Navigation
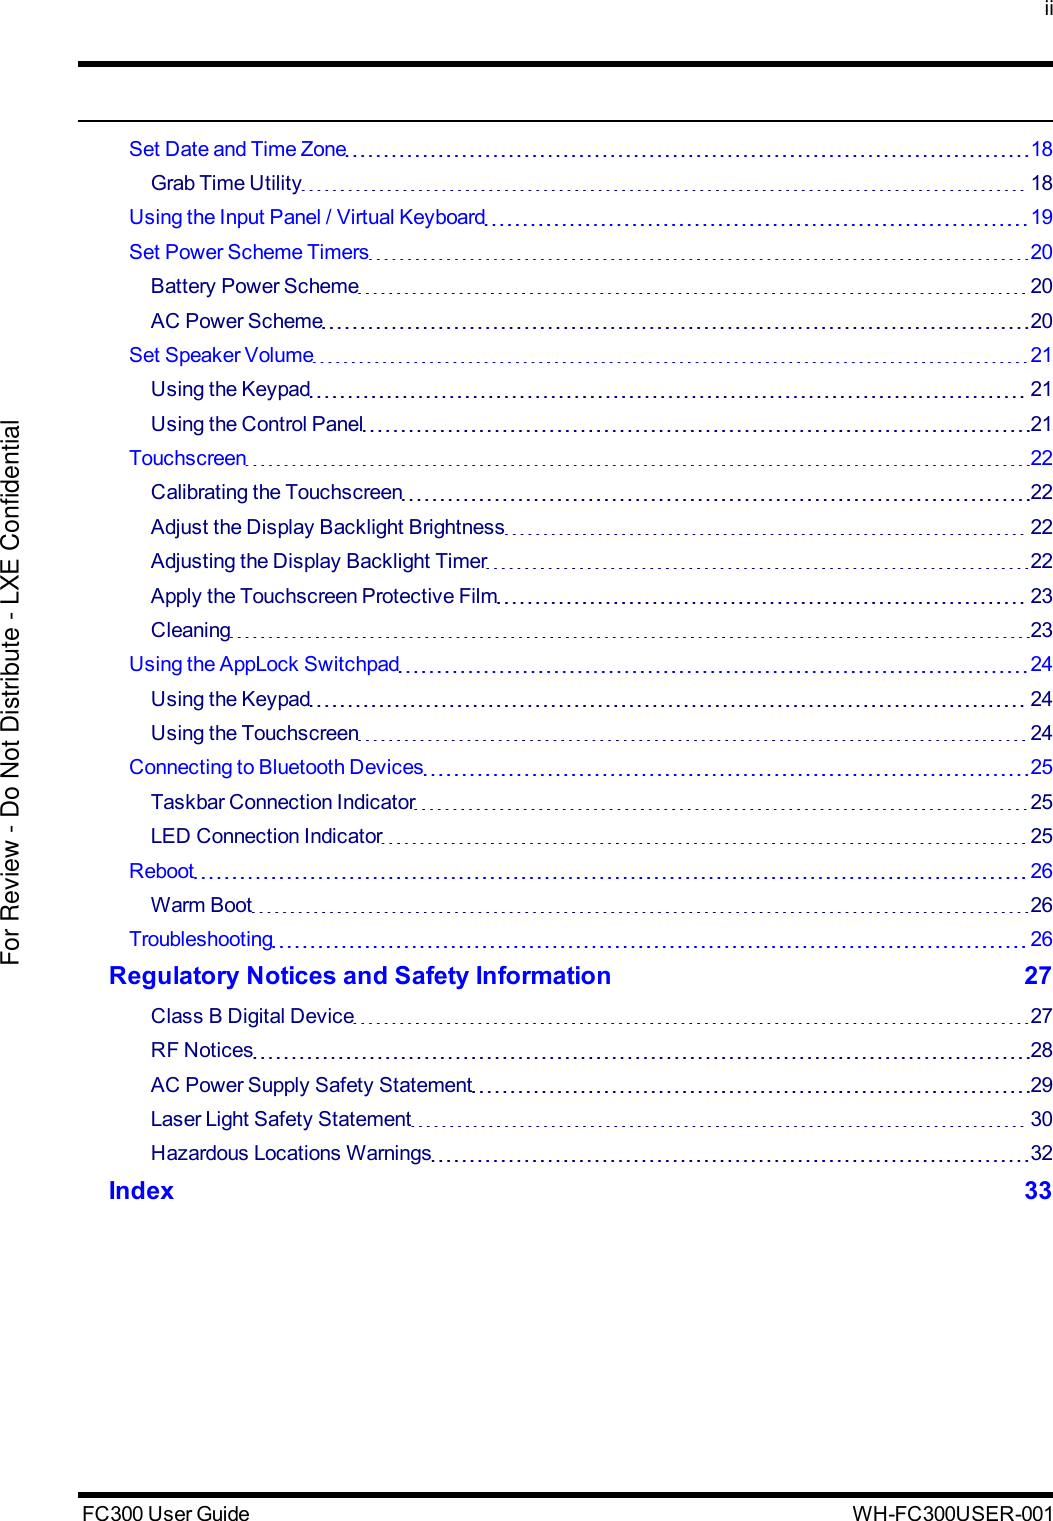

![Regulatory Notices and Safety InformationRF NoticesWaste Electrical and Electronic Equipment (WEEE)Important:This symbol is placed on the product to remind users to dispose of Waste Electrical andElectronic Equipment (WEEE) appropriately, per Directive 2002-96-EC. In most areas, thisproduct can be recycled, reclaimed and re-used when properly discarded. Do not discard labeledunits with trash. For information about proper disposal, contact LXE through your local salesrepresentative, or visit www lxe com.Class B Digital DeviceNOTICEThis device complies with Part 15 of the FCC Rules [and with RSS-210 of Industry Canada]. Operation issubject to the following two conditions:1. This device may not cause harmful interference, and2. This device must accept any interference received, including interference that may cause undesiredoperation.NOTE: This equipment has been tested and found to comply with the limits for a Class B digital device,pursuant to Part 15 of the FCC Rules. These limits are designed to provide reasonable protection againstharmful interference in a residential installation. This equipment generates, uses and can radiate radiofrequency energy and, if not installed and used in accordance with the instructions, may cause harmfulinterference to radio communications. However, there is no guarantee that interference will not occur in aparticular installation. If this equipment does cause harmful interference to radio or television reception, whichcan be determined by turning the equipment off and on, the user is encouraged to try to correct the interferenceby one or more of the following measures:●Reorient or relocate the receiving antenna.●Increase the separation between the equipment and the receiver.●Connect the equipment into an outlet on a circuit different from that to which the receiver is connected.●Consult the dealer or an experienced radio/TV technician for help.NOTICEChanges or modifications made to this equipment not expressly approved by LXE, Inc., may void the FCCauthorization to operate this equipment.Industry CanadaThis Class B digital apparatus meets all requirements of the Canadian Interference Causing EquipmentRegulations. Operation is subject to the following two conditions: (1) this device may not cause harmfulinterference, and (2) this device must accept any interference received, including interference that may causeundesired operation.WH-FC300USER-001 FC300 User GuideFor Review - Do Not Distribute - LXE Confidential](https://usermanual.wiki/Honeywell/LXEBT001.Users-Manual-F300/User-Guide-1166473-Page-31.png)
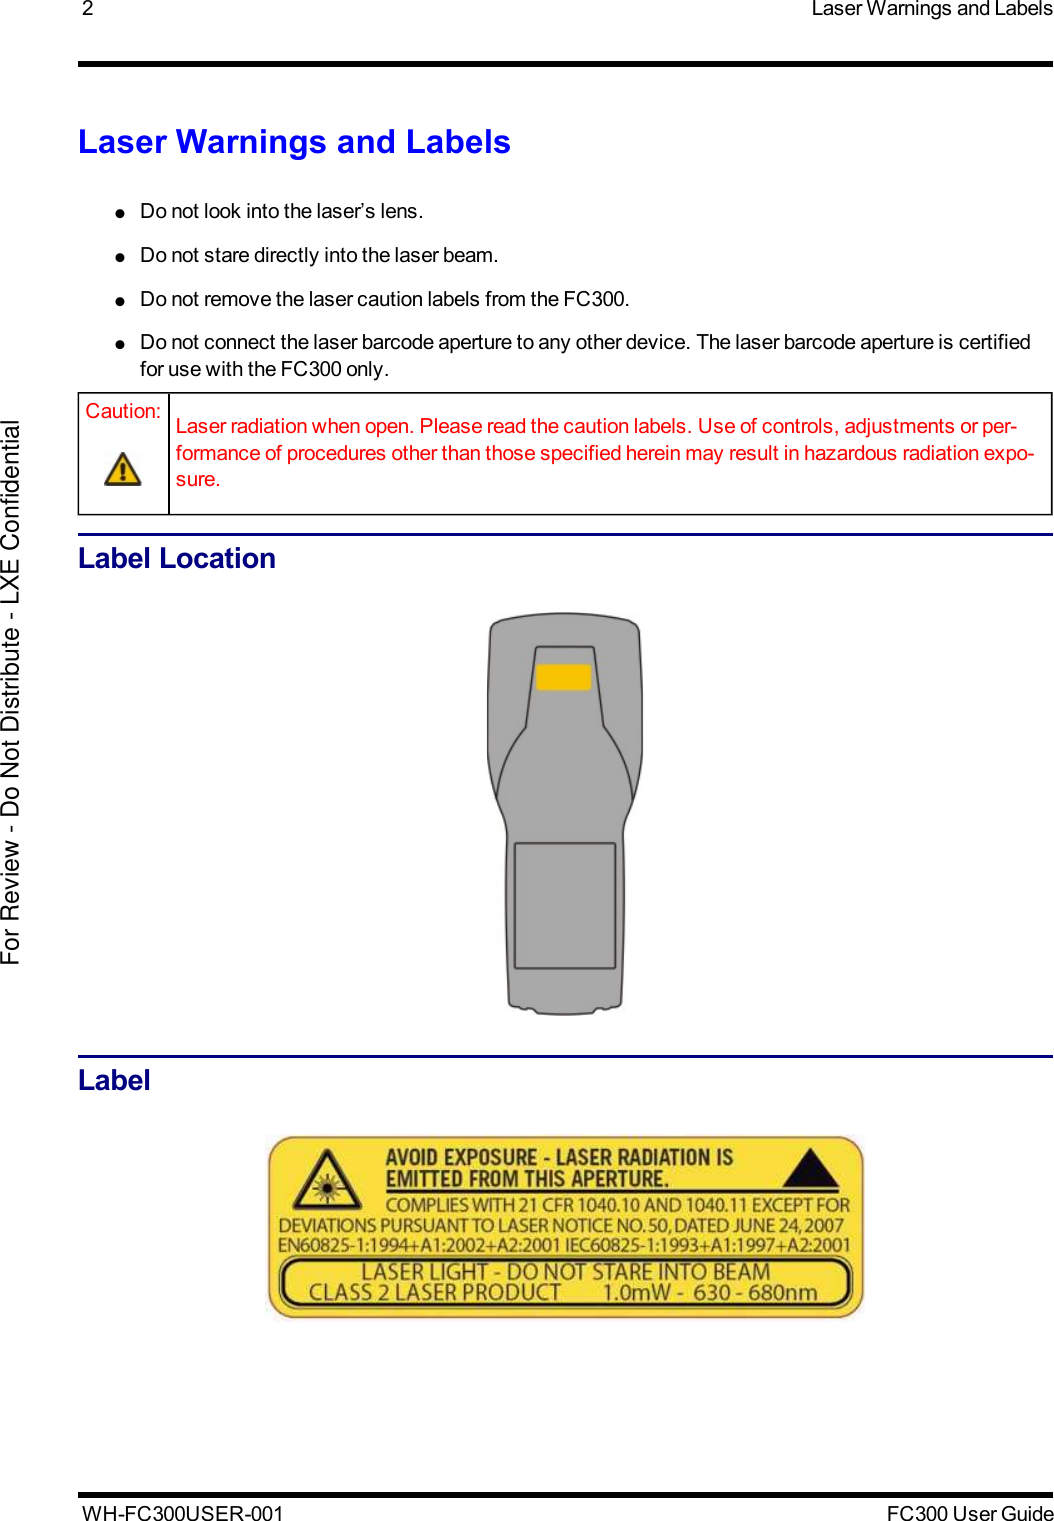
![RF Notices 28Cet appareil numérique de la classe B respecte toutes les exigences du Règlement sur le matériel brouilleurdu Canada. Le présent appareil numérique n’émet pas de bruits radioélectriques dépassant les limitesapplicables aux appareils numériques de Classe B prescrites dans le Règlement sur le brouillageradioélectrique édits par le ministère des Communications du Canada.Li-Ion BatteryWhen disposing of the FC300 main battery, the following precautions should be observed: The battery shouldbe disposed of properly. The battery should not be disassembled or crushed. The battery should not be heatedabove 212°F (100°C) or incinerated.NOTICE:This Class B digital apparatus complies with Canadian ICES-003.Cet appareil numérique de la classe [*] est conforme á la norme NMB-003 du Canada.RF NoticesThis device contains transmitter Module FCC ID: KDZLXE4830PRF Safety Notice (Summit Client - 4830)Caution:This portable device with its antenna complies with FCC and Industry Canada RF exposure limitsset for an uncontrolled environment. This equipment has shown compliance with FCC andIndustry Canada Specific Absorption Rate (SAR) limits. Highest reported SAR for the FC300 isUnknown W/kg on body. Any accessories not provided by LXE should not be used with thisdevice. This device must not be co-located or operating in conjunction with any other antenna ortransmitter.This device contains transmitter Module FCC ID: KDZLXE4831PRF Safety Notice (Summit Client - 4831)Caution:This portable device with its antenna complies with FCC and Industry Canada RF exposure limitsset for an uncontrolled environment. This equipment has shown compliance with FCC andIndustry Canada Specific Absorption Rate (SAR) limits. Highest reported SAR for the FC300 isUnknown W/kg on body. Any accessories not provided by LXE should not be used with thisdevice. This device must not be co-located or operating in conjunction with any other antenna ortransmitter.R&TTE Directive Requirements (Applies only to equipment operated within the EU/EFTA)Information to UserA label on the exterior of the device should resemble one of the labels shown below (the labelcontains the LXE part number of the installed radio card). The labels shown below and affixed to thedevice, identify where the device may be used and where its use is restricted. Use of a device isprohibited in countries not listed below or otherwise identified by the label. (May or may not includethe 0560 Notified Body Number. Substitute 4 digit Notified Body Number may also be applied.)FC300 User Guide WH-FC300USER-001For Review - Do Not Distribute - LXE Confidential](https://usermanual.wiki/Honeywell/LXEBT001.Users-Manual-F300/User-Guide-1166473-Page-32.png)