Hoover Enigma Bagged Pets Upright Vacuum Cleaner PU71EN01 Instruction Manual Product Code 39100390 PU71 EN01 PU01
User Manual: Hoover Instruction Manual Enigma PU71EN01 - Vacuum Cleaner Help and Advice from Hoover
Open the PDF directly: View PDF ![]() .
.
Page Count: 10
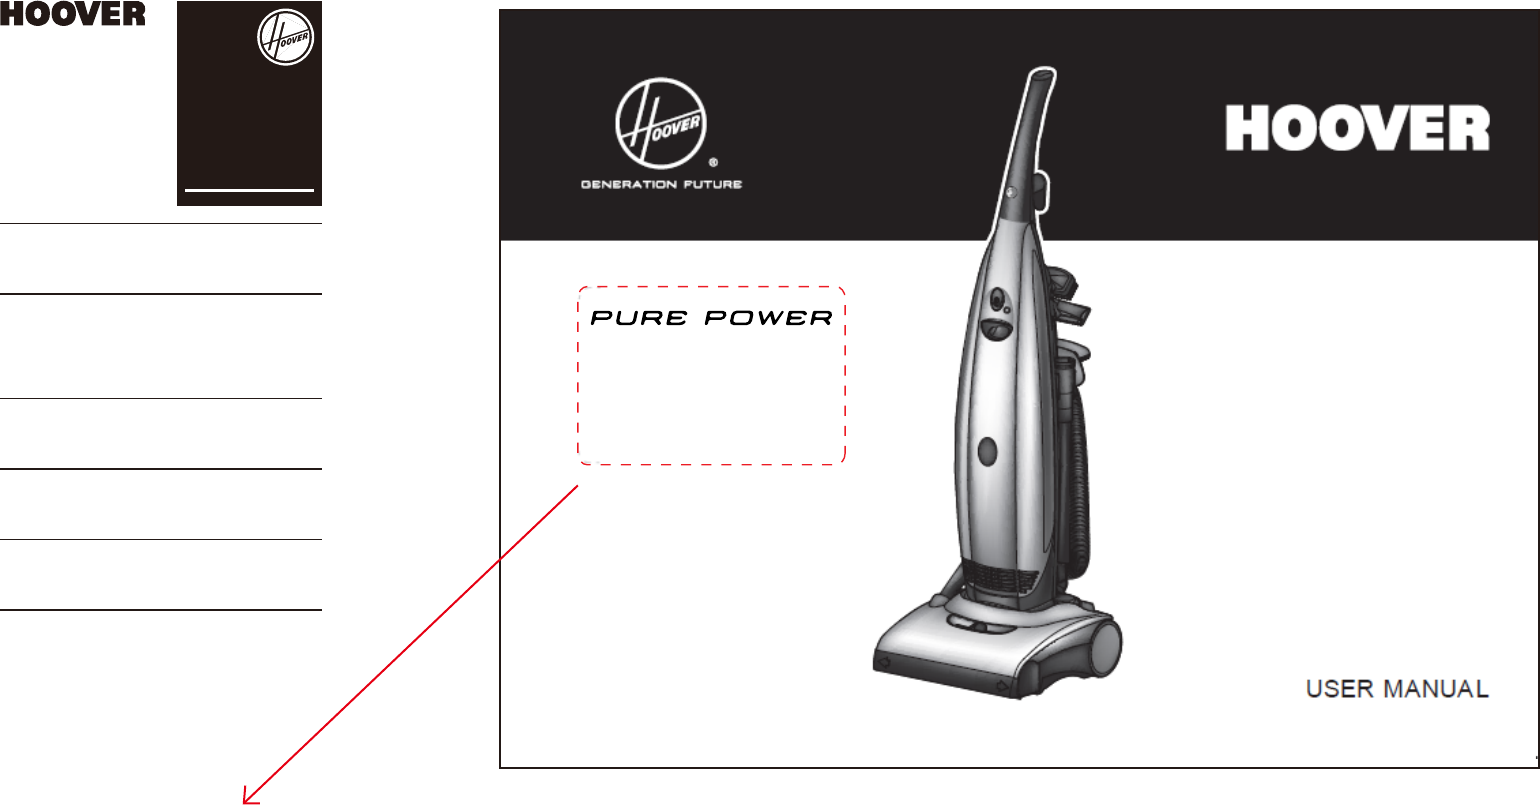
USER MANUAL
- 2 -
- 2 -
IMPORTANT SAFETY REMINDERS
This appliance should only be used for domestic cleaning, as
described in this user guide. Please ensure that this guide is fully
understood before operating the appliance.
Do not leave the appliance plugged in. Always switch off and
remove the plug from the socket after use, or before cleaning the
appliance or any maintenance task.
This appliance can be used by children aged from 8 years and
above and persons with reduced physical, sensory or mental
capabilities or lack of experience and knowledge if they have been
given supervision or instruction concerning use of the appliance
in a safe way and understand the hazards involved. Children shall
not play with the appliance. Cleaning and user maintenance shall
not be made by children without supervision.
If the power cord is damaged stop using the appliance immediately.
To avoid a safety hazard, an authorised Hoover service engineer
must replace the power cord.
Keep hands, feet, loose clothing and hair away from rotating
brushes.
Use only attachments, consumables or spares recommended or
supplied by Hoover.
When using cleaning tools ensure that the appliance is kept in the
upright (parked) position. This will avoid possible damage to the
appliance above you.
Static electricity: some carpets can cause a small build up of static
electricity. Any static discharge is not hazardous to health.
Do not use your appliance out of doors or on any wet surface or
for wet pick up.
Do not pick up hard or sharp objects, matches, hot ashes, cigarette
ends or other similar items.
aerosols or their vapours.
Do not run over the power cord when using your appliance or
remove the plug by pulling on the power cord.
Do not continue to use your appliance if it appears faulty.
Hoover service:
operation of this appliance we recommend that any servicing
or repairs are only carried out by an authorised Hoover service
engineer.
Do not stand on or wrap the cord around arms or legs when using
your appliance.
Do not use the appliance to clean animals or people.
When using the cleaning tools, ensure to always steady the
appliance with your other hand. This will ensure that the appliance
does not fall while in use.
WARNING: A thermal cut out switches off the appliance to prevent overheating if
switch off, unplug and correct the fault. It will take approximately 45 minutes for
the cut out to automatically reset.
The Environment
The symbol on this appliance indicates that this appliance may not be
treated as household waste. Instead it must be handed over to the applicable
Disposal must be carried out in accordance with local environmental
regulations for waste disposal. For more detailed information about
treatment, recovery and recycling of this appliance, please contact your local
purchased the appliance.
This appliance complies with the European Directives 2006/95/EC,
2004/108/EC and 2011/65/EU.
- 3 -
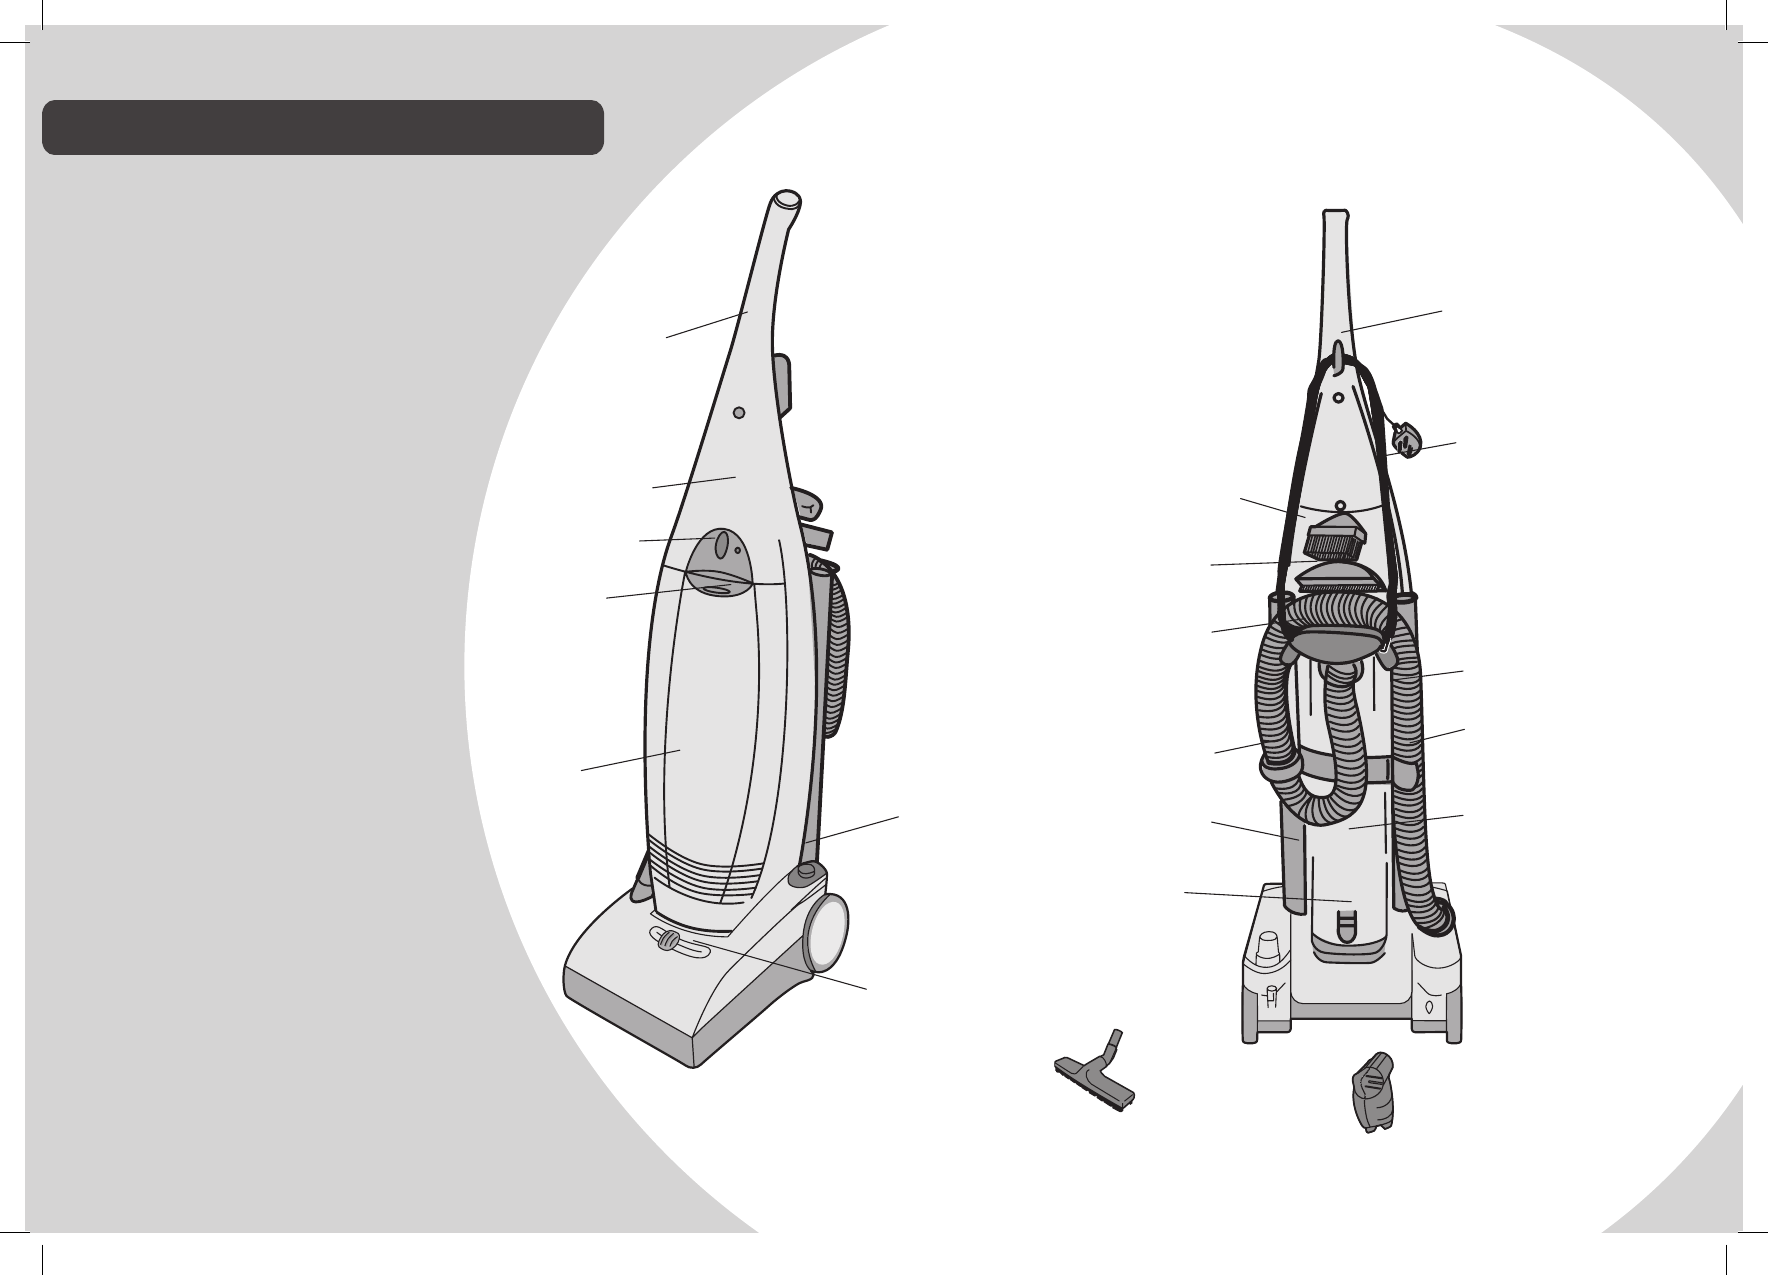
GETTING TO KNOW YOUR CLEANER
HANDLE
On/Off SWITCH
CLEANER
BODY
DOOR
RELEASE PAD
CARPET CARE
CONTROL
SELECTOR
HOSE HOOK
REMOVER*
PARQUET
*
CORD
SWIVEL HOOK
SUPPLY CORD
FLEXIBLE HOSE
HOSE SUPPORTS
EXHAUST FILTER
COVER
HOSE RETAINER
TOOL
- 3 -
CLEANER
LOCK
RELEASE
Effortless cleaning with
your new Hoover
(*Certain models only)
This vacuum cleaner is
supplied with an Energy
Label as required by
European Regulation
(EU) 665/2013.
- 4 -
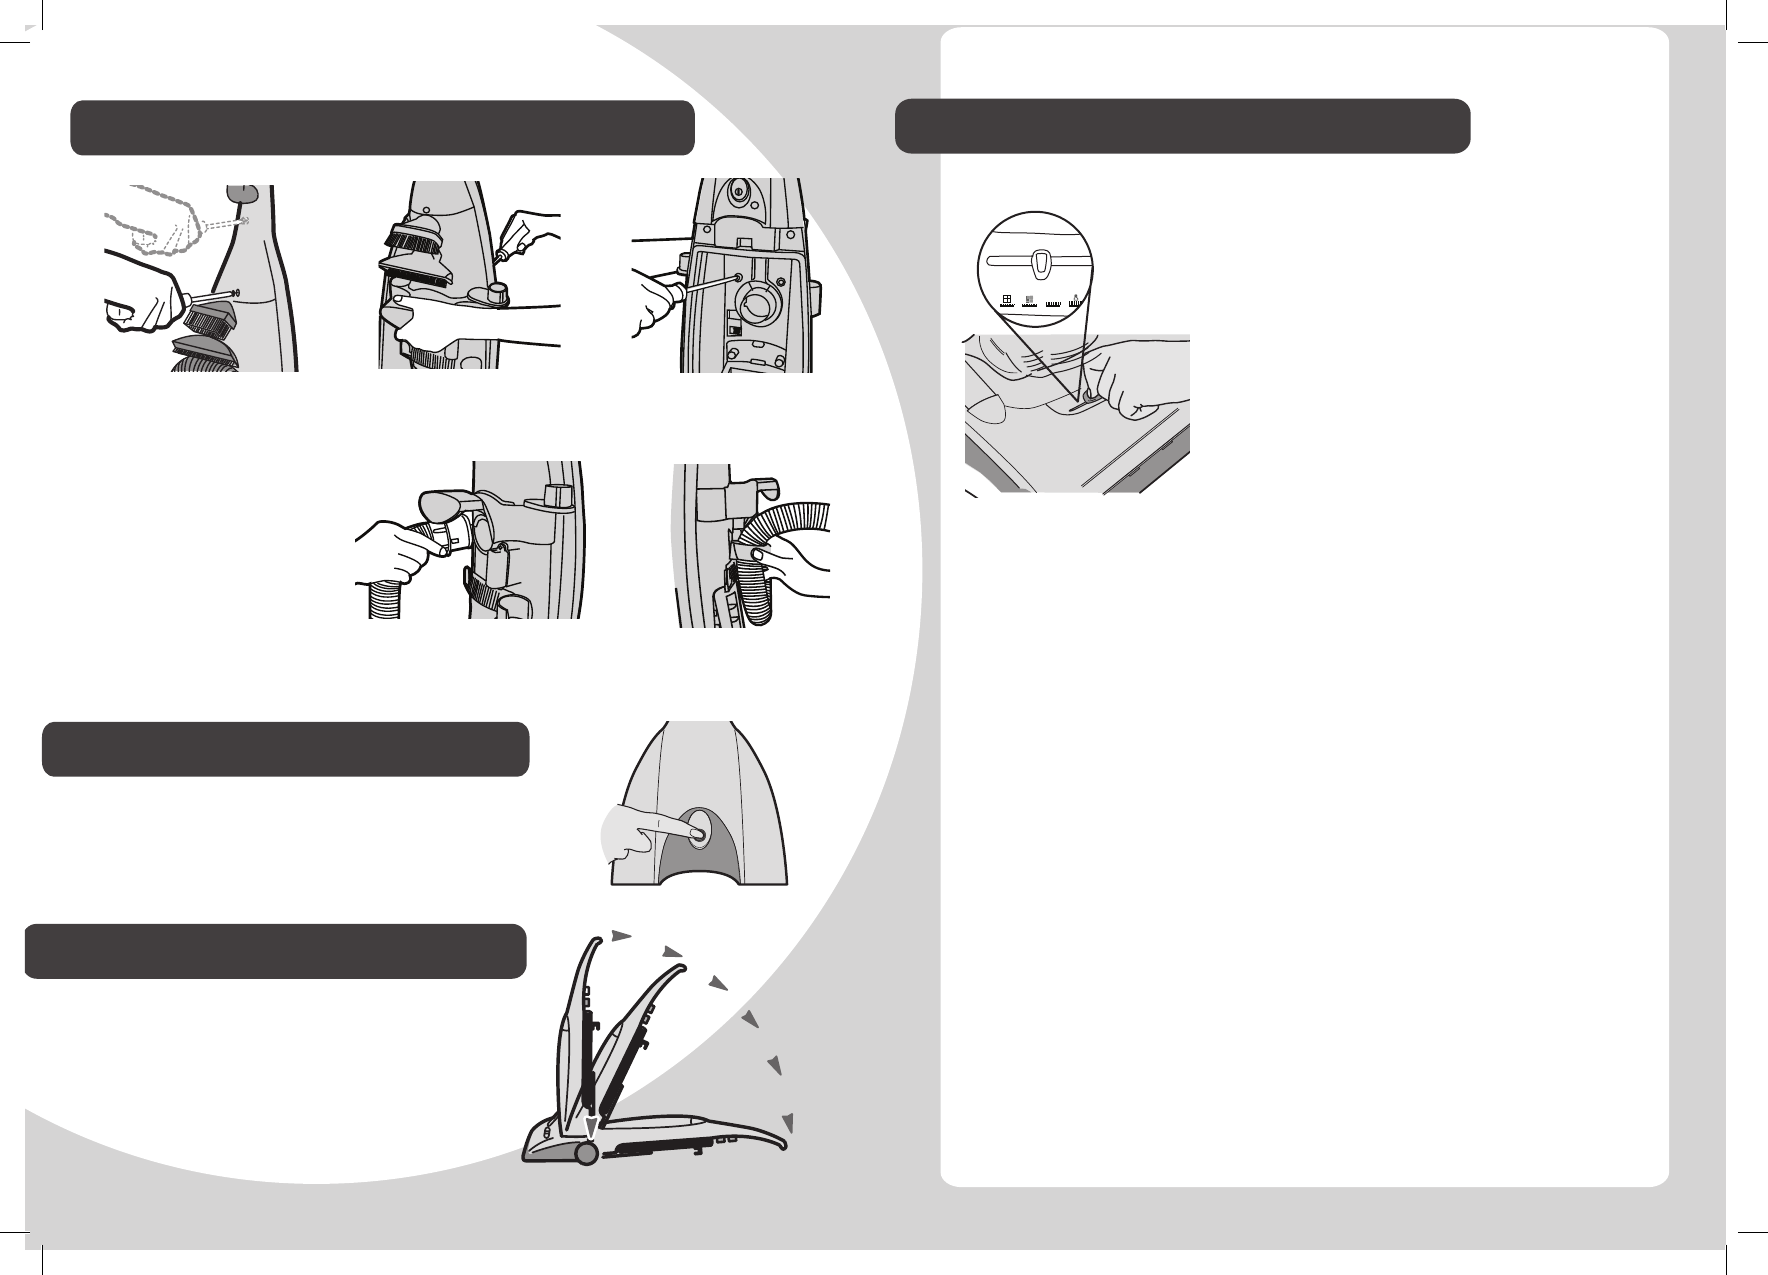
PREPARING TO USE YOUR CLEANER
POWER SWITCH SETTING
CLEANER LOCK RELEASE
CARPET CARE CONTROL SELECTOR
Switching on and off
Push bottom of the On/Off switch to switch on.
Push top of the On/Off switch to switch off.
Unlock the cleaner by pressing down on pedal
furniture and some maintenance tasks
simply press the pedal again and
Insert handle into body
of cleaner. Slide into
position.
with body of cleaner.
Tighten large screw (pre-
hole). Insert small screw
into handle lower hole
and tighten.
Connect hose to back of
product.
Latch hose retainer
to hose support.
the back of product
Screw top two provided
handle in place
The carpet care control selector raises and lowers the height of
the nozzle. Ensure that the cleaner is in the upright
(parked) position and move the selector
To obtain the best performance and
#1it is recommended
that the adjustment setting position 1 is
used for the main cleaning operations.
The other adjustment settings are for
ease of use, use on longer pile carpets,
or for specialist cleaning tasks.
Settings
1.
ceramic tiles.
2.
3. For longer pile carpets the motion resistance may increase.
push the vacuum cleaner.
4. Luxury carpet and Tool mode
IMPORTANT: Using this cleaner for loop pile carpets with
pile greater than 30mm is not recommended. Please consult
instruction before vacuuming.
IMPORTANT:
linoleum the selector switch must be moved to position 2. Failure
by European Regulation (EU) 665/2013. If the label shows a red
this indicates that the vacuum cleaner is not suitable for use on
#1NOTE:
(EU) 665/2013 and (EU) 666/2013.
4
3
12
- 5 -
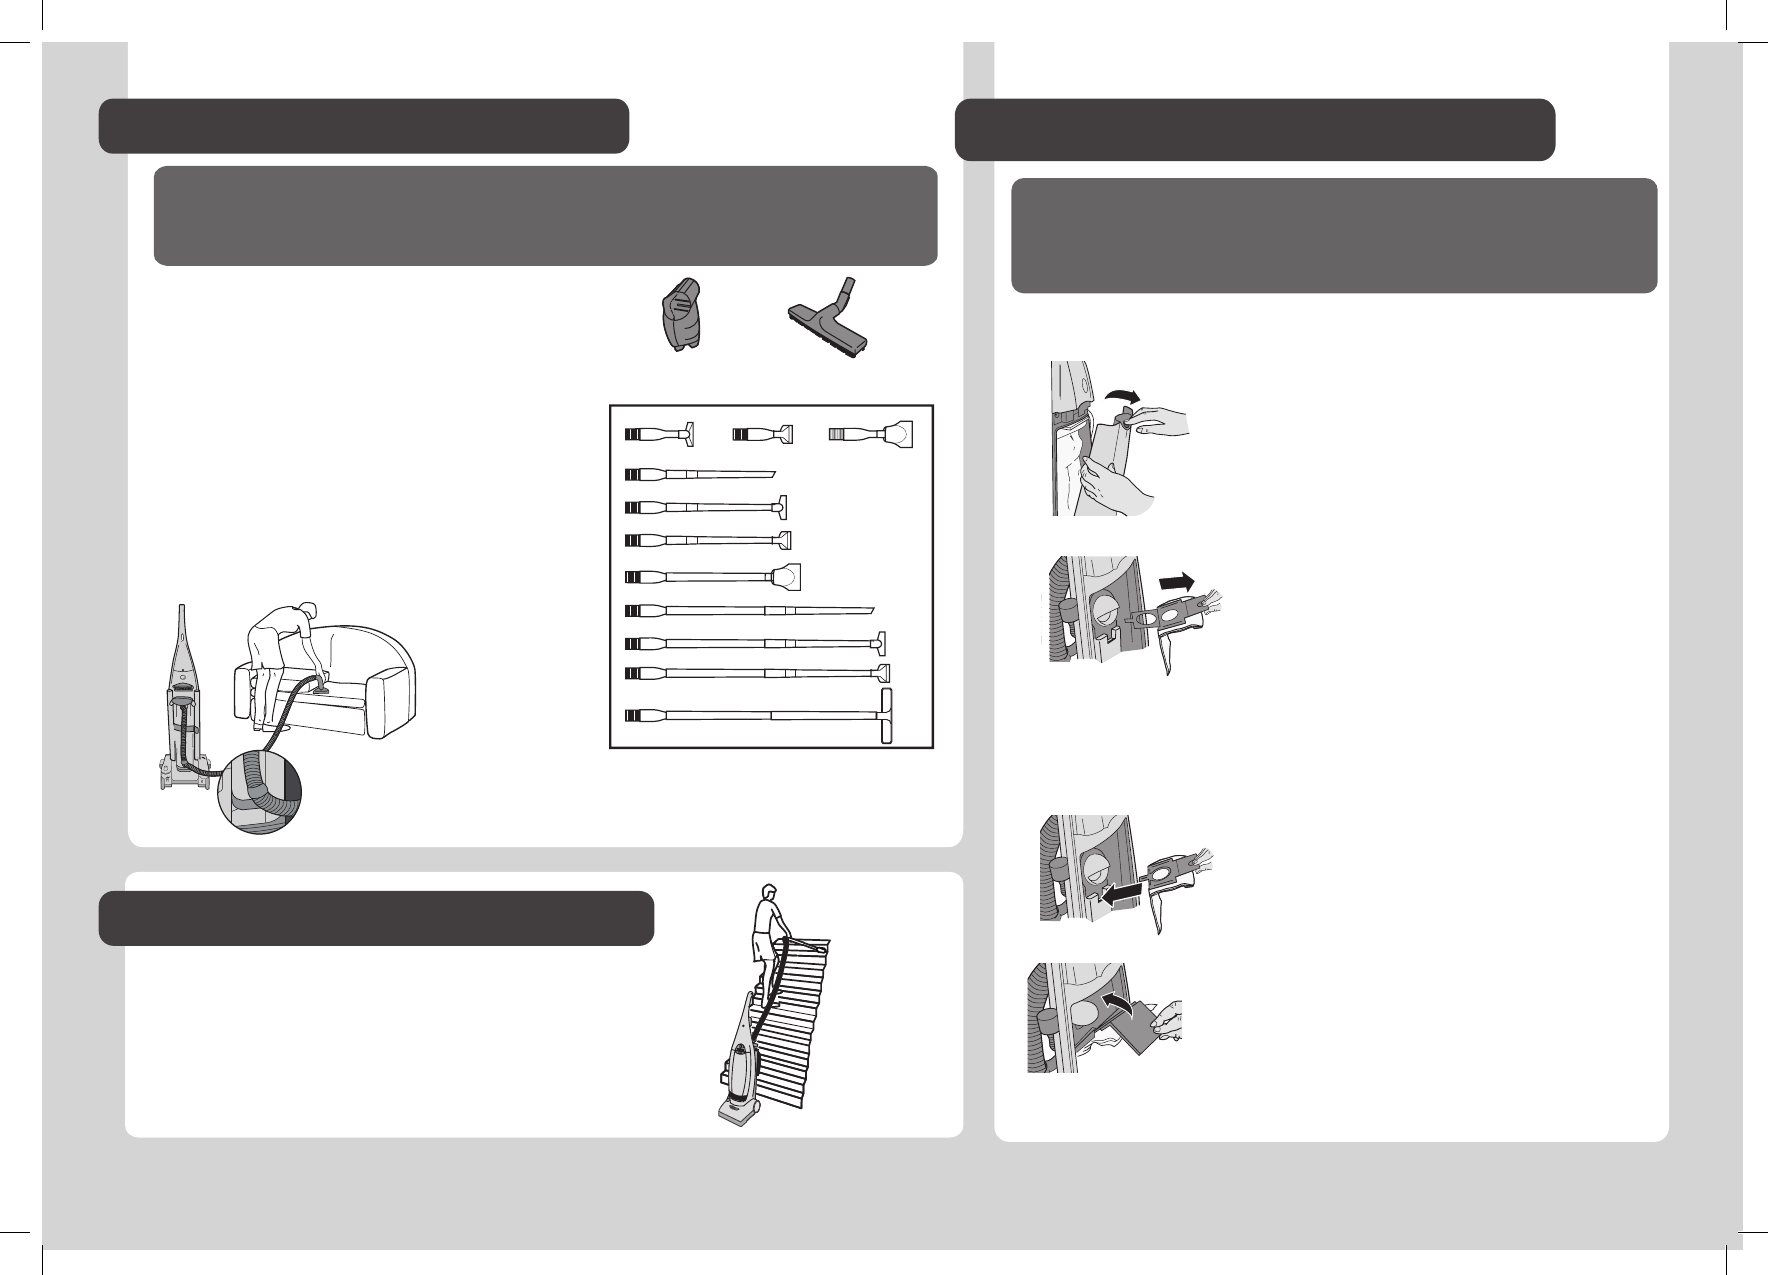
CLEANING TOOLS*
CLEANING THE STAIRS
!!
IMPORTANT: When using cleaning tools, the cleaner must be kept
in the upright (parked) position, particularly when cleaning stairs.
The carpet height selector should also be set to tool mode:
IMPORTANT: Switch cleaner off and remove plug
from electricity supply before changing the bag. Your
cleaner is supplied with a bag already tted. This bag
must not be re-used.
It is dangerous to place the cleaner above you whilst
cleaning the stairs.
ALWAYS work with the cleaner below you. Ensure it is
positioned up against the bottom step.
DO NOT attach hose retainer when cleaning the stairs.
- 5 -
* Certain models only
ALWAYS attach hose retainer to hook when using cleaning
tools.
Unhook after use.
Pet Hair & Allergen Remover *
Ideal for removing pet hairs.
Do not touch the rotating brush.
Parquet Nozzle*
Ideal for cleaning delicate surfaces.
For use combine with the Rigid Extension tube.
Extension Tube*
at its end, it is ideal for stair cleaning.
hose or at the end of the extension tube*.
Combine accessories depending on use.
CHANGING THE DISPOSABLE BAG
To remove bag:
Press down on the door release pad
and remove door.
hose inlet by pulling off the stiff card-
board at the top of the bag.
Slide bag from bag collar retainer by
pulling on stiff cardboard at top of the
bag collar. A shutter will automatically
seal off bag opening.
Discard full bag.
To t new bag:
Push the tab on the cardboard collar
into the slot beneath the hose inlet.
Push the bag collar over the hose inlet
bag door.
*
* *
*
*
*
*
*
- 6 -
- 6 -
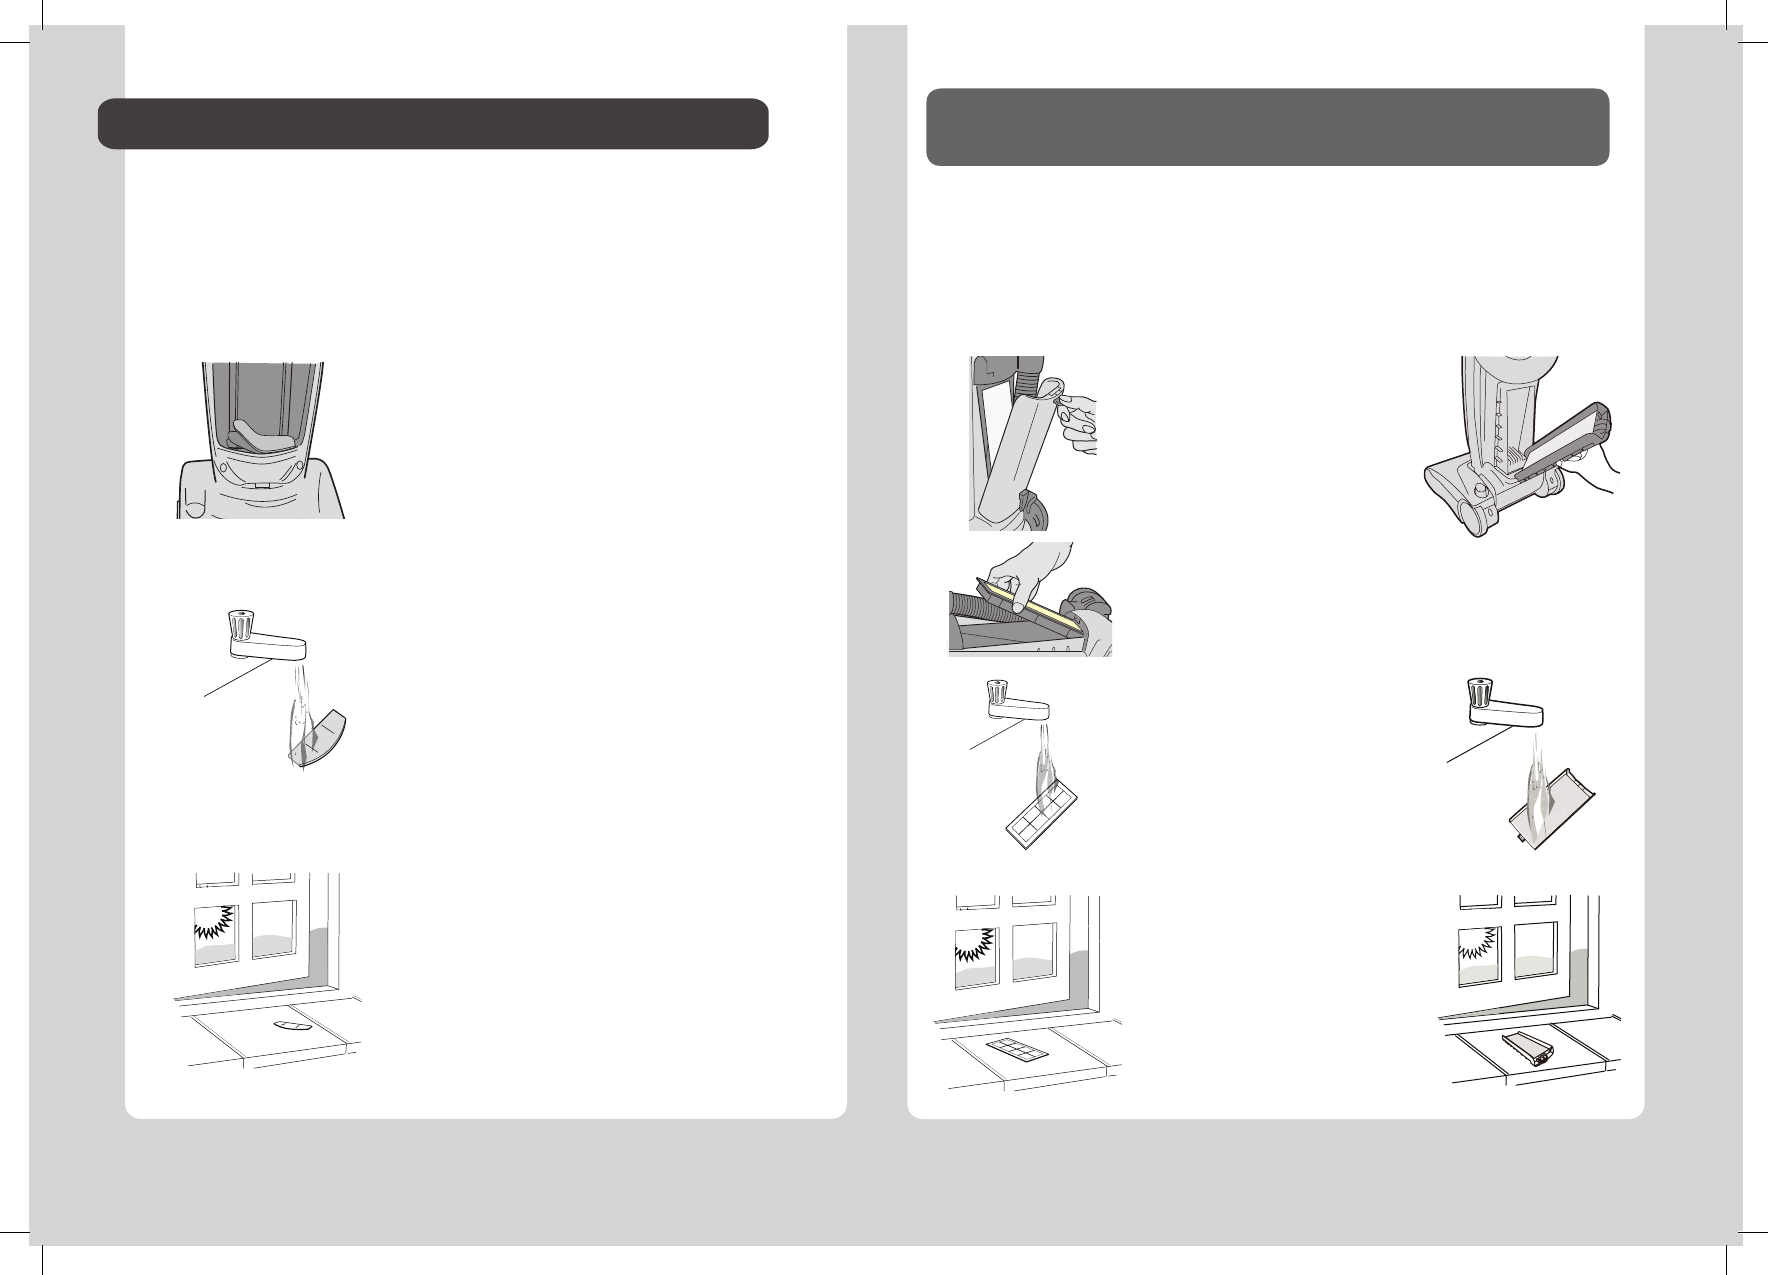
* Certain models only
CLEANING THE FILTERS*
Pre- motor lter
Exhaust lter
HEPA exhaust lter* Microlter exhaust lter*
IMPORTANT: For optimum cleaning performance, always keep
your lters clean.
!
!
Remove excess water by shaking and leave to
dry. Remove excess water by
shaking and leave to dry for
when completely dry.
water.
DO NOT USE HOT WATER OR
Press down on latch and
- 7 -
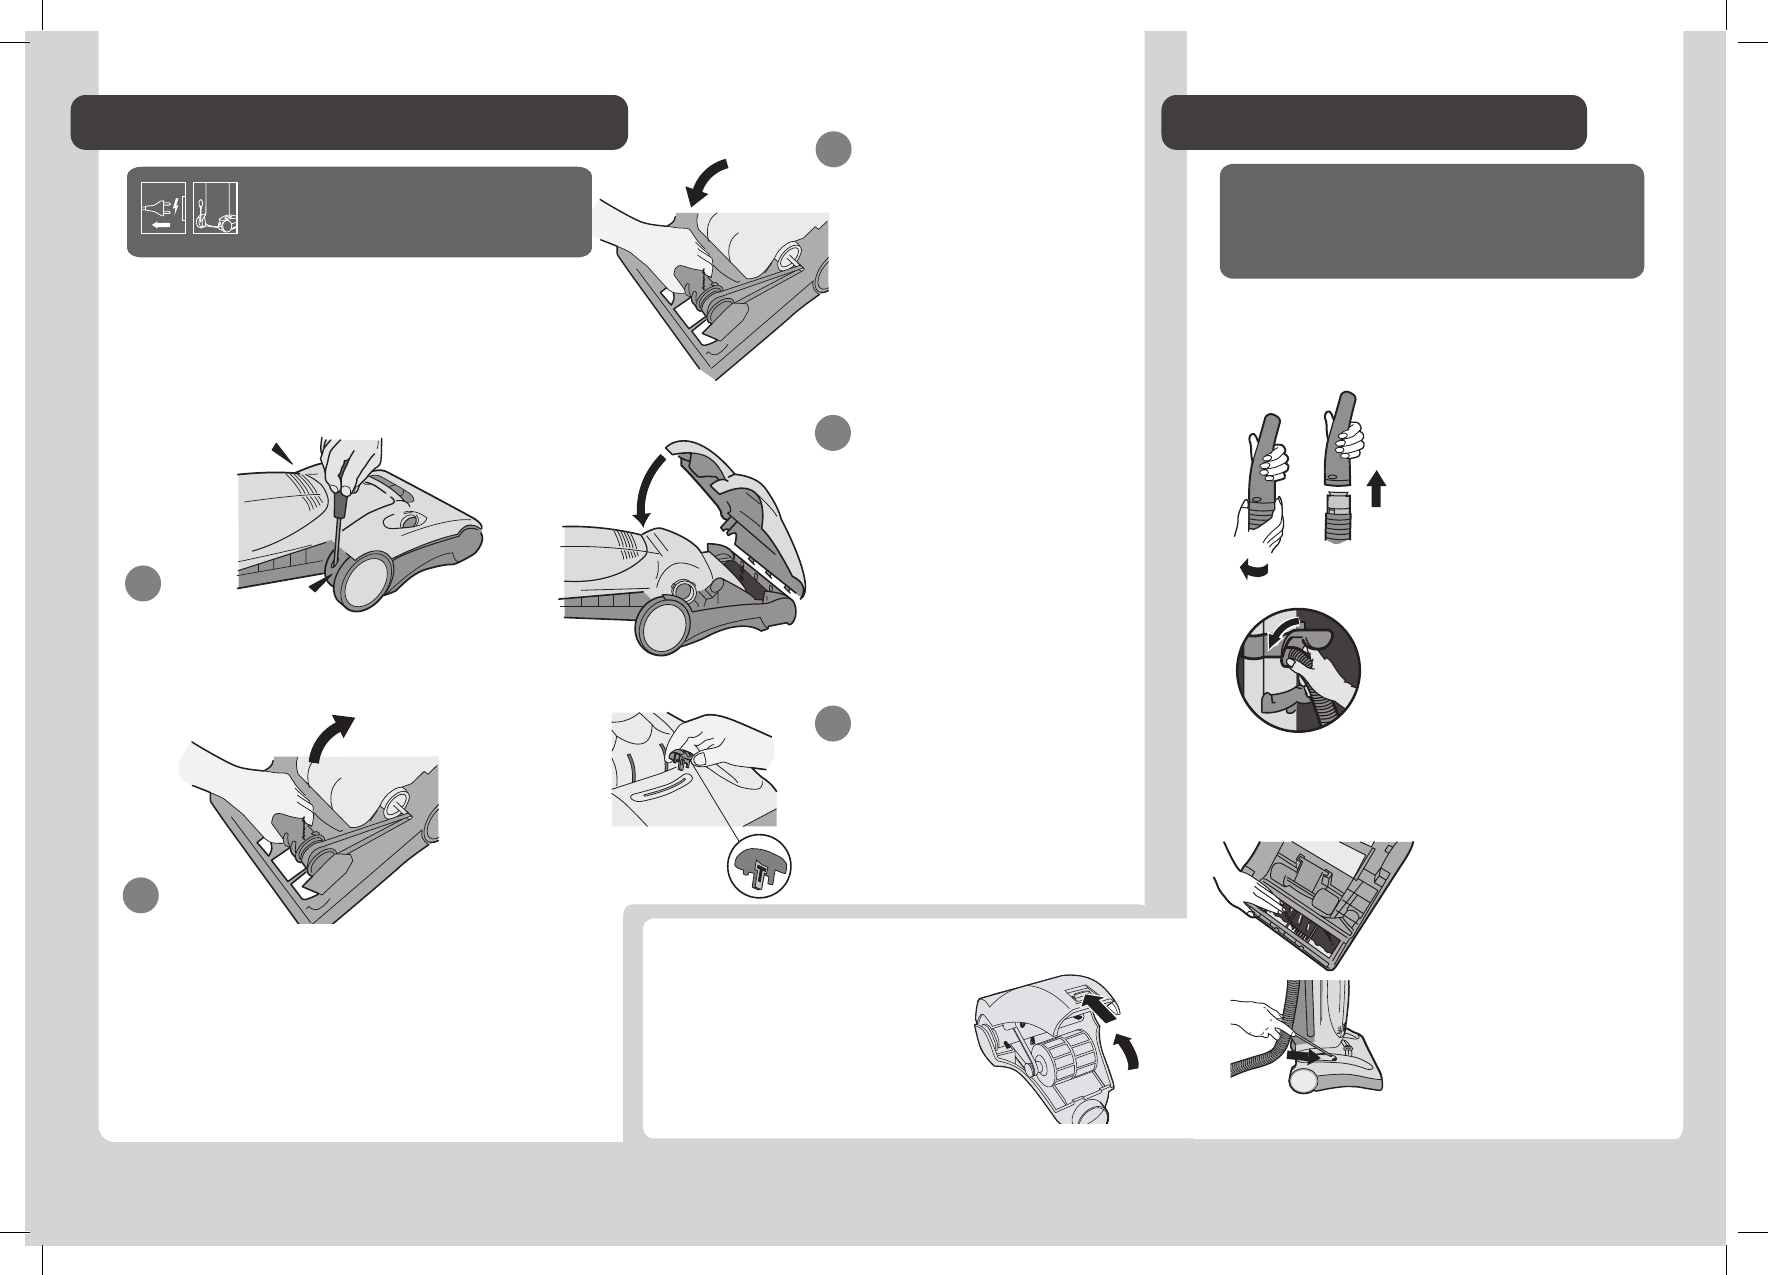
sure you have:
Remove hood
Remove brush assembly
out of cleaner housing. Remove belt from motor
spindle then from brush assembly.
Replace belt
around the brush channel.
Ret brush assembly
and stretch the belt until
brush mountings slot
down into the cleaner
housing. Rotate the
brush to ensure free
movement of the belt.
Ret hood
lugs along the front of
hood are located in the
slots along the front edge
of baseplate.
screws A and B.
Ret carpet care control
selector
(T) is towards the front of
the cleaner.
4
5
3
12IMPORTANT: Switch cleaner off and
remove plug from electricity supply
before checking the brushes or remov-
ing hood.
1
2
CHANGING BELT OR BRUSHES
This cleaner is unlikely to become blocked, except
up large solid objects. Clearing a blockage is simple.
If cleaning tools were in
use, check cleaning tool
Next check hose handgrip;
to remove grip ribbed ring
as shown, turn in direction
of arrow and ease apart.
To check the hose, stretch it
to full length and switch on
the cleaner; the suction will
dislodge most obstructions.
If this is unsuccessful,
switch off and unplug the
cleaner. Remove the hose
by turning it anti-clockwise
as shown. Detach hose and
remove blockage.
For blockages in cleaner base:
1. Turn the cleaner over
and check that the brushes
are free to rotate.
2. Check for a blockage in
hose socket. Use a piece of
to remove any obstructions.
CLEARING A BLOCKAGE
IMPORTANT: Switch the cleaner off
and remove the plug from the elec-
tricity supply before dismantling
cleaner.
!
- 7 -
* Certain models only
Removing a blockage from the
Pet Hair & Allergen Remover*
Open clip and lift cover to remove
blockage.
B
A

- 8 -
- 8 -
User checklist
If your cleaner is not working properly run through the following checklist.
1 Is there a working electricity supply to the cleaner?
Check with another electrical product.
To replace the bag, see the instructions on page 5.
3. Is the hose blocked?
To clear a blockage, see the instructions on page 7.
4. Is there a blockage in the cleaner base?
To clear a blockage, see the instructions on page 7.
6. Is the nozzle height set correctly?
To set the carpet care control selector, see the instructions on page 4.
7. Are the brushes rotating correctly?
To check the brushes, see the instructions on page 7.
8. Has the cleaner overheated?
If so, it will take about 30 minutes to reset itself.
to assist you over the telephone. A service charge will be made if the cleaner is
examined and found to be in working order, has not been assembled in accordance
with these instructions or has been used incorrectly. working order, has not been
assembled in accordance with these instructions or has been used incorrectly.
WARNING!
A thermal cut out switches off the cleaner to prevent overheating if it is used
unplug and correct the fault.
It will take about 45 minutes for the cut out to automatically reset.
IMPORTANT: Do not run cleaner over the supply cord as this could damage
the supply cord insulation.
IMPORTANT INFORMATION
Hoover Service
Hoover spares and Consumables
Always replace parts with genuine Hoover spares. These are available from
your local Hoover dealer or direct from Hoover. When ordering parts always
GUARANTEE STATEMENT
-
tive in the country in which it is sold. Details regarding these conditions can be
obtained from the dealer from whom the appliance was purchased. The bill of
sale or receipt must be produced when making any claim under the terms of
this guarantee.
Subject to change without notice.
Quality
ISO 9001
Hoover Limited
Pentrebach
Merthyr Tydl
Mid Glamorgan
CF48 4TU
HOOVER CUSTOMER HELPINE
08444 995 599
© 2014 48011634
INDUSTRIAL
DESIGN
Artwork Number:
Title:
Created:
Modified:
Engineering Approved:
Issue:
Date:
Date:
Date:
Hoover Ltd.
Industrial Design Department
5th Floor, 288 Dongping Street,
Suzhou Industrial Park,Suzhou,
PRC 215123
Tel: 0512-82181000 Ext 226
Note:
Artwork not to be used
unless approved by
Engineering.
Cris 2014/05/06
Cris 2014/05/06
user manual & manual label
MANUAL LABEL USER MANUAL
Printing colour : 黑(black)
Size : 297x210mm
Material: 1.cover= 铜版纸 coated paper(120g)
2.inside pages= 双胶纸 offset paper(80g)
Printing colour :
黑(black)
Size : 75x50mm
Material: Adhesiver sticker (不覆膜不干胶)
Background Colour:White(白色底)
stick
PU71 PU01 - 001 - 39100409
220-240V~50Hz
750W 6.53Kg
