Horizon Hobby HBZ4771 Game wireless controller User Manual Manual
Horizon Hobby, LLC Game wireless controller Manual
Manual
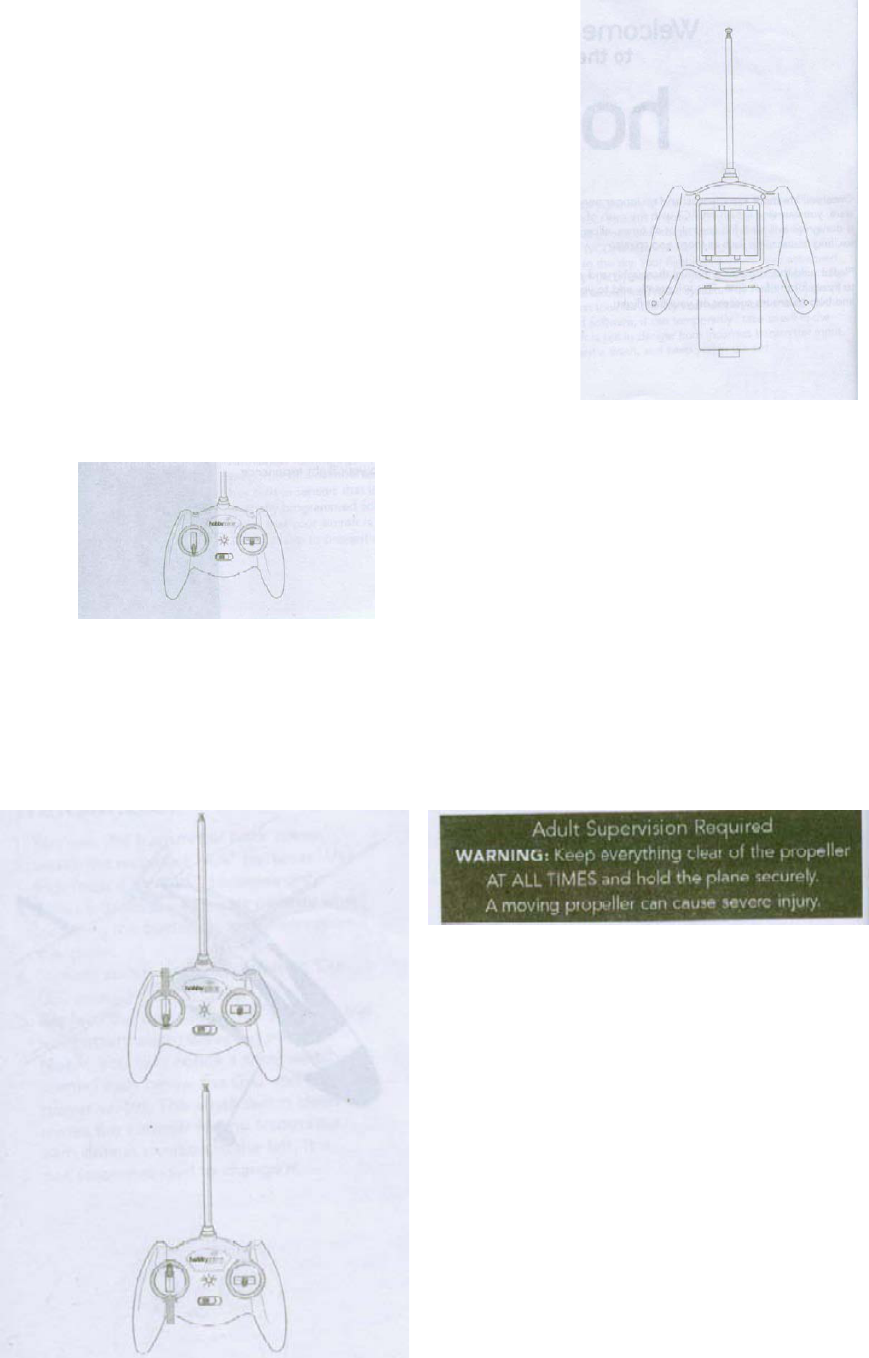
Transmitter Setup
1. Remove the transmitter back cover.
2. Install the included “AA” batteries. Use four fresh 1.5V “AA”
batteries only.
3. Be sure to observe proper polarity when installing the
batteries, and then replace the cover.
4. To test, switch on the transmitter. The LED should glow
brightly
5. Replace the batteries when you hear the low battery
alarm(beeping sound)
Note: You many notice a small switch immediately below
the LED and the power switch.
This small switch determines the controls for the
transmitter with default position to the left.
It is not recommended to change it.
Motor Test and Battery Discharging
1. Turn on transmitter.
2. Install the flight battery into fuselage and
plug it into the connector
3. Move the transmitter’s left stick all the way
down and hlod for one second. This will arm the
motor.
4. Move the transmitter’s left stick up. Since
most batteries come partially changed, the prop
should spin at high spped. (If the motor does not run.
Proceed to charging the battery.)
5. In order to fully discharge the battery, run
the motor at high speed until it shuts off. If there is
not enough charge in the battery to power the
propeller, then proceed to step 4.
6. When finished with the motor test, be sure to disconnect the battery first, then turn off the
transmitter.
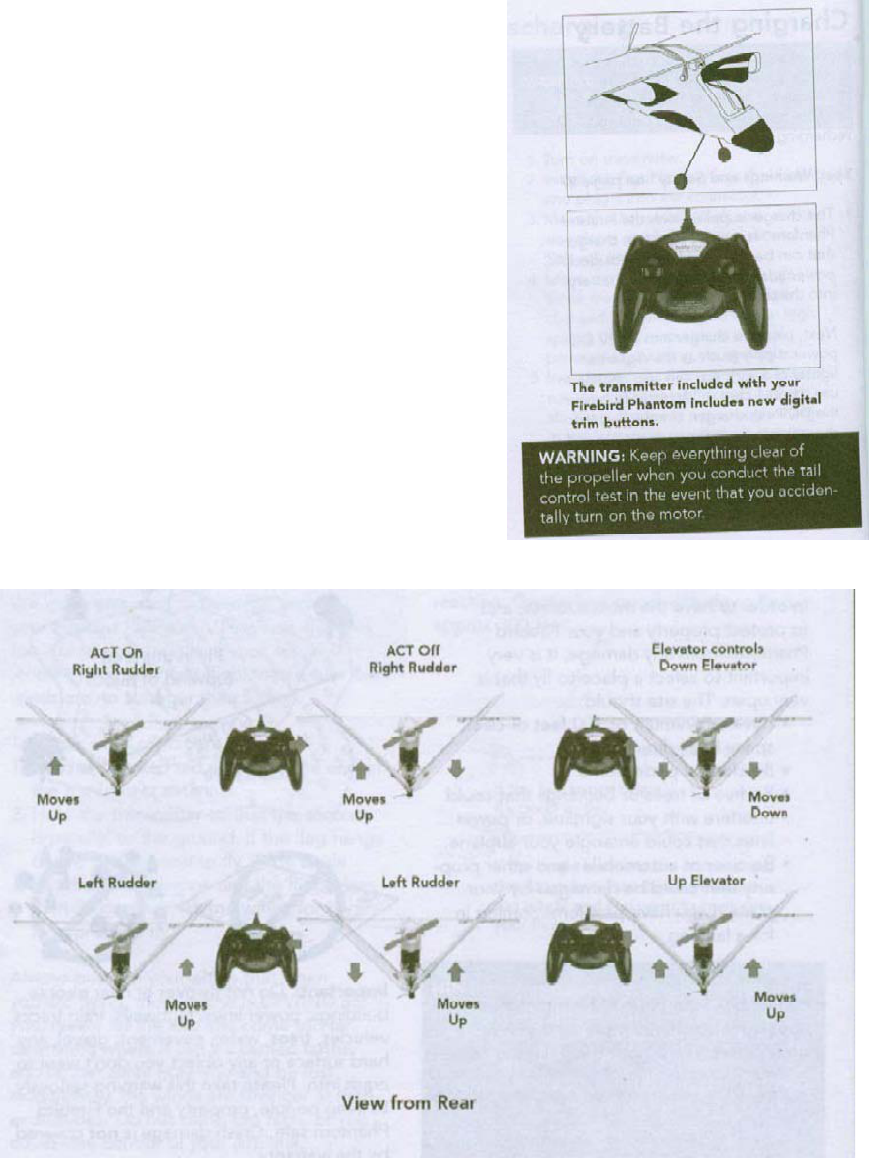
Tail Control Test
1. Switch on the transmiiter. Check the LED.
Do not touch the sticks for 2 secoonds while the
transmiiter automatically calibrates the controls.
2. Install the battery in the fuselages slot and plug in the
connnector. Do not arm the motor
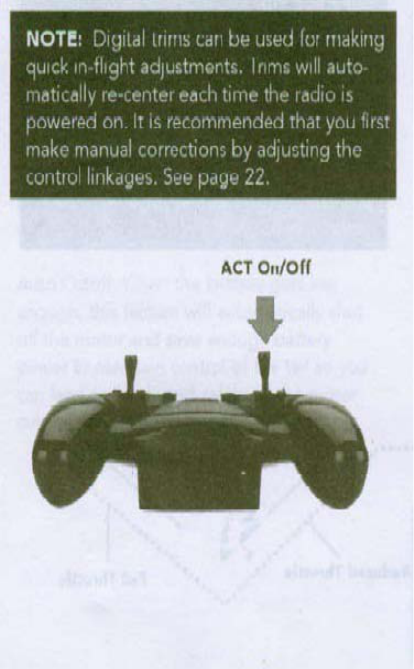
3. The small buttons under and to the side of the sticks are
the digital trim buttons and are used to adjust the
“neutral” point of your control stick. Each time the
transmitter is powerd up, it should reset the trim
automatically. These should self-center when you turn the
transmitter on
4.If you find that the control surface flap is not level with
the rest of the tail surface, you can correct this with a few
pushes of the appropriate trim buttons.
5. Move the right stick side to side which observing that the
tail flaps are moving as shown.
6. Move the right stick up and down which observing that
the tail flaps are moving as shown.
2 1wqwqwew wq
Flying
Sharp Turns:
Move the stick in the direction you want to turn
and add a bit of UP elevator at the same
time(pull back on stick). The plane will make a
sharper banking turn.
Rudder Trim
If the Firebird Phantom seems to drift in one
direction when the control stick is in the
neutral(centered) position, press the rudder
trim buttons below the control stick in the
opposite direction of the drift. Adjust until the
plane flies straight with the control stick at
neutral.
Elevator Trim:
If the model always “hunts” up or down, use the
trim buttons to the left of the stick to correct
this problem. If it hunts up, push the upper trim
button until if flies level. If it hunts down, push
the lower trim button until it flies level. The
model should fly straight with the stick at
neutral. Your Firebird Phantom should have a steady climb at full throttle when it is trimmed properly.
This equipment has been tested and found to comply with the limits for Part 15 of the FCC rules.
These limits are designed to provide reasonable protection against harmful interference in a
residential installation. This equipment generates, uses and can radiate radio frequency energy and, if
not installed and used in accordance with the instructions, may cause harmful interference to radio
communications.
However, there is no guarantee that interference will not occur in a particular installation. If this
equipment does
cause harmful interference to radio or television reception, which can be determined by turning the
equipment
off and on, the user is encouraged to try to correct the interference by one or more of the following
measures:
• Reorient or relocate the receiving antenna.
• Increase the separation between the equipment and receiver.
• Connect the equipment to an outlet on a circuit different from that to which the receiver is
connected.
This device complies with part 15 of the FCC rules. Operation is subject to the following two
conditions: (1) This device may not cause harmful interference, and (2) this device must accept any
interference received, including interference that may cause undesired operation.
Note: Modifications to this product will void the user’s authority to operate this equipment.
This Category II radiocommunication device complies with Industry Canada Standard RSS-310.
Ce dispositif de radiocommunication de catégorie II respecte la norme CNR-310 d’Industrie Canada.