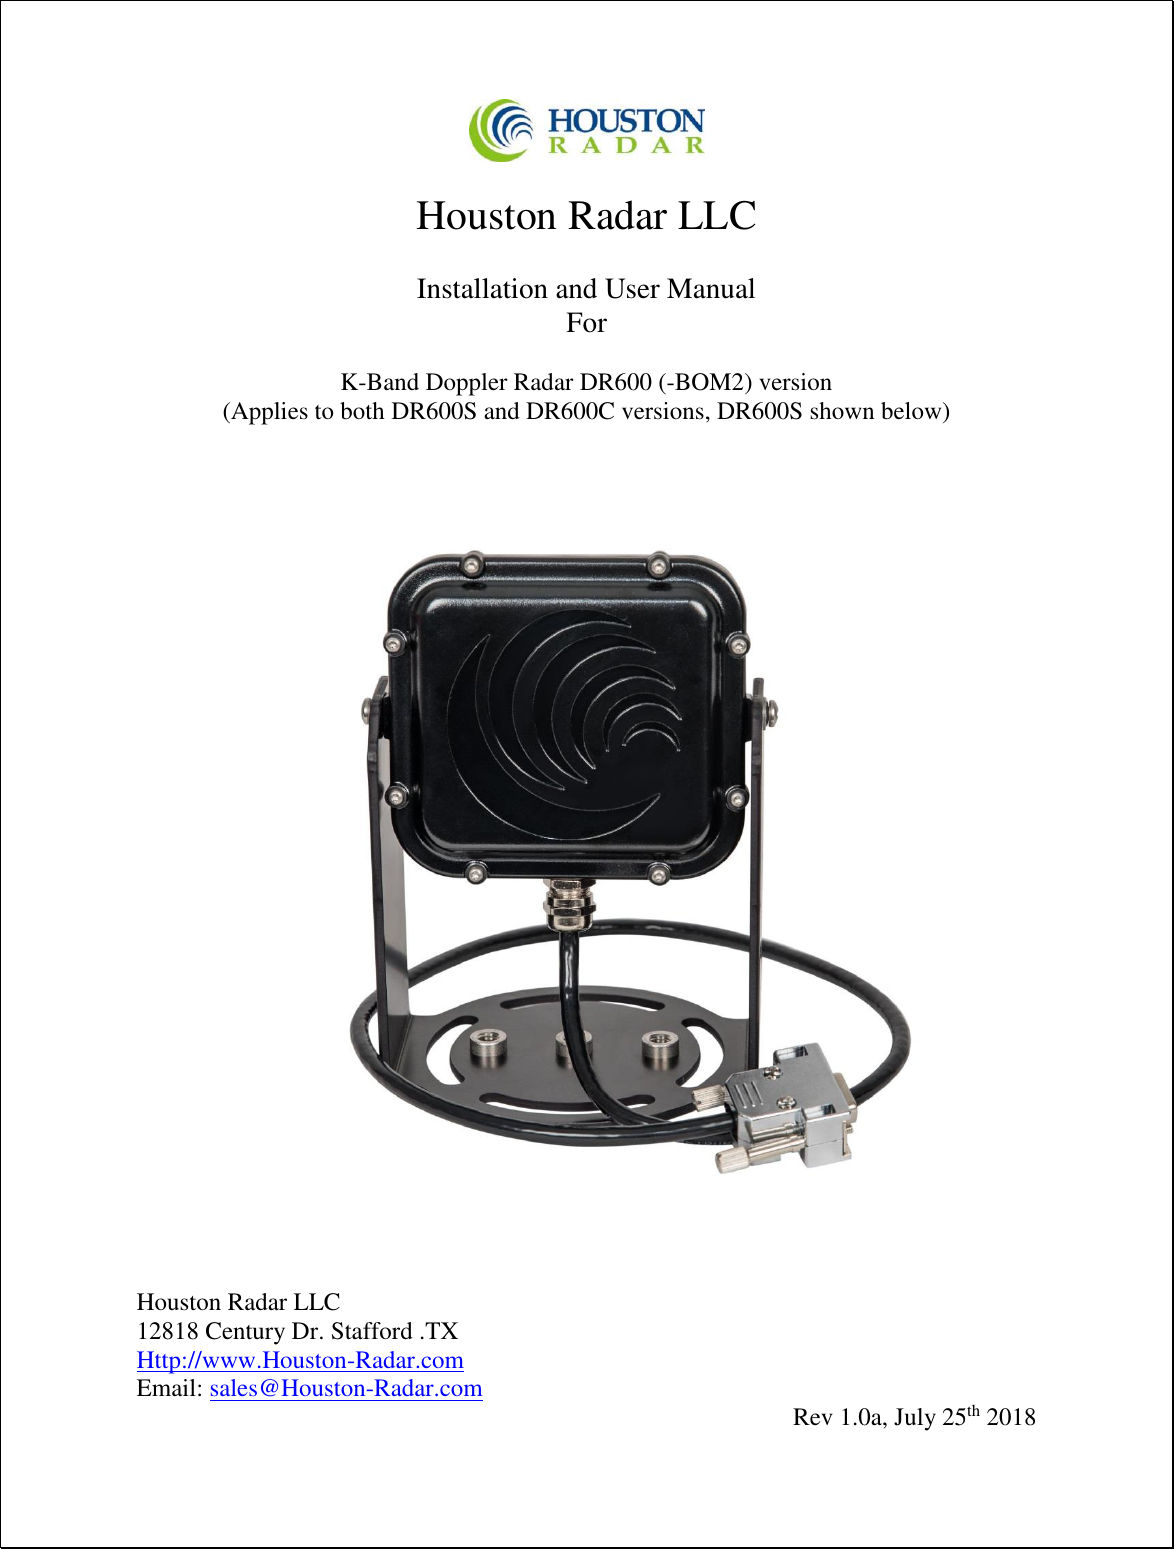
Houston Radar DR600 K-Band Doppler Radar User Manual Houston Radar LLC
Houston Radar LLC K-Band Doppler Radar Houston Radar LLC
UserManual.wiki
>
Houston Radar
>
DR600 User Manual
User Manual
Navigation menu
Upload a User Manual
Namespaces
Wiki Guide
HTML
PDF
Info
Views
User Manual
Discussion / Help
Navigation


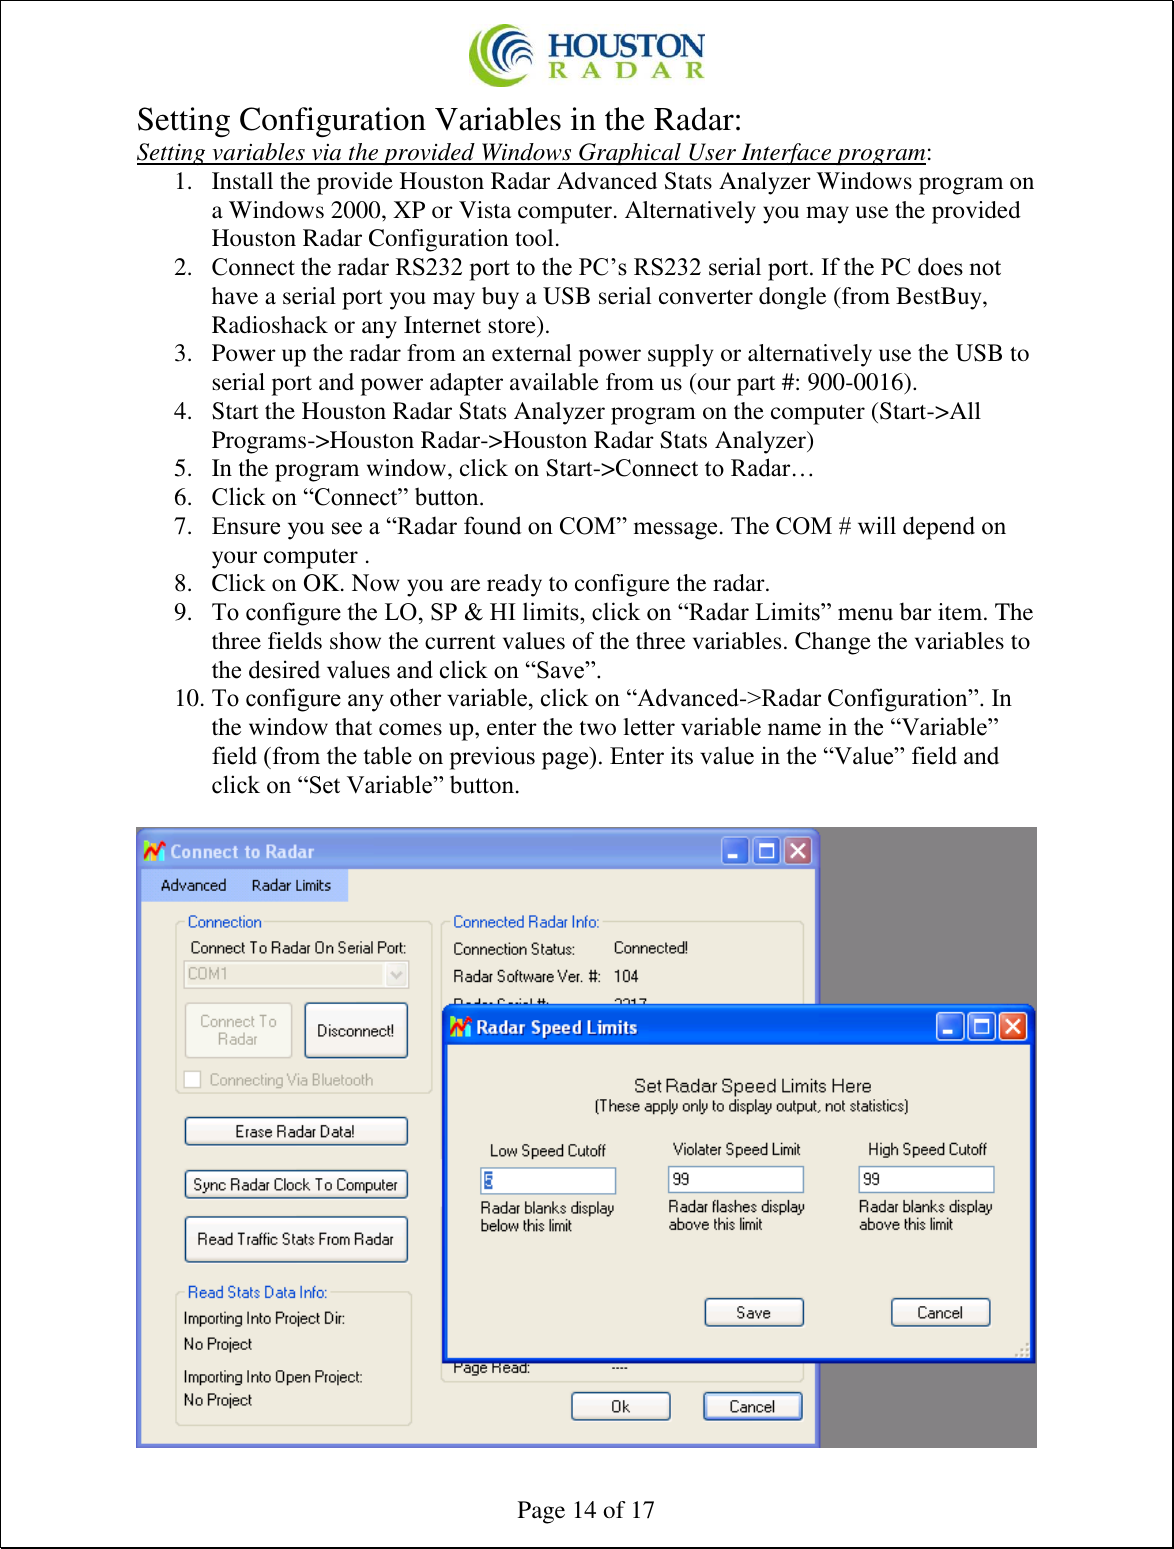
![Page 15 of 17 Setting variables from an ASCII Terminal program via ASCII commands: Starting from firmware version #415 all the radar variables can also be set and queried via a simple ASCII command set over the serial port. ASCII commands may be issued via an ASCII terminal program like Hyperterminal or Teraterm Pro. Alternatively, you may issue these commands from an attached microcontroller. The ASCII commands are: get (to get a config variable) set (set set a config variable to a supplied value) reset (resets the radar. Required after changing variables MO, MD and RS, RA(for DR series radars only). LO, HI, SP, ST, SF, UN do not require a reset). info (print out some info about the radar. Info is in the format of <tag>=<value>). New tags may be added in the future. Order of tags may be moved around. e.g. To set a variable (variables are documented in the user manual): set: <case sensitive var name> <value>[Enter] e.g. set:LO 5 alt format: set:LO=5 sets the low speed cutoff to 5 etc. Variables are case sensitive. Commands are not. Success is indicated by an "OK". Failure is indicated by either: "ERROR" - Command was recognized but some other error occurred (variable not present, format not correct etc.) <nothing returned> - Command was not recognized. Entire line was silently discarded. This ensures that spurious things like enters or other ASCII chars do not generate "ERROR" when you are not expecting them. To get a variable: get:<case sensitive var name>[ENTER] e.g. get:LO returns LO=5 (if value is presently set to 5).](https://usermanual.wiki/Houston-Radar/DR600/User-Guide-4184640-Page-15.png)