Hp 1010 Fax Setup Poster QIG3_enu
HP Fax 1010 series - (English) Setup Poster bpf01927
2015-01-05
: Hp Hp-1010-Fax-Setup-Poster-167907 hp-1010-fax-setup-poster-167907 hp pdf
Open the PDF directly: View PDF ![]() .
.
Page Count: 2
hp fax 1010 series
setup poster
4
3
ab
abc
Resolution
Scan &
Fax Mode Flash
DEFABC
MNOJKLGHI
WXYZTUVPQRS
Redial / Pause
Mute / Search
Cancel
Start / Enter
Copy
Menu
Scroll / Volume
Loudspeaker
Speed Dial
Symbols
Silent Mode
Report / Help Access
Cartridge
Ans. Mode /
Contrast
Space
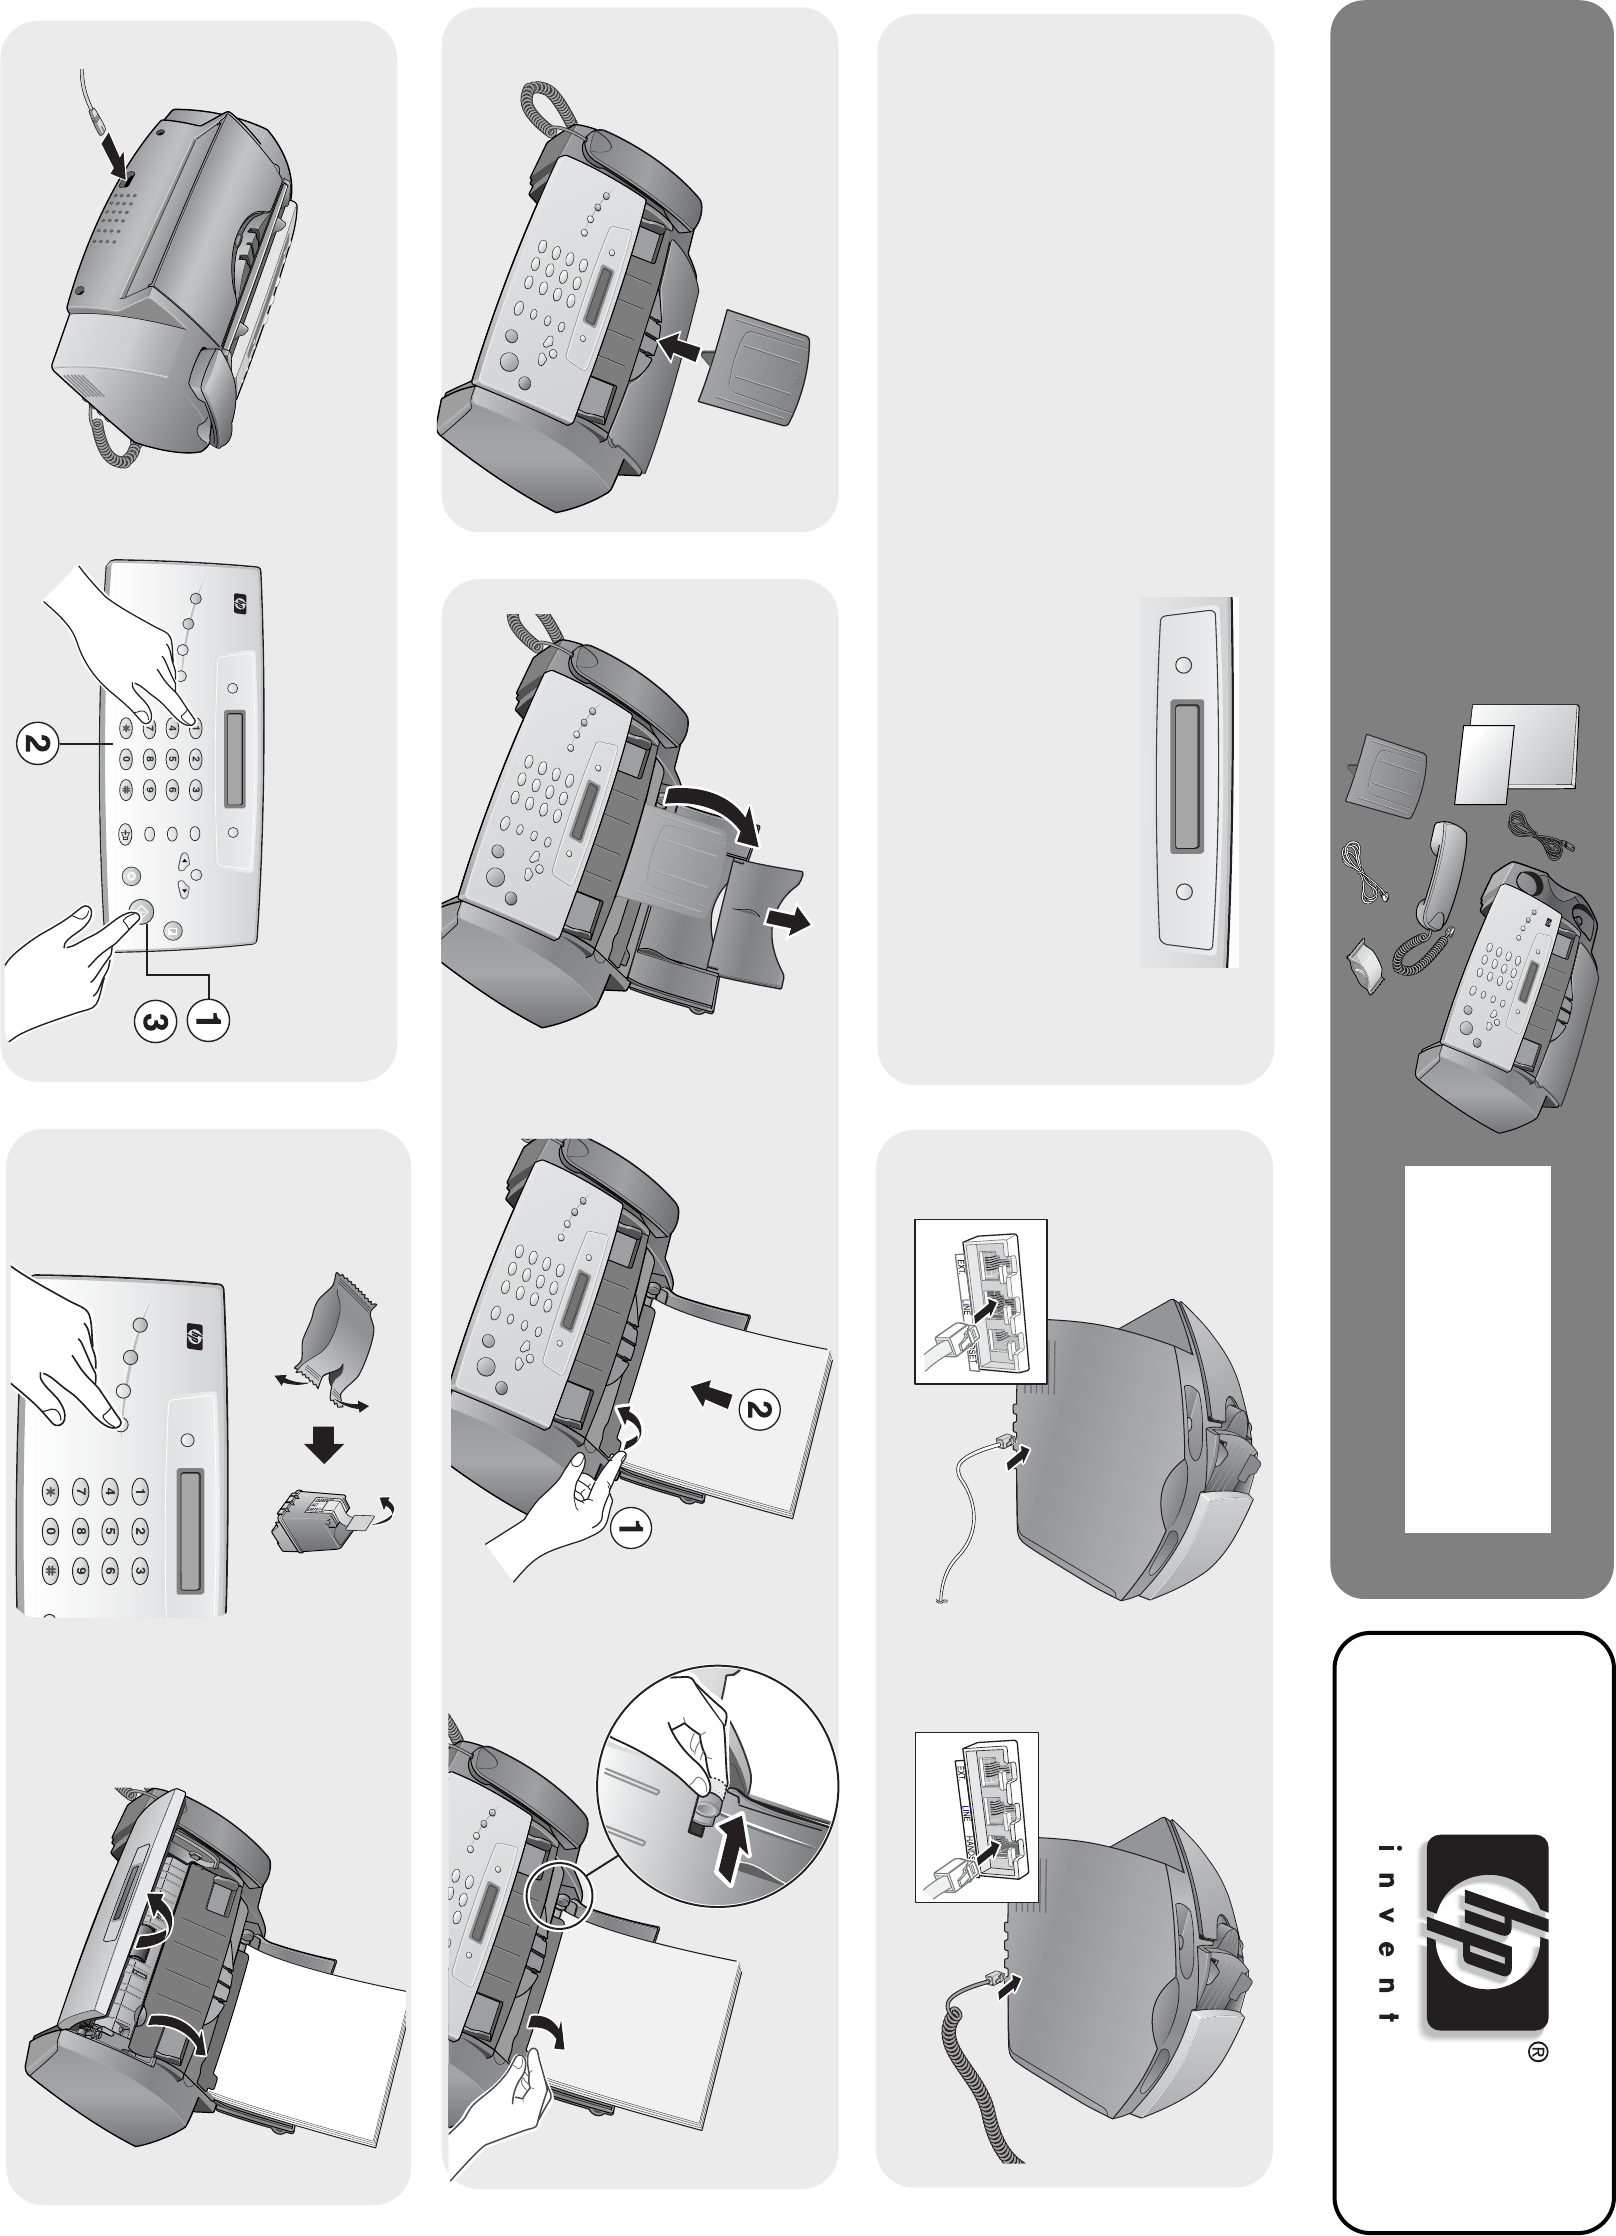
Set date and time when prompted.
b
Resolution
DEFABC
MNOJKLGHI
WXYZTUVPQRS
Red
Mu
Lo
Speed Dial
Symbols
Silent Mode
Report / Help Access
Cartridge
An
C
Scan &
Fax Mode Space
a
b
c
2
a
56
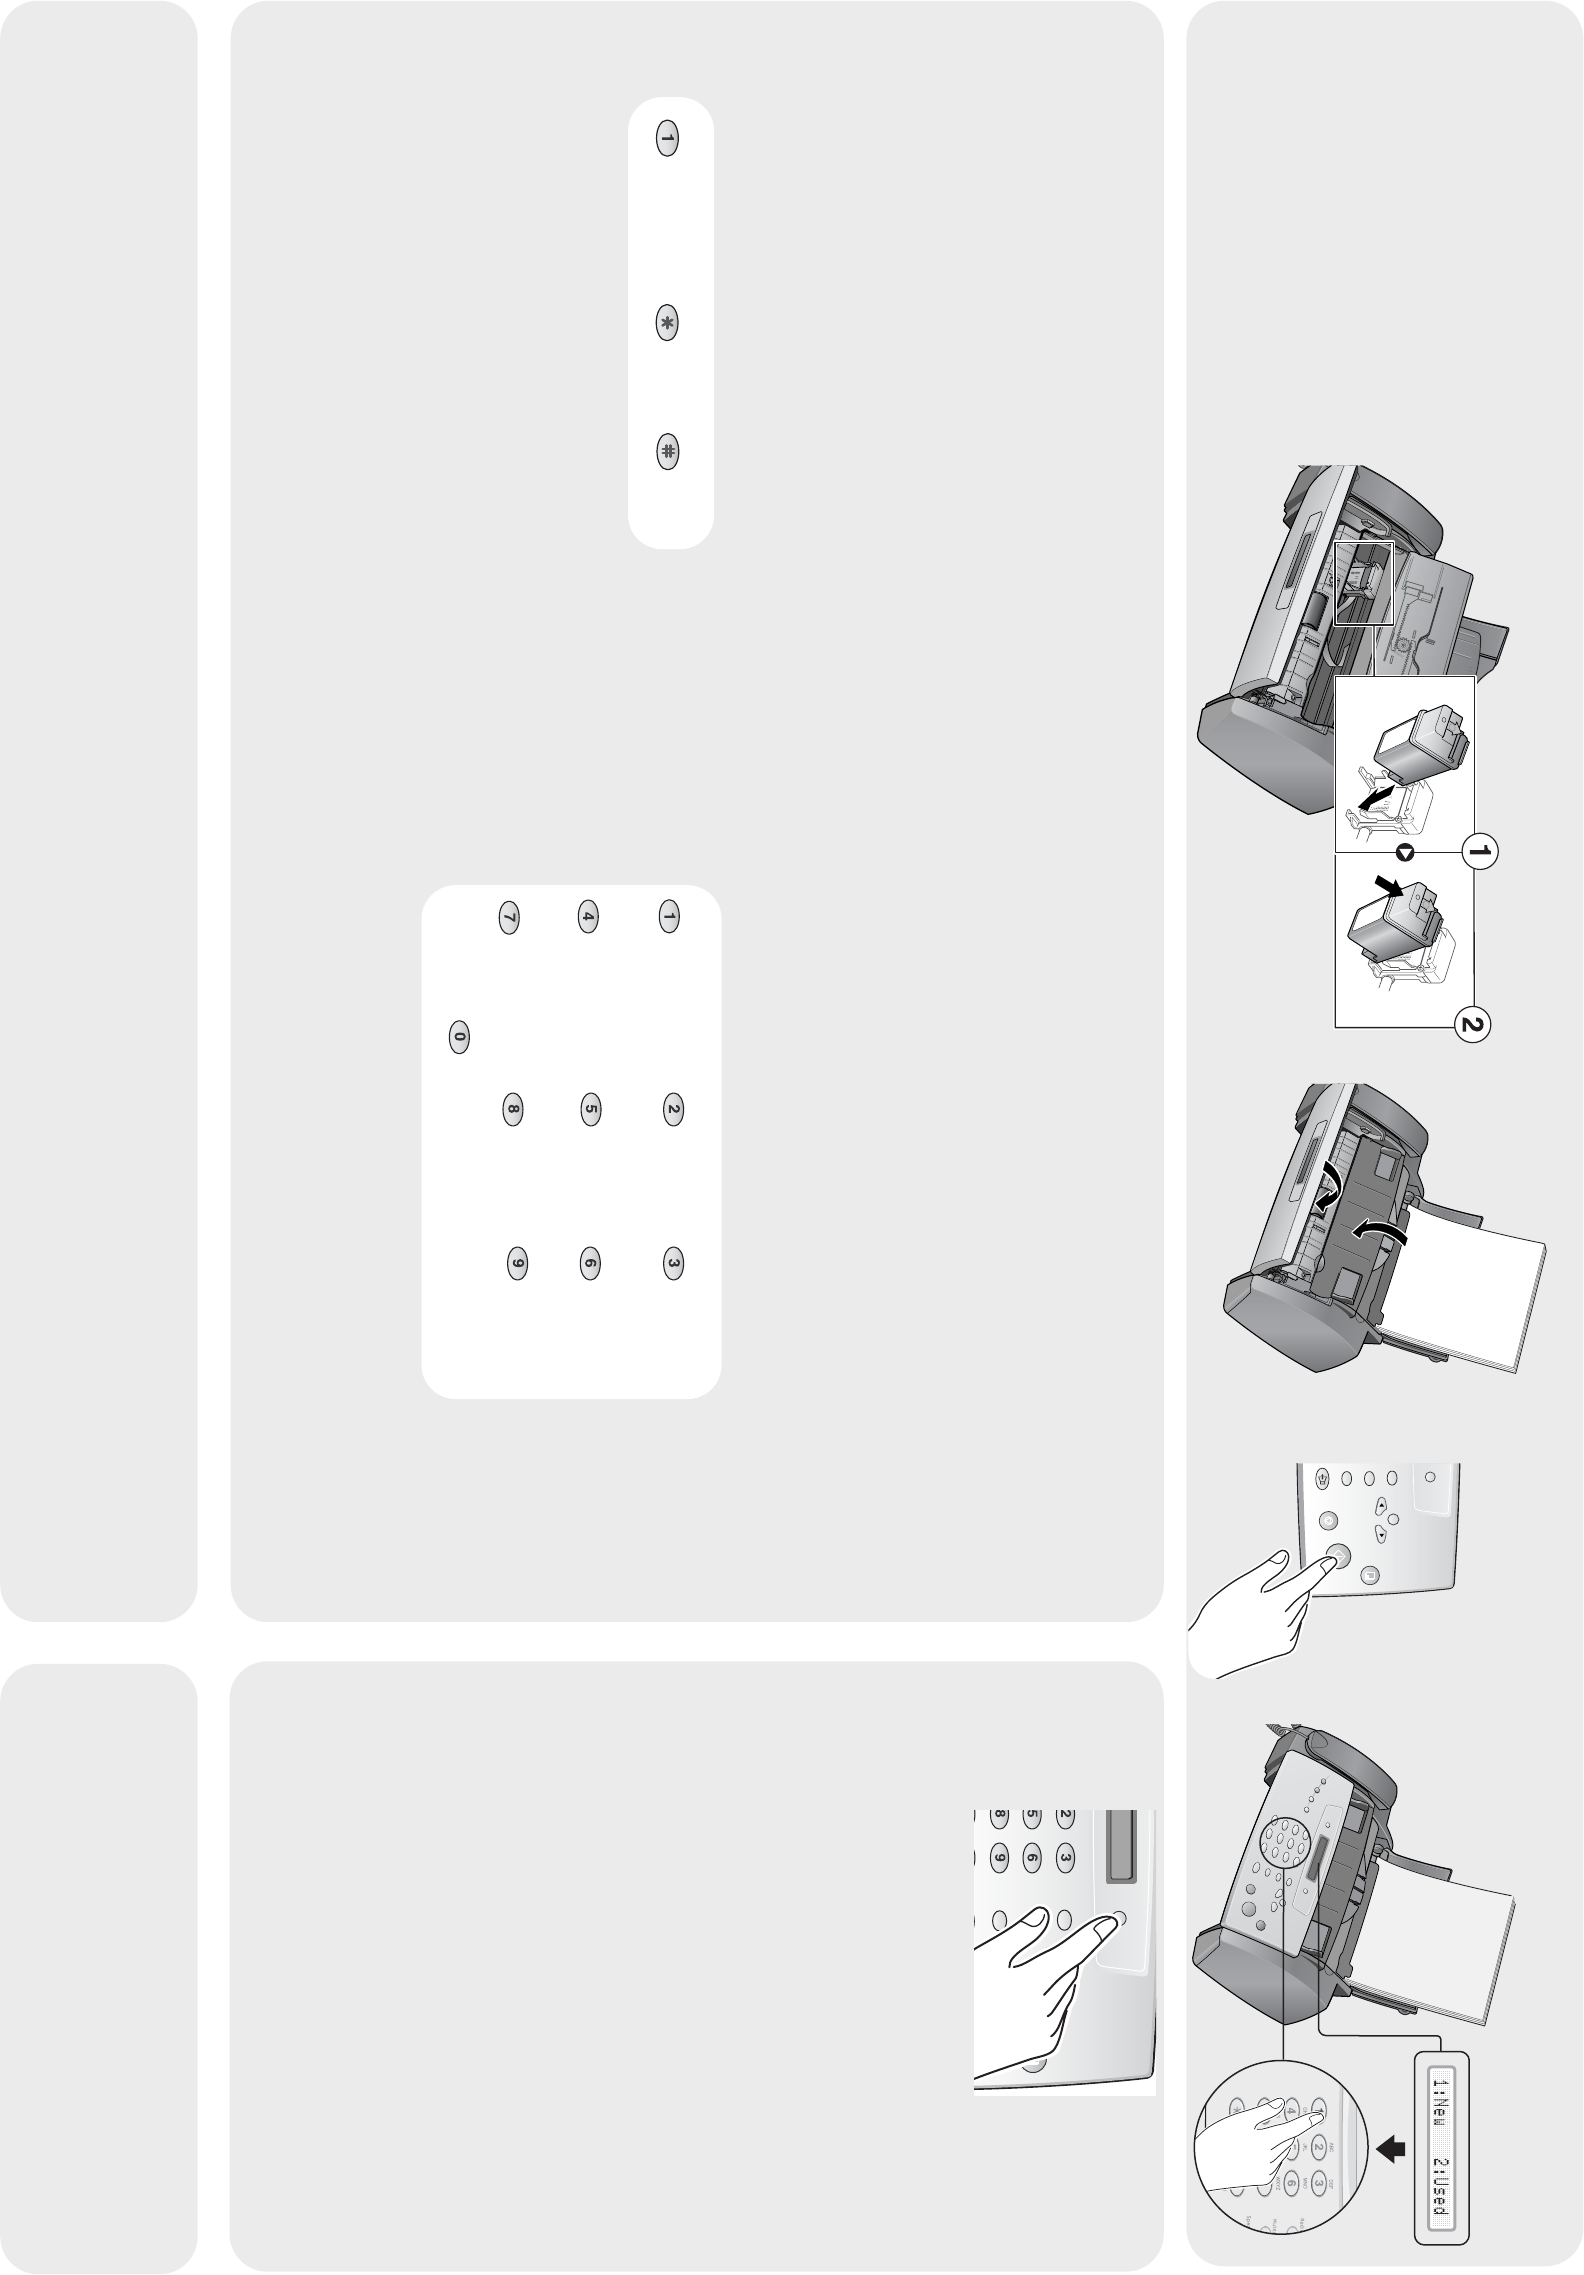
Snap firmly.
1ab
Remove all shipping tape.
DEFABC
Peel off protective plastic from around LCD
area and buttons.
*C9270-90101*
*
C9270-90101*
C9270-90101
Flash
Redial / Pause
Mute / Search
Cancel
Start / Enter
Copy
Menu
Scroll / Volume
Loudspeaker
Ans. Mode /
Contrast
fg
e
Press the Ans.Mode/Contrast button to set the answer
mode.
•FAX Mode: To have the machine always answer
as a fax.
•TEL Mode: To have the machine always answer
as a telephone where you must manually receive
faxes.
Go to Chapter 2 of the Basic Guide before selecting
other Answer Modes.
Setting the fax header (your name and fax number) is required
by law in many countries.
( ) –
Space 1
Space 1
ABC DEF
GHI JKL MNO
PQRS TUV WXYZ
Space 1
Space 1
GHI4
PQRS7
ABC2
JKL5
TUV8
DEF3
MNO6
WXYZ9
+ – , . ‘ / * # & ( ) 0
Fax Number Fax Name
1Press Menu repeatedly until System ID displays.
2Press Start/Enter.
Fax Number will display.
3Press Start/Enter.
The cursor will blink for you to enter the number. To enter
punctuation in the number use the keys labelled Fax
Number below.
4Enter the number and press Start/Enter.
Fax Name will display.
5Press Start/Enter.
The cursor will blink for you to enter the name. To enter
punctuation or other special characters in the name, use
the keys labelled Fax Name below.
6Enter the name and press Start/Enter.
DEF
A
BC
MNO
J
KL
WXYZ
T
UV
Cancel
Start / Enter
Scroll / Volume
78
9Unless you selected TEL Mode in Step 8,
review Chapter 2 of the Basic Guide.
dOrient the copper area on the cartridge
toward the back of the machine and
click it in the carrier at a slight slant as
shown.
www.hp.com/support
Click!
