Hp Pavilion 6340 Desktop Pc Us Can Getting Started Guide USGS6340
HP Pavilion PC 6300 Series - Getting Started Manual bph04358
2015-01-05
: Hp Hp-Pavilion-6340-Desktop-Pc-Us-Can-Getting-Started-Guide-150798 hp-pavilion-6340-desktop-pc-us-can-getting-started-guide-150798 hp pdf
Open the PDF directly: View PDF ![]() .
.
Page Count: 80

Getting Started
iii
Chapter 1 Preparing to Use Your
Computer .............................................................1
Chapter 2 Exploring Your System...........25
Chapter 3 Discovering Your Software ....37
Contents
iv
Chapter 4 Communicating
with the World ................................................. 47
Glossary............................................................ 57
Regulatory and Safety Information...........63
Index ...................................................................71

•
1
Chapter 1 covers the following topics:
•
Turning your computer on for the first time
•
Preparing your work environment
•
Positioning yourself properly
•
Positioning your computer components
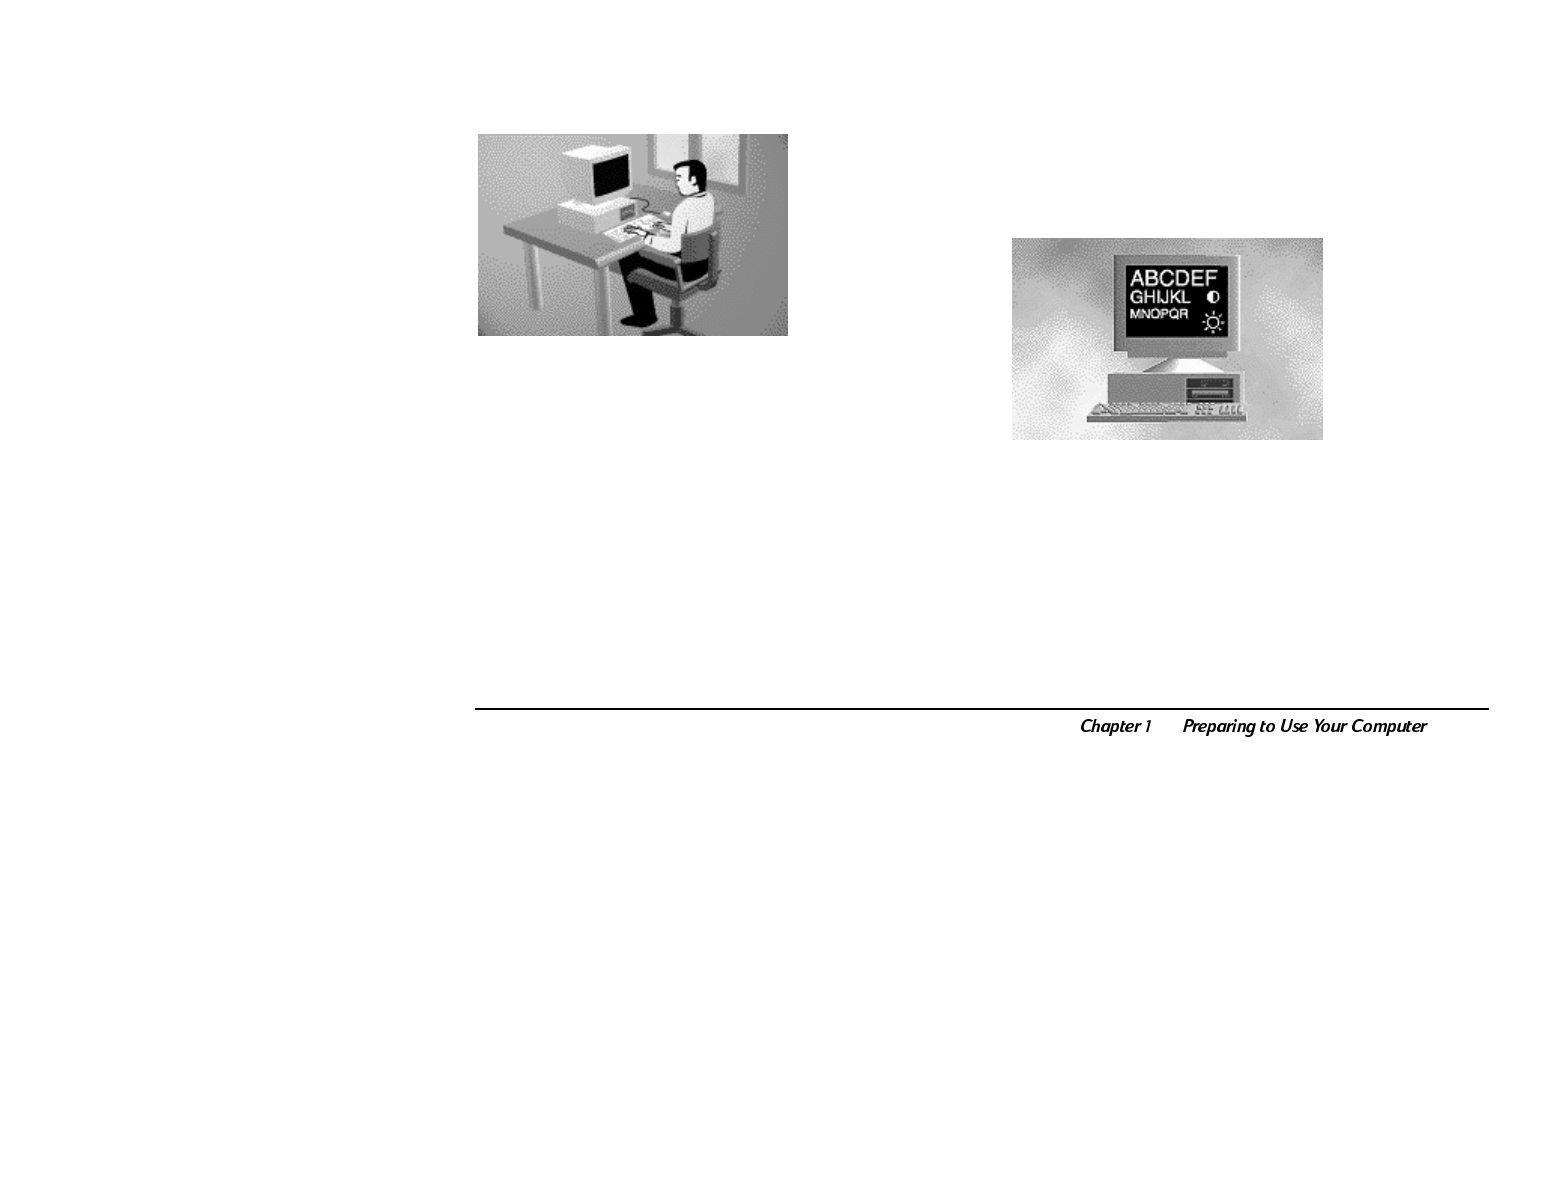
1Preparing to Use Your Computer
2
Turning On Your Computer For
the First Time
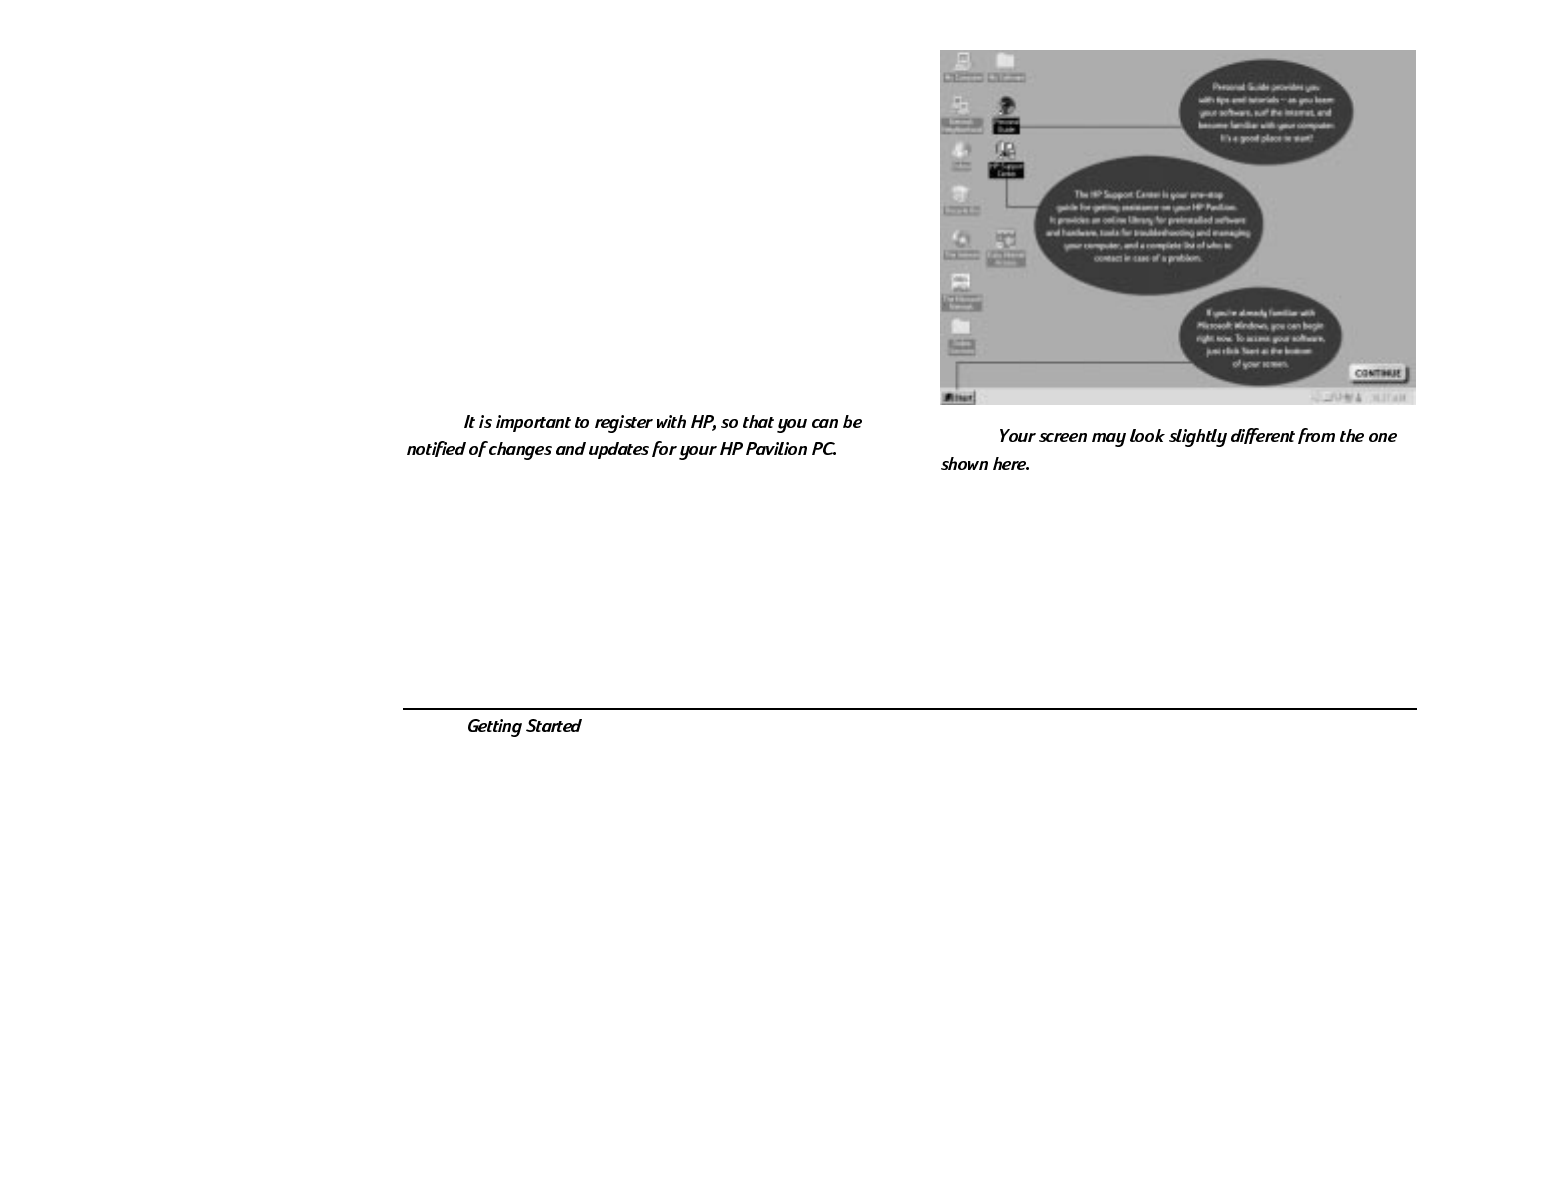
When you first turn on your computer, a series
of startup screens, including a mouse tutorial,
appears. When you get to the Microsoft® Windows®
desktop, you must click the message Click here to
finish setting up your PC.
As part of this final setup, you will see a roadmap that
points out and describes several important icons on
your desktop.
Note: Note:
If Your System Is Not Working
If any of your system components are not working
properly, see Chapter 2, Troubleshooting, in the
Getting Help guide.

•
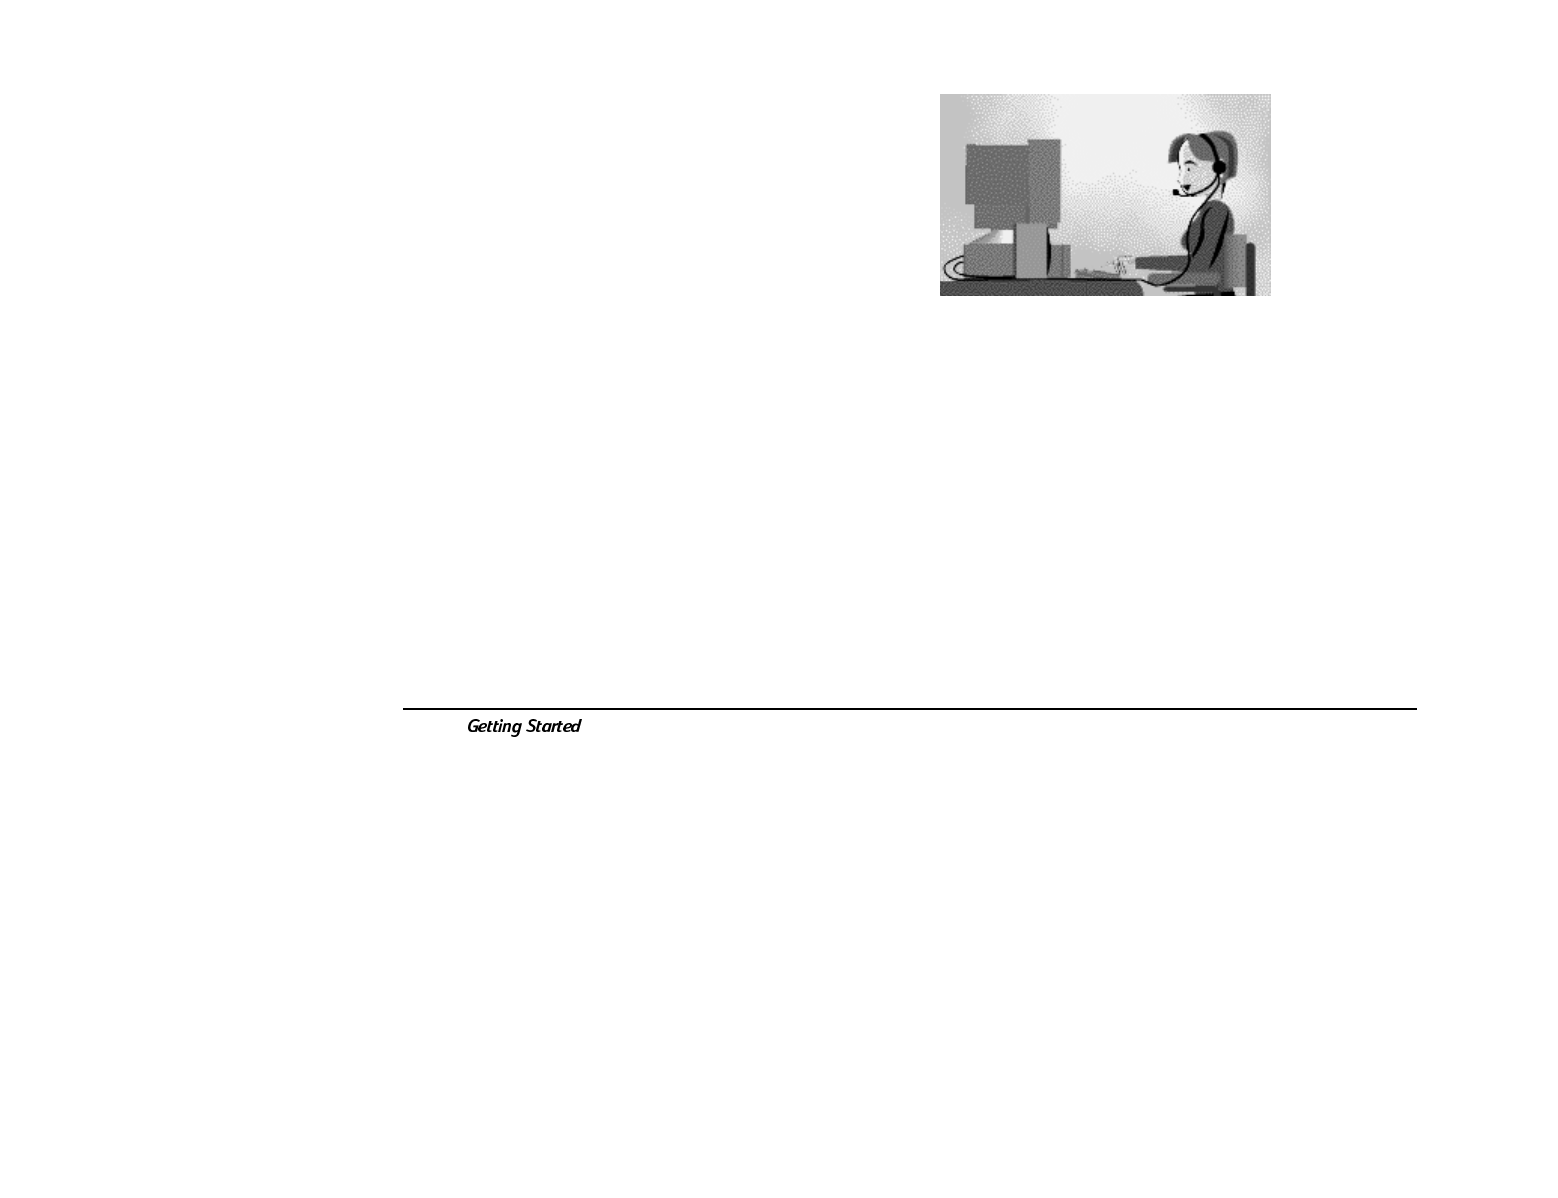
3
Working in Comfort with Your HP
Pavilion PC
Thank you for selecting HP computing equipment.
To optimize your comfort and productivity, it is
important that you set up your work area correctly
and use your HP equipment properly. With that in
mind, we have developed some setup and use
recommendations for you to follow, based on
established ergonomic principles.
Improper and prolonged use of keyboards and input
devices are among those tasks that have been
associated with repetitive strain injury (RSI) to soft
tissues in the hands and arms. If you experience
discomfort or pain while using any computing
equipment, discontinue use immediately and consult
your physician as soon as possible. For more
information on RSI, you may wish to consult About
Repetitive Strain Injury on page 4.
Please study the recommendations offered here and
consult the Information Sources listed on page 24.
Included there are references to relevant parts of
international standards, regulations, and guidelines,
such as ISO 9241 and the European Community
Display Screen Equipment directive. You may also
wish to consult your employers human resources
department or other relevant departments for
guidance specific to your company. For a quick
summary of the recommendations, refer to the
Comfort and Safety Checklist on page 21.
Note that the recommendations and quoted
dimensions in this guide are designed to
accommodate a broad range of people. If you fall
outside this range, you may need to adapt the
recommendations accordingly. For example, if you
are very tall, your work surface may need to be
higher than indicated in this guide.

4
Thank you, again, for choosing HP computing
equipment.
About Repetitive Strain Injury
Because your comfort and safety are our primary
concern, we strongly recommend that you use HP
computing equipment in accordance with established
ergonomic principles and recommendations.
Scientific literature suggests that there may be a
relationship between injury to soft tissues
especially in the hands and arms and prolonged
improper use of keyboards or other equipment
requiring repeated motions of the hands and
forearms. This literature also suggests that there are
many other risk factors that may increase the chance
of such injury, commonly called Repetitive Strain
Injury.
What is RSI?
Repetitive Strain Injury (RSI also known as
cumulative trauma disorder or repetitive motion
injury) is a type of injury where soft tissues in the
body, such as muscles, nerves, or tendons, become
irritated or inflamed. RSI has been a reported
problem for those who perform repetitive tasks such
as assembly line work, meatpacking, sewing, playing
musical instruments, and computer work. RSI also
has been observed in those who frequently engage in
activities such as carpentry, knitting, housework,
gardening, tennis, windsurfing, and lifting children.

•
5
What causes RSI?
The specific causes of RSI have not been established.
Nevertheless, the incidence of RSI has been
associated with a variety of risk factors, including:
•
Too many uninterrupted repetitions of an activity
or motion.
•
Performing an activity in an awkward or
unnatural posture.
•
Maintaining static posture for prolonged periods.
•
Failing to take frequent short breaks.
•
Other environmental and psychosocial factors.
In addition, there have been reports associating the
occurrence of RSI with the use of computer
keyboards, mice, and other input devices. Also,
certain medical conditions, such as rheumatoid
arthritis, obesity and diabetes, may predispose some
people to this type of injury.
What can I do to avoid RSI?
Some people who use computers may experience
physical discomfort during their use. This discomfort
may be a symptom of a repetitive strain injury.
Properly setting up and using computing equipment
can help to minimize your chances of experiencing
this discomfort. Well-designed and properly adjusted
equipment alone may not be sufficient to eliminate
all potential problems. Maintaining good posture and
positioning when working on computers also has a
significant bearing on your comfort.
What if I experience discomfort?
If you are experiencing any discomfort, seek
professional medical advice immediately. Typically,
the earlier a problem is diagnosed and treated, the
easier it is to resolve.
6
Preparing Your Work Environment
When using HP computing equipment, its important
that your work environment contribute to your
comfort and productivity. To help you achieve the
proper environment, we have developed
recommendations for optimizing your workspace,
seating, work surface, and lighting arrangements.
You, or both you and your employer, can best
determine your specific needs.
Your Workspace
Sufficient workspace should be available to allow
you to set up your equipment in a convenient,
comfortable arrangement.
•
The work environment should be as quiet and
free of distraction as possible.
•
For better eye comfort, you should avoid
reflective coverings on the ceiling, walls, and
floor as well as excessive contrast between the
screen and its surroundings.

•
7
•
As with any indoor environment, your workspace
should be well ventilated. If possible, adjust the
temperature to whatever is comfortable for you.
If you cant adjust the temperature, wear
appropriate clothing. Try to avoid working close
to air-conditioning or heater vents.
•
To prevent muscle stiffness, you must have
enough space to move around and vary your
position. Try not to remain in one position for
extended periods of time.
Your Chair
Its very important that your chair provides a
comfortable sitting position and offers the following
features:
•
A stable base, such as five legs with casters.
Make sure the casters are designed for the type
of floor you have in your workspace, whether it is
bare or carpeted.

8
•
A height- and tilt-adjustment feature. It should
be easy to adjust your chair height from 40 cm
to 52 cm (15.5 inches to 20.5 inches) as measured
from the top of the seat pan to the floor. If you
are much taller or shorter than average, you may
need a chair that can be adjusted beyond this
range. Adjust your chair so that the work surface
or keyboard tray is at elbow height and your feet
are flat on the floor with your knees slightly bent
below your hips. Ideally, the seat pan should be
able to tilt both forward (minimum of 5 degrees)
and backward (minimum of 10 degrees). If the
chair has an adjustable seat pan, inclining the
seat slightly forward will transfer some of the
pressure from the spine to the thighs and feet.
This will relieve pressure on your back.
•
A curved seat edge. The front of the seat should
be curved and finished in a waterfall edge.
•
An adjustable back support in both height and
forward and backward tilt. It is important that the
backrest correctly supports the lower part, or
lumbar curve, of the back.
•
A freely rotating swivel so you can move easily
from side-to-side.
•
Fully adjustable and padded armrests. The
chair arms should not interfere with adjusting the
chair or moving it close to your work surface.
•
9
Your Work Surface
Ideally, you should be able to adjust the height of
your work surface.
A simple way to ensure your work surface is at the
correct height is to first adjust the height of the seat-
pan of your chair. With your chair properly adjusted
and your feet firmly on the floor, adjust the work
surface height until your forearms are parallel to the
floor when you have your fingers on the keyboard or
other input device.
If possible, choose a work surface with cable
management capabilities. This will keep your cables
and wires orderly, off the floor and out of your way.
Its also best to choose a non-reflective work surface
to minimize eye discomfort from reflections and
glare.
10
Lighting
Proper lighting can help you avoid eye discomfort.
Lighting in your area should allow easy reading of
documents and keyboard legends. If more light is
needed for a particular task, use individual task
lighting rather than increasing the general lighting.
Incoming light should be shielded or diffused to
prevent glare and reflection. In cases where strong
sunlight is a problem, curtains, adjustable shades,
anti-glare filters, or monitor hoods are possible
solutions.
Work Environment Specifications
•
For better eye comfort in your work environment,
you should avoid reflective surface coverings.
The ceiling, walls, and floors should have a
medium level of reflectance (approximately
75 percent, 40 percent, and 30 percent,
respectively). Try to avoid excessive contrast
between the screen and its surroundings.
•
The work environment should be as quiet and
free of distraction as possible, with background
noise below 55 dBA.
•
Where possible, relative air humidity should be in
the range of 40 to 60 percent.
•
The recommendation for room temperature is
19 to 23 degrees C (66 to 73 degrees F). The
workplace should be well ventilated, as with any
indoor environment.
•
11
•
Recommended work surface space is 160 cm
wide by 80 to 90 cm deep (63 inches by 32 to
36 inches deep), or a corner unit of 91 to 107 cm
deep (36 to 42 inches). The recommended
vertical adjustment range is 66 to 77 cm (26 to
30 inches). If the height is fixed, it should be
between 72 and 75 cm (28.5 to 29.5 inches).
•
There should be at least 6 cm (2 inches) between
your thighs and the work surface. If the surface
has a kneehole, it should be at least 58 cm
(23 inches) wide, 65 cm (25.5 inches) high, and
60 cm (24 inches) deep.
•
Recommended lighting levels are between
300 and 500 lux (30 to 50 foot-candles). Values
over 1000 lux (100 foot-candles) are considered
to be too bright. For work on the screen, 300 lux
(30 foot-candles) is enough for most work.
When documents are to be read, 500 lux
(50 foot-candles) is recommended.
Your Work Posture
Sitting in one position for long periods can be
uncomfortable. To minimize the potential for
physical discomfort or injury, its important that you
maintain proper posture.

12
•
Back While sitting at your work surface, make
sure your back is supported by the chairs
backrest in an erect position or angled slightly
backwards.
•
Arms Your arms should be relaxed and loose,
elbows close to your sides, with forearms and
hands approximately parallel to the floor.
•
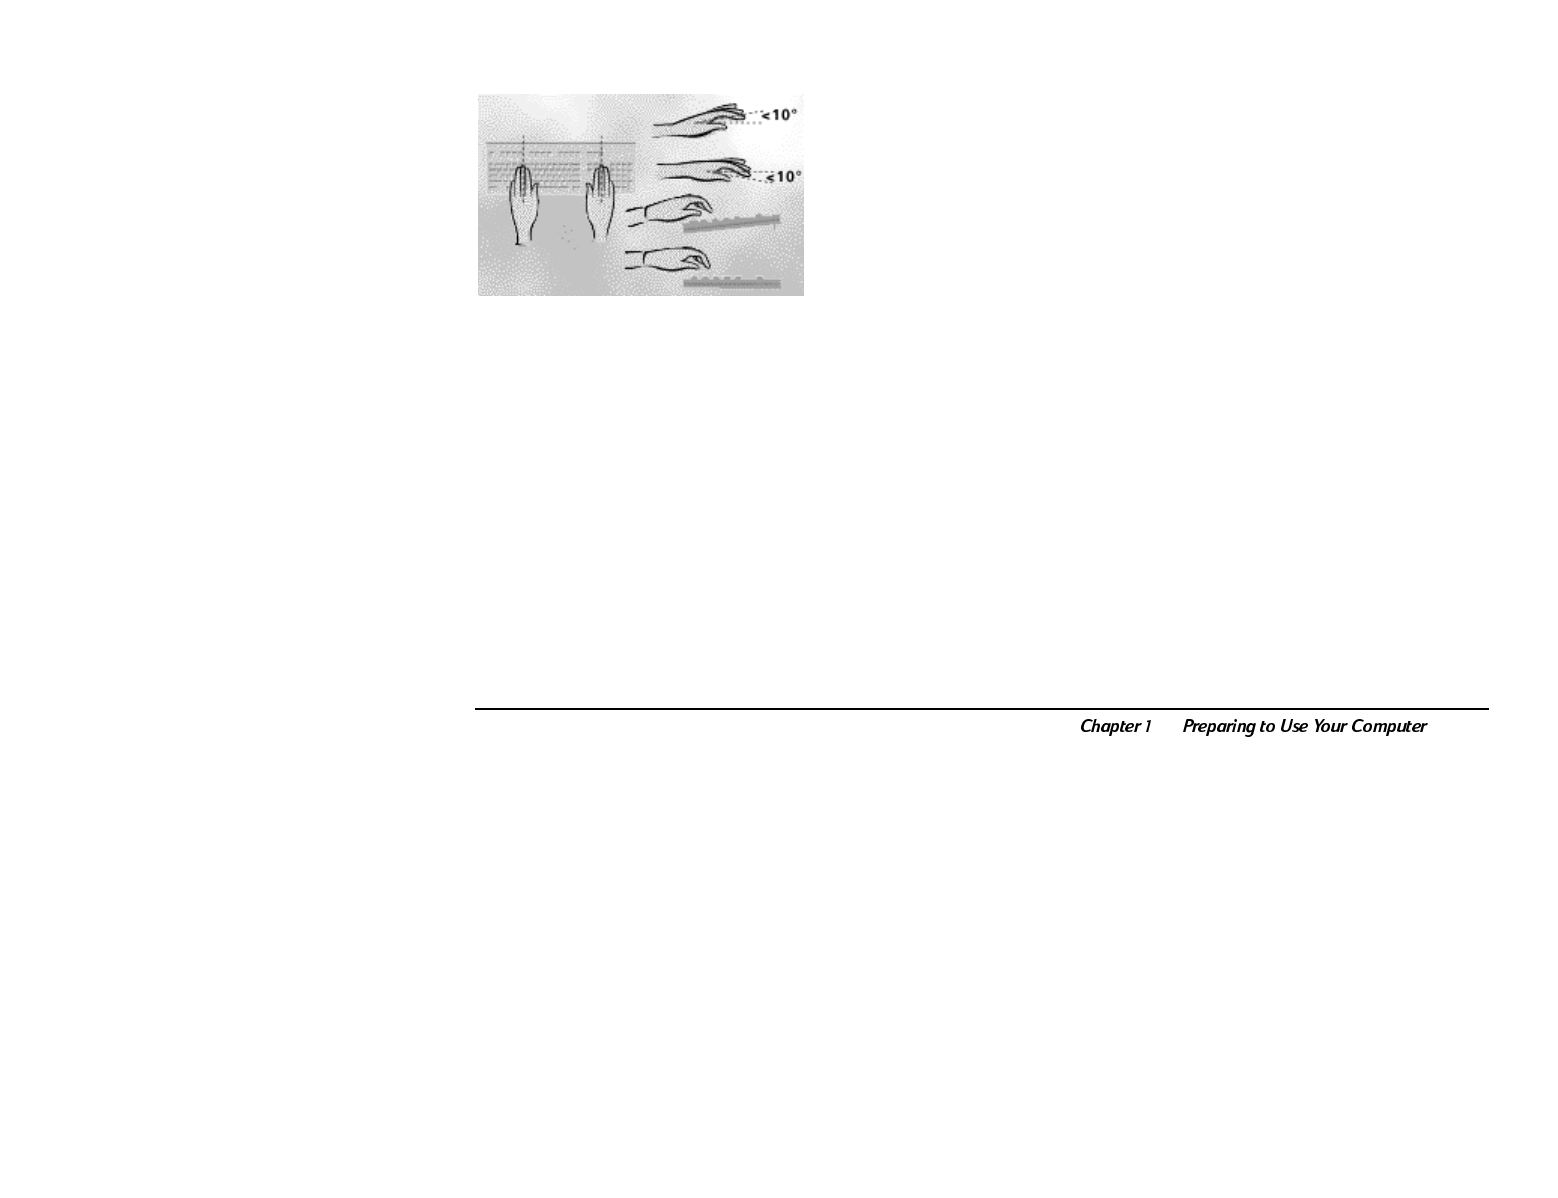
Wrists Your wrists should be as straight as
possible while using the keyboard, mouse, or
trackball. They should not be bent sideways, or
more than 10 degrees up or down.
•
Legs Your thighs should be horizontal or
angled slightly downward. Your lower legs
should be near a right angle to your thighs. Your
feet should rest flat on the floor. If necessary, use
a footrest, but double check that you have your
seat height adjusted correctly before getting a
footrest.
•
Head Your head should be upright or tilted
slightly forward. Avoid working with your head or
trunk twisted.
•
Overall Change your position frequently and
take regular breaks to avoid fatigue.
•
13
Setting Up Your HP Computing
Equipment
Make sure that all the elements of your HP computer
system monitor, document holder, keyboard,
mice and other input devices, and headphones and
speakers are optimally arranged and adjusted to
meet your personal requirements. The recommen-
dations that follow will help you achieve this.
Note that these recommendations apply only to the
use of HP desktop computers or HP notebook
computers that are used with a full-size keyboard,
monitor and mouse.
Your HP Monitor
It is important that your monitor screen be clean and
positioned correctly to improve readability and help
you work comfortably. Glare, high contrast,
reflections, dirt, and dust will interfere with what you
see on the screen. The recommendations that follow
can help you achieve a comfortable arrangement.

14
•
The top of your monitor screen should be at or
slightly below eye level. Most HP monitors come
with a tilt-and-swivel feature that makes it easy to
adjust the screen position. If your monitor doesnt
have this feature, consider acquiring an accessory
that provides this capability.
•
To avoid obscuring your view, the screen should
be positioned perpendicular to your line of sight;
that is, straight on.
•
To avoid glare or reflection, try to position the
monitor so the screen is at a right angle to your
window rather than in front of it. If reflection or
glare persists, tilting the screen forward may
help. If this adjustment is not sufficient, it may be
necessary to change either the position of the
monitor on your work surface, or the location of
your work surface. If reflection or glare is still a
problem, find out where it is coming from.
Common sources of glare are overhead lights,
windows, or reflections from shiny surfaces
including pictures or even bright clothing. See if
there is a way to control the source of the
problem (see Lighting on page 10). If that
doesnt work, try a high-quality anti-glare filter or
a screen hood.
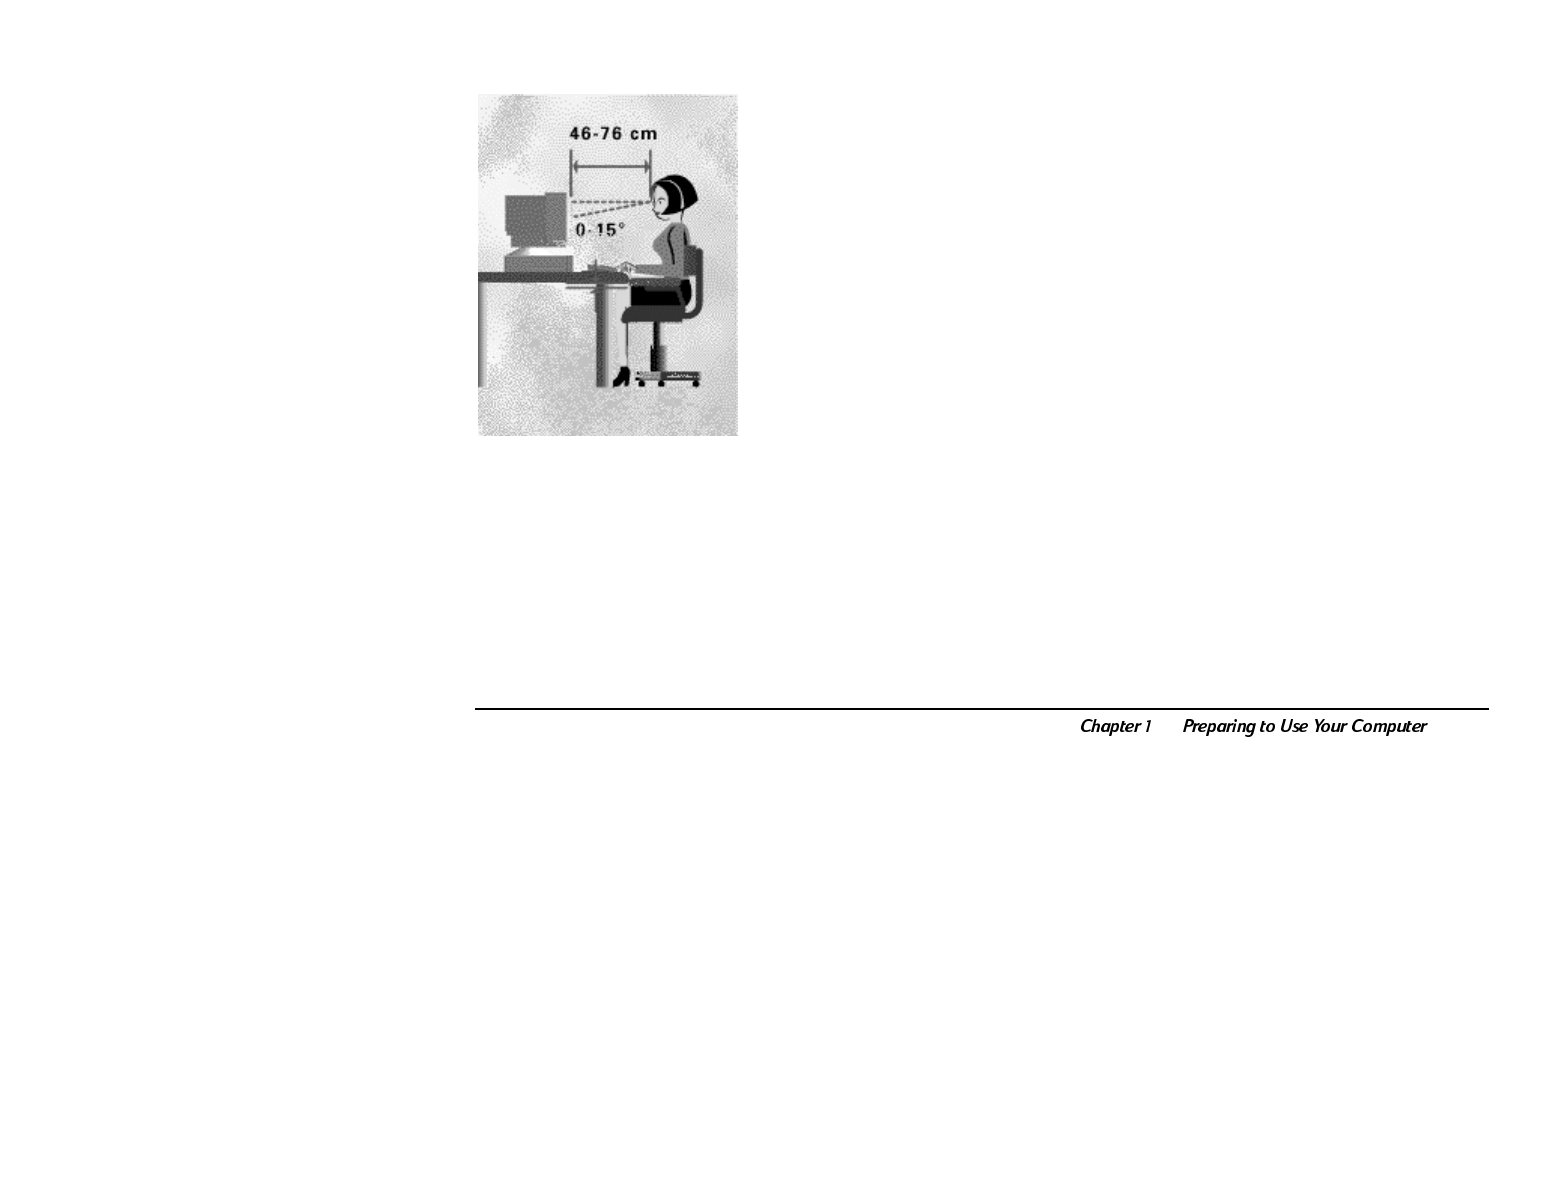
•
Maintain a comfortable viewing distance to the
screen. Most people prefer a viewing distance of
approximately 46 to 76 cm (18 to 30 inches),
depending on monitor size. Character size and
the amount of space available on the work
surface can affect this distance.
•
15
•
Text should be easy to read. To help ease
eyestrain, adjust text attributes such as character
size, spacing, and color. In addition, you will need
to use the controls provided with your monitor to
adjust the visual settings so that contrast and
brightness levels are comfortable for you. High
contrast and low brightness is usually the
preferable combination.
Note:
•
The monitor should be free from flicker. If the
image on your screen is not stable, the monitor
may require repair or adjustment.
•
When possible, use a program that has a simple
user interface, such as easily identifiable icons
and pull-down menus. Also, screen information
should be displayed in a structured and well-
organized way.
Monitor use specifications
•
When viewing your monitor, your head should
not be tilted more than 15 degrees forward.
•
Optimum readability for monitor use is generally
considered to be 21 minutes of arc. This
corresponds to a character size of 3.7 mm
(0.15 inches) at a viewing distance of 60 cm
(24 inches).
•
You should not have to look up more than
5 degrees above horizontal or down more than
30 degrees below horizontal for normal work
tasks, such as typing or reading.
16
Document Holders
When keying in data from a hard-copy document,
placing it in a document holder rather than on a flat
surface will make it easier to read. The following
recommendations should be observed when using a
document holder:
•
The document holder should be at
approximately the same height and distance
from your eyes as the screen, and as close to the
monitor as possible to prevent neck twisting.
Some users prefer a document holder mounted
to the monitor, while others prefer the document
holder positioned between the screen and
keyboard.
•
If the primary task is to view documents rather
than using the monitor, the document holder
may be placed directly in front of the keyboard
with the monitor slightly to the side.
•
To help reduce stress on your neck and prevent
eye fatigue, try to minimize the movement of
your head and eyes while using a document
holder.
•
17
Your HP Keyboard
The proper positioning and use of your HP keyboard
is important when using HP computing equipment.
Be sure to observe the following recommendations to
optimize your comfort and safety:
•
We recommend you place your keyboard in front
of the screen or document holder, whichever is
viewed the most. Your HP keyboard has long
cables, so you can place it in the position that is
most comfortable for you while you are using
your system.
•
Because HP keyboards vary in depth, youll want
to be sure that your work surface or keyboard
tray has sufficient room to accommodate your
model. The keyboard tray should be wide
enough to hold both the keyboard and mouse or
trackball: 66 to 71 cm (26 to 28 inches).
•
Your HP keyboard may have a kickstand that can
be opened or closed to raise or lower the
keyboard angle. If you are in the correct sitting
position with your elbows at about the same level
as the work surface, you may not need to use it.
However, if your elbows are below the work
surface, you may wish to use the kickstand to
raise the back of the keyboard.

18
•
An adjustable keyboard tray may be useful if you
cannot adjust your chair or work surface to the
proper height for typing. It should adjust in
height from 64 to 76 cm (25 to 30 inches) above
the floor and tilt forward and backward to help
you find the most comfortable position. Note
that research has shown that there may be less
muscle tension in shoulders and forearms with
the keyboard tilted away from you.
•
When using your HP keyboard, remember it takes
very little pressure or force from your fingers to
activate the keys. Improper typing style the
use of too much force can place unnecessary
stress on the tendons and muscles in your hands,
wrists, and forearms.
•
Make sure that your hands are in a neutral
position when you use your keyboard. This
means that your forearms, wrists, and hands
should be in a straight line.
•
The keyboard has a low profile to help prevent
excessive bending of your wrists while typing.
Literature suggests that you should not bend
your wrists sideways or more than 10 degrees up
or down. Keep your wrists straight by moving
your entire hand and forearm over to use the
function keys or numeric keypad.
•
You may use a palm rest to help keep your hands
and wrists in a comfortable and neutral position
when you are not typing. Some HP keyboards
come with an integrated palm rest. If you use a
palm rest, see that it is rounded and padded, and
flush in height with the front edge of the
keyboard. Note that your palms not your
wrists should rest on the palm rest. If you
dont have a palm rest, try not to rest your wrists
on a sharp edge, such as a work surface edge.
•
19
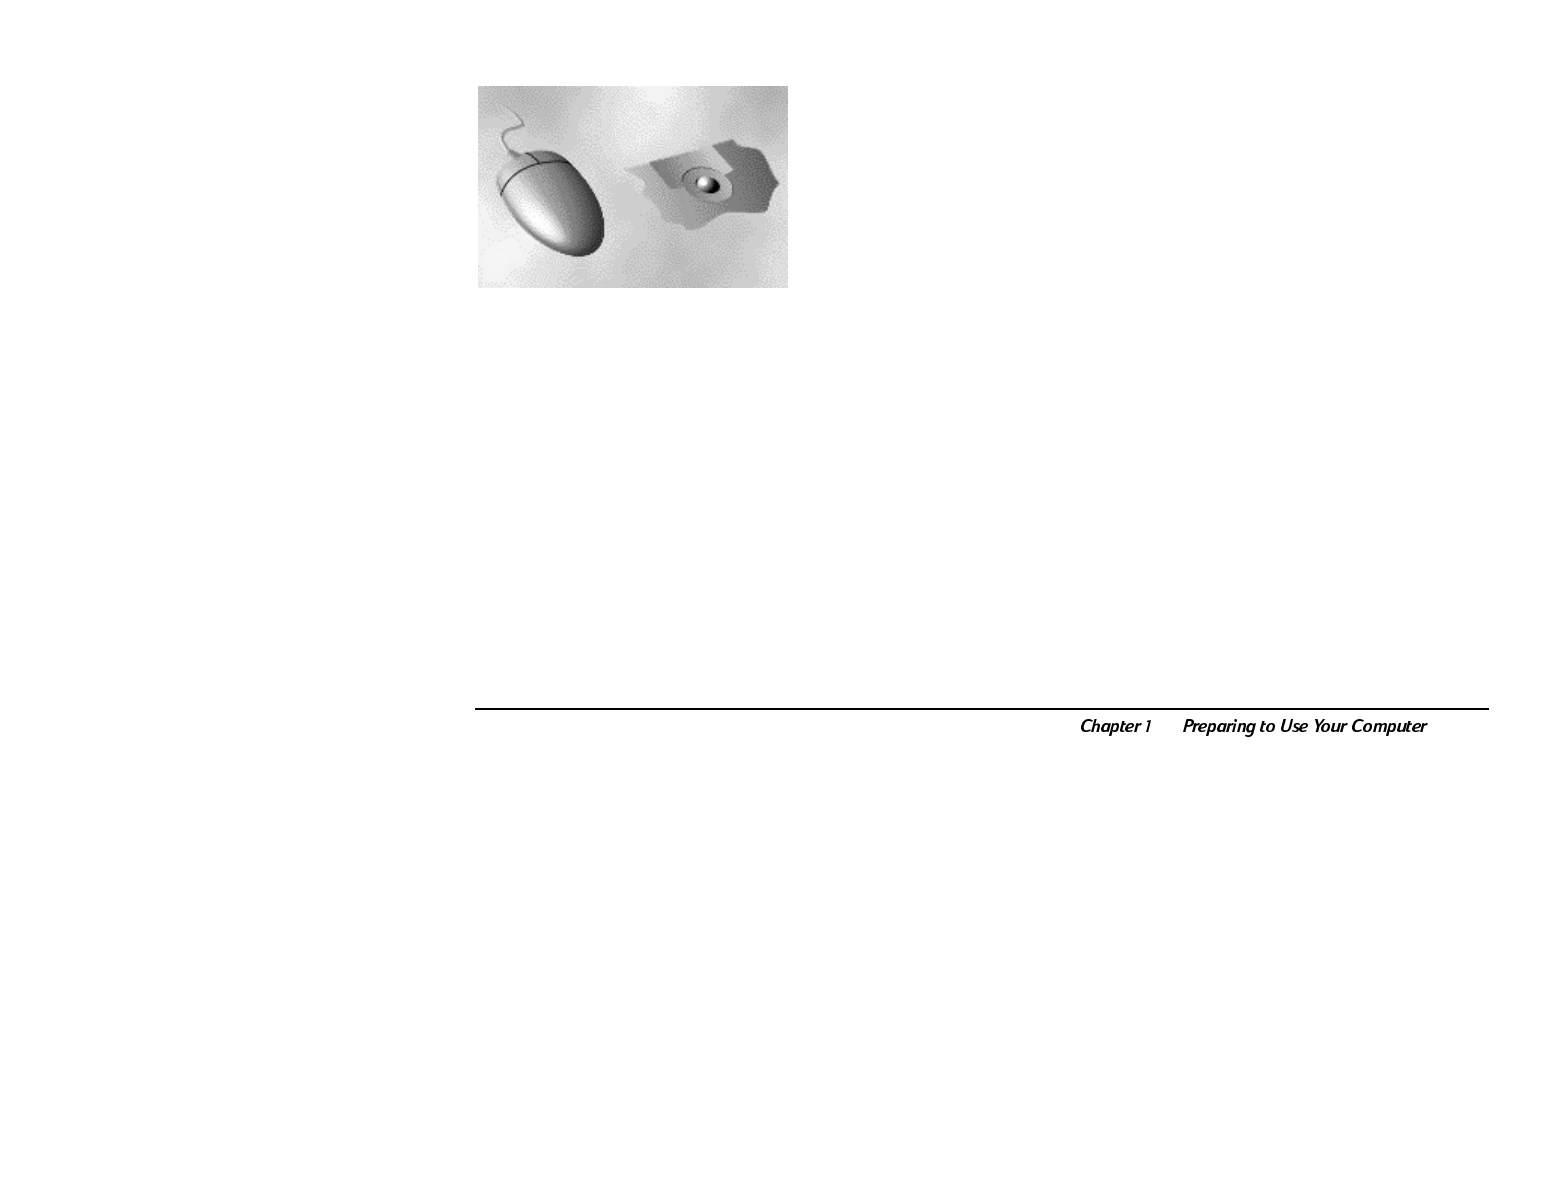
Mice and Other Input Devices
Various aspects of using mice and other input devices
may increase your risk of discomfort or injury.
Observing the following recommendations may
reduce that risk:
•
As with the keyboard, try to keep your hand,
wrist, and forearm in a neutral position while
using your mouse or other input device.
•
When using a stylus or light pen with a graphics
tablet, dont grip the stylus tightly. Keep your
hand and fingers relaxed and try to maintain a
neutral posture in your hand, wrist, and forearm.
•
If you use your thumb to rotate the ball on a
trackball or spaceball, keep it in a relaxed,
natural shape, and maintain a neutral posture in
your hand, wrist, and forearm.
•
Hold the mouse gently by draping your fingers
over it. Keep your hand relaxed and fingers
loose. Do not grip the mouse tightly.
•
It takes very little pressure or force from your
fingers to activate the buttons or scroll wheel on
your mouse, scrolling mouse, trackball, or other
input device. Using too much force can place
unnecessary stress on the tendons and muscles
in your hands, wrists, and forearms.
•
If you are using a scrolling mouse, be sure to
keep your fingers and hand in a relaxed, neutral
position when activating the scroll wheel. Also,
this type of mouse features software that can
minimize the number of mouse movements or
button clicks.
20
•
When using a mouse, trackball, stylus and
graphics tablet, or other input device, position it
as close to the keyboard as possible, and keep it
at the same level so you do not have to stretch
while using it.
•
Use a good quality mouse pad to enable the
mouse to work most effectively and reduce
unnecessary hand and wrist movements.
•
Be sure to keep your mouse and trackball clean.
Regular removal of accumulated dust and dirt
helps ensure proper tracking and reduces
unnecessary hand and wrist motions.
Headphones and Speakers
Listening to loud sounds for prolonged periods may
permanently damage your hearing. To avoid
discomfort from unexpected noise, always turn down
the volume before connecting headphones or
speakers to your HP equipment.
When you put on the headphones, slowly increase
the volume until you find a comfortable listening
level, then leave the volume control in that position.
•
21
Comfort and Safety Checklist
These recommendations are drawn from the latest
available international ergonomic standards and
recommendations, including ISO 9241 and ANSI/HFS
100-1988.
General
•
Work Surface Height Adjust either your seat
height, work surface, or both, to position the work
surface at approximately elbow height.
•
Work Surface Arrangement Make sure
frequently used equipment is within easy reach.
For example, if you are primarily using the
keyboard, place it directly in front of you, not to
the side. If you are primarily using the mouse,
place it in front of your hand or arm. If you are
using both a mouse and keyboard, place them
both at the same work surface height and close
together. If a palm rest is used, the height should
be flush with the front edge of the keyboard.
Other items, such as your telephone or notepad,
also should be considered.
•
Monitor Place your monitor so that the top of
the screen is at, or slightly below, eye level (up to
15 degrees).

22
•
Head Do not tilt your head forward by more
than 15 degrees, and try not to turn your head
toward the side.
•
Back While sitting at your work surface, make
sure your back is supported by the chairs
backrest in an erect position or angled slightly
backwards.
•
Arms Make sure your arms and elbows are
relaxed and loose, with your upper arm
perpendicular to the floor or slightly forward.
Keep your forearms and hands approximately
parallel to the floor with elbows bent between
70 and 115 degrees. Keep your elbows close to
your sides (less than 20 degrees away from your
body).
•
Legs Your thighs should be horizontal or
angled slightly downward. Your lower legs
should be near a right angle to your thighs. Make
sure there is sufficient room under the work
surface for your legs.
•
Feet If after adjusting your chair you cannot
rest your feet comfortably on the floor, use a
footrest, preferably one that can be adjusted in
height and angle.
Overall
•
Look away from the screen from time-to-time to
help reduce eyestrain. Focus on distant objects
briefly, and blink periodically to lubricate your
eyes. You also should have your eyes checked on
a regular basis and ensure your eyeglass
prescription is suitable for working on a monitor
screen.

•
23
•
Remember to occasionally shift position and
move your body. Keeping your body in one
position for long periods is unnatural and
stressful. When prolonged work is required, take
frequent short breaks. As a rule of thumb, a five
or ten minute break every hour is a good idea.
Short frequent breaks are more beneficial than
longer, less frequent, breaks. Data shows that
people who work for long periods of time without
a break may be more prone to injury.
•
Changing tasks frequently will help prevent
muscle stiffness. For example, alternating
between keyboarding, reading, writing, filing, and
moving around in your work environment helps
you maintain a relaxed posture. Occasionally
stretch the muscles in your hands, arms,
shoulders, neck, and back. You should stretch at
least as often as you take brief task breaks at
least once every hour.
•
Discomfort may be alleviated by using
alternative ergonomic designs and accessories
such as ergonomically personalized chairs, palm
rests, keyboard trays, alternative input devices,
prescription eyeglasses, anti-glare screens, and
more. Seek additional information from the
sources available to you, including your
employer, doctor, local office supply store, and
the information sources provided in this guide.
24
Information Sources
1
2
3
4
5
6
7
8
9
10
11
12
13
14

•
25
Chapter 2 covers the following topics:
•
Turning the computer on and off
•
Suspending your computer
•
Using the keyboard
•
Using the mouse
•
Using headphones
•
Working with diskettes
•
Using the CD-ROM drive
•
Using the modem
2Exploring Your System
26
Turning On Your Computer
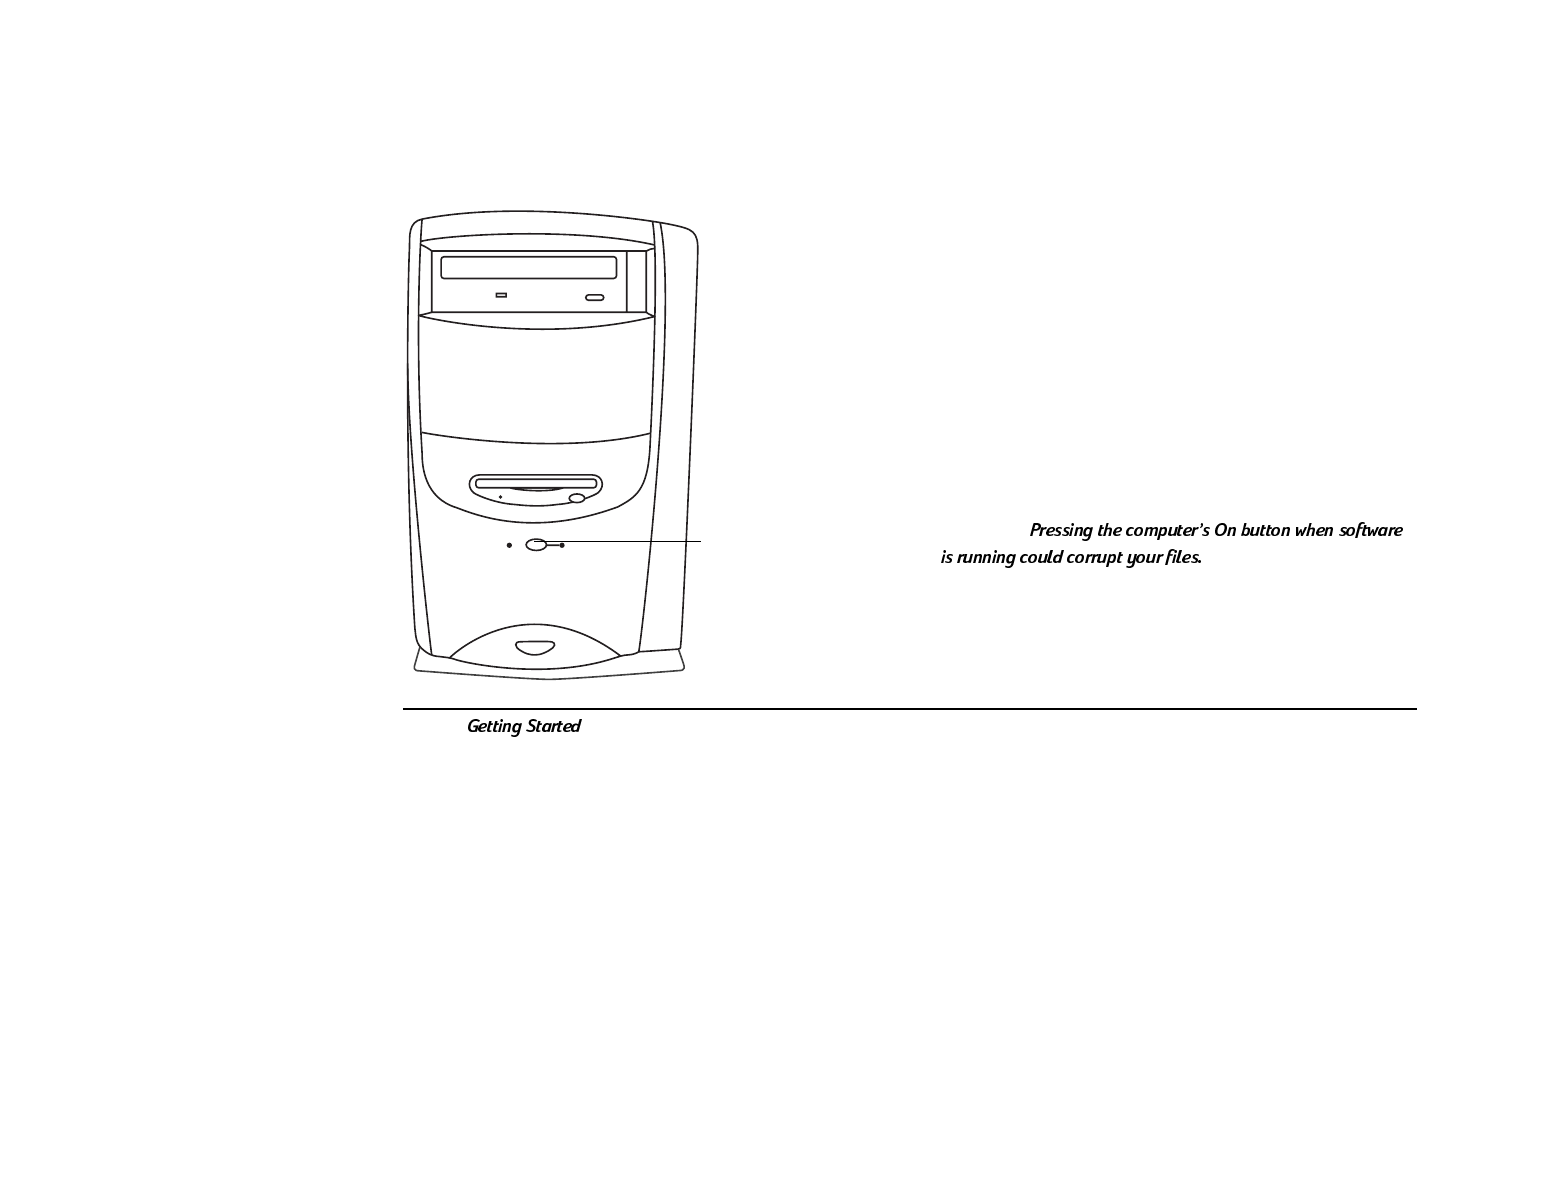
First, press the Power button on your display. Then, to
turn on your computer, press the On button on the
front of the PC.
On button
Turning Off Your Computer
There is only one way to turn off your computer
correctly. To turn off the computer:
1 Exit all software programs. (To close programs,
click X in the upper right corner of each window.)
2 Click Start on the taskbar.
3 Click Shut Down (last item on the menu).
4 In the dialog box, make sure Shut down is
selected.
5 Click Yes.
6 Turn off your display.
Caution:
•
27
Note:
Suspending Your Computer
As an alternative to shutting down your computer,
you can put your PC in Suspend mode. When you
suspend your computer, it goes into a low-power
state and your display is blank as if its turned
off. The next time you use your computer, any
applications, folders, and documents that were open
before you suspended the computer will be ready
and waiting for you. With Suspend, you can save
electricity without having to wait for your PC to go
through the normal startup routine when you turn on
the computer.
Suspend also allows faxes to come through to your
computer, and enables your PC to automatically
retrieve your e-mail messages and download
information from the World Wide Web (if you have
programmed your computer to do so).
To suspend the computer:
1 Press the Suspend button on the keyboard. The
screen goes dark, and the computer goes into
Suspend mode.
2 When you want to use your computer again, just
start to use the keyboard or mouse, or press the
Suspend button. The screen display will reappear
just as you left it.
Another way to suspend your computer is to choose
Suspend on the Start menu.
28
Note:
Using the Keyboard
You have a special keyboard that enables you to:
•
Connect directly to the Internet (if your
telephone line is connected to the computer).
•
Suspend your computer to save power while you
arent using it.
•
Get support information.
•
Set shortcuts to your favorite programs.
Note:
Special Keyboard Buttons
Internet Press this button to launch the Internet
browser of your choice. For more information on
connecting to the Internet, see page 48. This button
can be reconfigured to launch any application; see
Reconfiguring Keyboard Buttons on page 29.
Note:
Suspend Press this button when your computer
wont be used for a while, but you dont want to turn
it off. Pressing this key will save electricity. The screen
will go dark, and your computer will go into Suspend
mode. When you want to use your system again,
press Suspend again, move the mouse, or press any
key. The screen display will reappear just as you
left it.
•
29
Information Press this button to see HP support
options. By default, this button launches Personal
Guide but you can configure it to start HP Support
Center or any application you choose. For
information on reconfiguring this key, see the next
section, Reconfiguring Keyboard Buttons.
Reconfiguring Keyboard Buttons
Two buttons on the keyboard can be reconfigured to
start different applications: Information and Internet.
To reconfigure the buttons:
1 Click Start on the taskbar.
2 Select Settings.
3 Click Control Panel.
4 Double-click the Keyboard icon in
Control Panel.
5 Click the Keyboard Manager tab.
6 In the window that appears, click the button you
want to configure.
7 Select an application from the list, or click
Browse to find an application yourself.
8 Change the label to reflect the new application.
(The label will be displayed at the bottom of the
screen when the button is pressed.)
9 Click OK.
10 Repeat steps 6 through 9 for each button you
want to reconfigure.
11 Click OK when you are finished reconfiguring
your keyboard.
30
Changing the Screen Display of Keyboard
Messages
When you press any of the three buttons on the top
of your keyboard, the button description (such as
Suspend) appears on your screen.
To change the size, font, and color of these on-screen
messages:
1 Click Start on the taskbar.
2 Select Settings.
3 Click Control Panel.
4 Double-click the Keyboard icon in
Control Panel.
5 Click the Keyboard Manager tab.
6 Select Change Onscreen Display.
7 Make your changes.
8 Click Done.
9 Click OK.
Using the Mouse
As an alternative to the keyboard, you can use your
mouse to choose commands from the menus and
select items on the screen. To move the mouse
pointer, just slide the mouse on your desk in the
direction you want to move the pointer; the mouse
pointer will move on the screen in the same direction.
Mouse pads are not required, but they do provide a
clean, flat surface.
Once you have pointed to an item with the mouse,
you can select the item by tapping the left mouse
button once. For some tasks, such as opening a
document or running a program, youll need to
double-click the item. To double-click, point to the
item and tap the left mouse button twice, quickly.
The right mouse button functions differently in each
application. In many programs, the right button
displays a context-sensitive menu.
•
31
For practice using the mouse:
•
Run the mouse tutorial that came with your
computer. To start the program, click the Start
button on the taskbar, choose Run, type
windows\options\cabs\wintutor.exe, and
click OK.
•
Play Solitaire or any of the other games included
with your computer.
Note:
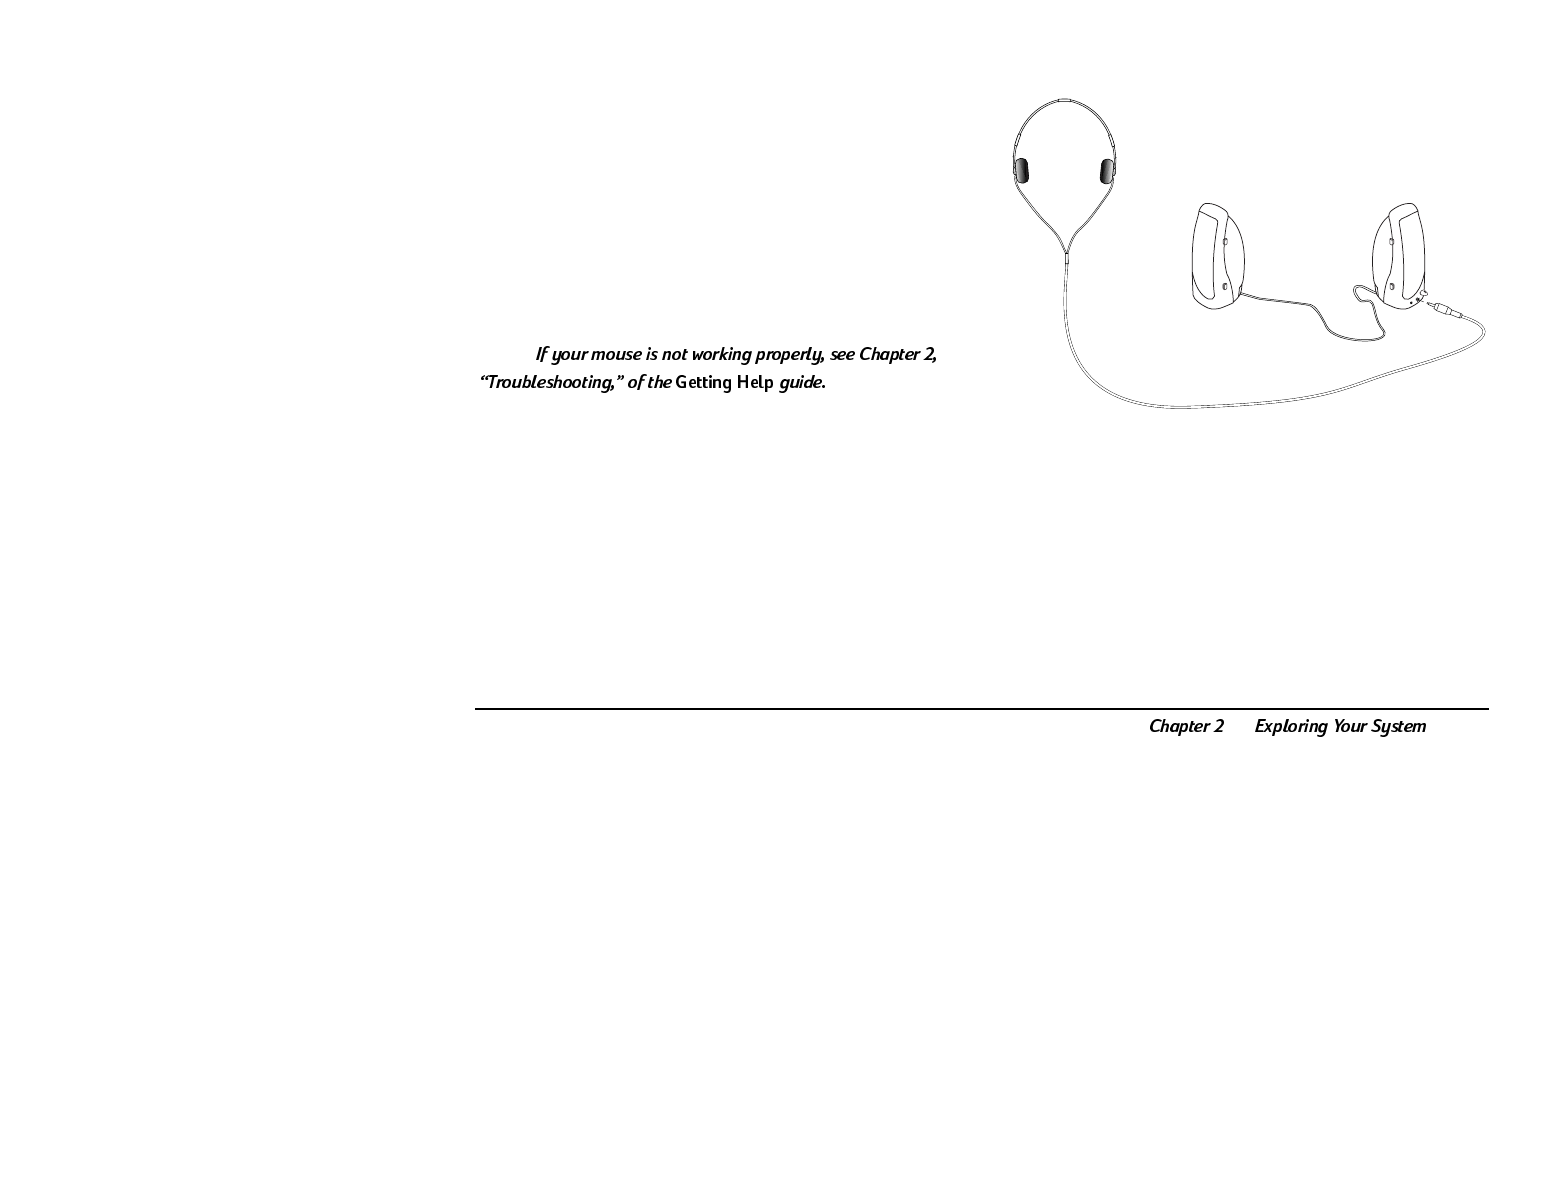
Using Headphones
Your right HP Pavilion speaker is equipped with a
standard mini (3.5mm) headphone jack. This jack
supports most portable headphones. If you would
like to use headphones equipped with the larger
.25-inch phone jack, inexpensive adapters are
available at most consumer electronics stores.

32
To use the headphones, plug them into the
headphone jack located at the front of the right
speaker.
Note that when the headphones are plugged in, the
speakers will be muted. (The systems line output,
however, will continue to work.) When you unplug the
headphones, the speakers will go back to normal
operation.
Working with Diskettes
Your computer comes with a 3.5-inch diskette drive.
To insert a diskette into the drive:
1 Hold the diskette by the label, with the label
facing up.
2 Insert the diskette into the drive, with the metal
plate going into the drive first.
3 Push the diskette into the drive until you hear a
click.
To remove the diskette, press the button underneath
the drive. Be sure to remove the diskette before
shutting down your computer; if a diskette is in the
drive the next time you turn on your computer, you
will see an error message and the Windows desktop
will not be able to start. If this happens, just eject the
diskette and press any key to continue.
•
33
Caring for Diskettes
Youll want to take proper care of your diskettes so
that you dont lose important information. Follow
these tips:
•
Keep magnetic material away from your
diskettes. Magnets can scramble the data on the
diskette.
•
Do not remove a diskette while the indicator light
is on.
•
Store diskettes at room temperature.
Formatting Diskettes
Before you can use a diskette, it must be formatted,
or initialized. Most diskettes come preformatted
check the box or diskette label to see if the diskettes
are already formatted. If they are not formatted, you
will need to format them yourself.
To format a diskette:
1 Insert the diskette in the drive.
2 Double-click the My Computer icon on the
desktop.
3 Click (dont double-click) the 3-1/2 floppy (A:)
icon.
4 Click File on the menu bar and choose Format.
5 Choose OK.
Warning:
34
Using the CD-ROM Drive
Your CD-ROM drive can run software on CD-ROMs as
well as play music CDs. This section shows you how
to perform these different tasks.
Note:
Inserting a CD
To insert a CD in the CD-ROM drive:
1 Make sure your computer is turned on.
2 To eject the disc tray, press the button under the
CD-ROM drive.
3 Remove the CD from its case, holding onto the
discs edges only.
4 With the label facing up, gently place the disc in
the tray.
5 Press the button under the CD-ROM. The disc
tray glides back inside the computer.
Caring for CDs
As with diskettes, CDs require special handling so that
you dont lose important information. Follow these
tips:
•
Return CDs to their protective cases when you are
finished using them.
•
Avoid touching the underside of the disc with
your fingers or placing the disc face up on your
desktop. Doing so could scratch the surface.
•
Handle the disc by its outside edges or inner hole
only.
•
Store CDs at room temperature.
•
35
Playing Music CDs
Music CDs automatically play when you insert them
into your CD-ROM drive. To adjust sound, skip tracks,
or stop playing the CD, click the Media Rack button
on the taskbar.
Using CDs that Came with Your
HP Pavilion PC
Some programs (such as encyclopedias) require that
you insert the CD in order to run the software. To play
these CDs:
1 Place the CD in the CD-ROM drive.
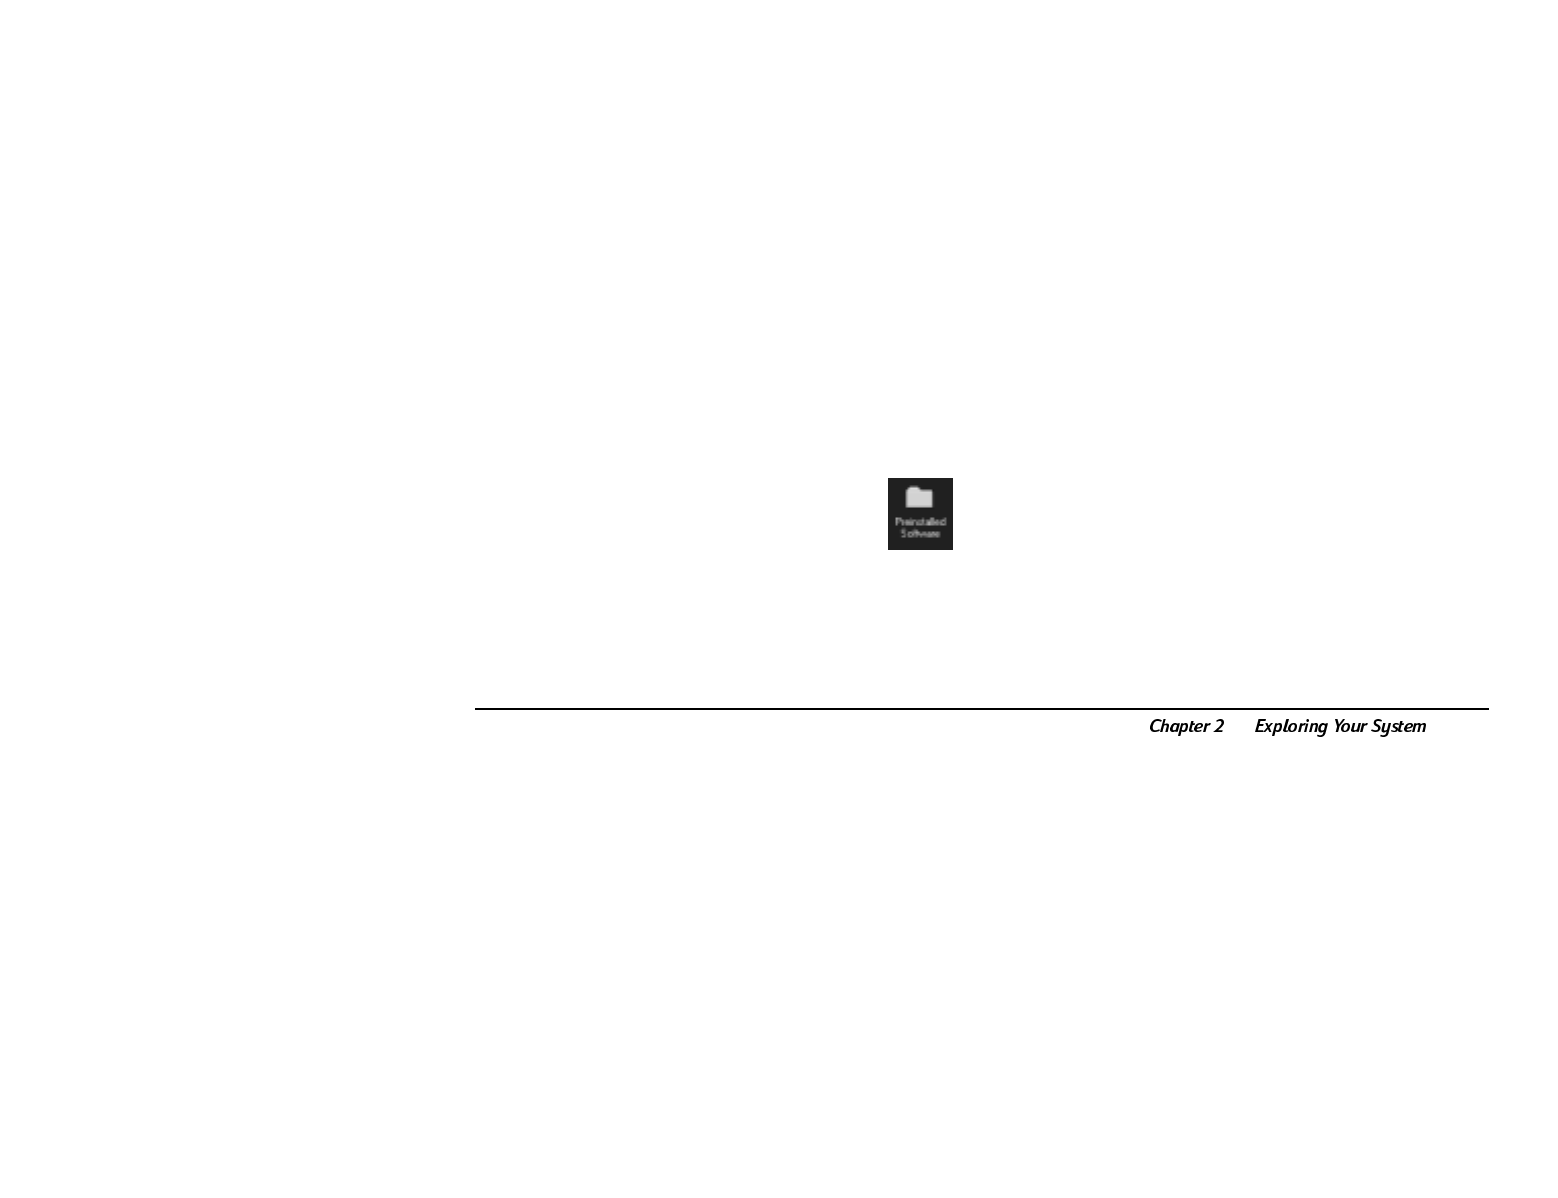
2 Double-click the Preinstalled Software
icon on your desktop.
3 Scroll the Preinstalled Software window until you
locate the program you want to start.
4 Double-click the CD title you wish to play.
Playing MPEG Videos
MPEG (Motion Picture Experts Group) videos can be
on CDs, files downloaded from the Internet, satellite
transmissions, or files on a diskette. Your computer
supports the MPEG-1 standard; these files typically
have a .DAT or .MPG extension.
To play an MPEG-1 file:
1 In My Computer or Windows Explorer, go to the
drive and folder containing the MPEG-1 file.
2 Double-click the file name you want to play.
36
Using the Modem
Your HP Pavilion PC comes with a K56flex data/fax
modem. Using the modem and the software included
with your PC, you can:
•
Connect to the Internet (see Connecting to the
Internet on page 48).
•
Send and receive e-mail messages (see Sending
and Receiving E-Mail on page 50).
•
Send and receive faxes (see Sending and
Receiving Faxes on page 55).
Note:
Even though your modem is capable of downloading
at 56Kbps using K56flex technology, your online or
Internet Service Provider may not operate at this
speed or support this technology. Please check with
your service provider for information on its
capabilities.
Please note that the maximum speed for faxing is
14.4Kbps.
•
37
Chapter 3 covers the following topics:
•
Learning about your Windows desktop
•
Finding your preinstalled software
•
Finding files
•
Adding and deleting software
•
Getting help from the HP Support Center
•
Getting software help
3Discovering Your Software
38
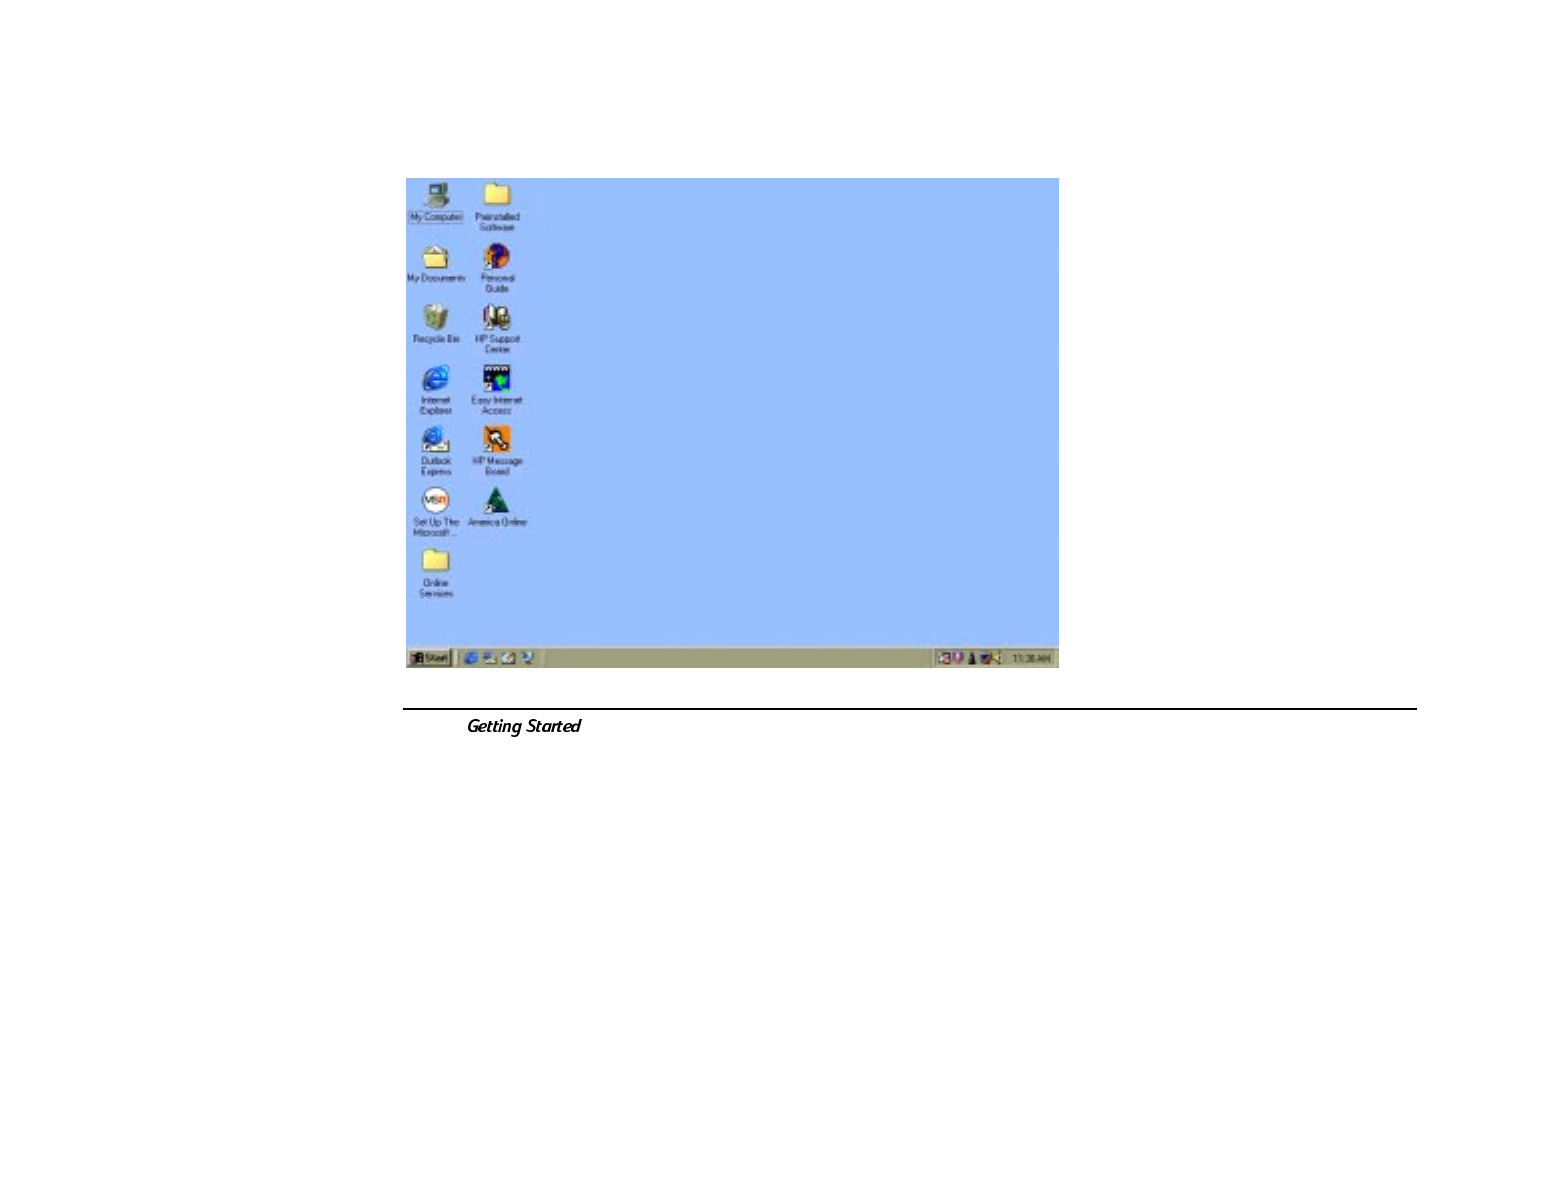
Learning about the Windows Desktop
After you turn on your computer and the operating system loads, the
Windows desktop appears.
•
39
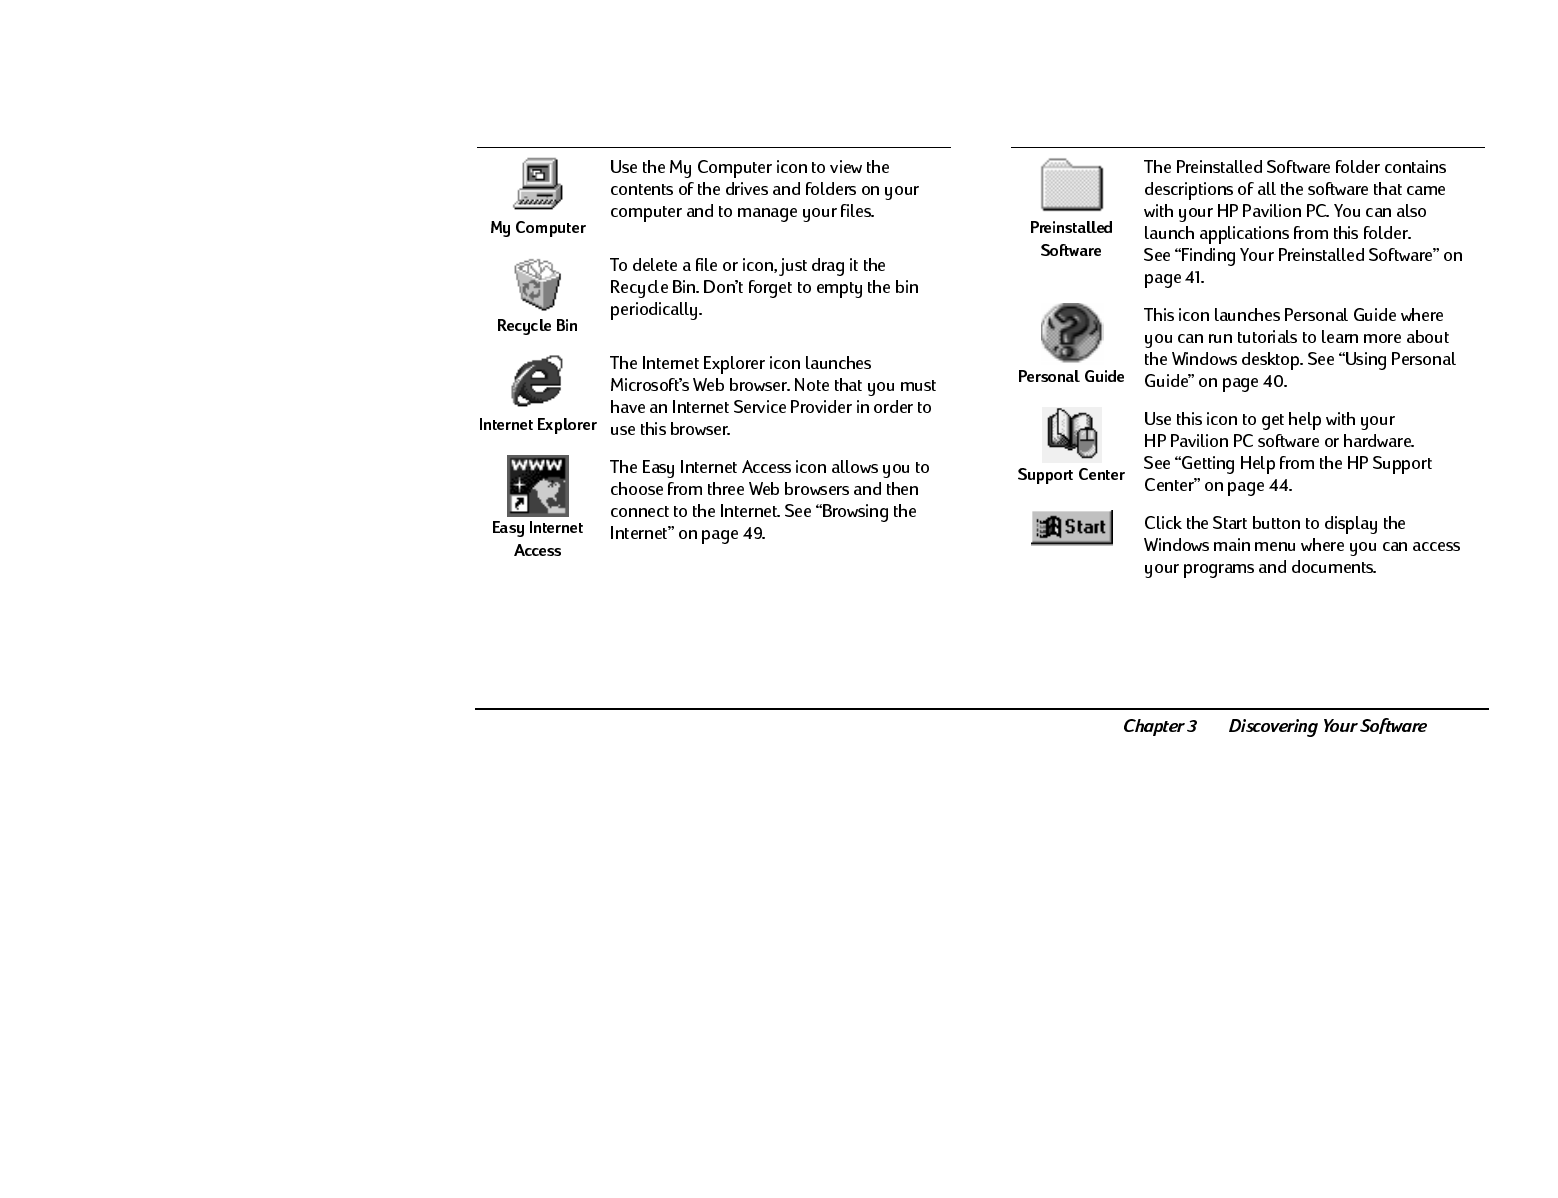
As you can see, the Windows desktop contains a
number of icons; the table below describes some of
the more important ones.
40
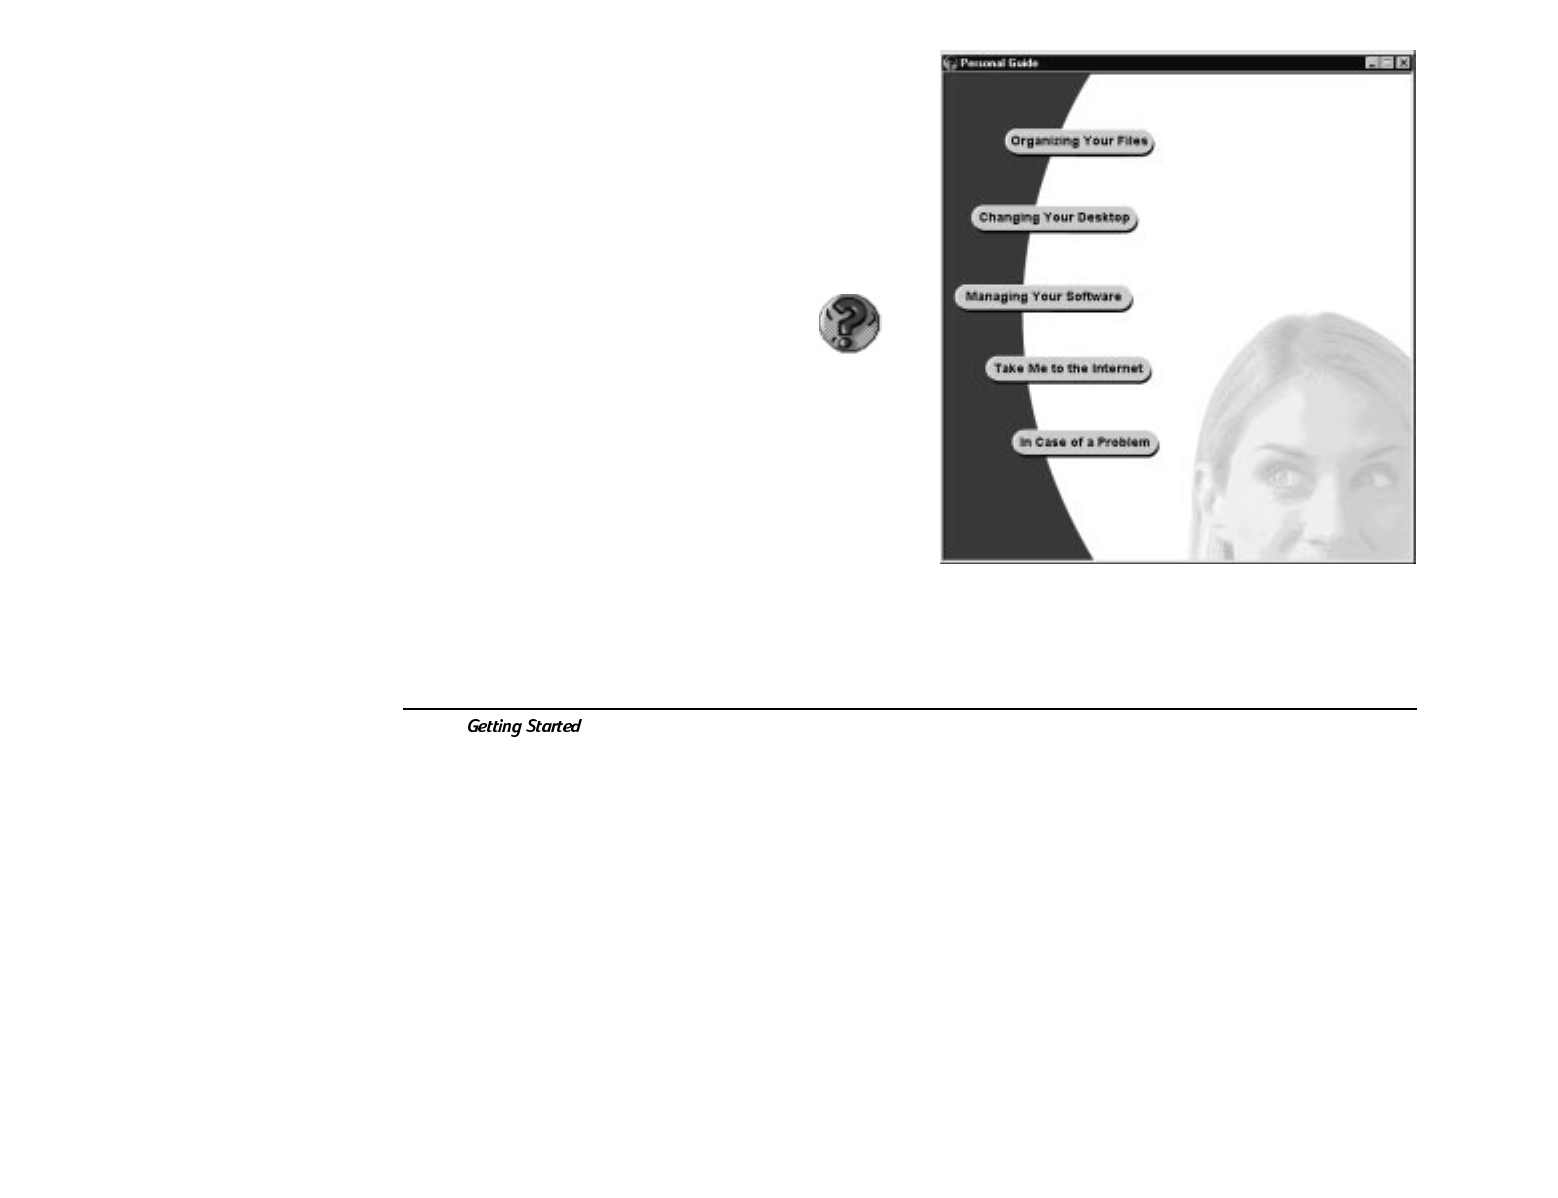
Using Personal Guide
For those who are new to the Windows desktop,
Personal Guide provides an easy way to start using
your HP Pavilion PC. It offers easy access to a variety
of on-screen tutorials and short demos that will help
you get up and running quickly with your new
computer.
Start Personal Guide by double-clicking its
icon on the Windows desktop.
To explore a Personal Guide category, click its button
in the Personal Guide window. Descriptions of the
Personal Guide categories are listed on the following
page.
•
41
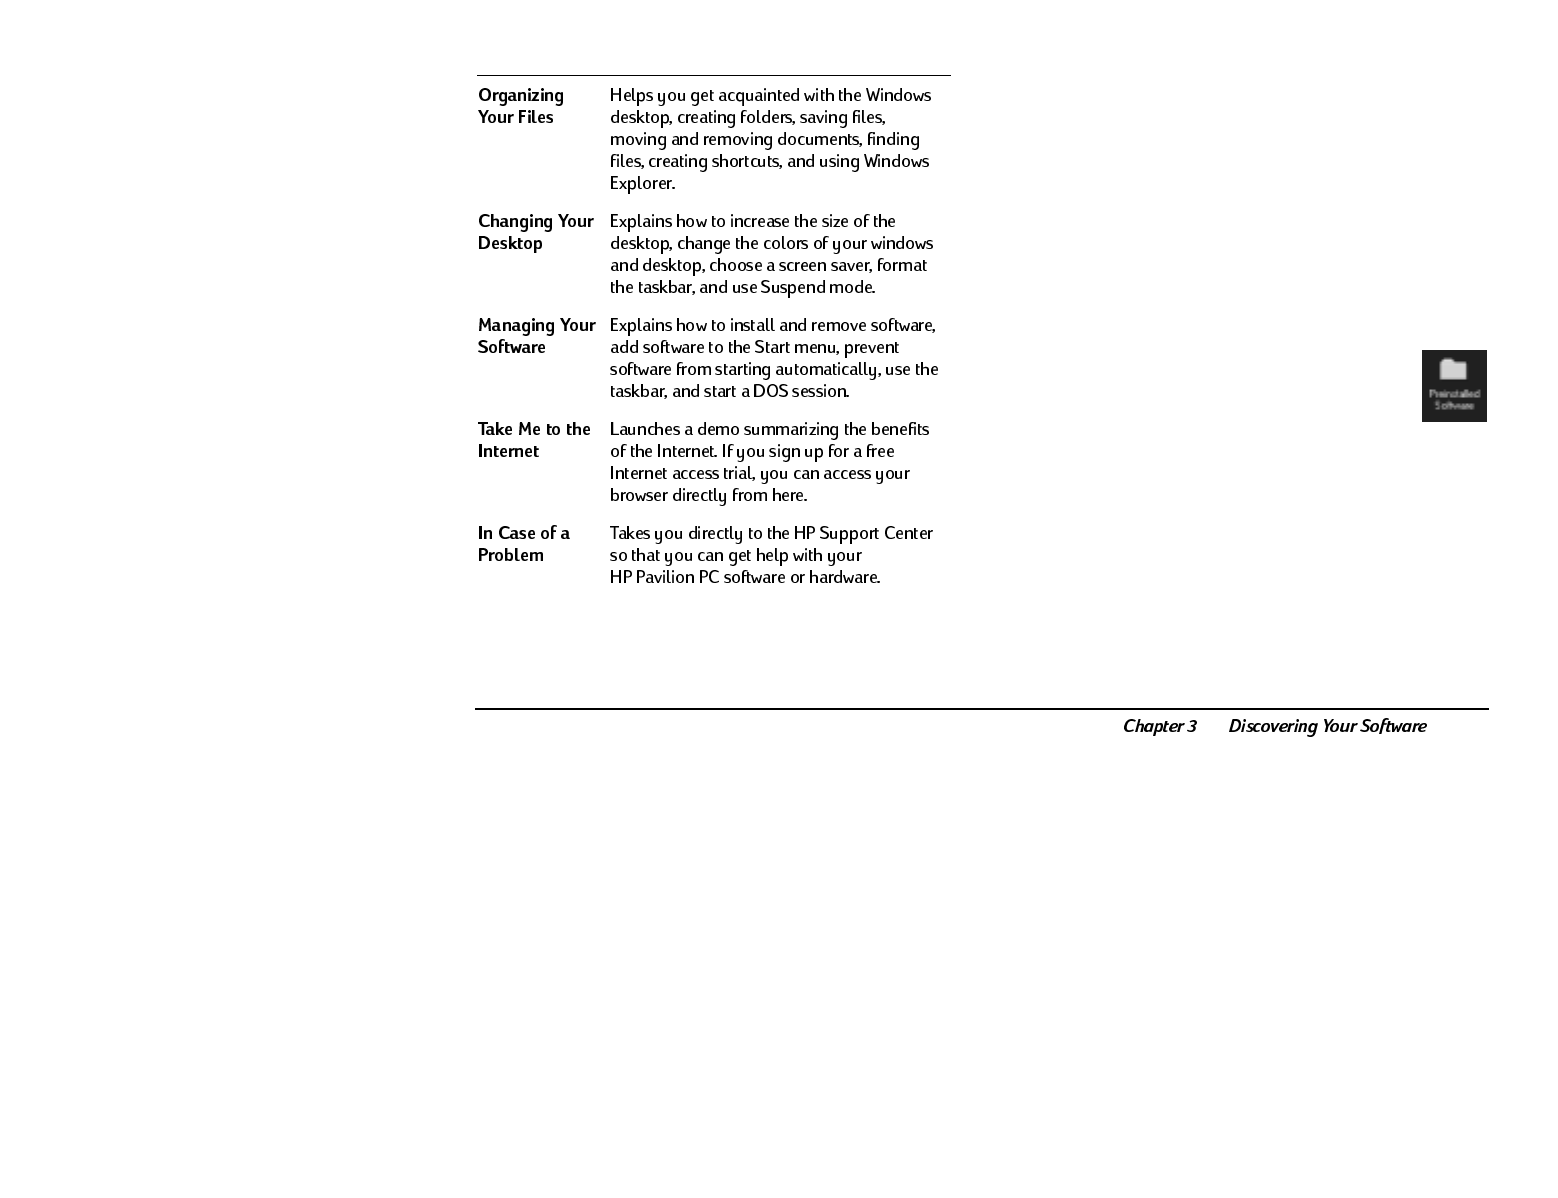
Personal Guide Categories Finding Your Preinstalled
Software
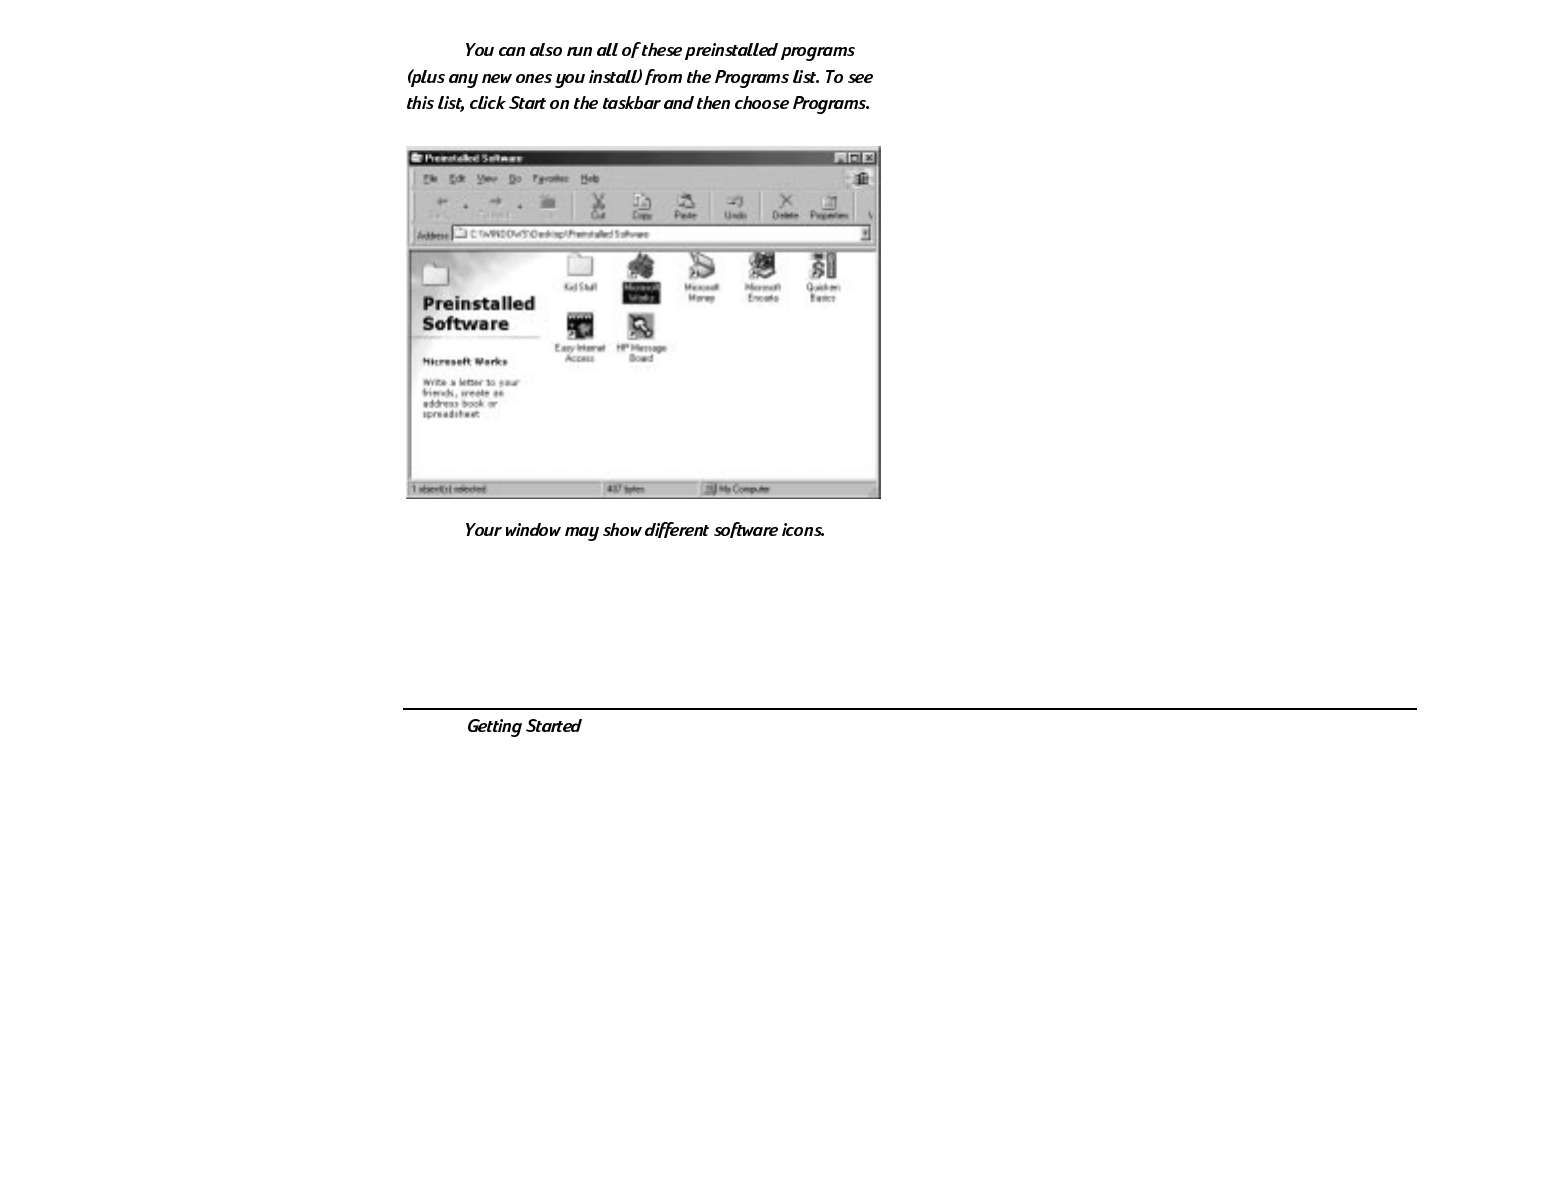
Your HP Pavilion PC comes with a number of
preinstalled software programs; for your
convenience, these programs have been placed in a
folder on your desktop. The programs vary,
depending on which system you purchased.
To see the key programs on your HP Pavilion PC:
1 Double-click the Preinstalled Software
folder on your Windows desktop.
2 Click once on an icon to view a description of the
software program; this description appears in the
left pane of the Preinstalled Software window.
3 To run a program, double-click the programs
icon in the window.
42
Note:
Note:
Finding Files
To find documents or folders on your computer:
1 Click Start on the taskbar.
2 Select Find.
3 Click Files or Folders.
4 Type all or part of the name of the document
(or folder).
5 Click Find Now. The magnifying-glass animation
means the search is in progress. If there are any
matches, a list of files appears.
6 Double-click the document (or folder) to open it.

•
43
Adding Software
The best way to install a new program is to use the
Add/Remove Programs utility.
To install new programs by running Add/Remove
Programs:
1 Insert the CD or diskette in the appropriate drive.
2 Click Start on the taskbar.
3 Select Settings.
4 Click Control Panel.
5 Double-click Add/Remove Programs.
6 Click Install.
7 Follow the on-screen directions.
Once a new program is installed, it appears in the
Programs section of the Start menu.
Deleting Software
There are a number of ways to remove programs
from your hard disk. Some programs come with their
own uninstall utility, which you use to remove the
program. You can also buy uninstall utilities that
remove any program from your hard disk. Or you
can use the Add/Remove Programs utility, located in
the Control Panel.
To use the Add/Remove Programs utility:
1 Click Start on the taskbar.
2 Select Settings.
3 Click Control Panel.
4 Double-click Add/Remove Programs.
5 Click the program you want to remove.
6 Click Add/Remove.
7 Click OK.

44
Getting Help from the HP
Support Center
The HP Support Center groups your support options,
online documentation, tutorials, and system
maintenance tools in one convenient location.
To go to the Support Center, choose
HP Support Center in the Start menu or
double-click the icon on the desktop.
Note:
Descriptions of HP Support Center options are listed
in the following table.
•
45
HP Support Center Options Getting Software Help
If you are having trouble learning a new software
program, you have a number of ways to get help:
•
Use the online help. In most programs, you
can open a help window by pressing the
F1 function key.
•
Read the online documentation. To see if a
program has documentation online,
double-click the HP Support Center icon
on the desktop and click the HP Pavilion
Library button.
•
Call the vendors telephone support number or
visit its Web site. This information is available in
the HP Support Center, in the Technical Support
category.

46
•
47
Chapter 4 covers the following topics:
•
Connecting to the Internet
•
Signing up for Internet access
•
Browsing the Internet
•
Sending and receiving e-mail
•
Using the HP Message Board
•
Sending and receiving faxes
4Communicating with the World

48
Connecting to the Internet
Your HP Pavilion PC is Internet-ready and comes with
everything you need to use the Internet:
•
Free* Internet access without the use of a credit
card (*Please read the terms and conditions on
page 53)
•
A Personal Message Board where you can create
and post messages to family and friends
•
Personalized e-mail accounts
•
Choice of three browsers
•
A Web site dedicated to HP Pavilion PC owners
Signing Up for Internet Access
If you havent yet signed up for your free* Internet
access:
1 Double-click the Easy Internet Access
icon on your desktop, or press the
Internet button on your keyboard.
2 Watch the interactive demo to acquaint yourself
with the Web and see how to use e-mail.
3 Click Sign Up to register for your free Internet
access trial.
4 Follow the instructions on your screen. During
the sign-up process, you have the option of
adding multiple e-mail accounts.
Note:
•
49
Whenever you want to connect to the
Internet in the future, just double-click the
Easy Internet Access icon on your desktop,
or press the Internet button on your keyboard.
Browsing the Internet
Exploring the Internet with your HP Pavilion PC is fun
and easy. When you sign up for the Easy Internet
Access, you have three Internet browsers to choose
from:
•
Easy Internet Access HPs customized
browser that offers an easy and fast way to surf
the Web and send and receive electronic mail.
•
Kids Internet Browser HPs customized
browser designed especially for children. It offers
e-mail services and access to fun Web sites.
•
Microsoft Internet Explorer a traditional Web
browser. For e-mail services, you will need to
configure Microsoft Outlook Express.
Each time you connect to the Internet, you can select
which browser you want to use, or you can create a
customized icon that launches either the Easy
Internet Access or Kids Internet browser.
To connect to the Internet:
1 Double-click the Easy Internet Access
icon on your desktop, or press the
Internet button on your keyboard.
2 Choose your account.
3 In the Browser Selector dialog box, click the
browser you want to use.
4 Click Start.
50
Once you are connected to the Internet, be sure to
visit the HP At Home Web site. An HP At Home
button is provided in the Easy Internet Access
browser, or you can enter the following address:
http://www.hp-at-home.com
At this Web site, you can get:
•
Tips and updates on using your computer
•
Ideas for projects that you can create on your PC
•
Additional assistance when you have a question
or need help
To visit other sites, click the buttons in the customized
browsers or type in the Web addresses. Another way
to browse the Internet is to use the browsers Search
button to hunt for all references to a specific word or
phrase on the Web.
Sending and Receiving E-Mail
The specific steps for sending and receiving e-mail
depend on which mail program you are using. The
procedures below are for the Easy Internet Access
browser.
To go to the Easy Internet Access browser e-mail
program:
1 Double-click the Easy Internet Access
icon on your desktop, or press the
Internet button on your keyboard.
2 If you have multiple mail accounts, click the
account you want to use.
3 Choose the Easy Internet Access browser and
click Start.
4 Click the Go to e-mail button.

•
51
To send an e-mail message:
1 In the Easy Internet Access e-mail window, click
Write messages.
2 Fill in the recipients e-mail address and the
subject of the e-mail, and then type your
message.
3 Click Send messages.
To receive e-mail messages:
1 In the Easy Internet Access e-mail window, click
Get messages.
2 Click a message in the list to read its contents.
When you are finished sending and receiving e-mail,
click the Close e-mail button.
Using the HP Message Board
After you sign up for the Easy Internet Access, you
have access to the HP Message Board. This is your
own personal space where you can post messages
and photos for others to view. Its a place where you
can share:
•
Your latest holiday photos
•
Personalized notes
•
Fun greetings
•
And much more
Just give your family and friends your Message
Board Web address and password and they can view
it with their own Internet connection.
Its as easy as Create, Post, and Share.
52
Creating a Message
To create a message for your Message Board:
1 Double-click the HP Message Board
icon on your desktop.
2 Click Create & Post to start the Message Creator.
3 Select a message option or choose to design one
of your own.
4 Start personalizing your message.
Posting a Message
Once youve completed your message, select Post to
my Message Board to send your message to your
Message Board.
After its been posted, a confirmation will be sent to
you. Posting takes approximately 510 minutes.
Sharing Your Message Board
Once you receive confirmation that your message
has been posted successfully, send e-mail to your
friends and give them the Web address and password
of your Message Board so they can view your
postings. You can find the Web address and password
in the confirmation e-mail that was sent to you after
you posted your message.
Another way to look up the Web address and
password needed for access to your postings is to
double-click the HP Message Board icon on
the desktop and select Giving people access
to your Message Board.

•
53
Terms and Conditions of the
Free Internet Access
•
Free Internet access is limited to the number
of specified hours, starting from the date of
purchase. Your daily usage may be limited
as well.
•
Free Internet access only covers the Internet
Service Provider (ISP) connect time. You will be
responsible for any additional phone toll charges
from the phone company that are incurred when
you call from your home or office to the nearest
access number.
•
When selecting a local access number, please
remember that calling a number within your area
code does not guarantee the call is free.
•
Please check with your phone carrier to make
sure the number you have selected is considered
a local call in your area. HP and GTE are not
responsible for additional long distance phone
charges.
•
Your Internet account is nontransferable.
54
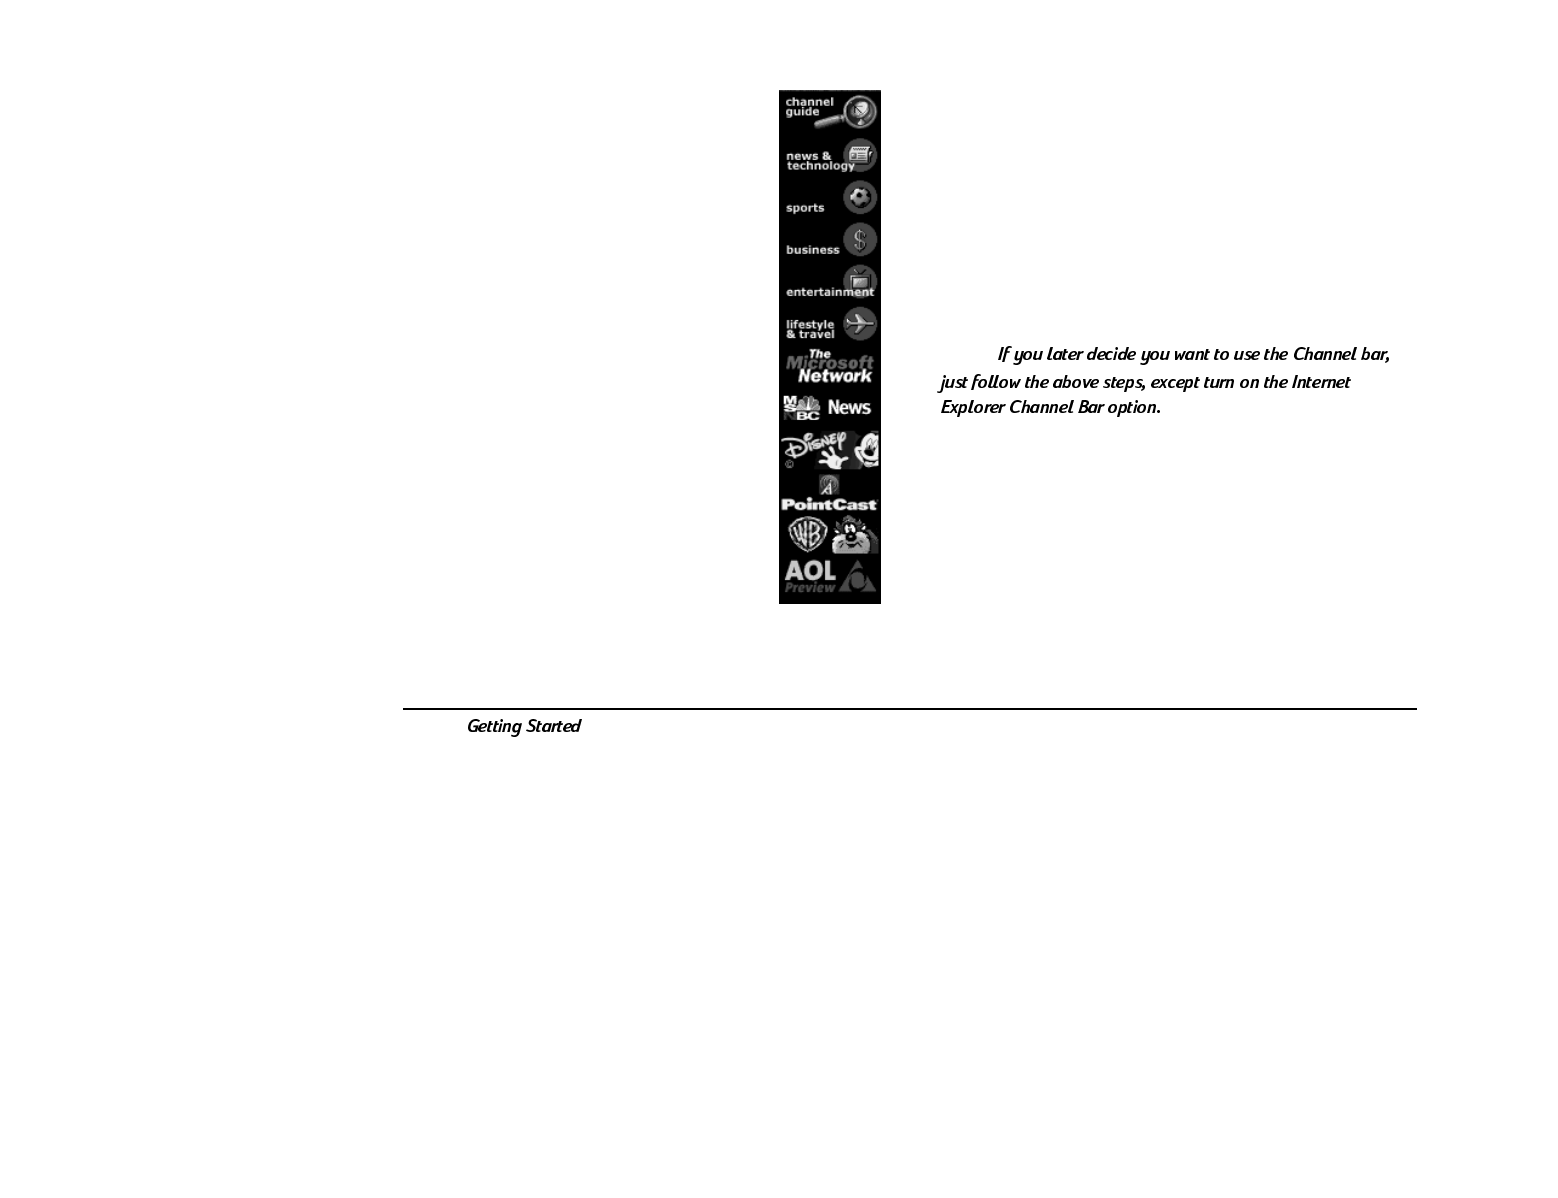
Removing the Channel Bar
Your Windows desktop may contain the
Internet Explorer Channel bar which you
can use to quickly access pages from
your favorite Web sites. In order to use
the bar, however, you must have an
Internet Service Provider (ISP) and you
need to set up Internet Explorer 4.0 to
connect with your ISP. If you dont plan
on using the Channel bar in the near
future, you may want to remove it from
the desktop.
To remove the Channel bar from the desktop:
1 Right-click an empty area of the desktop.
2 Choose Active Desktop and then Customize my
Desktop.
3 Turn off the Internet Explorer Channel Bar
option.
4 Click OK.
Note:
•
55
Sending and Receiving Faxes
The QuickLink III software included with your
HP Pavilion PC can turn your PC into a fax machine.
Sending a Fax
There are two ways to compose a fax. You can type a
message on the Quick Fax notepad, or you can fax a
file from any program that can print.
Sending a fax composed on the Quick Fax
notepad
1 Double-click the Preinstalled Software
folder on your desktop, and scroll the
window until you find QuickLink III.
2 To start the program, double-click QuickLink III.
3 Click Quick Fax on the QuickLink III main
window toolbar. The Message Manager appears.
4 Type the appropriate address and subject
information in the fax header.
5 Type the message body in the QuickFax Note
area.
6 Click Send Fax.
Faxing a file using software programs
Software programs that can print can also send faxes.
To send a fax, change the selected printer (in the Print
dialog box) to QuickLink III, and then print as you
normally do.
56
Receiving Faxes
QuickLink III also has the ability to receive, view, and
print faxes. Faxes are automatically received when the
QuickLink III program is running in an open or
minimized window.
Note:
To view and print a fax:
1 In QuickLink III, click View Fax on the toolbar.
2 Double-click the name of the fax that you want
to view.
3 Click the Print button to print the fax on the
selected printer.
57
A
B
C
Glossary
58
D
E
59
F
G
H
I
J
K
L

60
M
O
P
61
R
S
T
U
W

62
63
FCC Regulatory and Safety
Information
Regulatory Information Federal Communications
Commission (FCC) (USA only)
•
•
•
•
Regulatory and Safety Information
64
Consumer Information and FCC Requirements
•
•
•
•
•
Statement of Fax Branding
65
Canada Department of Communication (DOC)
Notice
66
67
Declaration of Conformity
68
Additional Safety Information
AC Power Safety Warning
69
Lithium Battery Caution
70
Laser Safety Statement TV Antenna Connectors Protection
External Television Antenna Grounding

71
2
1
1
2
3
4
5
6
7
3
4
5
6
7
Antenna Grounding
Antenna Grounding
Grounding Component
Electric Service Equipment
Ground Clamps
Ground Clamp
Grounding Conductors (NEC Section 810-21)
Antenna Discharge Unit (NEC Section 810-20)
Antenna Lead in Wire
Power Service Grounding Electrode System
(NEC Art 250, Part H)
Reference
Lightning Protection
Power Lines

72
73
A
B
C
D
E
F
H
Index
74
I
K
L
M
P
Q
R
S
75
T
U
V
W