Hua Xin Information Technology 20170822500 Robotic Vaccum Cleaner User Manual part
Shenzhen Hua Xin Information Technology Co., Ltd Robotic Vaccum Cleaner part
User Manual part

www.tesvor.com
Product Manual

1.Greetings from Tesvor!
Thank you for purchasing Tesvor Robot Vacuum!
We hope that our products will bring you an
intelligent and convenient lifestyle!
If you encounter any problems which cannot be solved
by this manual, please contact service@tesvor.com
Our products are subject to material, and our company reserves the right to
upgrade the products, subject to change without notice.

1. Welcome
2. Safety Instructions
3. Product Composition
3.1 Components Names
3.2 Product Specifications
4. Instructions
4.1 Remote Control Instructions
4.2 Operating Instructions
5. Product Maintenance
5.1 Side Brush Cleaning Replacement
5.2 Dust Container and Screen Cleaning
5.3 Other Component Maintenance
6. Common Faults
6.1 Alarm Prompt
6.2 Replaceable Module

Please read this instruction carefully and follow this manual. Any operations not following
this instruction may cause damage to the product.
Safety Precautions Related To The Host and Accessories
! Warning
1. This device complies with part 15 of the FCC Rules. Operation is subject to the following two
conditions:
1) This device may not cause harmful interference, and
2) This device must accept any interference received, including interference that my cause undesired
operation.)
2. Do not disassemble, repair or transfer the machine, or it will damage the product and cause
danger.
3. Do not use this product in an environment where fire or explosion is possible.
4. This product can only use the original power adapter, otherwise it may cause product damage
and fire.
5. Don’t stand or sit on this product, otherwise it may cause product damage or fall.
6. When the metal part of the power plug is attached to dust, be sure to wipe it with a dry cloth.
7. The power adapter uses 100-240V AC voltage. Please plug the plug into the socket so as to avoid
child touching.
8. Prohibit the host and electronic accessories from water immersion, otherwise it will cause
short-circuit damage.
9. Do not damage the power cord, or load weights on the power line. Please do not heat,
pull or bend the power cord.
10. When the vacuum is operating, please pay attention to the safety of children, elders to avoid
tripping risk. Please do not touch the side wheel and side brush to avoid injury.
11. This product is designed to be used in indoor situations, please do not use in outdoor areas.
12. Don’t let metal or conductive materials contact with the battery junction to avoid short-circuit.
Attention
1. Don ot touchthis product with wet hands, otherwise it may lead to electric shock.
2. Please do not put this product on places easy to cause dropping, such as seat, room, and high
platform.
3. This product is a precise electronic equipment and should avoid prolonged exposure in the sun.
4. Please do not use this product in humid environment, such as bathroom.
5. Do not bring this product near cigarette butts, lighters and other open flames.
6. Turn off the power switch at the bottom of the machine after using this product.
7. Prior to the use of this product, remove all vulnerable items on the floor, such as glass, lamps,
and items that may be entangled with brush and suction passages.
8. Prior to use, please carefully check whether the power adapter is connected to the socket,
otherwise it will cause damage to the machine.
RF radiation exposure statement

The Robotic Vacuum Cleaner complies with FCC RF radiation
exposure limits set forth for an uncontrolled
environment. Caution: To maintain the compliance with the
FCC’s
RF exposure guideline, install the Robotic Vacuum Cleaner at least
7.9” (20 cm) from ALL persons. The
transmitter of this device must not be co-located or operating in
conjunction with any other
antenna or transmitter.
This equipment has been tested and found to comply with the limits for a Class B
digital device, pursuant to part 15 of the FCC Rules. These limits are designed to
provide reasonable protection against harmful interference in a residential
installation. This equipment generates, uses and can radiate radio frequency
energy and, if not installed and used in accordance with the instructions, may
cause harmful interference to radio communications. However, there is no
guarantee that interference will not occur in a particular installation. If this
equipment does cause harmful interference to radio or television reception, which
can be determined by turning the equipment off and on, the user is encouraged
to try to correct the interference by one or more of the following measures:
—Reorient or relocate the receiving antenna.
—Increase the separation between the equipment and receiver.
—Connect the equipment into an outlet on a circuit different from that to
which the receiver is connected.
—Consult the dealer or an experienced radio/TV technician for help.
MODIFICATION: Any changes or modifications not expressly approved
by the grantee of this device could void the user’s authority to operate the
device.
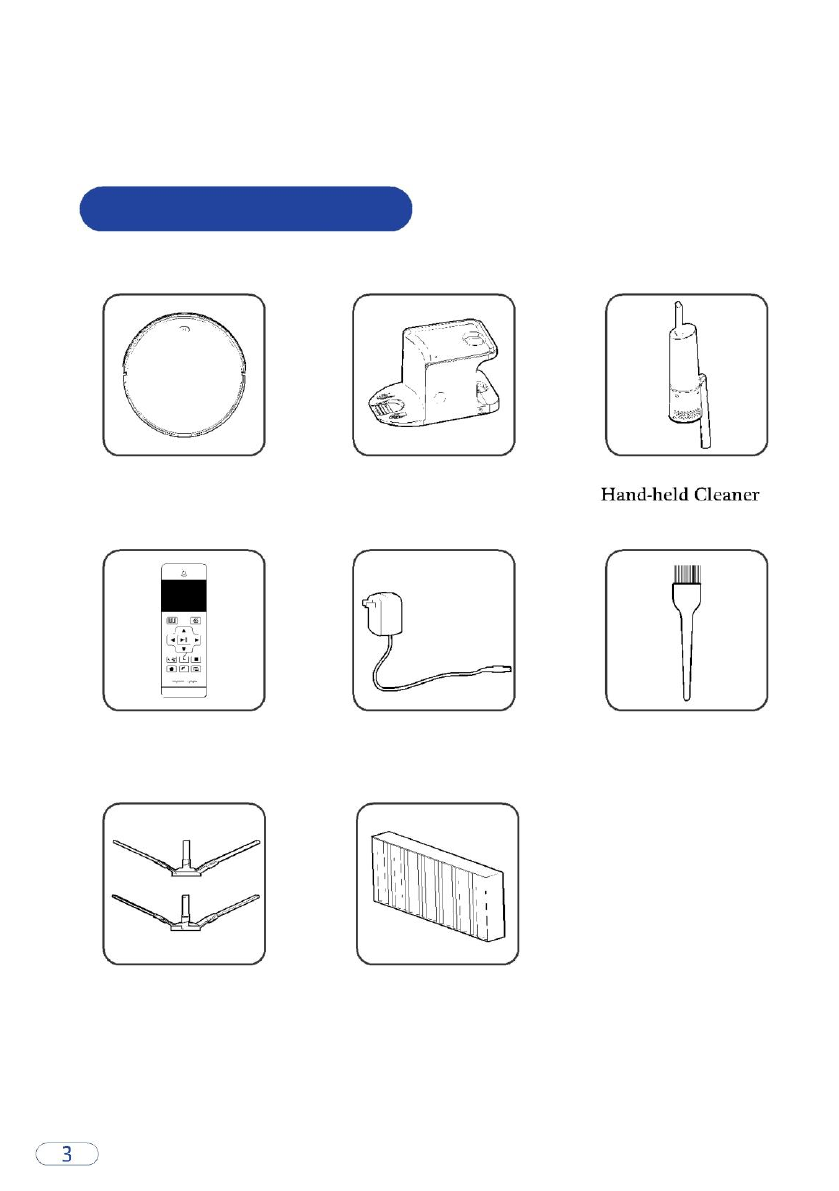
Product Composition
3.1 Component Name
Robot Vacuum Host Charger
Remote Control Power Adapter Cleaning Tools
Edge Swipes Extra HEPA filter
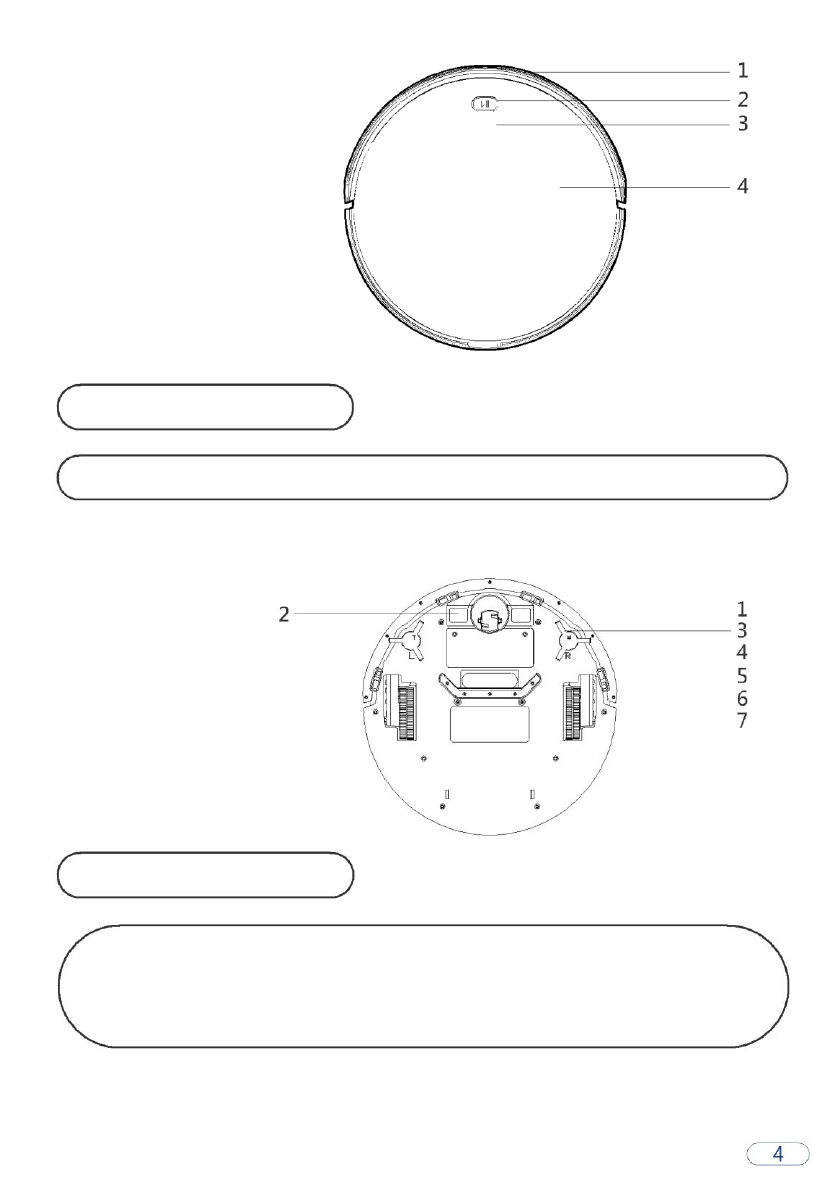
Robot Vacuum Host
1-Bumper 2-Control Button 3-Panel 4-Middle Lid
Robot Vacuum Host
1-Universal Wheel 2-Charging Spring Plate 3-Side Brush 4-
Battery Cover 5-Suction Port 6-Chassis 7-Side Wheel
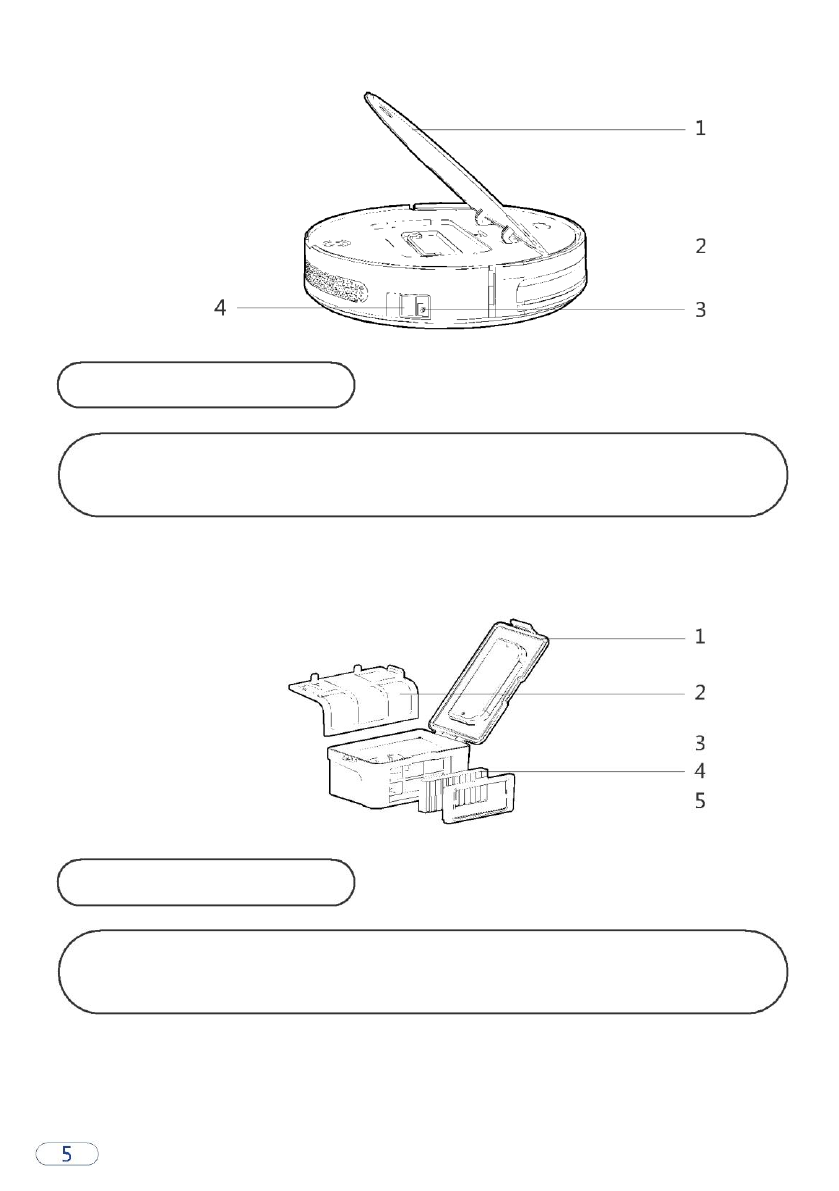
Robot Vacuum Host
1-Middle Cover 2-Dust Container 3-DC Power Plug
4-Power Switch
Dust Container
1-Dust Container Cover, 2-Basic Filter 3-Dust Container 4-
High-efficiency Filter 5-Dust Container Sealing Pad
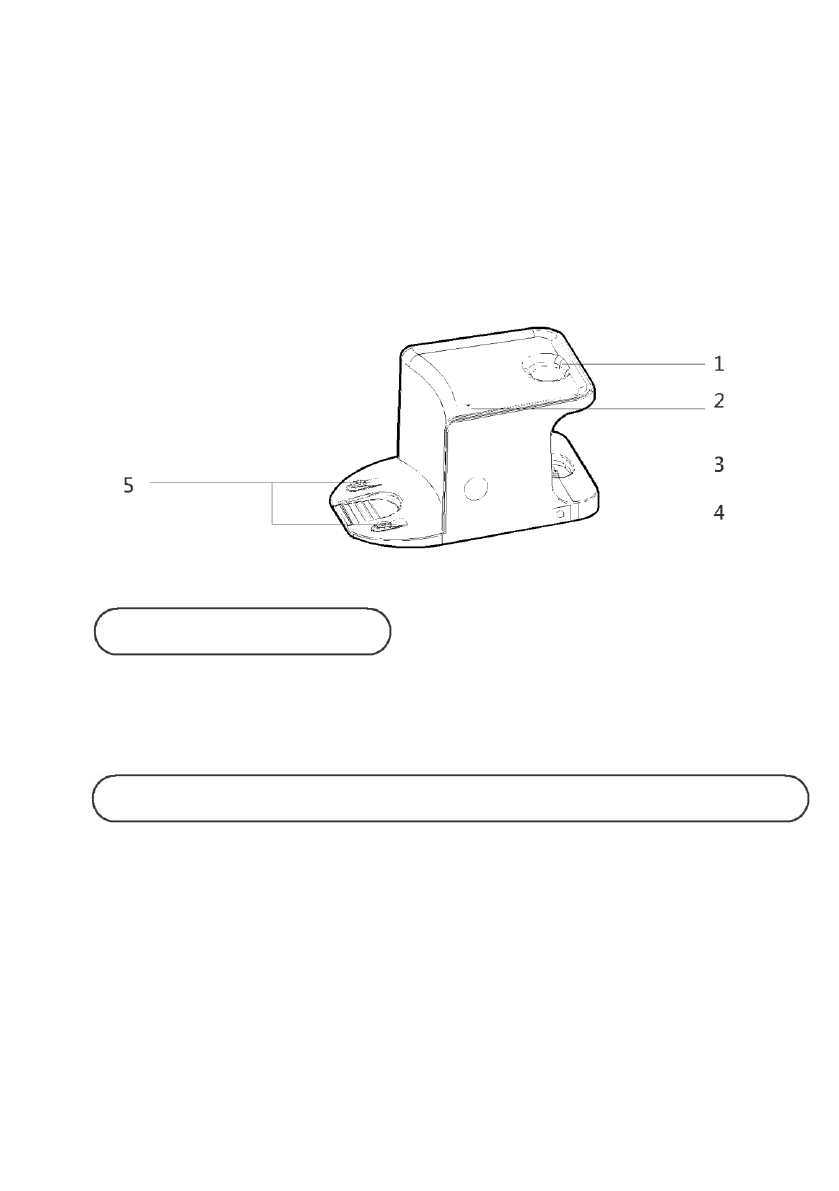
Charging Base
1-Charging Indicator 2-DC Power Plug 3-Charging Port
3.2 Product Specifications
Structure
Electronic
Diameter of host:320mm
Voltage: 14.4V
Thickness of host:78mm
Battery capacity: 2500mAh
Net weight of host:2.5kg
Main button type: LED button
Attachments
Operation Specifications
Dust container capacity: 600ml
Charge type: manual / automatic
Dishcloth (polyester cotton): 316*177*4mm
Cleaning time: about 100min
Charge time: 240-360min
Strong Suction
The suction of this product is very strong enough for daily uses.
Intelligent Suction Accommodation
The product adjusts the suction power according to different cleaning
modes, which not only greatly improves the cleaning efficiency, but
also saves 30% of the electricity consumption. The suction level can
also be adjusted by remote control.
User friendly Design
Easy to operate. Just press the(
) button gently, the machine
will start cleaning. In addition, your actions will prompt the voice to
confirm again.Short press (
) key, the machine starts cleaning,
and then press the key to control the machine to pause or continue to
work, and it will be accompanied by voice guidance.
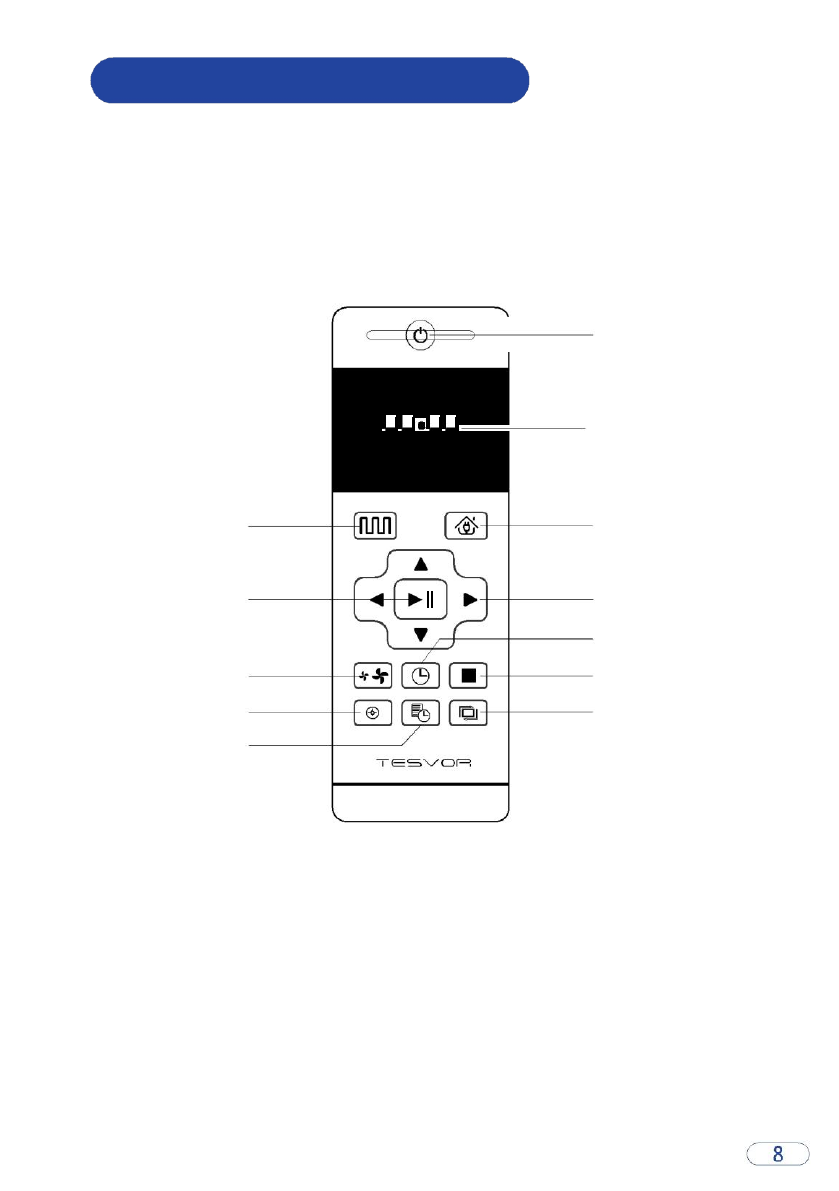
4.1 Remote Control Instructions
Power Switch
Display Screen
Smart Cleaning Mode
Recharge Key
Direction Key
Confirm Key
Clock Setting Key
Suction Setting Key
Single Room Cleaning Key
Fixed-Point Cleaning Mode
Border Cleaning Key
Reservation Settings Key
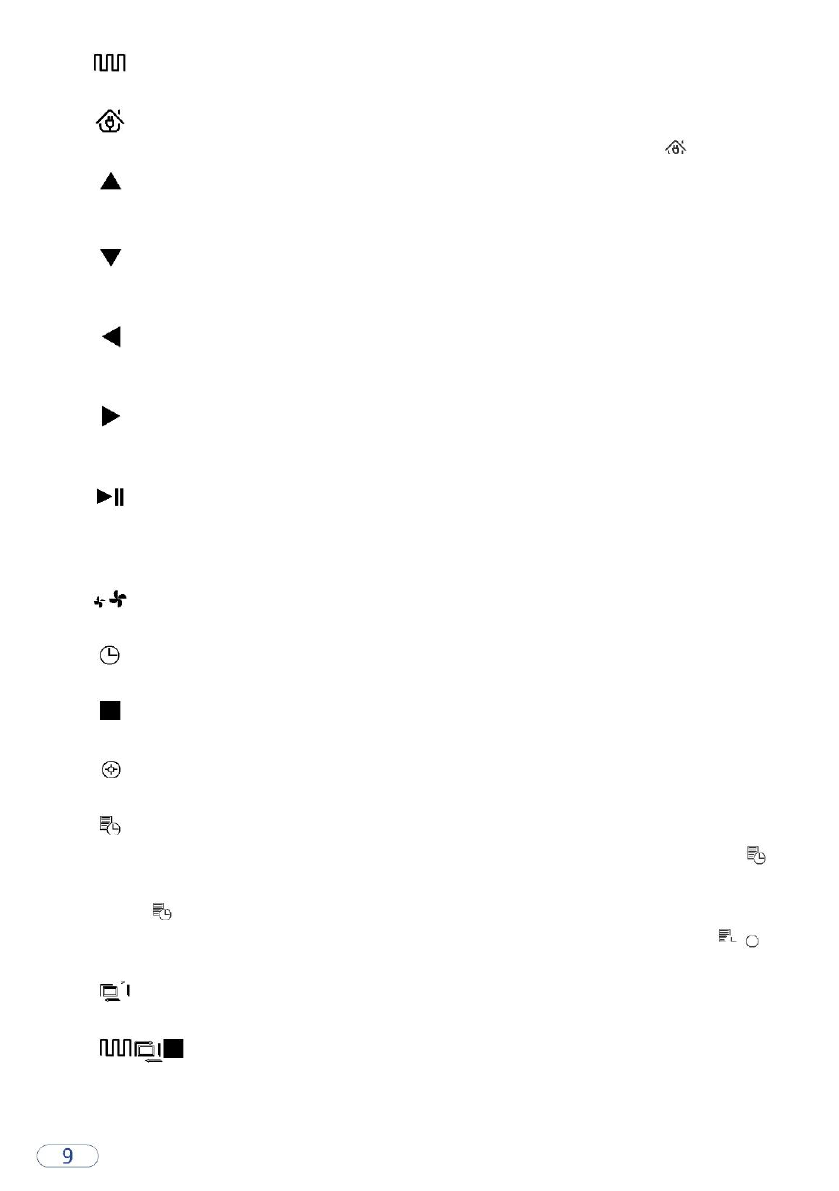
Smart Cleaning Key
Press this button to enter the mode.
Recharge Key
Press this button to enter the charging mode, and the remote control screen shows " "
Forward Key
Press this key, the machine continues to move forward, and the machine is suspended after loosening.
In the reservation mode or in the time setting mode, press this key to increase the number.
Backward Key
Press this key, the machine continues to move back, and the machine is suspended after loosening.
In the reservation mode or in the time setting mode, press this key to decrease the number.
Left Arrow
Press this key, the machine continues to move left, and the machine is suspended after loosening. In
the reservation mode or in the time setting mode, press this key to shift minute into hour.
Right Arrow
Press this key, the machine continues to move right, and the machine is suspended after loosening.
In the reservation mode or in the time setting mode, press this key to shift hour into minute.
Enter Key
At work, press this button to pause the machine, press this button in pause, and the machine
continues to work.
In the reservation setting or clock setting mode, press this button to save the settings.
Suction Setting Key
Press this button to adjust the suction size in any cleaning mode.
Time Setting Key
Press this button to enter the time setting mode and press the enter key to exit.
Single Room Cleaning Key
Press this key to enter single room cleaning mode.
Fixed-Point Cleaning Mode Key
Press this key to enter fixed-point cleaning mode
Reserved Cleaning Key
In standby mode, press this button to enter the reservation setting mode and display the icon
at the same time
In the reservation mode, press this button to save the data and exit the ink setting mode, when
the icon disappears in the display screen.
In reservation mode. By pressing the key, the reservation function is cancelled and the icon
disappears in the display screen.
Border Cleaning Key
Press this key to enter border cleaning key.
Key
These three keys can switch suction level.
Operation Instructions
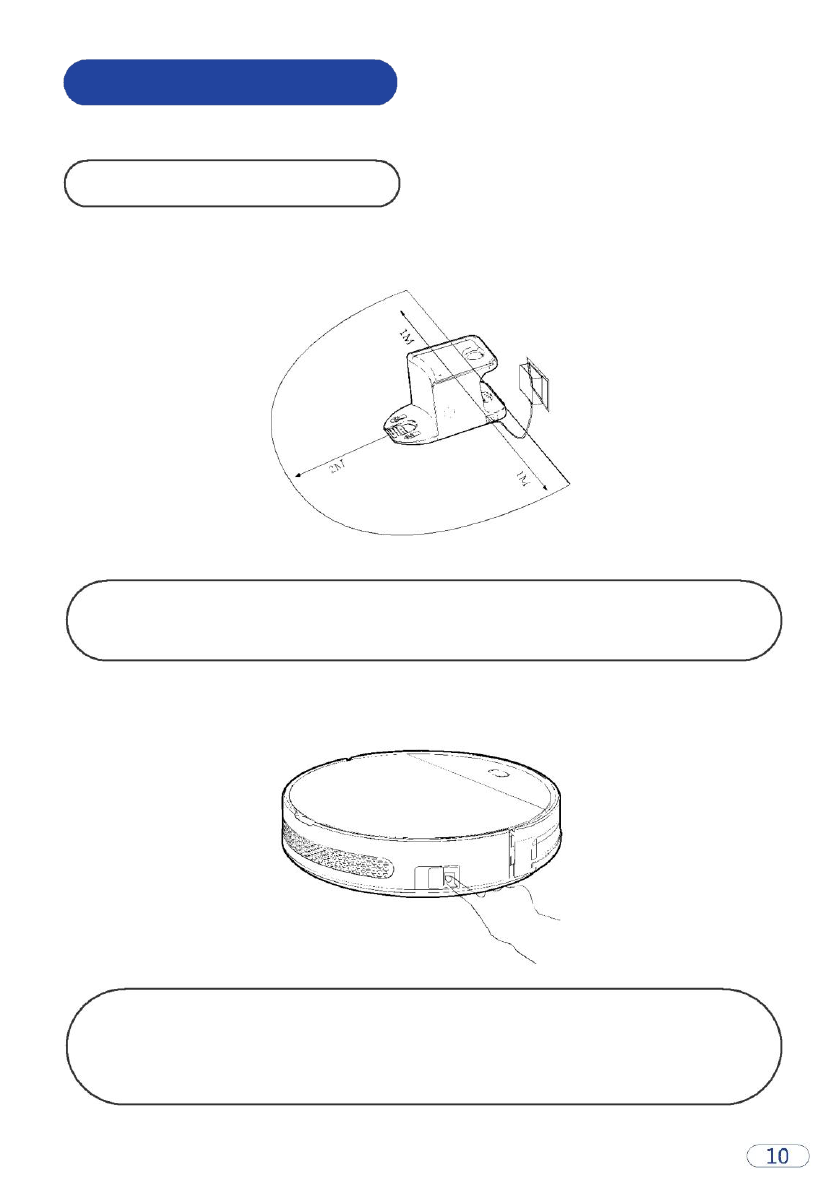
Place the Charging Base
Put the charging base against the wall. Don't put anything
around it, and don't put any radiation, such as a mirror.
Turn on the power switch on the machine side, "I" is boot,
"O" is shutdown. If the machine stops working for more
than 5 minutes, the machine will turn into sleeping mode.
Charge the Host
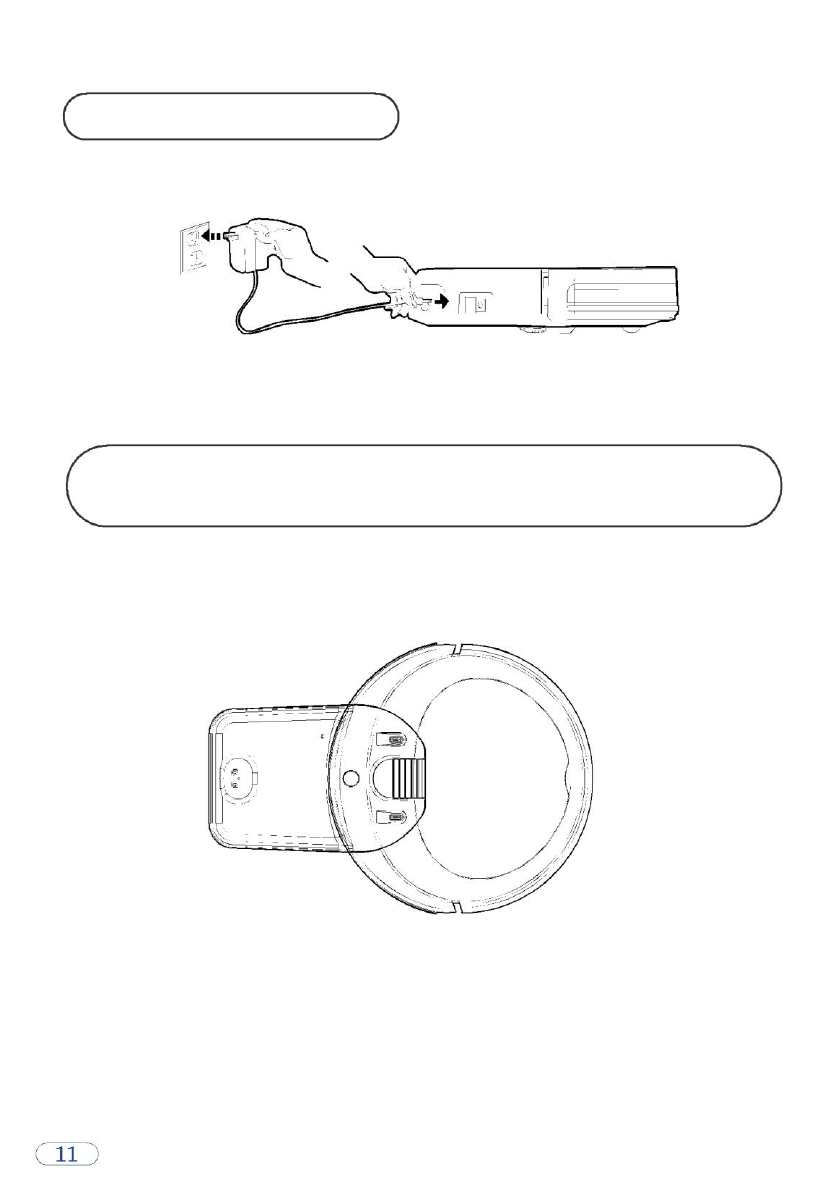
Before charging the machine, make sure that the power switch is on.
Plug the power adapter directly into the machine, and turn
on the power, and then the machine is charged.
Before charging the machine, make sure that the power switch is on.
Auto Charging
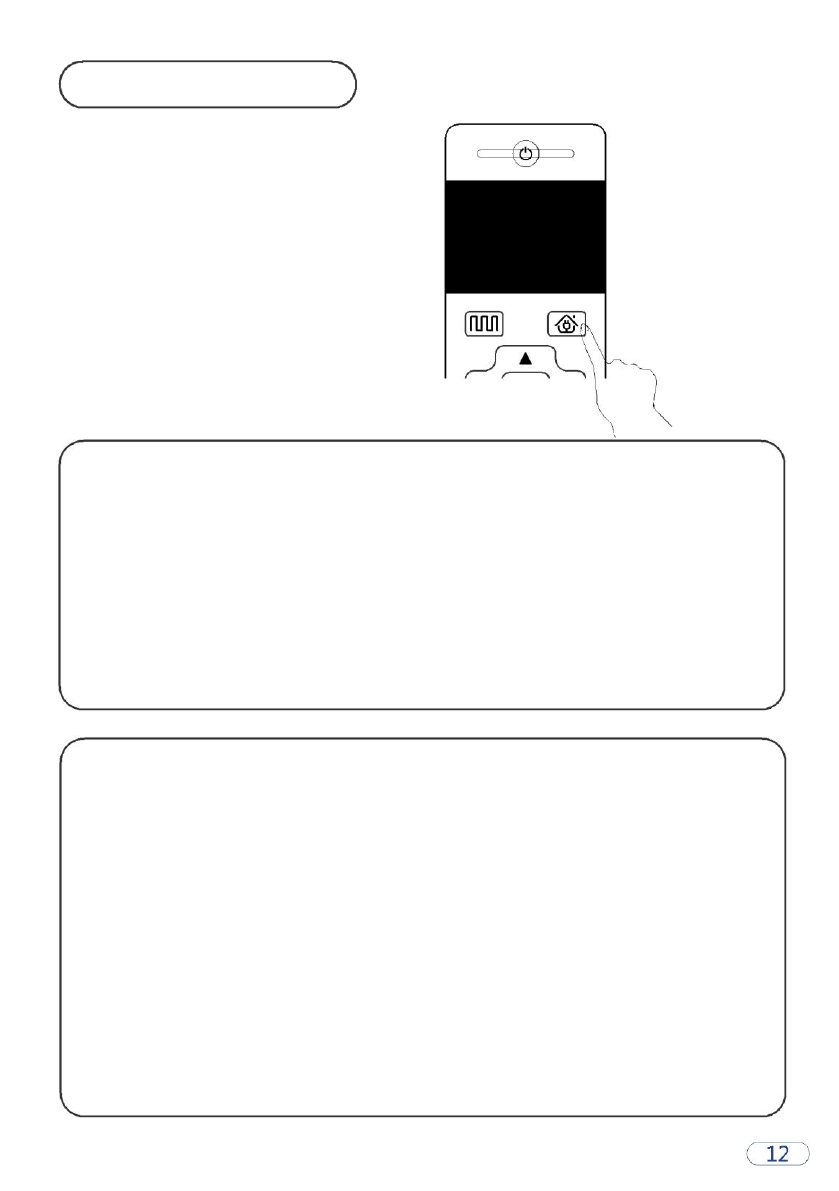
The machine can be auto charged by pressing the recharging key
of the remote control.
When the cleaning is completed or the power is too low, the
machine will automatically locate the charging seat for charging.
Please keep the charging seat on power, or the machine will not
be able to find the charging seat.
Attention: When charging this way, the machine will stop charging
and sweeping if the remote’s “cleaning" key is pressed. However,
this operation is not available when the machine is being charged
with the charging adapter.
Notes on Charging
A. When the battery is low, the red light of A key turns on.
B. The green light of B key will be flashing when the machine is charging.
C. When charging has completed, the green light will turn on.
D. Please check the power level of the machine when the machine is out of
power.
E. When charging for the first time, make sure that the charging time is at
least 12h.
F. When the machine is not used for a long time, turn off the power.
G. For daily uses, place the machine on the cradle, and make sure that the
cradle is connected to the power supply.
H. The machine will find its own charging stand for charging when the
power level is low. Make sure that there is no obstacle around the
charging stand.
Switching Modes
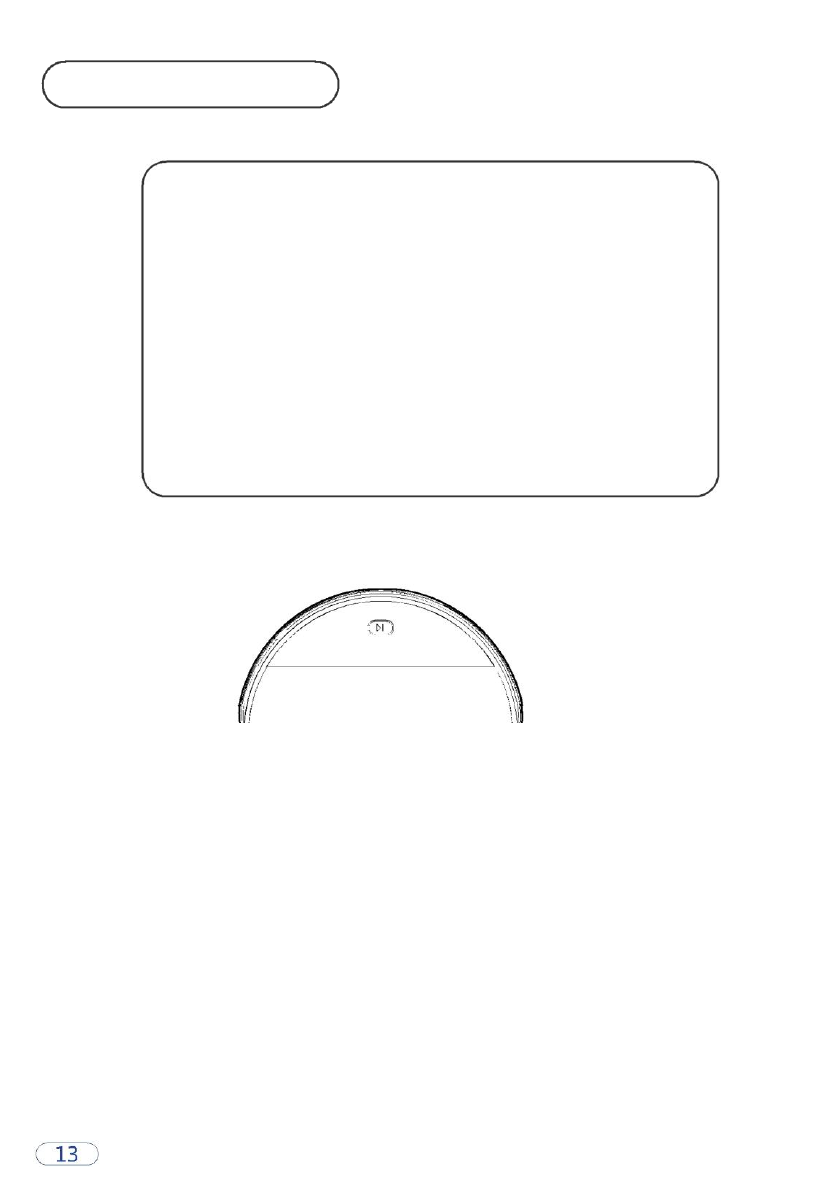
Standby Mode
The power switch is on, the A key is on, and the
machine is in a stationary state.
Sleep Mode
The power switch is on, the A key flashes, and the
machine is in a stationary state.
Operating Mode
The machine is in the working state, the A key is
lighting, and the machine turns into the cleaning mode.
Operating Procedures
Standby mode—Sleep mode—Operating mode
Booting
Make sure the power switch on the side of the machine is turned on. Press the
button of the machine or function mode key of remote control to start the work.
Suspend
When the machine is in operation, press the A key of the host or the B key of
the remote controller to stop working and press again to continue working.
Sleeping
The machine is in a stop condition and the key light is not on.
The machine goes into sleep when it is not operating for a short time. Press the
mode function key on the machine or the A key of the host to wake the machine.
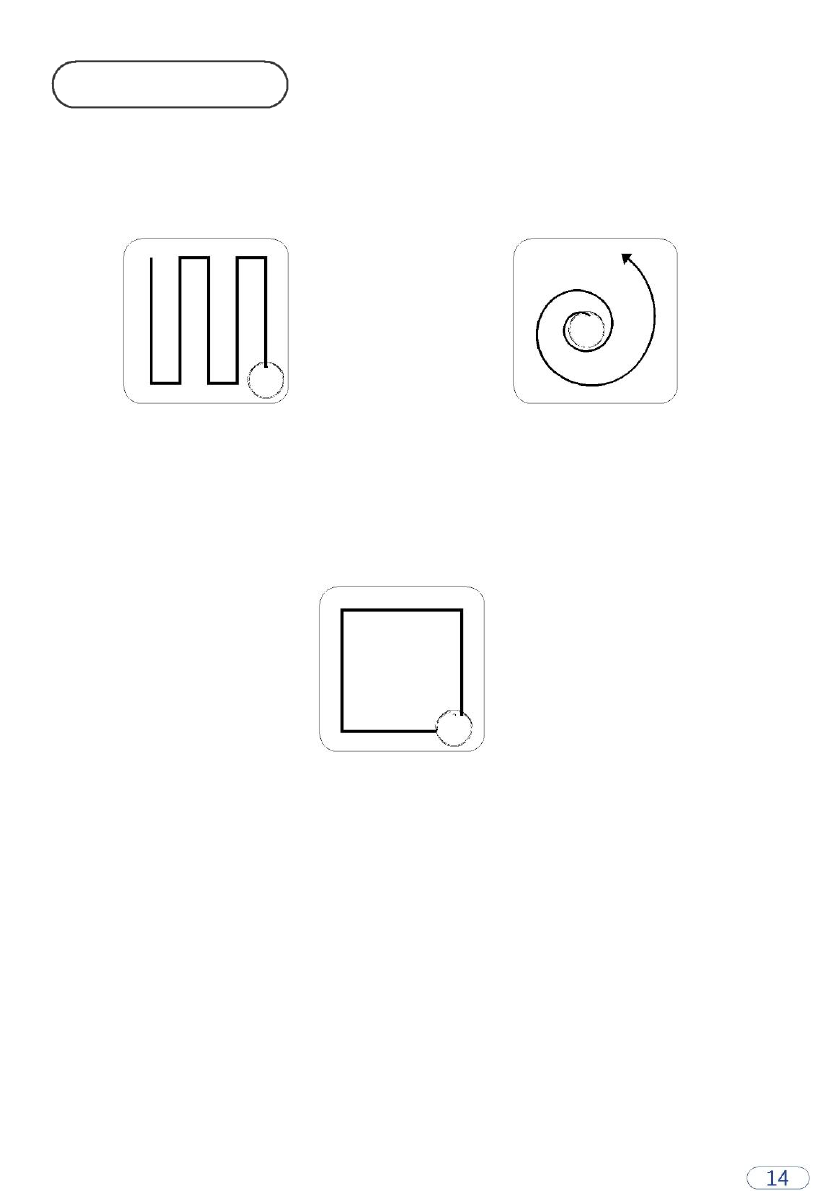
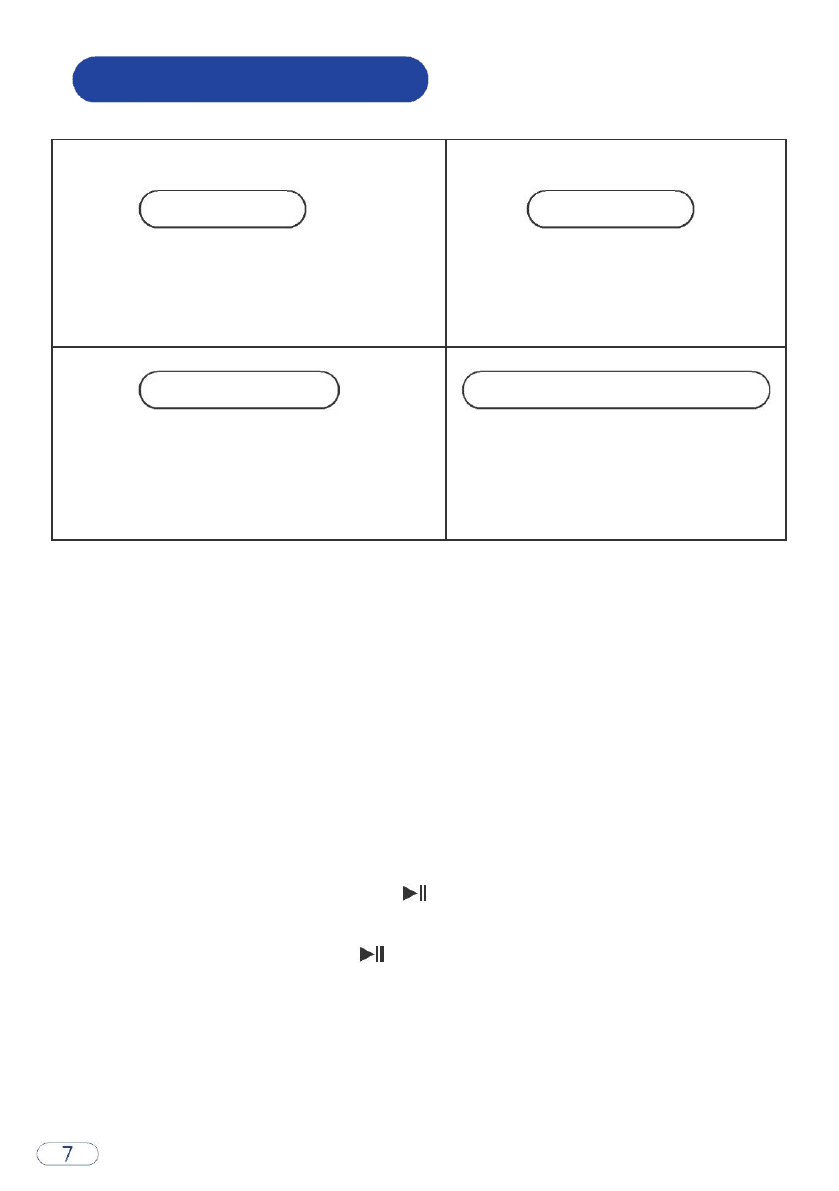
Cleaning Mode
Smart Cleaning Fixed-point Cleaning
The machine will clean the The fixed point cleaning function is
room in planned routes based on only suitable for operation on the APP.
the room situations
Edge Sweeping / Border Cleaning
The machine will sweep along
the edges of the room.
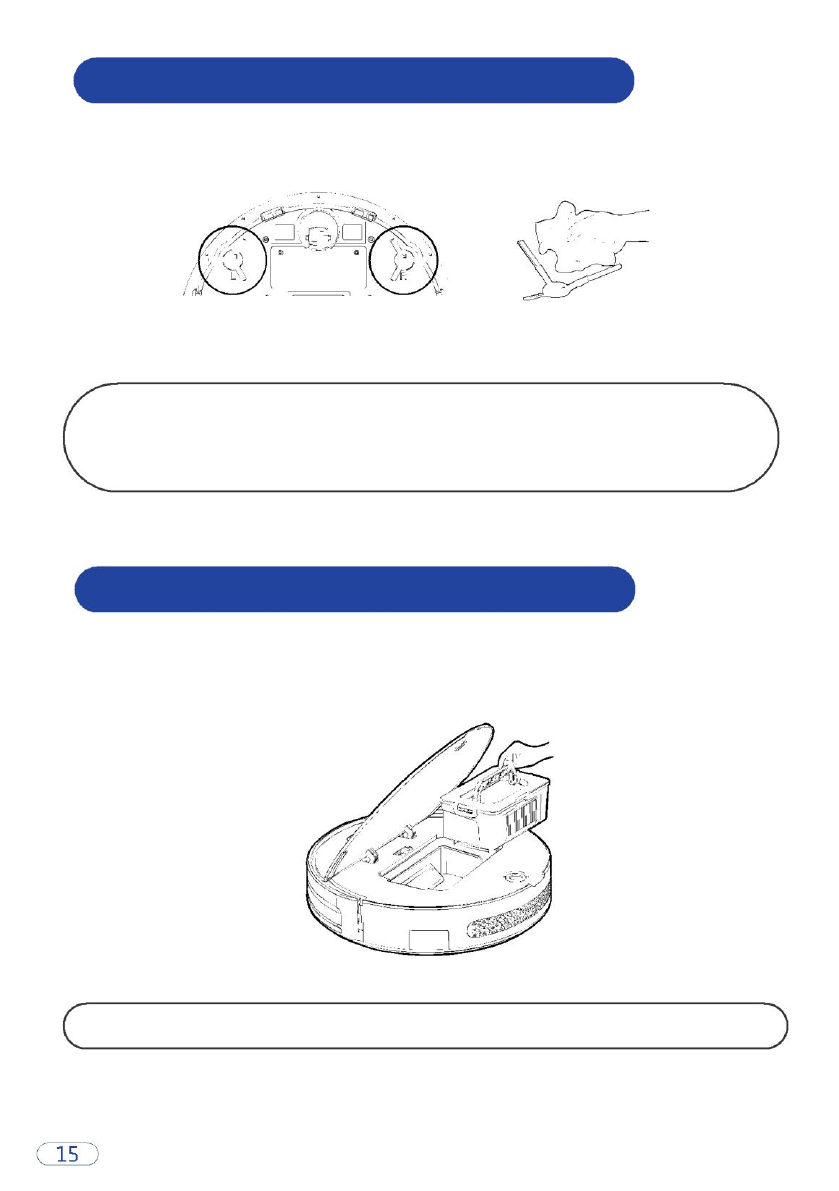
5.1 Side Brush Cleaning and Replacement
Check the brush condition: whether it has been damaged or entangled
with foreign material, then clean the brush with a cleaning tool or cloth.
When the side brush can not be used, please replace it in time.
5.2 Dust Container and Filter Cleaning
Open the top cover to remove the dust container. Please clean the dusts if any.
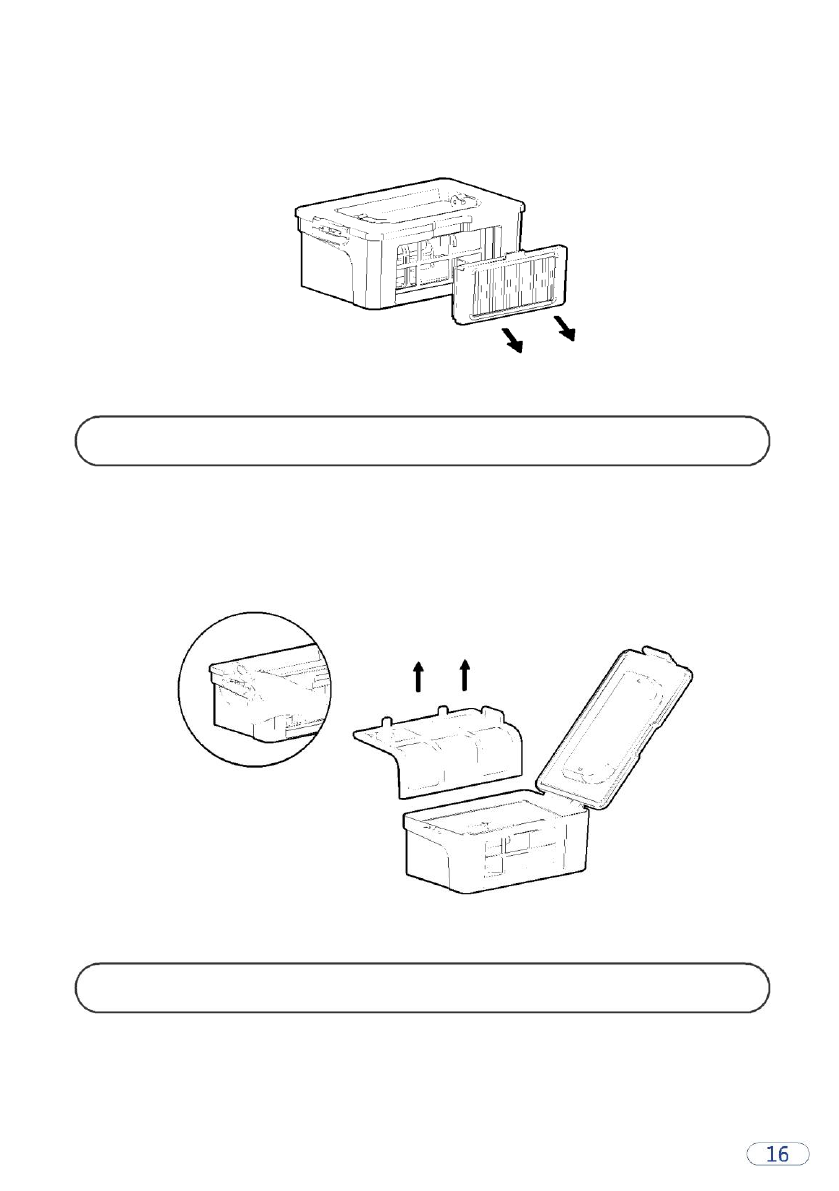
Remove the HEPA Filter
Open the litter box to remove the filter.
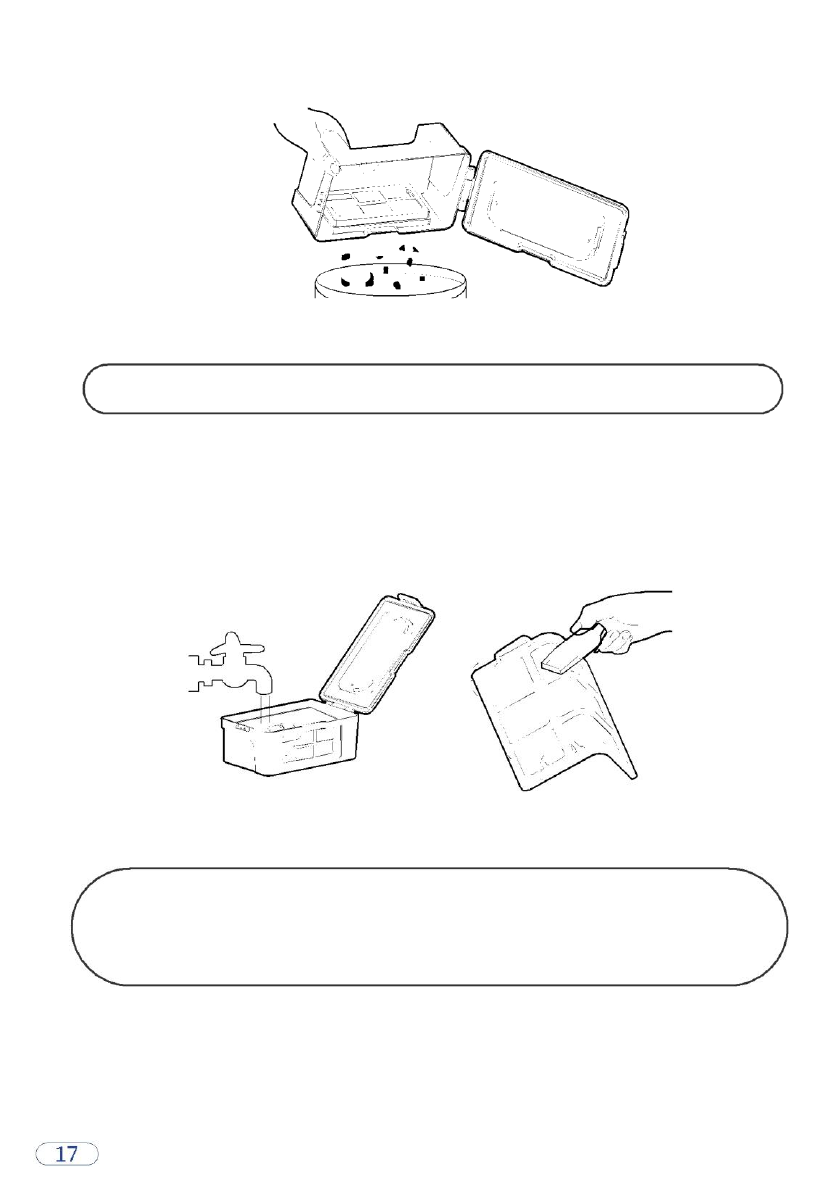
Lower the level of the dust container to dump the rubbish.
The dust container, high efficiency filter screen and basic filter
screen are thoroughly cleaned, and the basic filter screen should be
washed after 15-30 days, and the efficient filter screen is
recommended to be changed every 3-4 months.
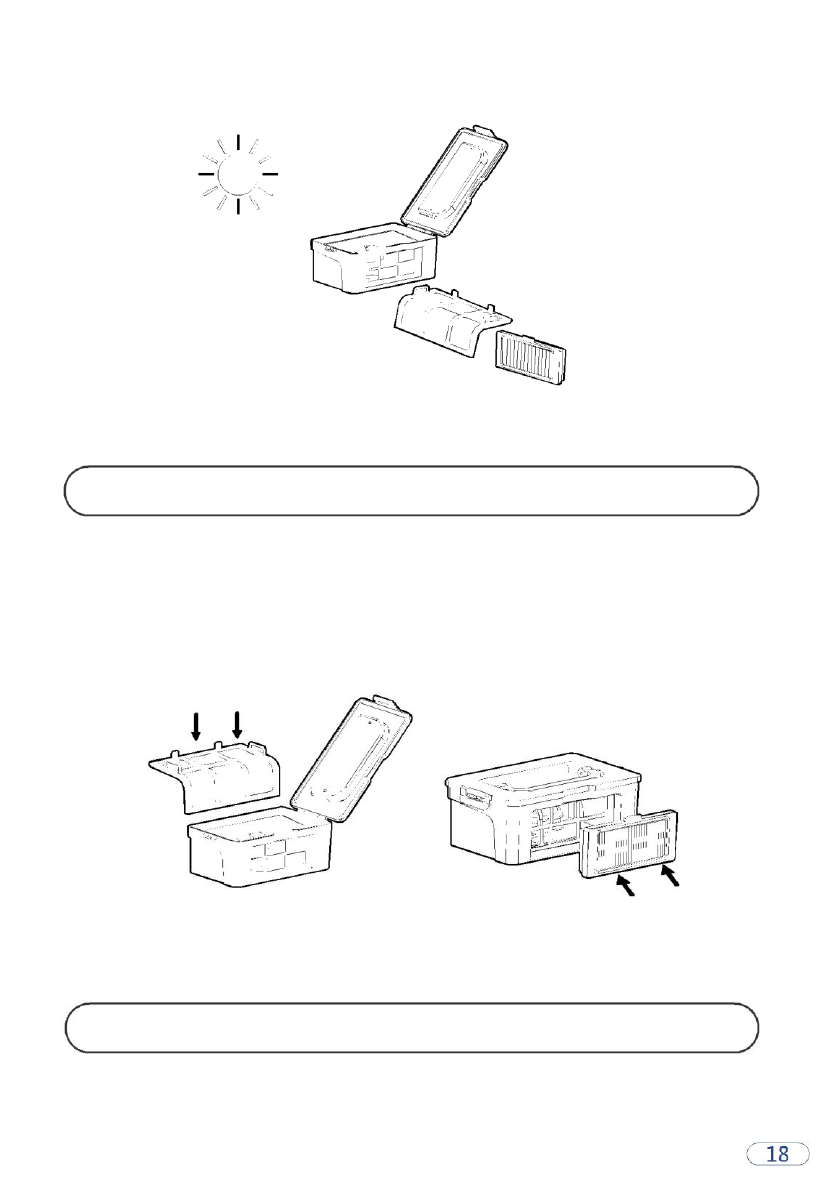
Dry the components until they are completely dry.
Re-install the basic screen and the HEPA filter back to the garbage can.
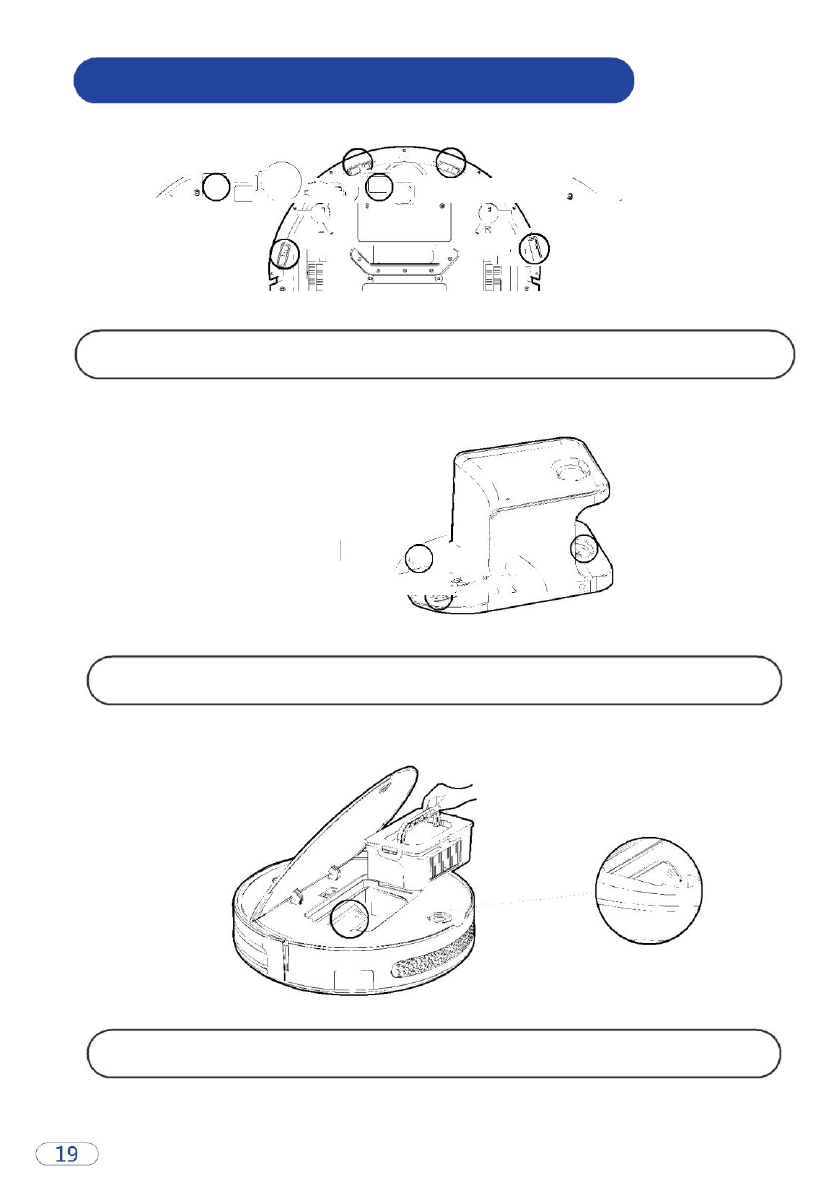
5.4 Maintenance Of Other Components
Electrode Poles
Sensor
Clean the electrodes and sensor gently with dry cloth.
Charging Base
Clean the charging ports with cleaning tools or clean soft cloth.
Clean suction passages regularly with cleaning tools or soft cloth.

6.1 Alarm Prompt
Message
Failure Cause
Solution
Dust container not installed
Dust Container was taken out and
Pack the filter back into the
not installed
dust container and press the
cleaning key
Please check whether the
The wheels holder is blocked
Check whether the wheel has
wheels are jammed
up
been wound and clean it up
Please check whether the front
The front holder is stuck
Check if the front holder can
is jammed
rebound itself normally
Low battery,Please
Less than 20% power left
The machine automatically
charge this robot
enters the recharge mode
Please check if the brush is
Brush edge issues
Check if the brush is entangled
wound or jammed
by wire/cable and clean up
Please move the machine to
The machine failed to recover
Move the vacuum to the
the open area and press the
spacious area and press the
cleaning key for cleaning
cleaning button
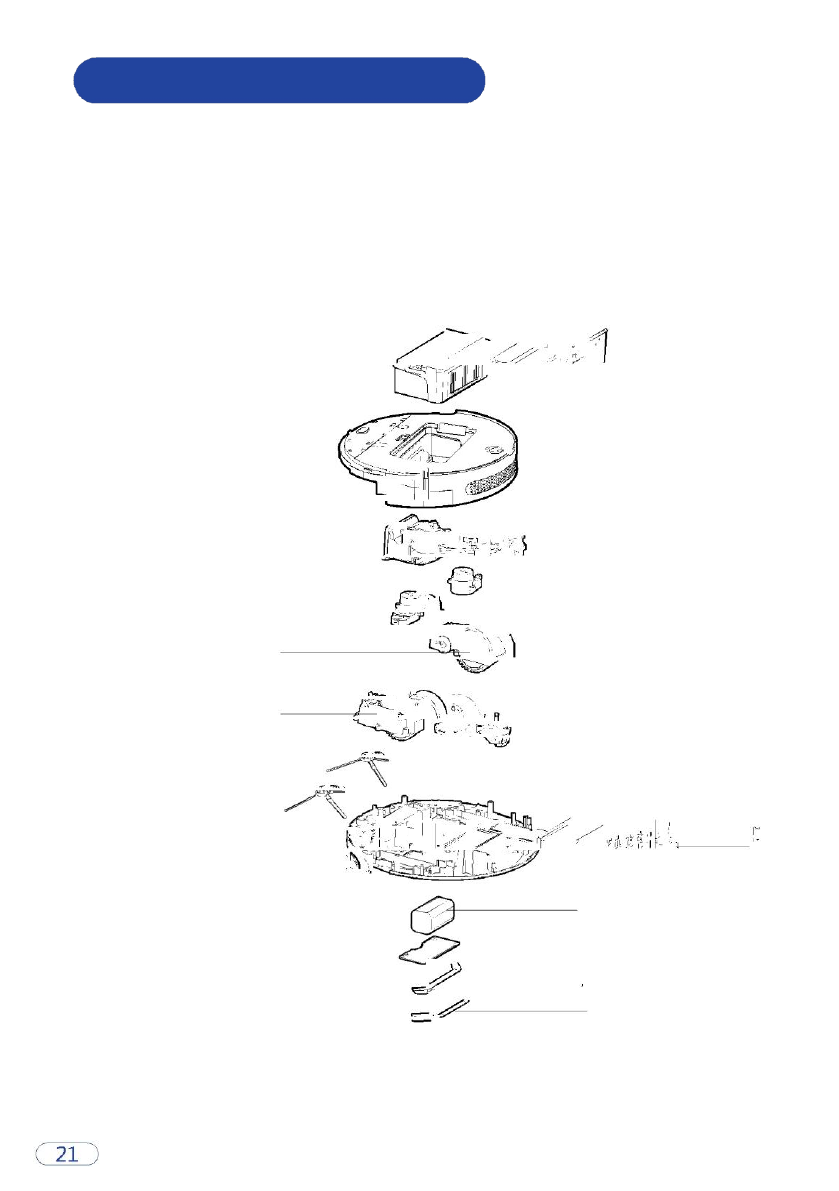
6.2 Replaceable Components
Dust Container
Shell
Fan Module
Side Brush Module
Right Wheel Module
Left Wheel Module
Universal Wheel Module
Right Side Brush
Left Side Brush
Pan
Lithium Battery
Battery Cover
Scraper
Pressure Plate

Make Life Smart
Manufacturer: TESVOR, Shenzhen Tian You Intelligence Co., Ltd
Address: 2nd Floor, Building B, You Xin Da Industrial
Park, Guangming New District, Shenzhen, China
Website: www.tesvor.com
Customer Contact: service@tesvor.com