Huace Navigation Technology A01002 GNSS receiver User Manual Manual
Shanghai Huace Navigation Technology LTD. GNSS receiver Manual
Manual
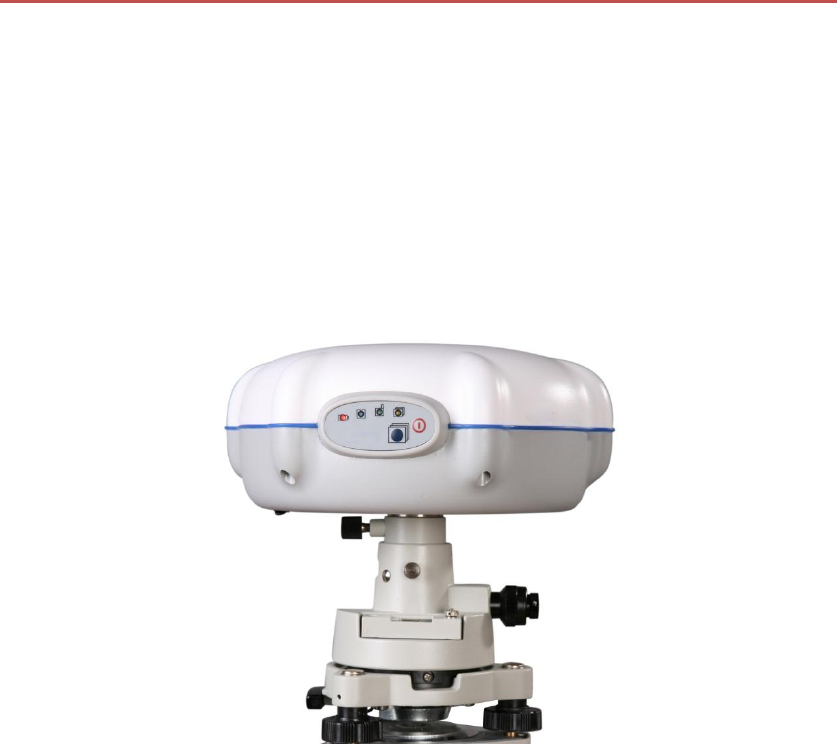
GETTING STARTED GUIDE
X90
Shanghai HuaCe Navigation Technology Ltd.
Shanghai China
Copyright
Copyright 2009-2011 HuaCe. © 2010- Shanghai HuaCe Navigation Technology Ltd. All
rights reserved. The HuaCe are trademark of Shanghai HuaCe Navigation Technology
Limited. All other trademarks are the property of their respective owners- Rev, August, 2010.
Trademarks
All product and brand names mentioned in this publication are trademarks of their
respective holders.
Where to Find Information
This manual is designed to guide you through the basic X90 procedures. You can find
additional information in the X90 Reference Manual and also the HuaCe Technical Training
Video.
FCC Statement
Federal Communications Commission (FCC)
Statement
This device complies with Part 15 of the FCC Rules. Operation is subject to the following two conditions:
1) this device may not cause harmful interference, and 2) this device must accept any interference
received, including interference that may cause
undesired operation of the device. You are cautioned that changes or modifications not expressly
approved by the part responsible for compliance could void the user’s authority to operate the equipment.
This equipment has been tested and found to comply with the limits for a Class B digital device, pursuant
to part 15 of the FCC rules. These limits are designed to provide reasonable protection against harmful
interference in a residential installation. This equipment generates, uses and can radiate radio frequency
energy and, if not installed and used in accordance with the instructions, may cause harmful interference
to radio communications. However, there is no guarantee that interference will not occur in a particular
installation. If this equipment does cause harmful interference to radio or television reception, which can
be determined by turning the equipment off and on, the user is encouraged to try to correct the
interference by one or more of the following measures:
Reorient or relocate the receiving antenna.
Increase the separation between the equipment and receiver.
Connect the equipment into an outlet on a circuit different from that to which the receiver is
connected.
Consult the dealer or an experienced radio/TV technician for help.
Content
1. Introduction .................................................................................................................................. 1
1.1 Technical Assistance ............................................................................................................ 1
1.2 Your Comments ................................................................................................................... 1
2. Overview ....................................................................................................................................... 2
2.1 Safety Information ............................................................................................................... 2
2.1.1 Warning and Cautions .............................................................................................. 2
2.1.3 Use and Care ............................................................................................................ 2
2.2 Features ............................................................................................................................... 3
2.3 Specifications ...................................................................................................................... 3
3. Preparation.................................................................................................................................... 5
3.1 Equipment Description ........................................................................................................ 5
3.2 Batteries and Power ............................................................................................................ 7
3.2.1 External Power and Internal Battery ........................................................................ 8
3.2.2 Charging the Battery ................................................................................................ 9
3.2.3 The Battery Usage and Disposing Notices ................................................................ 9
3.3 Parts of the Receiver (Control Panel) ................................................................................ 10
3.3.1 Front Panel View .................................................................................................... 10
3.3.2 Bottom View ........................................................................................................... 11
4. Setting up the Receiver ............................................................................................................... 13
4.1Receiver Setup ................................................................................................................... 13
5. Configuration............................................................................................................................... 14
5.1 Static Configuration ........................................................................................................... 14

Introduction
X90 GNSS – 1.01 Rev A – September 2010 1
1. Introduction
● Technical Assistance
● Your Comments
Thank you for choosing HuaCe X90 GNSS receiver.
This Getting Started Guide is designed to help you rapidly familiarize
yourself with your new equipment. Only a selection of the many
HuaCe X90 GNSS functions is presented in this guide.
1.1 Technical Assistance
If you have a problem and cannot find the information you need in
the product documentation, contact your local Dealer.
Alternatively, please request technical support using the HuaCe
Website at (www.chcnav.com) or HuaCe technical support email
support@chcnav.com.
1.2 Your Comments
Your feedback about the supporting documentation helps us to
improve it with each revision. E-mail your comments to
feedback@chcnav.com.

Overview
X90 GNSS – 1.01 Rev A – September 2010 2
2. Overview
● Safety Information
● Features
● Specification
2.1 Safety Information
This manual describes HuaCe X90 GNSS Receivers. Before you use
your receiver make sure that you have read and understood this
publication, as well as safety requirements.
2.1.1 Warning and Cautions
An absence of specific alerts does not mean that there are no safety
risks involved.
A Warning or Caution information is intended to minimize the risk
of personal injury and/or damage to the equipment.
WARNING-A Warning alerts you to a likely risk of serious injury to
your body and/or damage to the equipment.
CAUTION- A Caution alerts you to a possible risk of damage to the
equipment and/or loss of data.
2.1.3 Use and Care
The receiver can withstand the rough treatment that typically
occurs in the field. However, the receiver is high-precision
electronic equipment and should be treated with reasonable care.

Overview
X90 GNSS – 1.01 Rev A – September 2010 3
2.2 Features
The X90 GNSS receiver provides the following features:
Submeter-accuracy, real-time positioning using pseudorange
corrections.
Automatic OTF initialization while moving
Single Lithium-ion rechargeable battery
One 10-Pin Lemo port for:
o RTCM 2.X input and output
o CMR input and output
o NMEA outputs
One TNC radio antenna connector
Internal Memory for data storage
2.3 Specifications
Real Time Kinematic (RTK)
Horizontal: ± (10mm+1ppm) RMS
Vertical: ± (20mm+1ppm) RMS
Initializing Time: 10S
Initialization Reliability: Typical >99.9%
Static
Horizontal: ± (5mm+1ppm) RMS
Vertical: ± (10mm+2ppm) RMS
Data Format
RTCM2.1, RTCM 2.3, RTCM 3.0, CMR, RTCA, input and output
NMEA0183 outputs, GSOF outputs
Physical Reference
Size (H×D): 200mm×85mm
Weight: 1.4Kg (Without Battery)
Electrical Reference
Power Consumption: 2.8W
Battery Volume: 2400mAh
Battery Life: 6 Hours (Static)
1000 Recharges
External Power: 9-18V
Battery Power:6.8-7.4V

Overview
X90 GNSS – 1.01 Rev A – September 2010 4
Environment
Working Temperature: -30 °C — +65 °C
Storage Temperature: -40 °C — +75 °C
Humidity: 100% condensation
Waterproof and Dustproof: IP67, protected from temporary
immersion to depth of 1 meter, floating.
Shock and Vibration: Survive from 2 meters drop onto concretes
Characteristics
Buttons and Display: 2 buttons/4 LED lights
I/O: RS232, USB
Channel: 24 Channels*
*Channel Configuration: 12 L1, 12 L2 P(Y) or L2C Channels
Preparation
X90 GNSS – 1.01 Rev A – September 2010 5
3. Preparation
● Equipment Description
● Batteries and Power
● Parts of the Receiver (Control Panel)
3.1 Equipment Description
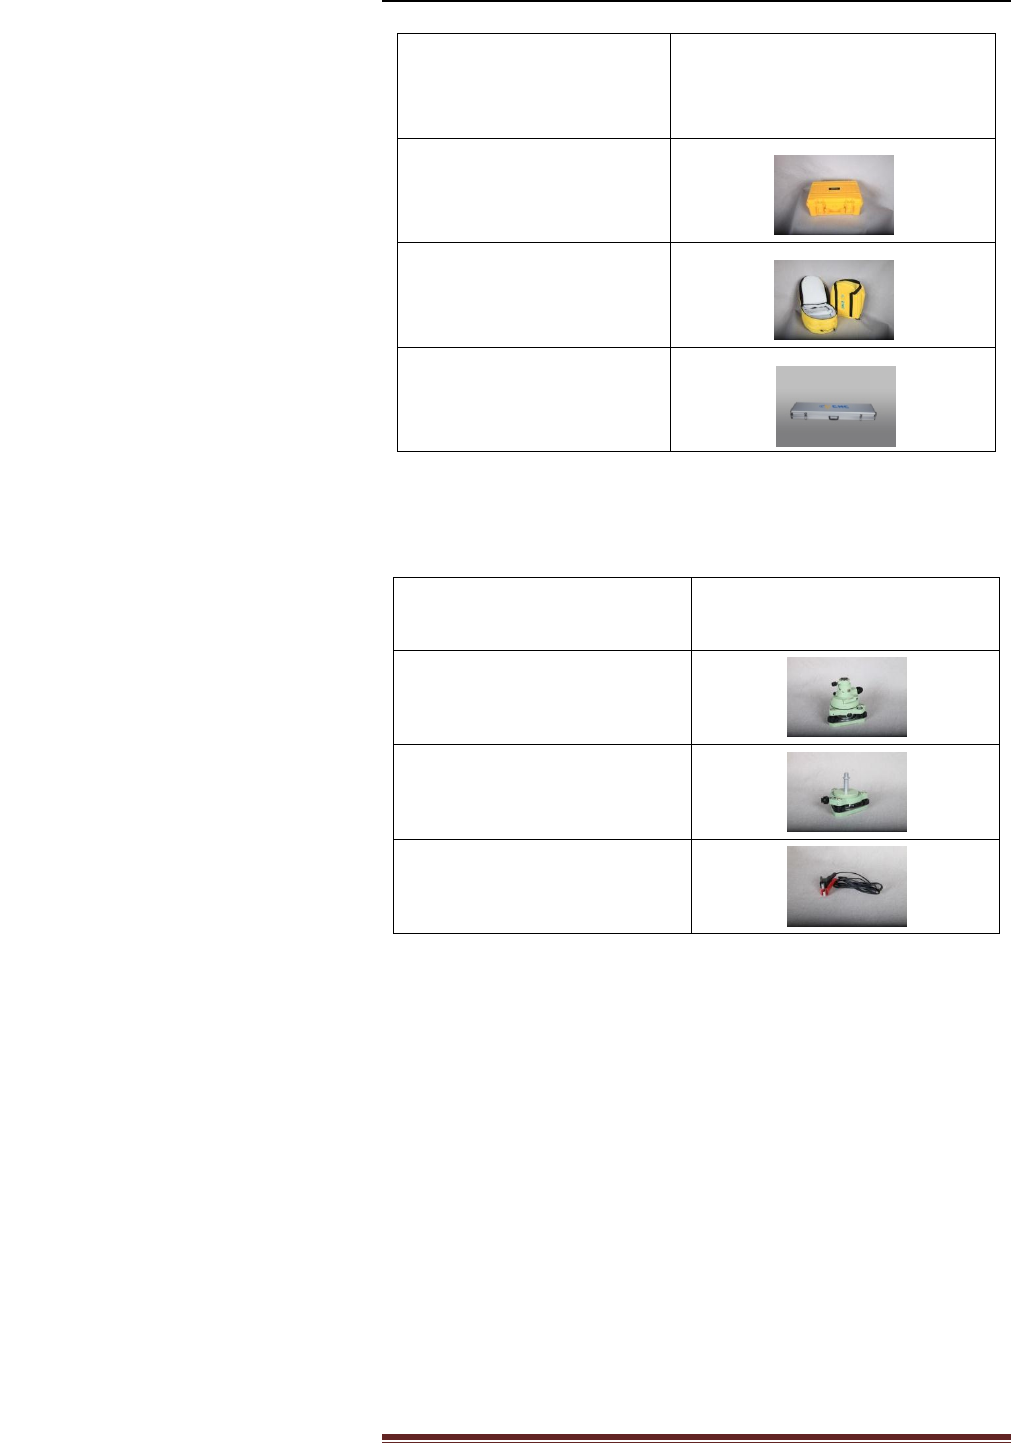
The tables below provide an overview of the different items
composing the HuaCe X90 GNSS.
Depending on the different purchase, you may have some of the
listed items. Basic Supply is the standard accessories for each kit.
Transportation Cases Option and Accessories Options are
depending on different orders requirements.
Item
Picture
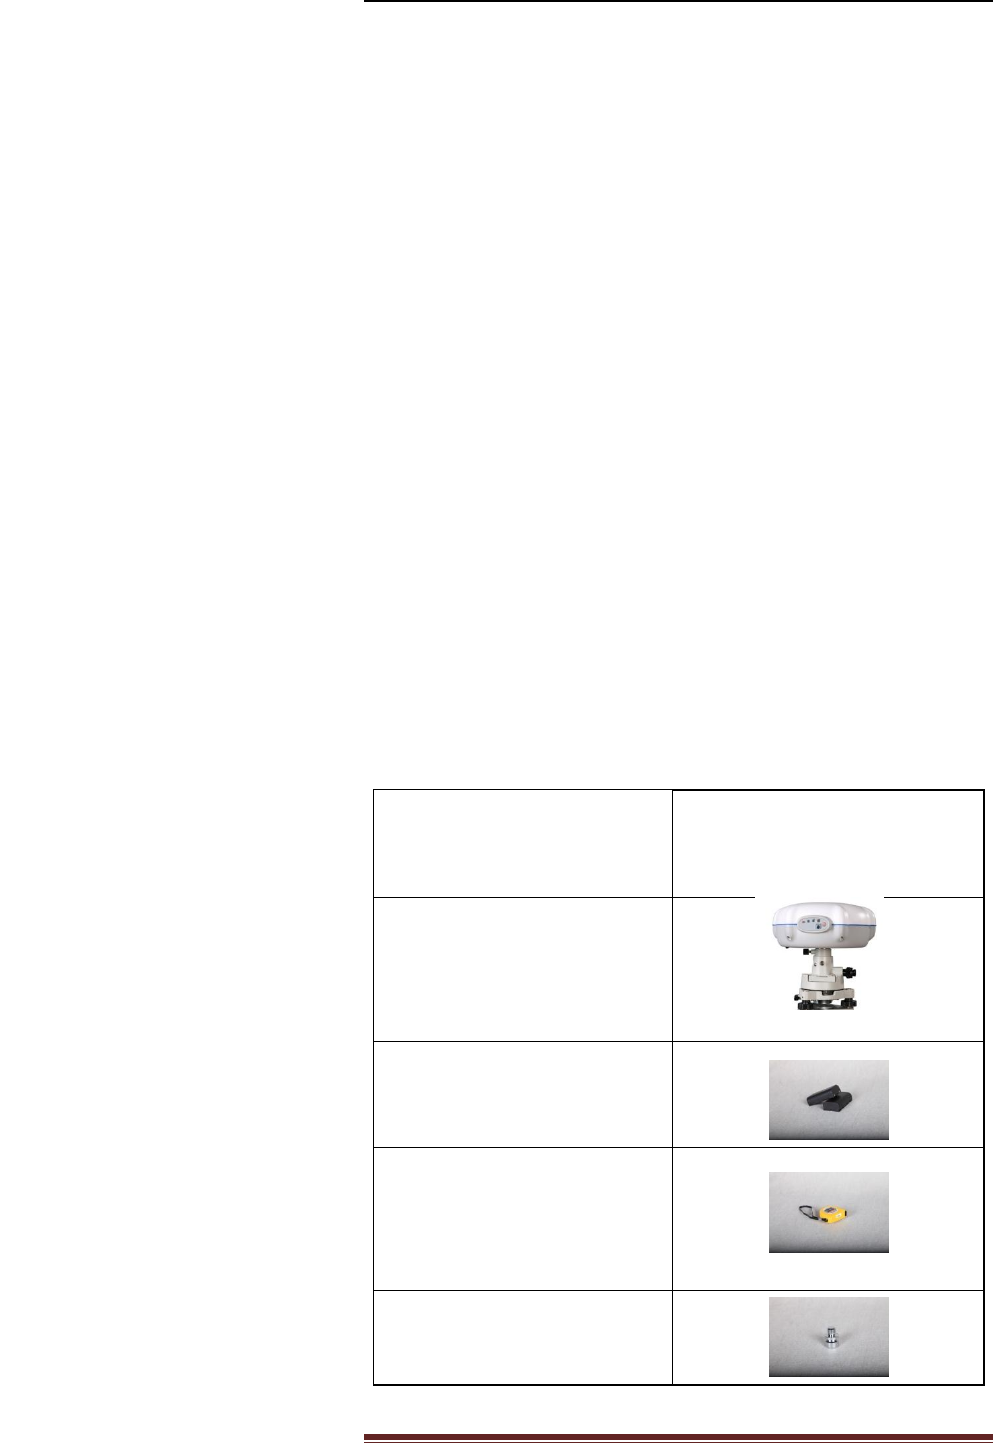
X90 GNSS Receiver Base
Lithium Battery
H.I. Tape
Connector
Receiver Kit Basic Supply
Preparation
X90 GNSS – 1.01 Rev A – September 2010 6
Item
Picture
Transport Case
Carry Pouch
Metal Transport Case for
Poles and Antenna
Item
Picture
Double Bubbles Tribranch with
High Adapter
Single Bubble Tribranch with
Lower Adapter
External Power Cable
Transportation Cases
Options
Accessories Options

Preparation
X90 GNSS – 1.01 Rev A – September 2010 7
3.2 Batteries and Power
WARNING-Charge and use the rechargeable Lithium-ion battery
only in strict accordance with the instructions. Charging or using
the battery in unauthorized equipment may cause an explosion or
fire, and result in personal injury and/or equipment damage.
To prevent injury or damage:
Do not charge or use the battery if it appears to be damaged
or leaking.
Charge the Lithium-ion battery only in HuaCe products that
is specified to charge it. Be sure to follow all instructions
that are provided with the battery charger.
Discontinue charging a battery that gives off extreme heat or
a burning odor.
Use the battery only in HuaCe equipment that is specified to
use it.
Use the battery only for its intended use and according to
the instructions in the product documentation.
WARNING –Do not damage the rechargeable Lithium-ion battery.
A damaged battery may cause an explosion or fire, and result in
personal injury and/or property damage.
To prevent injury or damage:
Do not use or charge the battery if it appears to be damaged.
Signs of damage include, but are not limited to, discoloration,
warping, and leaking battery fluid.
Do not expose the battery to fire, high temperature, or
direct sunlight.
Do not immerse the battery in water.
Do not use or store the battery inside a vehicle under hot
weather condition.
Do not drop or puncture the battery.
Do not open the battery or short-circuit its contacts.
WARNING-Avoid contact with the rechargeable Lithium-ion battery
if it appears to be leaking. Battery fluid is corrosive, and contact
with it can result in personal injury and/or property damage.
Preparation
X90 GNSS – 1.01 Rev A – September 2010 8
To prevent injury or damage:
If the battery leaks, avoid with the battery fluid.
If battery fluid gets into your eyes, immediately rinses your
eyes with clean water and seek medical attention. Please
do not rub your eyes!
If battery fluid gets onto your skin or clothing, immediately
use clean water to wash off the battery fluid.
3.2.1 External Power and Internal Battery
The receiver can be powered by its internal battery or by an
external power source connected to Receiver Lemo Port. If an
external power source is connected to Port, it is used in preference
to the internal battery. When there is no external power source
connected, or if the external power supply fails, the internal battery
is used.
External Power
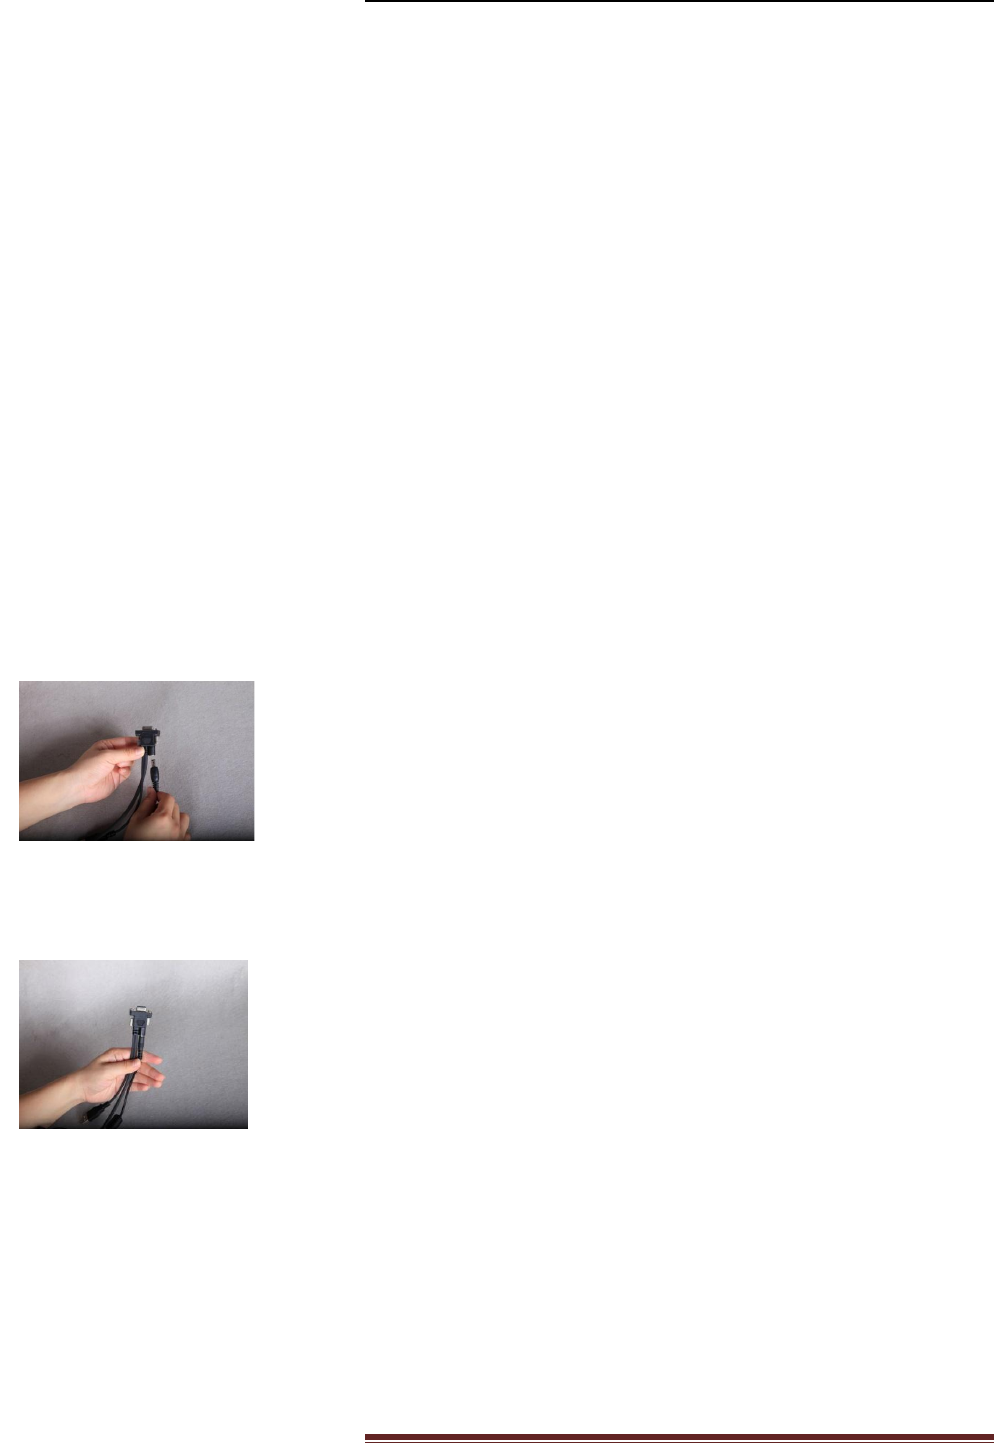
There are two methods to provide the external power to the
receiver by the HuaCe GPS to PC cable. The HuaCe GPS to PC
cable has one Power port.
In the office, the Power Adapter is connecting with AC
power of 100-240V, the output port of the Power Adapter
connects with the Power Port of the GPS to PC cable, shown
as Figure3.2-1.
In the field, the external power cable is connecting with the
Car battery, the output port of the external power cable
connects with the Power Port of the GPS to PC cable, shown
as Figure3.2-2.
Internal Battery
These receivers use a rechargeable lithium-ion battery. Make sure
the battery is fully charged for each HuaCe X90 being used in the
field.
Figure3.2-1
Figure3.2-2

Preparation
X90 GNSS – 1.01 Rev A – September 2010 9
3.2.2 Charging the Battery
The receiver is supplied with two rechargeable Lithium-ion batteries,
and a dual battery charger for each RTK kit. The two batteries
charge sequentially and take approximately three hours each to be
fully charged.
The battery charger comes with a separate universal AC Power
Adapter with a 1.5 meter output cable. Follow the instructions
below to operate the charger.
Connect the two parts of the Power Adapter and the Power
Adapter output with the Battery Charger. The red LED on
the Battery Charger is on, which means the whole
charger system is ready.
Put battery on the battery charger in right orientation (the
battery terminals should come into contact with the two
sets of connectors on the charger). When the battery is
placed in the right place, the Green/Yellow LED will start to
flash or turn on.
There are three LED on the Battery Charger, shown as C.
The middle red LED means the power condition of the
Charger. The other Green and Yellow LED represent the
working condition of two charger slot respectively. When
the Green/Yellow LED is flashing, it means the battery is on
charging, and the slower tells the less battery is going to be
charged in, in other words, when a full charged battery put
on the battery slot, the Green/Yellow LED will be turn on
and no flashing.
3.2.3 The Battery Usage and Disposing Notices
The rechargeable Lithium-ion battery is supplied partially charged.
The following recommendations provide optimal performance and
extend the life of your batteries:
Fully charge all new batteries prior to use.
Do not allow the batteries to discharge below 5 V.
Keep all batteries on continuous charge when not in use.
Batteries may be kept on charge indefinitely without
damage t the receiver or batteries.
Do not store batteries in the receiver or external charger
unless power is applied.
Preparation
X90 GNSS – 1.01 Rev A – September 2010
10
If you must store the batteries, fully charge them before
storing and then recharge them at least every three
months.
Disposing of the Rechargeable Lithium-ion Battery
Discharge the lithium-ion battery before disposing of it. When
disposing of the battery, be sure to do so in an environmentally
sensitive manner. Adhere to any local and national regulation
concerning battery disposal or recycling.
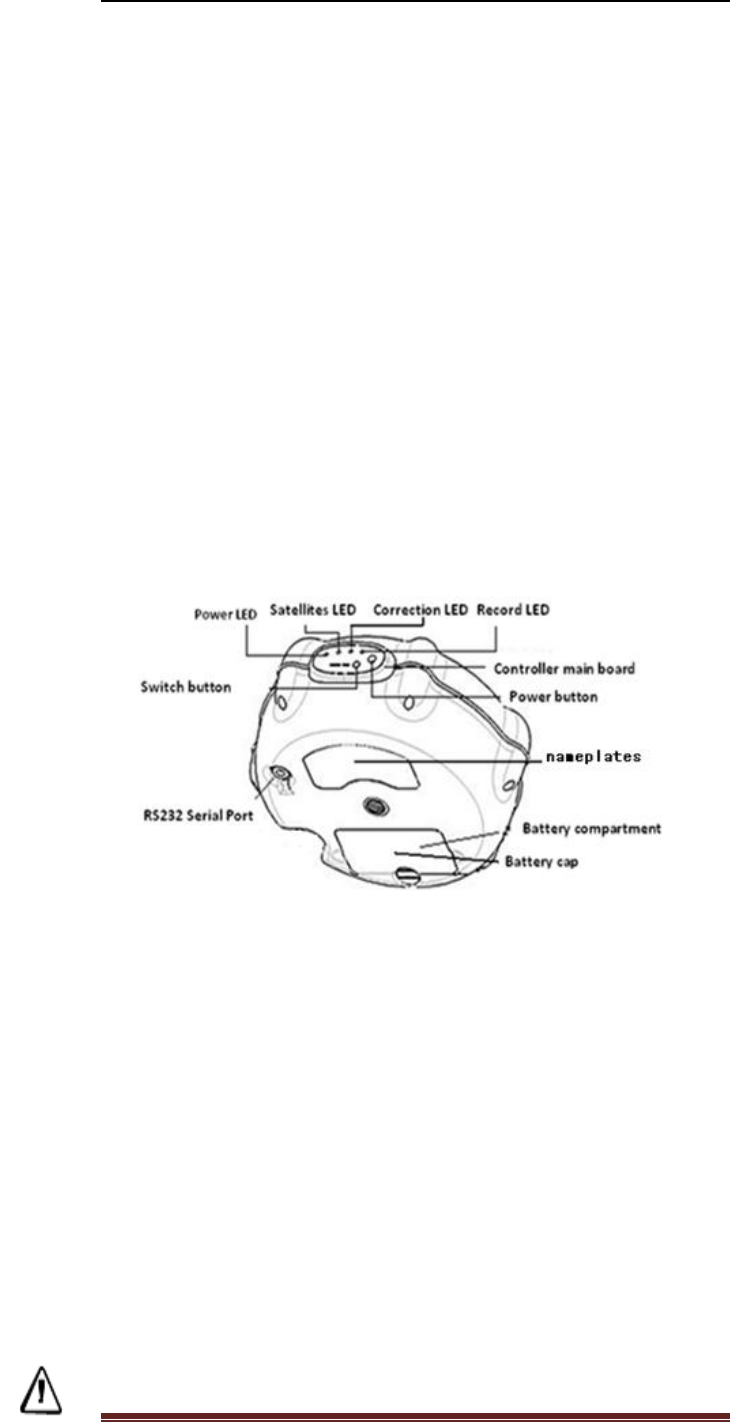
3.3 Parts of the Receiver (Control Panel)
3.3.1 Front Panel View
Power Button
To turn on X90 GNSS, hold the power button press and don’t release
until the power LED lights up.
Switch Button
The function of switch button is to switch X90 GNSS from RTK mode
to static mode. The procedure can be divided into 2 steps.
Step 1: Switching
Hold the switch button press and don’t release until you see the
Record LED off.
Step 2: Check
Press the switch button, if the correction LED turns on, it means the
switching succeed.
CAUTION: When you are doing check, if you press and hold the

Preparation
X90 GNSS – 1.01 Rev A – September 2010
11
switch button again, it will be back to RTK mode.
Power LED
This indicator is on when X90 GNSS is on, and off when it is off.
Satellite LED
This LED indicates how many satellites the receiver is tracking on, if
the LED flashes 5 times and then stops, it means the receiver is
tracking 5 satellites.
Record LED
The record LED only flashes in 2 situations
A. In the static mode
The interval of flashing shows the sample interval you set in the
HC-Loader or HCGPSet.
B.RTK mode
When you are using PDA to send commands to set the receiver’s
configuration or just communicating with the receiver.
Correction LED
The Correction LED only flashes once per second when
A. Base station successfully sends out difference data in RTK mode.
B. Rover station successfully gets difference data from Base station.
3.3.2 Bottom View
RS232 Serial Port
RS232 serial port is a 9 pin 0-shell Lemo connector that supports
RS-232 communications and external power input.
Adaptor
The 5/8” adaptor is used for setting up the receiver on the tripod.
Battery Compartment
WARNINGS:
Do not store batteries in the receiver unless it is applied.
Do not charge or use the battery if it appears to be damaged
or leaking.
Do not damage the rechargeable Lithium-ion battery. A
damaged battery may cause an explosion or fire, and may
result in personal injury and/or property damage.

Preparation
X90 GNSS – 1.01 Rev A – September 2010
12
Do not expose the battery to fire, high temperature, or
direct sunlight.
Do not immerse the battery in water.
Do not use or store the battery inside a vehicle under hot
weather condition.
Do not drop or puncture the battery.
Do not open the battery or short-circuit its contacts.

Setting up the Receiver
X90 GNSS – 1.01 Rev A – September 2010
13
4. Setting up the Receiver
4.1Receiver Setup
Prerequisites:
● You need a tripod and a tribrach to install the base.
● To power the radio, you need a standard 12-V DC battery.
Mount the different items as shown on the picture.

Appendix
X90 GNSS – 1.01 Rev A – September 2010
14
5. Configuration
● Static Configuration
● RTK Configuration
5.1 Static Configuration
There are 3 ways to configure the receiver in Static Mode.
A. Using RS232 Port and HCLoader Software in the Office
First, connect X90GNSS to your computer through RS232 line.
Second, run the software HCLoader and click icon Link to make the
receiver connected with computer.
Third, click icon Setup to set the sample interval (15S is
recommended) and mask angle of the receiver (13 is recommended)
and choose the Data Log mode as Auto, then click Apply to make
the configuration work and click Exit.
Fourth, restart the receiver.
B. Using PDA and Software HCGPRSSet in the Field
First, use RS232 port connecting PDA with receiver.
Second, tap the icon HCGPRSSet on the PDA.
Third, click Open then you will see this picture, set the sample
interval (15S is recommended and mask angle of the receiver (13 is
recommended) you want and choose the data log mode as Auto,
then click Apply to make the configuration works.
Fourth, restart the receiver.
C. Switch Button in the Field
The information has been introduced in Chapter 3.3.1