Huace Navigation Technology B01008 Data Collector User Manual
Shanghai Huace Navigation Technology LTD. Data Collector
UserManual.wiki
>
Huace Navigation Technology
>
B01008 User Manual
>
User Manual
Contents
1.
User Manual
2.
Users Manual
User Manual
Navigation menu
Upload a User Manual
Namespaces
Wiki Guide
HTML
PDF
Info
Views
User Manual
Discussion / Help
Navigation


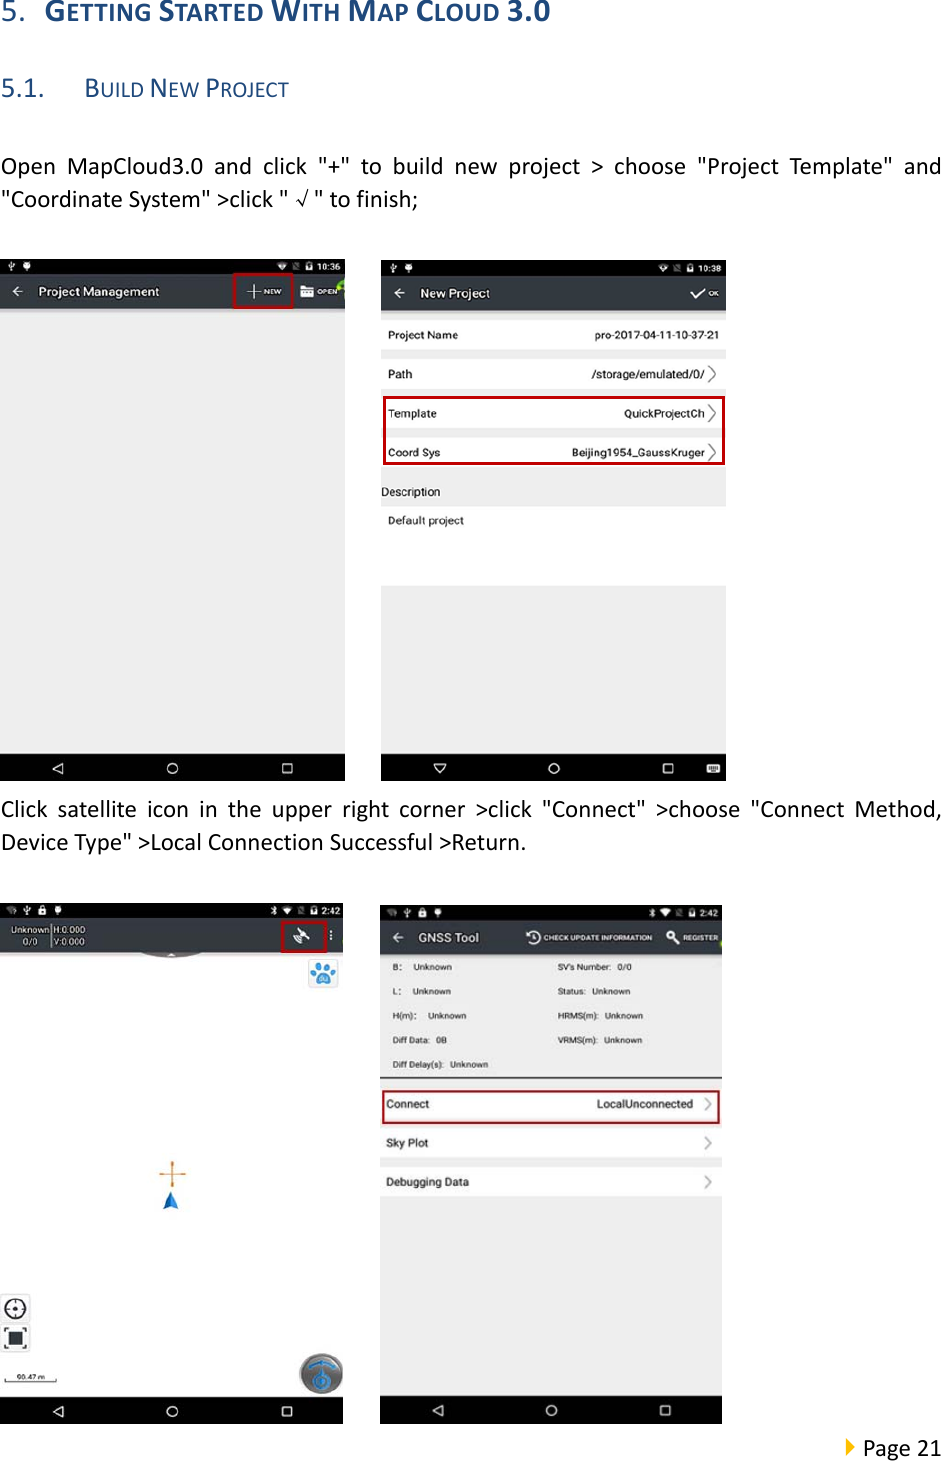
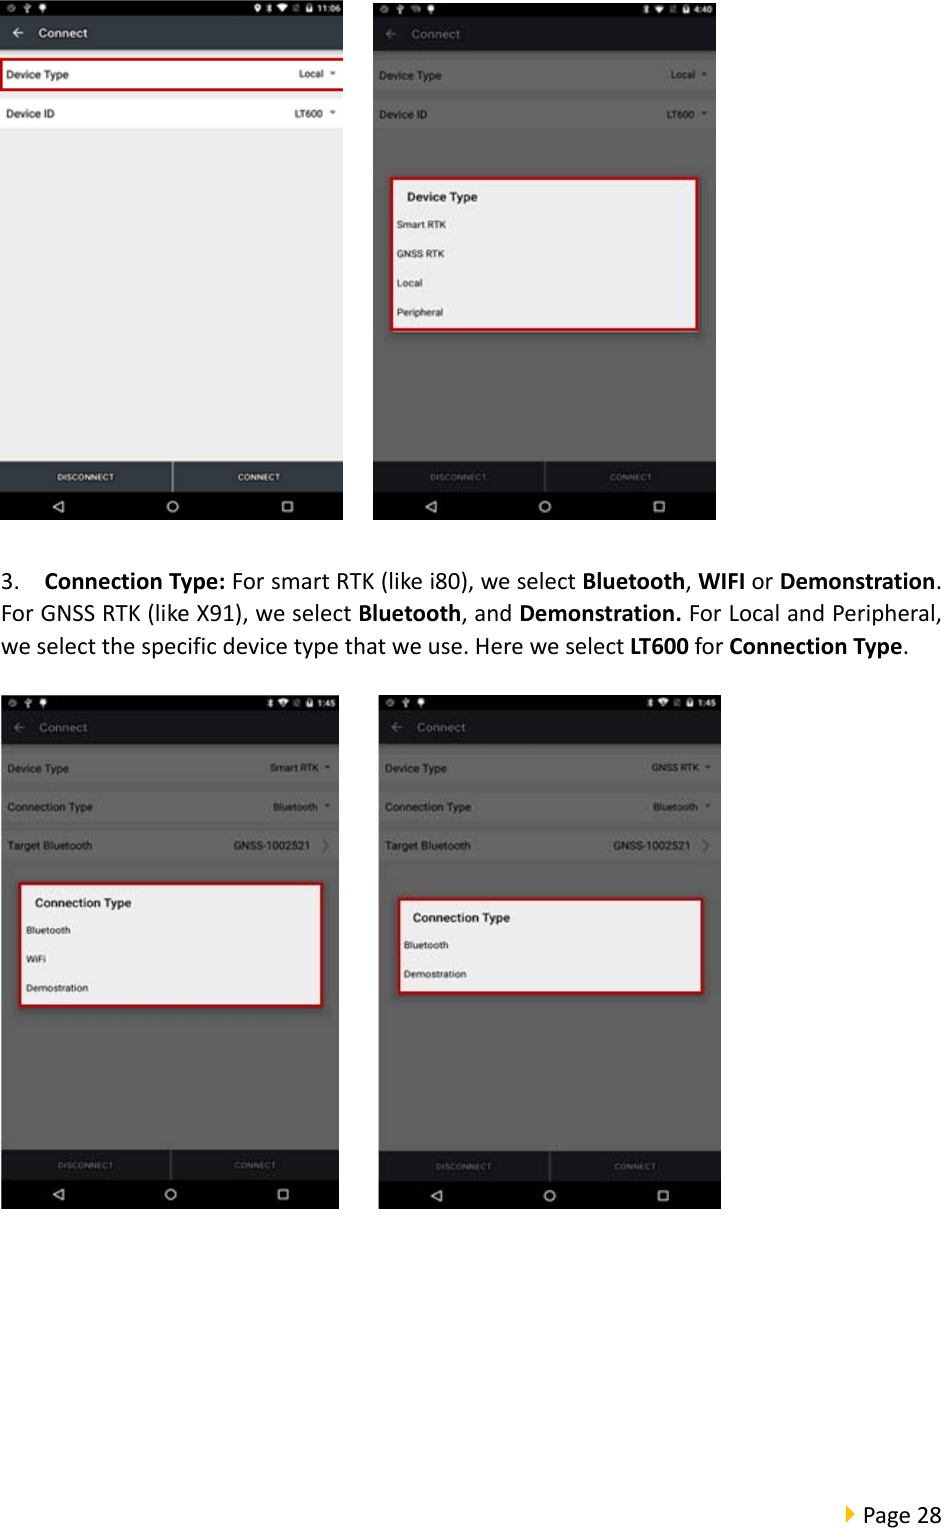
![Page276. GETTINGSTARTEDWITHGNSSTOOLGNSSToolisakindofservicemainlyusedforaccesstodataandlocal,BluetoothandWIFIconnection.ExternalAppcansendcommandtoreceiverbyusingGNSSToolthroughbroadcast.GNSSToolcancallCHCSDKtosendcommandtoreceiver.UsersonlyneedtoconnectwithGNSSTooltocommunicatewiththereceiver.Itwillberunninginthebackgroundonceconnectedandusersdon’tneedtostartit.BeforeusingGNSSTool,usersneedtoregisterfirst.UnregisteredGNSSToolonlyallowfor30minutestryout.6.1. CONNECTION1. OpenGNSSTool,click[Connect]menuandselect[DeviceType]and[ConnectionType]/[DeviceID]inconnectinterface. 2. DeviceType:GNSSToolcurrentlysupports4typesofDevice:SmartRTK,GNSSRTK,LocalandPeripheral.LocalsupportstypicalmobilephoneandCHCcustomizedhandheldcontrollerlikeLT40andLT600.PeripheralsupportsNMEA0183,X360Seriesandotherdevices.HereforLT600,wechooseLocal.](https://usermanual.wiki/Huace-Navigation-Technology/B01008.User-Manual/User-Guide-3566444-Page-27.png)
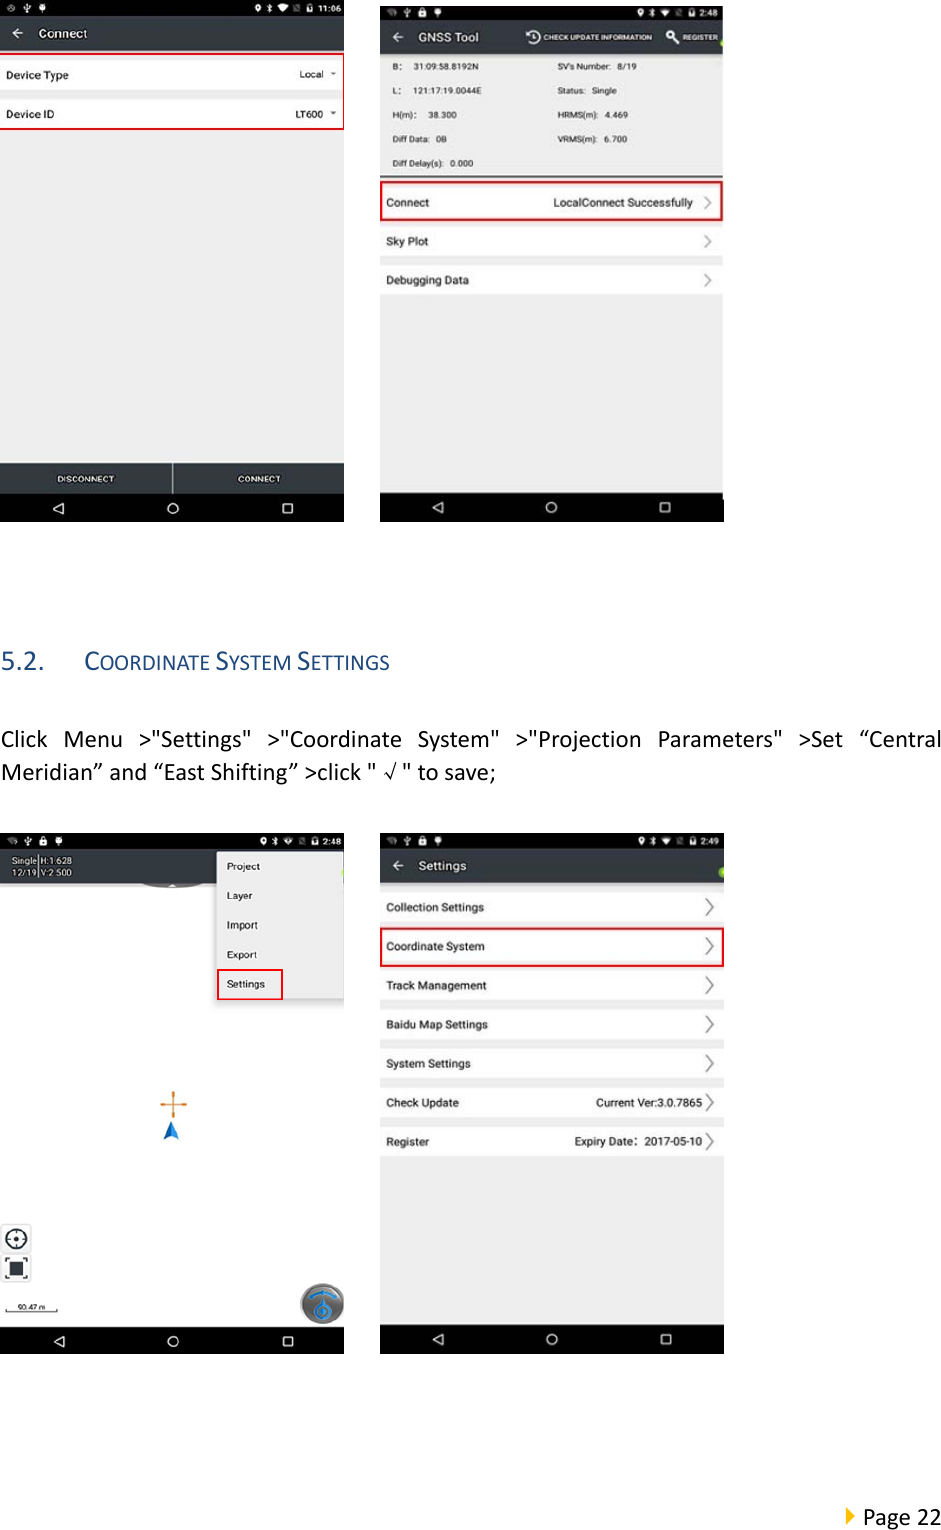
![Page29 4. Click[Connect]toconnectwiththereceiversuccessfullyandgobacktothepreviousinterface. 6.2. CORSLOGINAfterfinishingconnectionsuccessfully,wecanloginCORStoreceivedifferentialdata.UserscanloginCORSin4differentways:CORS,APIS,TCPandRTCMSDK.BeforeloginCORS,pleasemakesurethedevicehasbeenconnectedandthehandheldisconnectedtothe](https://usermanual.wiki/Huace-Navigation-Technology/B01008.User-Manual/User-Guide-3566444-Page-29.png)