Huace Navigation Technology B01011 Handheld GNSS Data Collector User Manual il
Shanghai Huace Navigation Technology LTD. Handheld GNSS Data Collector il
Contents
- 1. LT50 manual V1.0
- 2. LT50 manual V1.0
- 3. Uaser_Manual
- 4. User Manual
LT50 manual V1.0


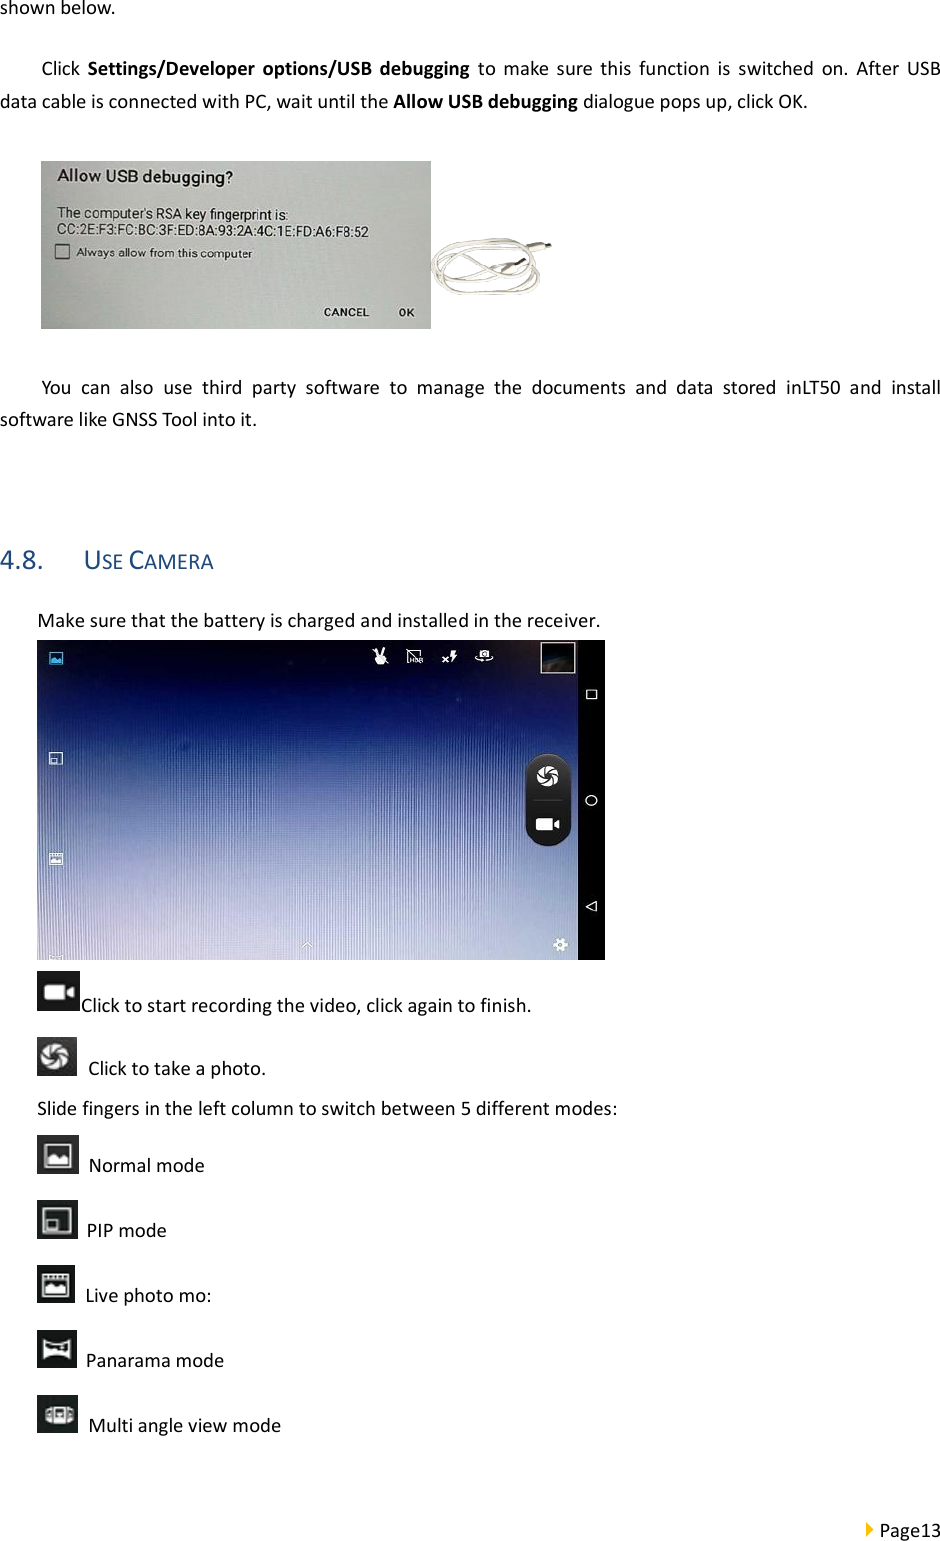

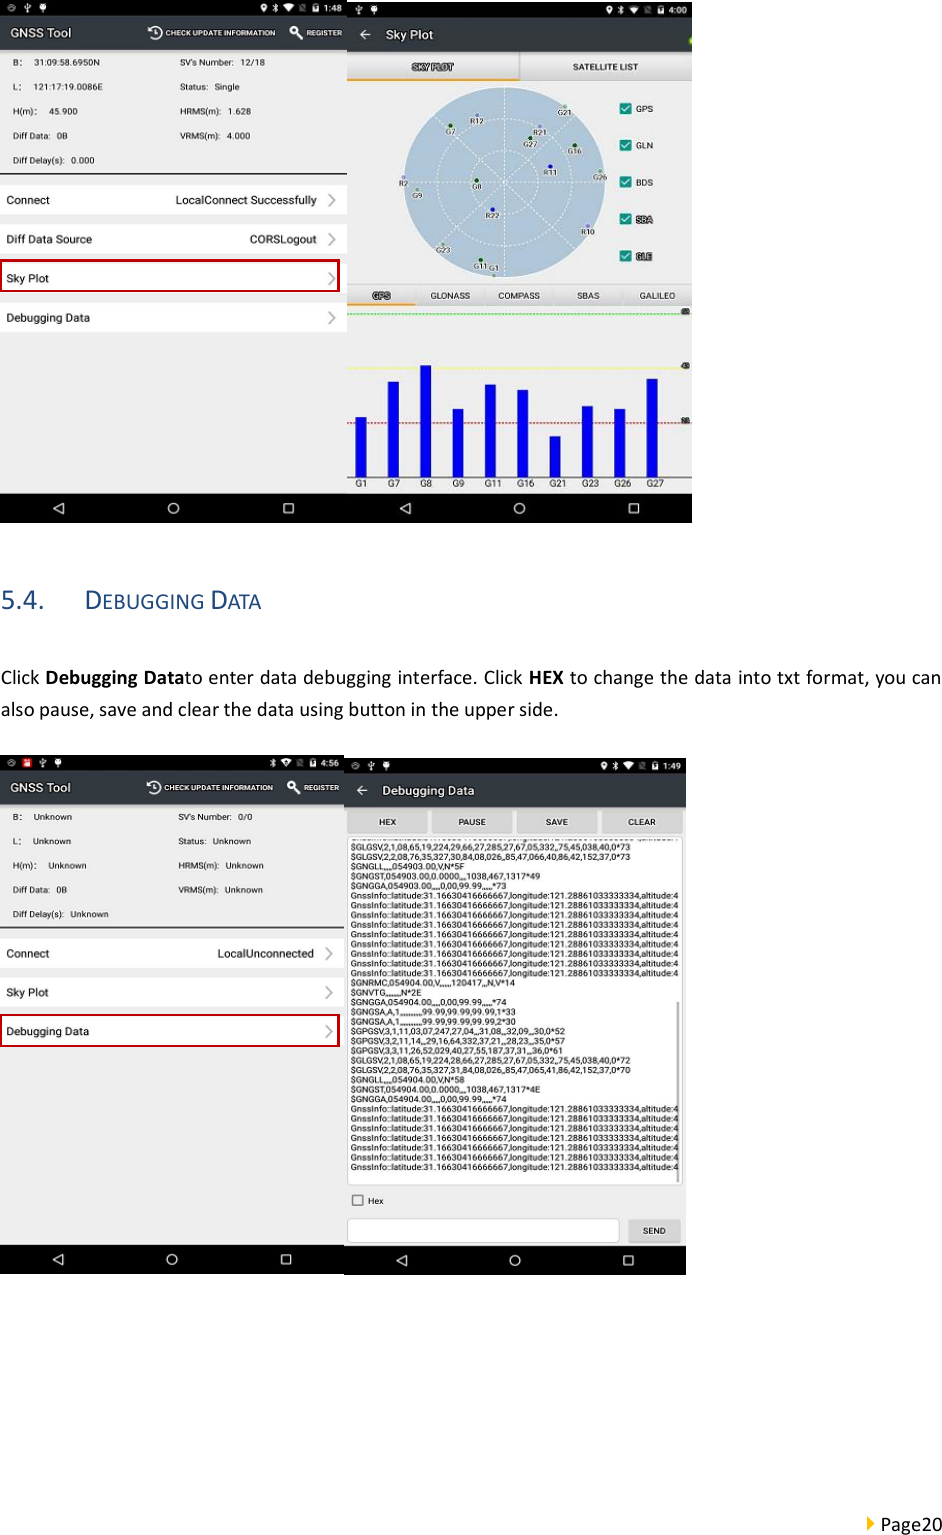
![ Page17 5. GETTING STARTED WITH GNSSTOOL 5.1. CONNECTION 1. OpenGNSSTool and click [Connect] menu and select [Device Type] and [Connection Type]/[Device ID] in connect interface. 2. Device Type: There are 4 types of Device Type: Smart RTK, GNSS RTK, Local and Peripheral. Here for LT50, we choose Local.](https://usermanual.wiki/Huace-Navigation-Technology/B01011.LT50-manual-V1-0/User-Guide-3931362-Page-18.png)
![ Page18 3. Connection Type: For smart RTK (like i80), we selectBluetooth, WIFIorDemonstration.For GNSS RTK (like X91), we selectBluetooth, and Demonstration. For Local and Peripheral,we select the specific device type that we use. Here we select LT50for Connection Type. 4. Click [Connect] to connect with the receiver successfully and go back to the previous interface.](https://usermanual.wiki/Huace-Navigation-Technology/B01011.LT50-manual-V1-0/User-Guide-3931362-Page-19.png)


LT50 manual V1.0


![ Page17 5. GETTING STARTED WITH GNSSTOOL 5.1. CONNECTION 1. OpenGNSSTool and click [Connect] menu and select [Device Type] and [Connection Type]/[Device ID] in connect interface. 2. Device Type: There are 4 types of Device Type: Smart RTK, GNSS RTK, Local and Peripheral. Here for LT50, we choose Local.](https://usermanual.wiki/Huace-Navigation-Technology/B01011.LT50-manual-V1-0/User-Guide-3931510-Page-18.png)
![ Page18 3. Connection Type: For smart RTK (like i80), we selectBluetooth, WIFIorDemonstration.For GNSS RTK (like X91), we selectBluetooth, and Demonstration. For Local and Peripheral,we select the specific device type that we use. Here we select LT50for Connection Type. 4. Click [Connect] to connect with the receiver successfully and go back to the previous interface.](https://usermanual.wiki/Huace-Navigation-Technology/B01011.LT50-manual-V1-0/User-Guide-3931510-Page-19.png)