Huawei Technologies B160 Fixed wireless terminal User Manual Wonderful Communication Mobile Life
Huawei Technologies Co.,Ltd Fixed wireless terminal Wonderful Communication Mobile Life
UserManual.wiki
>
Huawei Technologies
>
B160 User Manual
B160_User_Guide
Navigation menu
Upload a User Manual
Namespaces
Wiki Guide
HTML
PDF
Info
Views
User Manual
Discussion / Help
Navigation
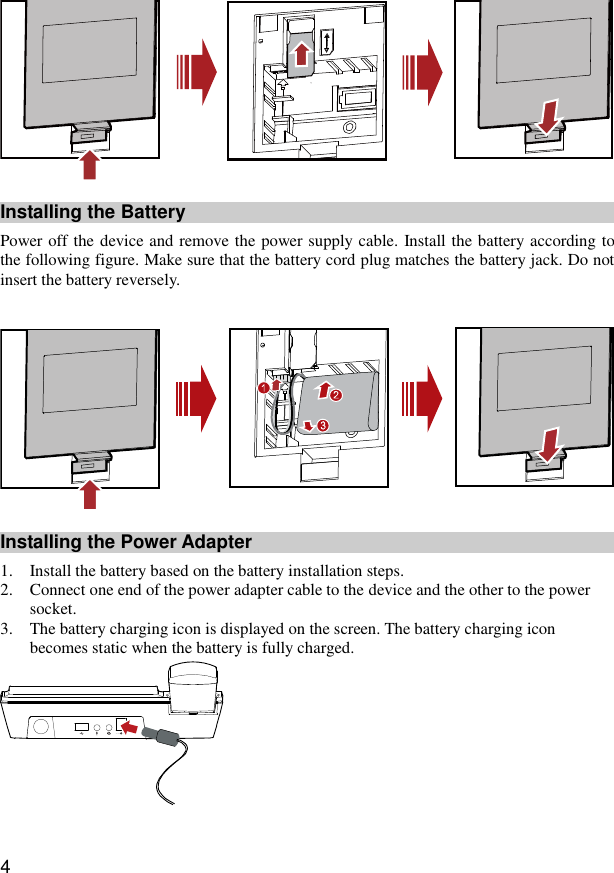
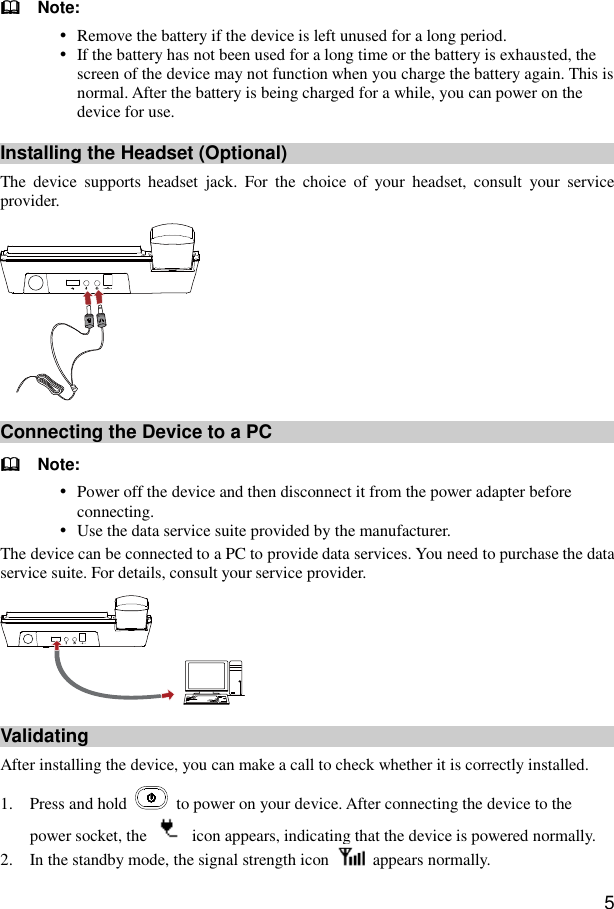
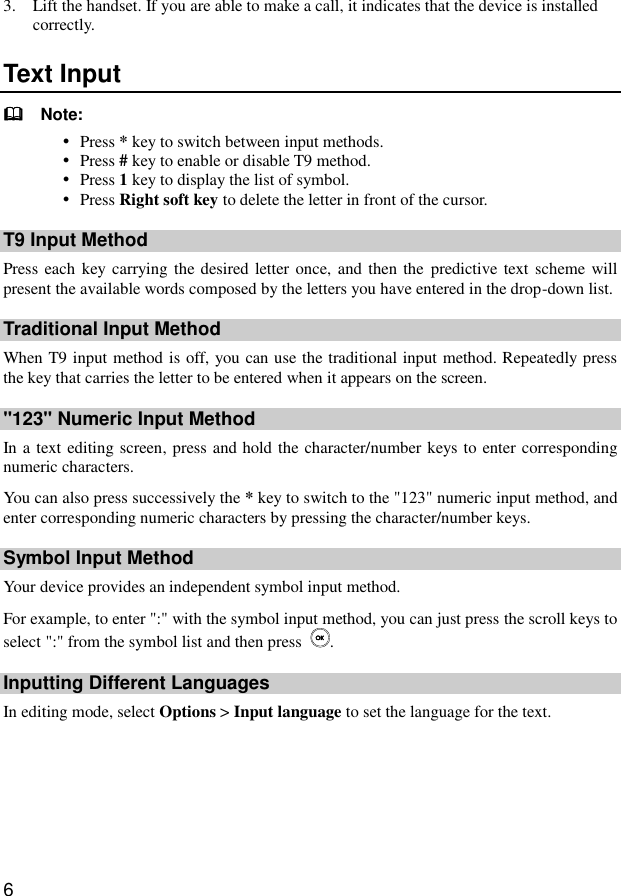

![22 If there is a case of battery deformation, color change, or abnormal heating while you charge or store the battery, remove the battery immediately and stop using it. Otherwise, it may lead to battery leakage, overheating, explosion, or fire. If the power cable is damaged (for example, the cord is exposed or broken), or the plug loosens, stop using the cable at once. Otherwise, it may lead to an electric shock, a short circuit of the charger, or a fire. Do not dispose of batteries in fire as they may explode. Batteries may also explode if damaged. Cleaning and Maintenance The device, battery, and charger are not water-resistant. Keep them dry. Protect the device, battery, and charger from water or vapor. Do not touch the device or the charger with a wet hand. Otherwise, it may lead to a short circuit, a malfunction of the device, and an electric shock to the user. Do not place your device, battery, and charger in places where they can get damaged because of collision. Otherwise, it may lead to battery leakage, device malfunction, overheating, fire, or explosion. Do not place magnetic storage media such as magnetic cards and floppy disks near the device. Radiation from the device may erase the information stored on them. Do not leave your device, battery, and charger in a place with an extreme high or low temperature. Otherwise, they may not function properly and may lead to a fire or an explosion. Do not place sharp metal objects such as pins near the earpiece. The earpiece may attract these objects and hurt you when you are using the device. Before you clean or maintain the device, power off the device and disconnect it from the charger. Do not use any chemical detergent, powder, or other chemical agents (such as alcohol and benzene) to clean the device and the charger. Otherwise, parts of the device may be damaged or a fire can be caused. You can clean the device and the charger with a piece of damp and soft antistatic cloth. Do not dismantle the device or accessories. Otherwise, the warranty on the device and accessories is invalid and the manufacturer is not liable to pay for the damage. Emergency Call You can use your device for emergency calls in the service area. The connection, however, cannot be guaranteed in all conditions. You should not rely solely on the device for essential communications. FCC Statement 15.19 NOTICE: This device complies with Part 15 of the FCC Rules [and with RSS-210 of Industry Canada].](https://usermanual.wiki/Huawei-Technologies/B160/User-Guide-1439951-Page-26.png)