Huawei Technologies E397BU-502 LTE/EVDO/CDMA dual mode 7 bands 2D USB Rotator for use as subscriber equipment in the LTE/CDMA system. User Manual English
Huawei Technologies Co.,Ltd LTE/EVDO/CDMA dual mode 7 bands 2D USB Rotator for use as subscriber equipment in the LTE/CDMA system. English
Contents
- 1. Quick start manual
- 2. Safety information
- 3. Quick Start manual
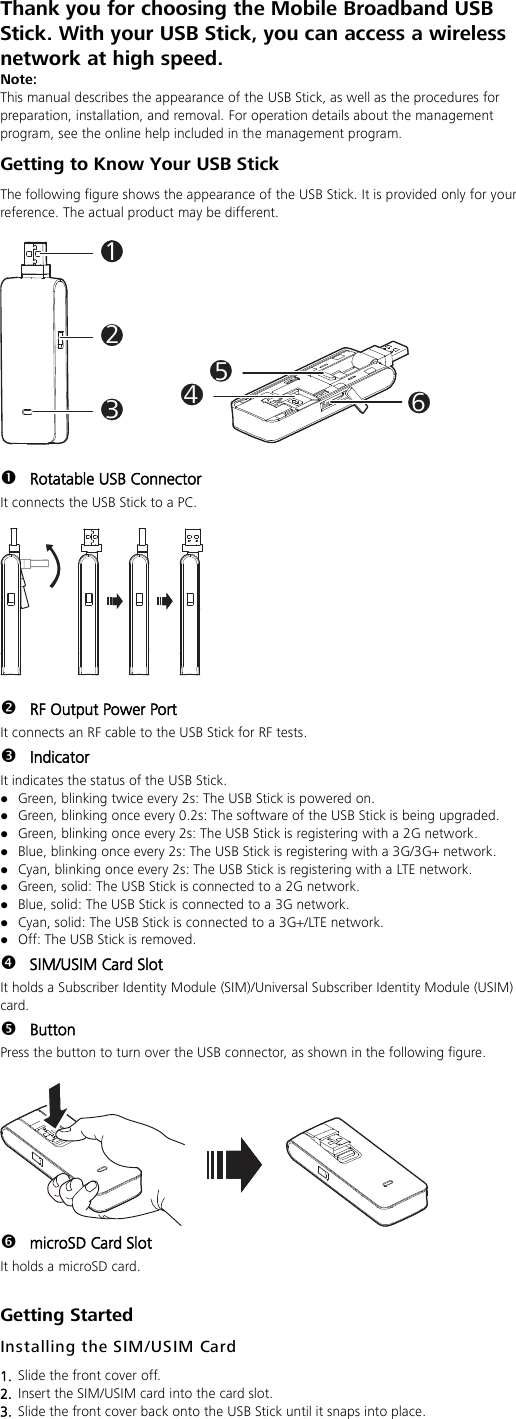
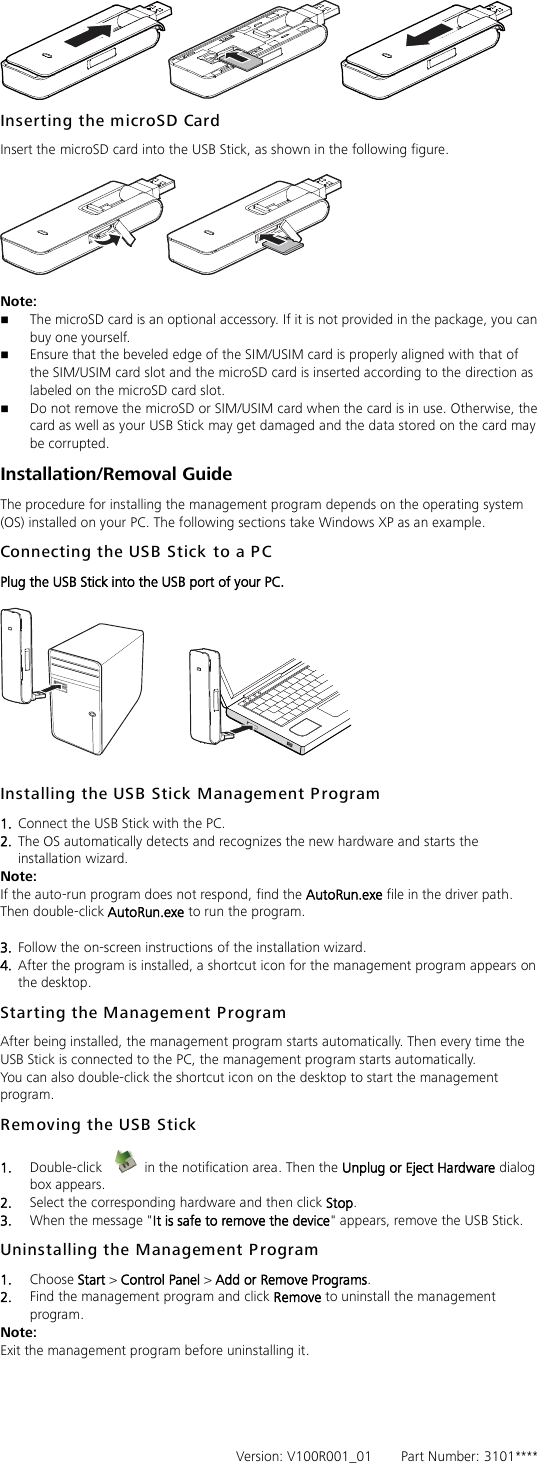
Quick start manual