Huawei Technologies EC321 CDMA Data Card User Manual HUAWEI EC301 321 351 Data Card
Huawei Technologies Co.,Ltd CDMA Data Card HUAWEI EC301 321 351 Data Card
UserManual.wiki
>
Huawei Technologies
>
EC321 User Manual
Users Manual
Navigation menu
Upload a User Manual
Namespaces
Wiki Guide
HTML
PDF
Info
Views
User Manual
Discussion / Help
Navigation
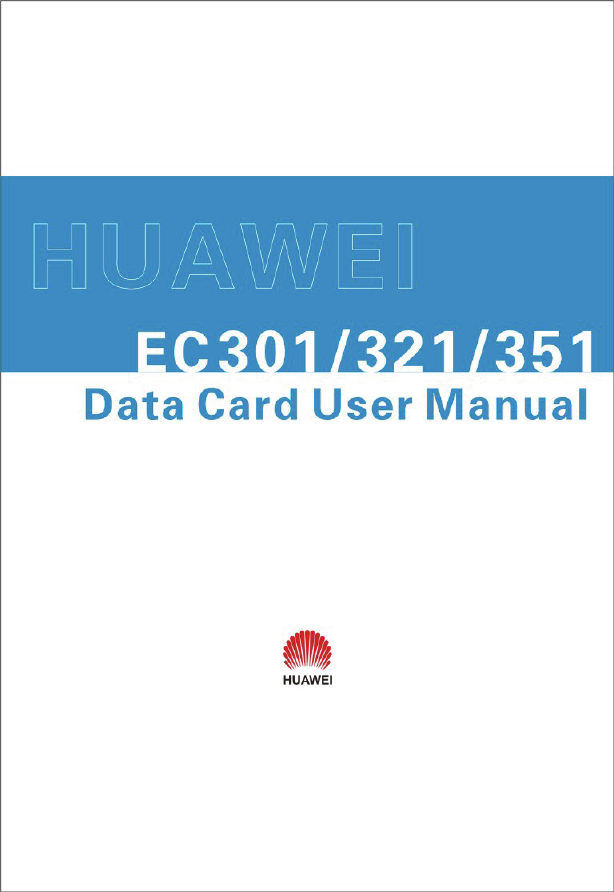

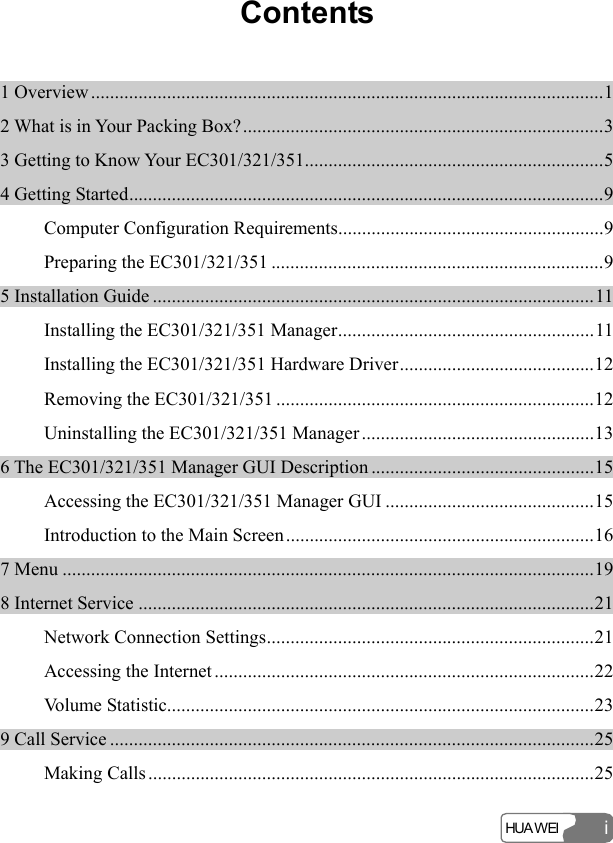


![HUA WEI 218 Internet Service Network Connection Settings Creating a Profile Select [Settings/Network Connection Settings] on the menu bar: Step Operation and description 1 Click New. 2 Enter a new profile name in the "Profile name" field. 3 Enter required relevant information for the settings. 4 Click Save to finish creating the profile. Note: y If you use the High-speed Packet Data Service to access the internet, please input #777 into the phone number. For more information, consult the network operator. y If you use the Low-speed Data Service Access to access the internet, please consult the network operator for all the information to be inputted.](https://usermanual.wiki/Huawei-Technologies/EC321/User-Guide-622752-Page-25.png)
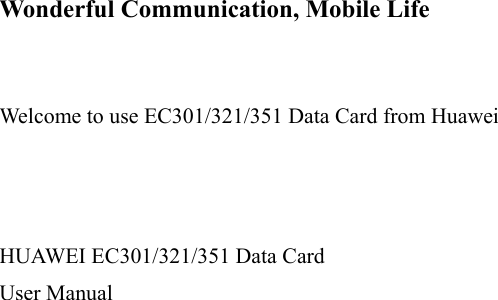
![88 IInntteerrnneett SSeerrvviiccee HUA WEI 22 Deleting a Profile Select [Settings/Network Connection Settings] on the menu bar: Step Operation and description 1 From the "Choose Profile Name" field, select a profile you want to delete. 2 Click Remove. Modifying a Profile Select [Settings/Network Connection Settings] on the menu bar: Step Operation and description 1 From the "Choose Profile Name" field, select a profile you want to modify. 2 Click Modify. 3 Make some changes. 4 Click Save. Accessing the Internet Step Operation and description 1 Select [Settings/Network Connection Settings], choose a profile you want, and click OK. 2 Click on to set up a connection. 3 After a prompt appears indicating that the connection is set up, click on or start the Explorer on your computer, and then you can access the Internet.](https://usermanual.wiki/Huawei-Technologies/EC321/User-Guide-622752-Page-26.png)
![88 IInntteerrnneett SSeerrvviiccee HUA WEI 23Step Operation and description 4 Click on to disconnect the connection. Once the connection is established, the following detailed information about the network connection is displayed on the main screen: y The duration of the current connection y The data volume of the current connection y The volume, rate and the top rate of the current sending and received data Volume Statistic You can view the content of the volume statistic. Select [Tools/Volume Statistic] on the menu bar: y Last Volume Statistic: the volume of the last connection with the Internet, including sent and received volume statistic values and the duration of the connection. y Total Volume Statistic: the total volume of all connections since the last operation of resetting you made, including sent and received volume statistic values and the duration of the connections. y Last Reset Time: recording the last time that you execute the operation of resetting. y Click Reset and you can clear the last volume statistic information and the total volume statistic information. Note: The above data of volume statistic is for your reference only.](https://usermanual.wiki/Huawei-Technologies/EC321/User-Guide-622752-Page-27.png)
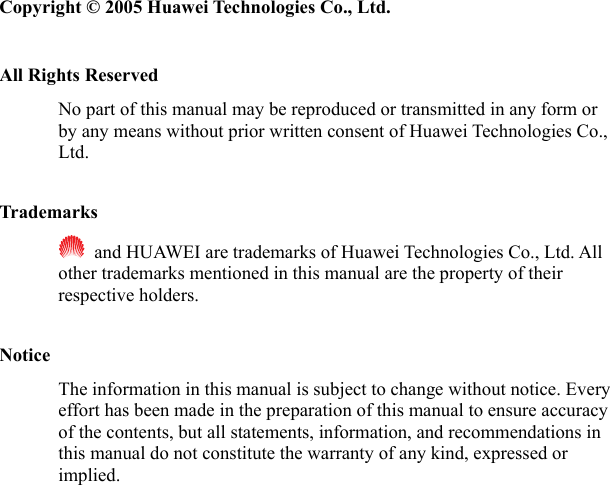
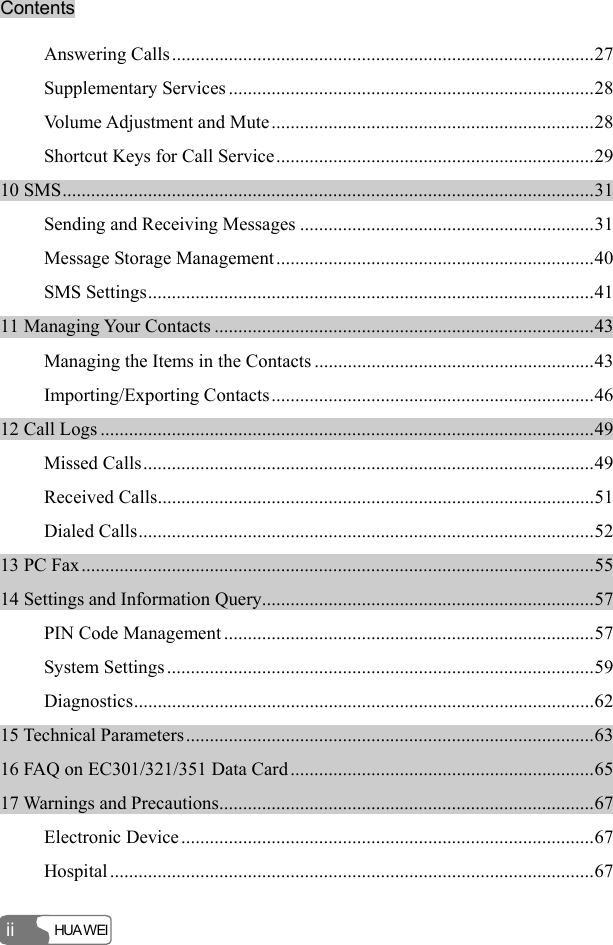
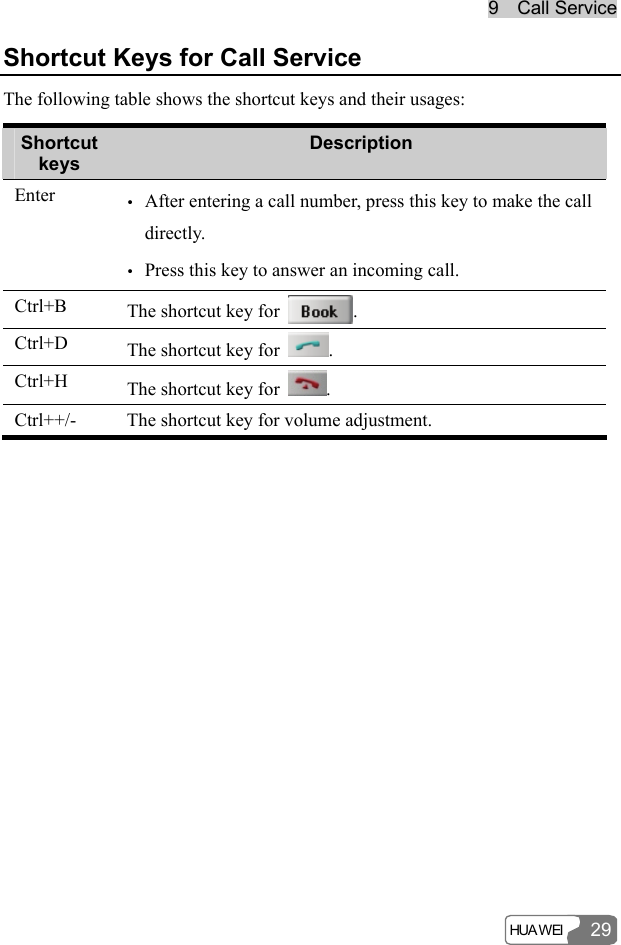
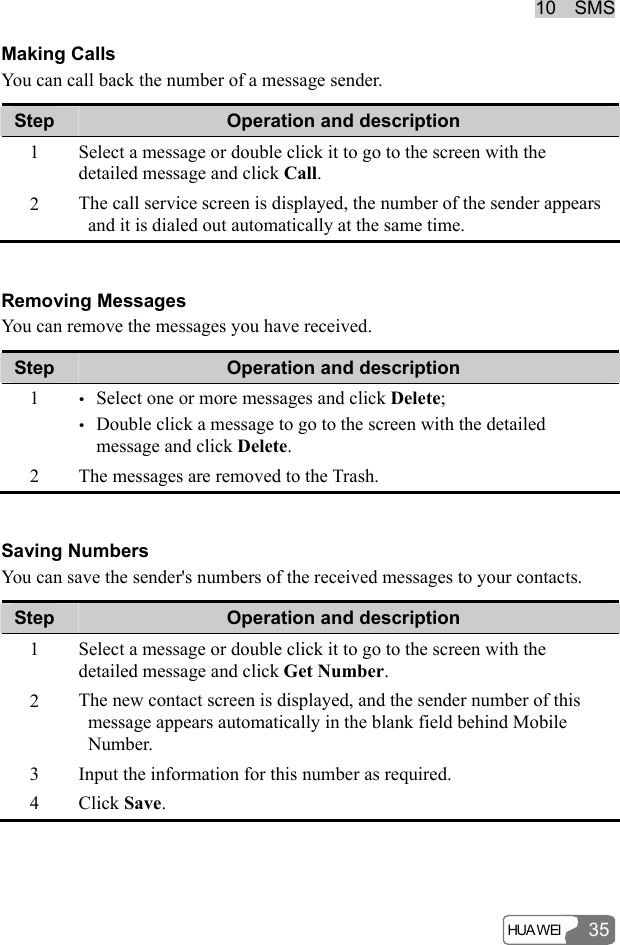
![HUA WEI 259 Call Service When you request the call service, you should insert the earphone to the jack on the EC301/321/351. Note: y You can use the control key on the earphone to answer or reject an incoming call conveniently: y When the ring for an incoming call sounds, you can press the control key to answer the call; y When the ring for an incoming call sounds, you can press and hold the control key to reject it; y During a call, you can press and hold the control key to end the call. Making Calls The EC301/321/351 provides many easy and quick ways to make calls. By Directly Entering a Telephone Number You may make a call by entering directly a telephone number: Step Operation and description 1 Click on or select [Tools/Call], the Call service screen is displayed. 2 Enter a telephone number by one of the following ways: y Enter the number directly with the keyboard of your computer. y Click the telephone keypad on the Call screen.](https://usermanual.wiki/Huawei-Technologies/EC321/User-Guide-622752-Page-28.png)
![99 CCaallll SSeerrvviiccee HUA WEI 26 Step Operation and description 3 Click on to make a call. 4 Click on to hang up. Note: You can remove the number on the call screen digit by digit by pressing the key. Pressing and holding down it can remove the whole number. You can also press the backspace key to do this. By Choosing a Telephone Number from the Contacts List You may make a call by choosing a telephone number from the Contacts list: Step Operation and description 1 Click on or select [Tools/Call], the Call service screen is displayed. 2 Click on , and the Contacts screen is displayed. Double click a contact or select a contact and then click Call: y If the contact you have selected has only one number, the number will appear on the call screen and be dialed out directly. y If the contact has two or more numbers, double click on this intended number from the pop-up Select Phone Number window or click Call after selecting the number; and the selected number will appear on the call screen and be dialed out directly. 3 Click on to hang up.](https://usermanual.wiki/Huawei-Technologies/EC321/User-Guide-622752-Page-29.png)
![99 CCaallll SSeerrvviiccee HUA WEI 27By Selecting a Recently Dialed Number You may make a call by selecting one from the recently dialed numbers: Step Operation and description 1 Click on or select [Tools/Call], the Call service screen is displayed. 2 Click on to display a list of 10 recently dialed numbers. Double click the intended telephone number or click Call after selecting the number, then the number will be dialed out directly. 3 Click on to hang up. Answering Calls The default alert mode of the EC301/321/351 for incoming calls is by sound. You can select [Settings/Options] to set the mode: You can select the sound alert, and the display alert. For specific operations, please refer to "System Settings". When you have any missed call, the amount of missed calls is displayed in real time under the status information on the main screen. With the Setting of Sound Alert When there is an incoming call, you will hear a sound alert: Step Action 1 Click on or select [Tools/Call], the Call service screen is displayed. 2 Click on to answer a call. 3 Click on to hang up.](https://usermanual.wiki/Huawei-Technologies/EC321/User-Guide-622752-Page-30.png)
![99 CCaallll SSeerrvviiccee HUA WEI 28 With the Setting of Display Alert An alert window is displayed when a call comes. You can choose to: Option Description Click Answer Answer the call. Click Reject/Ignore Reject/Ignore the call. Supplementary Services The EC301/321/351 data card supports the following supplementary services: y Call Forwarding-Busy y Call Forwarding-Default y Call Forwarding-No Answer y Call Forwarding-Unconditional y Call Waiting y Three-Way Calling y Caller ID Display y Conference Call To use the supplementary services, you need the operator to enable them. For details of the operation, please consult the network operator. Volume Adjustment and Mute Click on or select [Tools/Call], the Call service screen is displayed. You can adjust the volume no matter when you are making a call or not. You can also mute your voice so that the person you are talking to cannot hear you even though the line is still active. y To increase the volume, press . y To decrease the volume, press . y To mute your voice, press . y To resume normal talk, press .](https://usermanual.wiki/Huawei-Technologies/EC321/User-Guide-622752-Page-31.png)
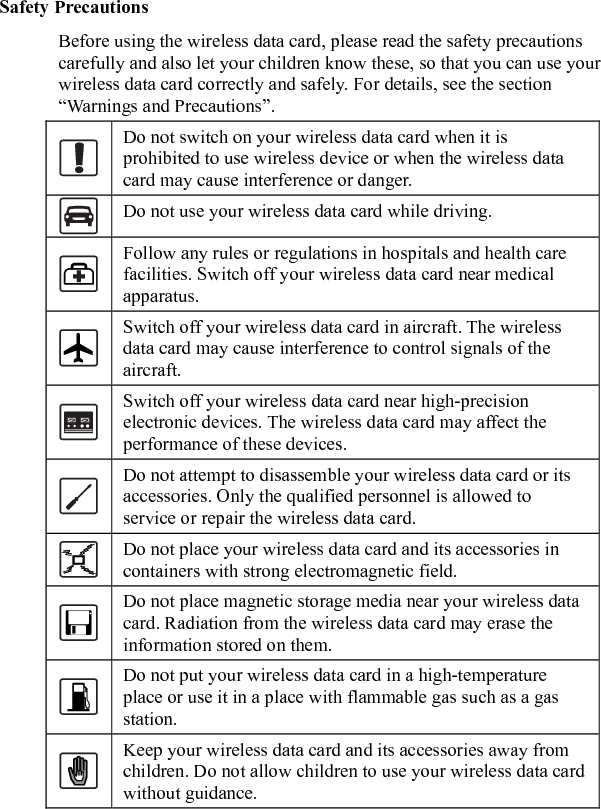
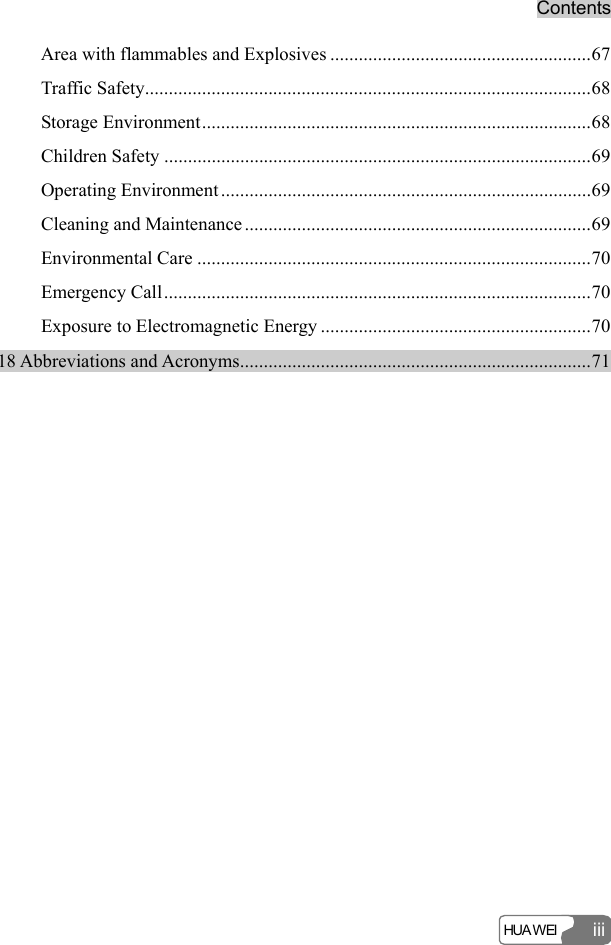
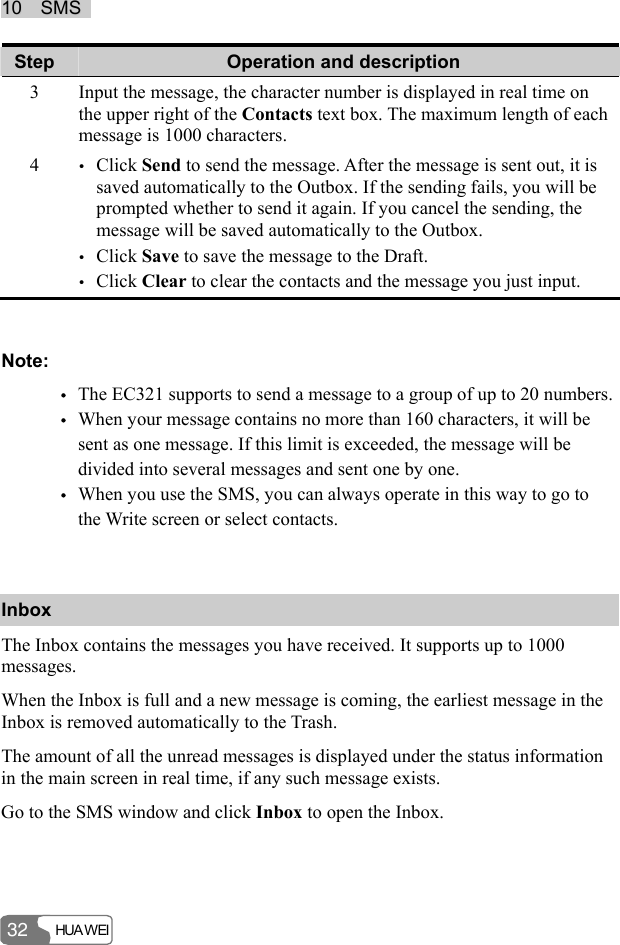
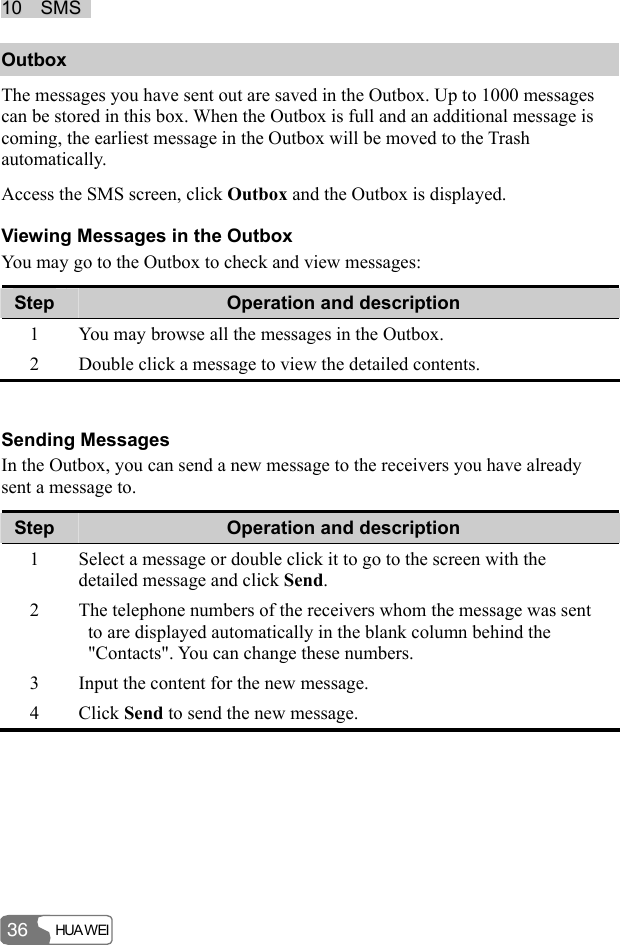
![HUA WEI 3110 SMS Sending and Receiving Messages Writing New Messages Click on or select [Tools/SMS], the SMS (Short Message Service) screen is displayed: Step Operation and description 1 Click Write, the Write screen is displayed. 2 Enter telephone number. You can enter one or more numbers by one of the following ways: y To enter one or more numbers directly: In the Contacts textbox, input numbers directly with semicolons ";" as the separator. y To select a number from the Contacts: Click Contacts, select one or more contact and click OK, and then select the number to send message in the pop-up dialog box and click OK.. Note: y You can directly input the numbers or select them from the Contacts. y When you select more than one contact, you can press Shift key to select a sequence of contacts, or press Ctrl to select them one by one y If you select several receivers, click the Apply to all items check box to simplify the following operations](https://usermanual.wiki/Huawei-Technologies/EC321/User-Guide-622752-Page-33.png)
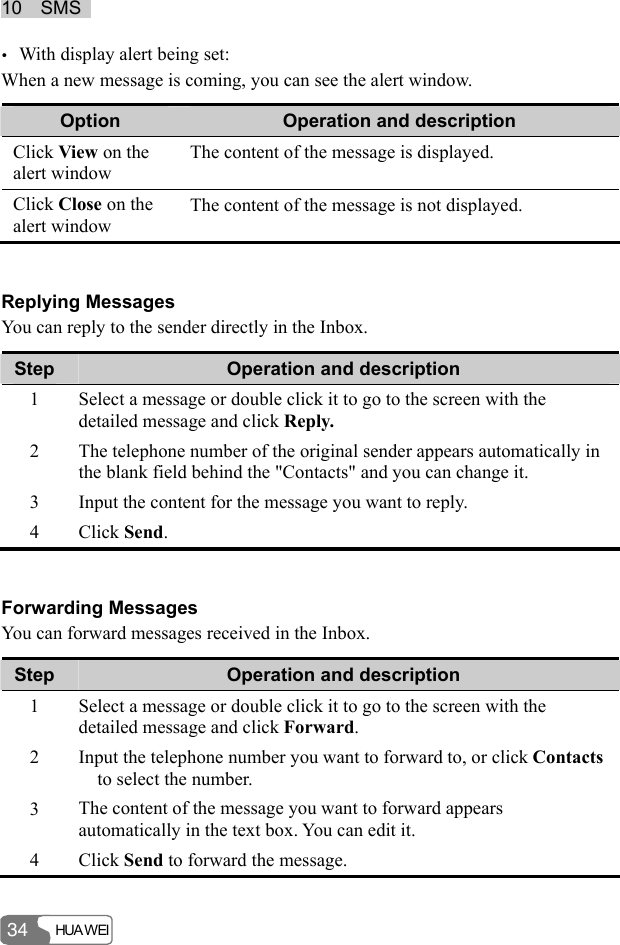
![1100 SSMMSS HUA WEI 33Going to the Inbox to View Your Messages 1 Go to the Inbox to View Your Messages Directly You may go to the inbox to browse and view your messages: Step Operation and description 1 Click on or select [Tools/SMS], the SMS screen is displayed. 2 Click Inbox to go to the Inbox and browse; double click a message to view the detailed contents. There are two types of icons in the Inbox: y : Standing for unread messages; y : Standing for read messages. 2 View Messages When New Messages Come According to the settings you have made on [Settings/Options], You can be alerted to a new message in different ways. You can select Sound alert or Display alert; for specific operations, please refer to "System Settings". y With sound alert being set: When a new message is coming, you can hear the sound alert: Step Operation and description 1 Click on or select [Tools/SMS], the SMS screen is displayed. 2 Click Inbox to go to the Inbox and check new messages; double click a message to view the detailed contents.](https://usermanual.wiki/Huawei-Technologies/EC321/User-Guide-622752-Page-35.png)
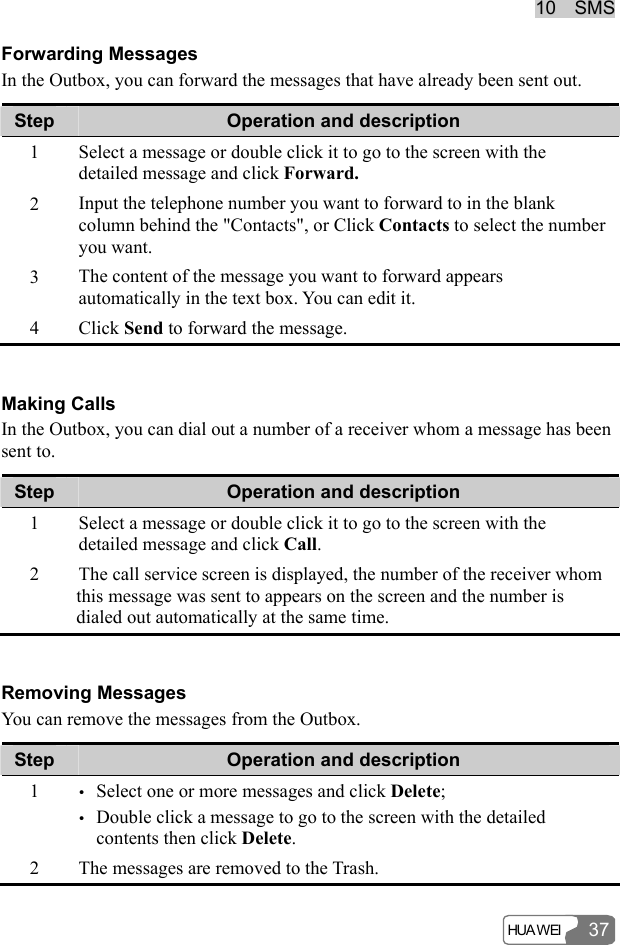
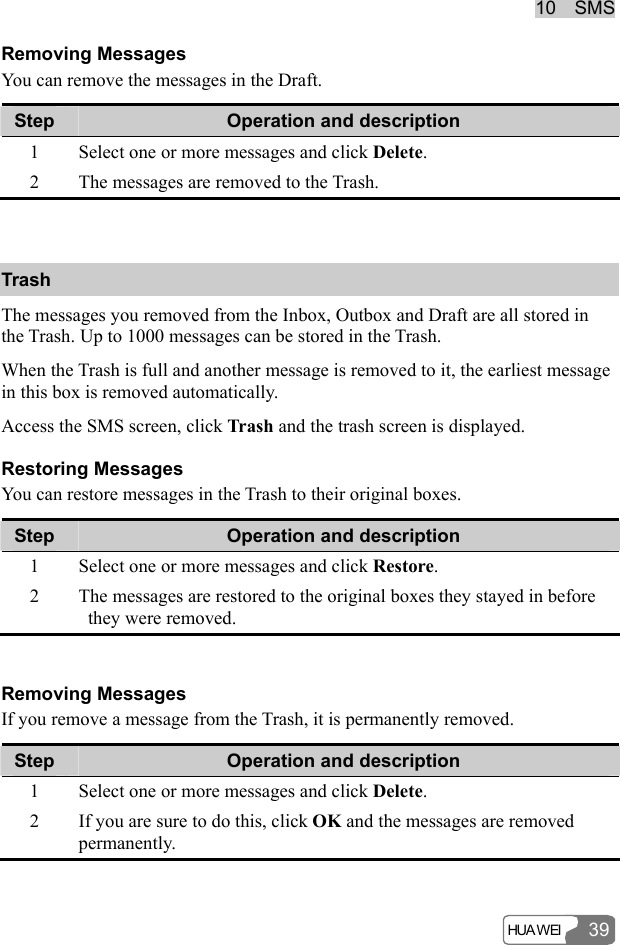
![1100 SSMMSS HUA WEI 40 Reports The Reports contains all the message reports you have received. Up to 1000 message reports can be stored in the Reports. When this box is full and another report is coming in, the earliest report in this box is removed automatically. Access the SMS screen, click Reports and the Reports box is displayed: Step Operation and description 1 Select one or more messages and click Delete. 2 If you are sure, click OK and this return notification message is removed. Message Storage Management Access [File/SMS Storage Manager], and then you can import the messages saved in the computer, UIM card and EC301/321/351 memory from one to another. Note: y With the message storage management, you can copy/move messages between different memories in mailboxes of the same type. Copying and moving messages cannot be executed between the mailboxes of different types. You cannot copy/move messages between two message report boxes nor between two Draft boxes. y The messages saved in EC301/321/351 memory will not be lost due to the changes of the UIM card and PC. y WMI Box: Waiting voice message indicator box.](https://usermanual.wiki/Huawei-Technologies/EC321/User-Guide-622752-Page-42.png)
![1100 SSMMSS HUA WEI 41Step Operation and description 1 From the window of SMS Storage Manager, you can select the source position and the aim position for the importing. 2 Select an operation mode: y Copy: the message at the source position will be kept y Move: the message at the source position will be deleted 3 Choose the message at the source position. Then, y Click on to import the message from the left of the arrow to the right of it. y Click on to import the message from the right of the arrow to the left of it. SMS Settings Select [Settings/SMS Settings], and the SMS settings screen is displayed: Option Description Reports You can enable or disable this function. When the function is enabled and you are sending a message, the network will send a message to inform you that the receiver has got the message you have sent. Priority Select the priority level for sending messages. Note: If no storage space is available in your UIM card for the reports, the "Request status report" option is invalid, please contact your UIM card provider for details.](https://usermanual.wiki/Huawei-Technologies/EC321/User-Guide-622752-Page-43.png)
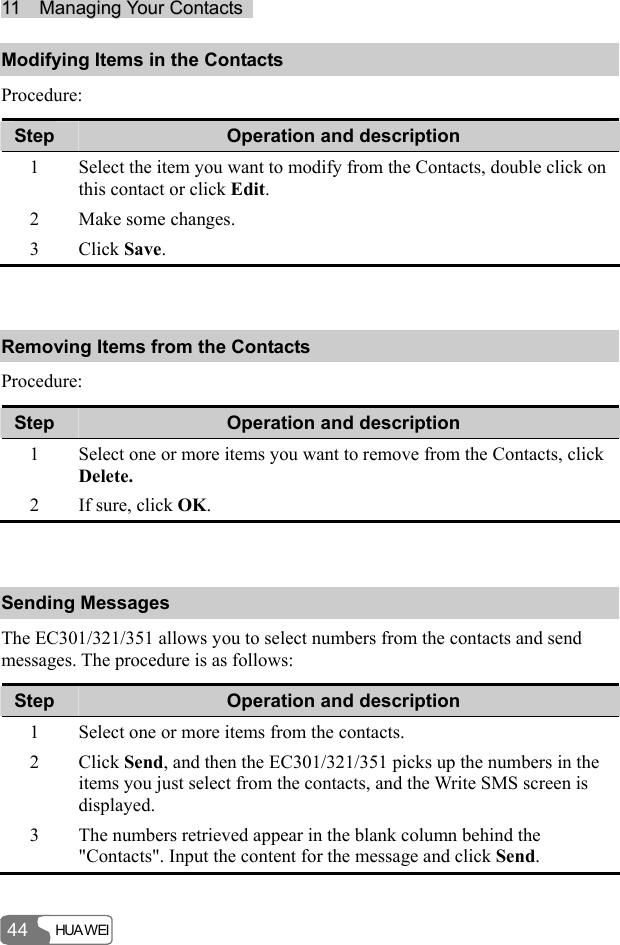
![HUA WEI 4311 Managing Your Contacts The EC301/321/351 supports up to 1000 items in the Contacts. You can create, modify and delete items in the Contacts. You can also send messages, make calls with the contacts. The EC301/321/351 also supports the import/export of the contacts for your convenience to manage the Contacts. Managing the Items in the Contacts Click on , or select [Tools/Contacts], and the contacts management screen is displayed. Creating Items in the Contacts Procedure: Step Operation and description 1 Click New. 2 Fill in the Name, Mobile Number, Family Phone Number, Office Phone number, E-mail addresses, and/or the Comments. 3 Click Save to save a new item in the Contacts.](https://usermanual.wiki/Huawei-Technologies/EC321/User-Guide-622752-Page-44.png)
![1111 MMaannaaggiinngg YYoouurr CCoonnttaaccttss HUA WEI 46 Importing/Exporting Contacts Importing Contacts The EC301/321/351 allows you to import the contacts items from a file in a specified format to the EC301/321/351 Contacts. The file formats that the EC301/321/351 supports for importing are .txt and .csv. Step Operation and description 1 Select [File/Import Contacts From File]. 2 From the Open window, select a file you want to import. 3 Click Open, and the items in the file are imported to the EC301/321/351 Contacts automatically. Exporting Contacts EC301/321/351 allows you to export the items from the EC301/321/351 Contacts to a file. The procedure is as follows: Step Operation and description 1 Select [File/Export Contacts To File]. 2 Select whether to be compatible with the Outlook from the pop-up window according to the actual conditions, and then select OK. Note: If you need export the contacts to the Outlook, check the checkbox, otherwise, error may occur while exporting. 3 In the Save as window, input a file name with .csv as its extension. 4 Click Save, and the items in the EC301/321/351 Contacts are exported to the specified file.](https://usermanual.wiki/Huawei-Technologies/EC321/User-Guide-622752-Page-47.png)
![1111 MMaannaaggiinngg YYoouurr CCoonnttaaccttss HUA WEI 47Note: Error occurs to the re-imported files if the exported files have been modified. Contacts Storage Management Access [File/Contacts Storage Manager], and then you can import the contacts saved in the computer, UIM card and EC301/321/351 Memory from one to another. Note: The contacts information saved in EC301/321/351 Memory will not be lost due to the changes of the UIM card and PC. Step Operation and description 1 From the window of Contacts Manager, you can select the source position and the aim position for the importing. 2 Select an operation mode: y Copy: the contacts information at the source position will be kept y Move: the contacts information at the source position will be deleted 3 Choose the contacts information at the source position. Then, y Click on to import the contacts information from the left of the arrow to the right of it. y Click on to import the contacts information from the right of the arrow to the left of it.](https://usermanual.wiki/Huawei-Technologies/EC321/User-Guide-622752-Page-48.png)
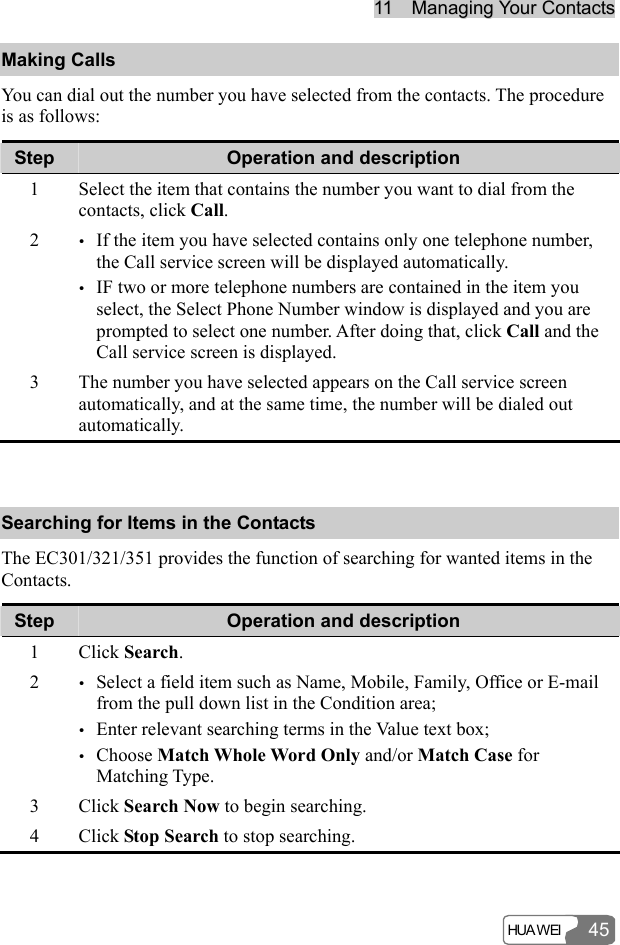
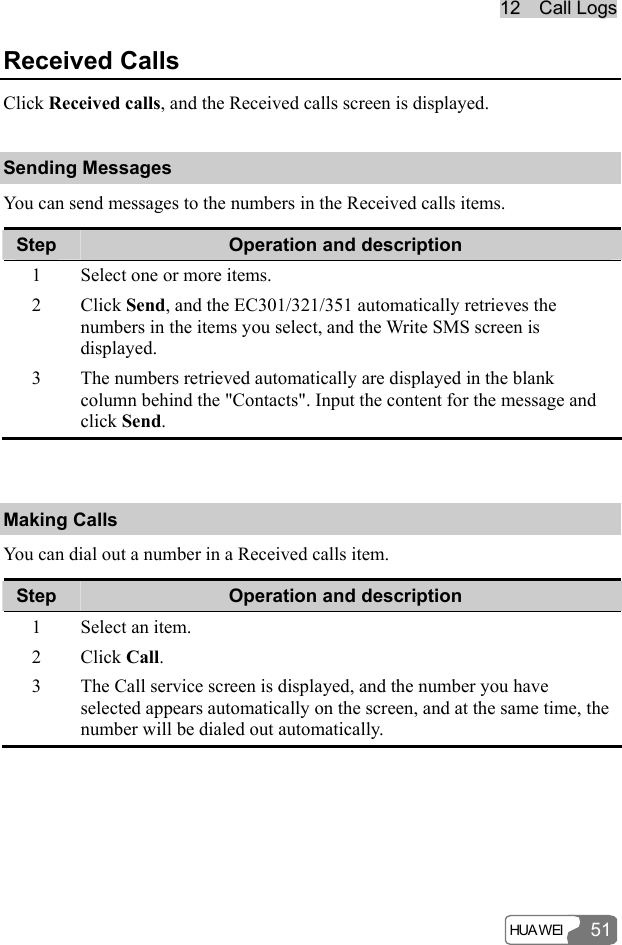
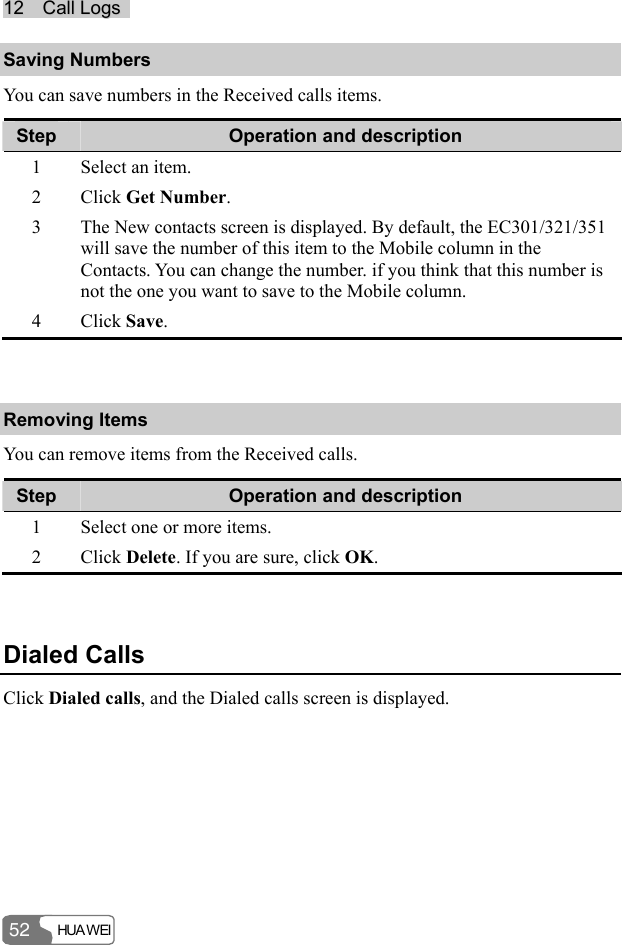
![HUA WEI 4912 Call Logs The call log contains information about dialed, received and missed calls. Each kind of log supports up to 1000 items. Click on or select [Tools/Call Log], the Call Log screen is displayed. Missed Calls Click Missed calls, and the Missed Calls screen is displayed. Sending Messages You can send messages to the numbers in the Missed calls items. Step Operation and description 1 Select one or more items. 2 Click Send, and then the EC301/321/351 automatically retrieves the numbers in the items you select, and the Write SMS screen is displayed. 3 The numbers retrieved automatically are displayed in the blank column behind the "Contacts". Input the content for the message and click Send. Making Calls You can dial out a number in a Missed calls item.](https://usermanual.wiki/Huawei-Technologies/EC321/User-Guide-622752-Page-49.png)
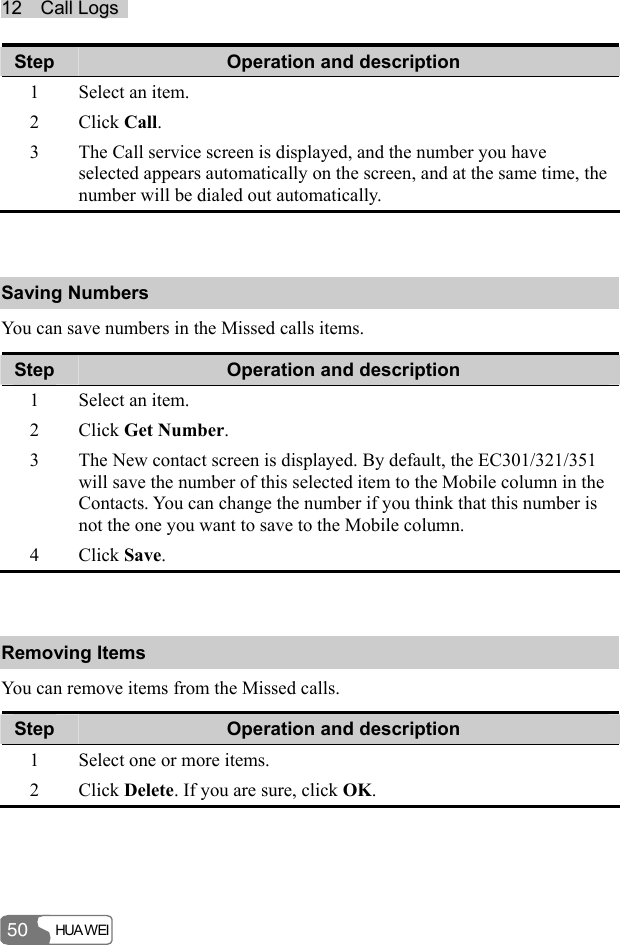
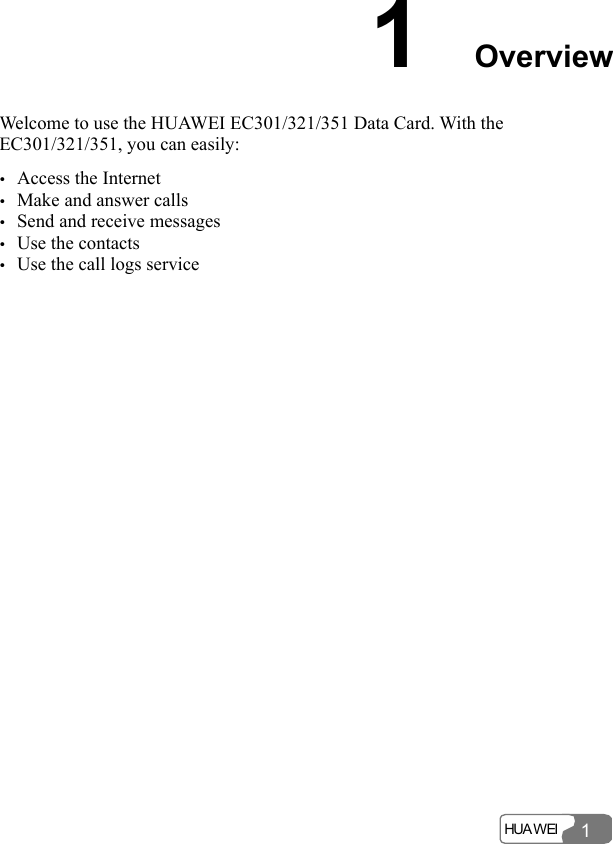
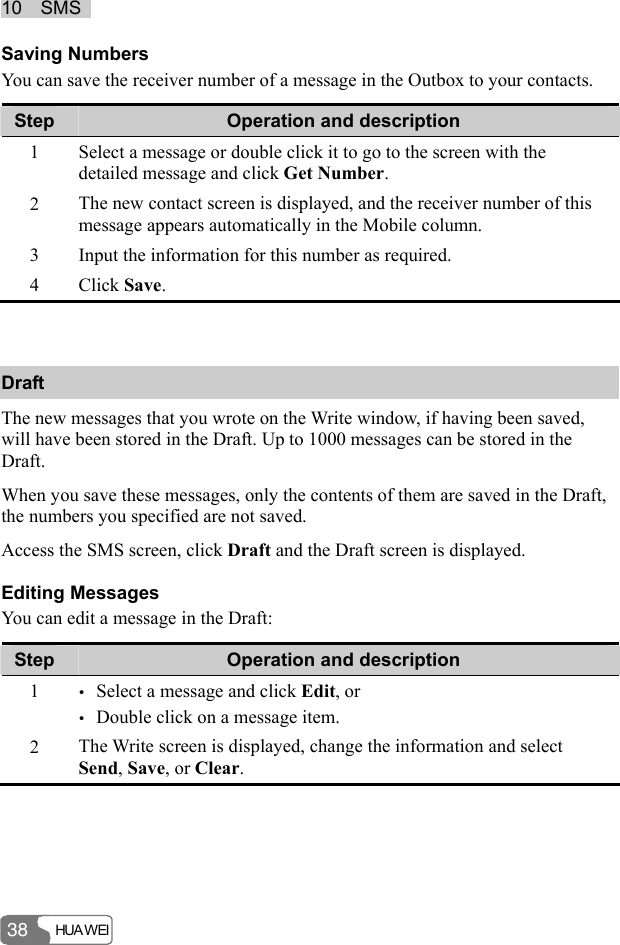
![HUA WEI 5714 Settings and Information Query PIN Code Management The PIN code is used to prevent your UIM card from the invalid uses. Generally, the PIN code is provided along with your UIM card. You can change your PIN code, and you can also enable/disable the PIN feature. If you enable the feature, you must enter a PIN code when the EC301/321/351 starts up. PIN Code Modification You can change your PIN code: Step Operation and description 1 Select [Settings/Modify PIN Code]. 2 Enter the current PIN code and the new PIN code, and then enter the new code again to confirm it. 3 Click OK to modify it.](https://usermanual.wiki/Huawei-Technologies/EC321/User-Guide-622752-Page-56.png)
![1144 SSeettttiinnggss aanndd IInnffoorrmmaattiioonn QQuueerryy HUA WEI 58 PIN Code Validation After accessing the EC301/321/351 management program, you can still use the function of PIN code validation: Step Operation and description 1 Select [Settings/PIN Code Protection]. 2 Selecting "Validate", you can access the PIN code validation flow which is the same as that when the EC manager starts. For more information, please refer to the descriptions on page 15. PIN Code Protection You can enable/disable the PIN feature. If the feature is enabled, you must enter a PIN code when the EC301/321/351 starts up. Otherwise, you need not do this. Step Operation and description 1 Select [Settings/PIN Code Protection]. 2 Select "Enable" or "Disable". After that, you should enter the PIN code according to the prompt. y Enable: You must enter the PIN code when the EC301/321/351 starts up. y Disable: You need not enter the PIN code when the EC301/321/351 starts up.](https://usermanual.wiki/Huawei-Technologies/EC321/User-Guide-622752-Page-57.png)
![1144 SSeettttiinnggss aanndd IInnffoorrmmaattiioonn QQuueerryy HUA WEI 59System Settings The system settings include the startup mode of the EC301/321/351 manager, the alert mode for incoming calls, the alert mode for messages, and so on. Select [Settings/Options]. Startup Selecting the “Startup Settings” tab, you can set the EC301/321/351 manager to start along with the Windows, to be displayed in the minimized mode when it starts, or otherwise. Option When the box is checked Launch software on Windows start up The EC301/321/351 manager starts along with the Windows. Start main window minimized The program is displayed in the minimized mode when it starts. When starting, check unread message When the program starts, it will check the unread messages in the UIM card and the data card.](https://usermanual.wiki/Huawei-Technologies/EC321/User-Guide-622752-Page-58.png)
![1144 SSeettttiinnggss aanndd IInnffoorrmmaattiioonn QQuueerryy HUA WEI 61Option Description Alert window Check the box, and an alert window is displayed whenever a new message comes. You can: y Click View to see the new message, or y Click Close to leave the message unseen. Alert tone y Click Browse to select a sound file. y Click Play to hear the sound. Once a sound file is selected, it plays on the earphone of data card whenever a new message comes. Note: The alert files can be in *.wav or *.mid form. Standby/Hibernate Settings Enter the “Standby/Hibernate” tab, and then you have the following options: Option Description Prevent Standby or Hibernate To prevent the computer from standby or hibernate mode. Allow Standby or Hibernate To allow the computer to start the standby or hibernate mode. Note: Select [Settings/Options], and then you can set the default values on each tab. To recover the current default configuration, click Default.](https://usermanual.wiki/Huawei-Technologies/EC321/User-Guide-622752-Page-60.png)
![1144 SSeettttiinnggss aanndd IInnffoorrmmaattiioonn QQuueerryy HUA WEI 62 Diagnostics EC301/321/351 allows you to query information about the EC301/321/351 and the UIM card. Select [Tools/Diagnostics]: y Messages in Wireless Device: This information is displayed in the format of "XX/YY", here XX indicates the amount of the existing messages, and YY indicates the capacity of the data card. y Contacts in Wireless Device: This information is displayed in the format of "XX/YY", here XX indicates the amount of the existing contacts, and YY indicates the capacity of the data card. y Messages in UIM: This information is displayed in the format of "XX/YY", here XX indicates the amount of the existing messages, and YY indicates the capacity of the UIM card. y Contacts in UIM: This information is displayed in the format of "XX/YY", here XX indicates the amount of the existing contacts, and YY indicates the capacity of the UIM card. y ESN Number: the ESN number of the EC301/321/351. y API Version: the version of the API. y Firmware Version: the board software version of the EC301/321/351. y Hardware Version: the hardware version of the EC301/321/351.](https://usermanual.wiki/Huawei-Technologies/EC321/User-Guide-622752-Page-61.png)
![1166 FFAAQQ oonn EECC330011//332211//335511 DDaattaa CCaarrdd HUA WEI 66 Only Part of the Message is Displayed After I Use the “Paste” Function to Edit it. Why? While editing the message, at most 1000 characters are supported in the text. If the quantity of the pasted information exceeds the limitation, the exceeding part will be deleted automatically. When a Message is received, no Prompting Window Appears. Why? Because you have not set the function of “Display alerts when a message is received”. Select [Settings/Options], and then check the “Display alerts when a message is received” from the “Message alerts settings”. How to Dial the Telephone Numbers with “+” Sign? Double-click the “*/+” key on the telephone service interface, or input it through the PC keyboard. Why cannot I Paste the Telephone Numbers? Only such telephone numbers as “0123456789#*+” are legal. Confirm no other character is contained in the cut or pasted texts.](https://usermanual.wiki/Huawei-Technologies/EC321/User-Guide-622752-Page-65.png)