Huawei Technologies EMETER Battery String Monitor Unit User Manual Product Installation Guide
Huawei Technologies Co.,Ltd Battery String Monitor Unit Product Installation Guide
Contents
- 1. User Manual I
- 2. User Manual II
- 3. User Manual III
User Manual III

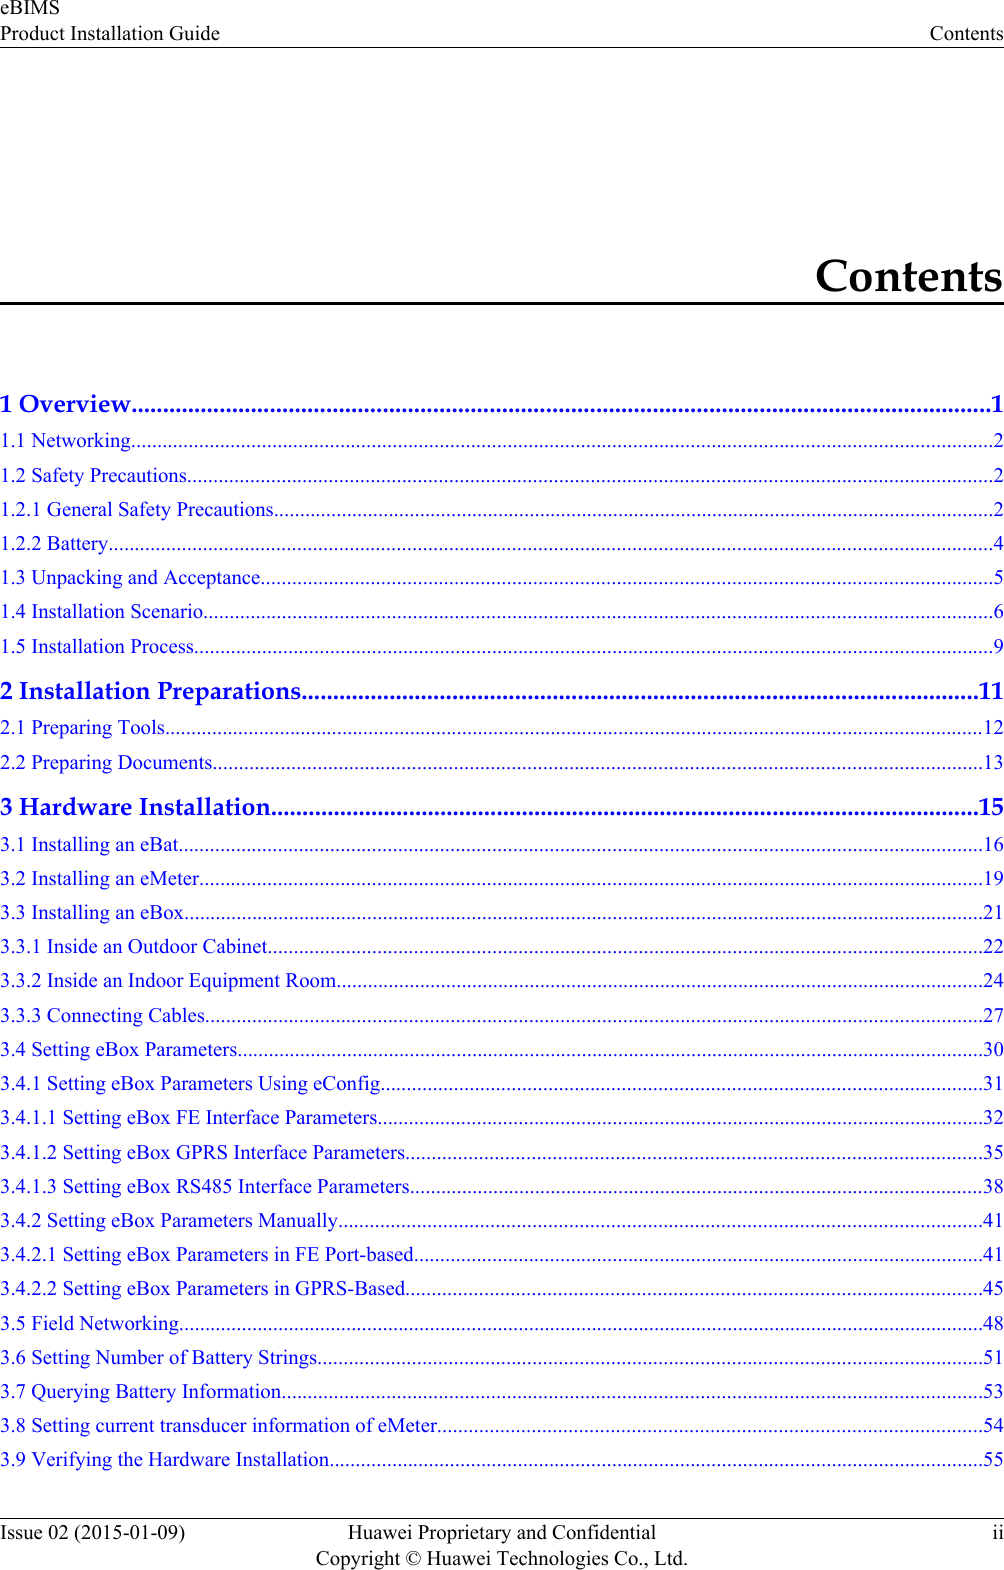

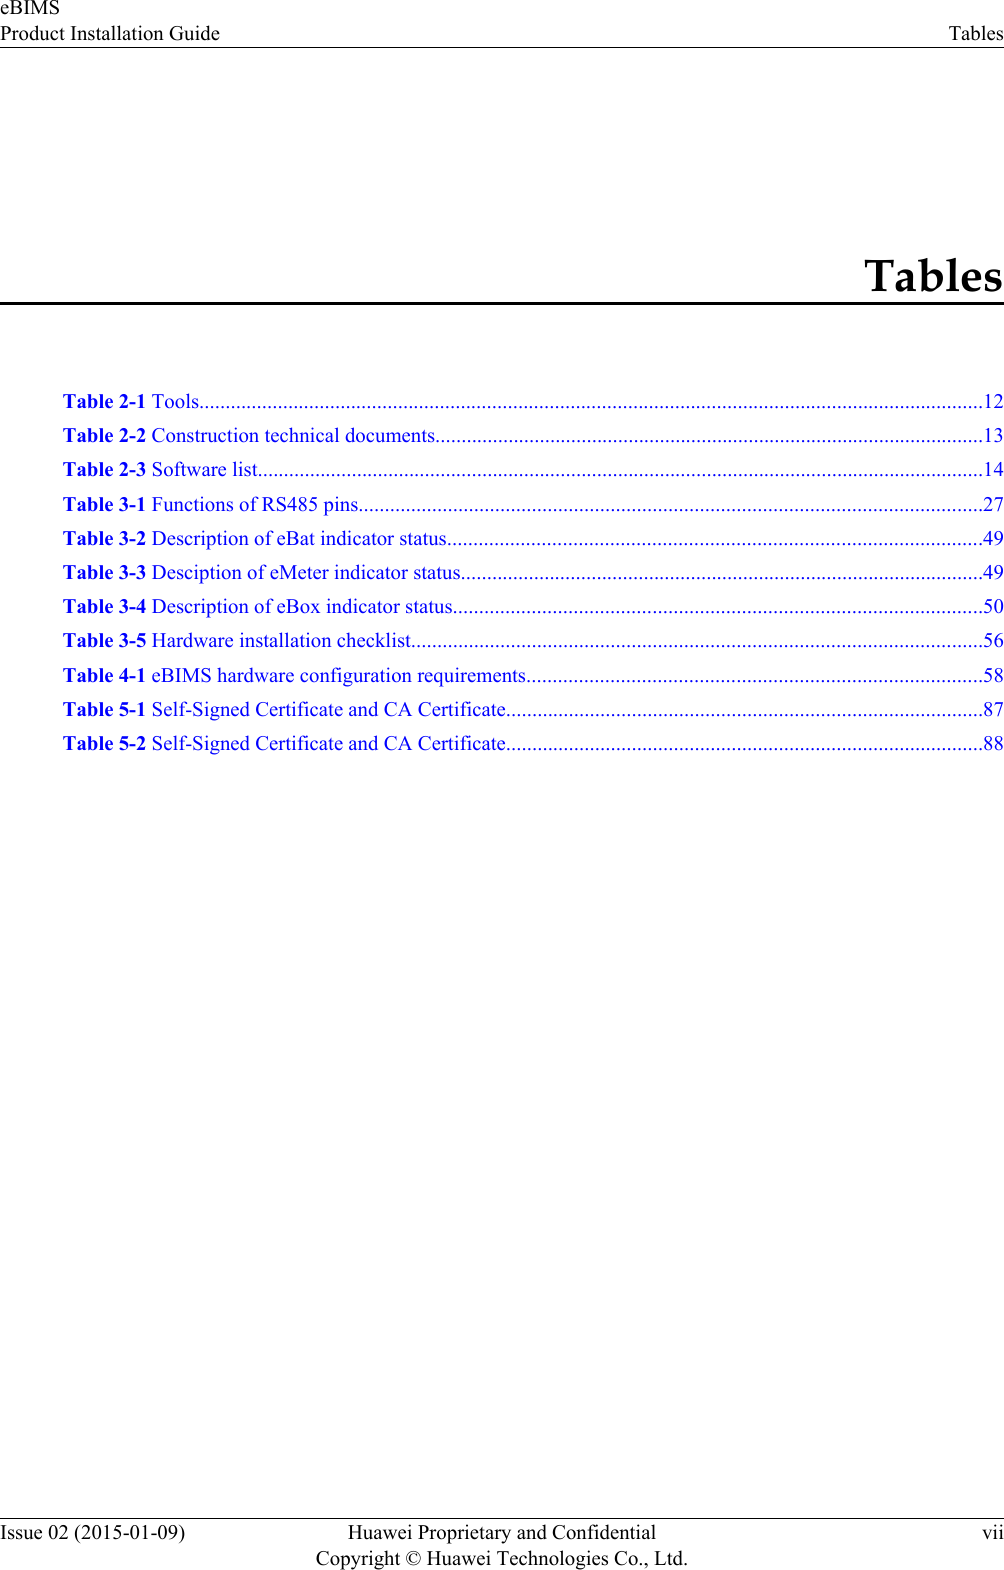


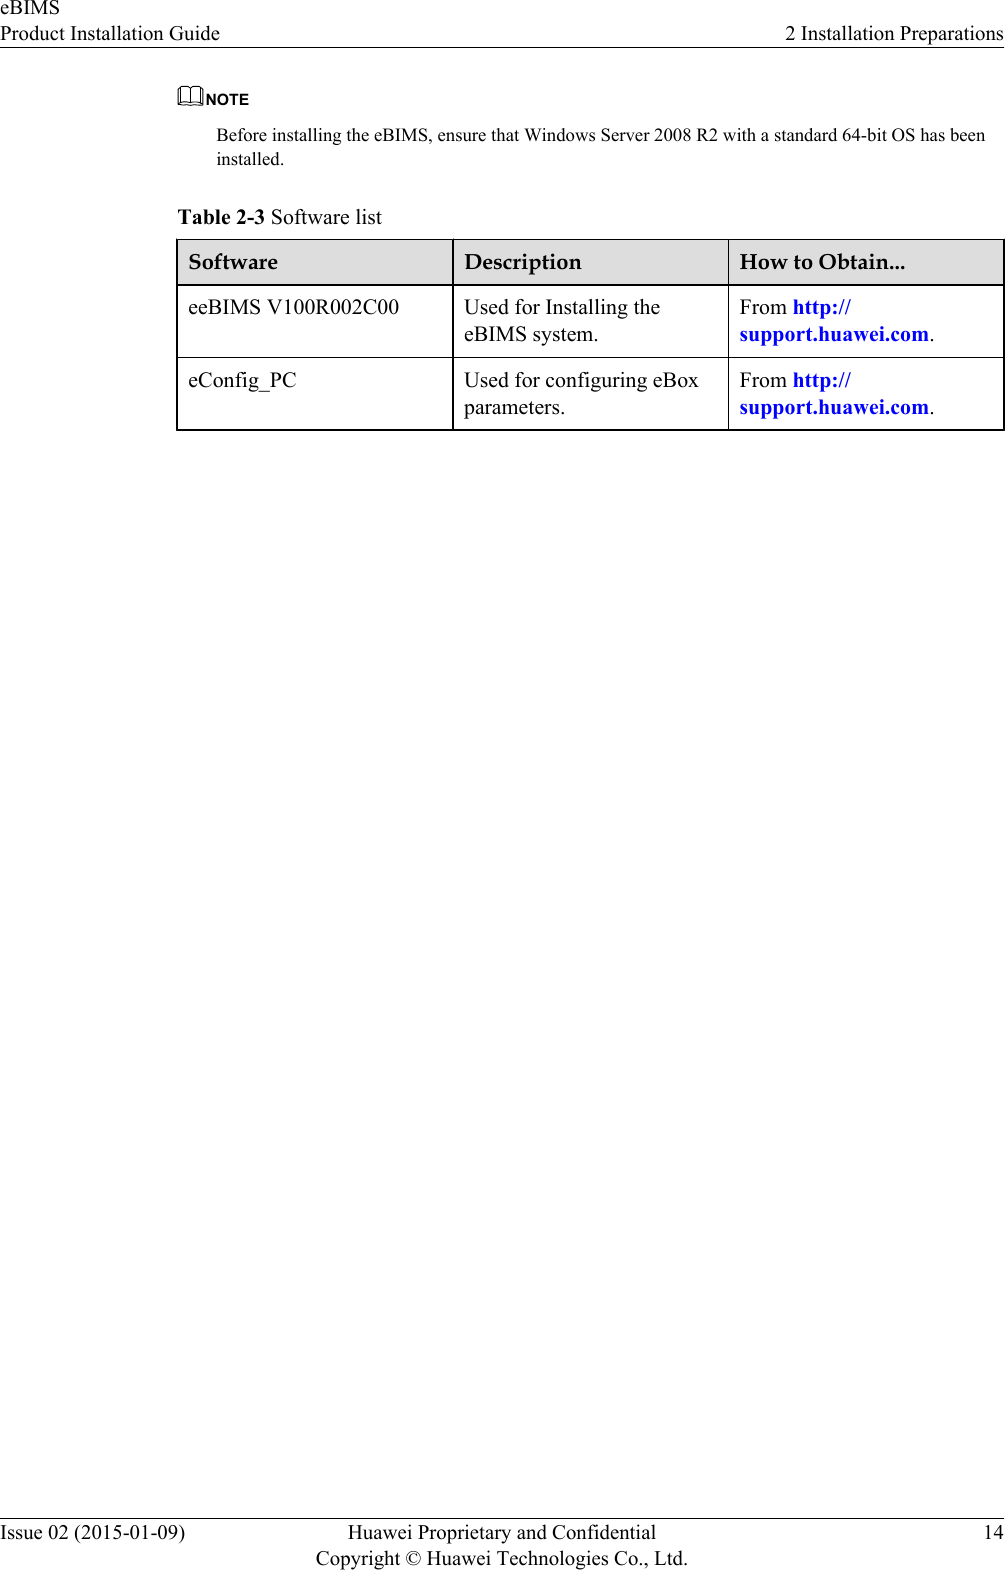

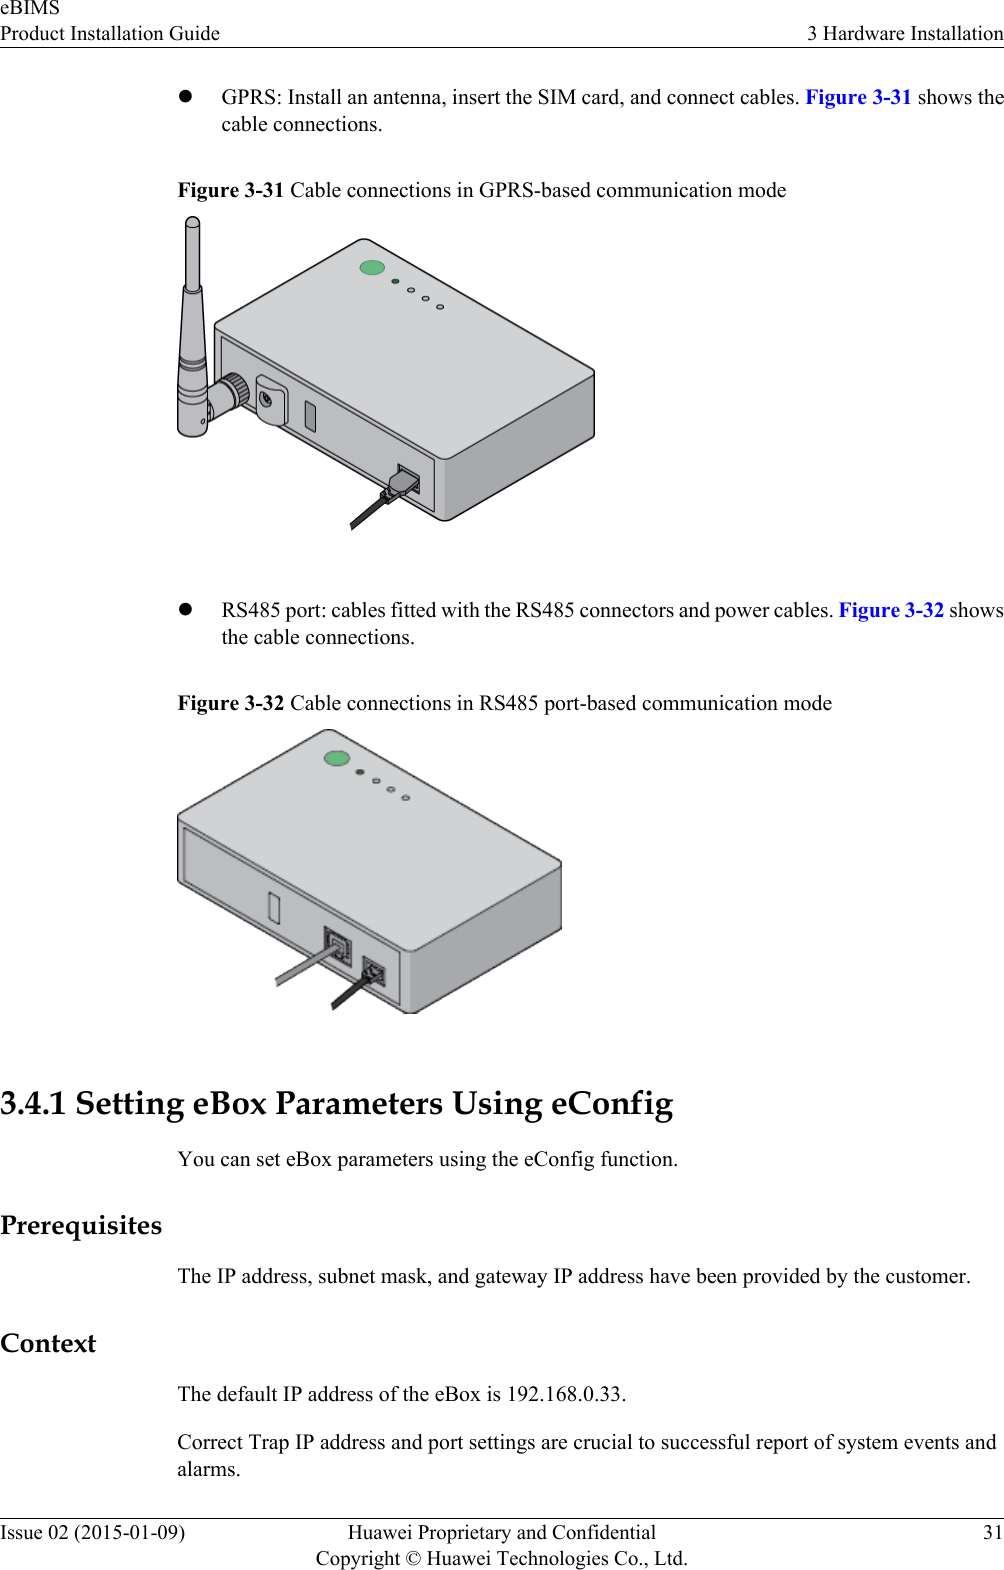
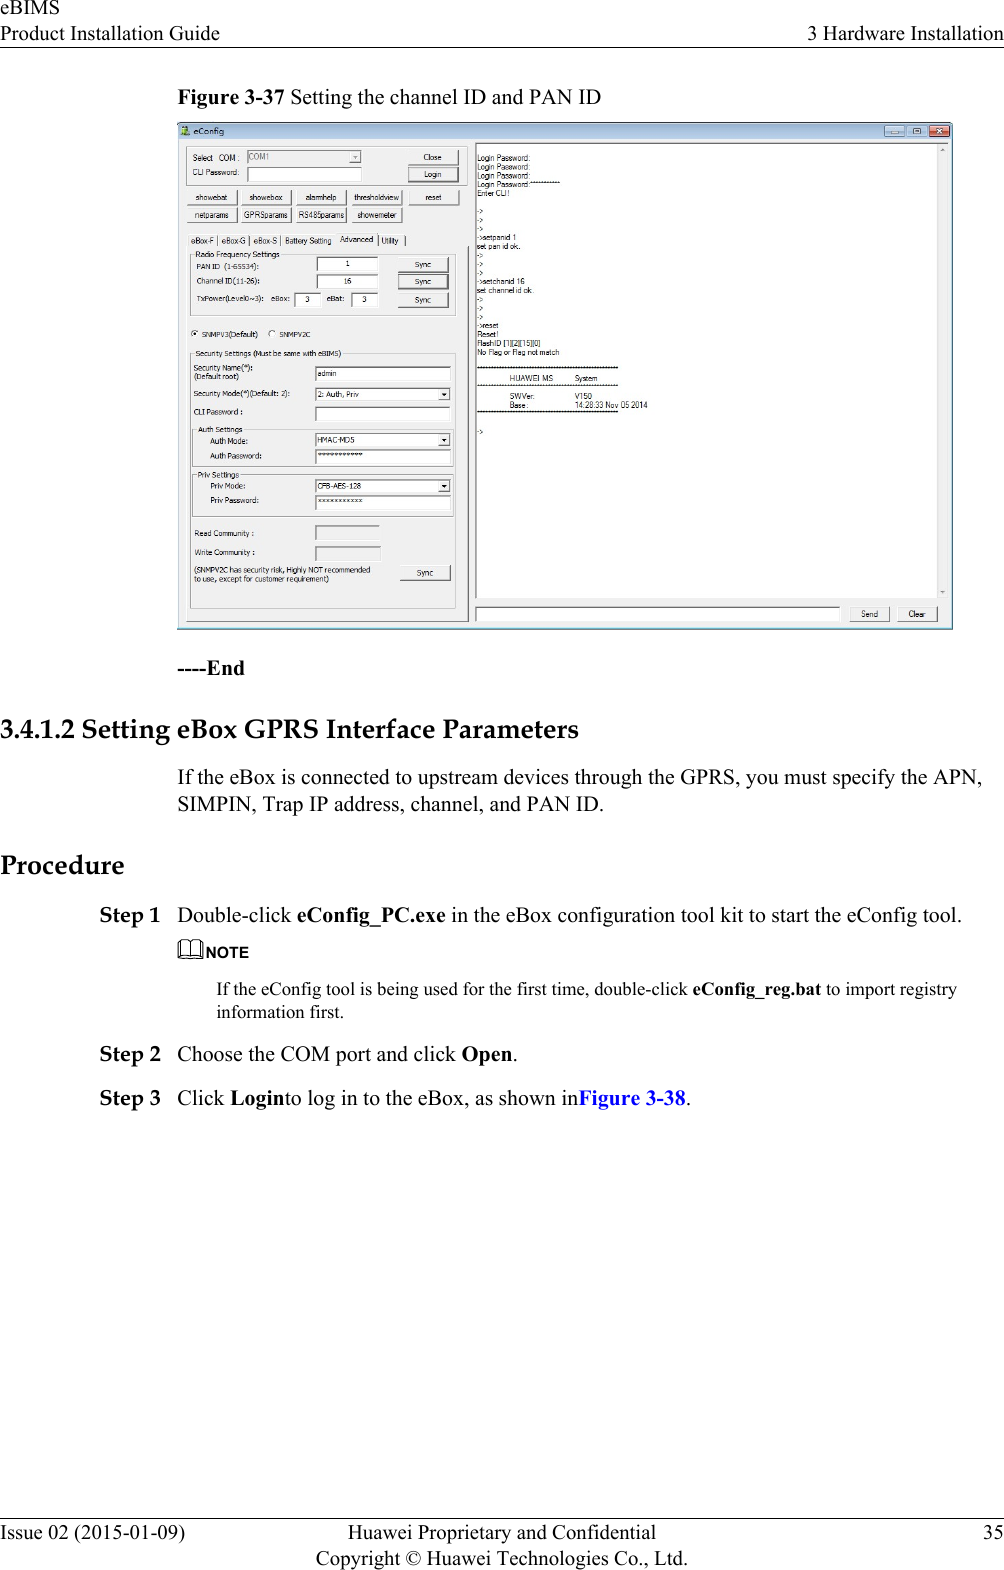
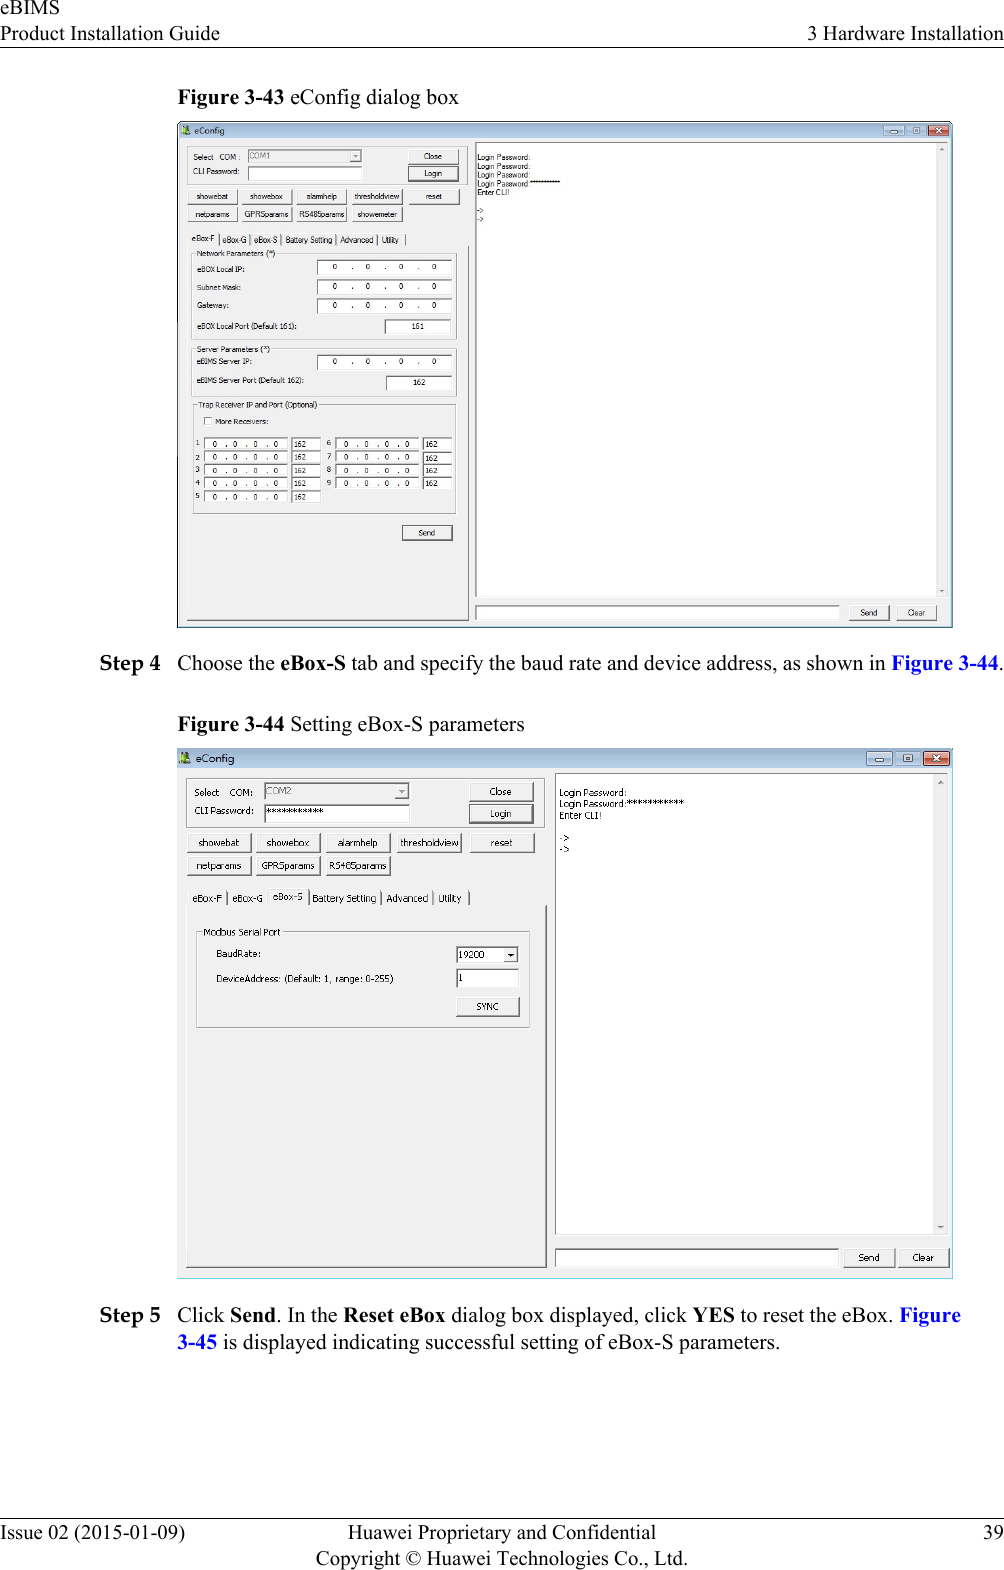
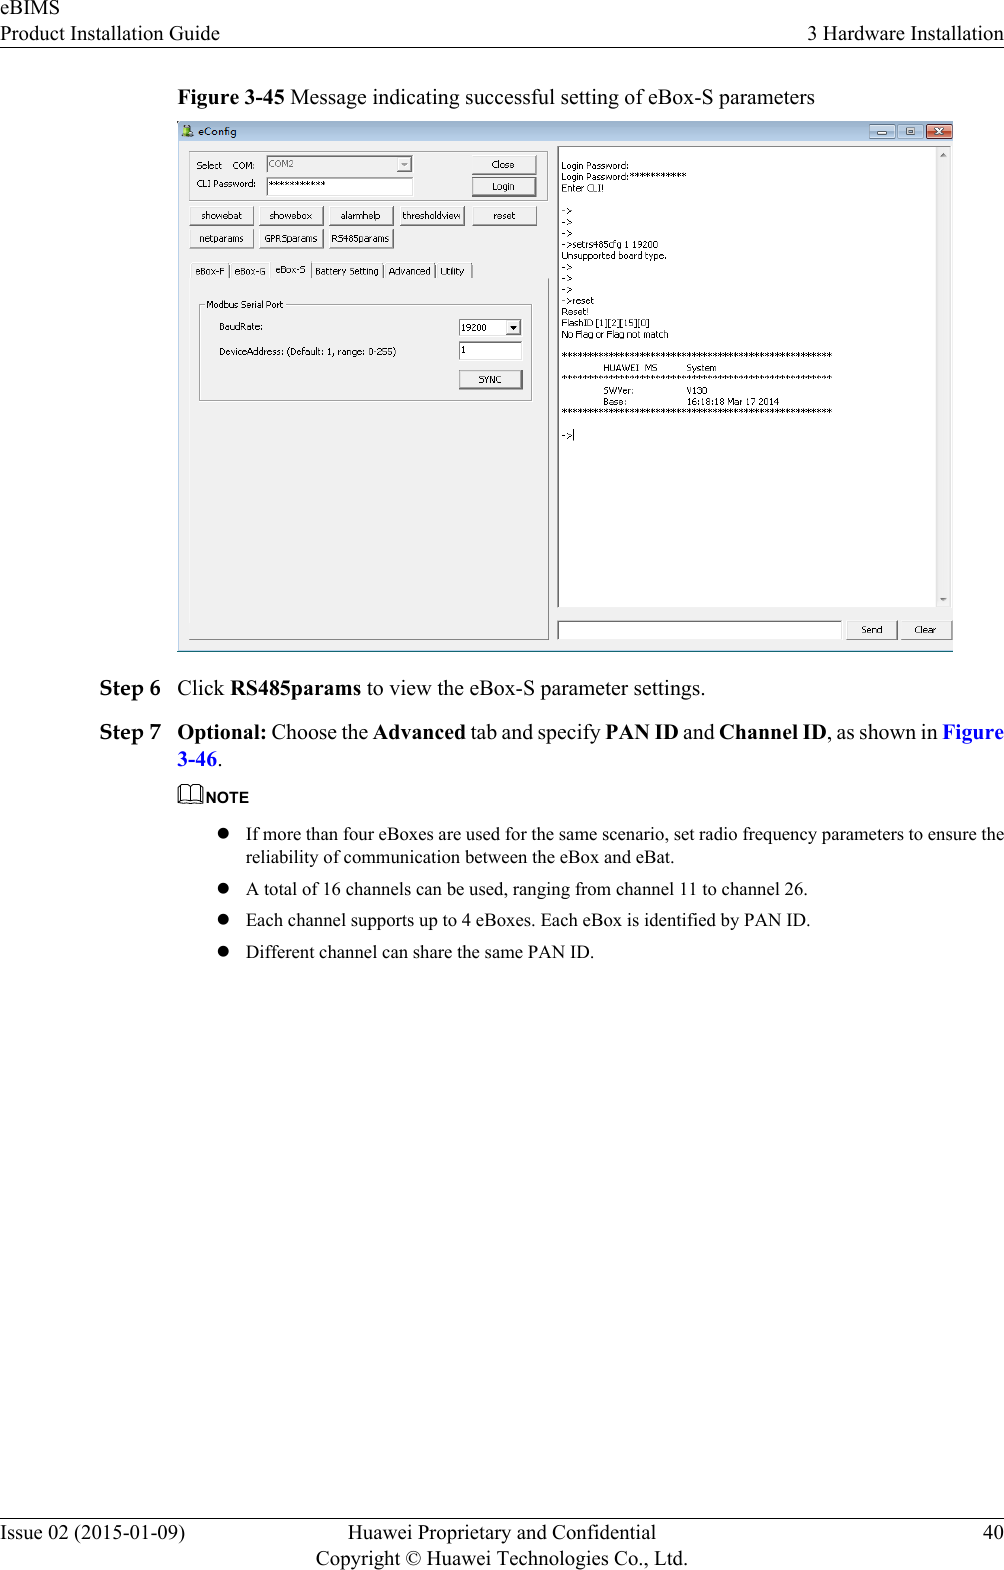
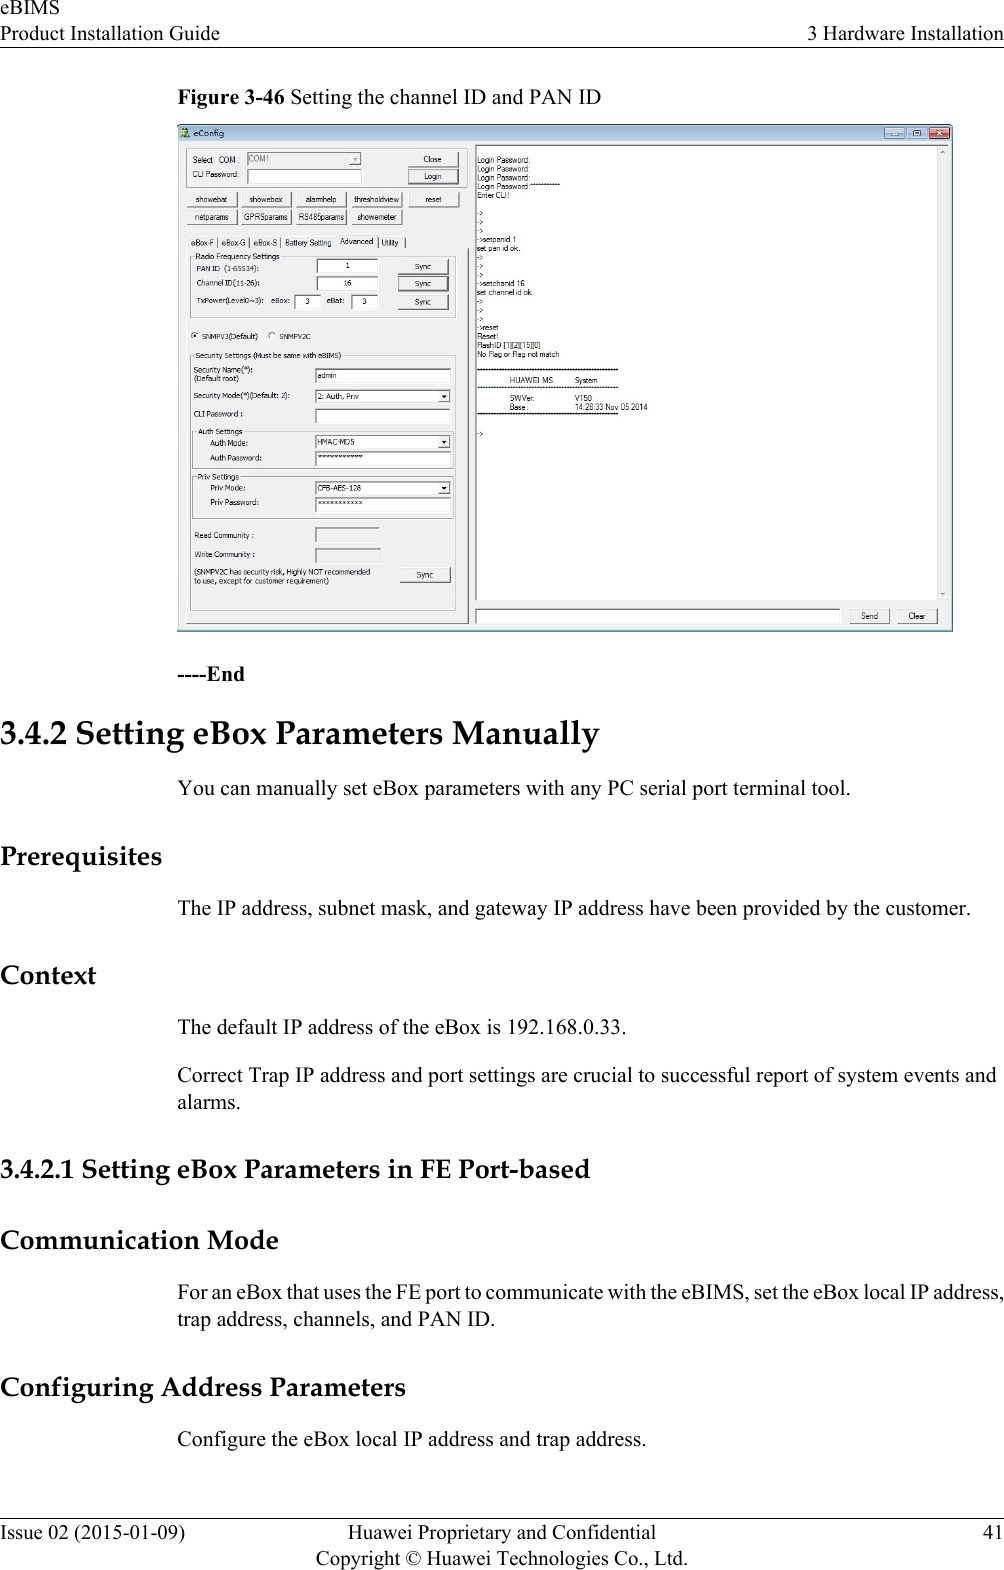
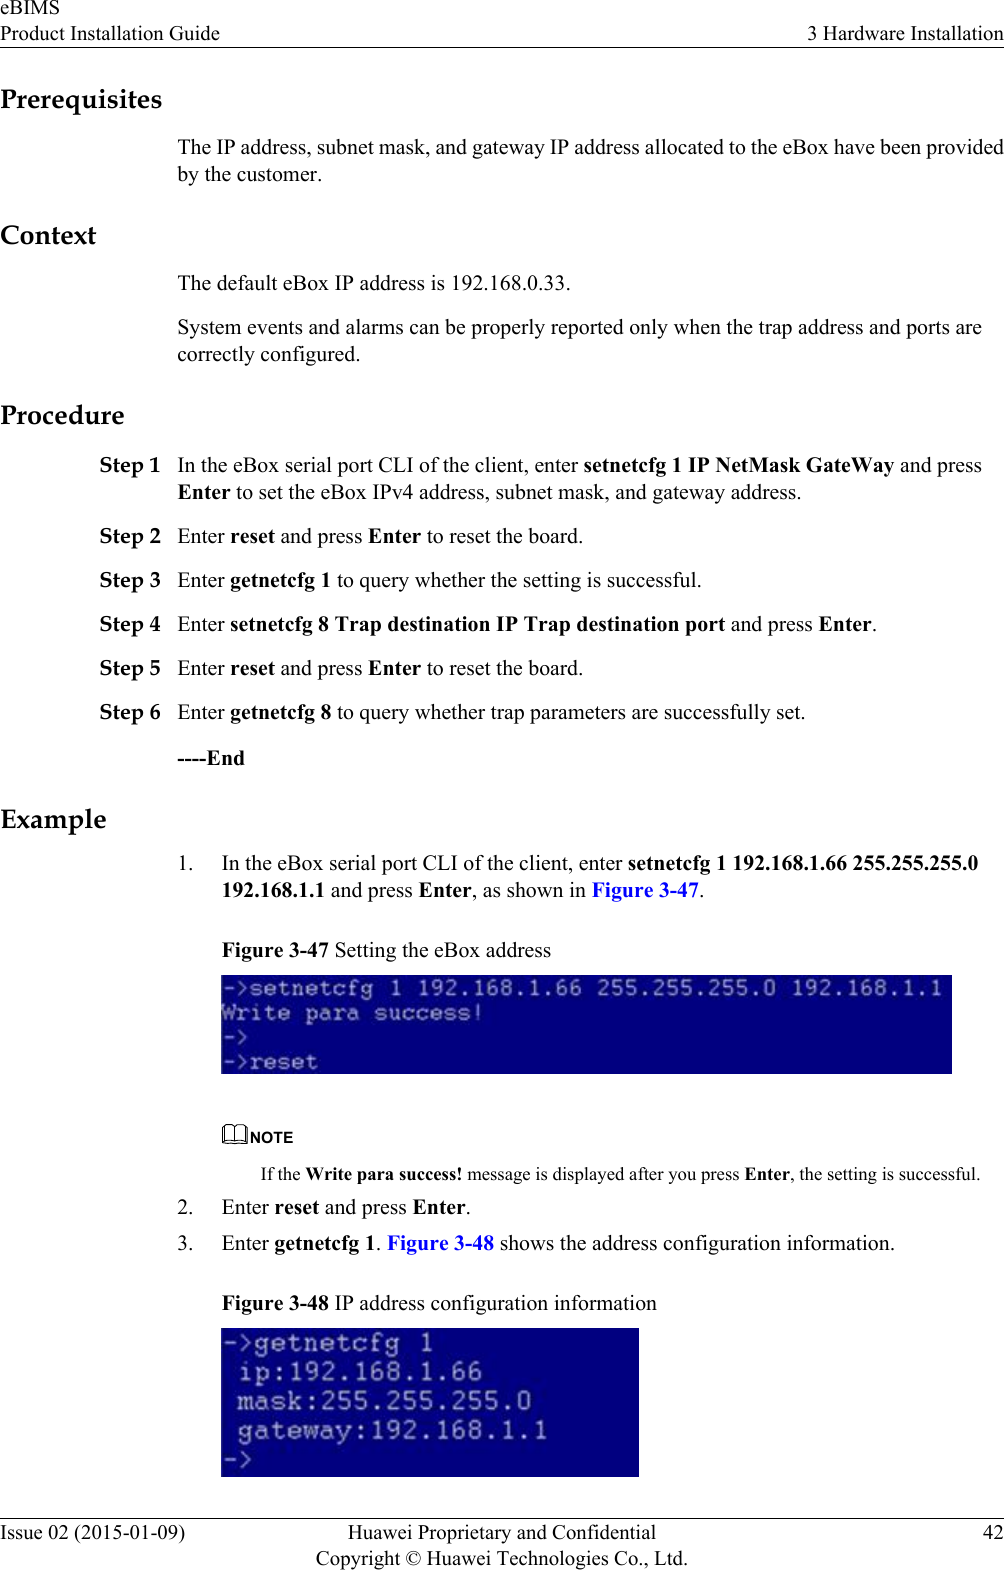
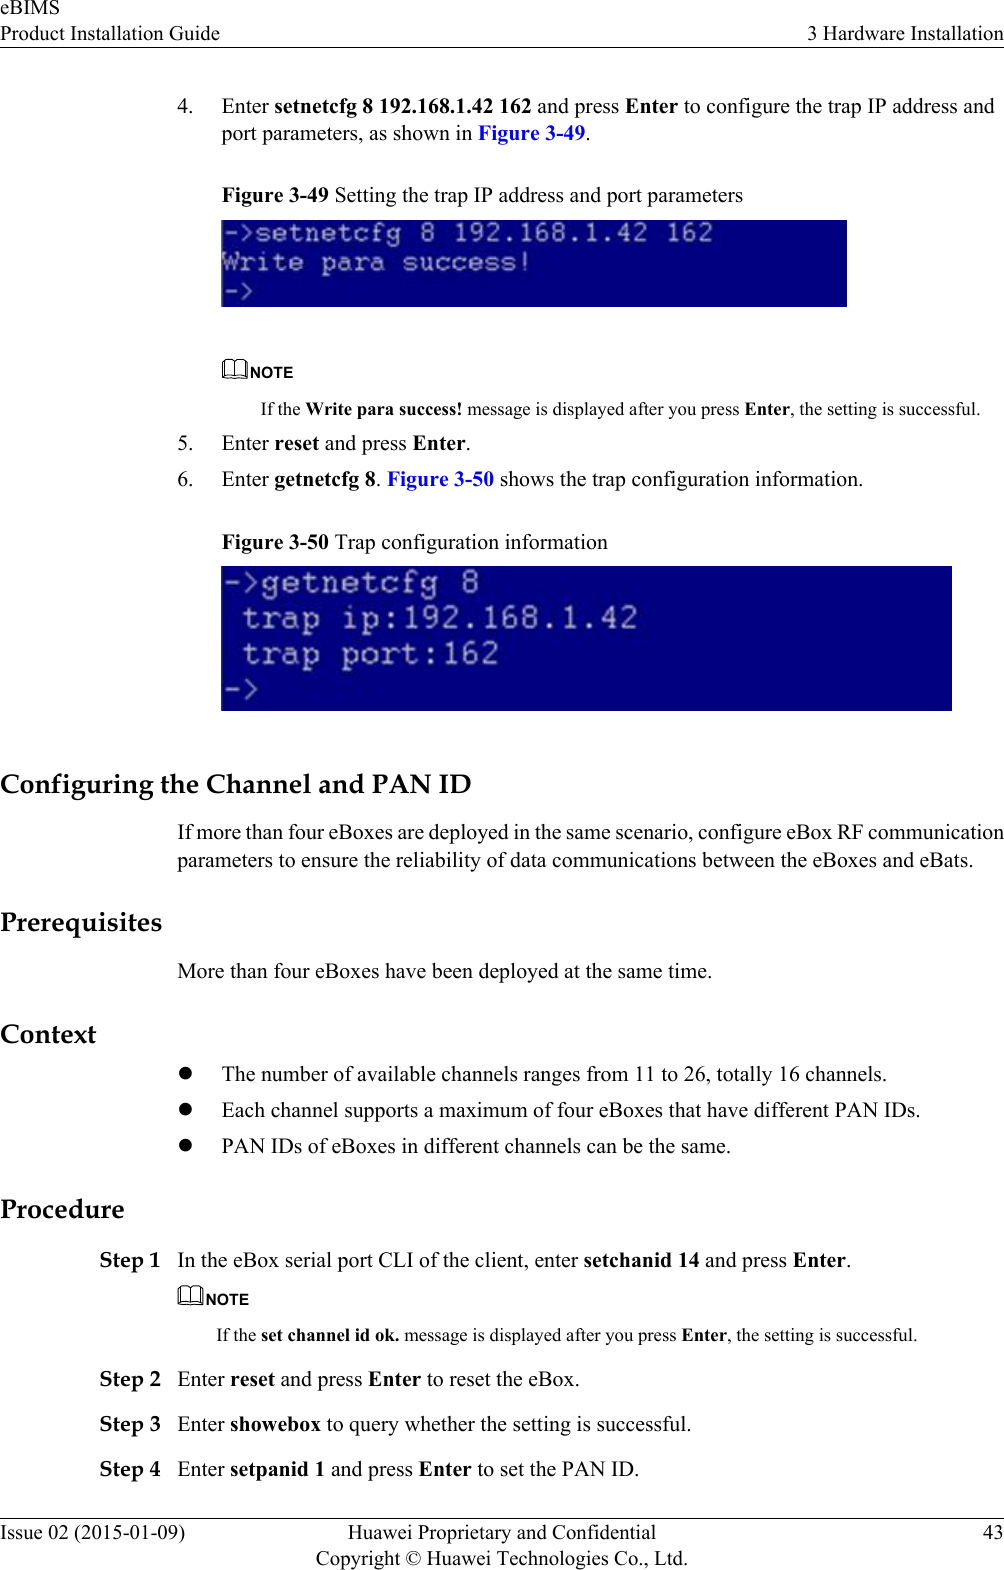
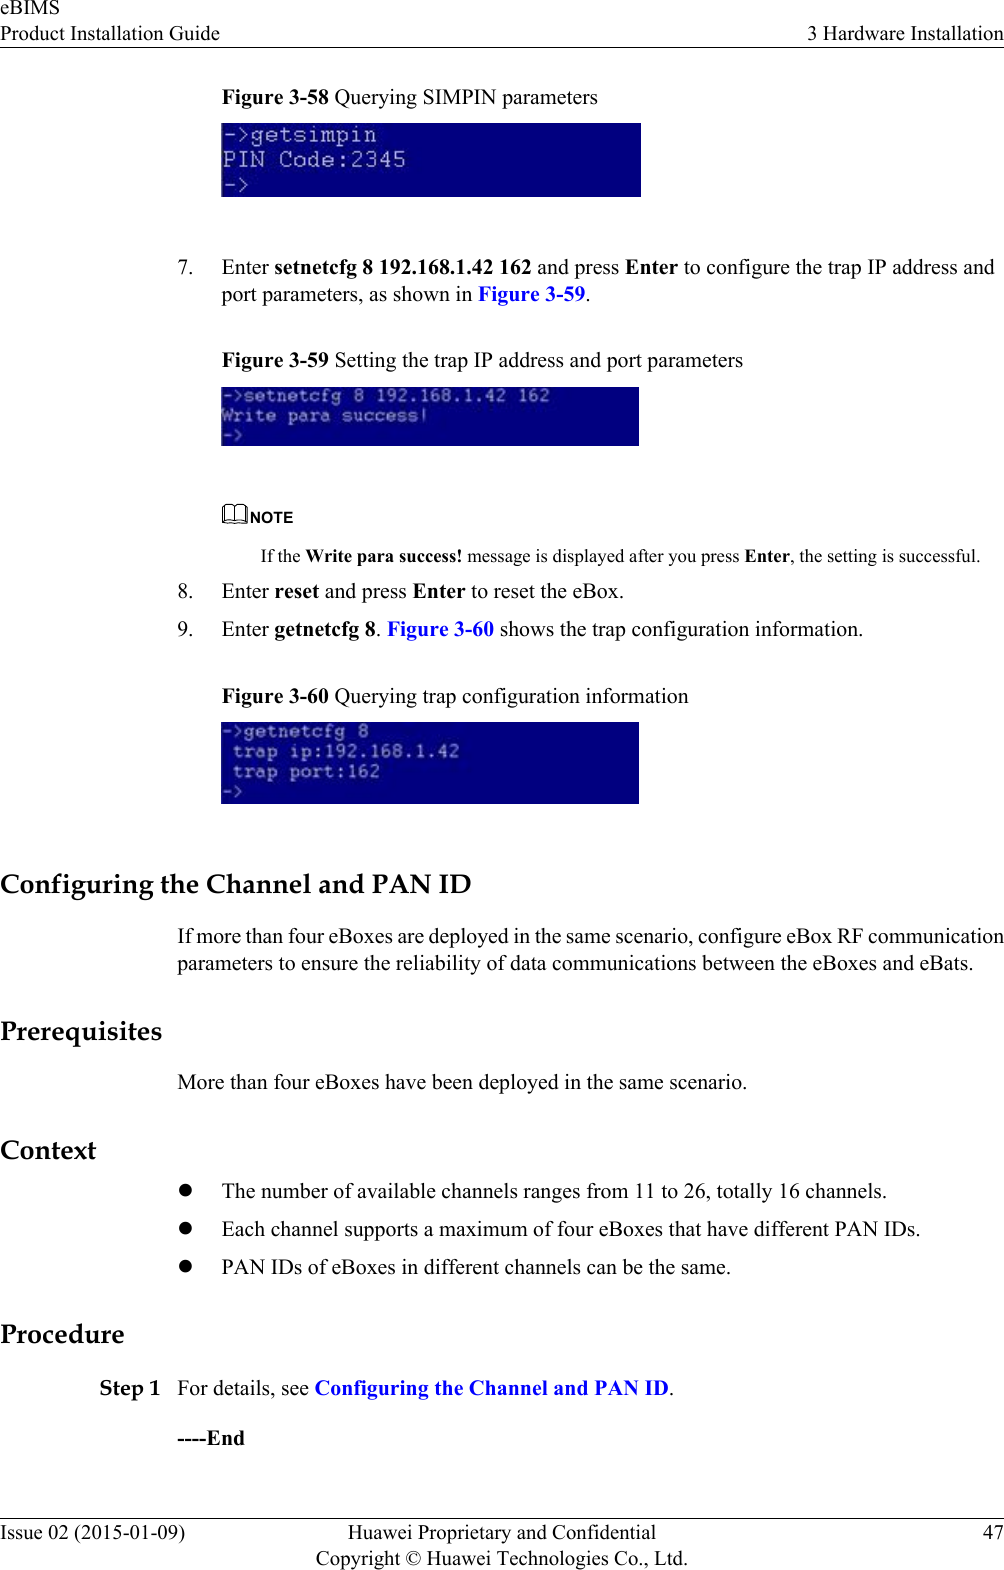
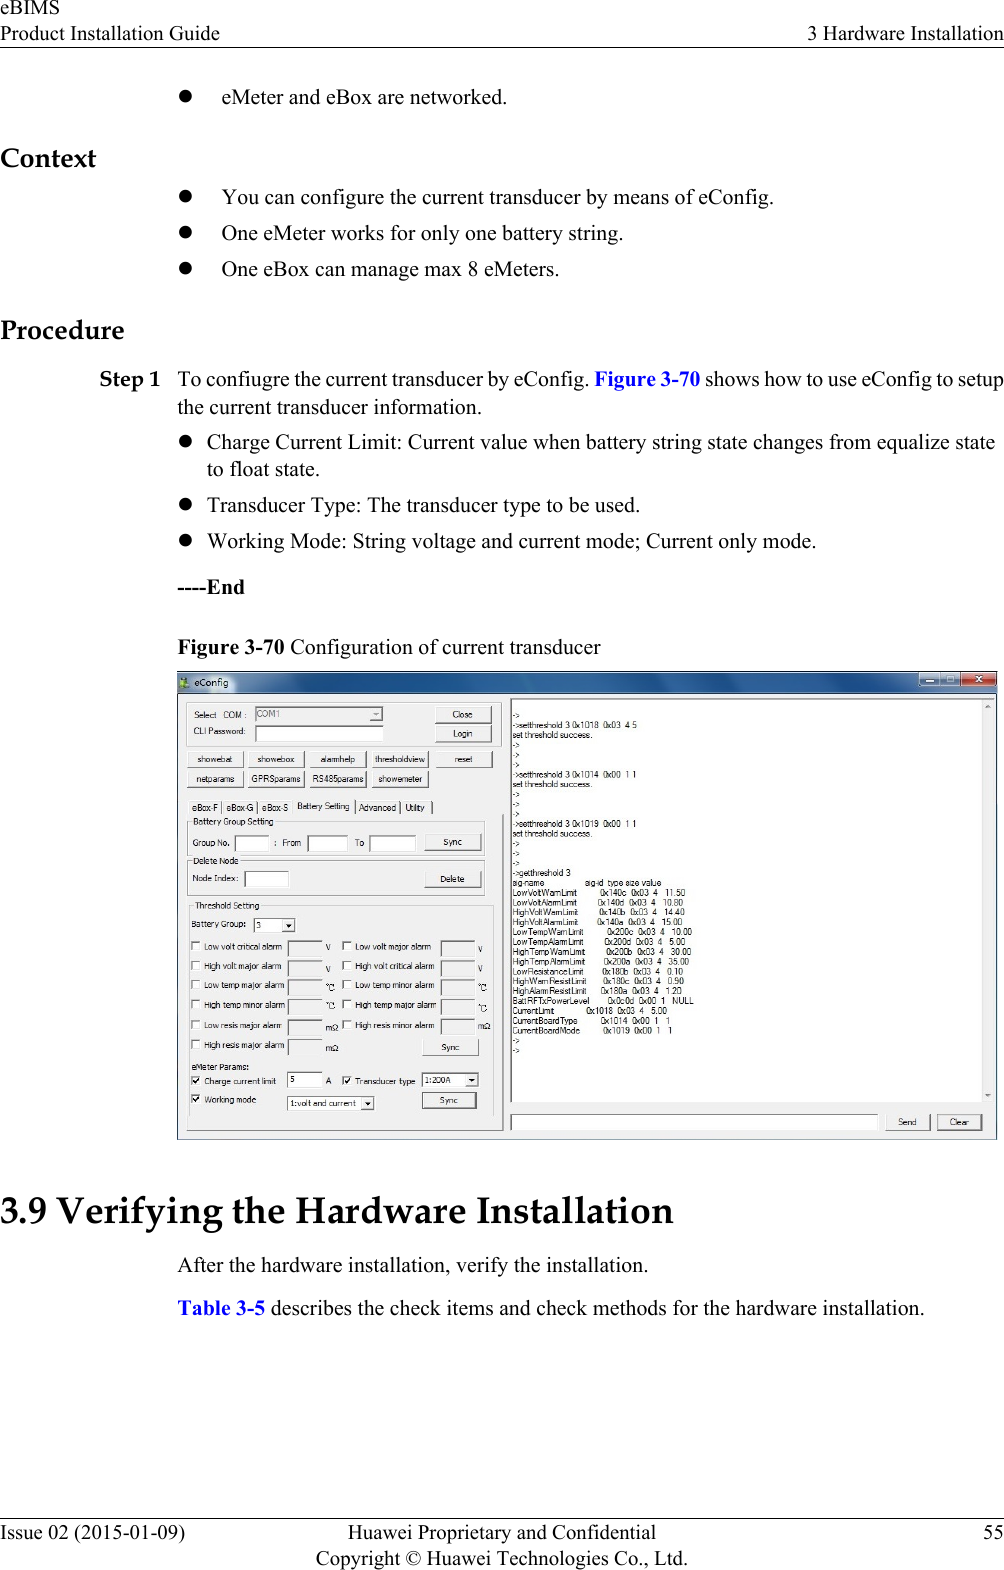
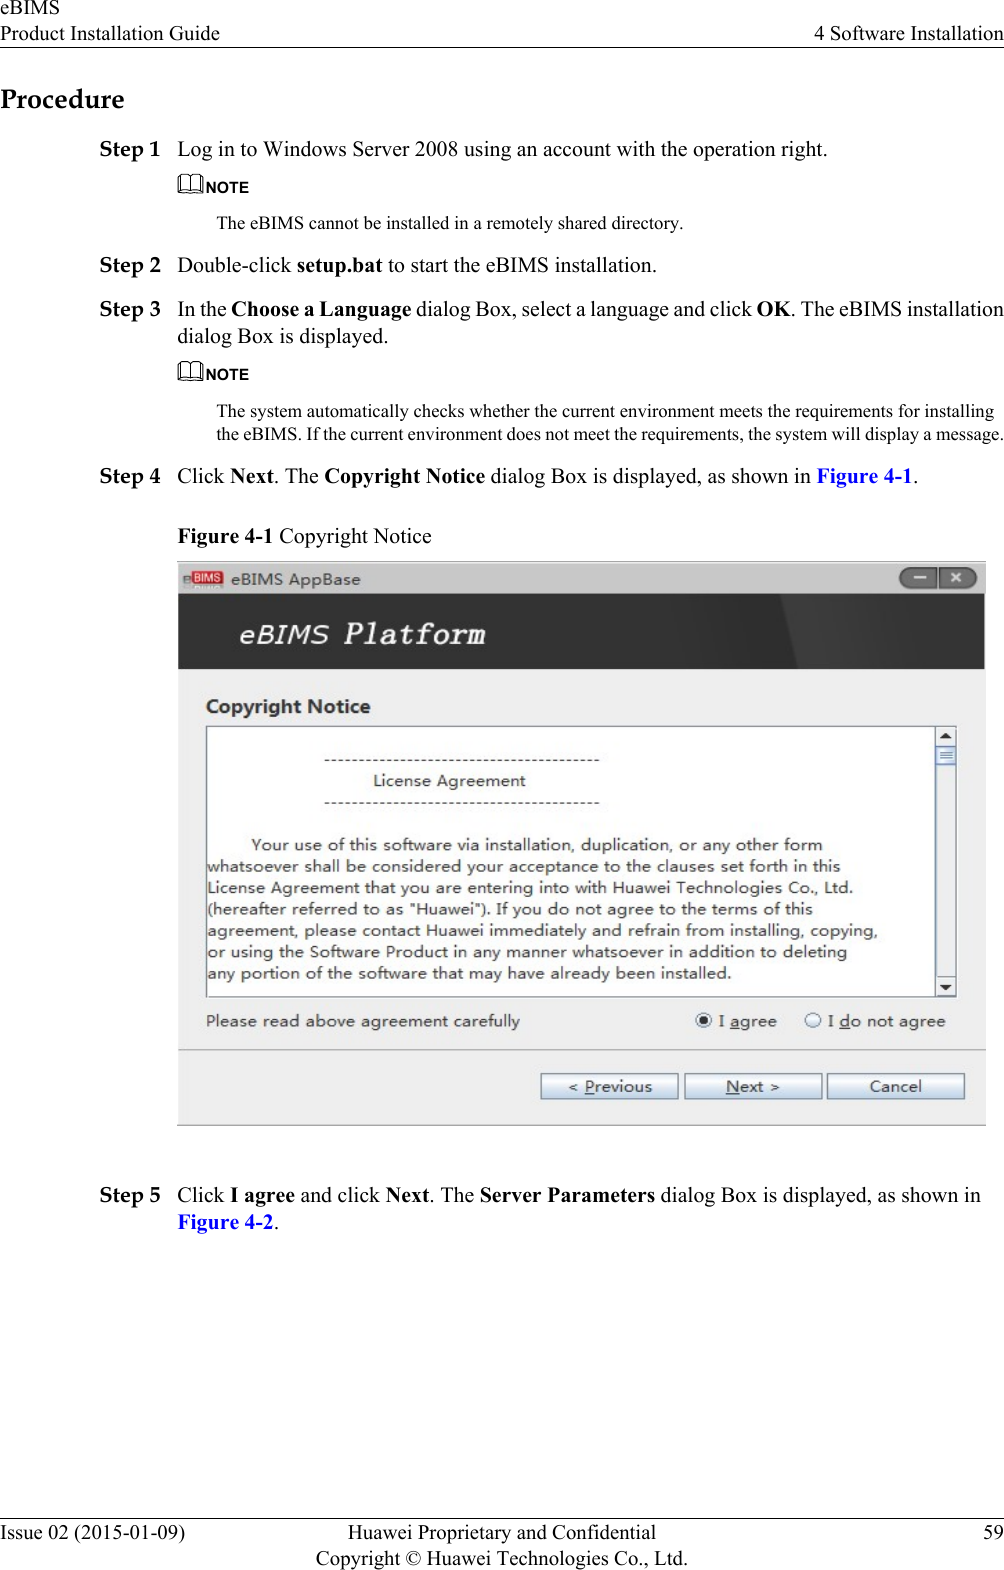


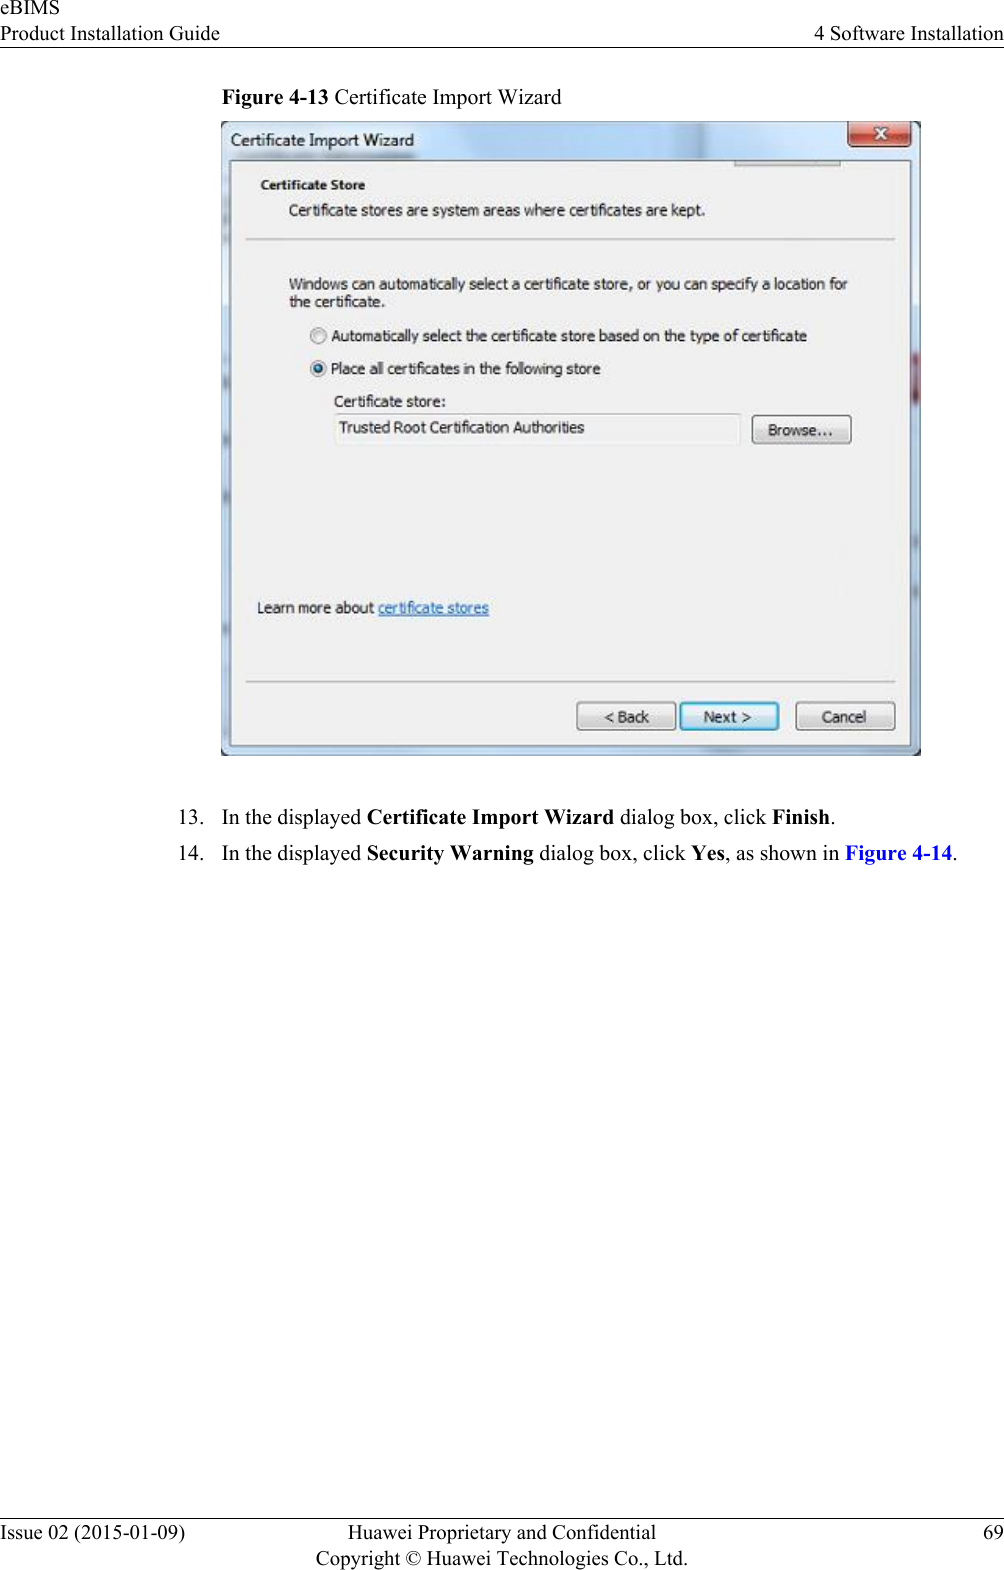

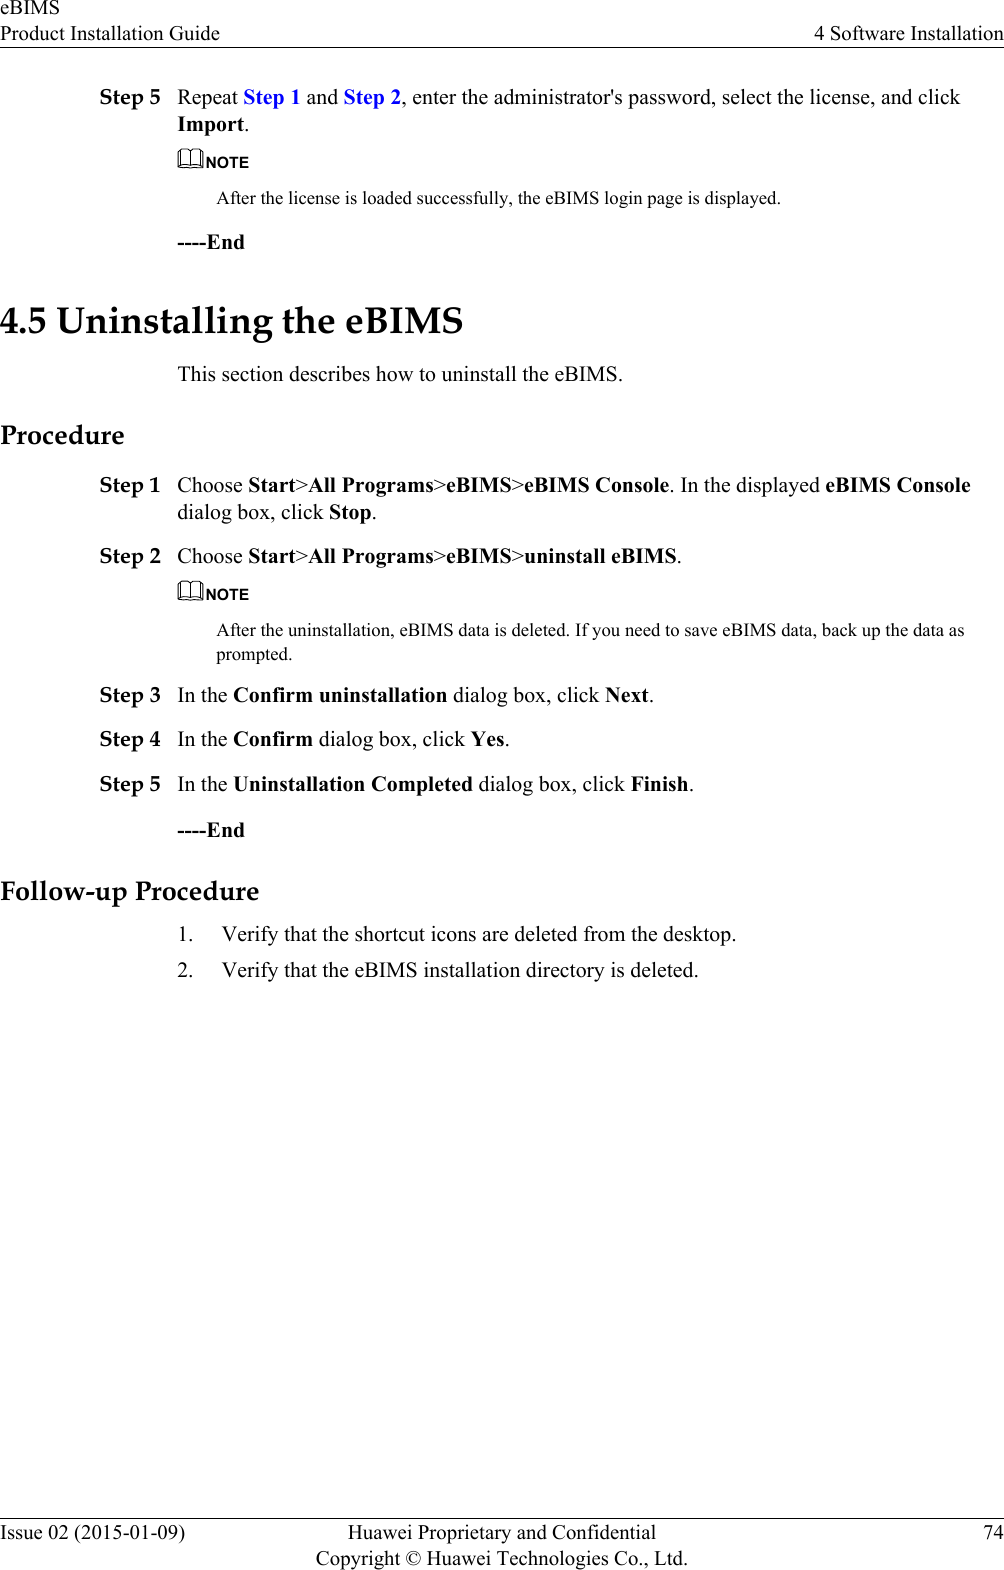
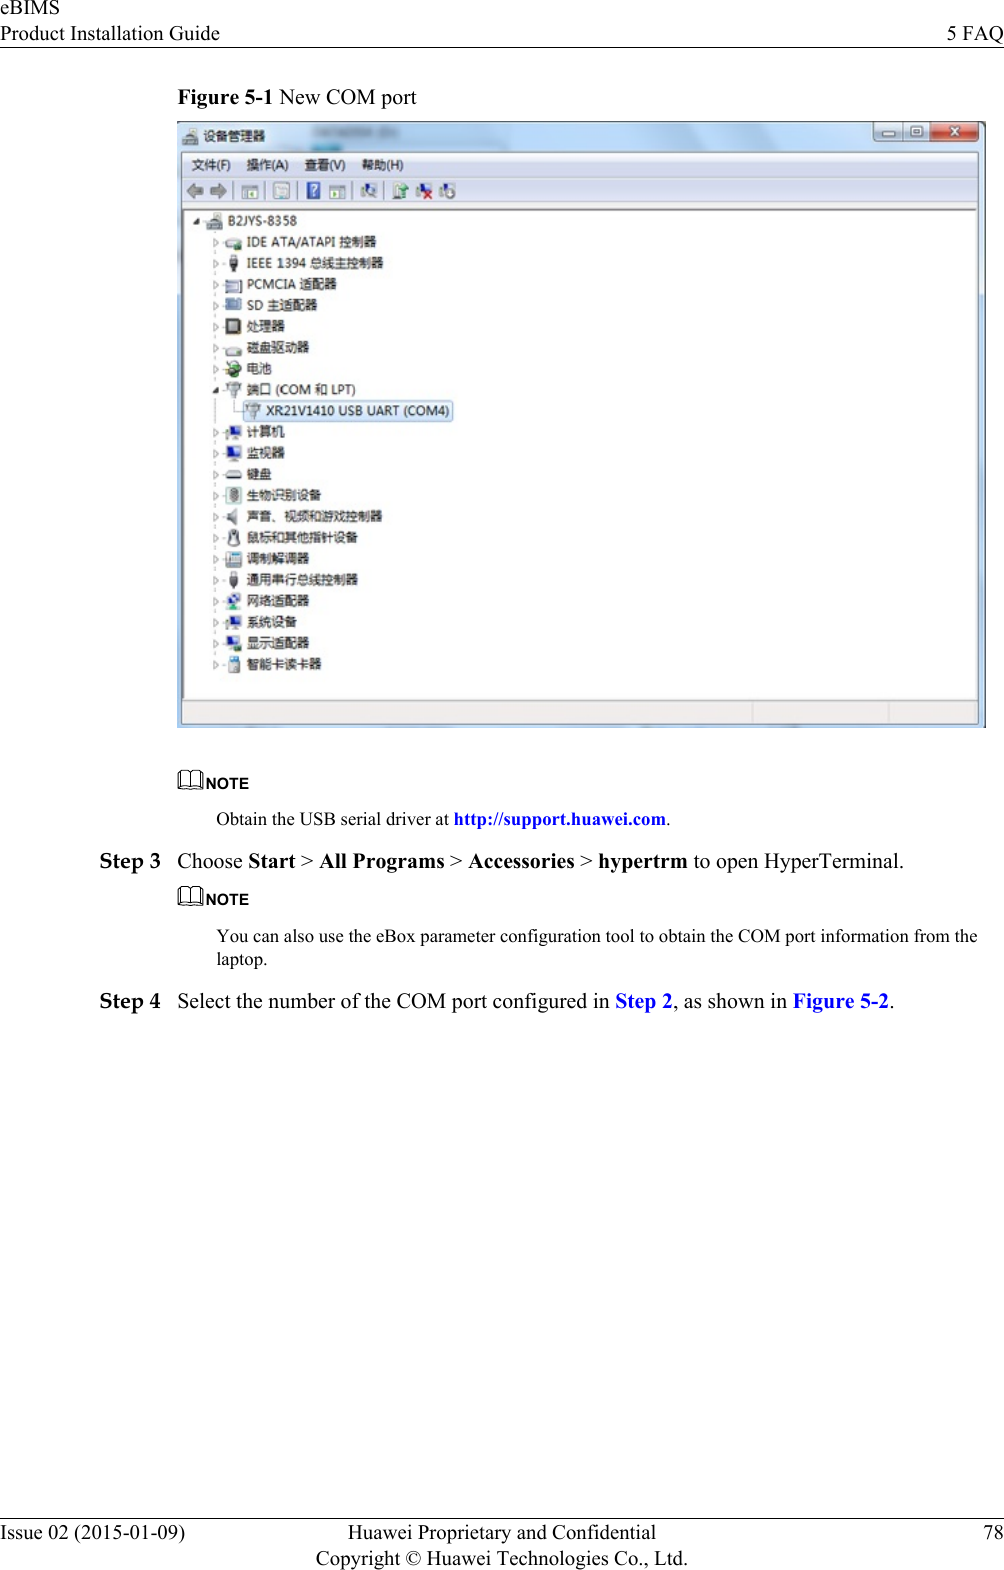
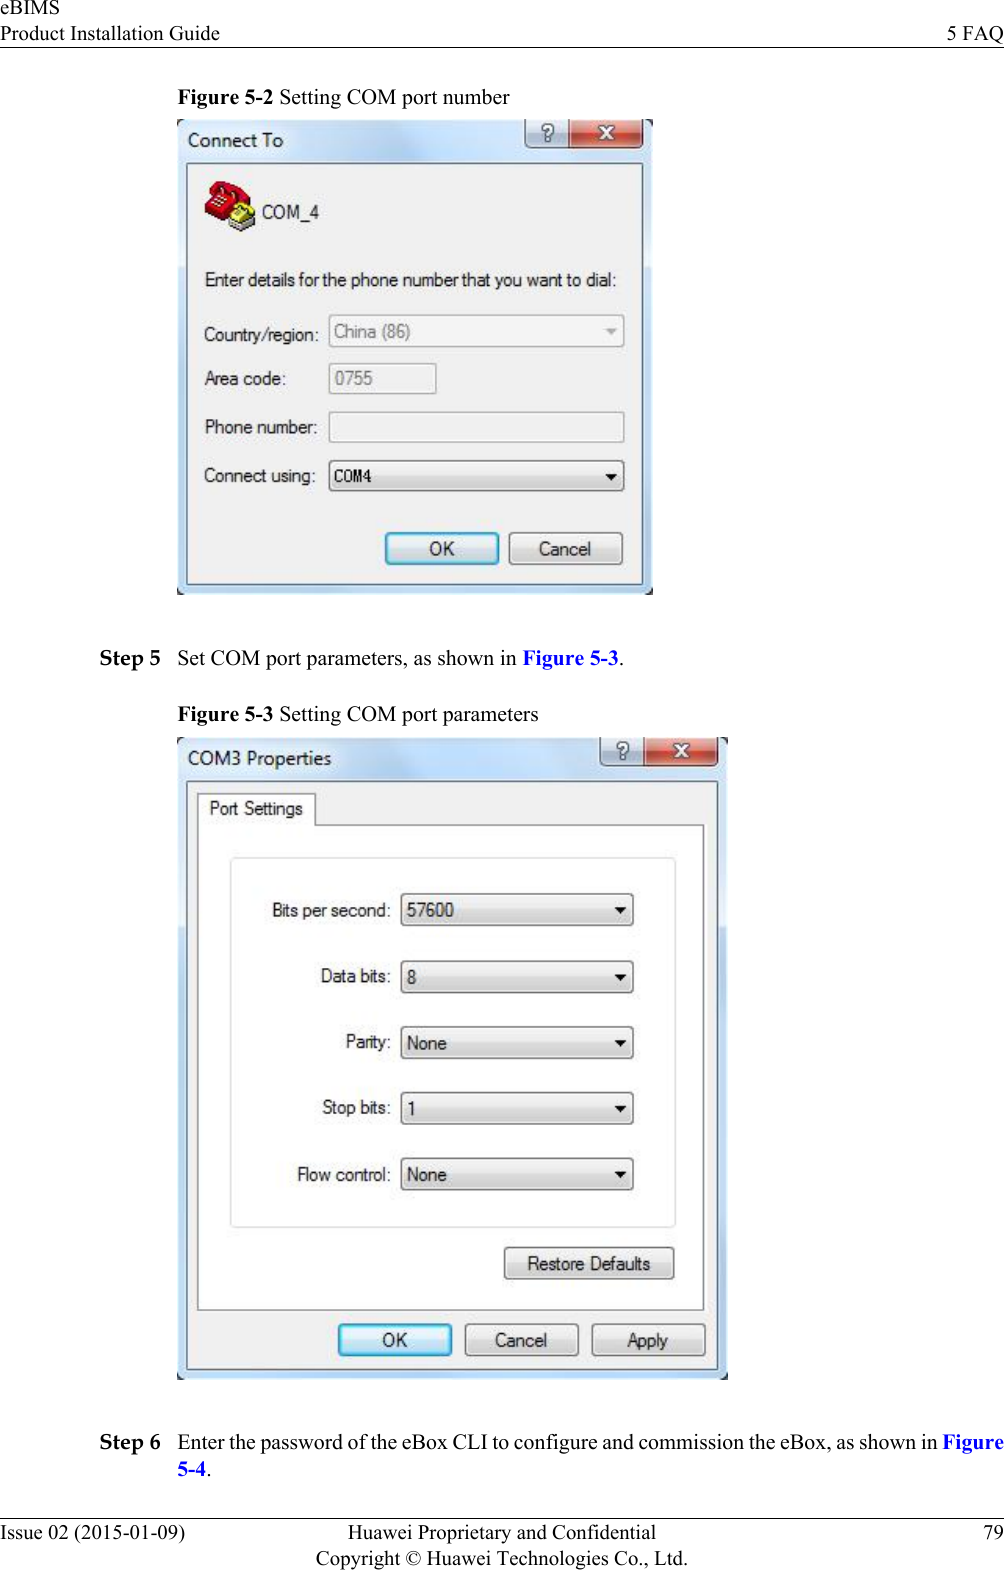
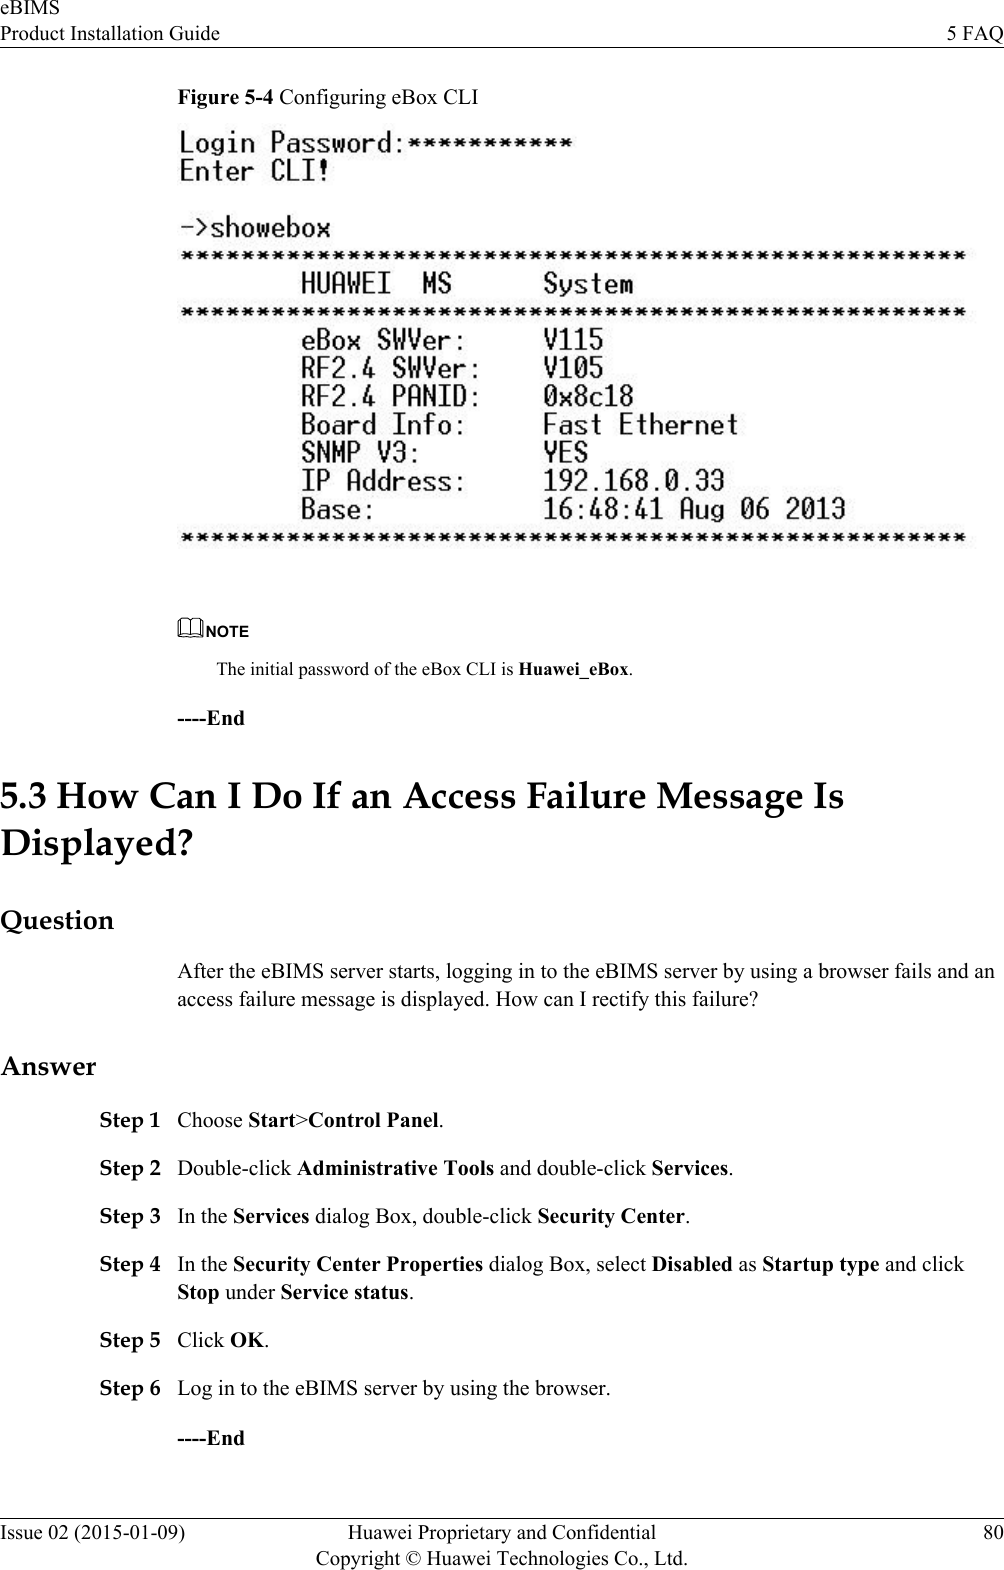
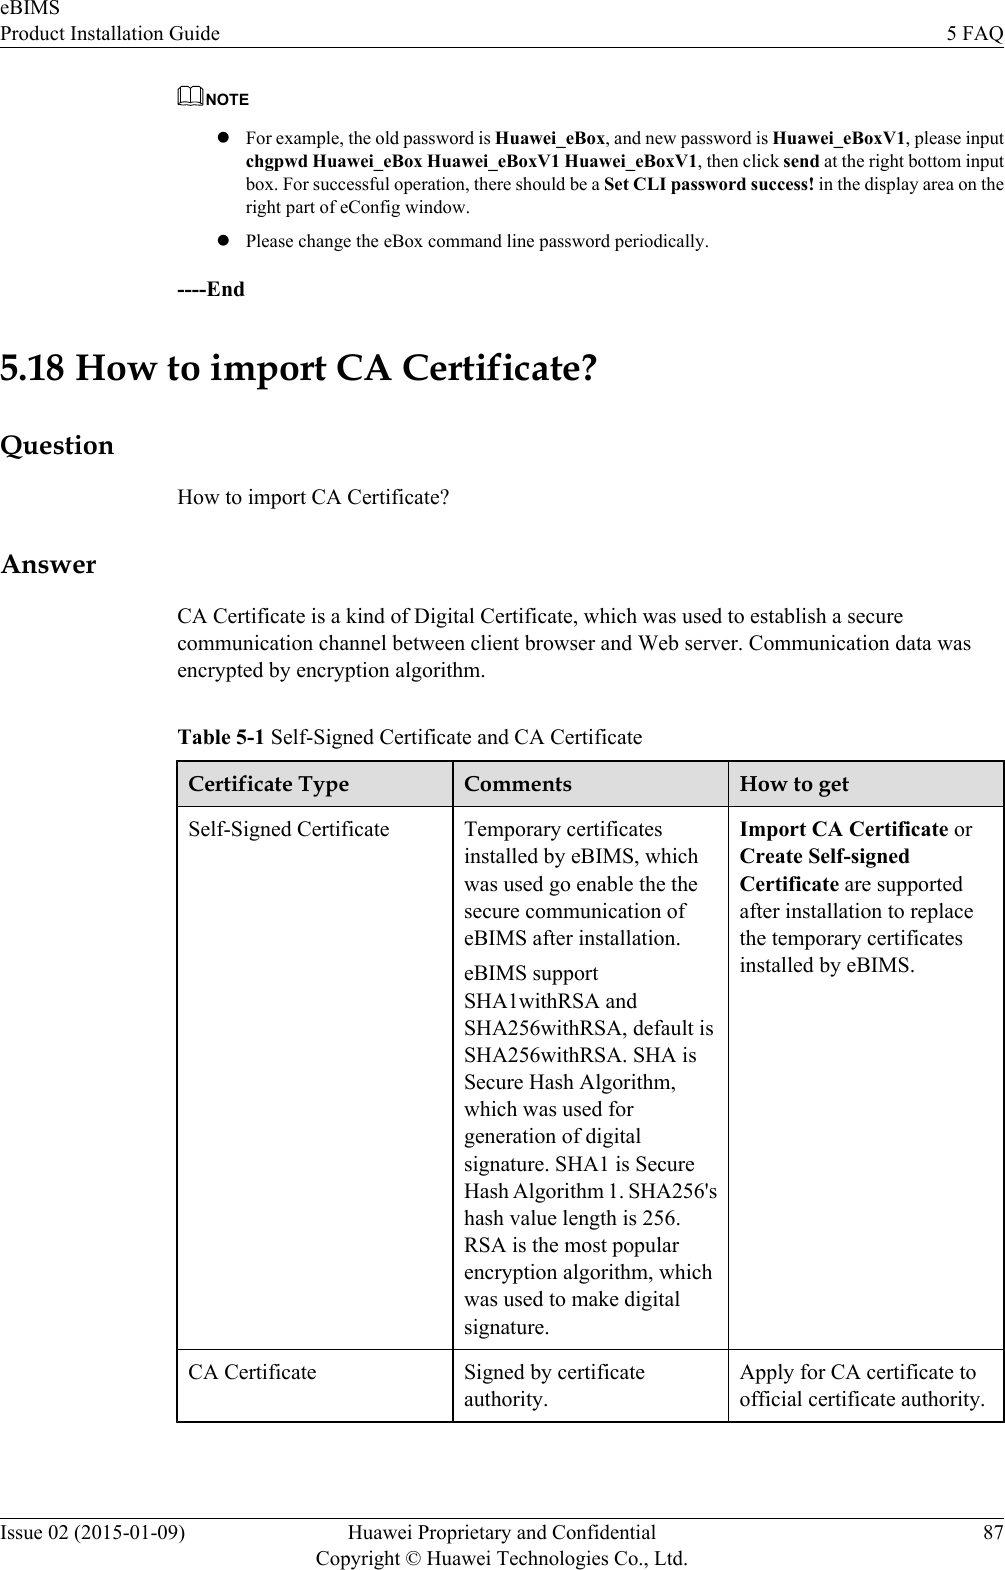
![AnswerStep 1 Choose Tool>Internet Options from the main menu. In the Internet Options dialog box, clickthe Security tab, and click Custom Level.Step 2 In the Security Settings dialog box, click Enable under Download>Automatic prompting forfile downloads.Step 3 Click OK.Step 4 Restart the Internet Explorer to log in to the eBIMS.----End5.16 How Can I Handle the Problem that Login to the eBIMSFails and the Account Is Locked?QuestionHow can I handle the problem that login to the eBIMS fails and the account is locked?AnswerStep 1 Log in to the eBIMS again after 30 minutes.NOTEUser admin can use other computers to log in to the eBIMS.----End5.17 How to change eBox command line passwordQuestionHow to change eBox command line password, after logged in?NOTEIt is recommended to change the default password to avoid the security risk.AnswerStep 1 Doulbe click eConfig_PC.exe to start the config tool.NOTEFor the first time to use eConfig tool, please double click eConfig_reg.bat firstly to register eConfig to yourPC.Step 2 Select the correct COM port, then input default password: Huawei_eBox, and click Open.Step 3 Input chgpwd [old pwd] [new pwd] [new pwd] at the right bottom input box, and then clicksend.eBIMSProduct Installation Guide 5 FAQIssue 02 (2015-01-09) Huawei Proprietary and ConfidentialCopyright © Huawei Technologies Co., Ltd.86](https://usermanual.wiki/Huawei-Technologies/EMETER.User-Manual-III/User-Guide-2599117-Page-94.png)