Huawei Technologies ESPACE6830 IP PHONE User Manual
Huawei Technologies Co.,Ltd IP PHONE Users Manual
UserManual.wiki
>
Huawei Technologies
>
ESPACE6830 User Manual
Users Manual
Navigation menu
Upload a User Manual
Namespaces
Wiki Guide
HTML
PDF
Info
Views
User Manual
Discussion / Help
Navigation
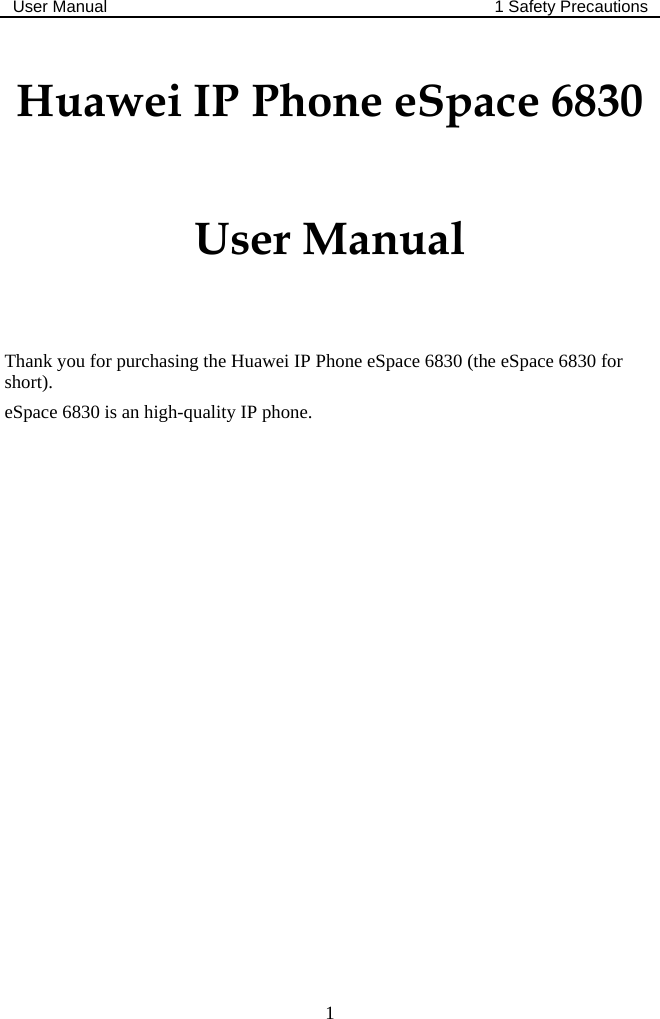

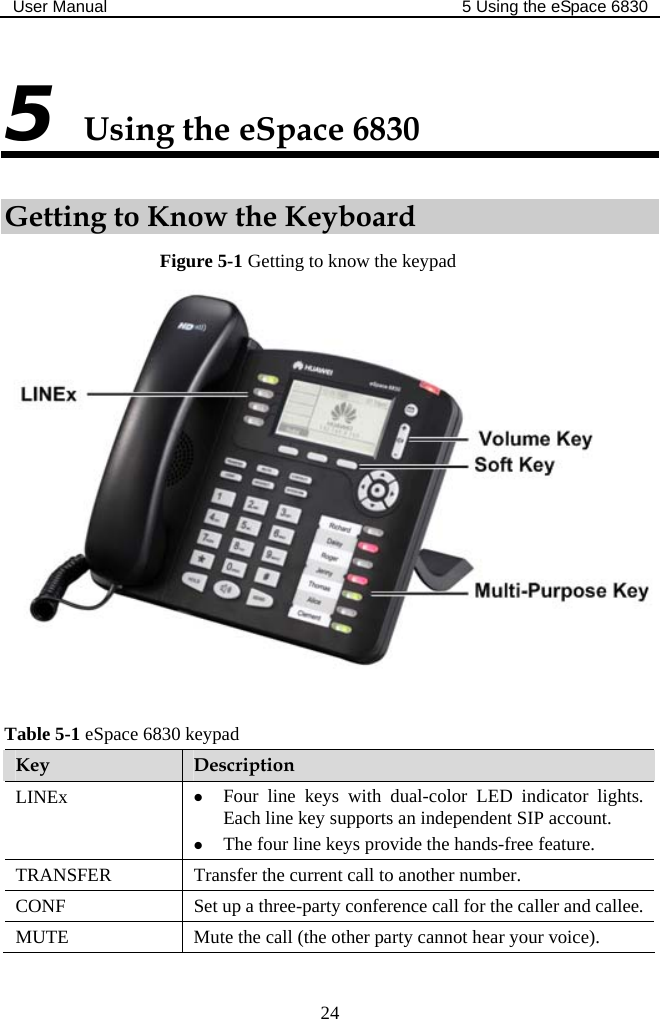
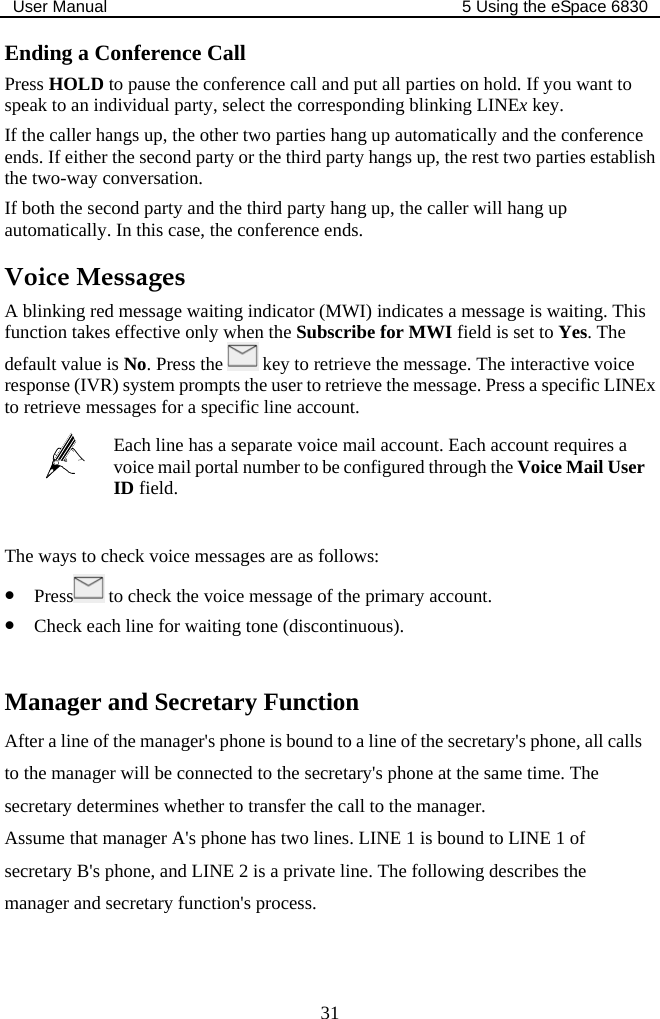
![User Manual 4 Configuring the eSpace 6830 14 4 Configuring the eSpace 6830 Configuring the Phone Through the Keypad To enter the configuration menu, press MENU. View the menu by pressing UP, DOWN, LEFT, or RIGHT. Press MENU to confirm the selection of a menu item, and delete an entry by pressing BackSpace. The phone automatically exits the menu when an incoming call comes or the phone is off-hook. If no keypad operation is performed within one minute, the IP phone automatically displays the standby image. Table 4-1 Keypad configuration menu Menu Configuration Description Call History Displays history records of received, dialed, transfered and missed calls. Status Displays the network status, account status, software version, MAC address, and hardware version of the phone. Phone Book Displays the phone book and related option. z [New Entry] Add a phone book record. After the fields such as Name, Family name, Number, and Acct are set or selected, select Confirm Add and press MENU to confirm the operation. Select Cancel & Return and press MENU to cancel the added information and return to the previous menu. z [Download Phonebook] Select Download Phonebook and press MENU. Then the phone downloads the updated phone book from the TFTP or HTTP server. This requires corresponding configuration of the download items of the phone book on the Web page. z [Delete All Entries] Delete all contacts in the phone book.](https://usermanual.wiki/Huawei-Technologies/ESPACE6830/User-Guide-1527218-Page-19.png)
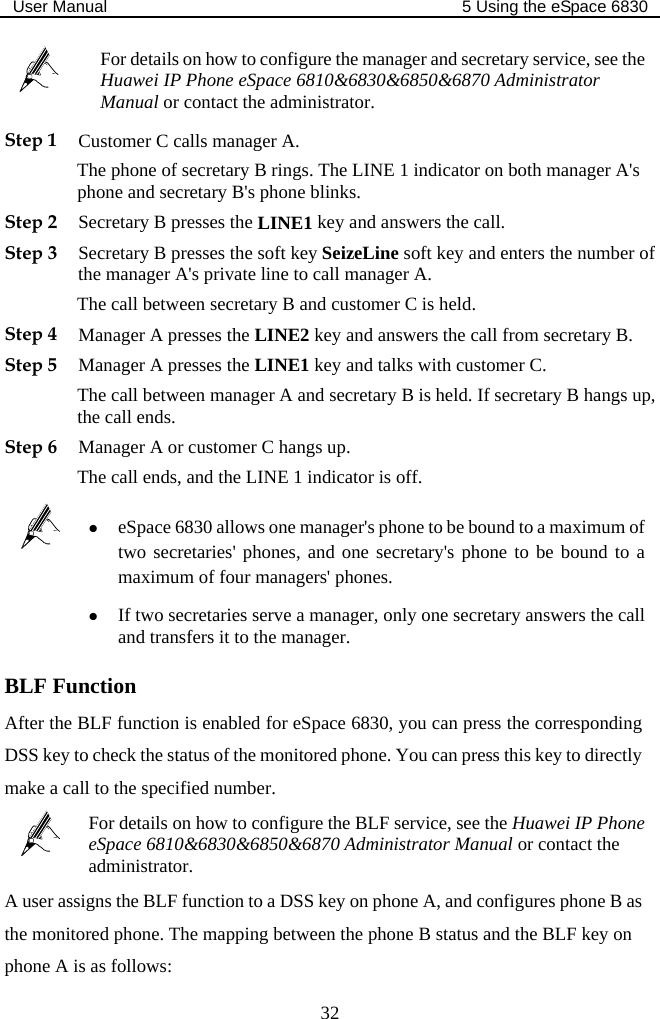
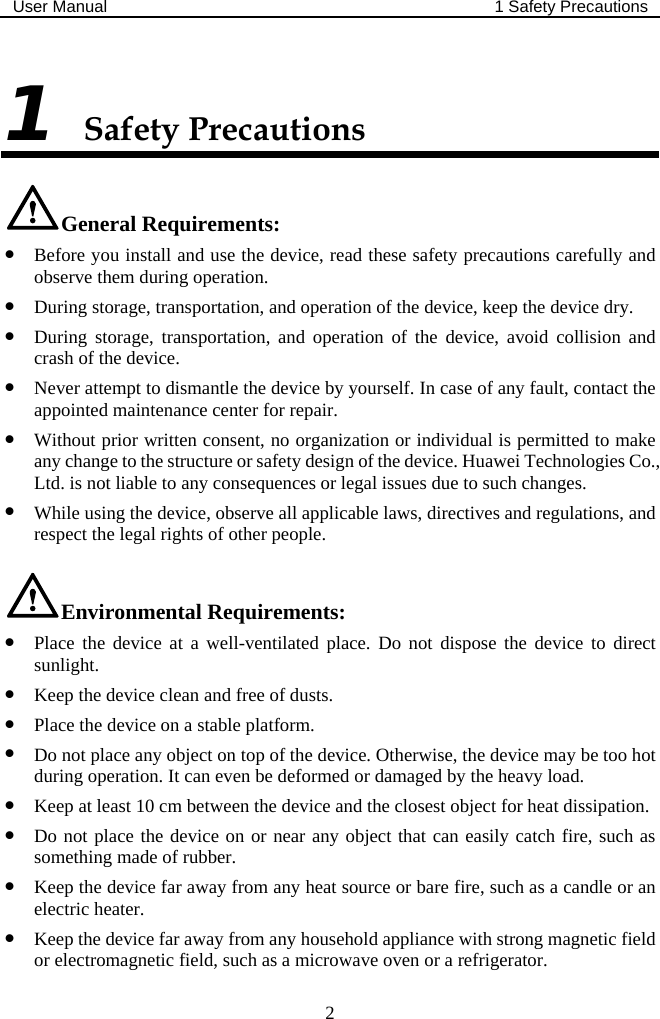
![User Manual 4 Configuring the eSpace 6830 15 Menu Configuration Description Direct IP call The input field of the destination IP address is provided when Direct IP call is selected. Type the destination IP address such as 10.10.10.2, press OK soft key to confirm the operation and send the call; press the Cancel soft key to cancel the call and return to previous menu. If the input information is incorrect, press BackSpace soft key to delete it. Displays the preference submenus of a user. z [Do Not Disturb] Choose this menu to enable or disable the DND function. z [Ring Tone] Choose this menu to set different ring tones. z [Ring Volume] Press MENU to hear the selected ring volume. Press LEFT or RIGHT to turn up or turn down the volume. z [LCD Contrast] Choose this menu to set the LCD screen contrast. z [LCD Brightness] Set the LCD brightness of the IP phone in active and idle states. The value ranges from 0 to 8. z [Download SCR XML] Send a request to the HTTP/TFTP server for downloading a screen saver to replace the original one. For details on how to configure this service, see the Huawei IP Phone eSpace 6810&6830&6850&6870 Administrator Manual or contact the administrator. z [Erase Custom SCR] Restore the factory setting for the standby image. z Display Language Choose this menu to select the language. z [Time Settings] Set the date and time of the IP phone. Preference Press LEFT or select Back to return to the main menu.](https://usermanual.wiki/Huawei-Technologies/ESPACE6830/User-Guide-1527218-Page-20.png)
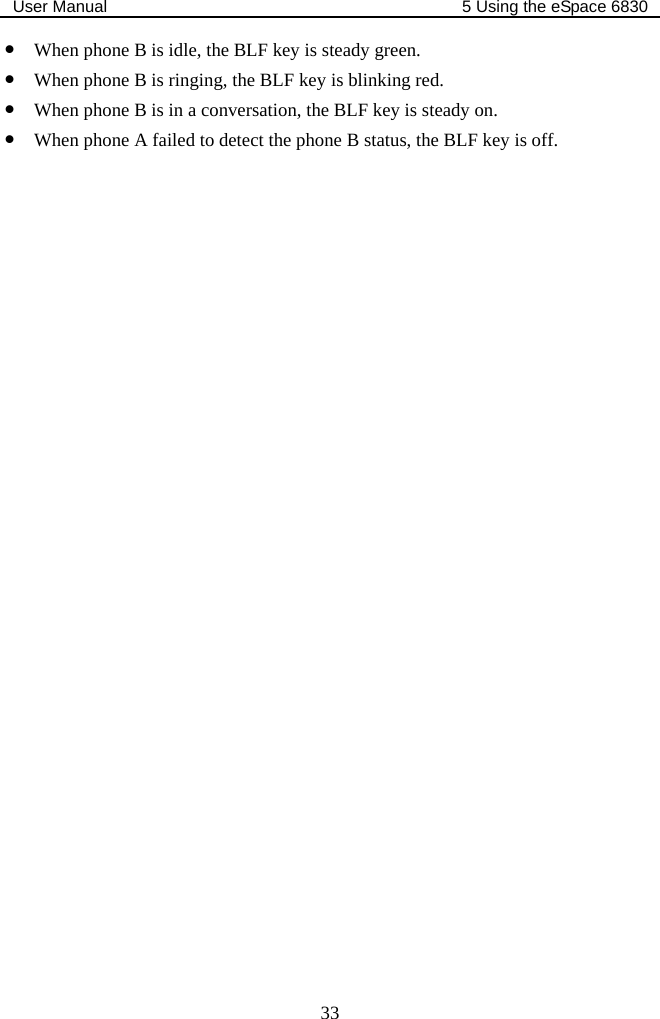
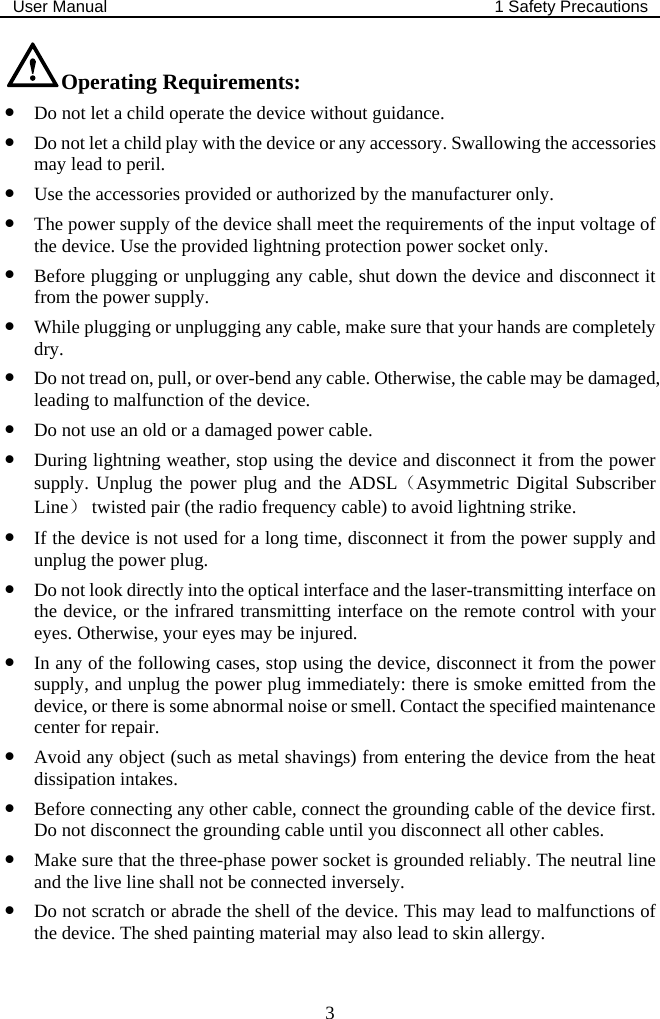
![User Manual 4 Configuring the eSpace 6830 16 Menu Configuration Description Display the configuration submenus. z [SIP] Set the SIP server for each account, including account, SIP proxy, Outbound proxy, SIP user ID, SIP Auth ID, SIP password, SIP transport, and Audio CODECs. z [Upgrade] Configure the firmware server and the file download server. Select either TFTP or HTTP to upgrade the firmware or configure the phone. z [Factory Reset] Type the MAC address on back of the phone. Press OK softkey to restore the factory reset settings. Factory reset clears all configurations and restores the phone to factory settings. z [Layer 2 QoS] Configure the 802.1Q VLAN tag and 802.1P priority. Config Press LEFT or select Back to return to the main menu. These items are used for factory testing and not recommended for users. z [Audio Loopback] Speak to the handset. If you hear your voice in the handset, your audio works well. Press MENU to exit the mode. z [Diagnostic Mode] All LEDs are on. Press any key on the keypad to display the key name on the LCD. Pick up the handset or press MENU to exit the diagnostic mode. Factory Functions Press LEFT or select Back to return to the main menu. Network Enable or disable the DHCP protocol. Set the IP address, subnet mask, and gateway address by using the keypad if the static IP mode is selected. Reboot Reboot the device. Exit Exit the menu.](https://usermanual.wiki/Huawei-Technologies/ESPACE6830/User-Guide-1527218-Page-21.png)