Huawei Technologies GL08D Mobile Cellular device supporting GSM850, PCS1900 User Manual English

Huawei Technologies Co.,Ltd Mobile Cellular device supporting GSM850, PCS1900 English

Contents

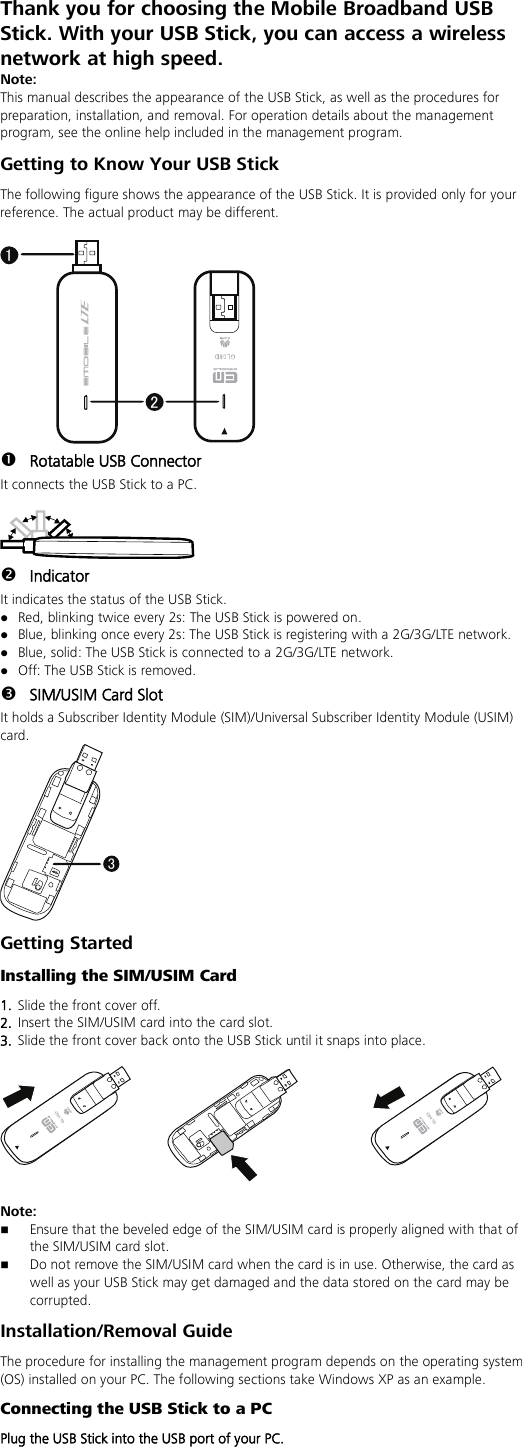
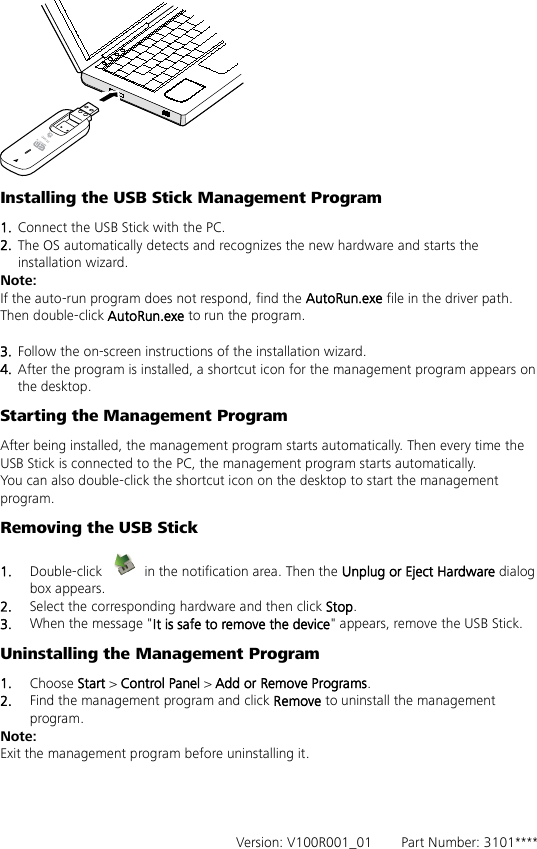
QSG-(V100R001_01,En)

Thank you for choosing the Mobile Broadband USB Stick. With your USB Stick, you can access a wireless network at high speed. Note: This manual describes the appearance of the USB Stick, as well as the procedures for preparation, installation, and removal. For operation details about the management program, see the online help included in the management program. Getting to Know Your USB Stick The following figure shows the appearance of the USB Stick. It is provided only for your reference. The actual product may be different.  21  Rotatable USB Connector It connects the USB Stick to a PC.    Indicator It indicates the status of the USB Stick.  Red, blinking twice every 2s: The USB Stick is powered on.  Blue, blinking once every 2s: The USB Stick is registering with a 2G/3G/LTE network.  Blue, solid: The USB Stick is connected to a 2G/3G/LTE network.  Off: The USB Stick is removed.  SIM/USIM Card Slot It holds a Subscriber Identity Module (SIM)/Universal Subscriber Identity Module (USIM) card. 3 Getting Started Installing the SIM/USIM Card 1.  Slide the front cover off. 2.  Insert the SIM/USIM card into the card slot.   3.  Slide the front cover back onto the USB Stick until it snaps into place.    Note:    Ensure that the beveled edge of the SIM/USIM card is properly aligned with that of the SIM/USIM card slot.  Do not remove the SIM/USIM card when the card is in use. Otherwise, the card as well as your USB Stick may get damaged and the data stored on the card may be corrupted. Installation/Removal Guide The procedure for installing the management program depends on the operating system (OS) installed on your PC. The following sections take Windows XP as an example. Connecting the USB Stick to a PC Plug the USB Stick into the USB port of your PC.
 Installing the USB Stick Management Program   1.  Connect the USB Stick with the PC. 2.  The OS automatically detects and recognizes the new hardware and starts the installation wizard. Note: If the auto-run program does not respond, find the AutoRun.exe file in the driver path. Then double-click AutoRun.exe to run the program.  3.  Follow the on-screen instructions of the installation wizard. 4.  After the program is installed, a shortcut icon for the management program appears on the desktop. Starting the Management Program After being installed, the management program starts automatically. Then every time the USB Stick is connected to the PC, the management program starts automatically. You can also double-click the shortcut icon on the desktop to start the management program. Removing the USB Stick 1.  Double-click   in the notification area. Then the Unplug or Eject Hardware dialog box appears. 2.  Select the corresponding hardware and then click Stop. 3.  When the message "It is safe to remove the device" appears, remove the USB Stick. Uninstalling the Management Program 1.  Choose Start > Control Panel > Add or Remove Programs. 2.  Find the management program and click Remove to uninstall the management program. Note: Exit the management program before uninstalling it.     Version: V100R001_01    Part Number: 3101****

Navigation menu