Huawei Technologies U120 Mobile Phone with Bluetooth Function User Manual U120
Huawei Technologies Co.,Ltd Mobile Phone with Bluetooth Function U120
Contents
- 1. Users Manual Part I
- 2. Users Manual Part II
- 3. Users Manual Part III
Users Manual Part II
18
5Contacts
Contacts enables you to save and manage such
information as phone numbers and addresses of your
contacts. You can save such information in your
phone or your SIM card. You can also assign eight
frequently-used numbers to speed dialing keys for
your convenience.
Making Calls from the Contacts
You can make a voice/video call with a contact
selected from the contacts list.
1 In the Contacts screen, press the left/right
scroll key to select Phone or SIM .
2 Select a contact and select Options > Call.
Then, you can select Voice Call or Video Call to
make a call. Alternatively, you can select Edit
before call to edit the number before making the
call.
Searching for a Contact
You can find a contact from the contacts list easily
and quickly by using this function on both the Phone
screen and the SIM screen.
1 In the Contacts screen, press the left/right
scroll key to select Phone or SIM .
2Select Options > Search.
3Select Options > Search, and then enter the
contact name you are searching for. The contact
will be displayed.
Note
The search result will include all matched
contacts from both the phone and SIM
memories, no matter from which screen
(Phone or SIM) you start searching.
You can also use quick search in the Phone or SIM
screen:
1In the Contacts screen, press the left/right
scroll key to select Phone or SIM .
U120.book Page 18 Friday, March 30, 2007 5:51 PM
Other Operations
19
5
Contacts
2Enter a string (one or more letters or numbers)
contained in the contact name you are searching
for (which is displayed at the bottom of the
screen). Then the contacts whose names con-
tain this string will be displayed.
You can also find a contact by entering the initials of
the first name and the last name of the contact. For
example, to find a contact named "Alice Green",
enter the initials "ag". This contact will be displayed in
the candidate list.
Other Operations
In the Contacts screen, press the left/right scroll
key to select Phone or SIM .Then select
Options for the following options.
Options Description
Create
Message
To send a message, MMS or Email to
the selected contact.
New To create a new contact.
Send
contact
To send a contact to other devices sup-
porting SMS or Bluetooth.
Copy to
SIM/Copy
to phone
To Copy one or more contacts from your
phone to the SIM card or from your SIM
card to the phone.
Speed
dial
Number
To assign often-used numbers to speed
dialing keys "2" to "9".
My
business
card
To save your own information to a Busi-
ness Card. You can send the information
by SMS or Bluetooth.
Backup
contacts
To back up your contacts from your
phone to a memory card or from your
memory card to your phone.
Delete To delete the selected contact.
Mark/
Unmark
To mark/unmark a record or all records
in your phone and SIM card.
Memory
status
To view the memory status of both your
phone and SIM card.
Settings To sort the contacts in the phone and the
SIM card or to set an alert before saving.
Options Description
U120.book Page 19 Friday, March 30, 2007 5:51 PM
Groups
20
Groups
You can rename a group, add group members, and
delete a group.
Adding/Deleting Group Members
You can add a member to a group in your phone or
delete a member from it.
1In the Contacts screen, press the left/right
scroll key to select Groups.
2Select a group and press to view the details.
3Select Option > Add. Select a contact and press
. The member you added will be displayed in
the group member list.
To delete a group member, select a member from the
group member list, and then select Options >
Delete.
Managing a Group
1In the Contacts screen, press the left/right
scroll key to select Groups.
2Select a group and select Options for the follow-
ing options.
• Detail: to view the details of a group.
• Create: to send a text message or MMS to all
members of a group.
• Rename: to change the name of a group.
• Delete: to delete a group and all members of
the group.
Note
You cannot rename or delete any group pre-
set in your phone.
U120.book Page 20 Friday, March 30, 2007 5:51 PM
21
6Call Log
The recently dialed calls, received calls and missed
calls are saved automatically. This makes it easier to
refer to these calls.
Making Calls from Call Log
1Select Call Log in the main menu and then
press the left/right scroll key to switch between
All calls , Missed , Received and
Dialed .
2Press the up/down scroll key to select a record.
Press to make a voice call or press to
make a video call.
Other Operations
Press the left/right scroll key to select All calls ,
Missed , Received or Dialed . Then select
Options for the following options.
Options Description
Edit
before
call
To edit the number before making a call.
Create
Message
To send a SMS or MMS.
Save
number
To save the numbers of the selected
record to the phone, the SIM card, or an
existing contact.
Call To make a voice call or a video call.
Display
mode
You can select Normal to display all
records or select Simple to ignore the
repeated records.
Delete To delete the selected record.
Mark/
Unmark
To mark/unmark a record or all records.
Calls
status
To display the information on voice calls,
video calls and data services.
In the voice call, video call and data
page, you can select Reset to clear all
records.
U120.book Page 21 Friday, March 30, 2007 5:51 PM
22
7Messaging
Text Messages
The maximum content for a single text message is
160 English letters. If the characters you entered
exceed this limit, the text is divided into two or more
continuous messages when it is sent.
Creating a text Message
1Select Messaging > Write SMS from the
main menu.
2In the message editing screen, select Options:
• Insert number: You can insert a phone number
saved on the phone or the SIM card.
• Common phrases: You can use this option to
speed up the text entry.
• T9 Switch: enable or disable T9 input method.
• Input mode: You may select one of the input
methods to enter the message contents.
• Input language: You can select an input lan-
guage for this message.
3After editing the message, press to access
the "Edit numbers" screen.
• Enter the phone number, and then select
Options > Send or press to send the mes-
sage.
• Select Options > Group or Contacts to
choose a number and send the message.
• Select Options > Save to drafts to save the
message.
SMS Mailboxes
The phone provides three mailboxes for SMS,
namely, Inbox , Sent and Drafts .
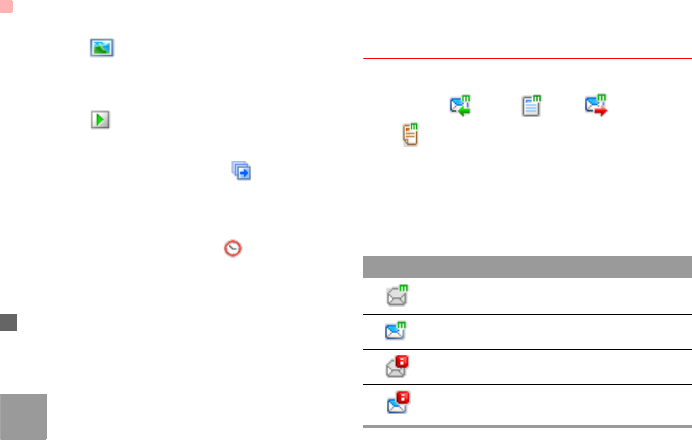
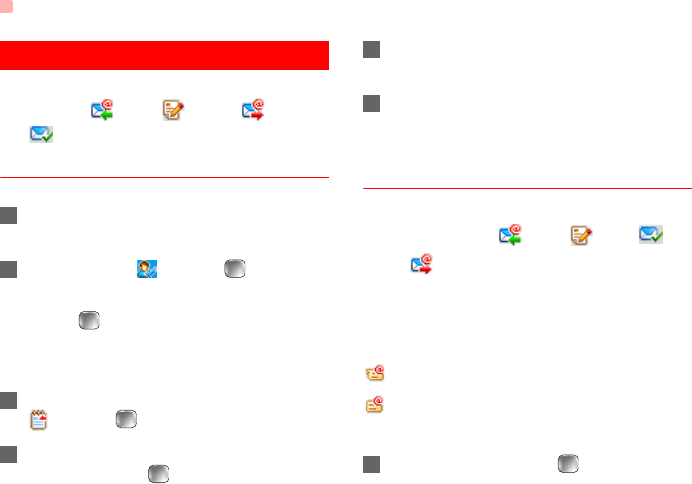
◆ Inbox
You can save the received messages in Inbox.
Icons in Inbox
Icon Description
a read message in the phone memory
Text Messages
23
7
Messaging
Viewing Messages in Inbox
1Select Messaging > SMS > Inbox.
2Press the up/down scroll key to view the mes-
sages and then press to view the details.
3Reply or call back.
• Press to reply with a text message.
• Press to call back by a voice call or press
to call back with a video call.
You can select Options for the following operations.
• Reply: To reply the message.
• Forward: To forward the message.
• Edit before call: To edit the number.
• Save number: To save the numbers retrieved from
an SMS to phone or SIM memory or an existing
entry in the contacts.
• Extract URL: To extract URL address from an SMS
for browsing web pages or stream media.
• Save Email address: To retrieve email address from
an SMS and save it.
• Copy to SIM: To back up the SMS to SIM memory.
• Call: To make a voice call or a video call.
• Delete: To delete the message.
◆ Sent
Sent is used to save the messages that have been
sent.
Icons in Sent
: A text message that has been sent and saved to
the phone.
an unread message in the phone mem-
ory
a read message on the SIM card mem-
ory
an unread message on the SIM card
memory
a read message report
an unread message report
Icon Description
Text Messages
24
: A text message that has been sent and saved to
the SIM card.
Viewing Messages in the Sent
1Select Messaging > SMS > Sent.
2Press the up/down scroll key to select a mes-
sage and press to view the details.
3Forward or make a call.
• Press to forward a text message.
• Press to make a voice call or press to
make a video call.
You may select Options to do the same operations
as those of SMS Inbox.
◆ Drafts
The Draft box is used to save the messages you cre-
ated and saved and those which failed to send.
Icons in Drafts
: A text message saved to the phone.
: A text message saved to the SIM card.
Viewing and Editing Messages in the Drafts
1Select Messaging > SMS > Drafts.
2Press the up/down scroll key to select a mes-
sage and press to edit it.
SMS Settings
You can change the SMS settings by performing the
following steps.
1Select Messaging > Settings > SMS from the
main menu.
2Set the parameters related to messages:
• Message center: You can set your mobile
phone to retrieve the message center number
from the SIM card or the phone. If you have
deleted the information by accident, contact
your service provider.
• Valid period: The time a message is kept in the
message center after it is sent.

Multimedia Messages
25
7
Messaging
• Auto save: You can set whether a message will
be saved automatically to Sent when it is sent.
• Save to: To set the position for saving newly
created messages, received messages, and
sent messages.
• Signature: To set whether your signature will
be sent along with the message. You can edit
the signature while creating a new message.
• Status report: You can set it to On or Off. If you
set it to On, the network will send you the infor-
mation on whether the message has reached
the recipient.
• Concatenated SMS: You can set it to On or
Off. If you set it to Off, you cannot edit and
send messages longer than the limits of a sin-
gle SMS.
Multimedia Messages
You can send messages attached with images, text
and music under this mode.
Creating a Multimedia Message
1Select Messaging > Write MMS from the main
menu.
2Select To, Cc and Bcc.
• Select an entry from the recipients list, and
then press or select Options > Edit to enter
a phone number.
• Select a position from the recipients list, select
Options > Contact or Group, and then select
phone numbers.
3Select Back to return to the Edit MMS screen,
select Subject to enter text as subject, and then
press .
4Select Content to edit the pages.
(1) Select to access the text entry field, and
then edit text.
Multimedia Messages
26
(2) Select to enter the image-editing field
and then you can select images or video files in
My Files.
(3) Select to enter the music-editing field and
then you can select audio files in My Files.
(4) Access the field indicated by and press
the left/right scroll key to select one from differ-
ent pages if there are more pages.
(5) Access the field indicated by and press the
left/right scroll key to adjust the playing time of
the current page.
5 Return to the Edit MMS screen, and select
Options > send to send the multimedia
message.
Note
If the video file is chosen in the image-edit-
ing field, you cannot edit the music-editing
field any more.
MMS Mailboxes
Your mobile phone provides four mailboxes for MMS,
namely, Inbox , Drafts , Sent and Tem-
plates .
◆ Inbox
Inbox is used to save the multimedia messages you
have received.
Icons in Inbox
Icon Description
a read message
an unread message
a read notice or delivery report for MMS
an unread notice or delivery report for
MMS

Multimedia Messages
27
7
Messaging
Viewing Messages in Inbox
1Select a multimedia message to view its con-
tents.
2During the playing, you can select Stop to stop
playing.
3Select Options for the following operations.
• Reply SMS: to reply a SMS to the SMS sender.
• Reply MMS: to reply a MMS to the MMS
sender.
• Forward: to forward the MMS.
• Edit before call: to edit the number before mak-
ing a call.
• Next page: to play the next page.
• Previous page: to play the previous page.
• Rewind: to return to the first page.
• Object list: After entering the content list of this
message, you may select an item and select
Save to save the message to a corresponding
directory of the folder.
• Save number: To save the numbers retrieved
from MMS to phone or SIM memory or an
existing entry in the contacts.
• Extract URL: To extract URL address from
MMS for browsing web pages or stream
media.
• Save Email address: To retrieve email address
from MMS and save.
◆ Drafts
Drafts is used to save the multimedia messages you
created and saved and those which failed to be sent.
Icons in Drafts
: A multimedia message saved after you created
it or a multimedia message failed to be sent.
Viewing and Editing Messages in Drafts
1Access Drafts and select a multimedia mes-
sage.
2Press to access the editing screen.

Multimedia Messages
28
3You can edit the message. The operations are
the same as those for creating a multimedia
message.
◆ Sent
The Sent is used to save the multimedia messages
that have been sent successfully.
Icons in Sent
: A multimedia message has been sent.
Viewing Messages in Sent
1Select a multimedia message to view its con-
tents.
2During playingan MMS, you can select Stop to
stop playing.
3During playing, you may select Options to do
the same operations as those of MMS Inbox.
Refer to "Messaging/MMS/MMS Mailboxes" on
page 26.
◆ Templates
To send messages quickly, you can save commonly
used multimedia messages as templates.
◆ Folders
You can categorize your multimedia messages into
different folders.
You can access Folders from the four tabs of Inbox,
Drafts, Sent or Templates.
Let us take the example of entering the Inbox
screen.
Select MMS > Inbox. Then select Options >
Folders. You can perform the following operations.
•Rename: to rename a folder.
•Select: to access a folder.
MMS Settings
Select Messaging > Settings > MMS, and then you
can set parameters related to multimedia messages.
It contains the following submenus.

Multimedia Messages
29
7
Messaging
◆ Sending
This option is used to set parameters related to send-
ing multimedia messages.
•Valid period: The time for a multimedia message
stored in the message center after it is sent.
•Delivery report: You have two alternatives, On and
Off. With this mode enabled (On), the network will
report on successfully sending a multimedia mes-
sage.
•Reading report: To set whether to accept a read
report.
•Send limit: To set the size limit of a multimedia
message to be sent.
•Save on send: To set whether a multimedia mes-
sage to the sent folder after it has been sent.
•Sender visibility: To set whether the sender infor-
mation will be displayed when a multimedia mes-
sage is sent.
◆ Receving
This option is used to set parameters related to
retrieval of multimedia messages.
•Send delivery report: You have two alternatives,
On and Off. When this mode is enabled (On), the
network sends a report to the sender indicating that
you have received the message.
•Send read report: To set whether to send a read
report.
•Receiving limit: To set the size limit of a multime-
dia message that you can receive.
•Auto receive: To set whether the phone automati-
cally receives multimedia messages or not.
Settings such as "Network Access Point" and "WAP
gateway" are all preset for your convenience.
Email
30
Email
Your mobile phone provides four mailboxes for email,
namely, Inbox , Drafts , Outbox and
Sent .
Creating an Email
1Select Messaging > New Email from the main
menu.
2Select Recipients and press .
• Select one record in the recipients list and then
press to enter an email address.
•Select Options > Contact/Group/History to
select an email address.
3In the email editing screen, select subject
and press to edit the contents.
4In the email editing screen, select the Content
text box and press to edit the content.
5In the email editing screen, select Attachment
to attach picture, music, video, or eBook.
6In the email editing screen, select Options to
save or send the email. The saved emails are in
the Messaging/Email/Drafts.
Mailboxes
Your mobile phone provides four mailboxes for
Emails, namely, Inbox , Drafts , Sent and
Outbox .
◆ Inbox
All Emails received are saved in the inbox.
Icons in Inbox
: A read email.
: An unread email.
Viewing and Editing Emails in Inbox
1Select an email and press to view the con-
tent. If only the title of this email is received, the
Email
31
7
Messaging
phone prompts whether to download other infor-
mation of the email.
2In the details screen, select Options > Reply to
reply the sender.
Other Options for Inbox
1Access Inbox of email.
2Select Options for the following operations.
• View: to view the selected email.
• Select: to mark the selected emails in the
inbox.
• Reply: to reply to the selected email.
• Forward: to forward the selected email.
• Move to folder: to move the selected email to a
specified folder.
• My folders: to categorize your emails in differ-
ent folders.
• Sync inbox: to synchronise emails from server.
• Sort: to sort your emails according to date,
sender or topic.
• Delete: to delete the selected email.
• Unmark all: to unmark all emails in the inbox.
• Mark all: to mark all emails in the inbox.
◆ Drafts
The saved new emails are saved in the drafts.
Icons in Drafts
: Emails to be sent.
Viewing and Editing Emails in Drafts
1Select the desired email in the drafts and press
to enter the editing screen.
2Edit the related information. For details, perform
the same operations as those in creating an
email.
Other operations in Drafts
1Enter Drafts of email.
2Select Options for the following operations.
• Edit: to edit the selected emails in the drafts.
Email
32
• Select: to mark the selected emails in the
drafts.
• Write Email: to create a new email.
• Move to folder: to move the selected email to a
specified folder.
• My folders: to categorize your emails in differ-
ent folders.
• Sort: to sort your emails according to date,
sender or topic.
• Delete: to delete the selected email.
• Unmark all: to unmark all selected emails in
the drafts.
• Mark all: to mark all emails in the drafts.
◆ Sent
The emails sent to server are saved in the sent box.
Icon for Sent
: A sent email.
Viewing and Editing Emails in Sent
1Select an email and press to enter the edit-
ing screen.
2Edit the related information. For details, perform
the same operations as in creating an email.
Other Options in Sent
1Enter Sent of email.
2Select Options for the following operations.
• View: to view the selected email.
• Select: to mark the selected emails in the sent.
• Forward: to forward the selected email.
• Delete: to delete the selected email.
• Move to: to move the selected email to a spec-
ified folder.
• My folders: to categorize your emails in differ-
ent folders.
• Sort: to sort your emails according to date,
sender or topic.

Email
33
7
Messaging
• Unmark all: to unmark all selected emails in
the sent.
• Mark all: to mark all emails in the sent.
◆ Outbox
Those emails which failed to send are retained in the
outbox.
Icon for Outbox
: Emails failed to send.
Viewing and Editing Emails in Outbox
1Select an email and press to enter the edit-
ing screen.
2Edit the related information. For details, perform
the same operations as in creating an email.
Other Operations in Outbox
1Enter Outbox of email.
2Select Options for the following operations:
• Edit: to edit the selected email.
• Select: to mark the selected emails in the out-
box.
• Send: to send the selected email.
• Move to folder: to move the selected email to a
specified folder.
• My folders: to categorize your emails in differ-
ent folders.
• Sort: to sort your Emails according to date,
sender or topic.
• Delete: to delete the selected email.
• Unmark all: to unmark all selected emails in
the outbox.
• Mark all: to mark all emails in the outbox.
◆ My Folders
You can categorize your emails in different folders.
You can enter My Folders from the inbox, drafts, out-
box and the sent box.
Here's an example, using the folder of the inbox:
Select Email > Inbox. Then select Options > My
Folders for the following operations.

Email
34
• Rename: to rename the folder.
• Select: to enter one folder.
Email Settings
Select Messaging > Settings > Email to set the fol-
lowing items.
◆ Accounts
1Select Options > Add account and enter the
account name. Press to access the General
settings screen.
2The related account information contains:
Account name, From name, From address, Pro-
tocol, Incoming server, User name, Password,
and Outgoing mail server.
3Select Options > Advanced settings to enter
the Advanced Settings screen.
4Return to the Account screen. Select Options >
Activate to activate this account.
5To delete an account, select an account and
then select Options > Delete account.
Note
For the account settings, contact your ser-
vice provider.
◆ Common Options
• Reply with history: to reply with history.
• Save sent Email: to save sent emails to the sent
box.
• Sending limit: to set the size of email.
• Receiving limit: to set the limit of the received email.
If the size of the email exceeds the limit, only the
title of the email will be received. If Only header is
selected, only the title of the email will be received.
• Network Access Point: This option is used to select
information about the profile to be adopted when
you send emails. For more information, consult
your service provider.
After finishing all settings, press Back.

Push Inbox
35
7
Messaging
◆ Memory Status
The memory in use of Inbox, Drafts, Outbox, Sent,
My folders and Total are displayed.
Push Inbox
The Push Inbox is used to save the Push messages
you have received.
You can enable or disable Wap Push via the Internet
Settings. For more information, please refer to "Inter-
net Settings" on page 48.
Viewing Push Messages
In the Push Inbox, select a Push message, and then
press to view the details of the Push message.
◆ Icon for Push Inbox
• : A read Push message.
• : An unread Push message.
◆ Other Operations for the Push Inbox
• Load: To start the WAP browser and connect a URL
specified by the Push message.
• Delete: To delete the selected messages.
• Unmark all: To unmark all Push messages.
• Mark all: To mark all the Push messages.
Push Inbox Settings
Select Messaging > Settings > Push messages to
set the Push inbox.
◆ Push Message Setting
You can set the acceptable push messages.
◆ Enable Push SL
You can enable or disable the push SL function by
selecting On or Off.
Broadcast Inbox
The broadcast messages are saved in the broadcast
inbox. You can set the broadcast message.

Voice Mail Number
36
Select Messaging > Setting > Broadcast to set the
following items.
• Service: to enable or disable this service.
• Subscription: to subscribe to broadcast channels or
cancel the subscription.
• Language: to select the language of the broadcast.
• Silent alert: to specify whether a silent alert occurs
when there is a new broadcast message.
• Auto delete: to set whether to auto delete earlier
messages when the broadcast inbox memory is
full.
Voice Mail Number
To use the voice mail services, you need to apply to
your network operator. After setting the correct num-
ber provided by your network operator, if you press
and hold in standby mode, the phone will dial out
the voice mail number automatically.
Common Phrases
Your mobile phone has been preset with some com-
monly used phrases, sending messages while
answering a call and auto replying. You can select
Messaging > Settings > Common phrases to edit
them if you want.
37
8Music
Music enables you to manage your music files
easily and conveniently.
My Music
You can play various music files, including those sup-
plied with the phone, recorded by using the phone,
downloaded from the Internet, and attached to email.
You can also enjoy the online audio files.
Function Options During Playing
During playing the music file, select Options for the
following operations.
• Nowplaying: To access the current playlist.
• Mute/Unmute: To mute or unmute the music.
• Bookmarks:To access the bookmark list.
• Playlist: To access the music playlist.
• Shuffle: On/Off the random play.
• Loop: To select to cycle play current music, play all
music or close.
• Equilibrium: To select the music style.
• Settings:To set the play mode, full screen direction,
and Streaming settings.
• Video camera:To enable the video camera function.
• CMB list: To access the CMB list.
• History:To display the records of the played music.
• Info.:To view the information of the music files.
• Exit: To exit the music play screen.
Screen Operations During Playing
During playing the music file, you can execute the fol-
lowing operations on the music file.
Opera-
tion Description
Press the up scroll key to access the
current playlist.
Press the down scroll key to go back the
begining of the current music file. Press
to replay this music file.
U120.book Page 37 Friday, March 30, 2007 5:51 PM
Playlist
38
Playlist
Selecting this option, you can rename and edit the
playlist as well as play the music in the playlist.
CMB List
This service is network-dependent. For details, con-
tact your service provider.
Press the left scroll key to access to the
last music file. Press and hold the left
scroll key to fast backward the current
music file.
Press the right scroll key to access the
next music file. Press and hold the right
scroll key to fast forward the current
music file.
/Press to pause the playing.
Press again to resume the playing.
Press the volume keys to adjust the vol-
ume.
Opera-
tion Description
U120.book Page 38 Friday, March 30, 2007 5:51 PM