Huawei Technologies V710 WCDMA/GPRS/GSM Mobile Phone with BT User Manual V710
Huawei Technologies Co.,Ltd WCDMA/GPRS/GSM Mobile Phone with BT V710
Contents
- 1. User Manual Part 1
- 2. User Manual Part 2
- 3. User Manual Part 3
User Manual Part 2
Text Messages
33
Messaging
8
Viewing Messages in Inbox
1Select Messaging > SMS > Inbox.
2Press the up/down scroll key to view the mes-
sages and then press to view the details.
3Reply or call back.
• Press to reply with a text message.
• Press to call back by a voice call or press
to call back with a video call.
Select Options for the following operations.
Other Operations for Inbox
1Select Messaging > SMS > Inbox .
2Select Options for the following operations:
• Details: to view the selected SMS.
• Delete: to delete the message.
a read message report
an unread message report
Opera-
tion Description
Reply To reply the message.
Delete To delete the message.
New To create a message.
Icon Description
Forward To forward the message.
Save
number
To save the numbers retrieved from
SMS to phone or SIM memory or an
existing entry in the contacts.
Edit
before
call
To edit the number.
Copy to
SIM
To back up the SMS to SIM.
Extract
URL
To extract URL address from SMS for
browsing web pages or stream media.
Save
email
address
To retrieve email address from SMS and
save.
Opera-
tion Description
V710.book Page 33 Tuesday, July 4, 2006 2:19 PM
Text Messages
34
• Reply: to reply the message.
• New: to create a message.
• Forward: to forward the message.
• Edit before call: to edit the number.
• Mark: to mark the selected message.
• Mark all: to mark all messages in the inbox.
• Save number: to save the numbers retrieved
from SMS to phone or SIM memory or to the
existing entry in the contacts.
• Copy to SIM: to back the SMS up to SIM.
• Memory status: To view the storage status of
SMS in the phone and SIM, including saved
number and the total capacity.
◆ Outbox
Outbox is used to save the messages that have
been sent out.
Icons in Outbox
: A text message that has been sent out and
saved to the phone.
: A text message that has been sent out and
saved to the SIM card.
Viewing Messages in the Outbox
1Select Messaging > SMS > Outbox .
2Press the up/down scroll key to select a mes-
sage and press to view the details.
3Forward or make a call.
• Press to forward a text message.
• Press to make a voice call or press to
make a video call.
You can Select Options for the following operations.
Opera-
tion Description
Forward To forward the message.
Delete To delete the message.
New To create a message.
Edit To edit the message.
Save
number
To save the numbers retrieved from
SMS to phone or SIM memory or an
existing entry in the contacts.
V710.book Page 34 Tuesday, July 4, 2006 2:19 PM

Text Messages
35
Messaging
8
Other Operations for Outbox
1Select Messaging > SMS > Outbox .
2Select Options for the following operations.
• Details: to view the selected SMS.
• Edit: to edit the message.
• Delete: to delete the message.
• New: to create a message.
• Forward: to forward the message.
• Edit before call: to edit the number.
• Mark: to mark the selected a message.
• Mark all: to mark all messages in the inbox.
• Save number: to save the numbers retrieved
from SMS to phone or SIM memory or an
existing entry in the contacts.
• Copy to SIM: to back the SMS up to SIM.
• Memory status: to view the storage status of
SMS in the phone and SIM, including saved
number and the total capacity.
◆ Draft
The Draft box is used to save the messages you cre-
ated and saved and those which failed to send.
Icons in Draft
: A text message saved to the phone.
: A text message saved to the SIM card.
Viewing and Editing Messages in the Draft
1Select Messaging > SMS > Drafts .
2Press the up/down scroll key to select a mes-
sage and press to edit it.
Other Operations for the Draft
1Select Messaging > SMS > Drafts .
Edit
before
call
To edit the number.
Copy to
SIM
To back the SMS up to SIM.
Extract
URL
To extract URL address from SMS for
browsing web pages or stream media.
Save
email
address
To retrieve email address from SMS and
save.
Opera-
tion Description
V710.book Page 35 Tuesday, July 4, 2006 2:19 PM

Multimedia Messages
36
2Select Options, and then you can do the same
operations as those of Outbox. You can also
edit the selected messages.
SMS Settings
You can change the SMS settings by performing the
following steps.
1Select Messaging > Settings > SMS from the
main menu.
2Set the parameters related to messages:
• Message centre: Your Vodafone 710 can auto
read the number of the message centre from
the SIM card or the phone. If you have deleted
the information by accident, contact Vodafone.
• Message validity : The time a message is kept
in the message centre after it is sent.
• Auto save: You can set whether a message will
be saved automatically to Outbox when it is
sent.
• Save location: To set the position for saving
newly created messages, received messages,
and sent messages.
• Signature: To set whether your signature will
be sent along with the message. You can edit
the signature while creating a new message.
• Status report: You can set it to On or Off. If you
set it to On, the network will send you the infor-
mation on whether the message has reached
the recipient.
• Concatenate SMS: You can set it to On or Off.
If you set it to Off, you cannot edit and send
messages longer than the limits of a single
SMS.
Multimedia Messages
You can send messages attached with images, text
and music under this mode.
Creating a Multimedia Message
1Select Messaging > New MMS from the
main menu.
2Select To, Cc or Bcc.
V710.book Page 36 Tuesday, July 4, 2006 2:19 PM
Multimedia Messages
37
Messaging
8
• Select an entry from the recipients list, and
then press or select Options > Edit to enter
a phone number.
• Select a position from the recipients list, select
Options > Contact or Group, and then select
phone numbers.
3Select Back to go back to the "Edit MMS"
screen, select Subject to enter text as subject,
and then press .
4Select Content to edit the pages.
(1) Select to access the text entry field, and
then edit text.
(2) Select to enter the image-editing field
and then you can select images or video files in
My Files.
(3) Select to enter the music-editing field and
then you can select audio files in My Files.
(4) Access the field indicated by and press -
the left/right scroll key to select one from differ-
ent pages if there are more pages.
(5) Access the field indicated by and press
the left/right scroll key to adjust the playing time
of the current page.
(6) You can select Options, then select Edit,
Send to, Remove object, Insert page, Delete
page, Preview for the multimedia pages.
5 Go back to the "Edit MMS" screen, Select
Options for the following operations:
• Send: to send this multimedia message.
• Save: to save this message to Messaging/
MMS/Drafts.
• Add to template: to save this message at Mes-
saging/MMS/Templates.
• Send settings: to set relevant sending parame-
ters for sending multimedia messages. For
details, please refer to "Messaging/Settings/
MMS Settings" on page 41.
• Size: to view the size of this multimedia mes-
sage.
V710.book Page 37 Tuesday, July 4, 2006 2:19 PM
Multimedia Messages
38
Note
• From the recipients list window select
phone numbers you need for To, Cc or
Bcc. Then select Options, you can set the
phone number to Set To, Set Cc or Set
Bcc. Meanwhile you may also select
Delete or Delete all to delete the selected
numbers or all numbers.
• If the video file is chosen in the image-
editing field, you cannot edit the music-
editing field any more.
MMS Mailboxes
Your Vodafone 710 provides four mailboxes for MMS,
namely, Inbox ,Drafts , Sent and Tem-
plates .
◆ Inbox
Inbox is used to save the multimedia messages you
have received.
Icons in Inbox
Viewing Messages in Inbox
1Select a multimedia message to view its con-
tents.
2During the playing, you can select Stop to stop
playing.
3Select Options for the following operations.
• Next page: to play the next page.
• Previous page: to play the previous page.
• Rewind: to return to the first page.
• Object list: After entering the content list of this
message, you may select an item and select
Icon Description
a read message
an unread message
a read notice or delivery report for MMS
an unread notice or delivery report for
MMS
V710.book Page 38 Tuesday, July 4, 2006 2:19 PM

Multimedia Messages
39
Messaging
8
Save to save the message to a corresponding
directory of the folder.
• Extract URL: To extract URL address from
MMS for browsing web pages or stream
media.
• Save number: To save the numbers retrieved
from MMS to phone or SIM memory or an
existing entry in the contacts.
• Save Email address: To retrieve email address
from MMS and save.
• Callback: to call back the sender of the
selected multimedia message.
• Reply SMS: to reply a SMS to the MMS
sender.
Other Operations for Inbox
1Access the Inbox of MMS.
2Select Options, and then you can do the follow-
ing operations:
• Reply MMS: to reply a MMS to the MMS
sender.
• Reply SMS: to reply a SMS to the MMS
sender.
• Forward: to forward a selected multimedia
message.
• Delete: to delete a selected multimedia mes-
sage.
• Move: to move the selected multimedia mes-
sage(s) to a specified folder.
• Folder: to save the multimedia message(s) you
moved.
• Callback: to call back the sender of the
selected multimedia message.
• Save contact: to save a selected multimedia
message sender's information.
• Sort: to sort the messages in the Inbox by
senders or by date.
• Mark: to mark the selected MMS.
• Mark all: to mark all the multimedia messages
in the inbox.
• Memory status: to view the memory status of
multimedia messages, including the occupied
memory of every mailbox, template and folder
and that of the total.
V710.book Page 39 Tuesday, July 4, 2006 2:19 PM
Multimedia Messages
40
◆ Drafts
Drafts is used to save the multimedia messages you
created and saved and those which failed to be sent.
Icons in Drafts
: A multimedia message saved after you created
it or a multimedia message failed to be sent.
Viewing and Editing Messages in Drafts
1Access Drafts and select a multimedia message.
2Press to enter the editing screen.
3Now you can edit the message. The operations
are the same as those for creating a multimedia
message.
Other Operations for the Drafts
1Access the Drafts of the MMS.
2Select Options, and you can perform the follow-
ing operations:
• Edit: to edit the selected multimedia message.
• Mark: to choose the current multimedia mes-
sage.
• New MMS: to create a new multimedia mes-
sage.
• Delete: to delete the selected multimedia mes-
sages.
• Move: to move the selected multimedia mes-
sages to a specified folder.
• Folder: to save the multimedia messages you
moved.
• Sort: to sort the messages in the Drafts by
recipients or by date.
• Unmark all: to unmark all the multimedia mes-
sages in the Drafts.
• Mark all: to mark all the multimedia messages
in the Drafts.
• Memory status: to view the memory status of
multimedia messages, including the occupied
memory of every mailbox, Template, Folder,
and that of total.
◆ Sent
The Sent is used to save the multimedia messages
that have been sent successfully.
Icons in Sent
: A multimedia message has been sent.
V710.book Page 40 Tuesday, July 4, 2006 2:19 PM
Multimedia Messages
41
Messaging
8
Viewing Messages in Sent
1Select a multimedia message to view its con-
tents.
2During playing, you can select Stop to stop play-
ing.
3During playing, you may select Options to do
the same operations as those of MMS Inbox.
Refer to "Messaging/MMS/MMS Mailboxes" on
page 38.
Other Operations for the Sent
1Access the Sent of the MMS.
2Select Options and you can do the same opera-
tions as those of MMS Inbox. Refer to "Messag-
ing/MMS/MMS Mailboxes" on page 38.
◆ Templates
To send messages quickly, you can turn the content
of commonly used multimedia messages into sam-
ples and save them. All operations on the Templates
menu are basically the same as those for the Drafts.
Please refer to "Drafts" on page 40 for details.
◆ Folder
You can categorize your multimedia messages into
different folders.
You can access Folder from the four tabs of Inbox,
Drafts, Sent or Template. The management of the
Folder is similar to that for the Drafts or Template.
Please refer to these sections for details.
Now let us take entering the Inbox screen as an
example.
Select MMS > Inbox . Then select Options >
Folder. You can perform the following operations.
•Rename: to rename a folder.
•Select: to access a folder. Operations for this folder
are similar to those for the Drafts or Templates.
MMS Settings
Select Messaging > Settings > MMS, and then you
can set parameters related to multimedia messages.
It contains the following submenus.
◆ Sending
This option is used to set parameters related to send-
ing multimedia messages.
V710.book Page 41 Tuesday, July 4, 2006 2:19 PM

Creating MMS Postcards
42
•Valid period: The time for a multimedia message
to be stored in the message centre after it has been
sent.
•Send report: You have two alternatives, On and
Off. With this mode enabled (On), the network will
report on successfully sending a multimedia mes-
sage.
•Read report: To set whether to accept a read
report.
•Send limit: To set the size limit of a multimedia
message to be sent.
•Save on send: To decide whether a multimedia
message will be saved to the Sent folder after it has
been sent.
•Sender visibility: To set whether the sender infor-
mation will be displayed when a multimedia mes-
sage is sent.
◆ Retrieval
This option is used to set parameters related to
retrieval of multimedia messages.
•Send delivery report: You have two alternatives,
On and Off. With this mode enabled (On), the net-
work will reply to the sender’s multimedia message
with a report indicating that you have received the
message.
•Send read report: To set whether to send a read
report.
•Retrieval limit: To set the size limit of a multimedia
message that you can receive.
•Auto retrieval: To set whether the phone automati-
cally receives multimedia messages or not.
Settings such as "Network Access Point" and "WAP
gateway" are all pre-set for your convenience.
Creating MMS Postcards
Use this option to get Vodafone to print out a photo
you have selected and send it by post to the recipi-
ent. From the Messaging menu, choose the New
postcard menu and press .
Select the photo you want to send and press .
Then press Insert and choose the High Resolution
format if requested. Type out the message you would
like printed on the postcard and press . Enter the
recipient's name, address, post code and city (and
V710.book Page 42 Tuesday, July 4, 2006 2:19 PM
Email
43
Messaging
8
optionally county and Country) using to move
through the options.
Finally, to send the postcard press Options > Send.
Note
This service may not be supported in all
counties yet. Check with your local
Vodafone service provider.
Email
Your Vodafone 710 provides four mailboxes for email,
namely, Inbox , Drafts , Outbox and
Sent .
Creating an Email
1Select Messaging > New Email from the
main menu.
2Select Recipients and press .
• Select one record in the recipients list and then
press to enter an email address.
•Select Options > Contact/Group/History to
select an email address.
3In the email editing screen, select sub-
ject and press to edit the contents.
4In the email editing screen, select the Content
text box and press to edit the content.
5In the email editing screen, select Attachment
to attach picture, music, video, or eBook.
6In the email editing screen, select Options to
save or send the email. The saved emails are in
the Messaging/Email/Drafts.
Note
In the recipients list screen, select the
addresses you want to sent, Cc, or Bcc
email to. Select Options > Set To/Set Cc/
Set Bcc or you can also delete/clear email
addresses.
Mailboxes
Your Vodafone 710 provides four mailboxes for
Emails, namely, Inbox ,Drafts , Outbox -
and SentOutbox .
V710.book Page 43 Tuesday, July 4, 2006 2:19 PM
Email
44
◆ Inbox
All Emails received are saved in the inbox.
Icons in Inbox
: A read email.
: An unread email.
Viewing and Editing Emails in Inbox
1Select an email and press to view the content.
If only the title of this email is received, the
phone will prompt whether to download other
information of the email.
2In the details screen, select Reply to reply the
sender.
Other Options for Inbox
1Access Inbox of email.
2Select Options for the following operations.
• View: to view the selected email.
• Select: to mark the selected emails in the
inbox.
• Reply: to reply to the selected email.
• Forward: to forward the selected email.
• Delete: to delete the selected email.
• Move to: to move the selected email to a spec-
ified folder.
• My folders: to categorize your emails in differ-
ent folders.
• Sort: to sort your emails according to date,
sender or topic.
• Sync inbox: to synchronize emails from server.
• Mark: to mark the selected emails in the inbox.
• Mark all: to mark all emails in the inbox.
◆ Drafts
The saved new emails are saved in the drafts.
Icons in Drafts
: Emails to be sent.
Viewing and Editing Emails in Drafts
1Select the desired email in the drafts and press
to enter the editing screen.
2Edit the related information. For details, follow
the same operations as in creating an email.
Other operations in Drafts
1Enter Drafts of email.
2Select Options for the following operations.
V710.book Page 44 Tuesday, July 4, 2006 2:19 PM

Email
45
Messaging
8
• Edit: to edit the selected emails in the drafts.
• Select: to mark the selected emails in the
drafts.
• New Email: to create a new email.
• Delete: to delete the selected email.
• Move to: to move the selected email to a spec-
ified folder.
• My folders: to categorize your emails in differ-
ent folders.
• Sort: to sort your emails according to date,
sender or topic.
• Mark all: to mark all emails in the drafts.
◆ Outbox
Those emails which failed to send are retained in the
outbox.
Icon for Outbox
: Emails failed to send.
Viewing and Editing Emails in Outbox
1Select an email and press to enter the editing
screen.
2Edit the related information. For details, follow
the same operations as those in creating an
email.
Other Operations in Outbox
1Enter Outbox of email.
2Select Options for the following operations:
• Edit: to edit the selected email.
• Select: to mark the selected emails in the out-
box.
• Send: to send the selected email.
• Delete: to delete the selected email.
• Move to: to move the selected email to a spec-
ified folder.
• My folders: to categorize your emails in differ-
ent folders.
• Sort: to sort your Emails according to date,
sender or topic.
• Mark all: to mark all emails in the outbox.
◆ Sent
The Emails sent to server are saved in the sent box.
V710.book Page 45 Tuesday, July 4, 2006 2:19 PM

Email
46
Icon for Sent
: A read email.
Viewing and Editing Emails in Sent
1Select an email and press to enter the editing
screen.
2Edit the related information. For details, follow
the same operations as in creating an email.
Other Options in Sent
1Enter Sent of email.
2Select Options for the following operations.
• View: to view the selected email.
• Select: to mark the selected emails in the sent.
• Forward: to forward the selected email.
• Delete: to delete the selected email.
• Move to: to move the selected email to a spec-
ified folder.
• My folders: to categorize your emails in differ-
ent folders.
• Sort: to sort your emails according to date,
sender or topic.
• Mark all: to mark all emails in the sent.
◆ Folder
You can categorize your emails in different folders.
You can enter Folder from the inbox, drafts, outbox
and the sent box.
Here's an example, using the folder of the inbox:
Select Email > Inbox. Then select Options > Folder
for the following operations.
• Rename: to rename the folder.
• Select: to enter one folder.
Email Settings
Select Messaging > Settings > Email to set the fol-
lowing items.
◆ Accounts
1Select Options > Add account and enter the
account name. Press to access the General
settings screen.
2The related account information contains:
Account name, Display name, Email address,
Protocol, Incoming mail server, User name,
Password, and Outgoing mail server.
V710.book Page 46 Tuesday, July 4, 2006 2:19 PM
Push Inbox
47
Messaging
8
3Select Options > Advanced settings to enter
the Advanced Settings screen.
4Return to the Account screen. Select Options >
Activate to activate this account.
5To delete an account, select an account and
then select Options > Delete account.
Note
For the account settings, contact Vodafone.
◆ Common Options
• Reply with history: to reply with history.
• Save sent email: to save sent emails to the sent
box.
• Send limit: to set the size of email.
• Receive limit: to set the limit of the received email.
If the size of the email exceeds the limit, only the
title of the email will be received. If Only header is
selected, only the title of the email will be received.
• Network Access Point: This option is used to select
information about the profile to be adopted when
you send emails. For more information, consult
Vodafone.
After finishing all settings, press Back.
◆ Memory Status
The memory in use of Inbox, Drafts, Outbox, Sent
and My folders are displayed.
Push Inbox
The Push Inbox is used to save the Push messages
you have received.
You can enable or disable Wap Push via the Internet
Settings. For more information, please refer to "Inter-
net Settings" on page 68.
Viewing Push Messages
In the Push Inbox, select a Push message, and then
press to view the details of the Push message.
◆ Icon for Push Inbox
• : A read Push message.
• : An unread Push message.
◆ Other Operations for the Push Inbox
• Load: To start the WAP browser and connect a URL
specified by the Push message.
V710.book Page 47 Tuesday, July 4, 2006 2:19 PM

Broadcast Inbox
48
• Delete: To delete the selected messages.
• Unmark all: To unmark all Push messages.
• mark all: To mark all the Push messages.
Push Inbox Settings
Select Messaging > Settings > Push messages to
set the Push inbox.
◆ Push Message Setting
You can select following options:
•Accept all: to set to accept all Push messages.
•Accept trusted: to set to accept only the trusted
Push messages.
•Accept MMS Push: to set to accept only the Push
messages prompting you with a multimedia mes-
sage.
•Accept none: to set to accept no Push messages.
◆ Push SL Setting
You can enable or disable the push SL function by
selecting On or Off.
◆ Whitelist and Blacklist
You can enable or disable whitelist and blacklist func-
tion by selecting On or Off.
◆ Push Whitelist
It is used to save the trusted Push message number.
◆ Push Blacklist
It is used to save the un-trusted Push message num-
ber.
Broadcast Inbox
The broadcast messages are saved in the broadcast
inbox. You can set the broadcast message.
Select Messaging > Setting > Broadcast to set the
following items.
• Service: to enable or disable this service.
• Subscription: to subscribe to broadcast channels or
cancel the subscription.
• Language: to select the language of the broadcast.
• Silent alert: to set whether to use an alert when
there is a new broadcast message.
• Auto delete: to set whether to auto delete earlier
messages when the broadcast inbox memory is
full.
V710.book Page 48 Tuesday, July 4, 2006 2:19 PM

Voice Mail Number
49
Messaging
8
Voice Mail Number
The voice mail number is already pre-set for you in
the phone. To access your voicemail, press and
hold in standby mode, the phone will dial out the
voice mail number automatically.
Common Phrases
Your Vodafone 710 has been preset with some com-
monly used phrases for inputting message, sending
messages while answering a call and auto replying.
You can edit them if you want.
1Select Messaging > Settings > Common
phrases.
2Select the phrase to be modified and then select
Modify.
V710.book Page 49 Tuesday, July 4, 2006 2:19 PM
50
9Music
Music enables you to manage your music files
easily and conveniently. It enables you to purchase a
huge variety of up to date music from Vodafone.
Vodafone offers a great variety of Music which is
always up to date.
My Music
You can play various music files, including those sup-
plied with the phone, recorded by yourself with the
phone, downloaded from the Internet, and attached
to email. You can also enjoy the online audio files.
Function Options
Select My Music > Options for the following opera-
tions.
Options Description
Open file To select and play the music files in your
phone.
Full
screen
To play the video file in full screen.
Mute/
Unmute
To mute or unmute the music
Playlist To access the music playlist.
Book-
marks
To access the bookmark list. You can
select and access the existed URL or
new stream media address to play
stream media files.
Cam-
corder
To enable the video camera function.
History To record the played music information.
Send To send the music file through mes-
sages, Email or Bluetooth.
Set as To set the music file as voice tone, video
tone or contact tone.
Property To view the information of the music
files.
Settings To set the play mode, full screen direc-
tion, and Stream setting.
Options Description
V710.book Page 50 Tuesday, July 4, 2006 2:19 PM
Vodafone Radio DJ
51
Music
9
Operations During Playing
During playing the music file, you can execute the fol-
lowing operations on the music file.
Note
When a call is coming:
• If a music file is being played, the music
file continues to play from where it was
interrupted after the call.
• If the music has been paused, the music
file stays in the paused state after the call.
Vodafone Radio DJ
Vodafone Radio DJ is a service which provides you a
selection of different music channels for you to
choose similar to Radio. If you skip tracks on a chan-
nel you listen to, the service will realise the kind of
music you are skipping and then not offer it again on
this channel. Also you can very easily mark music
tracks you like to download them later on.
You can do the following operations.
• My Channels: To create or edit the existed chan-
nels. Select Options to edit, create, rename, or
delete user-defined channels.
• RDJ Channels: Here you find a selection of differ-
ent music channels for you to choose. Select a
channel and then press to display the music
playlist contained in this channel.
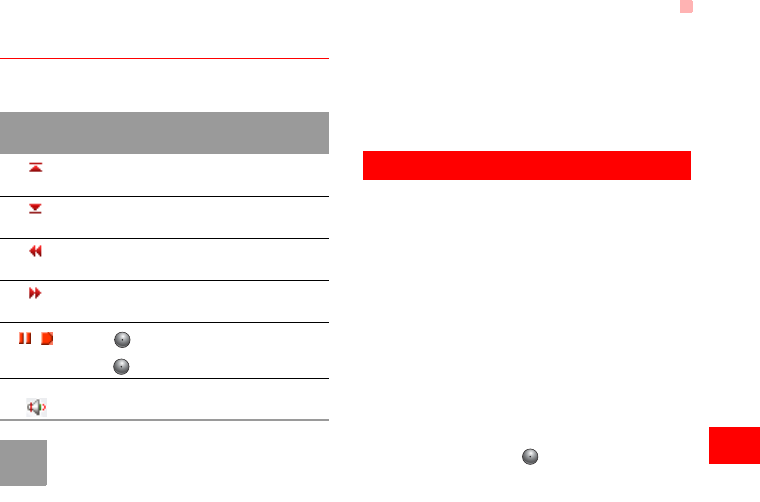
Opera-
tion Description
Press the up scroll key to play the previ-
ous music file.
Press the down scroll key to play the
next music file.
Press the right scroll key to fast forward
the music file.
Press the left scroll key to rewind the
music file.
/Press to pause the playing.
Press again to resume the playing.
Press the volume keys to adjust the vol-
ume.
V710.book Page 51 Tuesday, July 4, 2006 2:19 PM

Music Store
52
• RDJ Collections: In this area you find specific music
collections like the "best of hits" of an artist.
• My Account: To display and purchase the playing
time for streaming media. This will also be dis-
played automatically when your account balance is
too low for a channel or music album you have
selected.
Music Store
In the Vodafone Music Store you can find a great vari-
ety of music for you to download onto your mobile
phone.
My Wishlist
On your music wishlist you will find all the songs
which you have marked to download while listening
to a Radio DJ channel.
V710.book Page 52 Tuesday, July 4, 2006 2:19 PM

53
10Organiser & Tools
This function provides you with various assistant
tools, including SIM ToolKit, Alarm clock, Calendar,
Calculator, Unit converter, Currency converter, Syn-
chronise, Tasks, Voice recorder, Memo, World Time,
Stopwatch, Timer and Service dial number. You can
access the Organiser & Tools screen by select-
ing from the main menu.
SIM ToolKit
Your Vodafone 710 supports a number of clever Sim
ToolKit (STK) functions such as location based ser-
vices. For more information, consult Vodafone.
Alarm Clock
You can set several alarm clocks. You can also set
the prompt messages, alarm tones and the cycle
period for alarm clocks.
Setting Alarm Clocks
You can set an alarm clock as follows:
1Select one alarm from the list, and press to
set an alarm clock.
2Set the alarm time.
3Enter the prompt message.
4Select a ringtone. Your phone provides standard
ringtones and supports downloaded ringtones.
5Set the alarm cycle.
6Select whether to enable snooze.
7Select whether to vibrate when the time for an
alarm clock is up.
8Select whether to set the alarm tone.
9Press the left function key to start the alarm
clock.
Prompt Interface for an Alarm
When it is time for an alarm clock to ring, the selected
alarm tone is played and a prompt interface is dis-
played. You can stop the ringing by pressing any key
or by closing or opening your phone. On the prompt
V710.book Page 53 Tuesday, July 4, 2006 2:19 PM
Calendar
54
interface, you can select to snooze or stop the alarm
prompt.
• Snooze: On the prompt interface, press the right
function key to snooze the alarm. Then the alarm
will ring again in five minutes. You can snooze the
alarm three times.
• Stop: On the prompt interface, press the left func-
tion key to stop the alarm clock. Then the alarm
clock will not ring again.
If your phone is powered off, the alarm clock can still
ring, and you will be prompted whether to power on
the phone when it rings.
Stopping the Alarm Clock
Select an alarm clock from the list, and press the left
function key to deactivate it.
Calendar
With this function, you can view the calendar and
manage your schedules.
New Schedule
◆ Ways to Create Schedules
◆ Creating a Schedule
In the screen for editing schedule, you can set the fol-
lowing items: schedule title, schedule location,
Operation Description
On the
month
view
screen
Two ways are available:
• Select a date and press to access
the schedule event list of the current
day. Select Options > New to create
the schedule events of the current day.
• Select a date and select Options >
New to create the schedule events for
the current day.
On the
week view
screen
Select Options > New to create the
schedule events for the current day.
On the
day view
screen
Select Options > New to create the
schedule events for the current day.
V710.book Page 54 Tuesday, July 4, 2006 2:19 PM

Calendar
55
Organiser
&
10
schedule type, start/end time of the schedule,
whether to alarm, when to alarm before the start time,
alarm cycle, schedule details, alarm tone, and image
files.
Note
You can create up to 500 schedules in total
and 15 for each day. While creating a new
schedule, you need to set to alarm before
setting the alarm time, the alarm cycle, the
alarm tone and the image.
Calendar Functions
Enter calendar function and select Options, you can
execute the following operations on the calendars.
Prompt Interface for a Schedule
When it is time to remind you of a schedule, the
selected ringtone is played and a prompt interface is
Operation Description
View
mode
To view the calendar in three different
modes: month view, week view, and day
view.
New To create a new schedule.
Go to... To go to a certain date directly from the
Month view screen.
Display
events
To view all events, specified events, Cal-
endar files and to back up all schedules
to a memory card.
Delete
event
To delete all past events , specific period
events or all events.
Backup all To backup all schedules to the memory
card.
Restore
data
To restore all schedules from the mem-
ory card to the phone.
Memory
status
View the memory status, including the
used space and the total space.
Settings • Save location: you can save the sched-
ules to your phone or memory card.
• Main view: you can set the default view
to Month view, Week view or Day view.
• Week begin day: you can select Begin
with Monday or Begin with Sunday.
Operation Description
V710.book Page 55 Tuesday, July 4, 2006 2:19 PM
Calculator
56
displayed. You can stop the ringing by pressing any
key or by closing or opening your phone. On the
prompt interface, you can select to snooze or stop
the prompt.
• Snooze: On the prompt interface, press the right
function key to snooze. Then you will be prompted
again after five minutes. The prompt will always
snooze until you stop it.
• Stop: On the prompt interface, press the left func-
tion key to stop the prompt. Then you will not be
prompted any more.
Calculator
You can perform addition, subtraction, multiplication,
division and extraction operations on your phone.
• Press the number keys to enter the figures.
• Press the scroll key to enter the operators.
• Press the left function key to clear.
• Press the right function key to exit Calculator.
• Press to enter a radix point.
• Press to delete the character on the left of the
cursor.
• Press to perform extraction.
• Press to enter an equal mark.
Unit Converter
You can convert units of length and weight between
different systems on your phone.
1Press the up/down scroll key to select the unit
type bar, input unit bar or output unit bar.
2On the unit type selection bar, press the left/right
scroll key to select weight or length.
3On the From bar, press the left/right scroll key to
select the unit to be converted from.
4On the To bar, press the left/right scroll key to
select the unit to be converted to.
5Press the number keys to enter a numeric value
in the number bar.
Then you can view the conversion result.
Press or select CE to clear the numeric values
you entered.
V710.book Page 56 Tuesday, July 4, 2006 2:19 PM
Currency Converter
57
Organiser
&
10
Currency Converter
You can convert between different currencies on your
phone.
To using this function, access the Currency con-
verter screen, and then press the up/down scroll key
to switch between the setup items.
1On the Input bar, press the number keys to enter
a numeric value to be converted.
2On the From bar, press the left/right scroll key to
select the currency to be converted from.
3On the To bar, press the left/right scroll key to
select the currency to be converted to.
4On the Rate bar, enter the currency rate.
Then you can view the conversion result.
Press to clear the numeric values you entered.
Press Setting in the currency converter screen, and
you can select frequently used currency units. This
makes it easy to switch between selected units in the
From or To bar.
Synchronise
You can synchronise contacts with your personal
phone book stored on the Vodafone network. This
service might not be available in all Vodafone net-
works. Contact Vodafone for further details.
Select Synchronise from Organiser & Tools to
create or edit a profile. Select Options > View log to
view the latest synchronisation log. Before you use
the synchronise function, you may need to set a pro-
file.
1To create a profile, select Options > New to cre-
ate a profile.
2Press the left/right scroll key to switch between
Synchronise Item, Server Setting, and Network
Profile.
3In the Synchronise Item screen, select the item
to be synchronized and press to confirm it.
Then, enter the database path, User name,
Password of the synchronization items.
4In the Server Setting screen, enter the user
V710.book Page 57 Tuesday, July 4, 2006 2:19 PM
Tasks
58
name, password, server URL and port .
5In the Network profile screen, enter the proxy
server address and the port. Then, enter the net-
work access point and select a desired profile.
6Return to the previous menu and select Options
> Synchronise to start synchronising.
Note
Note that this service is not available on all
networks. Please contact Vodafone for more
information.
Tasks
You can define and manage tasks to be conducted
before a certain time. Your phone can remind you of
these tasks and track them automatically.
Select Tasks from Organiser & Tools .The tasks
are classified into three kinds: pending, done, and all.
You can define up to 1000 tasks on your phone.
New Tasks
To define a new task, press or select Options >
New on the Tasks screen. Then proceed with the fol-
lowing steps:
1Enter the title of the task.
2Set the deadline.
3Set the priority level.
4Set the accomplishment status of the task.
5Select whether to alert.
If you select alert, you need to set the time for
alert.
6Set the alert time of the task.
If you select not to alert, skip this step.
7Set the type of the task.
8Press the left function key to save it.
Other Operations on the Tasks Screen
On the Tasks screen, you can also perform the fol-
lowing operations: delete, edit, copy, mark finished,
V710.book Page 58 Tuesday, July 4, 2006 2:19 PM
Voice Recorder
59
Organiser
&
10
day view, send by Message, Email or Bluetooth, view
the memory status and delete all.
Operations on the Task Prompt
Interface
When it is time for the phone to remind you of a task,
it rings automatically and a prompt interface is dis-
played. You can stop the ringing by pressing any key
or by folding/unfolding your phone. On the prompt
interface, you can select to snooze or stop the task
prompt.
• Snooze: On the prompt interface, press the right
function key to snooze the alarm clock. Then the
phone will ring after five minutes. The prompt will
always snooze until you stop it.
• Stop: On the prompt interface, press the left func-
tion key to stop the ringing and close the prompt
interface. Then the phone will not ring any more.
Voice Recorder
You can record voices or sounds on your phone. You
can set the recording duration.
Select Organiser & Tools > Voice recorder from the
main menu, then you can execute the following oper-
ations.
Preparations Before Recording
1Set the duration: On the standby screen of the
voice recorder, select Options > Duration to set
the duration.
2View records: On the standby screen of the
voice recorder, select Options > Gallery to view
the audio files.
3Start recording: On the standby screen of the
voice recorder, press or select Option >
Record to start recording.
Operations During Recording
1Pause: During recording, press to pause, and
press again to resume.
2Stop and save: During recording, press the right
function key to stop recording.
V710.book Page 59 Tuesday, July 4, 2006 2:19 PM

Memo Pad
60
The audio file is saved in My Files\Music auto-
matically.
3Play an audio file instantly: After recording is fin-
ished, select Option > Play to play the audio file
instantly.
Alternatively, you can select Options for the fol-
lowing operations: send by Message, Email or
Bluetooth, set as tone and delete.
Memo Pad
You can take down important events on your phone.
You can save up to 100 such memos.
Select Memo from Organiser & Tools . If there is
no memo, you need to create one when you access
the Memo screen.
On the Memo Pad screen, you can perform the fol-
lowing operations: new, delete, edit, send by Mes-
sage or Bluetooth, view the memory status and
delete all.
World Time
You can view the time of important cities around the
world.
To switch among the time zones, press the left/right
scroll key.
If the daylight saving time (DST) is used in your city,
you need to set to DST. Then, you can get the right
local time. To set to DST, switch to the desired time
zone and then select Options > DST.
Stopwatch
You can use the stopwatch function and save up to
five records on your phone.
• Start: Press the left function key to start timing.
• Lap: Press the left function key to save the first
record of timing. Timing for the second record starts
automatically. You can go on timing and saving in
this way until five records are saved. Then the stop-
watch is stopped.
• Pause: Press the right function key during timing to
pause.
V710.book Page 60 Tuesday, July 4, 2006 2:19 PM

Timer
61
Organiser
&
10
• Continue: Press or select Options > Continue
to resume timing.
• Reset: In the state of pause, select Options >
Reset to clear all the stopwatch records.
Timer
You can set a timer for up to 99 hours and 59 min-
utes. After you have set it, the timer is displayed on
the home screen.
On the Timer screen, you can perform the following
operations: pause, continue and reset.
Service Dial Number
With this number you can get in touch with Vodafone.
V710.book Page 61 Tuesday, July 4, 2006 2:19 PM
62
11My Files
My Files enables you to manage the Pictures, Ring-
tones, Games, Music, Videos, Applications and Oth-
ers files conveniently. You can access My Files by
selecting from the main menu.
Pictures
Select My Files > Pictures to access the picture
folder. Select Download Pictures to download more
pictures from Vodafone live!. The downloaded files
are saved in this folder.
You can execute the following operations on the pic-
ture files.
Ringtones
Select My Files > Ringtones to access the ringtone
folder. Select Download Ringtones to download the
latest Ringtones from Vodafone. The downloaded
files are saved in this folder.
You can execute the following operations on the ring-
tone files.
Opera-
tion Description
View To view a picture file.
Send To send a picture file by message, post-
card, email or Bluetooth.
Cut To cut a picture file.
Copy To copy a picture file.
Delete To delete a picture file.
Mark/
Unmark
To select one or more pictures or cancel
the selection.
Set as
contact
image
To set a picture as thumbnail of a con-
tact.
Picture
edit
To edit a picture file.
Rename To rename a picture file.
Proper-
ties
To view the properties of one or more
files.
Opera-
tion Description
V710.book Page 62 Tuesday, July 4, 2006 2:19 PM
Games
63
My Files
11
Note
Some sound files are protected by DRM,
and may not be able to be used as a ring-
tone.
Games
Your Vodafone 710 supports Java games.
Select My Files > Games to access the game folder.
Select Download Games to download the latest
Java games from the Internet. The downloaded files
are saved in this folder.
Music
Select My Files > Music to access the music folder.
Select Download Music to download music from the
Vodafone live! portal. The downloaded files are
saved in this folder.
You can execute the following operations on the
music files.
Opera-
tion Description
Play To play a ringtone file.
Send To send a ringtone file by message,
email or Bluetooth.
Set as To set a ringtone as voice call tone,
video call tone or specific contact tone.
Cut To cut a ringtone file.
Copy To copy a ringtone file.
Delete To delete a ringtone file.
Mark/
Unmark
To select one or more ringtone files or
cancel the selection.
Rename To rename a ringtone file.
Proper-
ties
To view the properties of one or more
files. Opera-
tion Description
Play To play a music file.
Send To send a music file by message, email
or Bluetooth.
Set as To set a music file as voice call tone,
video call tone or specific contact tone.
V710.book Page 63 Tuesday, July 4, 2006 2:19 PM
Videos
64
While playing a music file, you can also execute the
following operations: open a file, view in full screen,
view the playlist, edit bookmarks, enable video cam-
era and view the history.
Videos
Select My Files > Videos to access the video folder.
Select Download Videos to download videos from
the Internet. The downloaded files are saved in this
folder.
You can execute the following operations on the
video files.
Operations During Playing
During playing a video file, you can also execute the
following operations: open a file, view in full screen,
mute, view the playlist, edit bookmarks, enable video
camera, view the history, send the file by MMS, Email
or Bluetooth, view the property and setting.
Cut To cut a music file.
Copy To copy a music file.
Delete To delete a music file.
Mark/
Unmark
To select one or more music files or can-
cel the selection.
Rename To rename a music file.
Proper-
ties
To view the properties of one or more
files.
Opera-
tion Description
Opera-
tion Description
Play To play a video file.
Send To send a video file by message, email
or Bluetooth.
Cut To cut a video file.
Copy To copy a video file.
Delete To delete a video file.
Mark/
Unmark
To select one or more video files or can-
cel the selection.
Rename To rename a video file.
Proper-
ties
To view the properties of one or more
files.
V710.book Page 64 Tuesday, July 4, 2006 2:19 PM

Applications
65
My Files
11
Applications
Any applications that you download are saved in this
folder.
Other
In the Other folder, you can save any kind of file. You
can also create new folders in this folder to cate-
gorise your files.
Memory Card
When the phone detects and recognises the memory
card, Memory card is displayed as a tab on the top
of the My Files screen. You can execute the same
operations on the contents in the memory card as
those in the phone. Your Vodafone 710 also provides
a function to format the memory card.
V710.book Page 65 Tuesday, July 4, 2006 2:19 PM
66
12Vodafone live!
The built-in browser makes it easy and pleasant to
tour around in the Vodafone live! portal. You can
access the Browser screen by selecting from the
main menu.
Vodafone live!
Browsing Pre-set Web Pages
In the homepage, select a link from the page; and
then select to browse the page. During browsing,
you can press the scroll keys to select a link to be
accessed. The selected link is highlighted.
Press to enter it.
Other Operations for the Homepage
After selecting Options from the homepage, you can
perform the following operations:
Function Description
Home-
page
To access the homepage.
Forward To go forward when you browse web
pages.
Book-
marks
To access the bookmark directory and
view the saved bookmarks.
Enter
URL
To enter a web site address and connect
it.
Recent
pages
To access pages you have browsed
recently. Ten entries of records can be
saved.
Save
page
To save the pages in your phone. Web
pages will be saved to the Saved pages
Save item To save contents on the page to the fold-
ers in your phone.
Refresh To refresh the current web page.
Exit To exit the current web page.
Saved
pages
To browse the saved pages offline.
Select Options > Goto to connect the
server end. Select Option > Delete to
delete the selected pages.
Function Description
V710.book Page 66 Tuesday, July 4, 2006 2:19 PM
Enter URL
67
Vodafone live!
12
Enter URL
Access the Enter URL screen, and then you can
enter the address of the web page to be accessed.
You can select Goto, Edit, Delete or Delete all from
the Options to perform corresponding operations
upon the entered address.
Bookmarks
With this option you can save and edit the information
of the websites that you often access.
Some bookmarks have been preset by Vodafone for
you on the phone. Select any one of them, and then
you can perform the following operations:
Adding a Bookmark
Select Add to add a Title and Address for a book-
mark.
Go to a Bookmark
Select a bookmark and press to connect the
selected bookmark. You may also connect to the
Settings • Save as homepage: to save the cur-
rent page as the homepage. You can
press the up/down scroll key to switch
between the title editing bar and the
address editing bar.
• Multimedia: to set whether to show
images or play background music.
• Cache: to set the cache to On/Off and
clear the cache.
• Cookies: to enable (On) or disable
(Off) cookies and clear cookies.
• Security: to show the "Current certifi-
cate", "CA certificates" and “Session
info“.
• Character set: to select one of the
character sets, including "Automati-
cally", "Unicode (UTF-8)", "UCS-2",
"GB2312", and "BIG-5".
• Clear recent page list: to clear recent
page list.
Function Description
V710.book Page 67 Tuesday, July 4, 2006 2:19 PM

Internet Settings
68
server to get the latest web page by selecting
Options > Goto.
Editing a Bookmark
Select a bookmark and then select Options > Edit to
edit the selected bookmark. The preset bookmarks
cannot be edited.
Deleting a Bookmark
Select a bookmark and then select Options > Delete
to delete the selected bookmark.
Internet Settings
These are preset for you to use the Vodafone ser-
vice. But if you need to modify them, open the
Browser and select Internet Settings.
V710.book Page 68 Tuesday, July 4, 2006 2:19 PM
69
13Video Call
Video calling is one of the major features of the 3G
network, enabling you to see as well as hear when
calling.
Functions on the Screen
During a video call, the phone displays the phone
number of the other party, call duration, and available
options.
During a video call, you can press to hold the call
and send a preset file to the other party. You can
press again to resume the call. Before you use the
function, you can preset a file in settings/video call/
Send freeze image.
You can also adjust the following settings:
Function operations
During a video call, you can select Options to do the
following operations:
Icon Description
Press the up or down scroll key to adjust
the brightness.
Press the left or right scroll key to zoom
in or zoom out.
Press the volume keys to adjust the vol-
ume.
/Press to switch between the loud-
speaker mode and the earpiece mode.
Opera-
tion Description
Hands-
free/Ear-
piece
Switch between the loudspeaker mode
and the earpiece mode.
Picture
in Pic-
ture
To set the P-in-P mode to off, top left,
top right or bottom left.
Switch
display
To switch display.
Icon Description
V710.book Page 69 Tuesday, July 4, 2006 2:19 PM
Function operations
70
External
view or
Internal
view
To switch between the main lens and the
assistant lens.
Image
quality
To set the image quality to best quality
or more smooth.
Forbid
video/
Open
video
To forbid or allow the video from your
side.
Forbid
audio/
Open
audio
To forbid or allow the audio from your
side.
Play file To play a media file.
Record To record a video clip. A recorded video
clip is saved to the My Files/Videos
directory.
Opera-
tion Description
Other
Applica-
tions
• SMS: To access the inbox.
• Contact: To access the Contacts
screen.
• Call Log: To access the Call Log
screen.
Opera-
tion Description
V710.book Page 70 Tuesday, July 4, 2006 2:19 PM
71
14Entertainment
You can use the phone to play games, take photos,
and listen to online music.
Games
You can play games and download more games.
Downloaded games are saved to the My
Files\Games directory.
Downloading Games
Vodafone offers a great choice of games for your
mobile phone. To download one of these to the
phone or memory card, select Download Games.
Available Options of Games
You can scroll the cursor to a Java game and press
or select Options > Select to launch the game.
In the Games screen, you can select Options to do
the following operations:
Opera-
tion Description
Select To launch the game.
Update To upgrade the game.
Delete To delete the game.
Proper-
ties
To view the property of the game.
Move To move games saved in the phone to
the memory card and vice versa.
Security To set the security requirements of the
game:
• Net Access
• Application Auto In
• Local Connectivity
• Messaging
• Multimedia Recording
• Read User Data Access
• Write User Data Access and Phone
call
Send To send the game to a recipient through
email or Bluetooth.
Setting To set the volume, vibration and internet
setting.
Opera-
tion Description
V710.book Page 71 Tuesday, July 4, 2006 2:19 PM
Camera
72
Camera
Press the Camera key or select Entertainment >
Camera to launch the camera.
Operations in the Viewfinder Screen
In the viewfinder screen, you can:
Note
If you use the assistant lens and set the res-
olution to 640 × 480, you cannot zoom in or
zoom out.
In the viewfinder screen, you can select Options to
set the following items:
Icon Operation
Press the left/right scroll key to adjust
the brightness.
Press the up scroll key or the down
scroll key to zoom in or zoom out.
Press the volume up key or volume
down key to adjust the contrast
Opera-
tion Description
Snapshot
To take a photo.
Video
camera
To record a video clip. For details, see
"Operations During Recording".
Frame To choose a frame for pictures.
Normal
size or
Screen
size
To set the viewfinder size.
Gallery To access the My Files/Pictures direc-
tory to view pictures.
Internal
view or
External
view
To switch between the assistant lens
and the main lens.
V710.book Page 72 Tuesday, July 4, 2006 2:19 PM