Hunter Douglas Window Fashions LEV ECTR0008 User Manual
Hunter Douglas Window Fashions ECTR0008
User Manual
Remote Control
Guide
2 3
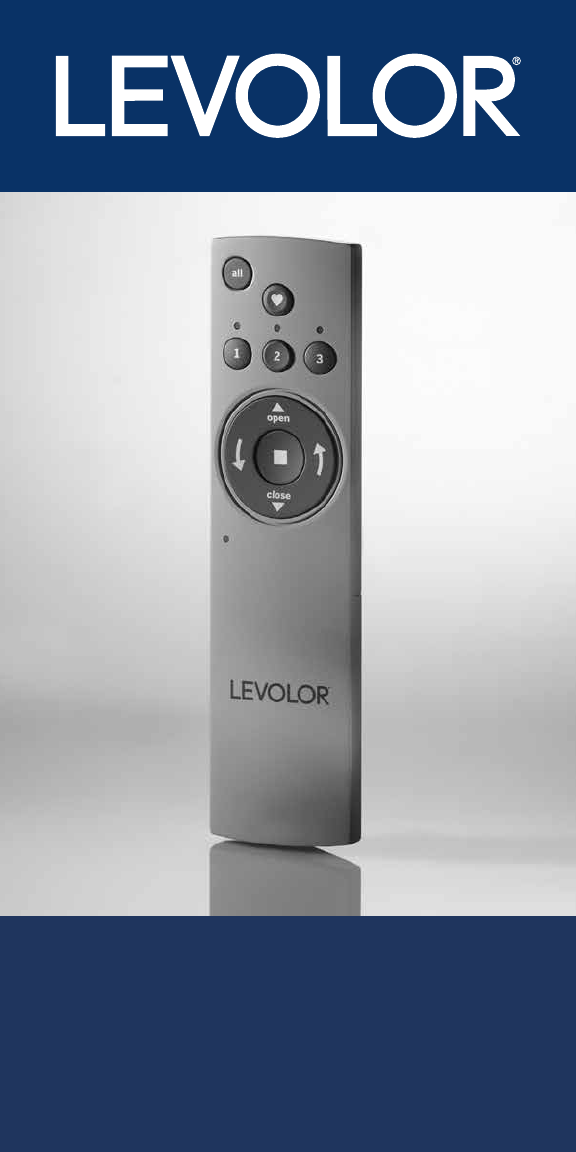
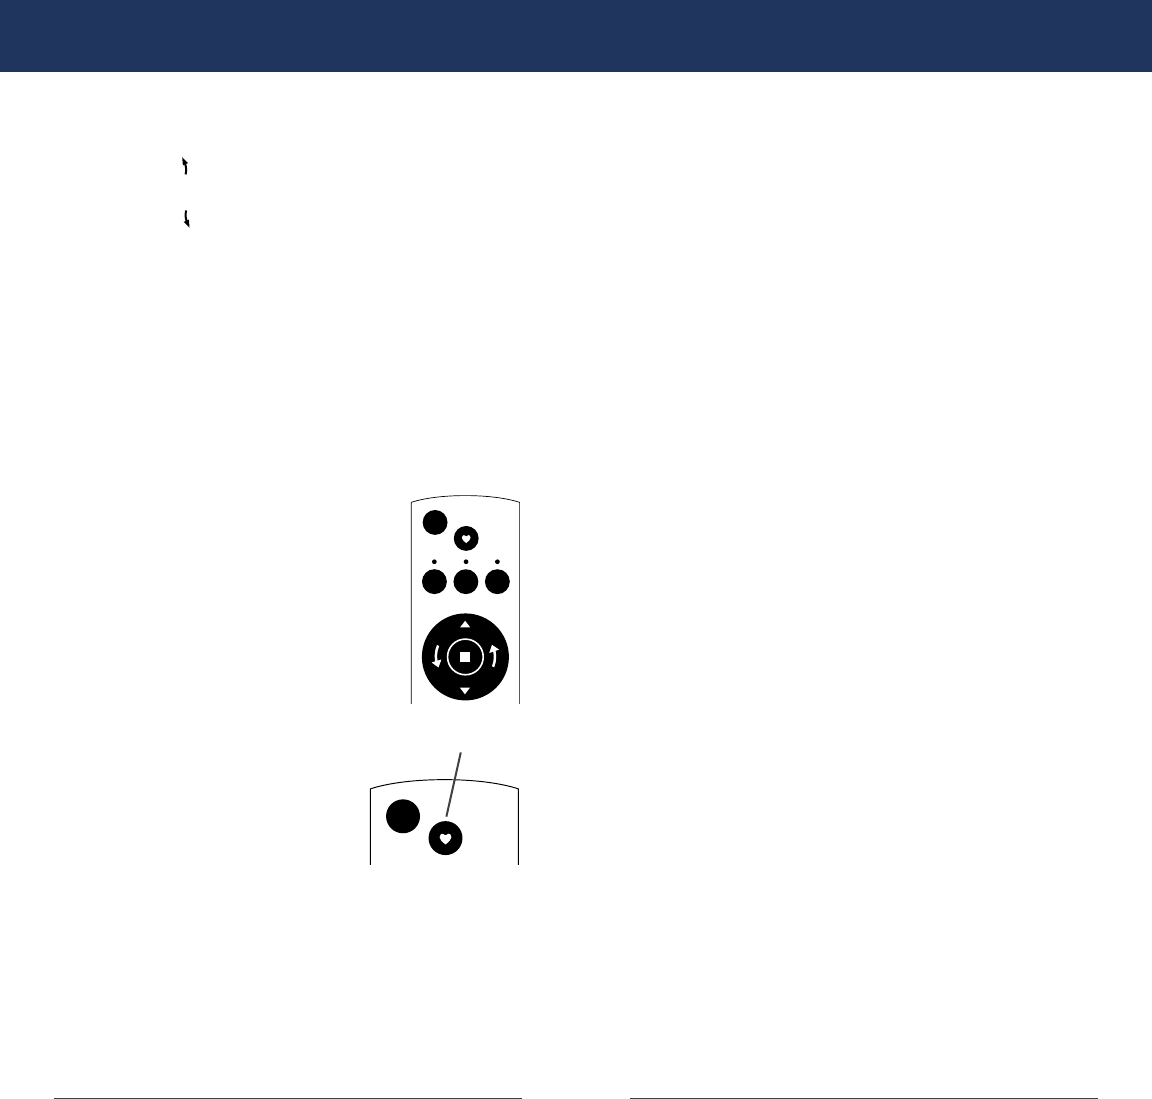
Remote Control Buttons
BACK
All Favorite
Groupings
Programming
Light
Indicator
Light
Battery
Compartment
Reset
Button
Function
Arrows,
Open,
Close, Tilt
FRONT
Button Key Symbol Function LED Light Color
All all Select all shading
groups at once
Groupings 1 ,2, 3 Shading Groups Green LED
Indicator Light
Favorite ♥Moves shade to pre-
set favorite position
Open ▲Shade Up &
Window Uncovered
Close ▼Shade Down &
Vanes Closed
Stop ■Stops Shade
Left Arrow Shade Down &
Vanes Closed
Right Arrow Shade Down &
Vanes Open
Programming
Light
Red LED
Indicator Light
Remote Control Guide Remote Control Guide
Table of Contents
© 2017 LEVOLOR®, Inc.
Thank you for your purchase of LEVOLOR® window
coverings with motorized operating system. This
guide will help you set up and operate your new
remote control and help you understand functions
and capabilities, allowing you to make the most of
your new Sheer Shadings purchase.
Table of Contents
Remote Control Buttons ...................................................3
Explanation of Functions ............................................ 4 - 6
GROUPS ........................................................................4
FAVORITES ...................................................................5
More than One Remote ................................................5
Terms to Know ..............................................................6
Getting Started ..................................................................7
Battery Placement .......................................................7
Mounting LEVOLOR® Remote Holder .........................7
Activating and Operating ...........................................8 - 10
Join a Window Covering to a GROUP ..........................8
Set a FAVORITE Position ..............................................9
Operating Window Coverings ....................................10
Additional Programming ...........................................11 - 12
Remove a Window Covering from a GROUP ..............11
More than One Remote ...............................................11
Create a Duplicate Remote ........................................ 12
Reset Window Covering / Remote ................................ 13
Reset Programming ................................................... 13
Reset Travel Limits ...................................................... 13
Reset Remote ............................................................. 13
Battery Replacement ...................................................... 14
Trouble Shooting .............................................................. 15
Radio Frequency Compliance ................................. 16 - 17
Warranty ............................................................................ 17
4 5
Explanation of Functions Explanation of Functions
1 2 3
all
open
close
1 2 3
all
open
close
Once your remote is programmed, you will be able
to operate and control the position and adjustment
of your new window coverings with a touch of a button.
You will be able to open/close and adjust the tilt position
of the vanes.
By setting up GROUPS and FAVORITES you will be able to
perform all functions.
GROUPS
Joining a window covering to a GROUP is
what connects a window covering to an
individual remote and allows the remote
to communicate with the window cover-
ing, so the window covering will follow the
remote commands. A window covering
will not operate with the remote, un-
less it is assigned to a GROUP.
Each LEVOLOR remote offers 3 GROUP assignments, desig-
nated by buttons numbered 1, 2, and 3 on the remote.
A GROUP can consist of a single window covering, or be
comprised of multiple window coverings, assigned to that
particular GROUP button. Window coverings assigned to the
same GROUP, will operate at the same time, when functions
are selected on the remote. There is no limit to the number of
window coverings you can assign to a given GROUP.
If you want a window covering to operate independently of other
window coverings, it must be added to a GROUP of its own.
A window covering can be added to more than one GROUP on
the same remote (or separate remotes).
Once the window coverings have been joined to a GROUP, the
remote will operate your window covering.
See page 8 "Join a window covering to a group".
Remote Control Guide Remote Control Guide
FAVORITES
Setting FAVORITES stores a preferred position
for each individual window covering, and recalls
stored position when the FAVORITES button is
selected. (Favorites button is designated by the heart ♥ sym-
bol.) Each window covering can have ONLY ONE FAVORITE
position. Upon arrival, each of your window coverings will be
set to the default FAVORITE position, which is half way down
with vanes closed. You can re-program each shade to your
FAVORITE position.
NOTE: the FAVORITE position for a given window covering is
stored in the window covering itself. The favorite position is
always the same regardless of which GROUP or GROUPS the
window covering is assigned to or which remote you use. If
you set a FAVORITE with one remote on one shade, and then
overwrite it with another FAVORITE position with a different
remote, you will only have the FAVORITE as set by the last
remote. From now on, any remotes programmed to that
shade will trigger the same FAVORITE position.
See page 9 "Set a FAVORITE position".
MORE THAN ONE REMOTE
Each motorized window covering can be ordered with or with-
out a remote. If you chose to have multiple remotes you have
two options in how each remote will function.
1. Additional remote
• Can be programmed differently from original remote.
• Can control a different set of window coverings and/
or different GROUPS.
2. Duplicate remote
• An exact duplicate of original remote.
• Must control the same set of window coverings
and/or GROUPS.
See page 9 for instructions on creating duplicate remote.
TRAVEL LIMIT/STOPS
A term used to describe the points when a window covering
stops along its travels. The window covering should travel
the full length of the window opening and stop. If the window
covering does not travel as expected, these limits can be
adjusted by resetting the window covering travel limits.
See page 12 "Resetting the Shade".
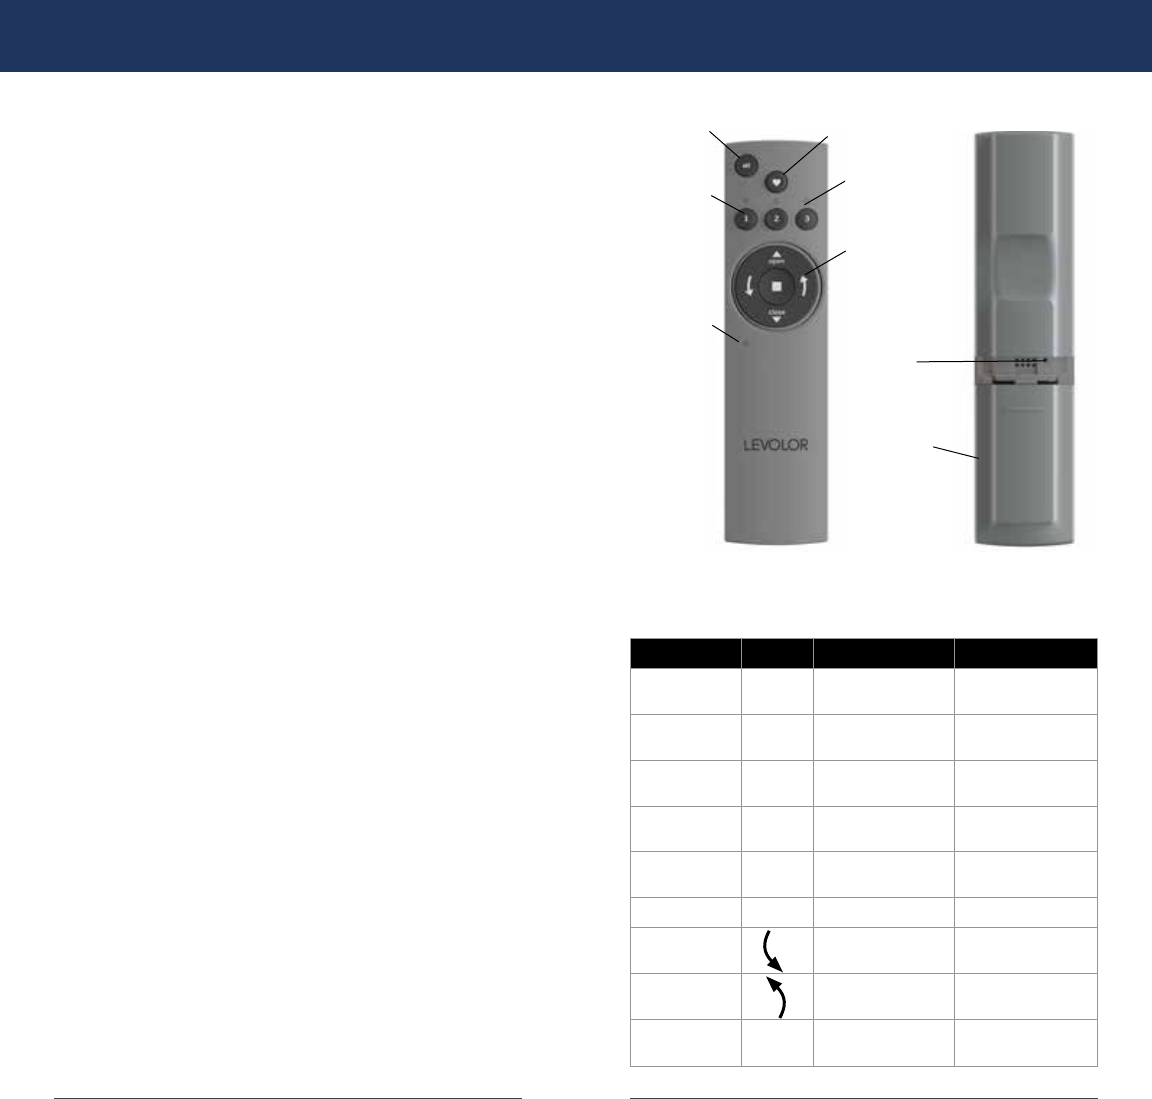
Favorites button
6 7
Explanation of Functions
Manual
Control
Button
Remote Control Guide Remote Control Guide
Getting Started
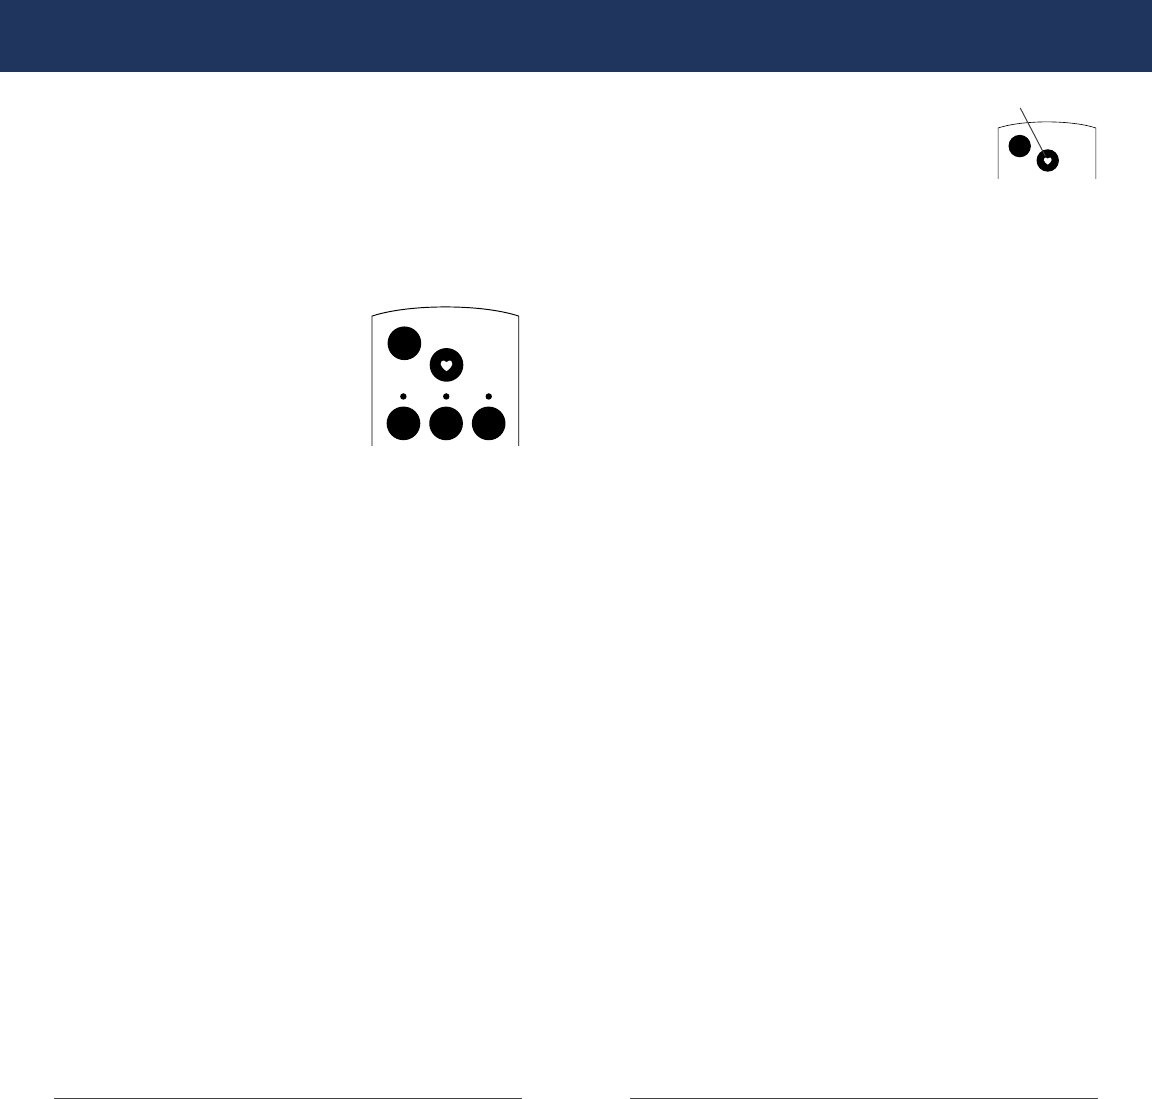
MANUAL CONTROL BUTTON
A manual control button is located
on the motor side of the headrail.
This button can control the window
covering without the remote. This
button is also used to program
your remote.
STANDARD BATTERY PACK
The standard power source provided with
the Levolor motorized operating system. A
tube of batteries that is connected to and
installed behind the headrail to supply power to the window
covering allowing it to link and function with the remote.
SATELLITE BATTERY PACK
An optional power source that allows the battery pack to be
mounted on the top of a headrail, next to molding or under the
sill. It is the best choice when the window covering is mounted
in a high window, restricting access to the battery pack.
REMOTE RESET BUTTON
A small recessed button located under the battery
compartment cover on the back of the remote. This
is used when creating a duplicate remote and/or
resetting the remote.
BATTERY PLACEMENT:
1. Remove the back cover, to expose the battery
compartment.
2. Use two new AAA Alkaline batteries (provided).
Slide a battery into each compartment being
sure to align correct positive and negative ends
and press into place.
3. Replace the back cover.
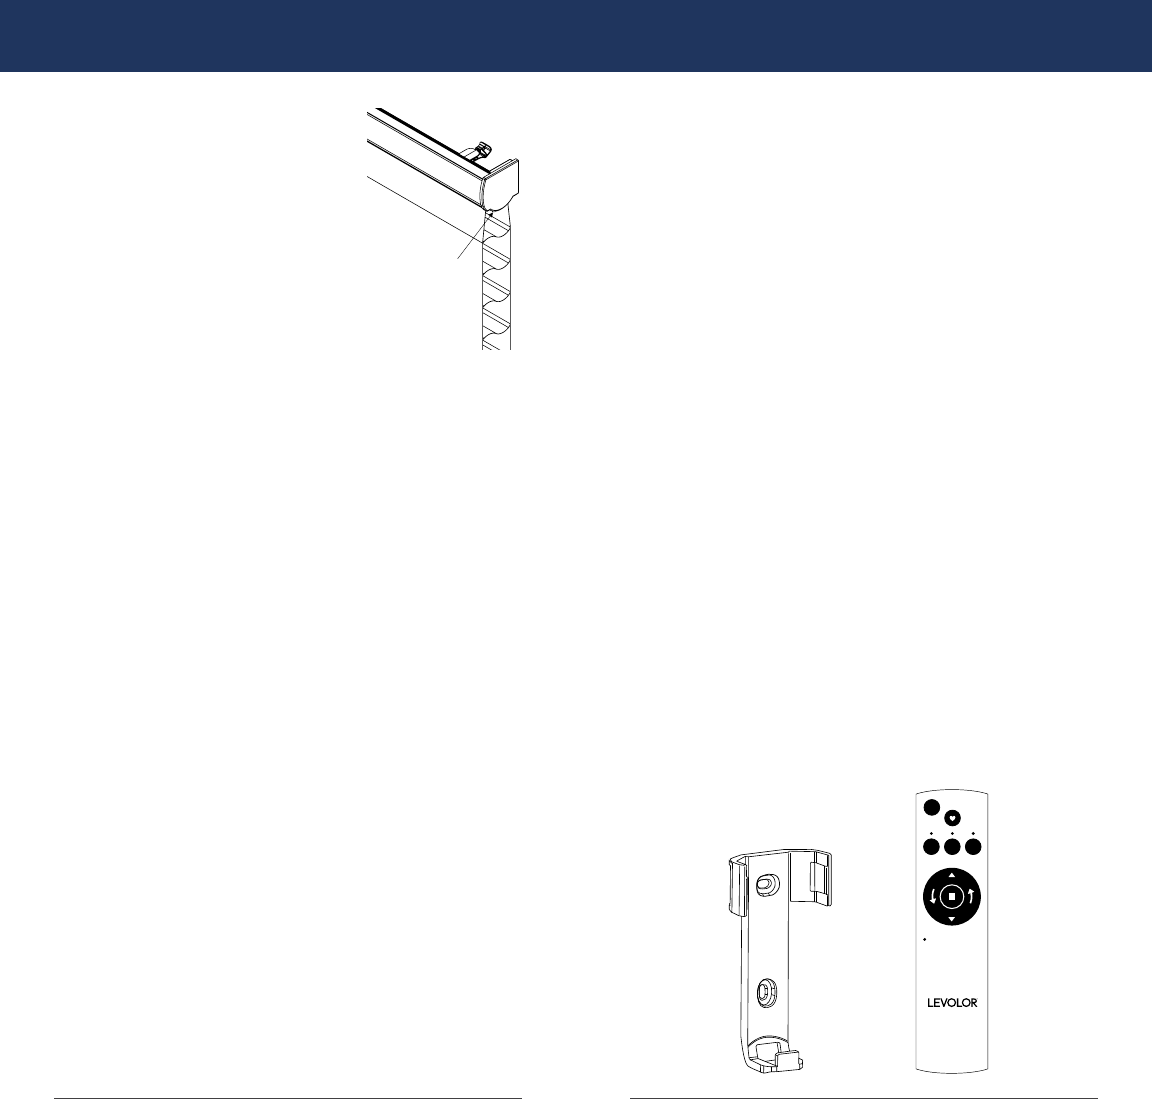
TOOLS NEEDED TO MOUNT REMOTE HOLDER:
— Power drill
— 3⁄32" drill bit
— Phillips screwdriver
— Pencil
— Drywall Anchors, if mounted into drywall
(not provided).
MOUNTING INSTRUCTIONS
1. Choose a location to mount the Remote Holder.
2. Orient the Remote Holder on the wall. Mark
screw holes.
3. If you are mounting the Remote Holder onto wood,
use a 3⁄32" drill bit to drill the screw holes.
4. Attach the Remote Holder to the wall using the
screws provided.
5. Gently push the remote into the Remote Holder
until it is snug.
NOTE: If you are mounting the Remote Holder onto drywall,
use drywall anchors.
1 2 3
all
open
close

8 9
Activating and Operating Activating and Operating
Remote Control Guide Remote Control Guide
JOIN A WINDOW COVERING TO A GROUP
NOTE: The LEVOLOR Remote will not operate a window
covering until the window covering has been added to
a GROUP.
1. Press and hold ■ STOP for 4 seconds to put the
remote in program mode.
2. The RED Programming light on the lower left of
the remote will flash to indicate the remote is in
program mode.
3. Press the desired GROUP number (1, 2 or 3) on
the remote.
4. The GREEN GROUP indicator light above the
GROUP button will flash to show it is selected.
5. Press and hold the manual control button on the
window covering.
6. While continuing to press the manual button,
press ▲ OPEN on the remote. The window
covering will move slightly to indicate it has
been joined to the GROUP.
7. Release the manual control button.
8. Press and hold ■ STOP for 4 seconds to exit program
mode. The lights will stop flashing.
SET A FAVORITE POSITION
Each shade has one FAVORITE position. Default setting is
half way down with vanes closed. Setting a new FAVORITE
position overwrites any previous setting.
1. Open or close the window covering to the
desired position.
2. Press and hold ■ STOP for 4 seconds to put the
remote in program mode.
3. The RED Programming light on the lower left of
the remote will flash to indicate the remote is in
program mode.
4. Press and hold the manual control button on the
window covering.
5. While continuing to press the manual control button,
press ♥ FAVORITE on the remote. The window cover-
ing will move slightly to indicate it has set this window
covering position as your FAVORITE.
6. Release the manual control button.
7. Press and hold ■ STOP for 4 seconds to exit program
mode. The lights will stop flashing.
OPERATING WINDOW COVERINGS
Once the window coverings have been joined to a GROUP
or multiple GROUPS, the remote is ready to operate the
window covering(s). Multiple window coverings can be
operated at the same time.
1. To wake up the remote press ■ STOP. The GREEN
indicator light from the last GROUP(S) selected
will be highlighted and active.
2. Press ALL or GROUP 1, 2 or 3 button(s) to select
specific window covering(s) to operate. The selected
GROUP(S) GREEN indicator light above the number
will light to show they are selected.
3. Multiple GROUP buttons may be selected at the
same time.
4. To deselect a GROUP, press the GROUP button again.
The GREEN indicator light above the GROUP button
will go out.
5. Press ▲ OPEN to open the selected window
covering(s).
Note: It is recommended that only similar window coverings
be included in a GROUP because of differences in product
features and operation.
10 11
Activating and Operating Additional Programming
1 2 3
all
open
close
Remote Control Guide Remote Control Guide
6. Press ▼ CLOSE to close the selected window
covering(s).
7. Press the RIGHT ARROW to close the window covering
and open the vanes or rotate the vanes to the right.
8. Press the LEFT ARROW to close the vanes or rotate
the vanes to the left.
9. Press ■ STOP to stop window covering/vane movement
anywhere along its travel path.
10. While the window covering is in motion, press the
opposite of its motion ▲ OPEN or ▼ CLOSE) to
reverse direction.
11. Press ♥ FAVORITE and window covering(s) will move
to your preset FAVORITE position.
To operate the shade using the remote: press the GROUP
button and then the desired function. You can operate more
than one group at a time, by pushing multiple
group buttons and then pushing desired
function. (As an example, you could press
GROUP button 1 & 3 in succession and then
select the function OPEN, and all window
coverings assigned to GROUP(S) 1 & 3, will
open.) You can also press the ALL button
and then select the function, and all shades
assigned to all GROUPS will perform the
function you selected.
To operate the window covering using
the FAVORITE function: press the GROUP
button and then select the FAVORITES
button. You can also select multiple
GROUP buttons, and then press the FA-
VORITES button, or you can press ALL
and then press the FAVORITE button.
REMOVE A WINDOW COVERING FROM A GROUP
1. Press and hold ■ STOP for 4 seconds to put the
remote in program mode.
2. The RED Programming light on the lower left of
the remote will flash to indicate the remote is in
program mode.
3. Press the desired GROUP number (1, 2 or 3) on
the remote.
4. The GREEN GROUP indicator light above the
GROUP number will flash to show it is selected.
5. Press and hold the manual control button on the
window covering.
6. While continuing to press the manual button, press
▼ CLOSE on the remote. The window covering will
move slightly to indicate it has been removed from
the GROUP.
7. Release the manual control button.
8. Press and hold ■ STOP for 4 seconds to exit program
mode. The lights will stop flashing.
MORE THAN ONE REMOTE
Each motorized window covering can be ordered with or with-
out a remote. If you chose to have multiple remotes you have
two options in how each remote will function.
1. Additional remote
• Can be programmed differently from original remote.
• Can control a different set of window coverings and/
or different GROUPS.
2. Duplicate remote
• An exact duplicate of original remote.
• Must control the same set of window coverings
and/or GROUPS.
See page 9 for instructions on creating duplicate remote.
1 2 3
all
open
close
Favorite Button

12 13
Additional Programming Reset Window Covering / Remote
Remote Control Guide Remote Control Guide
CREATING A DUPLICATE REMOTE
A duplicate remote will operate the same set of window
coverings and GROUPS as the original remote.
1. Remove the back cover from the new remote.
2. Using a paper clip, press and hold the recessed Reset
button for 6 seconds, until the GREEN GROUP indicator
lights flash twice. Replace the back cover.
3. Press and hold ■ STOP for 4 seconds on the original
remote to put it in program mode.
4. The RED Programming Light on the lower left of the
original remote will flash to indicate the remote is in
program mode.
5. While pressing and holding ALL on the new remote,
press and release ■ STOP on the original remote.
6. All of the GREEN GROUP button indicator lights on the
duplicate remote will flash twice to indicate all of the
information from the original remote has been copied.
7. Press and hold ■ STOP for 4 seconds on the original
remote to exit program mode.
NOTE: Additional remotes can be programmed differently
from original, to control a different set of window coverings
and/or different GROUPS.
RESET PROGRAMMING
This reset erases all programming stored in the window
covering, including GROUP assignments, preventing any
remote from operating the window covering. Its primary
use is during installation to correct GROUP assignments.
Note: This reset does not affect travel limits.
1. Press and hold the manual control button for a total of
12+ seconds. The window covering will move slightly
once after 6 seconds, then again after 12 seconds
2. Release the manual control button.
3. Refer to “Join a window covering to a GROUP” on
page 8, to program the window covering to a group.
RESET TRAVEL LIMITS
1. Press and hold the manual control button for 6+
seconds. The shading moves slightly up and down
once to indicate that it has been reset.
2. Release the manual control button.
3. The shade will now move on its own to set both the
top and bottom motor limits. Once this process is
done, the shading will move briefly in both directions.
RESET REMOTE
To remove any connections previously programmed between
the remote and any window coverings.
• Using a paper clip, BRIEFLY press the remote
reset button.
Previously paired Window covering(s) will not operate with
this remote anymore.

14 15
Replacing Batteries Trouble Shooting
Remote Control Guide Remote Control Guide
BATTERY REPLACEMENT
Replacing the batteries in the remote will not cause the loss
of any window covering programming, including GROUPS and
FAVORITE. The remote uses two Alkaline AAA batteries.
To replace the batteries in the remote:
1. Slide open back of battery compartment.
2. Gently lift and remove the old batteries. To remove
batteries use a small screwdriver or fingernail to lift
battery and remove from slot.
3. Insert new batteries, be sure to align correct positive
and negative ends and press into place.
4. Align and replace the back cover onto the backside
of the remote.
NOTE: When the window covering starts moving slowly,
the batteries in the window covering battery pack may
need to be replaced. More than likely the batteries in the
remote are just fine.
TROUBLE SHOOTING
Problem Window Shading does not operate with the
remote control.
Solution Make sure the Indicator light on the
remote control comes on when you try to
operate the widow shading. If the Indicator
light does not come on replace the batteries
in your remote control.
Note: Shade can still operate using the
manual control button on the headrail. If the
shading doesn’t operate with the manual
control button make sure it has power. If
the shade does not have power replace the
batteries on the standard battery pack or
the satellite battery pack.
Problem The window shading does not open or close
fully or has an intermediate stop that is no
longer wanted.
Solution Make sure the operation of the shade is not
obstructed. Reset the shading as described
in “Reset Programming” on page 12.

16 17
Compliance / Warranty Compliance / Warranty
Remote Control Guide Remote Control Guide
U.S. RADIO FREQUENCY FCC
COMPLIANCE STATEMENT
U.S. Radio Frequency FCC Compliance
This device complies with Part 15 of the FCC Rules. Operation
is subject to the following two conditions:
(1) This device may not cause harmful interference, and
(2) This device must accept any interference received,
including interference that may cause undesired
operation.
This equipment has been tested and found to comply with the
limits for a Class B digital device, pursuant to Part 15 of the
FCC Rules. These limits are designed to provide reasonable
protection against harmful interference in a residential instal-
lation. This equipment generates uses and can radiate radio
frequency energy and, if not installed and used in accord-
ance with the instructions, may cause harmful interference
to radio communications. However, there is no guarantee
that interference will not occur in a particular installation. If
this equipment does cause harmful interference to radio or
television reception, which can be determined by turning the
equipment off and on, the user is encouraged to try to correct
the interference by one or more of the following measures:
• Reorient or relocate the receiving antenna.
• Increase the separation between the equipment
and receiver.
• Connect the equipment into an outlet on a circuit
different from that to which the receiver is connected.
• Consult the dealer or an experienced radio/TV
technician for help.
Any changes or modifications not expressly approved by
the party responsible for compliance could void the user’s
authority to operate the equipment.
INDUSTRY CANADA
Under Industry Canada regulations, this radio transmitter
may only operate using an antenna of a type and maximum
(or lesser) gain approved for the transmitter by Industry
Canada. To reduce potential radio interference to other users,
the antenna type and its gain should be so chosen that the
equivalent isotopically radiated power (e.i.r.p.) is not more
than that necessary for successful communication.
This device complies with Industry Canada license-exempt
RSS standard(s). Operation is subject to the following two
conditions:
(1) this device may not cause interference, and
(2) this device must accept any interference, including
interference that may cause undesired operation of
the device.
Class B Digital Device Notice
This Class B digital apparatus complies with Canadian
ICES-003, RSS-Gen and RSS-210.
WARRANTY
For warranty information visit Levolor.com or contact customer
service at 1-800-538-6567
©2017 LEVOLOR®, Inc.
3 Glenlake Parkway NE
Atlanta, GA 30328 2019610