Hytera Communications MT680F4 TETRA Mobile Terminal User Manual
Hytera Communications Corporation Ltd. TETRA Mobile Terminal
User Manual

Preface
Thank you for purchasing Hytera MT680 TETRA digital mobile
terminal. MT680 is equipped with a large transflective TFT color
display and a built-in GPS module, and can operate in both TMO
and DMO modes. The benefits that this terminal can deliver will
dramatically improve your working efciency.
To derive optimum performance from the terminal, please read the
Safety Information Booklet and Owner’s Manual carefully before
use.
Telephone Call
Telephone call is usually a full duplex call initiated between
the terminal and a PSTN subscriber (such as telephone
user or mobile phone user).
To send or receive telephone calls, the mobile terminal
must operate in TMO mode, and must be authorized to
access public network through PSTN gateway. Telephone
call is a network service. For more details and availability
of the service, please contact your service provider.
Emergency Call
Emergency call has the highest priority, and is very helpful
for the user to request help when emergency occurs.
Generally, it is set to group call type. Emergency call can
break off any non-emergency calls in progress.
DMO (Direct Mode Operation)
DMO mode allows the terminals to communicate directly
with each other in simplex mode, without network
restriction. But functions that require network access, such
as telephone call and short message, will be disallowed.
TMO (Trunked Mode Operation)
TMO mode allows the terminals to communicate with
each other via the TETRA network, in half duplex or full
duplex mode. Functions that require network access are
supported.
Icon Information
The following icons are available through this manual:
Caution: indicates situations that could cause
damage to your terminal.
Note: indicates tips that can help you make
better use of your terminal.
Term Explanation
Key Operation
Short press: to press a key and release it quickly.
Long press: to press and hold down a key for above 2.5
seconds.
Hold down: to press a key and remain holding it down.
Individual Call
Individual call is a simplex or duplex call initiated by a
single user to another user, involving the calling party and
the called party only.
Group Call
Group call is a simplex call initiated by a single user to a
group of users, involving the calling party and all the group
members.
To operate in TMO mode, the terminal must be granted
authorization by your service provider, and must be within
the network coverage.
Full Duplex
Full duplex allows the ability to communicate in both
directions simultaneously.
Half Duplex
Half duplex, also known as simplex, allows the ability to
communicate in only one direction, at a time. Two-way
communication is possible, but not simultaneously.
Copyright Information
Hytera and HYT are the trademark or registered trademark
of Shenzhen Hytera Science & Technology Co.,Ltd. in
PRC and other countries and/or areas. Hytera retains the
ownership of its trademarks and product names. All other
trademarks and/or product names that may be used in this
manual are properties of their respective owners.
The Hytera product described in this manual may include
Hytera computer programs stored in memory or other
media. Laws in the PRC and/or other countries or areas
preserve for Hytera exclusive rights for Hytera computer
programs. The purchase of this product shall not be
deemed to grant, either directly or by implication, any
rights to the purchaser with respect to Hytera computer
programs. Any Hytera computer programs may not be
copied, modified, distributed, decompiled, or reverse-
engineered in any manner without the prior written consent
of Hytera.
Disclaimer
Hytera endeavors to achieve the accuracy and
completeness of this manual, but no warranty of accuracy
or reliability is given. All the specifications and designs
are subject to change without notice due to continuous
technology development. No part of this manual may be
copied, modied, translated, or distributed in any manner
without the express written permission of Hytera.
If you have any suggestions or would like to learn more
details, please visit us at http://www.hytera.cn.
RFEnergyExposureCompliance
● Your radio is designed and tested to comply with a number of national and international
standards and guidelines (listed below) regarding human exposure to radio frequency
electromagnetic energy. This radio complies with the IEEE and ICNIRP exposure limits for
occupational/controlled RF exposure environment at operating duty factors of up to 50%
transmitting and is authorized by the FCC for occupational use only. In terms of measuring
RF energy for compliance with the FCC exposure guidelines, your radio radiates measurable
RF energy only while it is transmitting (during talking), not when it is receiving (listening) or
in standby mode.
● The device complies with SAR and/or RF field strength limits of RSS-102 requirement
Your radio complies with the following of RF energy exposure
standards and guidelines
● United States Federal Communications Commission, Code of Federal Regulations; 47CFR
part 2 sub-part J
● American National Standards Institute (ANSI)/Institute of Electrical and Electronic Engineers
(IEEE) C95. 1-1992
● Institute of Electrical and Electronic Engineers (IEEE) C95. 1-1999 Edition
● International Commission on Non-Ionizing Radiation Protection (ICNIRP) 1998
Operational Instructions and Training Guidelines
● To ensure optimal performance and compliance with the occupational/controlled environment
RF energy exposure limits in the above standards and guidelines, users should transmit no
more than 50% of the time and always adhere to the following procedures:
● Gain of antenna must not exceed 5.5dBi.
● Antenna Installation: Install the mobile antenna at least 108 cm away from your body, in
accordance with the requirements of the antenna manufacturer/supplier.
Transmit and Receive
To transmit (talk), push the Push-To-Talk (PTT) key; to receive, release the PTT key.

EU Regulatory Conformance
The equipment is in compliance with the essential requirements and other relevant provisions
of the Directive 1999/5/EC.
FCC Licensing Information
Part 15 Compliance
This equipment has been tested and found to comply with the limits for a Class B digital
device, pursuant to part 15 of the FCC Rules. These limits are designed to provide reasonable
protection against harmful interference in a residential installation. This equipment generates,
uses and can radiate radio frequency energy and, if not installed and used in accordance with
the instructions, may cause harmful interference to radio communications. However, there is
no guarantee that interference will not occur in a particular installation. If this equipment does
cause harmful interference to radio or television reception, which can be determined by
turning the equipment off and on, the user is encouraged to try to correct the interference by
one or more of the following measures:
● Reorient or relocate the receiving antenna.
● Increase the separation between the equipment and receiver.
● Connect the equipment into an outlet on a circuit different from that to which the receiver is
connected.
● Consult the dealer or an experienced radio/TV technician for help.
Note:“Changes or modifications to this unit not expressly approved by the party responsible
for compliance could void the user’s authority to operate the equipment.”
FCC Licensing Requirements
A license from Federal Communications Commission is required prior to use. Your dealer will
program each radio with your authorized frequencies, signaling codes, etc., and will be there
to meet your communications needs as your system expands. Contact your dealer for more
information.
The radio is not intended for use by general population in an uncontrolled environment. It is only
for occupational use and only applied to work-related conditions.The radio must be only used by
users, who are fully aware of the hazards of the exposure and who are able to exercise control over
their RF exposure to qualify for the higher exposure limits.

Contents
Checking Items in the Package ----------------------- 1
Product Overview ----------------------------------------- 2
Front Panel-------------------------------------------------- 2
Rear Panel -------------------------------------------------- 2
Shortcut Keys ---------------------------------------------- 2
Installation -------------------------------------------------- 4
Status Indicators ------------------------------------------ 6
LCD Icons --------------------------------------------------- 6
LED Indicator ----------------------------------------------- 6
Instruction Icons ------------------------------------------- 6
Basic Operations ------------------------------------------ 7
Turning the Terminal On/Off ---------------------------- 7
Adjusting the Volume ------------------------------------- 7
Selecting a Talk Group ----------------------------------- 7
Switching Operation Mode ------------------------------ 7
Call ---------------------------------------------------------- 8
Individual Call ---------------------------------------------- 8
Group Call --------------------------------------------------- 8
Telephone Call --------------------------------------------- 9
Emergency Call -------------------------------------------- 9
Menu Navigation ------------------------------------------ 10
PhoneBook-------------------------------------------------- 11
Message ----------------------------------------------------- 11
Call Log ------------------------------------------------------ 12
Proles ------------------------------------------------------- 12
Settings ------------------------------------------------------ 13
Others -------------------------------------------------------- 14
Talk Group--------------------------------------------------- 15
DMO ---------------------------------------------------------- 16
Language ---------------------------------------------------- 17
GPS ----------------------------------------------------------- 17
Troubleshooting ------------------------------------------- 18
Care and Cleaning --------------------------------------- 20
Optional Accessories ------------------------------------ 21
Appendix 1 Input Method ------------------------------- 22
Appendix 2 SSI&TSI Dialing Rules ------------------- 23
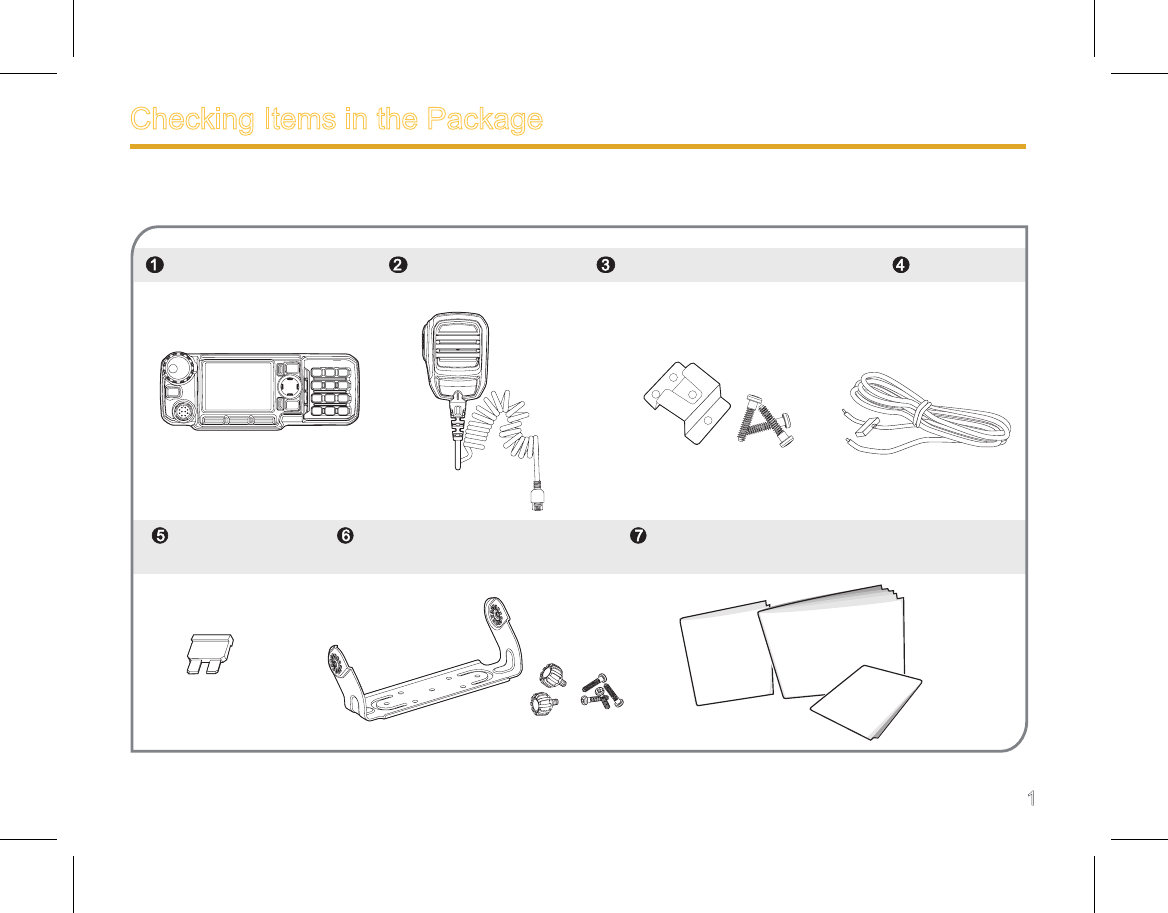
Checking Items in the Package
Please unpack carefully and check that all items listed below are received. If any item is missing or damaged, please contact
your dealer.
1
Mobile Terminal Palm Microphone Microphone Hanger and Screws Power Cord
Fuse Mounting Bracket Kit Owner’s Manual / Quick Reference Guide /Safety
Information Booklet
Safety Information Booklet
Owner’s Manual
Quick Reference Guide
2
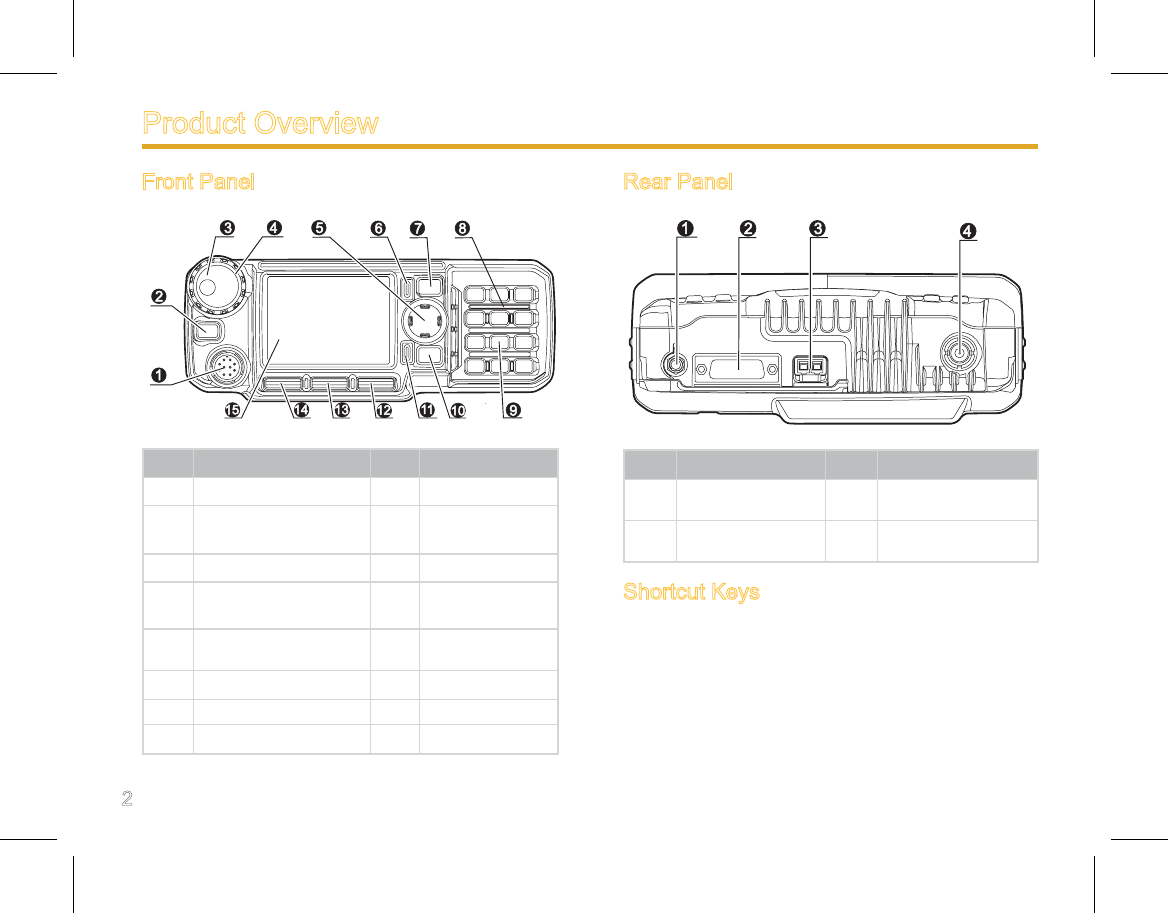
Product Overview
熟
悉
本
机
Front Panel
No. Part Name No. Part Name
1 Microphone Jack 2 Emergency Key
3Volume Control / Talk-
group Selector Knob 4 LED Indicator
5 Navigation Key 6 Back Key
7Power On-Off / Hang
Up Key 8 Speaker
9 Numeric Keypad 10 Answer / Call
Key
11 OK Key 12 Options Key
13 GPS Key 14 Function Key
15 LCD Display
Rear Panel
No. Part Name No. Part Name
1GPS Antenna
Jack 2 Accessory Jack
3 Power Inlet 4 BNC Antenna Con-
nector
Shortcut Keys
Most of the keys, including the four Navigation Keys,
Answer / Call Key, * Key, # Key and numeric keys 1-9,
can be set as shortcuts to access the menus and various
functions (table below lists the default shortcut functions).
Please refer to “Shortcuts” on Page 15 for the setting
method.

3
熟
悉
本
机
Product Overview
Key Shortcut Function
Up Key Enter the PhoneBook
Down Key Enter the Proles
Left Key Edit a message
Right Key Enter the Inbox
Answer / Call Key Enter the Dialed Calls list
4
Installation
Installation Instructions
This mobile terminal can be installed in 13.2V
(10.8V-15.6V allowable) negative ground electrical
systems only. Please check polarity and voltage of the
vehicle power supply before you install the terminal.
Please check the parts of screws which protrude from
the bottom surface, before you install the terminal. Drill
the mounting hole cautiously to avoid damage to the
vehicle wiring and other parts.
Please connect the supplied antenna and power cord
to the terminal, before you install it in the bracket.
Please x the terminal rmly with specied bracket.
Install the terminal in a location where it’s easy to
reach the front panel controls.
Please make sure there’s sufcient space at back of
the terminal for wiring.
When needed, replace the fuse for DC power cord with
a new fuse with the same specications.
Installation Tools
Electric drill
Cross head screwdriver
Hex socket sleeve (used for 4.8*20mm self-tapping
screws)

5
Installation
No. Part Name
1 Mobile Terminal
2 BNC Connector
3 Locking Knobs
4 Mounting Bracket
5 4.8 × 20 mm Self-
tapping Screws
6 Power Inlet
7 Black Power Cord
8 Red Power Cord
9 Fuse
10 Palm Microphone
11 Microphone Hanger
12 4 × 16 mm Self-
tapping Screws
A
B
C
D
E
Install the bracket in a location
where it’s easy to operate the
terminal.
Connect accessories such as
antenna and power cord to the
terminal.
Slide the terminal into the
mounting bracket and secure it
using the adjustment knobs.
Install the microphone hanger
in a location where it can be
reached easily.
Plug the palm microphone into
the microphone jack on the front
panel, and then place it on the
hanger.
Assembly Diagram
6
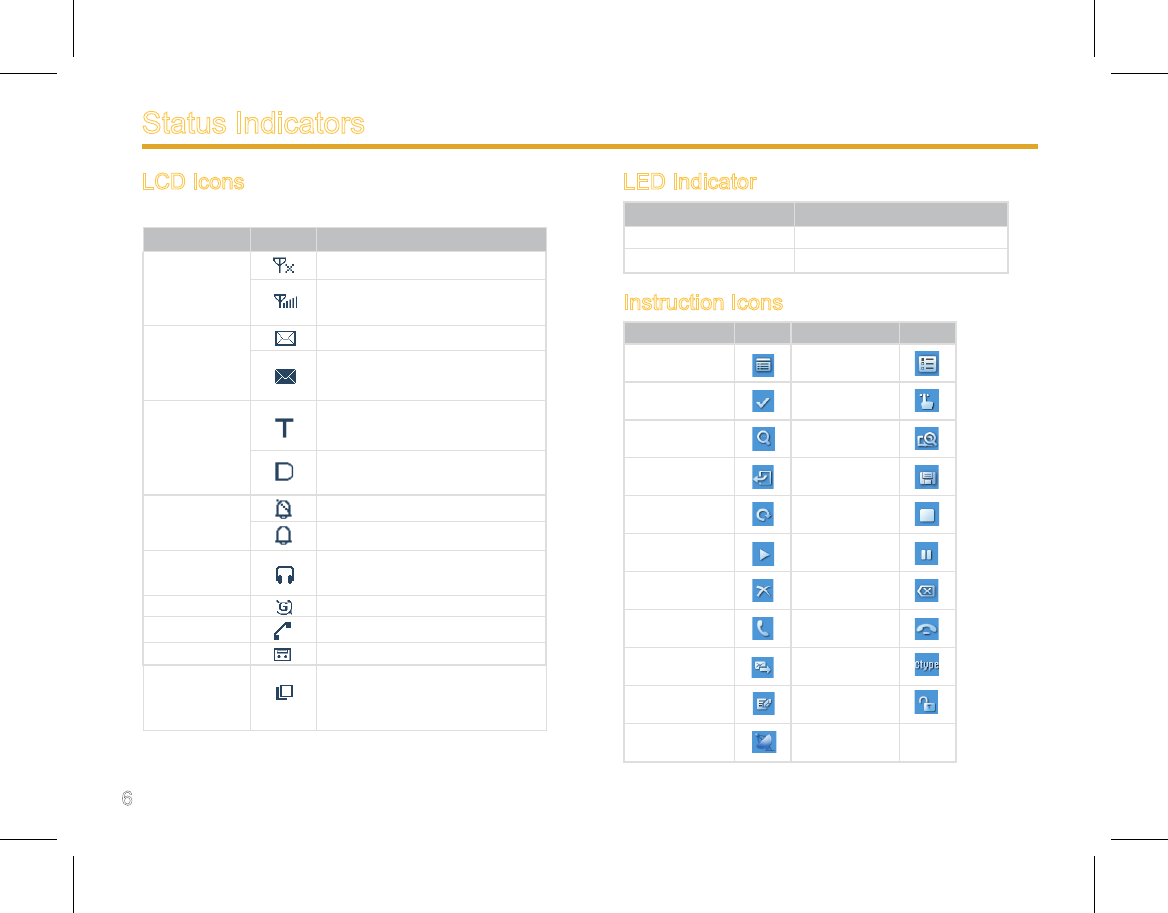
Icon Name Icon Terminal Status
RSSI
No signal
More bars indicate better
signal strength
Message
Icons
Unread message
Inbox is full and all are un-
read messages
Operation
Mode Icons
The terminal currently oper-
ates in TMO mode
The terminal currently oper-
ates in DMO mode
Prole
Icons
Silent
Normal
Accessory
Icon
An audio accessory is con-
nected
GPS Icon GPS is enabled
Call Icon A call is in progress
Record Icon Recording is in progress
Talkgroup
Selection
Icon
Selecting a talk group
Status Indicators
LCD Icons LED Indicator
Terminal Status LED Indicator
Transmitting a call LED solidly glows red.
Receiving a call LED solidly glows green.
Instruction Icons
Instruction Icon Instruction Icon
Functions Options
OK Operate
View Search
Back Save
Restore Stop
Start Pause
Delete Cancel
Answer Hang up
Send Ctype
Modify Unlock
GPS
7
Basic Operations
Turning the Terminal On/Off
To turn the terminal on, hold down the Power On/Off key
until the terminal displays power-up screen.
To turn the terminal off, long press the Power On/Off key.
Adjusting the Volume
You may adjust the volume through the knob. Rotate
the knob clockwise to increase the volume, or counter-
clockwise to decrease the volume. Then press OK to save.
If the volume is adjusted during a call, press Back and the
volume will be saved.
Selecting a Talk Group
In the home screen, press the knob to switch to talk group
selection mode (the terminal displays the icon ). Then
rotate the knob to select your desired talk group, and
press OK to conrm. Name of the current talk group will
appear on the home screen.
Switching Operation Mode
The terminal can operate in either TMO or DMO mode. To
switch between these two modes, press on the home
screen to enter the Options menu, and select “TMO” or
“DMO”.
8
Call
Individual Call
Both DMO and TMO support individual call.
Transmitting an Individual Call
Operations in DMO mode:
Input the target number through the keypad, or go to the
menu PhoneBook or Call Log to select the contact you
want to call. Then hold down the PTT and speak into the
microphone, to transmit a simplex call.
Operations in TMO mode:
Transmitting a call through menu
Go to the menu PhoneBook or Call Log to select the
contact you want to call. Then hold down the PTT to
transmit a simplex call, or press to transmit a duplex
call.
Transmitting a call through Manual Dial
Input the number you want to call through the keypad,
and press to select “Private No.”. Then hold down the
PTT to transmit a simplex call, or press to transmit a
duplex call.
Note: Entry of private number must comply with
the SSI&TSI dialing rules. See Appendix 2 SSI&TSI
Dialing Rules on page 24 for more details.
Receiving and Responding to an Individual
Call
Operations in DMO mode:
When the PTT is in released state, the terminal is always
ready to receive calls. When the other party stops talking,
you can hold down the PTT to call back.
Operations in TMO mode:
When a simplex call is received, you can listen to it without
any operation, unless the LCD prompts you to press the
PTT to receive it. When the other party stops talking, you
can hold down the PTT and speak into the microphone to
call back.
When a duplex call is received, you can press to
answer it. And both parties can speak simultaneously
without any operation.
Group Call
Both DMO and TMO support group call, and operations
are the same in both modes.
Transmitting a Group Call
1. In the home screen, press the knob to switch it to talk
group selection mode (the terminal displays the icon
).

9
Call
2. Rotate the knob to select a talk group you want to call.
The currently selected talk group will appear on the
display.
3. Press the knob again or press OK to conrm.
4. Hold down the PTT to transmit a group call.
Receiving and Responding to a Group Call
When a group call is received, you can listen to it without
any operation. When the other party stops talking, you can
hold down the PTT and speak into the microphone to call
back.
Telephone Call
Telephone call is available only when the terminal operates
in TMO mode and is set with appropriate Gateway No.
Please contact your network operator for more details.
Transmitting a Telephone Call
1. Input the number you want to call through the keypad,
and select “PABX” or “PSTN”.
2. Press to transmit a telephone call.
Available talk groups are preset by your dealer.
DMO mode supports up to 1024 talk groups, and
TMO mode supports up to 2048 talk groups.
Answering a Telephone Call
When a telephone call is received, you can press
to answer the call. And both parties can speak
simultaneously without any operation. To reject or to hang
up a telephone call, press .
Emergency Call
Both DMO and TMO s upport e merge ncy call , a nd
operations are the same in both modes.
Long press the top Emergency key to transmit an
emergency call. To terminate the call, press .
In DMO mode, emergency calls are transmitted to the
default talk group. And in TMO mode, the target receiver is
programmable through the programming software.
Note: Please speak into the duplex microphone
when sending a duplex call, or the simplex
microphone when sending a simplex call.
10
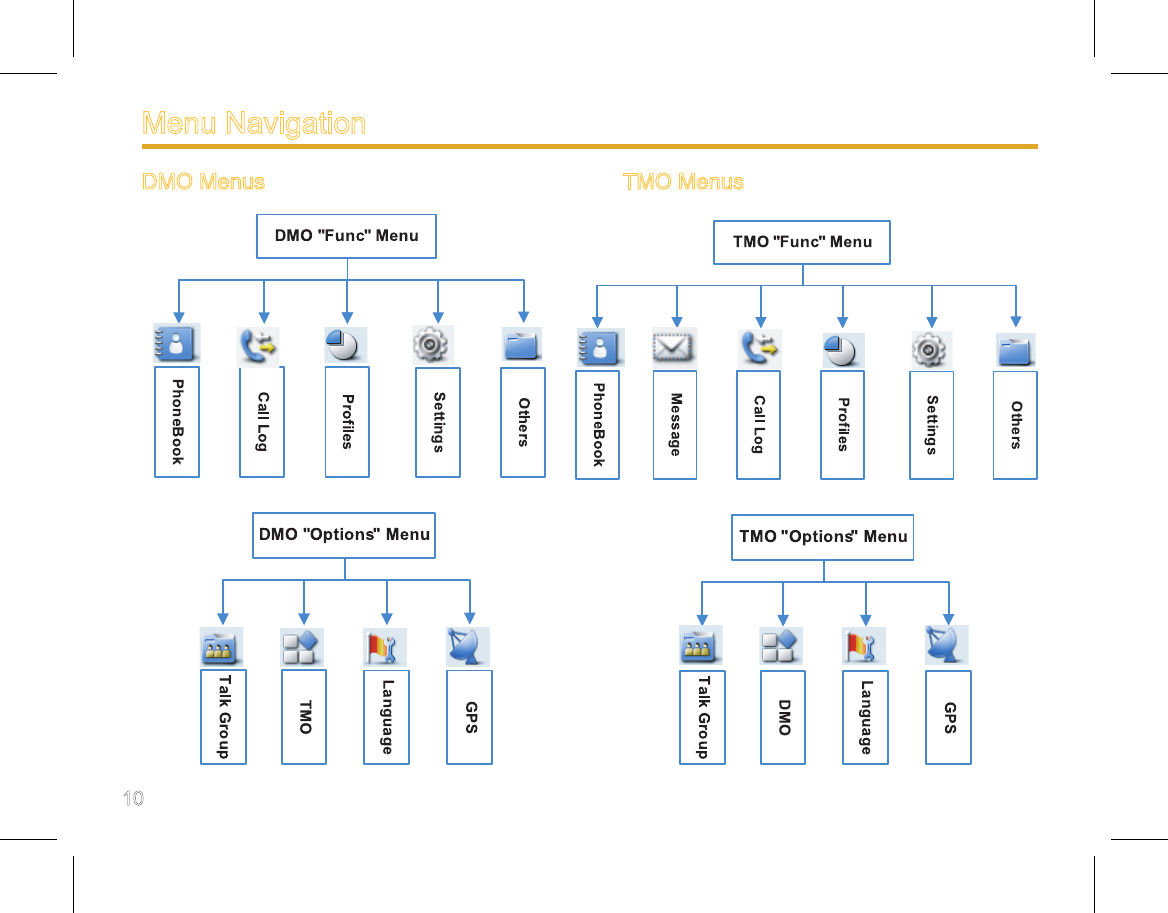
TMO Menus
Menu Navigation
DMO Menus
11
菜
单
导
航
The operations in TMO mode are the same as that in
DMO mode. Here we are going to introduce all menu
items based on TMO mode.
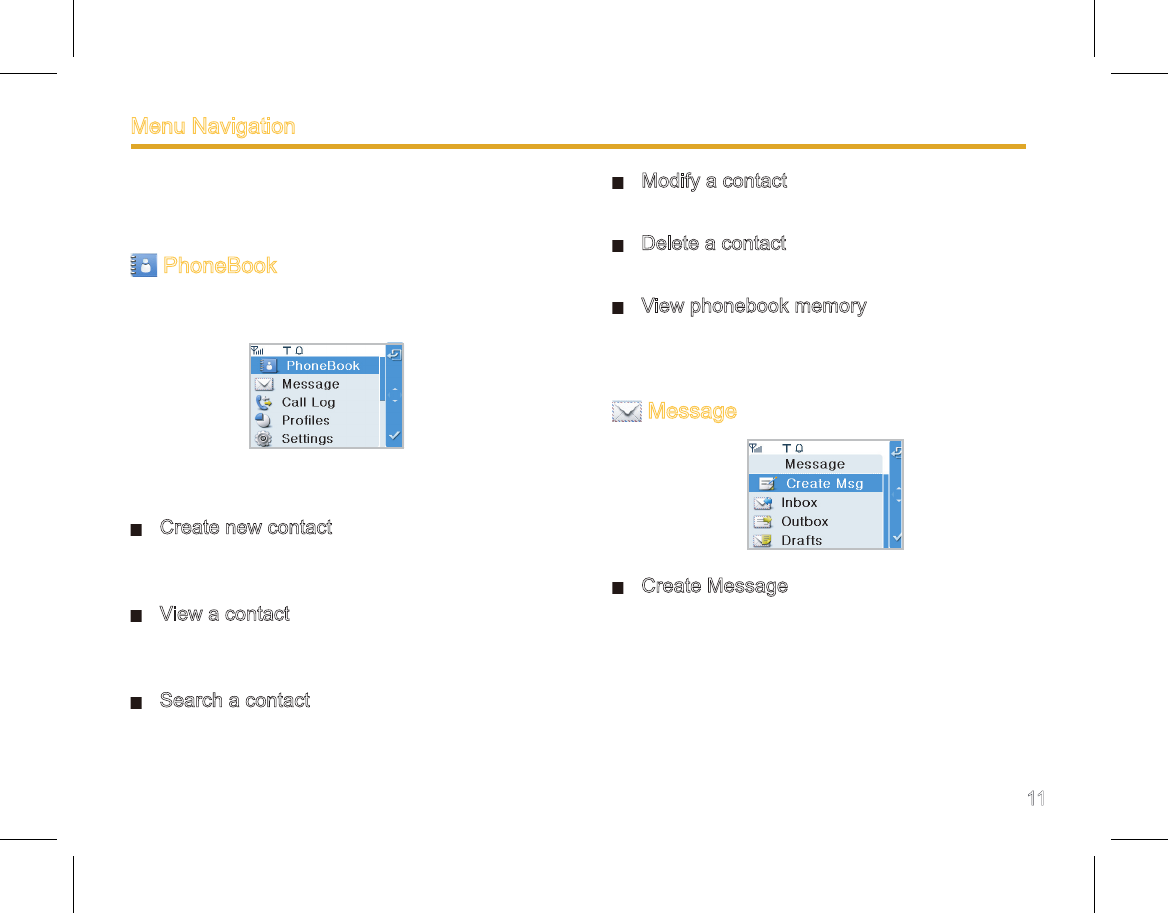
PhoneBook
This menu is used to store your contact information. See
the following gure for an overview of this menu:
Select a contact, and then you can perform these
operations:
Create new contact
To create a new contact. The phonebook can contain up to
512 entries.
View a contact
To view contact information including contact name and
number.
Search a contact
To look for a contact by name.
Menu Navigation
Modify a contact
To modify the name or number of a contact.
Delete a contact
To delete a contact from the phonebook.
View phonebook memory
To view the used space and free space of the phonebook
memory.
Message
Create Message
(1) Status Message
Status Message is predefined by your dealer. You can
choose to read and send them, but no editing is available.
(2) User Message
This option allows you to create a new text message with
140 bytes at most. The receiving party can either be an
individual or a group.
12
Menu Navigation
菜
单
导
航
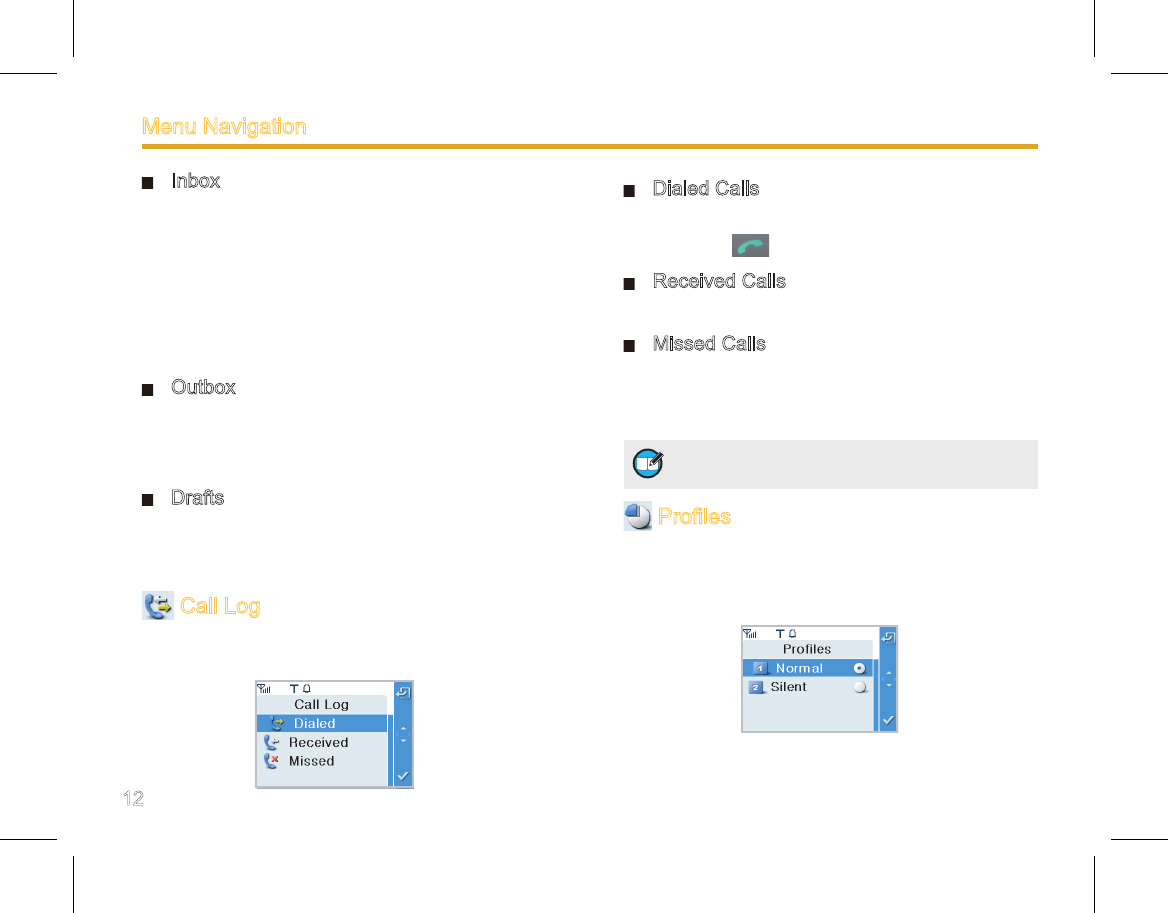
Inbox
All received messages are saved here. It can contain up
to 50 entries. When the inbox is full, the new message will
automatically overwrite the oldest read message. When
the inbox is overflowed with unread messages, you will
be unable to receive new messages. For any message,
you can perform these operations: Reply, Edit, Delete,
Forward, Extract No., and Call.
Outbox
The outbox can save up to 20 sent messages. For any
message, you can perform these operations: Edit, Delete,
Forward, Extract No., and Call.
Drafts
You can save up to 10 drafted messages here. For any
message, you can choose to delete, edit or send it.
Call Log
You can view the records of recent calls here. See the
following gure for an overview of this menu:
Dialed Calls
This option can save up to 20 entries. In the home screen,
you may press to quickly access the dialed calls list.
Received Calls
This option can save up to 20 entries.
Missed Calls
This option can save up to 20 entries. When there is a
missed call, appropriate indications will be given on the
display.
Proles
This menu allows you to customize alerts to an incoming
call, message or key press. See the following gure for an
overview of this menu:
Note: After selecting an entry, these options are
available: Call, View, Save, Delete, Delete All.
13
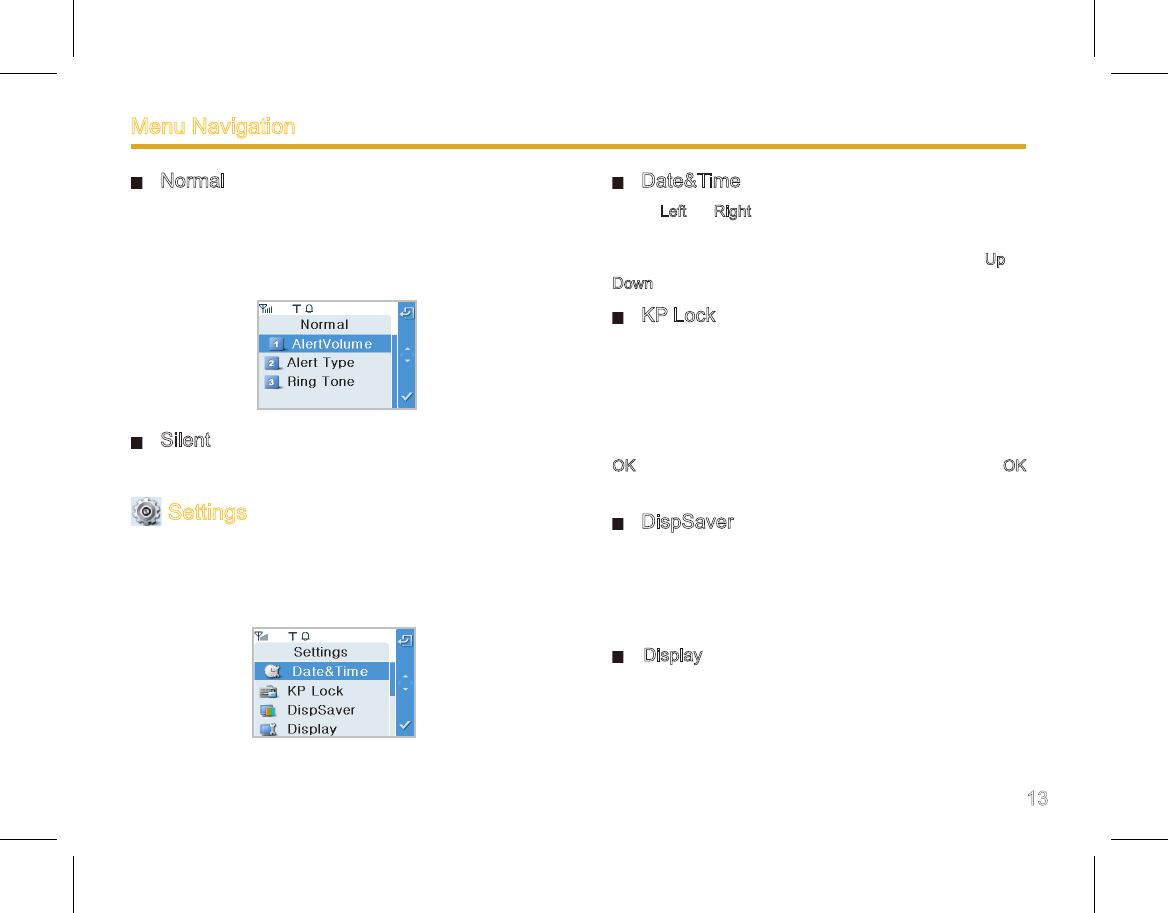
Normal
In this mode, the terminal will alert you to an incoming call
or a new message by giving ring indication. To match your
actual needs and preferences, you can customize the
following parameters:
Silent
In this mode, all audible indications will be disabled.
Settings
This menu allows you to customize terminal parameters,
to derive maximum performance from the terminal. See
the following gure for an overview of this menu:
Menu Navigation
Date&Time
Press Left or Right key to select the item to be set, and
then input the right value through the keypad. When the
current time is displayed in 12 Hour format, press Up or
Down key to toggle it between AM and PM.
KP Lock
This option allows you to enable or disable the Auto
Keypad Lock feature. The feature can prevent accidental
keypad operation. If it is enabled, the keypad will be
locked automatically after the programmed time (10
seconds by default) elapses. To unlock the keypad, press
OK and then *. In the home screen, you may press OK
and then * to lock the keypad.
DispSaver
This o p t i o n al l o w s yo u t o e n a b l e or disab l e t h e
screensaver. If enabled, it will be activated automatically
after the programmed time (10 seconds by default)
elapses.
Display
This option allows you to adjust display brightness and
turn keypad light on or off.
14
Speaker Note: the number of times that you are allowed
to input wrong PIN or PUK code is programmable
through the programming software. When the
terminal is disabled, contact your dealer to
activate it. The default PIN code is 1234, and the
default PUK code is 12345678.
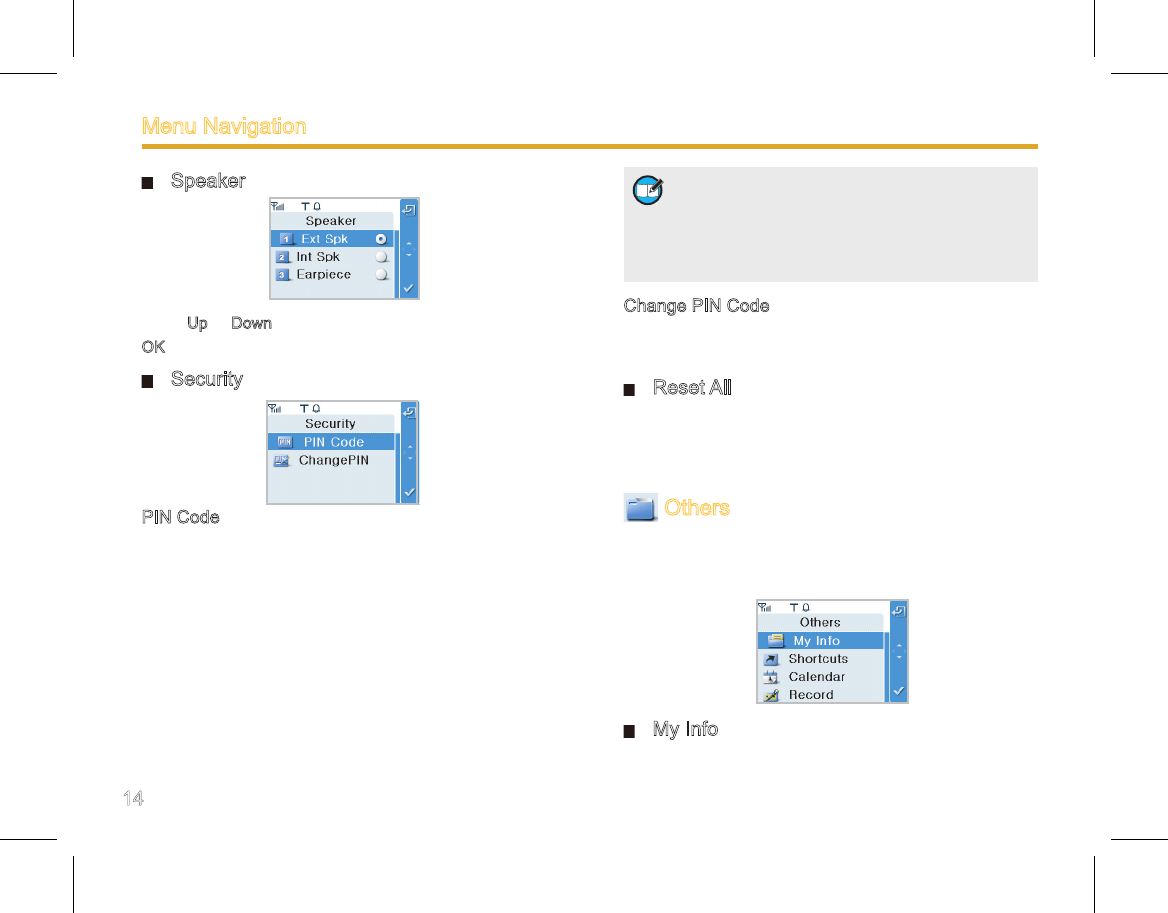
Change PIN Code
This option allows you to change the PIN code. Before
changing it, you need to enter the old PIN code correctly.
Reset All
This option allows you to restore all settings to default
values. To perform this operation, you need to input the
password (the default is 1234).
Others
This menu allows you to view some information saved in
your terminal. See the following gure for an overview of
this menu:
My Info
This option allows you to view some basic information
about the terminal, including MCC (Mobile Country Code),
Menu Navigation
Press Up or Down key to select a speaker, and then press
OK to conrm.
Security
PIN Code
To set PIN code On or Off, you will be required to input
the PIN code. The terminal will be locked when wrong PIN
code is entered up to the predened times. To unlock it,
you need to enter the right PUK code. Entry of the correct
PUK code will restore PIN code to the default value.
However, when wrong PUK code is entered up to the
predened times, the terminal will be disabled temporarily
and shows “Radio Disabled”.
15
MNC (Mobile Network Code) and ISSI (Individual Short
Subscriber Identity).
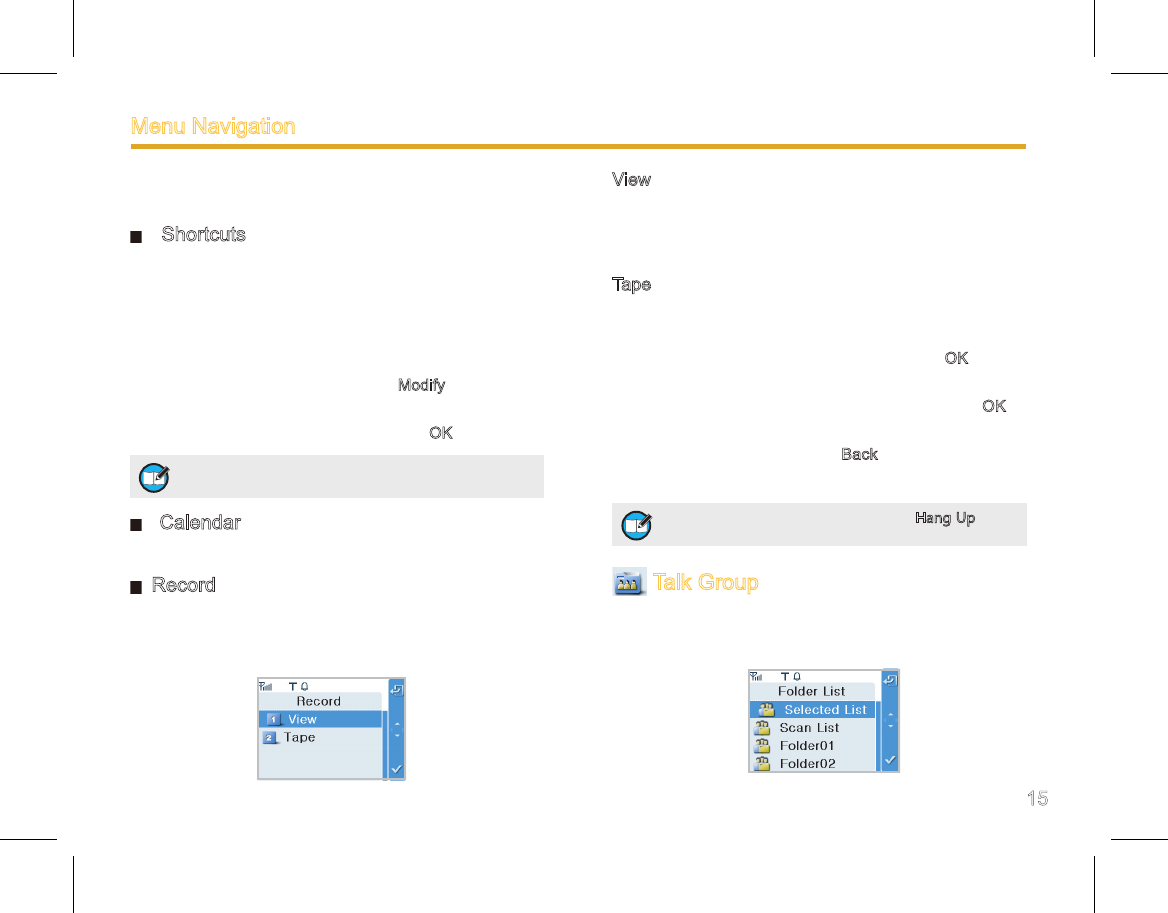
Shortcuts
To enhance operation convenience, you can assign your
desired function to a specic key as shortcut. Then you
can press the key to access a function easily. Operations
to create a shortcut:
1. Select Shortcuts to access the list of shortcut keys;
2. Select your desired key, and press Modify to access the
list of assignable functions;
3. Select your desired function, and press OK to conrm.
Calendar
This option allows you to view calendar information.
Record
The terminal allows you to record voice messages. This
menu includes two options View and Tape, as shown in
the gure below:
Note: To not assign any function to a key, just
select Empty.
View
To view record files already saved in your terminal. For
any record, you can perform these operations: Play,
Delete and View Detail.
Tape
This option allows you to record surrounding audio.
Operations:
1. Select the Record option, and then press OK to start
recording;
2. During the recording process, you may press OK to
pause.
3. You may at any time press Back to save record and
exit.
Talk Group
This menu allows you to customize talk group settings.
See the following gure for an overview of this menu:
Note: You may at any time press the Hang Up key
to exit without saving the record.
Menu Navigation
16
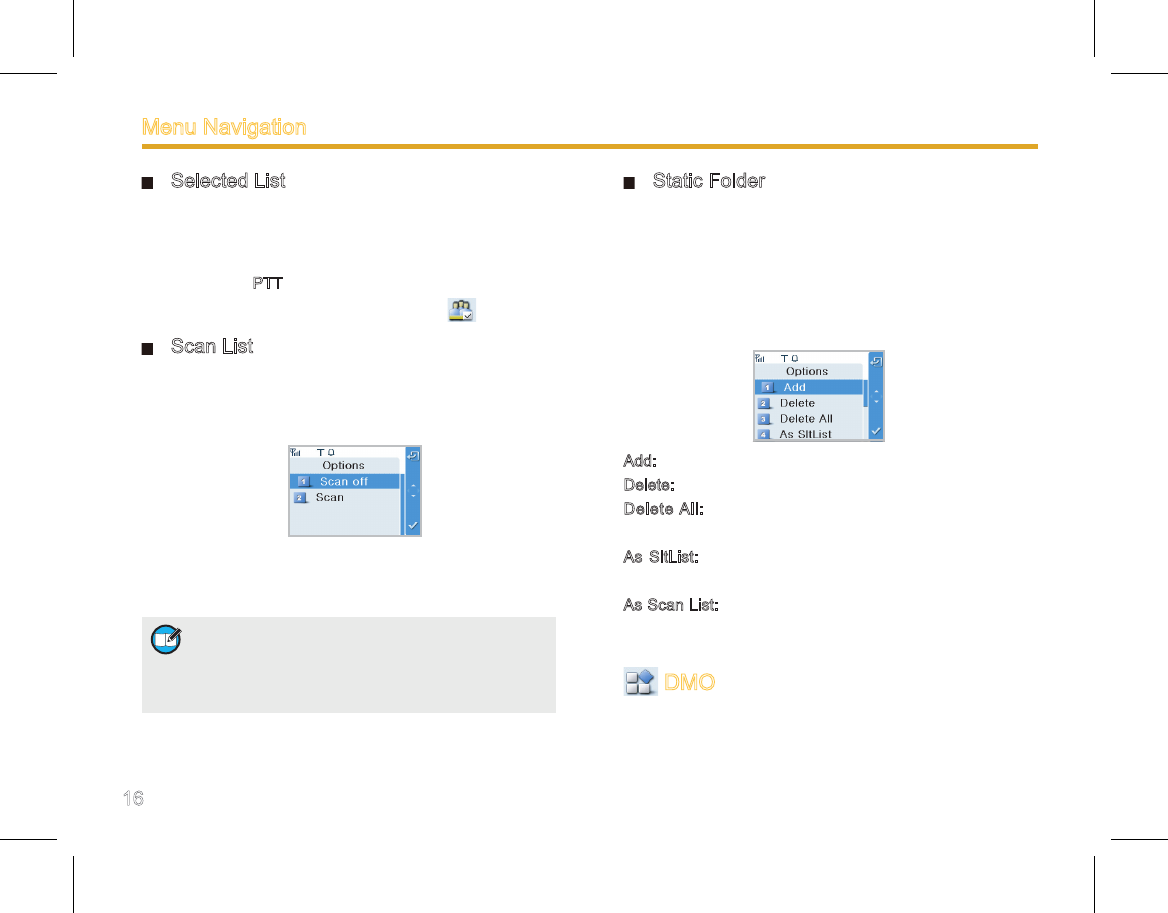
Selected List
You may transmit calls to any member included in the
Selected List. To transmit a call to a talk group, you need
to select this group through knob or menu, and then
hold down the PTT and speak into the microphone. The
selected default group will be marked with .
Scan List
To receive calls from a specific talk group, you must
include it in the Scan List, and set Scan on. See the
following gure for an overview of the menu:
Scan Off: to disable scan.
Scan: to activate scanning.
Menu Navigation
Note: Scan List is available for TMO mode only.
You can receive calls from any member included
in the Scan List, but cannot transmit calls to such
member. To transmit calls to a specific talk group,
you need to include it in the Selected List.
Static Folder
Static folder contains available talk groups, and is
predened by your dealer Your terminal supports up to 20
static folders, each with up to 20 talk groups. Talk groups
contained in static folders could be identical or different.
After accessing any of the folders, you can perform the
following operations:
Add: to include a talk group into the current folder;
Delete: to remove a talk group from the current folder;
Delete All: to remove all talk groups from the current
folder;
As SltList: to add all talk groups in the current folder to
Selected List;
As Scan List: to add all talk groups in the current folder to
Scan List;
DMO
In DMO mode, this option shall be TMO. You can use this
option to make your terminal work in DMO mode.
17
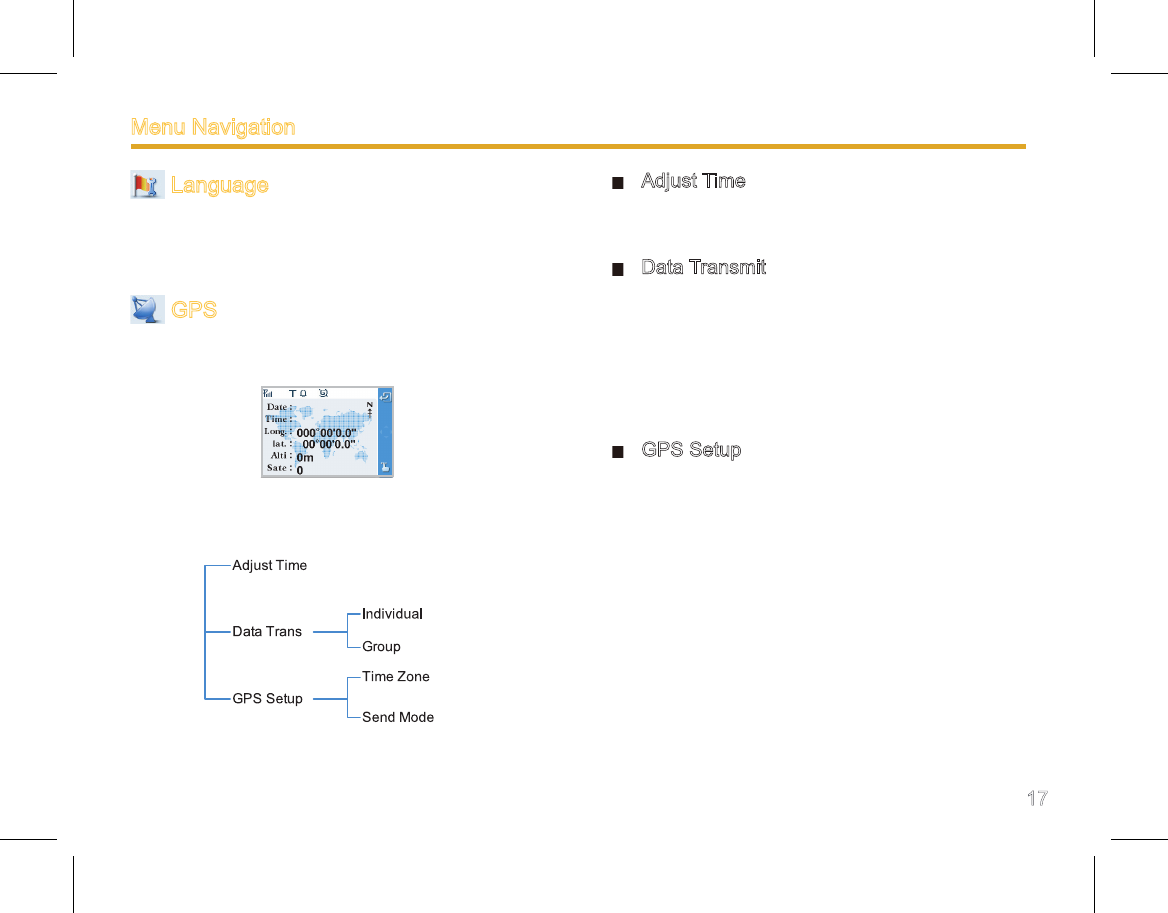
Language
This option allows you to select your favorable language.
Currently, this terminal only supports English and
Simplied Chinese.
GPS
The terminal supports GPS positioning capability. See the
following gure for an overview of this menu:
Select “Options->GPS”, and then you can customize the
following options:
Adjust Time
This option allows you to calibrate the time currently
displayed on your terminal with GPS time.
Data Transmit
You may choose to transmit GPS information to an
individual user, a group or the control center. Please be
noted that to implement this function, the terminal must
operate in TMO mode, and the GPS receiver must be
able to receive data from 3 or more satellites to ensure
accuracy.
GPS Setup
You may set the time zone and select a method to transmit
GPS information.
Manual Send: to manually transmit GPS information to an
individual user, a group or the control center.
Auto Send: to automatically transmit GPS information to a
predened receiver, at predened time.
Menu Navigation

18
Troubleshooting
Phenomena Analysis Solution
The terminal cannot be
powered on.
The power cord is connected improperly. Connect the power cord correctly.
The terminal unit and the front panel are
connected improperly (for split-type terminal
only).
Connect the terminal unit and front panel
correctly.
The terminal unit and the front panel are
connected with a damaged cable (for split-
type terminal only).
Replace the cable with a new one and
connect the terminal unit and front panel
correctly.
An abnormal voltage is output from the
vehicle battery. Check the battery strength.
The power cord is damaged. Replace the power cord with a new one.
The called party cannot
hear clearly.
The palm microphone and the terminal are
connected improperly.
Connect the microphone to the terminal
correctly.
The palm microphone is damaged. Replace the microphone and connect them
correctly.
Network registration fails
or network cannot be
found.
Your terminal is operating in DMO mode. Switch to TMO mode.
Your terminal is not within the network cov-
erage.
Check the signal strength. Make sure the
terminal is within the network coverage.
The terminal is not granted network access. Contact the network operator. Make sure
the terminal is authorized.
Calls cannot be initiated
in TMO mode.
The terminals are not within the network
coverage.
Check the signal strength. Make sure all the
terminals are within the network coverage.
The called party is operating in DMO mode. Make sure the called party switches to TMO
mode.
Calls cannot be initiated
in DMO mode.
The terminals are not within a valid commu-
nication range.
Make sure all terminals are within the com-
munication range.
The called party is operating in TMO mode. Make sure the called party switches to
DMO mode.
19
Group calls cannot be
sent or received.
Your terminal is not within valid coverage of
the target group.
Make sure the terminal is within the group
coverage.
Your terminal is not authorized to access the
target group.
Contact the network operator to obtain ac-
cess rights.
Half duplex calls are
terminated.
The transmission timer expires. Make sure the transmission duration is
within the predetermined value.
The channel is occupied by another terminal
with higher priority.
Initiate another call when the channel be-
comes available.
The network resources are allocated to other
services due to overloaded network.
Initiate another call when the network be-
comes available.
Normal calls are inter-
rupted.
The channel is assigned to emergency calls
or other calls with higher priority.
Initiate another call when the channel be-
comes available.
As for the same status
message, the content
displayed at the sending
party and at the receiving
party varies.
The parties have associated the same status
message ID with different contents.
Make sure the status message ID is associ-
ated with the same content.
Abnormal disconnection
occurs during a call.
Your terminal gets out of the network cover-
age (in TMO mode).
Check the signal strength. Make sure the
terminal is within the network coverage.
You are at an unfavorable position where
communication may be blocked by high
buildings or frustrated in the underground
areas (in DMO mode).
Move to an open and at area, and restart
the terminal.
If the above solutions cannot x your problems, or you may have some other queries, please contact us or your local dealer for
more technical support.
Phenomena Analysis Solution
Troubleshooting
20
Care and Cleaning
To guarantee optimal performance as well as a long
service life of your mobile terminal, please follow the tips
below.
Terminal Care
Do not pierce or scrape the terminal with any edged
instruments or hard objects.
Keep the terminal at a place of good ventilation and
heat dissipation to facilitate normal work.
Do not place irrelevant articles on top of the terminal to
ensure optimal heat dissipation.
Do not place the terminal in corrosive agents, solutions
or water.
Terminal Cleaning
Clean up the dust and fine particles on the terminal
parts with a clean and dry lint-free cloth or a brush
regularly.
Use a non-woven cloth with neutral cleanser to clean
the keys, control knobs, LCD and jacks after long-time
use. Do not use chemical preparations such as stain
removers, alcohol, sprays or oil preparations. Make
sure the terminal is completely dry before use.
Caution: Be sure to power off the terminal before
cleaning.
21
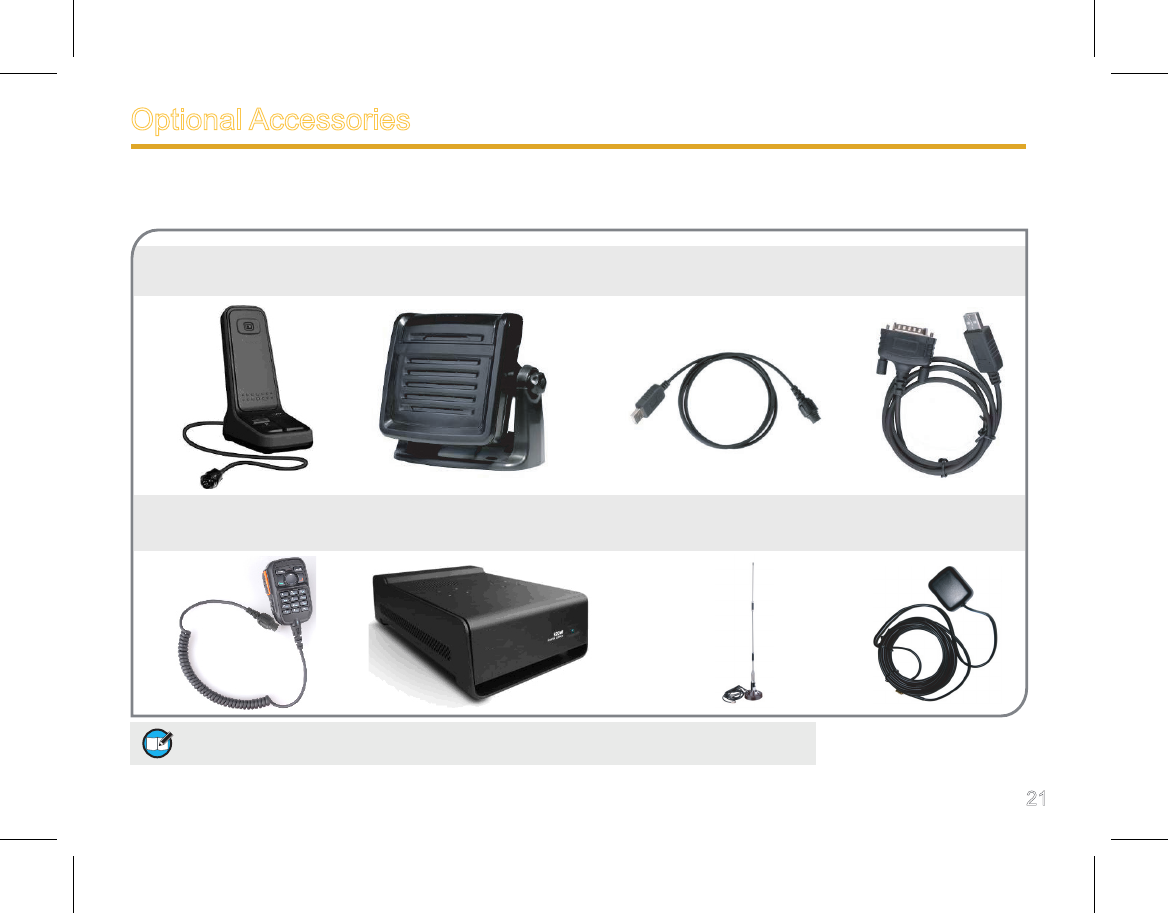
Desktop Microphone External Speaker SM09D1 Programming Cable (USB Port) Data Cable PC39
SM10A1 PC35
Keypad Microphone Power Supply (320W, backup power applicable) Antenna GPS Antenna
SM19A1 PS22002
Optional Accessories
The following items are the main optional accessories for the terminal, and please consult your local dealer for more other
accessories.
Note: Use the accessories specified by Hytera only. If not, Hytera shall not be liable for any
losses or damages arising out of use of unauthorized accessories.
22
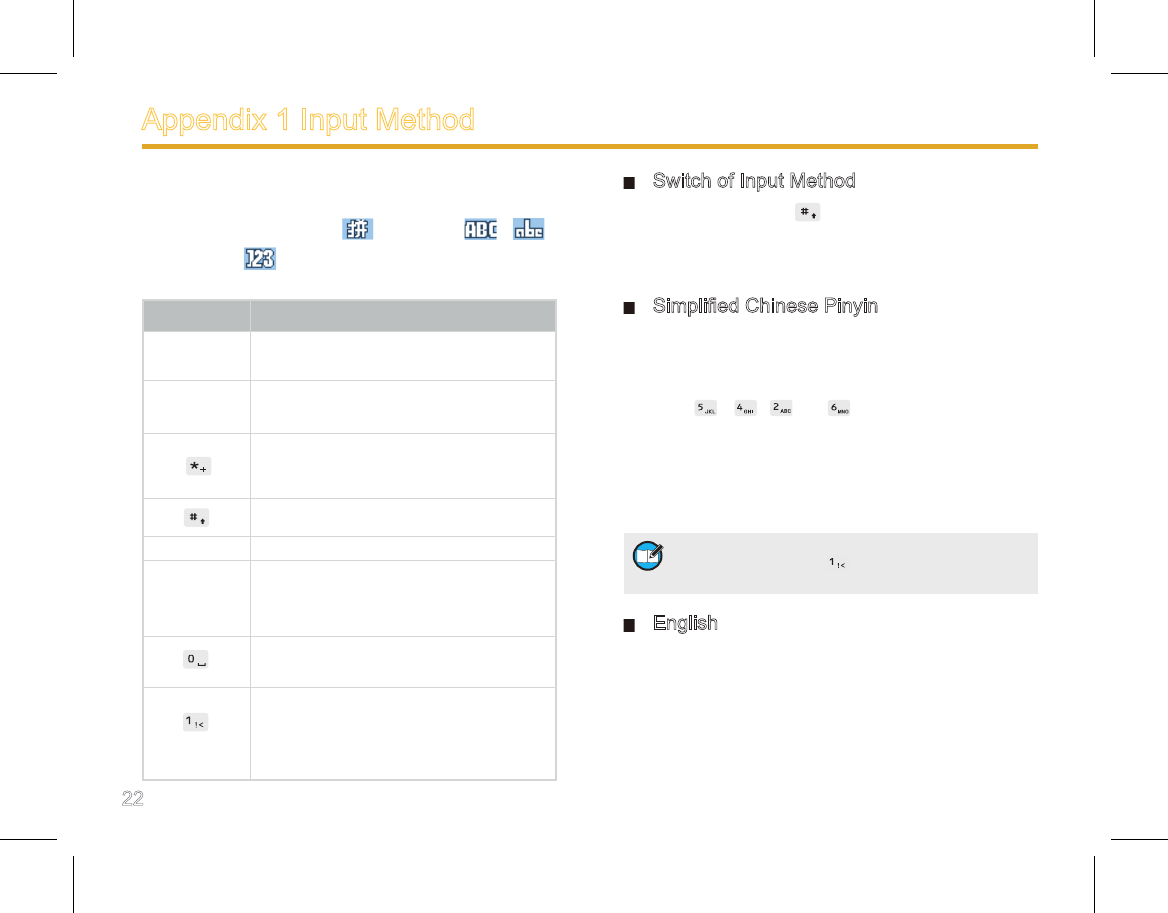
Appendix 1 Input Method
You can enter aliases, numbers or messages using the
keypad. This terminal supports three input methods:
Simplied Chinese Pinyin ( ), English ( / )
and Number ( ).
Use the following keys as instructed:
Key Function
Left/Right To highlight the pinyin combination or
Chinese character.
Up/Down To move to next page when selecting
Chinese characters.
To enter “*” (short press) or a space
(long press) under English and Number
input methods.
To switch among the input methods.
OK To select and conrm.
Delete
To delete the entered character one by
one (short press), or to delete all en-
tered characters at a time (long press).
To enter “0” under English and Number
input methods.
To enter punctuations under Simplied
Chinese Pinyin and English input meth-
ods; and
To enter “1” in Number input method.
Switch of Input Method
In input interface, press to switch to your desired input
method. The input mode is indicated by a symbol located
on top right corner of the display.
Simplied Chinese Pinyin
Enter the pinyin through alphanumeric keys; then a list of
possible combinations and corresponding characters will
appear. For example, to input the Chinese character “间”:
1. Press , , and in order;
2. Press OK to move the cursor from Pinyin area to
Chinese character area;
3. Use Right to scroll to the target character “间”;
4. Press OK.
English
The 26 letters are distributed among the alphanumeric
keys 2~9. Press the key which bears your desired letter
repeatedly until the letter appears. If the next letter is also
located on the present key, wait until the cursor moves
to the next entry position, and then input the letter. For
Note: To enter a space in Simplified Chinese Pinyin
input method, press to trigger an interface
filled with punctuations, and then select the space.
23
example, to input the English word “come”:
1. Press repeatedly until “c” appears;
2. Press repeatedly until “o” appears;
3. Wait until the cursor moves to the next entry position,
press again repeatedly until “m” appears;
4. Press repeatedly until “e” appears.
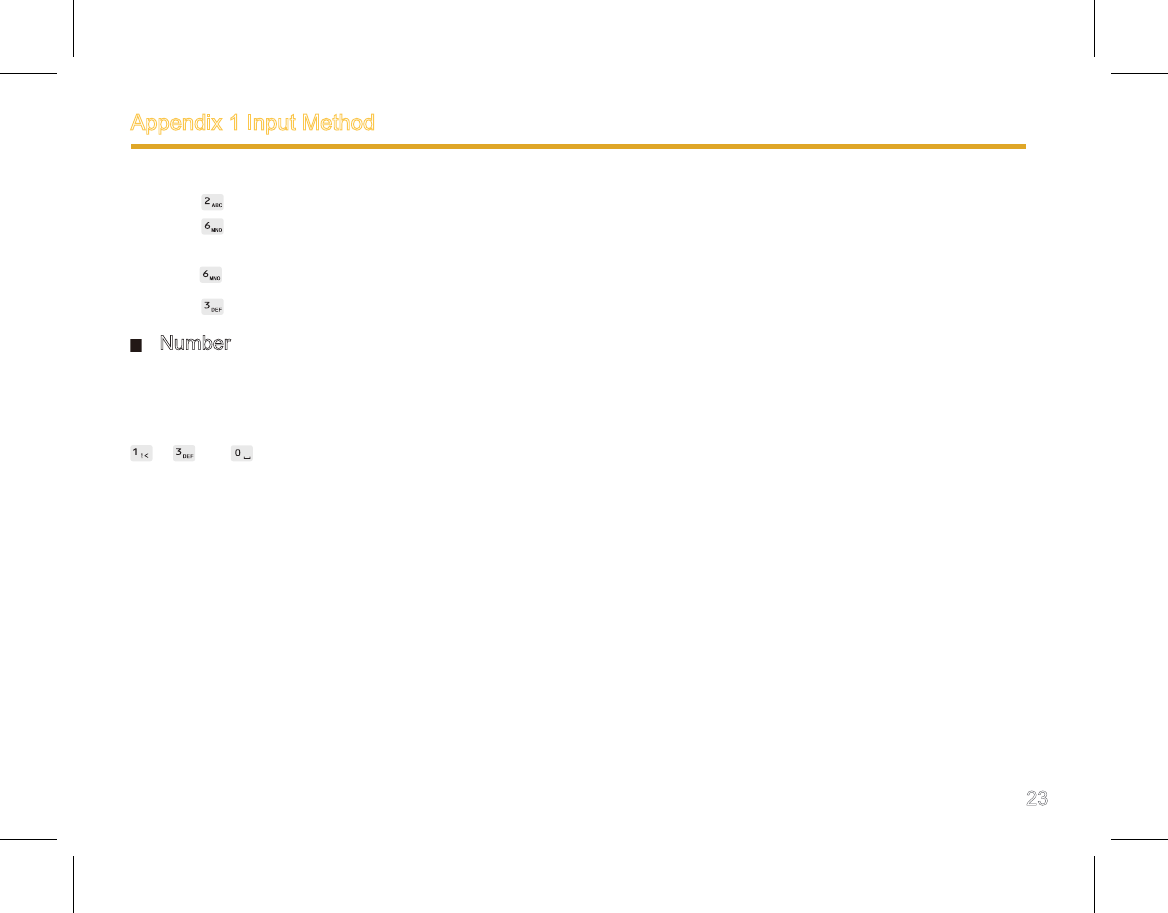
Number
When the input method is switched to Number, press
appropriate key to enter your desired number. For
example, to input the number “130”, you just need to press
、 and orderly.
Appendix 1 Input Method
24
Appendix 2 SSI&TSI Dialing Rules
This terminal supports these dialing methods: SSI&TSI,
PABX and PSTN. Each method shall follow a specific
dialing rule. Currently, this terminal is only capable of
checking SSI&TSI dialing rule:
For target number less than 8 digits, input it directly;
For example, when MCC = default value, MNC =
default value and ISSI = 504, you just need to input
504 to make the call;
For target number with 9-13 digits, input MNC+ISSI,
where ISSI must be 8 digits long. Add 0 before
the first digit to supplement the balance when it is
less than the said length. For MNC, input it as it is.
For example, when MCC=default value, MNC=20 and
ISSI=504, you need to input 2000000504 to make the
call;
For target number over 13 digits, input
MCC+MNC+ISSI, where ISSI must be 8 digits long,
MNC must be 4 or 5 digits long and MCC must be 3
digits long. Add 0 before the rst digit to supplement the
balance when any of them is less than the said length.
For example, when MCC = 460, MNC = 20 and ISSI =
504, you need to input 4600002000000504 or to make
the call.
Note: MCC stands for Mobile Country Code, MNC
stands for Mobile Network Code and ISSI stands
for Individual Short Subscriber Identity.