ILIFE TECHNOLOGY M723C MID User Manual M702 User Guide
ILIFE TECHNOLOGY(HK) LIMITED MID M702 User Guide
Users Manual
M723C User Guide
Precautions
Do not use the device at temperatures beyond the operating temperature range, as it will
significantly reduces the life of the screen and other components of the device and can
lead to malfunction of the device.
Do not drop cause an impact or strong shaking of the device.
Please only play at a suitable volume. Avoid excessively high volumes when using a
headset. If you feel any ear discomfort or noise, decrease the volume or turn it off.
Do not use the device near magnetic fields. Do not store the device near credit cards,
tickets, etc., otherwise magnetic stripe cards may be damaged.
Do not use the device while driving. Observe the law and traffic rules of the country of
your residence.
Do not use the device in areas of electronic interference or static electricity. This can
cause data loss.
Do not allow children to touch the internal components and cables of this device.
To ensure complete safety, do not disassemble the casing and do not try to get inside the
unit. Repairs should be performed by qualified personnel only.
Do not spill liquids on the device. This can cause electric shock. Besides, if liquid or dust
get inside the unit, they may cause malfunction, overheating and smoke. Keep the unit
dry.
The manufacturer reserves the right to alter specifications, appearance, contents of SW
and equipment of the product unilaterally, without prior notice.
Main Functions
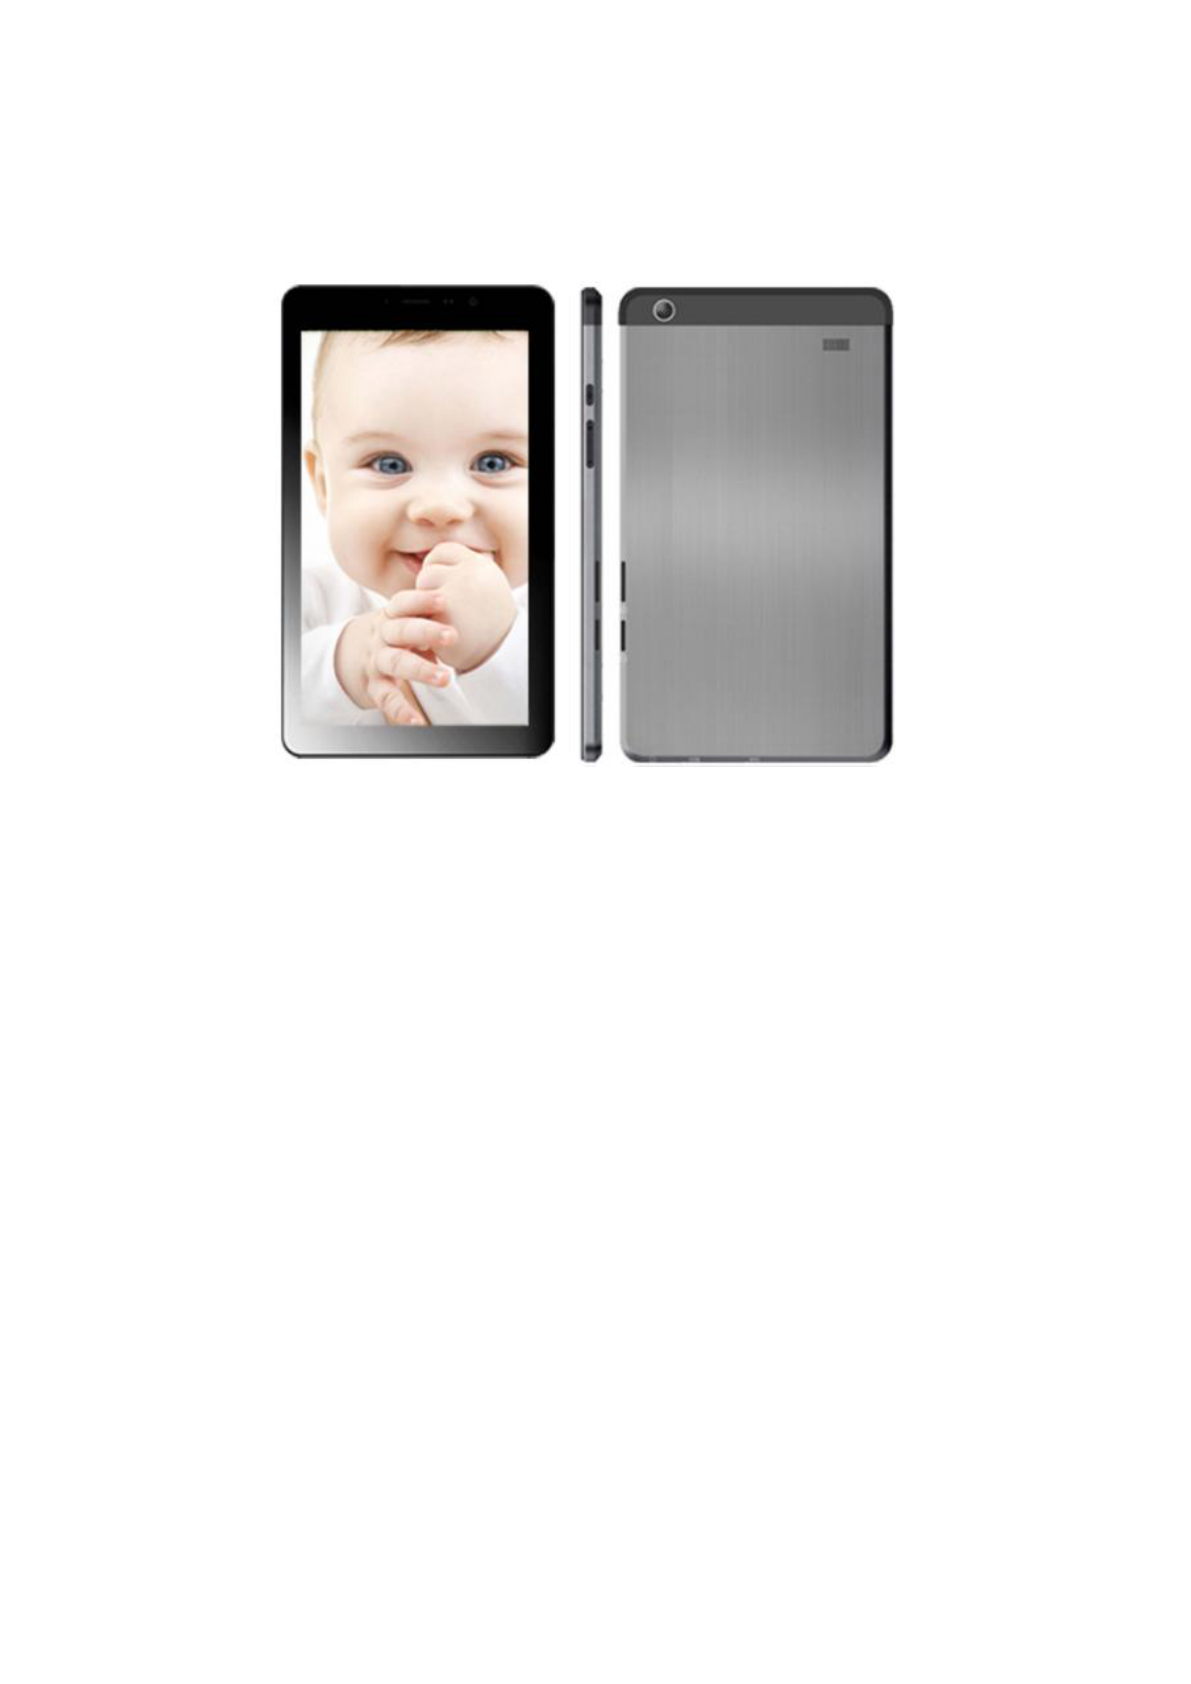
7 inch, multi-touch screen display, 1024x600 resolution;
Supports OTG function, through USB connected interfaces such as U disc and
removeable disc, to save and read data.
Wi-Fi capability can connect to and remember multiple networks, enabling internet access
wherever you go.
The Google Android OS offers many app and widget options, allowing you to personalize
your tablet. Whatever you can think of, it can do!
Download and install APK apps via the internet.
Business and entertainment at your fingertips: apps are available for email, word, web
browsing, news, instant messaging, financial reports, blogs, online gaming, online video,
stock market, weather reports, mobile tv, maps, entertainment software, etc.
Supports up to 32GB MicroSD card.
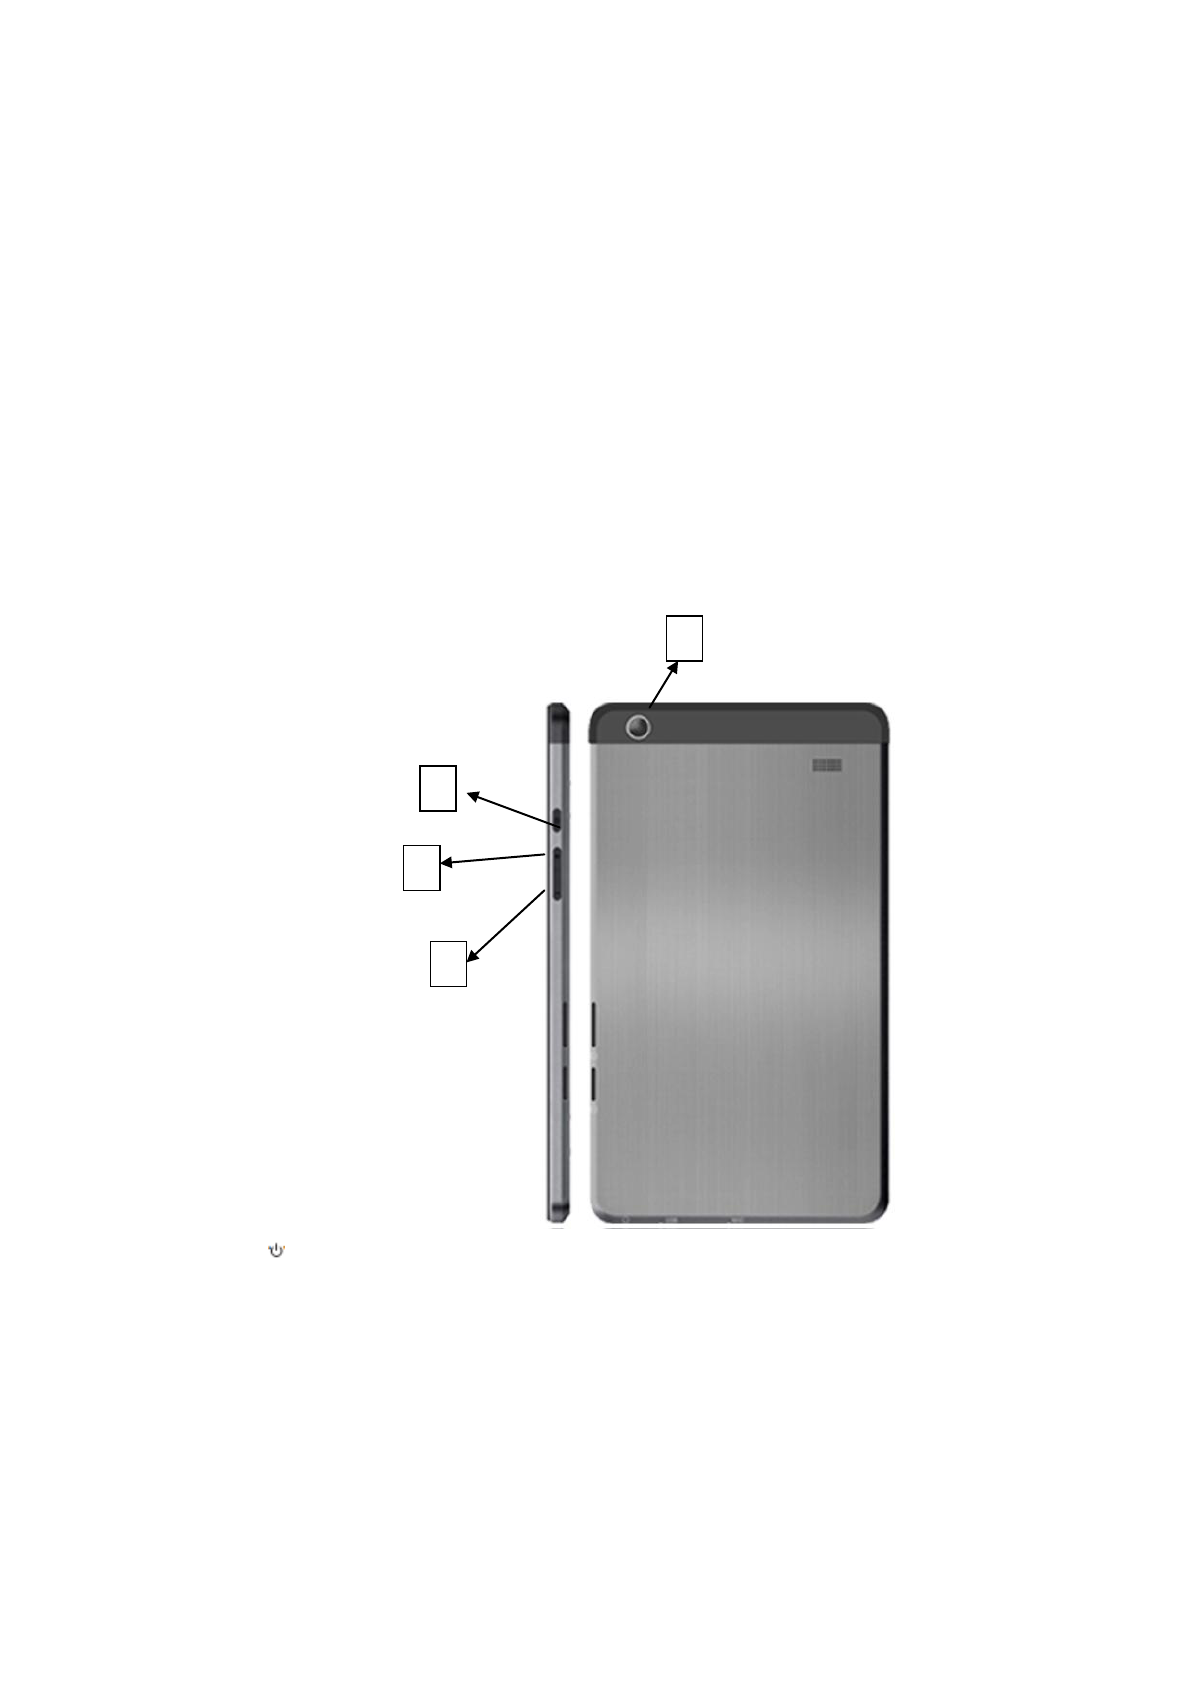
Control element
1. 1、“ ”: power button: Press briefly to sleep/wake. Press and hold to turn on/off.
2. Volume +
3. Volume –
4.Rear camera
4
3
2
1
Battery Charging
The device has a built-in rechargeable battery. When the indicator displays low battery, charge
the device.
Charging the battery: Plug the DC port into the unit, then to the AC/DC Adaptor. A battery
symbol will appear on the screen, and the battery will start to charge. If the unit is switched on,
the battery charge icon will display at the bottom right of the screen.
Note: This model can also charge through the USB port. If the tablet is connected via the USB
port for file transfers, etc., it will charge at the same time. USB charging is convenient while
working at your computer, but will charge more slowly than if a wall charger is used.
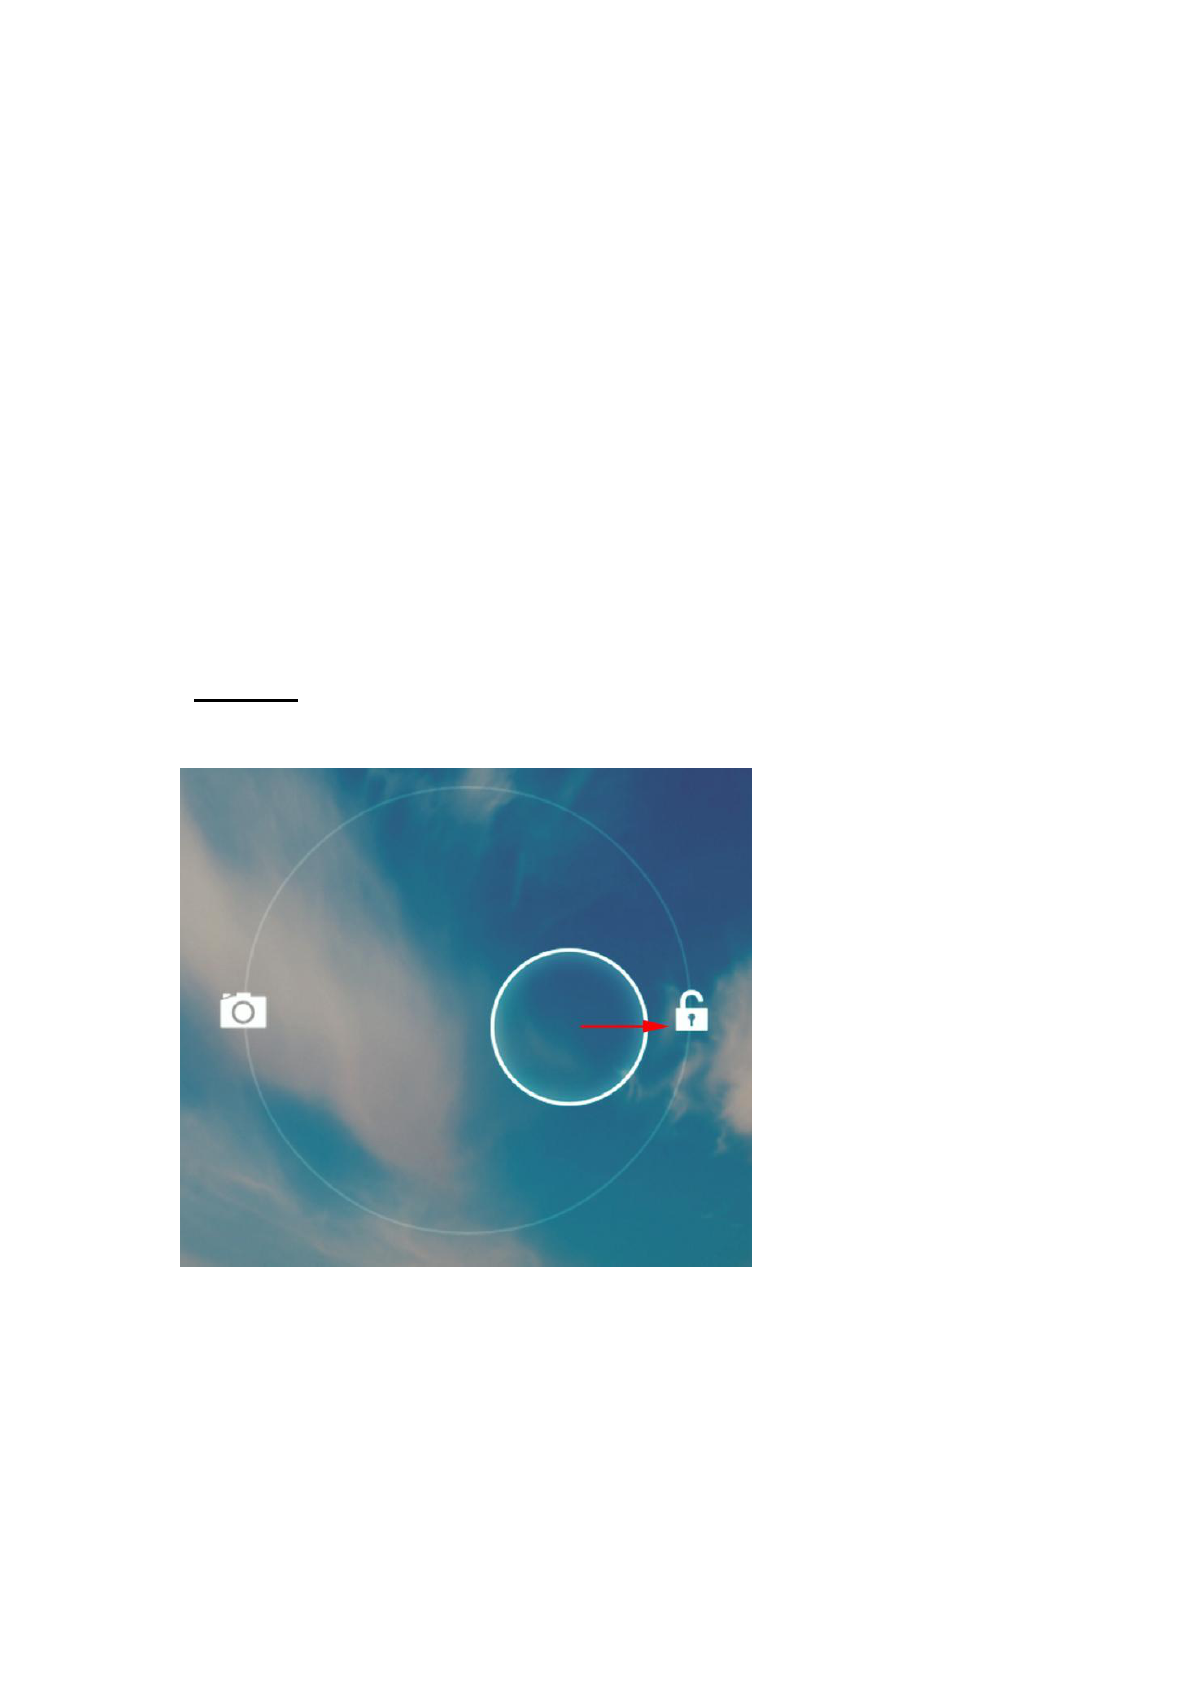
Power on/off
• Power on: Press and hold the power button until the logo appears, followed by the splash
screen and the main screen. Hold down the icon and drag it to the right onto the icon
representing an open lock to unlock the device.
• Sleep Mode: Sleep mode is convenient for regular use of the device. In this mode the device
stays active, but the display is turned off and the main screen is locked. This allows you to
instantly access your operating system while preventing accidental pressing on the display
and saving battery power. To go into sleep mode and back, briefly press the power button.
• Turn off: Press and hold the power button until a prompt appears asking if you want to switch
off the device. Click “OK” to shut down.

Rebooting the device
If the device cannot be powered on and does not respond to charging, then restart it by pressing the
RESET button (hole) with a thin pointed object, and then wait for the tablet to restart.
Connecting external USB-devices
• Connect an external USB-drive with a micro USB cable to the micro USB or USB (OTG-host) port of this
unit. Run the “Explorer” application and select “USB” to access the contents of the connected drive.
• You can connect other peripheral USB-devices (e.g. mouse, keyboard, external hard drives). It’s
enough to connect the peripheral device to the tablet; the device will be recognized and connected
automatically.
Connecting memory cards
The tablet PC is equipped with a slot for micro SD memory cards. The maximum supported card capacity
is 32 GB.
To add a Micro SD card: Carefully insert a Micro SD card into the slot with the label facing the screen.
The card will lock into place with a light “click.”
To remove the card: Simply press the card inwards slightly until you feel a light “click.” Then release
allowing the card to pop out for careful removal.
Note: Micro SD card not included.
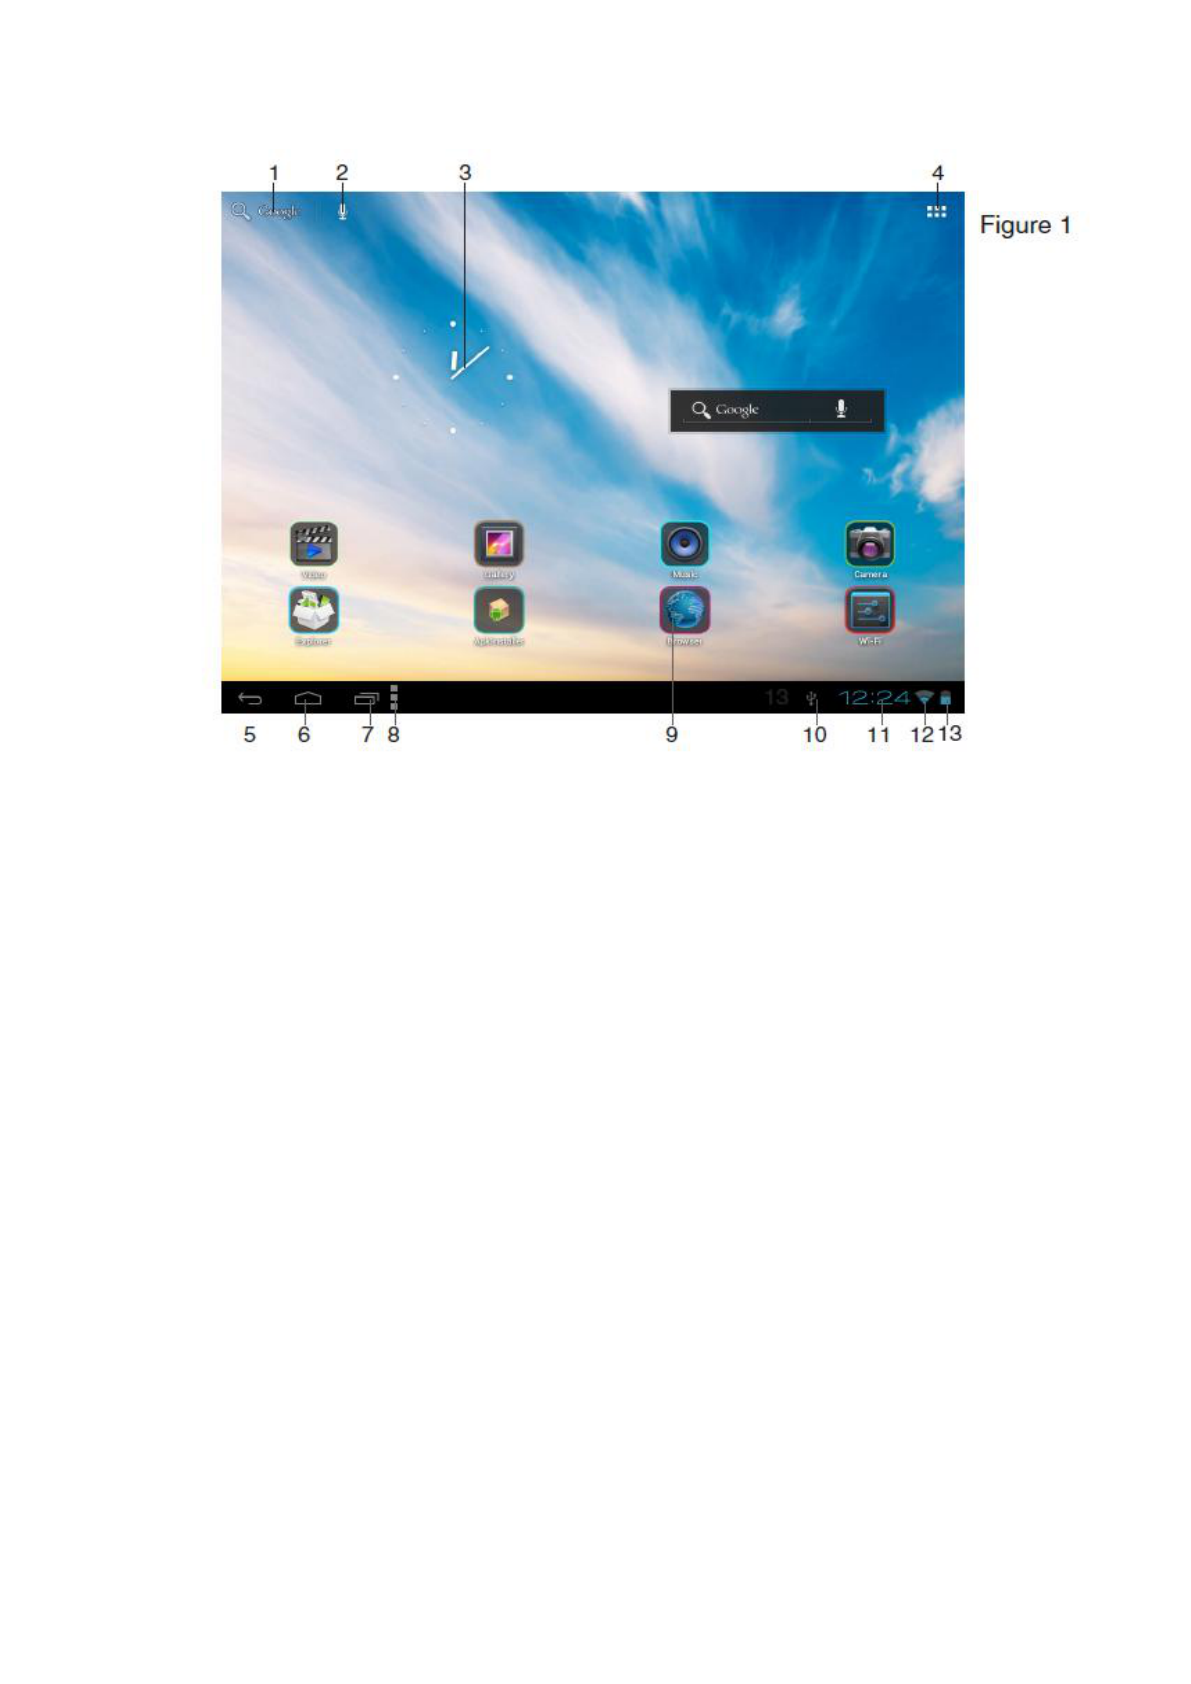
The main screen
After unlocking the device you can see the main (home) screen which provides access to system controls
and operating functions. Elements of the main screen are (Fig. 1):
1. Google Search. Click to go to the Google search page.
2. Voice search.
3. Alarm clock
4. List of all installed applications.
5. “Back” button. Click to return to the previous page/screen.
6. “Home” button. Click to go to home screen.
7. Click here to quickly switch between active applications.
8. Application icons.
9. Web Browser
10. Bluetooth connection.
11. Clock.
12. Wi-Fi connection status.
13. Battery charge indicator.
Touch-screen Navigation
Use your fingers to manipulate icons, buttons, menus, the onscreen keyboard, and other items on the
touch screen. You can also change the screen's orientation.
To select or activate something, touch it.
To type something, such as a name, password, or search terms, just touch where you want to type. A
keyboard will pop up onscreen, allowing you to type.
Other common gestures include:
• Touch & hold: Touch & hold an item on the screen by touching it and not lifting your finger until
an action occurs.
• Drag: Touch & hold an item for a moment and then, without lifting your finger, move your
finger on the screen until you reach the target position. For example, you can drag to reposition
shortcuts on the Home screen.
• Swipe or slide: Quickly move your finger across the surface of the screen without pausing
when you first touch (so you don't drag something instead). For example, you can slide a Home

screen left or right to view the other Home screens.
• Pinch: In some apps (such as Maps, Browser, and Gallery), you can zoom in and out by
placing two fingers on the screen at once and pinching them together (to zoom out) or
spreading them apart (to zoom in).
To avoid scratching or crushing, do not place objects on the touch screen surface.
Navigating the screen
Menu: For ALL Android applications and screens, pressing the MENU icon (depending on which screen
you are on, it will be on the left bottom portion or the extreme top right corner of the unit) or the Menu
Button (right hand side on the front of the unit) will reveal the menu items and options available with that
operation.
At the bottom of the screen, you'll see three Navigation buttons. They are always available. No matter
what you're doing with your unit, you can always get back to the main Home screen or return to previous
screens:
Back button : Opens the previous screen you were working in, even if it was in a different app. Once
you back up to the Home screen, you can’t go back any further in your history.
Home button : Opens Home. If you’re viewing a left or right Home screen, opens the central Home
screen
Recent apps : Opens a list of thumbnail images of apps you’ve worked with recently. To open an app,
touch it. To remove a thumbnail from the list, swipe it to the right.
: Vol – Vol+
Go to submenu.
Adding/removing objects on the desktop
• Adding a shortcut: Click the applications menu button (4) at the top right corner of the main screen,
then select the item you wish to place on your desktop. Touch the icon and hold it for 3 seconds. Without
taking your finger off the screen, drag the icon to a blank space of the active desktop, release the icon
and it will lock on the home screen.
• Removing an object from the desktop: On the home screen, click the unwanted item and hold for 3
seconds, until a white X and the word “Remove” appears at the top of the screen. Without taking your
finger off the screen drag and drop it on the X when it turns red.
(Deleting an object from the desktop, will not delete it from your system. Any object can be restored on
the desktop as described above.)
Wallpaper
There are two ways to set the background image on your desktop and screen lock:
• On the home screen, click on a blank area of the desktop and hold for 3 seconds, then
choose a wallpaper from several available options. Click “Set Wallpaper” to finalize your
choice.
• On the home screen, click the applications menu button (4) at the top right corner of the main
screen, in the APPS tab select “Settings”. In section “Display” select “Wallpaper”. Select a
picture available on the device. Click “Set Wallpaper”.
The Settings menu
Setting up your unit for the first
time:
Before using the unit, we strongly recommend setting up all the necessary items first. By doing
this, you are assured all is set up correctly to provide trouble free use.
To start set up your unit, select the Settings icon to reveal this screen.

Wi-Fi: Access the Wi-Fi management interface
Data usage: Check mobile data usage
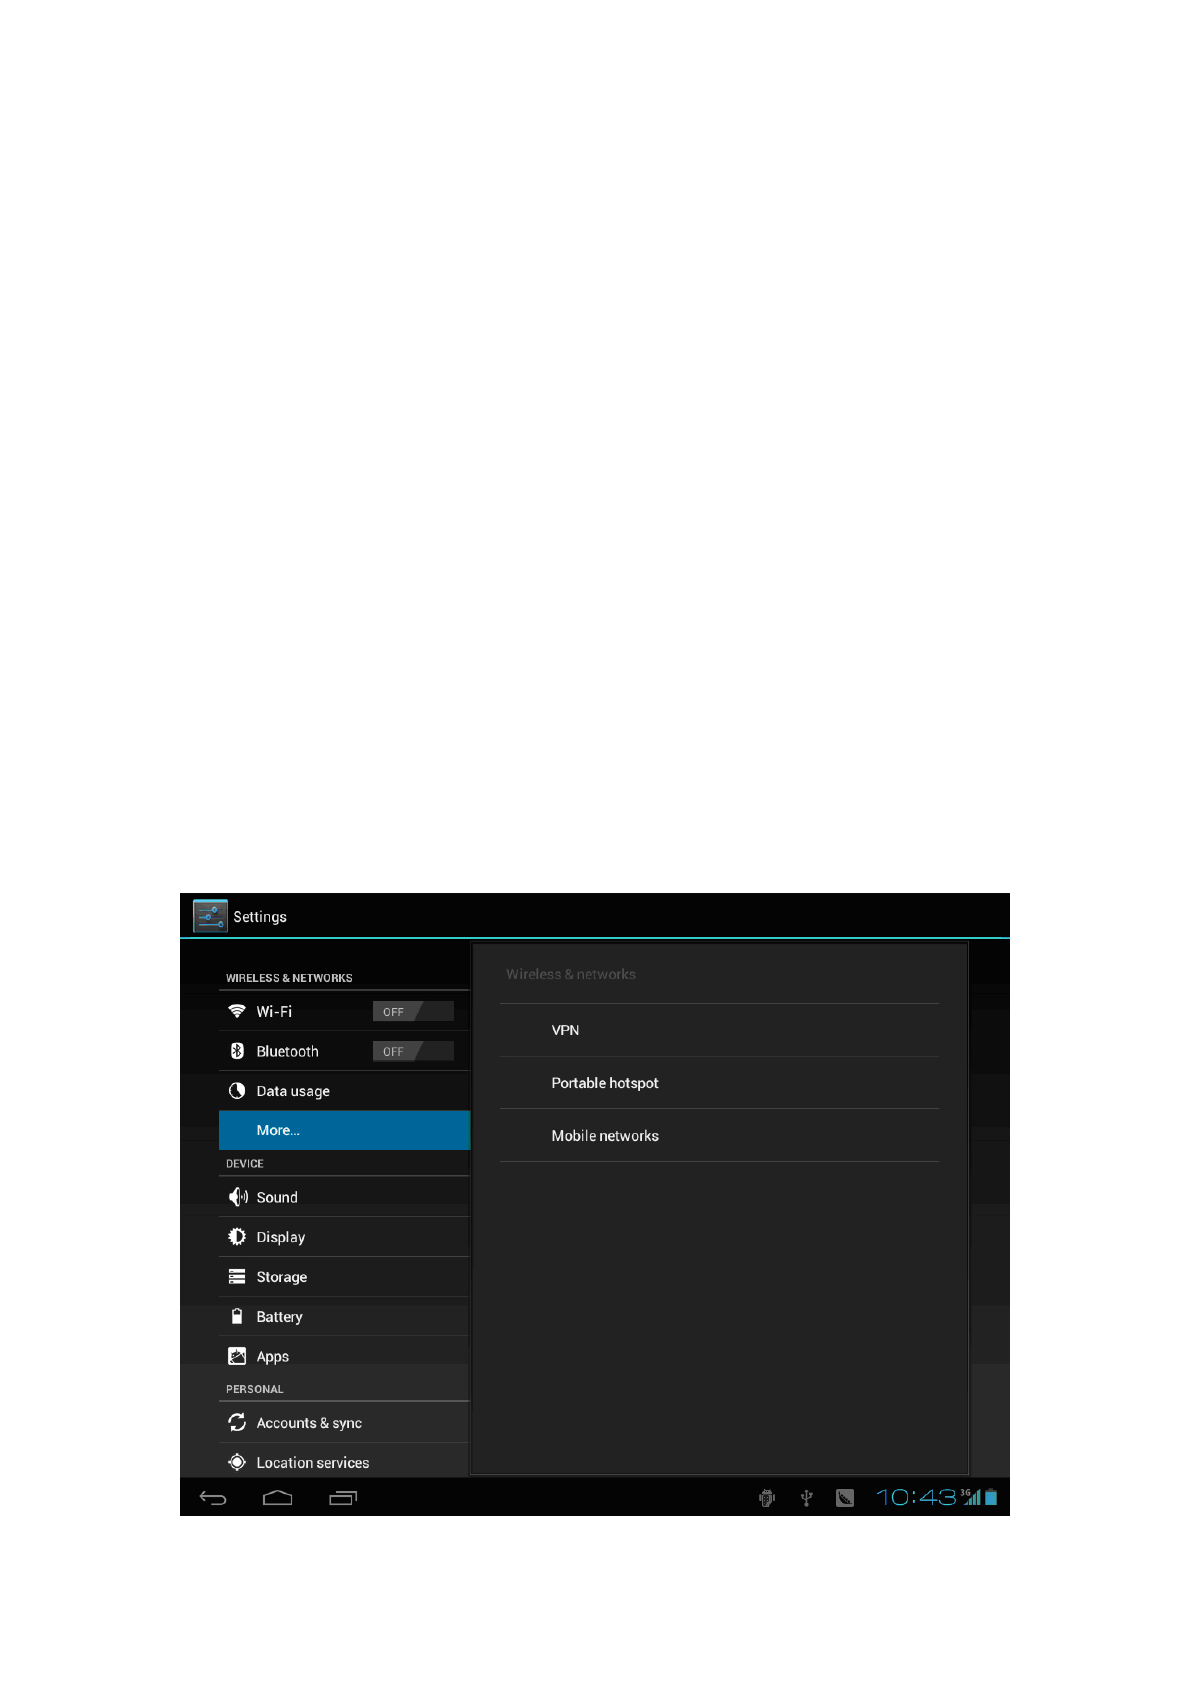
More: Set Airplane mode, Ethernet, VPN, Portable hotspot, Mobile networks
Sound: Adjust sound settings
Display: Adjust screen settings
Storage: Check storage space
Battery: Check battery usage
Apps: Manage all applications
Location access: Use your location info or not
Security: Set password/screen lock
Language and input: Set up input parameters
Back up and reset: Backup the unit/ Reset it
Add Accounts : Set up all accounts
Date and time: Set the time and date
Accessibility: Set talkback
Developer options: Set desktop backup password, USB debugging etc.
About device: Device specifications
Making calls
The tablet PC has a function of making and receiving phone calls and SMS using the 3G SIM card.
3G connectivity
Open the back case and insert one or two 3G SIM-cards into the appropriate slot on the unit.
Click the applications menu button (4) in the top right corner of the main screen, in the APPS
tab select “Settings”. In WIRELESS & NETWORKS select “More ...” Click on “Mobile networks”,
put a tick next to «Modem power» and enter the PIN-code. In the “Mobile network settings”,
select “Access Point». Select your access point from the list or adjust manually. When a
successful connection is performed, icon appears in the system tray.
Select the Phone application from the APPS menu.

In the Dial screen, enter a number, and press the Dial key to make a call.
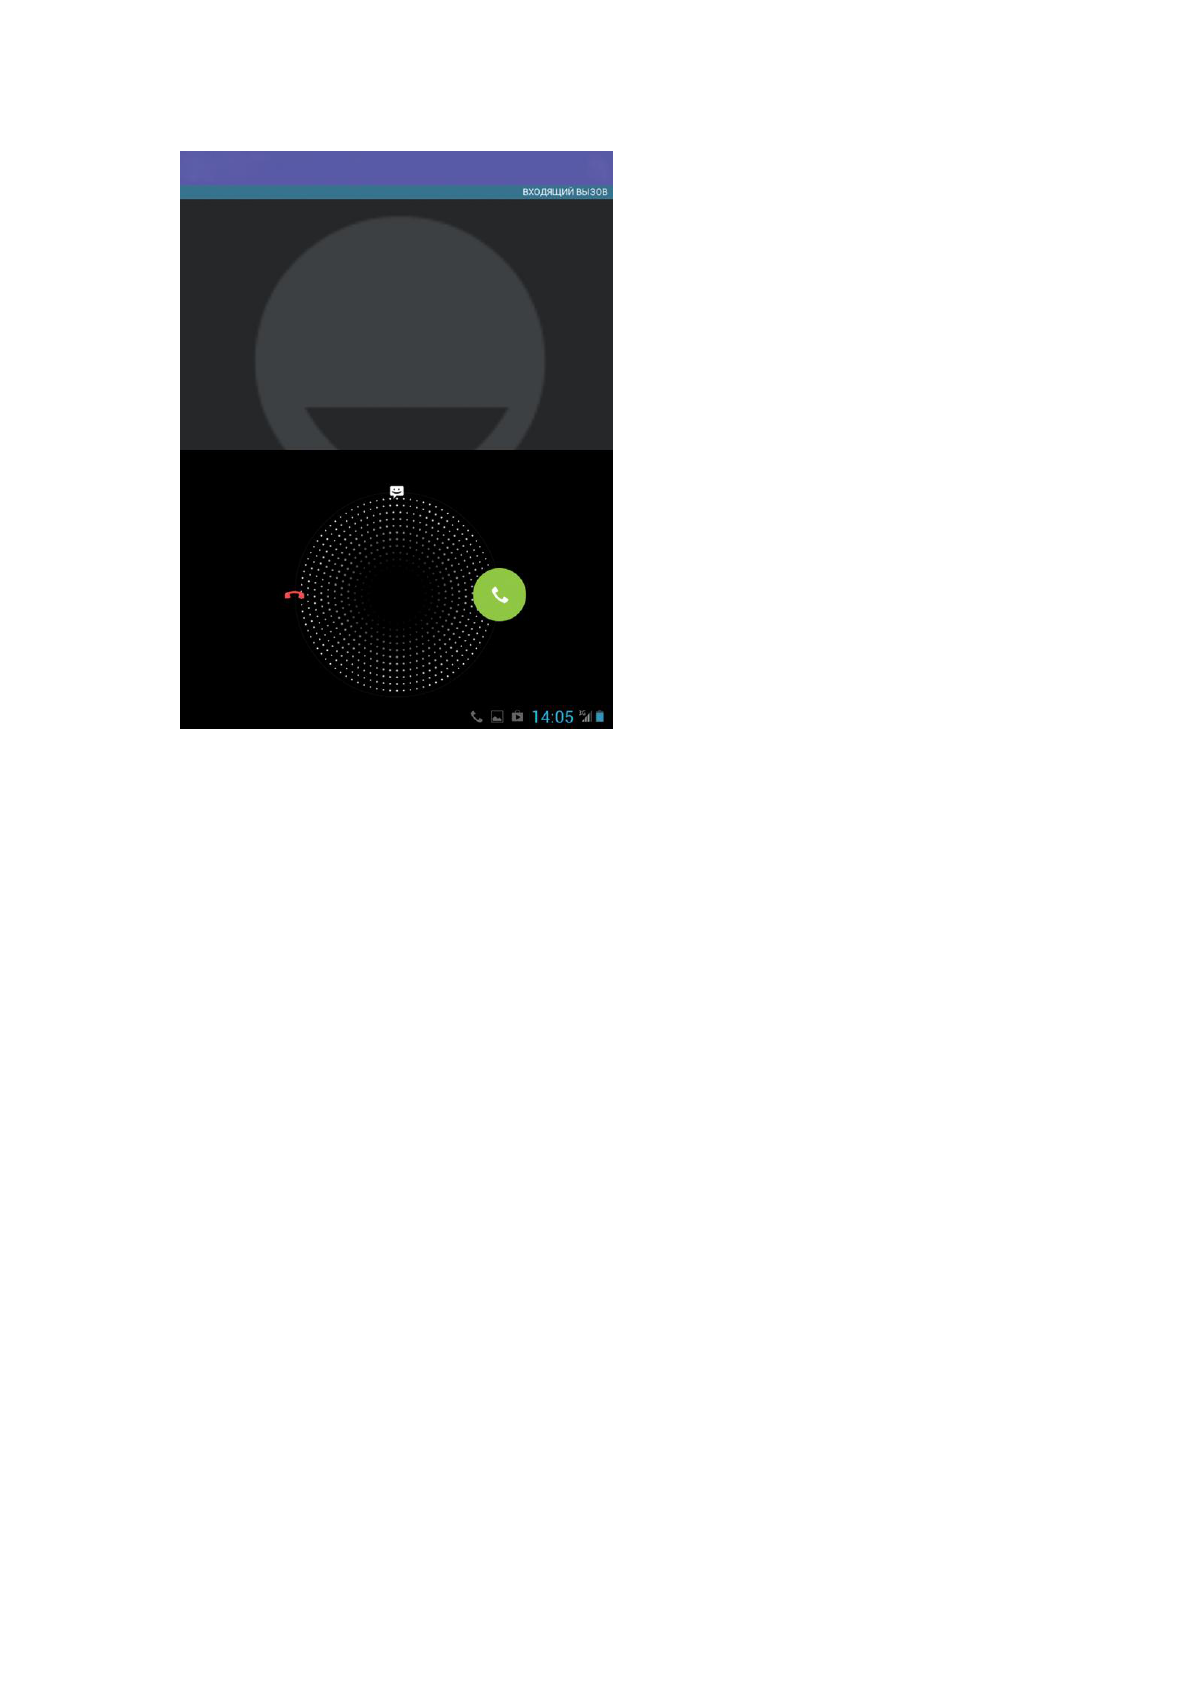
To change the number, delete the digits you have entered. During dialing, the animation
appears on the screen. After the call is picked up, the screen will show call status information. If
the connection alert tone has been set, your phone will ring the alert tone (network dependent).
To end a call, press the Hang Up key.
Accessing the Internet
Establishing a Wi-Fi connection
The device connects to the internet using a wireless broadband connection. You can connect
to a home network, or when you’re out and about by using the many free hotspots that you can
find in coffee shops, libraries etc.
To connect to a Wi-Fi network:
(1) Tap the Settings icon
(2) Slide the Wi-Fi button to the right so it’s in the “ON” position
(3) The device will scan the area and display a list of all available Wi-Fi hotspots. Choose a
network from the list, then tap “connect” to connect. If the hotspot is password protected you
need to get the password from your Internet Service Provider, or from your network
administrator.
Note:
1. The available network list is constantly refreshed automatically
2. When Wi-Fi is enabled, the device will connect automatically to your configured networks when they
are in range.
3. If the unit reports “no connection” or “connection failed” the password may have been entered
incorrectly. To retry, select the network name from the Wi-Fi menu and select “Forget?” Restart the Wi-Fi
and start the procedure again.
4. Once you have connected to a network for the first time, the unit will remember it and connect
automatically when it in range. The connection process will not need repeated.
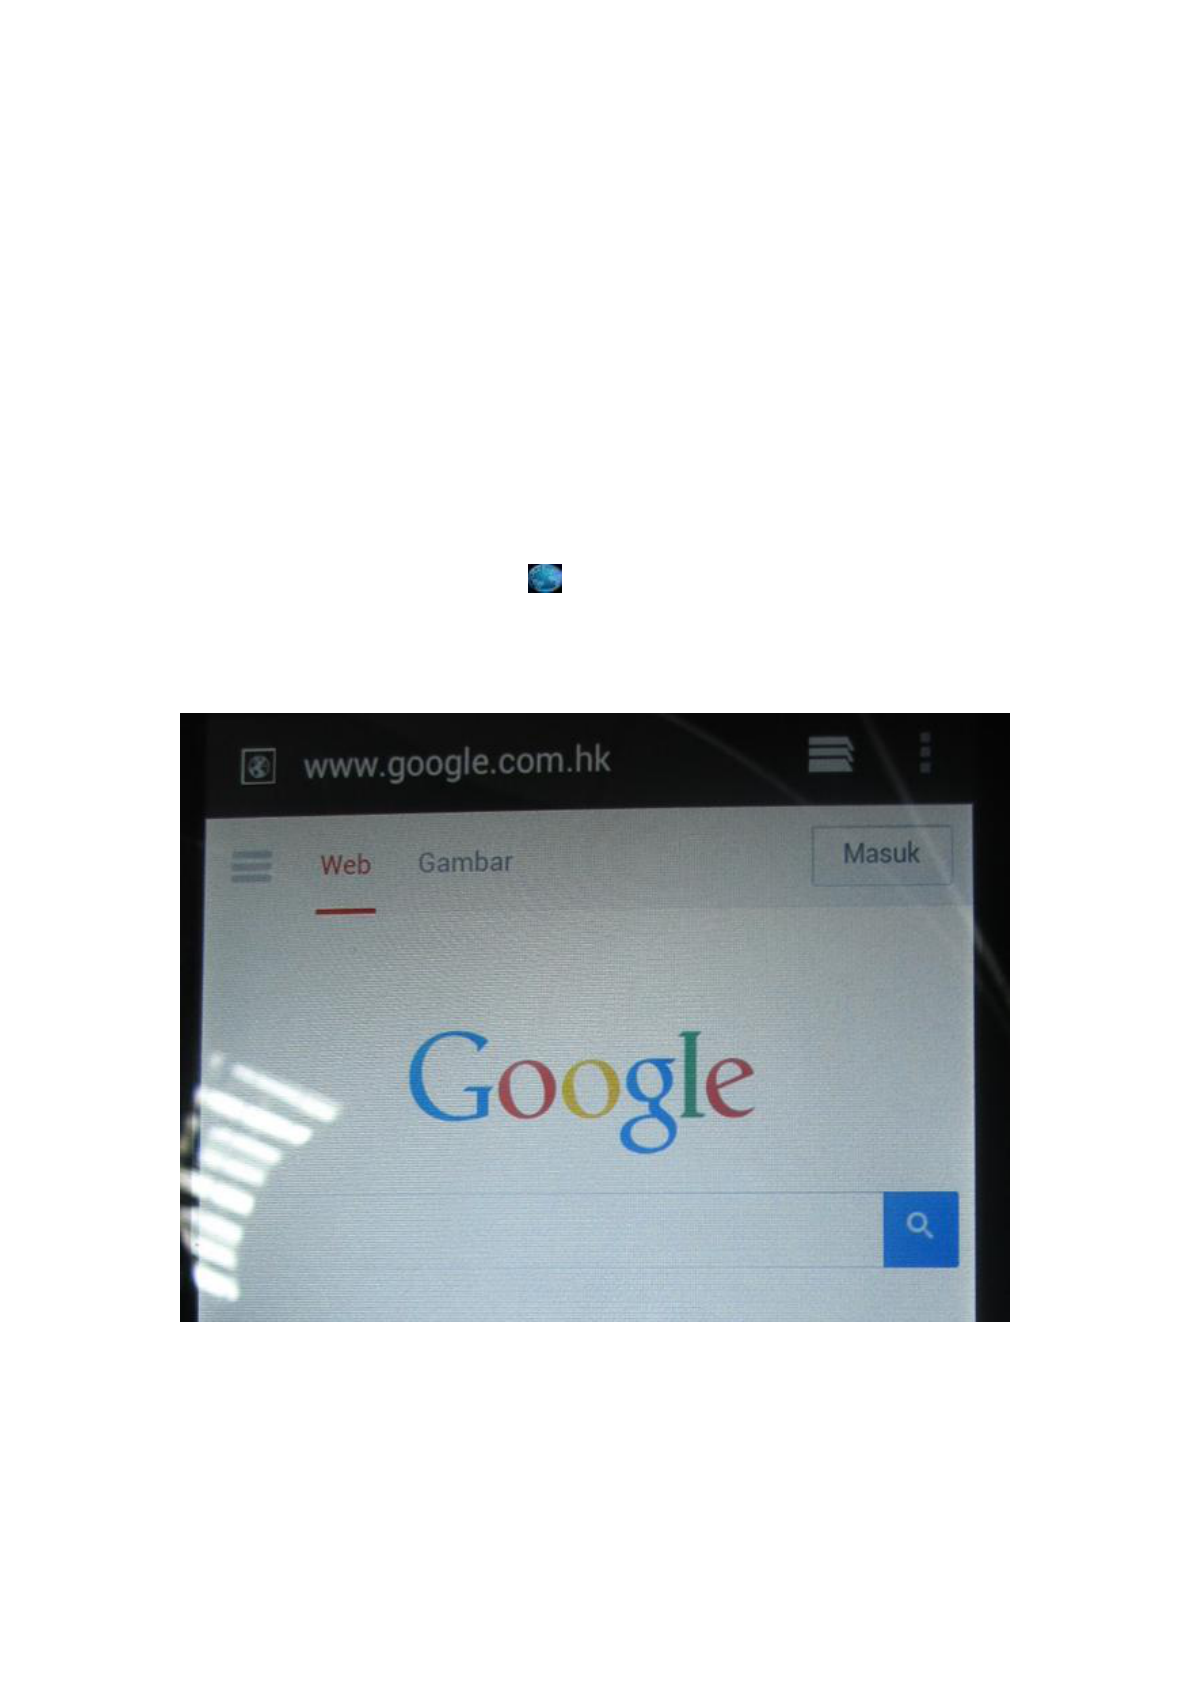
Web Browser
On the applications page, press the icon to open the browser. To reach a website,
type its URL into the address bar. After opening a web page, touch the screen to scroll
up and down, scan, and select other parts of the website.
Watch a video
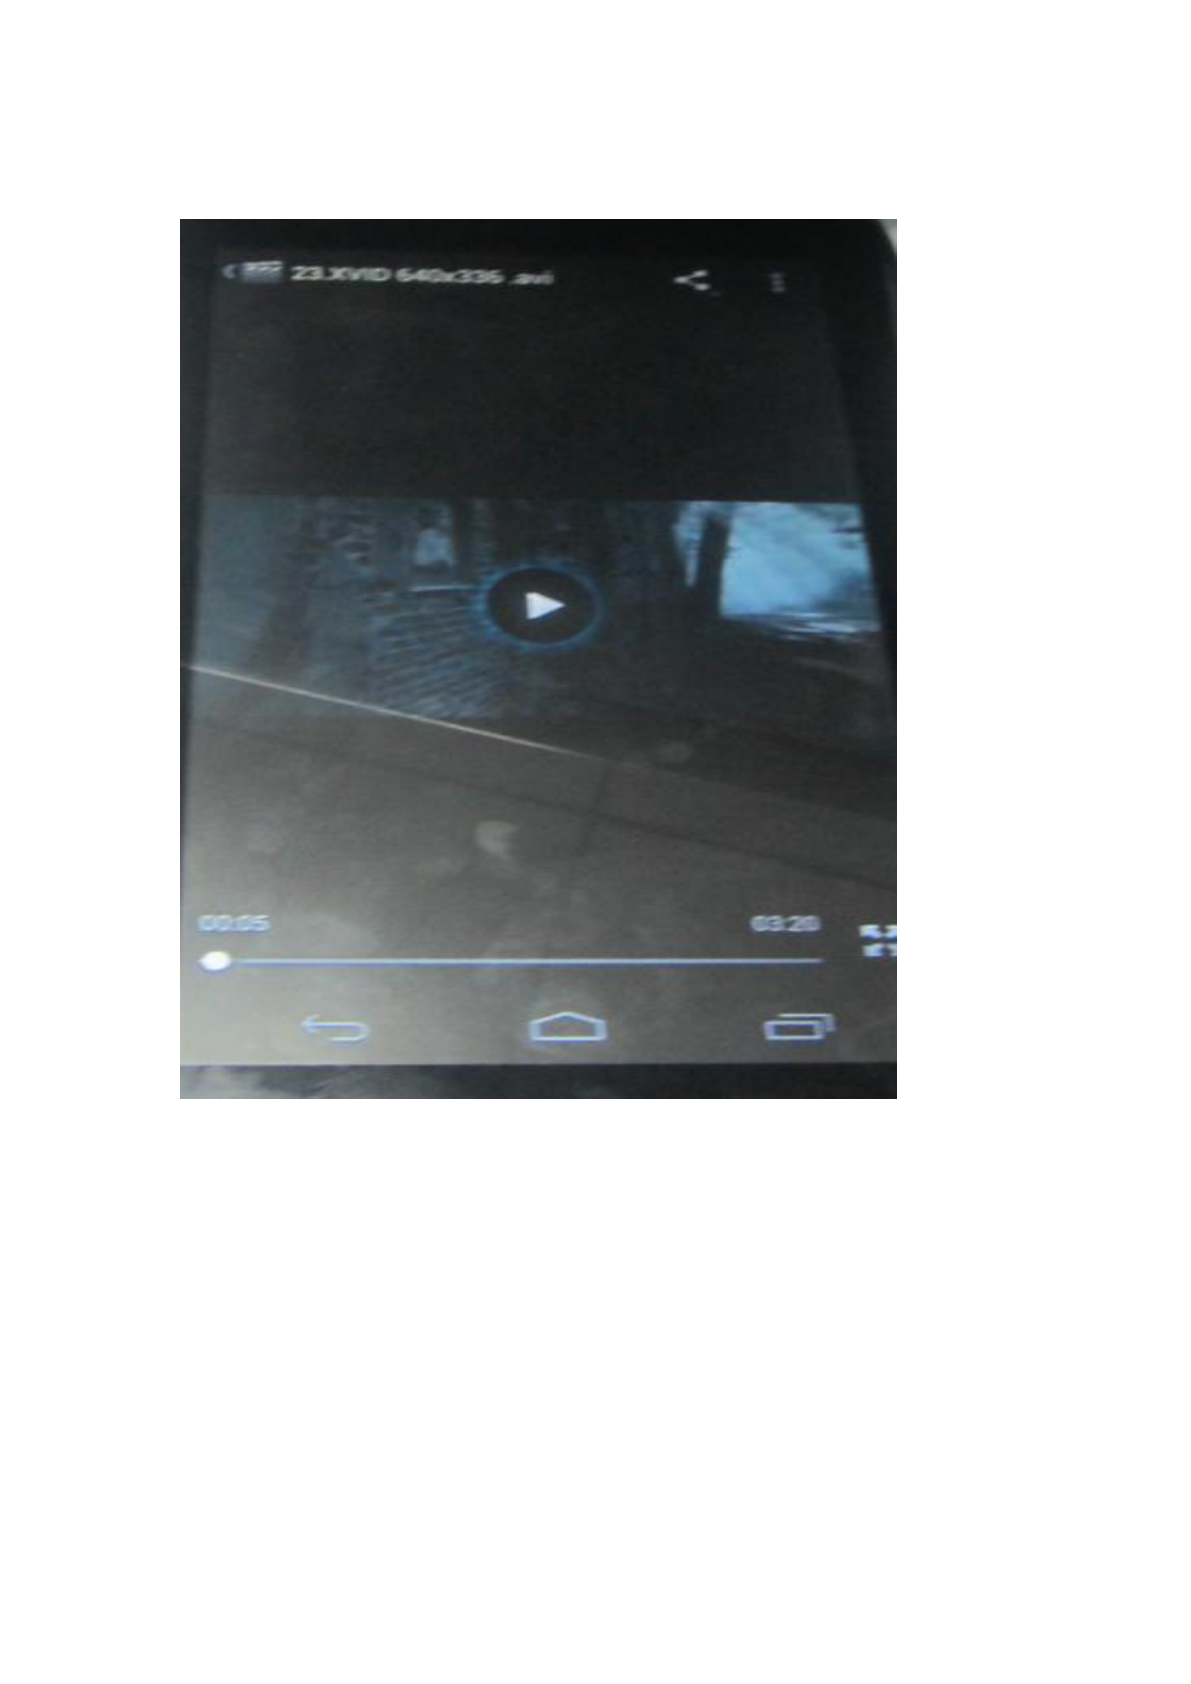
Select the video player icon to open the video interface:
Listen to music
Select the music player icon to open the music interface:
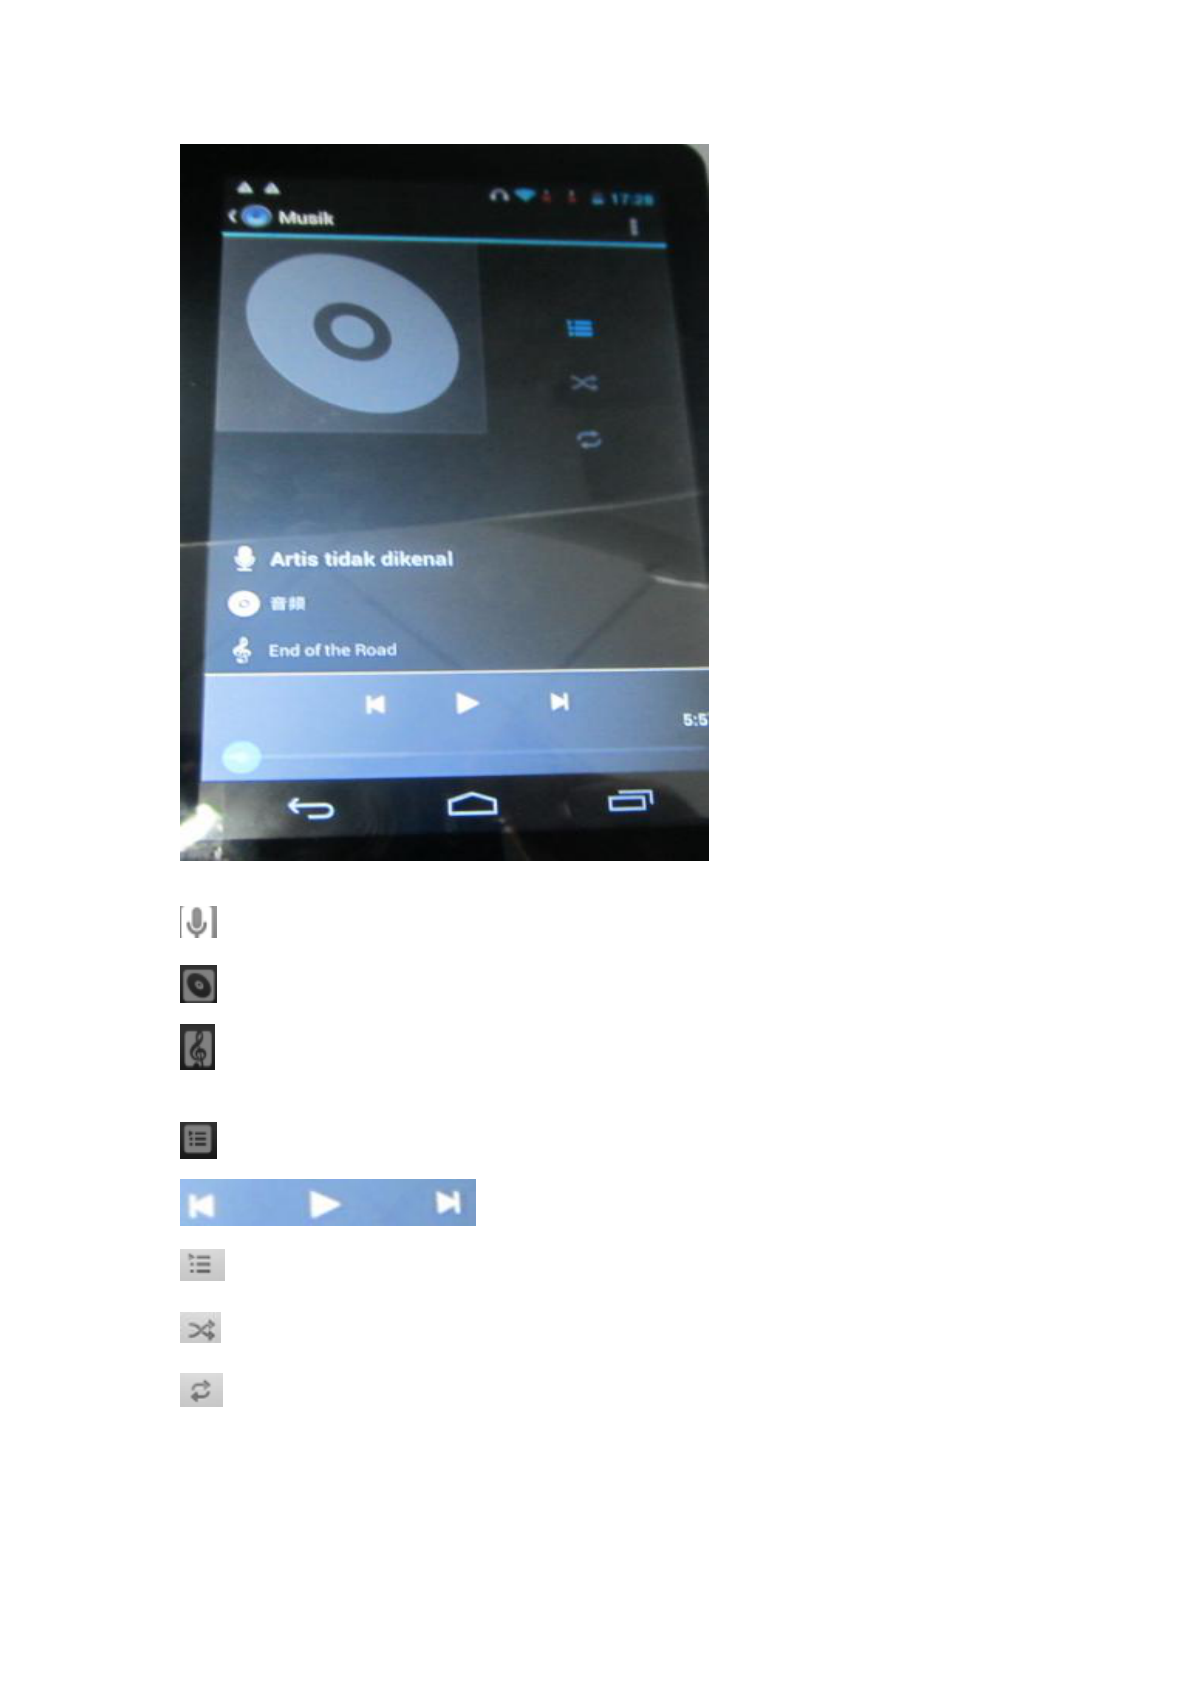
: Press to sort songs by artist
: Press to sort the songs by album
: Press to display all audio files on the screen
: Press to check play list
Select previous/next song, or suspend
: Press to display a list of audio files
: Press to turn shuffle on/off
: Press to set the repeat mode: repeat all, repeat one or deactivate
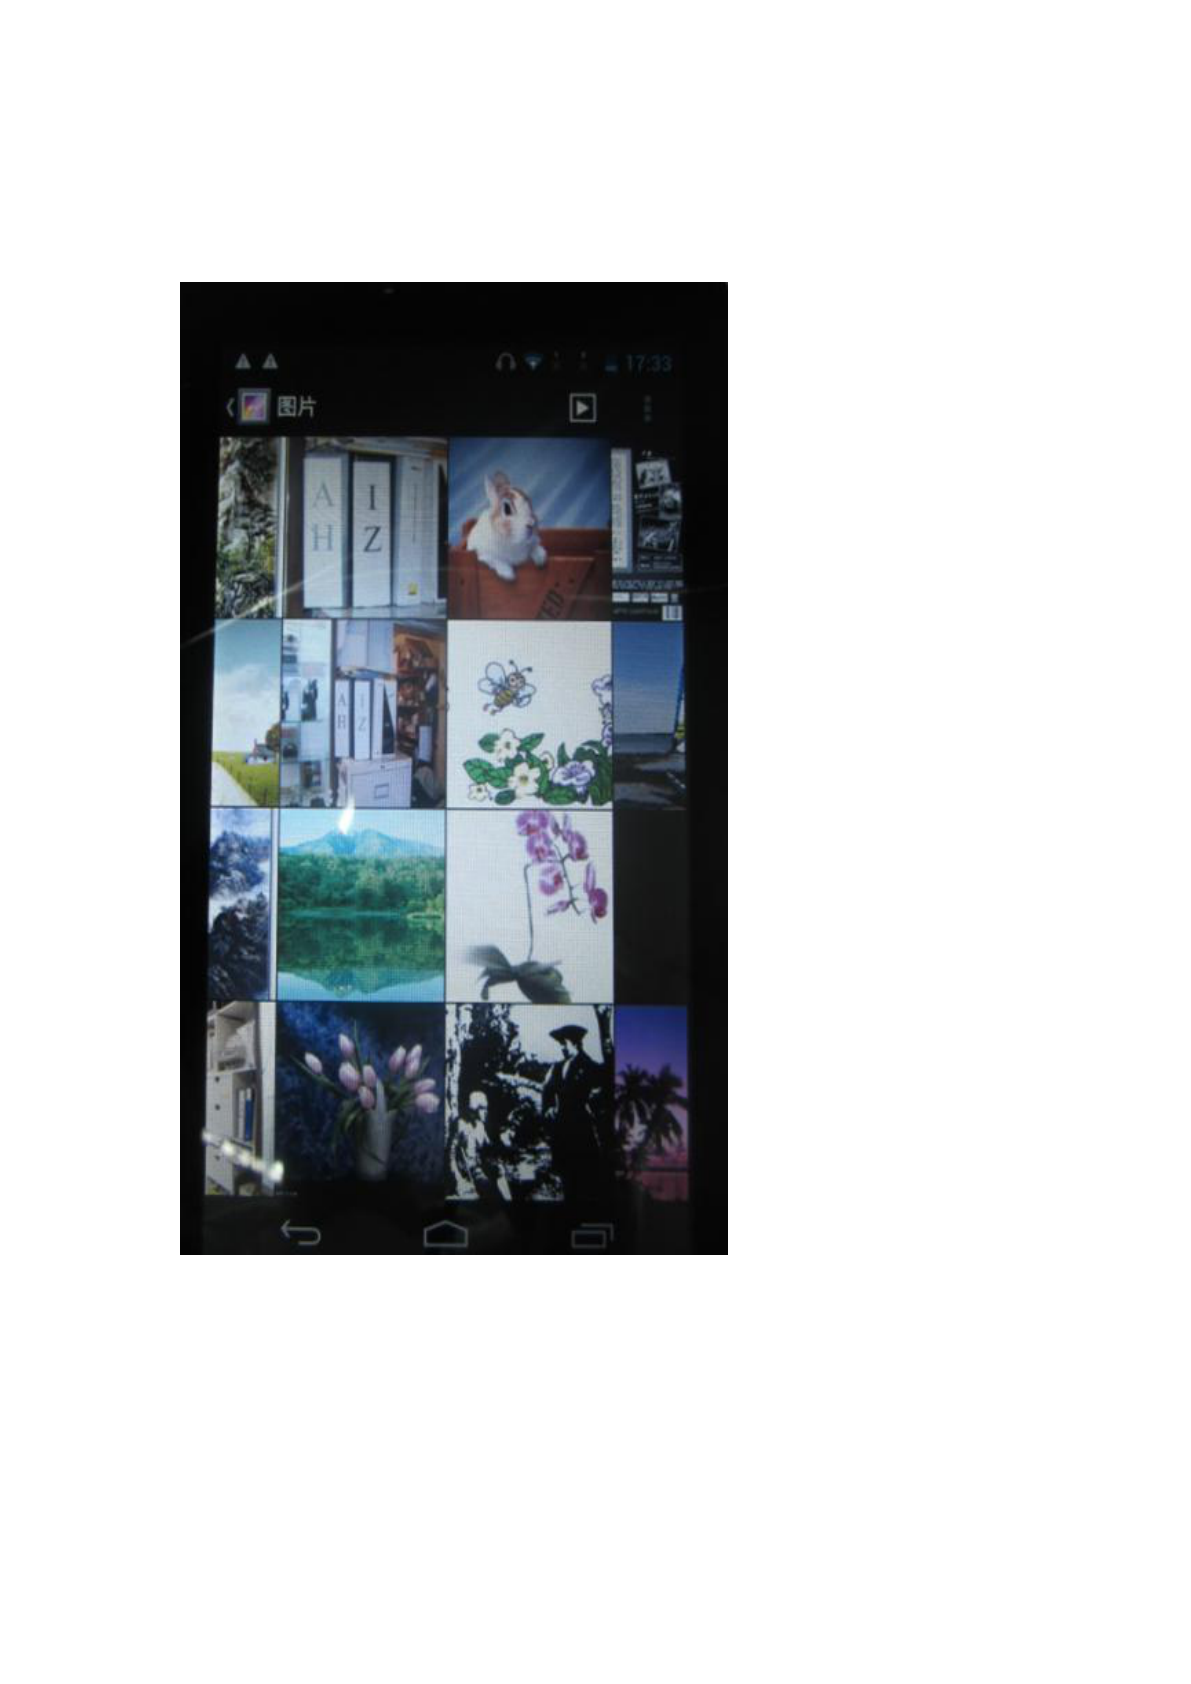
Viewing your photos
Select the gallery icon to access photo albums
(1) Photos will display as thumbnails. Slide your finger left or right across the screen to browse photos.
(2) Tap a photo thumbnail to view the photo in full screen.
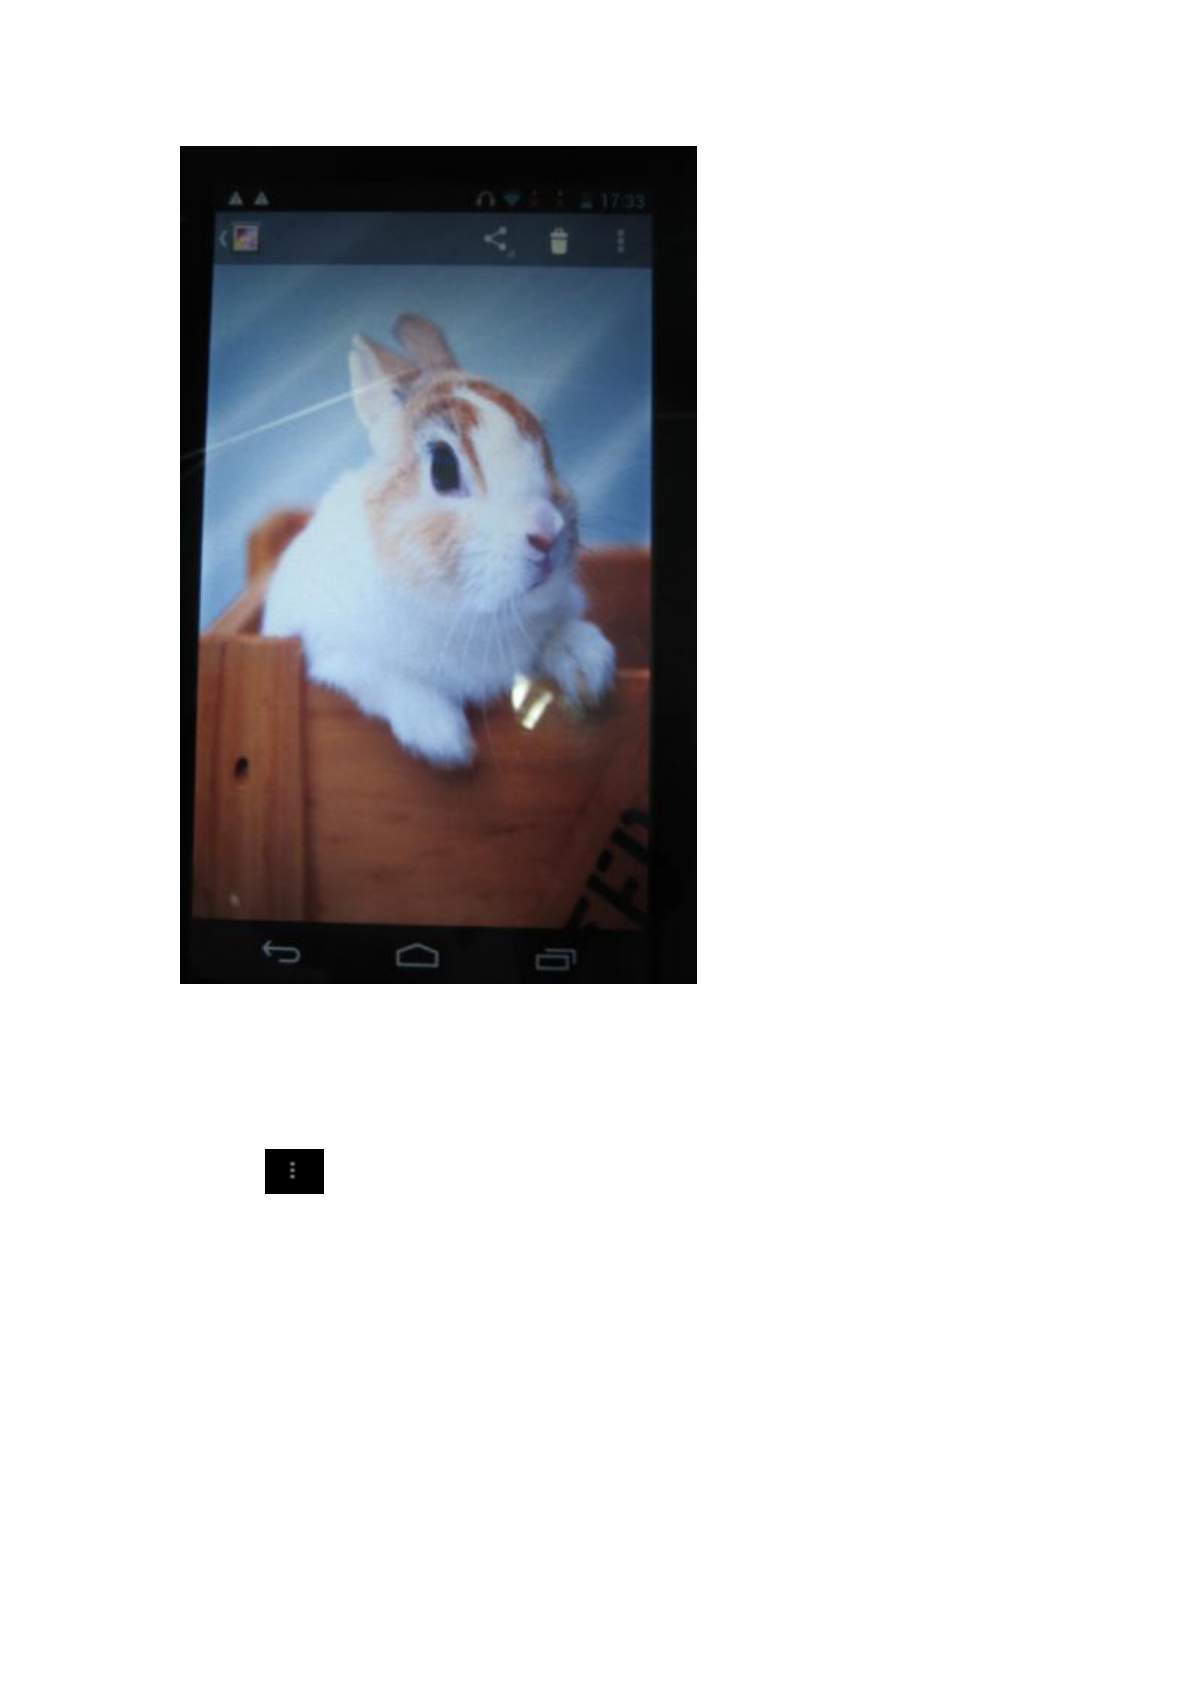
(3) To display previous/next picture, slide your figure across the screen.
(4) Display menu: While viewing a picture, tap on the screen or the Menu icon to bring up the
menu options.
(5)Touch to manage the photo and go to below interface.
Product Specifications

7" capacitive 5-point touch screen,
• Resolution: 1024x600 pixels
• Operation System: Android 4.2.2, supports Adobe Flash 8GB
• CPU:MT8312, Cortex A7 at 1.3GHz processor
• Aluminum case
• Built-in WiFi 802.11b/g/n
• Built-in RAM: 1GB DDRIII
• Built-in 0.3M pixels Front Camera / 2.0M pixels Rear camera
• Multi-language support
• 3-Directions Gravity sensor, Microphone and Speaker, Earphone jack, Mini USB slot, OTG
• Supports TF card, supports Max 32GB external Micro SD card (not included)
• Video Decoding: AVI, MP4, RM, RMVB, FLV, MOV, 3GP
• Music Decoder: MP3, WMA, WAV, APE, FLAC, AAC, OGG
• Picture formats: JPEG, BMP, GIF, PNG
• Dimension: 192*109*8.6MM
• Weight: 264.5g
Federal Communications Commission (FCC)
Interference Statement
This device complies with part 15 of the FCC Rules.
Operation is subject to the following two conditions:
(1) This device may not cause harmful interference,
and (2) this device must accept any interference
received, including interference that may cause
undesired operation.
This equipment has been tested and found to
comply with the limits for a Class B digital device,
pursuant to part 15 of the FCC Rules. These limits
are designed to provide reasonable protection
against harmful interference in a residential
installation. This equipment generates, uses and
can radiate radio frequency energy and, if not
installed and used in accordance with the
instructions, may cause harmful interference to radio
communications. However, there is no guarantee
that interference will not occur in a particular
installation. If this equipment does cause harmful
interference to radio or television reception, which
can be determined by turning the equipment off and

on, the user is encouraged to try to correct the
interference by one or more of the following
measures:
—Reorient or relocate the receiving antenna.
—Increase the separation between the equipment
and receiver.
—Connect the equipment into an outlet on a circuit
different from that to which the receiver is
connected.
—Consult the dealer or an experienced radio/TV
technician for help.
Note: Any changes or modifications not expressly
approved by the party responsible for compliance
could void the user's authority to operate the
equipment.
This mobile device meets guidelines for exposure to
radio waves. Your mobile device is a radio
transmitter and receiver. It is designed not to exceed
the limits for exposure to radio waves recommended

by international guidelines.
The SAR limit adopted by USA and Canada is 1.6
watts/kilogram (W/kg) averaged over one gram of
tissue. The highest SAR value reported to the
Federal Communications Commission (FCC) and
the Industry Canada (IC) for this device type when it
is tested for use at the ear is 0.113 W/kg, and that
when it is properly worn on the body is 0.799 W/kg.
The device complies with the RF specifications when
the device is used near your ear or at a distance of 0
cm from your body. Ensure that the device
accessories such as a device case and a device
holster are not composed of metal components. Keep
your device 0 cm away from your body to meet the
requirement earlier mentioned.