Inkel ETR0004 TFT LCD TV MONITOR User Manual USERS MANUAL
INKEL Corporation TFT LCD TV MONITOR USERS MANUAL
UserManual.wiki
>
Inkel
>
ETR0004 User Manual
USERS MANUAL
Navigation menu
Upload a User Manual
Namespaces
Wiki Guide
HTML
PDF
Info
Views
User Manual
Discussion / Help
Navigation

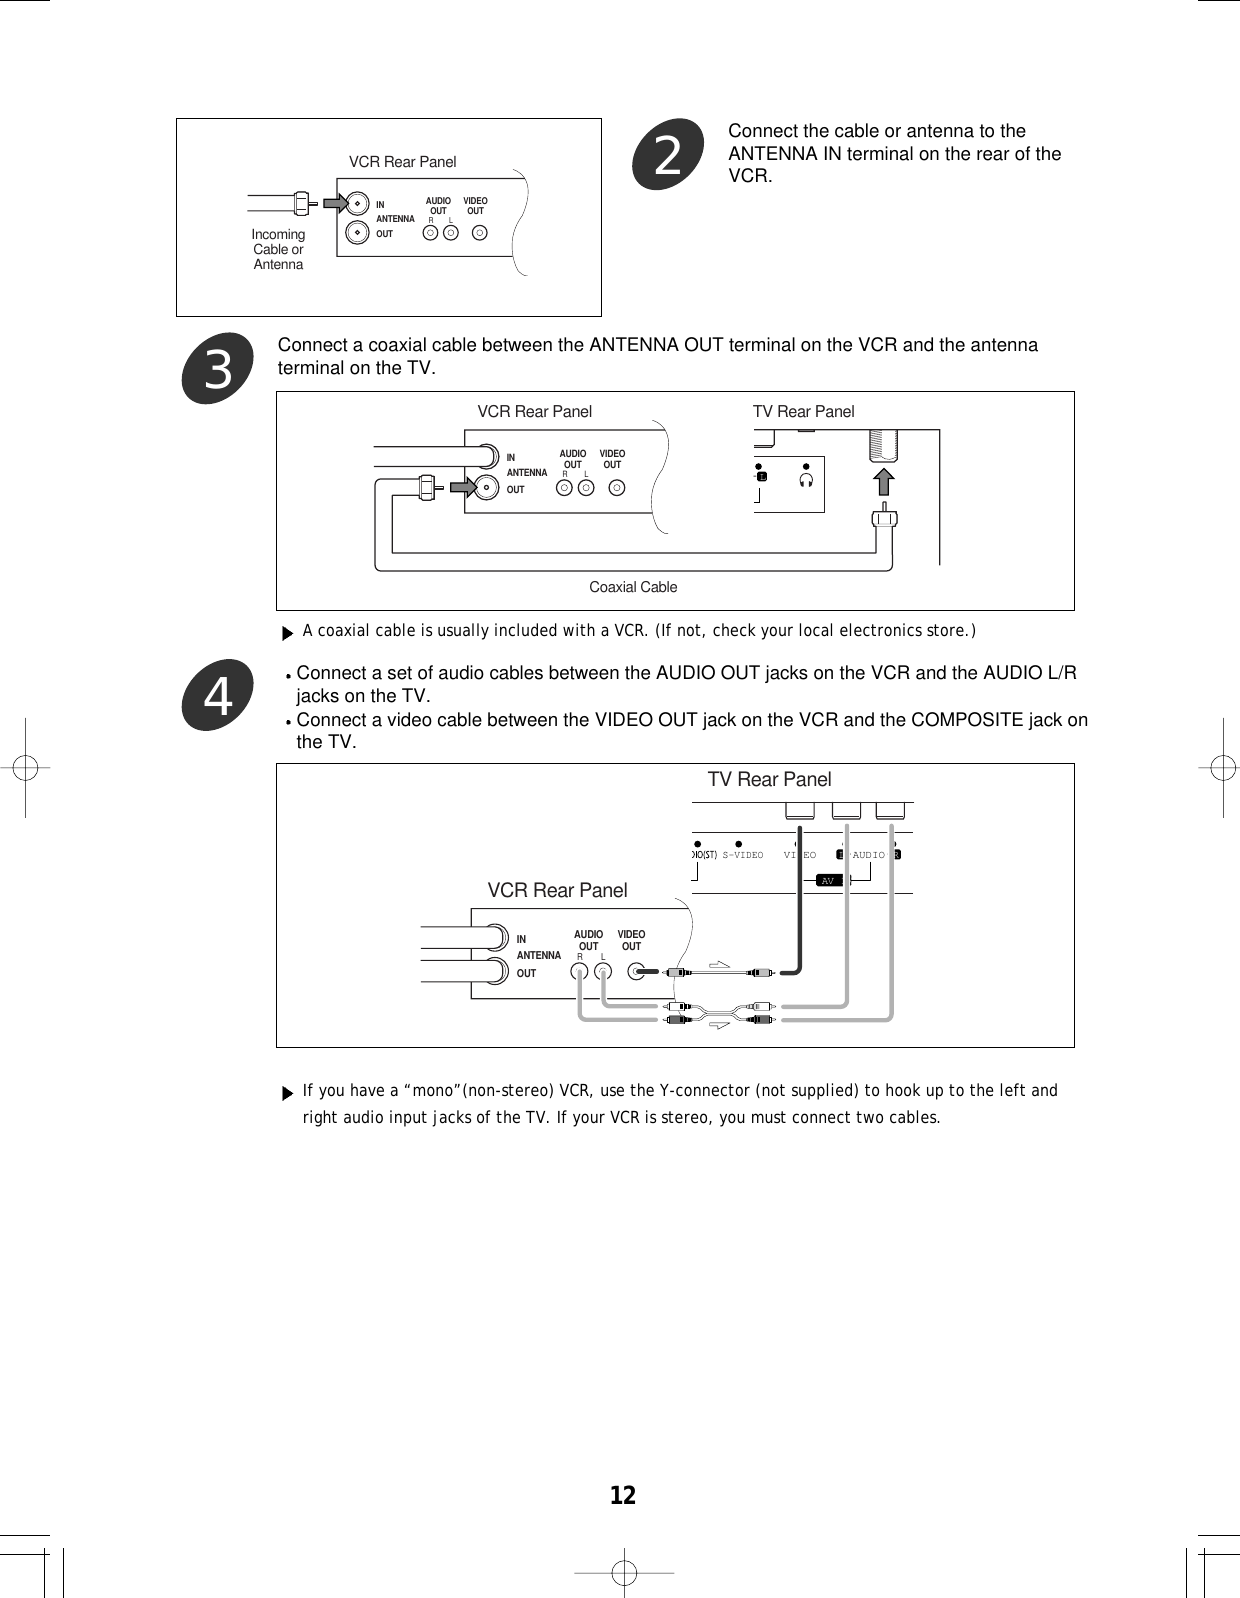
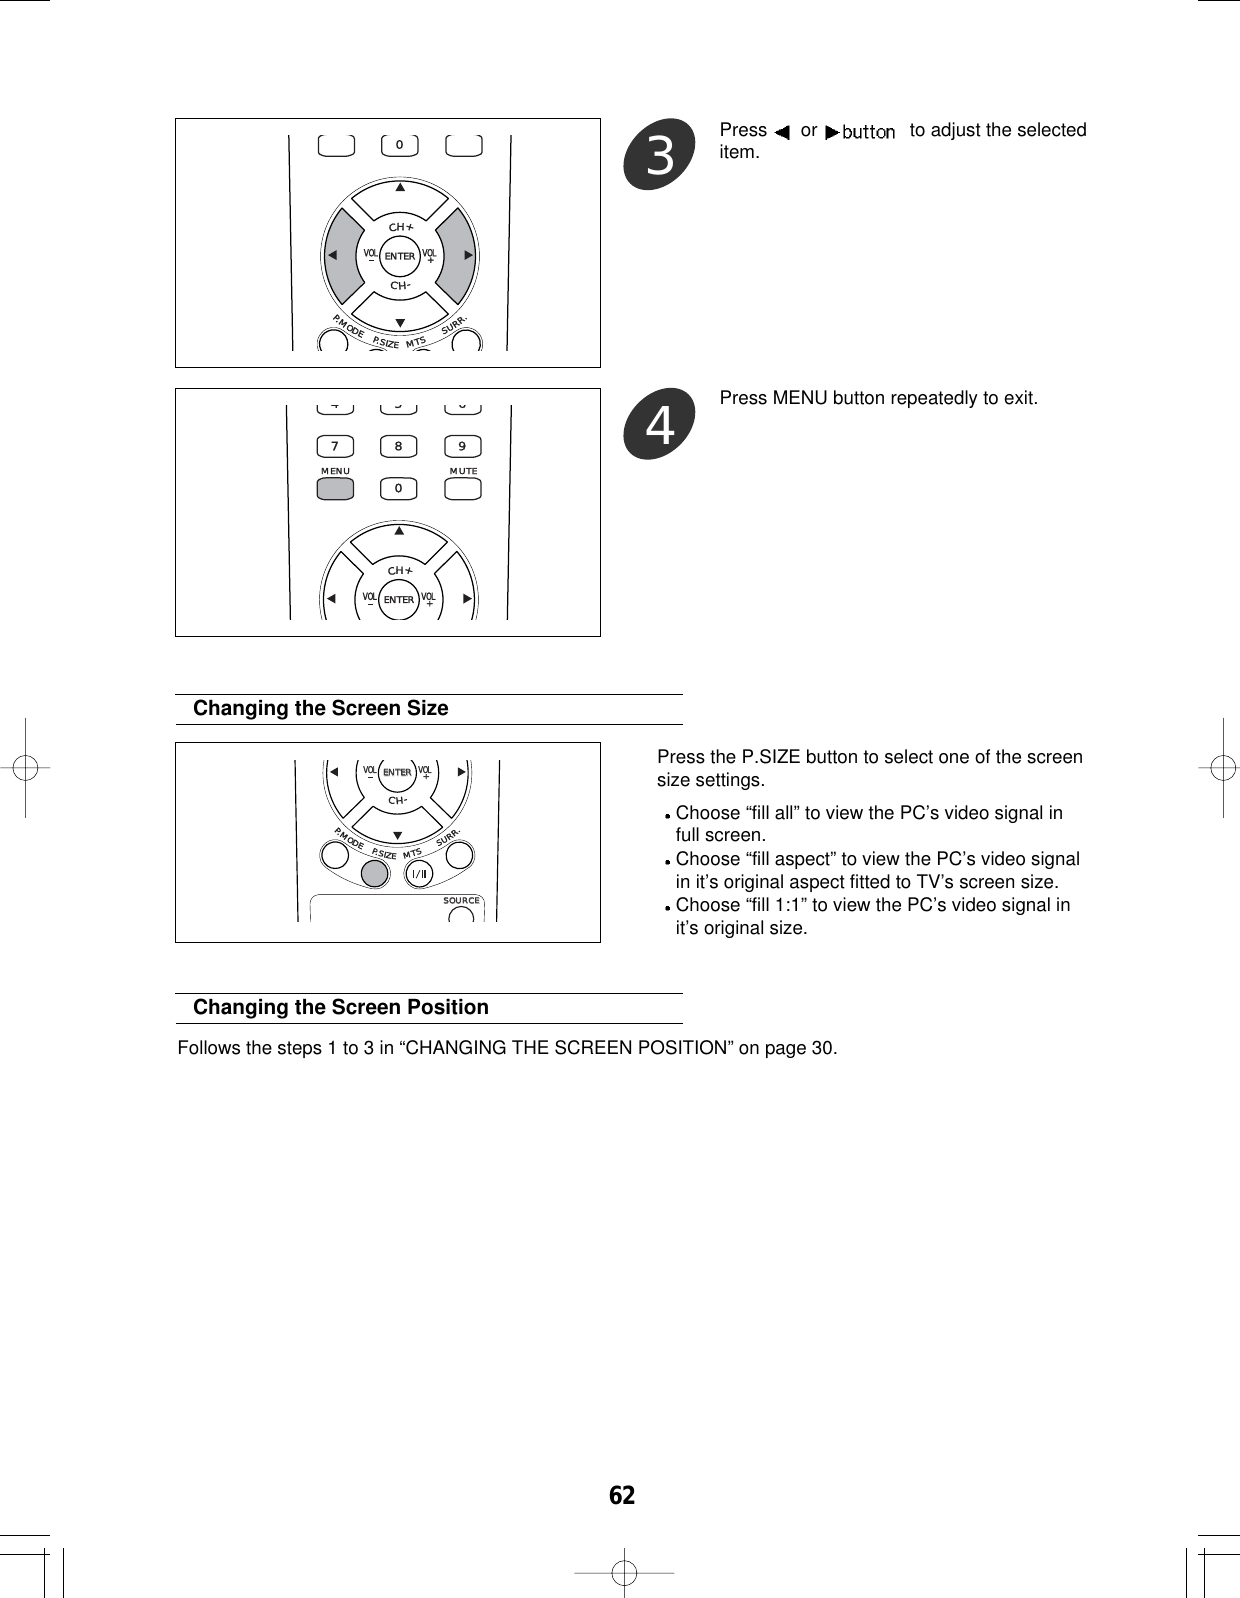
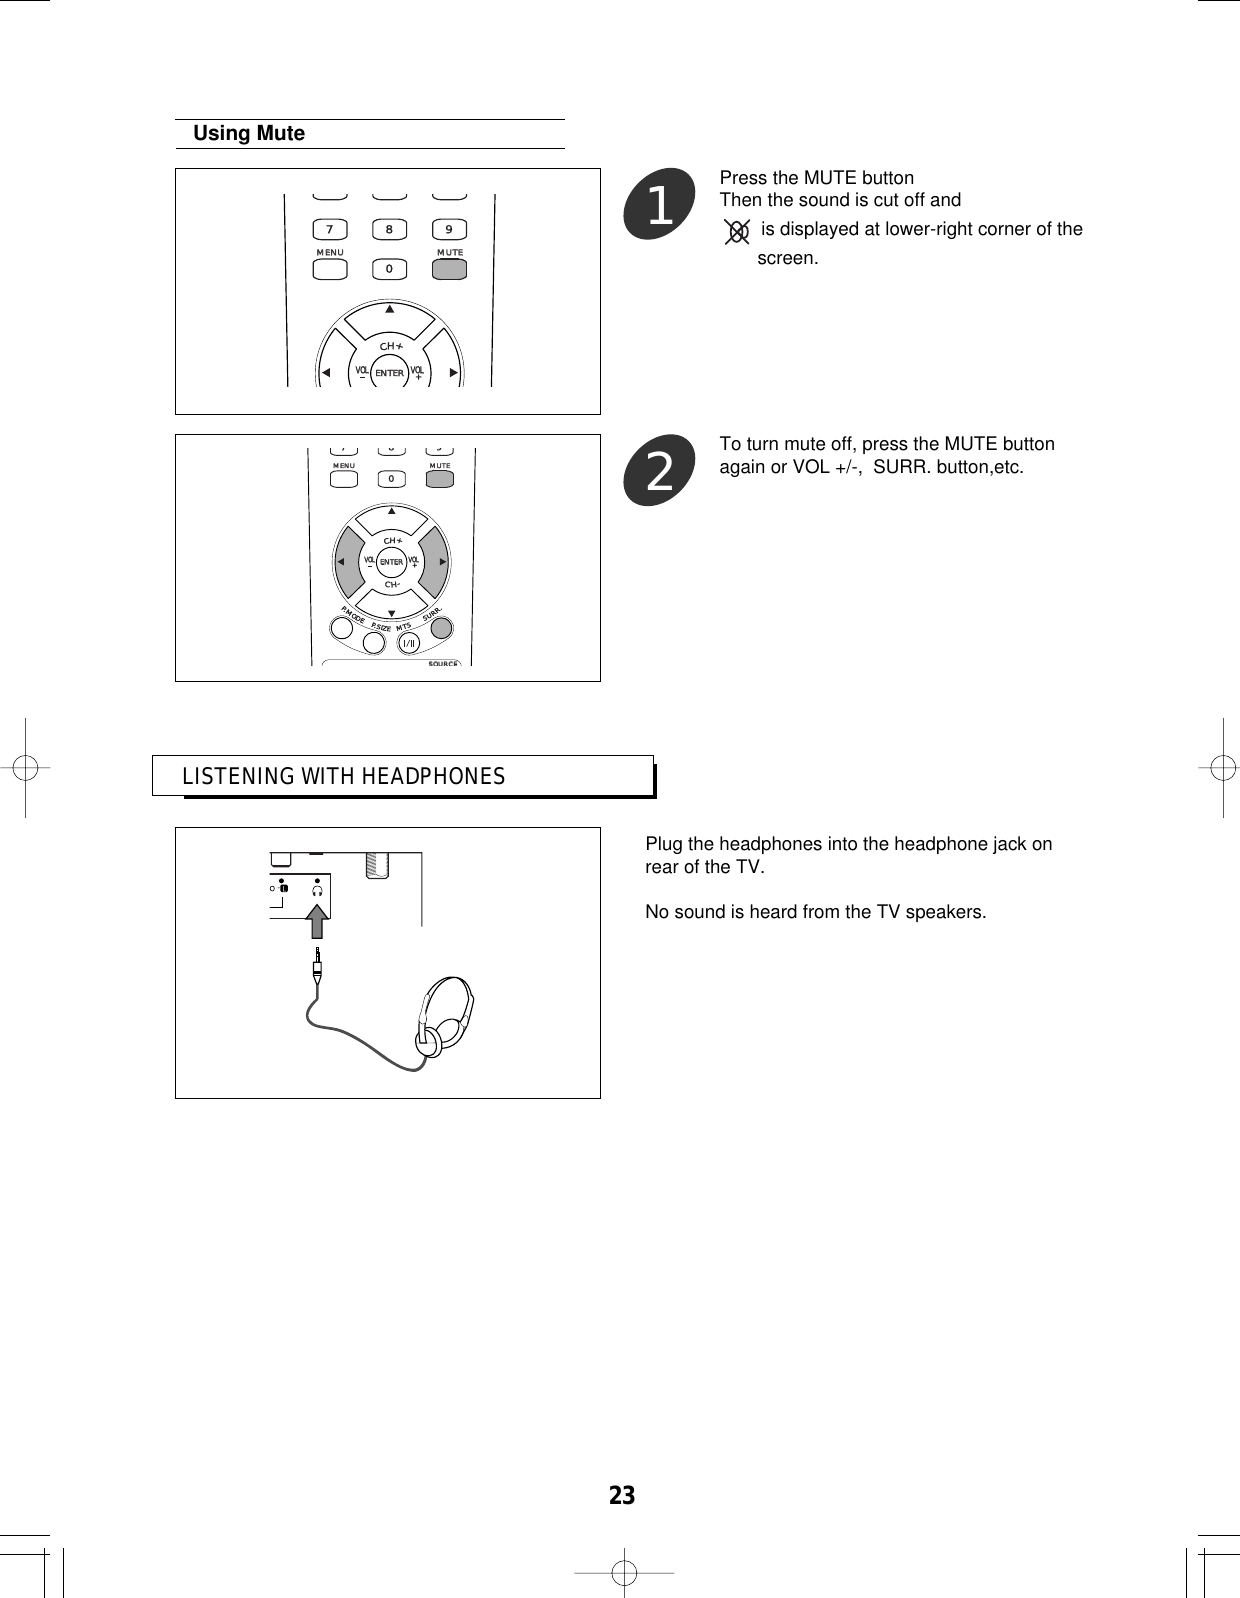
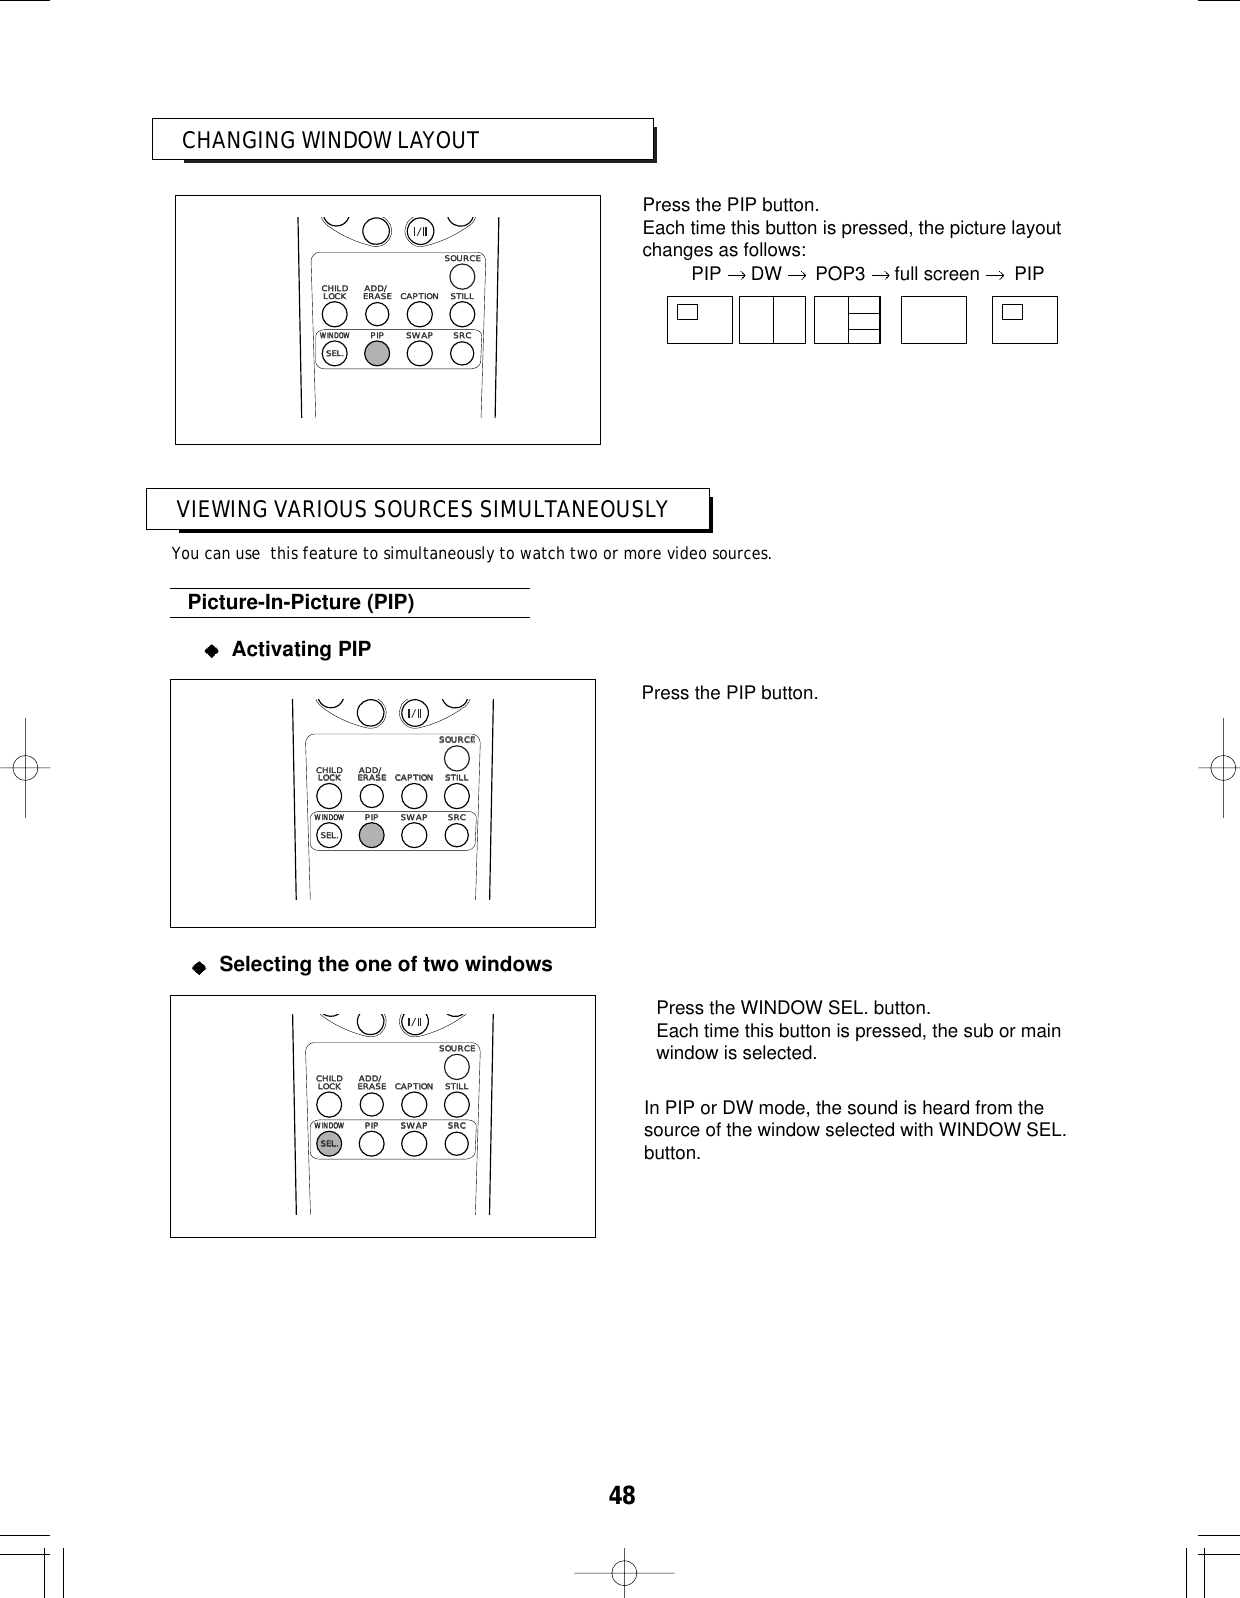
![VIEWING THE MENUPOWER ONPC AUTOENTERENTERVOLVOL VOLVOLCHILDLOCKMUTE PIP SWAP SRCADD/ERASE CAPTION STILL1234567 809SLEEP PRE.CH DISPLAYMENU MUTESOURCESTANDBYP.MODEP.SIZEMTSSURR.+REMOTE CONTROL RM-501CH+CH-After turning the power on, press MENUbutton.The main menu appears on the screen. Itstop side has 7 icons: tv, settings, picture,window, audio, time and options.The on-screen menus disappear from the screenafter several seconds. This time interval can beadjusted in the [options]-[osd timeout] menu. Seepage 17 for details.116CH VOL.MENU SOURCESTANDBY/ONPOWER ONPC AUTOENTERVOL VOLCHILDLOCKWINDOWSEL.PIP SWAP SRCADD/ERASE CAPTION STILL1234567809SLEEP PRE.CH AUTOSETMENU MUTESOURCESTANDBYCH+CH-P.MODEP.SIZEMTSSURR.+REMOTE CONTROL RM-501CH VOL.MENU SOURCESTANDBY/ONPOWER ONPC AUTOENTERVOL VOLCHILDLOCKWINDOWSEL.PIP SWAP SRCADD/ERASE CAPTION STILL1234567809SLEEP PRE.CH AUTOSETMENU MUTESOURCESTANDBYCH+CH-P.MODEP.SIZEMTSSURR.+REMOTE CONTROL RM-501OperationsTURNING THE POWER ON/OFFPOWER ONPOWER ONPC AUTOPC AUTOENTERENTERVOLVOL VOLVOLCHILDCHILDLOCKLOCKWINDOWSEL.PIP SWAP SRCADD/ADD/ERASEERASE CAPTIONCAPTION STILLSTILL1 2 34 5 67 809SLEEPSLEEP PRE.CHPRE.CH AUTOSETAUTOSETMENUMENU MUTEMUTESOURCESOURCESTSTANDBYANDBYCH+CH-P.MODEP.SIZEMTSSURR.+REMOTE CONTROL RM-5011To turn the power on, press the POWERON button on the remote control.You can also use the STANDBY/ON buttonon top of the TV.POWER ONPC AUTOPC AUTOENTERVOL VOLCHILDLOCKMUTE PIP SWAP SRCADD/ERASE CAPTION STILL1 2 34 5 6780+1009SLEEPSLEEP PRE.CHPRE.CH AUTOSETAUTOSETMENUSOURCESTANDBYP.MODEP.SIZEMTSSURR.+REMOTE CONTROL RM-501CH+CH-2To turn the power off, press the STANDBYbutton on the remote control.You can also use the STANDBY/ON buttonon top of the TV.In STANDBY mode, the standby indicatoron the front panel lights up red.When the power operation is in STANDBY mode,the apparatus is still connected on some AC linevoltages.Please be sure to unplug the cord when you leavehome for, say, a vacation.If the electricity fails or the AC input cord isunplugged while the power is on and plugged itagain, your TV enters directly into STANDBY mode.Depending on input source and some operationstatus, some menus cannot be selected and theconditions of menu may differ.](https://usermanual.wiki/Inkel/ETR0004/User-Guide-370672-Page-16.png)
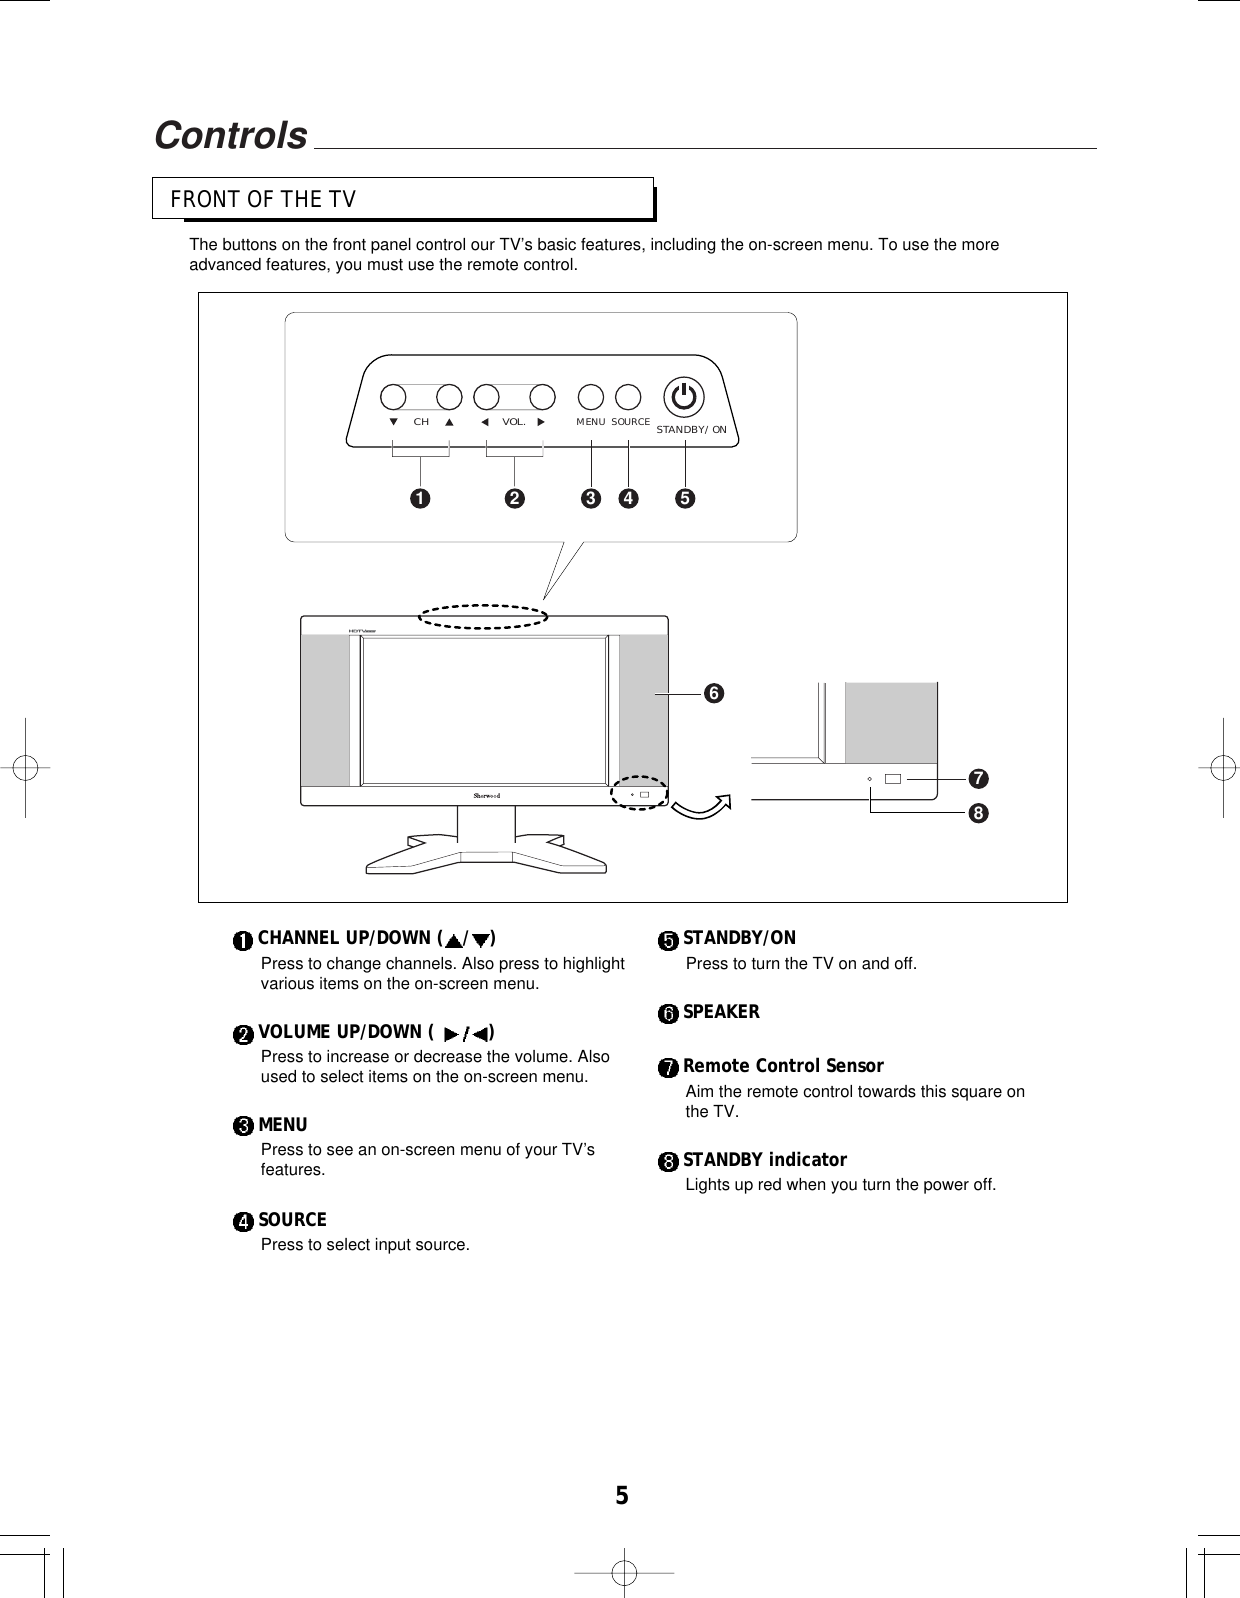
![17POWER ONPC AUTOENTERENTERVOLVOL VOLVOLCHILDLOCKMUTE PIP SWAP SRCADD/ERASE CAPTION STILL1234567809SLEEP PRE.CH DISPLAYMENU MUTESOURCESTANDBYP.MODEP.SIZEMTSSURR.+REMOTE CONTROL RM-501CH+CH-Use the or button to select one of theicons. Then press button to access theicon’s sub-menu.You can also use the MENU, CHANNEL and VOLUMEbuttons on the top panel of the TV to makeselections.2POWER ONPC AUTOENTERVOLVOL VOLVOLCHILDLOCKMUTE PIP SWAP SRCADD/ERASE CAPTION STILL1234 5 67 809SLEEP PRE.CH DISPLAYMENUMENU MUTEMUTESOURCESTANDBYP.MODEP.SIZEMTSSURR.+REMOTE CONTROL RM-501CH+CH-Press the MENU button repeatedly to exit.3SETTING THE OSD TIMEOUTPress the MENU button to display the menuand select [options] - [osd timeout] menuusing /and /buttons.1POWER ONPC AUTOENTERENTERVOLVOL VOLVOLCHILDLOCKMUTE PIP SWAP SRCADD/ERASE CAPTION STILL1234567809SLEEP PRE.CH DISPLAYMENUMENU MUTEMUTESOURCESTANDBYP.MODEP.SIZEMTSSURR.+REMOTE CONTROL RM-501CH+CH-Press or button to select appropriateosd timeout interval: 5, 15, 60 sec.2POWER ONPC AUTOENTERVOL VOLCHILDLOCKMUTE PIP SWAP SRCADD/ERASE CAPTION STILL1234567809SLEEP PRE.CH DISPLAYMENU MUTESOURCESTANDBYP.MODEP.SIZEMTSSURR.+REMOTE CONTROL RM-501CH+CH-POWER ONPC AUTOENTERVOLVOL VOLVOLCHILDLOCKMUTE PIP SWAP SRCADD/ERASE CAPTION STILL1234 5 67 809SLEEP PRE.CH DISPLAYMENUMENU MUTEMUTESOURCESTANDBYP.MODEP.SIZEMTSSURR.+REMOTE CONTROL RM-501CH+CH-Press the MENU button repeatedly to exit.3](https://usermanual.wiki/Inkel/ETR0004/User-Guide-370672-Page-17.png)
![POWER ONPC AUTOENTERVOLVOL VOLVOLCHILDLOCKMUTE PIP SWAP SRCADD/ERASE CAPTION STILL1234 5 67 809SLEEP PRE.CH DISPLAYMENUMENU MUTEMUTESOURCESTANDBYP.MODEP.SIZEMTSSURR.+REMOTE CONTROL RM-501CH+CH-Press the MENU button repeatedly to exit.4POWER ONPC AUTOENTERENTERVOLVOL VOLVOLCHILDLOCKMUTE PIP SWAP SRCADD/ERASE CAPTION STILL1234567809SLEEP PRE.CH DISPLAYMENU MUTESOURCESTANDBYP.MODEP.SIZEMTSSURR.+REMOTE CONTROL RM-501CH+CH-Press or button to select [options].Then press or button to select[language].2POWER ONPC AUTOENTERENTERVOLVOL VOLVOLCHILDLOCKMUTE PIP SWAP SRCADD/ERASE CAPTION STILL1234567809SLEEP PRE.CH DISPLAYMENU MUTESOURCESTANDBYP.MODEP.SIZEMTSSURR.+REMOTE CONTROL RM-501CH+CH-Press or button to select appropriatelanguage : English, Spanish, French.318POWER ONPC AUTOENTERVOLVOL VOLVOLCHILDLOCKMUTE PIP SWAP SRCADD/ERASE CAPTION STILL1234 5 67 809SLEEP PRE.CH DISPLAYMENUMENU MUTEMUTESOURCESTANDBYP.MODEP.SIZEMTSSURR.+REMOTE CONTROL RM-501CH+CH-Press the MENU button to display the menu.1SELECTING A MENU LANGUAGEFor explanation purposes, this instuctions explains the menu language displayed on the screen in English.](https://usermanual.wiki/Inkel/ETR0004/User-Guide-370672-Page-18.png)
![SELECTING INPUT SOURCE19You must select the appropriate mode in order to view each source on the TV.Sources can be selected with automatic or manual method.Auto-searching can be used with this method. You can set this method in on-screen menus.Press the MENU button to display the menuand select [options] - [source select] menuusing /and /buttons.1Press the SOURCE button to select asource you want.Each time this button is pressed, the TV searchesall sources and automatically detects one ofconnected and turned-on equipments.4POWER ONPC AUTOENTERVOL VOLCHILDCHILDLOCKLOCKWINDOWWINDOWSEL.SEL.PIPPIP SWSWAPAP SRCSRCADD/ADD/ERASEERASE CAPTIONCAPTION STILLSTILL1234567809SLEEP PRE.CH AUTOSETMENU MUTESOURCESOURCESTANDBYCH+CH-P.MODEP.SIZEMTSSURR.+REMOTE CONTROL RM-501Auto SelectionPress or button to select the “auto”. 2POWER ONPC AUTOENTERENTERVOLVOL VOLVOLCHILDLOCKMUTE PIP SWAP SRCADD/ERASE CAPTION STILL1234567809SLEEP PRE.CH DISPLAYMENU MUTESOURCESTANDBYP.MODEP.SIZEMTSSURR.+REMOTE CONTROL RM-501CH+CH-POWER ONPC AUTOENTERVOLVOL VOLVOLCHILDLOCKMUTE PIP SWAP SRCADD/ERASE CAPTION STILL1234 5 67 809SLEEP PRE.CH DISPLAYMENUMENU MUTEMUTESOURCESTANDBYP.MODEP.SIZEMTSSURR.+REMOTE CONTROL RM-501CH+CH-Press the MENU button repeatedly to exit.3POWER ONPC AUTOENTERENTERVOLVOL VOLVOLCHILDLOCKMUTE PIP SWAP SRCADD/ERASE CAPTION STILL1234567809SLEEP PRE.CH DISPLAYMENUMENU MUTEMUTESOURCESTANDBYP.MODEP.SIZEMTSSURR.+REMOTE CONTROL RM-501CH+CH-](https://usermanual.wiki/Inkel/ETR0004/User-Guide-370672-Page-19.png)
![20Press the MENU button to display the menuand select [options] - [source select] menuusing /and /buttons.1Press the SOURCE button to select asource you want.4POWER ONPC AUTOENTERVOL VOLCHILDCHILDLOCKLOCKWINDOWWINDOWSEL.SEL.PIPPIP SWSWAPAP SRCSRCADD/ADD/ERASEERASE CAPTIONCAPTION STILLSTILL1234567809SLEEP PRE.CH AUTOSETMENU MUTESOURCESOURCESTANDBYCH+CH-P.MODEP.SIZEMTSSURR.+REMOTE CONTROL RM-501Manual SelectionPress or button to select the “manual”. 2POWER ONPC AUTOENTERVOLVOL VOLVOLCHILDLOCKMUTE PIP SWAP SRCADD/ERASE CAPTION STILL1234 5 67 809SLEEP PRE.CH DISPLAYMENUMENU MUTEMUTESOURCESTANDBYP.MODEP.SIZEMTSSURR.+REMOTE CONTROL RM-501CH+CH-Press the MENU button repeatedly to exit.3POWER ONPC AUTOENTERENTERVOLVOL VOLVOLCHILDLOCKMUTE PIP SWAP SRCADD/ERASE CAPTION STILL1234567809SLEEP PRE.CH DISPLAYMENUMENU MUTEMUTESOURCESTANDBYP.MODEP.SIZEMTSSURR.+REMOTE CONTROL RM-501CH+CH-POWER ONPC AUTOENTERENTERVOLVOL VOLVOLCHILDLOCKMUTE PIP SWAP SRCADD/ERASE CAPTION STILL1234567809SLEEP PRE.CH DISPLAYMENU MUTESOURCESTANDBYP.MODEP.SIZEMTSSURR.+REMOTE CONTROL RM-501CH+CH-Each time this button is pressed, the sourcewill be changed as fjollows:TV S-VIDEO AV DVD PC DTV TVIn case of selecting PC, refer to “USING YOUR TV ASA COMPUTER(PC) DISPLAY” on page 60.](https://usermanual.wiki/Inkel/ETR0004/User-Guide-370672-Page-20.png)
![21Selecting A Broadcast SourceWhen you select the TV mode as input source, you should select the broadcast source.Press the MENU button to display the menuand select [tv] - [source] menu using /and /buttons.1Press or button to select the“antenna”(air) or “cable”. 2POWER ONPC AUTOENTERENTERVOLVOL VOLVOLCHILDLOCKMUTE PIP SWAP SRCADD/ERASE CAPTION STILL1234567809SLEEP PRE.CH DISPLAYMENU MUTESOURCESTANDBYP.MODEP.SIZEMTSSURR.+REMOTE CONTROL RM-501CH+CH-POWER ONPC AUTOENTERVOLVOL VOLVOLCHILDLOCKMUTE PIP SWAP SRCADD/ERASE CAPTION STILL1234 5 67 809SLEEP PRE.CH DISPLAYMENUMENU MUTEMUTESOURCESTANDBYP.MODEP.SIZEMTSSURR.+REMOTE CONTROL RM-501CH+CH-Press the MENU button repeatedly to exit.3POWER ONPC AUTOENTERENTERVOLVOL VOLVOLCHILDLOCKMUTE PIP SWAP SRCADD/ERASE CAPTION STILL1234567809SLEEP PRE.CH DISPLAYMENUMENU MUTEMUTESOURCESTANDBYP.MODEP.SIZEMTSSURR.+REMOTE CONTROL RM-501CH+CH-antenna : when viewing antenna(air) channelscable : when viewing cable channels](https://usermanual.wiki/Inkel/ETR0004/User-Guide-370672-Page-21.png)
![ADJUSTING THE VOLUME22Press the VOL + or VOL - button to increase ordecrease the volume.POWER ONPC AUTOENTERENTERVOLVOL VOLVOLCHILDLOCKMUTE PIP SWAP SRCADD/ERASE CAPTION STILL1234567809SLEEP PRE.CH DISPLAYMENU MUTESOURCESTANDBYP.MODEP.SIZEMTSSURR.+REMOTE CONTROL RM-501CH+CH-Auto VolumeEach broadcasting station has its own signal conditions, and it is inconvenient to adjust the volume every time thechannel is changed. “auto volume” automatically adjusts the volume of the desired channel by lowering the soundoutput when the modulation signal is high or by rasing the sound output when the modulation signal is low.Press the MENU button to display the menuand select [audio] - [auto volume] menuusing /and /buttons.1Pressing or button to select “on”.To cancel auto volume function, select “off”.2POWER ONPC AUTOENTERVOL VOLCHILDLOCKMUTE PIP SWAP SRCADD/ERASE CAPTION STILL1234567809SLEEP PRE.CH DISPLAYMENU MUTESOURCESTANDBYP.MODEP.SIZEMTSSURR.+REMOTE CONTROL RM-501CH+CH-Press MENU button repeatedly to exit.3POWER ONPC AUTOENTERVOL VOLCHILDLOCKMUTE PIP SWAP SRCADD/ERASE CAPTION STILL1234567 809SLEEP PRE.CH DISPLAYMENUMENU MUTEMUTESOURCESTANDBYP.MODEP.SIZEMTSSURR.+REMOTE CONTROL RM-501CH+CH-POWER ONPC AUTOENTERENTERVOLVOL VOLVOLCHILDLOCKMUTE PIP SWAP SRCADD/ERASE CAPTION STILL1234567809SLEEP PRE.CH DISPLAYMENUMENU MUTEMUTESOURCESTANDBYP.MODEP.SIZEMTSSURR.+REMOTE CONTROL RM-501CH+CH-](https://usermanual.wiki/Inkel/ETR0004/User-Guide-370672-Page-22.png)
![MEMORIZING THE CHANNELS24Stroing Channels In Memory (Automatic Method)Once you have memorized the available channels, you can use the CH +/- buttons to scan the memorized channels.Channels can be tuned with automatic or manual method.Before memorizing channels, first select the broadcast source.(Refer to “Selecting A Broadcast Source” on page 21 )All of the receivable channels can be stored by this method.You would better use this method during installation of your TV.Press the MENU button to display the menuand select [tv] - [autoset] menu using /and /buttons.1POWER ONPC AUTOENTERENTERVOLVOL VOLVOLCHILDLOCKMUTE PIP SWAP SRCADD/ERASE CAPTION STILL1234567809SLEEP PRE.CH DISPLAYMENU MUTESOURCESTANDBYP.MODEP.SIZEMTSSURR.+REMOTE CONTROL RM-501CH+CH-Press ENTER or button to begin autoset.2To stop autoset, press the MENU button.POWER ONPC AUTOENTERENTERVOLVOL VOLVOLCHILDLOCKMUTE PIP SWAP SRCADD/ERASE CAPTION STILL1234567809SLEEP PRE.CH DISPLAYMENUMENU MUTEMUTESOURCESTANDBYP.MODEP.SIZEMTSSURR.+REMOTE CONTROL RM-501CH+CH-After all the receivable channels are stored,the [tv] - [autoset] menu reappears.Press the MENU button repeatedly to exit.3POWER ONPC AUTOENTERVOLVOL VOLVOLCHILDLOCKMUTE PIP SWAP SRCADD/ERASE CAPTION STILL1234 5 67 809SLEEP PRE.CH DISPLAYMENUMENU MUTEMUTESOURCESTANDBYP.MODEP.SIZEMTSSURR.+REMOTE CONTROL RM-501CH+CH-POWER ONPC AUTOPC AUTOENTERVOL VOLCHILDLOCKMUTE PIP SWAP SRCADD/ERASE CAPTION STILL1 2 34 5 6780+1009SLEEPSLEEP PRE.CHPRE.CH AUTOSETAUTOSETMENUSOURCESTANDBYP.MODEP.SIZEMTSSURR.+REMOTE CONTROL RM-501CH+CH-Press the AUTOSET button on the remote control.Quick wayTo stop autoset, press the MENU button.](https://usermanual.wiki/Inkel/ETR0004/User-Guide-370672-Page-24.png)
![Press or button to select “add” or“erase”.After selecting one of them, thecorresponding channel is added or erased.4POWER ONPC AUTOENTERENTERVOLVOL VOLVOLCHILDLOCKMUTE PIP SWAP SRCADD/ERASE CAPTION STILL1234567809SLEEP PRE.CH DISPLAYMENU MUTESOURCESTANDBYP.MODEP.SIZEMTSSURR.+REMOTE CONTROL RM-501CH+CH-25Press the MENU button to display the menuand select [tv]-[channel] menu using /and /buttons.1POWER ONPC AUTOENTERVOL VOLCHILDLOCKMUTE PIP SWAP SRCADD/ERASE CAPTION STILL1234567809SLEEP PRE.CH DISPLAYMENU MUTESOURCESTANDBYP.MODEP.SIZEMTSSURR.+REMOTE CONTROL RM-501CH+CH-Adding And Erasing Channels (Manual Method)Press button to select [edit channels]menu.3POWER ONPC AUTOENTERVOL VOLCHILDLOCKWINDOWSEL.PIP SWAP SRCADD/ERASE CAPTION STILL1234567809SLEEP PRE.CH AUTOSETMENU MUTESOURCESTANDBYCH+CH-P.MODEP.SIZEMTSSURR.+REMOTE CONTROL RM-501Press or button to select a channel tobe added or erased.2POWER ONPC AUTOENTERVOL VOLCHILDLOCKMUTE PIP SWAP SRCADD/ERASE CAPTION STILL1234567809SLEEP PRE.CH DISPLAYMENU MUTESOURCESTANDBYP.MODEP.SIZEMTSSURR.+REMOTE CONTROL RM-501CH+CH-If you want to add or erase anotherchannel(s), repeat the upper steps 1 to 4.If not, press MENU button repeatedly to exit.5POWER ONPC AUTOENTERVOLVOL VOLVOLCHILDLOCKMUTE PIP SWAP SRCADD/ERASE CAPTION STILL1234 5 67 809SLEEP PRE.CH DISPLAYMENUMENU MUTEMUTESOURCESTANDBYP.MODEP.SIZEMTSSURR.+REMOTE CONTROL RM-501CH+CH-You can view any channel (including an erasedchannel) by using the number buttons on the remotecontrol.](https://usermanual.wiki/Inkel/ETR0004/User-Guide-370672-Page-25.png)

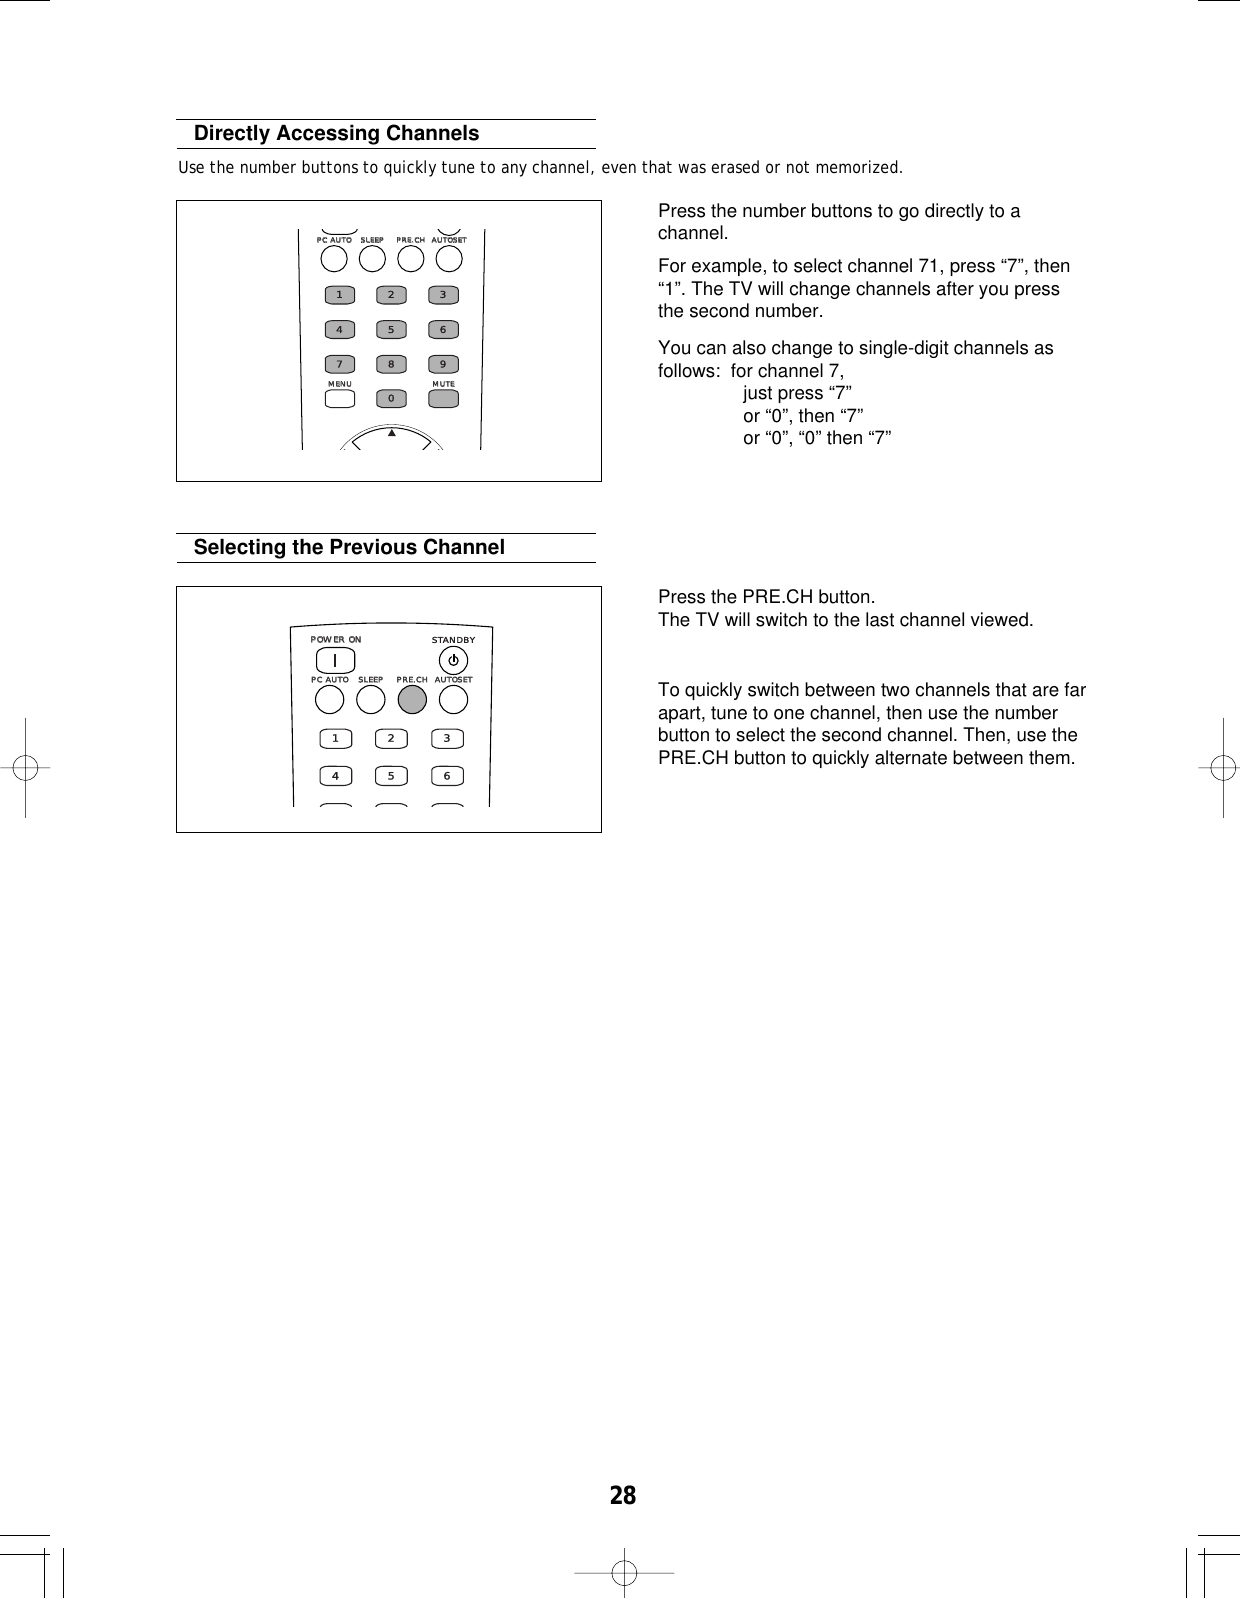
![CHANGING CHANNELS27Using the Channel +/- ButtonsPress the CH + or CH - button to change channels.POWER ONPC AUTOENTERENTERVOLVOL VOLVOLCHILDLOCKMUTE PIP SWAP SRCADD/ERASE CAPTION STILL1234567809SLEEP PRE.CH DISPLAYMENU MUTESOURCESTANDBYP.MODEP.SIZEMTSSURR.+REMOTE CONTROL RM-501CH+CH-Whenever you press these buttons, the TV changeschannels in sequence. You will see all the channelsthat have been memorized. You will not seechannels that were either erased or not memorized.Press the MENU button to display themenu and select [tv] - [channel] menuusing /and /buttons.1POWER ONPC AUTOENTERENTERVOLVOL VOLVOLCHILDLOCKMUTE PIP SWAP SRCADD/ERASE CAPTION STILL1234567809SLEEP PRE.CH DISPLAYMENUMENU MUTEMUTESOURCESTANDBYP.MODEP.SIZEMTSSURR.+REMOTE CONTROL RM-501CH+CH-Using On-Screen MenuPress or to change channels.2POWER ONPC AUTOENTERENTERVOLVOL VOLVOLCHILDLOCKMUTE PIP SWAP SRCADD/ERASE CAPTION STILL1234567809SLEEP PRE.CH DISPLAYMENU MUTESOURCESTANDBYP.MODEP.SIZEMTSSURR.+REMOTE CONTROL RM-501CH+CH-Press MENU button repeatedly to exit.3POWER ONPC AUTOENTERVOL VOLCHILDLOCKMUTE PIP SWAP SRCADD/ERASE CAPTION STILL1234 5 67 809SLEEP PRE.CH DISPLAYMENU MUTESOURCESTANDBYP.MODEP.SIZEMTSSURR.+REMOTE CONTROL RM-501CH+CH-](https://usermanual.wiki/Inkel/ETR0004/User-Guide-370672-Page-27.png)
![CUSTOMIZING THE PICTURE29You can use the on-screen menus to adjust the brightness, contrast, filter, sharpness, color and tint according to personalpreference (each items(sub-menus) can be varied according to the input source.).Alternatively, you can use one of the “automatic” settings. See next page.Press the MENU button to display the menuand select [picture] menu using or button.1POWER ONPC AUTOENTERVOLVOL VOLVOLCHILDLOCKMUTE PIP SWAP SRCADD/ERASE CAPTION STILL1234567 809SLEEP PRE.CH DISPLAYMENUMENU MUTEMUTESOURCESTANDBYP.MODEP.SIZEMTSSURR.+REMOTE CONTROL RM-501CH+CH-Press or button to select a particularitem.2POWER ONPC AUTOENTERVOLVOL VOLVOLCHILDLOCKMUTE PIP SWAP SRCADD/ERASE CAPTION STILL1234567809SLEEP PRE.CH DISPLAYMENUMENU MUTEMUTESOURCESTANDBYP.MODEP.SIZEMTSSURR.+REMOTE CONTROL RM-501CH+CH-Press or button to change the value ofa particular item.For example, if you select [contrast],pressing increases it.To adjust other items as desired, repeat theabove steps 1 to 3.3POWER ONPC AUTOENTERVOLVOL VOLVOLCHILDLOCKMUTE PIP SWAP SRCADD/ERASE CAPTION STILL1234567809SLEEP PRE.CH DISPLAYMENUMENU MUTEMUTESOURCESTANDBYP.MODEP.SIZEMTSSURR.+REMOTE CONTROL RM-501CH+CH-POWER ONPC AUTOENTERVOLVOL VOLVOLCHILDLOCKMUTE PIP SWAP SRCADD/ERASE CAPTION STILL1234 5 67 809SLEEP PRE.CH DISPLAYMENUMENU MUTEMUTESOURCESTANDBYP.MODEP.SIZEMTSSURR.+REMOTE CONTROL RM-501CH+CH-Press the MENU button repeatedly to exit.4](https://usermanual.wiki/Inkel/ETR0004/User-Guide-370672-Page-29.png)
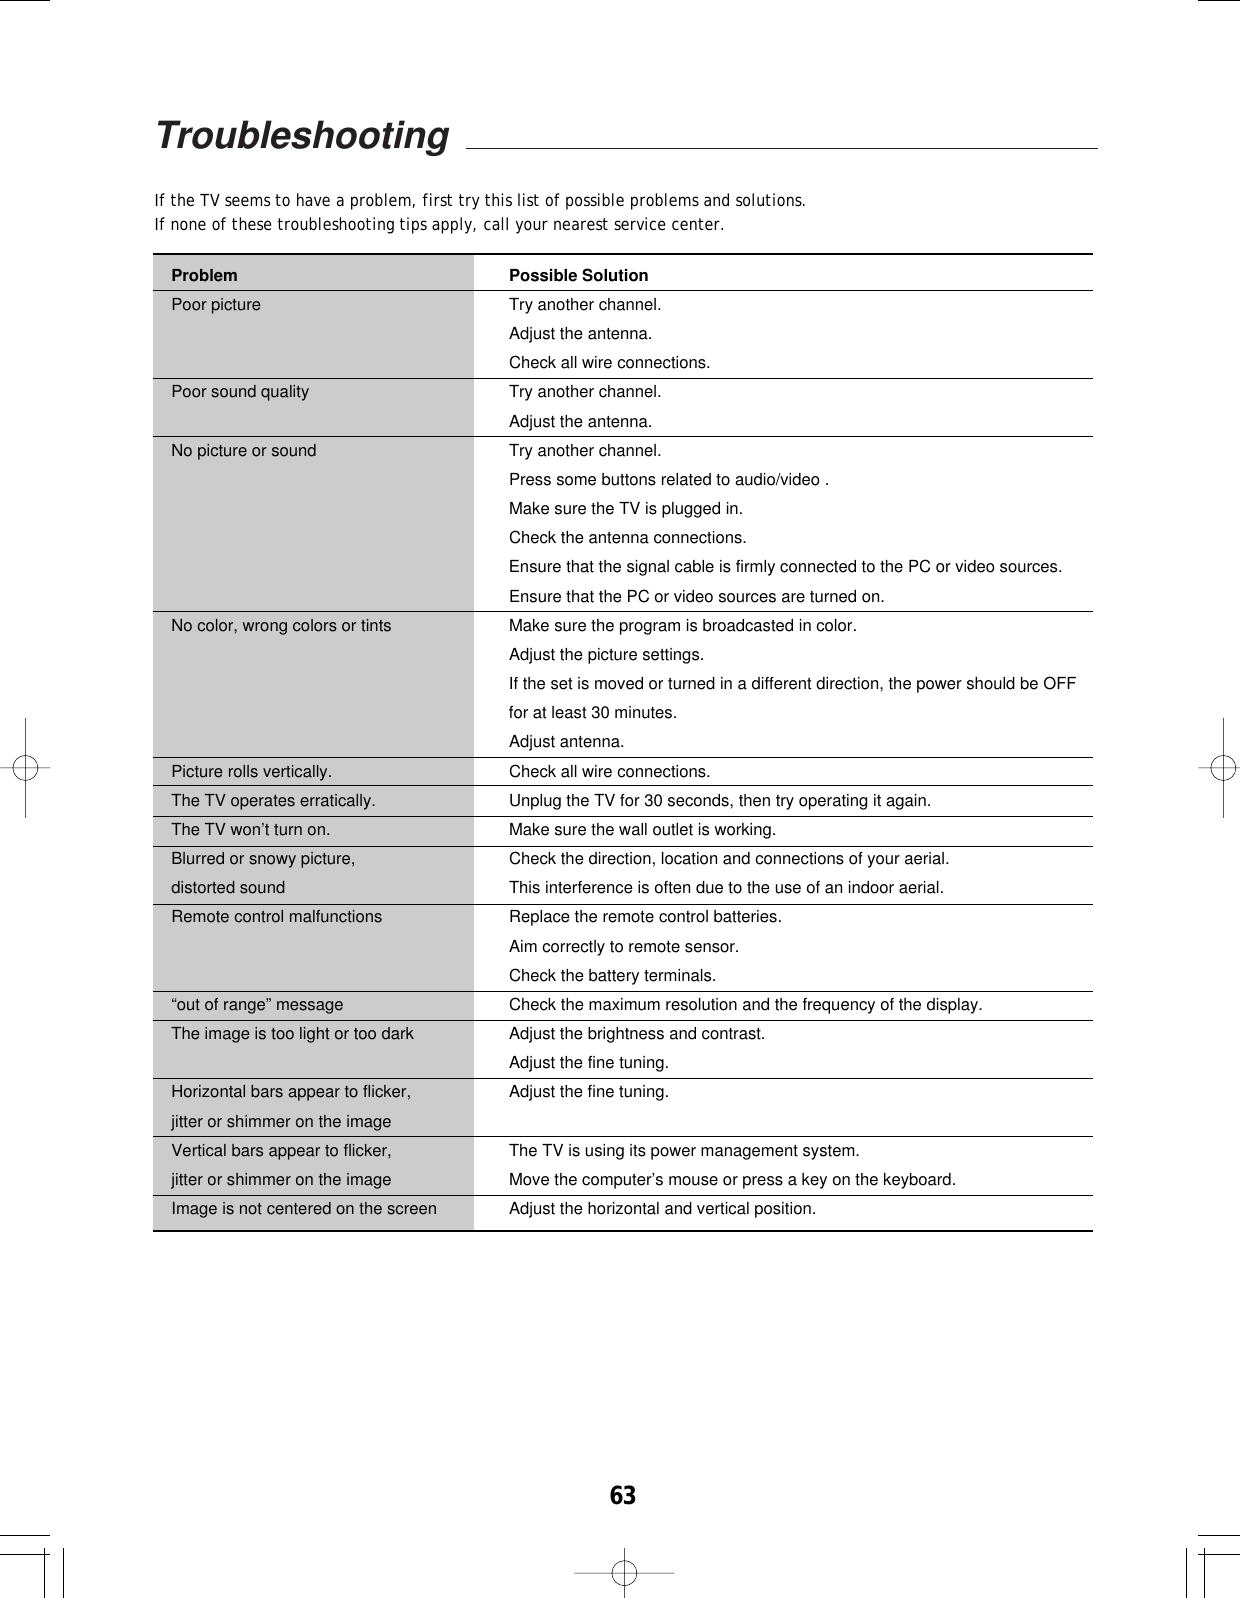
![USING AUTOMATIC PICTURE SETTINGS30Your TV has four automatic picture settings ("normal”, "movie", "sports" and "bright" ) that are preset at the factory. Youcan activate each picture setting by pressing the P.MODE button.POWER ONPC AUTOENTERVOLVOL VOLVOLCHILDLOCKMUTE PIP SWAP SRCADD/ERASE CAPTION STILL123456780+1009SLEEP PRE.CH DISPLAYMENUSOURCESOURCESTANDBYP.MODEP.SIZEMTSSURR.+REMOTE CONTROL RM-501CH+CH-Press the P.MODE button to select one of thepicture settings.Choose “normal” for normal screen.Choose “movie” to enjoy a movie as in a theater.Choose “sports” to enjoy sports as in a stadium.Choose “bright” for brighter screen.CHANGING THE SCREEN SIZECHANGING THE SCREEN POSITIONYou can change the screen size according to the program sources to be played back.Press the P.SIZE button to select one of the screensize settings.Choose “normal” to set the picture to 4:3 normalmode. This is a standard TV screen size.Choose “wide” to set to 16:9 wide mode.Choose “zoom” to magnify the size of the pictureon the screen.Choose “video game zoom” to magnify the size ofthe picture when enjoying a video game.Choose “fill all” to view 4:3 programs in fullscreen.Choose “anamorphic” to view 2.35:1 anamorphicDVDs in full screen458POWER ONPC AUTOENTERENTERVOLVOL VOLVOLCHILDLOCKMUTE PIP SWAP SRCADD/ERASE CAPTION STILL123670+1009SLEEP PRE.CH DISPLAYMENUSOURCESOURCESTANDBYP.MODEP.SIZEMTSSURR.+REMOTE CONTROL RM-501CH+CH-Press the MENU button to display the menuand select [window] - [h position] or [vposition] using /and /buttons.1POWER ONPC AUTOENTERENTERVOLVOL VOLVOLCHILDLOCKMUTE PIP SWAP SRCADD/ERASE CAPTION STILL1234567809SLEEP PRE.CH DISPLAYMENUMENU MUTEMUTESOURCESTANDBYP.MODEP.SIZEMTSSURR.+REMOTE CONTROL RM-501CH+CH-The screen position can be changed also in other sources (TV, AV, etc.)](https://usermanual.wiki/Inkel/ETR0004/User-Guide-370672-Page-30.png)
![CUSTOMIZING THE SOUND32The [treble], [bass] and [balance] can be adjusted to suit your personal preference.These can be selected when the [surround mode] menu is set to “user”. Refer to next page.Press the MENU button to display the menuand select [audio] menu using or buttons.1POWER ONPC AUTOENTERVOLVOL VOLVOLCHILDLOCKMUTE PIP SWAP SRCADD/ERASE CAPTION STILL1234567 809SLEEP PRE.CH DISPLAYMENUMENU MUTEMUTESOURCESTANDBYP.MODEP.SIZEMTSSURR.+REMOTE CONTROL RM-501CH+CH-Press or button to select a particularitem.2POWER ONPC AUTOENTERVOLVOL VOLVOLCHILDLOCKMUTE PIP SWAP SRCADD/ERASE CAPTION STILL1234567809SLEEP PRE.CH DISPLAYMENUMENU MUTEMUTESOURCESTANDBYP.MODEP.SIZEMTSSURR.+REMOTE CONTROL RM-501CH+CH-Press or button to change the value ofa particular item.For example, if you select [treble], pressingbutton increases it.To adjust other items as desired, repeat theabove steps 2 and 3.3POWER ONPC AUTOENTERVOLVOL VOLVOLCHILDLOCKMUTE PIP SWAP SRCADD/ERASE CAPTION STILL1234567809SLEEP PRE.CH DISPLAYMENUMENU MUTEMUTESOURCESTANDBYP.MODEP.SIZEMTSSURR.+REMOTE CONTROL RM-501CH+CH-POWER ONPC AUTOENTERVOLVOL VOLVOLCHILDLOCKMUTE PIP SWAP SRCADD/ERASE CAPTION STILL1234 5 67 809SLEEP PRE.CH DISPLAYMENUMENU MUTEMUTESOURCESTANDBYP.MODEP.SIZEMTSSURR.+REMOTE CONTROL RM-501CH+CH-Press the MENU button repeatedly to exit.4](https://usermanual.wiki/Inkel/ETR0004/User-Guide-370672-Page-32.png)
![SELECTING A SURROUND SOUND 33Your TV has five automatic sound settings (“standard”, “music”, “movie”, “sports”, “news”, and “user”) that are presetat the factory. You can activate any of them by making a selection from the on-screen menu).POWER ONPC AUTOENTERVOLVOL VOLVOLCHILDLOCKMUTE PIP SWAP SRCADD/ERASE CAPTION STILL1234 5 67 809SLEEP PRE.CH DISPLAYMENUMENU MUTEMUTESOURCESTANDBYP.MODEP.SIZEMTSSURR.+REMOTE CONTROL RM-501CH+CH-Press the MENU button repeatedly to exit.3Press the MENU button to display the menuand select [audio] - [surround mode] menuusing /and /button.1POWER ONPC AUTOENTERENTERVOLVOL VOLVOLCHILDLOCKMUTE PIP SWAP SRCADD/ERASE CAPTION STILL1234567809SLEEP PRE.CH DISPLAYMENUMENU MUTEMUTESOURCESTANDBYP.MODEP.SIZEMTSSURR.+REMOTE CONTROL RM-501CH+CH-Press or button to select anappropriate surround mode.2POWER ONPC AUTOENTERENTERVOLVOL VOLVOLCHILDLOCKMUTE PIP SWAP SRCADD/ERASE CAPTION STILL1234567809SLEEP PRE.CH DISPLAYMENU MUTESOURCESTANDBYP.MODEP.SIZEMTSSURR.+REMOTE CONTROL RM-501CH+CH-Choose “standard” for the standard factorysettings.Choose “music” when watching music video orconcert.Choose “movie” when watching movies.Choose “sports” when watching sport games.Choose “news” when watching news that ismostly dialogue. Choose “user” when adjusting audio items as youwant.Press the SURR. button.Each time this button is pressed, the surround modechanges as follows:standard music movie sports news user standardQuick wayPOWER ONPC AUTOENTERENTERVOLVOL VOLVOLCHILDCHILDLOCKLOCKMUTE PIP SWAP SRCADD/ADD/ERASEERASE CAPTIONCAPTION STILLSTILL123456780+1009SLEEP PRE.CH DISPLAYMENUSOURCESOURCESTANDBYP.MODEP.SIZEMTSSURR.+REMOTE CONTROL RM-501CH+CH-](https://usermanual.wiki/Inkel/ETR0004/User-Guide-370672-Page-33.png)
![FINE TUNING CHANNELSUse fine tuning to manually adjust a particular channel for optimal reception.Generally, fine tuning is only necessary if reception is poor.Press the MENU button to display the menuand select [tv] - [fine tune] menu using /and /buttons.1POWER ONPC AUTOENTERENTERVOLVOL VOLVOLCHILDLOCKMUTE PIP SWAP SRCADD/ERASE CAPTION STILL1234567809SLEEP PRE.CH DISPLAYMENUMENU MUTEMUTESOURCESTANDBYP.MODEP.SIZEMTSSURR.+REMOTE CONTROL RM-501CH+CH-34Press the MENU button to display the menuand select [options] - [menu background]menu using /and /buttons.1POWER ONPC AUTOENTERENTERVOLVOL VOLVOLCHILDLOCKMUTE PIP SWAP SRCADD/ERASE CAPTION STILL1234567809SLEEP PRE.CH DISPLAYMENUMENU MUTEMUTESOURCESTANDBYP.MODEP.SIZEMTSSURR.+REMOTE CONTROL RM-501CH+CH-Pressing or button changes thecaption background as follows:opaque translucent2POWER ONPC AUTOENTERVOL VOLCHILDLOCKMUTE PIP SWAP SRCADD/ERASE CAPTION STILL1234567809SLEEP PRE.CH DISPLAYMENU MUTESOURCESTANDBYP.MODEP.SIZEMTSSURR.+REMOTE CONTROL RM-501CH+CH-Press MENU button repeatedly to exit.3POWER ONPC AUTOENTERVOL VOLCHILDLOCKMUTE PIP SWAP SRCADD/ERASE CAPTION STILL1234567 809SLEEP PRE.CH DISPLAYMENUMENU MUTEMUTESOURCESTANDBYP.MODEP.SIZEMTSSURR.+REMOTE CONTROL RM-501CH+CH-SELECTING THE BACKGROUND OF MENUSpecial Features](https://usermanual.wiki/Inkel/ETR0004/User-Guide-370672-Page-34.png)
![Press ENTER or button.2POWER ONPC AUTOENTERENTERVOLVOL VOLVOLCHILDLOCKMUTE PIP SWAP SRCADD/ERASE CAPTION STILL1234567809SLEEP PRE.CH DISPLAYMENU MUTESOURCESTANDBYP.MODEP.SIZEMTSSURR.+REMOTE CONTROL RM-501CH+CH-Press or button to adjust the finetuning.3POWER ONPC AUTOENTERVOL VOLCHILDLOCKMUTE PIP SWAP SRCADD/ERASE CAPTION STILL1234567 809SLEEP PRE.CH DISPLAYMENUMENU MUTEMUTESOURCESTANDBYP.MODEP.SIZEMTSSURR.+REMOTE CONTROL RM-501CH+CH-Press the MENU button repeatedly to exit .435POWER ONPC AUTOENTERENTERVOLVOL VOLVOLCHILDLOCKMUTE PIP SWAP SRCADD/ERASE CAPTION STILL1234567809SLEEP PRE.CH DISPLAYMENU MUTESOURCESTANDBYP.MODEP.SIZEMTSSURR.+REMOTE CONTROL RM-501CH+CH-LABELING THE CHANNEL NAMEYou can label the channel name as you want.At a particular channel, press the MENUbutton to display the menu and select [tv] -[edit labels] using /and /buttons.1POWER ONPC AUTOENTERENTERVOLVOL VOLVOLCHILDLOCKMUTE PIP SWAP SRCADD/ERASE CAPTION STILL1234567809SLEEP PRE.CH DISPLAYMENUMENU MUTEMUTESOURCESTANDBYP.MODEP.SIZEMTSSURR.+REMOTE CONTROL RM-501CH+CH-Press ENTER or button to enter into submenu.2POWER ONPC AUTOENTERENTERVOLVOL VOLVOLCHILDLOCKMUTE PIP SWAP SRCADD/ERASE CAPTION STILL1234567809SLEEP PRE.CH DISPLAYMENU MUTESOURCESTANDBYP.MODEP.SIZEMTSSURR.+REMOTE CONTROL RM-501CH+CH-](https://usermanual.wiki/Inkel/ETR0004/User-Guide-370672-Page-35.png)
![FREEZING THE PICTUREPress the MENU button to display the menuand select [window] - [freeze window] menuusing /and /buttons.1POWER ONPC AUTOENTERENTERVOLVOL VOLVOLCHILDLOCKMUTE PIP SWAP SRCADD/ERASE CAPTION STILL1234567809SLEEP PRE.CH DISPLAYMENUMENU MUTEMUTESOURCESTANDBYP.MODEP.SIZEMTSSURR.+REMOTE CONTROL RM-501CH+CH-At a particular scene, press or buttonto select the “on”. 2POWER ONPC AUTOENTERENTERVOLVOL VOLVOLCHILDLOCKMUTE PIP SWAP SRCADD/ERASE CAPTION STILL1234567809SLEEP PRE.CH DISPLAYMENU MUTESOURCESTANDBYP.MODEP.SIZEMTSSURR.+REMOTE CONTROL RM-501CH+CH-Then the moving image is freezed.(Sournd is still heard.)To cancel this function, repeat the above steps 1and 2 to select the "off".36POWER ONPC AUTOENTERENTERVOLVOL VOLVOLCHILDLOCKMUTE PIP SWAP SRCADD/ERASE CAPTION STILL1234567809SLEEP PRE.CH DISPLAYMENU MUTESOURCESTANDBYP.MODEP.SIZEMTSSURR.+REMOTE CONTROL RM-501CH+CH-Press to move the cursor.Repeat above steps 3 and 4 to fill anothercharacters.It can be filled up to 5 characters.To clear the channel name, press theSOURCE button.4Press or button to select characters :A~Z, a~z, 0 ~ 9, !, “, #, $, %, &, ‘, (, ), *,+, ,, -, ., /, :, ;, <, =, >, ?, @, [, \, ], ^, _,`,space3POWER ONPC AUTOENTERENTERVOLVOL VOLVOLCHILDLOCKMUTE PIP SWAP SRCADD/ERASE CAPTION STILL1234567809SLEEP PRE.CH DISPLAYMENU MUTESOURCESTANDBYP.MODEP.SIZEMTSSURR.+REMOTE CONTROL RM-501CH+CH-POWER ONPC AUTOENTERVOLVOL VOLVOLCHILDLOCKMUTE PIP SWAP SRCADD/ERASE CAPTION STILL1234 5 67 809SLEEP PRE.CH DISPLAYMENUMENU MUTEMUTESOURCESTANDBYP.MODEP.SIZEMTSSURR.+REMOTE CONTROL RM-501CH+CH-Press the MENU button repeatedly to exit.To label other channel names, repeat theabove the steps 1 to 4.5](https://usermanual.wiki/Inkel/ETR0004/User-Guide-370672-Page-36.png)
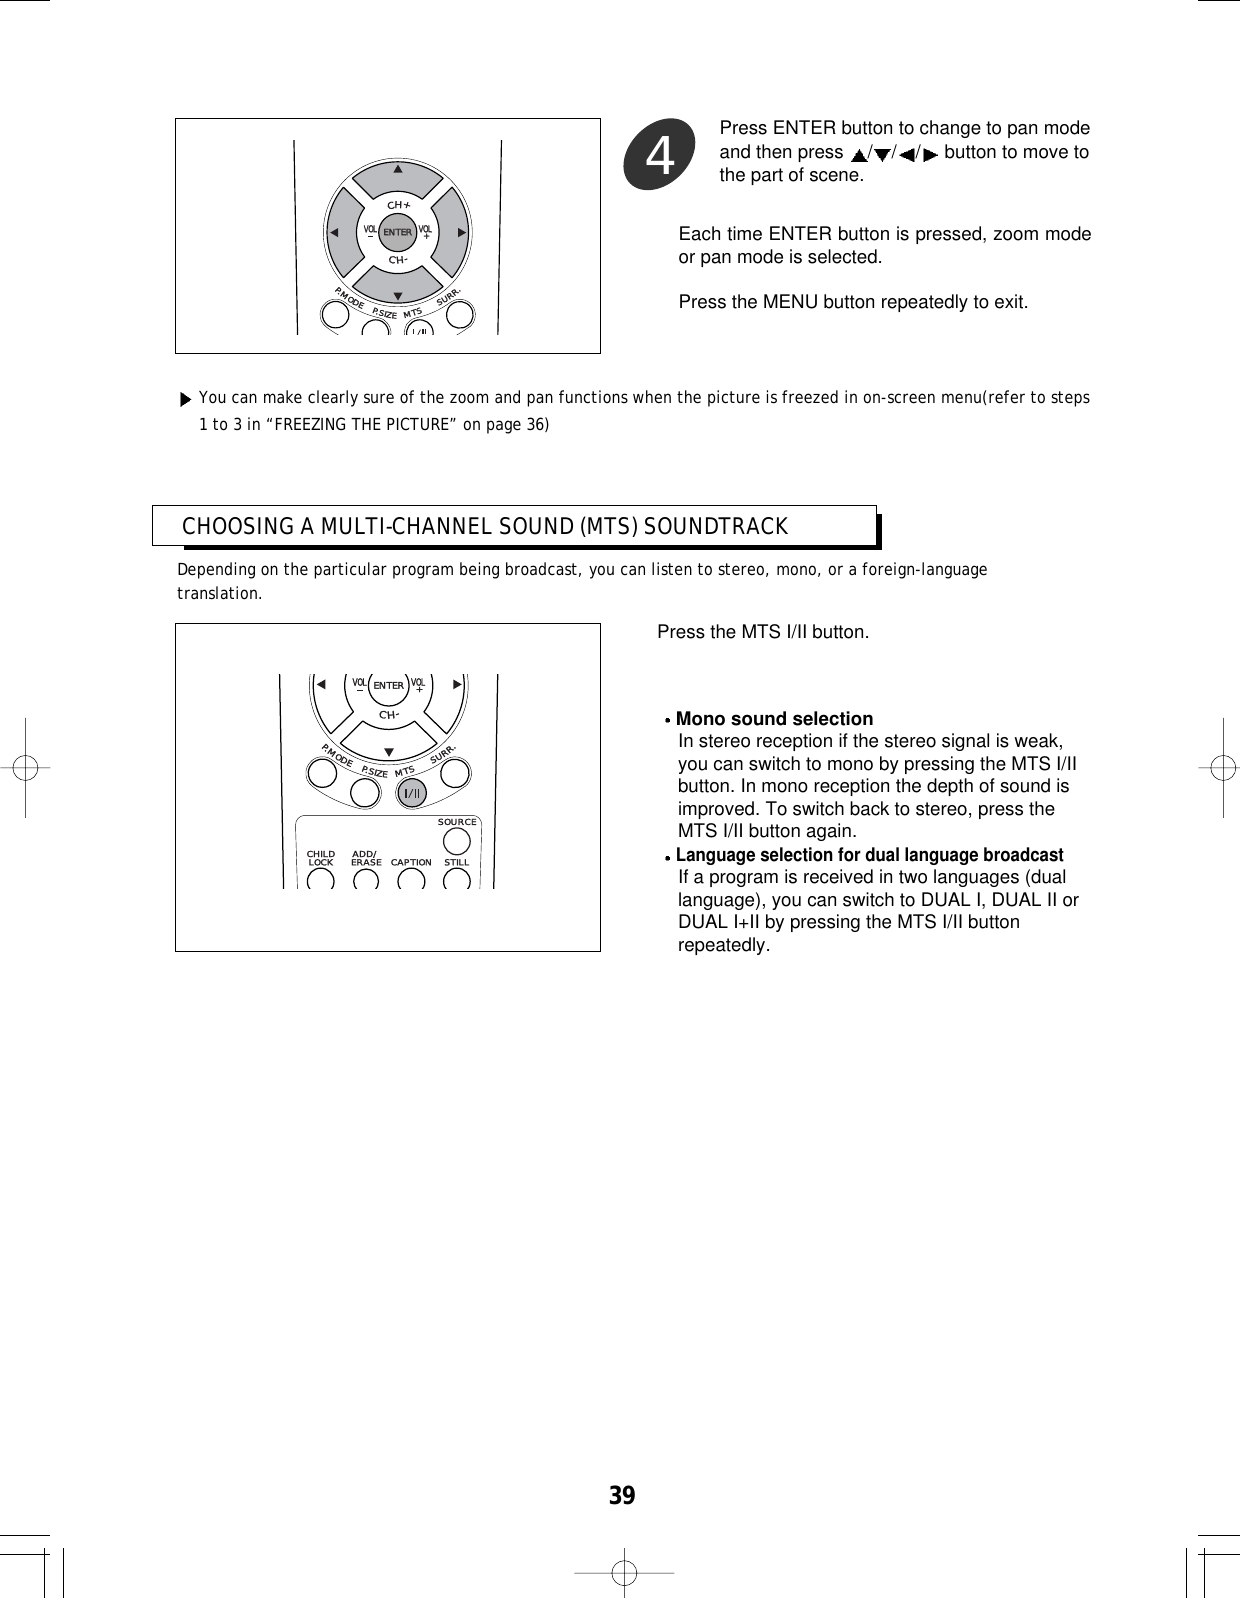
![37POWER ONPC AUTOENTERVOL VOLCHILDCHILDLOCKLOCKWINDOWWINDOWSEL.SEL.PIPPIP SWSWAPAP SRCSRCADD/ADD/ERASEERASE CAPTIONCAPTION STILLSTILL1234567809SLEEP PRE.CH AUTOSETMENU MUTESOURCESOURCESTANDBYCH+CH-P.MODEP.SIZEMTSSURR.+REMOTE CONTROL RM-501Press the STILL button at a particular scene.Press again to cancel.Quick wayPOWER ONPC AUTOENTERVOLVOL VOLVOLCHILDLOCKMUTE PIP SWAP SRCADD/ERASE CAPTION STILL1234 5 67 809SLEEP PRE.CH DISPLAYMENUMENU MUTEMUTESOURCESTANDBYP.MODEP.SIZEMTSSURR.+REMOTE CONTROL RM-501CH+CH-Press the MENU button repeatedly to exit.3This function can zoom any picture on the screen and pan to 4 directions.Press the MENU button to display the menuand select [window] - [digital pan and zoom]using /and /buttons.1POWER ONPC AUTOENTERENTERVOLVOL VOLVOLCHILDLOCKMUTE PIP SWAP SRCADD/ERASE CAPTION STILL1234567809SLEEP PRE.CH DISPLAYMENUMENU MUTEMUTESOURCESTANDBYP.MODEP.SIZEMTSSURR.+REMOTE CONTROL RM-501CH+CH-Press ENTER or button to enter into submenu.2POWER ONPC AUTOENTERENTERVOLVOL VOLVOLCHILDLOCKMUTE PIP SWAP SRCADD/ERASE CAPTION STILL1234567809SLEEP PRE.CH DISPLAYMENUMENU MUTEMUTESOURCESTANDBYP.MODEP.SIZEMTSSURR.+REMOTE CONTROL RM-501CH+CH-DIGITAL PAN AND ZOOMZooming the Picture](https://usermanual.wiki/Inkel/ETR0004/User-Guide-370672-Page-37.png)
![Press the MENU button to display the menuand select [window] - [digital pan and zoom]using /and /buttons.1POWER ONPC AUTOENTERENTERVOLVOL VOLVOLCHILDLOCKMUTE PIP SWAP SRCADD/ERASE CAPTION STILL1234567809SLEEP PRE.CH DISPLAYMENUMENU MUTEMUTESOURCESTANDBYP.MODEP.SIZEMTSSURR.+REMOTE CONTROL RM-501CH+CH-Press ENTER or button to enter intozoom mode.2POWER ONPC AUTOENTERENTERVOLVOL VOLVOLCHILDLOCKMUTE PIP SWAP SRCADD/ERASE CAPTION STILL1234567809SLEEP PRE.CH DISPLAYMENU MUTESOURCESTANDBYP.MODEP.SIZEMTSSURR.+REMOTE CONTROL RM-501CH+CH-Press repeatedly or hold down or button to zoom the scene as you want.3POWER ONPC AUTOENTERENTERVOLVOL VOLVOLCHILDLOCKMUTE PIP SWAP SRCADD/ERASE CAPTION STILL1234567809SLEEP PRE.CH DISPLAYMENU MUTESOURCESTANDBYP.MODEP.SIZEMTSSURR.+REMOTE CONTROL RM-501CH+CH-Panning the Picture38Each time or button is pressed, thepicture is magnified as follows:1.0 1.06 1.19 1.38 1.69 2.06 2.50 3.0 3.63 4.38 5.13 6.00 6.94 8.00 9.13 10.31 11.56 12.94 14.44 15.94To pan the picture, perform the step 5 in"Panning the Picture" procedure on page 39.3POWER ONPC AUTOENTERENTERVOLVOL VOLVOLCHILDLOCKMUTE PIP SWAP SRCADD/ERASE CAPTION STILL1234567809SLEEP PRE.CH DISPLAYMENU MUTESOURCESTANDBYP.MODEP.SIZEMTSSURR.+REMOTE CONTROL RM-501CH+CH-POWER ONPC AUTOENTERVOLVOL VOLVOLCHILDLOCKMUTE PIP SWAP SRCADD/ERASE CAPTION STILL1234 5 67 809SLEEP PRE.CH DISPLAYMENUMENU MUTEMUTESOURCESTANDBYP.MODEP.SIZEMTSSURR.+REMOTE CONTROL RM-501CH+CH-Press the MENU button repeatedly to exit.4](https://usermanual.wiki/Inkel/ETR0004/User-Guide-370672-Page-38.png)
![SETTING THE CLOCK40Setting the clock is neccessary in order to use the timer features of the TV.Also, you can check the time while watching the TV. (Just press ENTER button.)Press the MENU button to display the menuand select [time] - [clock] menu using /and /buttons.1POWER ONPC AUTOENTERENTERVOLVOL VOLVOLCHILDLOCKMUTE PIP SWAP SRCADD/ERASE CAPTION STILL1234567809SLEEP PRE.CH DISPLAYMENUMENU MUTEMUTESOURCESTANDBYP.MODEP.SIZEMTSSURR.+REMOTE CONTROL RM-501CH+CH-Press button.Then press or button repeatedly orholding down either of these buttons until thecorrect hour appears.2POWER ONPC AUTOENTERENTERVOLVOL VOLVOLCHILDLOCKMUTE PIP SWAP SRCADD/ERASE CAPTION STILL1234567809SLEEP PRE.CH DISPLAYMENU MUTESOURCESTANDBYP.MODEP.SIZEMTSSURR.+REMOTE CONTROL RM-501CH+CH-After the hour is set, press button.Then press or button repeatedly orhold down either of these buttons until thecorrect minutes appear.3POWER ONPC AUTOENTERENTERVOLVOL VOLVOLCHILDLOCKMUTE PIP SWAP SRCADD/ERASE CAPTION STILL1234567809SLEEP PRE.CH DISPLAYMENU MUTESOURCESTANDBYP.MODEP.SIZEMTSSURR.+REMOTE CONTROL RM-501CH+CH-After the minutes are set,Press MENU button repeatedly to exit.4POWER ONPC AUTOENTERVOL VOLCHILDLOCKMUTE PIP SWAP SRCADD/ERASE CAPTION STILL1234567 809SLEEP PRE.CH DISPLAYMENU MUTESOURCESTANDBYP.MODEP.SIZEMTSSURR.+REMOTE CONTROL RM-501CH+CH-](https://usermanual.wiki/Inkel/ETR0004/User-Guide-370672-Page-40.png)
![41SETTING THE ON/OFF TIMERPress the MENU button to display the menuand select [time] - [on time] menu using /and /buttons.1POWER ONPC AUTOENTERENTERVOLVOL VOLVOLCHILDLOCKMUTE PIP SWAP SRCADD/ERASE CAPTION STILL1234567809SLEEP PRE.CH DISPLAYMENUMENU MUTEMUTESOURCESTANDBYP.MODEP.SIZEMTSSURR.+REMOTE CONTROL RM-501CH+CH-2Press button.Then press or button repeatedly orhold down either of these buttons until thecorrect hour appears.(i.e., the hour when theTV will turn on.)3POWER ONPC AUTOENTERENTERVOLVOL VOLVOLCHILDLOCKMUTE PIP SWAP SRCADD/ERASE CAPTION STILL1234567809SLEEP PRE.CH DISPLAYMENU MUTESOURCESTANDBYP.MODEP.SIZEMTSSURR.+REMOTE CONTROL RM-501CH+CH-After the hour is set, press button.Then press or button repeatedly orhold down either of these buttons until thecorrect minutes appear.4POWER ONPC AUTOENTERENTERVOLVOL VOLVOLCHILDLOCKMUTE PIP SWAP SRCADD/ERASE CAPTION STILL1234567809SLEEP PRE.CH DISPLAYMENU MUTESOURCESTANDBYP.MODEP.SIZEMTSSURR.+REMOTE CONTROL RM-501CH+CH-Setting the On TimerMake sure the clock has been set correctly before setting the timer.After the minutes are set, press button.Then press or button to select on oroff.When off is selected, the on timer isdeactivated.POWER ONPC AUTOENTERENTERVOLVOL VOLVOLCHILDLOCKMUTE PIP SWAP SRCADD/ERASE CAPTION STILL1234567809SLEEP PRE.CH DISPLAYMENU MUTESOURCESTANDBYP.MODEP.SIZEMTSSURR.+REMOTE CONTROL RM-501CH+CH-](https://usermanual.wiki/Inkel/ETR0004/User-Guide-370672-Page-41.png)
![42POWER ONPC AUTOENTERENTERVOLVOL VOLVOLCHILDLOCKMUTE PIP SWAP SRCADD/ERASE CAPTION STILL1234567809SLEEP PRE.CH DISPLAYMENUMENU MUTEMUTESOURCESTANDBYP.MODEP.SIZEMTSSURR.+REMOTE CONTROL RM-501CH+CH-Press ENTER or button.Then press or to select [channel]menu.5Press or button repeatedly or holddown either of these buttons untilappropriate channel is selected. 6POWER ONPC AUTOENTERVOLVOL VOLVOLCHILDLOCKMUTE PIP SWAP SRCADD/ERASE CAPTION STILL1234567809SLEEP PRE.CH DISPLAYMENUMENU MUTEMUTESOURCESTANDBYP.MODEP.SIZEMTSSURR.+REMOTE CONTROL RM-501CH+CH-Press or button to select [volume]menu.7POWER ONPC AUTOENTERVOL VOLCHILDLOCKMUTE PIP SWAP SRCADD/ERASE CAPTION STILL1234567809SLEEP PRE.CH DISPLAYMENU MUTESOURCESTANDBYP.MODEP.SIZEMTSSURR.+REMOTE CONTROL RM-501CH+CH-Press or button repeatedly or holddown either of these buttons until the volumeis adjusted as desired. 8POWER ONPC AUTOENTERVOLVOL VOLVOLCHILDLOCKMUTE PIP SWAP SRCADD/ERASE CAPTION STILL1234567809SLEEP PRE.CH DISPLAYMENUMENU MUTEMUTESOURCESTANDBYP.MODEP.SIZEMTSSURR.+REMOTE CONTROL RM-501CH+CH-Setting the Off TimerPress or button to select [off time]menu.POWER ONPC AUTOENTERVOL VOLCHILDLOCKMUTE PIP SWAP SRCADD/ERASE CAPTION STILL1234567809SLEEP PRE.CH DISPLAYMENU MUTESOURCESTANDBYP.MODEP.SIZEMTSSURR.+REMOTE CONTROL RM-501CH+CH-9](https://usermanual.wiki/Inkel/ETR0004/User-Guide-370672-Page-42.png)

![SETTING THE SLEEP TIMER44The sleep timer automatically shuts off the TV after a preset time (from 10 to 240 minutes).After several seconds, the sleep display disappearsfrom the screen, and the time interval is set.POWER ONPC AUTOPC AUTOENTERVOL VOLCHILDLOCKMUTE PIP SWAP SRCADD/ERASE CAPTION STILL1 2 34 5 6780+1009SLEEPSLEEP PRE.CHPRE.CH AUTOSETAUTOSETMENUSOURCESTANDBYP.MODEP.SIZEMTSSURR.+REMOTE CONTROL RM-501CH+CH-Press the SLEEP button on the remote controlrepeatedly until the appropriate time intervalappears.To cancel the sleep timer, press the SLEEP button repeatedly until the “off” is displayed.If the power turns off then on again, the sleep timer is canceled.Quick wayPress the MENU button to display the menuand select [time] - [sleep timer] menu using/and /buttons.1POWER ONPC AUTOENTERENTERVOLVOL VOLVOLCHILDLOCKMUTE PIP SWAP SRCADD/ERASE CAPTION STILL1234567809SLEEP PRE.CH DISPLAYMENUMENU MUTEMUTESOURCESTANDBYP.MODEP.SIZEMTSSURR.+REMOTE CONTROL RM-501CH+CH-Press or button until the appropriatetime interval appears (any of the presetvalues from “off” to “ 240”).2POWER ONPC AUTOENTERVOL VOLCHILDLOCKMUTE PIP SWAP SRCADD/ERASE CAPTION STILL1234567809SLEEP PRE.CH DISPLAYMENU MUTESOURCESTANDBYP.MODEP.SIZEMTSSURR.+REMOTE CONTROL RM-501CH+CH-Press MENU button repeatedly to exit.3POWER ONPC AUTOENTERVOL VOLCHILDLOCKMUTE PIP SWAP SRCADD/ERASE CAPTION STILL1234 5 67 809SLEEP PRE.CH DISPLAYMENU MUTESOURCESTANDBYP.MODEP.SIZEMTSSURR.+REMOTE CONTROL RM-501CH+CH-](https://usermanual.wiki/Inkel/ETR0004/User-Guide-370672-Page-44.png)
![This TV is equipped with an internal closed caption decoder. Closed caption isa system which allows conversations, narration, and sound effects in TVprograms and home videos to be viewed as captions on the TV screen (see theillustration).Not all programs and videos will offer closed captioning.Please look for the “ “ symbol to ensure that captions will be shown.The closed caption broadcasts can be viewed in two modes: caption and text.For each mode, two channels are available: cc1 / cc2, t1 / t2.The caption mode shows subscripts of dialogs and commentaries of TV dramas and news programs while allowing aclear view of the picture.The text mode displays various information over the picture (such as TV program schedules and weather forecasts,etc.) that is independent of the TV programs.45ADJUSTING CLOSED CAPTION SETTINGSccI like a carrotPress the MENU button to display the menuand select [settings] - [close caption mode]menu using /and /buttons.1Pressing or button changes thecaption mode as follows:cc1 cc2 t1 t2 xds* cc12POWER ONPC AUTOENTERVOL VOLCHILDLOCKMUTE PIP SWAP SRCADD/ERASE CAPTION STILL1234567809SLEEP PRE.CH DISPLAYMENU MUTESOURCESTANDBYP.MODEP.SIZEMTSSURR.+REMOTE CONTROL RM-501CH+CH-Press MENU button repeatedly to exit.3POWER ONPC AUTOENTERVOL VOLCHILDLOCKMUTE PIP SWAP SRCADD/ERASE CAPTION STILL1234567 809SLEEP PRE.CH DISPLAYMENUMENU MUTEMUTESOURCESTANDBYP.MODEP.SIZEMTSSURR.+REMOTE CONTROL RM-501CH+CH-POWER ONPC AUTOENTERENTERVOLVOL VOLVOLCHILDLOCKMUTE PIP SWAP SRCADD/ERASE CAPTION STILL1234567809SLEEP PRE.CH DISPLAYMENUMENU MUTEMUTESOURCESTANDBYP.MODEP.SIZEMTSSURR.+REMOTE CONTROL RM-501CH+CH-Selecting the Kind of Closed Caption*XDS : Extended Data Service.This service displays "network name", "callletter", "program name", "program length" and"time in show" information, etc.](https://usermanual.wiki/Inkel/ETR0004/User-Guide-370672-Page-45.png)
![46Press the MENU button to display the menuand select [settings] - [close capt.background] menu using /and /buttons.1POWER ONPC AUTOENTERENTERVOLVOL VOLVOLCHILDLOCKMUTE PIP SWAP SRCADD/ERASE CAPTION STILL1234567809SLEEP PRE.CH DISPLAYMENUMENU MUTEMUTESOURCESTANDBYP.MODEP.SIZEMTSSURR.+REMOTE CONTROL RM-501CH+CH-Selecting the background of Closed CaptionPressing or button changes thecaption background as follows:opaque transparent2POWER ONPC AUTOENTERVOL VOLCHILDLOCKMUTE PIP SWAP SRCADD/ERASE CAPTION STILL1234567809SLEEP PRE.CH DISPLAYMENU MUTESOURCESTANDBYP.MODEP.SIZEMTSSURR.+REMOTE CONTROL RM-501CH+CH-Press MENU button repeatedly to exit.3POWER ONPC AUTOENTERVOL VOLCHILDLOCKMUTE PIP SWAP SRCADD/ERASE CAPTION STILL1234567 809SLEEP PRE.CH DISPLAYMENUMENU MUTEMUTESOURCESTANDBYP.MODEP.SIZEMTSSURR.+REMOTE CONTROL RM-501CH+CH-](https://usermanual.wiki/Inkel/ETR0004/User-Guide-370672-Page-46.png)
![47Press MENU button repeatedly to exit.3POWER ONPC AUTOENTERVOL VOLCHILDLOCKMUTE PIP SWAP SRCADD/ERASE CAPTION STILL1234567 809SLEEP PRE.CH DISPLAYMENUMENU MUTEMUTESOURCESTANDBYP.MODEP.SIZEMTSSURR.+REMOTE CONTROL RM-501CH+CH-Each time the CAPTION button is pressed, theviewing mode(off / on / on mute) is changed.POWER ONPC AUTOENTERVOL VOLCHILDCHILDLOCKLOCKWINDOWWINDOWSEL.SEL.PIPPIP SWSWAPAP SRCSRCADD/ADD/ERASEERASE CAPTIONCAPTION STILLSTILL1234567809SLEEP PRE.CH AUTOSETMENU MUTESOURCESOURCESTANDBYCH+CH-P.MODEP.SIZEMTSSURR.+REMOTE CONTROL RM-501Quick wayClosed caption may malfunction (white blocks, strange characters, etc.) if signal conditions are poor or if there areproblems at the broadcast source. This does not necessarily indicate a problem with your TV.If any button is pressed to call up the on-screen menu while viewing a closed caption broadcast, the closed captionswill disappear momentarily. If no text broadcast is being received while viewing in the text mode, the screen may become dark and blank for someprograms. Should this occur, switch the closed caption mode to off.VIEWING CLOSED CAPTIONSPress the MENU button to display the menuand select [settings] - [close caption] menuusing /and /buttons.1Pressing or button to select viewingmode as follows:off on on mute 2POWER ONPC AUTOENTERVOL VOLCHILDLOCKMUTE PIP SWAP SRCADD/ERASE CAPTION STILL1234567809SLEEP PRE.CH DISPLAYMENU MUTESOURCESTANDBYP.MODEP.SIZEMTSSURR.+REMOTE CONTROL RM-501CH+CH-off : Closed caption does not display.on : Closed caption displays.on mute : If a broadcast contains closedcaption data and MUTE button ispressed, the TV displays captionsautomatically. Pressing MUTEagain will return the TV to itsprevious condition.POWER ONPC AUTOENTERENTERVOLVOL VOLVOLCHILDLOCKMUTE PIP SWAP SRCADD/ERASE CAPTION STILL1234567809SLEEP PRE.CH DISPLAYMENUMENU MUTEMUTESOURCESTANDBYP.MODEP.SIZEMTSSURR.+REMOTE CONTROL RM-501CH+CH-](https://usermanual.wiki/Inkel/ETR0004/User-Guide-370672-Page-47.png)
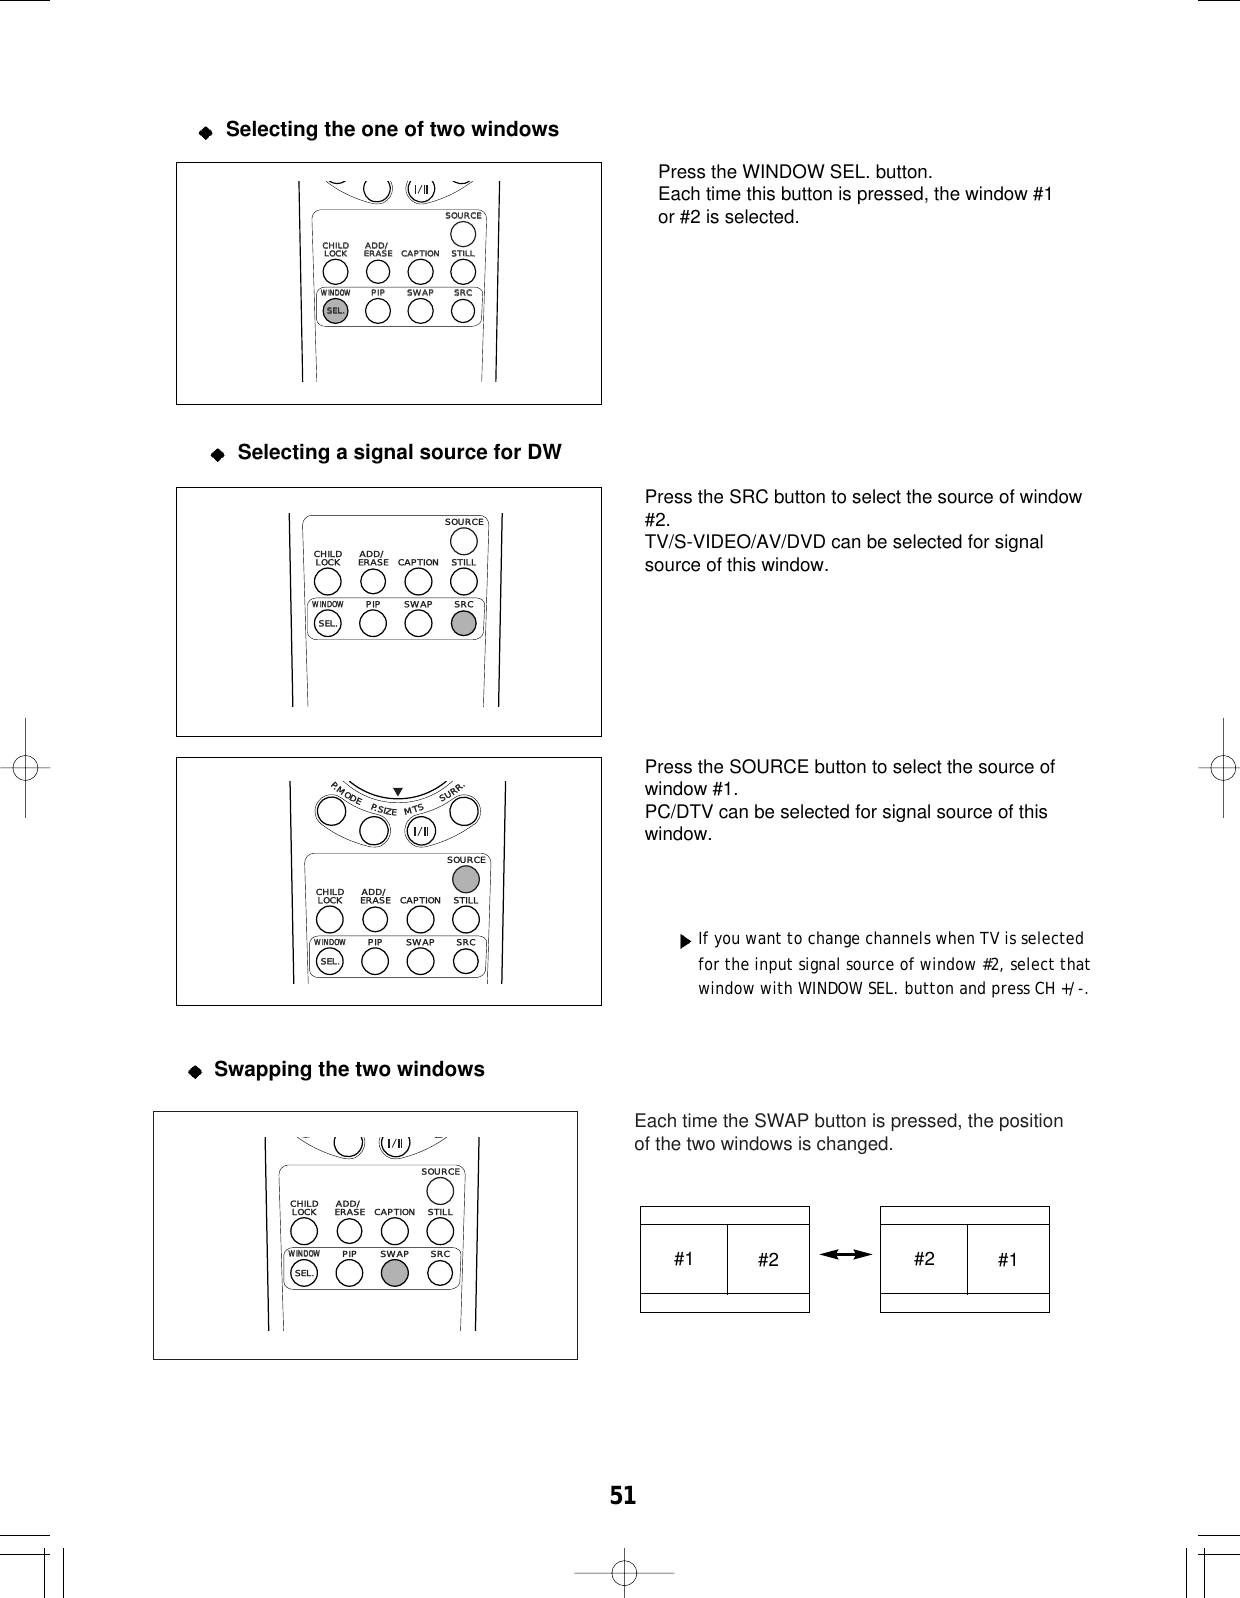
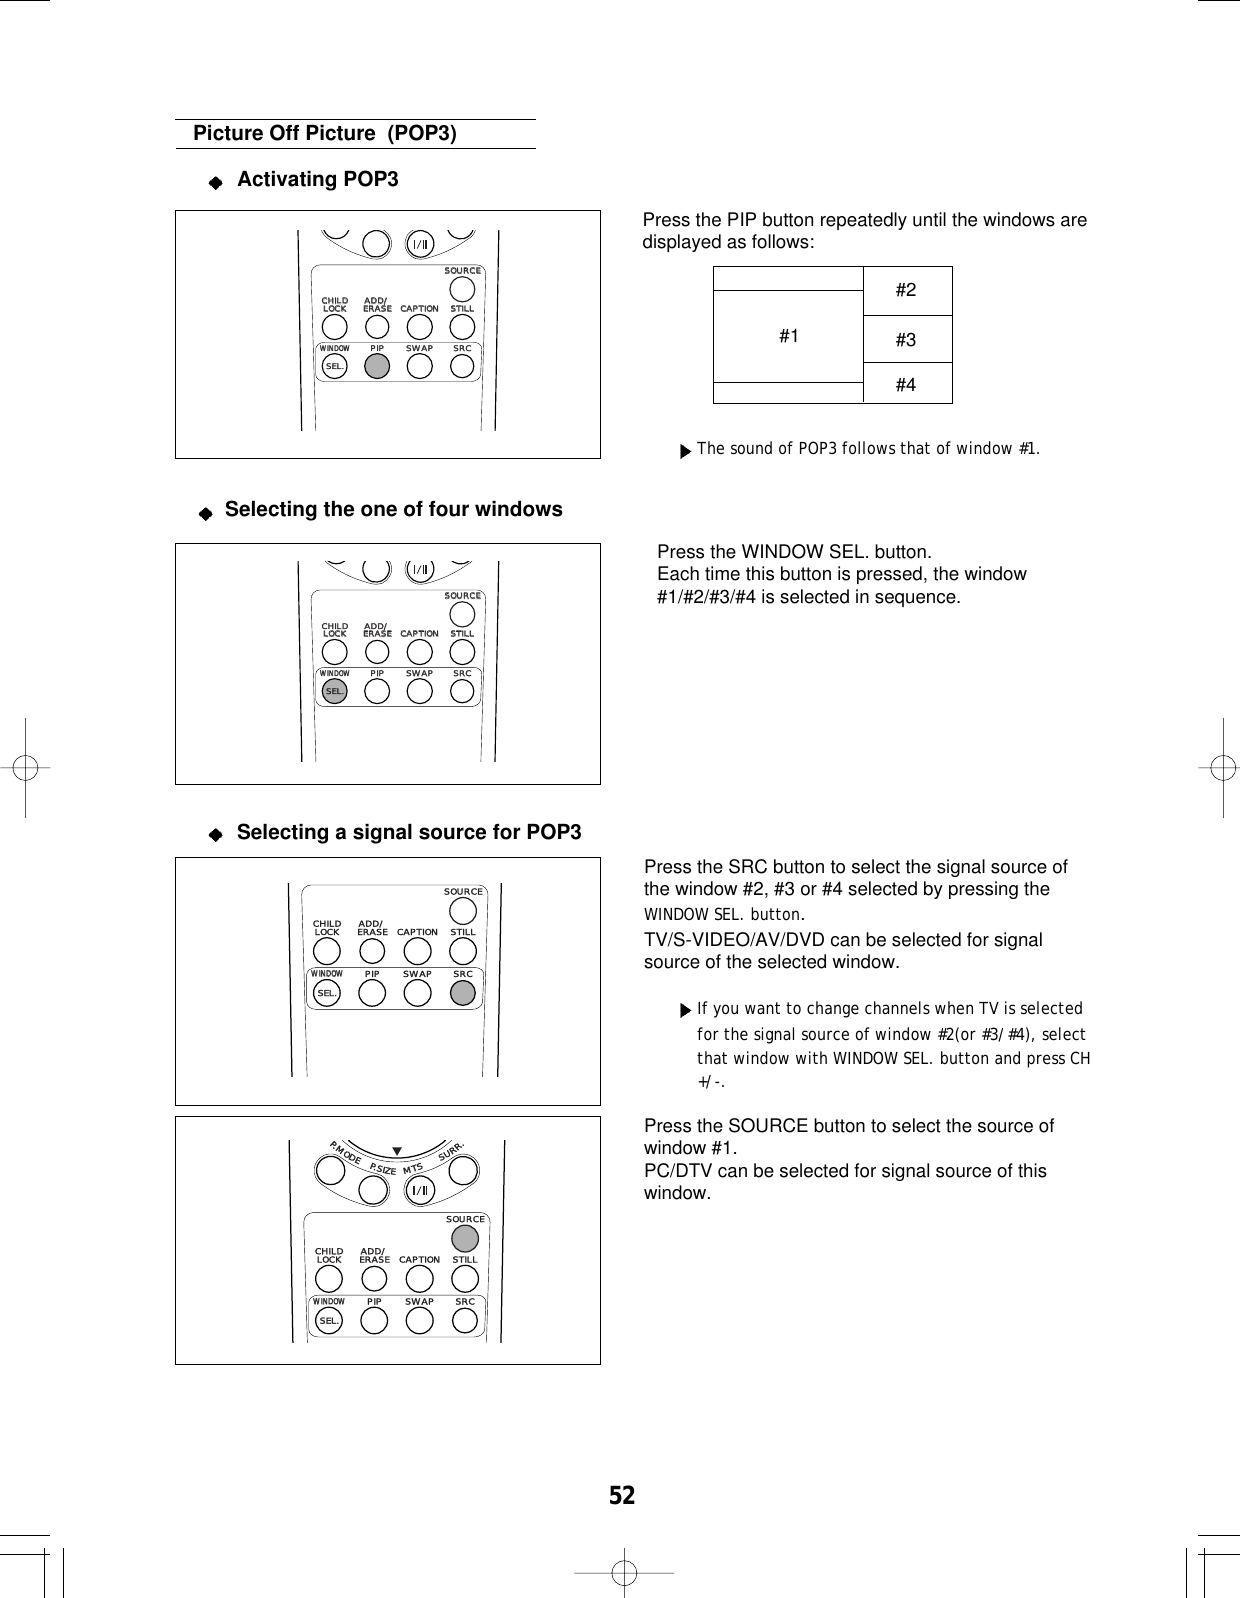
![Selecting a signal source for PIPPress the SRC button to select the source of subpicture.TV/S-VIDEO/AV/DVD can be selected for signalsource of sub picture.POWER ONPC AUTOENTERVOL VOLCHILDLOCKWINDOWWINDOWSEL.PIP SWAP SRCADD/ERASE CAPTION STILL1234567809SLEEP PRE.CH AUTOSETMENU MUTESOURCESTANDBYCH+CH-P.MODEP.SIZEMTSSURR.+REMOTE CONTROL RM-501Press the SOURCE button to select the source ofmain picture.PC/DTV can be selected for signal source of mainpicture.POWER ONPC AUTOENTERVOL VOLCHILDLOCKWINDOWWINDOWSEL.PIP SWAP SRCADD/ERASE CAPTION STILL1234567809SLEEP PRE.CH AUTOSETMENU MUTESOURCESTANDBYCH+CH-P.MODEP.SIZEMTSSURR.+REMOTE CONTROL RM-501If you want to change channels when TV is selectedfor the signal source of sub picture, select the subwindow with WINDOW SEL. button and press CH +/-.49Changing size of Sub windowPOWER ONPC AUTOENTERVOL VOLCHILDLOCKMUTE PIP SWAP SRCADD/ERASE CAPTION STILL1234567809SLEEP PRE.CH DISPLAYMENU MUTESOURCESTANDBYP.MODEP.SIZEMTSSURR.+REMOTE CONTROL RM-501CH+CH-Press or button to change the size ofPIP window.2Press the MENU button to display the menuand select [window] - [pip size] menu using/and /buttons.1POWER ONPC AUTOENTERENTERVOLVOL VOLVOLCHILDLOCKMUTE PIP SWAP SRCADD/ERASE CAPTION STILL1234567809SLEEP PRE.CH DISPLAYMENUMENU MUTEMUTESOURCESTANDBYP.MODEP.SIZEMTSSURR.+REMOTE CONTROL RM-501CH+CH-[pip size] menu is displayed only in the PIP mode.POWER ONPC AUTOENTERVOLVOL VOLVOLCHILDLOCKMUTE PIP SWAP SRCADD/ERASE CAPTION STILL1234 5 67 809SLEEP PRE.CH DISPLAYMENUMENU MUTEMUTESOURCESTANDBYP.MODEP.SIZEMTSSURR.+REMOTE CONTROL RM-501CH+CH-Press the MENU button repeatedly to exit.3](https://usermanual.wiki/Inkel/ETR0004/User-Guide-370672-Page-49.png)
![50Changing position of Sub windowPress the MENU button in PIP mode todisplay the menu and select [window] - [pipposition] using /and /buttons.1POWER ONPC AUTOENTERENTERVOLVOL VOLVOLCHILDLOCKMUTE PIP SWAP SRCADD/ERASE CAPTION STILL1234567809SLEEP PRE.CH DISPLAYMENUMENU MUTEMUTESOURCESTANDBYP.MODEP.SIZEMTSSURR.+REMOTE CONTROL RM-501CH+CH-Press or to select one of five locationsas follows:Whenever you select, the sub windowchanges it’s position.2POWER ONPC AUTOENTERVOL VOLCHILDLOCKMUTE PIP SWAP SRCADD/ERASE CAPTION STILL1234567809SLEEP PRE.CH DISPLAYMENU MUTESOURCESTANDBYP.MODEP.SIZEMTSSURR.+REMOTE CONTROL RM-501CH+CH-POWER ONPC AUTOENTERVOLVOL VOLVOLCHILDLOCKMUTE PIP SWAP SRCADD/ERASE CAPTION STILL1234 5 67 809SLEEP PRE.CH DISPLAYMENUMENU MUTEMUTESOURCESTANDBYP.MODEP.SIZEMTSSURR.+REMOTE CONTROL RM-501CH+CH-Press the MENU button repeatedly to exit.3Double Window (DW)Press the PIP button repeatedly until the windows aredisplayed as follows:POWER ONPC AUTOENTERVOL VOLCHILDCHILDLOCKLOCKWINDOWWINDOWSEL.SEL.PIPPIP SWSWAPAP SRCSRCADD/ADD/ERASEERASE CAPTIONCAPTION STILLSTILL1234567809SLEEP PRE.CH AUTOSETMENU MUTESOURCESOURCESTANDBYCH+CH-P.MODEP.SIZEMTSSURR.+REMOTE CONTROL RM-501Activating DW#1 #2](https://usermanual.wiki/Inkel/ETR0004/User-Guide-370672-Page-50.png)
![Press the MENU button to display the menuand select [settings] - [content blocking]menu using /and /buttons.1POWER ONPC AUTOENTERENTERVOLVOL VOLVOLCHILDLOCKMUTE PIP SWAP SRCADD/ERASE CAPTION STILL1234567809SLEEP PRE.CH DISPLAYMENUMENU MUTEMUTESOURCESTANDBYP.MODEP.SIZEMTSSURR.+REMOTE CONTROL RM-501CH+CH-Entering A PasswordBLOCKING THE CONTENTS53The Parental Control function (V-Chip) is used to block TV programs viewing based on the ratingssent by the broadcast station. The default setting is to allow all programs to be viewed. Viewing canbe blocked by the type of program and by the categories chosen to be blocked. Restriction of TV programs include two ratings that contain information about the program: the MPAArating and the TV Parental Guidelines. The MPAA rating is restricted by age. TV Parental Guidelinesare restricted by age and content. To use the Parental Control function, you should first enter a password and set the parental ratings. Since a TV program may use either the MPAA ratings or the TV Parental Guidelines, both should beadjusted for completed control.MPAA ratingsG: General audience (no restrictions).PG: Parental guidance suggested.PG-13: PG-13 (Parents strongly cautioned).R: Restricted (Children under 17 should be accompanied by an adult).NC-17: No children under age 17.X: Adults only. NR: No rated.The MPAA rating is only age-based.TV Parental GuidelinesTV Parental Guidelines consist of the age-based categories and the content categories as follows.Content categoriesFV: Fantasy violence.D: Sexual suggestive dialog.L: Adult language.S: Sexual situation.V: ViolenceAge-based categoriesY: Young children.Y7: Children 7 and over.G: General audience.PG: Parental guidance.14: Viewers 14 and over.MA: Mature audience. These categories consist of two separategroups:"Y" and "Y7"(young children throughage7), and "G" through "MA"(everybody else).](https://usermanual.wiki/Inkel/ETR0004/User-Guide-370672-Page-53.png)
![54Press button to select [enter].Then press button to enter the passwordentry mode.3POWER ONPC AUTOENTERVOL VOLCHILDLOCKMUTE PIP SWAP SRCADD/ERASE CAPTION STILL1234567809SLEEP PRE.CH DISPLAYMENU MUTESOURCESTANDBYP.MODEP.SIZEMTSSURR.+REMOTE CONTROL RM-501CH+CH-Press button to move the cursor to thedesired digit and press or button toselect the desired number (0~9).4POWER ONPC AUTOENTERVOL VOLCHILDLOCKMUTE PIP SWAP SRCADD/ERASE CAPTION STILL1234567809SLEEP PRE.CH DISPLAYMENU MUTESOURCESTANDBYP.MODEP.SIZEMTSSURR.+REMOTE CONTROL RM-501CH+CH-Press ENTER or button.2POWER ONPC AUTOENTERENTERVOLVOL VOLVOLCHILDLOCKMUTE PIP SWAP SRCADD/ERASE CAPTION STILL1234567809SLEEP PRE.CH DISPLAYMENU MUTESOURCESTANDBYP.MODEP.SIZEMTSSURR.+REMOTE CONTROL RM-501CH+CH-Repeat the above step 4 to enter 6 digit password.When you enter a password first time, enter "000000"as default settings.POWER ONPC AUTOENTERVOLVOL VOLVOLCHILDLOCKMUTE PIP SWAP SRCADD/ERASE CAPTION STILL1234 5 67 809SLEEP PRE.CH DISPLAYMENUMENU MUTEMUTESOURCESTANDBYP.MODEP.SIZEMTSSURR.+REMOTE CONTROL RM-501CH+CH-Press the MENU button to exit from thepassword entry mode.Press the MENU button repetedly to exit from the on-screen menu mode.6Press button to select "OK" and pressENTER button.If the correct password is entered, [enter] aswell as [change] are displayed.If the password is not correctly, [change] are not displayed. In this case, perform theabove step 4 to enter a password again.5POWER ONPC AUTOENTERENTERVOLVOL VOLVOLCHILDLOCKMUTE PIP SWAP SRCADD/ERASE CAPTION STILL1234567809SLEEP PRE.CH DISPLAYMENU MUTESOURCESTANDBYP.MODEP.SIZEMTSSURR.+REMOTE CONTROL RM-501CH+CH-](https://usermanual.wiki/Inkel/ETR0004/User-Guide-370672-Page-54.png)
![55Changing The PasswordBefore changing the passwond, you should enter the old password first, performing the steps 1~ 5 in"Entering A Password" on the previous page.Press button to select [change].Then press button to enter the newpassword entry mode.1POWER ONPC AUTOENTERVOL VOLCHILDLOCKMUTE PIP SWAP SRCADD/ERASE CAPTION STILL1234567809SLEEP PRE.CH DISPLAYMENU MUTESOURCESTANDBYP.MODEP.SIZEMTSSURR.+REMOTE CONTROL RM-501CH+CH-Press button to move the cursor to thedesired digit and press or button toselect the desired number (0~9).2POWER ONPC AUTOENTERVOL VOLCHILDLOCKMUTE PIP SWAP SRCADD/ERASE CAPTION STILL1234567809SLEEP PRE.CH DISPLAYMENU MUTESOURCESTANDBYP.MODEP.SIZEMTSSURR.+REMOTE CONTROL RM-501CH+CH-Repeat the above step 2 to enter a new 6 digitpassword.Press button to select "OK" and pressENTER button.3POWER ONPC AUTOENTERENTERVOLVOL VOLVOLCHILDLOCKMUTE PIP SWAP SRCADD/ERASE CAPTION STILL1234567809SLEEP PRE.CH DISPLAYMENU MUTESOURCESTANDBYP.MODEP.SIZEMTSSURR.+REMOTE CONTROL RM-501CH+CH-Once the new password is changed into, do notforget it. If you do not know it, you cannot set theparental ratings. Should this happen, reset all thesettings made in the menus and enter "000000"as password. (See "FACTORY RESET" on page59) POWER ONPC AUTOENTERVOLVOL VOLVOLCHILDLOCKMUTE PIP SWAP SRCADD/ERASE CAPTION STILL1234 5 67 809SLEEP PRE.CH DISPLAYMENUMENU MUTEMUTESOURCESTANDBYP.MODEP.SIZEMTSSURR.+REMOTE CONTROL RM-501CH+CH-Press the MENU button to exit from the newpassword entry mode.Press the MENU button repetedly to exit from theon-screen menu mode.6](https://usermanual.wiki/Inkel/ETR0004/User-Guide-370672-Page-55.png)
![56Setting The Restrictions Using MPAA RatingsBefore setting this restrictions, you should enter the password first, performing the steps 1~ 6 in "Entering APassword" on page 53.POWER ONPC AUTOENTERVOL VOLCHILDLOCKMUTE PIP SWAP SRCADD/ERASE CAPTION STILL1234567809SLEEP PRE.CH DISPLAYMENU MUTESOURCESTANDBYP.MODEP.SIZEMTSSURR.+REMOTE CONTROL RM-501CH+CH-Press or button to select [movieblocking].1Press or button to select a particularMPAA category to be blocked and press theENTER button.2Each time the ENTER button is pressed at acategory, that category will be blocked ornot.POWER ONPC AUTOENTERVOLVOL VOLVOLCHILDLOCKMUTE PIP SWAP SRCADD/ERASE CAPTION STILL1234 5 67 809SLEEP PRE.CH DISPLAYMENUMENU MUTEMUTESOURCESTANDBYP.MODEP.SIZEMTSSURR.+REMOTE CONTROL RM-501CH+CH-Press the MENU button to exit from themovie blocking mode.Press the MENU button repeatedly to exitfrom the on-screen menu mode.3POWER ONPC AUTOENTERENTERVOLVOL VOLVOLCHILDLOCKMUTE PIP SWAP SRCADD/ERASE CAPTION STILL1234567809SLEEP PRE.CH DISPLAYMENU MUTESOURCESTANDBYP.MODEP.SIZEMTSSURR.+REMOTE CONTROL RM-501CH+CH-Example 1: If "PG-13" is blocked, this will alsoautomatically block the higherratings "R", "NC-17", "X" and “NR".Example 2: If "R" is blocked, this will alsoautomatically block the higherratings "NC-17", "X", and "NR".](https://usermanual.wiki/Inkel/ETR0004/User-Guide-370672-Page-56.png)
![57Setting The Restrictions Using TV Parental GuidelinesBefore setting this restrictions, you should enter the password first, performing the steps 1~ 6 in "Entering APassword" on page 53.POWER ONPC AUTOENTERVOL VOLCHILDLOCKMUTE PIP SWAP SRCADD/ERASE CAPTION STILL1234567809SLEEP PRE.CH DISPLAYMENU MUTESOURCESTANDBYP.MODEP.SIZEMTSSURR.+REMOTE CONTROL RM-501CH+CH-Press or button to select [tv blocking].1Press /and /buttons to select aparticular age-based category to be blockedand press the ENTER button.2POWER ONPC AUTOENTERVOLVOL VOLVOLCHILDLOCKMUTE PIP SWAP SRCADD/ERASE CAPTION STILL1234 5 67 809SLEEP PRE.CH DISPLAYMENUMENU MUTEMUTESOURCESTANDBYP.MODEP.SIZEMTSSURR.+REMOTE CONTROL RM-501CH+CH-Press the MENU button to exit from the tvblocking mode.Press the MENU button repetedly to exitfrom the on-screen menu mode.4POWER ONPC AUTOENTERVOL VOLCHILDLOCKMUTE PIP SWAP SRCADD/ERASE CAPTION STILL1234567809SLEEP PRE.CH DISPLAYMENU MUTESOURCESTANDBYP.MODEP.SIZEMTSSURR.+REMOTE CONTROL RM-501CH+CH-POWER ONPC AUTOENTERENTERVOLVOL VOLVOLCHILDLOCKMUTE PIP SWAP SRCADD/ERASE CAPTION STILL1234567809SLEEP PRE.CH DISPLAYMENUMENU MUTEMUTESOURCESTANDBYP.MODEP.SIZEMTSSURR.+REMOTE CONTROL RM-501CH+CH-Press /and /buttons to select aparticular content category to be blockedand press the ENTER button.3If "L" sub rating in "PG" is blocked, the "L" subratings in "14" and "MA" will automatically beblocked.Each time the ENTER button is pressed at acategory, that category will be blocked or not.Example : If "Y7" is blocked, this will alsoautomatically block the higherratings "G", "PG", "14" and "MA". (Thecotent categories ("D", "L", "S", "V")work together similary.)"Y7", "PG", "14" and "MA" have sub ratings asadditional options. Do the next step to selectthe particular content category.Each time the ENTER button is pressed at acategory, that category will be blocked ornot.](https://usermanual.wiki/Inkel/ETR0004/User-Guide-370672-Page-57.png)
![58POWER ONPC AUTOENTERVOL VOLCHILDCHILDLOCKLOCKWINDOWWINDOWSEL.SEL.PIPPIP SWSWAPAP SRCSRCADD/ADD/ERASEERASE CAPTIONCAPTION STILLSTILL1234567809SLEEP PRE.CH AUTOSETMENU MUTESOURCESOURCESTANDBYCH+CH-P.MODEP.SIZEMTSSURR.+REMOTE CONTROL RM-501CHILD LOCKIf you do not want your child(ren) to watch the TV when you’re out, we recommend this function.Press the CHILD LOCK button."on" is displayed.And without remote control, this TV cannot becontrolled with the buttons of top panel.To cancel this function, press this button again."off" is displayed and the TV can be controlled withboth the buttons of top panel and remote control.Press the MENU button to display the menuand select [options] - [child lock] menu using/and /buttons.1Press or button to select the “on”. 2POWER ONPC AUTOENTERENTERVOLVOL VOLVOLCHILDLOCKMUTE PIP SWAP SRCADD/ERASE CAPTION STILL1234567809SLEEP PRE.CH DISPLAYMENU MUTESOURCESTANDBYP.MODEP.SIZEMTSSURR.+REMOTE CONTROL RM-501CH+CH-POWER ONPC AUTOENTERVOLVOL VOLVOLCHILDLOCKMUTE PIP SWAP SRCADD/ERASE CAPTION STILL1234 5 67 809SLEEP PRE.CH DISPLAYMENUMENU MUTEMUTESOURCESTANDBYP.MODEP.SIZEMTSSURR.+REMOTE CONTROL RM-501CH+CH-Press the MENU button repeatedly to exit.3POWER ONPC AUTOENTERENTERVOLVOL VOLVOLCHILDLOCKMUTE PIP SWAP SRCADD/ERASE CAPTION STILL1234567809SLEEP PRE.CH DISPLAYMENUMENU MUTEMUTESOURCESTANDBYP.MODEP.SIZEMTSSURR.+REMOTE CONTROL RM-501CH+CH-Then without remote control, this TV cannot becontrolled with the buttons of top panel.To cancel this function, select the "off".Then the TV can be coltrolled with both the buttonsof top panel and remote control.Quick way](https://usermanual.wiki/Inkel/ETR0004/User-Guide-370672-Page-58.png)
![59FACTORY RESETYou can reset all the settings made in the menus to the default settings.Press the MENU button to display the menuand select [options] - [factory reset] using /and /buttons.1POWER ONPC AUTOENTERENTERVOLVOL VOLVOLCHILDLOCKMUTE PIP SWAP SRCADD/ERASE CAPTION STILL1234567809SLEEP PRE.CH DISPLAYMENUMENU MUTEMUTESOURCESTANDBYP.MODEP.SIZEMTSSURR.+REMOTE CONTROL RM-501CH+CH-Press ENTER or button to enter into submenu.2POWER ONPC AUTOENTERENTERVOLVOL VOLVOLCHILDLOCKMUTE PIP SWAP SRCADD/ERASE CAPTION STILL1234567809SLEEP PRE.CH DISPLAYMENU MUTESOURCESTANDBYP.MODEP.SIZEMTSSURR.+REMOTE CONTROL RM-501CH+CH-Then all the settings are reset to the defaultsettings.](https://usermanual.wiki/Inkel/ETR0004/User-Guide-370672-Page-59.png)
![USING YOUR TV AS A COMPUTER (PC) DISPLAY60How to Connect Your PC to the TVSelecting the PC signal inputPress the SOURCE button to select the PCmode.If the [source select] menu is set to “auto”,each time this button is pressed, your TVsearches and detects the PC signalautomatically.POWER ONPC AUTOENTERVOL VOLCHILDCHILDLOCKLOCKWINDOWWINDOWSEL.SEL.PIPPIP SWSWAPAP SRCSRCADD/ADD/ERASEERASE CAPTIONCAPTION STILLSTILL1234567809SLEEP PRE.CH AUTOSETMENU MUTESOURCESOURCESTANDBYCH+CH-P.MODEP.SIZEMTSSURR.+REMOTE CONTROL RM-501Press PC AUTO button.The picture is automatically centered on thescreen.POWER ONPC AUTOPC AUTOENTERVOL VOLCHILDLOCKMUTE PIP SWAP SRCADD/ERASE CAPTION STILL1 2 34 5 6780+1009SLEEPSLEEP PRE.CHPRE.CH AUTOSETAUTOSETMENUSOURCESTANDBYP.MODEP.SIZEMTSSURR.+REMOTE CONTROL RM-501CH+CH-14V 60W VIDEOS-VIDEOAUDIO(ST)PC IN14V 60W VIDEOS-VIDEOAUDIO(ST)PC INPC VIDEO OUTPC AUDIO OUTREAR PANEL of TVREAR PANEL of TVPC video connectionPC audio connectionAligning the picture on the center of screenPC Display](https://usermanual.wiki/Inkel/ETR0004/User-Guide-370672-Page-60.png)
![Adjusting the Screen QualityThe purpose of picture quality adjustment is to remove or reduce picture noise.After the noise has been reduced, re-adjust the picture so that it is aligned on the center of screen.See "Aligning the picture on the center of screen" on page 60.Press the MENU button to display themenu and select [picture] using or button.1Press or to select [phase] forhorizontal stripes or [frequency] for verticalones.2POWER ONPC AUTOENTERVOL VOLCHILDLOCKMUTE PIP SWAP SRCADD/ERASE CAPTION STILL1234567809SLEEP PRE.CH DISPLAYMENU MUTESOURCESTANDBYP.MODEP.SIZEMTSSURR.+REMOTE CONTROL RM-501CH+CH-POWER ONPC AUTOENTERENTERVOLVOL VOLVOLCHILDLOCKMUTE PIP SWAP SRCADD/ERASE CAPTION STILL1234567 809SLEEP PRE.CH DISPLAYMENUMENU MUTEMUTESOURCESTANDBYP.MODEP.SIZEMTSSURR.+REMOTE CONTROL RM-501CH+CH-61Mode Resolution Vertical HorizontalFrequency(Hz) Frequency (KHz)VGA 640 X 480 60 31.4640 X 480 67 35640 X 480 75 37.5640 X 480 85 43.2SVGA 800 X 600 56 35.1(MAC) 800 X 600 60 37.8800 X 600 85 53.6832 X 624 75 49.7XGA 1024 X 768 60 48.31024 X 768 70 56.41024 X 768 75 601024 X 768 85 68.6WXGA 1280 X 768 60 47.7SXGA 1280X1024 60 64How to Set up Your PC Display Your PC display must be set as supportable format of this unit.The displayable monitor specification is shown below:If possible, use 1280 X 768 @ 60Hzvideo mode to obtain the best imagequality for your LCD monitor. If usedunder the other resolutions, somescaled or processed pictures mayappear on the screen. If the message “out of range” appearson the screen, adjust the PC as in theleft table.1280X768 @ 60 Hz video mode may notbe displayed well at certain videocard.](https://usermanual.wiki/Inkel/ETR0004/User-Guide-370672-Page-61.png)