IPRO TECHNOLOGY IPROI324N GSM Mobile Phone User Manual I324N
HONG KONG IPRO TECHNOLOGY CO.,LIMITED GSM Mobile Phone I324N
User Manual

1
I324N Pro
User’s Manual
TABLE OF CONTENT
1.Basic Information ............................... 5
1.1.Brief Introduction ................................................ 5
2.Before Use ............................................ 7
2.1. Name and Explanation of Each Part .................... 7
2.1.1.Appearance Sketch Map ........................... 7
2.1.2.Description of the Standby Pictures .......... 7
2.1.3.Description of Keys .................................. 8
2.2.Install SIM Card and Memory Card .................. 10
2.2.1.SIM Card ................................................. 10
2
2.2.2.Inserting and Taking out SIM Card ........ 11
2.2.3.Memory Card .......................................... 12
2.3. Battery ............................................................... 12
2.3.1.Install the Battery .................................... 12
2.3.2.Charging .................................................. 13
2.4. Security Password ............................................. 14
3.Quick User Guide .............................. 15
3.1. Feature Functions .............................................. 15
3.2. Dial a Call .......................................................... 17
3.3. Reject a Call ...................................................... 18
3.4. Receive a Call .................................................... 18
3.5. End a Call .......................................................... 18
3.6. Emergency Services .......................................... 18
3.7. Extension Speed Dial ........................................ 18
3.8. Dialed Calls/Missed Calls/Received
Calls/Rejected Calls ..................................................... 19
3.9. Call Forward ...................................................... 19
3.10. Call Waiting ....................................................... 19
3.11. Call Barring ....................................................... 20
3.12. Power off the Phone .......................................... 20
3.13. T-flash Card ....................................................... 20
3
3.14. charging to another mobile phone ..................... 20
4.Function Menu .................................. 21
4.1.Dialpad .............................................................. 21
4.2.Contacts ............................................................. 21
4.2.1.New ......................................................... 22
4.2.2.Write message ......................................... 22
4.2.3.Call .......................................................... 22
4.2.4.Delete ...................................................... 22
4.2.5.Delete multiple ........................................ 22
4.2.6.Copy ........................................................ 23
4.2.7.Others ...................................................... 23
4.3. Call Logs ........................................................... 23
4.3.1.Missed calls ............................................. 23
4.3.2.Dialed calls .............................................. 24
4.3.3.Received calls ......................................... 24
4.3.4.Rejected calls .......................................... 24
4.3.5.Delete all ................................................. 25
4.3.6.Call timer ................................................ 25
4.3.7.GPRS counter .......................................... 25
4.4 Image ................................................................. 25
4.5 Message ............................................................. 26
4
4.5.1Chat mode ............................................... 26
4.5.2Write Message ........................................ 26
4.5.3Inbox ....................................................... 27
4.5.4Outbox ..................................................... 28
4.5.5Drafts ....................................................... 29
4.5.6Sentbox ................................................... 29
4.5.7Templates ................................................ 29
4.5.8Settings .................................................... 30
4.5.9Message capacity .................................... 31
4.6 Camera ............................................................... 31
4.7 Audio ................................................................. 32
4.8 Multimedia ........................................................ 33
4.8.1Video ....................................................... 33
4.8.2Recorder .................................................. 34
4.9 Games ................................................................ 34
4.10 FM Radio ........................................................... 34
4.11 DV ..................................................................... 35
4.12 Bluetooth ........................................................... 36
4.13 STK ................................................................... 37
4.14 Organizer ........................................................... 37
4.14.1Calendar .................................................. 37
4.14.2Calculator ................................................ 38
4.14.3Clock ....................................................... 38
5
4.15 My Files ............................................................. 38
4.16 Internet ............................................................... 39
4.17 Profiles ............................................................... 39
4.18 Settings .............................................................. 39
4.18.1Phone settings ......................................... 40
4.18.2Display .................................................... 40
4.18.3Security settings ...................................... 41
4.18.4Call Settings ............................................ 42
4.18.5Network setting ....................................... 45
5Text Input .......................................... 46
6Care and Maintenance ..................... 48
1. Basic Information
1.1. Brief Introduction
Thanks for selecting I324N PRO color screen GSM digital
mobile phone. Through reading the manual, you can fully know
6
how to use I324N PRO mobile phone, appreciate its complete
function and simple operating method.
I324N PRO color screen mobile phone is designed aiming at
GSM network environment; the phone is Two Card Two Standby,
but you can not call another SIM card when one SIM card is under
phone call. Besides basic call functions, I324N PRO also provides
many kinds of practical functions, such as name card holder, scene
mode, message, audio and video player, camera and video, game,
Bluetooth, alarm clock, calculator,, STK, time and date, auto
power-on and shut-down ,and etc. so that convenient for your work
and leisure activities. In addition, I324N PRO adopts personalized
human-computer interface design, its complete function can meet
your different requirements.
I324N PRO color screen mobile phone accords with GSM
criterion, has obtained the certification of competent authority.
The company reserves the rights to revise the contents of the
manual without prior notice.

7
2. Before Use
2.1. Name and Explanation of Each Part
2.1.1. Appearance Sketch Map
The picture is only for your reference.
2.1.2. Description of the Standby Pictures
Network signal strength
The more the stripe is, the stronger the signal is.
When SIM card 1s inserted in card slot 1, standby
screen will show the icon.
Network signal strength
The more the stripe is, the stronger the signal is.
When SIM card 1s inserted in card slot 2, standby
screen will show the icon.
Battery strength
The full the fill is, the more electric quantity is.
Standby screen will show the icon.
8
Silent mode
When scene mode is set as mute mode, standby
screen will show the icon.
Vibrate mode
When scene mode is set as Vibration mode
, standby screen will show the icon.
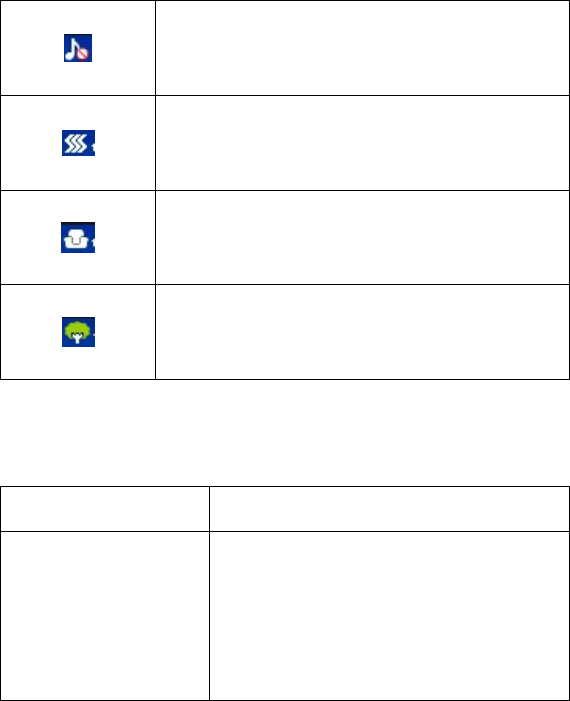
Indoor mode
When scene mode is set as indoor mode, standby
screen will show the icon.
Outdoor mode
When scene mode is set as outdoor mode, standby
screen will show the icon.
2.1.3. Description of Keys
Keys Function
Left soft key/
Right soft key
1.Execute functions that the
left-down/right-down corner indicator
shows.
2. In the standby mode, press Left Soft
key to access Menu, Right Soft key to

9
access Contacts.
Navigation key
On other interfaces, it equals to
navigation key and direction key except
for special functions.
OK key Press it to confirm.
Dial key
1. Press this key to dial or receive an
incoming call.
2. When in the standby mode, press this
key to access Dialed Calls.
MP3 key In idle mode, Press it to access audio
player directly.
End key
1. Mainly used as power on/off.
2. Press to return to standby screen in
any interface.
3. End calls or reject incoming calls.
Message key In the standby mode, press it to access
massage.
Number key
It is used to dial and input numbers or
characters.
Press and hold Number key 1 or 2 to

10
get through the preset voice inbox.
# Key
1. In text editing interface, press "#"
key to switch text the input method.
2. On the standby interface Press and
hold "#" key to transfer the profile of
Normal/Silent/ Vibrate.
* Key
On the standby interface, input *; after
inputting telephone number, if you want
to input extension number, please press
twice asterisk key, after the display
screen shows “+”, please input your
extension number.
2.2. Install SIM Card and Memory Card
2.2.1. SIM Card
Before using the phone, you must insert valid SIM
(Subscriber Identity Module) card in the phone. SIM card 1s
provided by network supplier.
All the information related to network connection are
recorded in the chip of SIM card, also the names, telephone
11
numbers and SMS that storing in the name card holder of SIM card.
You can take out SIM card from your phone, and use it in any
GSM mobile phone (new mobile phone can read SIM card
automatically).
In order to avoid losing or damaging the information saves in
SIM card, please don’t touch the metal contact surface, and place
SIM card in the place that away from electricity and magnetic
force. Once SIM card is damaged, you can’t use the phone
normally.
Prompt: Please make sure to power off the phone before taking
out SIM card. It is absolutely forbidden to insert or take
out SIM card with external power supply; otherwise it
may damage SIM card and the phone.
2.2.2. Inserting and Taking out SIM Card
Metal contact surface of SIM card is easily scratched. You
must take out SIM card carefully before the assembly.
Power off the phone, remove the rear cover, battery or other
external power supply.
Make the end of SIM card without cutting angle inside and
aim at the card slot of the phone and metal surface of SIM
card face downward, then insert SIM card to the card slot of
the phone, the other SIM card is also inserted in this way.
12
When taking out SIM card, directly pull it outward and then
can take out SIM card.
Prompt: Without special explanation inserting two SIM cards
are defaulted in the manual. If you just insert one
SIM card, maybe some options of the menu will not
be shown.
2.2.3. Memory Card
Aim at the T card slot and push the T card gently, and the card
will be inserted correctly.
Prompt: If the memory card is failed, please check whether it
is correctly placed and good contact of metal point.
2.3. Battery
2.3.1. Install the Battery
Take off the rear cover, of the mobile.
Make one end of battery with metal surface aim at the battery
connector.
Then gently press the battery downward using the finger, and
then press the other end to install the battery.
13
Prompt: Please operate correctly to avoid damaging the
battery connector.
Do not place the battery in fire ; follow local laws and
ordinances in Disposing used battery.
Check the model number of the charger before using it to
charge the mobile.
Only use approved battery , charger and accessories applicable
to the specific mobile model . Using other types of battery ,
charger and accessories may violate the certification or
warranty terms of the accessories may violate the certification
or warranty terms of the equipment and may result in danger .
Return waste and used batteries to the supplier or specified
recovery site .
CAUTION!
Risk of explosion if battery is replaced by an incorrect type .
Dispose of used batteries according to the instructions .
2.3.2. Charging
Insert the charger on the charging interface at the side end of
the phone.
After inserting the charging plug, battery strength icon stripe
at the top right corner of the screen is scrolling, which means that
14
the charging is processing; when the stripe is full of the whole icon
and stop scrolling, which means that the battery charging is
completed; when the charging is completed, please pull out the
plug.
When electric quantity is not enough, warning message will
be sent; and electric quantity shows empty. When electric quantity
is too low, the phone will power off automatically. Please don’t
make the battery in the status of not enough electric quantity for a
long time; otherwise it may damage the battery quality and service
life. Please don’t charge the battery for a long time.
Prompt: In order to ensure normal operation of the phone,
please make sure to use the designated charger.
2.4. Security Password
PIN
PIN (Personal Identification Number) is used to prevent your
SIM card from being used illegally. PIN is usually provided with
SIM card together. If you input wrong PIN for continuous three
times, please input PUK to unlock it. Please contact with network
operations company for more details.
PIN 2
You need to input PIN2 when entering some functions (such
as call charge); if you input wrong PIN2 for continuous three times,
15
you need to input PUK2 to unlock it. Please contact with network
operations company for more details.
PUK
When changing the locked PIN, you need to input PUK
(Personal Unlock Key). PUK is provided with SIM card together.
If it is not provided, please contact with your service provider. If
you input wrong PUK for continuous ten times, the SIM card can’t
be used again. Please contact with your service provider to buy
new card. You can’t change PUK. If you lose the code, please
contact with your service provider.
PUK2
When changing the locked PIN2, you need to input PUK2. If
you input wrong PUK2 for continuous ten times, you can’t use the
functions that need PIN2. Please contact with your service provider
to buy new card. You can’t change PUK 2. If you lose the code,
please contact with your service provider.
3. Quick User Guide
3.1. Feature Functions
The phone has not only the basic functions of mobile phone,
16
but also support rich, practical and rapid feature functions, can be
briefly introduced as follows:
Contacts: Each name card holder record stored in the phone
can be related with several telephone numbers at most, the
phone can store 300 records at most; can send SMS in the
name card holder; you can copy name card holder record
between SIM card and the phone.
Profiles: Custom the ringtone (include ringtone settings,
volume adjustment, incoming call prompt, message prompt,
alarm clock prompt, key-press tone, low voltage warning
tone, power-on and power-off tone) according to different
events or environment.
Call log: The phone will automatically store the information
of call log for you to check; support to call the telephone
number in the call log; support to save the telephone number
in the call log to name card holder and set as rejected call;
support the function of sending SMS and etc. to the telephone
numbers in the call log.
Message: The phone supports storing SMS and 200 pieces at
most. The phone supports the storing status of SMS in SIM
card and the phone.
Multimedia: Your phone provides all kinds of entertainment
services including player, camera, FM radio and other
17
functions.
Camera: The phone supports camera and video function. You
can customize the camera and video, and switch between
prepositive and postpositive video captures through menu
option.
Tools: The phone supports various practical functions.
Supports alarm clock, calendar, calculator and other
functions.
Settings: You can customize the phone according to the needs,
include phone settings, display settings, call settings, security
settings and other functions.
Input method: The phone supports various input modes,
which is convenient for you to input English, letters, numbers,
symbols, and etc.
3.2. Dial a Call
In standby mode, press numerical keys to input phone
number to dial phone number. When you finish inputting phone
number, press the dial key to make a call. If you're making a long
distance call, add the area code preceding the telephone number.
18
3.3. Reject a Call
You can press End key to reject an incoming call.
3.4. Receive a Call
When an incoming call arrives, the phone will give out the
corresponding prompt (such as vibration, ringtone, and etc.); if
network support, the phone screen will show the name and
telephone number of the caller; at this time, you can press Dial key
to receive an incoming call.
3.5. End a Call
After finishing a call, you can press End key to end a call.
3.6. Emergency Services
You can directly dial an emergency service call without SIM
card.
Different network uses different emergency numbers, please
consult your network operations company for more details.
3.7. Extension Speed Dial
After inputting telephone number, if you want to input branch
19
number, please press and hold “*”, input your extension number
after the display screen shows “P”. After getting through the call, it
will directly dial the extension.
3.8. Dialed Calls/Missed Calls/Received
Calls/Rejected Calls
You can enter call log to check the relevant details of dialed
calls, missed calls, received calls and rejected calls.
Prompt: The record of incoming call from blacklist number
will be saved in Rejected Calls.
3.9. Call Forward
After call forward function is started, according to different
forward conditions settings (Call Forward Unconditionally,
Forward Busy, Forward No Answer, Forward Can Not Reach), you
can select to switch the incoming call to voice inbox or other
telephone numbers.
3.10. Call Waiting
After call waiting function is started, when you are calling,
the other call can be put through.
20
3.11. Call Barring
After call barring function is started, according to different
restricted conditions settings (all the dialed calls, all the incoming
calls, incoming calls when roaming, dialed international calls,
outgoing international calls when roaming), you can restrict the
call under the corresponding conditions (need to apply to network
operator for business).
3.12. Power off the Phone
In the standby mode, press and hold End key to power off
the phone.
3.13. T-flash Card
Insert the T-Flash card into phone from the background.
This will expand the Flash memory of the phone.
Tap Multimedia menu, you can browse MP3, MP4, picture, video,
photograph etc.
3.14. charging to another mobile phone
The phone can charge to another mobile phone.
21
4. Function Menu
4.1. Dialpad
Please refer pg18 the Dial a Call
4.2. Contacts
This function could help you browse the name card holder,
store, edit and delete the names and phone numbers in the phone
and SIM card. To facilitate the management of the records, this
phone sets the group function, collecting the similar items into a
group. The storage capacity of the SIM card varies and the
maximum storage capacity of this phone is 300.
On the standby interface, press right soft key to enter the
interface of the name card holder. When the record of the name
card holder is not empty, press left soft key for the following
operation:
Prompt: Take the records in SIM card 1 for example.
22
4.2.1. New
Create new name card holder records to SIM card or the
mobile phone.
4.2.2. Write message
Send SMS to this record.
4.2.3. Call
Dial this record directly or by means of IP call.
4.2.4. Delete
Delete this record.
4.2.5. Delete multiple
Delete multiple records you selected.
23
4.2.6. Copy
Copy the record to SIM cards or memory card.
4.2.7. Others
――Speed dial: Set speed dial on/off and set number.
――Own number: Edit my number.
――Service number
――Memory status: You could enquire the capacity of SIM1,
SIM2 and the phone.
4.3. Call Logs
Display your recent call log.
4.3.1. Missed calls
Display the list of your recent missed numbers.
On the interface of Missed, choose one record, then press left
soft key “Option” to enter the Option interface and you could go
on the following operations.
24
Details: Display the information of dial calls (Number, Date,
Time, Duration, From, Style, and SIM Name)
Call: Recall the number.
Write message: You could send message to this number.
Add to contacts: Add the number to Phone/SIM1/SIM2
Add to blacklist: Add this number to the blacklist.
Delete: Delete this record.
Delete all: Delete all the records in the Missed list.
4.3.2. Dialed calls
Display the list of your recent dialed numbers. The operation is the
same as the Missed.
4.3.3. Received calls
Display the list of your recent answered numbers. The operation is
the same as the Missed.
4.3.4. Rejected calls
Display the incoming call records in the blacklist. The operation is
25
the same as the Missed.
4.3.5. Delete all
You could delete all the records of the Dialed, Received, Missed
and Rejected.
4.3.6. Call timer
Display information details of SIM1/SIM2: Last Call, Received
Calls, Dialed Calls, and All Calls. Press left soft key to "Reset".
4.3.7. GPRS counter
Display information details of SIM1/SIM2: Last sent, Last
received, Total sent, and Total received. Press left soft key to
"Reset".
4.4 Image
Enter the images list interface, press left soft key, you could
go on the following operations.

26
--Set as wallpaper: set this image as wallpaper
--Set as contaction: set this image as contaction
--Delete: delete this image.
--Share: send this file to Bluetooth.
--Mark: choose the image or all of the images.
--Rename: rename the file
--Slide play: view this file as full screen.
--Details: to show the images details.
4.5 Message
4.5.1 Chat mode
The Mobile phone support voice king display function.
4.5.2 Write Message
You could write new message by using this function. When
you input the message to be sent, press left soft key to send, to
insert the templates, to add contact person information and symbol,
and to save, etc.
--Send: Enter the interface of input number, you can dial the
27
phone number directly, or press left soft key to
enter the name card holder and choose the number
to send.
--Insert template: Enter the templates interface and you could
insert the template to the message.
--Add contact info: Enter the Name card holder interface and
you could insert the name card holder
information to the message.
--Add phiz: Enter the symbol interface and add the symbols to
the message.
--Save as drafts: Save this message to the drafts.
--Exit: Return to previous menu.
4.5.3 Inbox
Store the SMS message you’ve received. The SMS message
could be differentiated by different icons. The icons before the
message list means whether this message is SMS message and
which is stored in SIM1, SIM2 or the phone.
Choose one SMS press left soft key, then you will do several
operations, for example, reply the SMS, delete, dial and mark.
Press OK key directly you can read this SMS.
――Reply: You could choose to reply the addresser by SMS.
28
――Delete: Delete this message.
――Call: Call the addresser.
--Lock/unlock: Lock the message or unlock it.
――Mark: Choose this message or all messages in the inbox,
or only choose the messages saved in SIM 1, SIM 2, SIM1storage
SMS or SIM2 storage SMS
――Sort: Sort the messages in the inbox by time, contact
person, theme or message type.
――Delete repeated numbers: Delete all the messages of the
same number.
4.5.4 Outbox
Store the SMS you’ve sent in failure. The SMS could be
differentiated by different icons. The two icons before the message
list means whether this message is SMS, and it is stored in SIM1,
SIM2 or the phone.
Choose one SMS and press left soft key, you could send,
delete, lock, mark, sort, and so on.
29
4.5.5 Drafts
Store the SMS you’ve edited. The SMS could be
differentiated by different icons. The two icons before the message
list means whether this message is SMS, and it is stored in SIM1,
SIM2 or the phone.
Choose one SMS press left soft key, you could delete, edit,
lock, mark, sort, and so on.
4.5.6 Sentbox
Store the SMS you’ve sent successfully. The SMS could be
differentiated by different icons. The two icons before the message
list means whether this message is SMS, and it is stored in SIM1,
SIM2 or the phone.
Choose one SMS and press left soft key, you could delete,
forward, lock, mark, sort, and so on.
4.5.7 Templates
You could edit or delete the templates.
30
4.5.8 Settings
SMS Settings
There are seven options: SIM 1 service center, SIM2 service center,
service center validity period, status report, save sent message,
prior storage medium.
--SIM1 msg center: Display the SMS service center number
in SIM1.
--SIM2 msg center: Display the SMS service center number
in SIM2.
--Massage validity period: You could set the validity period of
the message for 1 hour, 6 hours, 24 hours, 72 hours, 1 week and
the maximum value.
Prompt: This time is related with the services of the network
operator.
--Status report: May choose to start up or shut down the
delivery report. After switching this function as on, when the
receiver gets the message or doesn’t get for some reason, the SMS
service center will give you a delivery report, so you will know
whether your message sent successfully or not conveniently.
--Save sent messages: There are three options: “prompt”,
“Save”, “Not save”.
31
Prompt: Before sending the message,
you will be suggested to choose “Send
and Save” or “Send only”.
Save: Save automatically your sent
message.
Not save: Not to save automatically
your sent message.
--Preferred storage: You could choose the preferential storage
position at SIM card or phone.
4.5.9 Message capacity
You could view the capacity of SMS.
4.6 Camera
You can take photo at any time .The photo can be used as
wallpaper of your device or you can send it to your friends
through Bluetooth.
On the photo preview interface, press Middle key to get a
picture. Press the left soft key, and you can carry out such
operations as Store photos, DV mode and Settings. If you press
settings you get the following options:
32
―Quality: There are three options in photo image quality:
Advanced, Common and Low. The default mode will be
“Common”.
―Flickers setting: You can set as 50Hz or 60Hz.
―Shutter sound: You can set up the sound of shutter as:
Active or Off.
―Auto save: You can select “Active” or “Off”.
―Storage: You can save it to the memory card.
Prompt: Observe photographing related local laws and
regulations. Do not use the function in illegal way.
4.7 Audio
This phone could play the MP3 stored in the phone memory
and support the background play.
Press "MP3" key to enter and use the Navigation keys to operate
the MP3 player.
Press up key and down key to adjust volume. Press left soft key to
access Options:
On the audio player interface, move cursor to the shortcut
keys on the screen, you could rapidly operate the MP3 functions.
Under the MP3 list interface, press left soft key, then you can
do operations as follows:
--Music list: Display all the MP3 or the play list you’ve
33
saved.
--Add: Add the selected MP3 to the list.
--Set as ringtone: Set the selected MP3 as the call ring or
alarm ring of the incoming call.
--Shuffle: Activated/off.
--Repeat: off/all/one.
--Settings: Set the music setting display, Equalizer, BT
stereo output, BT stereo headset.
--Open review: You can choose to open or close A-B
answer read function
--Exit: Return to previous menu.
4.8 Multimedia
4.8.1 Video
Use this function to play video files. By pressing the direction
key can you control the playing process of video player: play/pause
(OK key),switch to last video/next video(press left or right
direction key), fast forward (press and hold right direction key)
and rewind (press and hold left direction key). In video player
interface, you can press the Up/Down key to tune volume, number
key 0 to switch to full screen play.
34
4.8.2 Recorder
Use this function you can record or listen to your own record.
The phone support AMR\WAV. The recording file you
stopped would be stored in file list automatically.
4.9 Games
The game of Sokoban will allow you to play very happy.
4.10 FM Radio
You can listen to Fm radio freely. Enter the radio interface,
adjust volume by pressing the up and down direction keys, and
change previous or next channel by pressing the left and right
direction keys.
On the interface of the Radio playing, press left soft key you
could enter the options menu and do operations as follows:
--Auto search and save: Search frequency available
automatically and save it to broadcasting station list.
-- Channel list: You can view all the broadcasting stations
you saved.
--Save: Save the frequency you searched to the list.
--Manual search: Search the broadcasting station by input
35
frequency manually.
--Open/Close speaker: You can start up loudspeaker to
make the sound louder.
--Background play: When the function is on, you can do
other operations while listening to the radio.
--Record: You can record your favorite music or program.
To record, make sure that the radio is powered ON.
-- Record File list: Select File list to check your previously
stored files.
--Help
Prompt: Please connect with the earphone before you listen to
the radio, for the device is equal to radio antenna.
4.11 DV
The device is equipped with a video capture so that you can
chat with your friends through it. A driver is needed to be
installed when the video capture function is used. The details can
be found in driver installation guide.
――Size: You can set the photo image size.
――Brightness: Six levels of brightness are available.
――Contrast: Six levels of contrast are available.
――Effect: The special effect can be classified into:
36
normal, black and white, red, green, blue,
yellow, canvas and negative.
In camera preview interface press left soft key you can
enter options menu as follows:
――Settings:
―Flickers setting : You can set as 50Hz or 60Hz.
4.12 Bluetooth
Activated/Close Bluetooth
Bluetooth visibility
You can choose “Activated” or “close” Bluetooth visibility.
If the Bluetooth visibility is close, others cannot search your
phone.
Paired device
You can search different Bluetooth equipments and find
compatible ones (as long as the PIN codes of two Bluetooth
equipments are identical with each other, the match will be
successful. The PIN code of Bluetooth earphone is different due to
different type, and you can find the code in operating manual of the
Bluetooth earphone.).
My Bluetooth name
You can change the name of the phone.
Bluetooth file storage
37
Help
You can view the operating instruction of Bluetooth.
4.13 STK
This function is provided by network supplier, such
as mobile monternet, M-zone, global and some other
brand increment service. This function isn’t available if it
is beyond SIM card and network supplier’s support. So
please contact network supplier to get more.
4.14 Organizer
4.14.1 Calendar
You can use this feature to view the year and date easily. Use
up/down/left/right direction key to navigator other date.
-―Add new schedule: Add a new schedule.
――View Schedules : View the schedule.
――All Schedules: Display all schedules.
――Clear today is tasks: Delete today schedule.
――Clear All: Delete all schedules.
――Go to Date: Enter the Solar calendar and it can go to the
38
date you want to check.
4.14.2 Calculator
The function will make your device a calculator with which
you can carry out simple math calculation.
4.14.3 Clock
You can edit alarm, time, ring and repeated ring mode.
In “ alarm edit” mode, you can scroll up or down direction
key, when the cursor goes to the desired option, press “OK”, then
you can select desired settings.
The alarm clock feature sounds an alert or makes a vibration
alert at a time you specify.
4.15 My Files
You can check the specific content and service condition of
the phone memory via this function. Meanwhile, you can format
memory, too.
Prompt: There is no own memory capacity in the phone.
39
4.16 Internet
The device is compatible with WAP service. You can visit
various WAP services, for instance, news, weather forecast and
airlines etc. The services are specially designed for the device and
are maintained by WAP service supplier.
WAP service requires network backup. You can consult the
network operator or service supplier about the availability, rates
and tax of WAP services.
Select SIM/SIM2 to enter:
4.17 Profiles
User profiles define how your phone reacts when you receive
a call or a message, how your keypad sounds when you press the
keypad, and more. Each of the available profiles can be left at their
default setting or customized to suit your needs. Select and
customize the most suitable profiles for your situation. The
available modes are Normal, Silent, Meeting, Indoor and Outdoor.
4.18 Settings
You can customize the settings, such as time and date,
language, call settings etc.
40
4.18.1 Phone settings
Time & date: You can set up the date and time on the phone
as well as their display mode.
Language settings: You can select phone language.
Auto Power on/off: You can set the time and repeat mode of
power-on and power-off.
Power : You can view the electric quantity of your battery.
Restore factory settings: You can restore part of the phone
settings as factory settings. The default code of restoring
factory settings is: 1234.
4.18.2 Display
Animation effect:
――Power on display
――Power off display
Wallpaper settings: You can set as default wallpaper image as
well as more other wallpaper images.
Contrast: On the screen backlight interface you can set
different lightness of your phone by pressing the left/right
direction key.
41
Keypad backlight time:
――20secs
――10secs
――5secs
――night mode
――Off
4.18.3 Security settings
――PIN
You can start up, shut down or modify PIN code.
Correct PIN code shall be input when you unlock or
shut down PIN code. If PIN code verification is
started up, each time when you switch on your
phone, you will have to input PIN code. If you input
mistaken PIN codes three times in a row, SIM card
will be locked. You will have to get PUK1 code to
unlock it. Please contact network operator to get
PUK1 code when necessary.
The default PIN code is 1234.
――Modify PIN2
You can modify PIN2 code. For details, please
contact network operator.
42
――Phone locked
You can start up or shut down “phone locked” or
revise it. When “phone locked” is started up, you
will have to input “password” each time when you
use the phone. The default phone password is 1234.
――Modify the cellphone password
――Privacy
You can review privacy protection password. Besides, you
can also set passwords for some menus, in this way,
you will have to input password each time when
you desire to open the menus. The default
password of privacy protection mode is 1234.
――Lock screen by end-key
-Activated
-Off
――Fixed dial number
――Blacklist
-Blacklist list
-Blacklist settings
4.18.4 Call Settings
Dual-SIM
43
――Standby mode: Only SIM1 enable/ Only SIM2 enable/
Dual SIM dual standby
――Reply by original SIM: Call/SMS Reply by original
SIM
――Set SIM name: You can set any name you like as the
name of SIM card slot.
Call divert: When “call divert” function is started up, you
can transfer the incoming call to voice inbox or other phone
number according to the scheduled “ call divert” conditions.
――Call forwarding unconditional: All incoming calls
will be transferred to voice inbox or
other phone number according to
the setup.
――Call forwarding on busy: When your number is
busy, the incoming calls will be
transferred to voice inbox or other
phone number according to the
setup.
――Call forwarding on no reply: When there are
missed calls in your phone, they
will be transferred to voice inbox or
other phone number according to
the setup.
44
――Divert If Unreachable: When your phone is power
off or out of the service area, the
incoming calls will be transferred to
voice inbox or other phone number
according to the setup.
――Cancel All Diverts: You can delete all settings of
call divert.
Call waiting: You can start up or shut down the function.
When it is started up, even when you are making a call, you
can also receive another income call.
Call barring: All outgoing calls, incoming calls, roaming
incoming calls, international outgoing calls, roaming
international outgoing calls are available.
――All outgoing calls: Activate/Deactivate/Check
Status
――All incoming calls: Activate/Deactivate/Check
Status
――Incoming calls when roaming:
Activate/Deactivate/Check Status
―― ISD calling: Activate/Deactivate/Check Status
――Dial when INTL roaming:
Activate/Deactivate/Check Status
――Cancel all barring : Cancel all restrictions on the
45
call.
――Change Password: You can consult your network
operator about the call
barring password.
Prompt: The above-mentioned function will have to need
network support. To use the function, please contact
your network service provider.
Hide ID: This function must be supported by network.
Select SIM1/SIM2
-Hide ID
-Display own ID
-Display ID by Network
Others:
――IP shortcut key: In this function, you can set IP call to
enter the number.
――Call time minute reminder
――Auto redial: Activate/ Deactivate
——Vibration when connected: Activated/Off
――Auto record voice call: Activated/Off
4.18.5 Network setting
Network account
46
You can select network count which you want to use.
GPRS Service
Activated/Off
Data connection settings
You can select connect when needed, always connect.
Network selection
This function can let you select the network manually or
automatically when the phone is in the roaming state. You can use
this function only after you have made an effective roaming.
Select SIM1/SIM2 and then access:
-Auto Select: Press the left key and Ok, the mobile phone will
search various networks. This operation will let your phone
register the most suitable network.
-Manual Select: Press the left soft key and Ok, the mobile phone
will search various networks. You can select the suitable network
from the listed networks.
5 Text Input
The device provides several text input modes so that you can
47
write text or input data in your “contacts”, edit “contacts” record,
search English names and write SMS and to-do list.
In “text input” mode, if you want to change the input way,
you can press “#” key. The selected input way will appear on the
top left of the screen.
Letter (Capital, Normal)
Enter edit page, press “#”and switch the input mode to
“letter”, then press the keys on keypad, selected letters will
appear on the screen.
Press the number key can get the first letter marked on the key,
press twice quickly can get the second letter marked on the key.
Similarly, if the letter you want to input have the same key with the
former letter, please wait until the cursor appears again, then input
the new letter.
For example, if you want to input “ok”, you need to press the
“6” key three times continuously and get “o”, then press the
key”5” twice, “ k” will appear on the screen. Press right soft key,
you can delete the text you input.
Number
Enter “edit” mode, press “#” key you can change the input
way to “ number”. Then press the keys, number will appear on the
screen. The key 0-9 separately represents the figure from 0 to 9.
48
You can press corresponding key to get desired number. Press right
soft key can delete the number you input.
Punctuation
Enter the “edit” mode, press key “*”, the punctuations will
appear. You can scroll the direction key so that the cursor can
select desired punctuation. Press right soft key can select the
desired punctuation.
6 Care and Maintenance
Maintenance of battery
·Your device is powered by a rechargeable battery. It is necessary
to have the battery charged when it is going to wear out. The full
performance of a new battery is achieved only when it is fully
wore out.
·Unplug the charger from the electrical plug and the device when
not in use. Do not leave fully a charged battery connected to a
charger over a week, since overcharging may shorten its lifetime.
·Temperature tends to affect the limit of battery to be charged.
Therefore, it is necessary for the battery to be cooled or warmed
before it is charged. If the temperature of batter exceeds 40ºC ,the
49
battery cannot be charged.
·Use the battery only for its intended purpose and avoid
short-circuiting. Accidental short-circuiting can occur when a
metallic object causes direct connection of the positive (+) and
negative (-) terminals of the battery.
·Do not use damaged battery.
·Leave the battery in hot or cold places will reduce the capacity
and lifetime of the battery. A device with a hot or cold battery may
not work temporarily, even when the battery is fully charged.
·Do not dispose of batteries in a fire as they may explode. Dispose
of batteries according to local regulations.
Care of maintenance of your device
The suggestions below will help you protect your warranty
coverage.
·Keep the device and accessories out of the reach of small children.
·Keep the device dry. All types of liquids or moisture will corrode
electronic circuits.
· Do not store the device in hot areas. High temperatures can
shorten the life of electronic devices and warp or melt certain
plastics.
·Do not attempt to open the device other than as instructed in this
guide. Non-professional handling may damage the device.
·Do not use harsh chemicals or strong detergents to clean the

50
device.
·Use only the supplied or an approved replacement attachments,
for the unauthorized ones could invalidate the warranty of
maintenance.
FCC Caution.
§ 15.19 Labelling requirements.
This device complies with part 15 of the FCC Rules. Operation is subject to the following two
conditions: (1) This device may not cause harmful interference, and (2) this device must
accept any interference received, including interference that may cause undesired operation.
§ 15.21 Information to user.
Any Changes or modifications not expressly approved by the party responsible for
compliance could void the user's authority to operate the equipment.
§ 15.105 Information to the user.
Note: This equipment has been tested and found to comply with the limits for a Class B
digital device, pursuant to part 15 of the FCC Rules. These limits are designed to provide
reasonable protection against harmful interference in a residential installation. This equipment
generates uses and can radiate radio frequency energy and, if not installed and used in
accordance with the instructions, may cause harmful interference to radio communications.
However, there is no guarantee that interference will not occur in a particular installation. If

51
this equipment does cause harmful interference to radio or television reception, which can be
determined by turning the equipment off and on, the user is encouraged to try to correct the
interference by one or more of the following measures:
-Reorient or relocate the receiving antenna.
-Increase the separation between the equipment and receiver.
-Connect the equipment into an outlet on a circuit different from that to which the receiver is
connected.
-Consult the dealer or an experienced radio/TV technician for help.
Specific Absorption Rate (SAR) information:
This GSM Mobile Phone meets the government's requirements for exposure to radio waves.
The guidelines are based on standards that were developed by independent scientific
organizations through periodic and thorough evaluation of scientific studies. The standards
include a substantial safety margin designed to assure the safety of all persons regardless of
age or health.
FCC RF Exposure Information and Statement The SAR limit of USA (FCC) is 1.6
W/kg averaged over one gram of tissue. Device types: i324n (FCC ID: PQ4IPROI324N
) has also been tested against this SAR limit. The highest SAR value reported under this
standard during product certification for use at the ear is 1.11W/kg and when properly worn
on the body is 0.70W/kg. This device was tested for typical body-worn operations with the
back of the handset kept 1.5cm from the body. To maintain compliance with FCC RF
exposure requirements, use accessories that maintain a 1.5cm separation distance between the
52
user's body and the back of the handset. The use of belt clips, holsters and similar accessories
should not contain metallic components in its assembly. The use of accessories that do not
satisfy these requirements may not comply with FCC RF exposure requirements, and should
be avoided.
Body-worn Operation
This device was tested for typical body-worn operations. To comply with RF exposure
requirements, a minimum separation distance of 1.5 cm must be maintained between the
user’s body and the handset, including the antenna. Third-party belt-clips, holsters, and
similar accessories used by this device should not contain any metallic components.
Body-worn accessories that do not meet these requirements may not comply with RF
exposure requirements and should be avoided. Use only the supplied or an approved antenna.