IRIVER IFP799 MP3 PLAYER User Manual 1
IRIVER LIMITED MP3 PLAYER Users Manual 1
UserManual.wiki
>
IRIVER
>
IFP799 User Manual
>
Users Manual 1
Contents
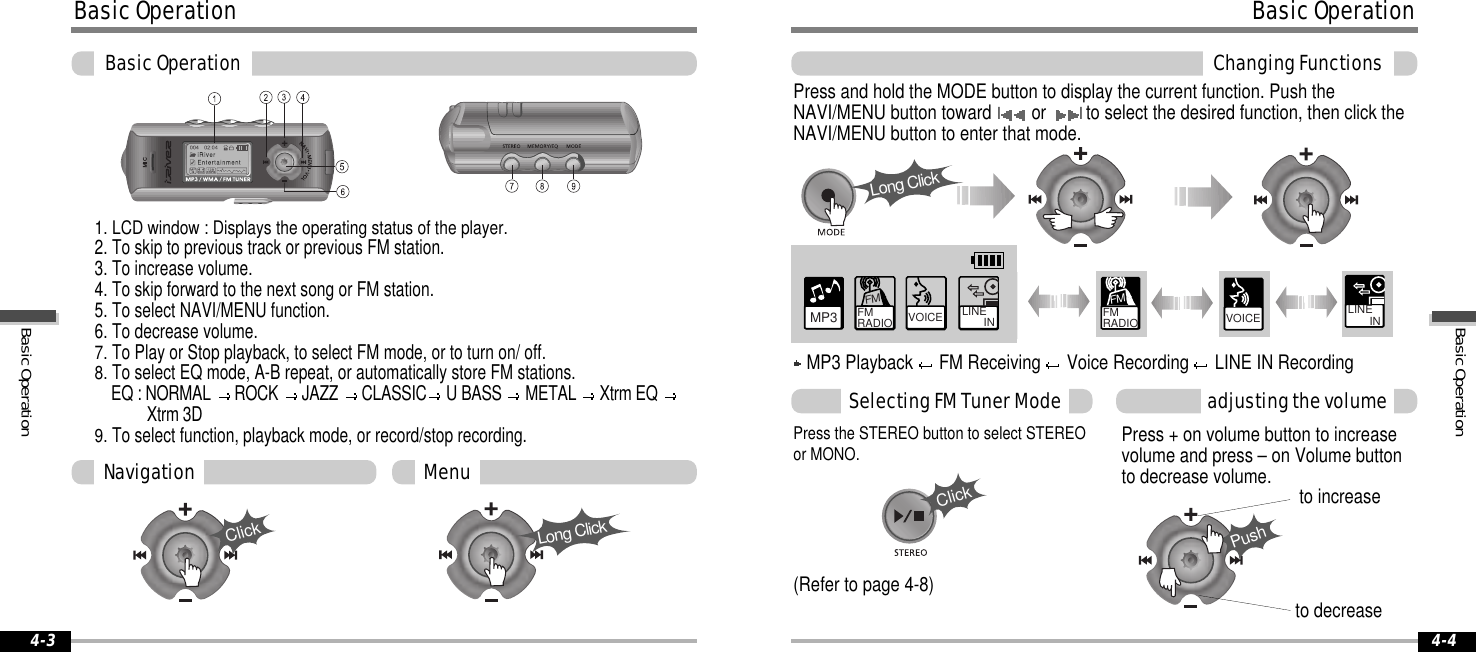
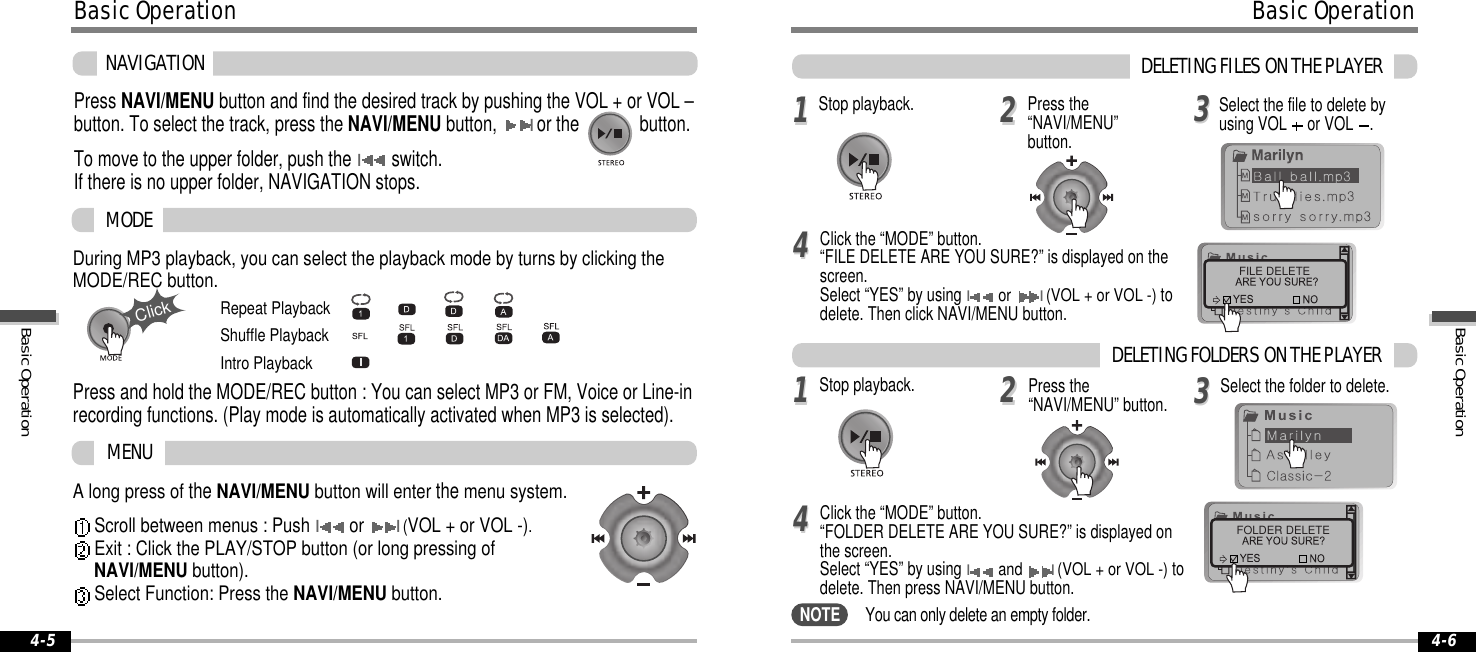
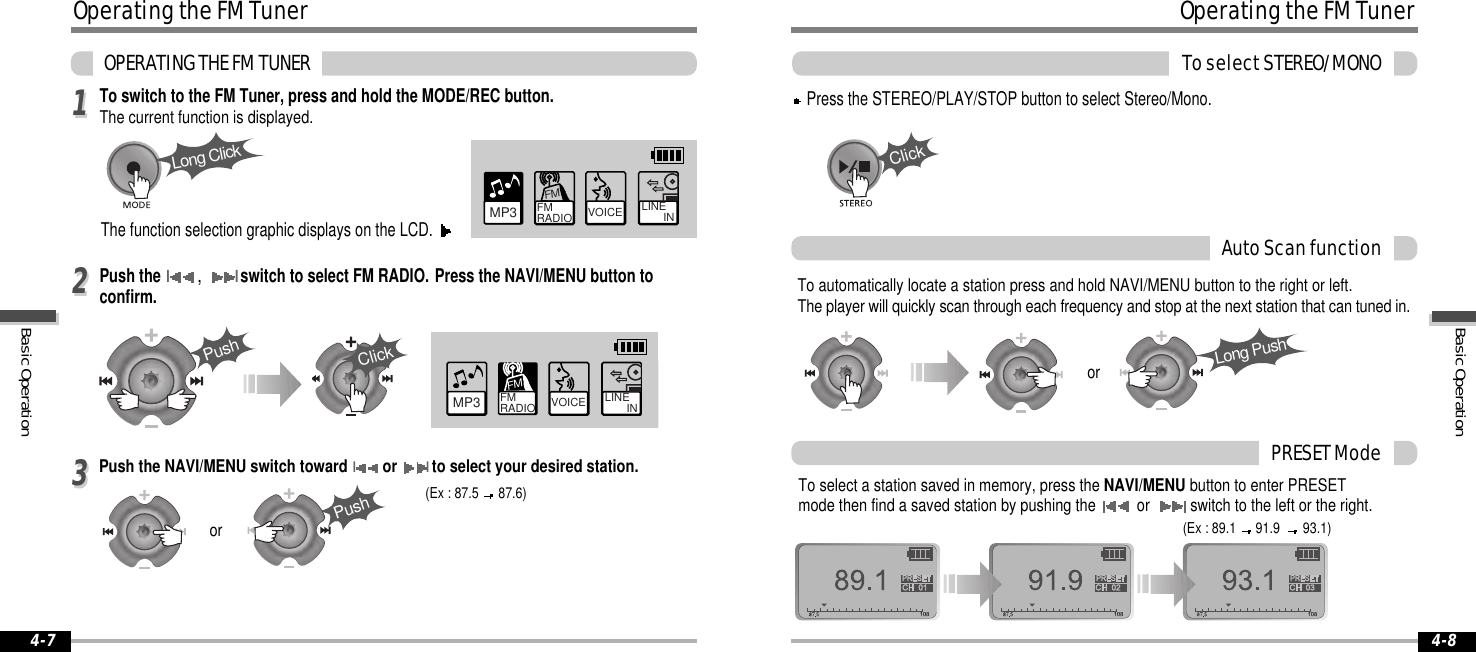
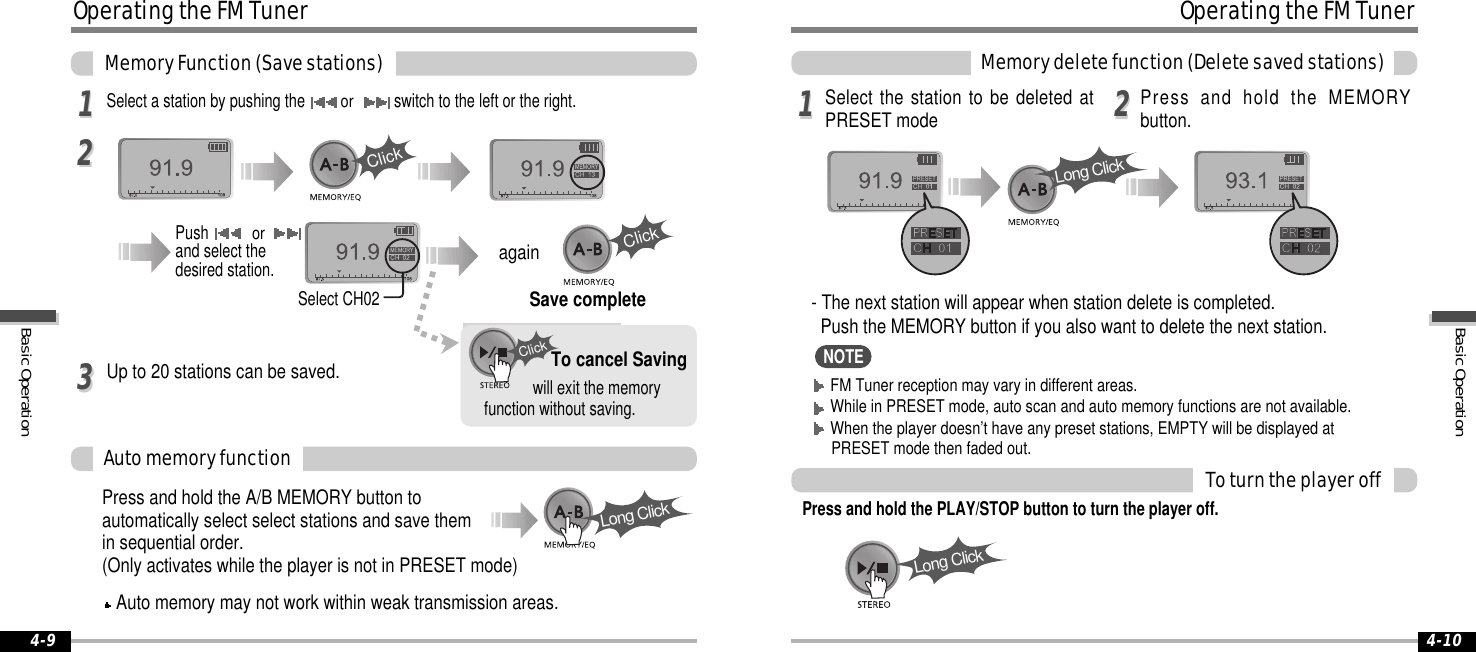
1.
Users Manual 1
2.
Users Manual 2
Users Manual 1
Navigation menu
Upload a User Manual
Namespaces
Wiki Guide
HTML
PDF
Info
Views
User Manual
Discussion / Help
Navigation

![556644ClickClickClickPushSTEREO 44.1KHz 128KBPSAUDIO001VOICE LINE INMP3 FM RADIOFM4-164-1511STEREO 44.1KHz 128KBPSClick1122ClickClick11ClickPress the MODE/REC button andLINE-IN recording is started.Press theIorI(VOL + or VOL -)switch to select the LINE-IN mode. Press the NAVI/MENU button (orPLAY/STOP) to go to LINE-INrecording mode.(Record StandbyMode)Recording-externalaudiosourceRecordingfromanexternalaudiosourceorPress play on your externalequipment (if necessary) to beginplayback to be recorded.77Press the MODE/REC button.Toplayarecordedfile[2]After pressing the NAVI/MENU button,select a recorded file using theVOL +orVOL -switch.Press the PLAY/STOP button.Press the PLAY/STOP button.Recording-externalaudiosourceTostoprecording Toplayarecordedfile[1]- The recorded file is saved asAUDIO000.REC, AUDIO001.REC... insequential order. Files are saved in theRECORD folder.- Select Ext. Mic on the CONTROL line-in/ext. mic menu to use the externalmicrophone. (Refer to page 4-23)- Files recorded using an externalmicrophone are saved as EXMIC000.REC.NOTEBasicOperationBasicOperation](https://usermanual.wiki/IRIVER/IFP799.Users-Manual-1/User-Guide-407613-Page-20.png)