IZZO GOLF C10524 CAL TRAVERSE ELECTRONIC CART User Manual
IZZO GOLF, INC. CAL TRAVERSE ELECTRONIC CART
User Manual
User Manual
CAL TRAVERSE ELECTRONIC CART
#C10524
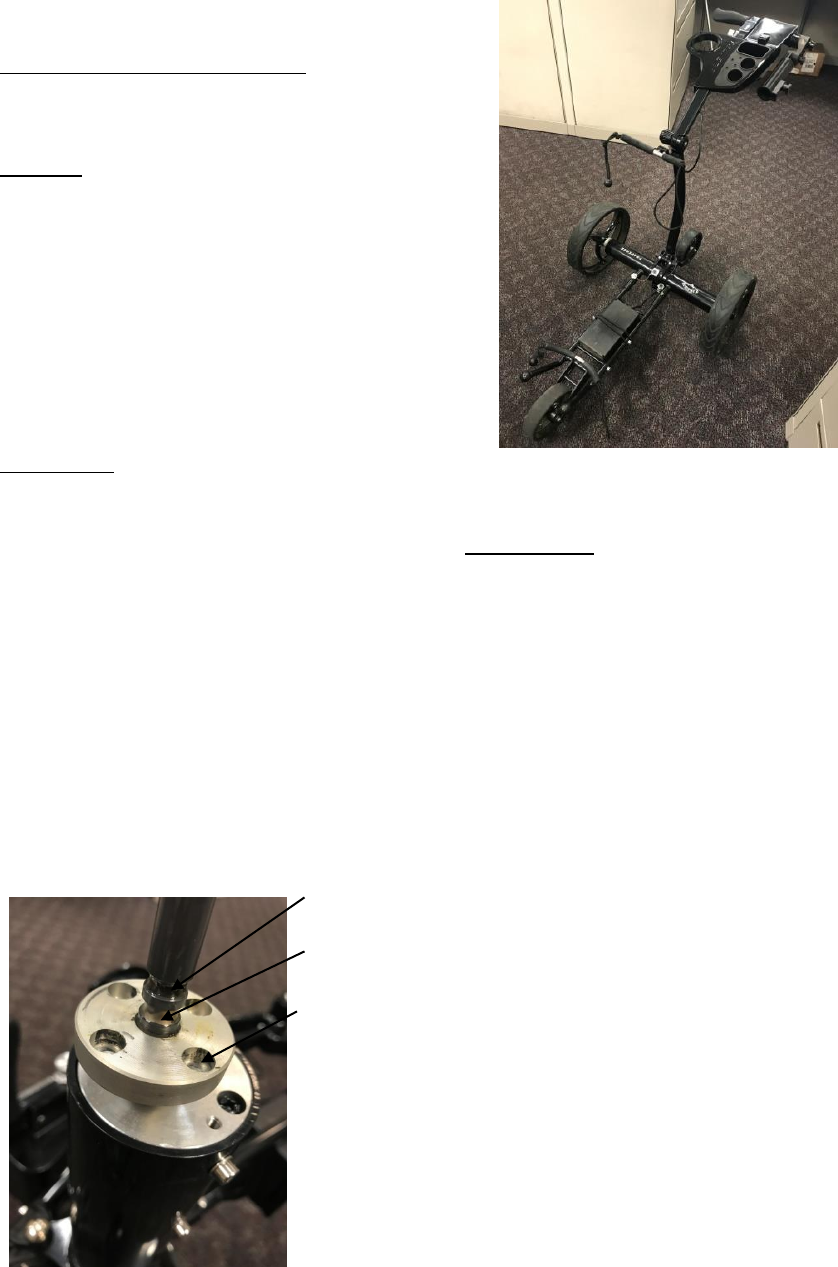
Callaway Traverse Electric Cart
Contents:
1. Traverse cart
2. Battery
3. Charger
4. Remote
Initial set up:
The Traverse will require some assembly once it is removed from the package. The wheels will need to
be attached for use. In order to attach the wheels, push and hold the silver push pins on each of the
wheels. Next, slide the wheel over the axle. On each of the wheels there are 4 hex bolts. These bolts fit
into the holes on the axle hub of each side. The wheel will install correctly when the 4 hex bolts fit into
the 4 holes on the axle hub. On each axle there are 2 grooves for the wheel pins to lock into. The first
groove keeps the wheels on the cart but does not connect the wheels to the motors. This allows the
cart to be used as a traditional push cart in the event that your battery dies or would like to push the
cart manually. The second groove connects the wheels to the motor hubs. The wheel will be correctly
connected to the motor when the 4 bolts fit into the 4 corresponding holes on the axle hub. Also the
wheel will sit flush against the axle hub rather than have a space.
Axle with 2 Grooves:
1st Axle Groove
2nd Axle Groove
4 holes on axle hub
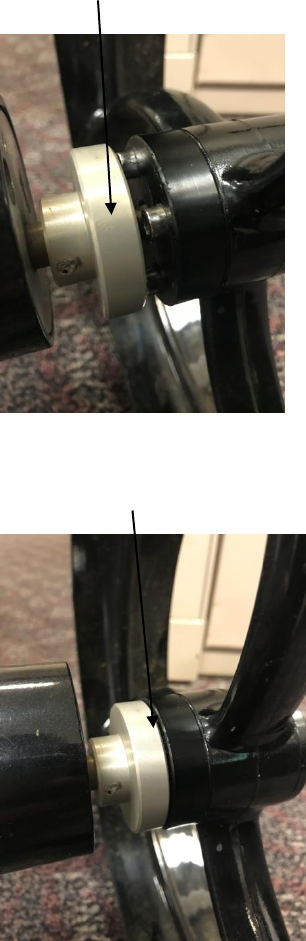
Wheel is installed on the first axle groove. Motor is not engaged and the cart can be pushed like a
traditional push cart. The cart will not move using the motors if the wheels are installed on the first
groove.
Wheel is installed on the second groove. The cart will now move using the motors. Notice the wheel
sits flush against the axle hub:
The rear wheelie bar will also need to be attached for use. In order to attach, pull up on the knob
located on the wheel and slide the wheelie bar onto the square bar on the back of the cart. The Wheelie
bar will lock into the corresponding hole on the cart. The wheelie bar will “click” into place.
Once the wheels and wheelie bar have been installed, the cart is ready for use.
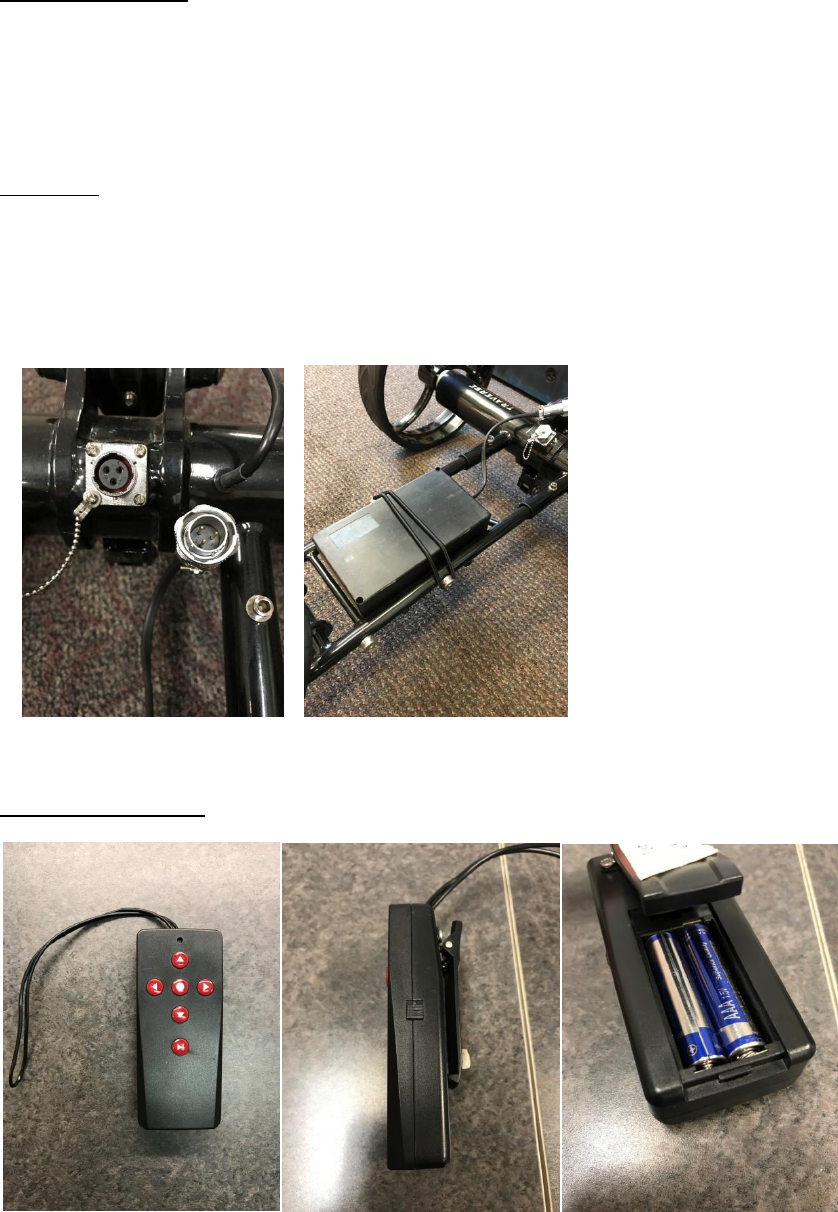
Charging the battery:
The Lithium ion battery will run the cart for 18-27 holes. To charge the battery, simply plug the charger
into the wall. Next, connect the battery to the charger. The LED indicator on the charger will turn red
when the battery is charging and will turn green when the battery is fully charged. Charging time can
range from 3 to 6 hours depending on previous use.
Operation:
Plug a fully charged battery to the cart. The plug and port have grooves to specifically align the battery
into the cart battery port. Once you align the grooves on the battery plug and port, connect the battery
to the cart port and twist the silver locking collar to ensure the battery remains connected to the cart
during use. When the battery is not connected, use the plug cover to protect the port from any debris.
Next, strap the battery down on the cart so it does not move during operation.
Remote control layout:

To turn the remote on, slide the switch on the side of the remote towards the antenna. The cart has
three speeds in each direction:
UP- Forward (3 speeds by pressing: once, twice, 3)
Down- Backwards (3 speeds by pressing: once, twice, 3)
Arrow L- Left Turn (single clicks or holding)
Arrow R- Right Turn (single clicks or holding)
‘Circle’ (middle button)- Stop
Play/pause: Pressing this button once slows the cart but will not stop the cart. Holding the play/pause
button will stop the cart.
To power the cart on: Connect a fully charged battery to the cart and hold the power button located
on the cart handle until the power indicator light turns green. To turn the cart off, hold the power
button until the green light turns off.
The “T” Symbol above the power button is the Timer
Button. Pressing this runs the cart for set time periods:
Pressed Once: T1: 8 seconds (≈15 yards)
Pressed Twice: T2: 13 seconds (≈23 yards)
Pressed 3 Times: T3: 18 seconds (≈37 yards)
Below the power button are 2 indicator lights: a battery symbol
and a star.
The battery shaped Indicator light will emit green
when the battery has enough power and is okay
for use
The star shaped indicator light will be red when
the battery is low and needs to be charged.
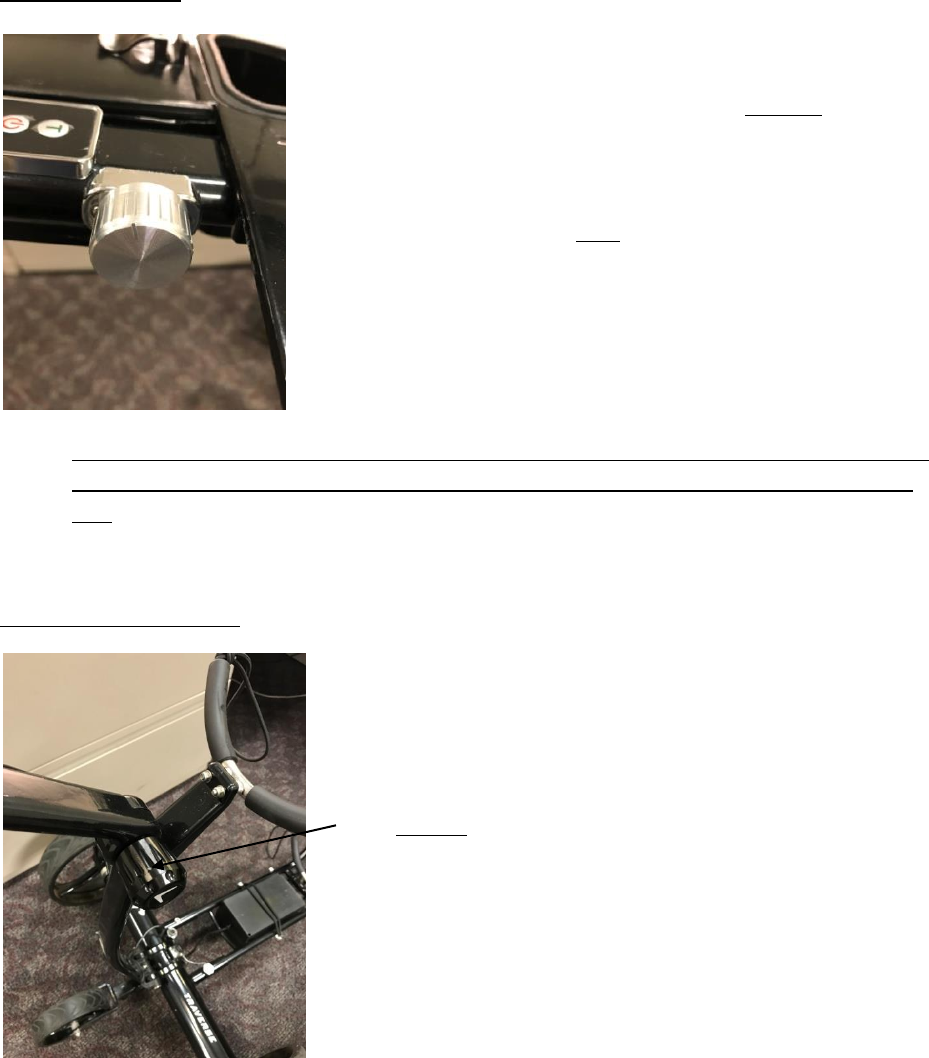
Speed Control Knob:
The silver knob located by the power button and timer button
is the Speed control adjustment.
This knob controls how fast the cart runs without the remote.
The remote can only be used to stop the cart: pressing the
middle button once.
This knob is used for walking behind the cart without using the
remote. The cart will only move forward when using the
speed control knob.
To increase speed, turn the knob clockwise; to decrease
speed, turn the knob counter-clockwise. To stop the cart, turn
the knob counter clockwise until the knob does not rotate any
further. Also, pressing the power button once will stop the
cart.
Do not touch the knob if you are not ready for the cart to move. The Cart will continue to move
until the knob is turned to the off position. Also, pressing the power button once will stop the
cart.
Cart Handle Adjustment:
To adjust the angle of the cart handle, loosen the black
knob with the Callaway Chevron located near the upper bag
holder.
Adjust the handle to the desired angle and tighten the black
knob.
Caution: When adjusting the handle, loosen the knob
enough so there is a space between the “teeth” on the cart
handle. If the knob is not loosened enough, the “teeth” can
wear and cause adjustment issues.
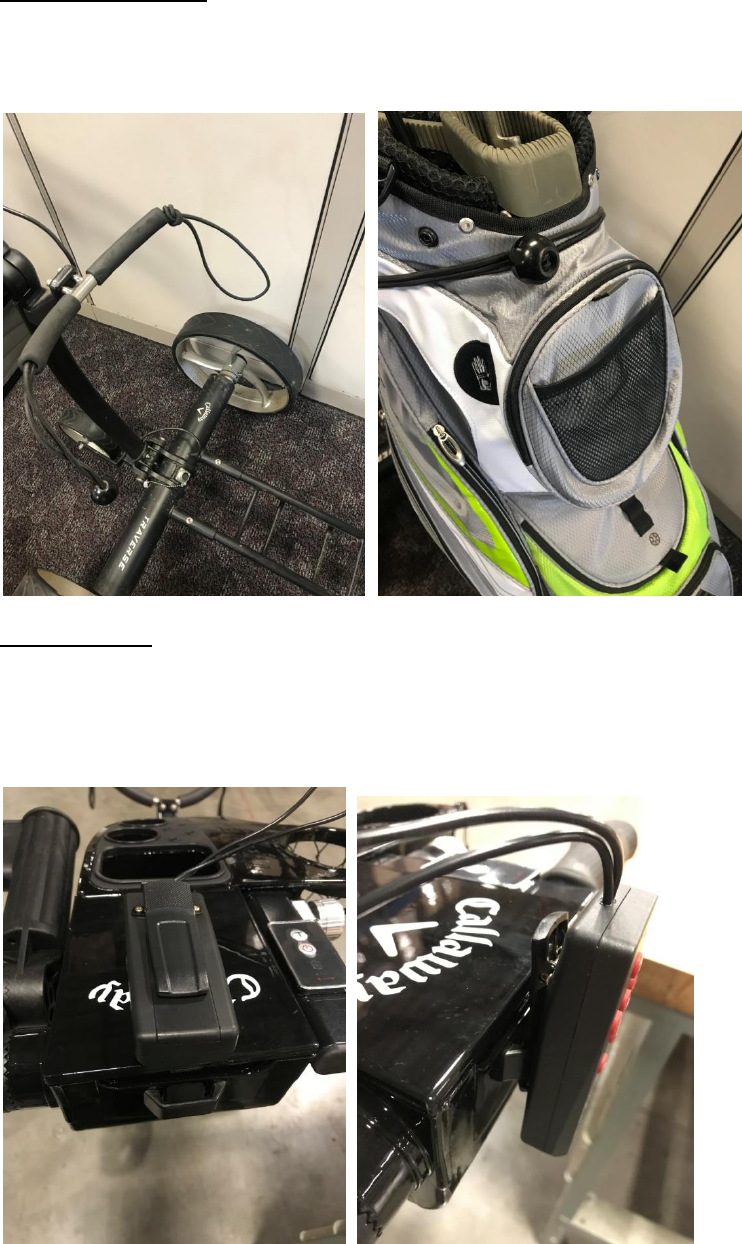
Securing Bag to Cart:
One end of the straps has a loop and the other end has a plastic ball attached. The loop goes
around the ball to secure your bag using tension. There is an upper bag strap and a lower one:
Remote Mount:
On the back of the cart handle, there is a plastic “loop”. If you would like to secure the remote
to the cart, the back of the remote clip can slide into the “loop” for convenient remote
placement:
FCC Warning:
This equipment has been tested and found to comply with the limits for a Class B digital device,
pursuant to part 15 of the FCC Rules. These limits are designed to provide reasonable protection
against harmful interference in a residential installation. This equipment generates, uses and can
radiate radio frequency energy and, if not installed and used in accordance with the instructions,
may cause harmful interference to radio communications. However, there is no guarantee that
interference will not occur in a particular installation. If this equipment does cause harmful
interference to radio or television reception, which can be determined by turning the equipment
off and on, the user is encouraged to try to correct the interference by one or more of the
following measures:
• Reorient or relocate the receiving antenna.
• Increase the separation between the equipment and receiver.
• Connect the equipment into an outlet on a circuit different from that to which the receiver is
connected.
• Consult the dealer or an experienced radio/TV technician for help.
Caution: Any changes or modifications to this device not explicitly approved by manufacturer
could void your authority to operate this equipment.
This device complies with part 15 of the FCC Rules. Operation is subject to the following two
conditions: (1) This device may not cause harmful interference, and (2) this device must accept
any interference received, including interference that may cause undesired operation.
The device has been evaluated to meet general RF exposure requirement. The device can be used in por
table exposure condition without restriction.