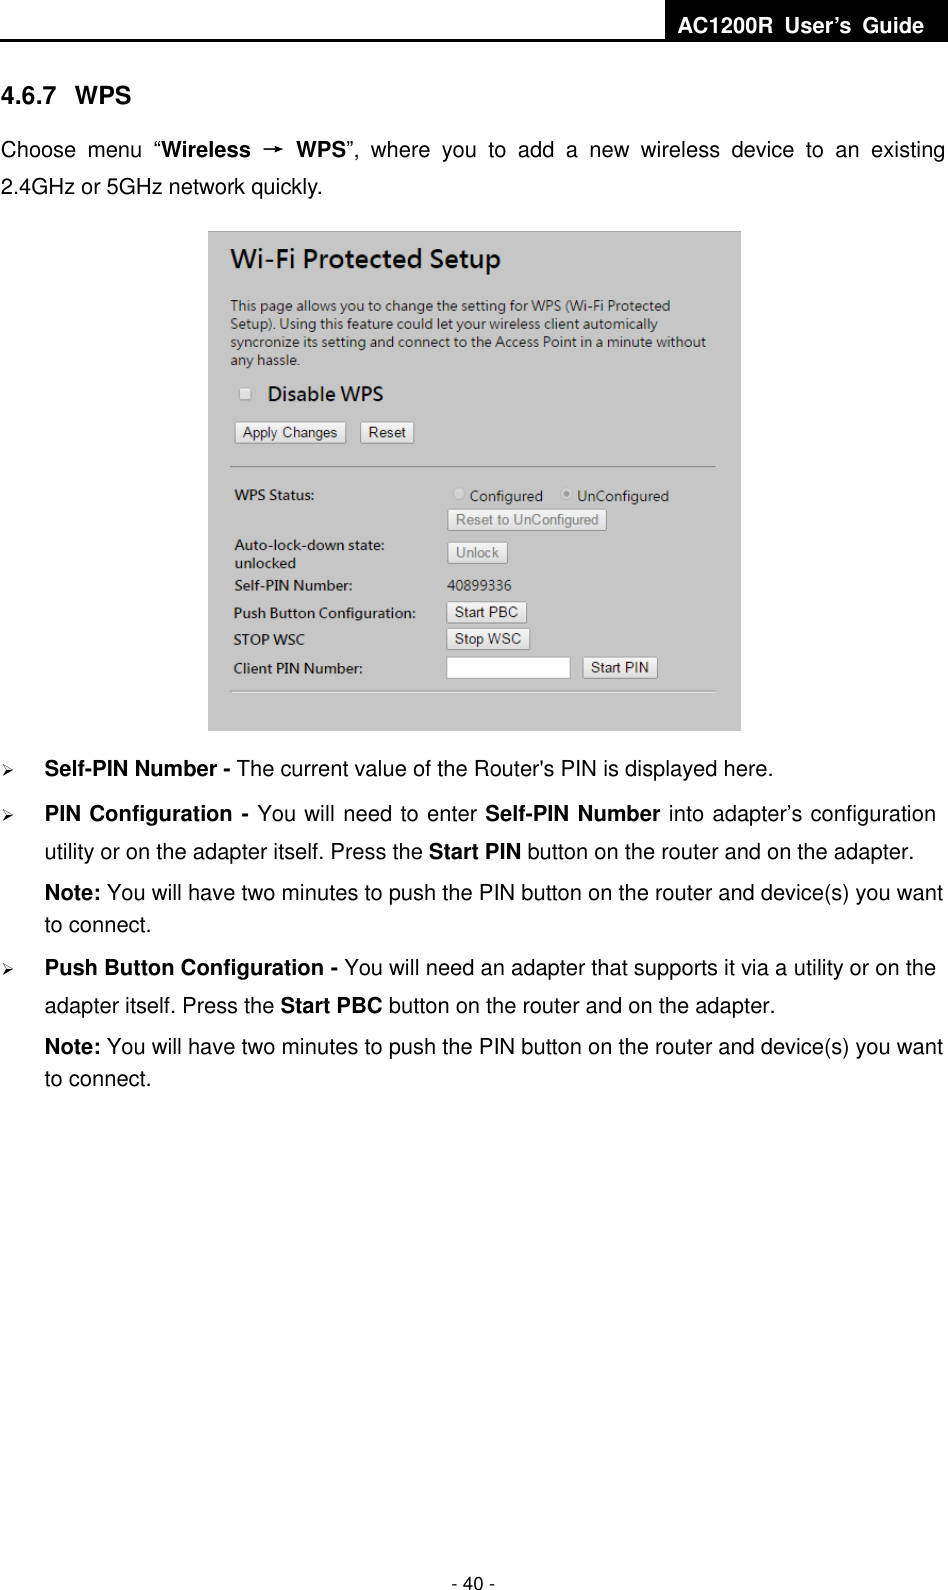
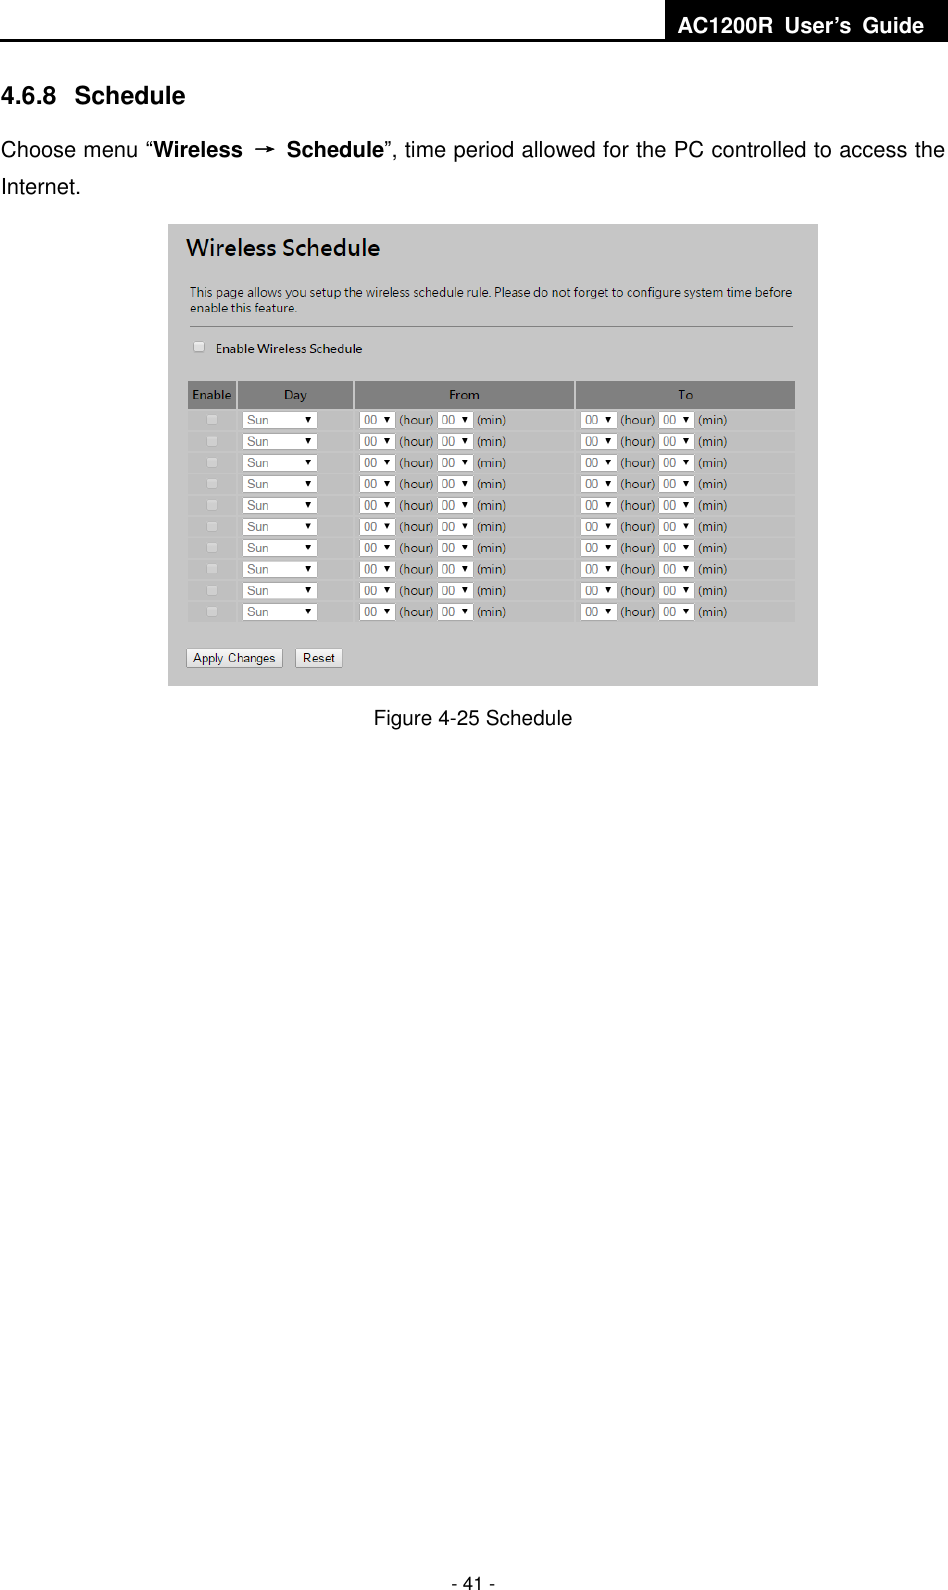
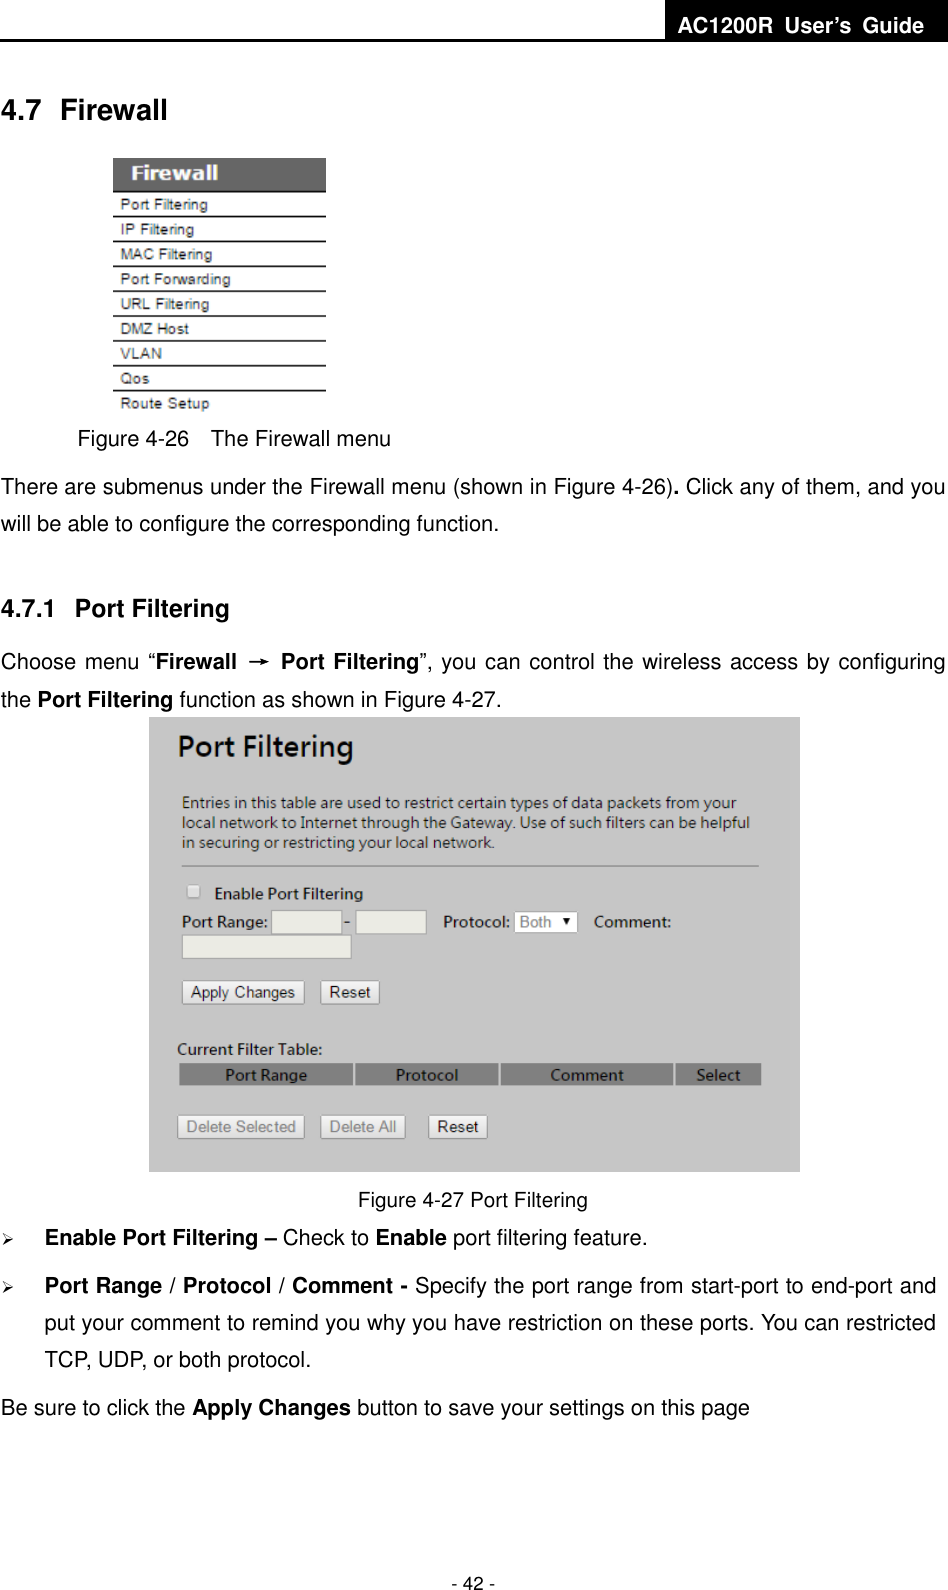
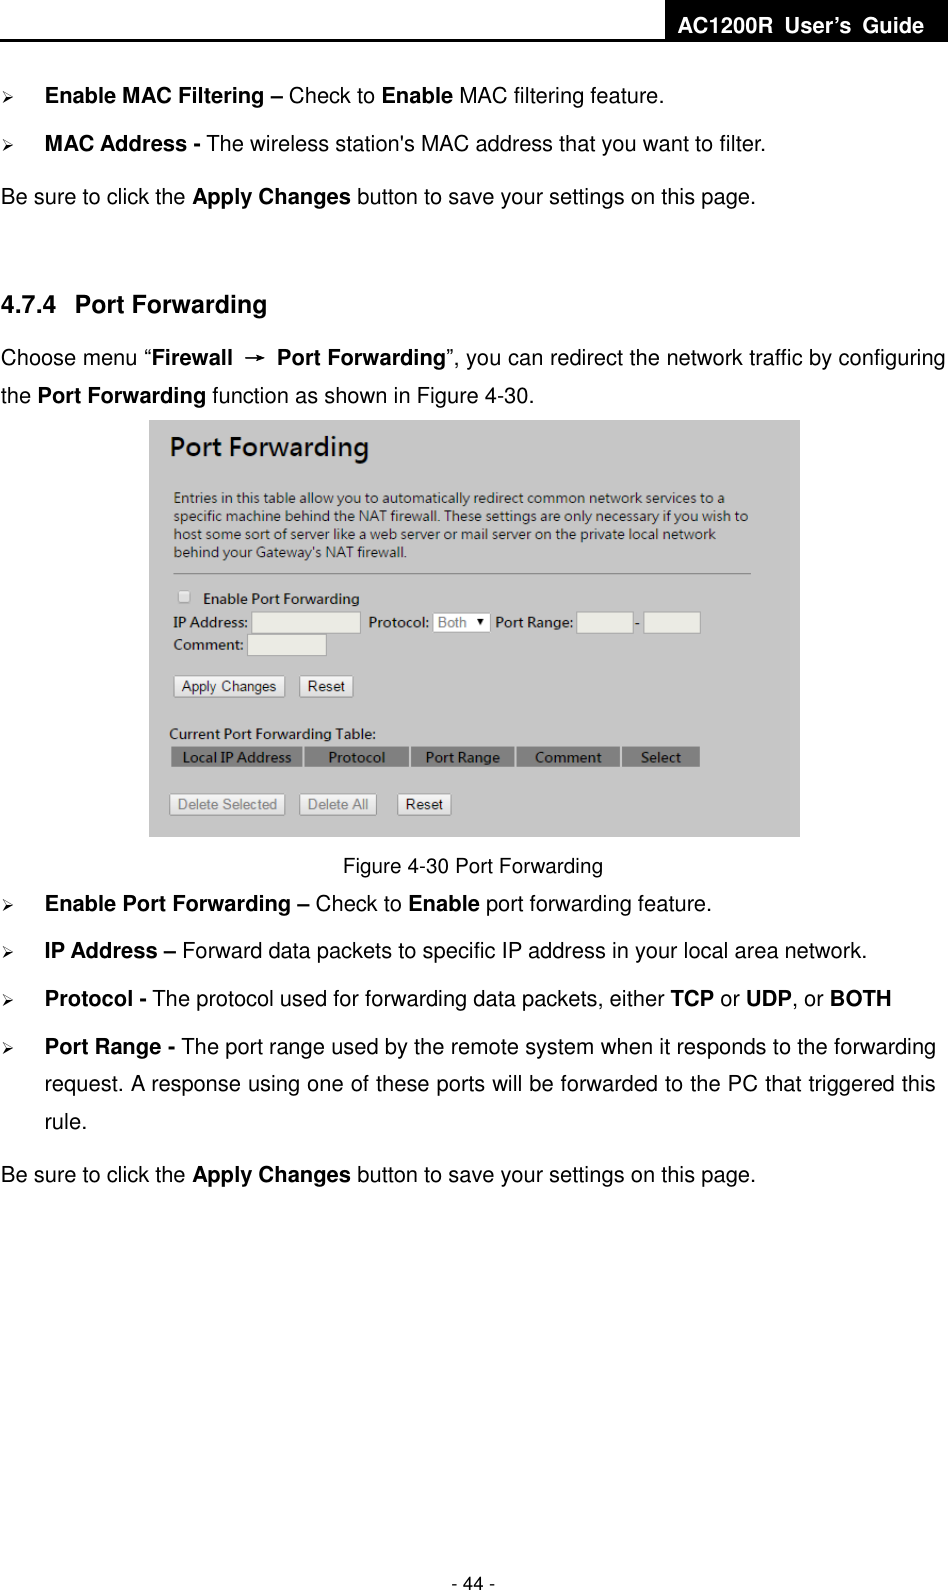
Iconnect 197D 802.11ac AC1200 Wide-Range WiFi Router User Manual
Iconnect 802.11ac AC1200 Wide-Range WiFi Router Users Manual
UserManual.wiki
>
Iconnect
>
197D User Manual
>
Users Manual
Contents
1.
Users Manual
2.
Users manual
Users Manual
Navigation menu
Upload a User Manual
Namespaces
Wiki Guide
HTML
PDF
Info
Views
User Manual
Discussion / Help
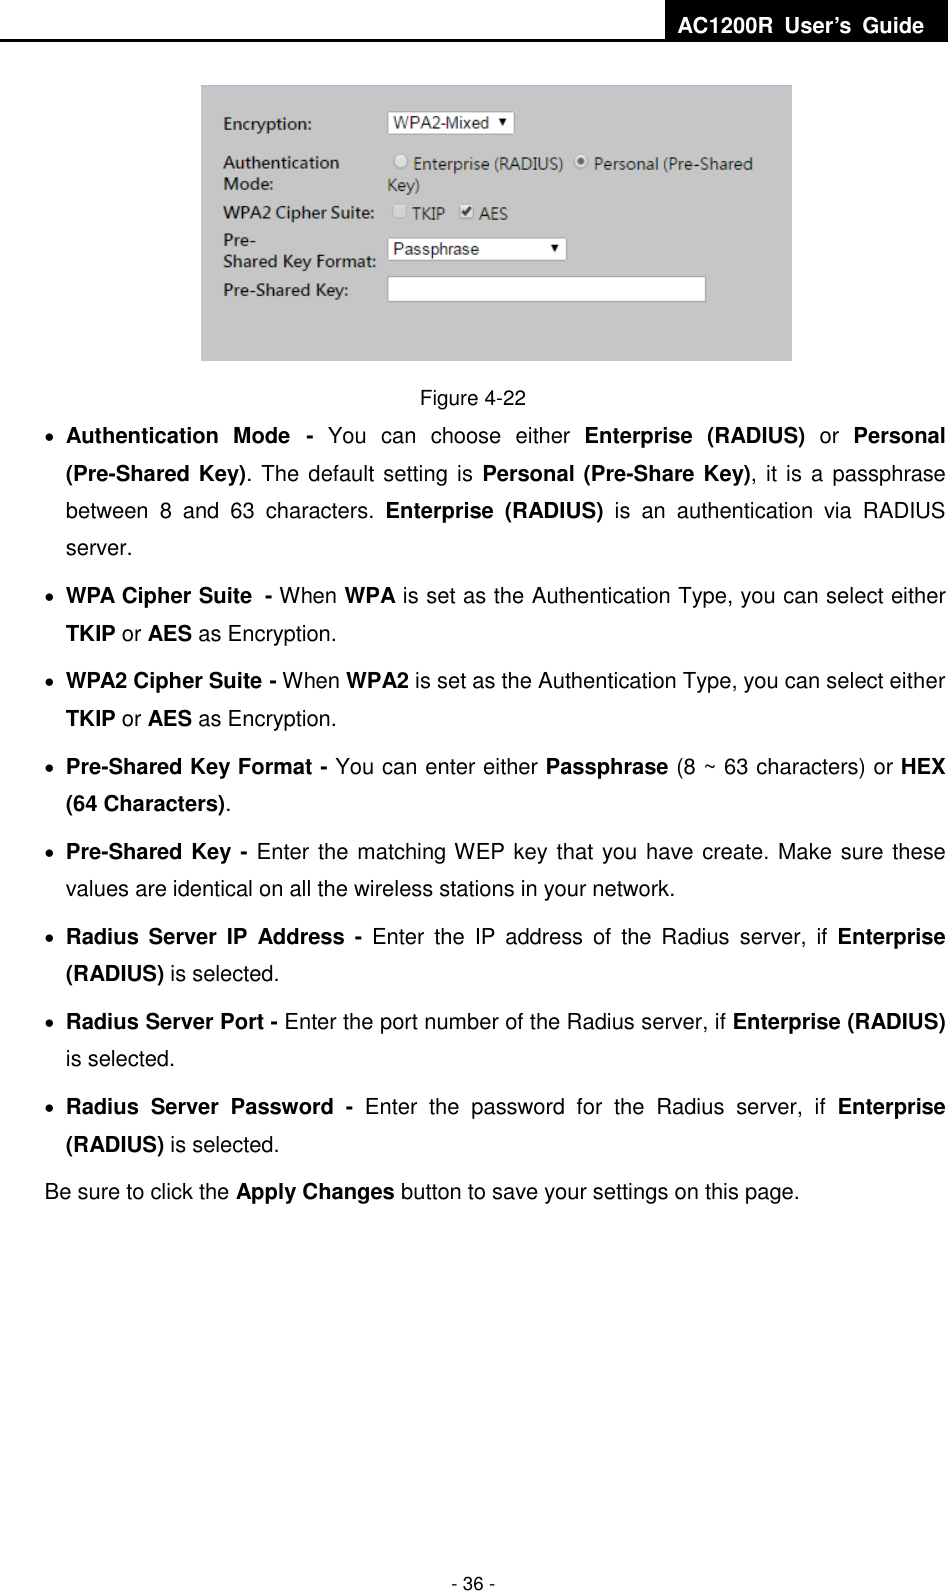
Navigation


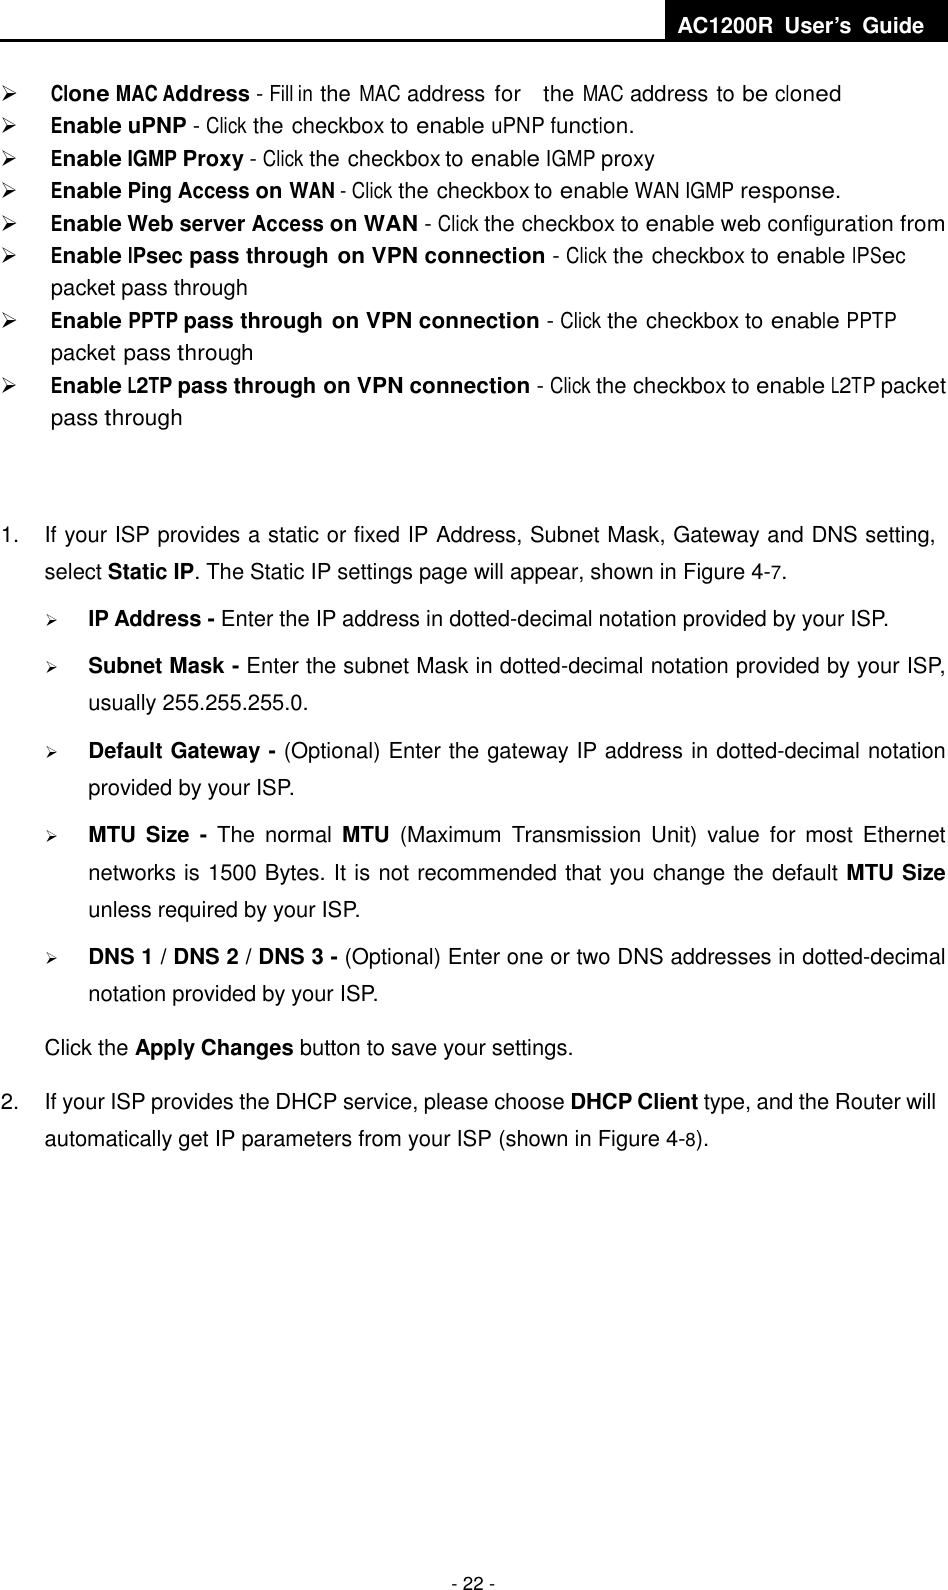
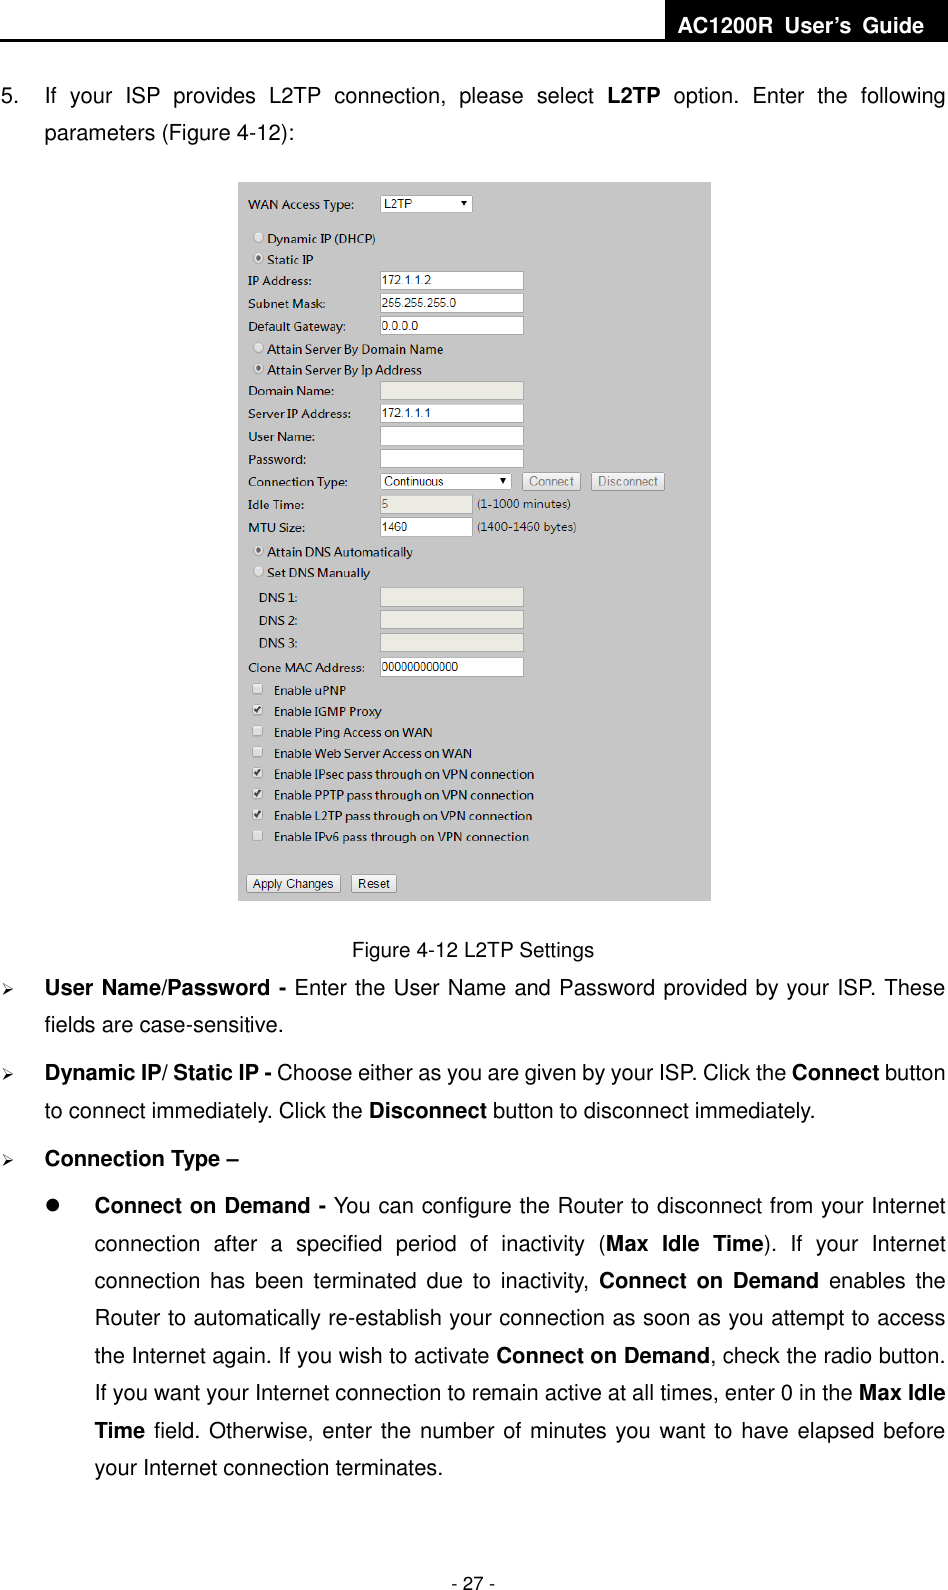
![AC1200R User’s Guide - 21 - Default Gateway - Enter the gateway IP address in dotted-decimal notation provided by your system administrator. DHCP – Select Disabled, Client or Server in different operation mode for AC1200R DHCP Client Range - Fill in the start IP address and end IP address to allocate a range of IP addresses; client with DHCP function set will be assigned an IP address automatically. Show Client – Press open to active the DHCP Client Table window that shows the active clients with their assigned IP address, MAC address and time expired information. [Server mode only] DHCP Lease Time – Amount of time the IP address is leased for. Set Static DHCP - Manual setup Static DHCP IP address for specific MAC address. [Server mode only] Domain Name - Assign Domain Name and dispatch to DHCP clients [optional] 802.1d Spanning Tree - Enable or disable the IEEE 802.1d Spanning Tree function from pull-down menu. Clone MAC Address - Fill in the MAC address for the MAC address to be cloned. 4.5.2 WAN Interface Choose menu “TCP/IP Settings → WAN”, you can configure the IP parameters of the WAN on the screen shown below. Figure 4-7 WAN – Static IP](https://usermanual.wiki/Iconnect/197D.Users-Manual/User-Guide-2611638-Page-26.png)