Inrico Technologies T192 Network Two Way Radio User Manual T192
Shenzhen Inrico Electronics Co.,Ltd Network Two Way Radio T192
User Manual

Please read this instruction book carefully before use and keep this with care
T192
IN TOUCH TIMELY EVERYWHERE
GLOBAL WALKIE-TALKIE
SINCE 2004


Warning
● Flammable environment (gas, dust and fog, etc.)
● Please turn off the radio before getting close to the blasting zone or
detonato handset.
General information before use
Please observe the following instructions to prevent fire, injury or damage
to the handset.
◎ The recommended use pattern is 1 min of emission and 4 mins of receives.
Constant emission over long time will cause over heat on the back side. Do
not let the back touch any plastic surface when put it down.
◎ Prohibit to modify this product in any case.
◎ Please do not expose the handset to long-time direct sunlight, neither to close
any heat source.
◎ Please do not expose the handset to dust, damp and spill. and over object that
is unstable.
◎ If abnormal odor or smoke noted from the handset, please shut down
immediately, remove the battery unit, and contact our local authorized service
provider.

Contents
Unpacking and checking equipment
Accessories
Preparation work
Using the Lithium Battery
Feature of the Lithium battery
Charging for the Lithium battery
Operating instructions of battery charging
Installing accessories
Installing/Removing battery
Installing antenna
Installing belt clip
Installing sling
Installing headset
Knowing the device well
Unit structure
Volume selector/ON and OFF switch
Push To Talk button PTT
Session selector
Indicator lights status
Introduction
Installing SIM card
Basic use
Session selection
FAQ
Indicator light interpretation
Brief technical data
1
1
1
2
2
2
2
3
3
4
4
5
5
6
7
7
7
7
7
8
8
8
8
9
10
10
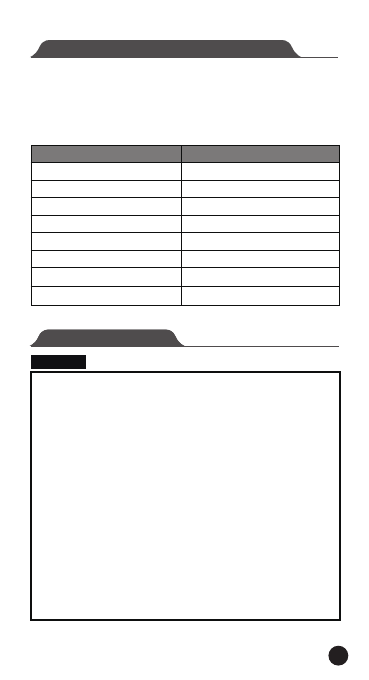
Unpacking and checking equipment
Note: following instructions is only suitable for authorized retailers and
service providers.Carefully unpack the radio. We recommend you check
the items listed in the following table before discarding the package. If
any item is missing, please contact local dealer immediately.
Accessories:
Preparation work
※ Do not overcharge with the battery
Please stop to charging if it is uncompleted in normal time. The battery may
flame, smoke or crack due to abnormal charging process.
※ Do not put battery into the microwave or high pressure container
The battery my flame, smoke or crack.
※ Do not expose broken battery to any flame.
If the battery is seen broken (or with abnormal odor), please remove it from
flammable condition immediately. The fluid in battery is really flammable, which
may cause flame or smoke.
※ Do not use abnormal battery
If the battery is abnormal in odor, color, shape or any other form, please remove
it from charger or radio and do not use it anymore.
※ Please use exclusive adapter
The adapter in accessories is designed exclusively for the bought radio. It ensures
the safety and reliability of battery charging.
Warning
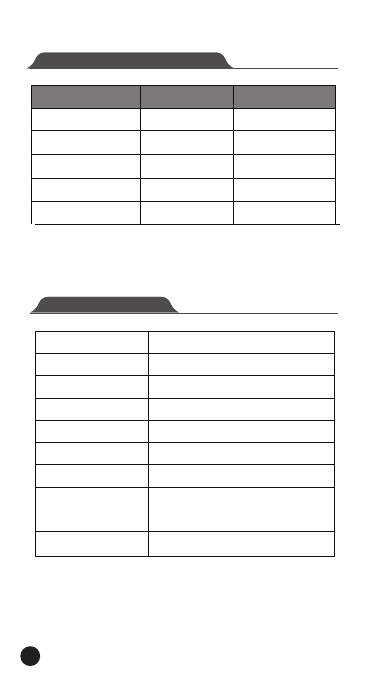
Items
Handset
Lithium battery
AC adapter
Antenna
Sling
Belt clip
Desktop charger
User manual
Number
1
1
1
1
1
1
1
1
01

Using the Lithium Battery
Charge before use
To reduce electrical emission in battery, please remove the battery
from device if not in use within a long time. Please keep the battery
in cool and dry places. When keeping battery for a long time:
1、Remove battery from device;
2、If possible, please fully charge the battery before store;
3、Store the battery in places that are cool and dry (with the
temperature lower than 25 Celsius);
Feature of the Lithium Battery:
※ After repeated charging process, the capacity will decrease.
※ The battery degenerates gradually even without being used.
※ More time will be required when Lithium battery is being charged
in cool condition.
※ Charging and storage of Lithium battery in relatively warm
condition will jeopardize its service life. Please do not keep them
inside the vehicle or near heating equipment.
※ If the duration of battery shortens significantly, please replace
the battery immediately to prevent fluid leak.
Charging Lithium battery
After the AC adapter is connected and the battery is well placed,
the indicator will show red which means the charging is in progress.
Green will indicate that the battery is fully charged. The indicator
will go off if the temperature is not proper, or the battery is
damaged or the connection is poor.
Operating instructions of battery charging
1. Plug the charger end of the power supply cord into the power
receptacle located at the back of the charger.
Plug the wall receptacle end of the power supply cord into the
appropriate AC outlet.
2. Insert a battery, or handset with battery (with the handset
turned off), into the charger's pocket.
3. Charger indicator status:
※
Steady Red: Battery is being charged.
※
Steady Green: Battery has been charged completely.
02
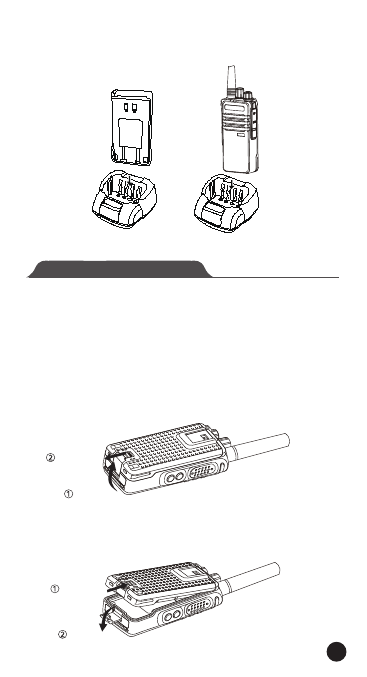
Installing accessories
Installing/Removing battery
※ Do not short circuit the battery terminal, or put the battery in fire.
※ Do not attempt to remove the shell of battery.
※ Do not install battery in any dangerous condition, since the
possible flame may cause explosion.
03
4. After battery charged fully, remove the end of power supply
cord from the outlet, and then remove the battery or handset
from circuitthe charger.
Battery latch
Push to lock
Battery latch
Push to lock
To install the battery. Turn off the radio. Please make sure the bolt on the top of battery
aim at the location hole on the top of aluminium plate. Fastening the battery latch as
direction ① after pushing down battery to fit the radio. At last push to lock the battery as
direction ② .
To remove battery. Turn off the radio and push to unlock battery as direction
①.Break apart out of aluminum plate naturally, and then take off the battery.
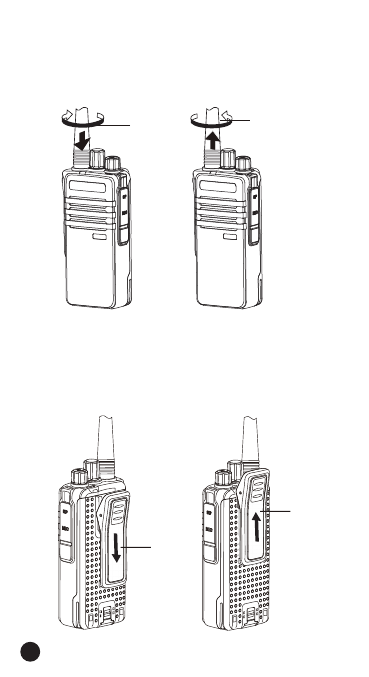
Antenna Antenna
Installing antenna
Hold the antenna pedestal, revolve the antenna in clockwise
until it is tightened.
Installing belt clip
Glide
Push up
04
To Install belt clip. Press the movable buckle on the top of the belt clip. Parallel push and
make sure the belt clip slot aim at battery slot until hear the voice "click",. Buckle locked.
the belt clip installation finish.
To remove belt clip. Press the movable buckle, the other hand push up hard with propping
the bottom belt clip ,belt clip remove.
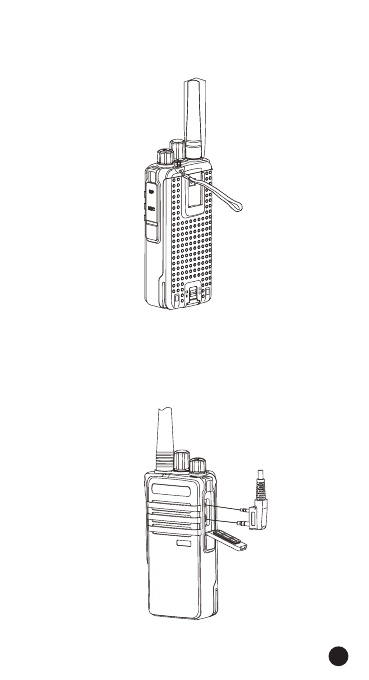
Installing headset
Open the cover from the top of device to show the headset sockets.
Headset will work immediately after being plugged in.
Installing sling
Take the tail of sling across the oval hole on the back of handset
to install.
05
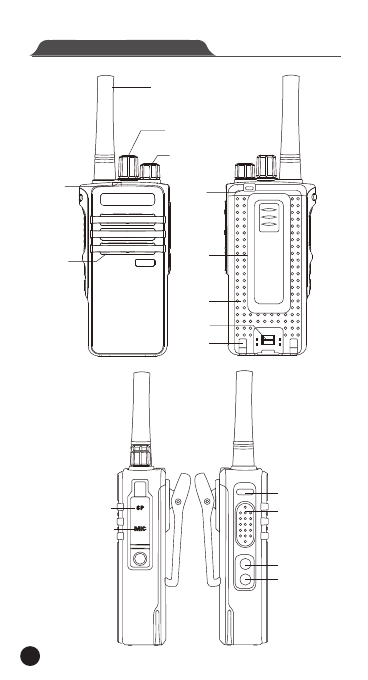
Knowing the device well
06
Antenna
Channel Switch
Switch & Vol Knob
Indicator
Microphone
Lanyard Hole
Belt Clip
Battery
Charging Contact
Battery Latch
Mi
PTT
User-defined
User-defined
User-defined
Earphone Jack
crophone Jack

Unit structure
1.Volume selector/ ON/OFF switch
A:Clockwise for switch ON, counterclockwise for switch OFF.
B:Clockwise for volume UP, counterclockwise for volume DOWN.
2.Push To Talk button PTT
A:Press PTT button to initiate a call (red light goes on) when
handset is standing by.
B:If not in reception, hold PPT to apply for turn to talk (red light
goes on).
Release the PPT button to quit talk and go back to stand by.
3.Session selector
Revolve the selector for last/next session. And confirm to enter
the current session with voice prompt.
4. Recorder playback/Individual call
Press to voice-play the last call. Hold for 3 seconds to enter a
single call,then press to selecting member.
5.Indicator light status
The green light goes on after the device is switched on. The green
light flashes fast to indicate network searching. In standing by, the
green light flashes for every 5 seconds. The green light remains on
for reception, and the red light remains on for emission.
07

1.Installing battery and SIM card
Please insert effective USIM card before use, make sure the
USIM card can be effective in any selected WCDMA cellphone.
(1)Revolve the volume button to switch ON/OFF device.
(2)Remove the battery cover by pushing backwards.
(3)Lift USIM socket cover, place the USIM card in the socket
well in right direction.
(4)Replace the battery and cover.
2.Basic use:
Switch ON: Revolve the volume button clockwise to switch ON
device, there will be voice prompt for switch ON. After the device
is successfully switched ON, the green light goes on first then
flash to indicate network searching. After the network is
connected, there will be voice prompt.
Switch OFF: Revolve the volume button counterclockwise to
switch OFF device, the light will goes off.
Note: Do not frequently switch between ON and OFF, it may
affect the switch function.
Volume adjustment: Revolve clockwise to volume UP,
counterclockwise to volume DOWN.
Headset: Plug in headset, press the PPT button on headset if
there is one to initiate a call, release the button to cancel the call.
Low battery notification: When the battery is lower than 10%,
there will be voice prompt to indicate charging need.
3.Session selection:
Before switching ON, user needs to revolve the selector to
Channel 1 (The default session is Channel 1, revolve to select
other sessions. If the session is not available, there will be voice
prompt:No Channel).
Introduction
08

9
If your handset shows following problem in use, please check the
instruction below, and if the issue still persists, please contact
local authorized service.
1.Poor reception: Possible reasons: signal over your current location
is weak (such as basement or next to a blocking building), or the
network is busy (such as during rush hours).
Solutions: 1. Please move to somewhere with improved signal.
2: Please avoid using at that moment or wait for while before
another attempt.
2.Echo or noise: Possible reason: the quality of network service
provider is flawed. Solution: Restart the radio will let it automatically
search for available network with better quality.
3.Less duration: Possible reasons: the duration depends a lot on
the settings by network service provider. Using and charging the
handset under condition with high temperature will also jeopardize
the battery duration. Searching for network constantly in
weak-network area will also lower the duration. Solution: if you are
at place with weak signal, please temporarily switch OFF the handset.
4.Unable to connect to network: Possible reasons: USIM card
not effective, poor signal, out of network service area.
Solutions: replace another USIM card, move to somewhere open
and flat, if you are in the building , move near to the window.
FAQ
10
Brief technical data
Indicator light interpretation
ON/Setting
Searching for network
Standing by
Initiating call
Receiving call
Green on
Green flashes fast
Green flashes slow
Red on
Green on
Flash every 1 sec
Flash every 5 secs
Device Status FrequencyIndicator Status
Voltage
Frequency band
Size
Weight
Working temperature
Storage temperature
Transmit power
Sound output power
3.7V
56*35*112mm(width*length*height)
~300g
-10---+55celcius
-40---+85celcius
23dBm ~ 30dBm@-104dBm
2W@10%distortion
Receive sensitivity
GSM900, DCS 1800, WCDMA Band I: 1920~1980MHz,
WCDMA Band VIII: 880~915MHz
WCDMA2100 : ≤-106.7dBm
WCDMA1900/900/850 : ≤-107.5dBm
GSM850/900/1800/1900 : ≤-108dBm
FCC RF Exposure Information and Statement
This device meets the government's requirements for exposure to radio waves. The guidelines are
based on standards that were developed by independent scientific organizations through periodic
and thorough evaluation of scientific studies. The standards include a substantial safety margin
designed to assure the safety of all persons regardless of age or health. The SAR limit of USA
(FCC) is 1.6 W/kg averaged. This Device has also been tested against this SAR limit. SAR
information on this and other pad can be viewed on‐line at http://www.fcc.gov/oet/ea/fccid/.
Please use the device FCC ID number for search. This device was test Body SAR with belt-clip
0mm and Front-of-face SAR with 25mm. To maintain compliance with FCC RF exposure
requirements. The use of belt clips, holsters and similar accessories should not contain metallic
components in its assembly. The use of accessories that do not satisfy these requirements may not
comply with FCC RF exposure requirements, and should be avoided.
FCC Warning
This device complies with part 15 of the FCC Rules. Operation is subject to the condition that this
device does not cause harmful interference.
NOTE 1: This equipment has been tested and found to comply with the limits for a Class B digital
device, pursuant to part 15 of the FCC Rules. These limits are designed to provide reasonable
protection against harmful interference in a residential installation. This equipment generates, uses
and can radiate radio frequency energy and, if not installed and used in accordance with the
instructions, may cause harmful interference to radio communications. However, there is no
guarantee that interference will not occur in a particular installation. If this equipment does cause
harmful interference to radio or television reception, which can be determined by turning the
equipment off and on, the user is encouraged to try to correct the interference by one or more of
the following measures:
- Reorient or relocate the receiving antenna.
- Increase the separation between the equipment and receiver.
-Connect the equipment into an outlet on a circuit different from that to which the receiver is
connected.
-Consult the dealer or an experienced radio/TV technician for help.
NOTE 2: Any changes or modifications to this unit not expressly approved by the party
responsible for compliance could void the user's authority to operate the equipment.

Professional In High Quality Two Way Radios
www.inrico.cn
SHENZHEN INRICO ELECTRONICS CO.,LTD