Insignia NS 32E859A11 User Manual To The 57af5dc9 46ed 4c2d 9371 72b416034711
User Manual: Insignia NS-32E859A11 to the manual
Open the PDF directly: View PDF ![]() .
.
Page Count: 123 [warning: Documents this large are best viewed by clicking the View PDF Link!]
- CHILD SAFETY
- Important safety instructions
- Introduction
- Easy to use
- Easy to connect
- Easy to find
- Installing the stand or wall-mount bracket
- TV components
- Using the remote control
- Making connections
- Connecting the power
- Connecting an antenna or cable TV without a cable box
- Connecting a cable or satellite box
- Connecting an HDMI device
- Connecting a DVI device
- Connecting a component video device
- Connecting a composite video device
- Connecting a camcorder, game, or VCR
- Connecting a computer
- Connecting headphones
- Connecting a digital audio receiver
- Connecting an analog audio receiver
- Connecting your TV to your home network
- Turning on your TV for the first time
- Understanding the basics
- Using the applications offered on your TV
- Adjusting the video
- Adjusting audio settings
- Manually adjusting audio settings
- Selecting the Dolby digital output
- Setting the Audyssey Dynamic Volume control
- Setting the SRS TruSurround HD mode
- Turning your TV speakers on or off
- Setting up Rocketboost™
- Adding another Rocketboost device
- Changing the Rocketboost sound source
- Using a different Rocketboost manager
- Listening to TV audio through other Rocketboost devices
- Repeating the Rocketboost set up
- Expanding your Rocketboost System
- Playing TV audio only
- Setting the button sound effects volume
- Selecting the language for a TV program
- Using Audio Return Channel (ARC)
- Resetting all Audio menu settings
- Changing channel settings
- Setting parental controls
- Using closed captioning
- Adjusting time settings
- Adjusting Internet settings
- Using INlink to control HDMI devices
- Adjusting other options
- Maintaining
- Troubleshooting
- Specifications
- Setting up your Z-Wave remote control
- Advanced remote control programming
- Controlling the remote control backlight
- Legal notices
- Two-year limited warranty
User Guide
NS-32E859A11/NS-42E859A11

Thank You
Congratulations on your purchase of a high-quality connected
Insignia product. Your NS-32E859A11 or NS-42E859A11 represents
the start of the art in LED connected TV design. We have created an
experience that is easy to use, easy to connect, and easy to find.

www.insigniaproducts.com i
CHILD SAFETY . . . . . . . . . . . . . . . . . . . . . . . . . . . . . . . . . . . . 2
Important safety instructions . . . . . . . . . . . . . . . . . . . . . 3
Warnings . . . . . . . . . . . . . . . . . . . . . . . . . . . . . . . . . . . . . . . . . . . . . . . . . . . .3
Cautions . . . . . . . . . . . . . . . . . . . . . . . . . . . . . . . . . . . . . . . . . . . . . . . . . . . . .4
Introduction . . . . . . . . . . . . . . . . . . . . . . . . . . . . . . . . . . . . . . 8
Easy to use . . . . . . . . . . . . . . . . . . . . . . . . . . . . . . . . . . . . . . . 8
TiVo DESIGN™ . . . . . . . . . . . . . . . . . . . . . . . . . . . . . . . . . . . . . . . . . . . . . . . .8
Two-year limited warranty . . . . . . . . . . . . . . . . . . . . . . . . . . . . . . . . . . . .8
Game mode . . . . . . . . . . . . . . . . . . . . . . . . . . . . . . . . . . . . . . . . . . . . . . . . .8
Insignia Motion 120Hz . . . . . . . . . . . . . . . . . . . . . . . . . . . . . . . . . . . . . . .8
AUDYSSEY Dynamic Volume plus Dynamic EQ . . . . . . . . . . . . . . . .8
SRS TruSurround HD . . . . . . . . . . . . . . . . . . . . . . . . . . . . . . . . . . . . . . . . .8
Easy to connect . . . . . . . . . . . . . . . . . . . . . . . . . . . . . . . . . . . 9
WiFi . . . . . . . . . . . . . . . . . . . . . . . . . . . . . . . . . . . . . . . . . . . . . . . . . . . . . . . . .9
Z-Wave . . . . . . . . . . . . . . . . . . . . . . . . . . . . . . . . . . . . . . . . . . . . . . . . . . . . . .9
Rocketboost™ Wireless Card Ready . . . . . . . . . . . . . . . . . . . . . . . . . . .9
Easy to find . . . . . . . . . . . . . . . . . . . . . . . . . . . . . . . . . . . . . .10
TiVo Search . . . . . . . . . . . . . . . . . . . . . . . . . . . . . . . . . . . . . . . . . . . . . . . . 10
CinemaNow . . . . . . . . . . . . . . . . . . . . . . . . . . . . . . . . . . . . . . . . . . . . . . . 10
Netflix . . . . . . . . . . . . . . . . . . . . . . . . . . . . . . . . . . . . . . . . . . . . . . . . . . . . . 10
Pandora . . . . . . . . . . . . . . . . . . . . . . . . . . . . . . . . . . . . . . . . . . . . . . . . . . . 10
Napster . . . . . . . . . . . . . . . . . . . . . . . . . . . . . . . . . . . . . . . . . . . . . . . . . . . . 10
Installing the stand or wall-mount bracket . . . . . . . .11
Installing the stand . . . . . . . . . . . . . . . . . . . . . . . . . . . . . . . . . . . . . . . . . 11
Installing a wall-mount bracket . . . . . . . . . . . . . . . . . . . . . . . . . . . . . 11
Installing a Kensington lock . . . . . . . . . . . . . . . . . . . . . . . . . . . . . . . . 12
TV components . . . . . . . . . . . . . . . . . . . . . . . . . . . . . . . . .12
Accessories . . . . . . . . . . . . . . . . . . . . . . . . . . . . . . . . . . . . . . . . . . . . . . . . 12
Front . . . . . . . . . . . . . . . . . . . . . . . . . . . . . . . . . . . . . . . . . . . . . . . . . . . . . . 13
Side . . . . . . . . . . . . . . . . . . . . . . . . . . . . . . . . . . . . . . . . . . . . . . . . . . . . . . . 13
Back . . . . . . . . . . . . . . . . . . . . . . . . . . . . . . . . . . . . . . . . . . . . . . . . . . . . . . . 14
Remote control . . . . . . . . . . . . . . . . . . . . . . . . . . . . . . . . . . . . . . . . . . . . 15
Using the remote control . . . . . . . . . . . . . . . . . . . . . . . .17
Installing the remote control batteries . . . . . . . . . . . . . . . . . . . . . . 17
Making connections . . . . . . . . . . . . . . . . . . . . . . . . . . . . . 17
Connecting the power . . . . . . . . . . . . . . . . . . . . . . . . . . . . . . . . . . . . . .17
Connecting an antenna or cable TV without a cable box . . . . . 18
Connecting a cable or satellite box . . . . . . . . . . . . . . . . . . . . . . . . . .19
Connecting an HDMI device . . . . . . . . . . . . . . . . . . . . . . . . . . . . . . . . .20
Connecting a DVI device . . . . . . . . . . . . . . . . . . . . . . . . . . . . . . . . . . . . 21
Connecting a component video device . . . . . . . . . . . . . . . . . . . . . .22
Connecting a composite video device . . . . . . . . . . . . . . . . . . . . . . . 23
Connecting a camcorder, game, or VCR . . . . . . . . . . . . . . . . . . . . . .23
Connecting a computer . . . . . . . . . . . . . . . . . . . . . . . . . . . . . . . . . . . . . 24
Connecting headphones . . . . . . . . . . . . . . . . . . . . . . . . . . . . . . . . . . . . 25
Connecting a digital audio receiver . . . . . . . . . . . . . . . . . . . . . . . . . . 25
Connecting an analog audio receiver . . . . . . . . . . . . . . . . . . . . . . . .26
Connecting your TV to your home network . . . . . . . 26
Wireless connection . . . . . . . . . . . . . . . . . . . . . . . . . . . . . . . . . . . . . . . .26
Wired connection . . . . . . . . . . . . . . . . . . . . . . . . . . . . . . . . . . . . . . . . . . . 27
Turning on your TV for the first time . . . . . . . . . . . . . . 27
Programming your universal Insignia remote control . . . . . . . . 29
Understanding the basics . . . . . . . . . . . . . . . . . . . . . . . . 35
Turning your TV on or off . . . . . . . . . . . . . . . . . . . . . . . . . . . . . . . . . . . 35
Selecting the video input source . . . . . . . . . . . . . . . . . . . . . . . . . . . . 35
Navigating menus and using the on-screen keyboard . . . . . . . . 36
Selecting a channel . . . . . . . . . . . . . . . . . . . . . . . . . . . . . . . . . . . . . . . . .37
Adjusting the volume . . . . . . . . . . . . . . . . . . . . . . . . . . . . . . . . . . . . . . . 37
Displaying additional information . . . . . . . . . . . . . . . . . . . . . . . . . . . 37
Using the applications offered on your TV . . . . . . . . 40
Watching movies with CinemaNow . . . . . . . . . . . . . . . . . . . . . . . . . 40
Watching movies with Netflix . . . . . . . . . . . . . . . . . . . . . . . . . . . . . . . 40
Listening to music with Pandora . . . . . . . . . . . . . . . . . . . . . . . . . . . . 41
TiVo Search . . . . . . . . . . . . . . . . . . . . . . . . . . . . . . . . . . . . . . . . . . . . . . . . . 41
Adjusting the video . . . . . . . . . . . . . . . . . . . . . . . . . . . . . . 42
Adjusting the video settings . . . . . . . . . . . . . . . . . . . . . . . . . . . . . . . .42
Resetting all video settings . . . . . . . . . . . . . . . . . . . . . . . . . . . . . . . . . . 44
Turning the video window on or off . . . . . . . . . . . . . . . . . . . . . . . . . 45
Adjusting audio settings . . . . . . . . . . . . . . . . . . . . . . . . . 46
Manually adjusting audio settings . . . . . . . . . . . . . . . . . . . . . . . . . . .46
Selecting the Dolby digital output . . . . . . . . . . . . . . . . . . . . . . . . . . .47
Setting the Audyssey Dynamic Volume control . . . . . . . . . . . . . . 48
CONTENTS

ii www.insigniaproducts.com
Setting the SRS TruSurround HD mode . . . . . . . . . . . . . . . . . . . . . .49
Turning your TV speakers on or off . . . . . . . . . . . . . . . . . . . . . . . . . . .50
Setting up Rocketboost™ . . . . . . . . . . . . . . . . . . . . . . . . . . . . . . . . . . . .51
Adding another Rocketboost device . . . . . . . . . . . . . . . . . . . . . . . . .54
Changing the Rocketboost sound source . . . . . . . . . . . . . . . . . . . .56
Using a different Rocketboost manager . . . . . . . . . . . . . . . . . . . . . .57
Listening to TV audio through other Rocketboost devices . . . .58
Repeating the Rocketboost set up . . . . . . . . . . . . . . . . . . . . . . . . . . .60
Expanding your Rocketboost System . . . . . . . . . . . . . . . . . . . . . . . .61
Playing TV audio only . . . . . . . . . . . . . . . . . . . . . . . . . . . . . . . . . . . . . . .62
Setting the button sound effects volume . . . . . . . . . . . . . . . . . . . .63
Selecting the language for a TV program . . . . . . . . . . . . . . . . . . . .64
Using Audio Return Channel (ARC) . . . . . . . . . . . . . . . . . . . . . . . . . .65
Resetting all Audio menu settings . . . . . . . . . . . . . . . . . . . . . . . . . . .66
Changing channel settings . . . . . . . . . . . . . . . . . . . . . . 67
Automatically scanning for channels . . . . . . . . . . . . . . . . . . . . . . . .67
Setting up the channel and favorite channel lists . . . . . . . . . . . . .68
Viewing a favorite channel . . . . . . . . . . . . . . . . . . . . . . . . . . . . . . . . . .69
Checking the signal strength . . . . . . . . . . . . . . . . . . . . . . . . . . . . . . . .70
Setting parental controls . . . . . . . . . . . . . . . . . . . . . . . . 71
Setting the PIN (password) . . . . . . . . . . . . . . . . . . . . . . . . . . . . . . . . . .71
Changing the PIN (password) . . . . . . . . . . . . . . . . . . . . . . . . . . . . . . . .72
Turning Parental Controls on or off . . . . . . . . . . . . . . . . . . . . . . . . . .73
Setting Parental Control levels . . . . . . . . . . . . . . . . . . . . . . . . . . . . . . .74
Setting channel locks . . . . . . . . . . . . . . . . . . . . . . . . . . . . . . . . . . . . . . .75
Locking control buttons . . . . . . . . . . . . . . . . . . . . . . . . . . . . . . . . . . . . .75
Using closed captioning . . . . . . . . . . . . . . . . . . . . . . . . . 76
Turning closed captioning on or off . . . . . . . . . . . . . . . . . . . . . . . . . .76
Selecting the analog closed captioning mode . . . . . . . . . . . . . . . .77
Customizing digital closed captioning . . . . . . . . . . . . . . . . . . . . . . .78
Adjusting time settings . . . . . . . . . . . . . . . . . . . . . . . . . 80
Setting the date and time . . . . . . . . . . . . . . . . . . . . . . . . . . . . . . . . . . .80
Setting the sleep timer . . . . . . . . . . . . . . . . . . . . . . . . . . . . . . . . . . . . . .81
Adjusting Internet settings . . . . . . . . . . . . . . . . . . . . . . 81
Configuring a wireless connection . . . . . . . . . . . . . . . . . . . . . . . . . . .81
Configuring a wired connection . . . . . . . . . . . . . . . . . . . . . . . . . . . . .86
Testing the network . . . . . . . . . . . . . . . . . . . . . . . . . . . . . . . . . . . . . . . . .89
Disabling Internet features . . . . . . . . . . . . . . . . . . . . . . . . . . . . . . . . . .89
Using INlink to control HDMI devices . . . . . . . . . . . . 90
Setting up INlink HDMI control . . . . . . . . . . . . . . . . . . . . . . . . . . . . . .90
Adjusting other options 92
Adjusting the INSIGNIA logo brightness . . . . . . . . . . . . . . . . . . . . . 92
Setting the TV power on mode . . . . . . . . . . . . . . . . . . . . . . . . . . . . . . 93
Labeling an input source . . . . . . . . . . . . . . . . . . . . . . . . . . . . . . . . . . . . 94
Turning the source sensor on or off . . . . . . . . . . . . . . . . . . . . . . . . . 95
Resetting all options on the Devices menu . . . . . . . . . . . . . . . . . . 96
Resetting all options on the Appearance menu . . . . . . . . . . . . . . 97
Maintaining . . . . . . . . . . . . . . . . . . . . . . . . . . . . . . . . . . . 100
Cleaning the TV cabinet . . . . . . . . . . . . . . . . . . . . . . . . . . . . . . . . . . .100
Cleaning the LED-LCD screen . . . . . . . . . . . . . . . . . . . . . . . . . . . . . .100
Updating your TV software . . . . . . . . . . . . . . . . . . . . . . . . . . . . . . . . .100
Troubleshooting . . . . . . . . . . . . . . . . . . . . . . . . . . . . . . . 100
Using the on-screen help . . . . . . . . . . . . . . . . . . . . . . . . . . . . . . . . . .100
Resetting your TV to the factory defaults . . . . . . . . . . . . . . . . . . .103
Specifications . . . . . . . . . . . . . . . . . . . . . . . . . . . . . . . . . 104
Setting up your Z-Wave remote control . . . . . . . . 108
Adding your remote control to the TV Z-Wave network . . . . . 108
Toggling between IR and RF communication . . . . . . . . . . . . . . .108
Removing your remote control from the TV Z-Wave network 109
Resetting your TV Z-Wave network . . . . . . . . . . . . . . . . . . . . . . . . .109
Managing Z-Wave network (other device as Controller) . . . . .110
Z-Wave Terminology . . . . . . . . . . . . . . . . . . . . . . . . . . . . . . . . . . . . . .110
Advanced remote control programming . . . . . . . 111
Programming a learned button . . . . . . . . . . . . . . . . . . . . . . . . . . . .111
Deleting a single learned button . . . . . . . . . . . . . . . . . . . . . . . . . . .111
Deleting all learned buttons in a specific mode . . . . . . . . . . . . .112
Programming macros . . . . . . . . . . . . . . . . . . . . . . . . . . . . . . . . . . . . . .112
Controlling the remote control backlight . . . . . . . 113
Turning the remote control backlight on or off . . . . . . . . . . . . .113
Setting the remote control backlight delay . . . . . . . . . . . . . . . . .113
Legal notices . . . . . . . . . . . . . . . . . . . . . . . . . . . . . . . . . . 116
Two-year limited warranty . . . . . . . . . . . . . . . . . . . . . 117


2www.insigniaproducts.com
Safety Information NS-32E859A11/NS-42E859A11
As you enjoy your new product, keep these safety tips in mind
The issue
The home theater entertainment experience is a growing trend, and larger TVs are popular purchases. However, TVs are not
always supported on the proper stands or installed according to the manufacturer’s recommendations. We and the consumer
electronics industry are committed to making home entertainment enjoyable and safe.
TVs that are inappropriately placed on dressers, bookcases, shelves, desks, speakers, chests, or carts may fall over and cause injury.
Tune into safety
•One size of TV stand does not fit all. Use only a TV stand rated for the weight of your TV.
•Carefully read and understand all enclosed instructions for proper use of this product.
•Don’t let children climb on or play with entertainment system furniture and TVs.
•Don’t place TVs on furniture that can easily be used as steps, such as a chest of drawers.
•Remember that children can become excited while watching a program, especially on a
“larger-than-life” TV. Make sure that you place or install the TV where it cannot be pushed,
pulled over, or knocked down.
•Make sure that you route all cords and cables so that they cannot be pulled or grabbed by
curious children.
Wall mounting
If you decide to wall mount your TV, always remember:
•One size of wall mount does not fit all. Use only a wall mount rated for the weight of your TV
and that has been recommended by this TV manufacturer, listed in this manual, or
otherwise listed by an independent laboratory as suitable for your TV.
•Follow all instructions supplied by the TV and wall mount manufacturers.
•If you have any doubts about your ability to safely wall mount your TV, get help from a
professional installer.
•Make sure that the wall where you are mounting the TV is appropriate. Some wall mounts are not
designed to be mounted to walls backed with steel studs or cinder blocks. If you are unsure, ask a
professional installer.
•TVs can be heavy. At least two people are required for safe wall mount installation.
f
CHILD SAFETY
It makes a difference how and where you use
your flat panel display
www.insigniaproducts.com 3
NS-32E859A11/NS-42E859A11 Safety Information
Important safety instructions
1Read these instructions.
2Keep these instructions.
3Heed all warnings.
4Follow all instructions.
5Do not use this apparatus near water.
6Clean only with dry cloth.
7Do not block any ventilation openings. Install in accordance
with the manufacturer's instructions.
8Do not install near any heat sources such as radiators, heat
registers, stoves, or other apparatus (including amplifiers)
that produce heat.
9Do not defeat the safety purpose of the polarized or
grounding-type plug. A polarized plug has two blades with
one wider than the other. A grounding type plug has two
blades and a third grounding prong. The wide blade or the
third prong are provided for your safety. If the provided plug
does not fit into your outlet, consult an electrician for
replacement of the obsolete outlet.
10 Protect the power cord from being walked on or pinched
particularly at plugs, convenience receptacles, and the point
where they exit from the apparatus.
11 Only use attachments/accessories specified by the
manufacturer.
12 Use only with a cart, stand, tripod, bracket, or
table specified by the manufacturer, or sold with
the apparatus. When a cart is used, use caution
when moving the cart/apparatus combination to
avoid injury from tip-over.
13 Unplug this apparatus during lightning storms or when
unused for long periods of time.
14 Refer all servicing to qualified service personnel. Servicing is
required when the apparatus has been damaged in any way,
such as power-supply cord or plug is damaged, liquid has
been spilled or objects have fallen into the apparatus, the
apparatus has been exposed to rain or moisture, does not
operate normally, or has been dropped.
15 The mains plug is the disconnecting device. The plug must
remain readily operable.
16 The apparatus with grounding-type plug is a class I
apparatus. Class I apparatus need to be connected to earth
ground wire to prevent possible electric shock. Make sure
that you connect the class I apparatus to a mains socket
outlet with a protective earthing connection.
17 Remote control batteries should not be exposed to
excessive heat such as sunshine, fire, or the like.
18 The apparatus shall not be exposed to dripping or splashing,
and no objects filled with liquids, such as vases, shall be
placed on the apparatus.
Warnings
Electric shock hazard
To reduce the risk of fire or electric shock, do not remove any
cover or expose the device to rain or moisture. No
user-serviceable parts are inside. Refer servicing to qualified
service technicians.
Lightning
For added protection for your device receiver during a lightning
storm, or when it is left unattended and unused for long
periods of time, unplug it from the power outlet and disconnect
any antenna or cable system. This helps prevent property
damage and personal injury from lightning and power line
surges.
CAUTION
RISK OF ELECTRIC SHOCK
DO NOT OPEN
This symbol indicates that dangerous
voltage constituting a risk of electric
shock is present within your TV. This
label is located on the back of your TV.
This symbol indicates that there are
important operating and maintenance
instructions in the literature
accompanying your TV.
S3125A
4www.insigniaproducts.com
Safety Information NS-32E859A11/NS-42E859A11
Power lines
An outside antenna system should not be located in the
vicinity of overhead power lines or other electric light or
power circuits, or where it can fall into such power lines or
circuits. When installing an outside antenna system, extreme
care should be taken to keep from touching such power lines
or circuits as contact with them might be fatal.
Handling the LCD panel
• Your TV’s screen is made of glass. Do not drop your TV or hit,
jolt, or press hard against the LCD panel. If the screen breaks,
be careful of broken glass.
• If the LCD panel is broken, make absolutely sure that you do
not touch the liquid in the panel. This may cause skin
inflammation.
• If the liquid gets in your mouth, immediately gargle, rinse,
and consult with your doctor. Also, if the liquid gets in your
eyes or touches your skin, consult with your doctor after
rinsing for at least 15 minutes or longer in clean water.
Replacement parts
When replacement parts are required, make sure that the
service technician uses replacement parts specified by the
manufacturer that have the same characteristics as the original
part. Unauthorized substitutions may result in fire, electric
shock, personal injury, or other hazards.
Safety check
After completing any service or repair to this device, ask the
service technician to perform routine safety checks to
determine that your TV is in correct operating condition.
Power source
Operate your TV only from the type of power source indicated
on the marking label. If you are not sure of the type of power
supplied to your home, consult an electrician or your local
power company.
Cautions
Damage requiring service
Unplug this TV from the power outlet and refer servicing to
qualified service personnel under the following conditions:
• When the power supply cord or plug is damaged or frayed.
• If liquid has been spilled or objects have fallen into your TV.
• If your TV has been exposed to rain or water.
• If your TV does not operate normally by following the
operating instructions. Adjust only those controls that are
covered by the operating instructions because incorrect
adjustment of other controls may result in damage and will
often require extensive work by a qualified technician to
restore your TV to its normal operation.
• If your TV has been dropped or damaged in any way.
• When your TV exhibits a distinct change in performance.
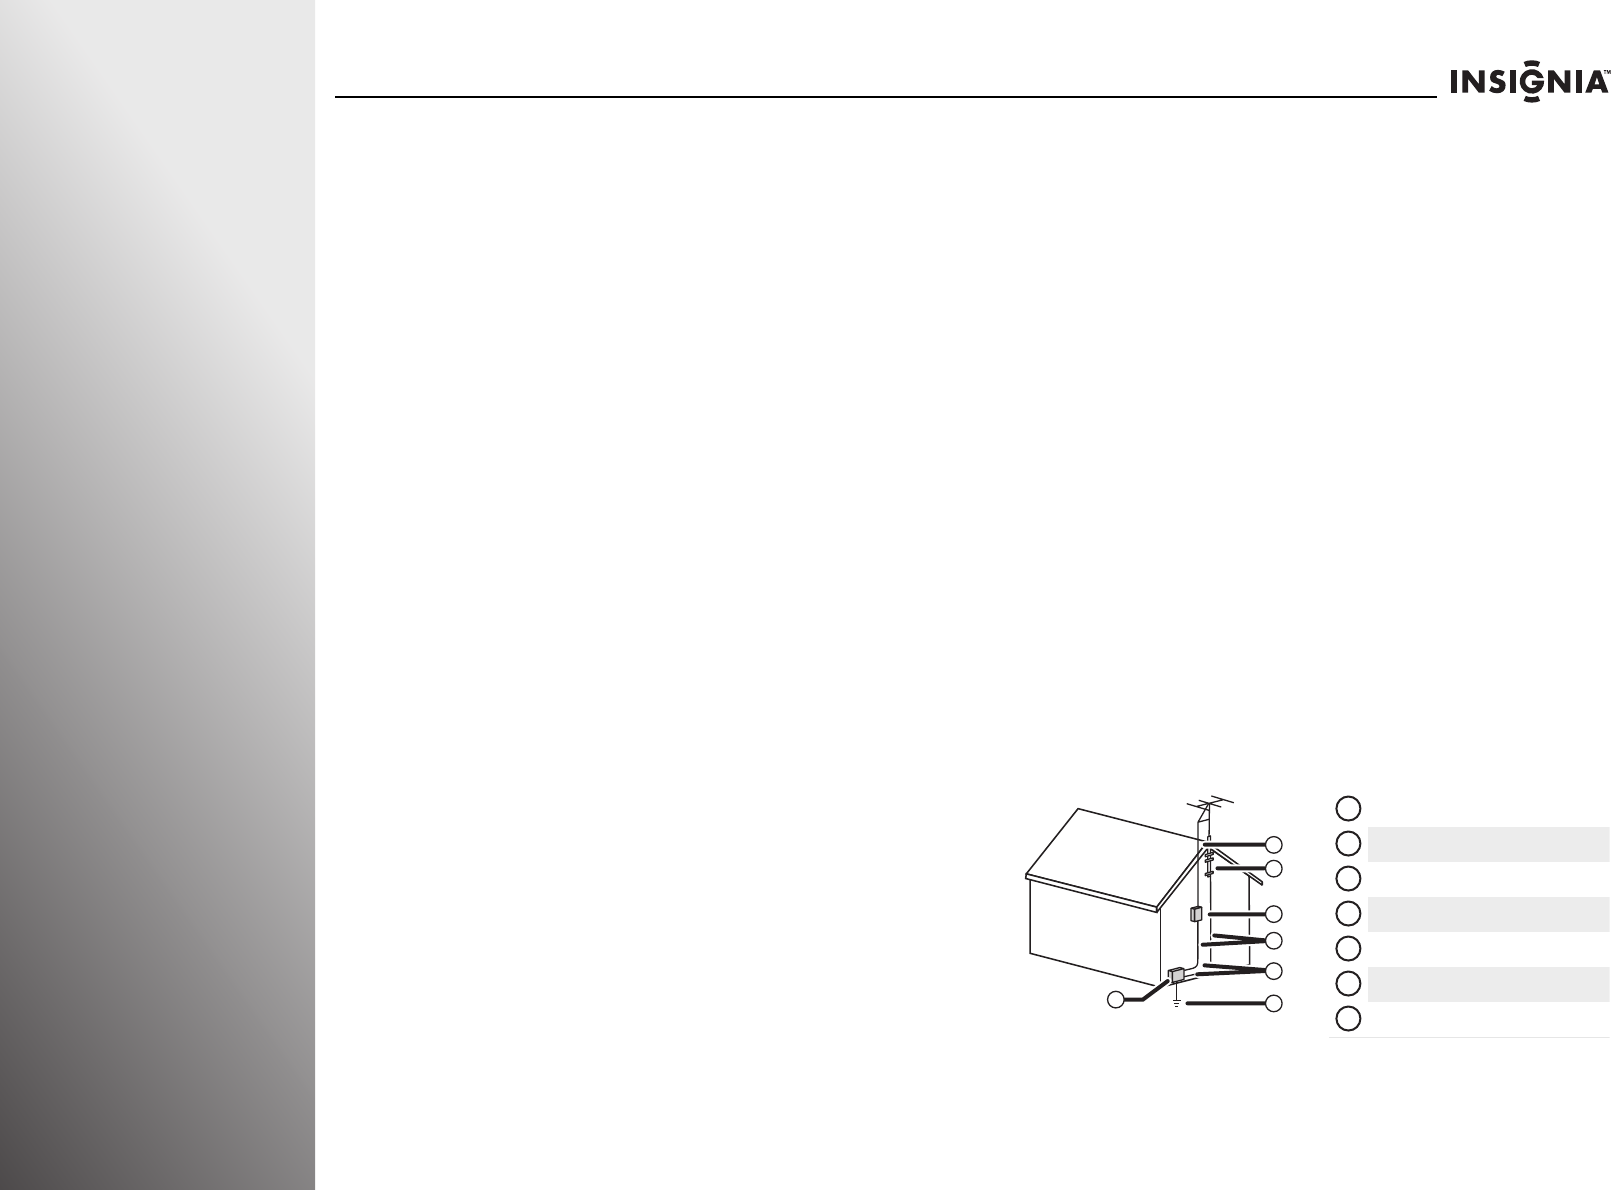
Outdoor antenna grounding
If an outside antenna or cable system is connected to your TV,
make sure that the antenna or cable system is grounded to
provide some protection against voltage surges and built-up
static charges. Article 810 of the National Electrical Code,
ANSI/NFPA No. 70, provides information with respect to
correct grounding of the mast and supporting structure,
grounding of the lead-in wire to an antenna discharge unit,
size of grounding conductors, location of the
antenna-discharge unit, connection to grounding electrodes,
and requirements for the grounding electrode.
2
1
3
4
5
6
7
Antenna lead-in wire
Grounding clamp
Antenna discharge unit
Grounding conductors
Ground clamps
Power service grounding electrode system
Electric service equipment
1
2
3
4
5
6
7

www.insigniaproducts.com 5
NS-32E859A11/NS-42E859A11 Safety Information
Note to CATV system installer
Article 820 of the National Electrical Code, ANSI/NFPA No. 40
provides guidance for correct grounding. Specifically, it states
that the cable ground must be connected to the grounding
system of the building as close to the point of cable entry as
practical.
Condensation
Moisture will form on the TV if the TV is brought from cool
surroundings into a warm room or if the temperature of the
room rises suddenly. When this happens, the TV's performance
may be impaired. To prevent this, let the TV stand in its new
surroundings for about an hour before switching it on, or make
sure that the room temperature rises gradually.
Condensation may also form during the summer if the TV is
exposed to the breeze from an air conditioner. In such cases,
change the location of the TV.
Mobile telephone warning
To avoid interference with your TV picture and sound,
operating problems, or even damage, keep your cordless and
cellular telephones away from the TV.
End of life directives
Your TV contains tin-lead solder. Disposal of this material may
be regulated for environmental reasons. Your TV also contains
material that can be recycled and reused. For disposal or
recycling information, contact your local authorities or the
Electronic Industries Alliance at www.eia.org to find a recycler
in your area.
Non-active pixels
The LCD panel contains almost 3 million thin film transistors,
which provide exceptionally sharp video quality. Occasionally, a
few non-active pixels may appear on the screen as a fixed blue,
green, or red point. These non-active pixels do not adversely
affect the performance of your TV, and are not considered
defects.


7
Getting Started
Installing the stand or wall-mount bracket. . . . . . . . . . . . . . . . . . . . . . . . . . . . . .11
TV components . . . . . . . . . . . . . . . . . . . . . . . . . . . . . . . . . . . . . . . . . . . . . . . . . . . . . . .12
Using the remote control . . . . . . . . . . . . . . . . . . . . . . . . . . . . . . . . . . . . . . . . . . . . . .17
Making connections . . . . . . . . . . . . . . . . . . . . . . . . . . . . . . . . . . . . . . . . . . . . . . . . . . .17
Connecting your TV to your home network. . . . . . . . . . . . . . . . . . . . . . . . . . . . .26
Turning on your TV for the first time. . . . . . . . . . . . . . . . . . . . . . . . . . . . . . . . . . . .27
Understanding the basics . . . . . . . . . . . . . . . . . . . . . . . . . . . . . . . . . . . . . . . . . . . . . .35

8www.insigniaproducts.com
Getting Started NS-32E859A11/NS-42E859A11
Introduction
Congratulations on your purchase of a high-quality connected
Insignia product. Your NS-32E859A11 or NS-42E859A11
represents the start of the art in LED connected TV design. We
have created an experience that is easy to use, easy to connect,
and easy to find.
Easy to use
TiVo DESIGN™
The only TV that combines the power of the Internet with the
legendary TiVo user interface, all in stunning HD. You’ll find
entertainment from both broadcast TV and the Internet with
just a few clicks of your remote control. Now get what you
want, when you want it.
•Award-winning TiVo experience: Easily access all your
favorite TV shows, movies and more with the easy to use TiVo
user interface.
•Intelligent Search: Search by title, artist, director, keyword
and more.
•Access to the best Internet entertainment: Enjoy movies
from Netflix and CinemaNow, music from Pandora and
Napster, and much more.
•Future-proof: New software features, updates, and
enhancements download automatically.
•Broadband connected: Delivers a plethora of new
entertainment choices including TV, Movies, and Music.
Two-year limited warranty
Feel confident in the quality of Insignia TV parts and assembly.
Gain peace of mind knowing that you are not only getting the
best picture possible but are safeguarded against any
unforeseen service and repairs by an industry leading
two-year limited manufacturer warranty.
Game mode
Video games generally require adjustments to the television
picture settings to get the maximum experience. By simply
pressing the GAME button on the front of your TV, your TV
settings will automatically adjust for video games. It couldn't
be easier.
Insignia Motion 120Hz
With a 120Hz screen, a screen with 1,080 lines of resolution
progressively scanned, and special motion-detection
technology, you will be experiencing a picture with clearer
detail, brightness, smoother transitions, judder-free and
reduced motion blurring, particularly when watching
fast-motion sports and action scenes. (See page 42 for
instructions on how to adjust the TV picture.)
AUDYSSEY Dynamic Volume plus
Dynamic EQ
Have you ever caught yourself wishing that you didn't
constantly need to adjust the volume: wishing that the
commercials wouldn't blare and that you could better hear
whispering during a movie scene? Audyssey Dynamic Volume
is a feature that lets you put the remote control down and
enjoy your show while Audyssey adjusts the sound levels for
you automatically. Audyssey Dynamic EQ is a feature that
automatically finds the richest sound settings-including
enhanced bass-for each scene, even when the volume level is
held steady, making the sound coming from your TV speakers
sound more lifelike. (See page 48 for instructions on how to
adjust the audio settings to take advantage of Audyssey.)
SRS TruSurround HD
At Insignia, providing you with superior audio quality is just as
important as exceptional picture quality. That's why we added
SRS TruSurround HD, which provides you with a theater-like
surround-sound experience, with the clearer dialog and the
enhanced bass sounds that movie viewers and gamers crave.
www.insigniaproducts.com 9
NS-32E859A11/NS-42E859A11 Getting Started
Easy to connect
WiFi
Connect your TV wirelessly to the Internet. By connecting your
TV to the Internet you can enjoy all your TV has to offer! Access
Internet content through the Internet applications that came
with your TV. New and exciting applications are continually
being added to your TV.
No additional adapter required. The WiFi feature is built-in.
Z-Wave
Setting up a universal remote can be difficult. With the two way
radio frequency (RF) Z-Wave functionality built in, we have
made it easy to use your Insignia remote to control all your
home theater devices. Follow the on-screen guide, it couldn’t
be easier. (See “Setting up your Z-Wave remote control” on
page 108 for instructions on how to do this).
Rocketboost™ Wireless Card Ready
Installing a Rocketboost ™ Wireless Card (card sold separately)
lets this product send and receive wireless audio with your
other Rocketboost™ products. For example, you can listen to TV
audio with Rocketboost wireless headphones.
What is Rocketboost™?
Rocketboost™ is expandable wireless digital audio.
• Products with Rocketboost™ technology let you easily expand
your listening experience throughout your home.
• Rocketboost™ does not interfere with other wireless products
in your home.
• Rocketboost™ is uncompressed digital audio compatible with
all audio formats such as Dolby, TrueHD, and DTS-HD Master
Audio used with Blu-ray.
When you see the Rocketboost™ logo on any product, it has
been designed to work with other Rocketboost™ products, no
matter who manufactures them. (See page 51 for instructions
on how to set up a Rocketboost Wireless Card.)

10 www.insigniaproducts.com
Getting Started NS-32E859A11/NS-42E859A11
Easy to find
TiVo Search
You can search for specific shows by title or actor name, or you
can discover new shows recommended for you.
•Searching by title or actor name: TiVo Search lets you
search content, so you’re always sure to find something great
to watch. Just enter a search term, and you’ll see results for
shows available from video-on-demand providers.
On the search screen, enter a few letters of your search term
(title or actor’s name). Select a show title or actor’s name
from the results list to see more details.
CinemaNow
With CinemaNow on your TV, you can rent some of your
favorites from the comfort of your couch. All you need is your
Insignia remote. Once you have a CinemaNow account from
CinemaNow.com, grab some popcorn and enjoy the show.
(See page 40 for instructions on how to register with
CinemaNow.)
Netflix
With Netflix on your TV, if you have a Netflix unlimited plan,
you can instantly watch thousands of movies and TV episodes
streamed from Netflix to your TV. Just add shows to your
Netflix Instant Queue, and start watching. (See page 40 for
instructions on how to register with Netflix.)
Pandora
Pandora on your TV lets you choose exactly the music you
want to hear and creates personal Internet radio stations that
play it for you. Just enter a song title or band name that
represents the kind of music you want to hear, and Pandora
will start a unique “Pandora station” that plays music similar to
it. Add variety by entering other titles and bands to your
station, and even more variety by creating multiple Pandora
stations (up to 100!). (See page 41 for instructions on how to
register with Pandora.)
Napster
Listen to what you want, when you want with Napster, the
ultimate online jukebox. Access instantly your choice of over
11 million songs—anytime, anywhere. Kick back with ad-free
radio stations, recommendations, and Billboard® charts back
to 1955. Create your own playlists for a customized listening
experience.
Note
Please connect to the internet to download the latest
software to allow use of these features.
www.insigniaproducts.com 11
NS-32E859A11/NS-42E859A11 Getting Started
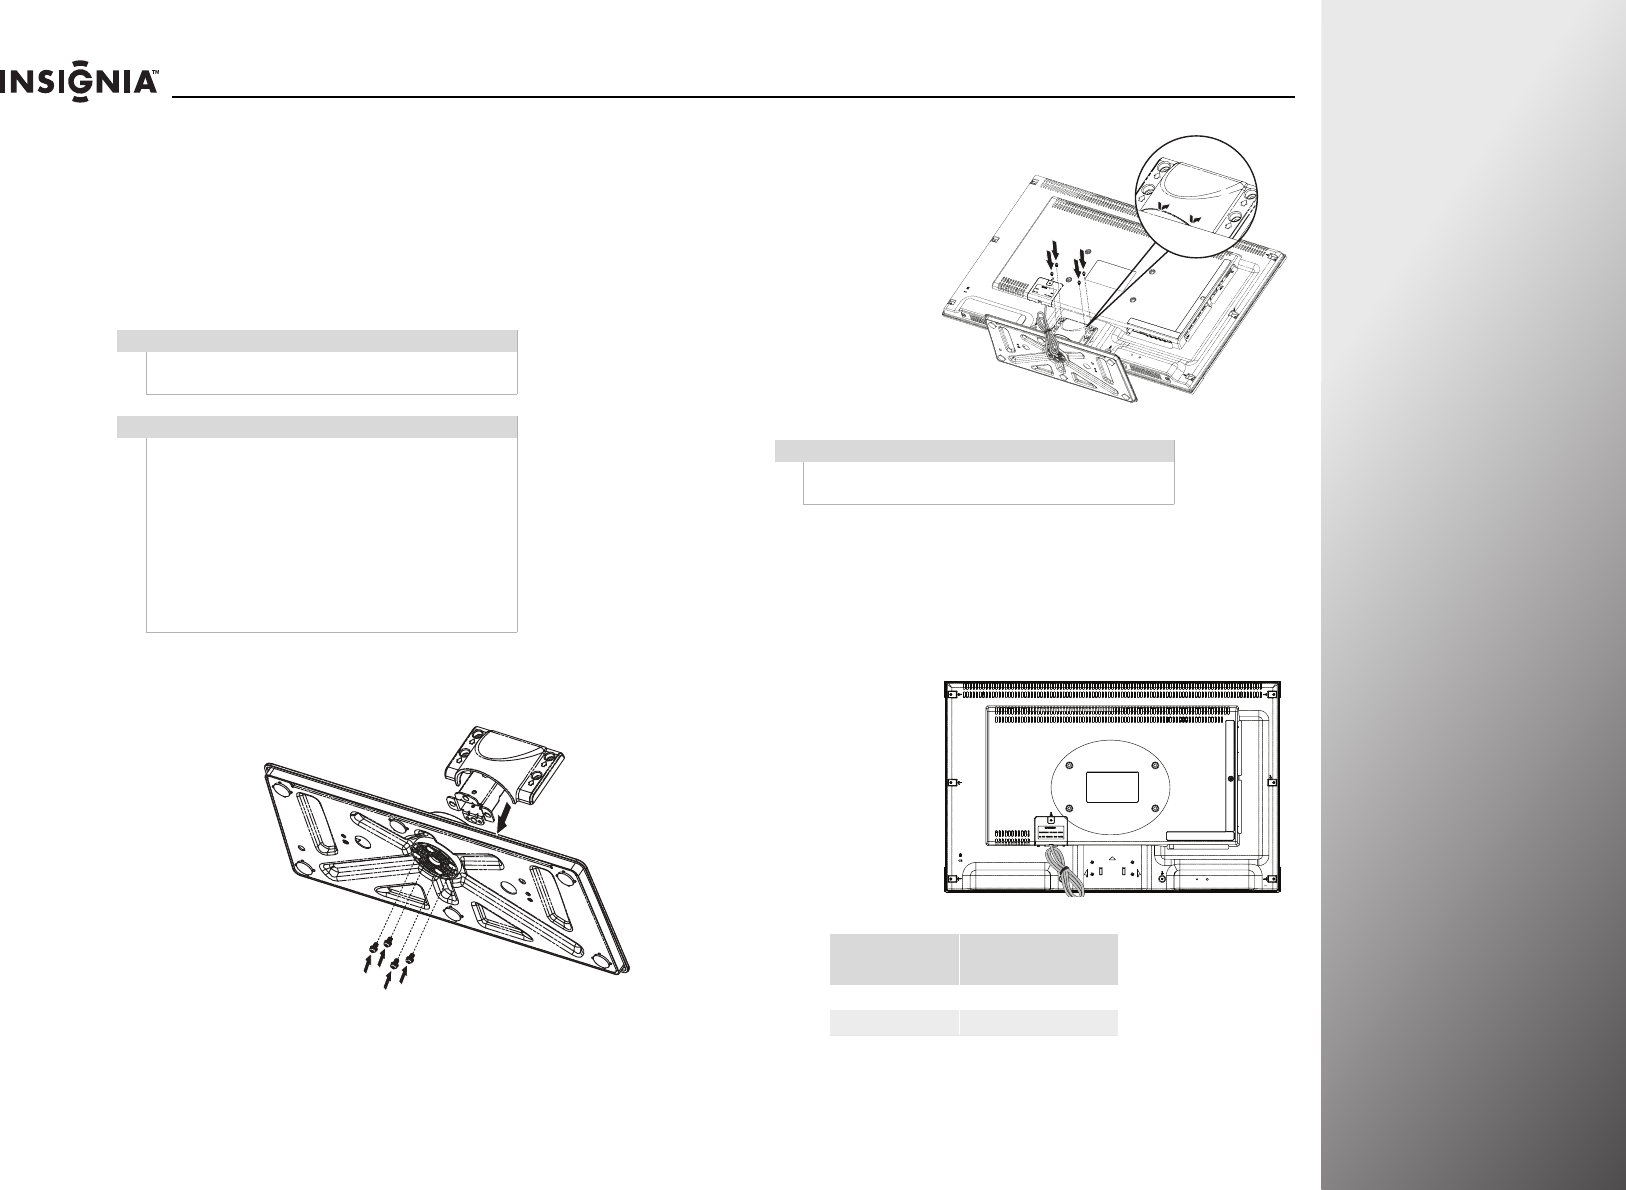
Installing the stand or
wall-mount bracket
To set your TV on a cabinet or other flat surface, you must install
the stand.
To mount your TV on a wall or other vertical surface, you must
remove the stand.
Installing the stand
To install the stand:
1Carefully place
your TV screen
face-down on a
cushioned, clean
surface to protect
the screen from
damages and
scratches.
2Attach the stand
neck to the base
and secure it with
four
M4 × L17 mm
screws (provided).
3Align the stand on
the TV base, then
insert the metal
tabs on the stand
into the designated
slots on the TV
base.
4Secure the stand
with four
M4 × L17 mm
screws (provided).
Installing a wall-mount bracket
To install a wall-mount bracket:
1Carefully place your TV screen face-down on a cushioned,
clean surface to protect the screen from damages and
scratches.
2Secure the wall
mount bracket to
the TV using these
four screws or those
provided with the
bracket.
Warning
Make sure that you unplug the power cord before
you install or remove the stand.
Warning
Read these instructions carefully before you try to
install the stand or a wall-mount bracket.
If you are not sure you can install the stand or
wall-mount bracket, consult a professional installer
or service personnel. Your warranty does not cover
damages or injuries that happen due to mishandling
or incorrect assembly.
When installing the stand or wall-mount bracket,
make sure that you place your TV on a soft cushion or
covering to prevent scratching or damage to your
TV’s finish or screen.
Caution
Make sure that you use all the screws provided for
the stand assembly.
Model Vesa mount pattern
(H x V)
NS-32E859A11 200 x 100 mm
NS-42E859A11 200 x 200 mm
Did you know?
Init Products offer quality
stands and mounts, perfect for
your new TV.
Visit the Best Buy store nearest
you to see a wide assortment
of television accessories.
12 www.insigniaproducts.com
Getting Started NS-32E859A11/NS-42E859A11
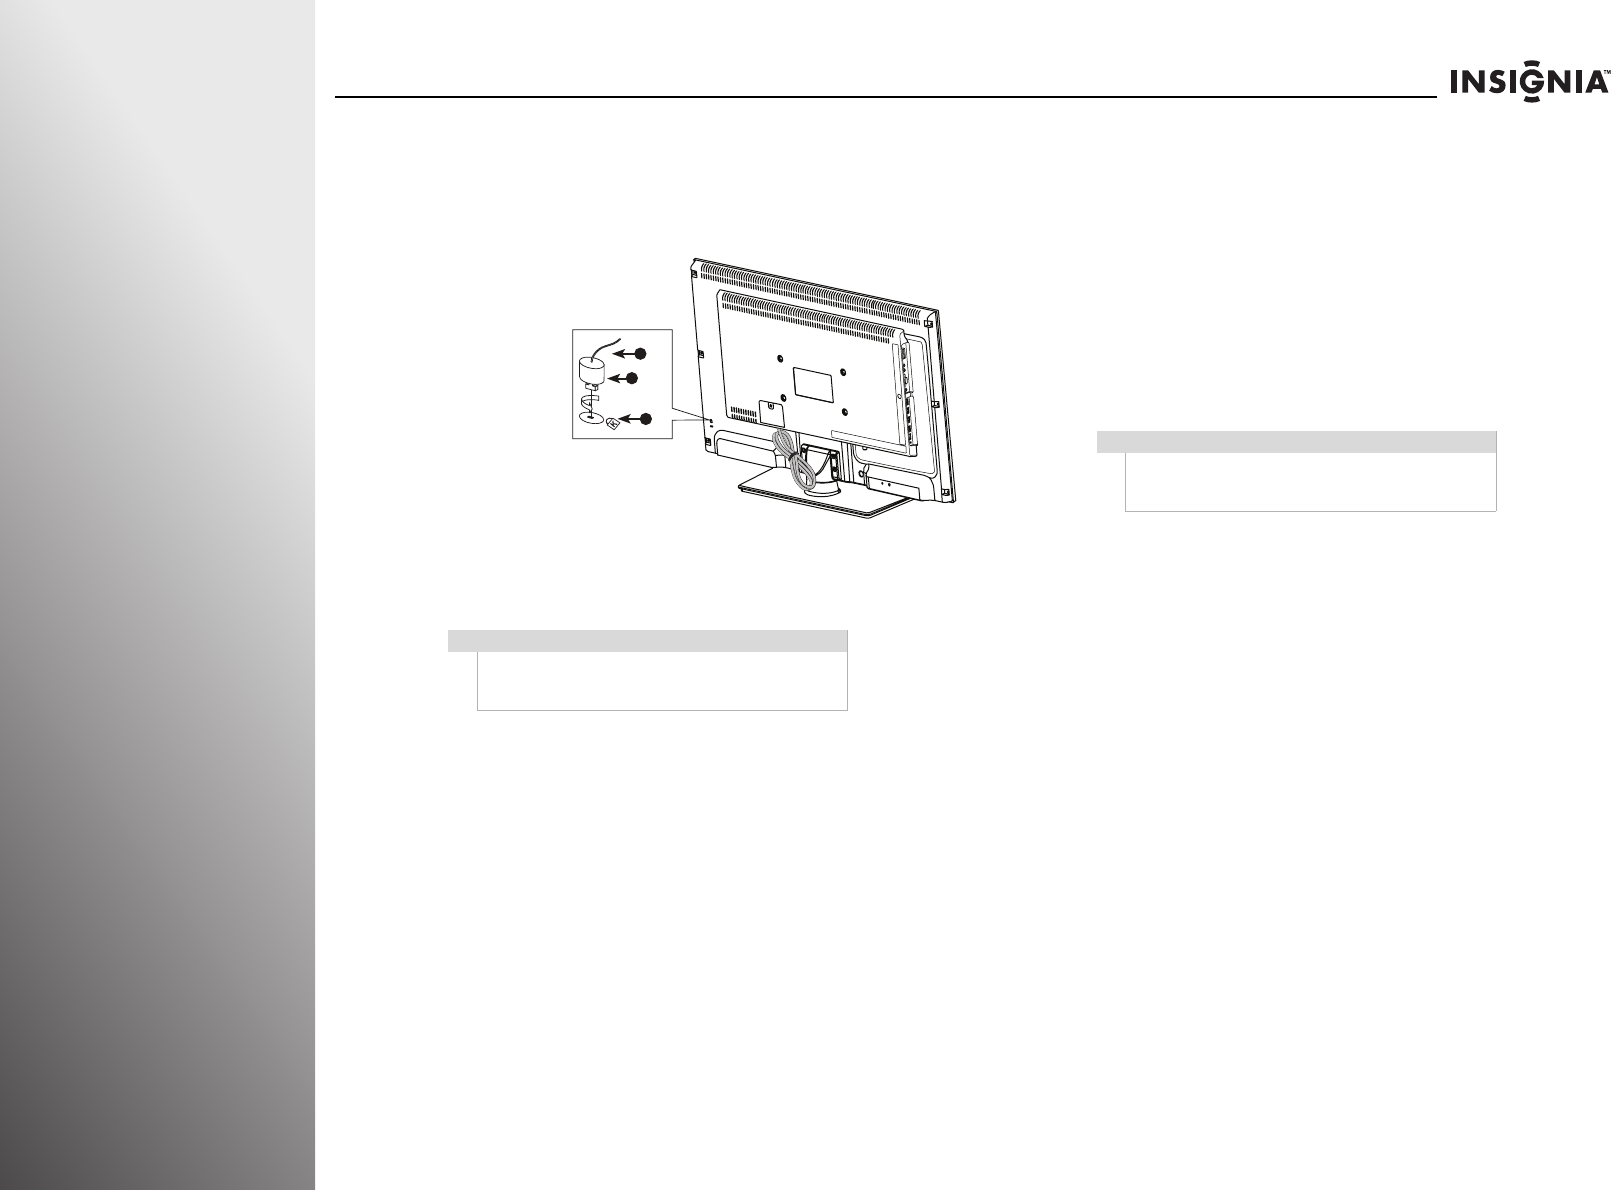
Installing a Kensington lock
A Kensington lock (not provided) is a device used to physically
secure your TV when it is used in a public place.
To install a Kensington lock:
1Insert the
locking device
into the
Kensington
slot on the TV.
2Turn the
device in the
locking
direction.
3Connect the Kensington lock cable.
4Secure the Kensington lock to a desk or a heavy stationary
object.
TV components
Accessories
Make sure that the following accessories are provided in the
packaging:
Caution
The appearance of the lock and the locking direction
may vary depending on the lock manufacturer. See
the documentation that came with the lock.
3
1
2
• TV stand with screws
• Universal remote control
with AA batteries (2)
• Component video cable
•Audio cable
•Cleaning cloth
•Quick Setup Guide
Note
The cleaning cloth is for cleaning the TV screen only.
Do not use the cleaning cloth to clean any other part
of your TV.
www.insigniaproducts.com 13
NS-32E859A11/NS-42E859A11 Getting Started
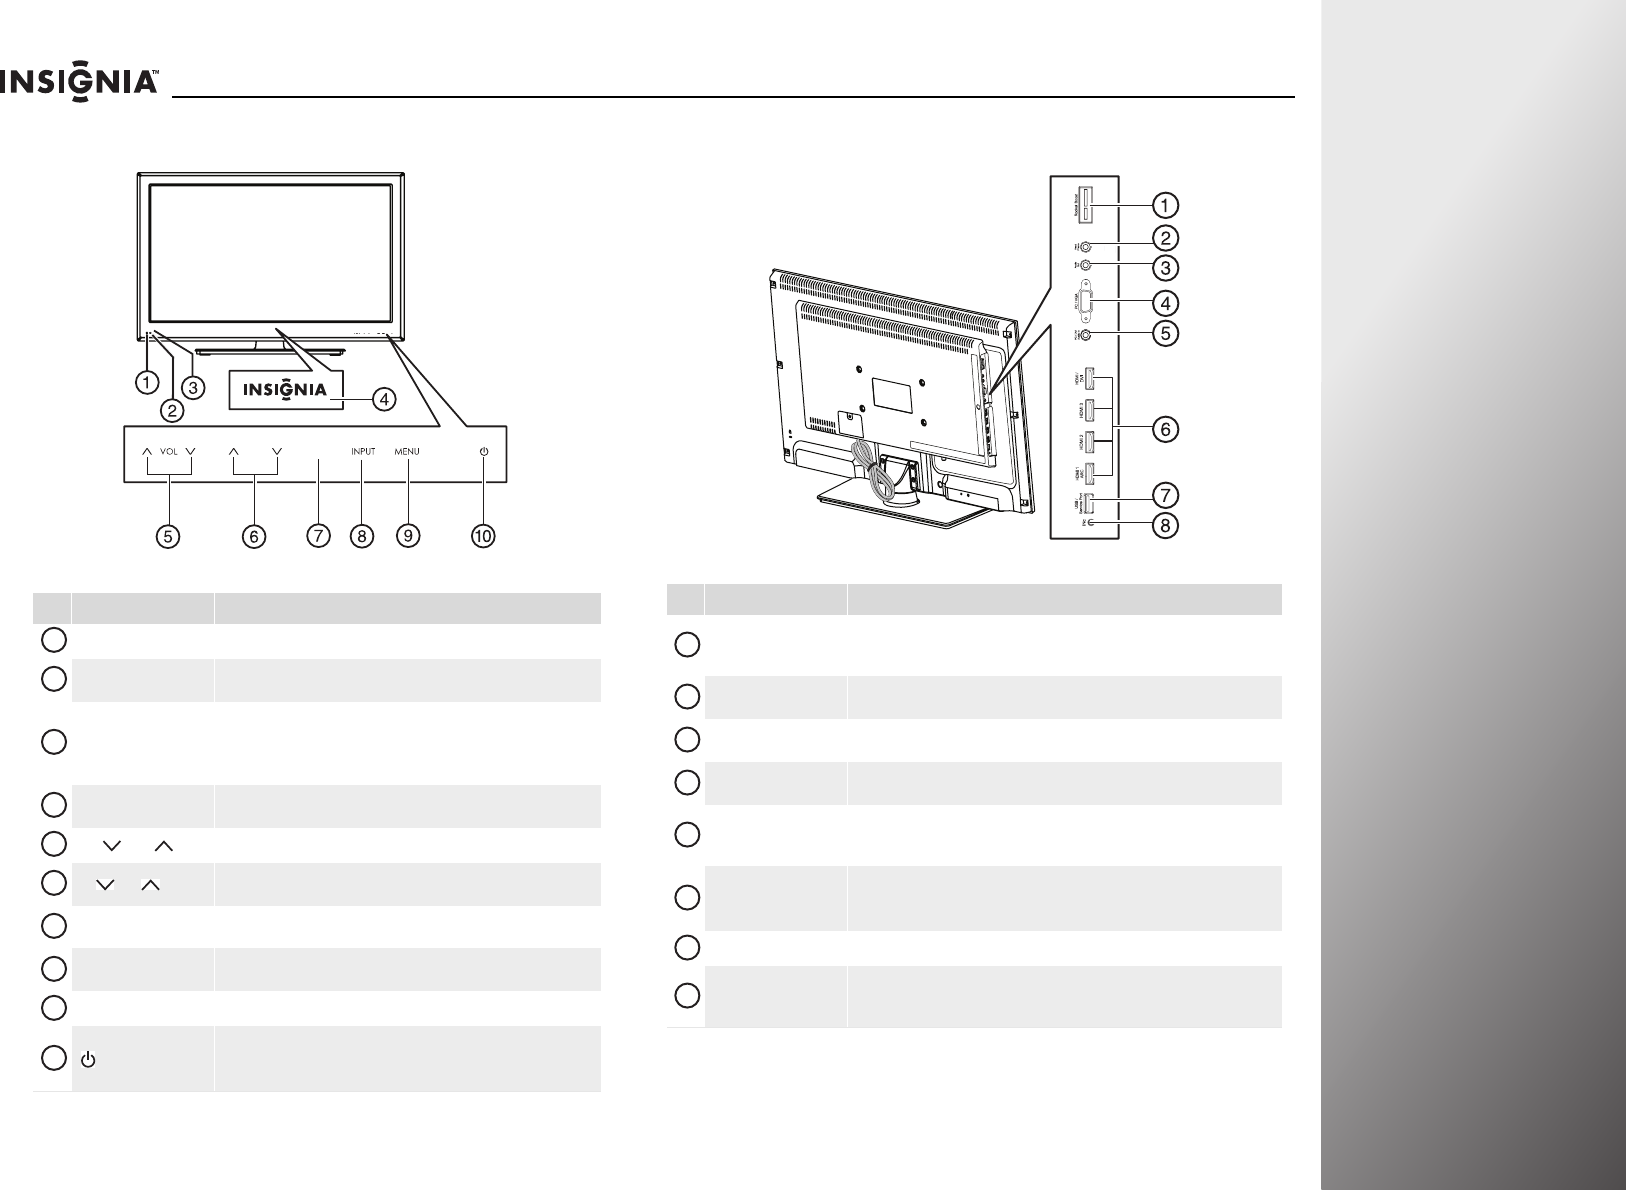
Front Side
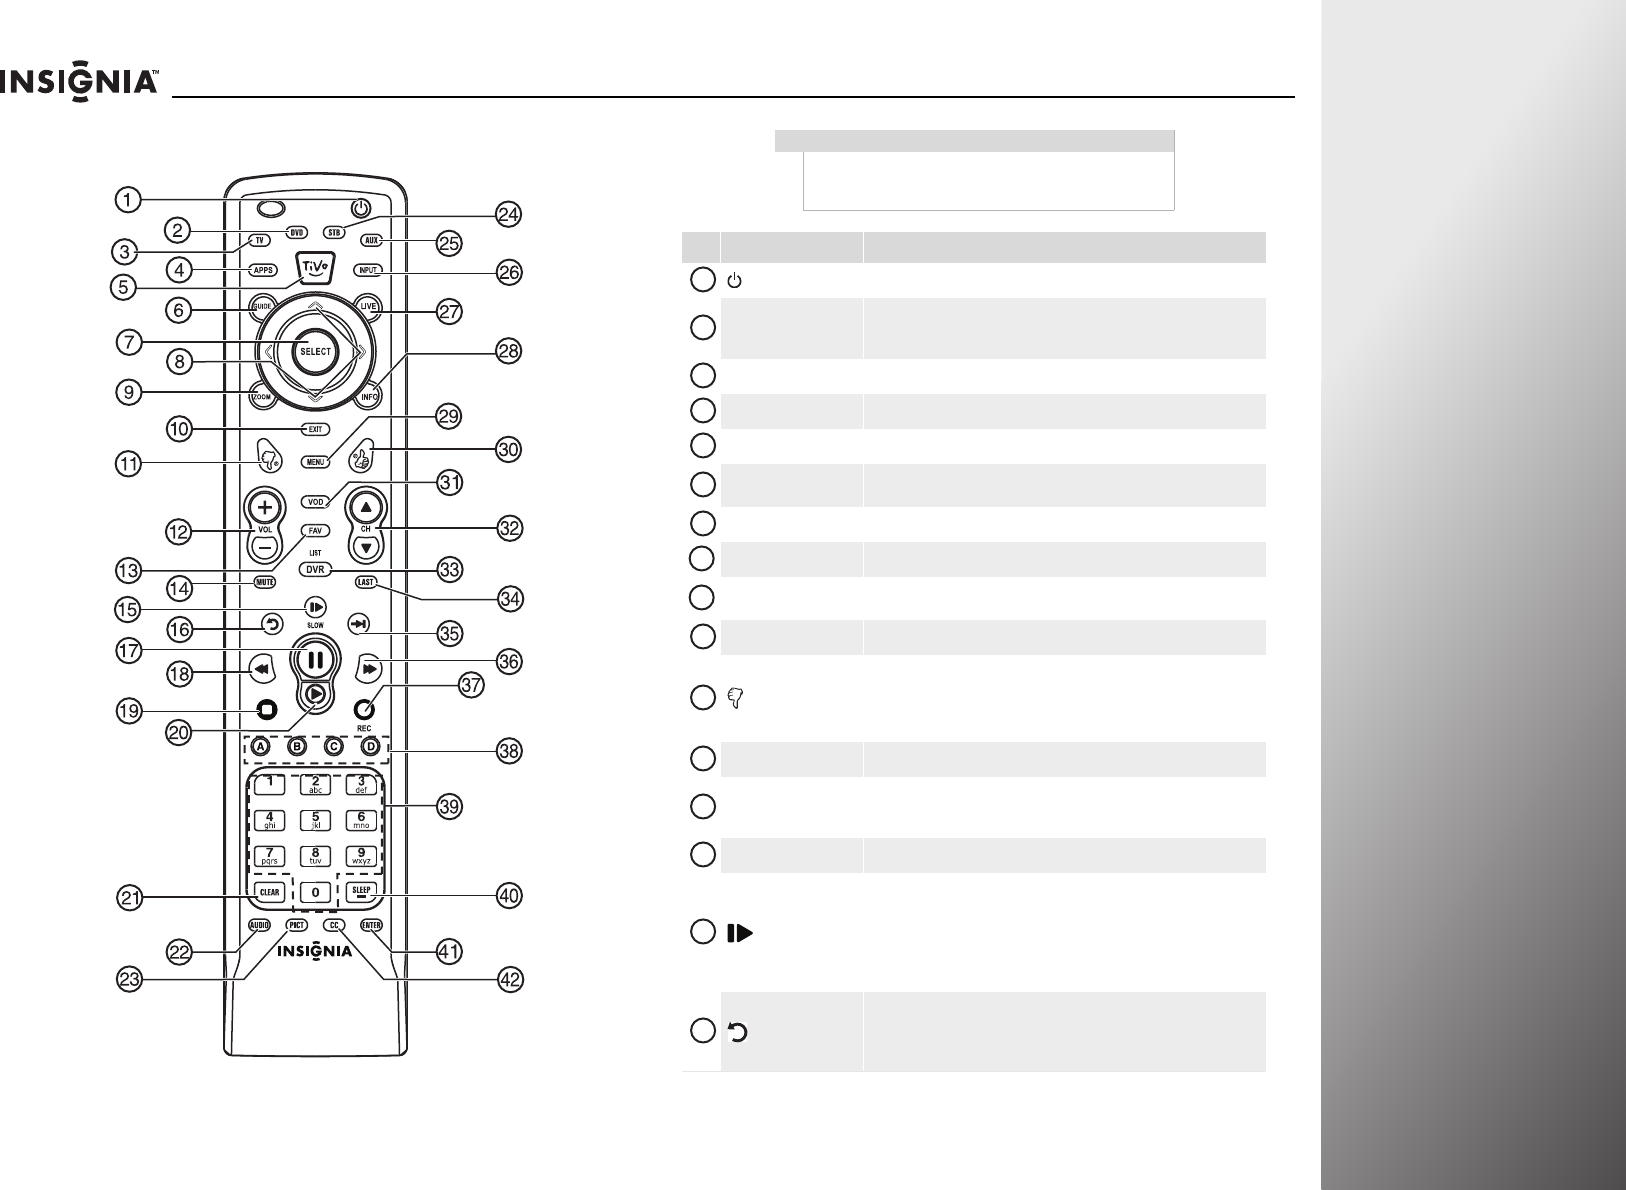
#Button Description
Remote control sensor Receives signals from the remote control. Do not block.
Ambient light sensor Detects the ambient light conditions to optimize the picture
brightness for optimum viewing and provides energy savings.
Power indicator
Lights blue when your TV is turned on.
Depending on the TV power on mode you select, lights red or purple
when your TV is in standby mode. For more information, see “Setting
the TV power on mode” on page 93.
INSIGNIA logo Lights when the logo feature is turned on. For more information, see
“Adjusting the INSIGNIA logo brightness” on page 92.
VOL /VOL Press to decrease or increase the volume.
CH /CH Press to go to the previous or next channel. For more information, see
“Selecting a channel” on page 37.
GAME Press to use the Game mode feature for optimal performance while
playing games.
INPUT Press to open input source list. For more information, see “Selecting
the video input source” on page 35.
MENU Press to open the on-screen menu. Press again to close the menu.
(power)
Press to turn on your TV. Press again to put your TV in standby mode.
When your TV is in standby mode, power still flows through it. To
completely disconnect power, unplug the power cord.
GAMECH
GAMECH
1
2
3
4
5
6
7
8
9
10
#Jack Description
Rocketboost
Insert a Rocketboost Wireless card (RF-RBCARD, sold seperately) to wirelessly
connect Rocketboost audio products to your TV. For more information, see
“Setting up Rocketboost™” on page 51.
Headphone Connect headphones to this jack. For more information, see “Connecting
headphones” on page 25.
Audio Out Connect an analog sound system to this jack to send the TV audio through the
sound system. See “Connecting an analog audio receiver” on page 26.
PC/VGA Connect the video for a computer to this jack. For more information, see
“Connecting a computer” on page 24.
PC/DVI Audio In
Connect the audio for a computer or DVI device to this jack. For more
information, see “Connecting a computer” on page 24 or “Connecting a DVI
device” on page 21.
HDMI jacks
Connect HDMI devices to these jacks. An HDMI cable carries both video and
sound. You do not need to make an audio connection for an HDMI device.
For more information, see “Connecting an HDMI device” on page 20.
USB/Service Port For service only. Do not use.
INc
Connect a device that has RS232 controls, such as a connected soundbar. By
doing this your TV remote control will be able to control the soundbar’s
volume.
1
2
3
4
5
6
7
8
14 www.insigniaproducts.com
Getting Started NS-32E859A11/NS-42E859A11
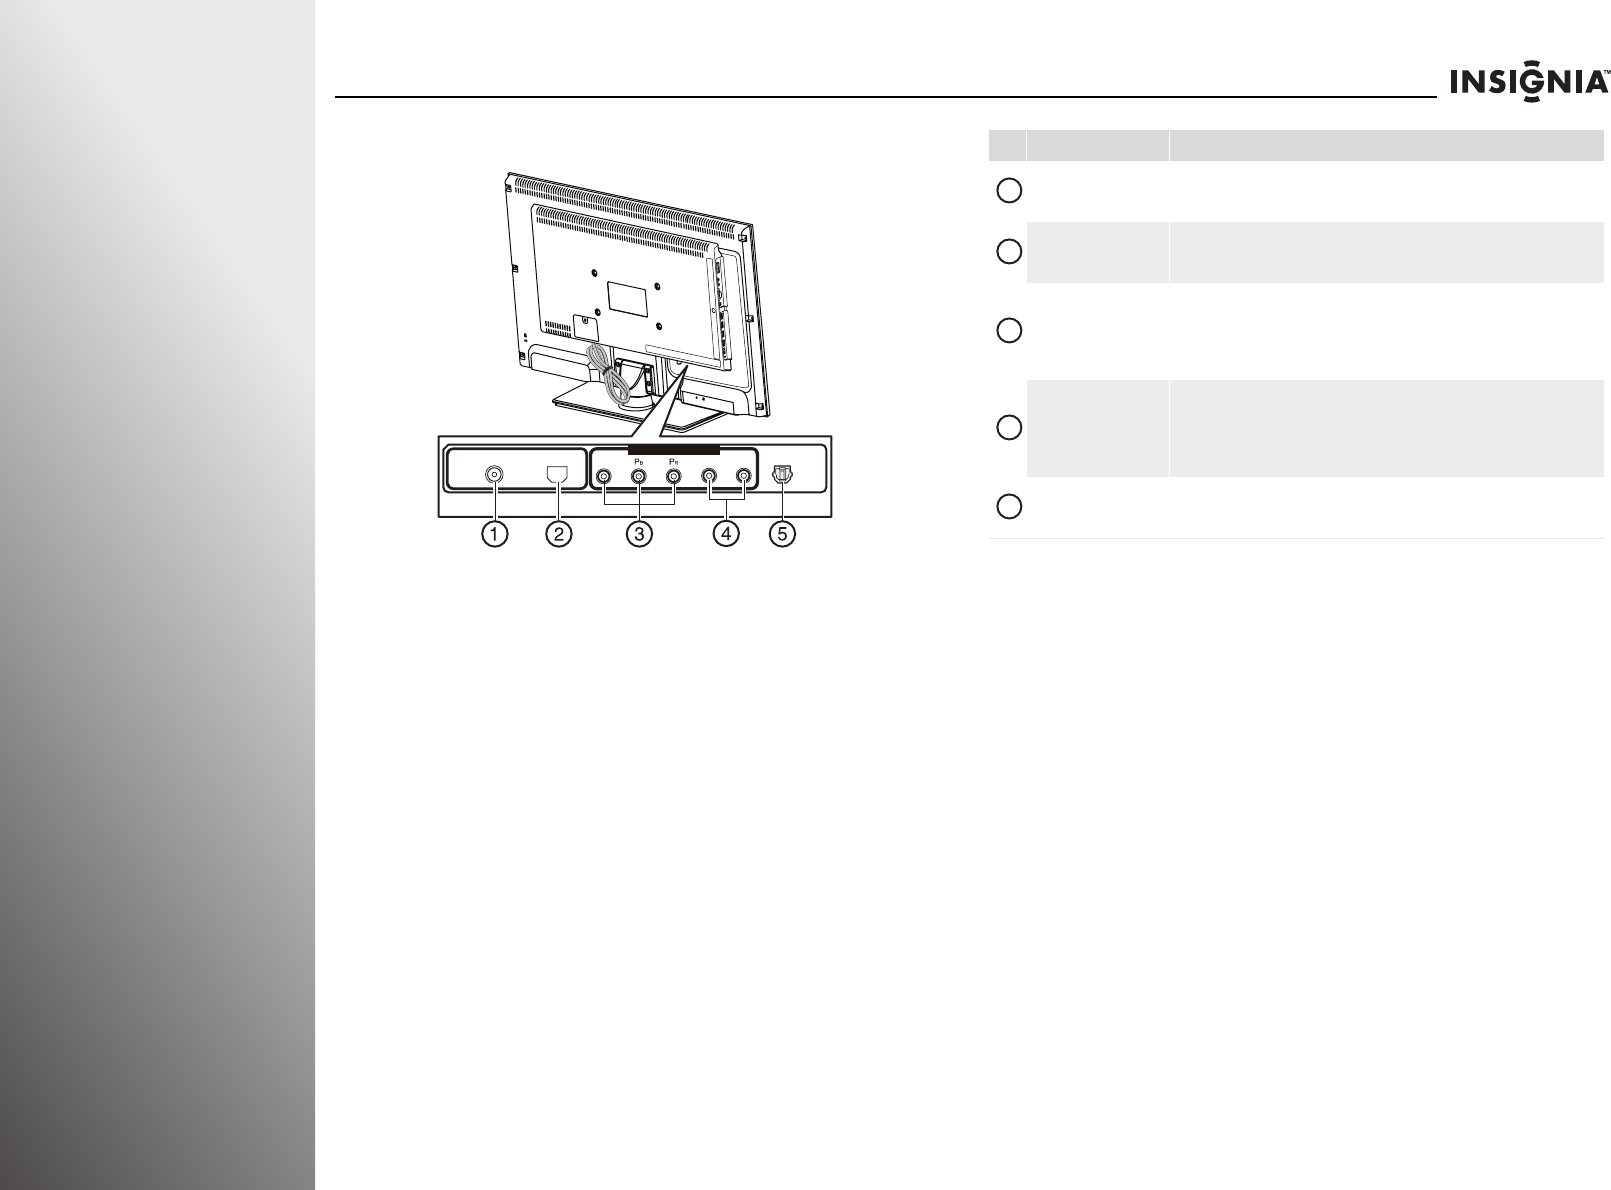
Back
ANT/CABLE IN ETHERNET
COMPONENT/ AV-IN
SPDIF
SPDIF
Y/Video L R
#Jack Description
ANT/CABLE IN
Connect an antenna, cable TV (without a cable box), or a satellite TV box to
this jack. For more information, see “Connecting an antenna or cable TV
without a cable box” on page 18.
ETHERNET
Connect an Ethernet cable to this jack to connect your TV to the Internet. For
more information, see “Connecting your TV to your home network” on
page 26.
COMPONENT/AV-IN
Connect the video for a component video device to these jacks, or connect the
video for a composite video device to the Y/Video jack. For more information,
see “Connecting a component video device” on page 22, “Connecting a
composite video device” on page 23, or “Connecting a camcorder, game, or
VCR” on page 23.
L/R (audio in)
Connect the audio for a component video device connected to the
Y/Video/PB/PR jacks or a composite video device connected to the Y/Video
jack. For more information, see “Connecting a component video device” on
page 22, “Connecting a composite video device” on page 23, or “Connecting a
camcorder, game, or VCR” on page 23.
SPDIF
Connect a digital sound system to this jack to send the TV audio through the
sound system. For more information, see “Connecting a digital audio receiver”
on page 25.
1
2
3
4
5
www.insigniaproducts.com 15
NS-32E859A11/NS-42E859A11 Getting Started
Remote control Note
If you see a low battery message or the power button
blinks five times after your press a button, the remote
control batteries need to be changed.
#Button Description
(power) Press to turn your TV on or off.
DVD
Press to control a DVD player. You must program the remote control
before this button works. For more information, see “Programming your
universal Insignia remote control” on page 29.
TV Press to put the remote in TV mode.
APPS Press to open the Apps bar.
TiVo Press to open the Home menu.
GUIDE Press to open the program guide. For more information, see “Displaying
additional information” on page 37.
SELECT Press to confirm selections or changes.
S T W XPress to move left, right, up, or down in on-screen menus.
ZOOM Press to select the aspect ratio. For more information, see “Adjusting the
video settings” on page 42.
EXIT Press to close the on-screen menu.
(thumbs down)
Press to decrease the thumbs rating by 1 thumb.
In the channel list, press to remove a highlighted channel from the
favorite list.
In the on-screen keyboard, press to switch to lowercase letters.
VOL+/VOL– Press to increase or decrease the volume.
FAV
Press to open the favorite channel list. For more information, see
“Setting up the channel and favorite channel lists” on page 68 and
“Viewing a favorite channel” on page 69.
MUTE Press to mute the sound. Press again to restore the sound.
/SLOW
Press to enter slow motion playback in TV VOD mode (watching Netflix
and CinemaNow) or when using a DVD player or Blu-ray player. For more
information, see “Programming your universal Insignia remote control”
on page 29.
Press to turn the video window on or off. For more information, see
“Turning the video window on or off” on page 45.
(replay)
Press to jump back eight seconds in TV VOD mode (watching Netflix and
CinemaNow) or when using a DVD player or Blu-ray player. For more
information, see “Programming your universal Insignia remote control”
on page 29.
1
2
3
4
5
6
7
8
9
10
11
12
13
14
15
16
16 www.insigniaproducts.com
Getting Started NS-32E859A11/NS-42E859A11
(pause)
Press to pause playback in TV VOD mode (watching Netflix and
CinemaNow) or when using a DVD player or Blu-ray player. For more
information, see “Programming your universal Insignia remote control”
on page 29.
(fast-reverse)
Press to fast-reverse in TV VOD mode (watching Netflix and CinemaNow)
or when using a DVD player or Blu-ray player. For more information, see
“Programming your universal Insignia remote control” on page 29.
(stop)
Press to stop playback in TV VOD mode (watching Netflix and
CinemaNow) or when using a DVD player or Blu-ray player. For more
information,see “Programming your universal Insignia remote control”
on page 29.
X (play)
Press to start playback in TV VOD mode (watching Netflix and
CinemaNow) or when using a DVD player or Blu-ray player. For more
information, see “Programming your universal Insignia remote control”
on page 29.
CLEAR Press to clear character input in the on-screen keyboard.
AUDIO
Press to adjust the audio settings for Audyssey Dynamic Volume,
SRS TruSurround HD, Audio Only, Audio Return Channel (ARC),
Treble, Bass, or Balance. For more information, see “Manually
adjusting audio settings” on page 46.
PICT Press to adjust the video settings. For more information, see “Adjusting
the video settings” on page 42.
STB
Press to control a set-top box. You must program the remote control
before this button works. For more information, see “Programming your
universal Insignia remote control” on page 29.
AUX
Press to control auxiliary devices, such as amplifiers or receivers. You
must program the remote control before this button works. For more
information, see “Programming your universal Insignia remote control”
on page 29.
INPUT
Press to open the input source list, then press S or T to cycle through
the available input sources. For more information, see “Selecting the
video input source” on page 35.
LIVE In menu mode, press to return to full-screen video TV mode.
INFO
Press to display TV status information, such as the channel number,
channel name (if available), or signal source. For more information, see
“Displaying additional information” on page 37.
In the channel list, press to rename the highlighted channel. For more
information, see “Setting up the channel and favorite channel lists” on
page 68.
MENU Press to open the on-screen menu.
(thumbs up)
Press to increase the thumbs rating by 1 thumb.
In the channel list, press to add a highlighted channel to the favorite list.
In the on-screen keyboard, press to switch to uppercase letters.
#Button Description
17
18
19
20
21
22
23
24
25
26
27
28
29
30
VOD
Press to access the VOD (video on demand) on-screen menu to watch
video services offered through your connected TV, such as Netflix,
CinemaNow, etc.
CHS/CHTPress to change channels. For more information, see “Selecting a
channel” on page 37.
LIST/DVR
Press to see the list of all the recorded programs in a DVR/STB that is set
up with your remote control. You must program the remote control
before this button works. For more information, see “Programming your
universal Insignia remote control” on page 29.
LAST Press to go to the last viewed channel in TV mode.
(advance)
Press to jump forward to the next segment in TV VOD mode (watching
Netflix and CinemaNow) or when using a DVD player or Blu-ray player.
For more information, see “Programming your universal Insignia remote
control” on page 29.
(fast-forward)
Press to fast-forward in TV VOD mode (watching Netflix and
CinemaNow) or when using a DVD player or Blu-ray player. For more
information, see “Programming your universal Insignia remote control”
on page 29.
(record)
Press to record a program. You need to program the remote control to
work with your DVR. You must program the remote control before this
button works. For more information, see “Programming your universal
Insignia remote control” on page 29.
A B C D Provides an enhanced interface for attached device (such as a DVR),
Internet applications, and TiVo search features.
Numbers
Press to enter channel numbers, the parental control password, or
characters.
When programming the remote control, press to enter device and
programming codes.
SLEEP/—
Press to enter a digital sub-channel number in Live TV mode.
Press to set the sleep timer. You can select Cancel, 5, 10, 15, 30, 60, 90
minutes and 2, 3, 4 hours. For more information, see “Setting the sleep
timer” on page 81.
ENTER Press to confirm selections or changes.
CC Press to turn closed captioning on or off. For more information, see
“Turning closed captioning on or off” on page 76.
#Button Description
31
32
33
34
35
36
37
38
39
40
41
42
www.insigniaproducts.com 17
NS-32E859A11/NS-42E859A11 Getting Started
Using the remote control
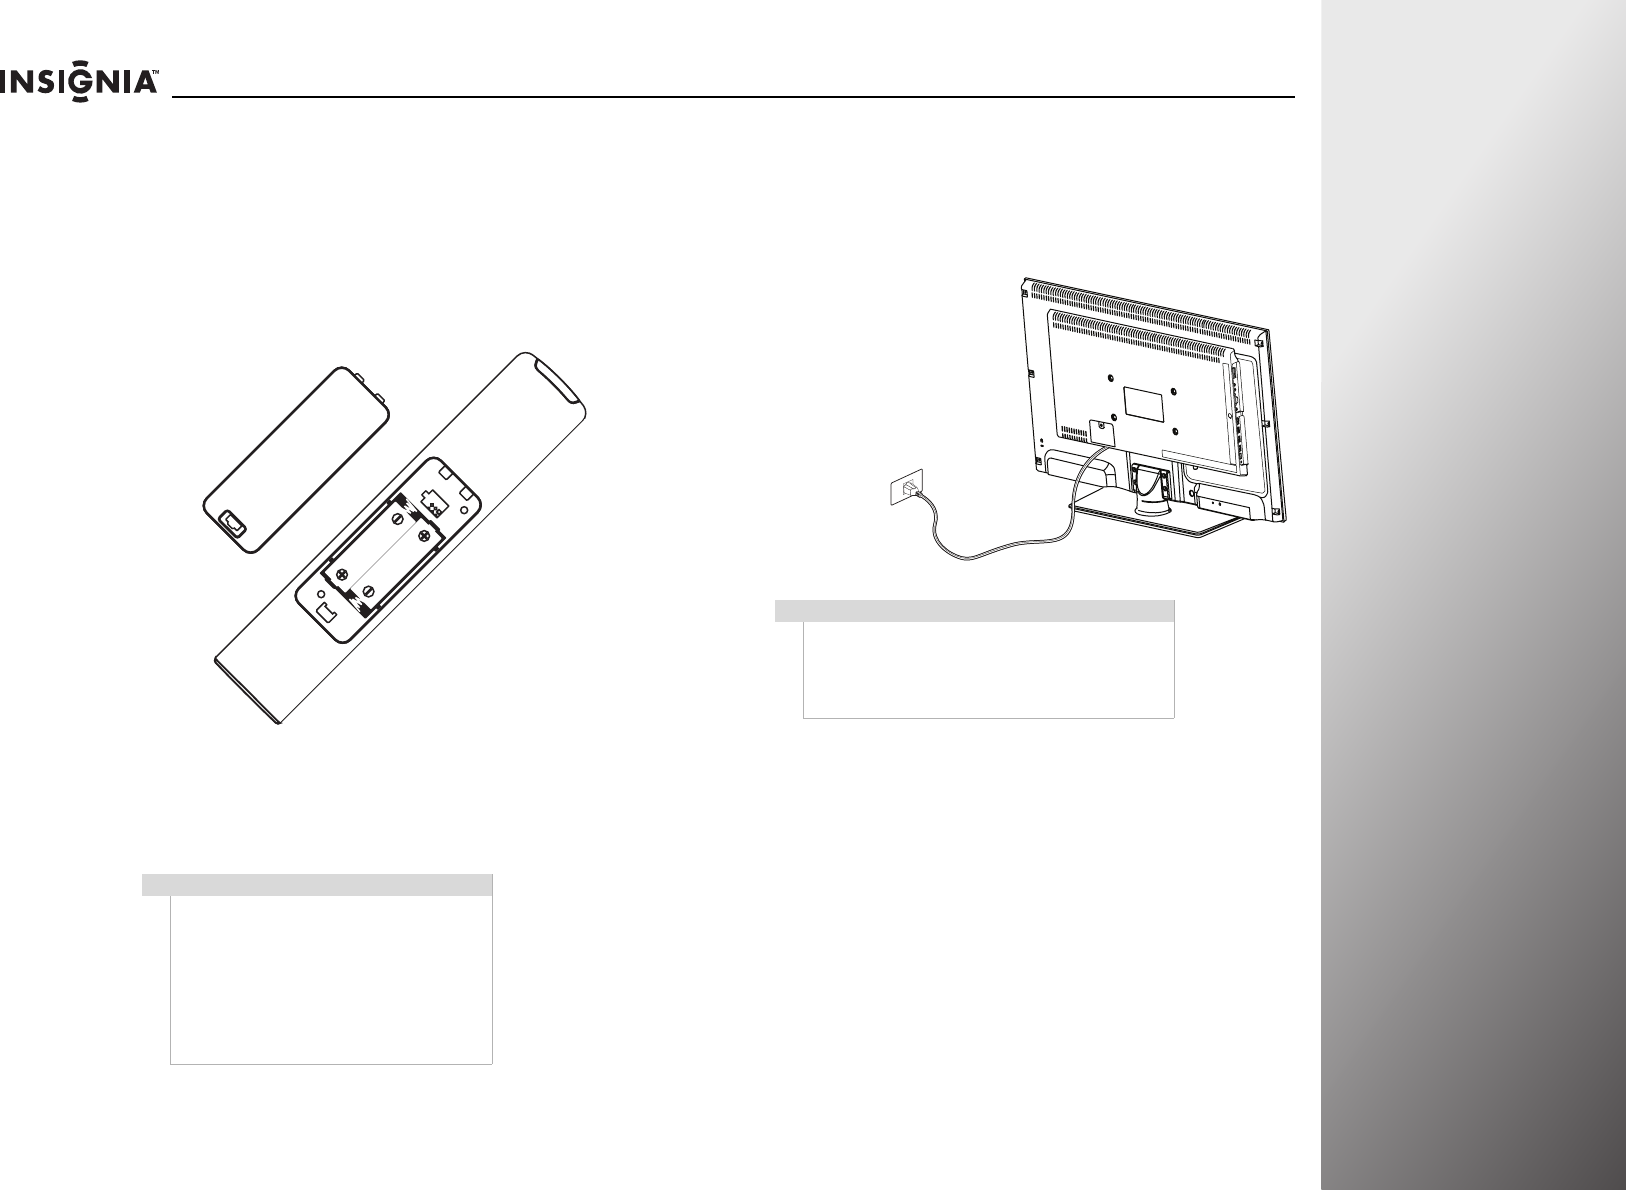
Installing the remote control batteries
To install the remote control batteries:
1While pressing the release button on the battery
compartment cover on the back of the remote, lift the cover
off the remote.
2Insert two AA batteries into the battery compartment. Make
sure that you match the + and – symbols on the batteries
with the + and – symbols in the battery compartment.
3Replace the battery cover.
Making connections
Connecting the power
To connect the power:
•Plug the power
cord on back of
your TV into a
power outlet.
Cautions
• Batteries should not be exposed to
excessive heat, such as sunshine, heat
registers, or fire.
• Battery chemicals can cause a rash. If the
batteries leak, clean the battery
compartment with a cloth. If chemicals
touch your skin, wash immediately.
• Make sure that batteries are disposed of
correctly. Do not burn or incinerate.
Cautions
• Make sure that you use the correct type of
power. See the label on your TV.
• If you do not intend to use your TV for an
extended period of time, unplug the power
cord from the power outlet.
Did you know?
Insignia, Dynex, and
Rocketfish offers a wide
variety of cords and cables
for connecting just about
type of device to your new
TV. Stop in a store nearest
you or visit
www.bestbuy.com
18 www.insigniaproducts.com
Getting Started NS-32E859A11/NS-42E859A11
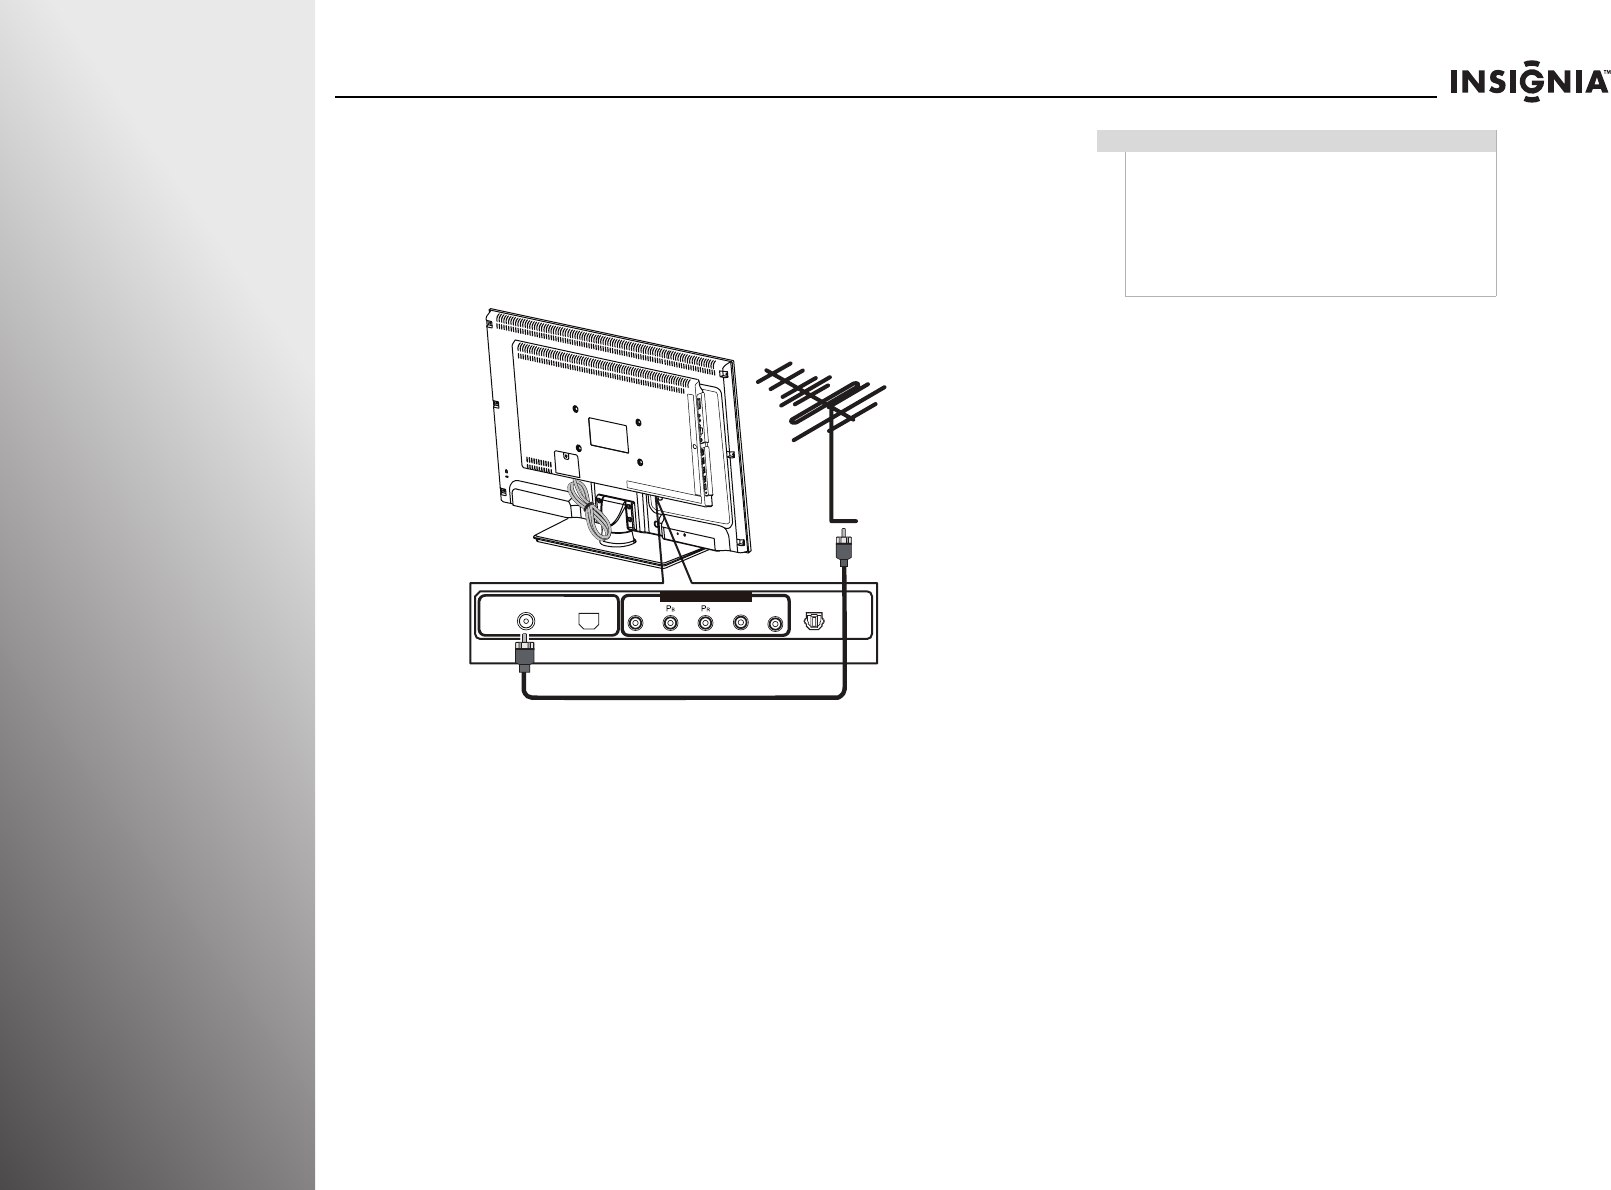
Connecting an antenna or cable TV without
a cable box
To connect an antenna or cable TV without a cable box:
• Connect a coaxial cable (not provided) to the ANT/CABLE IN
jack on the back of your TV and to the antenna or cable TV
wall jack.
ANT/CABLE IN ETHERNET
COMPONENT/ AV-IN
SPDIF
SPDIF
Y/Video L R
Cautions
• Use a 75 ohm cable to eliminate interference and
noise from radio waves.
• Do not bundle the 75 ohm cable with the power
cord or other cables.
• If the antenna is not installed correctly, contact
qualified service personnel to correct the
problem.

www.insigniaproducts.com 19
NS-32E859A11/NS-42E859A11 Getting Started
Connecting a cable or satellite box
Many cable or satellite TV boxes have more than one
connection type. To get the best video, you should use the best
connection type available.
To connect a cable TV or satellite TV box:
1Connect the incoming cable or satellite from the wall jack to
the cable-in or satellite-in jack on the cable box or satellite
box.
2Depending on the jacks available on the cable or satellite TV
box, connect a cable from the outgoing jacks on the cable or
satellite TV box to the corresponding jacks on the back of
your TV. The connection can be to an HDMI jack or the
COMPONENT/AV-IN (Y/PB/PR) jacks.
Connection type Video quality
HDMI Best
Component Better than composite
Composite Better than coaxial
Coaxial Good
ANT/CABLE IN ETHERNET
COMPONENT/ AV-IN
SPDIF
SPDIF
Y/Video L R
HDMI
Component
Connect the cable TV or satellite to
one of the follow connections:
HDMI
Component
Composite
Aaudio

20 www.insigniaproducts.com
Getting Started NS-32E859A11/NS-42E859A11
3If you use the COMPONENT/AV-IN (Y/PB/PR) jacks,
connect an audio cable (provided) to the Land R (audio in)
jacks on the back of your TV.
4Connect the other end of the audio cable to the audio out
jack(s) on the cable or satellite box.
Connecting an HDMI device
If your device has an HDMI connection, we recommend that
you use the HDMI connection to get the best quality possible.
To connect an HDMI device:
1Make sure that your TV’s power cord is unplugged and the
HDMI device is turned off.
2Connect an HDMI cable (not provided) to the HDMI 1,
HDMI 2, HDMI 3, or HDMI/DVI jack on the side of your TV
and to the HDMI OUT jack on the HDMI device.
To play from an HDMI device:
1Turn on your TV.
2Turn on the HDMI device, then set it to the correct output
mode. See the documentation that came with the device
for more information.
3Press INPUT to open the input source list.
4Press S or T to highlight HDMI 1, HDMI 2, HDMI 3, or
HDMI 4, then press SELECT.
Note
• If the cable or satellite box does not have an
HDMI or component connection, you can
connect the cable or satellite to the composite
jacks on the back of your TV. See “Connecting a
composite video device” on page 23.
• If the cable or satellite box does not have an
HDMI, component, or composite connection,
connect the box to the ANT/CABLE IN jack on
the back of your TV. See “Connecting an
antenna or cable TV without a cable box” on
page 18.
Note
If the source sensor is turned on, the inputs that do
not have devices connected are grayed in the input
source list. When you press INPUT, your TV moves
between the inputs that have devices connected.
You can select a grayed input by pressing S or T. For
more information, see “Turning the source sensor on
or off” on page 95.
Side of TV
HDMI device
www.insigniaproducts.com 21
NS-32E859A11/NS-42E859A11 Getting Started
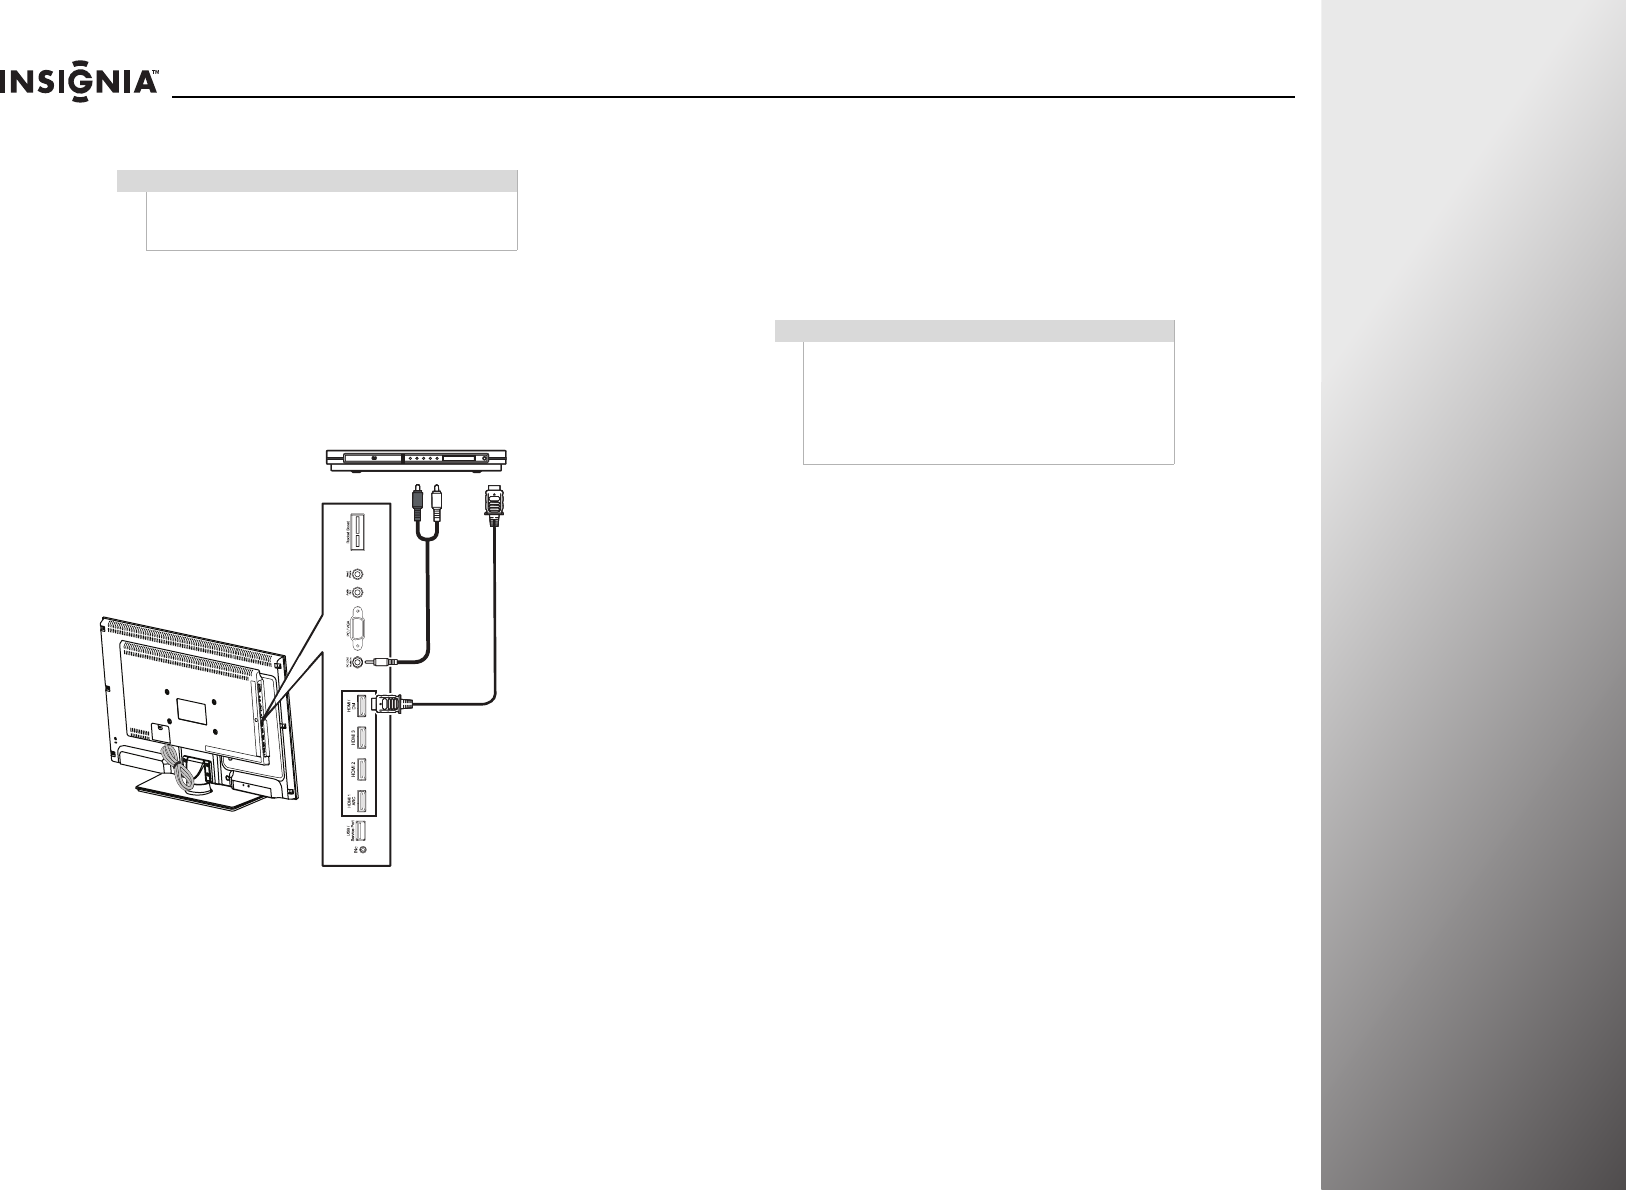
Connecting a DVI device
To connect a DVI device:
1Make sure that your TV’s power cord is unplugged and the
DVI device is turned off.
2Connect an HDMI-DVI adapter (not provided) to one end of
an HDMI cable (not provided), then connect the adapter to
the DVI OUT jack on the DVI device.
3Connect the other end of the HDMI cable to the HDMI/DVI
jack on the side of your TV.
4Connect an audio cable to the PC/DVI Audio In jack on the
side of your TV and to the AUDIO OUT jack on the DVI
device.
To play from a DVI device:
1Turn on your TV.
2Turn on the DVI device, then set it to the correct output
mode. See the documentation that came with the device for
more information.
3Press INPUT to open the input source list.
4Press S or T to highlight HDMI 4, then press SELECT.
Note
A DVI device must be connected to the HDMI/DVI
jack. If you connect a DVI device to another HDMI
jack, you will not hear audio.
DVI device
Side of TV
Note
If the source sensor is turned on, the inputs that do
not have devices connected are grayed in the input
source list. When you press INPUT, your TV moves
between the inputs that have devices connected.
You can select a grayed input by pressing S or T. For
more information, see “Turning the source sensor on
or off” on page 95.
22 www.insigniaproducts.com
Getting Started NS-32E859A11/NS-42E859A11
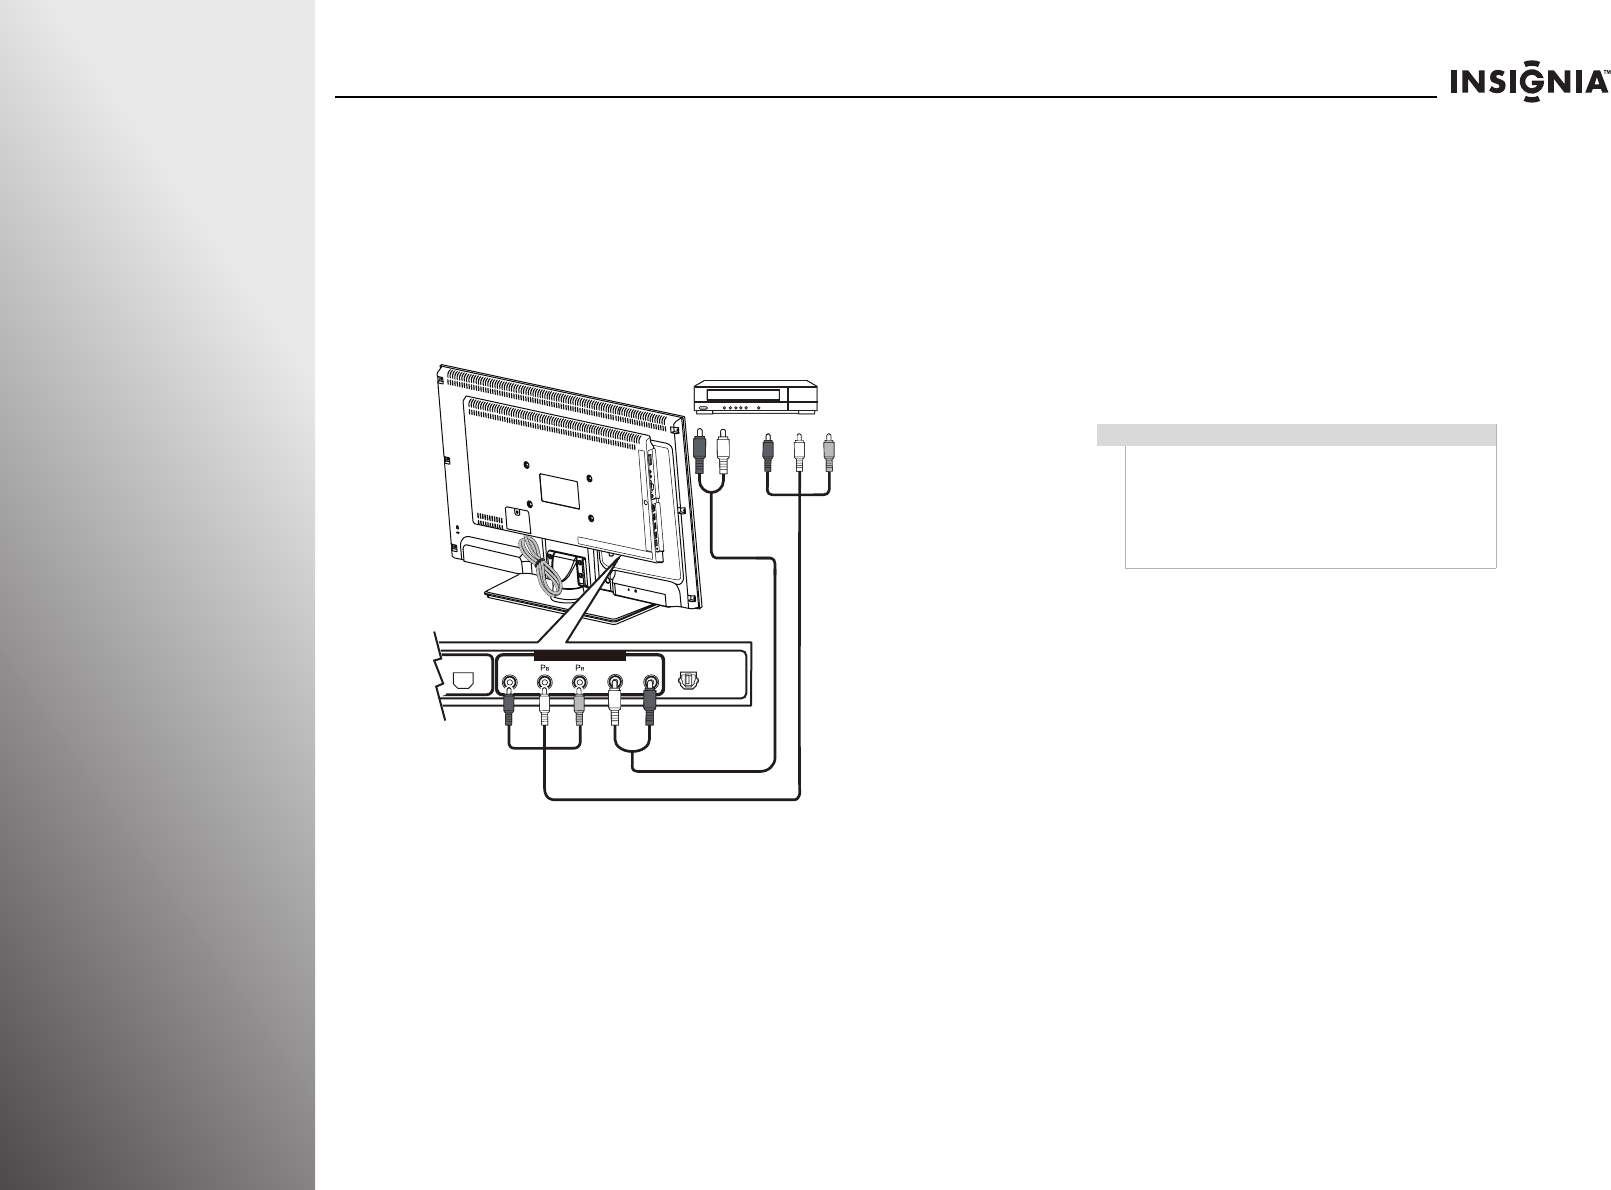
Connecting a component video device
To connect a component video device:
1Make sure that your TV’s power cord is unplugged and the
component video device is turned off.
2Connect a component video cable (provided) to the
COMPONENT/AV-IN (Y/PB/PR) jacks on the back of your TV
and to the COMPONENT OUT jacks on the component
video device.
3Connect an audio cable (provided) to the L and R (audio in)
jacks on the back of your TV and to the L and R AUDIO OUT
jacks on the component video device.
To play from the component video device:
1Turn on your TV.
2Turn on the component video device, then set it to the
correct output mode. See the documentation that came
with the device for more information.
3Press INPUT to open the input source list.
4Press S or T to highlight Component/Composite, then
press SELECT.
ETHERNET
COMPONENT/ AV-IN
SPDIFSPDIF
Y/Video L R
Back of TV
Component video device
Cables are often
color-coded. Match color
to color.
Audio cable
Component video cable
Note
If the source sensor is turned on, the inputs that do
not have devices connected are grayed in the input
source list. When you press INPUT, your TV moves
between the inputs that have devices connected.
You can select a grayed input by pressing S or T. For
more information, see “Turning the source sensor on
or off” on page 95.
www.insigniaproducts.com 23
NS-32E859A11/NS-42E859A11 Getting Started
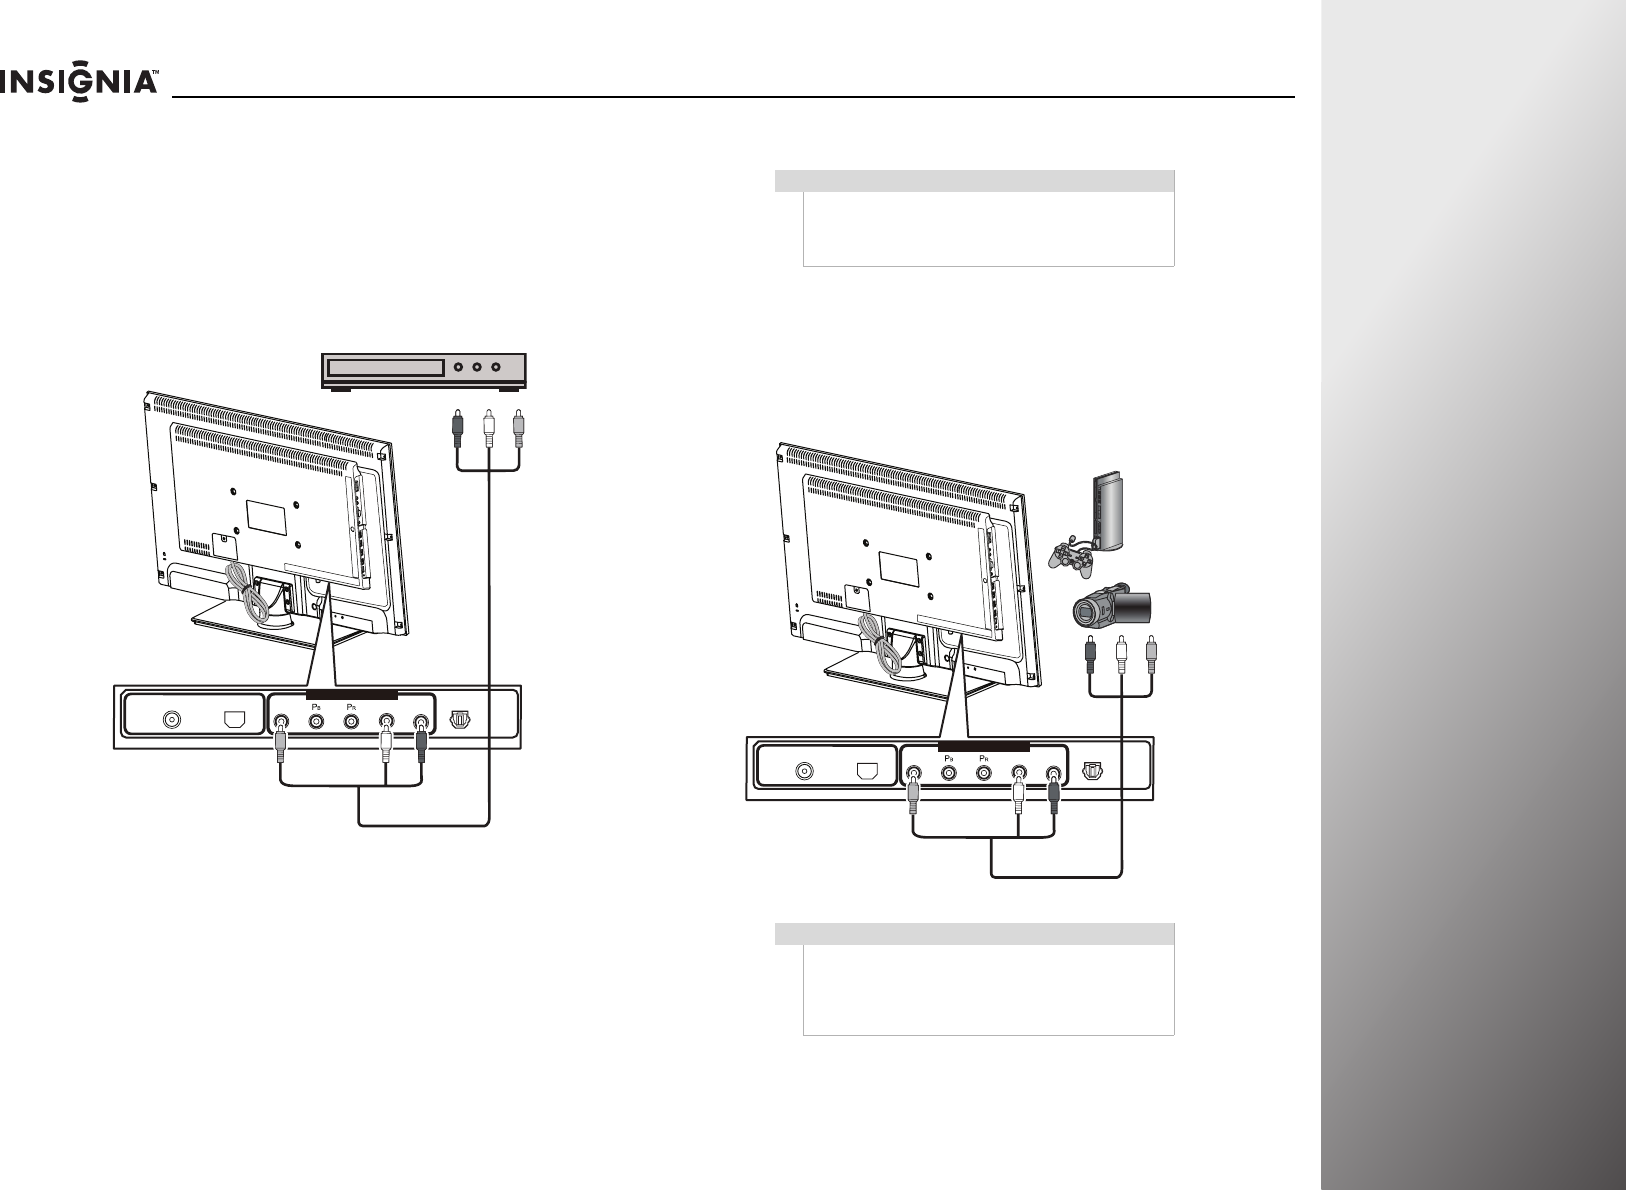
Connecting a composite video device
To connect a composite video device:
1Make sure that your TV’s power cord is unplugged and the
composite video device is turned off.
2Connect an AV cable (not provided) to the Y/Video and
Land R (audio in) jacks on the back of your TV and to the
AV OUT jacks on the composite video device.
To play from the composite video device:
1Turn on your TV.
2Turn on the composite video device, then set it to the
correct output mode. See the documentation that came
with the device for more information.
3Press INPUT to open the input source list.
4Press S or T to highlight Component/Composite, then
press SELECT.
Connecting a camcorder, game, or VCR
To connect a camcorder, game, or VCR:
1Make sure that your TV’s power cord is unplugged and the
camcorder or game console is turned off.
2Connect an AV cable (not provided) to the Y/Video and
Land R (audio in) jacks on the back of your TV and to the
AV OUT jacks on the camcorder, game console, or VCR.
ANT/CABLE IN ETHERNET
COMPONENT/ AV-IN
SPDIF
SPDIF
Y/Video L R
Composite video device
Cables are often
color-coded. Match
color to color.
AV cable
Note
If your camcorder or game console has an HDMI or
component connection, we recommend that you use
the HDMI or component connection to get the best
picture quality.
Note
The composite video jack Y/Video is also one of the
component video jacks. When making connection
with an AV (composite) cable, connect the yellow
plug to the green/yellow (Y/Video) jack on the back
of your TV.
ANT/CABLE IN ETHERNET
COMPONENT/ AV-IN
SPDIF
SPDIF
Y/Video L R
External device
AV cable
24 www.insigniaproducts.com
Getting Started NS-32E859A11/NS-42E859A11
To play from the camcorder or game console:
1Turn on your TV, then turn on the device.
2Press INPUT to open the input source list.
3Press S or T to highlight Component/Composite, then
press SELECT.
4If you connected a VCR, insert a videotape, then press PLAY
on the VCR.
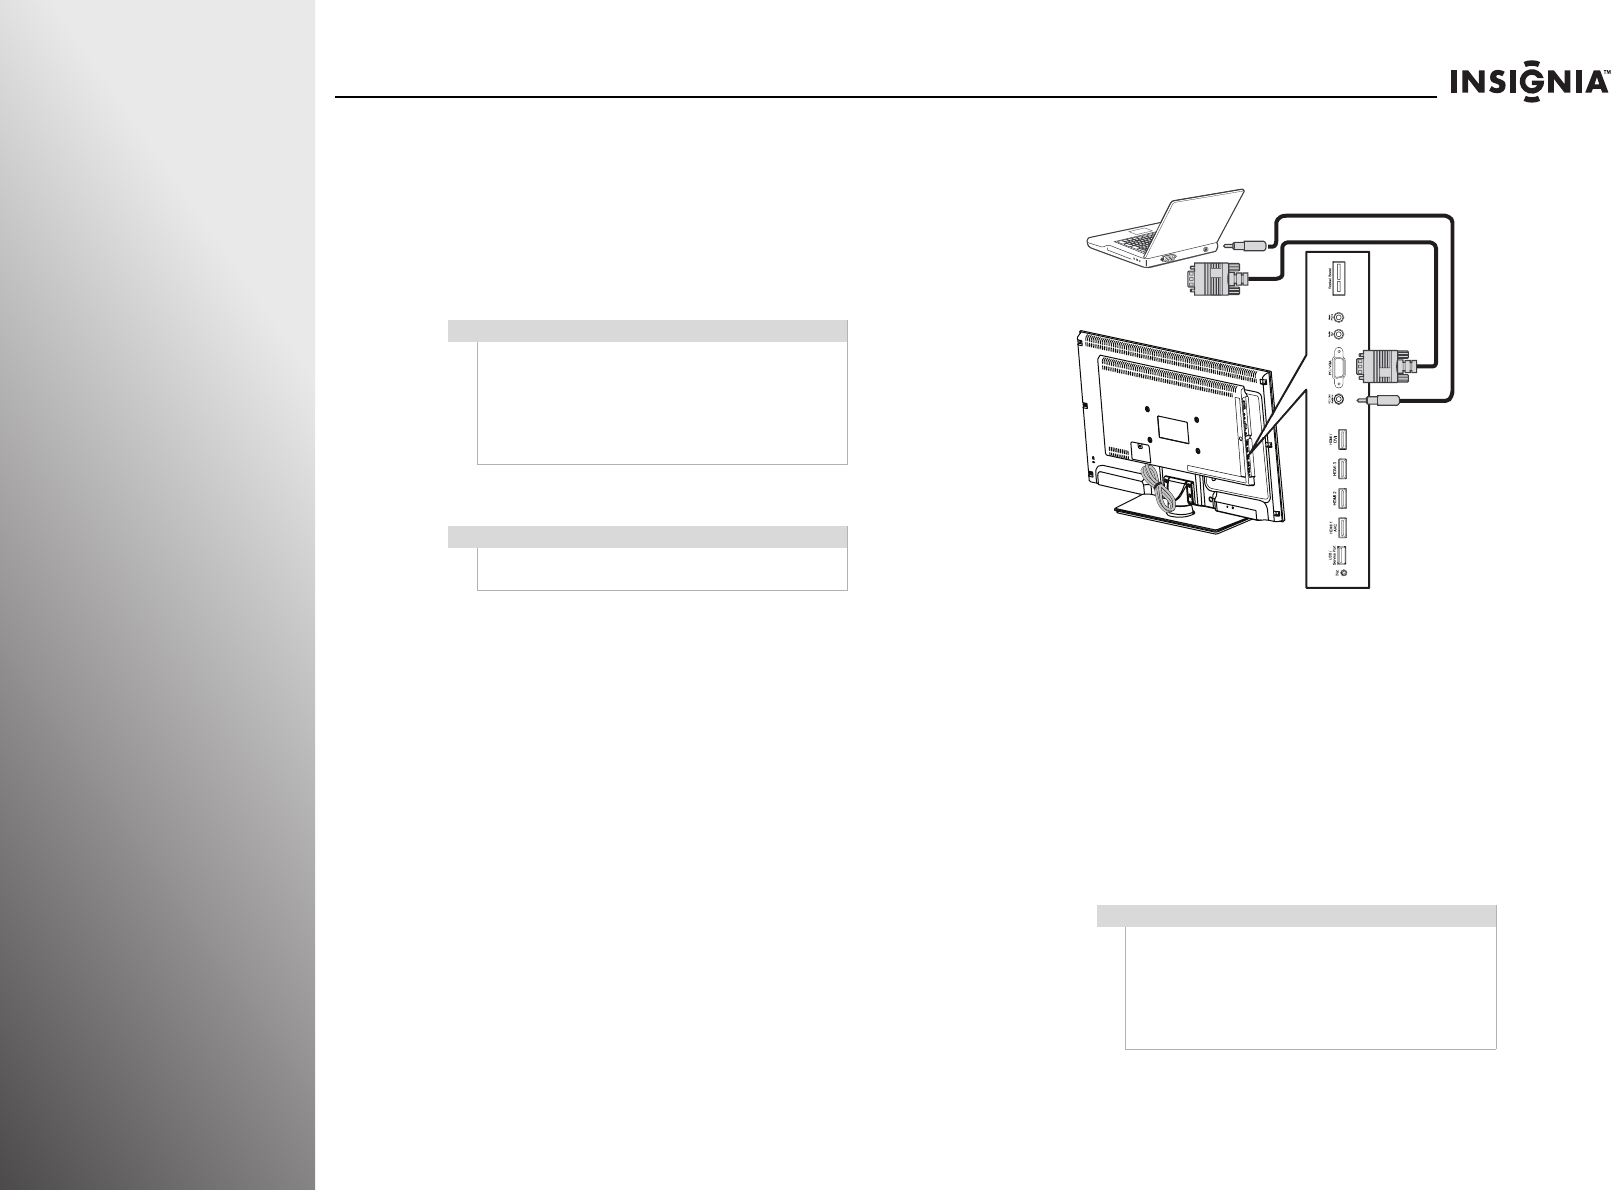
Connecting a computer
To connect a computer:
1Make sure that your TV’s power cord is unplugged and the
computer is turned off.
2Connect a VGA cable (not provided) to the PC/VGA jack on
the side of your TV and to the VGA jack on the computer.
3Connect an audio cable with a stereo mini plug to the
PC/DVI Audio In jack on the side of your TV and to the
LINE OUT or AUDIO OUT jack on the computer.
To play video from the computer:
1Turn on your TV, then turn on the computer.
2Press INPUT to open the input source list.
3Press S or T to highlight VGA, then press SELECT.
4On the computer, adjust the display properties, if
necessary.
Note
If the source sensor is turned on, the inputs that do
not have devices connected are grayed in the input
source list. When you press INPUT, your TV moves
between the inputs that have devices connected.
You can select a grayed input by pressing S or T. For
more information, see “Turning the source sensor on
or off” on page 95.
Note
If the computer has an HDMI jack, you can connect it
to one of the HDMI jacks on your TV.
Note
If the source sensor is turned on, the inputs that do
not have devices connected are grayed in the input
source list. When you press INPUT, your TV moves
between the inputs that have devices connected.
You can select a grayed input by pressing S or T. For
more information, see “Turning the source sensor on
or off” on page 95.
Side of TV
VGA cable
Audio cable
www.insigniaproducts.com 25
NS-32E859A11/NS-42E859A11 Getting Started
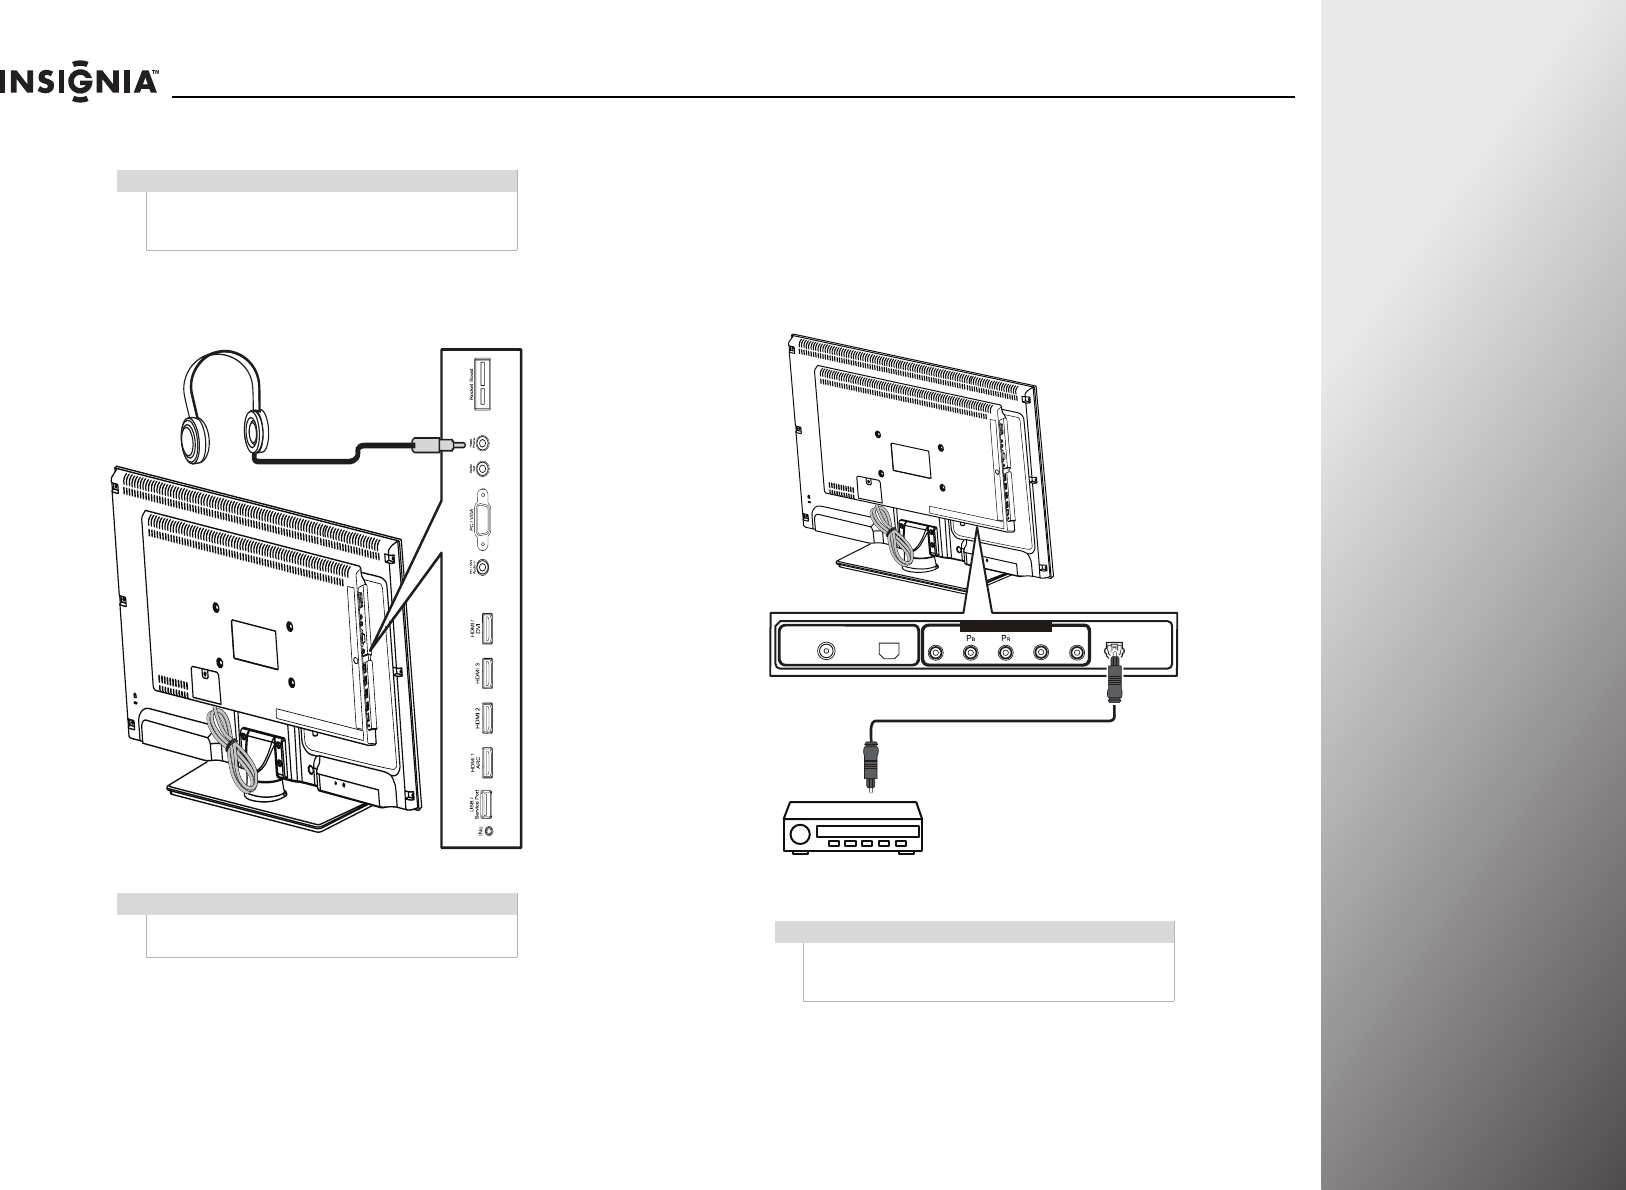
Connecting headphones
To connect headphones:
• Connect headphones to the Headphone jack on the side of
your TV.
Connecting a digital audio receiver
To connect a digital audio receiver:
1Make sure that your TV’s power cord is unplugged and the
digital audio receiver is turned off.
2Connect a digital optical audio cable (not included) to the
SPDIF jack on the back of your TV and to the digital optical
audio jack on the digital audio receiver.
Warning
Loud noise can damage your hearing. When using
headphones, use the lowest volume setting on your
headphones that still lets you hear the sound.
Note
When headphones are plugged in, the sound from
your TV’s speakers is muted.
Side of TV
Note
To hear sound only from the receiver, turn off the TV
speakers. For more information, see “Turning your TV
speakers on or off” on page 50.
ANT/CABLE IN ETHERNET
COMPONENT/ AV-IN
SPDIF
SPDIF
Y/Video L R
Back of TV
Digital audio receiver
26 www.insigniaproducts.com
Getting Started NS-32E859A11/NS-42E859A11
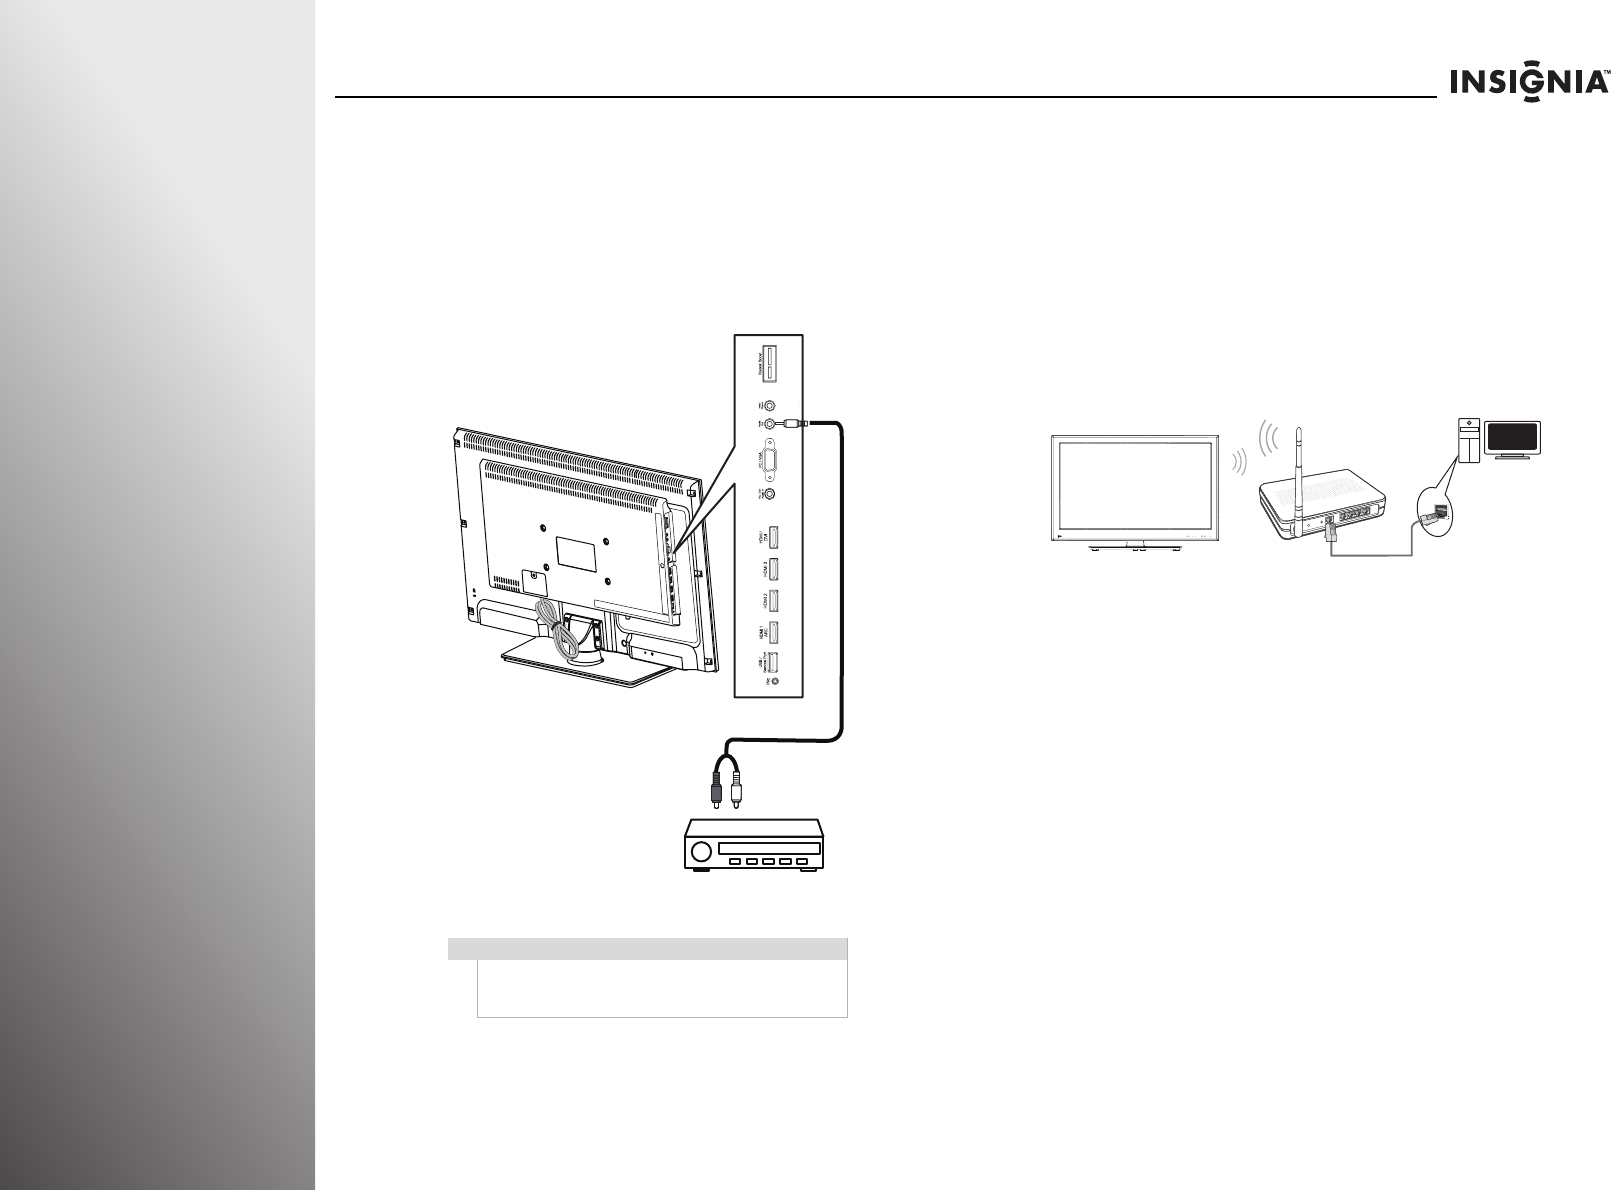
Connecting an analog audio receiver
To connect an analog audio receiver:
1Make sure that your TV’s power cord is unplugged and the
analog audio receiver is turned off.
2Connect an audio cable (not provided) to the Audio Out
jack on the side of your TV and to the AUDIO IN jacks on
the analog audio receiver.
Connecting your TV to your
home network
Wireless connection
Your TV has a built-in wireless WiFi device that lets you access
the Internet through your home network. With this feature,
you can easily connect to a wireless network and enjoy the
benefits of networking in a cable-free environment.
To connect to a wireless network:
For step-by-step instructions to set up a wireless Internet
connection, see “Configuring a wireless connection” on
page 81.
Note
To hear sound only from the receiver, turn off the TV
speakers. For more information, see “Turning your TV
speakers on or off” on page 50.
Side of TV
Analog audio receiver
GAMECH
www.insigniaproducts.com 27
NS-32E859A11/NS-42E859A11 Getting Started
Wired connection
Depending on how your Internet connection is setup, you can
connect your TV to:
•An Internet jack
•A modem
•A router
To connect your TV to your home network:
• Connect an Ethernet cable (not provided) to the ETHERNET
jack on the back of your TV and to your home network.
For step-by-step instructions to set up a wired Internet
connection, see “Configuring a wired connection” on page 86.
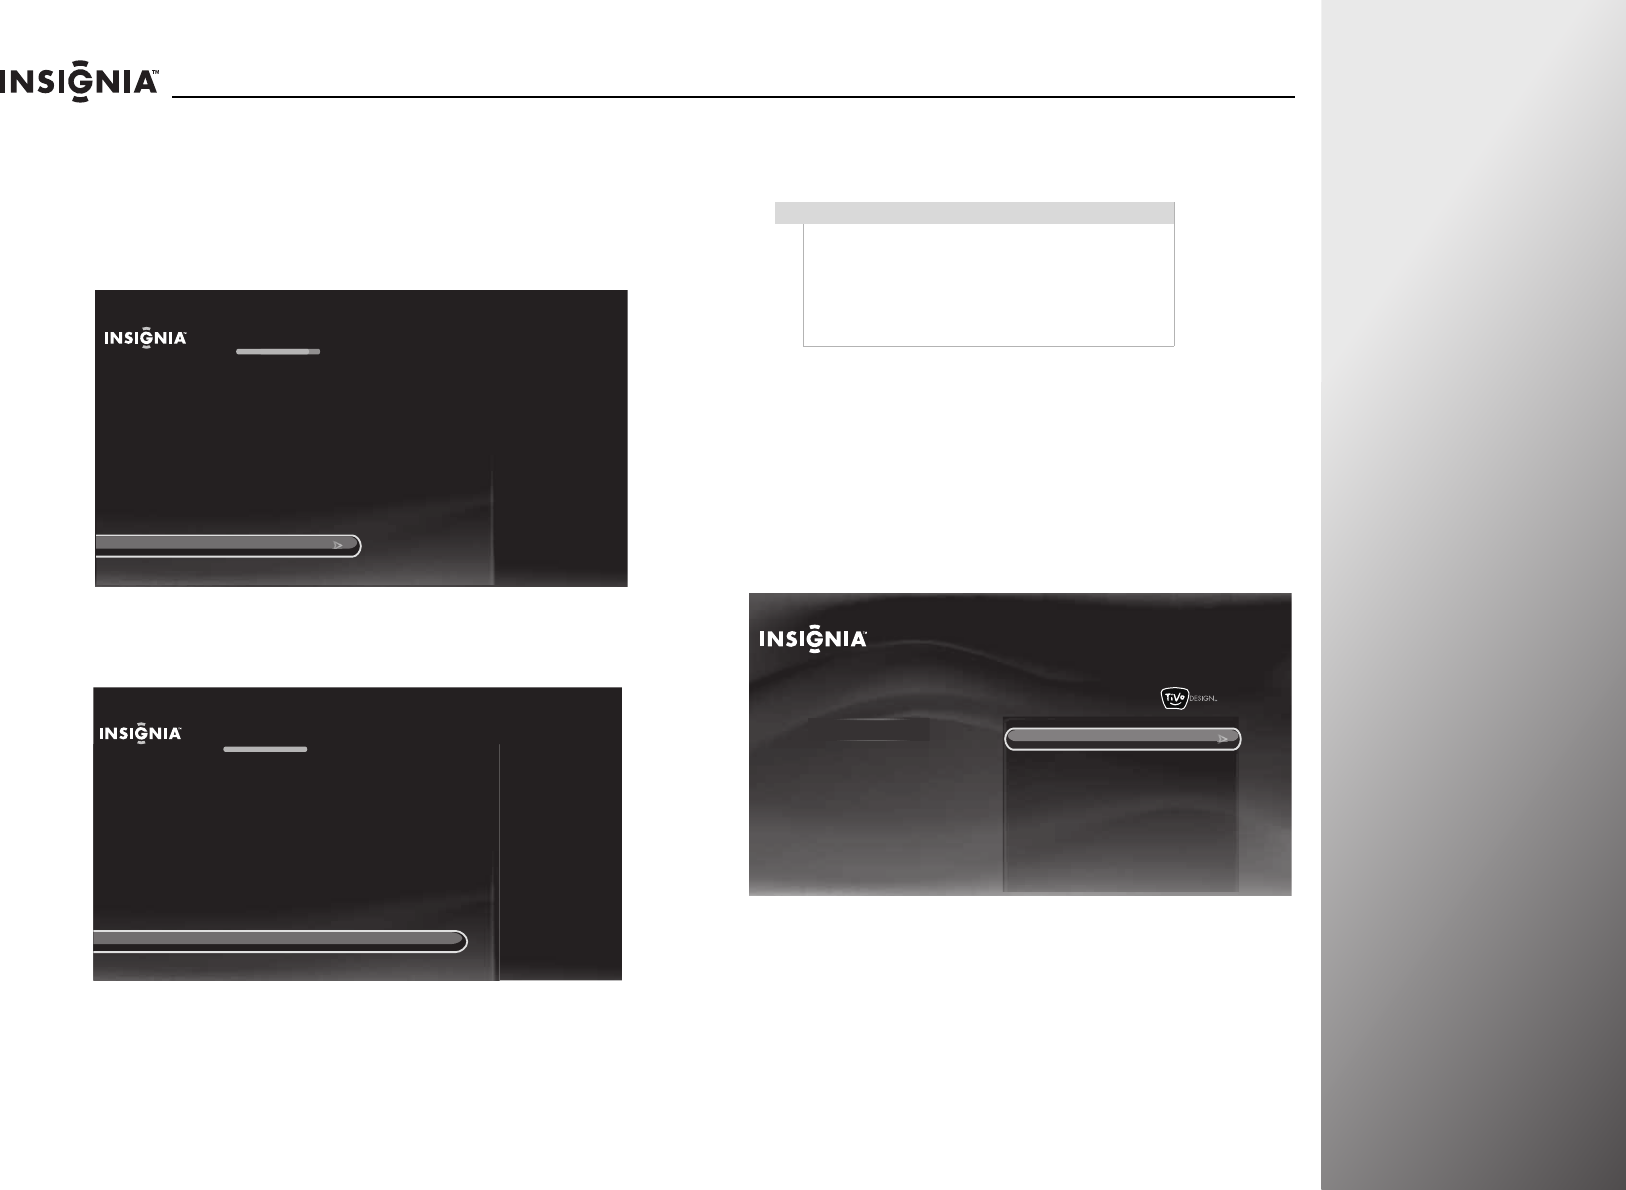
Turning on your TV for the
first time
The first time you turn on your TV, the Setup Wizard opens. The
Setup Wizard guides you through setting up basic settings. You
can skip these settings or press EXIT, MENU, TiVo, or LIVE on
your remote control to exit the wizard (except when a software
update is in progress).
To set up your TV:
1Make sure that you have:
• Installed the remote control batteries. (See page 17 for
details).
• Connected an antenna, cable TV, or satellite TV. (See
page 18 for details.)
• Connected to your home network, if available. (See
page 26 for details).
• Connected the power cord. (See page 17 for details.)
2Press (power) to turn on your TV.
3The Welcome screen opens. Press S or T to highlight Set up
this TV (typical), then press SELECT.
Note
Unless otherwise noted, all tasks in this section are
based on using the remote control.
ANT/CABLE IN ETHERNET
COMPONENTAVIN
SPDIF
Y/Video L R
Back of TV
OR
Internet jack Modem Router
Note
If you are setting up your TV for in-store display,
highlight Set up in retail mode, then press SELECT.
The Retail Mode Energy Usage screen opens. Highlight
Continue with retail mode, then press SELECT. The
Retail Mode Activated screen opens. Press SELECT to
select Continue.
Welcome
You are about to begin Guided Setup,which prepares the Insignia HD
TV for your use. This typically takes less than 45 minutes.
(If you skip Guided Setup now, you can set it up later by pressing TIVO
and choosing Settings > Help > Reset this TV > Repeat Guided
Setup.)
Set up this TV(typical)
Set up in retail mode
Skip for now
28 www.insigniaproducts.com
Getting Started NS-32E859A11/NS-42E859A11
4The Remote Control Connection screen opens. Press and
on your remote control to pair the remote control. Press
SELECT when the RF Connection Successful screen opens.
5The Network Setup screen opens. Press S or T to highlight
your network connection type, then press SELECT and
follow the on-screen instructions to set up your network
and run the network speed test.
6The Set Up Channels screen opens. Press S or T to highlight
your signal type, then press SELECT to start the channel
scan. If you use a cable or satellite TV box, you do not need
to scan for channels.
7If you connected to a network in Step 5 and a software
update is available, the Update in Progress screen opens.
Follow the on-screen instructions to install the software
update.
Remote Control Connection
Cancel (use IR instead)
To set up your remote control to use RF (radio frequency) to
communicate with your TV, hold down the THUMBS UP and
THUMBS DOWN buttons at the same time for 5 seconds. This will
mean you won’t need to point the remote control directly at the TV.
H
old down THUMBS UP and THUMBS DOWN for 5 seconds
Network Setup
Set up wireless network
Use wired Ethernet instead
Skip this step, I don’t have a network
You are about to set up this TV to use your home network.
If you have a wired network, please plug an Ethernet cable into the
TV.
If you have a wireless network, DO NOT plug an Ethernet cable into
the TV.
Set Up Channels
Antenna
Cable (without a box)
Skip this step, don’t scan for channels
Your TV works with either cable or antenna channels. Select the TV
signal you have connected to this TV. The TV will then begin scanning
for channels, which may take up to 30 minutes.
Note: You only need to scan for channels for cable if you are NOT
using a cable box. If you have a cable box (or satellite box), that box
already has information about your channels, and you can skip this step.
Update In Progress
Please wait...
Preparing
Connecting
Getting info
Disconnecting
Loading info
(Done)
(Done)
(Done)
(Done)
(38% complete)
www.insigniaproducts.com 29
NS-32E859A11/NS-42E859A11 Getting Started
8The Date and Time Setup screen opens. Press S or T to
highlight Use this date and time, then press SELECT.
OR
Press S or T to highlight Set date and time manually, then
press SELECT and follow the on-screen instructions to set
your time zone, daylight saving option, and date and time.
9The Congratulations screen opens. Press TiVo to enjoy your
new TV.
10 If you skipped the channel scan in Step 6 because you are
using a cable or satellite TV box, your TV switches to the
active input source that you connected the cable or satellite
box to before displaying the Home menu.
Programming your universal Insignia remote
control
Programming the mode buttons
You can program the mode buttons on your TV remote control
(DVD, STB, or AUX) to control the corresponding device using
your TV remote control.
To program the mode buttons:
1Press TiVo. The Home screen opens. Press S or T to select
Settings, then press X or SELECT.
2Press S or T to highlight Settings, then press X or SELECT.
Date and Time Setup
Use this date and time
Set date and time manually
The current date and time are:
12/12/2010 at 10:00 PM Eastern Standard Time
If the date and time are not correct, you may manually set them.
Congratulations!
Press TIVO to continue
You TV is now set up.
Press TIVO at any time to access the TV’s menu and On Demand shows.
Press LIVE at any time to watch television.
Enjoy your new TV!
Note
To use the on-screen setup for your remote control,
the remote control must be in RF mode. If the remote
control is not in RF mode, the RF Remote Control
Required screen opens when you try to enter the
Remote control setup menu. Follow the on-screen
instructions to switch your remote control to RF
mode.
10:00pm
Home
Settings
Connect to the Internet Settings
Parental Controls
Check for updates
Account & system info
Help
Sleep timer
30 www.insigniaproducts.com
Getting Started NS-32E859A11/NS-42E859A11
3Press S or T to highlight Devices, then press X or SELECT.
4Press S or T to highlight Remote control setup, then press
X or SELECT. If your remote control is not in RF mode,
follow the on-screen instructions to switch to RF mode.
5Press S or T to highlight the mode button on your remote
control that you want to program (DVD, STB, or AUX), then
press X or SELECT.
6Press S or T to highlight the device you want to control
with the button you are programming, then press X or
SELECT and follow the on-screen instructions.
7Repeatedly press X to highlight the list of brands, press S or
T to highlight the brand of your device, then press SELECT.
10:00 PM
Settings
Audio
Channels & providers
Network
Recommendations
Video
Appearance
Source sensor
Remote control setup
TV power on
Reset device settings
INlink HDMI control
Devices
10:00 PM
Settings
Audio
Channels & providers
Devices
Network
Recommendations
Video
Appearance INlink HDMI control
D
e
vi
ces
Set up the remote control to
control the devices that you use
with this TV, like your cable box,
DVR, or DVD player.
Source sensor
Remote control setup
TV power on
Reset device settings
Note
You can narrow down the brand or model number
list by entering the first one or two letters or numbers
of your device brand and model number using the
on-screen keyboard.
10:00 PM
Remote Control Setup
DVD button
STB button
AUX button
Power button in TV mode
Volume button
Backlight
Reset all remote settings
Set up the DVD button on your
remote to control your device.
10:00pm
Step 1: Select Device
DVD
VCR
Select the device you would like to control when you press the DVD
button on the remote control.
Remote Control Setup (DVD button)
www.insigniaproducts.com 31
NS-32E859A11/NS-42E859A11 Getting Started
8Repeatedly press X to highlight the list of models, press S or
T to highlight the model number of your device, then press
SELECT.
9Follow the on-screen instruction to test the remote control
on the device.
10 Press S or T to highlight Ye s, co n t in u e, then press SELECT.
11 Press S or T to highlight the input jack you want to assign to
this button, then press SELECT. When you press the mode
button, your TV switches to the input source you selected
for the device.
If you do not want to switch to the input source you selected
for the device when you press the mode button, select
I don’t want to automatically switch inputs, then press
SELECT.
12 Press S or T to highlight the device you want to turn on and
off when you press the power button in this mode, then
press SELECT. A check mark appears next to the selected
device. Press S or T to highlight Use these settings, then
press SELECT.
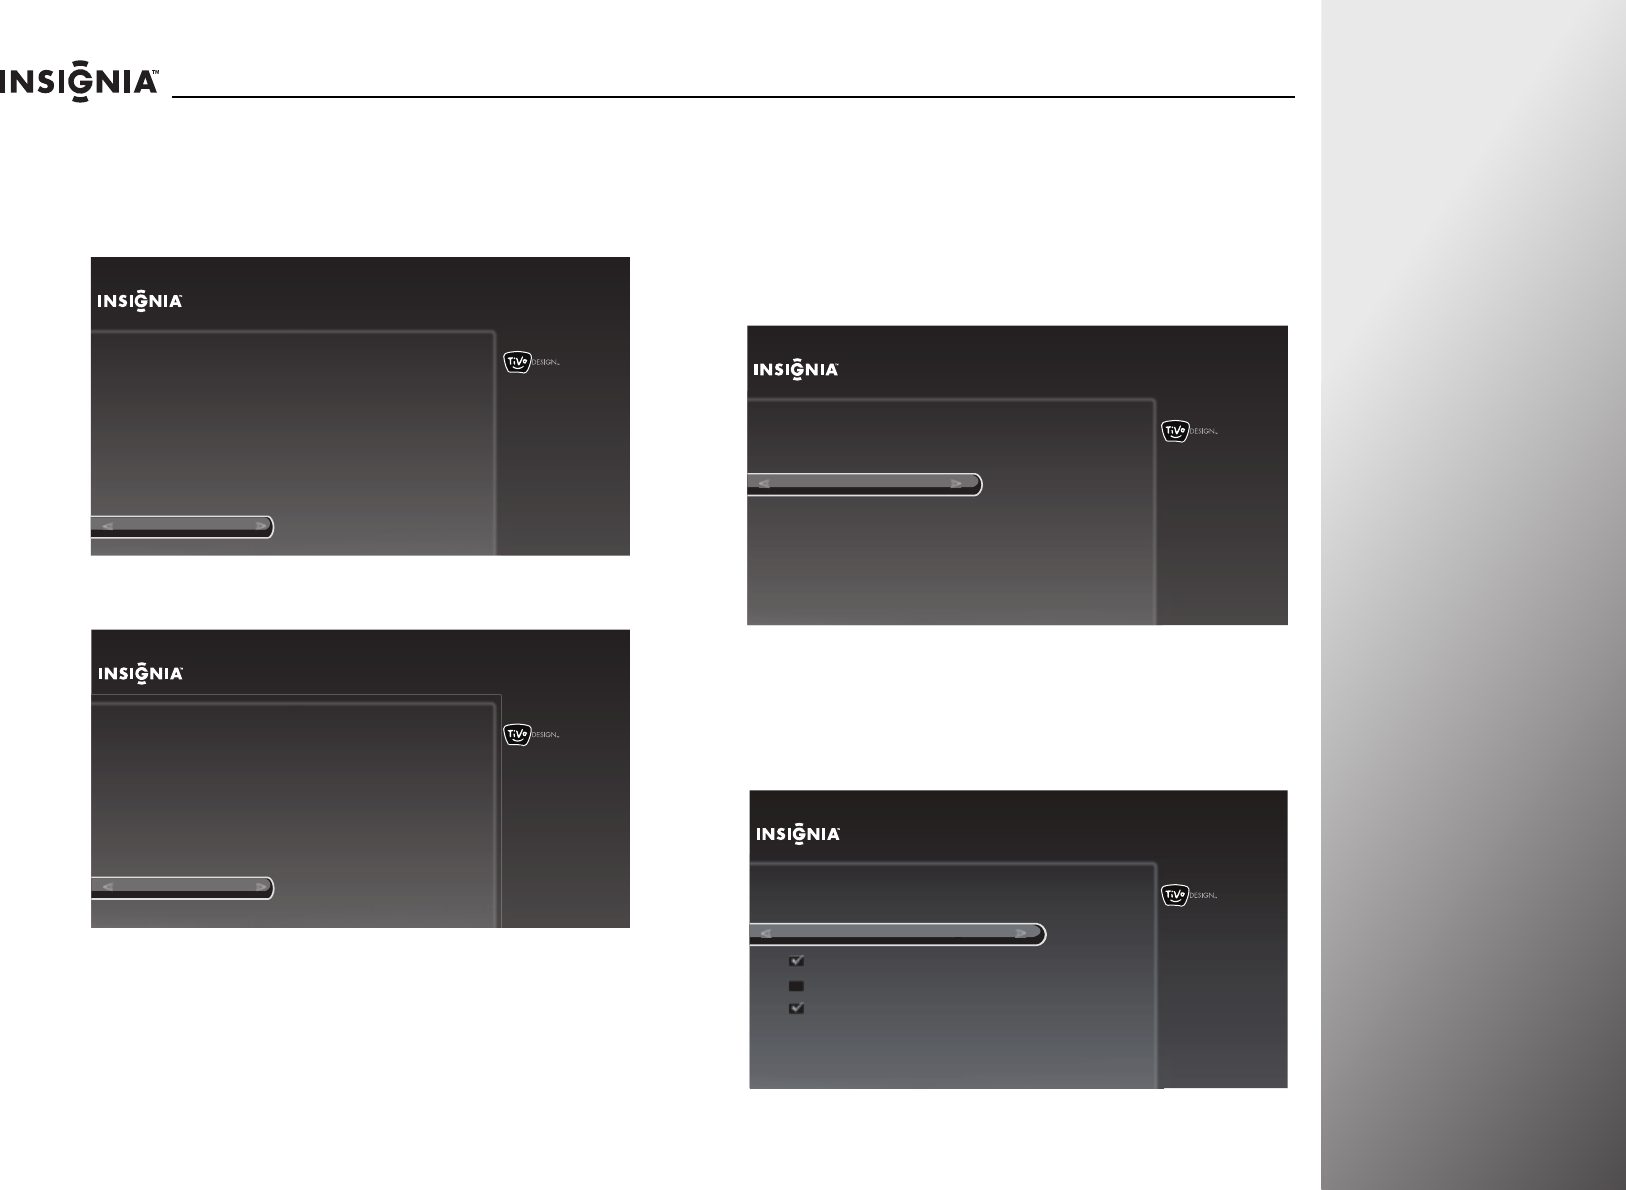
10:00pm
Step 4: Test Setup
Start test
Now we will test to see if the remote can control your DVD (or other
device).
1. Turn ON the DVD (or other device).
2. Point the remote at the DVD (or other device).
3. The remote will try to turn the device OFF.
Remote Control Setup (DVD button)
10:00pm
Step 4: Test Setup
Yes, continue
No
Did the device turn OFF ?
To confirm that the remote fully controls the DVD (or other device),
turn ON the device and then try the following buttons on the remote control:
1. Play
2. Stop
Does the remote reliably control the device?
Remote Control Setup (DVD button)
10:00pm
Step 5: Select Input
HDMI 1 (no device)
HDMI 2 (no device)
HDMI 3 (no device)
HDMI 4 (no device)
Component/Composite (no device)
VGA (no device)
I don’t want to automatically switch inputs
If the DVD (or other device) is connected to one of the inputs of this TV,
the TV will automatically change to that input when you press the DVD
button on the remote control.
Remote Control Setup (DVD button)
10:00pm
Step 6: Power Button in DVD Mode
Choose all of the devices you want to turn on and off when you press the
power button on the remote control while it is in DVD mode.
Use these settings
Remote Control Setup (DVD button)
TV
AUX
Set-top box
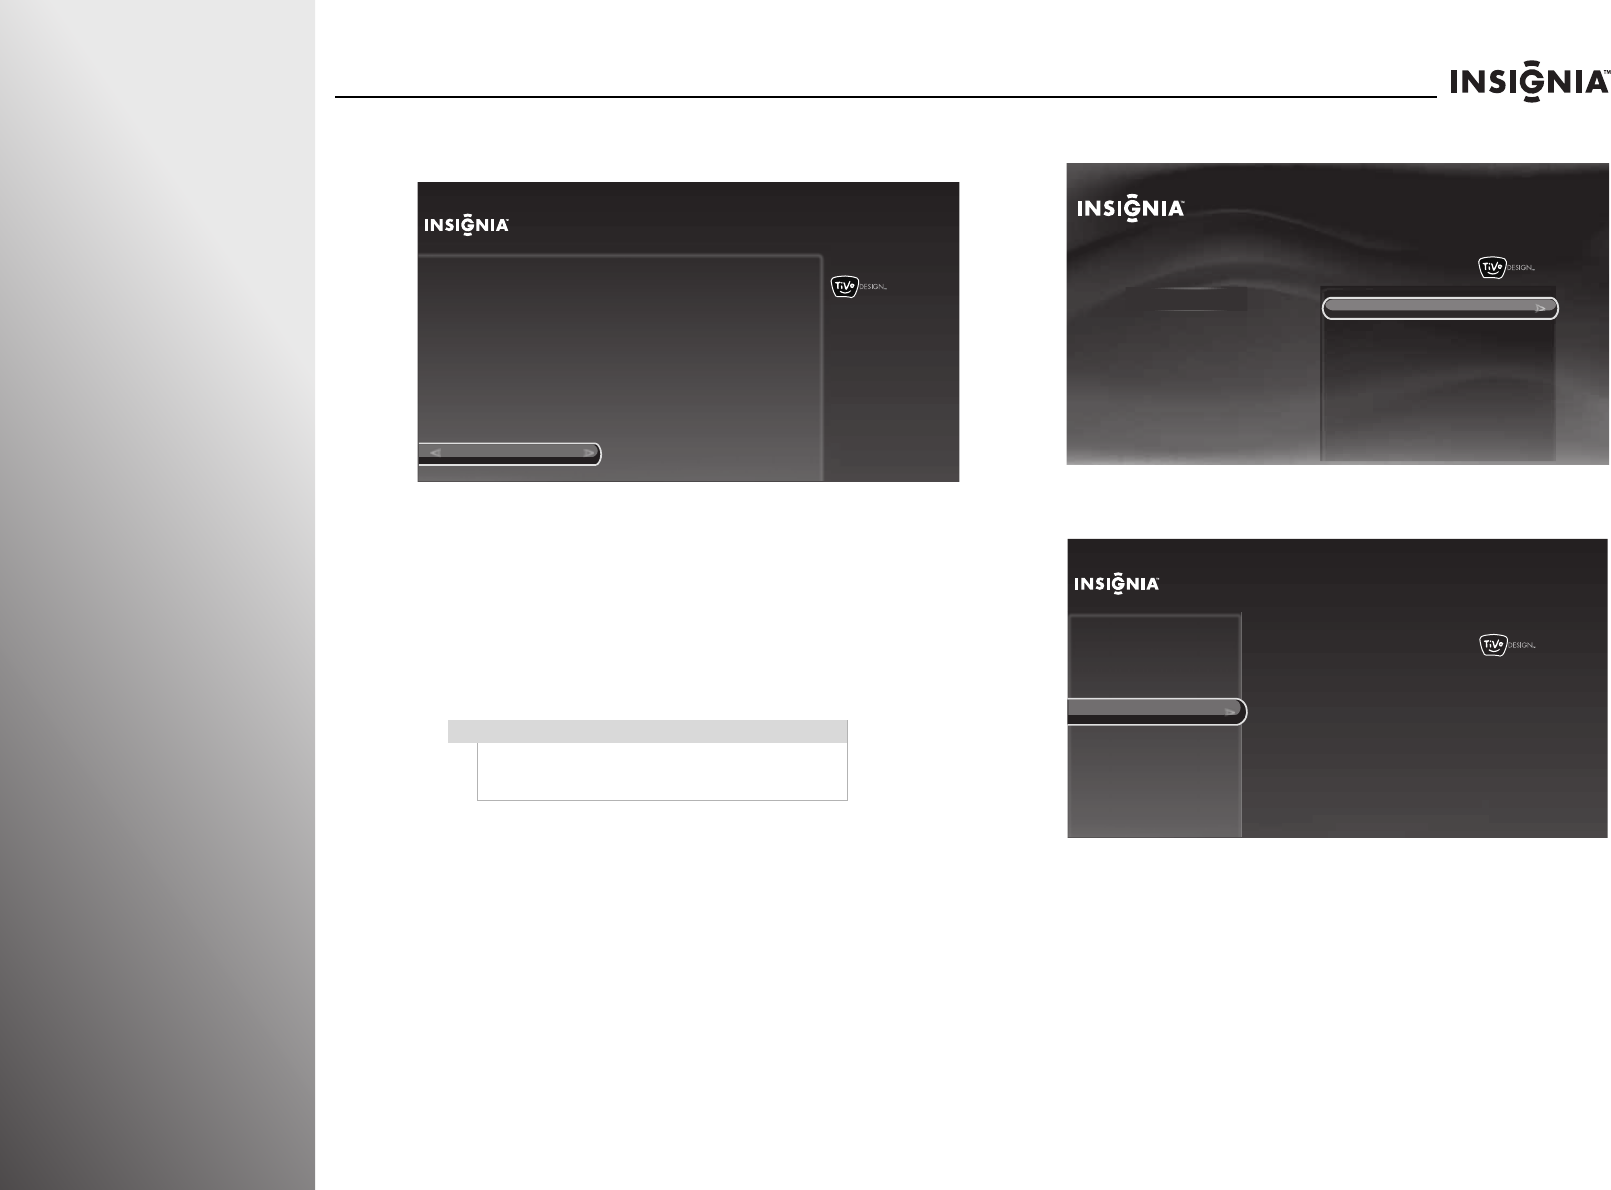
32 www.insigniaproducts.com
Getting Started NS-32E859A11/NS-42E859A11
13 Press SELECT to select OK and return to the remote control
setup menu.
Programming the button lock
You can set the power button to turn selected devices on and
off with the TV while in TV mode.
You can set the volume button to control a selected device,
regardless of what mode you are in. For example, if you lock
the volume to your DVD player, then go to TV mode, when you
press the volume button on your Insignia remote control, the
volume will change on your DVD player and not on your TV.
To program the button lock:
1Press TiVo. The Home screen opens. Press S or T to select
Settings, then press X or SELECT.
2Press S or T to highlight Settings, then press X or SELECT.
3Press S or T to highlight Devices, then press X or SELECT.
Note
Before you program the button lock, you need to
program the mode buttons. For more information,
see “Programming the mode buttons” on page 29.
10:00pm
Setup Complete!
OK
Remote Control Setup (DVD button)
The DVD button on your remote is now successfully set up to control the
DVD (or other device) connected to HDMI 1 [HDMI 1] on this TV.
You may want to perform two more steps:
- If you want the volume button to control the DVD player’s volume,
choose “Volume button” on the Remote Control Setup screen.
- If you want the DVD player to power off with the TV while the remote is
in TV mode, choose “Power button in TV mode” on the Remote Control
Setup screen.
10:00pm
Home
Settings
Connect to the Internet Settings
Parental Controls
Check for updates
Account & system info
Help
Sleep timer
10:00 PM
Settings
Audio
Channels & providers
Network
Recommendations
Video
Appearance
Source sensor
Remote control setup
TV power on
Reset device settings
INlink HDMI control
Devices
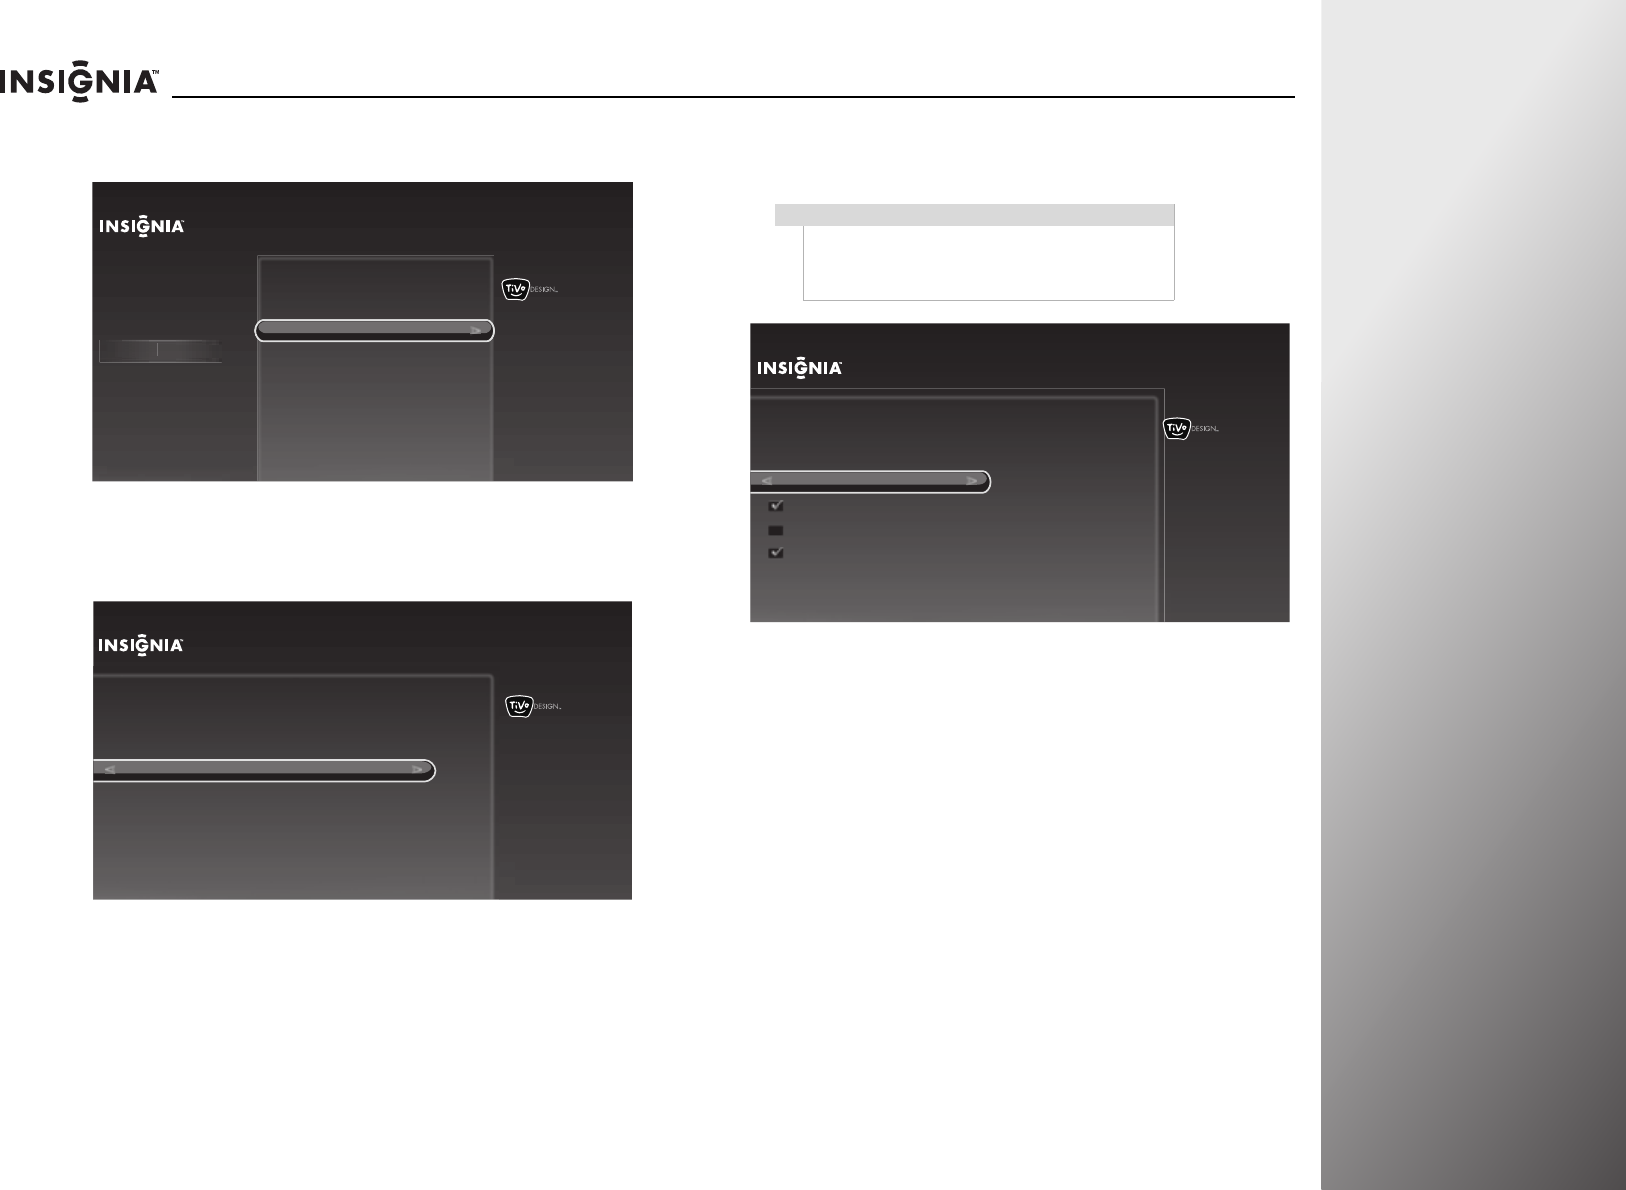
www.insigniaproducts.com 33
NS-32E859A11/NS-42E859A11 Getting Started
4Press S or T to highlight Remote control setup, then press
X or SELECT.
5Press S or T to highlight the button on your remote control
that you want to lock (power or volume), then press X or
SELECT.
6Press S or T to highlight the device you want the locked
button to control, then press X or SELECT to return to the
Remote Control Setup menu.
Resetting all the remote settings
You can reset the remote control to the factory defaults. This
will clear all the programming and button lock settings.
To reset all the remote settings:
1Press TiVo. The Home screen opens. Press S or T to select
Settings, then press X or SELECT.
10:00 PM
Settings
Audio
Channels & providers
Devices
Network
Recommendations
Video
Appearance INlink HDMI control
D
e
vi
ces
Set up the remote control to
control the devices that you use
with this TV, like your cable box,
DVR, or DVD player.
Source sensor
Remote control setup
TV power on
Reset device settings
10:00 PM
Remote control setup
DVD button
STB button
AUX button
Power button in TV mode
Volume button
Backlight
Reset all remote settings
Set up the power button on the
remote to control your devices
while in TV mode.
Current Settings:
AUX, DVD
Note
You can assign more than one device for the power
button to control while in TV mode. Highlight Use
these settings, then press SELECT after adding the
devices.
10:00pm
Set up Power Button in TV Mode
Use these settings
AUX
Set-top box
DVD
Remote Control Setup
Choose all of the devices you want to turn on and off when you press
the power button on the remote control while it is in TV mode.
Did you know?
Insignia has a variety of
high-quality speaker
systems for your new TV.
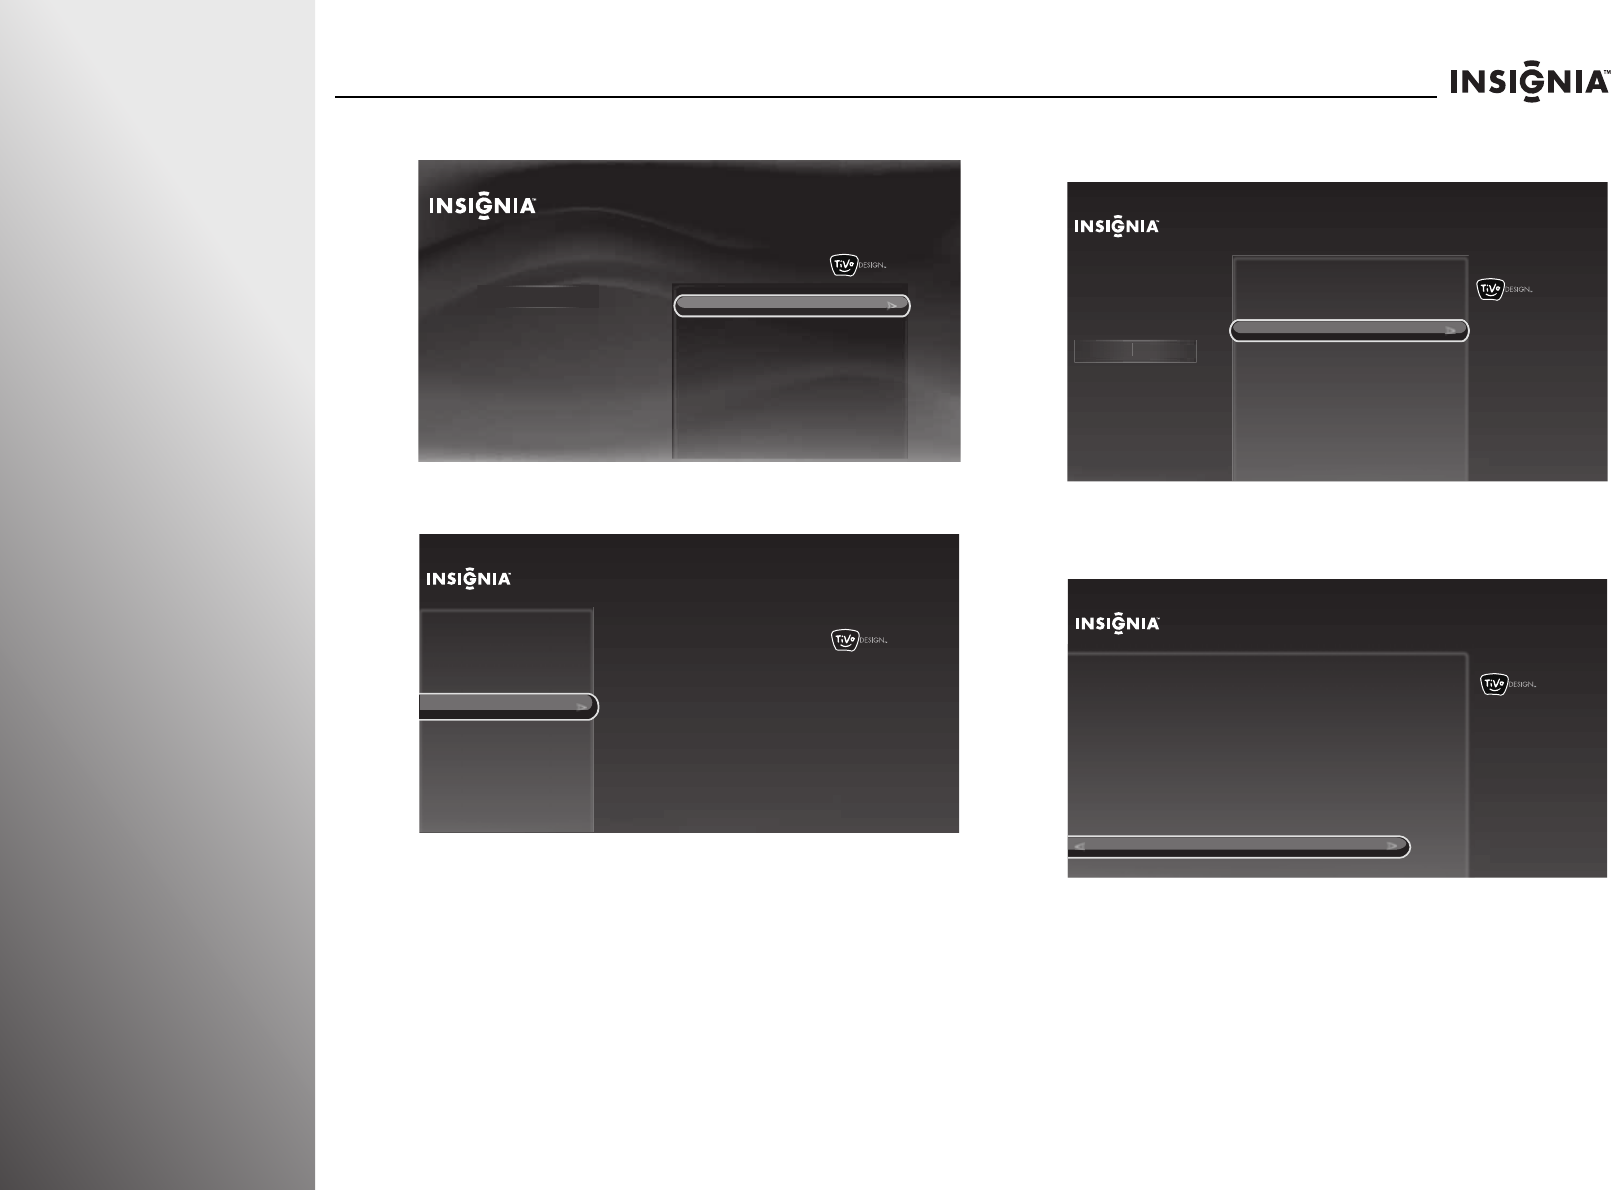
34 www.insigniaproducts.com
Getting Started NS-32E859A11/NS-42E859A11
2Press S or T to highlight Settings, then press X or SELECT.
3Press S or T to highlight Devices, then press X or SELECT.
4Press S or T to highlight Remote control setup, then press
X or SELECT.
5Press S or T to highlight Reset all remote settings, then
press X or SELECT.
6Press S or T to highlight Yes, reset all remote settings,
then press SELECT.
10:00pm
Home
Settings
Connect to the Internet Settings
Parental Controls
Check for updates
Account & system info
Help
Sleep timer
10:00 PM
Settings
Audio
Channels & providers
Network
Recommendations
Video
Appearance
Source sensor
Remote control setup
TV power on
Reset device settings
INlink HDMI control
Devices
10:00 PM
Settings
Audio
Channels & providers
Devices
Network
Recommendations
Video
Appearance INlink HDMI control
D
e
vi
ces
Set up the remote control to
control the devices that you use
with this TV, like your cable box,
DVR, or DVD player.
Source sensor
Remote control setup
TV power on
Reset device settings
10:00 PM
Remote Control Setup
DVD button
STB button
AUX button
Power button in TV mode
Volume button
Backlight
Reset all remote settings
Resets the entire
remote settings
to factory defaults.
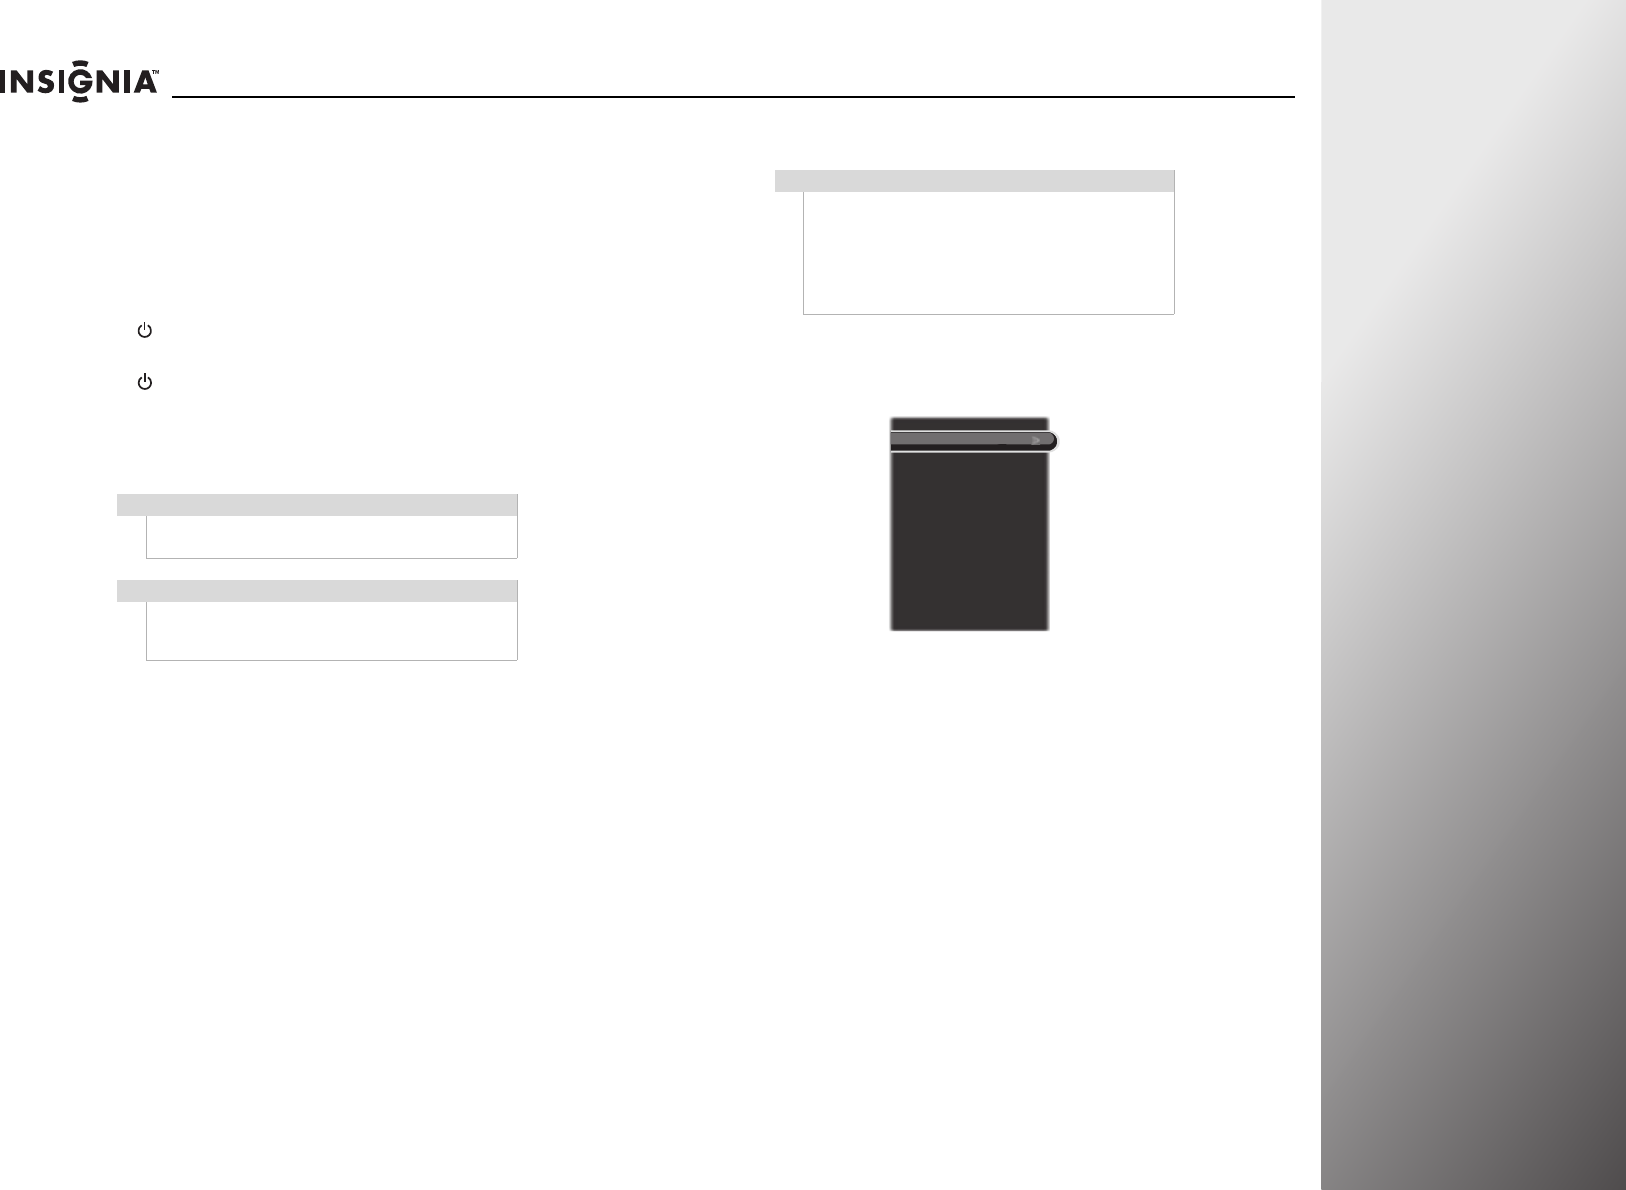
www.insigniaproducts.com 35
NS-32E859A11/NS-42E859A11 Getting Started
Understanding the basics
Turning your TV on or off
To turn your TV on and off:
1Make sure that the power cord is already connected to a
power outlet.
2Press (power) to turn on your TV. The power indicator LED
turns blue.
3Press (power) again to turn off your TV. Your TV enters
Standby mode and the power indicator turns red or purple,
depending on the TV power on mode you select. For more
information, see “Setting the TV power on mode” on
page 93.
Selecting the video input source
To select the video input source:
1Turn on your TV, then press INPUT on the remote control.
The input source list opens.
2Press S or T to highlight a video input source, then press
SELECT. You can select:
•TV
•HDMI 1
•HDMI 2
•HDMI 3
•HDMI 4
•Component/Composite (to select a component or
composite device)
•VGA
Warning
When your TV is off, power still flows into it. To
disconnect power, unplug the power cord.
Note
If your TV does not detect a signal and you do not
press any buttons for several minutes, your TV goes
into Standby mode automatically.
Note
If the source sensor is turned on, the inputs that do
not have devices connected are grayed in the input
source list. When you press INPUT, your TV moves
between the inputs that have devices connected.
You can select a grayed input by pressing S or T. For
more information, see “Turning the source sensor on
or off” on page 95.
Component/Composite
HDMI 1
HDMI 2
HDMI 3
HDMI 4
VGA
TV
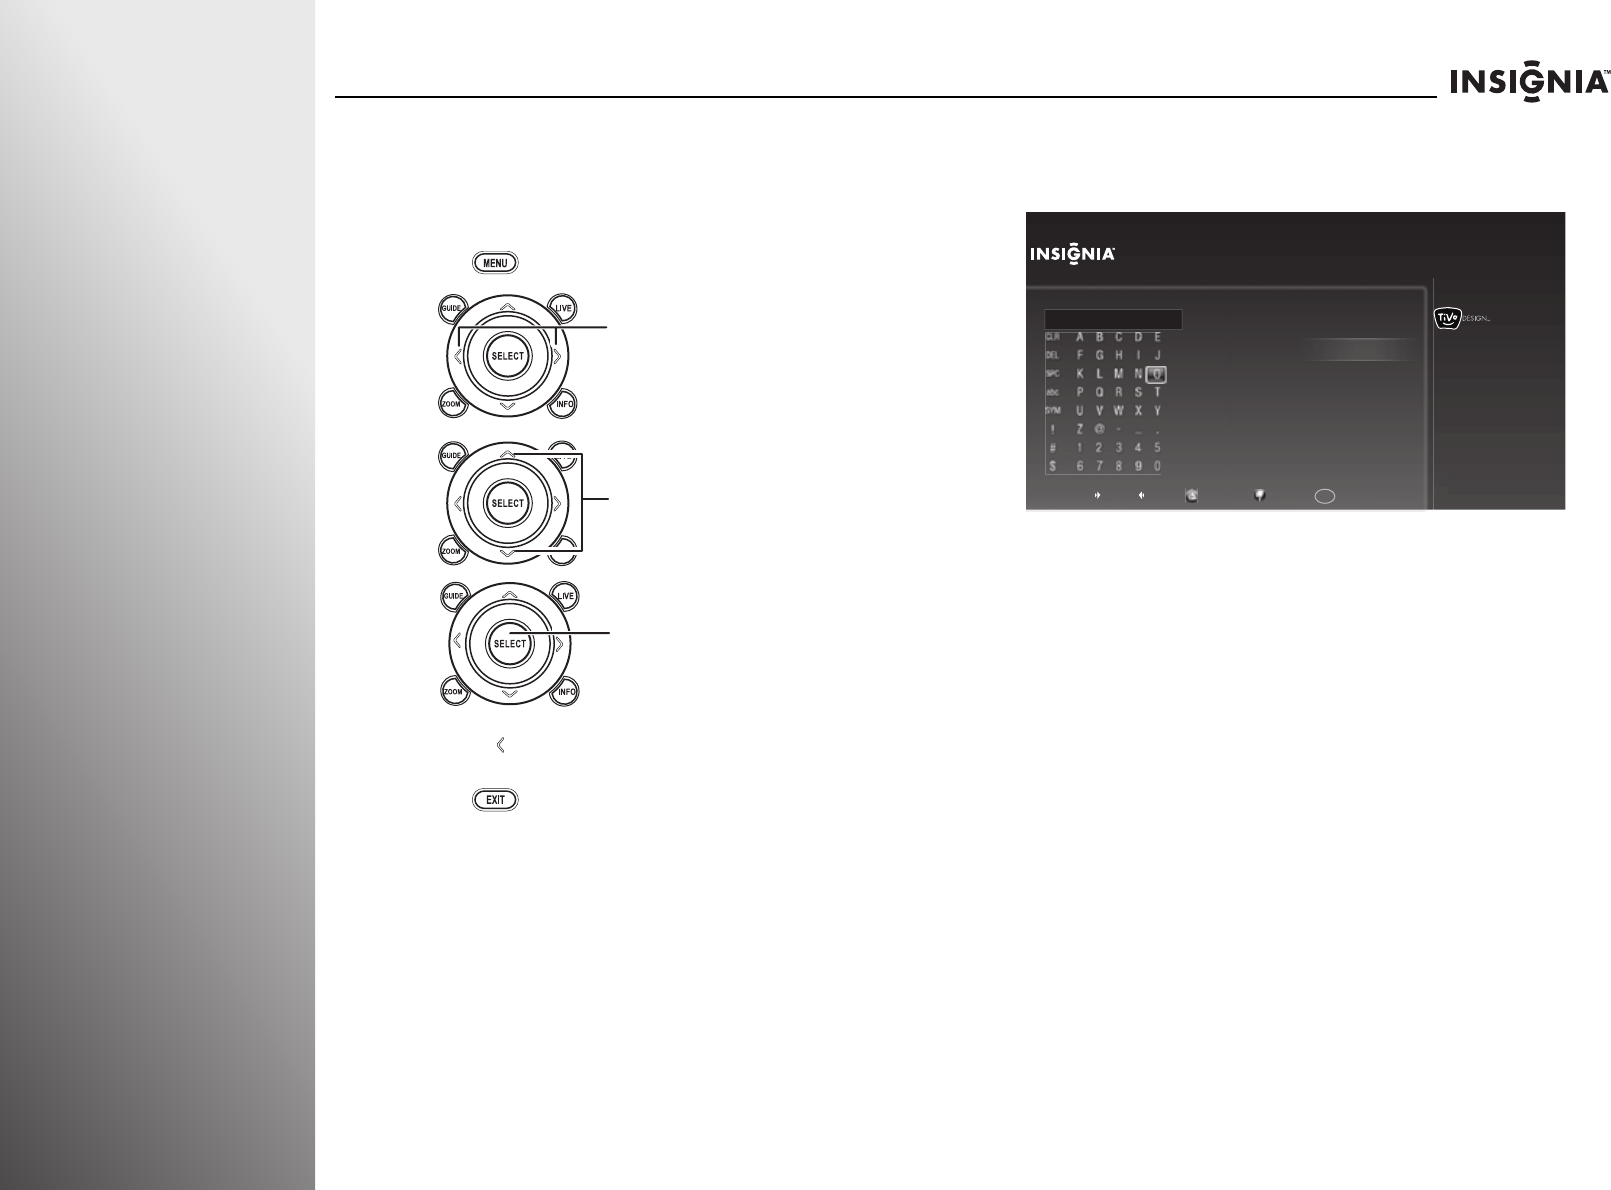
36 www.insigniaproducts.com
Getting Started NS-32E859A11/NS-42E859A11
Navigating menus and using the on-screen
keyboard
Navigating the menus
Using the on-screen keyboard
The keyboard screen lets you create custom labels (names) for
input sources or channels.
To use the on-screen keyboard:
•Press
STW or X to highlight a character, then press
SELECT to enter the character in the text entry area.
• Highlight CLR, then press SELECT to clear the text entry
area.
• Highlight DEL, then press SELECT to delete one character
to the left of the cursor in the text entry area.
• Highlight SPC, then press SELECT to add one space to the
right of the cursor in the text entry area.
• Highlight ABC, then press SELECT to change all keyboard
characters to uppercase. The ABC key changes to abc.
• Highlight abc, then press SELECT to change all keyboard
characters to lowercase.The abc key changes to ABC.
• Highlight SYM, then press SELECT to replace the
characters with symbols. The SYM key changes to ABC or
abc, depending on the character mode you were in
before you entered symbol mode.
Press to open the menu.
Press X to move the cursor on the
screen, adjust a selected item, or
enter a setting.
Press W to move the cursor on the
screen, adjust a selected item, or
return to the previous screen.
Press to select menu items.
Press to confirm your selections or
enter a sub-menu.
Press to return to the previous
screen.
Press to close the menu.
10:00 PM
Name HDMI 4
SpaceShortcuts: Delete Uppercase Lowercase Numbers
Enter a name for the input and then press RIGHT to choose Done entering name.
HD TV__
Done entering name
Cancel
1

www.insigniaproducts.com 37
NS-32E859A11/NS-42E859A11 Getting Started
To use the remote control shortcuts:
• Press on your remote control to add one space to the
right of the cursor in the text entry area.
• Press on your remote control to delete one character to
the left of the cursor in the text entry area.
• Press on your remote control to switch to ABC mode.
• Press on your remote control to switch to abc mode.
• Press number buttons on your remote control to enter
numbers in the text entry area.
Selecting a channel
To select a channel:
•Press CHS or CHT to go to the next higher or lower
channel in the channel list.
• Press the number buttons to enter the channel number
you want, then wait for the channel to change or press
SELECT to immediately change the channel.
• To select a digital sub-channel, press the number buttons
to select the main digital channel, press — (dash), then
press the number button for the sub-channel. Wait for the
channel to change, or press SELECT to immediately
change the channel. For example, to tune to channel 5-1,
press 5, — (dash), then 1.
•Press LAST to go to the last viewed channel.
•Press FAV to open the favorite channel list, press S or T to
highlight a channel, then press SELECT.
Adjusting the volume
To adjust the volume:
•Press VOL+ or VOL– to increase or decrease the volume.
•Press MUTE to turn off the sound. Press MUTE again to
turn the sound back on.
Displaying additional information
To view channel information:
•Press INFO to view an information banner. The information
banner shows the current program information such as
channel number, video input source, and resolution.
•Digital channel information—Displays the channel
number, station name, channel label, broadcast
program name, TV rating, signal type, audio
information, resolution, CC mode, current time, and
current program start and end times.
•Analog channel information—Displays channel
number, channel label (if available), signal type, audio
information, and resolution.
•Press GUIDE to show the digital program guide, which
may list available programs, program times, and program
summaries, depending on the information provided by the
broadcaster.
Note
If a list has more than one page, press S
or T to scroll through the pages.


39
Using Your TV
Using the applications offered on your TV . . . . . . . . . . . . . . . . . . . . . . . . . . . . . .40
Adjusting the video. . . . . . . . . . . . . . . . . . . . . . . . . . . . . . . . . . . . . . . . . . . . . . . . . . . .42
Adjusting audio settings . . . . . . . . . . . . . . . . . . . . . . . . . . . . . . . . . . . . . . . . . . . . . . .46
Changing channel settings. . . . . . . . . . . . . . . . . . . . . . . . . . . . . . . . . . . . . . . . . . . . .67
Setting parental controls. . . . . . . . . . . . . . . . . . . . . . . . . . . . . . . . . . . . . . . . . . . . . . .71
Using closed captioning . . . . . . . . . . . . . . . . . . . . . . . . . . . . . . . . . . . . . . . . . . . . . . .76
Adjusting time settings . . . . . . . . . . . . . . . . . . . . . . . . . . . . . . . . . . . . . . . . . . . . . . . .80
Adjusting Internet settings. . . . . . . . . . . . . . . . . . . . . . . . . . . . . . . . . . . . . . . . . . . . .81
Using INlink to control HDMI devices . . . . . . . . . . . . . . . . . . . . . . . . . . . . . . . . . . .90
Adjusting other options . . . . . . . . . . . . . . . . . . . . . . . . . . . . . . . . . . . . . . . . . . . . . . .92
40 www.insigniaproducts.com
Using Your TV NS-32E859A11/NS-42E859A11
Using the applications
offered on your TV
Enjoy all your TV has to offer! Access Internet content through
the Internet applications that came with your TV. New and
exciting applications are continually being added to the TV. Be
sure to watch for those to come.
To enjoy the online content you need high speed Internet
access, such as cable or DSL, hooked up through a wireless or
wired Internet connection.
Watching movies with CinemaNow
With CinemaNow on TV, you can rent some of your favorite
movies from the comfort of your couch. All you need is your
Insignia remote control. Once you have a CinemaNow account
from CinemaNow.com, grab some popcorn and enjoy the
show.
To watch movies with CinemaNow:
1First set up your CinemaNow account through your PC. Go
to www.cinemanow.com/activate to get an activation PIN.
2Click Activate a New Device, then sign in again with your
user name and password.
3Enter any name in the Name Your Device section, then
click Continue.
You now have been provided with a valid activation
number to enter into the activation field within the
CinemaNow application on your TV.
4Once you have successfully established an Internet
connection on your TV, select the CinemaNow application
on your TV using your remote control.
5Select the Settings tab at the bottom of the screen.
6Select Activate and enter your activation code. You can
now rent movies using CinemaNow.
Watching movies with Netflix
With Netflix on TV and a Netflix unlimited plan, you can
instantly watch thousands movies and TV episodes streamed
from Netflix to your TV. Just add shows to your Netflix Instant
Queue and start watching.
To watch movies with Netflix you must first activate your TV for
Netflix.
To activate your TV:
1Select the Netflix application.
2If you do not have a Netflix account, select no-start my
FREE trial. Go to your computer and sign up at
www.netflix.com/Insignia, then come back to your TV and
select I’m now a member. An activation code will be
displayed on your TV.
OR
If you do have an existing Netflix account, select
yes-activate instant streaming from Netflix. Enter your
e-mail address and password to log into your account. An
activation code will be displayed on your TV.
3Go to your computer and go to www.netflix.com/activate.
4Enter the activation code that is displayed on your TV.
To watch movies with Netflix:
1Activate your account following the previous steps.
2Select the Netflix application using your remote control.
3Add movies to your Instant Queue from either your TV or
from the Netflix Web site.
4Select and play movies or TV episodes.
5Use your Insignia remote control to control playback of
movies or TV episodes.
Note
Your TV does not have a full web browser. To access
Internet content use the applications provided on
the TV.

www.insigniaproducts.com 41
NS-32E859A11/NS-42E859A11 Using Your TV
6For questions regarding the Netflix service please visit:
www.netflix.com/help or call 1-866-579-7113.
Listening to music with Pandora
Pandora on TV lets you choose exactly the music you want to
hear and creates personal Internet radio stations that play it for
you. Just enter a song title or band name that represents the
kind of music you want to hear, and Pandora will start a unique
“Pandora station” that plays similar music. Add variety by
entering other titles and bands to your station, and even more
variety by creating multiple Pandora stations (up to 100!).
Check us out today.
For existing Pandora customers:
1Select the Pandora application.
2Select I have a Pandora account from the options, then
sign in with your account information.
For new Pandora customers:
1Select the Pandora application.
2Select I am new to Pandora from the options. You will
receive an activation code.
3On your PC, go to www.pandora.com and enter the
activation code from Step 2, then click Activate.
4Click Create a Pandora Account and follow the on-screen
instructions.
5Select a previously created station or create a new station by
entering a favorite song or artist using the on-screen
keyboard. The music begins playing and information about
the song is displayed. You can also create stations on the
Pandora Web site.
6Use your Insignia remote control when listening to a song to
control the playback.
To create a new Pandora account using a PC:
• Go to http://www.pandora.com/ to create a new account.
TiVo Search
You can search for specific shows by title or actor name, or you
can discover new shows recommended for you.
Finding content you want to watch using TiVo Search
To find content you want to watch using TiVo search:
1Press TiVo. The Home screen opens.
2Select TV & movies on demand, then select Search.
3Use the letter grid to spell out the title, person, or word
you’re looking for. Press the arrow buttons to move around,
then press SELECT on each letter you want. As you select
letters, a list of possible matches sorted by popularity
appears on the right. For example, if you enter the letters
HOW, you might see matches for the show “How I Met Your
Mother,” the video on demand movie “How To Lose A Guy In
Ten Days,” and the director Ron Howard.
Results are sorted by popularity, with better matches higher
in the list.
4Keep selecting letters until you see what you’re searching
for. If you make a mistake, you can press CLEAR to erase
everything, or to erase one letter at a time. Insert a space
by pressing .
Insignia is constantly working to find all of your favorite
entertainment for you. Connecting to your high-speed Internet
connection opens up a whole new world of home
entertainment. With a broadband connection and video on
demand, your TV is the hub for movies, music, and TV shows
from a host of video providers, including Insignia video on
demand!
Want to stream a whole season of your favorite show? Give
Netflix a try. Would you rather rent or buy a new released
movie, go to CinemaNow? Do it all, with your Insignia TV.
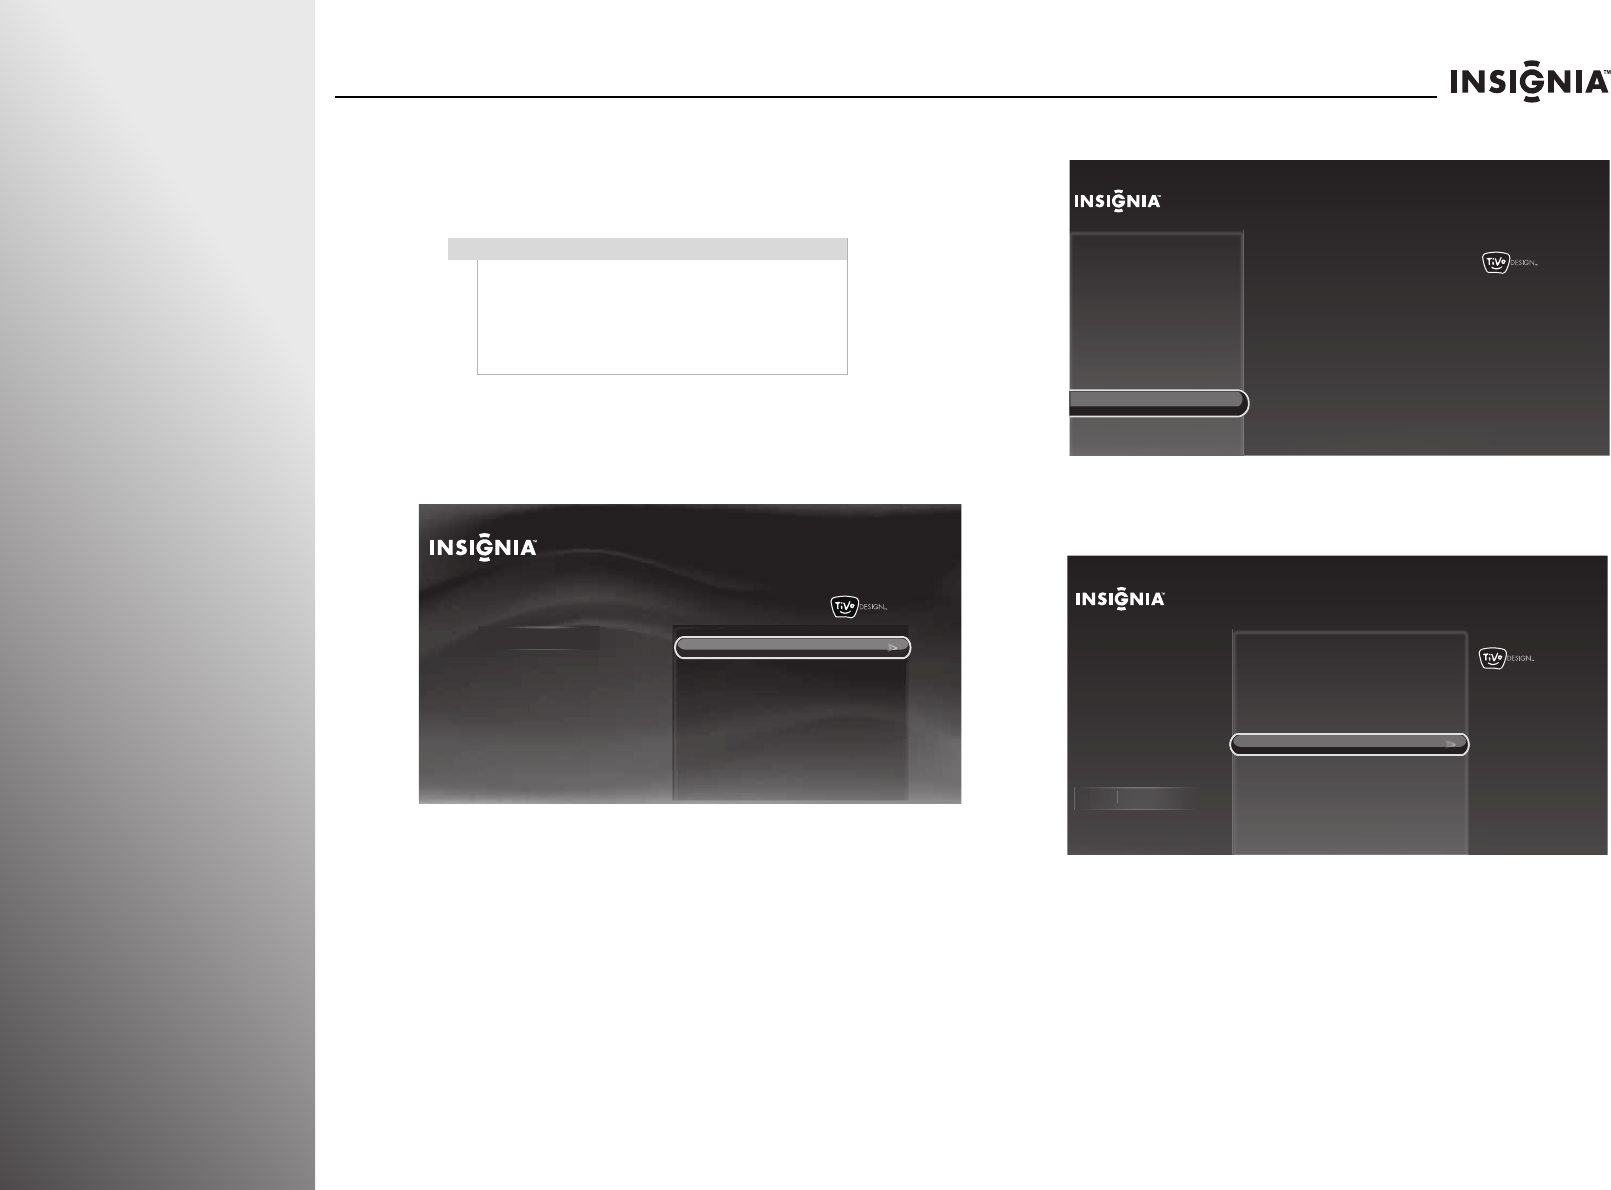
42 www.insigniaproducts.com
Using Your TV NS-32E859A11/NS-42E859A11
Adjusting the video
Adjusting the video settings
To adjust video settings:
1Press TiVo. The Home screen opens. Press S or T to select
Settings, then press X or SELECT.
2Press S or T to highlight Settings, then press X or SELECT.
3Press S or T to highlight Video, then press X or SELECT.
4Press S or T to highlight an active video input, then press
SELECT.
5Press S or T to highlight an option, then press W or X to
adjust a setting or change a value. You can select:
•Profile—Selects the video mode.
•Vivid—Provides bright and dynamic video.
•Standard—Provides standard video.
•Energy savings—Decreases the backlight brightness
for energy savings.
•Theater—Provides finely detailed cinema-like
viewing.
Notes
•You can press PICT, then W or X to select the
Profile setting. If you want to manually adjust
the video settings, select Custom, then press
SELECT to access the video settings menu.
• Different video inputs have different setting
options.
10:00pm
Home
Settings
Connect to the Internet Settings
Parental Controls
Check for updates
Account & system info
Help
Sleep timer
10:00pm
Settings
Channels & providers
Devices
Network
Recommendations
Appearance TV video settings
HDMI 1 video settings (no device)
HDMI 2 video settings (no device)
HDMI 3 video settings (no device)
HDMI 4 video settings (no device)
Comp video settings (no device)
VGA video settings (no device)
Reset all video settings
Audio
Video
10:00pm
Settings
Audio
Channels & providers
Devices
Network
Recommendations
Video
Appearance
Vid
eo
Adjust all video settings for the
HDMI 3 input. (This input currently
does not have a device
connected.)
TV video settings
HDMI 1 video settings (no device)
HDMI 2 video settings (no device)
HDMI 3 video settings (no device)
HDMI 4 video settings (no device)
Comp video settings (no device)
VGA video settings (no device)
Reset all video settings
Current settings:
Profile:
Aspect ratio:
Brightness:
Contrast:
Sharpness:
Energy savings
Normal
45
53
15

www.insigniaproducts.com 43
NS-32E859A11/NS-42E859A11 Using Your TV
•Sports—Provides a sharp, high contrast picture.
•Game—Provides optimal performance for playing
games.
•PC—For use with a computer.
•Custom—Lets you manually adjust video settings.
•Aspect ratio—Selects the picture aspect ratio.
•Normal—Preserves the 4:3 aspect ratio. Black bars are
shown on edges.
•Zoom—Enlarges the picture but may crop the top and
bottom.
•Wide—Stretches the 4:3 content to eliminate left and
right bars.
•Cinema—Stretches the picture at the edges, but
maintains a good aspect ratio at the center of the
screen.
•Brightness—Adjusts the brightness of dark areas of the
video.
•Contrast—Adjusts the white level of the picture.
•Sharpness—Adjusts the sharpness of the picture.
•Dynamic backlight—Automatically adjusts the overall
brightness of the picture. When any option other than Off
is selected, the Backlight option cannot be adjusted.
•Backlight—Controls the overall brightness of the picture.
•Color saturation—Adjusts color intensity.
•Color tint—Adjusts the picture hue (red, green).
•Color temperature—Selects the color temperature.
•Cool—Produces a gentle, blue-hued image.
•Normal—Produces a vivid image.
•Warm—Produces a red-hued image.
•Advanced contrast—Dynamically adjusts picture detail
and brightness. You can select On or Off.
•Insignia motion—Selects the Insignia motion mode to
enhance video detail and motion smoothness. You can
select Low (reduce ghosting or halo), Middle, High, 24p
film mode (which provides smooth and clear motion for
film-based videos), or Off.
•Noise reduction—Selects the noise reduction mode to
reduce video noise (snow). You can select Low, Middle,
High, or Off.
•Overscan—Adjusts the picture’s display range. You can
select On or Off.
•Clock adjust—Minimizes vertical stripes.
•Auto power—Puts your TV into sleep mode after 15
minutes of inactivity in VGA mode. You can select On or
Off.
•Phase adjust—Minimizes horizontal stripes.
•Adjust picture position—Adjusts the horizontal and
vertical picture position.
•Use these settings—Uses the current settings. Press
SELECT to return to the previous screen.
•Reset <input> video settings—Resets the video settings
of the selected input to the factory defaults.
6Press SELECT to save your settings and return to the
previous screen.
Note
The Vivid, Energy savings, Theater, and Sports options are
not available in VGA mode.
Note
You can also press ZOOM to select the aspect ratio.
Notes
•The Sharpness, Color saturation, Color tint,
Advanced contrast, Noise reduction, and
Overscan settings are not available in VGA
mode.
•Clock adjust, Auto Power, Phase adjust, and
Adjust picture position settings are only
available in VGA mode.
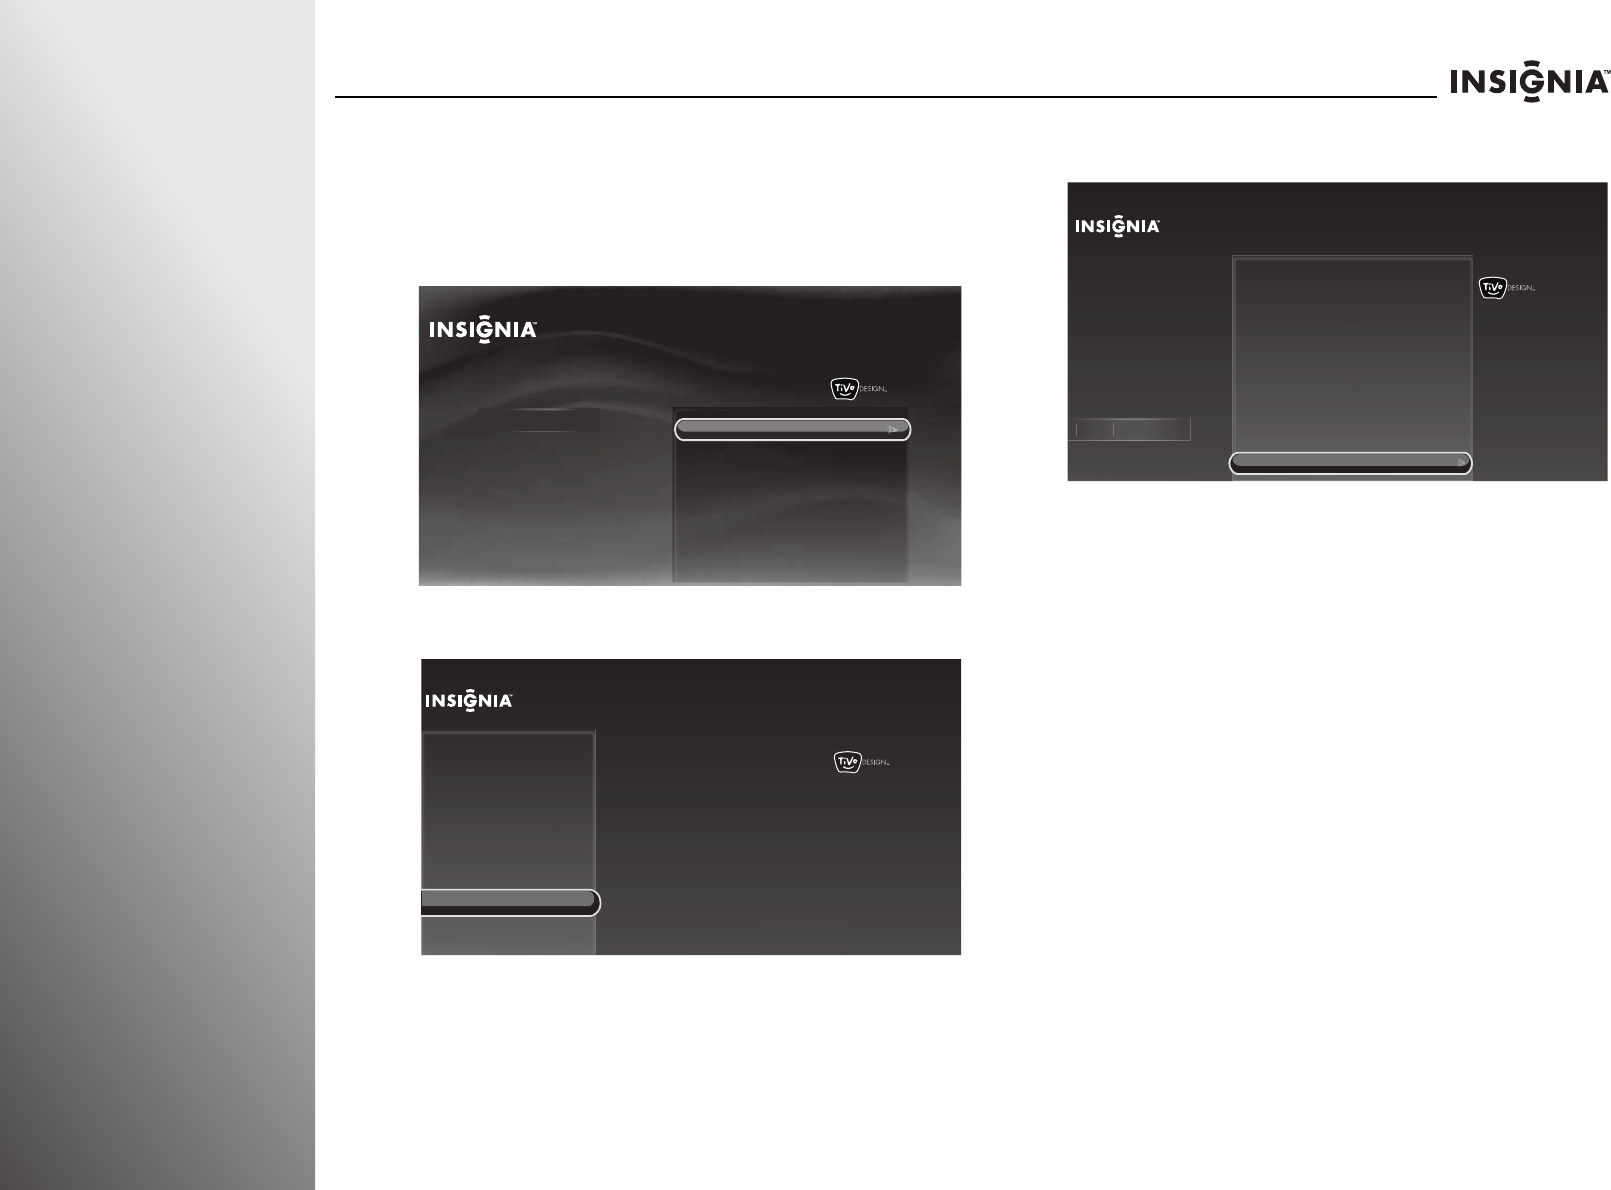
44 www.insigniaproducts.com
Using Your TV NS-32E859A11/NS-42E859A11
Resetting all video settings
To reset all video settings:
1Press TiVo. The Home screen opens. Press S or T to select
Settings, then press X or SELECT.
2Press S or T to highlight Settings, then press X or SELECT.
3Press S or T to highlight Video, then press X or SELECT.
4Press S or T to highlight Reset all video settings, then
press X or SELECT.
5Press S or T to highlight Yes, reset all video settings, then
press SELECT. The video settings are reset to factory
defaults.
10:00pm
Home
Settings
Connect to the Internet Settings
Parental Controls
Check for updates
Account & system info
Help
Sleep timer
10:00pm
Settings
Channels & providers
Devices
Network
Recommendations
Appearance TV video settings
HDMI 1 video settings (no device)
HDMI 2 video settings (no device)
HDMI 3 video settings (no device)
HDMI 4 video settings (no device)
Comp video settings (no device)
VGA video settings (no device)
Reset all video settings
Audio
Video
10:00pm
Settings
Channels & providers
Devices
Network
Recommendations
Video
Appearance
Audio
Vi
d
eo
TV video settings
HDMI 2 video settings (no device)
HDMI 3 video settings (no device)
HDMI 4 video settings (no device)
Comp video settings (no device)
VGA video settings
HDMI 1 video settings (no device)
Reset all video settings
Restore all video settings for all
inputs to the state they were in
when the TV was first purchased.
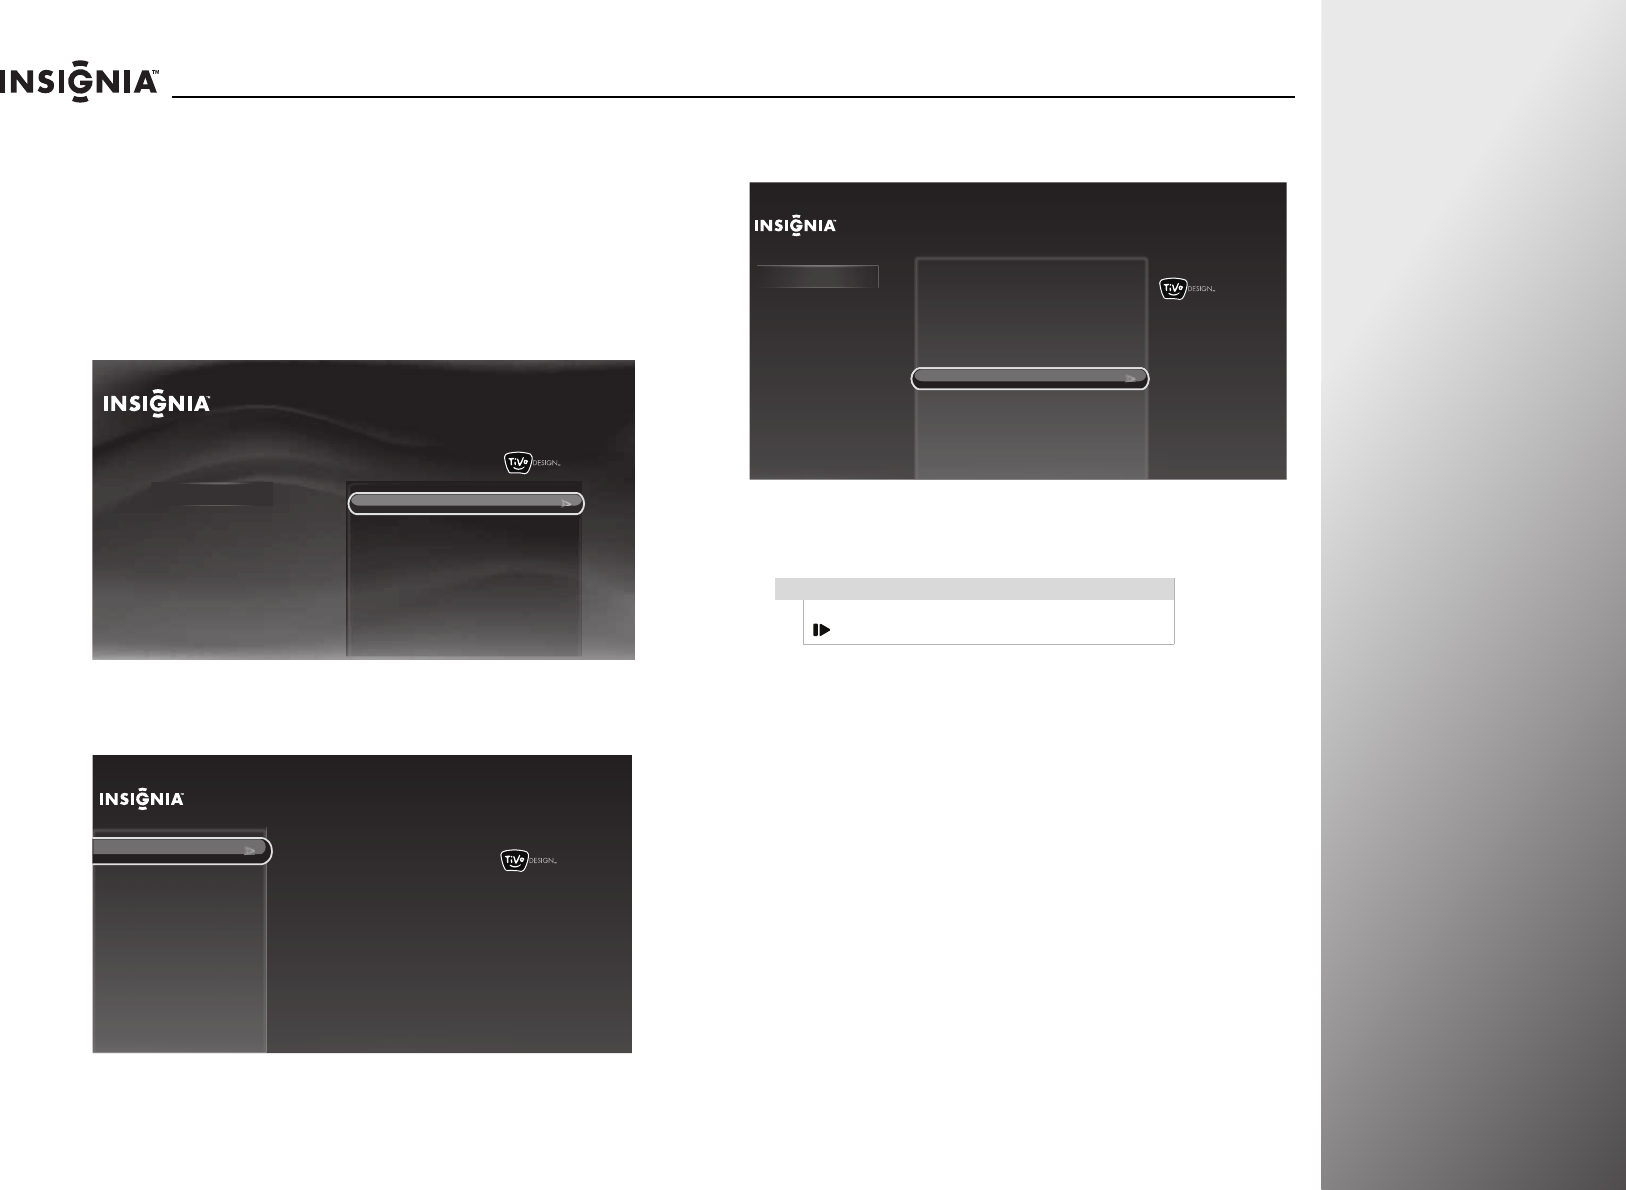
www.insigniaproducts.com 45
NS-32E859A11/NS-42E859A11 Using Your TV
Turning the video window on or off
Your TV can display a video window on the top right corner of
the screen so you can continue watching your show while using
the menu.
To turn the video window on or off:
1Press TiVo. The Home screen opens. Press S or T to select
Settings, then press X or SELECT.
2Press S or T to highlight Settings, then press X or SELECT.
3Press S or T to highlight Appearance, then press X or
SELECT.
4Press S or T to highlight Video window, then press X or
SELECT.
5Press S or T to highlight On or Off, then press SELECT to
save your setting and return to the previous screen.
10:00pm
Home
Settings
Connect to the Internet Settings
Parental Controls
Check for updates
Account & system info
Help
Sleep timer
10:00 PM
Settings
Audio
Channels & providers
Devices
Network
Recommendations
Video
Appearance
Logo brightness
Input labels
Closed captioning
Video window
Reset all appearance settings
Time
Note
You can temporarily turn the video window on or off by pressing
/SLOW regardless of whether this option is turned on or off.
10:00 PM
Settings
Audio
Channels & providers
Devices
Network
Recommendations
Video
Appearance
Reset all appearance settings
Time
App
earance
Turn on or off the video window
displayed in the upper right corner.
Current setting:
Logo brightness
Input labels
On
Closed captioning
Video window
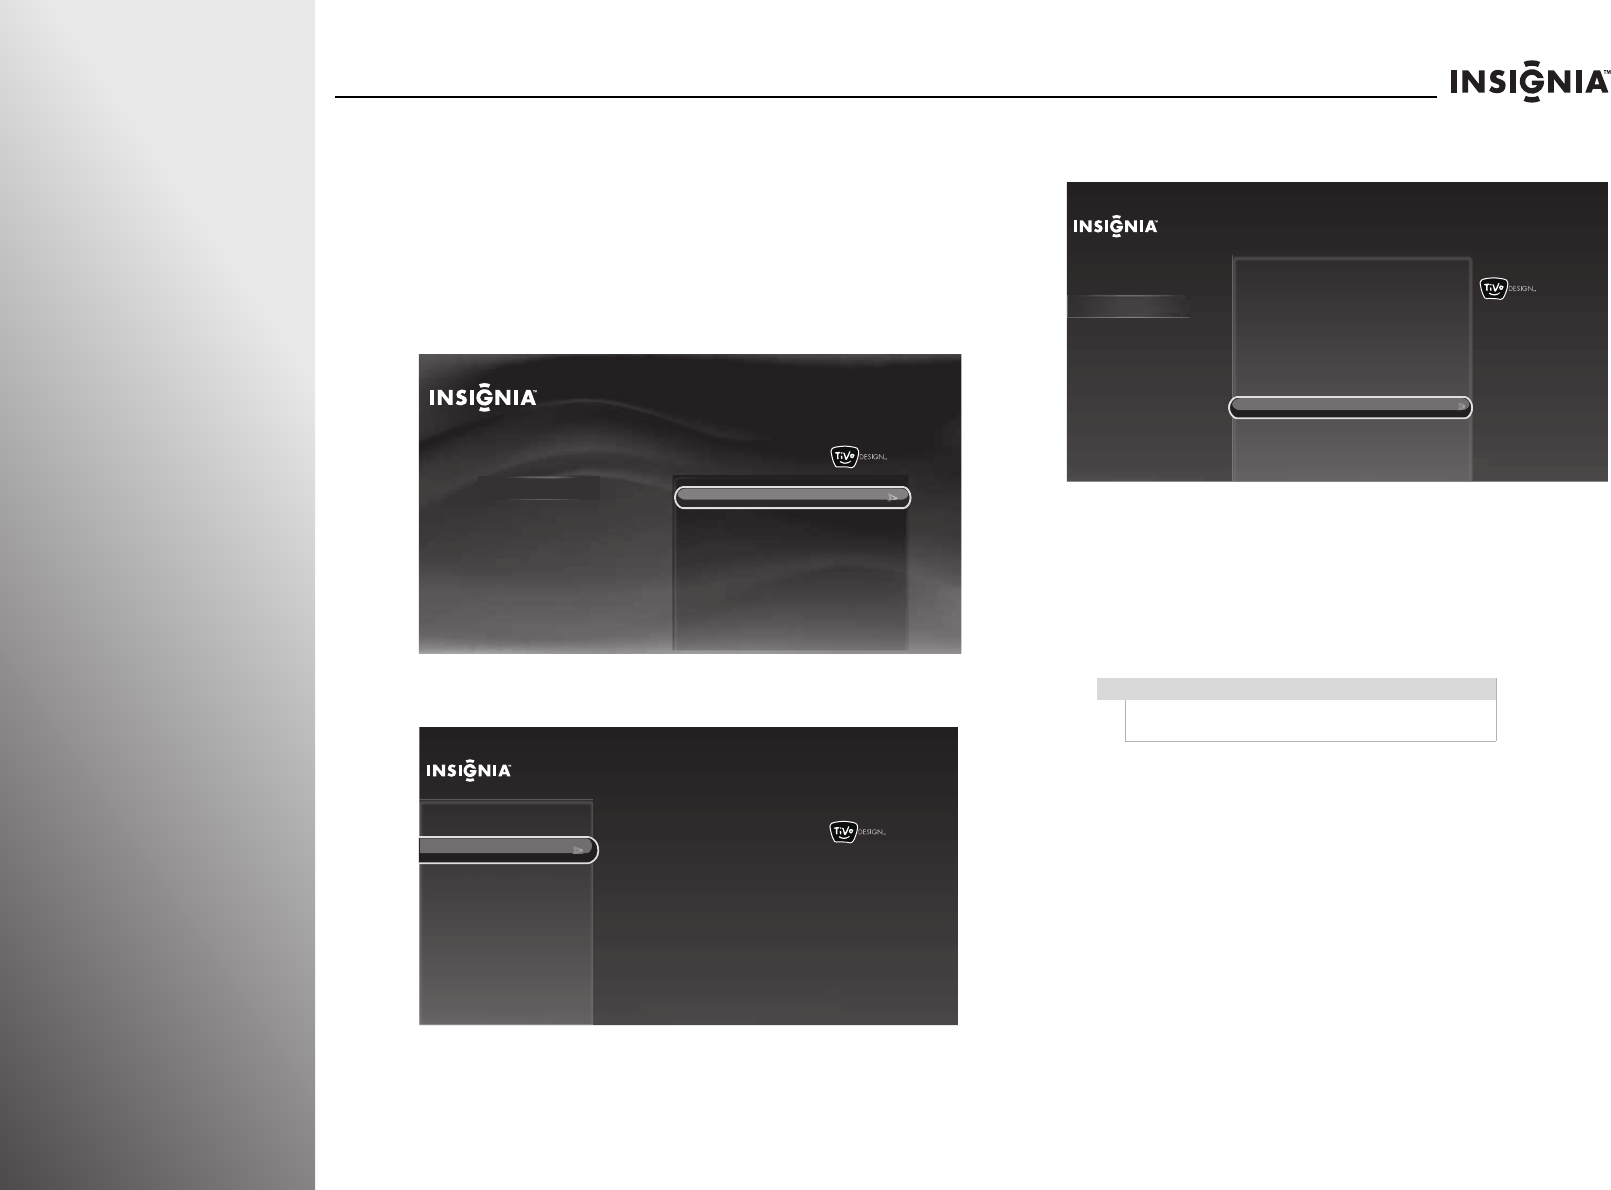
46 www.insigniaproducts.com
Using Your TV NS-32E859A11/NS-42E859A11
Adjusting audio settings
Manually adjusting audio settings
To manually adjust audio settings:
1Press TiVo. The Home screen opens. Press S or T to select
Settings, then press X or SELECT.
2Press S or T to highlight Settings, then press X or SELECT.
3Press S or T to highlight Audio, then press X or SELECT.
4Press S or T to highlight Manually adjust audio, then
press X or SELECT.
5Press S or T to highlight an option, then press W or X to
adjust its setting. You can adjust:
•Treble—Adjusts the high sounds.
•Bass—Adjusts the low sounds.
•Balance—Adjusts the balance between the left and right
audio channels.
6Press SELECT to highlight Use these settings, then press
SELECT again to save your settings and return to the
previous screen.
10:00pm
Home
Settings
Connect to the Internet Settings
Parental Controls
Check for updates
Account & system info
Help
Sleep timer
10:00 PM
Settings
Channels & providers
Devices
Network
Recommendations
Video
Appearance
Sound effects volume
Alternate audio
Dolby Digital
Audyssey Dynamic Volume™
SRS TruSurround HD™
Rocketboost™ settings
Manually adjust audio
Audio only (no video)
TV speakers
Audio return channel (ARC)
Audio
Note
If SRS TruSurround HD™ is set to On, Treble and
Bass are dimmed and cannot be adjusted.
10:00 PM
Settings
Channels & providers
Devices
Network
Recommendations
Video
Appearance
Audio
Audio
Adjust the treble, bass, and
balance between speakers.
Sound effects volume
Alternate audio
Dolby Digital
Audyssey Dynamic Volume™
SRS TruSurround HD™
Rocketboost™ settings
Manually adjust audio
Audio only (no video)
TV speakers
Audio return channel (ARC)
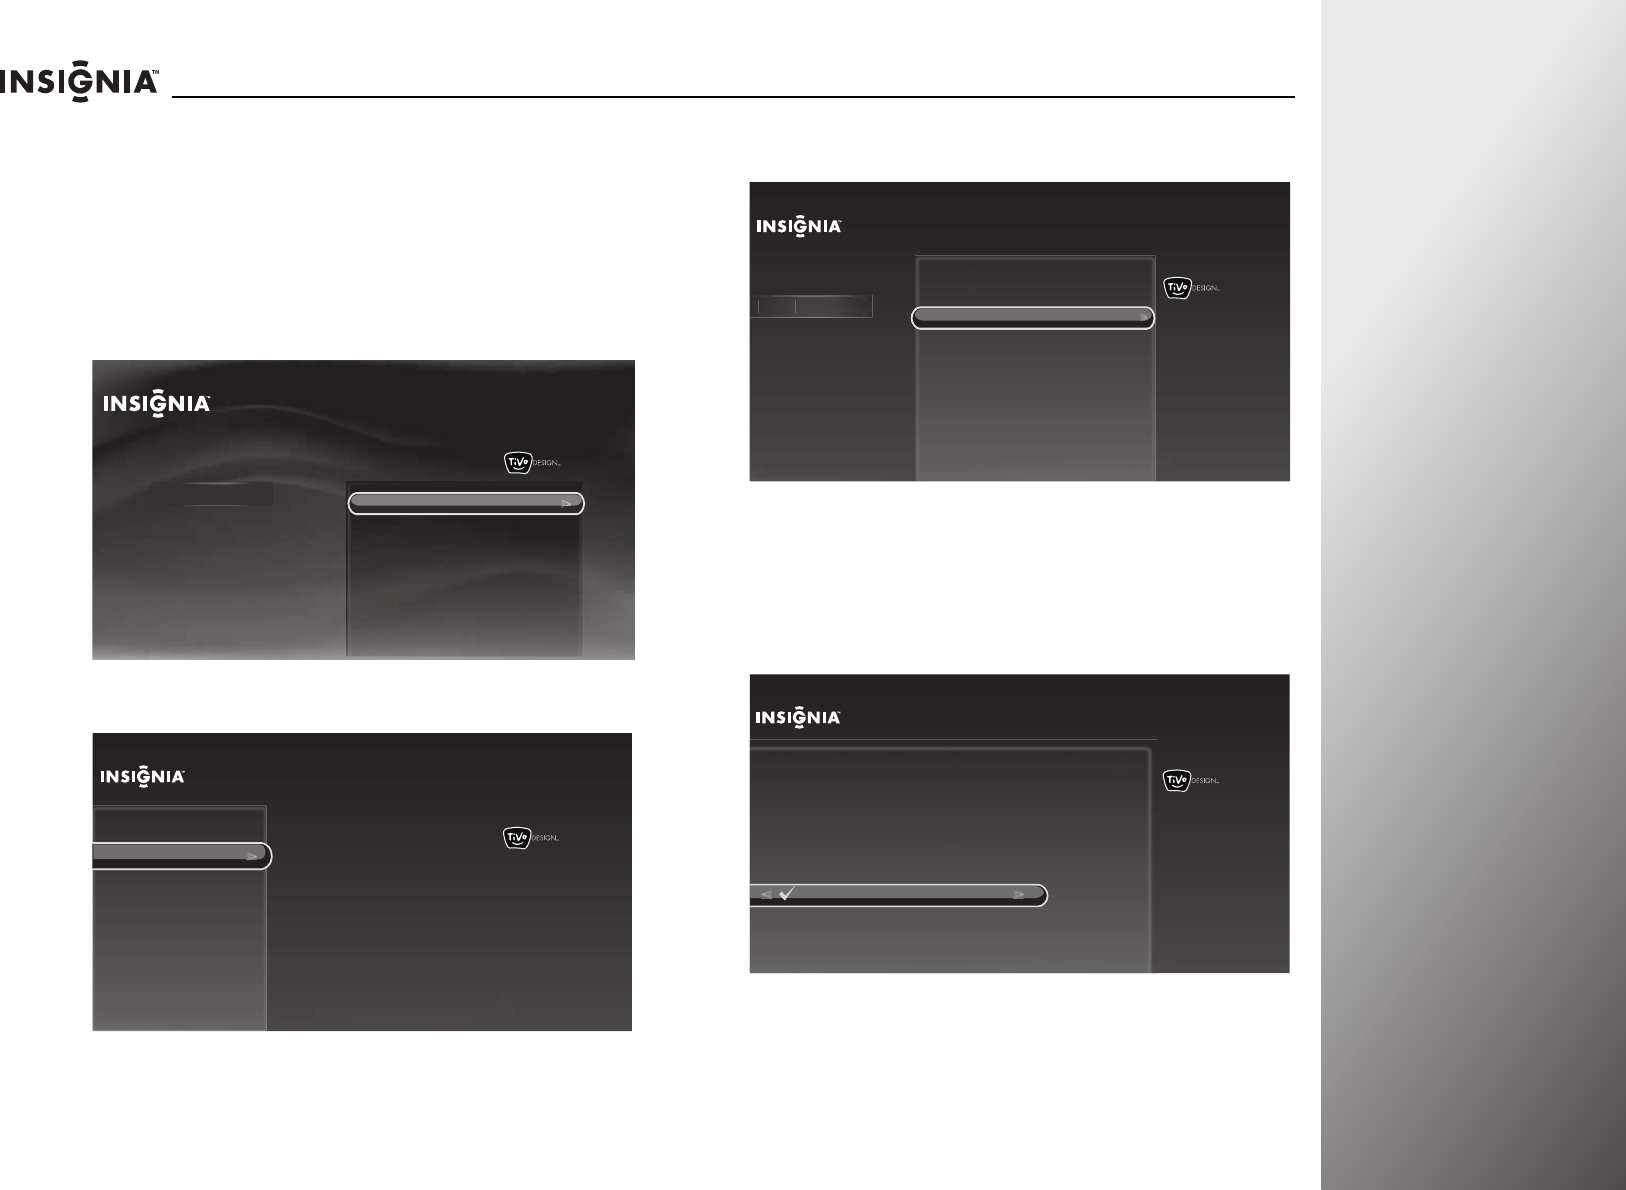
www.insigniaproducts.com 47
NS-32E859A11/NS-42E859A11 Using Your TV
Selecting the Dolby digital output
You can select the format for your digital audio output If you
have connected an amplifier or receiver to the SPDIF jack on
your TV.
To select the Dolby digital output:
1Press TiVo. The Home screen opens. Press S or T to select
Settings, then press X or SELECT.
2Press S or T to highlight Settings, then press X or SELECT.
3Press S or T to highlight Audio, then press X or SELECT.
4Press S or T to highlight Dolby Digital, then press X or
SELECT.
5Press S or T to highlight an option. You can select:
•Dolby Digital (preferred)—Outputs audio in Dolby
Digital format if your amplifier or receiver has a Dolby
Digital decoder.
•Dolby Digital to PCM—Outputs audio in 2-channel
stereo.
6Press SELECT to save your setting and return to the previous
menu.
10:00pm
Home
Settings
Connect to the Internet Settings
Parental Controls
Check for updates
Account & system info
Help
Sleep timer
10:00 PM
Settings
Channels & providers
Devices
Network
Recommendations
Video
Appearance
Sound effects volume
Alternate audio
Dolby Digital
Audyssey Dynamic Volume™
SRS TruSurround HD™
Rocketboost™ settings
Manually adjust audio
Audio only (no video)
TV speakers
Audio return channel (ARC)
Audio
10:00 PM
Settings
Sound effects volume
Audyssey Dynamic Volume™
SRS TruSurround HD™
Rocketboost™ settings
Manually adjust audio
Audio only (no video)
TV speakers
Audio return channel (ARC)
Channels & providers
Devices
Network
Recommendations
Video
Appearance
Audio
Aud
i
o
Choose the audio format for the
digital audio output.
Alternate audio
Current setting:
Dolby digital
Dolby Digital
10:00pm
Dolby Digital Output
If you have connected an amplifier/receiver to the digital audio
(SPDIF) output on the TV, select a compatible format.
Dolby Digital to PCM
Enables audio in Dolby Digital
format. Choose this if your
amplifier/receiver has a Dolby
Digital decoder.
Dolby Digital (preferred)
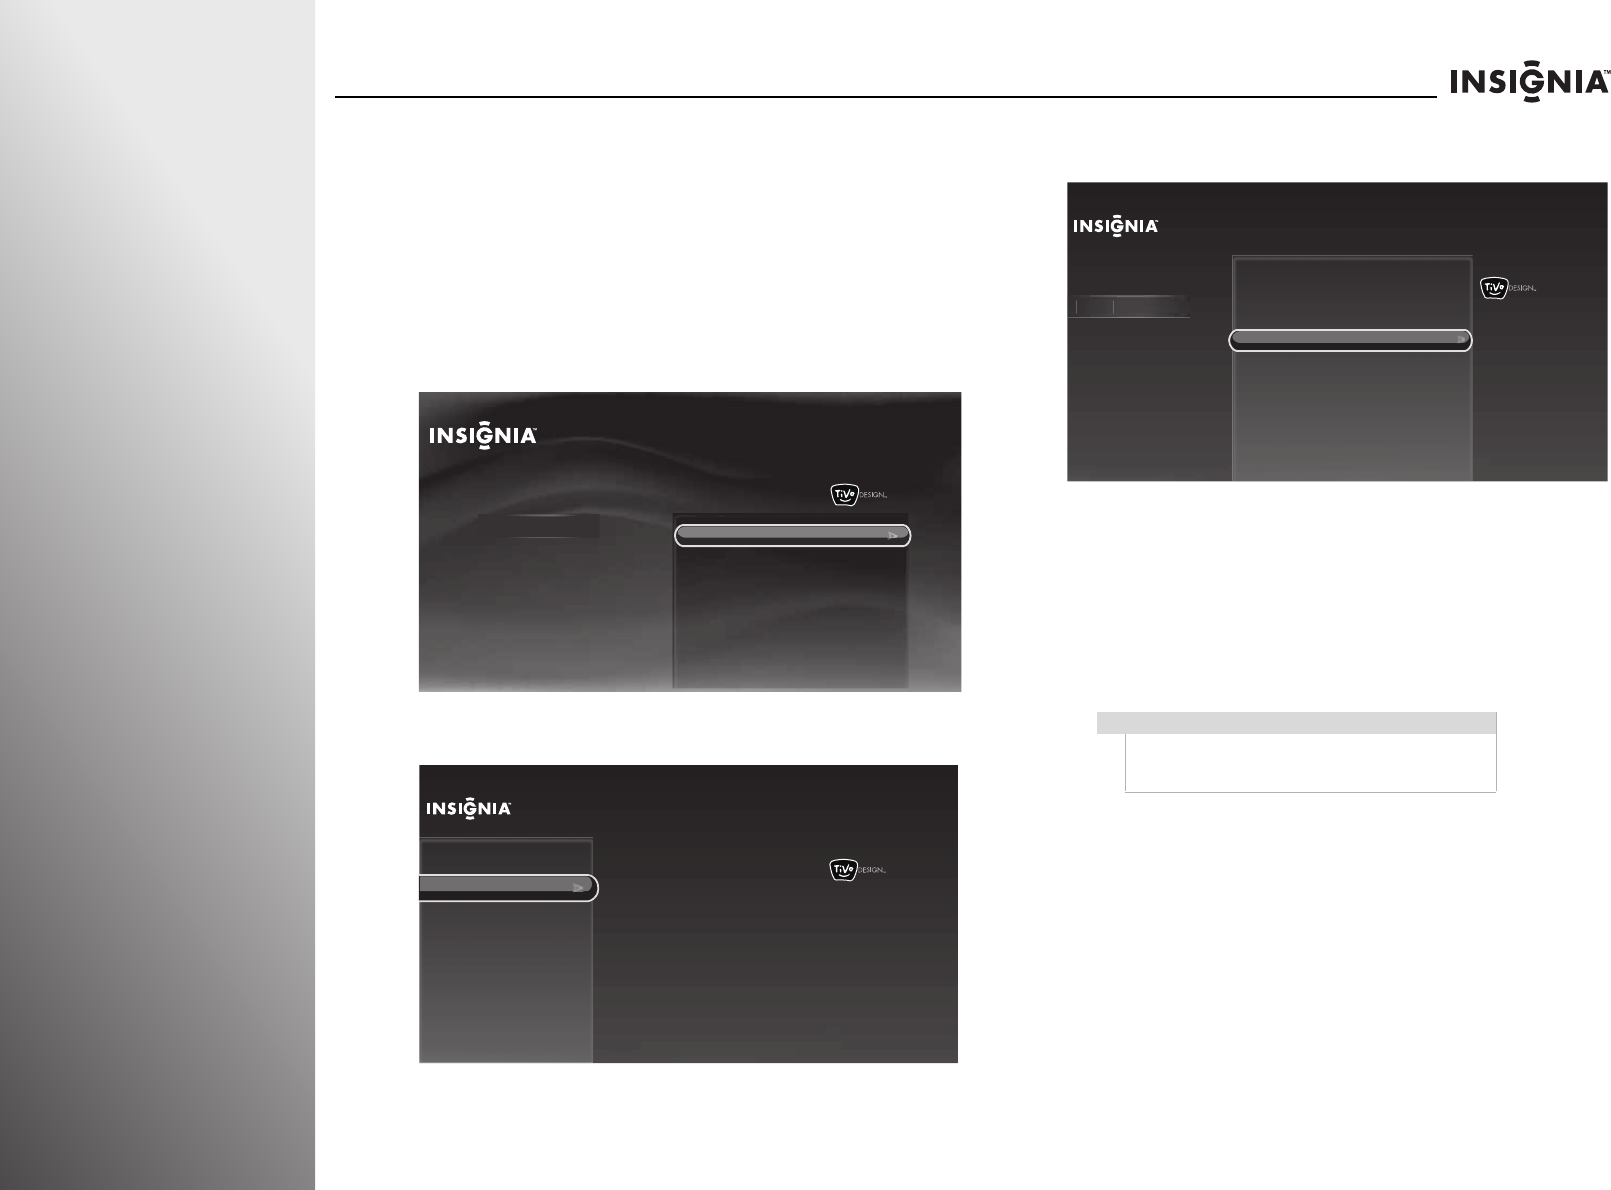
48 www.insigniaproducts.com
Using Your TV NS-32E859A11/NS-42E859A11
Setting the Audyssey Dynamic Volume
control
Audyssey Dynamic Volume control adjusts the volume so that
commercials and loud scenes in a program are more
consistent with the rest of the scenes.
To set the Audyssey Dynamic Volume control:
1Press TiVo. The Home screen opens. Press S or T to select
Settings, then press X or SELECT.
2Press S or T to highlight Settings, then press X or SELECT.
3Press S or T to highlight Audio, then press X or SELECT.
4Press S or T to highlight Audyssey Dynamic Volume™,
then press X or SELECT.
5Press S or T to highlight an option. You can select:
•Off—Turns off the Audyssey Dynamic Volume™ control.
•Light—Adjusts the volume level slightly.
•Medium—Adjusts the volume level moderately.
•Heavy—Adjusts the volume level heavily.
6Press SELECT to save your setting and return to the
previous screen.
10:00pm
Home
Settings
Connect to the Internet Settings
Parental Controls
Check for updates
Account & system info
Help
Sleep timer
10:00 PM
Settings
Channels & providers
Devices
Network
Recommendations
Video
Appearance
Sound effects volume
Alternate audio
Dolby Digital
Audyssey Dynamic Volume™
SRS TruSurround HD™
Rocketboost™ settings
Manually adjust audio
Audio only (no video)
TV speakers
Audio return channel (ARC)
Audio
Note
If the Audyssey Dynamic Volume™ control is set to
Light, Medium, or Heavy, the SRS
TruSurroundHD™ feature is automatically set to Off.
10:00 PM
Settings
Sound effects volume
Audyssey Dynamic Volume™
SRS TruSurround HD™
Rocketboost™ settings
Manually adjust audio
Audio only (no video)
TV speakers
Audio return channel (ARC)
Channels & providers
Devices
Network
Recommendations
Video
Appearance
Audio
Audio
Alternate audio
Current setting:
Light
Dolby Digital
Dynamically adjusts the volume so
that commercials are not louder
than TV shows.
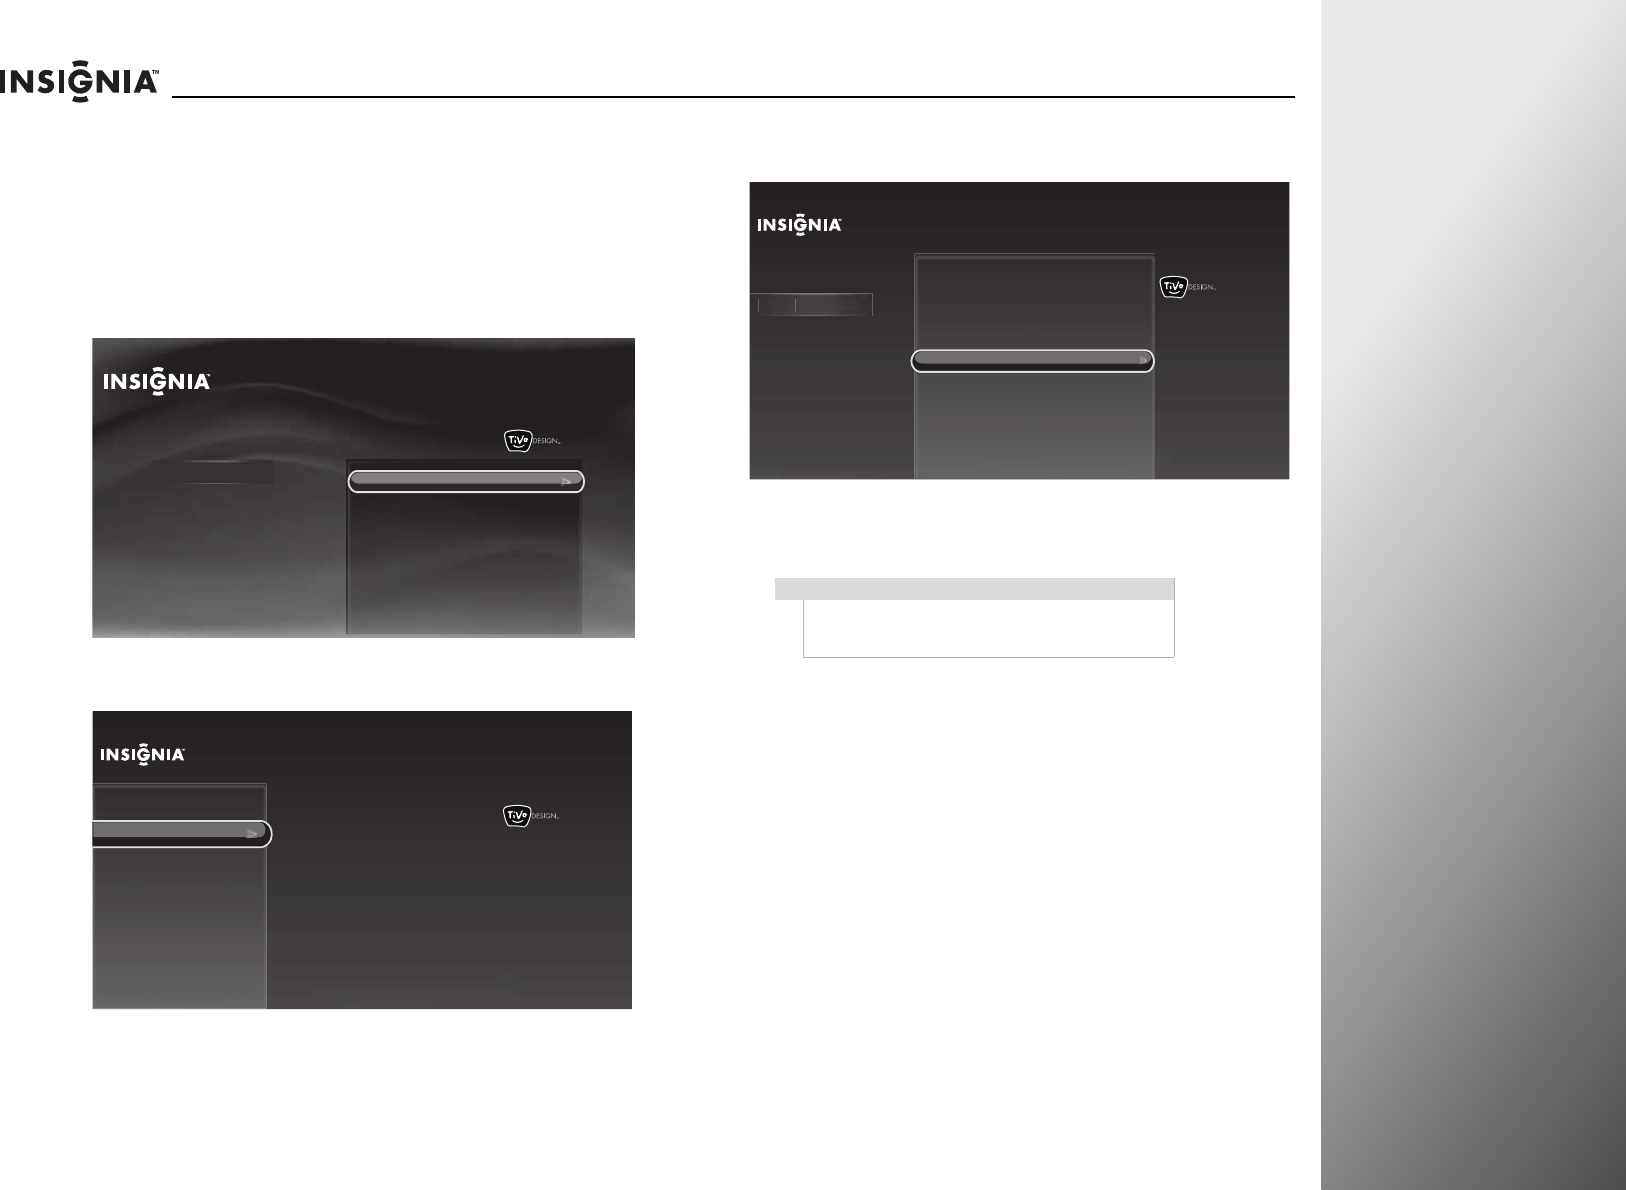
www.insigniaproducts.com 49
NS-32E859A11/NS-42E859A11 Using Your TV
Setting the SRS TruSurround HD mode
The SRS TruSurround HD simulates surround sound through TV
speakers.
To set the SRS TruSurround HD mode:
1Press TiVo. The Home screen opens. Press S or T to select
Settings, then press X or SELECT.
2Press S or T to highlight Settings, then press X or SELECT.
3Press S or T to highlight Audio, then press X or SELECT.
4Press S or T to highlight SRS TruSurround HD™, then press
X or SELECT.
5Press S or T to highlight On or Off, then press SELECT to
save your setting and return to the previous screen.
10:00pm
Home
Settings
Connect to the Internet Settings
Parental Controls
Check for updates
Account & system info
Help
Sleep timer
10:00 PM
Settings
Channels & providers
Devices
Network
Recommendations
Video
Appearance
Sound effects volume
Alternate audio
Dolby Digital
Audyssey Dynamic Volume™
SRS TruSurround HD™
Rocketboost™ settings
Manually adjust audio
Audio only (no video)
TV speakers
Audio return channel (ARC)
Audio
Note
If the SRS TruSurround HD™ is set to On, the
Audyssey Dynamic Volume feature is automatically
set to Off.
10:00 PM
Settings
Sound effects volume
Audyssey Dynamic Volume™
SRS TruSurround HD™
Rocketboost™ settings
Manually adjust audio
Audio only (no video)
TV speakers
Audio return channel (ARC)
Channels & providers
Devices
Network
Recommendations
Video
Appearance
Audio
Au
di
o
Alternate audio
Current setting:
On
Dolby Digital
Simulates surround sound through
your TV speakers.
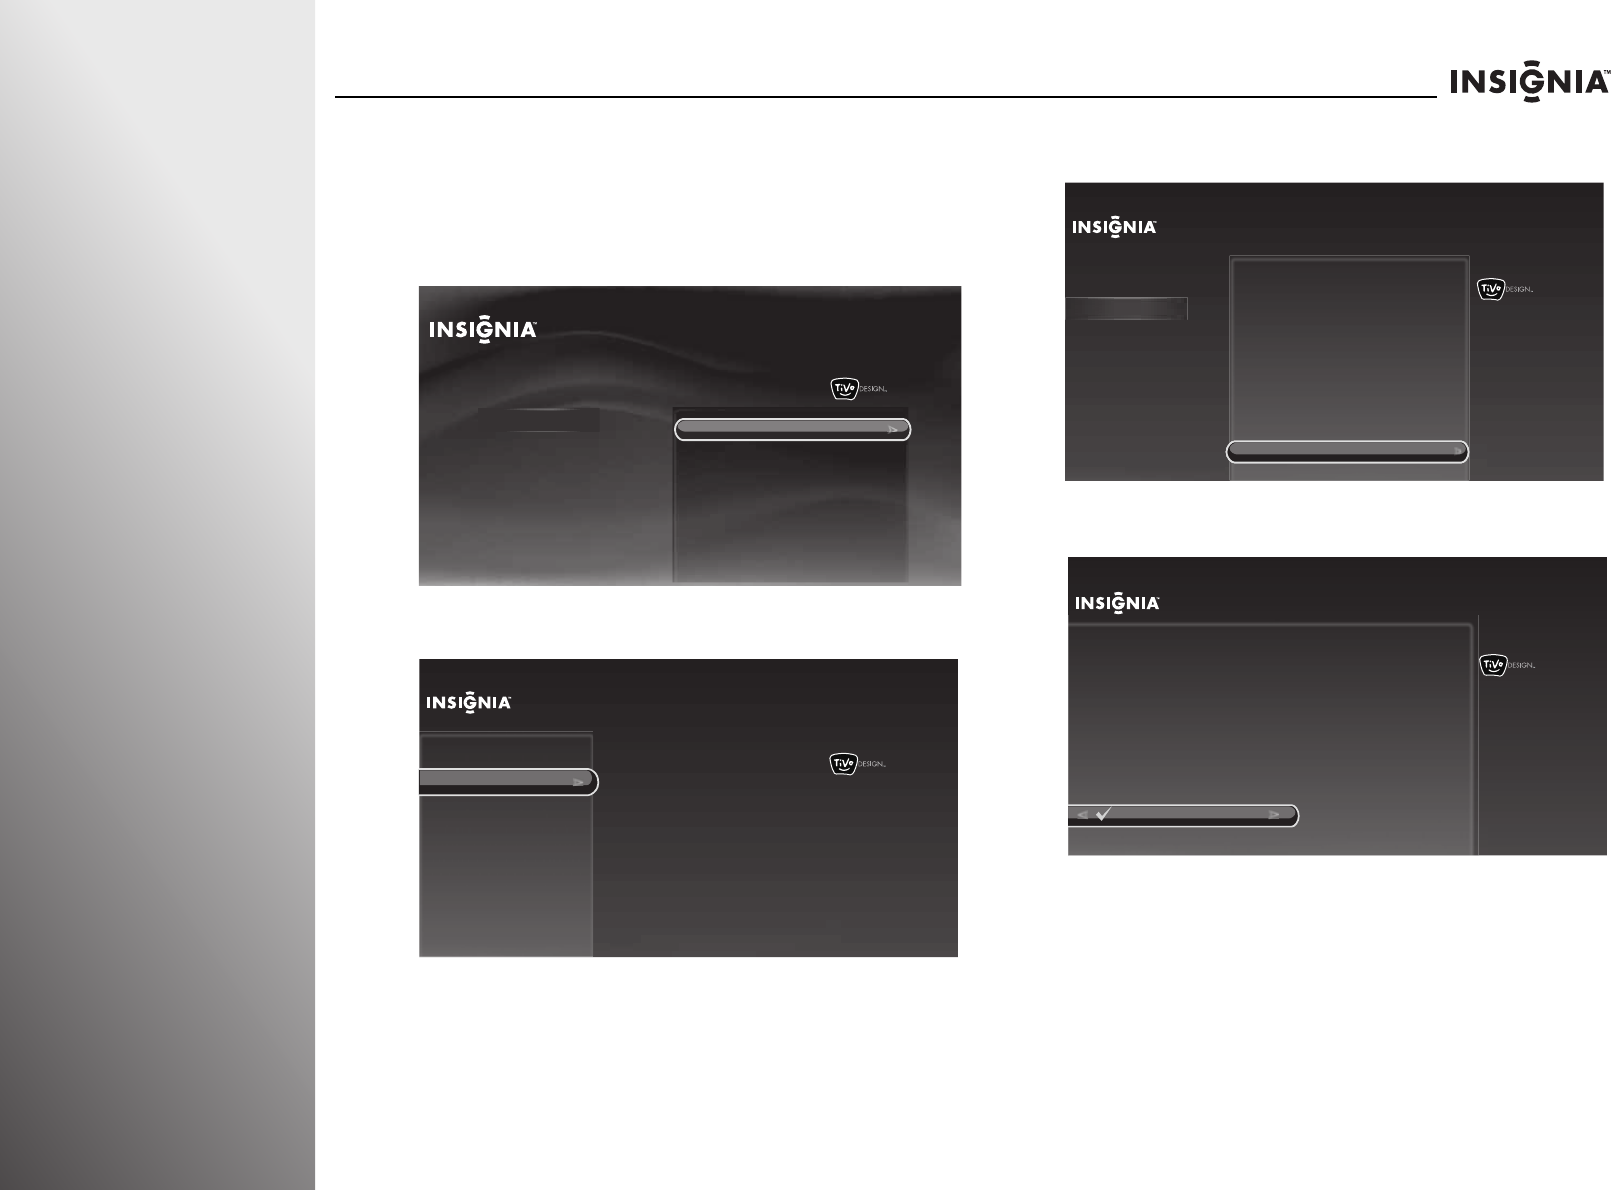
50 www.insigniaproducts.com
Using Your TV NS-32E859A11/NS-42E859A11
Turning your TV speakers on or off
To turn your TV speakers on or off:
1Press TiVo. The Home screen opens. Press S or T to select
Settings, then press X or SELECT.
2Press S or T to highlight Settings, then press X or SELECT.
3Press S or T to highlight Audio, then press X or SELECT.
4Press S or T to highlight TV speakers, then press X or
SELECT.
5Press S or T to highlight On or Off, then press X or SELECT.
10:00pm
Home
Settings
Connect to the Internet Settings
Parental Controls
Check for updates
Account & system info
Help
Sleep timer
10:00 PM
Settings
Channels & providers
Devices
Network
Recommendations
Video
Appearance
Sound effects volume
Alternate audio
Dolby Digital
Audyssey Dynamic Volume™
SRS TruSurround HD™
Rocketboost™ settings
Manually adjust audio
Audio only (no video)
TV speakers
Audio return channel (ARC)
Audio
10:00 PM
Settings
Sound effects volume
Audyssey Dynamic Volume™
SRS TruSurround HD™
Rocketboost™ settings
Manually adjust audio
Audio only (no video)
TV speakers
Audio return channel (ARC)
Channels & providers
Devices
Network
Recommendations
Video
Appearance
Audio
Au
d
i
o
Alternate audio
Current setting:
On
Dolby Digital
Choose to turn the speakers in
your TV on or off.
TV speakers
On
Off
If you turn your TV speakers off you will only hear sound through
other speakers connected to your entertainment center.
10:00pm
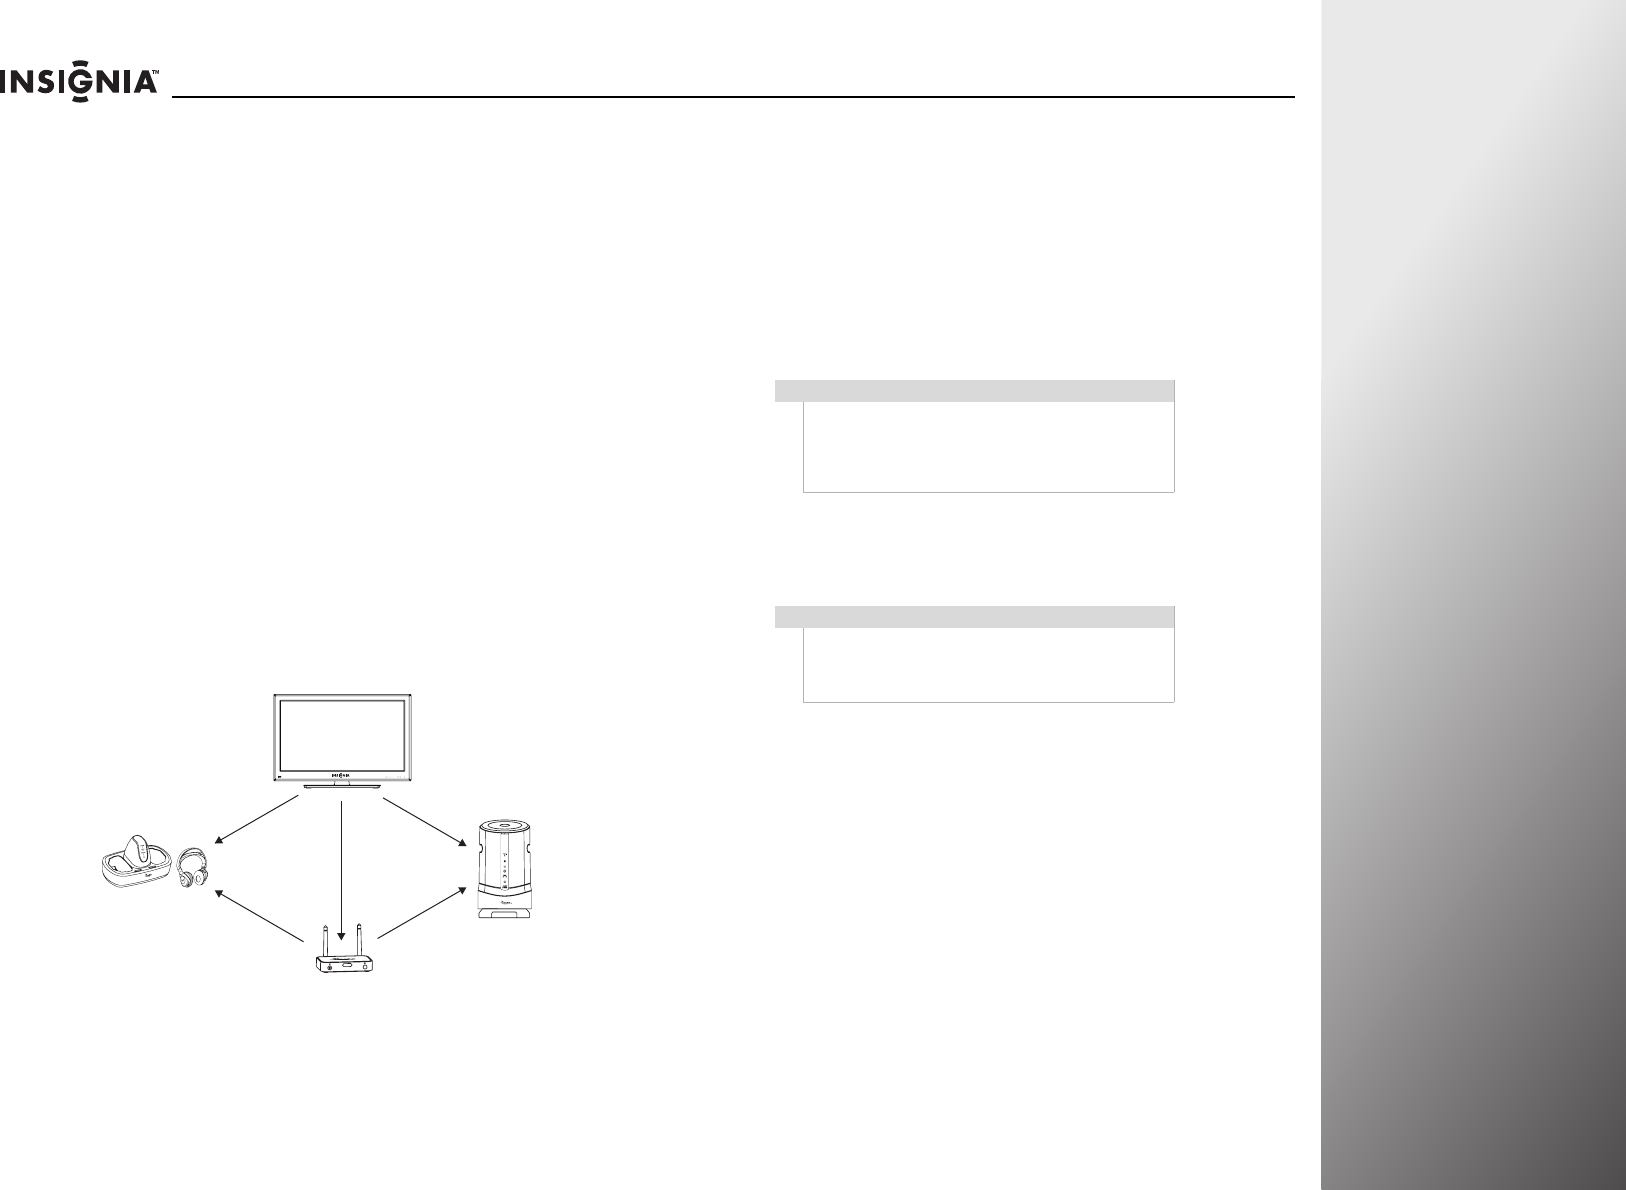
www.insigniaproducts.com 51
NS-32E859A11/NS-42E859A11 Using Your TV
Setting up Rocketboost™
Congratulations on your purchase of this Rocketboost™
Ready TV.
Rocketboost uses state of the art 2.4 GHz wireless audio
technology. When used with other Rocketboost products, you
can enjoy your music or other audio throughout your house
without the limitations of cables.
How does Rocketboost work?
Rocketboost technology can connect all audio devices
throughout your home to form a home audio network.
Rocketboost products include “Senders,” which send or
transmit audio streams, and “Receivers,” which receive the
audio. This lets you listen to music from your Sender in other
rooms using your Receiver. Your Rocketboost Ready TV can be
used as both a sender and receiver.
As a sender you can listen to your TV audio using any other
Rocketboost receiver. As a receiver you can listen to the audio
from any other Rocketboost sender.
Rocketboost is expandable. Each Rocketboost Receiver can
select the audio from any Sender in your Rocketboost audio
network. The following shows an example Rocketboost
network. You can set up your network to meet your specific
needs.
We hope you enjoy your new Rocketboost system. Remember
that it’s designed to grow with your home entertainment needs
and that it’s easy to add a new device to the network as you
expand your system.
For more information on Rocketboost products, go to
www.rocketboost.com.
Establishing communication
Rocketboost products form an audio network and each
Rocketboost receiver can select the audio from any
Rocketboost sender in the network.
If this is your first Rocketboost product, you should make the TV
the hub or manager. If you already have a working Rocketboost
network, then one of your other devices is already the hub or
manager.
Is this your first Rocketboost product?
YES—If this is your first Rocketboost enabled product, follow
the steps under “Setting up Rocketboost with your TV as the
hub or manager” on page 52.
NO—If this is not your first Rocketboost enabled product and
you already have a working Rocketboost network, go to
“Setting up Rocketboost with another device as the hub or
manager” on page 53.
GAMECH
Note
Every Rocketboost network must contain one hub or
manager device, which helps devices join the
network. The network can have only one hub, which
you can enable using the hub switch on Rocketboost
senders and sender/receivers.
Note
Hub devices must always have power for your
network to operate. The hub device can be in
standby (power saving) mode, but must stay
plugged in.
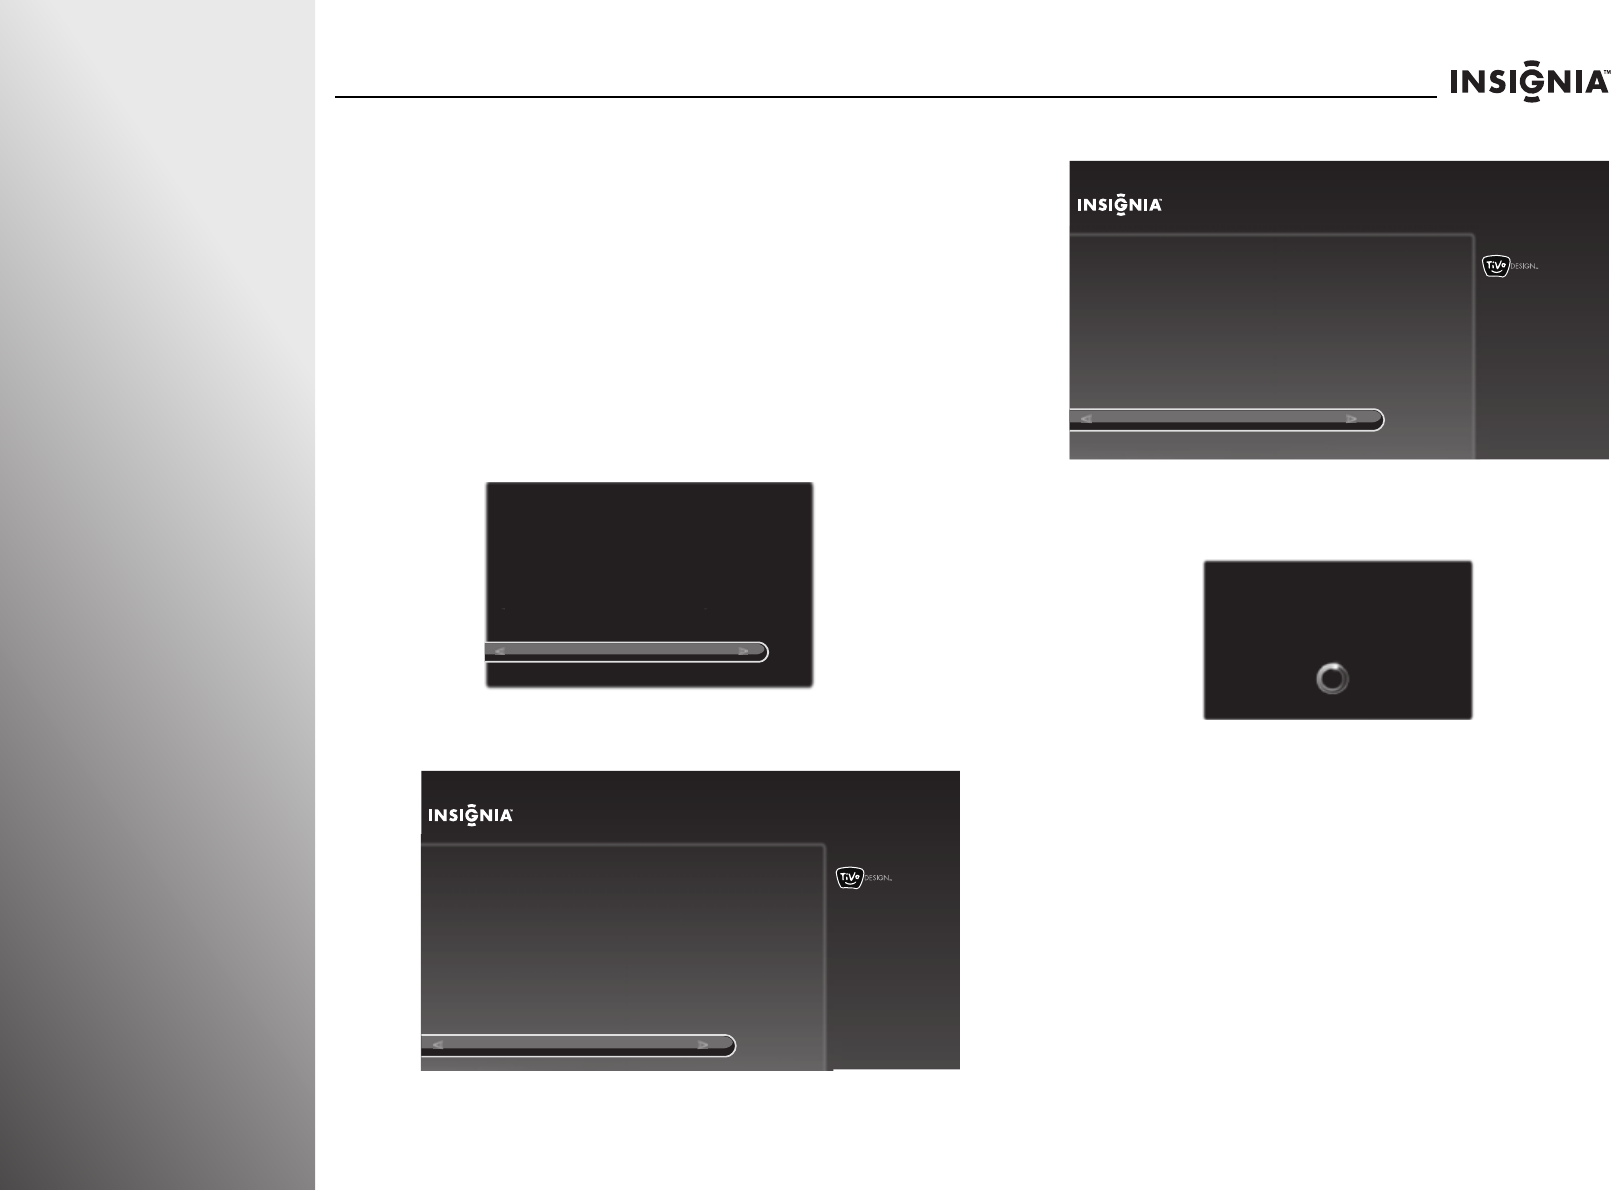
52 www.insigniaproducts.com
Using Your TV NS-32E859A11/NS-42E859A11
Setting up Rocketboost with your TV as the hub or manager
To set up Rocketboost with your TV as the hub or manager:
1Insert a Rocketboost Wireless Card (RF-RBCARD, sold
separately) in the Rocketboost slot on the side of your TV.
The card connector is keyed so it can only be installed one
way. When inserting the card, make sure that it is oriented
so the Rocketboost logo on the card is facing you.
2Make sure that the the hub switches (if available) on your
other Rocketboost devices are set to DISABLE because
your TV is acting as manager. Refer to the documentation
that came with your other Rocketboost devices to set up
the audio system.
3Press S or T to highlight Yes, set up Rocketboost now,
then press SELECT.
4Press S or T to highlight No, then press SELECT.
5Press S or T to highlight Continue, then press SELECT.
6Press and hold the power button of the Rocketboost
device.
7When your TV finds the device, press S or T to highlight
OK, then press SELECT to exit the setup.
OR
Rocketboost™ Card Detected
Yes, set up Rocketboost now
Skip for now
To use Rocketboost, you first need to set this TV up on a
Rocketboost network.
If you have already set up Rocketboost, choose “Skip for now.”
You can set it up later by pressing TIVO and choose
Settings > Settings > Audio > Rocketboost settings.
10:00pm
Rocketboost™ Setup
No
Yes
Do you have other Rocketboost products working in your home?
Choose this option if you have
not set any other Rocketboost
devices as the Rocketboost
manager (i.e., have a hub state
set to Enable). Make sure your
other devices have the hub
state set to Disable.
10:00pm
Rocketboost™ Setup
Continue
Skip for now
Make sure that your other Rocketboost device that you want to join to
the TV is turned on and then choose “Continue”.
To set up Rocketboost later, press TIVO and choose Settings >
Settings > Audio > Rocketboost settings.
Press the Device’s Power Button
Go to the other Rocketboost device and press and hold
the POWER button for 3 seconds. The button’s blue
LED will flash and then turn solid when the TV
has located the device
LEFT or CLEAR to stop
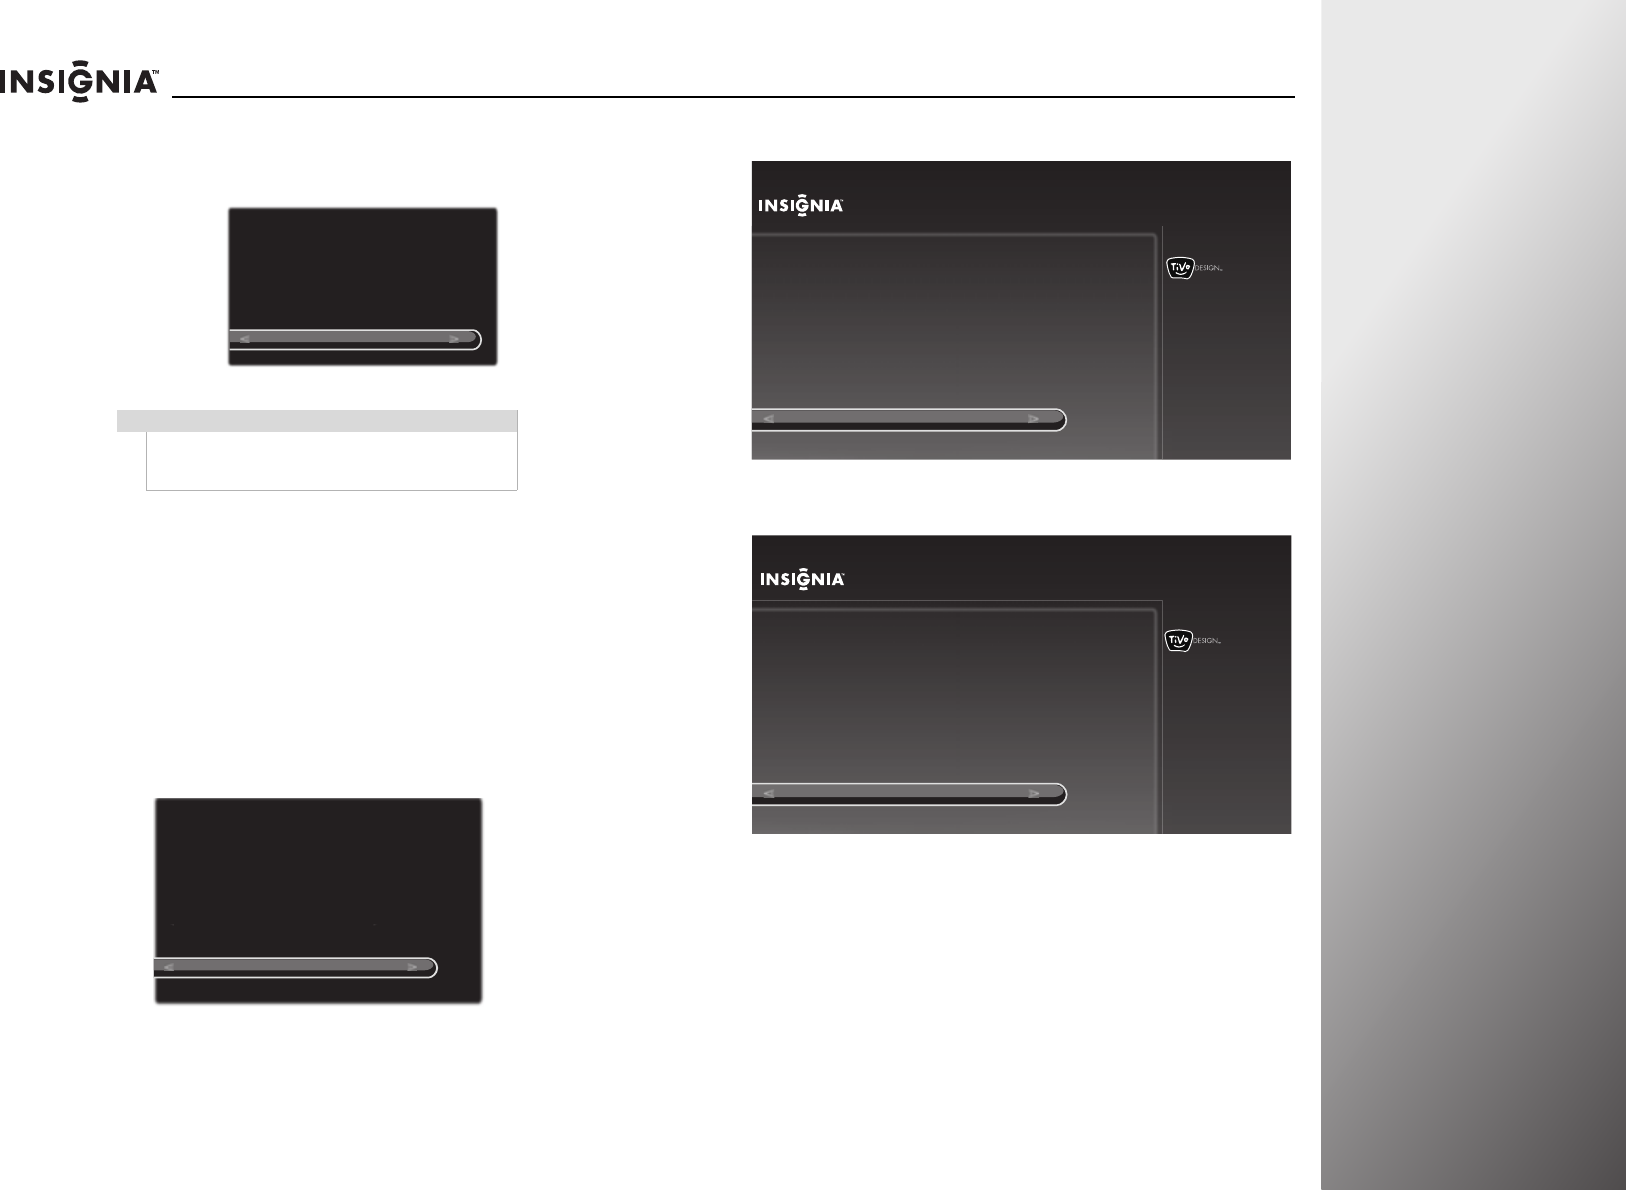
www.insigniaproducts.com 53
NS-32E859A11/NS-42E859A11 Using Your TV
Press S or T to highlight Add another Rocketboost device,
then press SELECT to add another Rocketboost device to
the network.
Setting up Rocketboost with another device as the hub or manager
To set up Rocketboost with another device as the hub or
manager:
1Refer to the documentation that came with your
Rocketboost device to set up the Rocketboost network with
one of your Rocketboost devices as manager (hub status set
to ENABLE).
2Insert a Rocketboost™ Wireless Card (RF-RBCARD, sold
separately) into the Rocketboost slot on the side of your TV.
3Press S or T to highlight Yes, set up Rocketboost now,
then press SELECT.
4Press S or T to highlight Ye s , then press SELECT.
5Press S or T to highlight Continue, then press SELECT.
Note
You can add up to eight devices to the Rocketboost
network, but only five devices (sources) can be
transmitting audio at a time.
Rocketboost Setup Complete
OK
Add another Rocketboost device
The TV has successfully located the
Rocketboost device named iPod.
To listen to Rocketboost devices other than the TV, press
AUDIO and choose “Change Rocketboost sound source”.
Rocketboost™ Card Detected
Yes, set up Rocketboost now
Skip for now
To use Rocketboost, you first need to set this TV up on a
Rocketboost network.
If you have already set up Rocketboost, choose “Skip for now.”
You can set it up later by pressing TIVO and choose
Settings > Settings > Audio > Rocketboost settings.
10:00pm
Rocketboost™ Setup
Yes
No
Choose this option if you already
have a Rocketboost network set
up and you want to add the TV to
the network.
Do you have other Rocketboost products working in your home?
10:00pm
Rocketboost™ Setup
Continue
Skip for now
Make sure that your other Rocketboost device that you want to join to
the TV is turned on and then choose “Continue”.
To set up Rocketboost later, press TIVO and choose Settings >
Settings > Audio > Rocketboost settings.
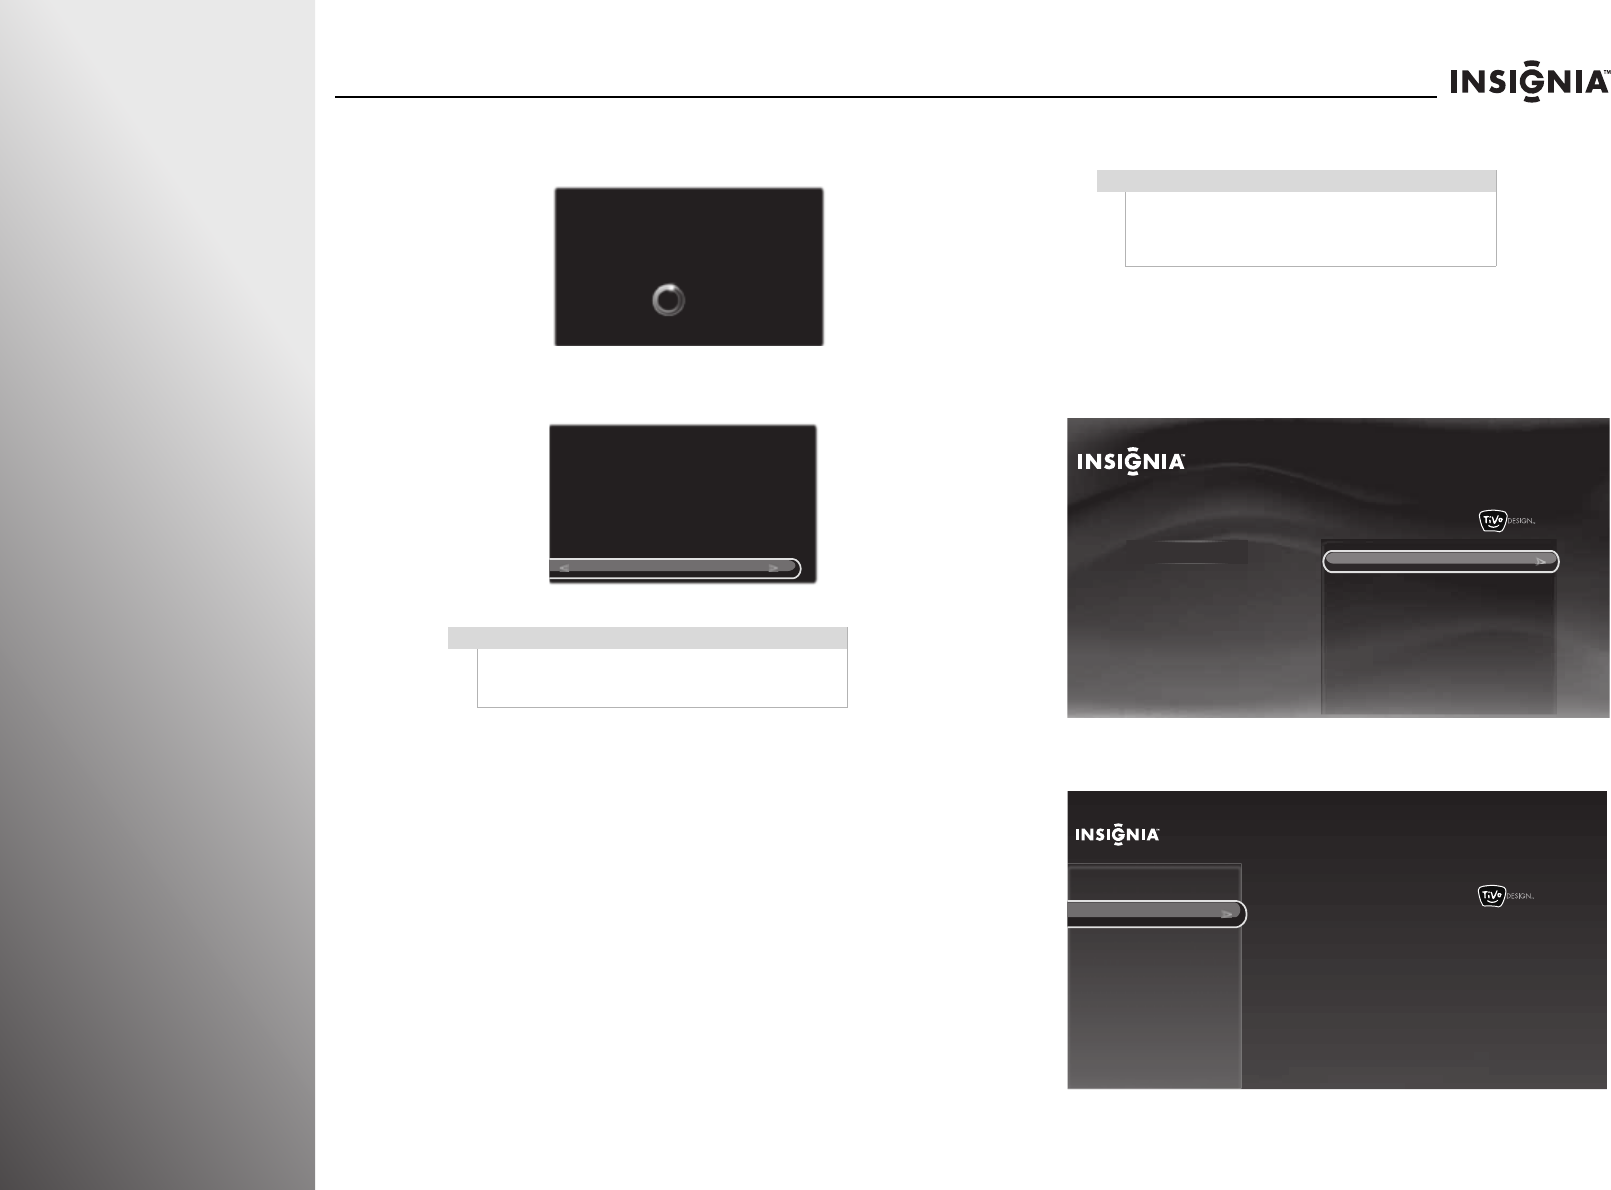
54 www.insigniaproducts.com
Using Your TV NS-32E859A11/NS-42E859A11
6Press and hold the power button of the Rocketboost
manager.
7Press SELECT to exit the setup.
Adding another Rocketboost device
To add another Rocketboost device with your TV as the
hub or manager:
1Press TiVo. The Home screen opens. Press S or T to select
Settings, then press X or SELECT.
2Press S or T to highlight Settings, then press X or SELECT.
3Press S or T to highlight Audio, then press X or SELECT.
Note
To add another Rocketboost device to the network,
refer to the device's documentation for more
information.
Press the Manager’s Power Button
Go to the Rocketboost manager device and
press and hold the POWER button for 3 seconds.
The manager’s green LED will flash and then turn solid
when the TV has located the manager.
LEFT or CLEAR to stop
Rocketboost Setup Complete
OK
The TV has successfully located the Rocketboost
manager.
To listen to Rocketboost devices other than the TV, press
AUDIO and choose “Change Rocketboost sound source”.
Note
If one of your other Rocketboost devices is the hub or
manager, refer to that device's documentation for
how to add additional Rocketboost devices to the
network.
10:00pm
Home
Settings
Connect to the Internet Settings
Parental Controls
Check for updates
Account & system info
Help
Sleep timer
10:00 PM
Settings
Channels & providers
Devices
Network
Recommendations
Video
Appearance
Sound effects volume
Alternate audio
Dolby Digital
Audyssey Dynamic Volume™
SRS TruSurround HD™
Rocketboost™ settings
Manually adjust audio
Audio only (no video)
TV speakers
Audio return channel (ARC)
Audio
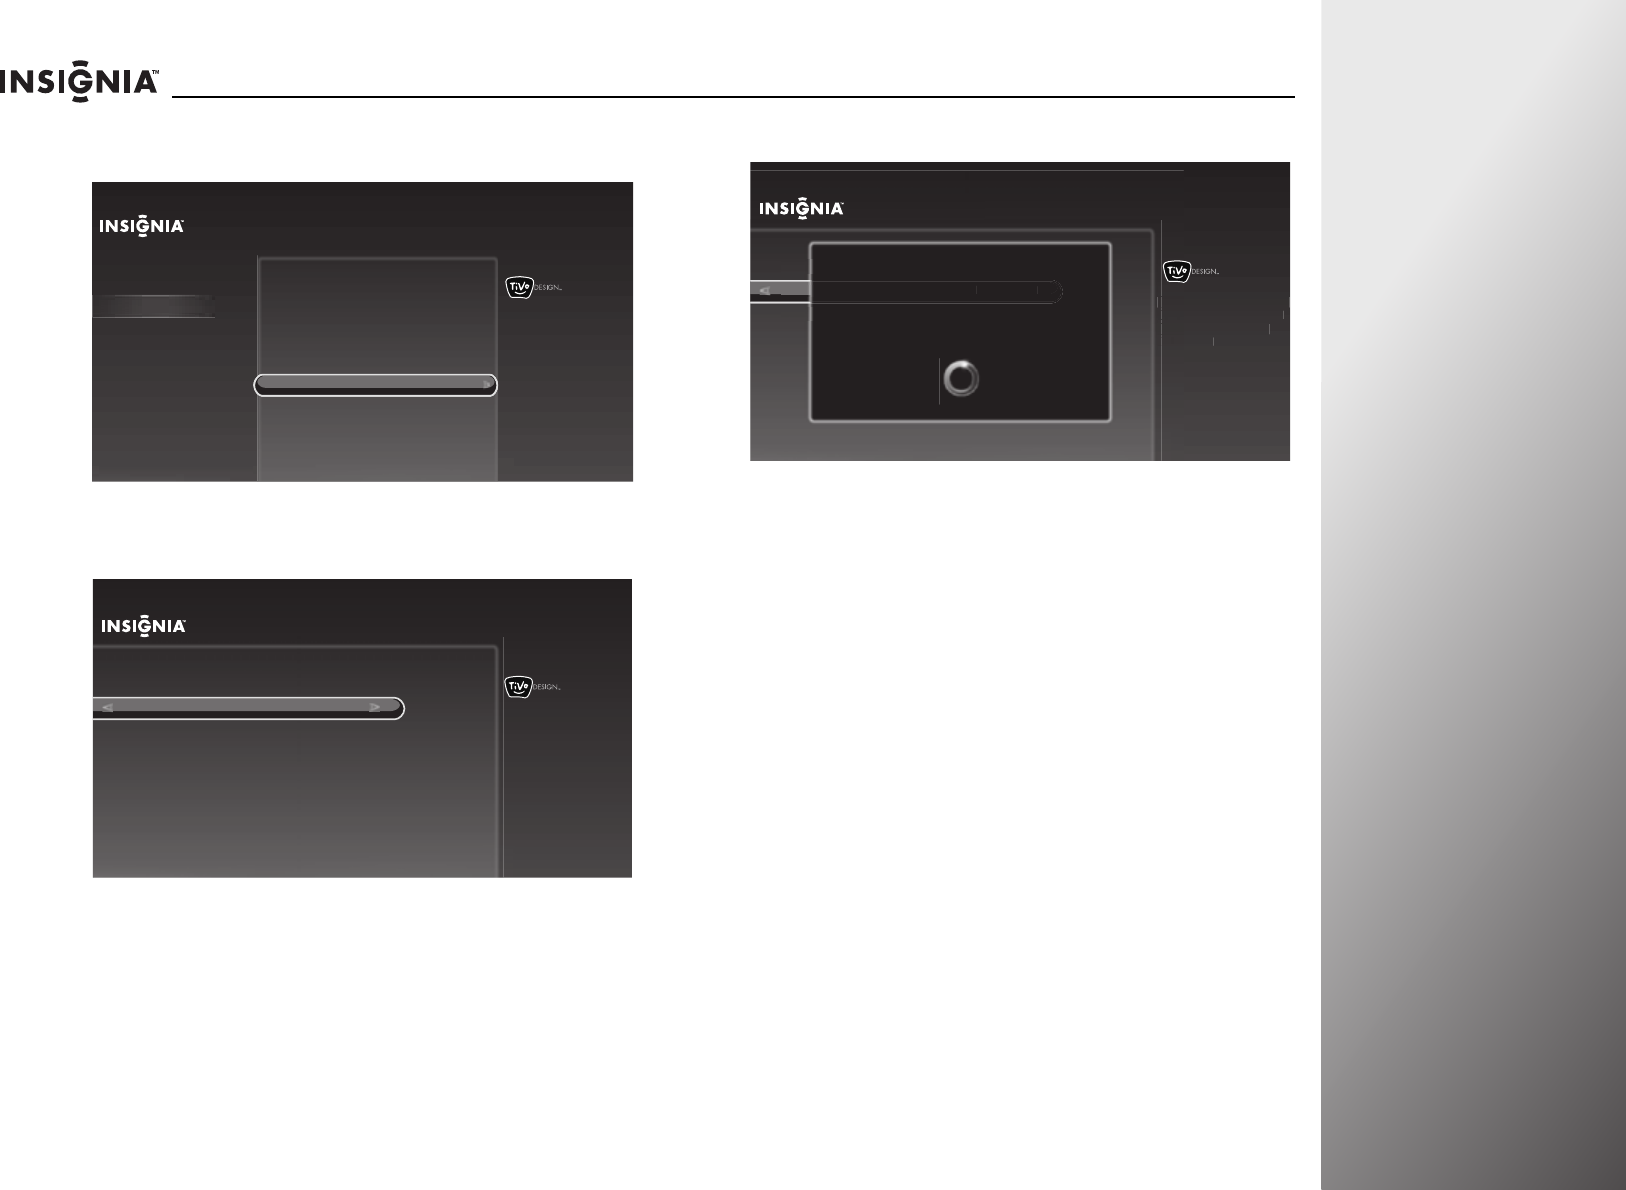
www.insigniaproducts.com 55
NS-32E859A11/NS-42E859A11 Using Your TV
4Press S or T to highlight Rocketboost™ settings, then press
X or SELECT.
5Press S or T to highlight Add another Rocketboost device,
then press X or SELECT.
6Press and hold the power button of the Rocketboost device.
7Press S or T to highlight OK, then press X or SELECT to
return to the previous screen.
OR
Press S or T to highlight Add another Rocketboost device,
then press X or SELECT to add another device.
10:00 PM
Settings
Sound effects volume
Audyssey Dynamic Volume™
SRS TruSurround HD™
Manually adjust audio
Audio only (no video)
TV speakers
Audio return channel (ARC)
Channels & providers
Devices
Network
Recommendations
Video
Appearance
Audio
Aud
i
o
Alternate audio
Dolby Digital
Set up Rocketboost wireless
audio.
Rocketboost™ settings
Rocketboost™ settings
10:00pm
Change Rocketboost sound source
Start sending TV audio over Rocketboost
Repeat Rocketboost set up
Add another Rocketboost device
Choose this option when you have
a new Rocketboost device to add
to your Rocketboost wireless
audio network.
Rocketboost™ settings
10:00 PM
Change Rocketboost sound source
Repeat Rocketboost set up
Add another Rocketboost device
Choose this option when you have
a new Rocketboost device to add
to your Rocketboost wireless
audio network.
Roc
k
et
b
oost™ settin
g
s
Ch
a
a
a
a
a
a
a
n
ng
e Rocketboost sound sourc
e
Re
p
p
p
p
p
p
p
p
eat Rocketboost set up
Add
d
d
d
d
d
d
d
an
other
Rocketboost
dev
ice
Add
d
d
d
d
d
d
d
an
oth
er
Rocketboo
st
dev
ice
C
hoos
e
C
new
R
a
o
y
ou
r
t
o
u
di
o
n
a
Press the Device's Power Button
Go to the other Rocketboost device and press and hold
the POWER button for 3 seconds. The button’s blue LED
will flash and then turn solid when the TV has located
the device.
Press LEFT or CLEAR to stop
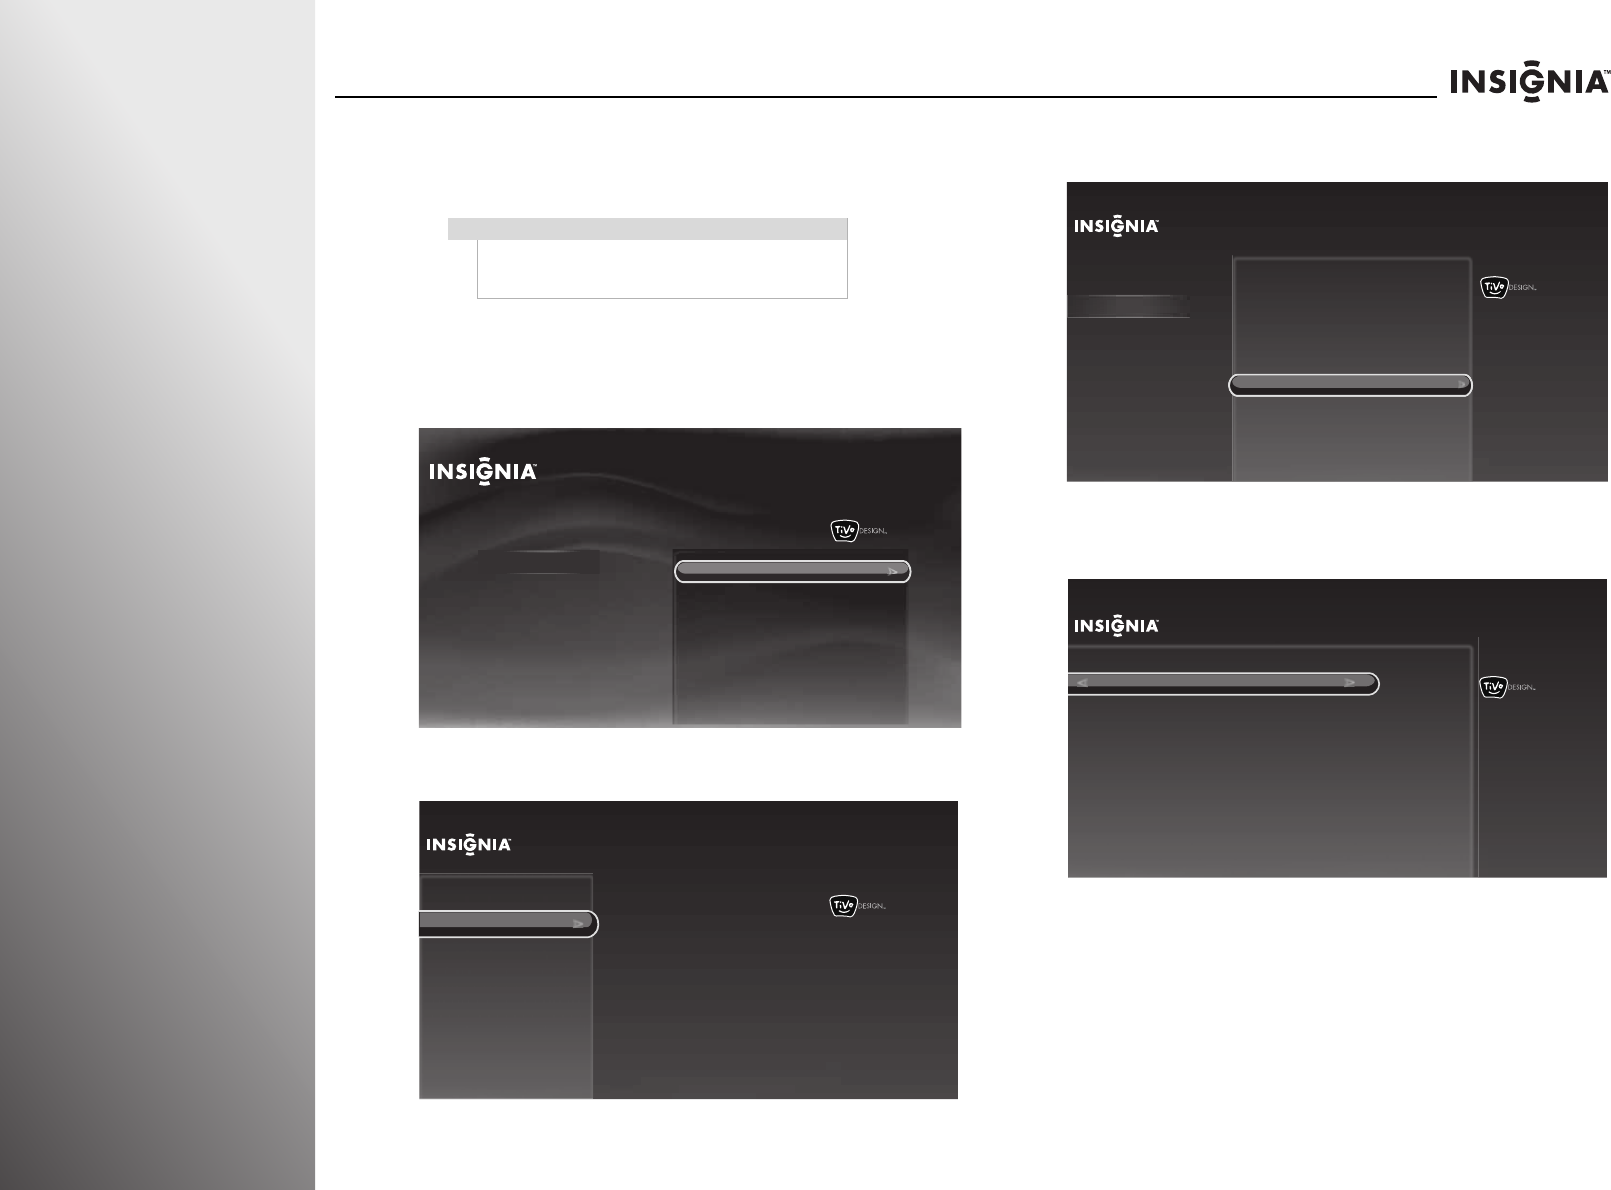
56 www.insigniaproducts.com
Using Your TV NS-32E859A11/NS-42E859A11
Changing the Rocketboost sound source
You can select the Rocketboost sound source that you want to
hear through the TV speakers.
To change the Rocketboost sound source:
1Press TiVo. The Home screen opens. Press S or T to select
Settings, then press X or SELECT.
2Press S or T to highlight Settings, then press X or SELECT.
3Press S or T to highlight Audio, then press X or SELECT.
4Press S or T to highlight Rocketboost™ settings, then
press X or SELECT.
5Press S or T to highlight Change Rocketboost sound
source, then press X or SELECT.
Note
This can only be done when a Rocketboost card has
been inserted into your TV and the Rocketboost
network has been setup.
10:00pm
Home
Settings
Connect to the Internet Settings
Parental Controls
Check for updates
Account & system info
Help
Sleep timer
10:00 PM
Settings
Channels & providers
Devices
Network
Recommendations
Video
Appearance
Sound effects volume
Alternate audio
Dolby Digital
Audyssey Dynamic Volume™
SRS TruSurround HD™
Rocketboost™ settings
Manually adjust audio
Audio only (no video)
TV speakers
Audio return channel (ARC)
Audio
10:00 PM
Settings
Sound effects volume
Audyssey Dynamic Volume™
SRS TruSurround HD™
Manually adjust audio
Audio only (no video)
TV speakers
Audio return channel (ARC)
Channels & providers
Devices
Network
Recommendations
Video
Appearance
Audio
Aud
i
o
Alternate audio
Dolby Digital
Set up Rocketboost wireless
audio.
Rocketboost™ settings
Rocketboost™ settings
10:00pm
Change Rocketboost sound source
Add another Rocketboost device
Repeat Rocketboost set up
Choose which Rocketboost
device should play sound
through the TV's
speakers.
Start sending TV audio over Rocketboost
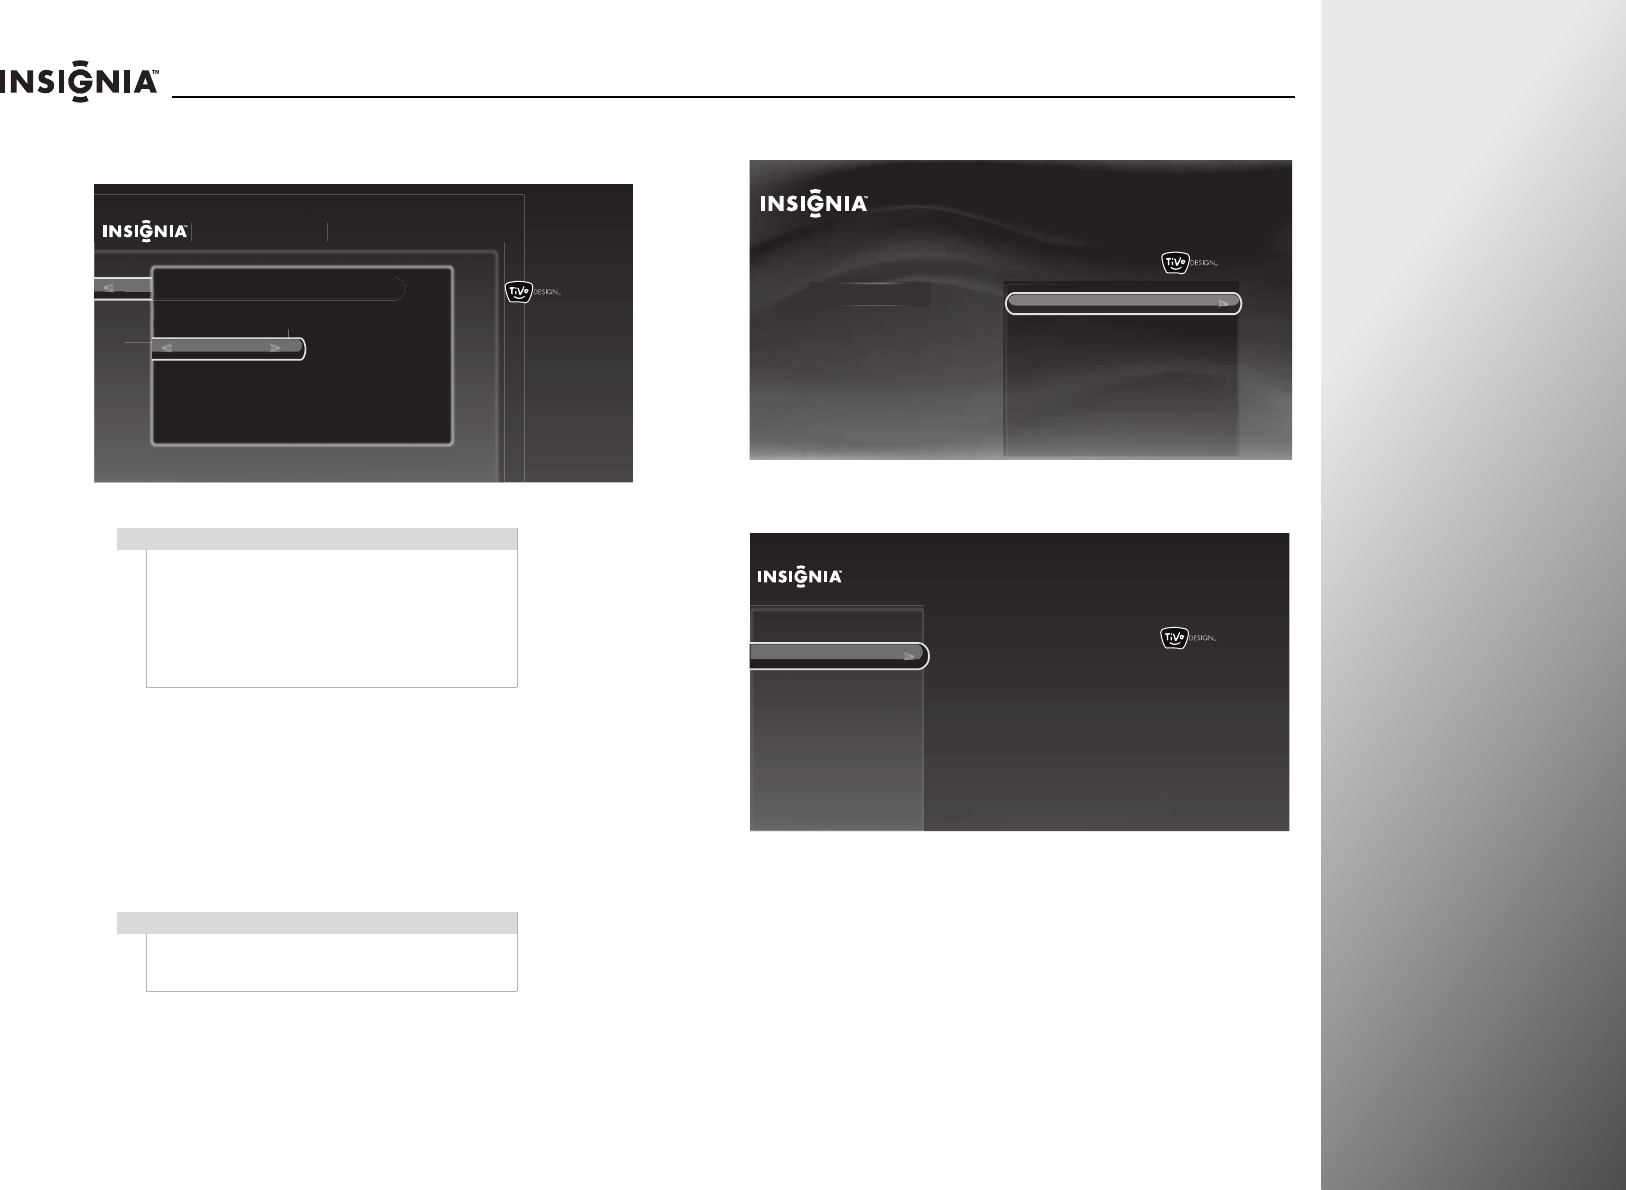
www.insigniaproducts.com 57
NS-32E859A11/NS-42E859A11 Using Your TV
6If multiple devices are listed, press S or T to highlight the
device, then press SELECT.
Using a different Rocketboost manager
When you are using the Rocketboost network with another
device as the manager, you can switch to use a different
Rocketboost network configured with a different manager. This
may be useful if you want to limit the available sound sources
to specific Rocketboost networks.
You can also use the following steps if you change your
Rocketboost hub or manager to a different Rocketboost device.
To use a different Rocketboost manager:
1Press TiVo. The Home screen opens. Press S or T to select
Settings, then press X or SELECT.
2Press S or T to highlight Settings, then press X or SELECT.
3Press S or T to highlight Audio, then press X or SELECT.
Warning
You can have up to five Rocketboost sound sources
(transmitting audio simultaneous) in the network.
This includes the TV transmit sound source if you are
sending the TV audio over Rocketboost. If you want
to display five other sources in the list, do not send
TV audio over Rocketboost. For more information,
see “Listening to TV audio through other
Rocketboost devices” on page 58.
Note
To add other Rocketboost device to the network with
another device as the manager, refer to the devices’
documentation for more information.
Rocketboost™ settings
10:00 PM
Change Rocketboost sound source
Add another Rocketboost device
Repeat Rocketboost set up
Rocketboost™ settin
g
s
Cha
a
a
a
a
a
a
a
a
nge
Rocketboost
sound
source
Cha
a
a
a
a
a
a
a
a
nge Rocketboost sound source
A
dd
d
d
d
d
d
d
d
d
a
n
o
th
e
r R
oc
k
e
t
boo
s
t
de
vi
ce
Re
p
p
p
p
p
p
p
p
eat Rocketboost set u
p
Rocketboost Source
Press SELECT on the source you want to listen to.
TV (HDMI 1)
Source 1
Source 2
Source 3
Source 4
Choose which Rocketboost
device should play sound
through the TV's
speakers.
10:00pm
Home
Settings
Connect to the Internet Settings
Parental Controls
Check for updates
Account & system info
Help
Sleep timer
10:00 PM
Settings
Channels & providers
Devices
Network
Recommendations
Video
Appearance
Sound effects volume
Alternate audio
Dolby Digital
Audyssey Dynamic Volume™
SRS TruSurround HD™
Rocketboost™ settings
Manually adjust audio
Audio only (no video)
TV speakers
Audio return channel (ARC)
Audio
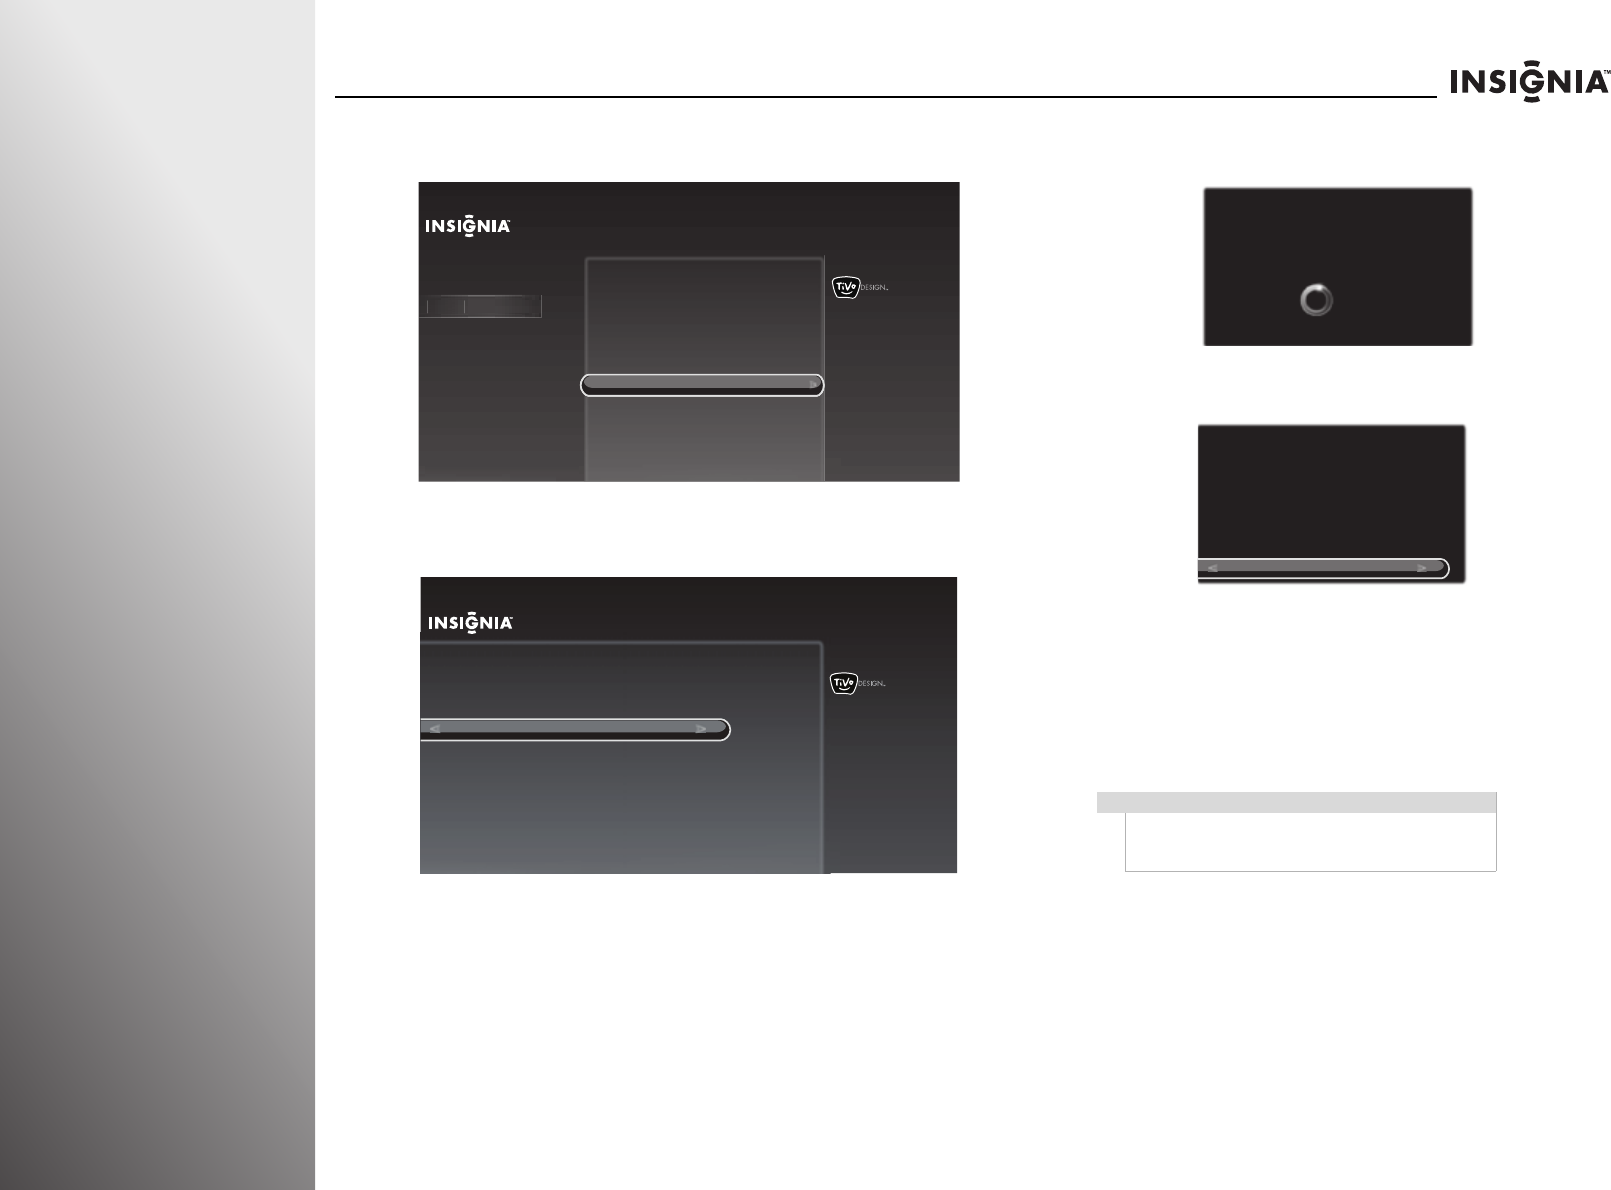
58 www.insigniaproducts.com
Using Your TV NS-32E859A11/NS-42E859A11
4Press S or T to highlight Rocketboost™ settings, then
press X or SELECT.
5Press S or T to highlight Use a different Rocketboost
manager, then press X or SELECT.
6Press and hold the power button of the Rocketboost
manager.
7Press SELECT to return to the previous screen.
Listening to TV audio through other
Rocketboost devices
You can listen to your TV audio through other Rocketboost
devices. For example, you can listen to TV audio around your
house using Rocketboost enabled headphones (RF-RBWHP01)
or the Rocketboost indoor/outdoor speaker (RF-RBWS02).
To listen to TV audio through other Rocketboost devices:
1Press TiVo. The Home screen opens. Press S or T to select
Settings, then press X or SELECT.
10:00 PM
Settings
Sound effects volume
Audyssey Dynamic Volume™
SRS TruSurround HD™
Manually adjust audio
Audio only (no video)
TV speakers
Audio return channel (ARC)
Channels & providers
Devices
Network
Recommendations
Video
Appearance
Audio
Aud
i
o
Alternate audio
Dolby Digital
Set up Rocketboost wireless
audio.
Rocketboost™ settings
Rocketboost™ settings
10:00pm
Change Rocketboost sound source
Start sending TV audio over Rocketboost
Repeat Rocketboost set up
Use a different Rocketboost manager
Choose this option if
you have changed
which Rocketboost
device is the
manager(hub mode is
enabled on another
device). To use the TV
as the manager,
choose "Repeat
Rocketboost set up."
Note
This can only be done when a Rocketboost card has
been inserted into your TV and the Rocketboost
network has been setup.
Press the Manager’s Power Button
Go to the Rocketboost manager device and
press and hold the POWER button for 3 seconds.
The manager’s green LED will flash and then turn solid
when the TV has located the manager.
LEFT or CLEAR to stop
Rocketboost Setup Complete
OK
The TV has successfully located the Rocketboost
manager.
To listen to Rocketboost devices other than the TV, press
AUDIO and choose “Change Rocketboost sound source”.
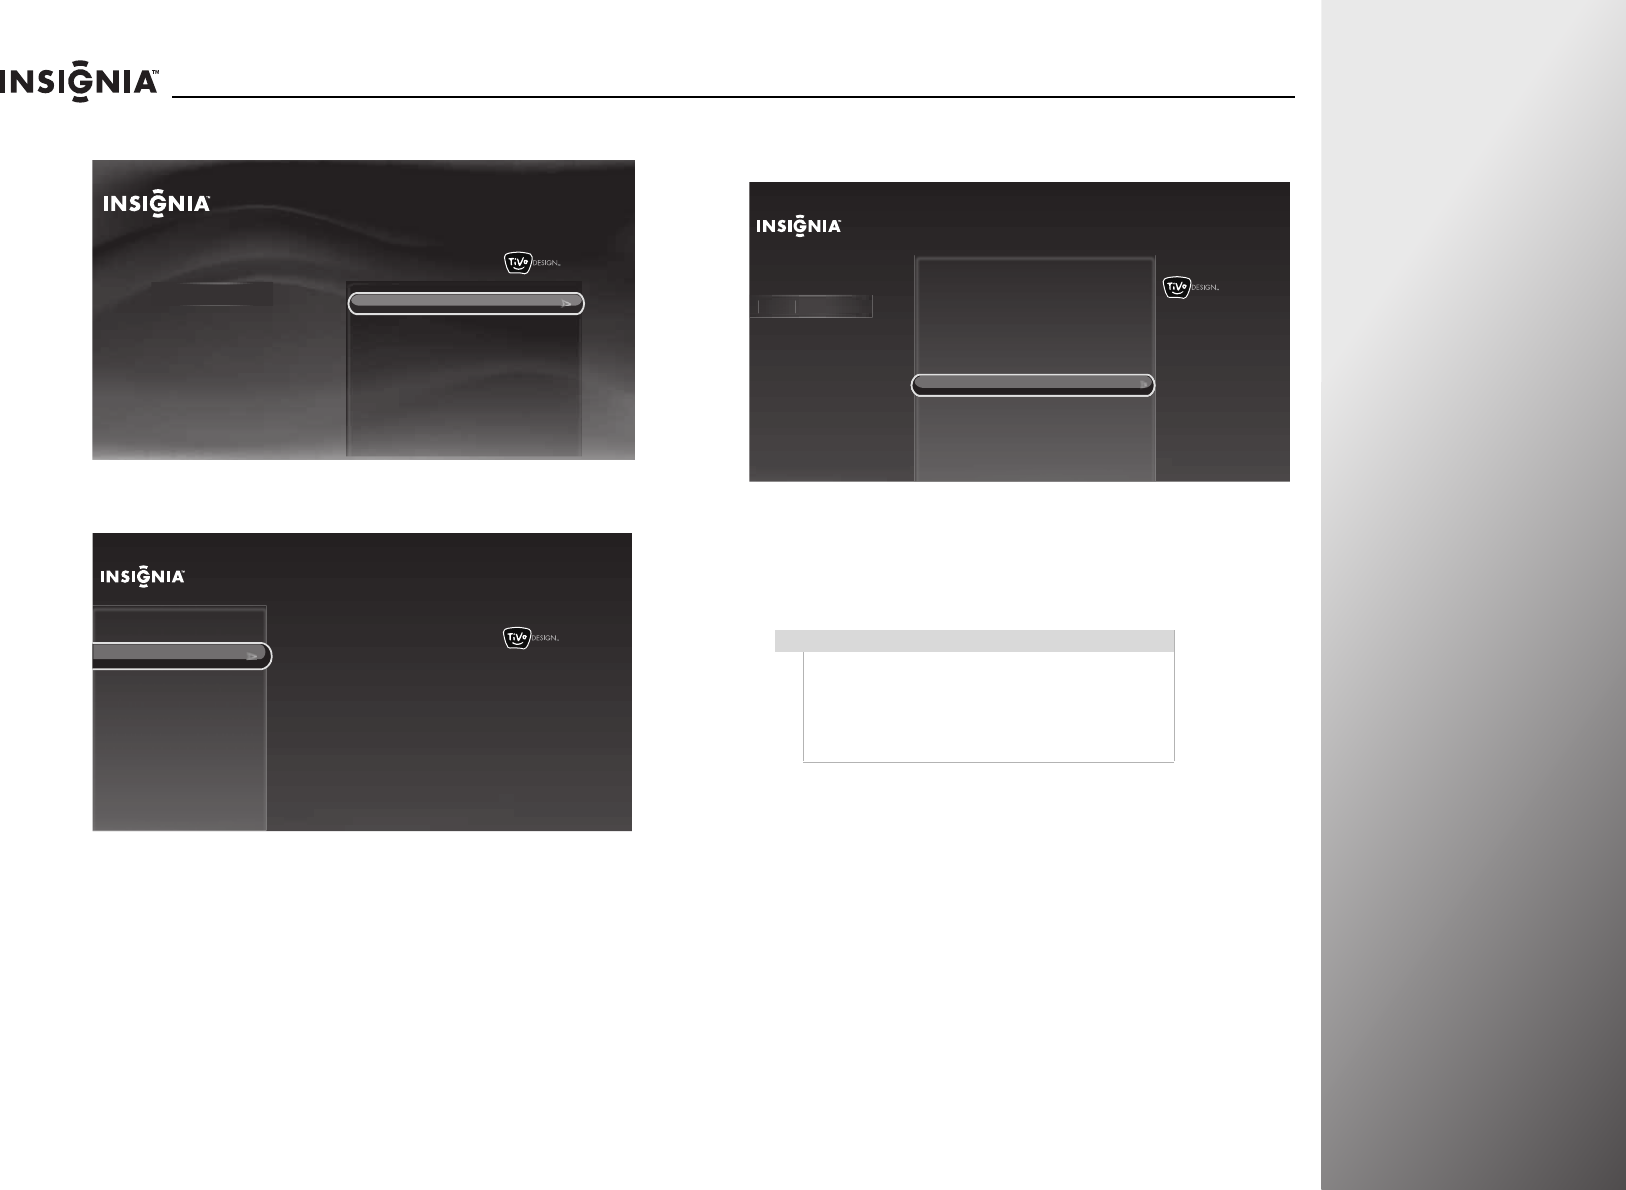
www.insigniaproducts.com 59
NS-32E859A11/NS-42E859A11 Using Your TV
2Press S or T to highlight Settings, then press X or SELECT.
3Press S or T to highlight Audio, then press X or SELECT.
4Press S or T to highlight Rocketboost™ settings, then press
X or SELECT.
5Press S or T to highlight Start sending TV audio over
Rocketboost, then press X or SELECT.
6Press S or T to highlight Yes, start sending TV audio to
Rocketboost, then press X or SELECT.
10:00pm
Home
Settings
Connect to the Internet Settings
Parental Controls
Check for updates
Account & system info
Help
Sleep timer
10:00 PM
Settings
Channels & providers
Devices
Network
Recommendations
Video
Appearance
Sound effects volume
Alternate audio
Dolby Digital
Audyssey Dynamic Volume™
SRS TruSurround HD™
Rocketboost™ settings
Manually adjust audio
Audio only (no video)
TV speakers
Audio return channel (ARC)
Audio Note
You can have up to five simultaneous Rocketboost
sound sources (transmitting audio) in your network.
If your network already has five Rocketboost sound
sources, you will have to turn off one of the other
sound sources if you want to enable the TV audio on
the Rocketboost network.
10:00 PM
Settings
Sound effects volume
Audyssey Dynamic Volume™
SRS TruSurround HD™
Manually adjust audio
Audio only (no video)
TV speakers
Audio return channel (ARC)
Channels & providers
Devices
Network
Recommendations
Video
Appearance
Audio
Aud
i
o
Alternate audio
Dolby Digital
Set up Rocketboost wireless
audio.
Rocketboost™ settings
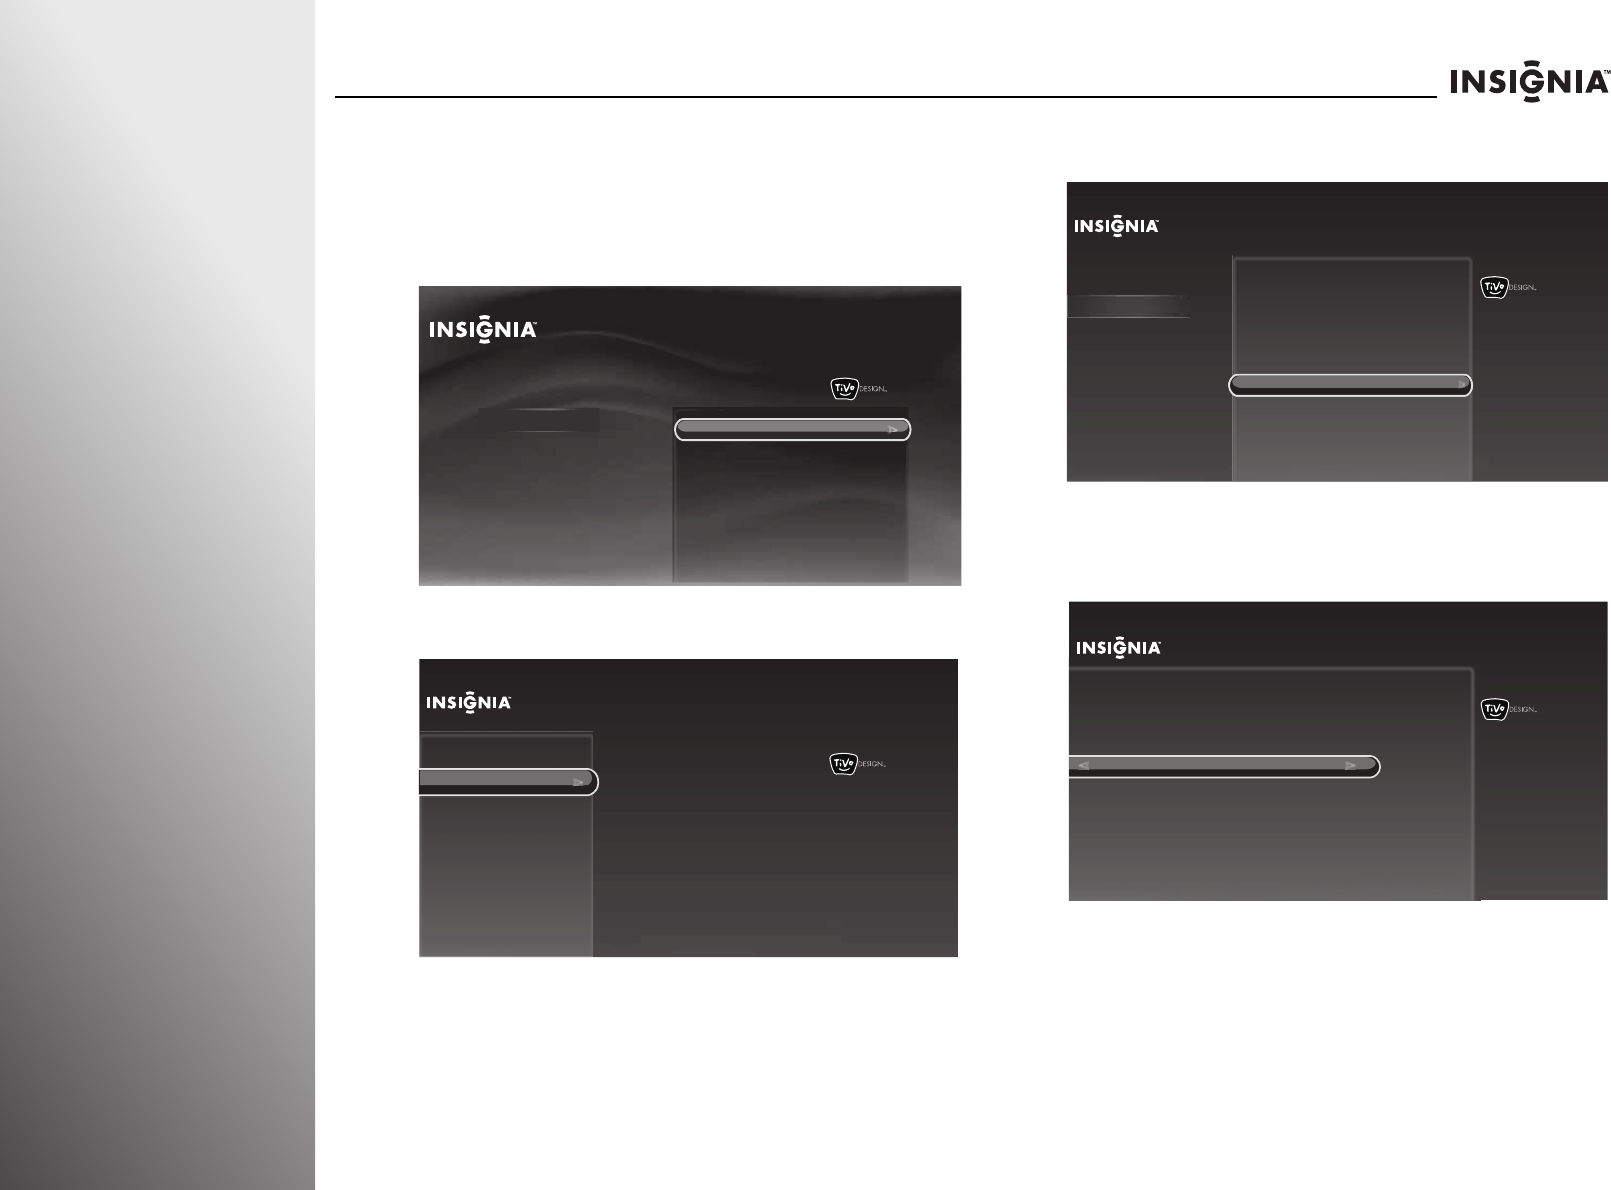
60 www.insigniaproducts.com
Using Your TV NS-32E859A11/NS-42E859A11
Repeating the Rocketboost set up
To repeat the Rocketboost set up:
1Press TiVo. The Home screen opens. Press S or T to select
Settings, then press X or SELECT.
2Press S or T to highlight Settings, then press X or SELECT.
3Press S or T to highlight Audio, then press X or SELECT.
4Press S or T to highlight Rocketboost™ settings, then
press X or SELECT.
5Press S or T to highlight Repeat Rocketboost set up, then
press X or SELECT. For instructions, see “Setting up
Rocketboost™” on page 51.
10:00pm
Home
Settings
Connect to the Internet Settings
Parental Controls
Check for updates
Account & system info
Help
Sleep timer
10:00 PM
Settings
Channels & providers
Devices
Network
Recommendations
Video
Appearance
Sound effects volume
Alternate audio
Dolby Digital
Audyssey Dynamic Volume™
SRS TruSurround HD™
Rocketboost™ settings
Manually adjust audio
Audio only (no video)
TV speakers
Audio return channel (ARC)
Audio
10:00 PM
Settings
Sound effects volume
Audyssey Dynamic Volume™
SRS TruSurround HD™
Manually adjust audio
Audio only (no video)
TV speakers
Audio return channel (ARC)
Channels & providers
Devices
Network
Recommendations
Video
Appearance
Audio
Aud
i
o
Alternate audio
Dolby Digital
Set up Rocketboost wireless
audio.
Rocketboost™ settings
Rocketboost™ settings
10:00pm
Change Rocketboost sound source
Add another Rocketboost device
Start sending TV audio over Rocketboost
Start Rocketboost setup
from the beginning. Redo
set up if you want to change
which Rocketboost device
is the manager.
Repeat Rocketboost set up
www.insigniaproducts.com 61
NS-32E859A11/NS-42E859A11 Using Your TV
Expanding your Rocketboost System
Rocketboost technology is expandable. Each Rocketboost
Receiver can select the audio from any Sender in your
Rocketboost audio network.
You can set up your network to meet your specific needs. The
following highlight some of the Rocketboost products you may
want to use with your Rocketboost enabled TV:
• RF-RBWHP01, Rocketboost Wireless Headphones, include a
Sender device and wireless headphones. You can listen to
audio sources connected to the Sender or directly from your
TV using the wireless headphones.
• RF-RBWS02, Rocketboost Wireless Indoor/Outdoor Speaker,
includes a wireless speaker and the RF-RBAUX wireless
sender/receiver. You can listen to audio sources connected to
the sender/receiver or audio from your TV using the wireless
speaker.
• RF-RBAUX, Rocketboost Wireless Sender/Receiver can be used
as both a Sender and Receiver. As a Sender, you can connect it
to your other audio source devices (like a home theater or
mp3 player) and receive that audio using your TV or any other
Rocketboost Receiver. As a Receiver you can connect it to your
stereo system or amplified speakers and listen to the audio
from your TV or any other Rocketboost sender.
• RF-RBREC, Rocketboost Amplified Audio Receiver, is an
amplified Receiver. You connect speakers to this and listen to
audio from your TV or any of your Rocketboost Sender
devices. This is a great way to expand your Rocketboost
system to listen to your music anywhere in the house.
• RF-RBKIT, Rocketboost Wireless HD Starter Kit, includes a
Sender device and the RF-RBREC, amplified Receiver. This
product can be used for home theater wireless surround
sound for multi-room audio.
For more information, and to see what other Rocketboost
products are available, visit www.rocketboost.com.
Rocketboost Network Capabilities
The maximum number of Rocketboost devices in a
Rocketboost Network is nine. If you already have nine devices
and attempt to join another one, the joining will fail for the new
device.
The maximum number of audio streams that can be sent
simultaneously on the Rocketboost network is one of the
following:
• 5 stereo CD quality
• 1 stereo HD quality + 3 CD quality
• 2 stereo HD quality + 2 stereo CD quality
• 3 stereo HD quality
Note
If you want to remove a device from your
Rocketboost network you need to rejoin it to a
different hub device (this basically creates a second
Rocketboost network).
Note
HD streams are available if using the RF-RBKIT sender.
If your system is in a maximum audio stream state,
the TX indicator will not light on the Sender devices
that have exceeded the maximum. To use those
devices’ audio streams, you need to turn off one of
your other senders.
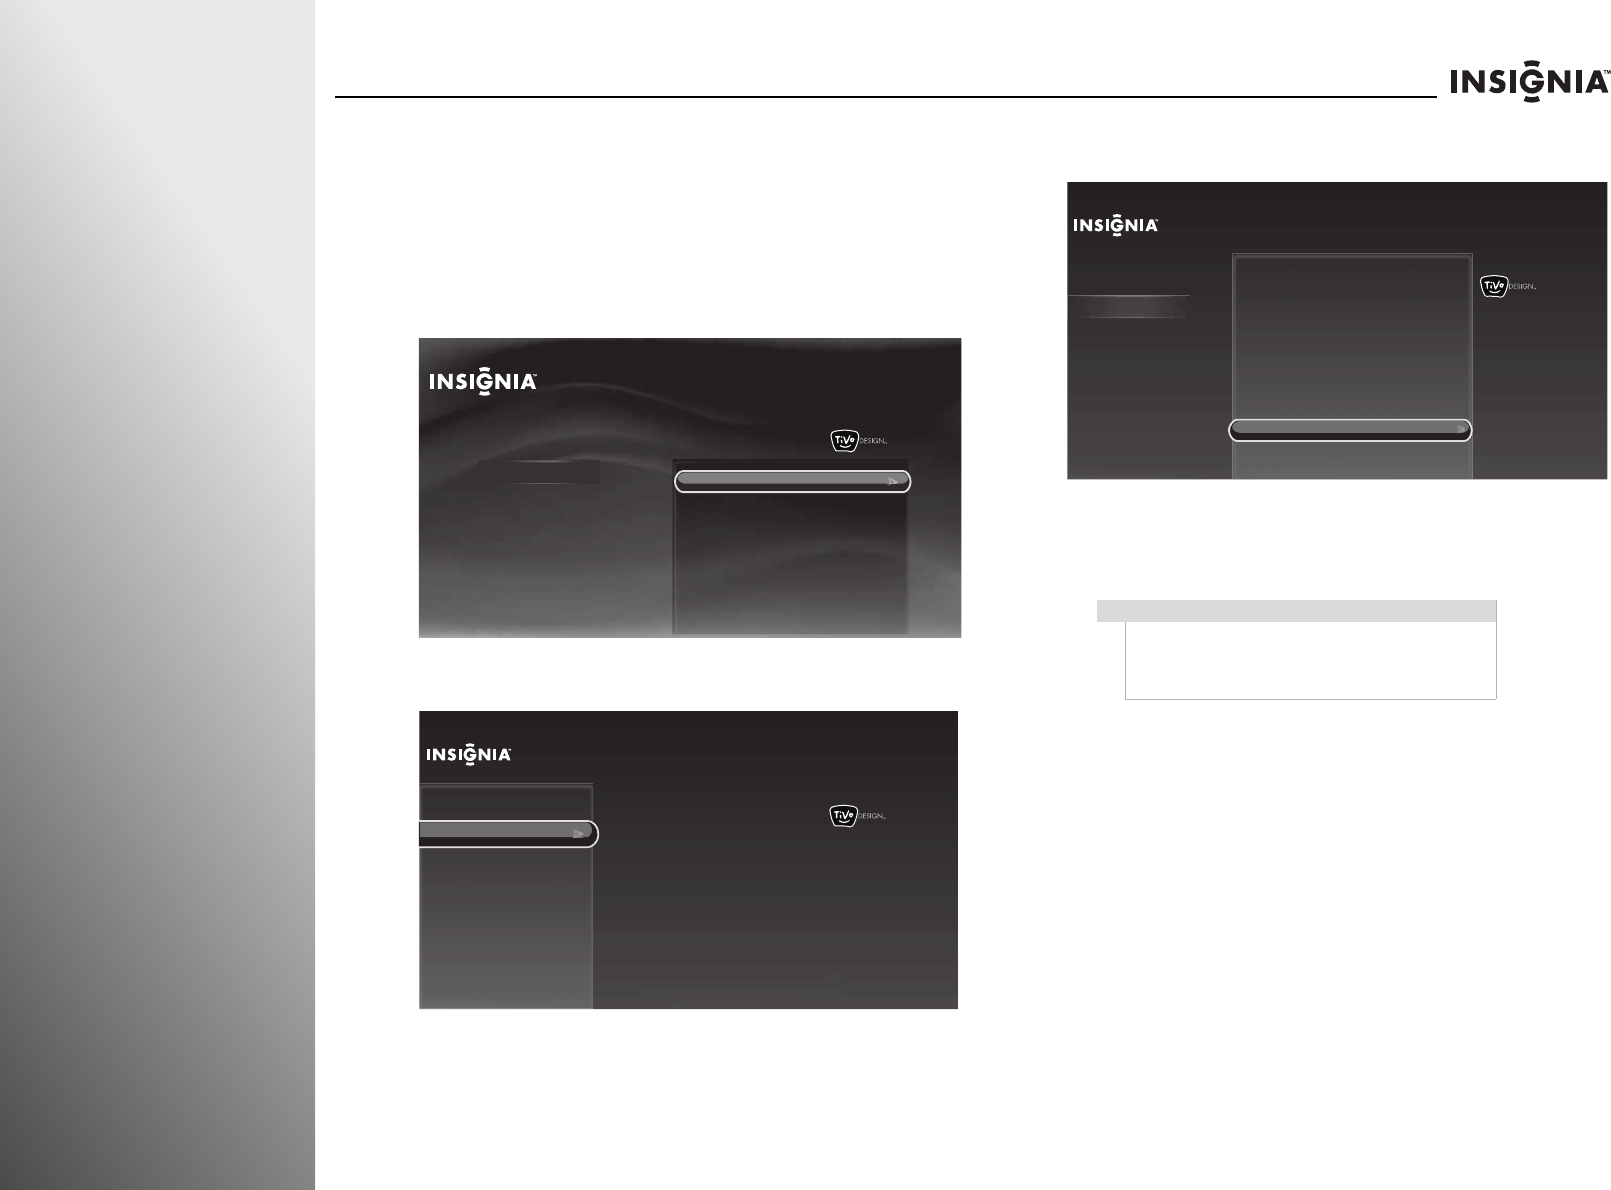
62 www.insigniaproducts.com
Using Your TV NS-32E859A11/NS-42E859A11
Playing TV audio only
You can turn off the picture on your TV and listen to the
program audio only.
To play TV audio only:
1Press TiVo. The Home screen opens. Press S or T to select
Settings, then press X or SELECT.
2Press S or T to highlight Settings, then press X or SELECT.
3Press S or T to highlight Audio, then press X or SELECT.
4Press S or T to highlight Audio only (no video), then press
X or SELECT.
5Press S or T to highlight Yes, play audio and turn off
video, then press SELECT to save your setting and return to
the previous screen.
10:00pm
Home
Settings
Connect to the Internet Settings
Parental Controls
Check for updates
Account & system info
Help
Sleep timer
10:00 PM
Settings
Channels & providers
Devices
Network
Recommendations
Video
Appearance
Sound effects volume
Alternate audio
Dolby Digital
Audyssey Dynamic Volume™
SRS TruSurround HD™
Rocketboost™ settings
Manually adjust audio
Audio only (no video)
TV speakers
Audio return channel (ARC)
Audio
Notes
•Audio Only works only when the input source is
TV and your TV is receiving a broadcast signal.
• To exit audio only mode, press any button on
your remote control to display the video again.
10:00 PM
Settings
Sound effects volume
Audyssey Dynamic Volume™
SRS TruSurround HD™
Rocketboost™ settings
Manually adjust audio
Audio only (no video)
TV speakers
Audio return channel (ARC)
Channels & providers
Devices
Network
Recommendations
Video
Appearance
Audio
A
udioAlternate audio
Dolby Digital
Turns off video but leaves on the
audio for the show that you are
watching.

www.insigniaproducts.com 63
NS-32E859A11/NS-42E859A11 Using Your TV
Setting the button sound effects volume
You can set the volume level of the sound you hear when
pressing the buttons on the remote control.
To set the button sound effects volume:
1Press TiVo. The Home screen opens. Press S or T to select
Settings, then press X or SELECT.
2Press S or T to highlight Settings, then press X or SELECT.
3Press S or T to highlight Audio, then press X or SELECT.
4Press S or T to highlight Sound effects volume, then press
X or SELECT.
5Press S or T to highlight Off, Low, Medium, or High, then
press SELECT to save your setting and return to the previous
screen.
10:00pm
Home
Settings
Connect to the Internet Settings
Parental Controls
Check for updates
Account & system info
Help
Sleep timer
10:00 PM
Settings
Channels & providers
Devices
Network
Recommendations
Video
Appearance
Sound effects volume
Alternate audio
Dolby Digital
Audyssey Dynamic Volume™
SRS TruSurround HD™
Rocketboost™ settings
Manually adjust audio
Audio only (no video)
TV speakers
Audio return channel (ARC)
Audio
10:00 PM
Settings
Sound effects volume
Audyssey Dynamic Volume™
SRS TruSurround HD™
Rocketboost™ settings
Manually adjust audio
Audio only (no video)
TV speakers
Audio return channel (ARC)
Channels & providers
Devices
Network
Recommendations
Video
Appearance
Audio
A
ud
i
o
Alternate audio
Dolby Digital
Choose the volume of the sounds
that you hear when you press
buttons on the remote control.
Current setting:
Medium
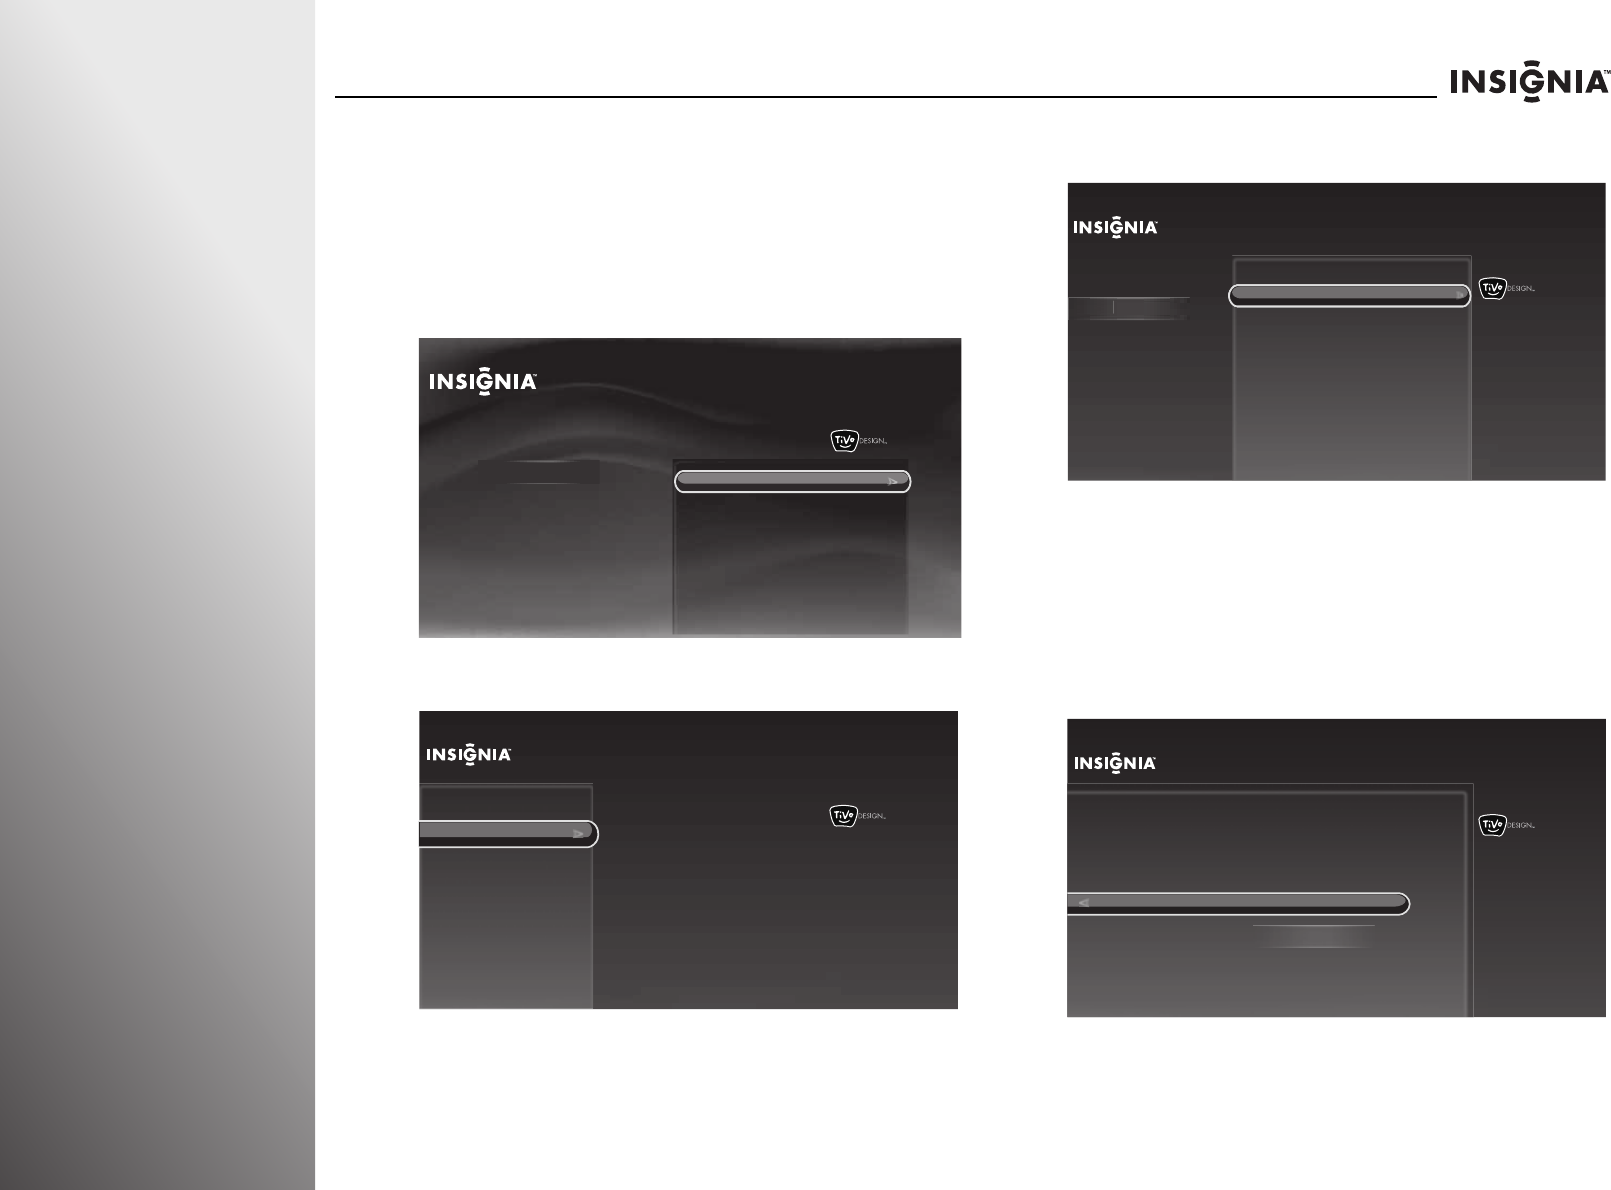
64 www.insigniaproducts.com
Using Your TV NS-32E859A11/NS-42E859A11
Selecting the language for a TV program
You can select the default audio language and audio program
for upcoming shows that have multiple language tracks.
To select the language for a TV program:
1Press TiVo. The Home screen opens. Press S or T to select
Settings, then press X or SELECT.
2Press S or T to highlight Settings, then press X or SELECT.
3Press S or T to highlight Audio, then press X or SELECT.
4Press S or T to highlight Alternate audio, then press X or
SELECT.
5Press S or T to highlight an option, then press W or X to
select a setting. You can select:
•Audio language—Selects the default audio language for
shows that have multiple language tracks. Options are
English, Español (Spanish), and Français (French).
•Audio program–Select Main to listen to standard audio
for all shows, or select Secondary (SAP) to listen to a
secondary audio program, if available.
6Press SELECT to highlight Use these options, then press
SELECT again to save the setting and return to the previous
screen.
10:00pm
Home
Settings
Connect to the Internet Settings
Parental Controls
Check for updates
Account & system info
Help
Sleep timer
10:00 PM
Settings
Channels & providers
Devices
Network
Recommendations
Video
Appearance
Sound effects volume
Alternate audio
Dolby Digital
Audyssey Dynamic Volume™
SRS TruSurround HD™
Rocketboost™ settings
Manually adjust audio
Audio only (no video)
TV speakers
Audio return channel (ARC)
Audio
10:00 PM
Settings
Sound effects volume
Audyssey Dynamic Volume™
SRS TruSurround HD™
Rocketboost™ settings
Manually adjust audio
Audio only (no video)
TV speakers
Audio return channel (ARC)
Channels & providers
Devices
Network
Recommendations
Video
Appearance
Audio
Aud
i
o
Alternate audio
Dolby Digital
Choose the default audio language
and audio program for upcoming
shows that haven multiple language
tracks.
Current settings:
Language:
Program:
English
Main
10:00pm
Alternate Audio
Change these settings if you would like to listen to shows in a language
other than English. Changes take effect the next time you change
channels.
Audio language:
Use these options
Audio program:
English
Main
En
g
lis
h
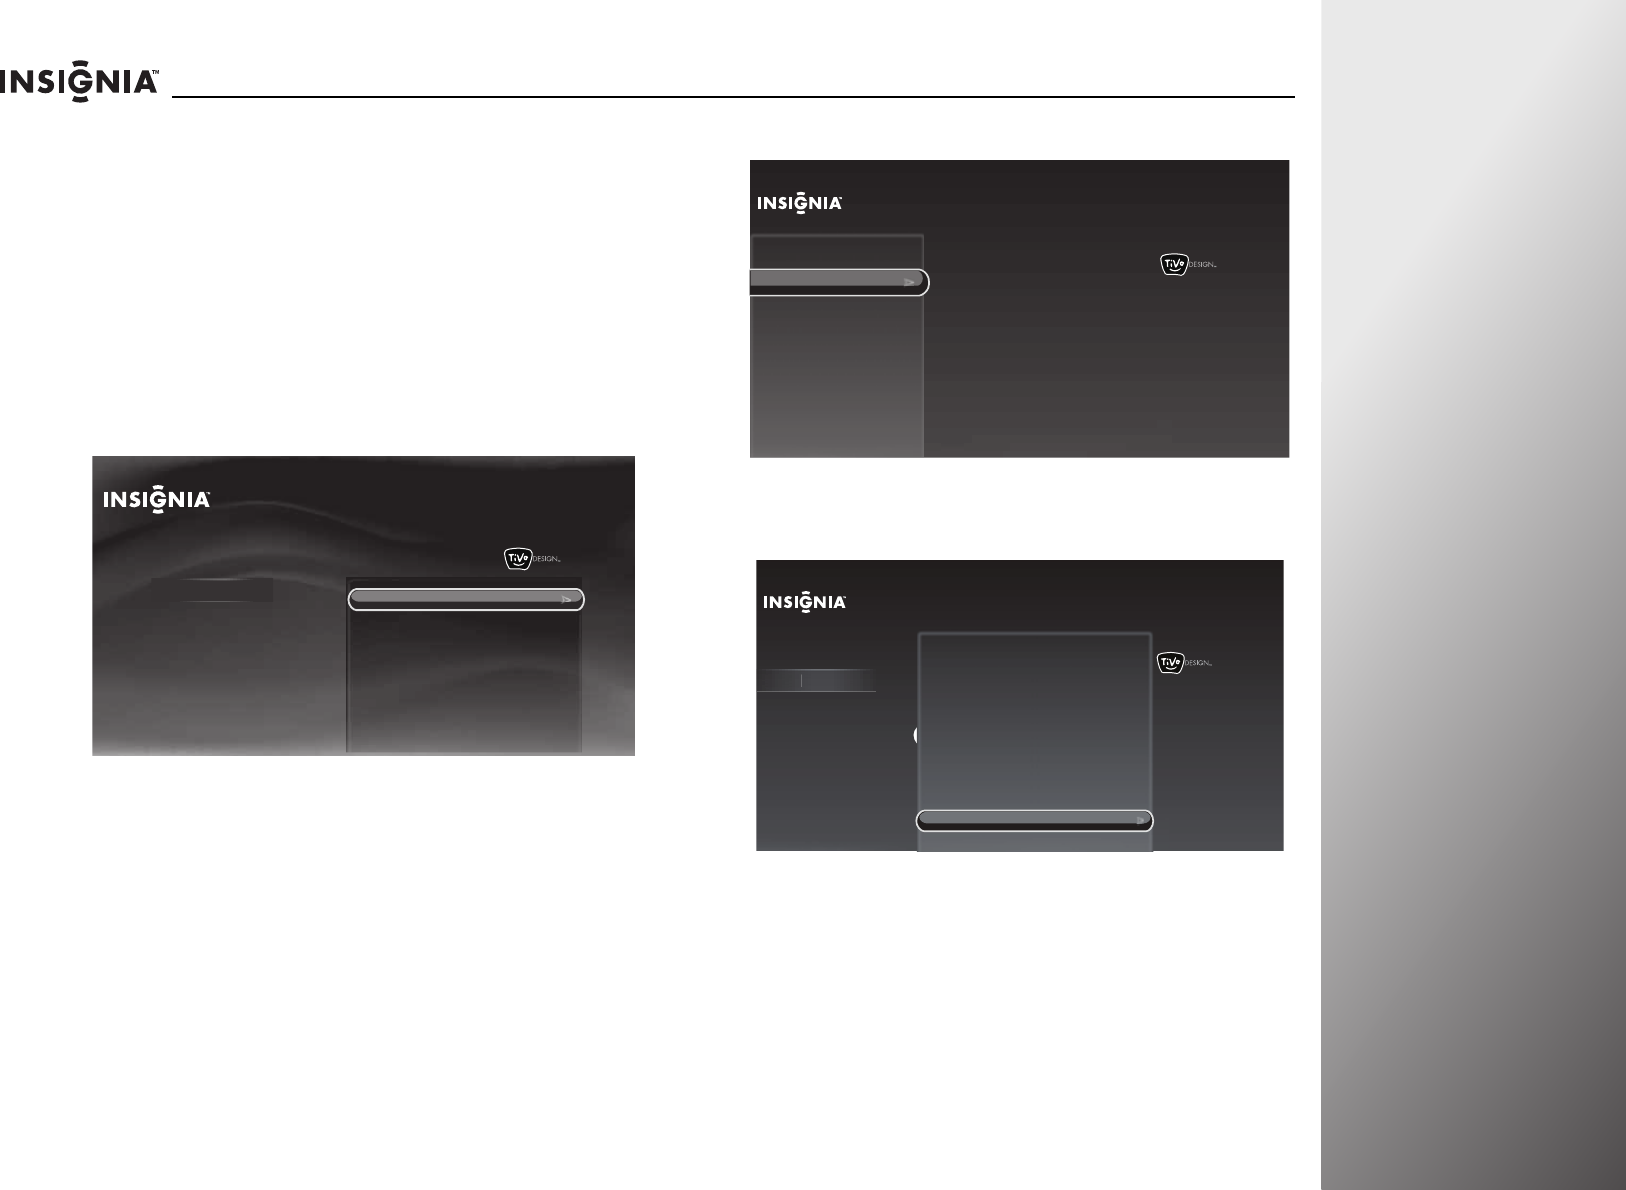
www.insigniaproducts.com 65
NS-32E859A11/NS-42E859A11 Using Your TV
Using Audio Return Channel (ARC)
The Audio Return Channel feature sends the TV audio signal to
the A/V receiver or amplifier through the HDMI cable. You do
not need to connect a cable from the audio output of your TV
to the audio input of the A/V receiver or amplifier.
To use Audio Return Channel:
1Connect an ARC-enabled device to the HDMI 1 ARC jack on
the side of your TV, and make sure that the ARC feature on
the connected device is turned on.
2Press TiVo. The Home screen opens. Press S or T to select
Settings, then press X or SELECT.
3Press S or T to highlight Settings, then press X or SELECT.
4Press S or T to highlight Audio, then press X or SELECT.
5Press S or T to highlight Audio return channel (ARC), then
press X or SELECT.
10:00pm
Home
Settings
Connect to the Internet Settings
Parental Controls
Check for updates
Account & system info
Help
Sleep timer
10:00 PM
Settings
Channels & providers
Devices
Network
Recommendations
Video
Appearance
Sound effects volume
Alternate audio
Dolby Digital
Audyssey Dynamic Volume™
SRS TruSurround HD™
Rocketboost™ settings
Manually adjust audio
Audio only (no video)
TV speakers
Audio return channel (ARC)
Audio
10:00pm
Settings
Audyssey Dynamic Volume™
SRS TruSurrond HD™
Rocketboost™ settings
Manually adjust audio
Audio only (no video)
TV speakers
Channels & providers
Devices
Network
Recommendations
Video
Appearance
Audio
A
udio
Alternate audio
Current setting:
On
Dolby Digital
This allows the TV to send the
audio signal to another device
through the HDMI port.
Audio return channel (ARC)
Reset all audio settings
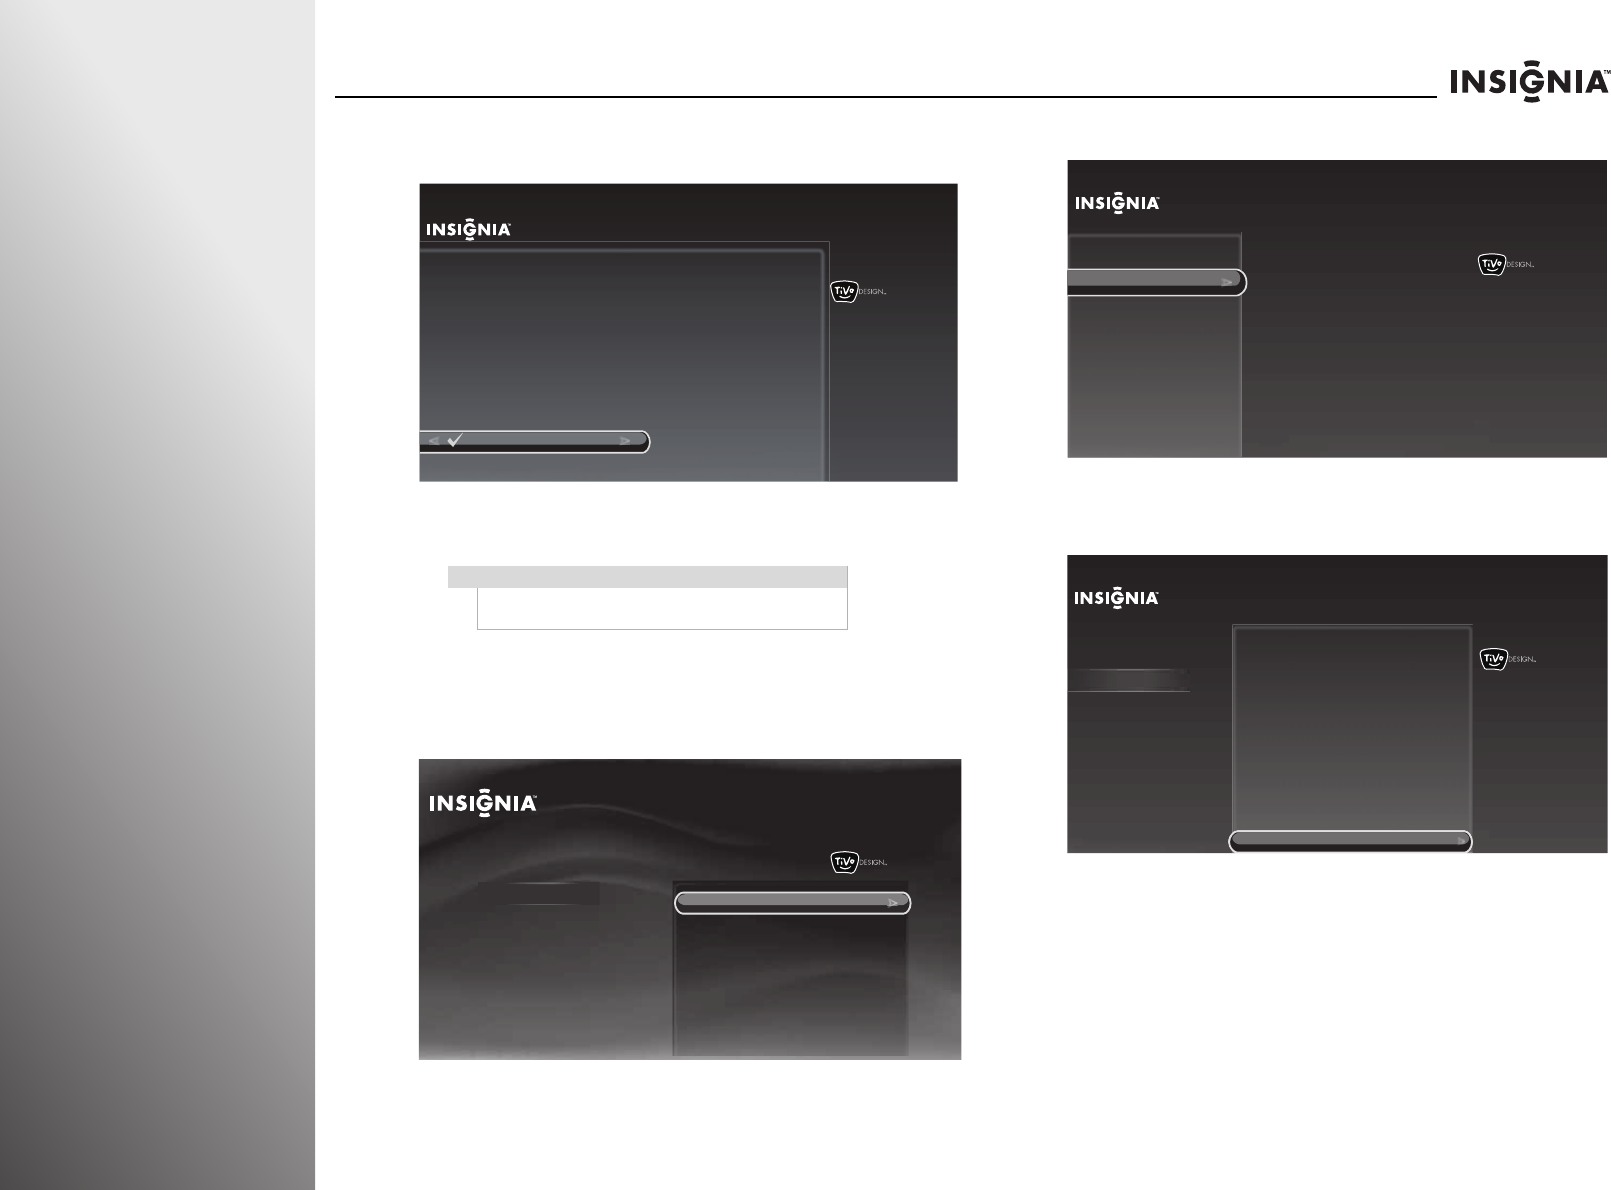
66 www.insigniaproducts.com
Using Your TV NS-32E859A11/NS-42E859A11
6Press S or T to highlight On or Off, then press SELECT to
save the setting and return to the previous screen.
Resetting all Audio menu settings
To reset all Audio menu settings:
1Press TiVo. The Home screen opens. Press S or T to select
Settings, then press X or SELECT.
2Press S or T to highlight Settings, then press X or SELECT.
3Press S or T to highlight Audio, then press X or SELECT.
4Press S or T to highlight Reset all audio settings, then
press X or SELECT.
5Press S or T to highlight Yes, reset all audio settings, then
press SELECT. The audio settings are reset to factory
defaults.
Note
The audio settings will be reset to the factory
defaults.
Audio Return Channel
On
Off
Audio return channel (ARC) allows your TV to send the audio signal it
receives to another device, such as an A/V receiver, through an HDMI
cable.
10:00pm
10:00pm
Home
Settings
Connect to the Internet Settings
Parental Controls
Check for updates
Account & system info
Help
Sleep timer
10:00 PM
Settings
Channels & providers
Devices
Network
Recommendations
Video
Appearance
Sound effects volume
Alternate audio
Dolby Digital
Audyssey Dynamic Volume™
SRS TruSurround HD™
Rocketboost™ settings
Manually adjust audio
Audio only (no video)
TV speakers
Audio return channel (ARC)
Audio
10:00 PM
Settings
Audyssey Dynamic Volume™
SRS TruSurround HD™
Rocketboost™ settings
Manually adjust audio
Audio only (no video)
TV speakers
Audio return channel (ARC)
Reset all audio settings
Channels & providers
Devices
Network
Recommendations
Video
Appearance
Audio
Aud
i
o
Alternate audio
Dolby Digital
Reset all audio settings to the
state they were in when the TV
was first purchased.
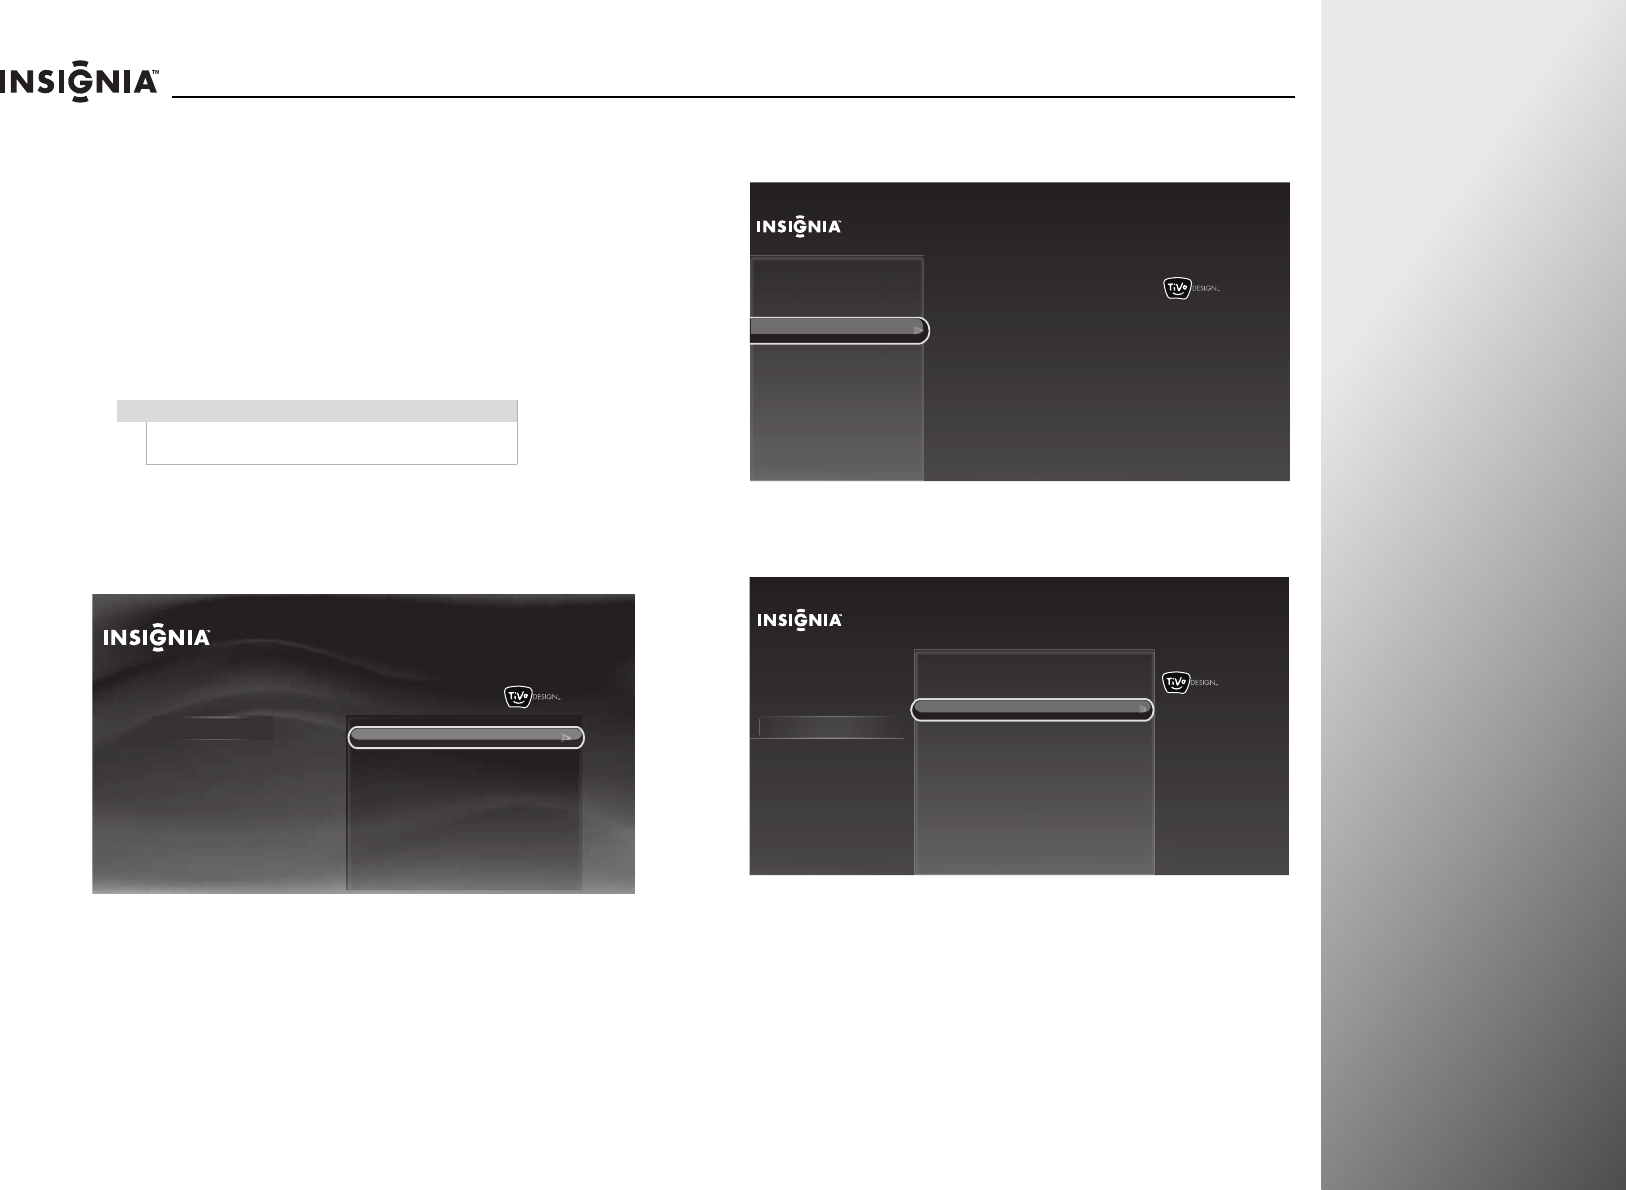
www.insigniaproducts.com 67
NS-32E859A11/NS-42E859A11 Using Your TV
Changing channel settings
Automatically scanning for channels
When you scan for channels, your TV searches for channels with
signals and stores the channel information in the channel list.
When you press CHS or CHT, your TV goes to the next or
previous channel in the channel list.
If the TV signal source changes, for example you change from
an outdoor antenna to cable TV (no box), you need to scan for
channels.
To automatically scan for channels:
1Press TiVo. The Home screen opens. Press S or T to select
Settings, then press X or SELECT.
2Press S or T to highlight Settings, then press X or SELECT.
3Press S or T to highlight Channels & providers, then press
X or SELECT.
4Press S or T to highlight Scan for channels, then press X or
SELECT.
Note
If you are using a cable box or satellite TV box, you do
not have to scan for channels.
10:00pm
Home
Settings
Connect to the Internet Settings
Parental Controls
Check for updates
Account & system info
Help
Sleep timer
10:00 PM
Settings
Devices
Network
Recommendations
Appearance Channel list
Scan for channels
Signal strength
Audio
Video
Channels & providers
10:00 PM
Settings
Channels & providers
Devices
Network
Recommendations
Video
Appearance
Audio
C
hannels
&
p
roviders
Set up your cable or antenna
channels and check signal quality.
Channel list
Signal strength
Scan for channels
Current setting:
Antenna
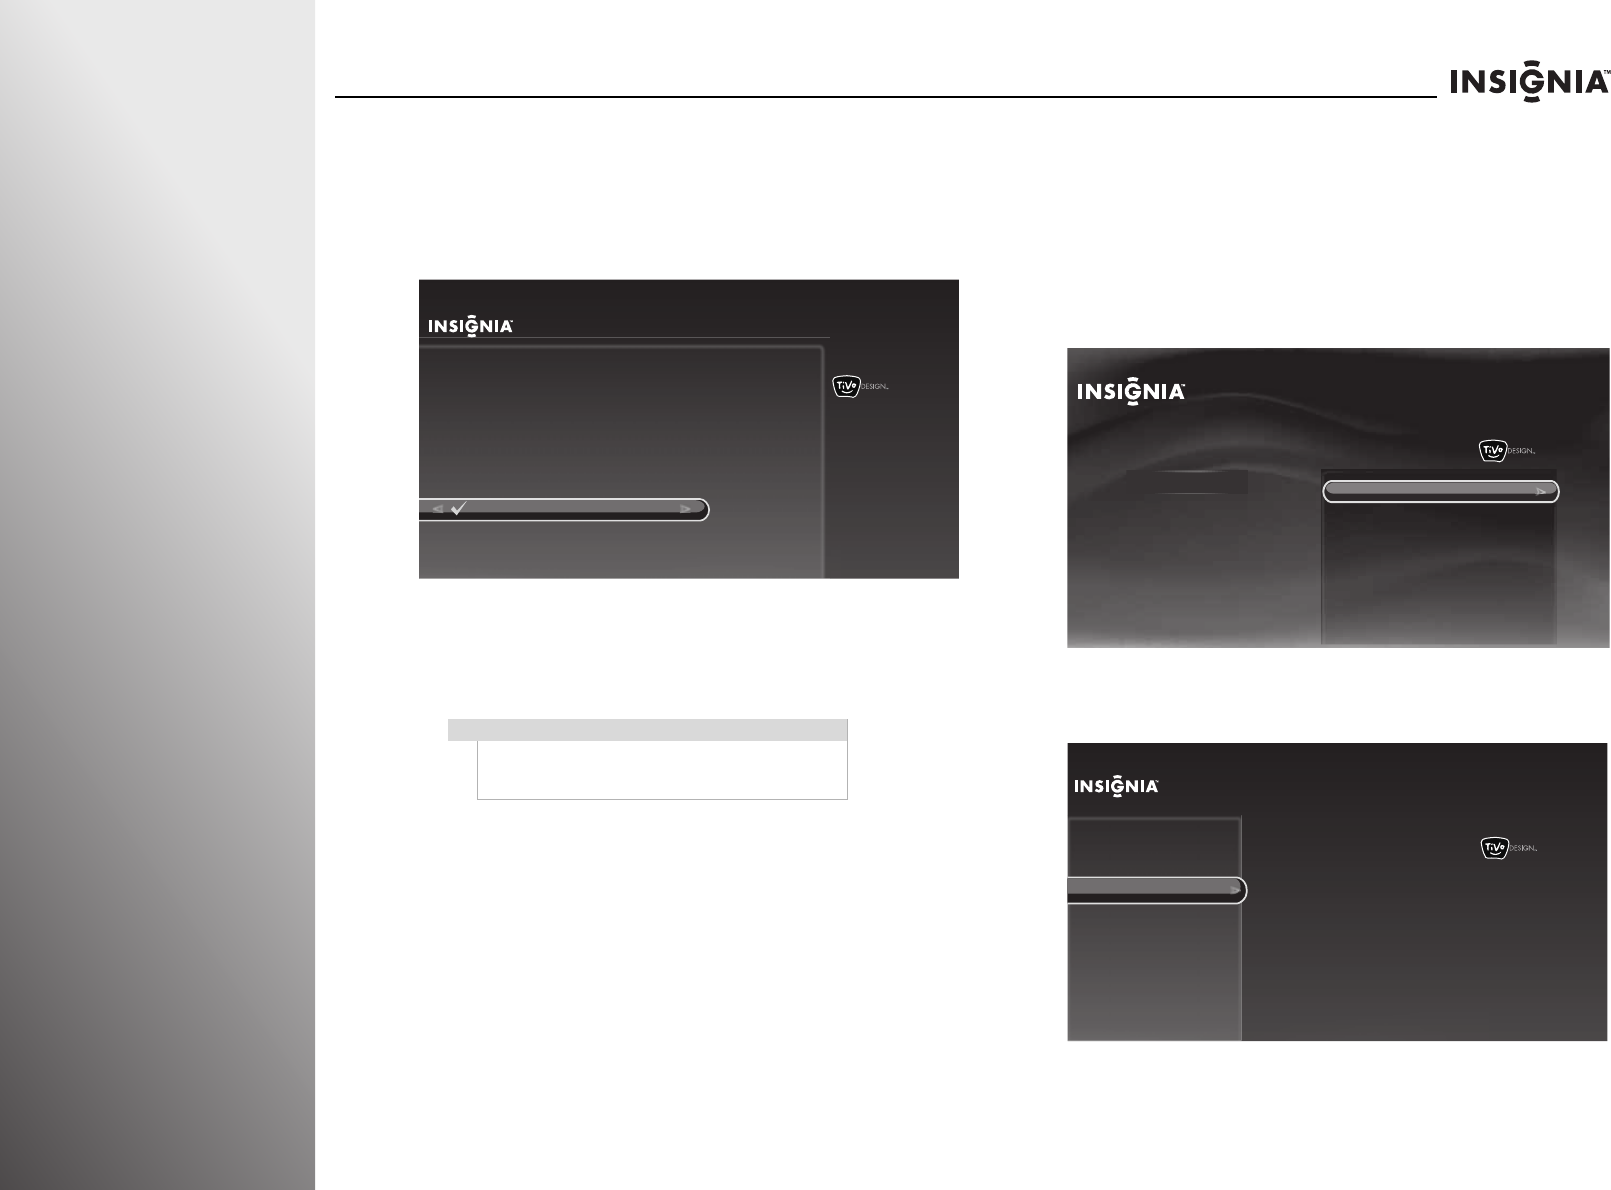
68 www.insigniaproducts.com
Using Your TV NS-32E859A11/NS-42E859A11
5Press S or T to highlight Cable (without a box) or
Antenna, then press SELECT. The Channel Scan starts.
• If you are using an antenna for a standard or HDTV
signal, select Antenna.
• If your cable is connected directly to the TV (using no
cable box), select Cable (without a box).
If your cable or satellite TV is connected to your TV through
a cable or satellite box, the channel search is not necessary
because the cable or satellite box already has the channel
information needed to communicate with your TV.
Setting up the channel and favorite channel
lists
You can add, hide, or mark favorite channels in the channel list.
To set up the channel and favorite channel lists:
1Press TiVo. The Home screen opens. Press S or T to select
Settings, then press X or SELECT.
2Press S or T to highlight Settings, then press X or SELECT.
3Press S or T to highlight Channels & providers, then press
X or SELECT.
Note
You can press CLEAR, MENU, or EXIT to stop the
channel scan, but you will need to run the channel
scan again to create a channel list.
10:00pm
Scan for Channels
Antenna
Cable (without a box)
Your TV works with either cable or antenna channels. Select the TV
signal you have connected to this TV. The TV will then begin scanning
for channels, which may take up to 30 minutes.
You only need to scan for channels for cable if you are NOT
using a cable box. If you have a cable box (or a satellite box), the box
already has information about your channels
10:00pm
Home
Settings
Connect to the Internet Settings
Parental Controls
Check for updates
Account & system info
Help
Sleep timer
10:00 PM
Settings
Devices
Network
Recommendations
Appearance Channel list
Scan for channels
Signal strength
Audio
Video
Channels & providers
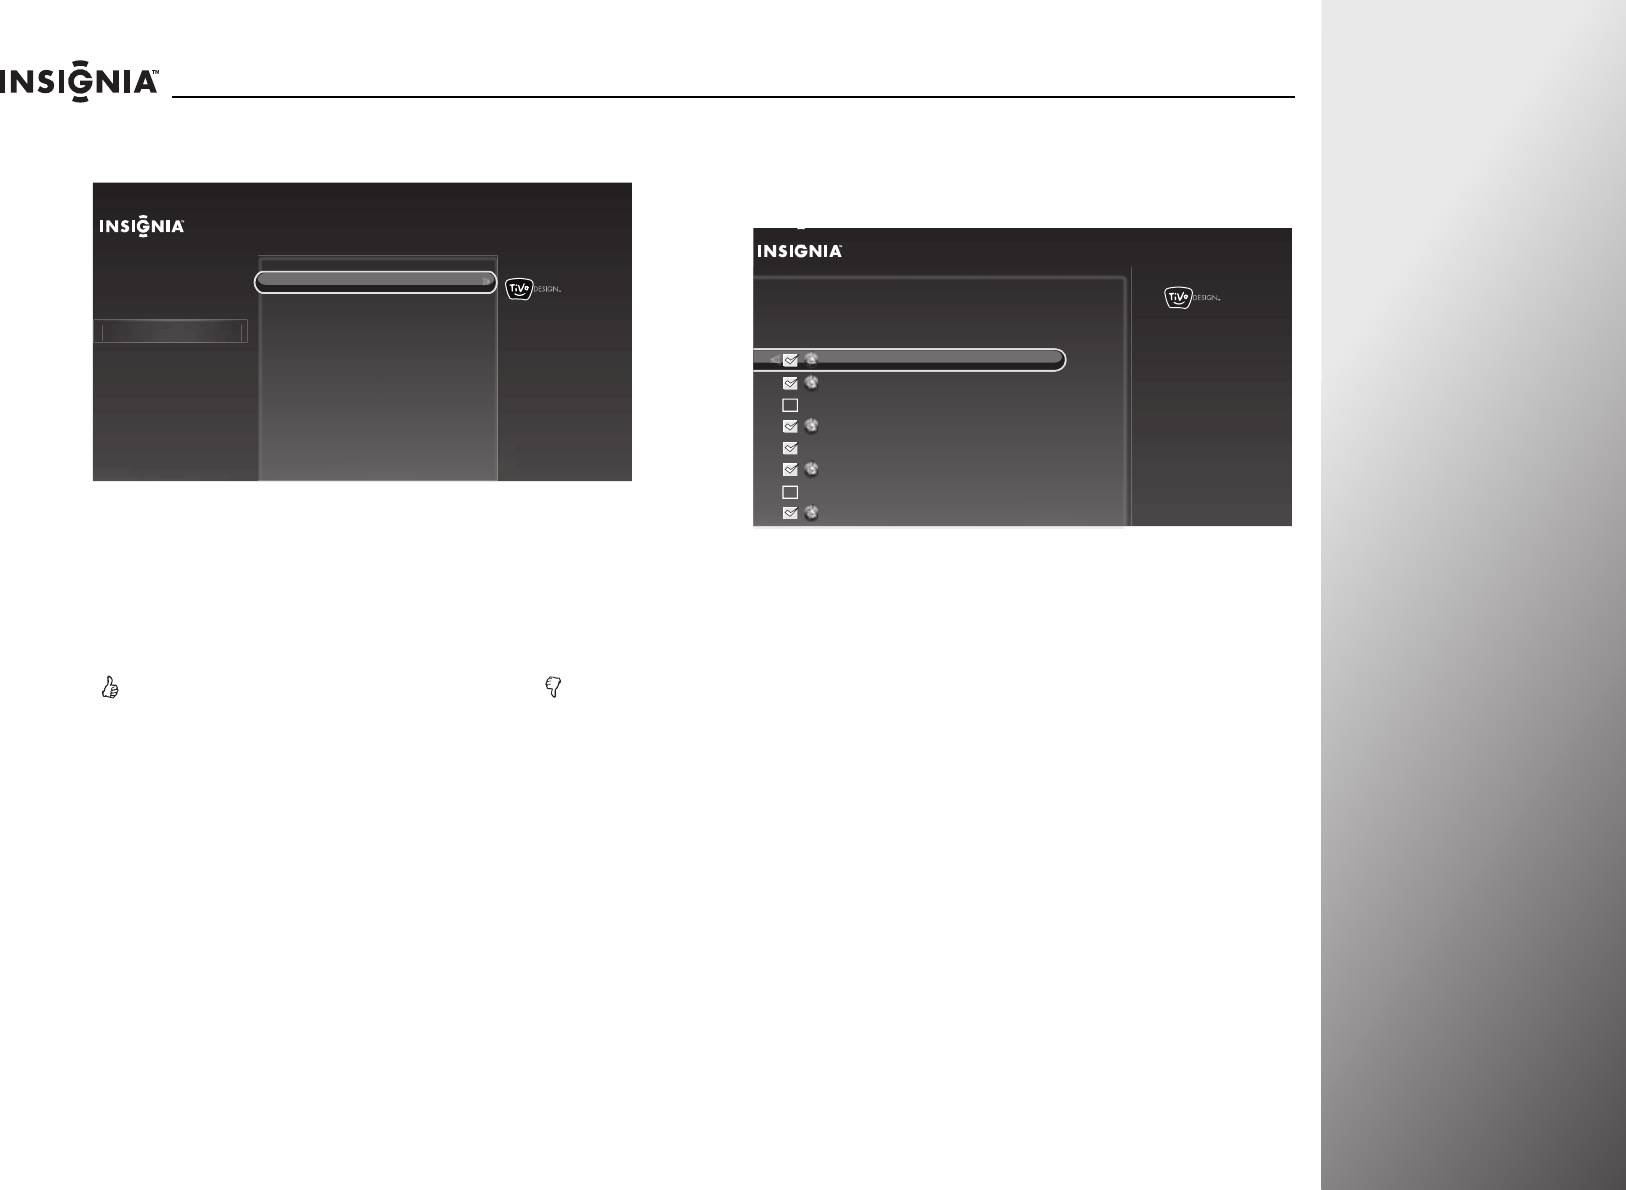
www.insigniaproducts.com 69
NS-32E859A11/NS-42E859A11 Using Your TV
4Press S or T to highlight Channel list, then press X or
SELECT.
5Press S or T to highlight a channel, then press:
•SELECT:
• If the channel is selected, unselects the channel, then
highlights the next channel in the list.
• If the channel is unselected, selects the channel, then
highlights the next channel in the list.
• to add the channel to the favorite list or press to
remove the channel from the favorite list.
•INFO to rename a channel. Use the on-screen keyboard to
enter a new name and assign it to the channel. For more
information, see “Using the on-screen keyboard” on
page 36.
6Press W to go to the previous screen or press EXIT to close
the menu.
Viewing a favorite channel
To view a favorite channel:
1Press FAV. The favorite channel list opens.
2Press S or T to highlight a favorite channel, then press
SELECT.
10:00 PM
Settings
Channels & providers
Devices
Network
Recommendations
Video
Appearance
Audio
Channels &
p
rovider
s
Select the channels you want
displayed in Live TV.
Set up your favorite channels.
Signal strength
Scan for channels
Channel list
10:00pm
Channel List
2 KTVU
3 KNTV
4 HBOP
5 KPIX
6 KICU
7 KGO
8 KTSF
9 KOED
Fox Affiliate
Home Box Office (Pacific)
CBS Affiliate
Independent
ABC Affiliate
Independent
PBS Independent
Use number buttons to jump to a specific channel. Press SELECT to
mark channels you receive , orTHUMBS UP to mark favorite.
KTVU
Press INFO to rename
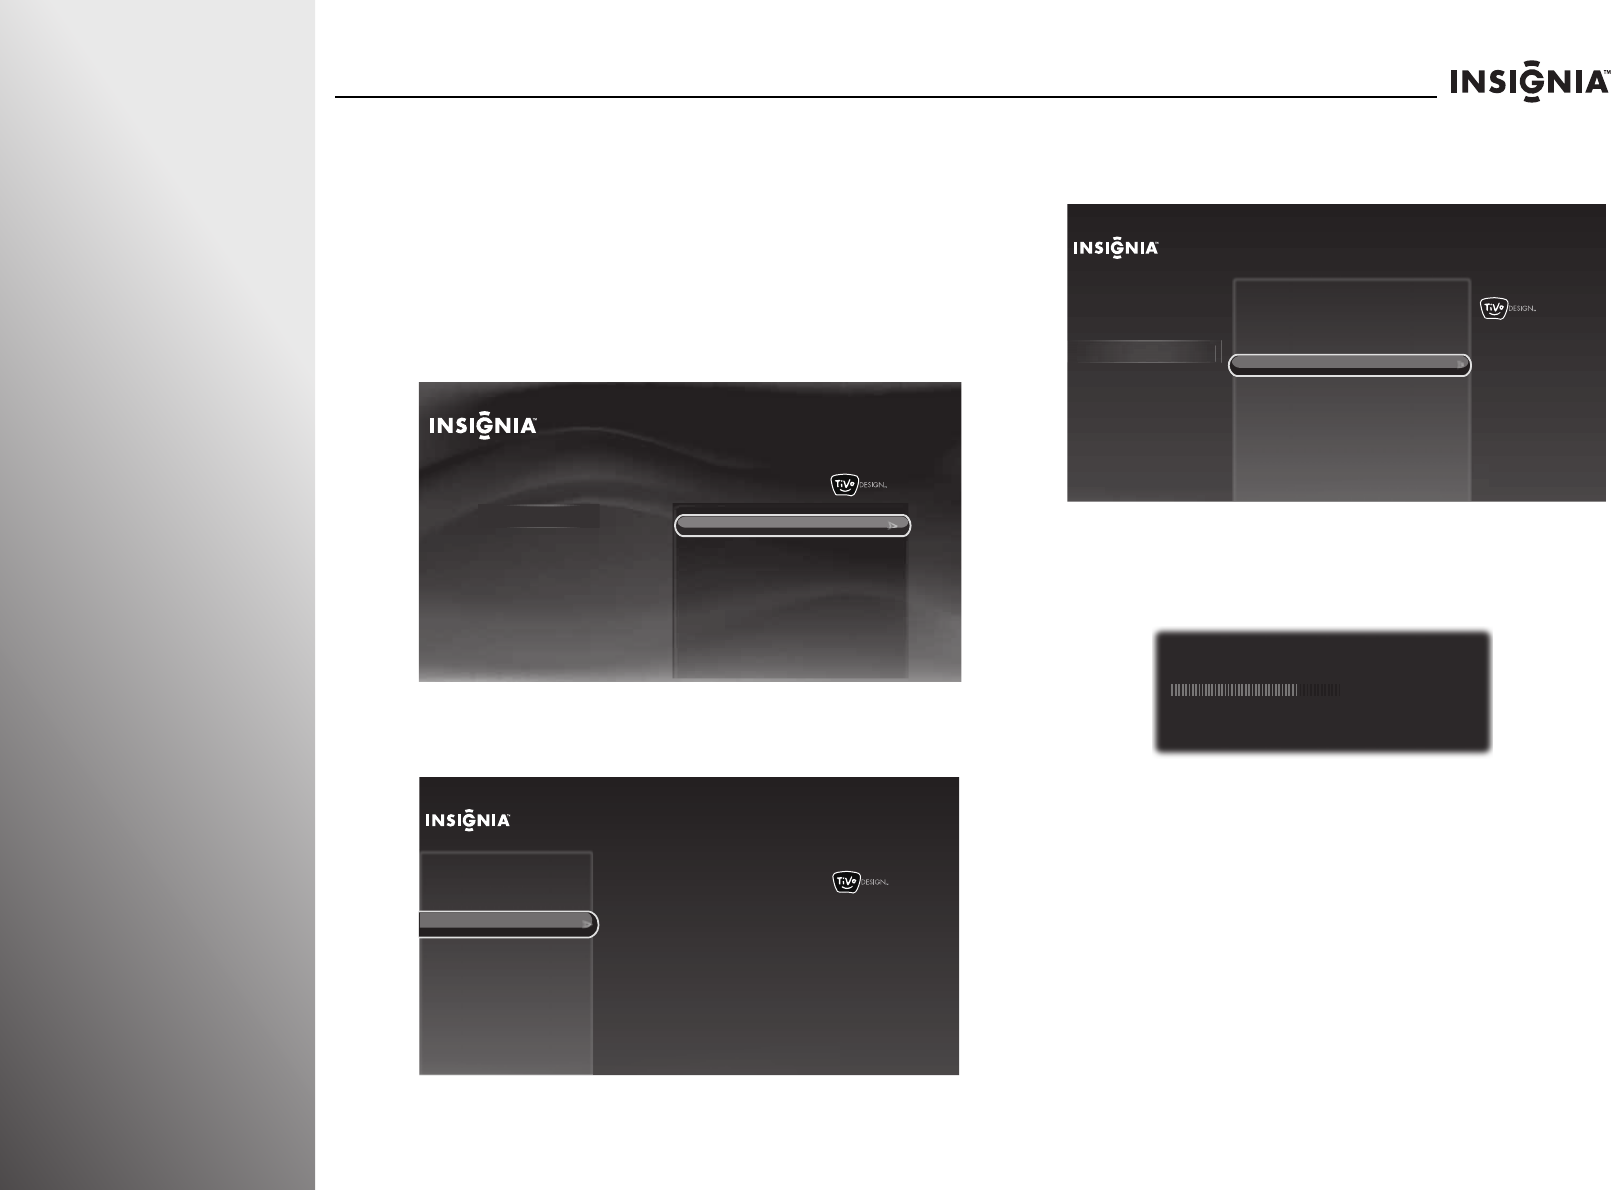
70 www.insigniaproducts.com
Using Your TV NS-32E859A11/NS-42E859A11
Checking the signal strength
You can check the signal strength to determine if you need to
adjust your antenna or cable input. The higher the signal
strength, the less likely you are to experience picture
degradation.
To check the signal strength:
1Press TiVo. The Home screen opens. Press S or T to select
Settings, then press X or SELECT.
2Press S or T to highlight Settings, then press X or SELECT.
3Press S or T to highlight Channels & providers, then press
X or SELECT.
4Press S or T to highlight Signal strength, then press X or
SELECT. The Signal Strength screen opens showing the
signal strength meter for the last watched channel.
5Press CHS or CHT to change channels, or press CLEAR or
EXIT to close the Signal Strength screen and return to full
screen video.
10:00pm
Home
Settings
Connect to the Internet Settings
Parental Controls
Check for updates
Account & system info
Help
Sleep timer
10:00 PM
Settings
Devices
Network
Recommendations
Appearance Channel list
Scan for channels
Signal strength
Audio
Video
Channels & providers
10:00 PM
Settings
Channels & providers
Devices
Network
Recommendations
Video
Appearance
Audio
C
hannels
&
providers
Display the signal strength of
antenna or cable channels.
Scan for channels
Channel list
Signal strength
Signal Strength
Channel 2 KTVUDT
48 Peak: 62
Signal acquired
CHAN UP/DOWN or 0-9 to change channels, CLEAR to exit.
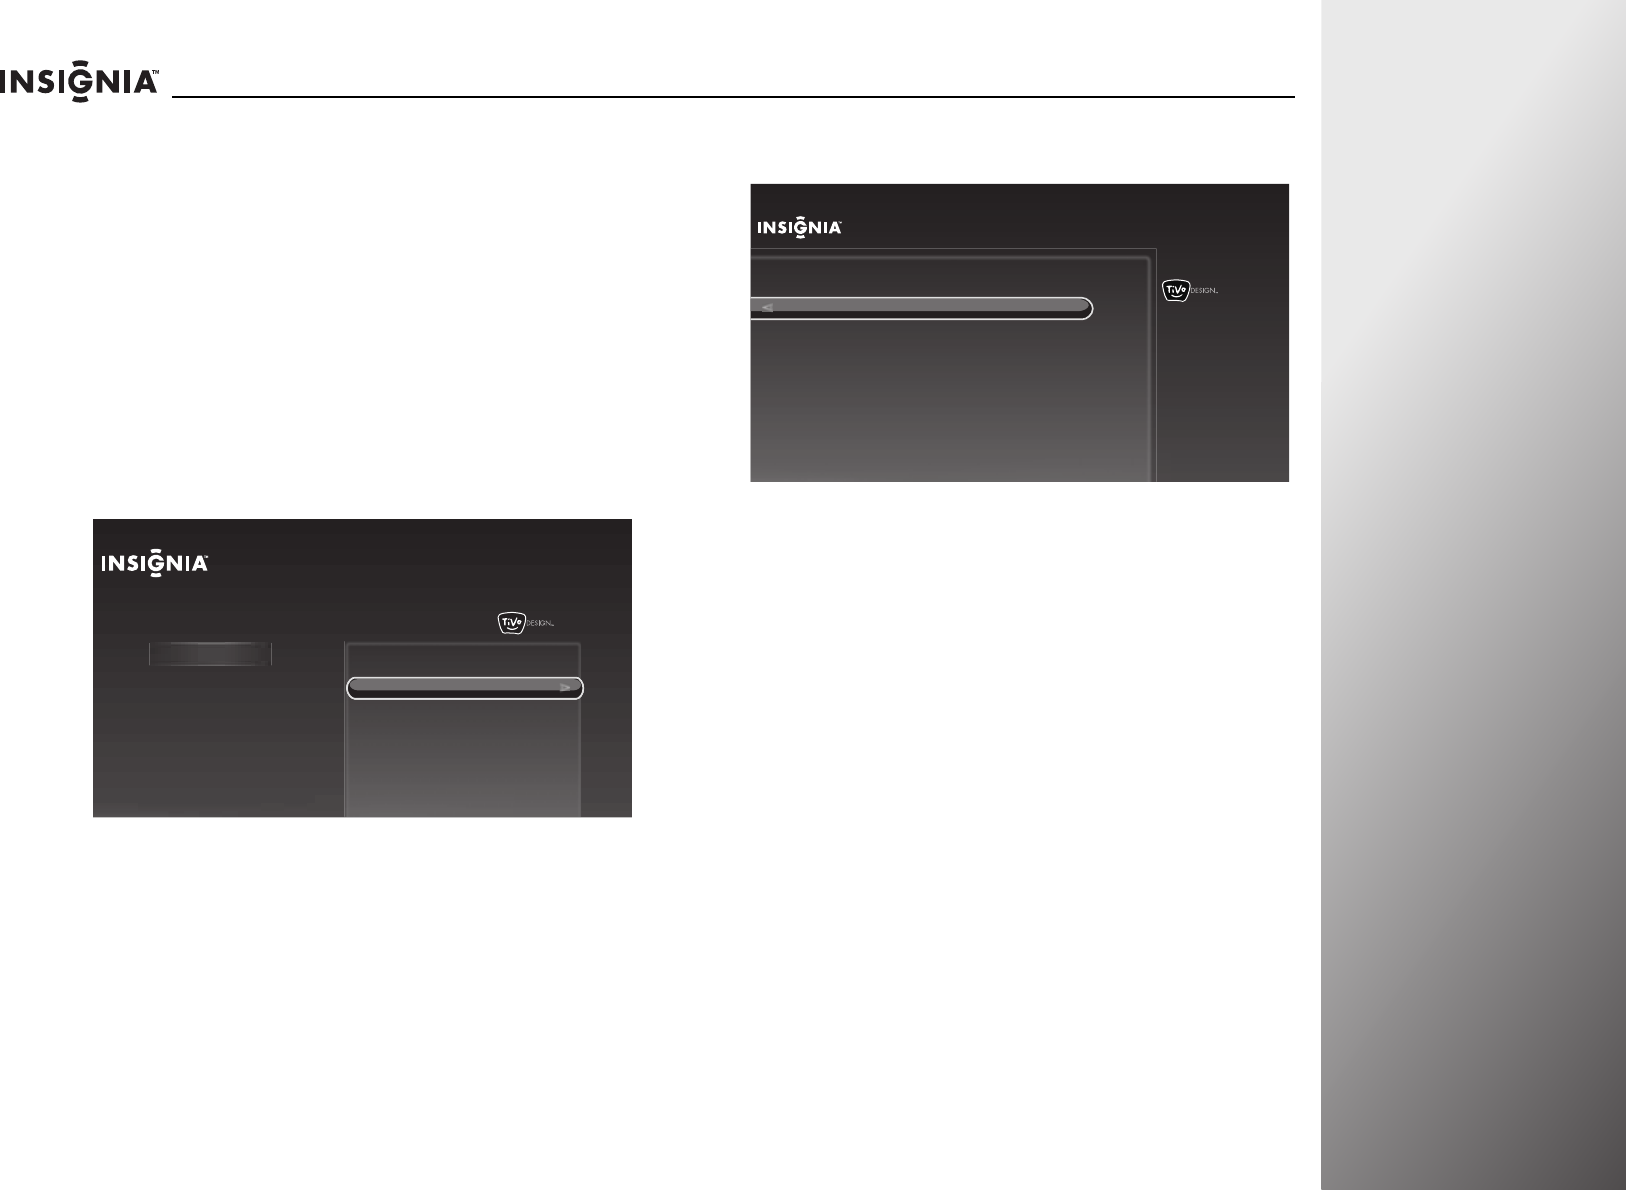
www.insigniaproducts.com 71
NS-32E859A11/NS-42E859A11 Using Your TV
Setting parental controls
Parental controls let you control what your children watch on
TV. When set, parental controls read the rating of the program
(with some exceptions, such as news and sports) and deny
access to programs that exceed the rating level you select. To
watch programs that exceed the selected rating, you must
enter your PIN (password).
Setting the PIN (password)
To set PIN (password):
1Press TiVo. The Home screen opens. Press S or T to select
Settings, then press X or SELECT.
2Press S or T to highlight Parental Controls, then press X or
SELECT.
3Press S or T to highlight any Parental Controls option, then
press X or SELECT. The Set PIN screen opens.
4Press the number buttons to enter your personal four-digit
PIN. The Confirm PIN screen opens. Enter the PIN again.
10:00 PM
Home
Settings
Connect to the Internet Settings
Parental Controls
Check for updates
Account & system info
Help
Sleep timer
10:00 PM
Parental Controls
Parental Controls are OFF
Turn on Parental Controls
Rating limits
Lock channels
Lock buttons
Turn Parental Controls on to block
TV shows and movies by rating,
lock specific channels, or lock the
buttons on the TV.
Current setting:
OFF
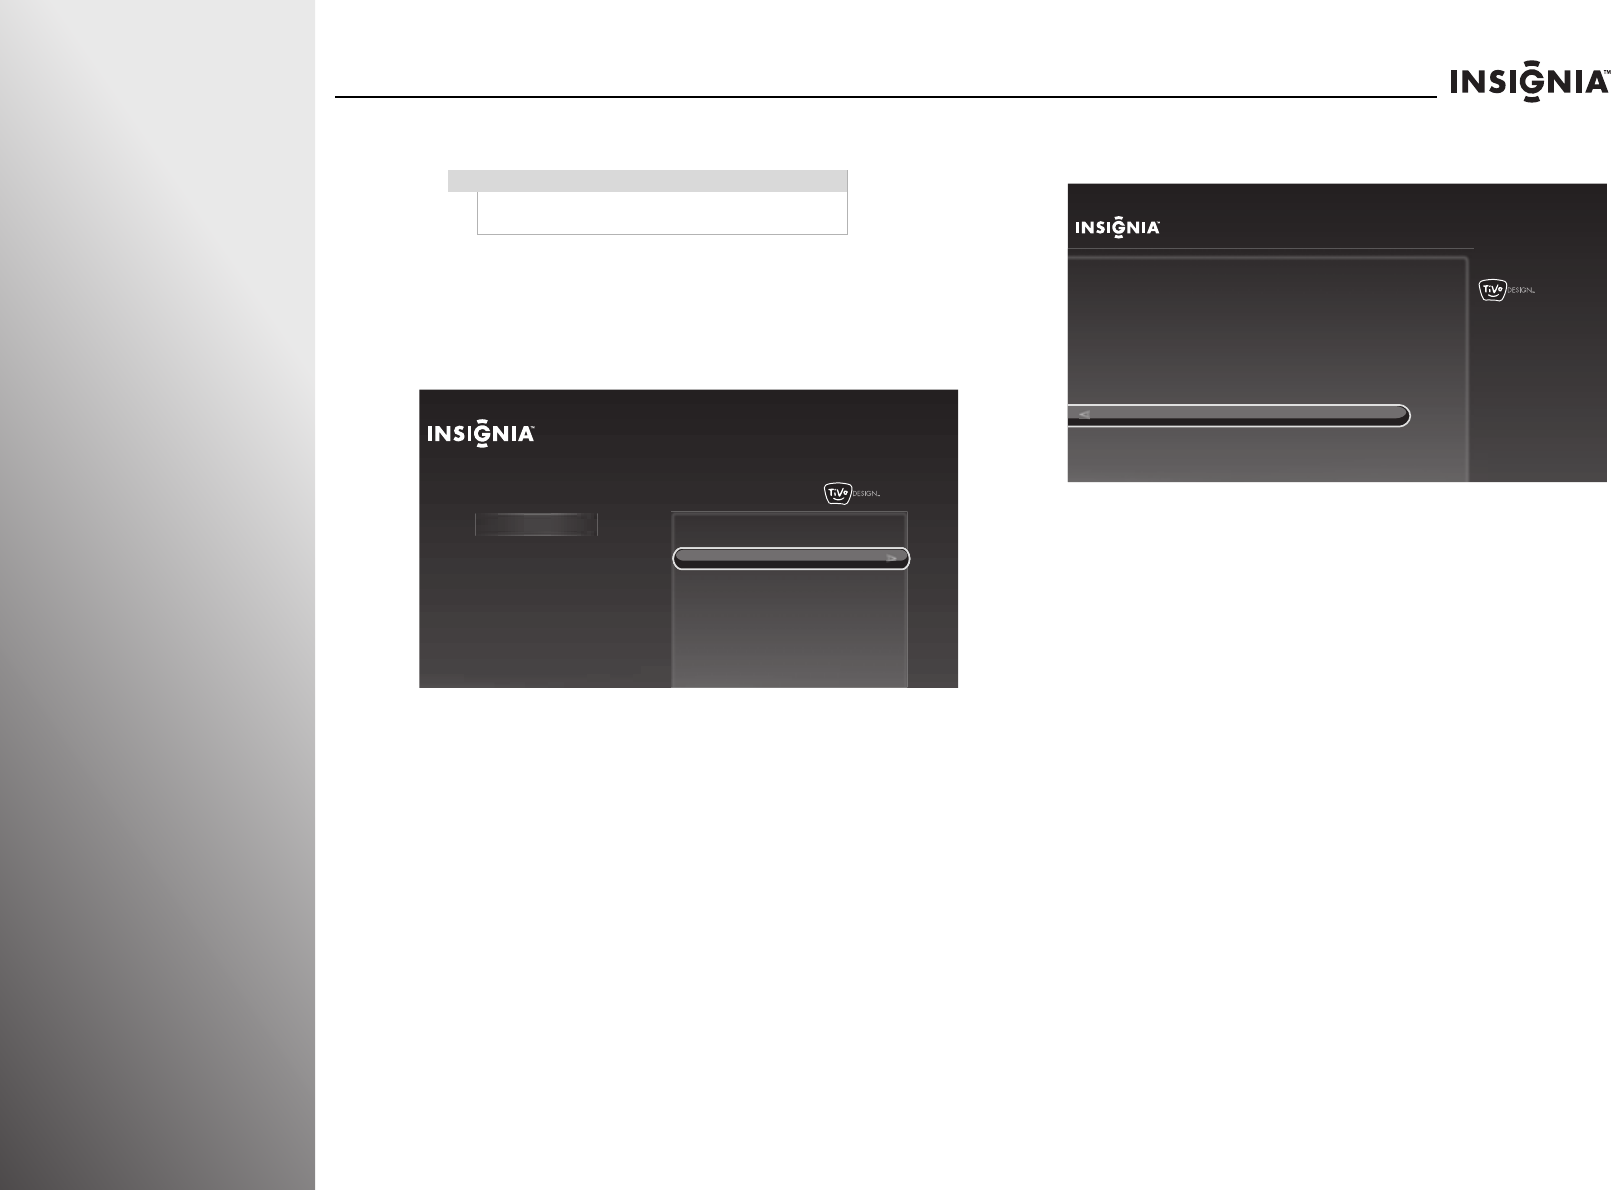
72 www.insigniaproducts.com
Using Your TV NS-32E859A11/NS-42E859A11
Changing the PIN (password)
To change the PIN:
1Press TiVo. The Home screen opens. Press S or T to select
Settings, then press X or SELECT.
2Press S or T to highlight Parental Controls, then press X or
SELECT.
3Press the number buttons to enter your four-digit PIN. The
Parental Controls screen opens.
4Press S or T to highlight Change PIN, then press X or
SELECT. The Current PIN screen opens.
5Press the number buttons to enter the current four-digit
PIN. If you forgot your PIN, enter 9999. The New PIN screen
opens.
6Press the number buttons to enter the new four-digit PIN.
The Confirm PIN screen opens.
7Press the number buttons to enter the new four-digit PIN
again. The Parental Controls screen opens.
Note
You can only change the PIN if you have set a PIN and
turned on Parental Controls.
10:00 PM
Home
Settings
Connect to the Internet Settings
Parental Controls
Check for updates
Account & system info
Help
Sleep timer
10:00 PM
Parental Controls
Parental Controls are ON
Disable Parental Controls
Rating limits
Lock channels
Lock buttons
Change the PIN that you enter to
watch blocked TV shows and
movies.
Change PIN
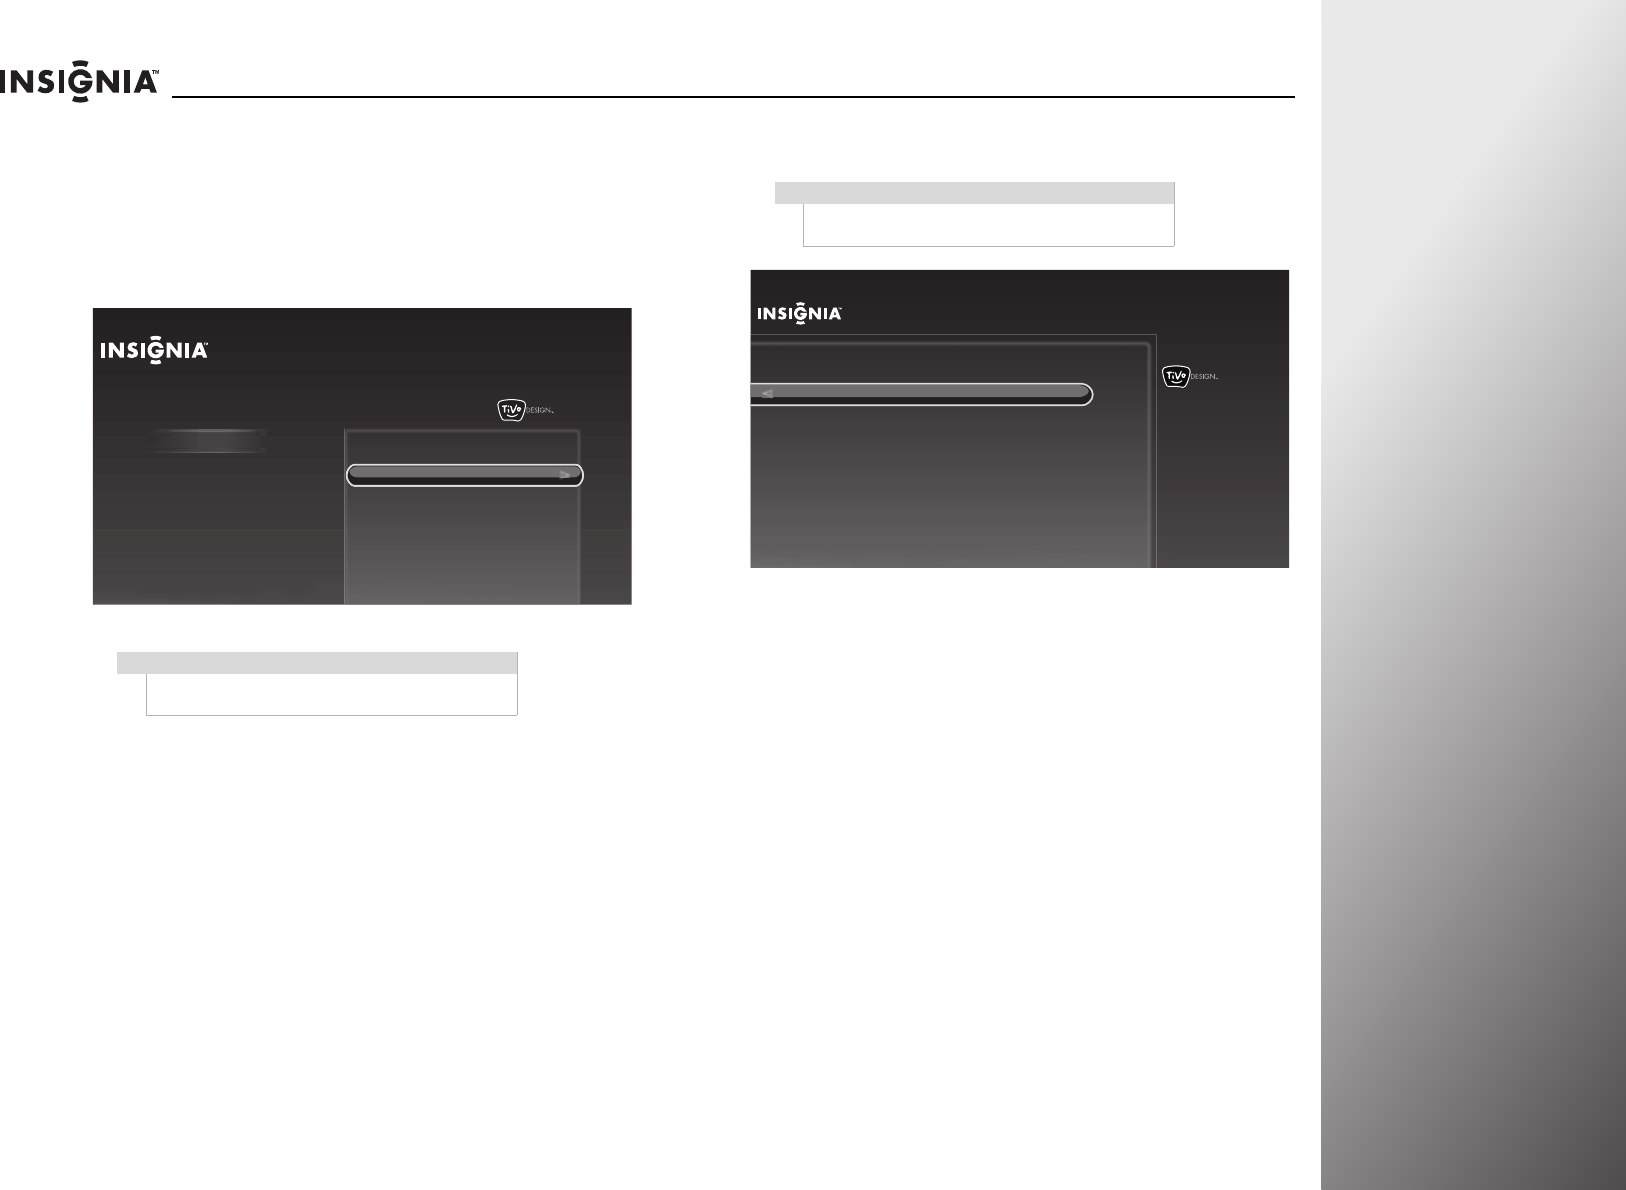
www.insigniaproducts.com 73
NS-32E859A11/NS-42E859A11 Using Your TV
Turning Parental Controls on or off
Tuning Parental Controls on or off:
1Press TiVo. The Home screen opens. Press S or T to select
Settings, then press X or SELECT.
2Press S or T to highlight Parental Controls, then press X or
SELECT.
3Press S or T to highlight Turn on Parental Controls or
Disable Parental Controls, then press SELECT.
Note
If Parental Controls is set to On, you have to enter
your PIN to access the Parental Controls menu.
10:00 PM
Home
Settings
Connect to the Internet Settings
Parental Controls
Check for updates
Account & system info
Help
Sleep timer
Note
If you select Disable Parental Controls, you have to
enter your PIN.
10:00 PM
Parental Controls
Parental Controls are OFF
Turn on Parental Controls
Rating limits
Lock channels
Lock buttons
Turn Parental Controls on to block
TV shows and movies by rating,
lock specific channels, or lock the
buttons on the TV.
Current setting:
OFF
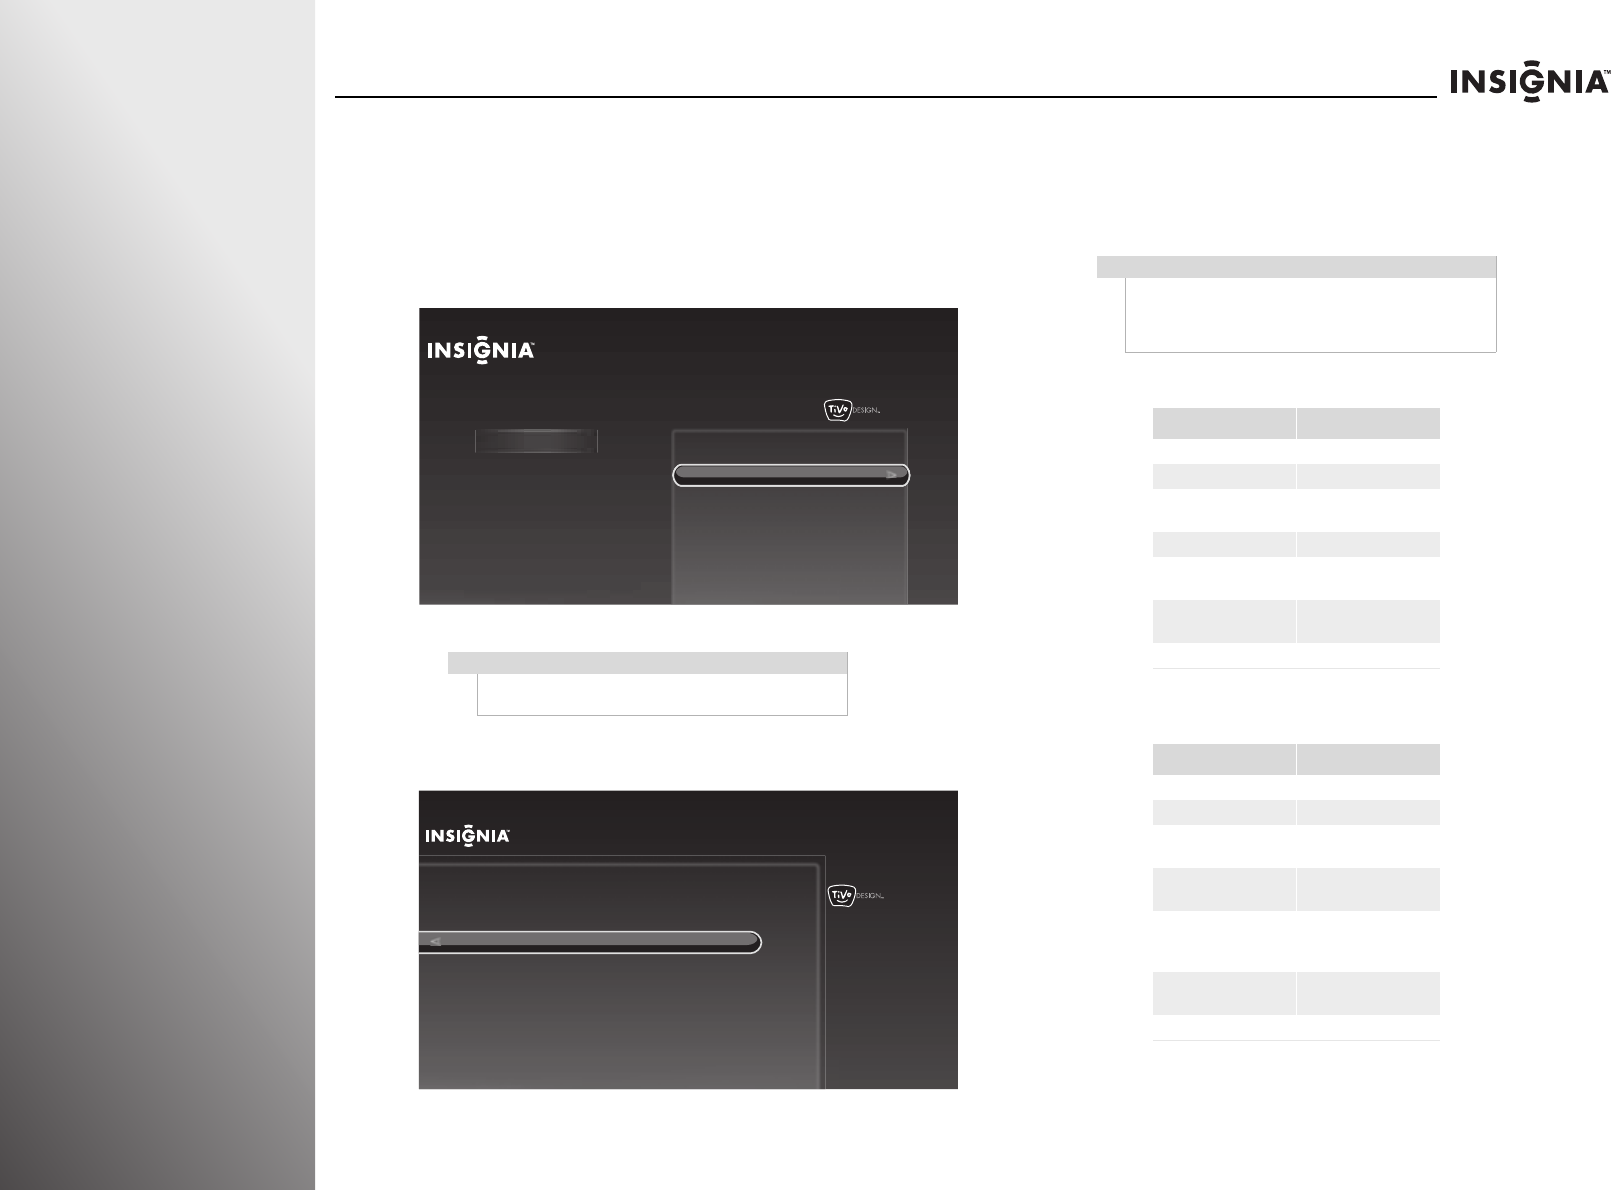
74 www.insigniaproducts.com
Using Your TV NS-32E859A11/NS-42E859A11
Setting Parental Control levels
To set Parental Control levels:
1Press TiVo. The Home screen opens. Press S or T to select
Settings, then press X or SELECT.
2Press S or T to highlight Parental Controls, then press X or
SELECT.
3Press S or T to highlight Rating limits, then press X or
SELECT.
4Press S or T to highlight a rating option, then press W or X
to select a rating level.
5After setting all the options, press SELECT to highlight Use
these settings, then press SELECT again to save your
settings and return to the previous screen.
U.S. TV ratings
U.S. movie (MPAA) ratings
Note
If Parental Controls is set to on, you have to enter
your PIN to access the Parental controls menu.
10:00 PM
Home
Settings
Connect to the Internet Settings
Parental Controls
Check for updates
Account & system info
Help
Sleep timer
10:00 PM
Parental Controls
Parental Controls are OFF
Turn on Parental Controls
Rating limits
Lock channels
Lock buttons
Block content by TV and movie
(MPAA) rating level.
Current settings:
TV rating:
Movie rating:
Unrated shows:
Other ratings:
Allow all
Allow all
Allow all
Allow all
Note
You can watch a program that exceeds the rating
limits you set by entering your PIN to turn off Parental
Controls temporarily. To turn on Parental Controls
again, turn your TV off, then on again
Rating Description
Not rated NONE
TV-Y All children
TV-Y7 Children over seven
years of age
TV-G General audiences
TV-PG Parental guidance
suggested
TV-14 Parents strongly
cautioned
TV-MA Mature audiences only
Rating Description
None Movie not rated
GGeneral audiences
PG Parental guidance
suggested
PG-13 Suitable for children 13
and older
R Parental guidance
suggested for children
under 17
NC-17 Not suitable for children
under 17
AO (Adult Only) Adults only
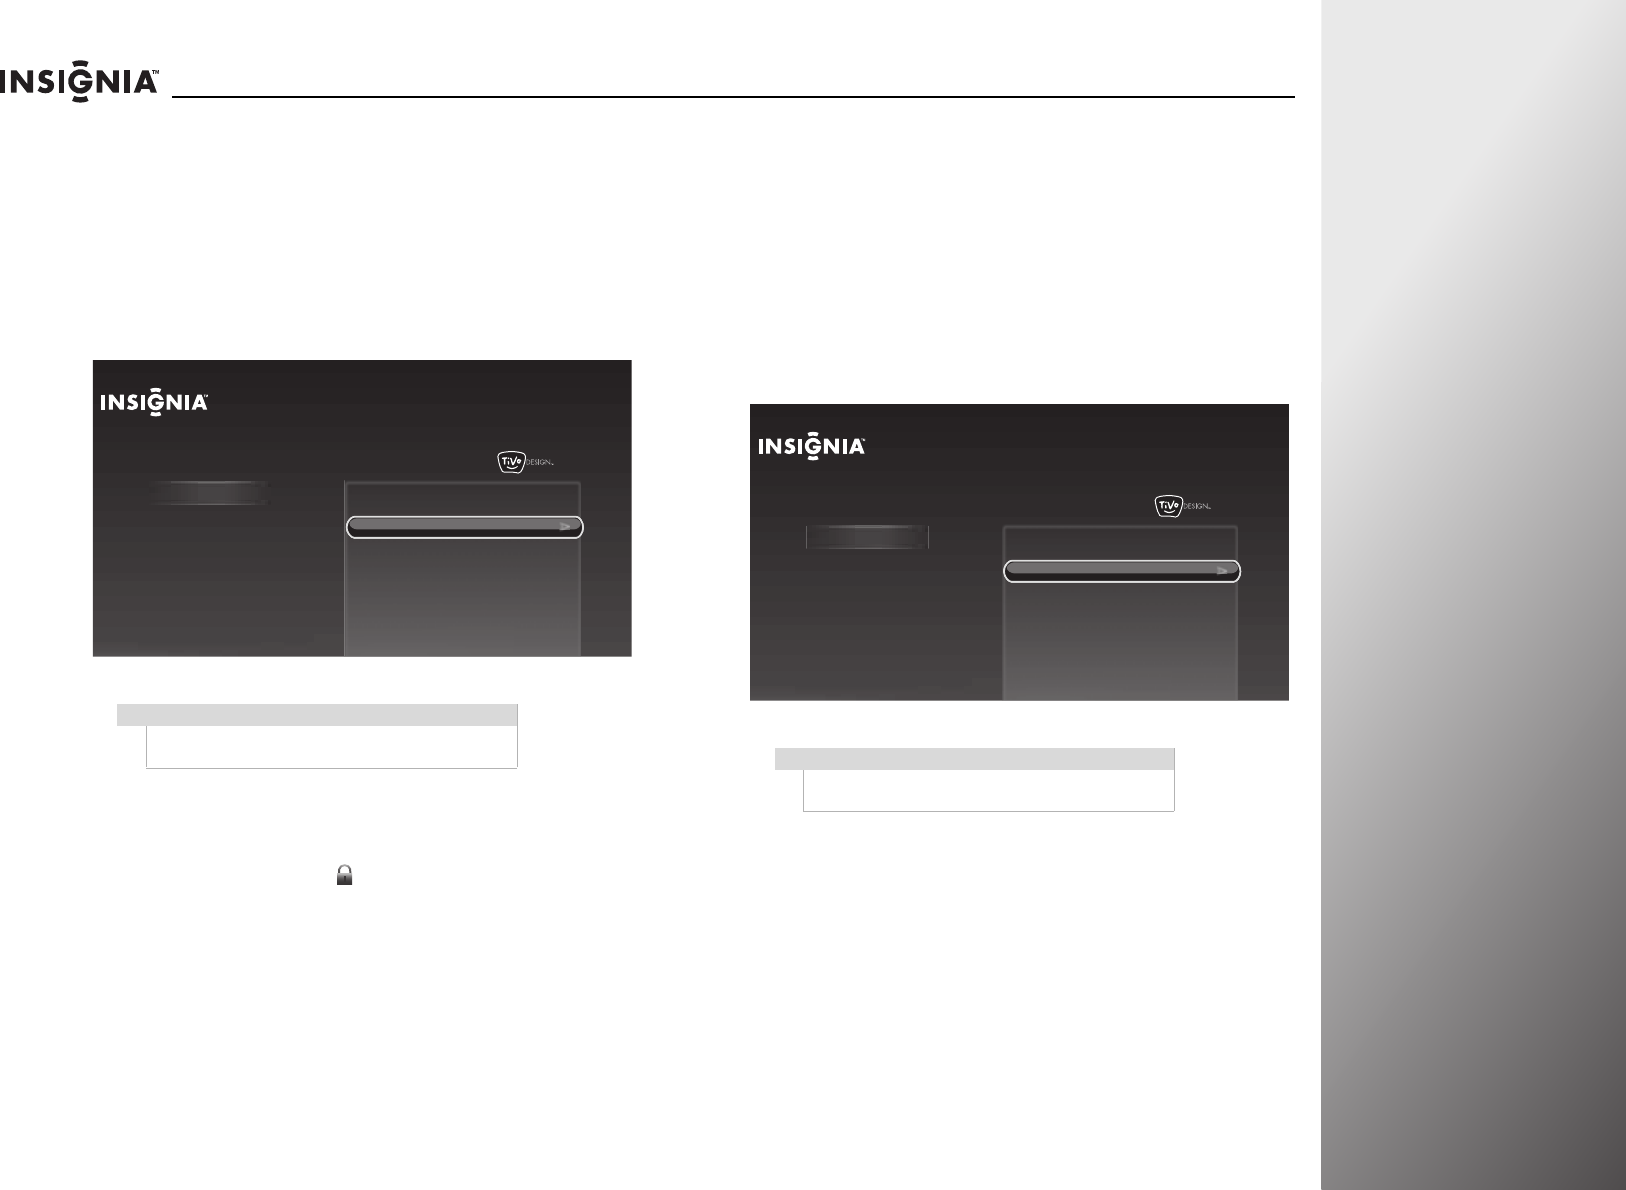
www.insigniaproducts.com 75
NS-32E859A11/NS-42E859A11 Using Your TV
Setting channel locks
You can lock specific channels. To view a locked channel, you
have to enter your PIN.
To set channel locks:
1Press TiVo. The Home screen opens. Press S or T to select
Settings, then press X or SELECT.
2Press S or T to highlight Parental Controls, then press X or
SELECT.
3Press S or T to highlight Lock channels, then press SELECT.
4Press S or T to select a specific channel.
5Press SELECT to lock or unlock the channel. A locked
channel is displayed with a .
6Press S or T to select Use these settings, then press
SELECT to save your settings and return to the previous
screen.
Locking control buttons
You can lock the buttons on the front of your TV to prevent
children from accidentally changing your TV settings. When the
buttons are locked, you can only operate your TV using the
remote control.
To lock control buttons:
1Press TiVo. The Home screen opens. Press S or T to select
Settings, then press X or SELECT.
2Press S or T to highlight Parental Controls, then press X or
SELECT.
3Press S or T to highlight Lock buttons, then press SELECT.
4Press S or T to highlight Lock TV buttons, then press
SELECT to save your setting and return to the previous
screen.
Note
If Parental Controls is set to on, you have to enter
your PIN to access the Parental controls menu.
10:00 PM
Home
Settings
Connect to the Internet Settings
Parental Controls
Check for updates
Account & system info
Help
Sleep timer
Note
If Parental Controls is set to on, you have to enter
your PIN to access the Parental controls menu.
10:00 PM
Home
Settings
Connect to the Internet Settings
Parental Controls
Check for updates
Account & system info
Help
Sleep timer
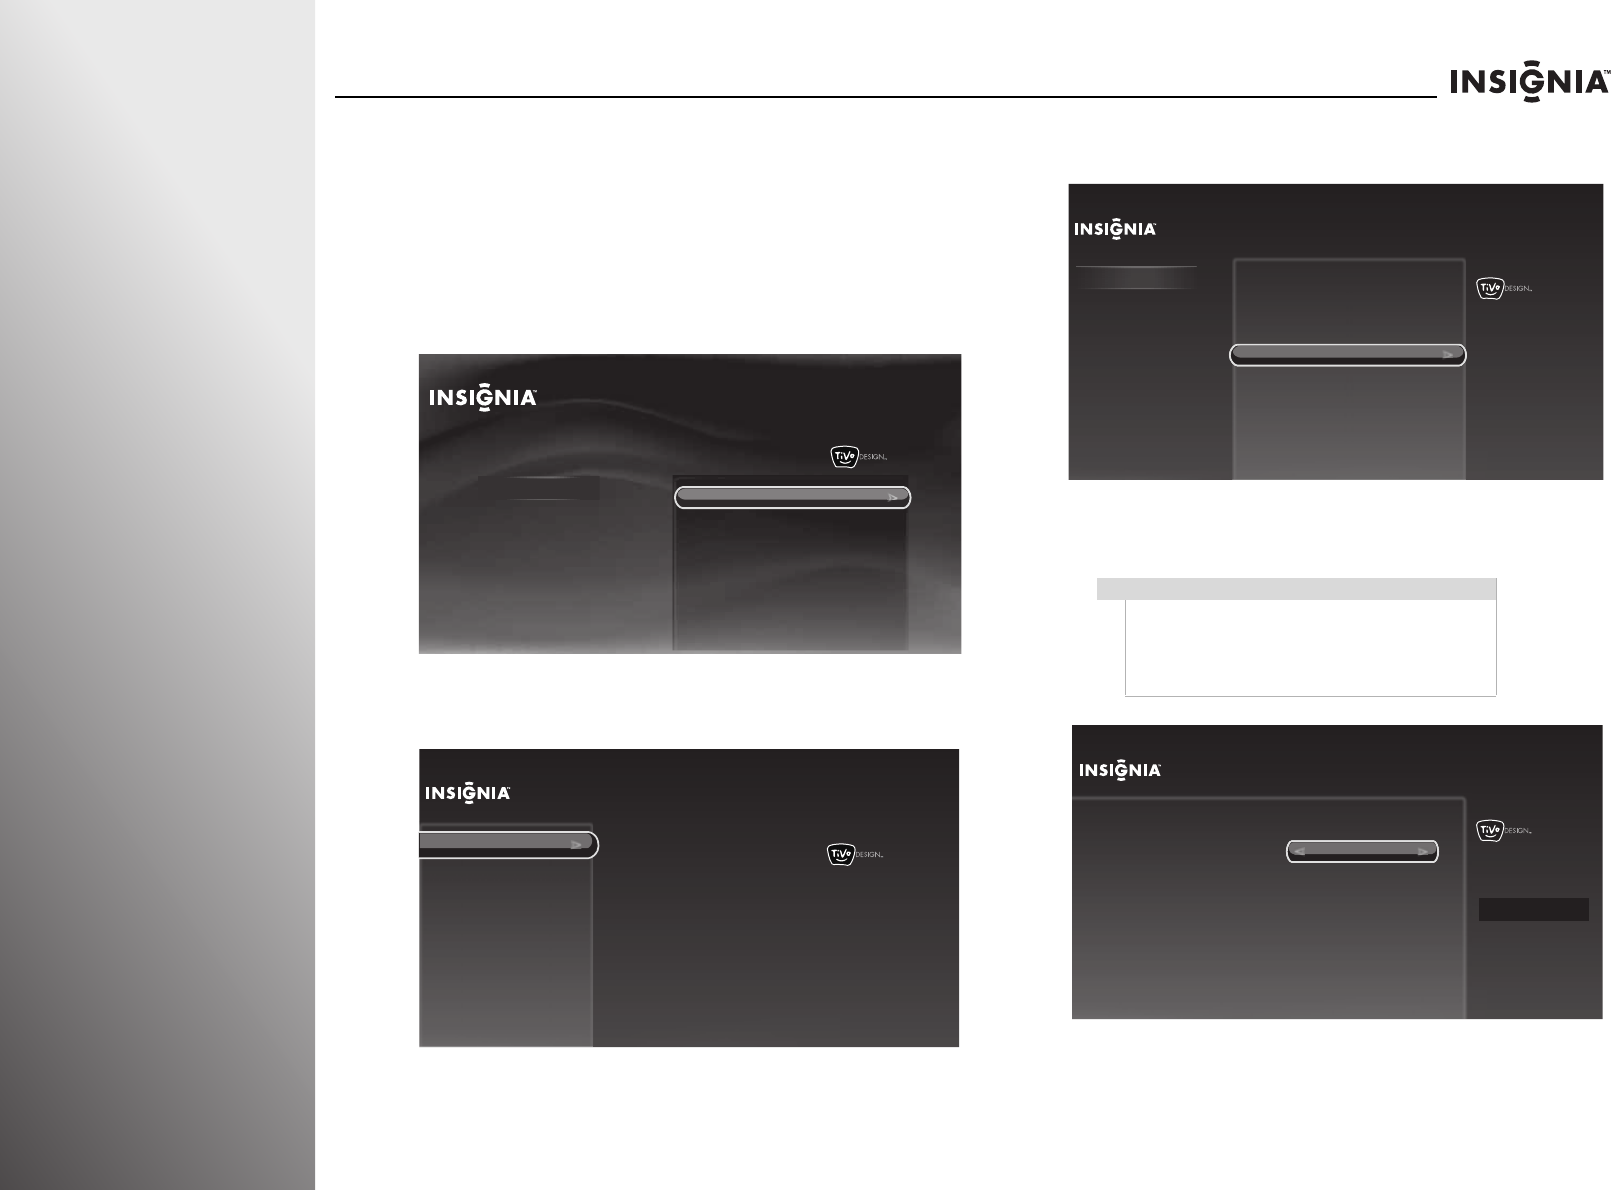
76 www.insigniaproducts.com
Using Your TV NS-32E859A11/NS-42E859A11
Using closed captioning
Turning closed captioning on or off
To turn closed captioning on or off:
1Press TiVo. The Home screen opens. Press S or T to select
Settings, then press X or SELECT.
2Press S or T to highlight Settings, then press X or SELECT.
3Press S or T to highlight Appearance, then press X or
SELECT.
4Press S or T to highlight Closed captioning, then press X
or SELECT.
5Press S or T to highlight Closed captioning, then press W
or X to select On or Off, or On when mute.
6Press SELECT to highlight Done setting closed
captioning options, then press SELECT again to save your
setting and return to the previous screen.
10:00pm
Home
Settings
Connect to the Internet Settings
Parental Controls
Check for updates
Account & system info
Help
Sleep timer
10:00 PM
Settings
Audio
Channels & providers
Devices
Network
Recommendations
Video
Appearance
Logo brightness
Input labels
Closed captioning
Video window
Reset all appearance settings
Time
Notes
• You can also press CC to turn closed captioning
on or off.
•If Closed captioning is set to Off, other closed
captioning options are grayed out and are not
available.
10:00 PM
Settings
Audio
Channels & providers
Devices
Network
Recommendations
Video
Appearance
Reset all appearance settings
Time
Ap
p
earance
Logo brightness
Input labels
Closed captioning
Video window
Turn on and off closed captioning,
and change the size and color of
captions.
Current setting:
Off
10:00 PM
Closed Captioning
Closed captioning:
Standard captions:
Digital captions:
Text size:
Font:
Text color:
Background color:
Done setting closed captioning options
DTVCC1
As broadcast
As broadcast
As broadcast
As broadcast
CC1
On
Turn on and off closed captions.
Sample text
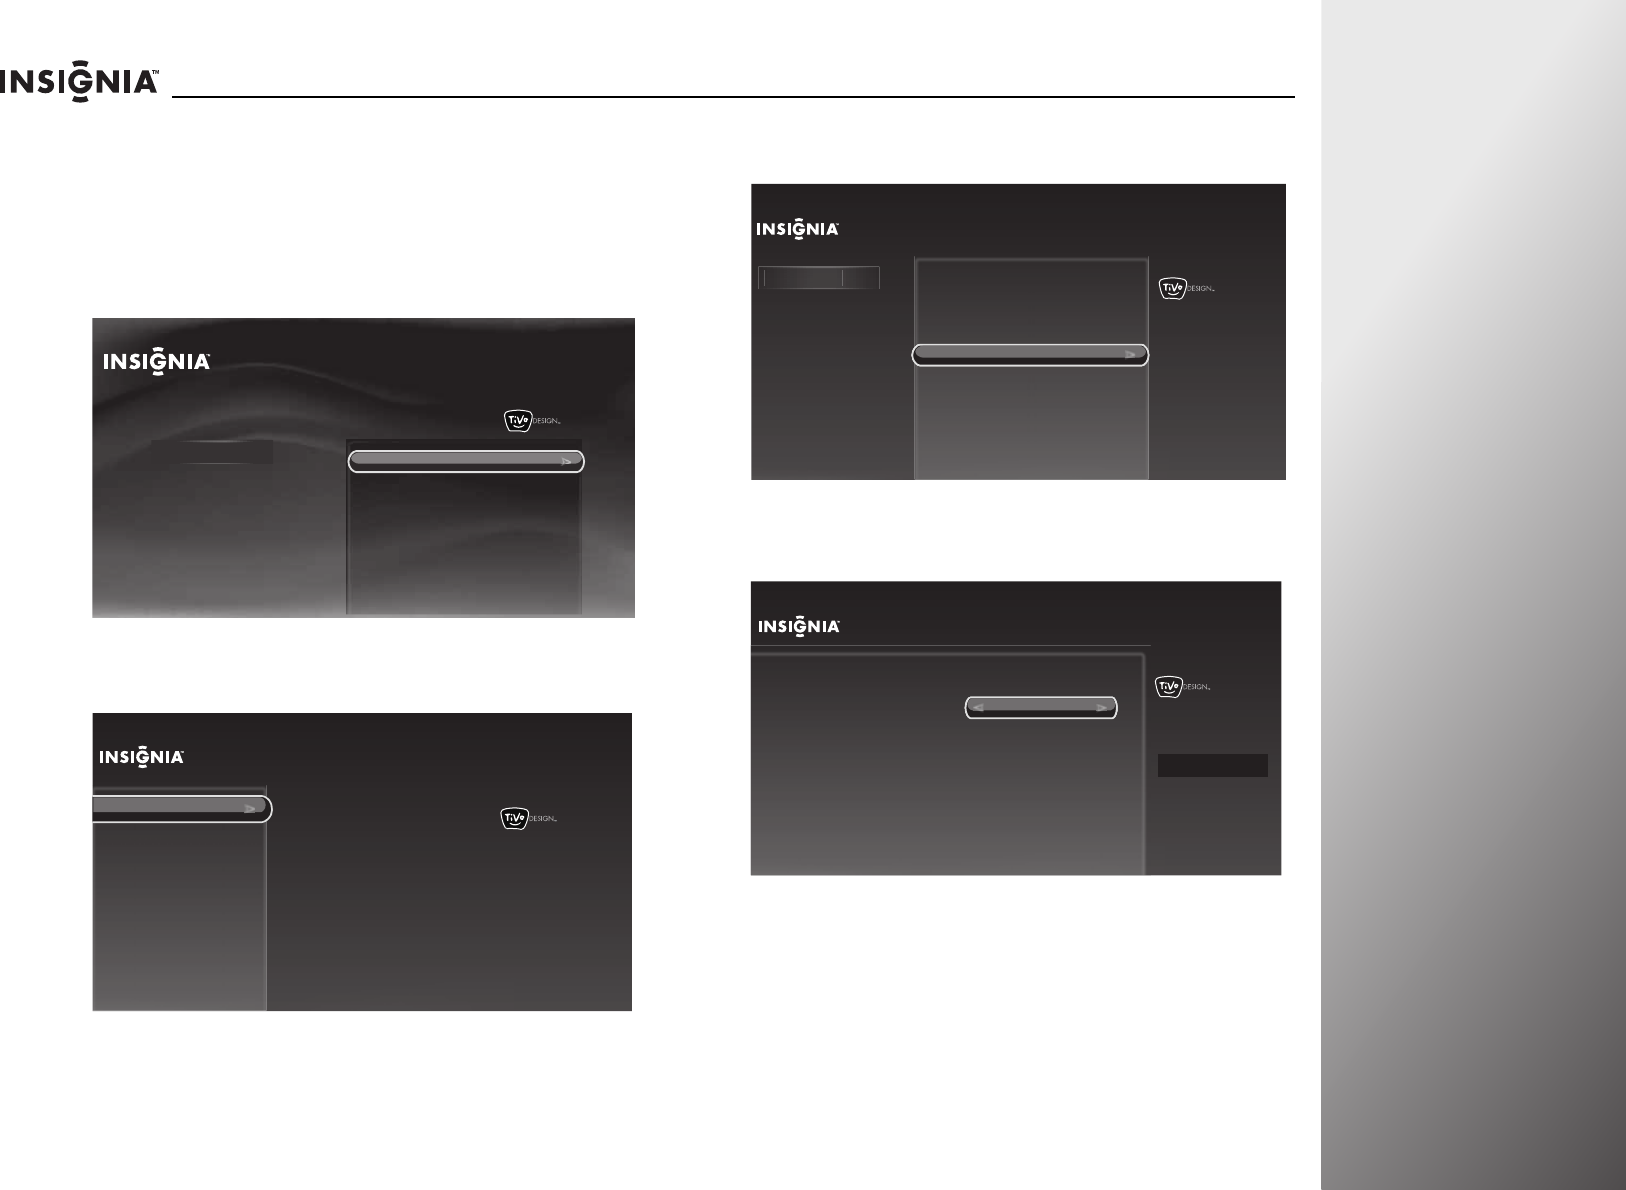
www.insigniaproducts.com 77
NS-32E859A11/NS-42E859A11 Using Your TV
Selecting the analog closed captioning
mode
To select the analog closed captioning mode:
1Press TiVo. The Home screen opens. Press S or T to select
Settings, then press X or SELECT.
2Press S or T to highlight Settings, then press X or SELECT.
3Press S or T to highlight Appearance, then press X or
SELECT.
4Press S or T to highlight Closed captioning, then press X or
SELECT.
5Press S or T to highlight Closed captioning, then press W or
X to select On.
10:00pm
Home
Settings
Connect to the Internet Settings
Parental Controls
Check for updates
Account & system info
Help
Sleep timer
10:00 PM
Settings
Audio
Channels & providers
Devices
Network
Recommendations
Video
Appearance
Logo brightness
Input labels
Closed captioning
Video window
Reset all appearance settings
Time
10:00 PM
Settings
Audio
Channels & providers
Devices
Network
Recommendations
Video
Appearance
Reset all appearance settings
Time
Ap
p
earance
Logo brightness
Input labels
Closed captioning
Video window
Turn on and off closed captioning,
and change the size and color of
captions.
Current setting:
Off
10:00 PM
Closed Captioning
Closed captioning:
Standard captions:
Digital captions:
Text size:
Font:
Text color:
Background color:
Done setting closed captioning options
DTVCC1
As broadcast
As broadcast
As broadcast
As broadcast
CC1
On
Turn on and off closed captions.
Sample text
78 www.insigniaproducts.com
Using Your TV NS-32E859A11/NS-42E859A11
6Press S or T to highlight Standard captions.
7Press W or X to select an analog closed captioning setting.
You can select CC1 through CC4. Closed captioning
appears in a small banner across the bottom of the screen.
CC1 is usually the “printed” version of the audio. CC2
through CC4 display content provided by the broadcaster.
8Press SELECT to highlight Done setting closed
captioning options, then press SELECT again to save your
setting and return to the previous screen.
Customizing digital closed captioning
To customize digital closed captioning:
1Press TiVo. The Home screen opens. Press S or T to select
Settings, then press X or SELECT.
2Press S or T to highlight Settings, then press X or SELECT.
3Press S or T to highlight Appearance, then press X or
SELECT.
10:00 PM
Closed Captioning
Closed captioning:
Standard captions:
Digital captions:
Text size:
Font:
Text color:
Background color:
Done setting closed captioning options
On
DTVCC1
As broadcast
As broadcast
As broadcast
As broadcast
CC1
CC1 is English caption. CC3 is
often used for Spanish captions.
(Each channel is different.)
Sample text
10:00pm
Home
Settings
Connect to the Internet Settings
Parental Controls
Check for updates
Account & system info
Help
Sleep timer
10:00 PM
Settings
Audio
Channels & providers
Devices
Network
Recommendations
Video
Appearance
Logo brightness
Input labels
Closed captioning
Video window
Reset all appearance settings
Time
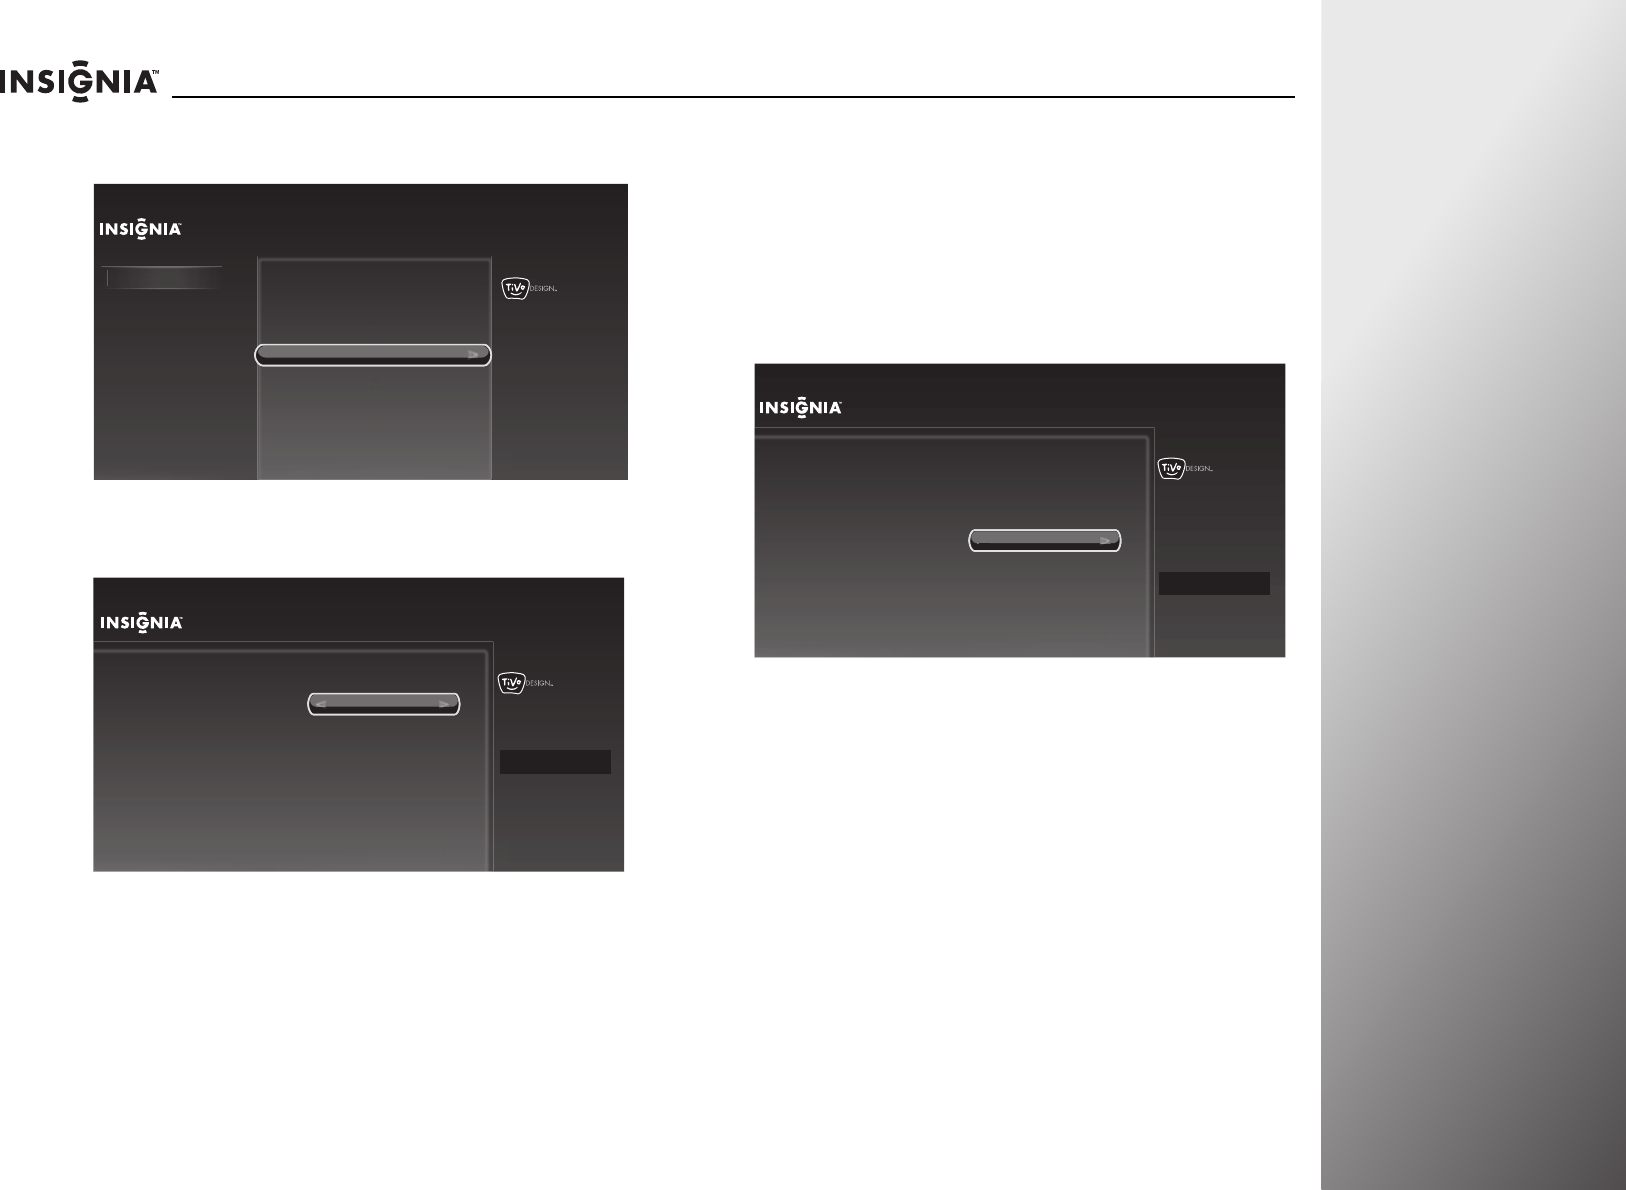
www.insigniaproducts.com 79
NS-32E859A11/NS-42E859A11 Using Your TV
4Press S or T to highlight Closed captioning, then press X or
SELECT.
5Press S or T to highlight Closed captioning, then press W or
X to select On.
6Press S or T to highlight a digital closed captioning option,
then press W or X to select a digital closed caption setting.
You can select:
•Digital captions—Selects the digital captioning setting.
You can select DTVCC1 through DTVCC6.
•Text size—Selects the font size.
•Font—Selects the font style.
•Text color—Selects the color for the words.
•Background color—Selects the color for the background.
7Press SELECT to highlight Done setting closed captioning
options, then press SELECT again to save your setting and
return to the previous screen.
10:00 PM
Settings
Audio
Channels & providers
Devices
Network
Recommendations
Video
Appearance
Reset all appearance settings
Time
Ap
p
earance
Logo brightness
Input labels
Closed captioning
Video window
Turn on and off closed captioning,
and change the size and color of
captions.
Current setting:
Off
10:00 PM
Closed Captioning
Closed captioning:
Standard captions:
Digital captions:
Text size:
Font:
Text color:
Background color:
Done setting closed captioning options
DTVCC1
As broadcast
As broadcast
As broadcast
As broadcast
CC1
On
Turn on and off closed captions.
Sample text
10:00 PM
Closed Captioning
Closed captioning:
Standard captions:
Digital captions:
Text size:
Font:
Text color:
Background color:
Done setting closed captioning options
On
As broadcast
As broadcast
As broadcast
As broadcast
CC1
DTVCC1
DTVCC1 is English caption.
DTVCC3 is often used for Spanish
captions. (Each channel is
different.)
Sample text
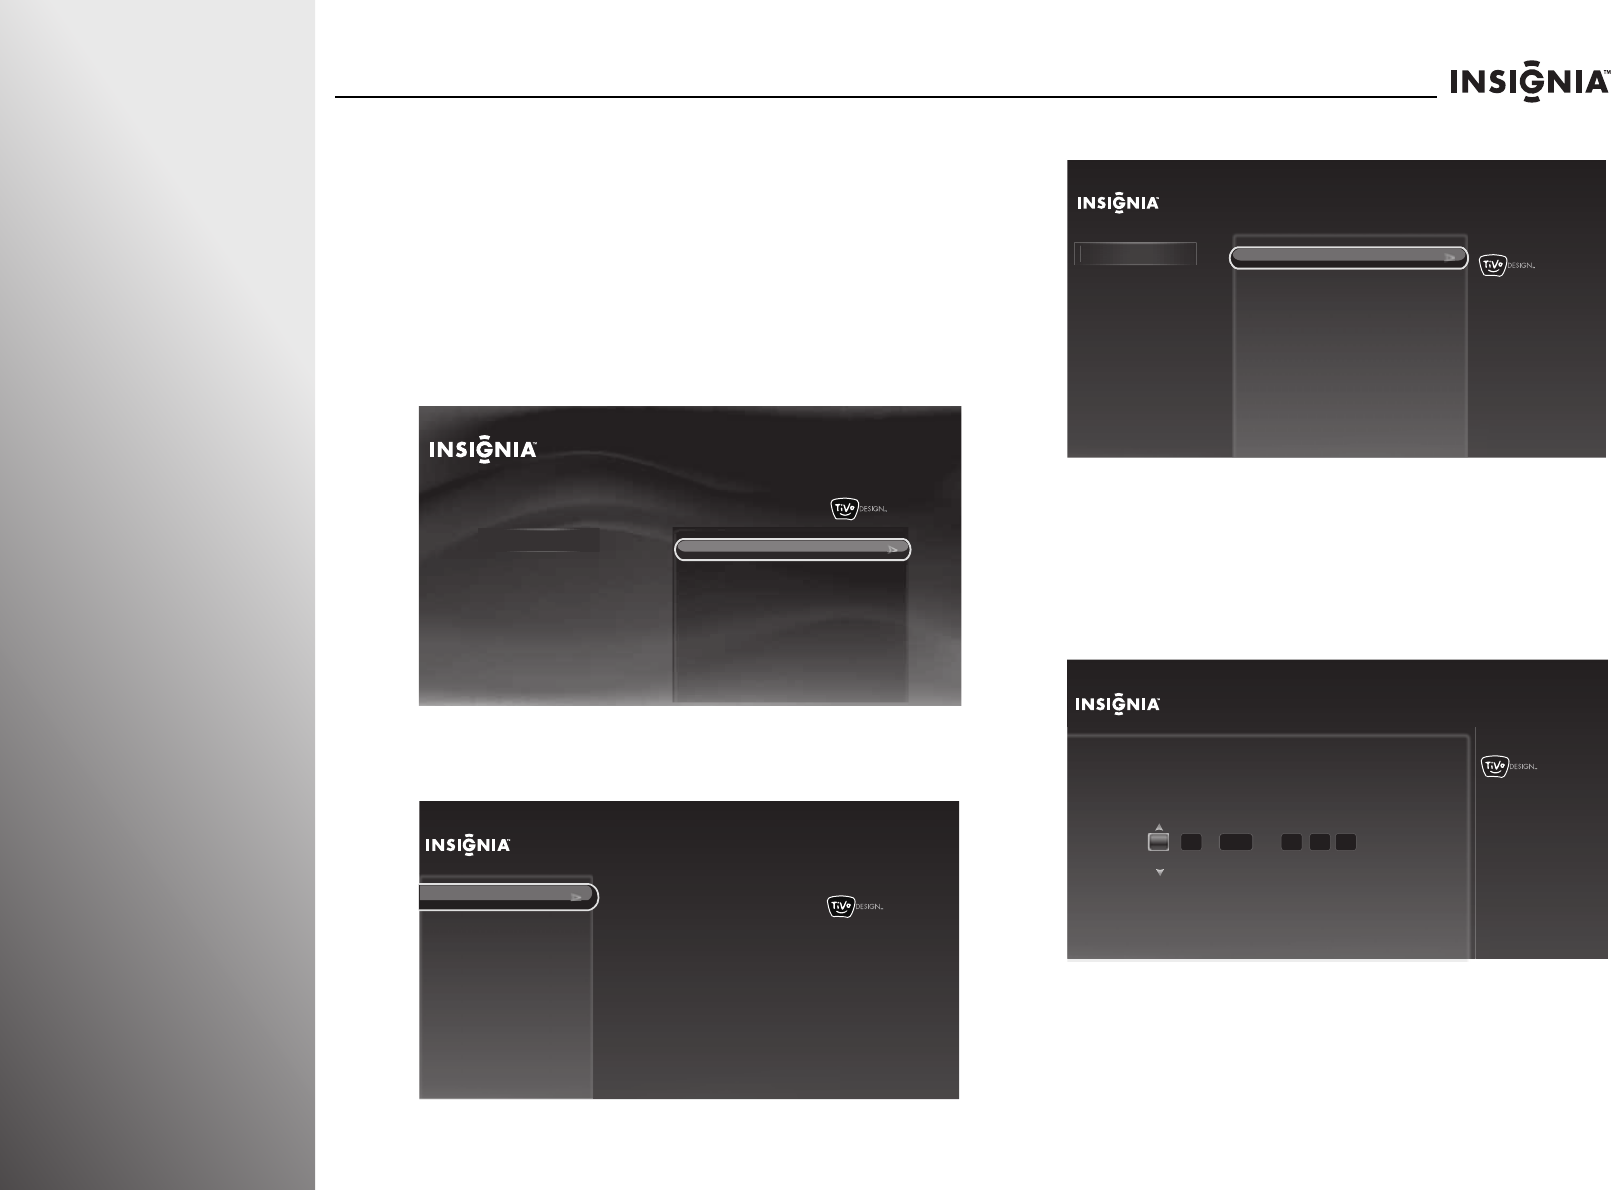
80 www.insigniaproducts.com
Using Your TV NS-32E859A11/NS-42E859A11
Adjusting time settings
Setting the date and time
You can set the date and time setting shown in the on-screen
preview pane.
To set the date and time:
1Press TiVo. The Home screen opens. Press S or T to select
Settings, then press X or SELECT.
2Press S or T to highlight Settings, then press X or SELECT.
3Press S or T to highlight Appearance, then press X or
SELECT.
4Press S or T to highlight Time, then press X or SELECT.
5Press S or T to highlight your time zone, then press X or
SELECT.
6Press S or T to select the daylight saving setting, then
press X or SELECT.
7Follow the on-screen instructions to set the date and time
values.
8Press SELECT to save your settings and return to the
previous screen.
10:00pm
Home
Settings
Connect to the Internet Settings
Parental Controls
Check for updates
Account & system info
Help
Sleep timer
10:00 PM
Settings
Audio
Channels & providers
Devices
Network
Recommendations
Video
Appearance
Logo brightness
Input labels
Closed captioning
Video window
Reset all appearance settings
Time
10:00 PM
Settings
Audio
Channels & providers
Devices
Network
Recommendations
Video
Appearance
Reset all appearance settings
App
earance
Logo brightness
Input labels
Closed captioning
Video window
Time
Set the current date and time.
Current date and time:
12/12/2010 10:00pm
10:00pm
Set Date and Time
12
11 / / at :
12 12 AM
Month
Use the number buttons on the remote control to set the current date and
time.
Eastern Standard Time
Press SELECT when done
2010
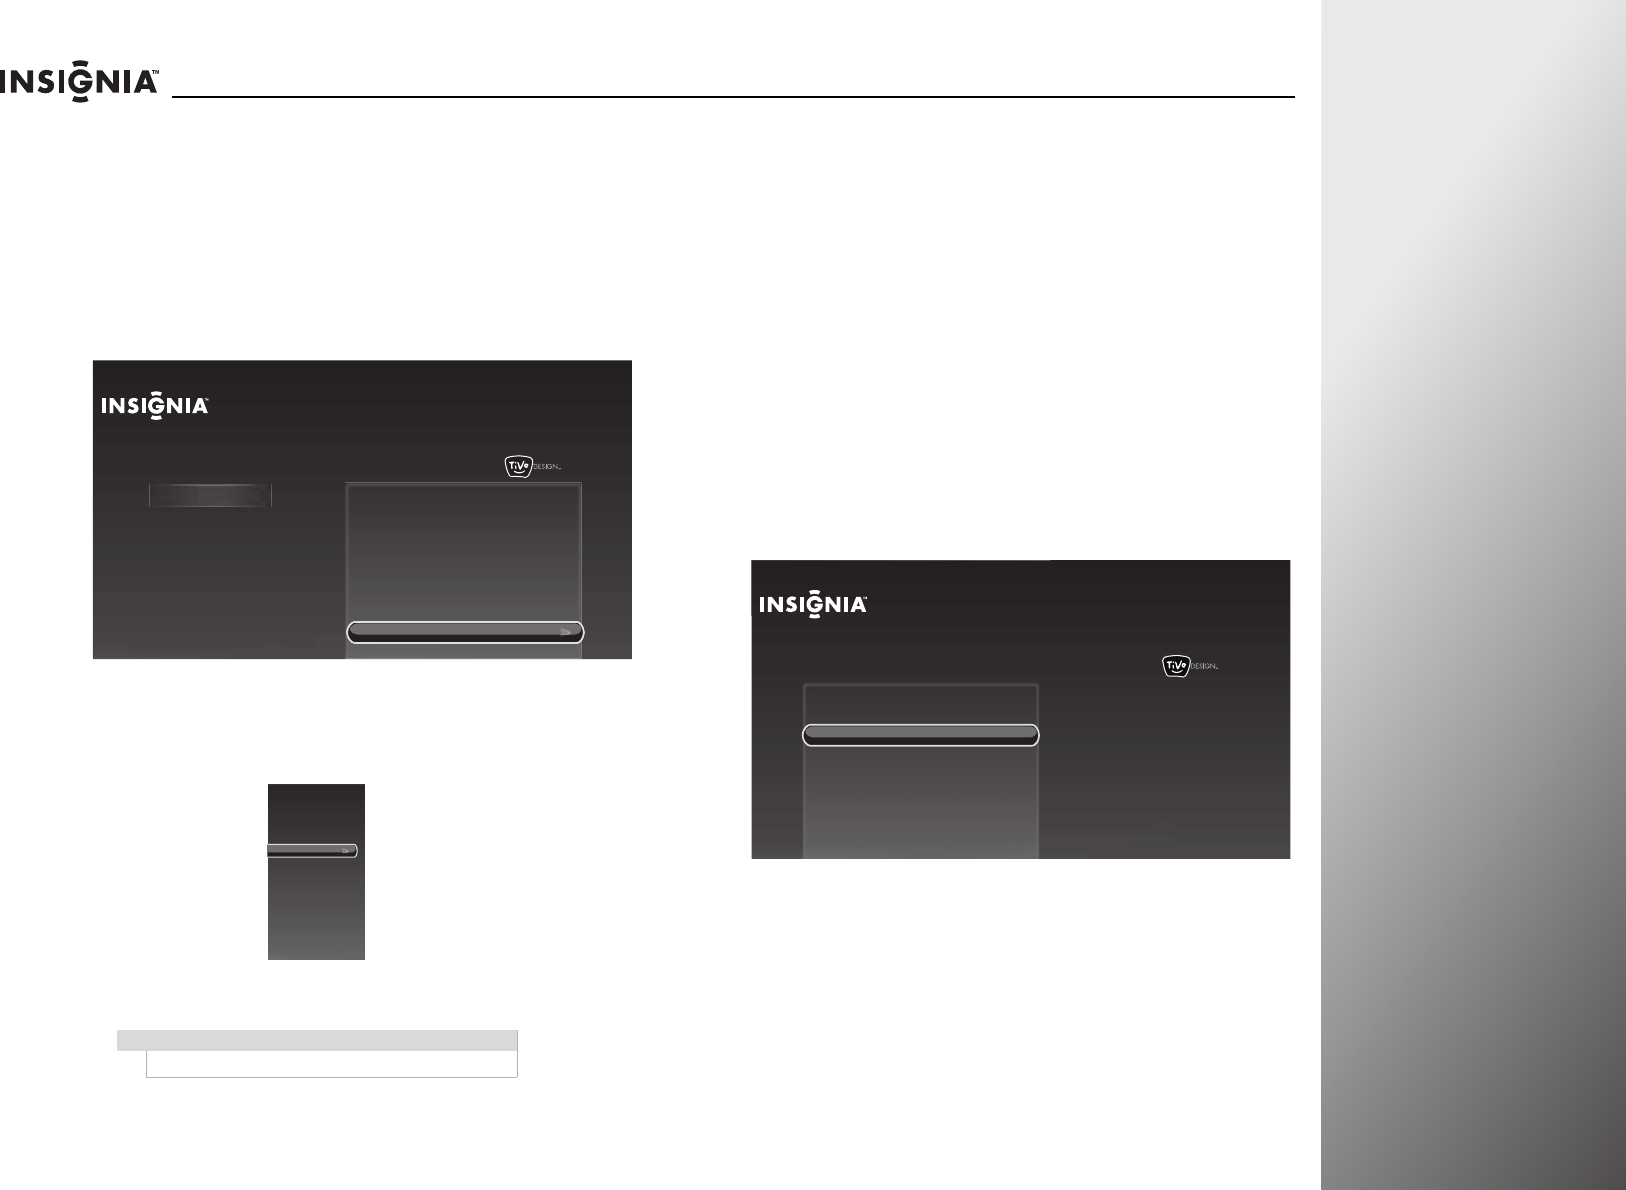
www.insigniaproducts.com 81
NS-32E859A11/NS-42E859A11 Using Your TV
Setting the sleep timer
You can specify the amount of time you want your TV to wait
before it automatically turns off.
To set the sleep timer:
1Press TiVo. The Home screen opens. Press S or T to select
Settings, then press X or SELECT.
2Press S or T to highlight Sleep timer, then press X or
SELECT.
3Press S or T to select the amount of time you want your TV
to wait before it turns off automatically. To turn off the sleep
timer, select Cancel.
4Press SELECT to save your setting and close the Sleep Timer screen.
Adjusting Internet settings
Your TV can be connected to your wired network using the
Ethernet port on the back of your TV or using a wireless
network.
Using a wired network provides the best performance, because
the attached devices connect directly to the network and are
not subject to radio frequency interference.
Configuring a wireless connection
Regular wireless (not WPS)
You will need your network password if your router is set up to
use one.
To connect the wireless network without WPS:
1Press TiVo. The Home screen opens. Press S or T to highlight
Connect to the Internet, then press X or SELECT.
Note
You can also press SLEEP to set the sleep timer.
10:00 PM
Home
Settings
Connect to the Internet Settings
Parental Controls
Check for updates
Account & system info
Help
Sleep timer
Sleep Timer
Turn off the TV after
a certain amount of
time has passed.
Cancel
5 minutes
10 minutes
15 minutes
30 minutes
60 minutes
90 minutes
2 hours
3 hours
4 hours
10:00pm
Home
Settings
Connect to the Internet
Connect this TV to your home network and
Internet connection in order to access TV and
movies on demand and play web videos.
Simply plug an Ethernet cable into the back of
the TV or configure it to work with your
wireless network.
Go to Network Settings
82 www.insigniaproducts.com
Using Your TV NS-32E859A11/NS-42E859A11
2When Go to network settings is highlighted, press
SELECT.
3Press S or T to highlight Set up wireless network, then
press X or SELECT.
4Press S or T to highlight No, then press SELECT. Your TV
starts scanning for wireless networks.
5Press S or T to highlight Choose wireless network, then
press SELECT to access the wireless network list.
10:00 PM
Home
Settings
Connect to the Internet
Go to network settings
Connect this TV to your home network and
Internet connection in order to access TV
and movies on demand and play web
videos. Simply plug an Ethernet cable into
the back of the TV or configure it to work
with your wireless network.
10:00pm
Network Setup
Set up wireless network
Use wired Ethernet instead
You are about to set up this TV to use your home network.
If you have a wired network, please plug an Ethernet cable into the
TV. If you have a wireless network, DO NOT plug an Ethernet cable
into the TV.
Network connection details:
No Internet connection found
10:00 PM
Use WPS?
You are about to connect your TV to your wireless home network.
Does your wireless router support WPS? Look for the WPS label
on your router.
Yes, I have a WPS button
Yes, I have WPS and use a PIN
No
Choose this option to search for
wireless networks in your home.
You will need to know your
network password if your router is
set up to use one.
10:00 PM
Set up Network
Choose wireless network
Enter wireless network name
Use wired Ethernet instead
e
twor
k
wo
rk
wo
rk
r
k n
a
m
e
n
stea
d
elephant
babylon
california
daphne
Scan for wireless networks again
SELECT the name of your network.
If your network is not visible, you
can try scanning for wireless
networks again, or enter your
wireless network name.

www.insigniaproducts.com 83
NS-32E859A11/NS-42E859A11 Using Your TV
6Press S or T to highlight the network you want, then press
SELECT. If your network has a password, enter the password.
When the connection is successful, the Network settings
screen opens.
If this is the first time you have set up the Internet, the
Network Speed Test screen opens. Follow the on-screen
instructions to complete the network setup.
Using WPS with a router that has a WPS button
To configure a wireless connection using WPS:
1Press TiVo. The Home screen opens. Press S or T to highlight
Connect to the Internet, then press X or SELECT.
2When Go to network settings is highlighted, press SELECT.
3Press S or T to highlight Set up wireless network, then
press X or SELECT.
Note
If your router is set to keep your network name
hidden, select Enter wireless network name to
manually enter the name and the password.
10:00pm
Home
Settings
Connect to the Internet
Connect this TV to your home network and
Internet connection in order to access TV and
movies on demand and play web videos.
Simply plug an Ethernet cable into the back of
the TV or configure it to work with your
wireless network.
Go to Network Settings
10:00 PM
Home
Settings
Connect to the Internet
Go to network settings
Connect this TV to your home network and
Internet connection in order to access TV
and movies on demand and play web
videos. Simply plug an Ethernet cable into
the back of the TV or configure it to work
with your wireless network.
10:00pm
Network Setup
Set up wireless network
Use wired Ethernet instead
You are about to set up this TV to use your home network.
If you have a wired network, please plug an Ethernet cable into the
TV. If you have a wireless network, DO NOT plug an Ethernet cable
into the TV.
Network connection details:
No Internet connection found
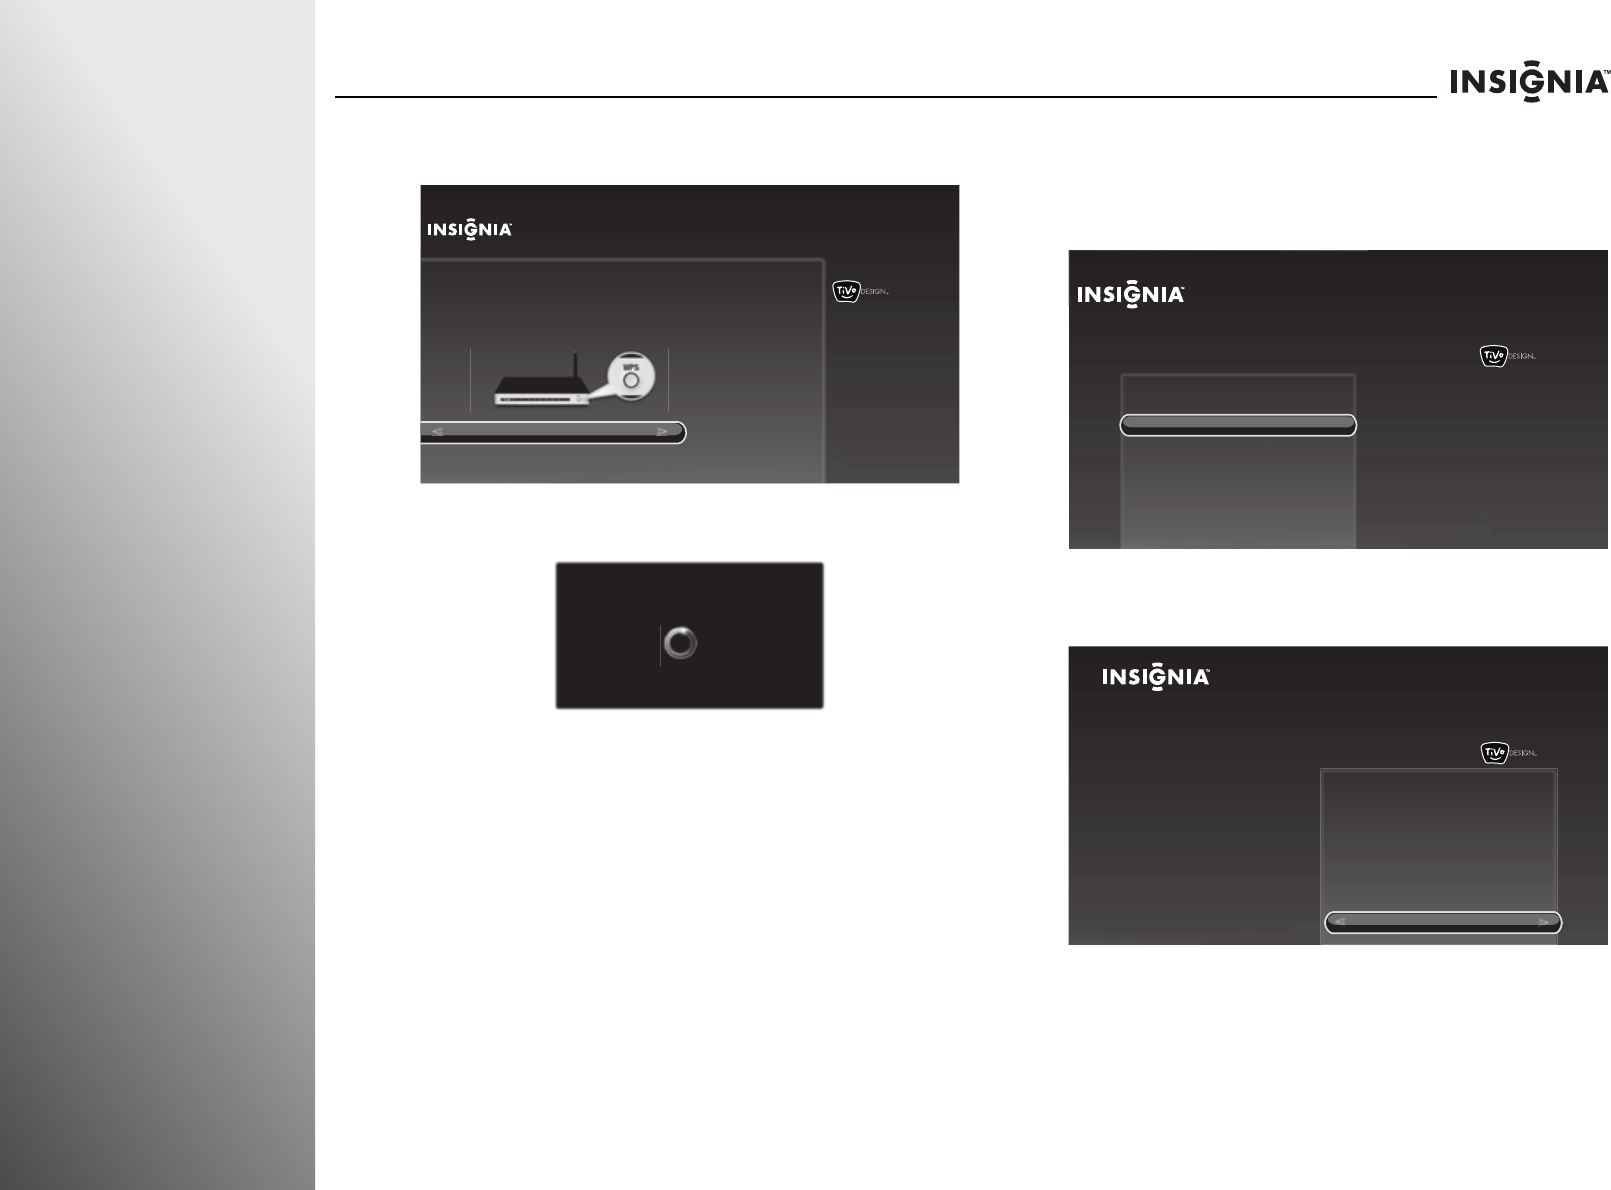
84 www.insigniaproducts.com
Using Your TV NS-32E859A11/NS-42E859A11
4Press S or T to highlight Yes, I h ave a W P S b u t t o n , then
press SELECT.
5Press the WPS button on your router.
When the connection is successful, the Network settings
screen opens.
If this is the first time you have set up the Internet, the
Network Speed Test screen opens. Follow the on-screen
instructions to complete the network setup.
Using WPS and a PIN
To connect the wireless network using WPS and a PIN:
1Press TiVo. The Home screen opens. Press S or T to
highlight Connect to the Internet, then press X or SELECT.
2When Go to network settings is highlighted, press
SELECT.
10:00 pm
Use WPS?
You are about to connect your TV to your wireless home network.
Does your wireless router support WPS? Look for the WPS label on
your router.
Yes, I have a WPS button
Yes, I have WPS and use a PIN
No
Choose this option if you have a
WPS button on your wireless
router.
Press the WPS Button now
Go to your router and press its WPS button.
10:00pm
Home
Settings
Connect to the Internet
Connect this TV to your home network and
Internet connection in order to access TV and
movies on demand and play web videos.
Simply plug an Ethernet cable into the back of
the TV or configure it to work with your
wireless network.
Go to Network Settings
10:00 PM
Home
Settings
Connect to the Internet
Go to network settings
Connect this TV to your home network and
Internet connection in order to access TV
and movies on demand and play web
videos. Simply plug an Ethernet cable into
the back of the TV or configure it to work
with your wireless network.
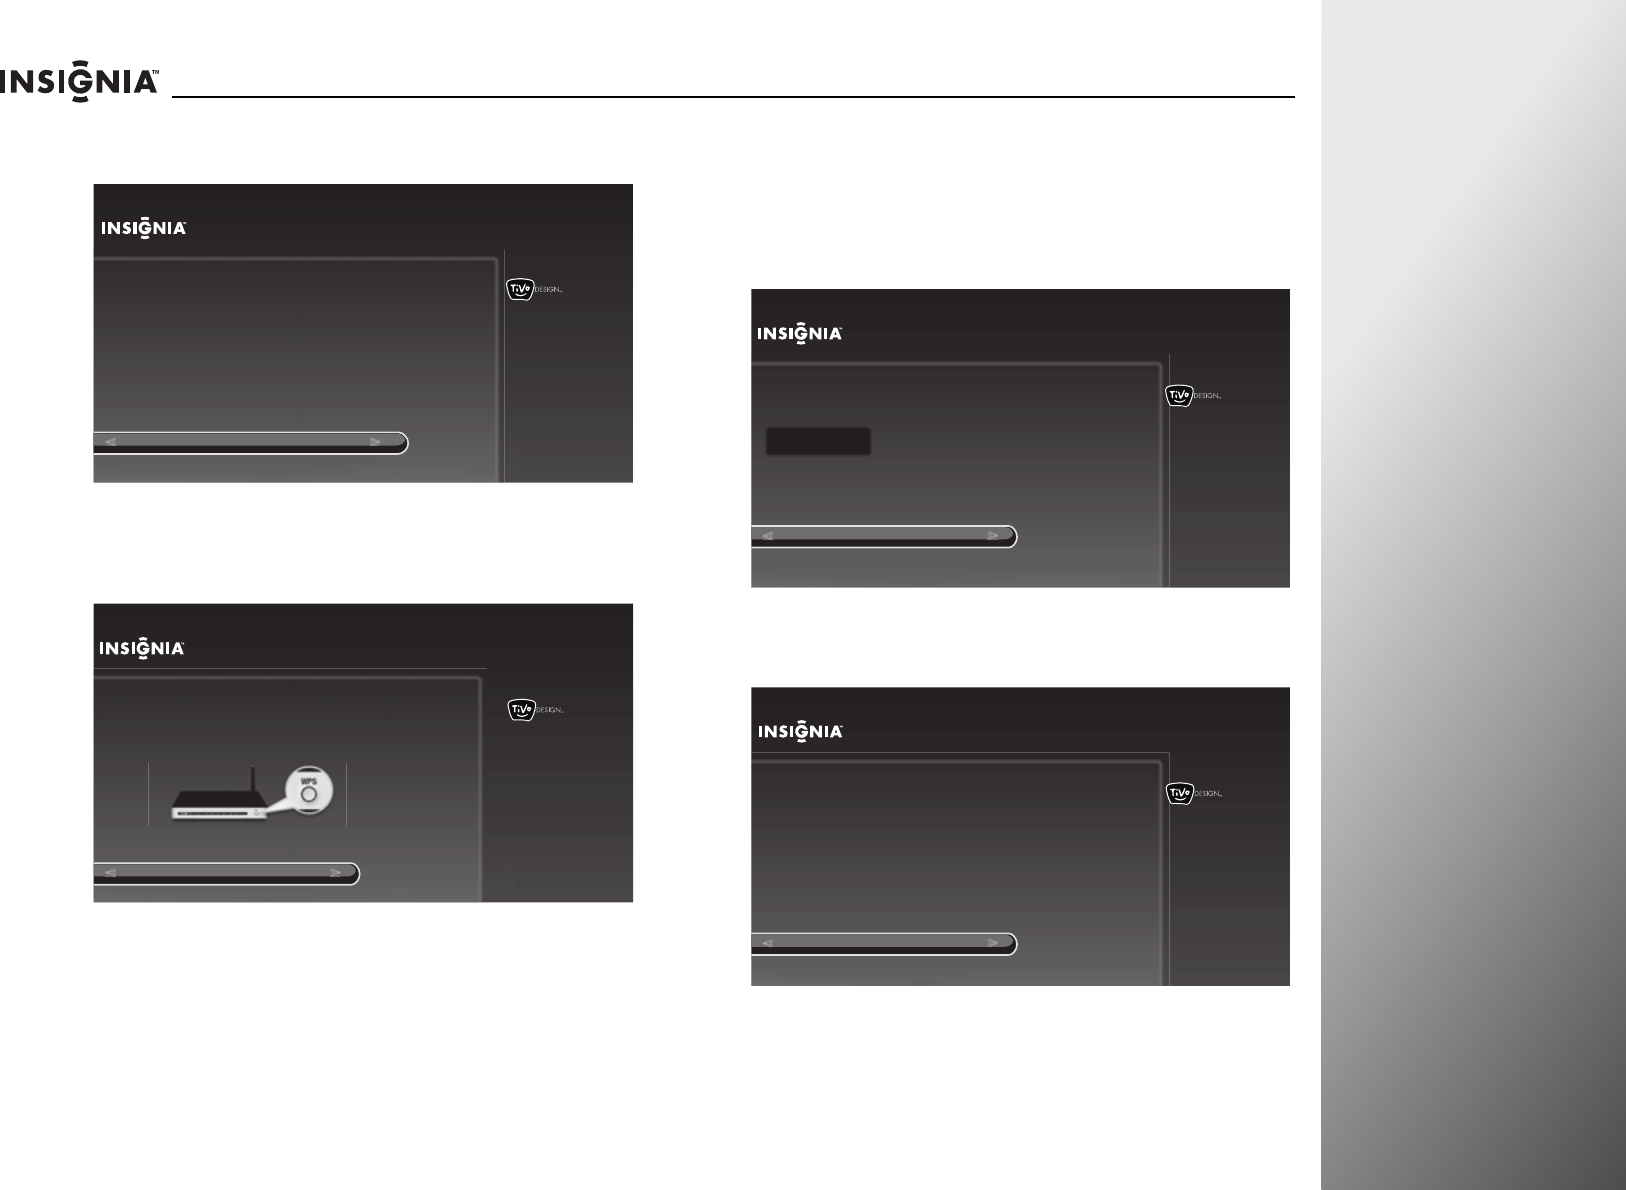
www.insigniaproducts.com 85
NS-32E859A11/NS-42E859A11 Using Your TV
3Press S or T to highlight Set up wireless network, then
press X or SELECT.
4Press S or T to highlight Yes, I have WPS and use a PIN,
then press SELECT. Your TV starts scanning for wireless
networks.
5Press S or T to highlight the network you want, then press
SELECT.
6Use the number buttons on the remote control to enter the
4 or 8 digit PIN, then press S or T to highlight OK and press
SELECT.
OR
If you do not know your PIN, highlight I can’t find a PIN on
my router, then press SELECT.
7Submit the displayed PIN on the website provided by your
Internet service provider, then press SELECT.
10:00pm
Network Setup
Set up wireless network
Use wired Ethernet instead
You are about to set up this TV to use your home network.
If you have a wired network, please plug an Ethernet cable into the
TV. If you have a wireless network, DO NOT plug an Ethernet cable
into the TV.
Network connection details:
No Internet connection found
10:00 PM
Use WPS?
You are about to connect your TV to your wireless home network.
Does your wireless router support WPS? Look for the WPS
label on your router.
Yes, I have a WPS button
Yes, I have WPS and use a PIN
No
Choose this option if your wireless
router requires the use of
a numerical PIN.
(Often printed on the bottom of the
router)
10:00 PM
Enter WPS PIN
Use the numbers on your remote control to enter your PIN. You can find the 4
or 8 digit PIN on the bottom of your router.
OK
I can’t find a PIN on my router
_
10:00 PM
Enter WPS PIN
If you cannot find a PIN on your router, you will need to enter the PIN below on
the website provided by your Internet Service Provider.
OK
PIN: 12345678
After you have successfully submitted the PIN on the website, press OK to
continue.
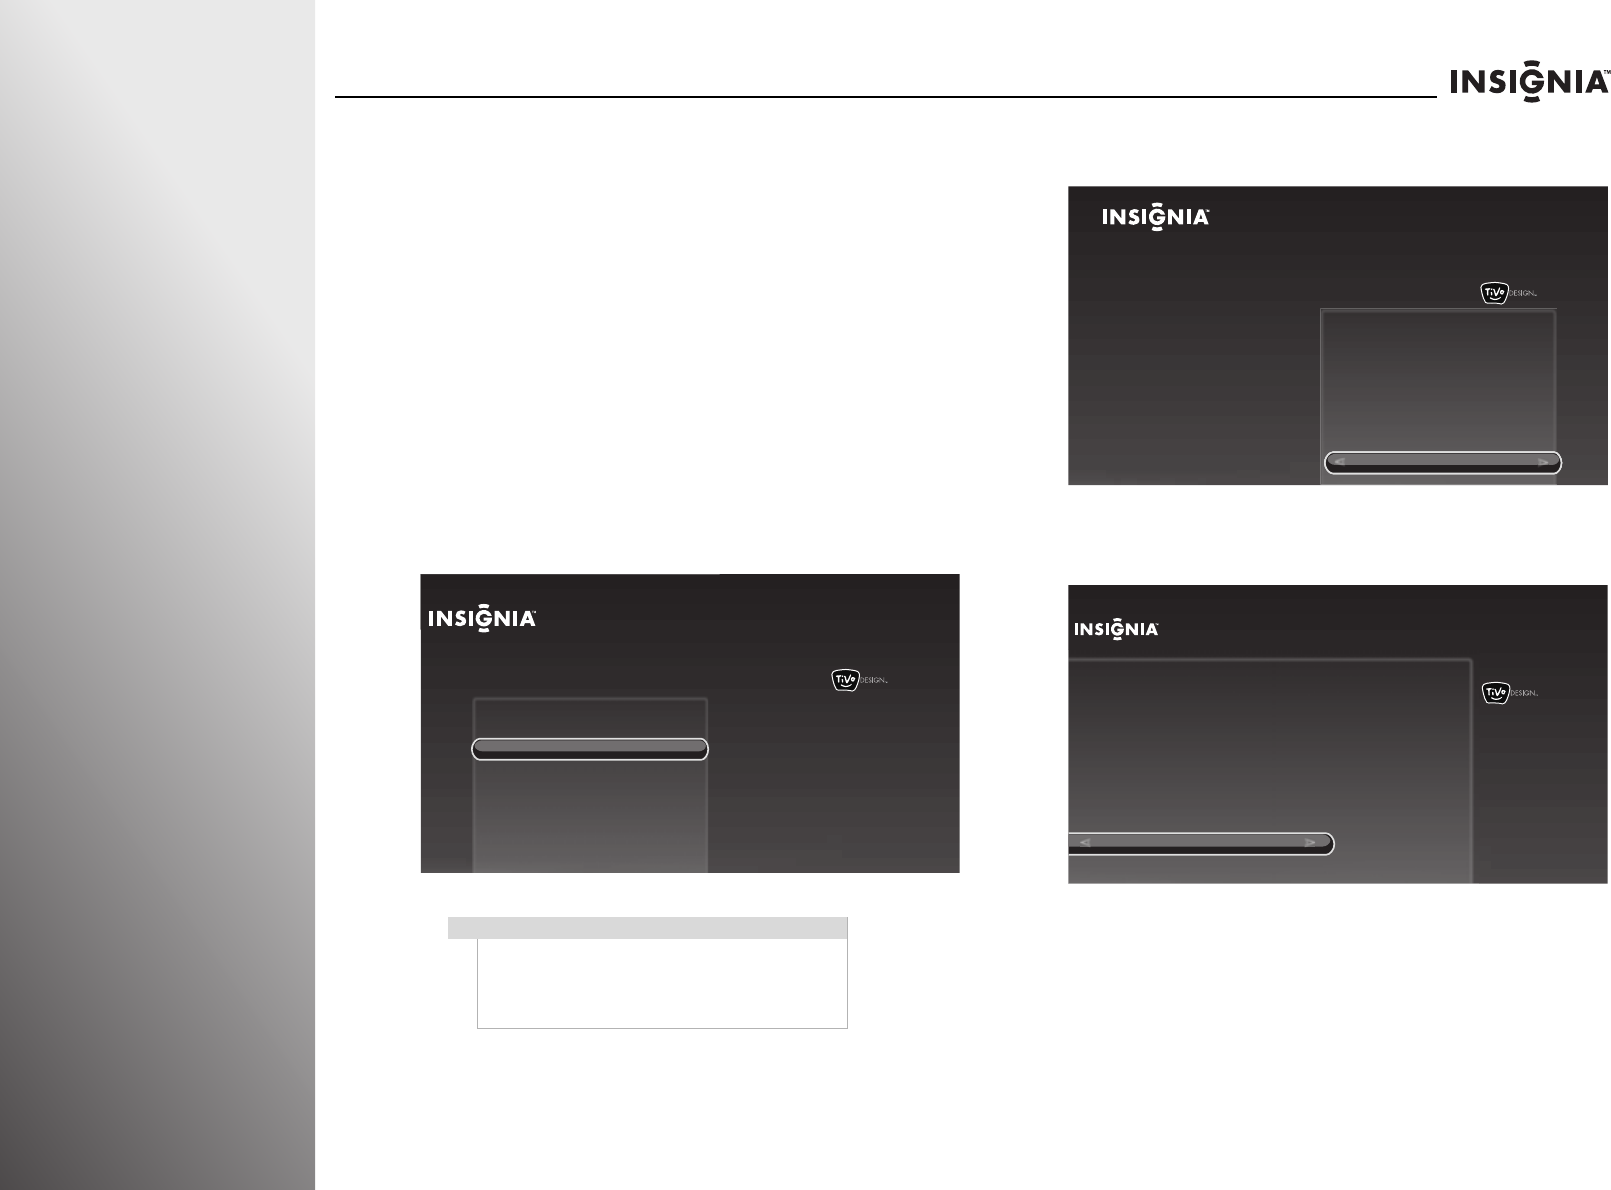
86 www.insigniaproducts.com
Using Your TV NS-32E859A11/NS-42E859A11
When the connection is successful, the Network settings
screen opens.
If this is the first time you have set up the Internet, the
Network Speed Test screen opens. Follow the on-screen
instructions to complete the network setup.
Configuring a wired connection
Automatically using DHCP
One of the most common ways to configure a wired
connection is using Dynamic Host Configuration Protocol
(DHCP). When you use DHCP, your Internet provider
automatically assigns an IP address, subnet mask, gateway,
and DNS.
To configure a wired connection automatically using
DHCP:
1Press TiVo. The Home screen opens. press S or T to
highlight Connect to the Internet, then press X or SELECT.
2When Go to network settings is highlighted, press
SELECT.
3Press S or T to highlight Continue, then press SELECT to
keep the current setting and start the auto setup.
When the connection is successful, the Network settings
screen opens.
If this is the first time you have set up the Internet, the
Network Speed Test screen opens. Follow the on-screen
instructions to complete the network setup.
Note
If the network is automatically connected after the
Ethernet cable is plugged, the Connect to the
Internet option is not available. You can check the
network settings. For more information, see “Testing
the network” on page 89.
10:00pm
Home
Settings
Connect to the Internet
Connect this TV to your home network and
Internet connection in order to access TV and
movies on demand and play web videos.
Simply plug an Ethernet cable into the back of
the TV or configure it to work with your
wireless network.
Go to Network Settings
10:00 PM
Home
Settings
Connect to the Internet
Go to network settings
Connect this TV to your home network and
Internet connection in order to access TV
and movies on demand and play web
videos. Simply plug an Ethernet cable into
the back of the TV or configure it to work
with your wireless network.
10:00 PM
Ethernet Connection Found
Continue
Change network settings
An active wired Ethernet connection was detected. Your TV
has been set up to use this connection.
Select “Continue” to keep this setting (recommended), or choose “Change
network settings” to manually set up and verify your network settings.
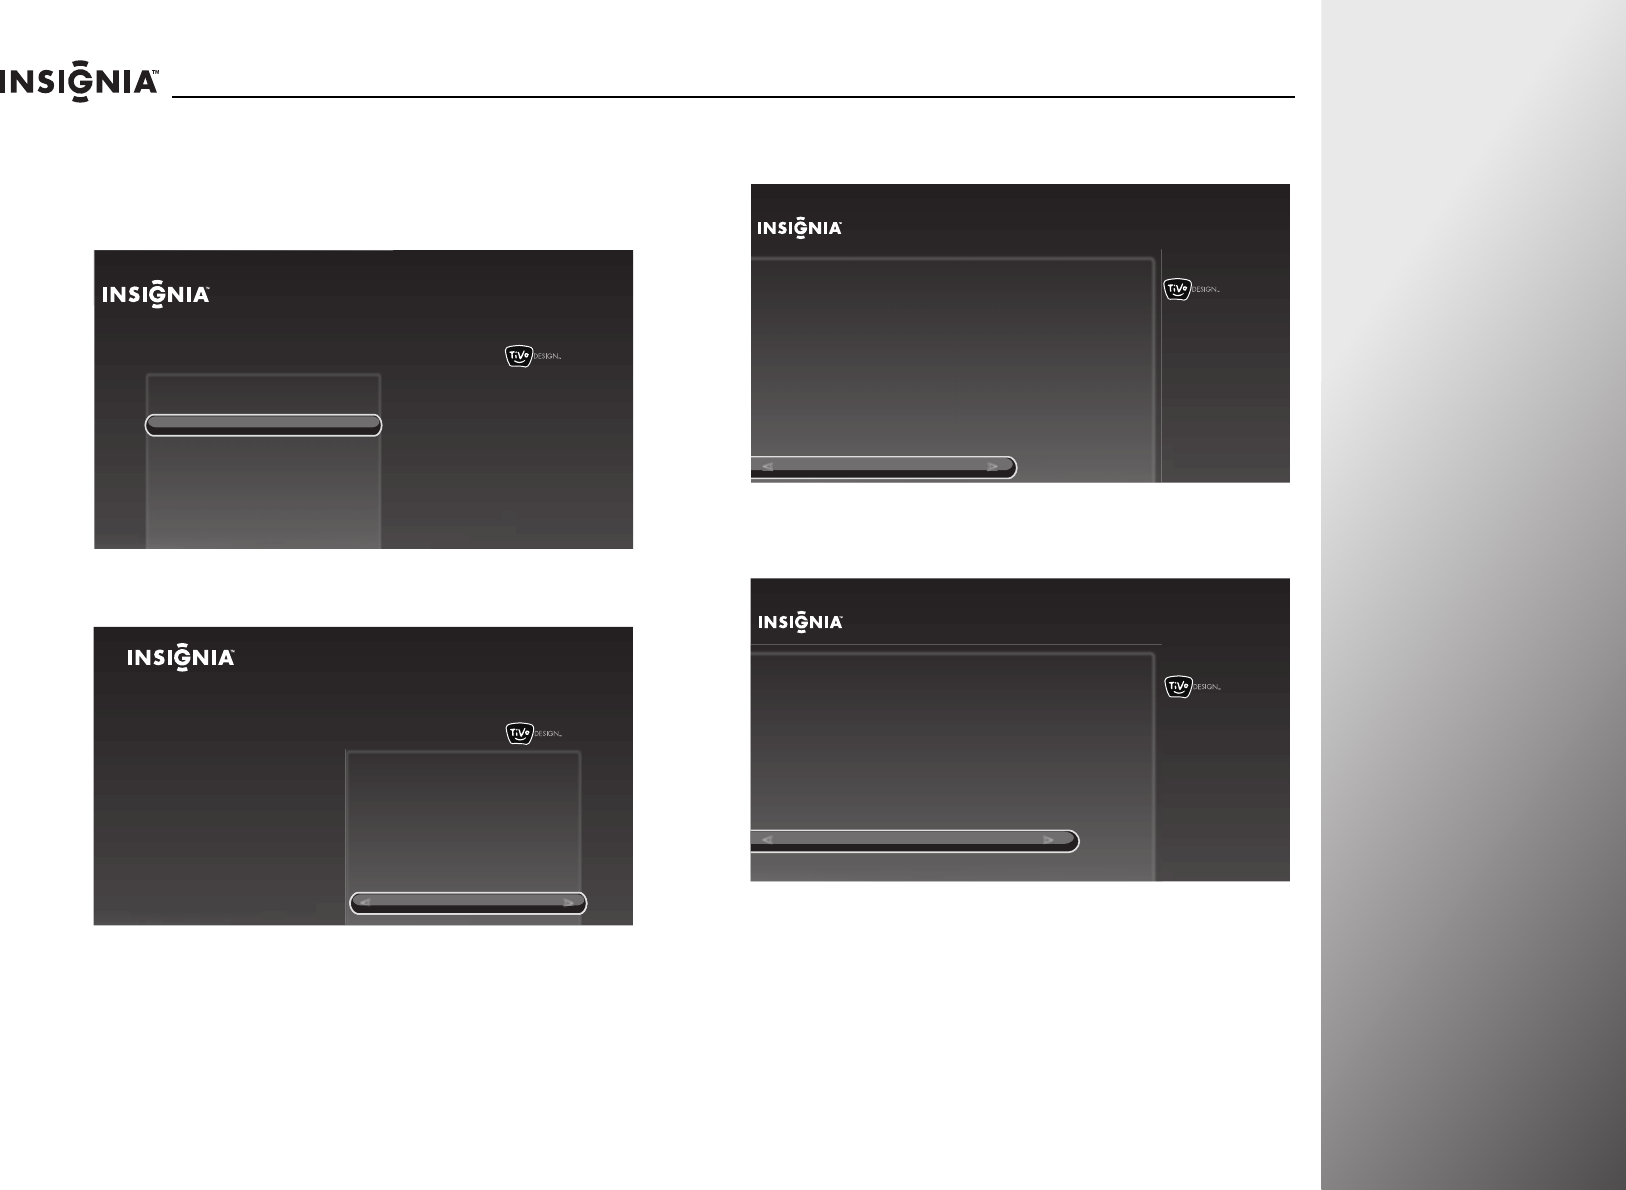
www.insigniaproducts.com 87
NS-32E859A11/NS-42E859A11 Using Your TV
Manually
To set up the wired connection manually:
1Press TiVo. The Home screen opens. Press S or T to highlight
Connect to the Internet, then press X or SELECT.
2When Go to network settings is highlighted, press SELECT.
3Press S or T to highlight Change network settings, then
press SELECT.
4Press S or T to highlight Get automatically from a DHCP
server (typical), then press SELECT.
OR
10:00pm
Home
Settings
Connect to the Internet
Connect this TV to your home network and
Internet connection in order to access TV and
movies on demand and play web videos.
Simply plug an Ethernet cable into the back of
the TV or configure it to work with your
wireless network.
Go to Network Settings
10:00 PM
Home
Settings
Connect to the Internet
Go to network settings
Connect this TV to your home network and
Internet connection in order to access TV
and movies on demand and play web
videos. Simply plug an Ethernet cable into
the back of the TV or configure it to work
with your wireless network.
10:00 PM
Ethernet Connection Found
Continue
An active wired Ethernet connection was detected. Your TV
has been set up to use this connection.
Select “Continue” to keep this setting (recommended), or choose “Change
network settings” to manually set up and verify your network settings.
Change network settings
10:00 PM
Network IP Address
If your home network uses DHCP, choose “Get automatically from a DHCP
server.” If your home network does not use DHCP, set a static IP address.
Let me specify a static IP address
Get automatically from a DHCP server (typical)
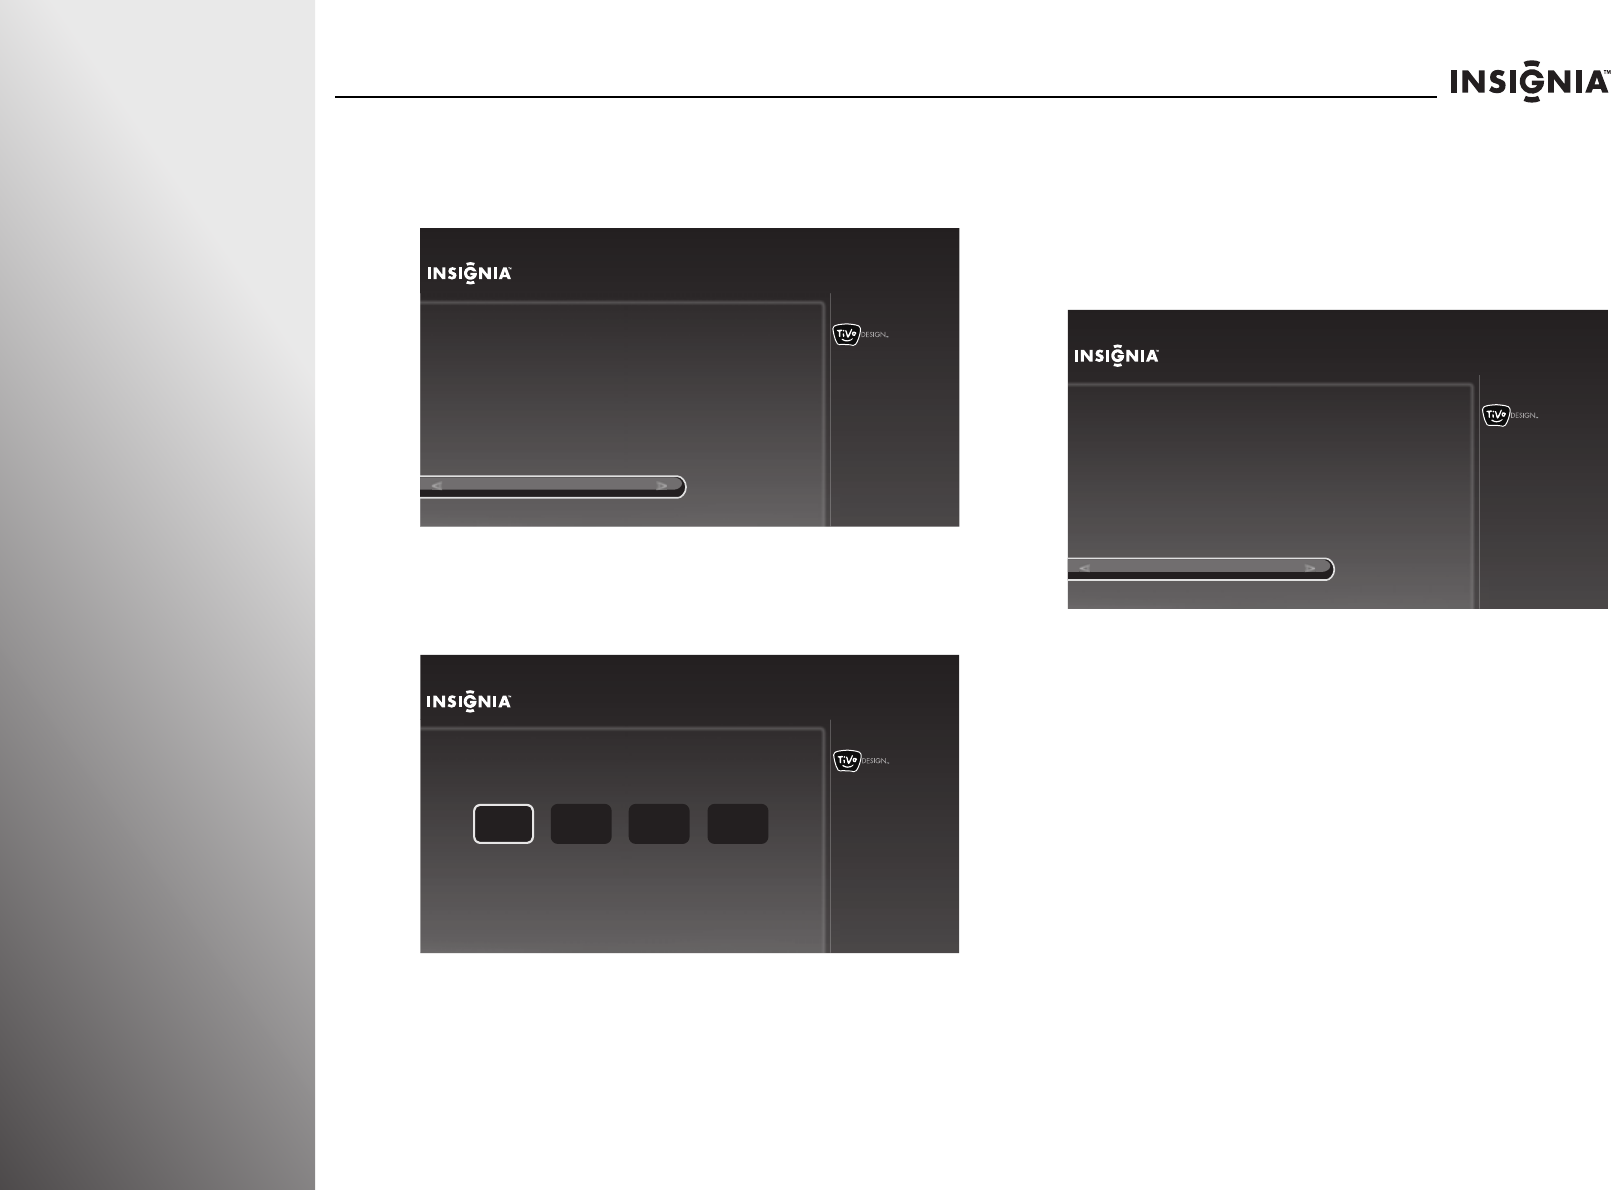
88 www.insigniaproducts.com
Using Your TV NS-32E859A11/NS-42E859A11
If your home network does not use DHCP, select Let me
specify a static IP address, then press SELECT. The
following screen opens. Complete Steps 5 through 8 to
complete the setup.
5Press SELECT. The Enter IP Address screen opens.
6Use the number buttons on the remote control to enter
your IP address, then press SELECT.
7If the displayed IP information is correct, press S or T to
highlight Yes, these are correct, then press SELECT.
OR
If the displayed IP information is not correct, press S or T to
highlight No, let me enter specific address, then press
SELECT. Enter your subnet mask, gateway (router) address,
and DNS address.
When the connection is successful, the Network settings
screen opens.
If this is the first time you have set up the Internet, the
Network Speed Test screen opens. Follow the on-screen
instructions to complete the network setup.
10:00 PM
Static IP Setup
In this next part, you’ll specify a static IP address. To complete this process,
you will need to know the following:
- IP address
- Subnet mask
- Gateway (router) address
- DNS (name server) address
Continue
10:00 PM
Enter IP address
Use the number buttons on the remote control to enter your IP address.
Press SELECT when done
...
25
10:00 PM
Use these IP Addresses?
Are all of the following correct?
Subnet mask:
Gateway (router) address:
DNS (name server) address:
255.255.255.0
192.168.1.1
192.168.1.1
Yes, these are correct
No, let me enter specific addresses
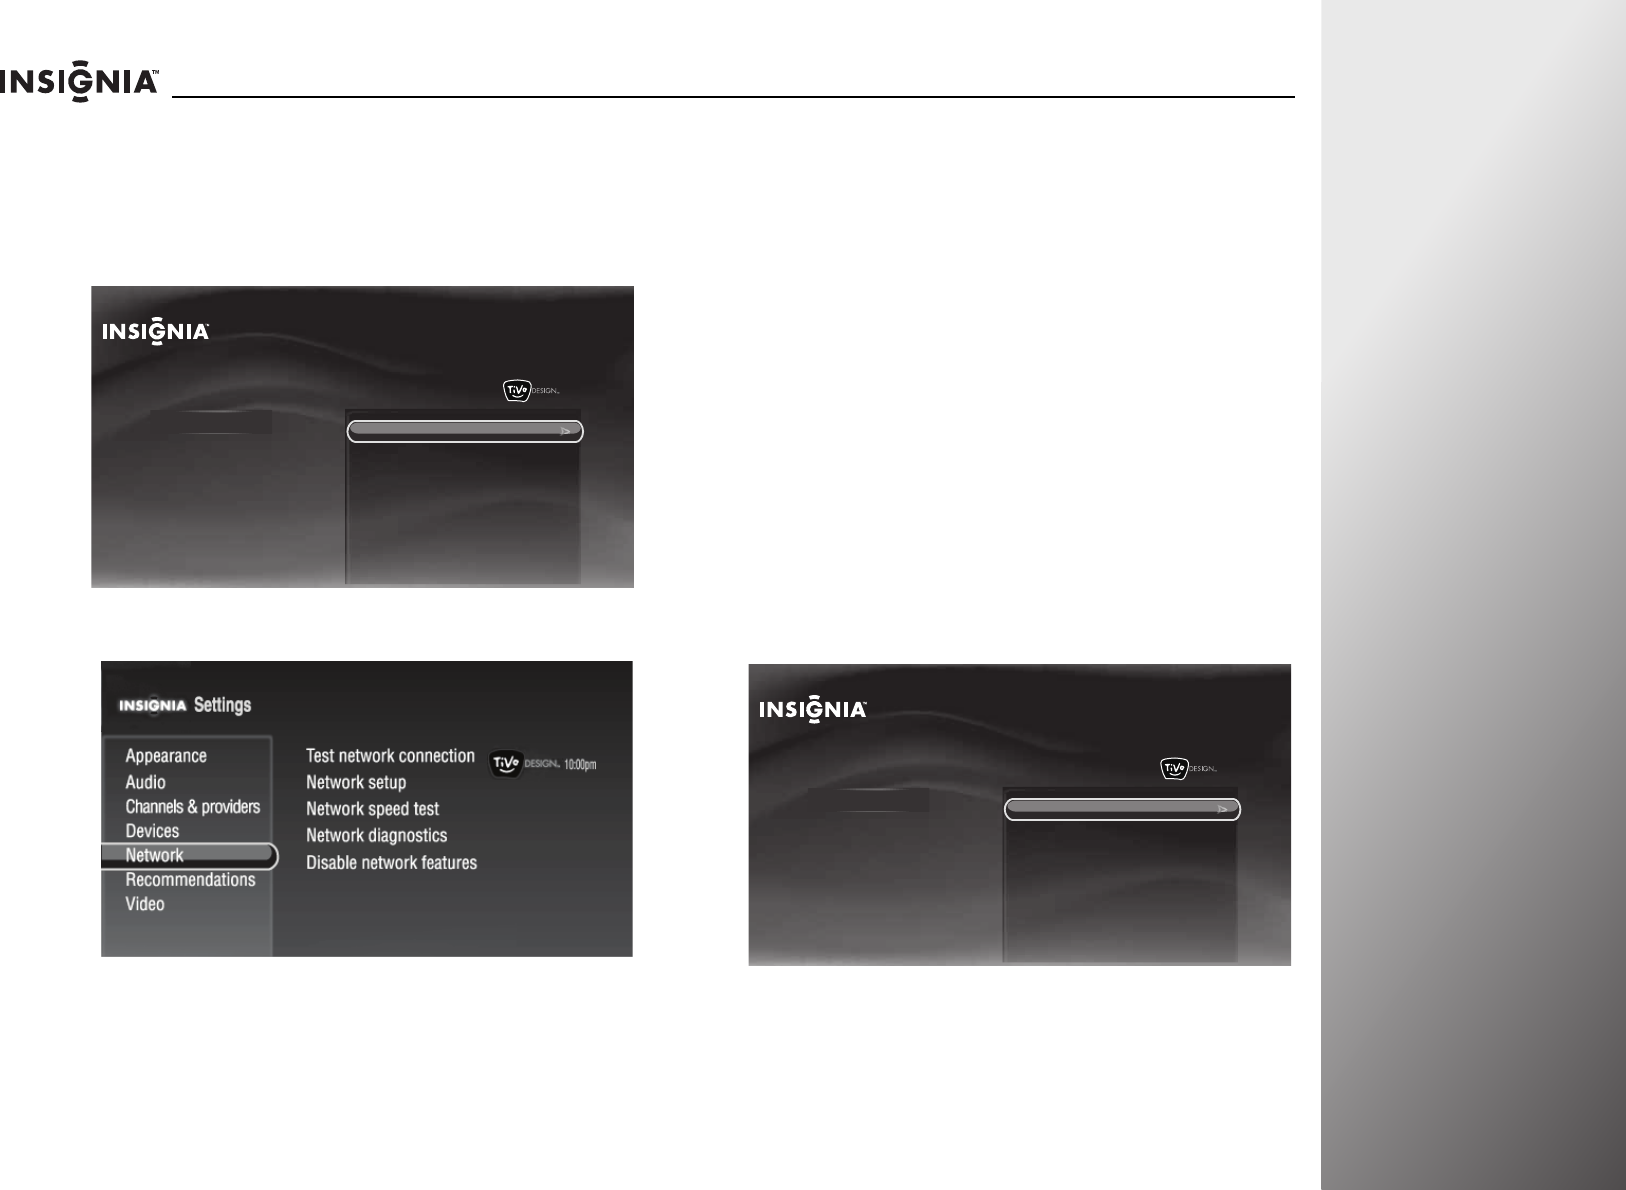
www.insigniaproducts.com 89
NS-32E859A11/NS-42E859A11 Using Your TV
Testing the network
To test the network:
1Press TiVo. The Home screen opens. Press S or T to select
Settings, then press X or SELECT.
2Press S or T to highlight Settings, then press X or SELECT.
3Press S or T to highlight Network, then press X or SELECT.
4Press S or T to highlight a network option, then press X or
SELECT. You can select:
•Test network connection—Tests the network connection
automatically. You can view your network connection
details in the right preview pane.
•Network setup—Changes the network settings or the
type of connection.
•Network speed test—Helps determine the kinds of
On-Demand TV shows and movies that will play best on
your TV based on the connection speed.
•Network diagnostics—Runs network diagnostics such as
DNS resolution test, Test network connection, and
Network speed test.
Disabling Internet features
You can disable all the features that use the Internet on your TV,
such as Video on Demand (VOD).
To disable Internet features:
1Press TiVo. The Home screen opens. Press S or T to select
Settings, then press X or SELECT.
2Press S or T to highlight Settings, then press X or SELECT.
10:00pm
Home
Settings Settings
Parental Controls
Check for updates
Account & system info
Help
Sleep timer
10:00pm
Home
Settings Settings
Parental Controls
Check for updates
Account & system info
Help
Sleep timer
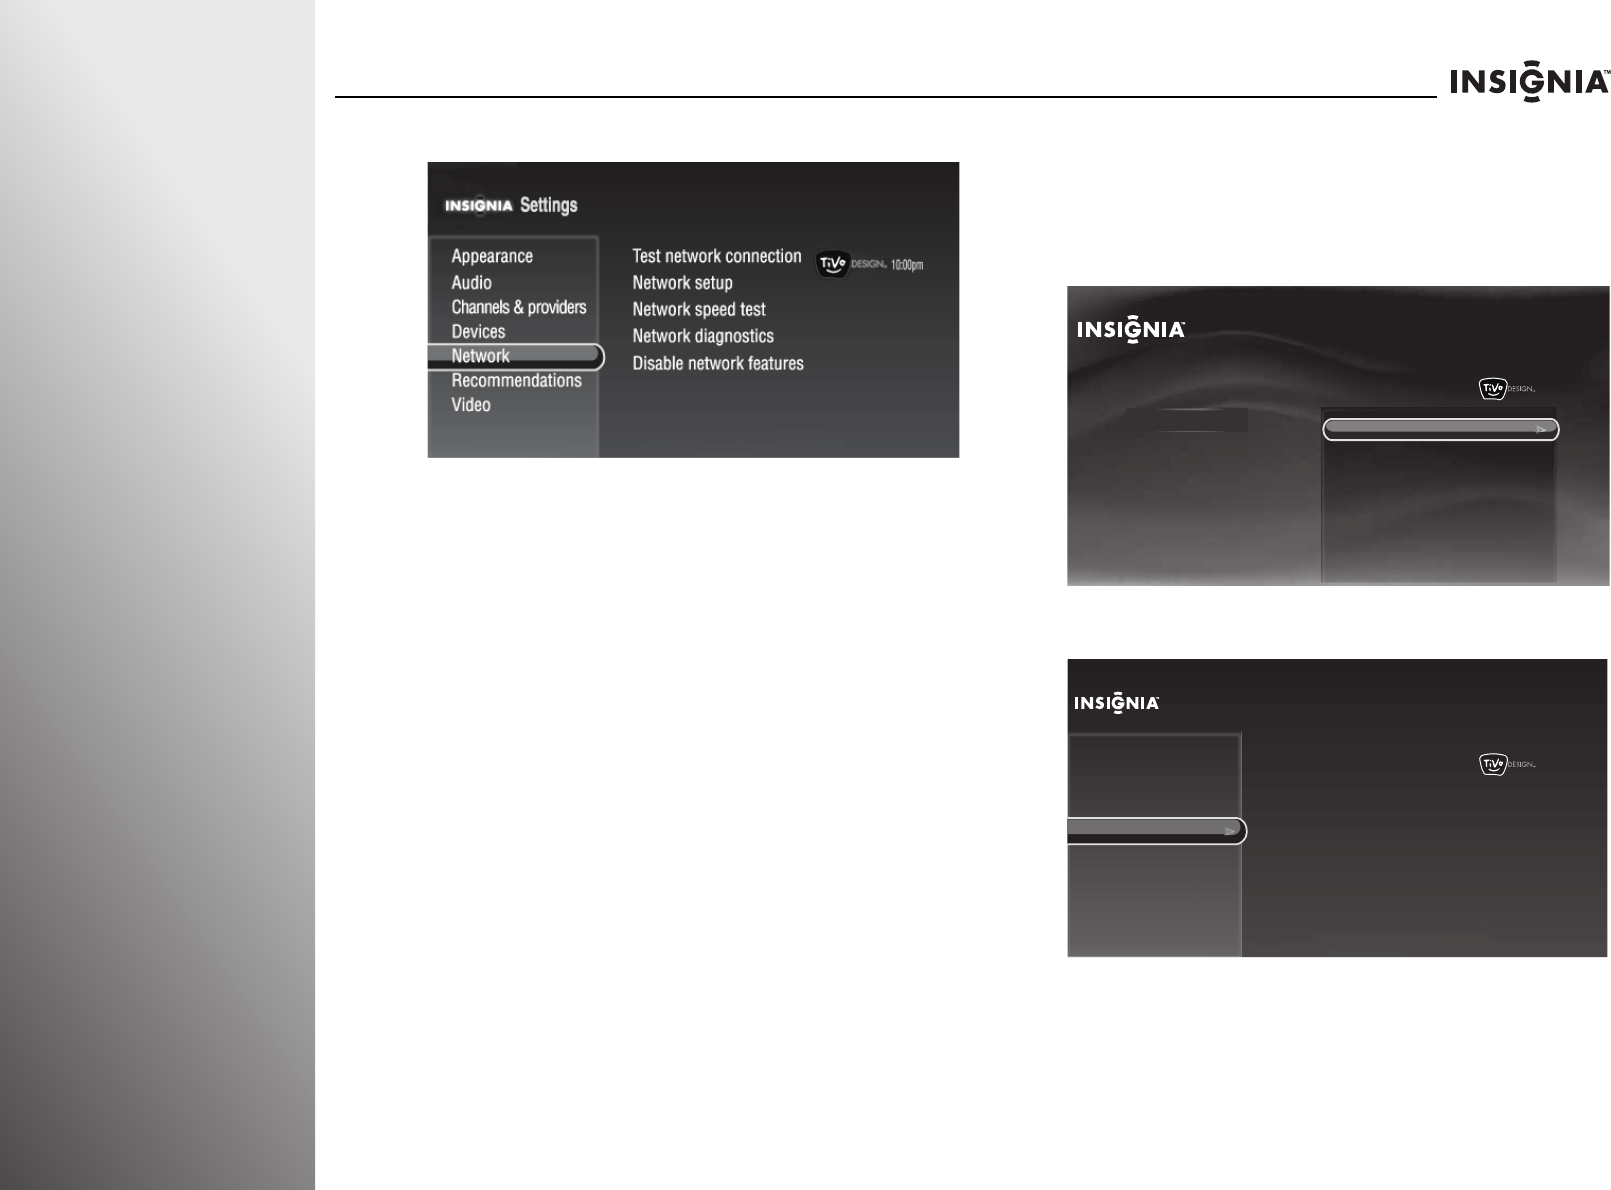
90 www.insigniaproducts.com
Using Your TV NS-32E859A11/NS-42E859A11
3Press S or T to highlight Network, then press X or SELECT.
4Press S or T to highlight Disable network features, then
press SELECT.
5Press S or T to highlight Yes, disable all network features,
then press SELECT to save your setting and return to the
previous screen.
Using INlink to control HDMI
devices
INlink lets you use the remote control that came with your TV
to turn off devices and control basic functions if you use an
HDMI cable to connect devices that support CEC. For example,
if you insert a disc into a DVD player and start playing the disc,
your TV will automatically turn on and go to the correct input
(HDMI 1, 2, 3, or 4). You can now control the DVD player with
your TV’s remote control.
Setting up INlink HDMI control
To set up INlink HDMI control:
1Press TiVo. The Home screen opens. Press S or T to select
Settings, then press X or SELECT.
2Press S or T to highlight Settings, then press X or SELECT.
3Press S or T to highlight Devices, then press X or SELECT.
10:00pm
Home
Settings
Connect to the Internet Settings
Parental Controls
Check for updates
Account & system info
Help
Sleep timer
10:00 PM
Settings
Audio
Channels & providers
Network
Recommendations
Video
Appearance
Source sensor
Remote control setup
TV power on
Reset device settings
INlink HDMI control
Devices
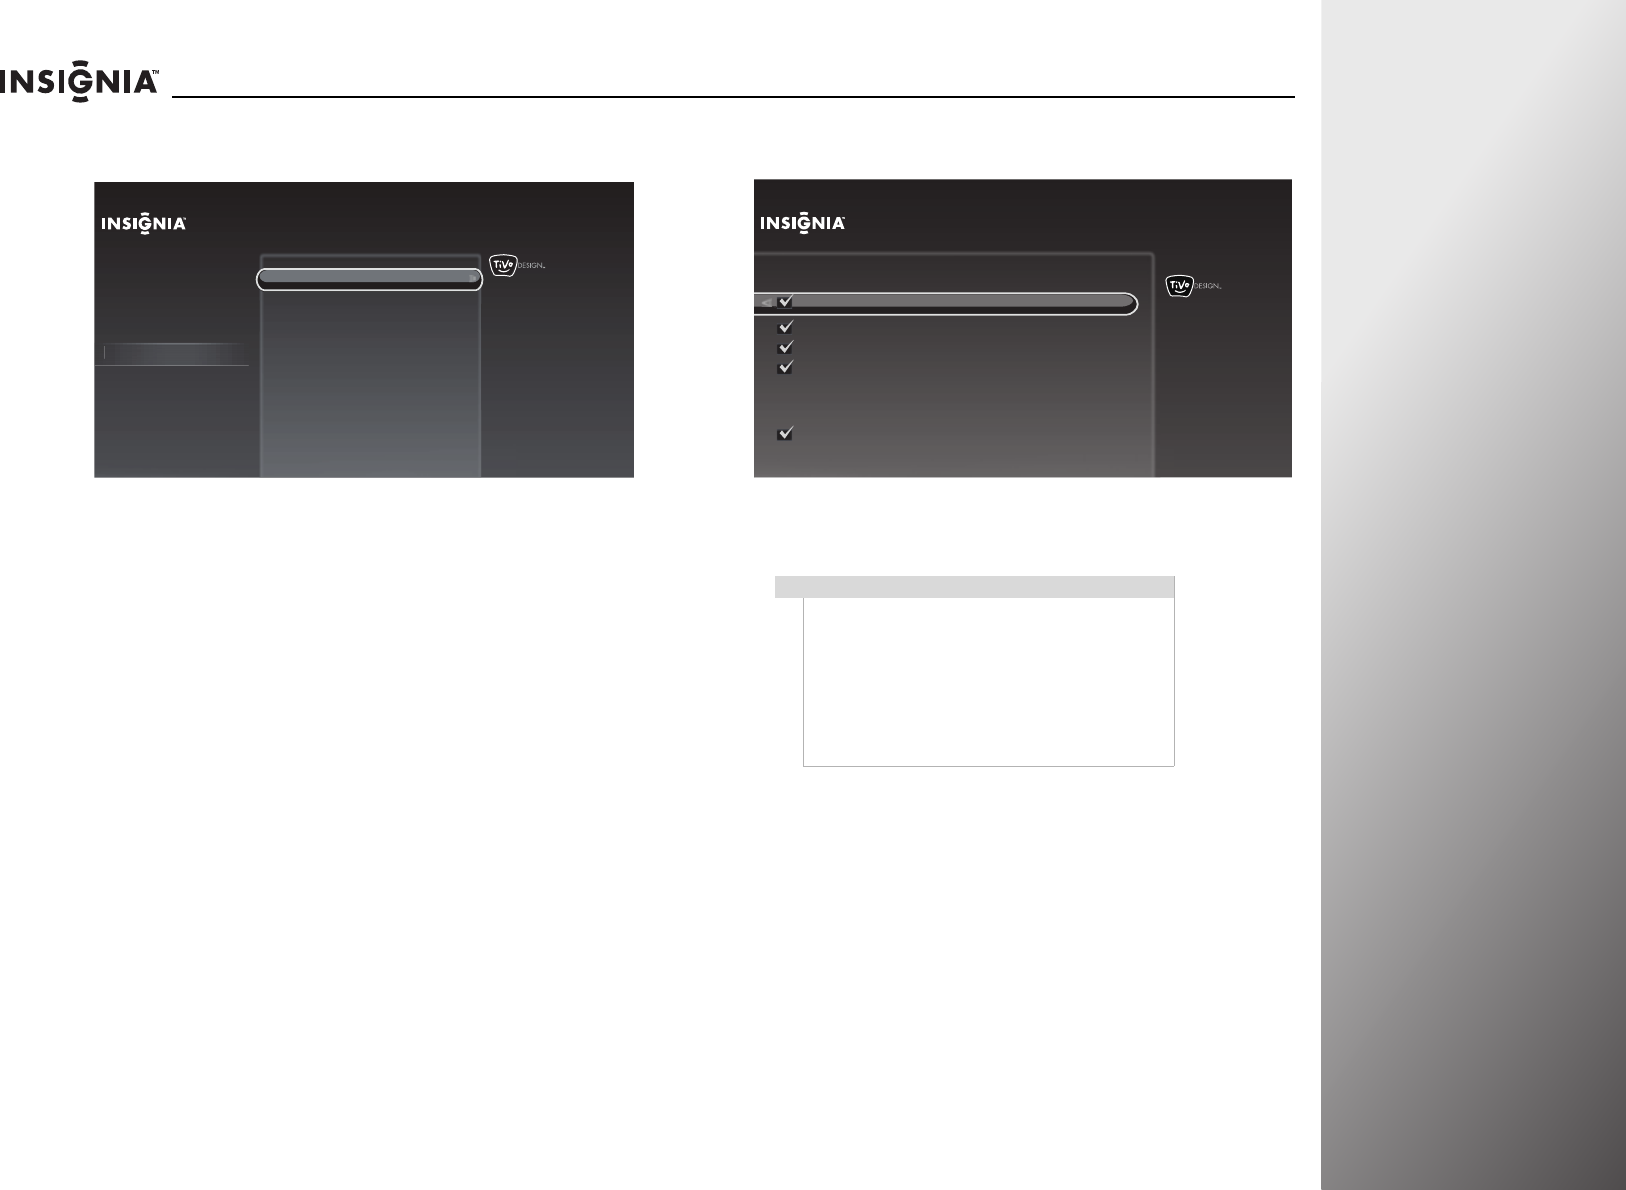
www.insigniaproducts.com 91
NS-32E859A11/NS-42E859A11 Using Your TV
4Press S or T to highlight INlink HDMI control, then press X
or SELECT.
5Press S or T to highlight an option, then press SELECT to
turn the option on or off. You can select:
•Turn other devices off when TV turns off—Turns all
other CEC devices off when you turn off the TV.
•MENU button can control other devices—The MENU
button on the TV remote controls the menu on the
currently selected input device (if it has CEC support).
•VOLUME and MUTE buttons can control other
devices—The VOL +, VOL–, and MUTE buttons on the TV
remote control the volume on the currently selected input
device (if it has CEC support).
•RECORD button starts and stops recordings—Pressing
RECORD on the TV remote tells a recording device to start
a recording (if it has CEC support). Pressing RECORD again
stops the recording.
•Turn TV on when another device turns on—Turns the TV
on when you turn on other devices that have CEC support.
6Press W to return to the previous menu, or press EXIT to
close the screen.
10:00pm
Settings
Channels & providers
Devices
Network
Recommendations
Video
Appearance
Audio
D
ev
i
ce
s
If you use HDMI cable to
connect devices that support
CEC, you can use the TV
remote to power the device
and control its basic functions.
INlink HDMI contorl
Remote control setup
TV power on
Reset device settings
Source sensor
Notes
• HDMI cables must be used to connect HDMI
CEC-compatible devices to your TV.
• The connected device’s HDMI CEC feature must
be turned on.
• If you connect an HDMI device that is not HDMI
CEC-compatible, the INlink HDMI control option
does not work.
• Depending on the connected HDMI device, the
INlink HDMI control option may not work.
10:00pm
INlink HDMI Control
TV remote control:
Turn other devices off when TV turns off
MENU button can control other devices
VOLUME and MUTE buttons can control other devices
Turns all other devices with
CEC support off when you
turn off the TV.
Other remote controls:
Turn TV on when another device turns on
RECORD button starts and stops recordings
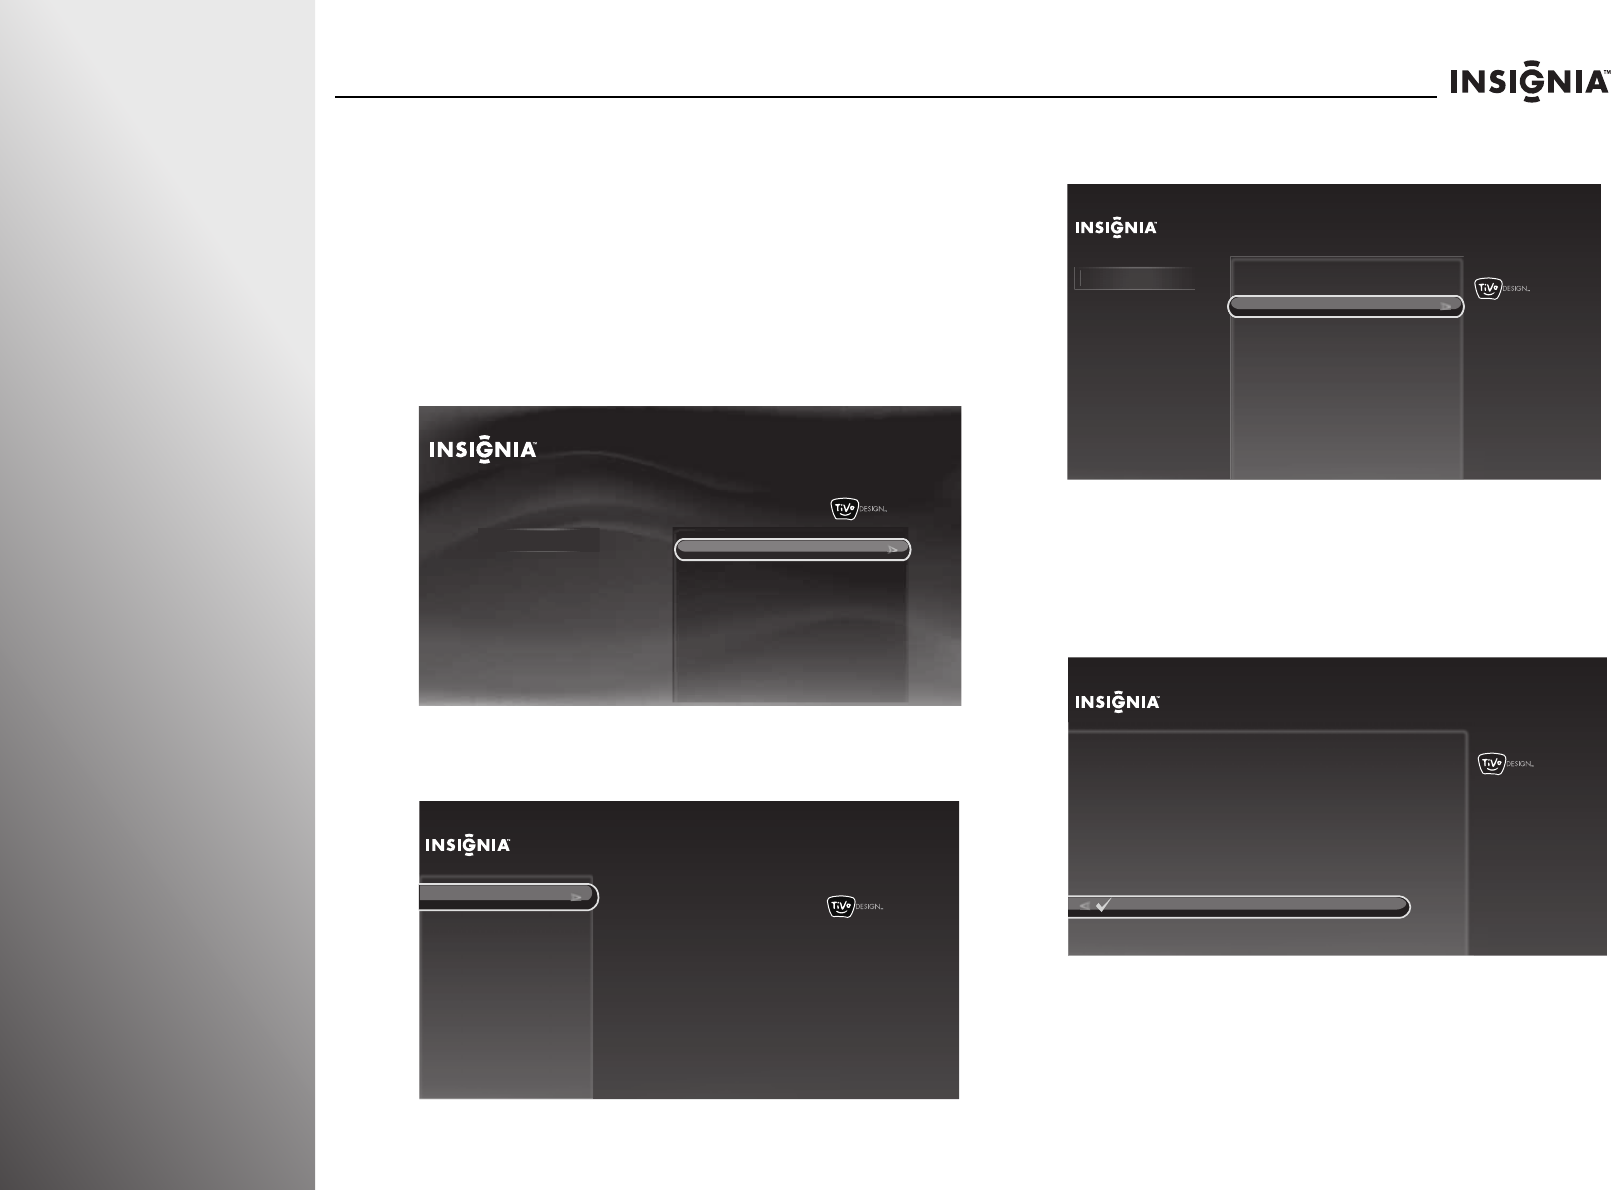
92 www.insigniaproducts.com
Using Your TV NS-32E859A11/NS-42E859A11
Adjusting other options
Adjusting the INSIGNIA logo brightness
The INSIGNIA logo on the front of your TV can light when your
TV is turned on. You can adjust the logo brightness.
To adjust the INSIGNIA logo brightness:
1Press TiVo. The Home screen opens. Press S or T to select
Settings, then press X or SELECT.
2Press S or T to highlight Settings, then press X or SELECT.
3Press S or T to highlight Appearance, then press X or
SELECT.
4Press S or T to highlight Logo brightness, then press X or
SELECT.
5Press S or T to highlight an option. You can select:
•Off—Turns off the logo when your TV is on.
•Low—Sets the brightness level to low when your TV is on.
•High—Sets the brightness level to high when your TV is
on.
6Press SELECT to return to the previous menu.
10:00pm
Home
Settings
Connect to the Internet Settings
Parental Controls
Check for updates
Account & system info
Help
Sleep timer
10:00 PM
Settings
Audio
Channels & providers
Devices
Network
Recommendations
Video
Appearance
Logo brightness
Input labels
Closed captioning
Video window
Reset all appearance settings
Time
10:00pm
Settings
Audio
Channels & providers
Devices
Network
Recommendations
Video
Appearance
Input labels
Closed captioning
Video window
Reset all appearance settings
Time
A
ppearance
Choose how bright the Insignia
logo glows when the TV is
powered on.
Current setting:
Low
Logo brightness
10:00pm
Logo Brightness
Choose how bright the Insignia logo glows when the TV is powered on.
Off
Low
High
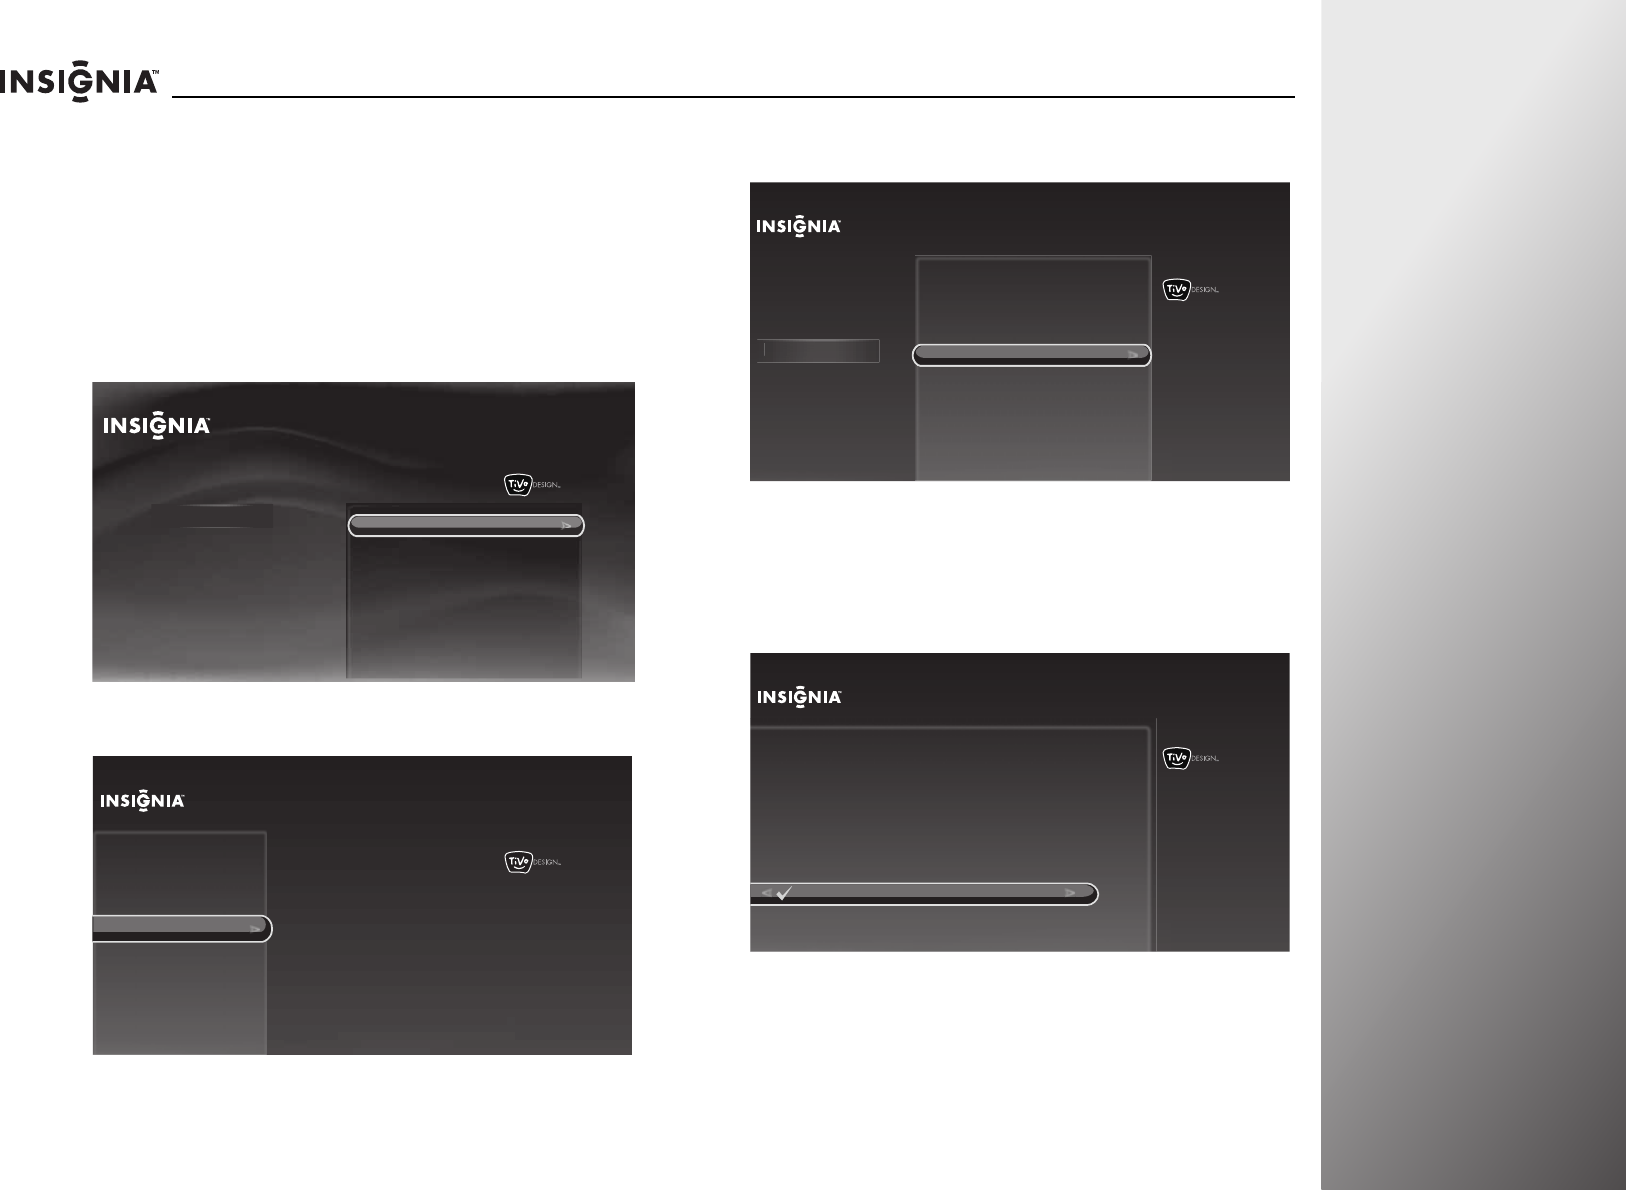
www.insigniaproducts.com 93
NS-32E859A11/NS-42E859A11 Using Your TV
Setting the TV power on mode
While your TV is in standby mode, you can set the TV power on
mode to maximize your energy savings (standard power on) or
to minimize the time it takes to turn the power back on (power
on quickly).
To set the TV power on mode:
1Press TiVo. The Home screen opens. Press S or T to select
Settings, then press X or SELECT.
2Press S or T to highlight Settings, then press X or SELECT.
3Press S or T to highlight Devices, then press X or SELECT.
4Press S or T to highlight TV power on, then press X or
SELECT.
5Press S or T to highlight an option. You can select:
•Standard power on (Energy Star Compliant)—The
power indicator lights red in standby mode.
•Power on quickly—The power indicator lights purple in
standby mode.
6Press X or SELECT to return to the previous screen. If you
select Power on quickly, the Power On Energy Usage screen
opens. Press SELECT again to save the setting and return to
the previous screen.
10:00pm
Home
Settings
Connect to the Internet Settings
Parental Controls
Check for updates
Account & system info
Help
Sleep timer
10:00 PM
Settings
Audio
Channels & providers
Network
Recommendations
Video
Appearance
Source sensor
Remote control setup
TV power on
Reset device settings
INlink HDMI control
Devices
10:00pm
Settings
Audio
Channels & providers
Devices
Network
Recommendations
Video
Appearance INlink HDMI control
D
evi
ces
Choose between Energy Star
Compliant power on and quicker
TV power on.
Current setting:
Standard power on (Energy Star
Compliant)
Source sensor
Remote control setup
TV power on
Reset device settings
10:00pm
TV Power On
Standard power on (Energy Star Compliant)
Power on quickly
When you turn off your TV do you want to maximize your energy
savings or minimize the time it takes for your TV to turn on again?
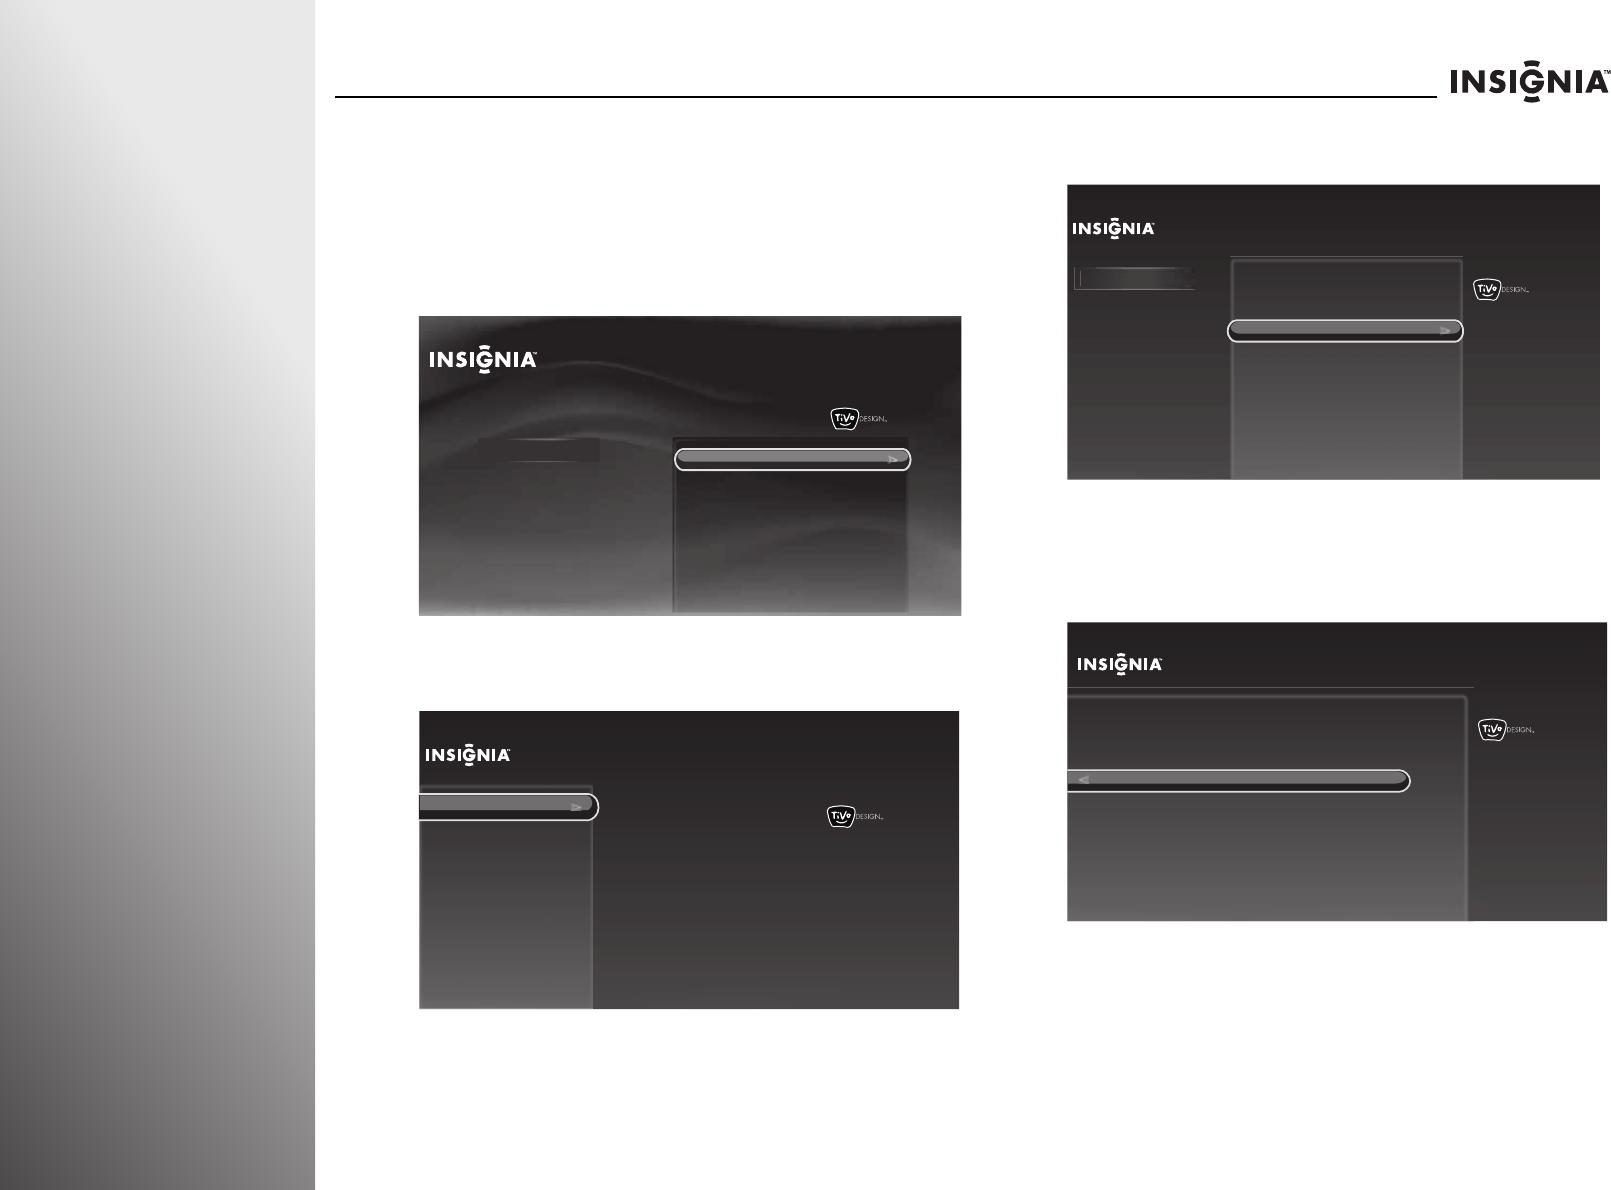
94 www.insigniaproducts.com
Using Your TV NS-32E859A11/NS-42E859A11
Labeling an input source
You can label an input source to make it easier to identify.
To label an input source:
1Press TiVo. The Home screen opens. Press S or T to select
Settings, then press X or SELECT.
2Press S or T to highlight Settings, then press X or SELECT.
3Press S or T to highlight Appearance, then press X or
SELECT.
4Press S or T to highlight Input labels, then press X or
SELECT.
5Press S or T to select the input source you want to label,
then press W or X to select from the preset list of labels,
including DVD, Blu-Ray, Cable Box, Satellite, DVR,
Receiver, Game, Computer, VCR, or Custom.
10:00pm
Home
Settings
Connect to the Internet Settings
Parental Controls
Check for updates
Account & system info
Help
Sleep timer
10:00 PM
Settings
Audio
Channels & providers
Devices
Network
Recommendations
Video
Appearance
Logo brightness
Input labels
Closed captioning
Video window
Reset all appearance settings
Time
10:00 PM
Settings
Audio
Channels & providers
Devices
Network
Recommendations
Video
Appearance
Closed captioning
Video window
Reset all appearance settings
Time
App
earance
Name the TV inputs so you can
easily tell which device is showing
video on the TV.
Current setting:
Logo brightness
Input labels
HDMI 1:
HDMI 2:
HDMI 3:
HDMI 4:
Component/
Composite: (no device)
VGA:
(no device)
(no device)
(no device)
(no device)
(no device)
10:00pm
Name your TV inputs to easily identify devices as you switch inputs. To
create your own name, choose “Custom...” and press SELECT.
Done naming TV inputs
Input Labels
HDMI 1:
HDMI 2:
HDMI 3:
HDMI 4:
Component/Composite:
VGA:
HDMI 1 (no device)
HDMI 2 (no device)
HDMI 3 (no device)
HDMI 4 (no device)
Component/Composite(no device)
VGA (no device)
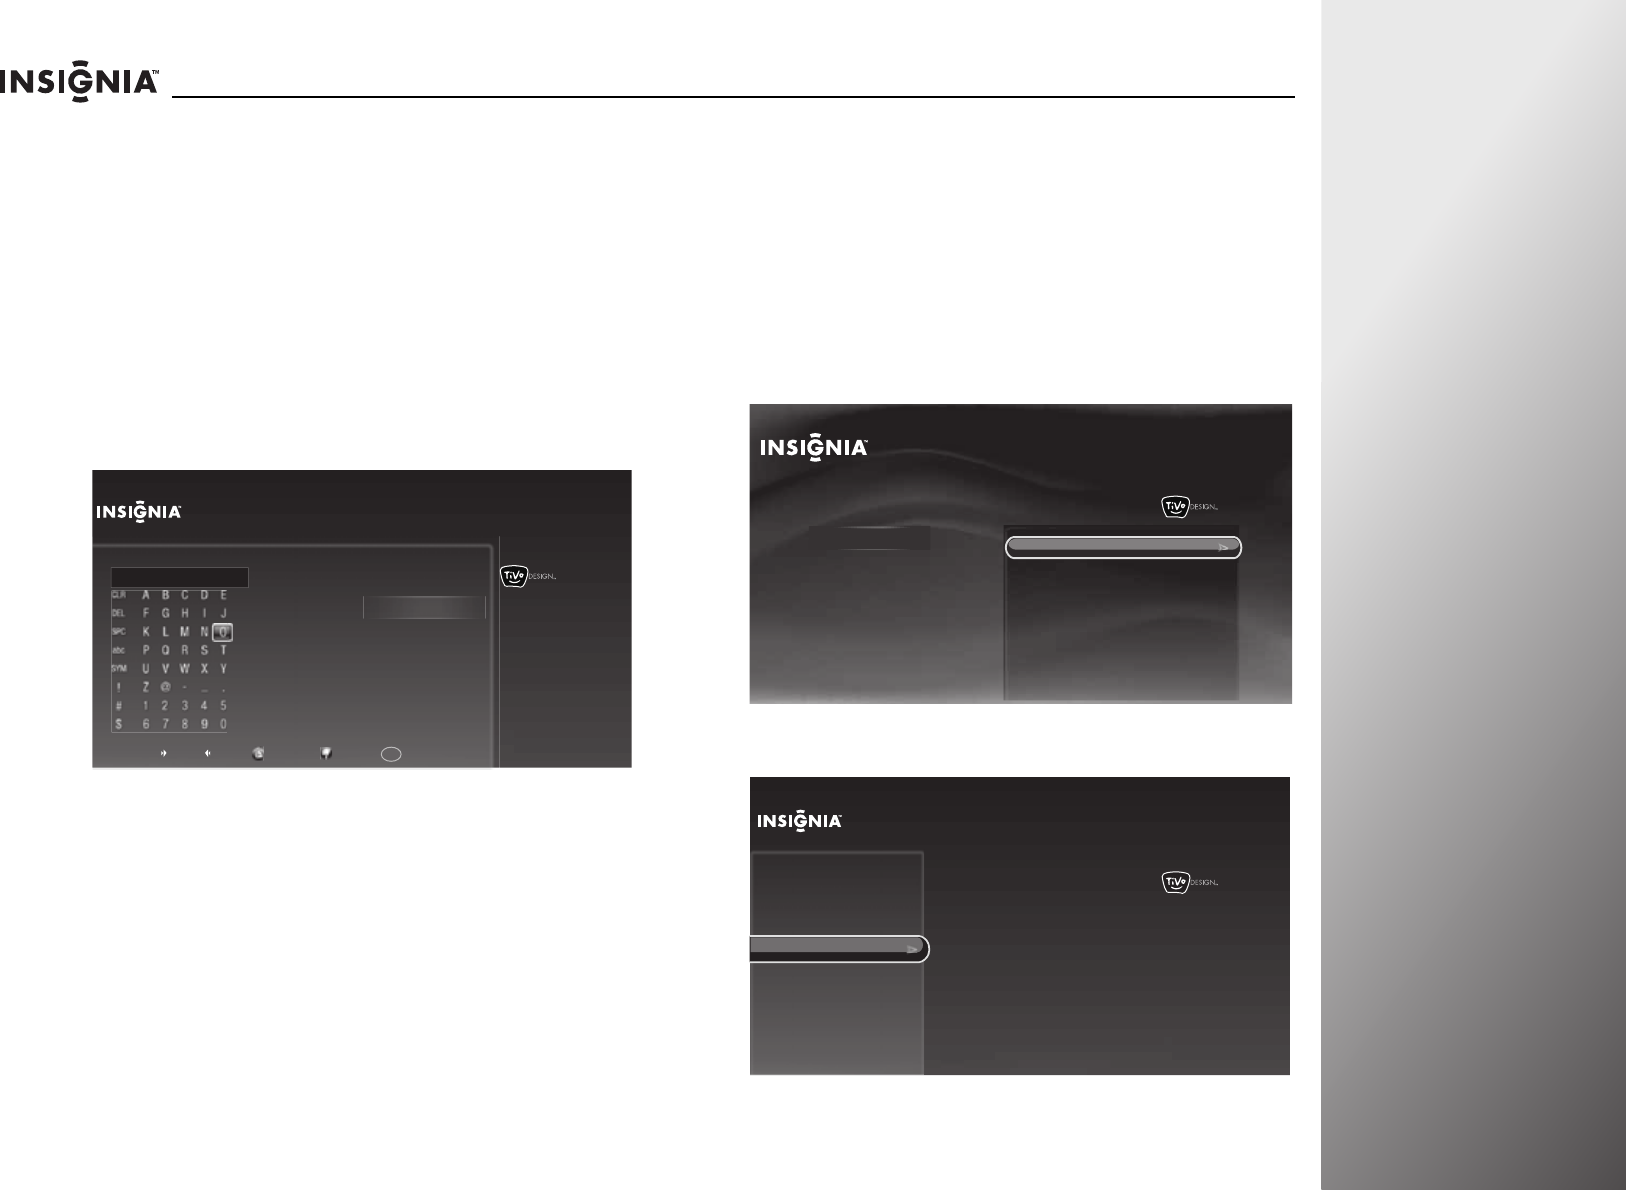
www.insigniaproducts.com 95
NS-32E859A11/NS-42E859A11 Using Your TV
6If you selected Custom, press SELECT, then go to “Creating
a custom label” on page 95 to create your own label for the
input source.
OR
If you selected a preset label, press SELECT to highlight
Done naming TV inputs, then press SELECT again to save
your setting and return to the previous screen.
Creating a custom label
To create a custom label:
1When the on-screen keyboard opens, enter a name for the
input source, then highlight Done entering name. For
instructions for using the on-screen keyboard, see “Using
the on-screen keyboard” on page 36.
2Press SELECT to save your setting and return to the previous
screen.
Turning the source sensor on or off
When the source sensor feature is turned on, your TV
automatically detects which video jacks have devices
connected to them when the devices are turned on. Your TV
uses this information to determine how the input source list
looks when you press INPUT.
To turn the source sensor on or off:
1Press TiVo. The Home screen opens. Press S or T to select
Settings, then press X or SELECT.
2Press S or T to highlight Settings, then press X or SELECT.
3Press S or T to highlight Devices, then press X or SELECT.
10:00 PM
Name HDMI 4
SpaceShortcuts: Delete Uppercase Lowercase Numbers
Enter a name for the input and then press RIGHT to choose Done entering name.
HD TV__
Done entering name
Cancel
1
10:00pm
Home
Settings
Connect to the Internet Settings
Parental Controls
Check for updates
Account & system info
Help
Sleep timer
10:00 PM
Settings
Audio
Channels & providers
Network
Recommendations
Video
Appearance
Source sensor
Remote control setup
TV power on
Reset device settings
INlink HDMI control
Devices
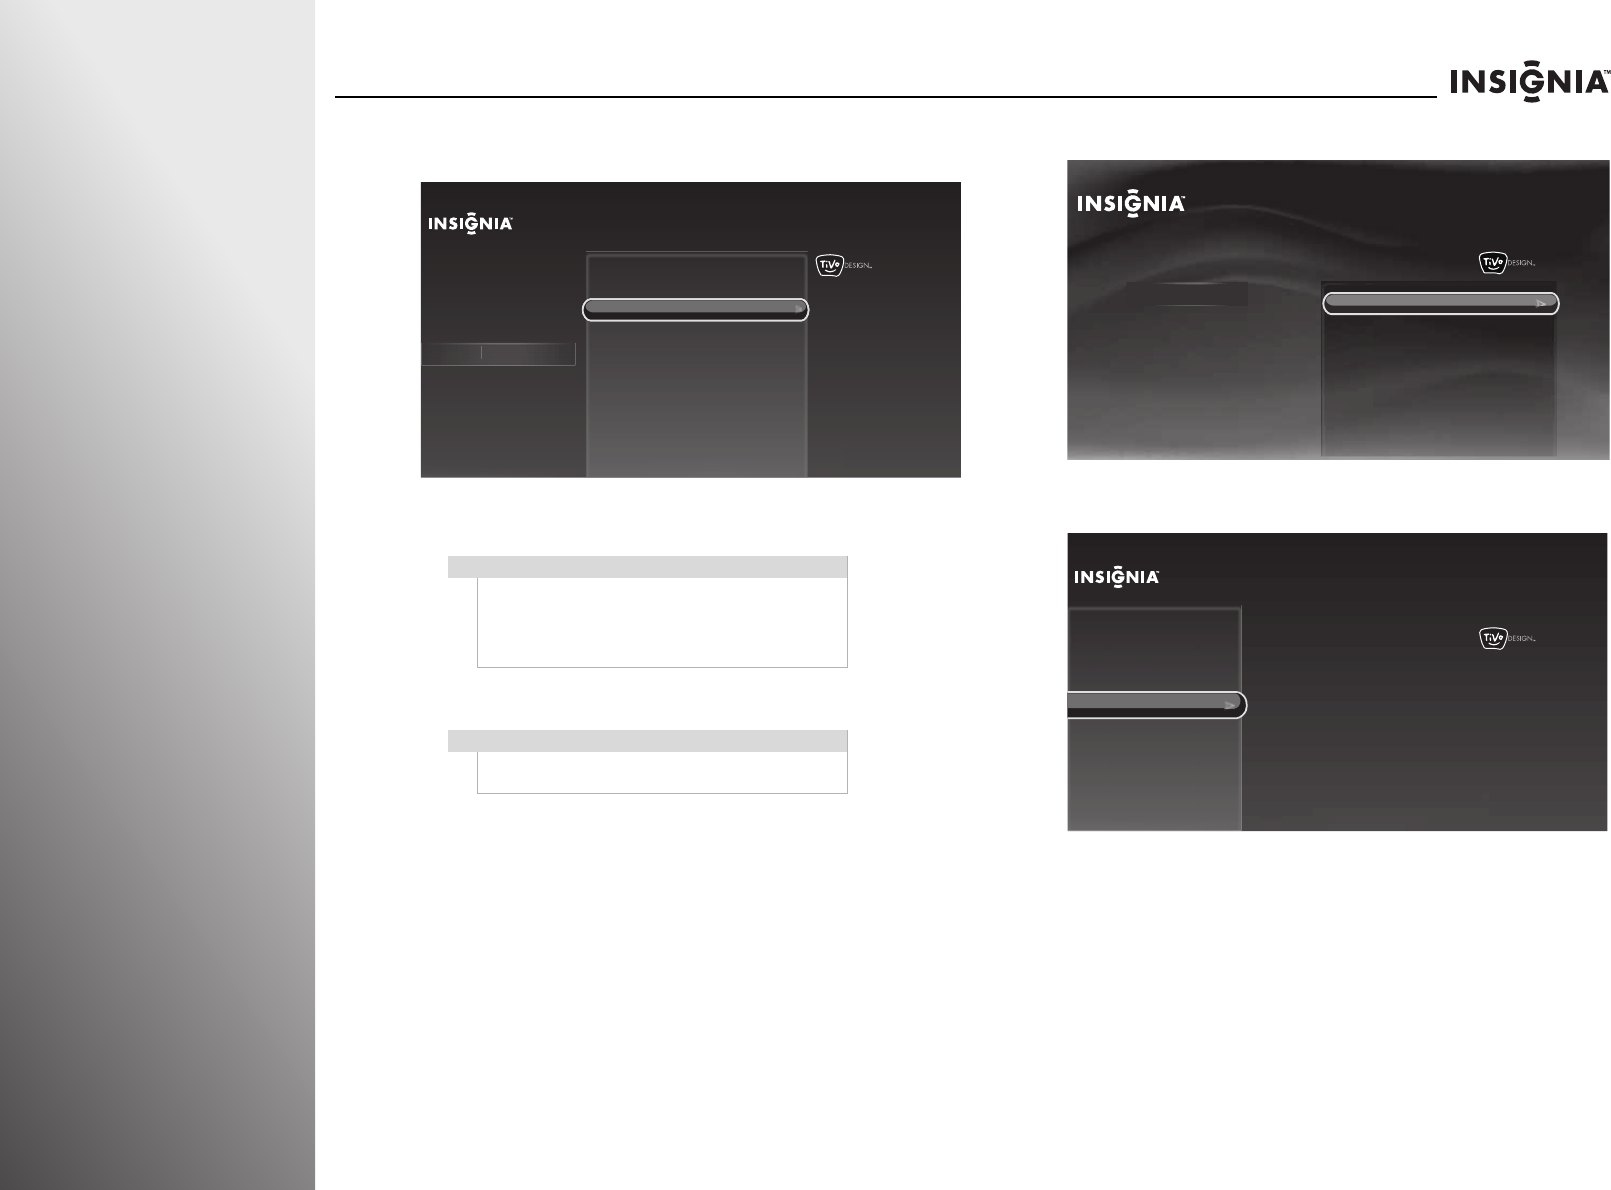
96 www.insigniaproducts.com
Using Your TV NS-32E859A11/NS-42E859A11
4Press S or T to highlight Source sensor, then press X or
SELECT.
5Press S or T to highlight On or Off, then press X or SELECT.
Resetting all options on the Devices menu
To reset all options on the Devices menu:
1Press TiVo. The Home screen opens. Press S or T to select
Settings, then press X or SELECT.
2Press S or T to highlight Settings, then press X or SELECT.
3Press S or T to highlight Devices, then press X or SELECT.
4Press S or T to highlight Reset device settings, then press
SELECT.
5Press S or T to select Yes, reset device settings, then press
SELECT. The device settings are reset to factory defaults.
Warning
When the source sensor is set to On, the inactive
input sources will be grayed out on the input source
list. Pressing INPUT moves between active inputs
only. However, you can still move between inactive
inputs by pressing S or T.
Note
The device settings will be reset to the factory
defaults.
10:00pm
Settings
Channels & providers
Devices
Network
Recommendations
Video
Appearance
Audio
D
ev
i
ce
s
When the source sensor is on, inputs
are shown in gray if they have no
device attached or the device is
powered off.
INlink HDMI contorl
Remote control setup
TV power on
Reset device settings
Current setting:
Off
Source sensor
10:00pm
Home
Settings
Connect to the Internet Settings
Parental Controls
Check for updates
Account & system info
Help
Sleep timer
10:00 PM
Settings
Audio
Channels & providers
Network
Recommendations
Video
Appearance
Source sensor
Remote control setup
TV power on
Reset device settings
INlink HDMI control
Devices
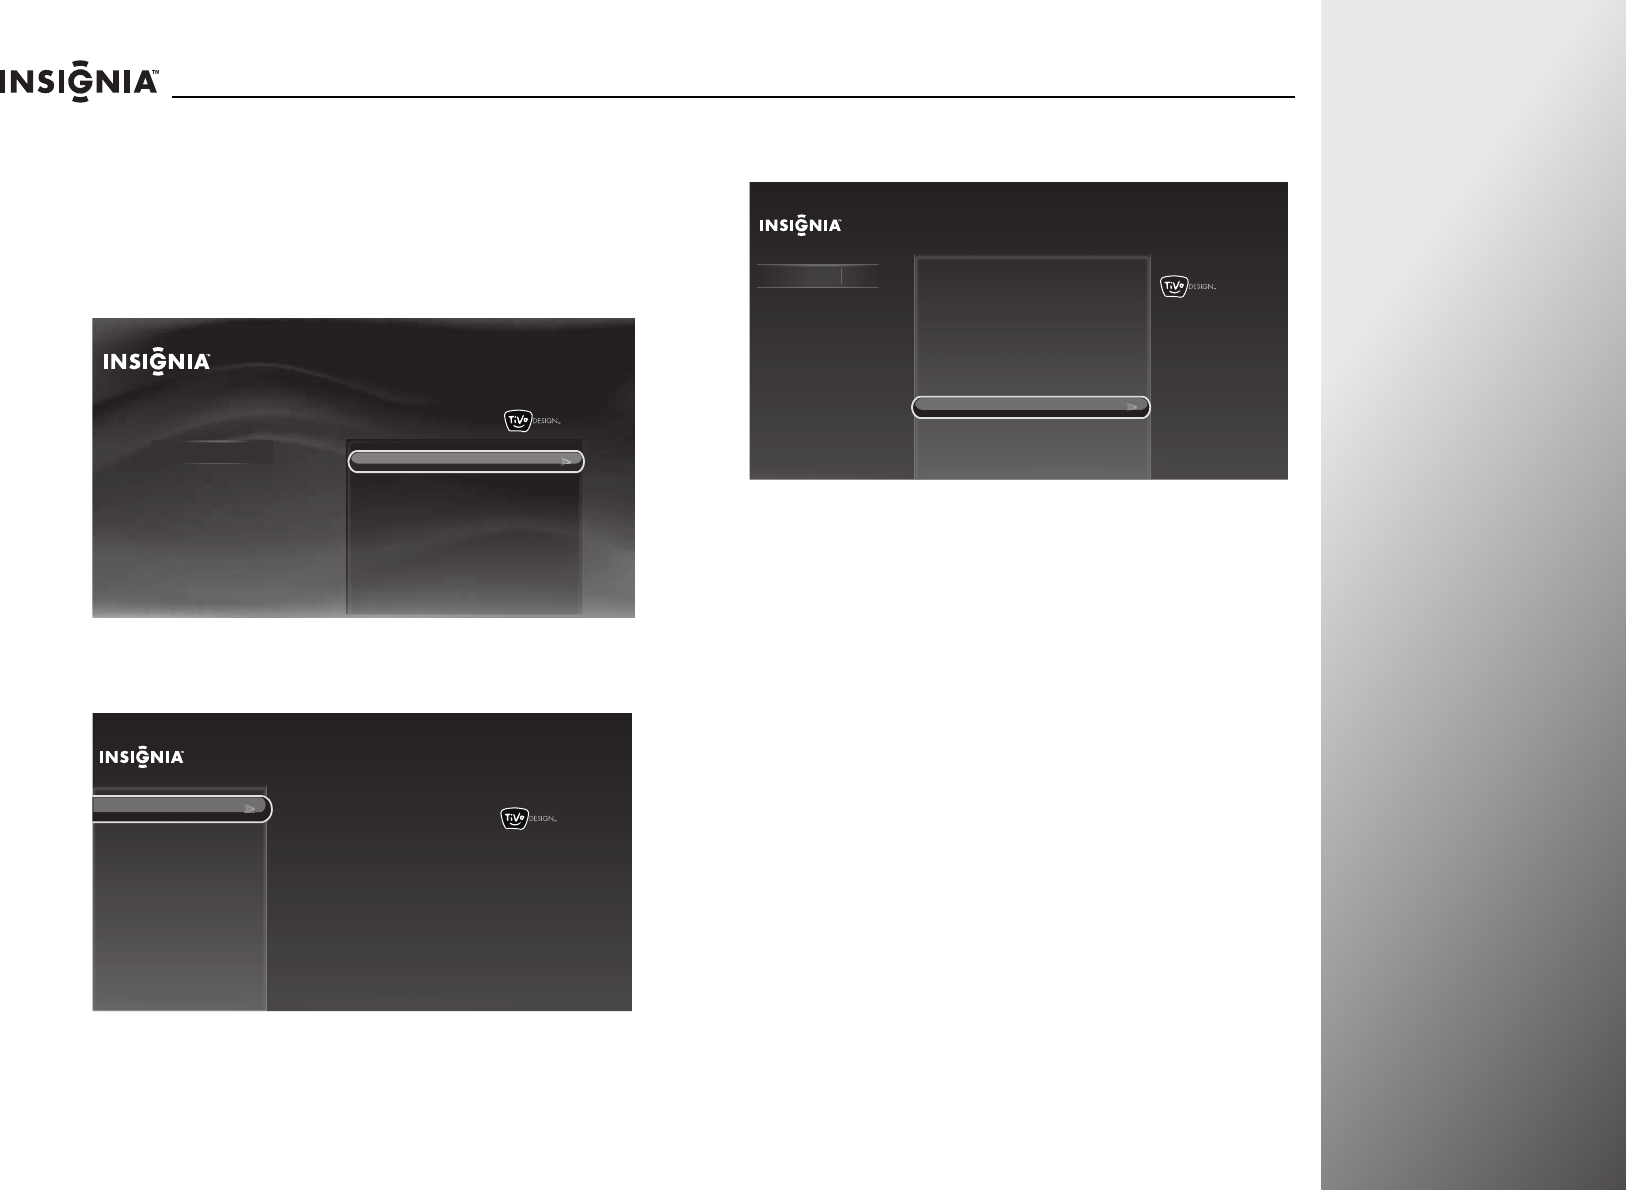
www.insigniaproducts.com 97
NS-32E859A11/NS-42E859A11 Using Your TV
Resetting all options on the Appearance
menu
To reset all options on the Appearance menu:
1Press TiVo. The Home screen opens. Press S or T to select
Settings, then press X or SELECT.
2Press S or T to highlight Settings, then press X or SELECT.
3Press S or T to highlight Appearance, then press X or
SELECT.
4Press S or T to highlight Reset all appearance settings,
then press X or SELECT.
5Press S or T to select Yes, reset all appearance settings,
then press SELECT. The appearance settings are reset to
factory defaults.
10:00pm
Home
Settings
Connect to the Internet Settings
Parental Controls
Check for updates
Account & system info
Help
Sleep timer
10:00 PM
Settings
Audio
Channels & providers
Devices
Network
Recommendations
Video
Appearance
Logo brightness
Input labels
Closed captioning
Video window
Reset all appearance settings
Time
10:00 PM
Settings
Audio
Channels & providers
Devices
Network
Recommendations
Video
Appearance Time
App
earance
Reset all appearance settings to
the state they were in when the TV
was first purchased.
Logo brightness
Input labels
Closed captioning
Video window
Reset all appearance settings


99
Maintaining,
Troubleshooting,
and Specifications
Maintaining . . . . . . . . . . . . . . . . . . . . . . . . . . . . . . . . . . . . . . . . . . . . . . . . . . . . . . . . . 100
Troubleshooting. . . . . . . . . . . . . . . . . . . . . . . . . . . . . . . . . . . . . . . . . . . . . . . . . . . . . 100
Specifications . . . . . . . . . . . . . . . . . . . . . . . . . . . . . . . . . . . . . . . . . . . . . . . . . . . . . . . 104

100 www.insigniaproducts.com
Maintaining, Troubleshooting, and Specifications NS-32E859A11/NS-42E859A11
Maintaining
Cleaning the TV cabinet
Clean the TV cabinet with a soft, dry cloth. If surfaces are
extremely dirty, slightly dampen the cloth with lukewarm
water.
Cleaning the LED-LCD screen
Clean the screen with a clean, soft, lint-free cloth. If additional
cleaning is necessary, apply a small amount of non-ammonia,
non-alcohol-based glass cleaner onto the cloth, then wipe the
screen.
Updating your TV software
To update your TV software:
1Make sure that your TV is connected to the Internet. For
more information, see “Connecting your TV to your home
network” on page 26 and “Adjusting Internet settings” on
page 81.
2Press TiVo. The Home screen opens. Press S or T to select
Settings, then press X or SELECT.
3Press S or T to highlight Check for updates. Your TV
checks for software updates.
Troubleshooting
Using the on-screen help
Your TV features on-screen help that provides tips and
solutions to common problems.
To use the on-screen help:
1Press TiVo. The Home screen opens. Press S or T to select
Settings, then press X or SELECT.
2Press S or T to highlight Help, then press X or SELECT.
3Press S or T to highlight a topic, then press SELECT.
Information that may help you solve a problem appears.
If the on-screen help does not have the solutions you need,
see the following list of problems and solutions.
Cautions
• Make sure that your TV is turned off and the
power cord is disconnected from the power
outlet before cleaning your TV.
• Never spray or pour any liquid directly onto the
LCD screen or the TV cabinet.
• Never use a solvent or alcohol to clean your TV.
Do not spray insecticide near your TV. Such
chemicals may cause damage and discoloration
to the exposed surfaces.
Note
Before you can receive system updates, you must
have your TV connected to the Internet.
Caution
Do not try to repair your TV yourself. Refer all
servicing to qualified service personnel.
Note
If the information spans more than one page, press S
or T to scroll line by line or press CH S/ CHT to scroll
page by page.
Problem Solution
Power
No power
• Make sure that the power cord is correctly
connected to a power outlet. See “Connecting the
power” on page 17.
• Unplug the power cord, wait 60 seconds, then plug
the cord back in and turn on your TV.
• Other devices (for example, surround sound
receiver, external speakers, fans, or hair dryers)
may be interfering with your TV. Try turning off one
device at a time to determine which device is
causing interference. Once you have determined
which device is causing interference, move it
further from the TV to eliminate the interference.
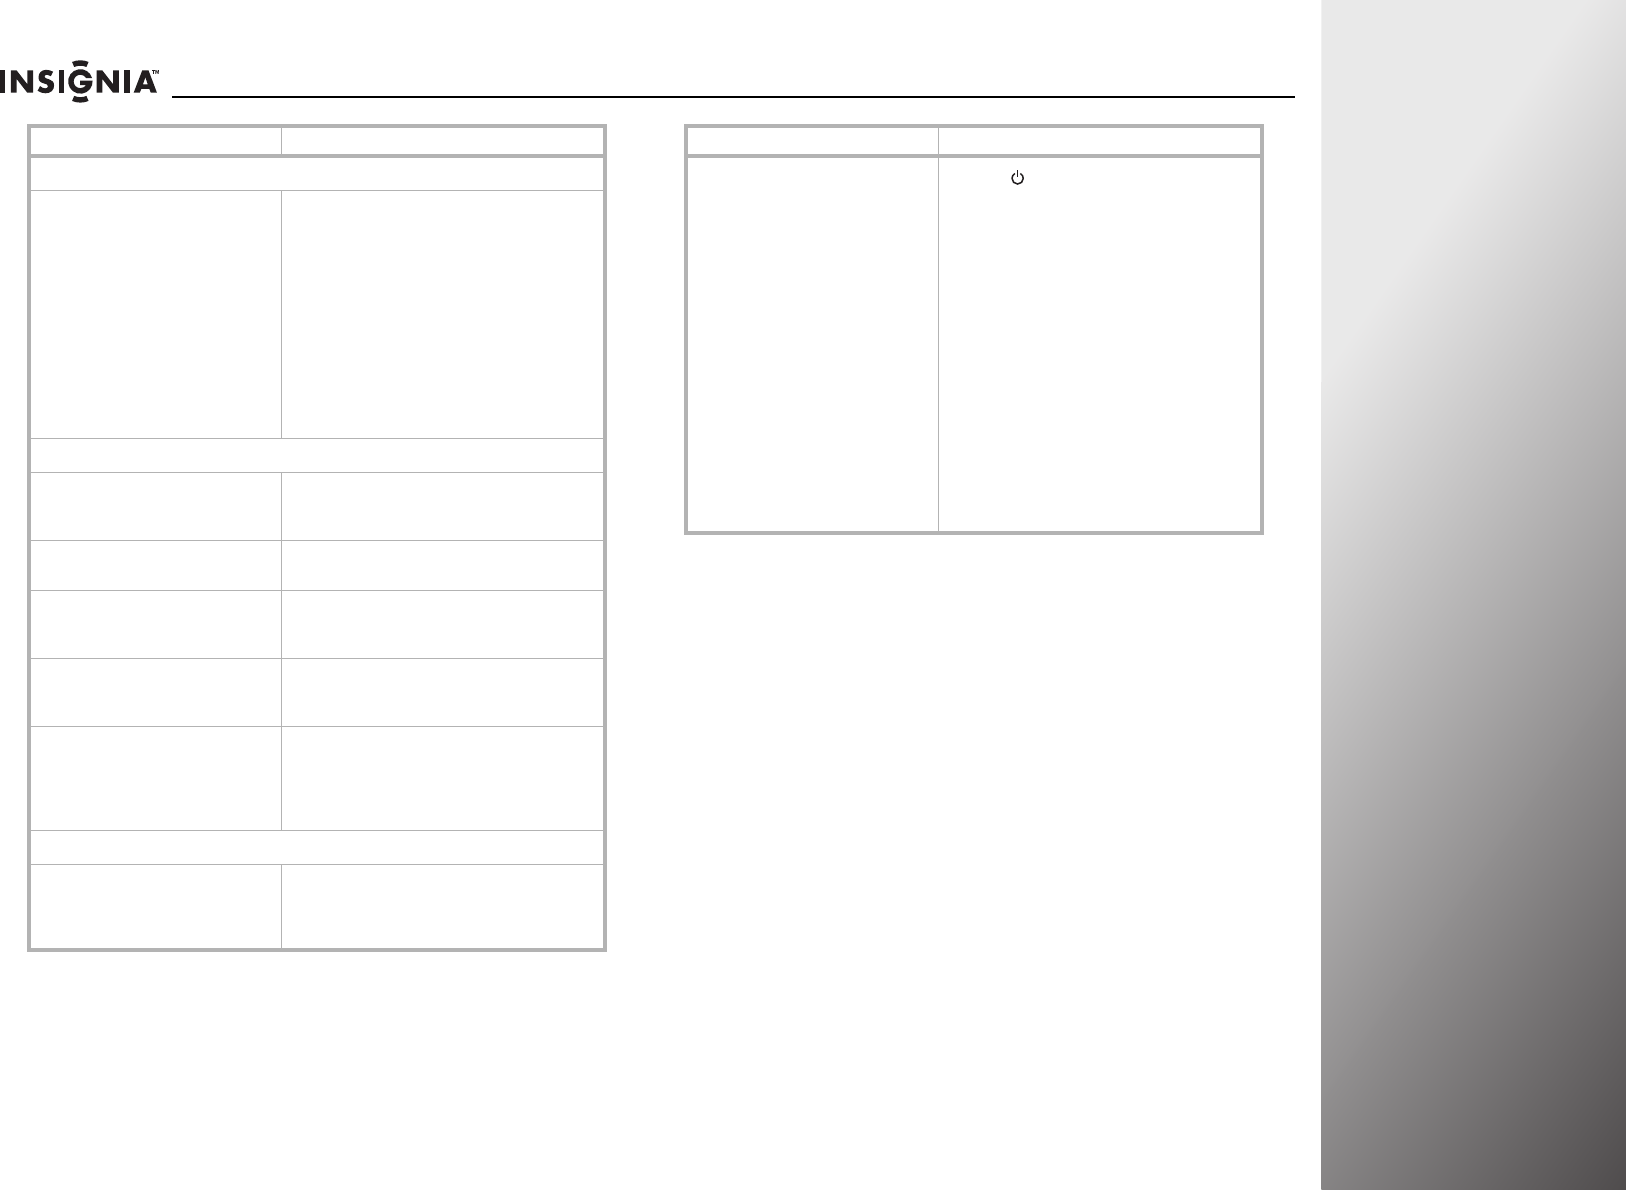
www.insigniaproducts.com 101
NS-32E859A11/NS-42E859A11 Maintaining, Troubleshooting, and Specifications
General remote control
The Z-Wave remote control does not work
• Make sure that the power cord is correctly
connected to a power outlet.
• Make sure the remote control is added to the
Z-Wave network and paired with your TV. See
“Setting up your Z-Wave remote control” on
page 108.
• Replace the batteries. Make sure that the + and –
symbols on the batteries align with the + and –
symbols in the battery compartment. See
“Installing the remote control batteries” on
page 17.
• Make sure the remote control is in correct device
mode. Press TV to control your TV.
Programmed remote control functions
The LED does not blink when you press a
button.
• Try pressing different buttons.
• The batteries may already be drained. Replace the
batteries.
The LED blinks when you press a button but
the device does not respond • Make sure the remote is aimed at your device and is
not more than 40 feet (12.2 m) away.
The LED blinks one long blink while in
program mode
• An entry error has occurred (for example, wrong
button was pressed). Try entering the sequence
again.
No volume on a device • Make sure that the volume is not locked to a
different mode. See “Programming the button
lock” on page 32.
The device does not power on or off
• Make sure that the power button is not locked to a
different mode or the power button is not assigned
to another device. See “Programming the button
lock” on page 32 or Step 12 in “Programming the
mode buttons” on page 29.
Picture
Picture does not fill the screen. There are
black bars around the picture.
• Change the aspect ratio. An increasing amount of
digital TV and movies are presented in wide screen
(16:9). See “Adjusting the video settings” on
page 42.
Problem Solution
No picture
• Press on the TV or remote control.
• Make sure that the power cord is plugged in.
• Try another channel. The station may be
experiencing problems.
• Make sure that the video cables are connected
securely to the back of your TV. See “Making
connections” on page 17.
• Adjust the contrast and brightness. See “Adjusting
the video settings” on page 42.
• Make sure that the correct video source is selected.
See “Selecting the video input source” on page 35.
• Make sure that the incoming signal is compatible.
• Make sure the antenna or cable TV is connected
correctly and securely. See “Connecting a cable or
satellite box” on page 19 or “Connecting an
antenna or cable TV without a cable box” on
page 18.
• Check the closed caption settings. Some TEXT
modes can block the screen. See “Using closed
captioning” on page 76.
Problem Solution
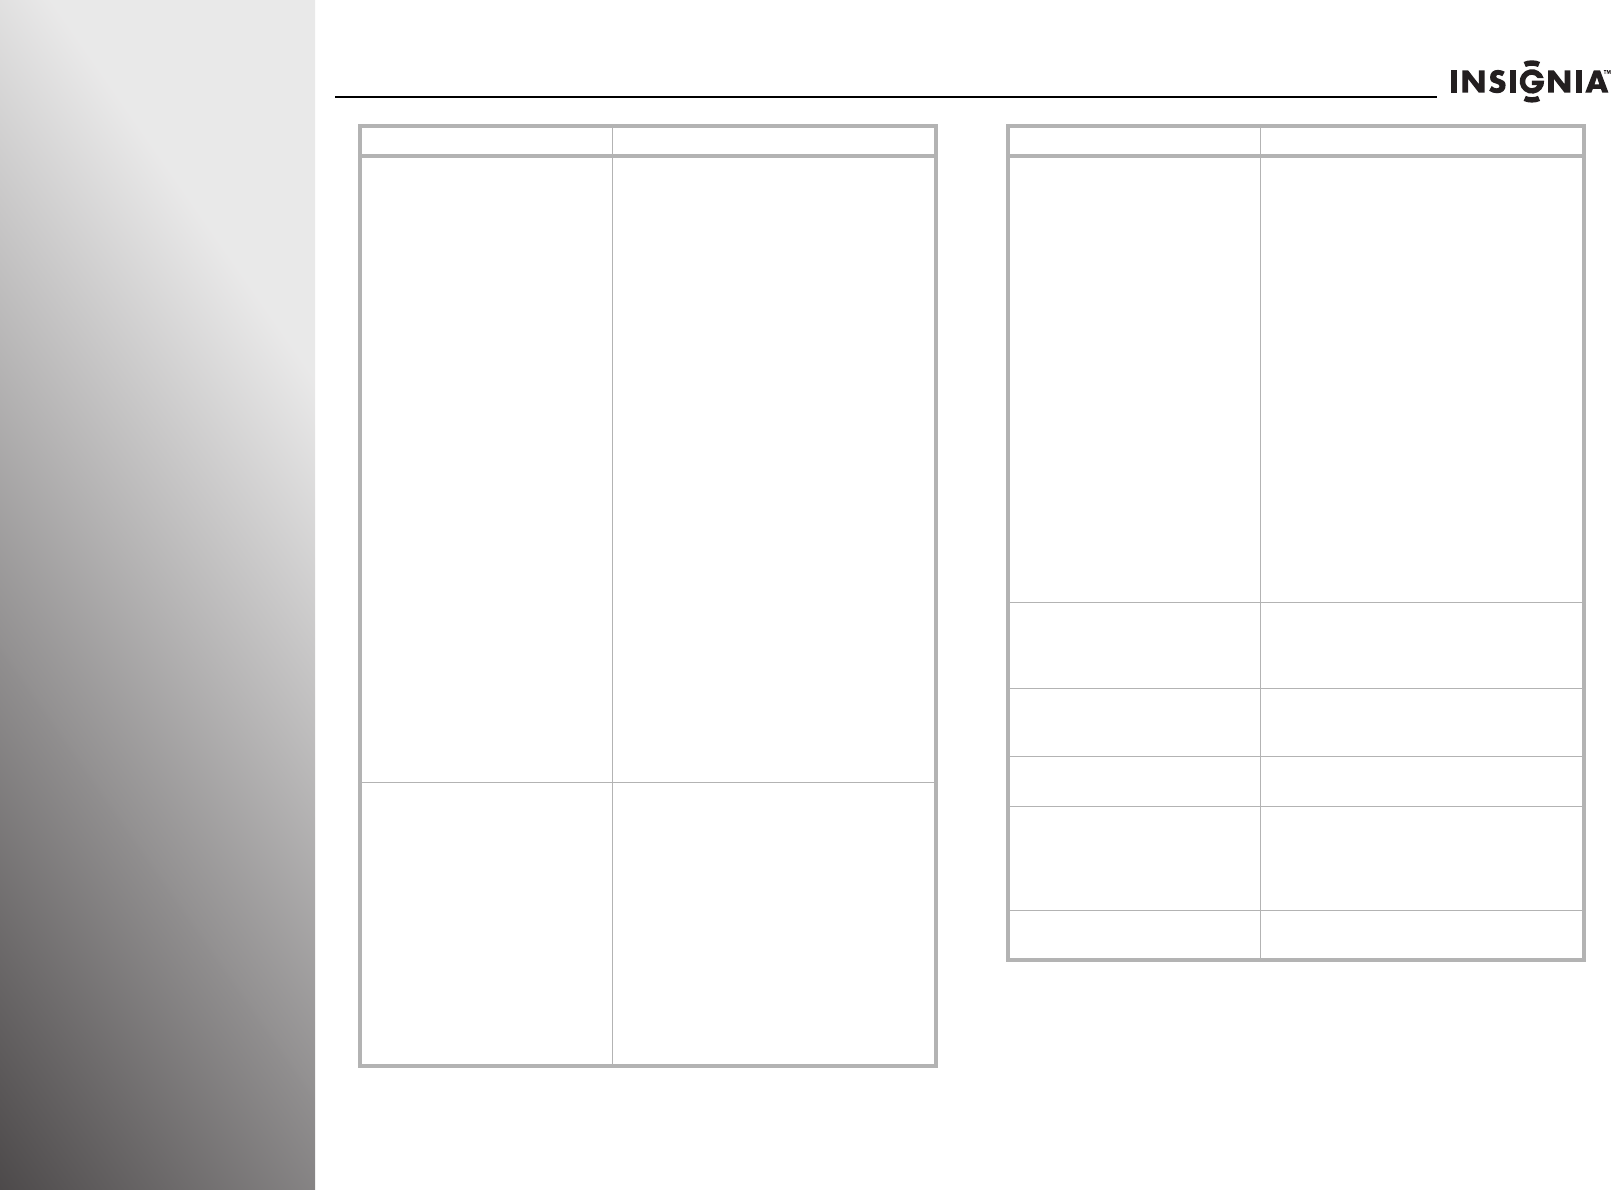
102 www.insigniaproducts.com
Maintaining, Troubleshooting, and Specifications NS-32E859A11/NS-42E859A11
Dark, poor, or no picture (screen is lit), but
sound is good.
• Adjust the contrast, color, and brightness settings.
See “Adjusting the video settings” on page 42.
• Try another channel. The station may be
experiencing problems.
• Make sure the antenna or cable TV is connected
correctly and securely. See “Connecting a cable or
satellite box” on page 19 or “Connecting an
antenna or cable TV without a cable box” on
page 18.
• Make sure that the correct picture mode is selected.
See “Adjusting the video settings” on page 42.
• If you are using an antenna, the digital channel
signal may be low. To check the digital channel
signal strength, see “Checking the signal strength”
on page 70.
• If you are using an antenna and the signal strength
is low, adjust the antenna or use a highly
directional outdoor antenna or set-top antenna
with a built-in amplifier.
• Make sure that the Audio only option is set to Off.
See “Playing TV audio only” on page 62.
• Make sure that the video cables are connected
securely to the back of your TV. See “Making
connections” on page 17.
• The video cable(s) you are using may be bad. Try a
new set.
• Adjust the color saturation. See “Adjusting the
video settings” on page 42.
• Make sure that the room is not too bright. Light
reflecting off the screen can make the picture
difficult to see.
• If an S-VHS camera or a camcorder is connected
while another connected device is turned on, the
picture may be poor. Turn off one or more devices.
Only snow (noise) appears on the screen.
• Try another channel. The station may be
experiencing problems.
• Make sure the antenna or cable TV is connected
correctly and securely. See “Connecting a cable or
satellite box” on page 19 or “Connecting an
antenna or cable TV without a cable box” on
page 18.
• If you are using an antenna, the digital channel
signal may be low. To check the digital channel
signal strength, see “Checking the signal strength”
on page 70.
• If you are using an antenna and the signal strength
is low, adjust the antenna or use a highly
directional outdoor antenna or set-top antenna
with a built-in amplifier.
Problem Solution
Horizontal dotted line
• Make sure the antenna or cable TV is connected
correctly and securely. See “Connecting a cable or
satellite box” on page 19 or “Connecting an
antenna or cable TV without a cable box” on
page 18.
• If you are using an antenna, the digital channel
signal may be low. To check the digital channel
signal strength, see “Checking the signal strength”
on page 70.
• If you are using an antenna and the signal strength
is low, adjust the antenna or use a highly
directional outdoor antenna or set-top antenna
with a built-in amplifier.
• Make sure that the video cables are connected
securely to the back of your TV.
• The video cable(s) you are using may be bad. Try a
new set.
• Other devices (for example, surround sound
receiver, external speakers, fans, or hair dryers)
may be interfering with your TV. Try turning off one
device at a time to determine which device is
causing interference. Once you have determined
which device is causing interference, move it
further from the TV to eliminate the interference.
“Ghost” or double image
• Obstructions, such as high-rise building or hills,
may be preventing your antenna from receiving a
clear signal. Using a highly directional antenna
may improve the picture quality.
Snowy picture or noise • Make sure that the AV and antenna cables are
connected securely. See “Making connections” on
page 17.
VGA picture is not stable or synchronized • Make sure that you have selected the correct VGA
mode on your computer.
After image appears
• Do not display a still image, such as logo, game, or
computer image, for an extended period of time.
This can cause a permanent after-image to be
burned into the screen. This type of damage is not
covered by your warranty.
The picture has a few bright or dark spots. • A few bright or dark spots on an LCD screen is
normal. It does not affect the operation of this TV.
Problem Solution
www.insigniaproducts.com 103
NS-32E859A11/NS-42E859A11 Maintaining, Troubleshooting, and Specifications
Resetting your TV to the factory defaults
You can reset your TV to the factory defaults and repeat the
setup process that you went through when you first turned on
your TV.
To reset your T V:
1Press TiVo. The Home screen opens. Press S or T to select
Settings, then press X or SELECT.
2Press S or T to highlight Help, then press X or SELECT.
Audio
Good picture but no sound
• Increase the volume.
• Make sure that the sound is not muted.
• Make sure that the correct audio mode is selected.
See “Manually adjusting audio settings” on
page 46.
• Make sure that the audio cables are connected
correctly and securely to the back of your TV. See
“Making connections” on page 17.
• Make sure the antenna or cable TV is connected
correctly and securely. See “Connecting a cable or
satellite box” on page 19 or “Connecting an
antenna or cable TV without a cable box” on
page 18.
• If you are using an antenna, the digital channel
signal may be low. To check the digital channel
signal strength, see “Checking the signal strength”
on page 70.
• The audio cable(s) you are using may be bad. Try a
new set.
No output from one of the speakers
• Adjust the balance of the speakers. See “Manually
adjusting audio settings” on page 46.
• Make sure that the audio cables are connected
correctly and securely to the back of your TV. See
“Making connections” on page 17.
Audio noise
• Other devices (for example, surround sound
receiver, external speakers, fans, or hair dryers)
may be interfering with your TV. Try turning off one
device at a time to determine which device is
causing interference. Once you have determined
which device is causing interference, move it
further from the TV to eliminate the interference.
Other
The TV displays “searching for a signal on
this source” and never displays a picture
•Press INPUT and make sure that you have selected
the correct input for the device or service you are
trying to use.
• If you are using a cable or satellite box, use the
remote that came with that box to change
channels.
• Make sure you have the correct input selected to
view channels from the cable or satellite box.
Buttons on the front of the TV do not work
• Make sure that the Lock buttons option is set to
Off. See “Locking control buttons” on page 75.
• Unplug the power cord, wait a few seconds, then
plug the cord back in and turn on your TV.
Problem Solution
INlink does not work
• Make sure that the device you want to control is
HDMI CEC-compatible.
• Make sure that the HDMI device’s power cord is
connected correctly.
• Make sure that the INlink HDMI control settings are
configured. See “Setting up INlink HDMI control”
on page 90.
• Connect an INlink device using an HDMI 1.3 cable.
Applications • If you are having trouble with one of the
applications, contact the service provider for that
service.
Wired network connection
No network connection • Make sure your TV and modem or router is
connected securely.
• Make sure your network address is set up correctly.
Automatic network setup fails
• The DHCP service is not enabled on the router, or no
router is present. Refer to your router’s
documentation for instructions on enabling DHCP.
If you do not have a router, you must manually set
up the network address.
• Internet service is not available. Check your cable
or DSL modem or contact your ISP for Internet
service issues.
Manual network setup fails • Make sure you enter correct IP address.
Network connection is unstable • Unplug the Ethernet cables, then plug them
back in.
Wireless connection
No network connection • Make sure your wireless access point is turned on
and set up correctly.
Network connection is unstable • Move your wireless access point closer to your TV.
Problem Solution
104 www.insigniaproducts.com
Maintaining, Troubleshooting, and Specifications NS-32E859A11/NS-42E859A11
3Press S or T to highlight Reset this TV, then press SELECT.
4Press S or T to highlight Clear and delete everything,
then press SELECT. If Parental Controls is turned on, the
Enter PIN screen opens. Enter your four-digit PIN to
continue.
5Press three times, then press SELECT to confirm this
selection and start the Setup Wizard setup.
Specifications
Design specifications are subject to change without notice.
Dimensions and weight specifications are approximate.
Warranty
Dimensions and weight
Screen
Display resolutions/VGA scan rates
Tuner
NS-32E859A11 NS-42E859A11
Parts: 2 years
Labor: 2 years
Parts: 2 years
Labor: 2 years
NS-32E859A11 NS-42E859A11
Without stand:
30.62 ×1.8 × 19.32 in.
(777.8 × 45.8 × 490.8 mm)
With stand:
30.62 × 7.37 × 20.94 in.
(777.8 × 187.2 × 531.9 mm)
Without stand:
39.84 × 1.96 × 24.5 in.
(1011.9 × 49.8 × 622.9 mm)
With stand:
39.84 × 11.19 × 28.62 in.
(1011.9 × 284.3 × 727.0 mm)
Without stand:
20.4 lb. (9.25 kg)
With stand:
23.1 lb. (10.5 kg)
Without stand:
32.84 lb. (14.9 kg)
With stand:
39.24 lb. (17.8 kg)
NS-32E859A11 NS-42E859A11
Screen size measured
diagonally
31.55" 42"
Display type LCD
Active matrix full high-
definition TFT
LCD
Active matrix full high-
definition TFT
Panel 60 Hz vs.120 Hz 120Hz 120Hz
Display resolution 1080p 1080p
Panel resolution 1920 × 1080
(RGB vertical stripe)
1920 × 1080
(RGB vertical stripe)
Aspect ratio 16:9 16:9
Contrast ratio (typical)–panel 4000 : 1 4000: 1
Dynamic contrast ratio–list
value
10000:1 12000:1
Brightness (center typical)
cd/m2
450 nits 450 nits
Comb filter 3d y/c digital 3d y/c digital
Response time 6.5 ms 5.5 ms
Horizontal viewing angle 178° 178°
Vertical viewing angle 178° 178°
NS-32E859A11 NS-42E859A11
HDMI Suggested Resolutions:
1080p, 1080i, 720p,
480p, 480i
Suggested Resolutions:
1080p, 1080i, 720p,
480p, 480i
Component video Suggested Resolutions:
1080p, 1080i, 720p,
480p, 480i
Suggested Resolutions:
1080p, 1080i, 720p,
480p, 480i
PC/VGA Suggested scan rates:
640 × 480/60Hz,
800 × 600/60Hz,
1024 × 768/60Hz,
1280 × 1024/60Hz,
1680 × 1050/60Hz,
1920 × 1080/60Hz
Suggested scan rates:
640 × 480/60Hz,
800 × 600/60Hz,
1024 × 768/60Hz,
1280 × 1024/60Hz,
1680 × 1050/60Hz,
1920 × 1080/60Hz
NS-32E859A11 NS-42E859A11
Analog NTSC NTSC
Digital ATSC, 8-VSB, Clear-QAM ATSC, 8-VSB, Clear-QAM
www.insigniaproducts.com 105
NS-32E859A11/NS-42E859A11 Maintaining, Troubleshooting, and Specifications
Inputs
Outputs
Audio
Power
Miscellaneous
NS-32E859A11 NS-42E859A11
HDMI 4 (side)
E-EDID-compliant
HDCP-compliant
4 (side)
E-EDID-compliant
HDCP-compliant
Component video 1 (back) 1 (back)
Composite video 1 (back) 1 (back)
Shared audio (component
and composite)
Yes Yes
S-Video No No
PC/VGA 1 (side) 1 (side)
3.5mm PC audio input 1 (side) 1 (side)
DVI 1- HDMI/DVI (side) 1- HDMI/DVI (side)
USB Compliance: USB 2.0
For service only
Compliance: USB 2.0
For service only
Antenna F type F type
INc Uart Uart
Rocketboost PCI-e PCI-e
NS-32E859A11 NS-42E859A11
Video No No
Analog audio 1 (side) 1 (side)
Digital audio 1 (back) SPDIF 1 (back) SPDIF
Headphone 1 (side) 1 (side)
WiFi 802.11n / dual band 802.11n / dual band
Ethernet 10/100 base-T/TX 10/100 base-T/TX
NS-32E859A11 NS-42E859A11
Simulated Surround Sound Yes -SRS TruSurround HD Yes -SRS TruSurround HD
Audyssey Dynamic Volume Yes - Audyssey DVL, ABX,
EQ
Yes - Audyssey DVL, ABX,
EQ
Speaker output 10 W (R) + 10 W (L) 5 W (R) + 5 W (L) +
10 W (woofer)
NS-32E859A11 NS-42E859A11
Power consumption On: <77W
Standby: <1W
On: <115W
Standby: <1W
Power input 120V/60Hz 120V/60Hz
NS-32E859A11 NS-42E859A11
OSD languages English English
INlink Yes Yes
Game Mode Yes Yes
ENERGY STAR qualified Yes Yes
Internet connectable Yes Yes
TV base screws M4 type (17 mm length)
(8 pcs)
M4 type (17 mm length)
(8 pcs)
V-Chip (version 2.0) Yes Yes
Sleep timer Yes Yes
Channel labeling Yes Yes
VESA mount (mm)
(horizontal × vertical)
200 × 100 200 × 200
Note
The length of the wall-mount screws vary depending
on the wall-mount bracket you purchased. See the
instructions that came with the wall-mount bracket
for screw lengths.


107
Appendix
Setting up your Z-Wave remote control. . . . . . . . . . . . . . . . . . . . . . . . . . . . . . . 108
Advanced remote control programming . . . . . . . . . . . . . . . . . . . . . . . . . . . . . 111
Controlling the remote control backlight . . . . . . . . . . . . . . . . . . . . . . . . . . . . . 113
108 www.insigniaproducts.com
Appendix NS-32E859A11/NS-42E859A11
Setting up your Z-Wave
remote control
The remote control that came with your TV is different from a
traditional IR remote control. Using Z-Wave technology, your
remote control allows RF communication with your TV. You do
not have to point the remote control toward the remote
control sensor on the front of your TV.
Adding your remote control to the TV
Z-Wave network
To turn on the RF communication between your TV and the
remote control, you have to add the remote control to the
Z-Wave network first.
To add your remote control to your TV Z-Wave network
(TV as Primary Controller):
1Press and hold VOL and VOL on the front of your TV at
the same time. The Set up a New Remote Control screen
opens.
2Press and hold and on the remote control for about
five seconds. The remote control LED blinks four times and
the Remote Control Setup Complete screen opens.
3Press SELECT to complete the setup. You can now use the
RF communication between the remote control and
your TV.
Toggling between IR and RF communication
Once your remote control is added to the TV Z-Wave network,
you can use Z-Wave RF communication to control your TV.
However, you can also switch to IR communication, which
requires you to point the remote control toward the remote
control sensor when you try to control your TV.
RF communication with your TV does not require you to point
the remote control toward the remote control sensor on the
front of your TV. Also your remote control and TV can talk to
each other which will help with setting up your Insignia
Universal remote to work with other home theater devices.
To toggle between IR and RF communication:
• If you are using RF communication, press and hold and
EXIT at the same time. The remote control switches to IR
mode and the LED blinks four times.
• If you are using IR communication, press and hold and
EXIT at the same time. The remote control switches to RF
mode and the LED blinks twice.
Note
Your Insignia TV is configured as a AV Control
Point Device, and as such does not support or
control with the Basic Command Class.
Set up a New Remote Control
Hold down theTHUMBS UP and THUMBS DOWN buttons
at the same time for 5 seconds to set up your new remote
control to work with this TV.
Press any button on the TV to cancel.
Note
To add other Z-Wave devices to your TV
Z-Wave network, perform Step 1 above, then
follow the instructions in the user manual of
that device to complete the setup.
Remote Control Setup Complete
OK
The TV now recognizes your new remote control.
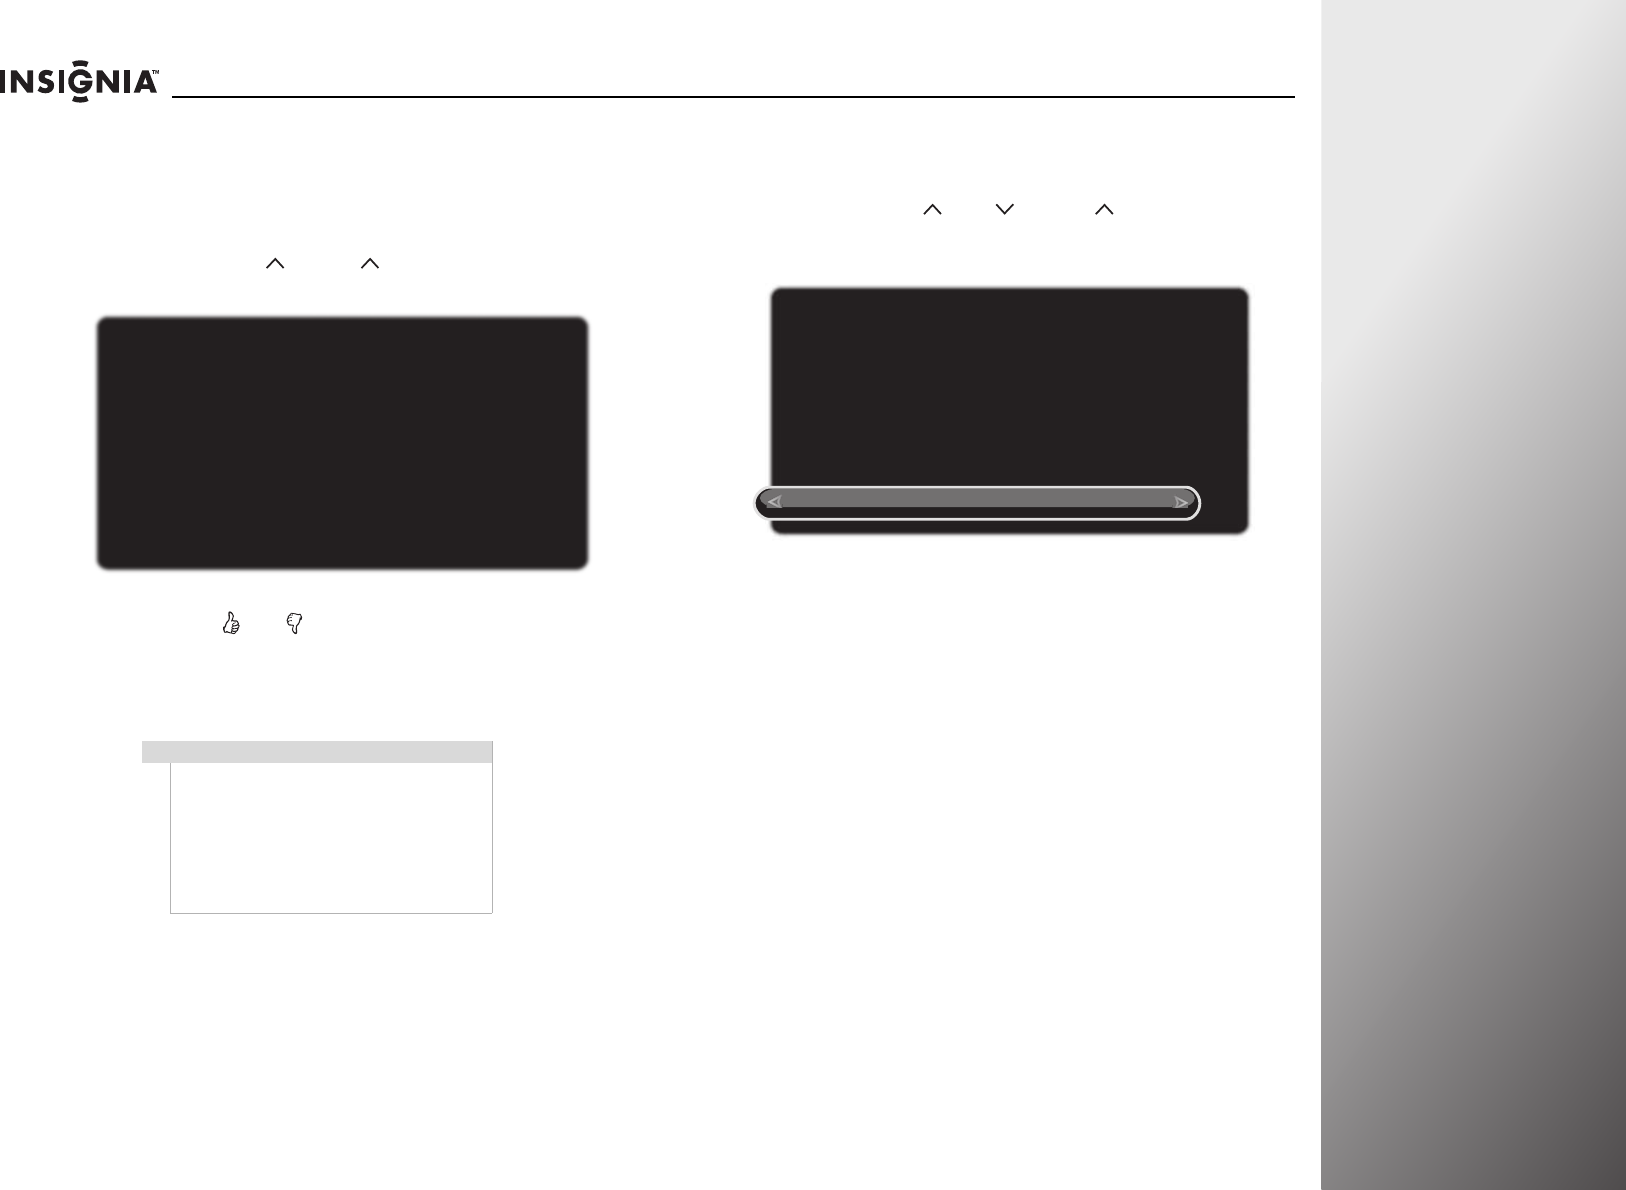
www.insigniaproducts.com 109
NS-32E859A11/NS-42E859A11 Appendix
Removing your remote control from the TV
Z-Wave network
To remove your remote control from the TV Z-Wave
network (TV as Primary Controller):
1Press and hold VOL and CH on the front of your TV at
the same time. The Remove a Z-Wave Device screen opens.
2Press and hold and on the remote control for about five
seconds. The Z-Wave Device Removed screen opens. The
remote control is removed from the TV Z-Wave network, and
RF communication is not available. To close the screen, press
SELECT or wait a few seconds.
Resetting your TV Z-Wave network
To reset your TV Z-Wave network:
1Press and hold VOL , VOL , and CH on the front of
your TV at the same time. The Reset Z-Wave Network? screen
opens.
2Press S or T to highlight Reset Z-Wave Network, then press
SELECT.
Note
• To enable RF communication, you have
to add the remote control to the Z-Wave
network again.
• To remove other Z-Wave devices from
your TV Z-Wave network, perform Step 1
above, then follow the instructions in
the user manual of that device to
complete the removal.
Remove a Z-WAVE Device?
Press any button on the TV to cancel.
Go to your Z-Wave device and follow the instructions to
remove it from your Z-Wave network.
Reset Z-Wave Network?
Cancel
Reset Z-Wave Network
Warning: this will reset your Z-Wave network, and any
devices you wish to use will need to be added again.
110 www.insigniaproducts.com
Appendix NS-32E859A11/NS-42E859A11
3Press SELECT to complete the reset.
Managing Z-Wave network (other device as
Controller)
Your TV can be operated in another Z-Wave network with
Z-Wave certified devices from other manufacturers or other
applications. The different listening nodes within the network
can act as repeaters regardless of vendor.
To add your TV to other Z-Wave network:
• Refer to the user manual of the Z-Wave device (Primary
Controller) for programming information.
• When the Z-Wave device is in programming (setup)
mode, press CH and CH on the TV at the same time
to add your TV to the Z-Wave network.
To remove your TV from other Z-Wave network:
• Refer to the user manual of the Z-Wave device (Primary
Controller) for programming information.
• When the Z-Wave device is in programming (setup)
mode, press CH and CH on the TV at the same time
to remove your TV from the Z-Wave network.
Z-Wave Terminology
Primary Controller—This is the main device used to set up
and control your Z-Wave network. There can only be one
primary controller, and it must be used to add or delete
devices. A primary controller can be a portable device like a
hand-held remote control, a static controller (permanently
installed and never moved), a Z-Wave enabled PC, or a Z-Wave
enabled Ethernet router/bridge.
Secondary Controller—The Z-Wave network supports
multiple controllers so you can use additional Z-Wave remotes
throughout the home. If the secondary controller is the same
brand and model as the primary, it will have all of the same
capabilities as the primary with one exception; the secondary
controller can not be used to add or delete devices.
Home Control Network—Your controllers and every Z-Wave
device you have added with the primary controller are linked
together into a wireless network. Each device in your network
has a unique address assigned to it and cannot be activated by
your neighbor’s Z-Wave controller.
Node/Device—Node is the technical term used to describe a
Z-Wave device in your home control network. The terms
“Node” and “Device” both refer to an individual Z-Wave
enabled device and are interchangeable within context of
instructions.
Note
After resetting your TV Z-Wave network, to
use your remote control, you have to switch
to IR communication or remove then add the
remote control to the TV Z-Wave network
again to enable RF communication.
For more information, see “Toggling between
IR and RF communication” on page 108 or
“Removing your remote control from the TV
Z-Wave network” on page 109 and “Adding
your remote control to the TV Z-Wave
network” on page 108.
Note
To setup your Z-Wave network with other
devices, refer to the user manual of the
devices for more information.
Z-Wave Network Reset
OK
Your Z-Wave network has been successfully reset. Any
devices you wish to use on the Z-Wave network must
be added again.

www.insigniaproducts.com 111
NS-32E859A11/NS-42E859A11 Appendix
Notes on Z-Wave network management
• Adding a node or device can also be referred to as including a
node or device. Removing a node or device can also be
referred to as excluding or deleting a node or device.
• Every Z-Wave enabled device acts as a signal repeater and
multiple devices result in more possible transmission routes
which helps eliminate “RF dead-spots.”
Advanced remote control
programming
Programming a learned button
Your remote control includes a learning feature that lets you
add functions that are unique to your home entertainment
devices (such as VCR tracking up or down). However, there are
some considerations to keep in mind:
• Your original remote controls must be in working order for
learning to work correctly.
• Learned buttons are mode-specific, so each button can store a
unique function for each mode.
• Do not use the mode buttons or TiVo button.
• Certain device functions are not learnable, including
multi-frequency types, some high-frequency functions, and
other unusual formats.
• When setting up learned buttons, avoid high levels of
ambient light such as natural sunlight or energy efficient
fluorescent lights.
To program a learned button:
1Press and hold the A and D buttons at the same time until
the LED blinks twice, then release.
2Enter 9 7 5. The LED blinks twice.
3Press the mode button you want to learn functions on, then
press the button on the Insignia remote you want to
program.
4Place your Insignia remote control head-to-head (about 2"
apart) from your original remote control (the one that came
with the device).
5On the original remote, press and hold the button to be
learned. Continue holding the button on the original remote
until the Insignia’s LED blinks twice.
6Repeat Step 3 through 5 to program another button. After
you have completed programming all the buttons you want,
press and hold SELECT until the LED blinks twice to save all
data learned.
Deleting a single learned button
This process returns the button to its original programming for
the mode you select. You can also delete learned programming
by teaching a different function to the button (see
“Programming a learned button” on page 111).
To delete a single learned button:
1Press and hold the A and D buttons at the same time until
the LED blinks twice, then release.
2Enter 9 7 6. The LED blinks twice.
Note
Have your original remote controls handy before
programming learning.
Notes
• If more than 10 seconds pass between button
presses, the remote control exits programming.
• If the LED displays one long flash instead,
replace the batteries. If the remote control
continues to display one long flash, the remote
control cannot learn a new button.
Notes
• If more than 10 seconds pass between button
presses, the remote control exits programming.
• If the LED displays one long flash instead,
replace the batteries. If the remote control
continues to display one long flash, the remote
control cannot learn a new button.

112 www.insigniaproducts.com
Appendix NS-32E859A11/NS-42E859A11
3Press the mode button that you want to remove the
learned button from, then press the button containing the
learned function to be deleted, twice. The LED blinks twice
and programming ends.
Deleting all learned buttons in a specific
mode
To delete all learned buttons in a specific mode:
1Press and hold the A and D buttons at the same time until
the LED blinks twice, then release.
2Enter 9 7 6. The LED blinks twice.
3Press the mode button twice (for example, DVD, STB, or
AUX) to clear all the learned buttons for that mode. The
LED blinks twice and programming ends.
Programming macros
Your can program any button (except the TiVo button) on your
remote control with a macro function. Each button can be set
up to perform a pre-programmed set of sequential button
presses with the press of a single button. You can use a macro
to control a home theater operation, to set a favorite channel,
or for other functions you want to control with one button
press. Each macro button can hold up to 32 button presses.
You can program two types of macros:
• Mode-independent—Works in any mode.
• Mode-dependent—Works in a specific mode.
To program a mode-independent macro:
1Press and hold the A and D buttons at the same time until
the LED blinks twice, then release.
2Enter 9 9 5. The LED blinks twice.
3Press the button you want to assign to a macro.
4Enter the series of commands you want the macro to
execute (up to 32 commands).
5Press and hold SELECT until the red LED blinks twice, then
release.
When you press the preset macro button, the remote sends
the series of commands you have entered, regardless of
what mode you are in. For example, you could program a
macro button to turn on both your TV and cable box and
select a particular channel.
To program a mode-dependent macro:
1Press the device mode button (DVD, STB, or AUX).
2Press and hold the A and D buttons at the same time until
the LED blinks twice, then release.
3Enter 9 7 8. The LED blinks twice.
4Press the button you want to assign to a macro.
5Enter the series of commands you want the macro to
execute (up to 32 commands).
6Press and hold SELECT until the red LED blinks twice, then
release.
When you press the macro button, the remote sends the
series of commands you have entered, but only if you are in
the mode you selected in Step 1. For example, you could
program the macro button to turn on both your TV and
cable box and select a particular channel, but only if you
are in TV mode. If you are in DVD mode, this button does
not execute the macro you set up in TV mode.
Notes
• If more than 10 seconds pass between button
presses, the remote control exits programming.
• If the LED displays one long flash instead,
replace the batteries. If the remote control
continues to display one long flash, the remote
control cannot learn a new button.
Note
Programming a new macro over an existing one
erases the original macro.
Note
To clear the macro, repeat Steps 1 through 5, but do
not enter a series of commands at Step 4.
Note
To clear the macro, repeat Steps 1 through 6, but do
not enter a series of commands at Step 4.

www.insigniaproducts.com 113
NS-32E859A11/NS-42E859A11 Appendix
Controlling the remote
control backlight
Your remote control has a backlight that can turn on when you
press a button. You can set the amount of time your want the
backlight to stay on before it automatically turns off.
Turning the remote control backlight on or
off
To turn your remote control backlight on or off:
1Press and hold the A and D buttons at the same time until
the power LED blinks twice, then release.
2Enter 9 7 2. If you are turning on the remote control
backlight, the power LED blinks twice. If you are turning off
the remote control backlight, the power LED blinks four
times.
Setting the remote control backlight delay
To set the remote control backlight delay:
1Press TiVo. The Home screen opens. Press S or T to select
Settings, then press X or SELECT.
2Press S or T to highlight Settings, then press X or SELECT.
3Press S or T to highlight Devices, then press X or SELECT.
4Press S or T to highlight Remote control setup, then press
X or SELECT.
10:00pm
Home
Settings
Connect to the Internet Settings
Parental Controls
Check for updates
Account & system info
Help
Sleep timer
10:00 PM
Settings
Audio
Channels & providers
Network
Recommendations
Video
Appearance
Source sensor
Remote control setup
TV power on
Reset device settings
INlink HDMI control
Devices
10:00 PM
Settings
Audio
Channels & providers
Devices
Network
Recommendations
Video
Appearance INlink HDMI control
D
e
vi
ces
Set up the remote control to
control the devices that you use
with this TV, like your cable box,
DVR, or DVD player.
Source sensor
Remote control setup
TV power on
Reset device settings
114 www.insigniaproducts.com
Appendix NS-32E859A11/NS-42E859A11
5Press S or T to highlight Backlight, then press X or
SELECT.
6Press S or T to highlight the amount of time you want the
backlight to stay on, then press X or SELECT.
10:00 PM
Remote control setup
DVD button
STB button
AUX button
Power button in TV mode
Volume button
Backlight
Reset all remote settings
Set the delay before the
backlight on the remote
control automatically turns off.
Current Settings:
3 seconds
10:00 PM
Setup Backlight
3 seconds
2 seconds
1 seconds
4 seconds
5 seconds
6 seconds
7 seconds
8 seconds
9 seconds
10 seconds
Remote Control Setup
Set the dealy before the backlight on the remote control automatically turns off.


116 www.insigniaproducts.com
Legal Notices NS-32E859A11/NS-42E859A11
Legal notices
FCC Part 15
This device complies with Part 15 of the FCC Rules. Operation of this product is subject
to the following two conditions: (1) this device may not cause harmful interference,
and (2) this device must accept any interference received, including interference that
may cause undesired operation.
This equipment has been tested and found to comply within the limits for a class B
digital device, pursuant to Part 15 of the FCC Rules. These limits are designed to
provide reasonable protection against harmful interference in a residential
installation. This equipment generates, uses, and can radiate radio frequency energy
and, if not installed and used in accordance with the instructions, may cause harmful
interference to radio communications. However, there is no guarantee that
interference will not occur in a particular installation. If this equipment does cause
harmful interference to radio or television reception, which can be determined by
turning the equipment off and on, the user is encouraged to try to correct the
interference by one or more of the following measures:
• Reorient or relocate the receiving antenna.
• Increase the separation between the equipment and receiver.
• Connect the equipment into an outlet on a circuit different from that to which
the receiver is connected.
• Consult the dealer or an experienced radio/TV technician for help.
FCC ID Number Remote: MG38881-R
FCC ID Number WiFi Module: NKR-DNUB-B1"
FCC warning
Changes or modifications not expressly approved by the party responsible for
compliance with the FCC Rules could void the user’s authority to operate this
equipment.
DHHS and FDA safety certification
• This product is made and tested to meet safety standards of the FCC,
requirements and compliance with safety performance of the U.S. Department
of Health and Human Services, and also with FDA Radiation Performance
Standards 21 CFR Subchapter J.
RSS 310 statement
To reduce potential radio interference to other users, the antenna type and its gain
should be so chosen that the equivalent isotropically radiated power (e.i.r.p.) is not
more than that permitted for successful communication.
HDMI
HDMI, the HDMI logo, and High-Definition Multimedia
Interface are trademarks or registered trademarks of
HDMI Licensing LLC.
Audyssey
Audyssey Dynamic Volume™
Energy Star
To meet Energy Star requirements, keep TV settings at the factory
default settings.
SRS TruSurround HD
is a trademark of SRS Labs, Inc. TruSurround HD
technology is incorporated under license from SRS Labs, Inc.
SRS TruSurround HD™ creates an immersive, feature-rich
surround sound experience from two speakers, complete with
rich bass, high frequency detail and clear dialog.
Open Source Software
For OPEN SOURCE SOFTWARE informaiton please refer to the Legal section in the
on-screen display (OSD)on the TV.
If you require additional information or you wish to receive the complete
corresponding GPL or LGPL licensed source code, please call the Insignia support line
at 1-877-467-4289. This source code is available for a period of three (3) years from the
date of the distribution of this product by Insignia.
Disclaimer
This Insignia product may contain content and/or services that belong to a third party.
Such third party content and/or service may only be used in compliance with the
terms and conditions that govern such use. Unless expressly authorized by the
applicable third party's terms of use, you may not modify, copy, republish, upload,
post, transmit, translate, sell, create derivative works, exploit, or distribute in any
manner or medium any third party content or service displayed through the Insignia
product.
All third party content or service is provided "as is." Third party content or service may
be terminated or interrupted at any time. Insignia has no control over the networks
and transmission facilities that third party content and services are transmitted
through. Any question or request regarding third party content or services should be
made directly to the applicable third party. INSIGNIA EXPRESSLY DISCLAIMS ANY
RESPONSIBILITY OR LIABILITY FOR ANY AVAILABILITY, INTERRUPTION OR SUSPENSION
OF ANY THIRD PARTY CONTENT OR SERVICE MADE AVAILABLE THROUGH THE
INSIGNIA PRODUCT. INSIGNIA DOES NOT WARRANT OR MAKE ANY REPRESENTATION,
WHETHER EXPRESS OR IMPLIED, ABOUT THE SUBSTANCE, QUALITY, FUNCTIONALITY,
ACCURACY, VALIDITY, TIMELINESS, SUITABILITY, AVAILABILITY, COMPLETENESS,
FITNESS FOR A PARTICULAR PURPOSE, MERCHANTABILITY OR ANY OTHER
REPRESENTATION ABOUT SUCH CONTENT OR SERVICES. INSIGNIA EXPRESSLY
DISCLAIMS ANY AND ALL IMPLIED WARRANTIES, INCLUDING BUT NOT LIMITED TO,
WARRANTIES OF MERCHANTABILITY OR FITNESS FOR A PARTICULAR PURPOSE.
UNDER NO CIRCUMSTANCES, INCLUDING NEGLIGENCE, SHALL INSIGNIA BE LIABLE,
WHETHER IN CONTRACT OR TORT, FOR ANY DIRECT, INDIRECT, INCIDENTAL, SPECIAL
OR CONSEQUENTIAL DAMAGES, ATTORNEY FEES, COSTS, EXPENSES, OR ANY OTHER
DAMAGES ARISING OUT OF OR IN CONNECTION WITH THE USE OF ANY THIRD PARTY
CONTENT OR SERVICES, EVEN IF ADVISED OF THE POSSIBILITY OF SUCH DAMAGES.
DYNAMIC VOLUME

www.insigniaproducts.com 117
NS-32E859A11/NS-42E859A11 Legal Notices
Two-year limited warranty
Definitions:
Insignia Products (“Insignia”) warrants to you, the original purchaser of this new
Insignia-branded television (“Product”), that the Product shall be free of defects in the
original manufacturer of the material or workmanship for a period of two (2) years from
the date of your purchase of the Product (“Warranty Period”). For this warranty to apply,
your Product must be purchased in the United States or Canada from a Best Buy or
Future Shop authorized dealer of Insignia brand products only that are packaged with
this warranty statement.
How long does the coverage last?
The Warranty Period lasts for 2 years (730 days) from the date you purchased the
Product. Your purchase date is printed on the receipt you received with the Product.
What does this warranty cover?
During the Warranty Period, if the original manufacture of the material or workmanship
of the Product is determined to be defective by an authorized Insignia repair center or
store personnel, Insignia will (at its sole option): (1) repair the Product with new or
rebuilt parts; or (2) replace the Product at no charge with new or rebuilt comparable
products or parts. Products and parts replaced under this warranty become the
property of Insignia and are not returned to you. If service of Products or parts are
required after the Warranty Period expires, you must pay all labor and parts charges.
This warranty lasts as long as you own your Insignia Product during the Warranty
Period. Warranty coverage terminates if you sell or otherwise transfer the Product.
How to obtain warranty service?
If you purchased the Product at a Best Buy or Future Shop retail store location and your
television Product has a screen size of less than 37 inches, please take your original
receipt and the Product to any Best Buy or Future Shop store. Make sure that you place
the Product in its original packaging or packaging that provides the same amount of
protection as the original packaging. If you purchased the Product from a Best Buy or
Future Shop online web site, mail your original receipt and the Product to the address
listed on the web site. Make sure that you put the Product in its original packaging or
packaging that provides the same amount of protection as the original packaging.
To obtain in-home warranty service for a television with a screen 37 inches or larger, in
the United States call 1-888-BESTBUY, Canada call 1-866-BESTBUY for Future Shop call
1-800-663-2275. Call agents will diagnose and correct the issue over the phone or will
have an Insignia-approved repair technician dispatched to your home.
Where is the warranty valid?
This warranty is valid only to the original purchaser of the product in the United States
and Canada at Best Buy or Future Shop branded retail stores or websites.
What does the warranty not cover?
This warranty does not cover:
• Customer instruction/education
• Installation
• Set up adjustments
• Cosmetic damage
• Damage due to acts of God, such as power surges
•Accident(s)
•Misuse
•Abuse
• Negligence
• Commercial purposes/use, including but not limited to use in a place of business
or in communal areas of a multiple dwelling condominium or apartment complex,
or otherwise used in a place of other than a private home.
• Modification of any part of the Product, including the antenna
• Plasma display panel damaged by static (non-moving) images applied for lengthy
periods (burn-in).
• Damage due to incorrect operation or maintenance
• Connection to an incorrect voltage or power supply
• Attempted repair by any person not authorized by Insignia to service the Product
• Products sold “as is” or “with all faults”
• Consumables, including but not limited to batteries (i.e. AA, AAA, C etc.)
• Products where the factory applied serial number has been altered or removed
• Loss or Theft of this product or any part of the product
REPAIR REPLACEMENT AS PROVIDED UNDER THIS WARRANTY IS YOUR EXCLUSIVE
REMEDY FOR BREACH OF WARRANTY. INSIGNIA SHALL NOT BE LIABLE FOR ANY
INCIDENTAL OR CONSEQUENTIAL DAMAGES FOR THE BREACH OF ANY EXPRESS OR
IMPLIED WARRANTY ON THIS PRODUCT, INCLUDING, BUT NOT LIMITED TO, LOST DATA,
LOSS OF USE OF YOUR PRODUCT, LOST BUSINESS OR LOST PROFITS. INSIGNIA
PRODUCTS MAKES NO OTHER EXPRESS WARRANTIES WITH RESPECT TO THE PRODUCT,
ALL EXPRESS AND IMPLIED WARRANTIES FOR THE PRODUCT, INCLUDING, BUT NOT
LIMITED TO, ANY IMPLIED WARRANTIES OF AND CONDITIONS OF MERCHANTABILITY
AND FITNESS FOR A PARTICULAR PURPOSE, ARE LIMITED IN DURATION TO THE
WARRANTY PERIOD SET FORTH ABOVE AND NO WARRANTIES, WHETHER EXPRESS OR
IMPLIED, WILL APPLY AFTER THE WARRANTY PERIOD. SOME STATES, PROVINCES AND
JURISDICTIONS DO NOT ALLOW LIMITATIONS ON HOW LONG AN IMPLIED WARRANTY
LASTS, SO THE ABOVE LIMITATION MAY NOT APPLY TO YOU. THIS WARRANTY GIVES
YOU SPECIFIC LEGAL RIGHTS, AND YOU MAY ALSO HAVE OTHER RIGHTS, WHICH VARY
FROM STATE TO STATE OR PROVINCE TO PROVINCE.
Contact Insignia:
For customer service please call 1-877-467-4289
www.insigniaproducts.com
Distributed by Best Buy Purchasing, LLC
7601 Penn Avenue South, Richfield, Minnesota, U.S.A. 55423-3645
© 2011 BBY Solutions, Inc.
All rights reserved. INSIGNIA is a trademark of BBY Solutions, Inc. Registered in some
countries. All other products and brand names are trademarks of their respective
owners.

www.insigniaproducts.com (877) 467-4289
Distributed by Best Buy Purchasing, LLC 7601 Penn Avenue South, Richfield, MN USA 55423-3645
© 2011 BBY Solutions, Inc. All rights reserved. INSIGNIA is a trademark of BBY Solutions, Inc. Registered in some countries.
All other products and brand names are trademarks of their respective owners.
ENGLISH 11-0338
