Intech Electronics CS8060 Bluetooth Headset User Manual MCB 8060010 0A A
In Tech Electronics Ltd Bluetooth Headset MCB 8060010 0A A
Contents
- 1. Manual CS8059
- 2. Manual CS8060
Manual CS8060
2
5
!
!
!
!
!
Headset in den Pairing Mode (Verbindungsmodus) bringen
Anrufe weiterleiten
Stellen Sie sicher, dass das HS vollkommen aufgeladen und dass das Ladegerät vom
Handy getrennt ist, bevor Sie die Verbindung starten. Bei ausgeschaltetem HS 4
Sekunden lang S1 gedrückt halten. Die rote und grüne LED-Anzeigen blinken
abwechselnd und signalisieren, dass das HS sich im Pairing Mode befindet.
Befolgen Sie die Betriebsanleitungen Ihres Bluetooth-Telefones, um den Pairing
Vorgang zu starten. Normalerweise muss dazu das Setup- oder Verbindungsmenü
aufgerufen und dann die Optionen zur Identifikation der Bluetooth Geräte gewählt
werden. Bluetooth braucht einige Sekunden, um eine Verbindung herzustellen.
Auf dem Display Ihres Handys erscheint die Meldung, dass das “CS8060” Headset
gefunden wurde und die Frage, ob Sie es registrieren möchten. In diesem Fall müssen
Sie dies bestätigen. Das Display des Handys fragt Sie nach einen Passcode oder eine
PIN. Geben Sie die Zahlenfolge von “0000” ein.
Wenn die LED-Anzeige des HS alle 3 Sekunden grün blinkt, bedeutet das, dass der
Verbindungsvorgang erfolgreich beendet wurde. Normalerweise fragt das Handy, ob
Sie den Namen des Headsets ändern möchten. Wir empfehlen CS8060 als Namen zu
bestätigen und nicht zu ändern. Sie können so viele Headsets und Geräte in Ihrem
Handy registrieren, wie Sie möchten. Im Fall, dass der Verbindungsvorgang nicht wie
vorgesehen abläuft: Schalten Sie das Headset und das Handy aus und warten Sie 10
Sekunden. Nun schalten Sie das Headset und das Handy wieder an und wiederholen
Sie die Schritte Pairing Mode von Anfang an.
Wenn Sie einen Anruf erhalten, hören Sie über das HS einen Rufton. Drücken Sie auf
S1, beantworten Sie den Anruf. Die grüne LED-Anzeige leuchtet kurz und dann
wiederholt auf (jede Sekunde) während der Anruf im Gange ist.
(Für Nokia 3650 oder ähnliche Modelle)
Sind Sie mit einem Anrufer verbunden, können die Anrufe vom Bluetooth-Telefon auf
das HS und vom HS auf das Bluetooth-Telefon weitergeleitet werden.
Um die Anrufe vom Bluetooth-Telefon auf das HS weiterzuleiten: Drücken Sie einmal
S1, der Anruf wird auf das HS weitergeleitet.
Um einen Anruf vom HS auf das Bluetooth-Telefon weiterzuleiten, folgen Sie dem
Bedienungshandbuch Ihres Handys.
Um das Mikrofon während eines aktuellen Gesprächs stumm zu schalten:
Drücken Sie S2 und S3 gleichzeitig eine Sekunde lang, das Mikrofon wird stumm
geschaltet. Ein unterbrochener Beep-Ton ertönt solange die Stumm-Funktion aktiv ist.
Wenn das Mikrophon stumm geschaltet ist, drücken Sie S2 und S3 gleichzeitig, um die
Stumm-Funktion zu beenden; der Beep-Ton wird beendet.
“”
Nach erfolgreicher Verbindung des HS und des Handys wird das Handy “verbinden”
anzeigen Dann Wählen Sie “Ja” um die Verbingdung herzustellen Nun sind Sie
bereit, über das HS Anrufe zu machen oder Anrufe anzunehmen. Für andere Telefone
verwenden Sie die jeweiligen Bedienungshandbücher um die Verbindung herzustellen.
Bluetooth-Verbindung herstellen
Anrufe annehmen
Stummschalten des Mikrofons
,
..
Stumm-Funktion beenden
!
!
!
!
Putting Headset in Pairing Mode
Establishing Link
Answering Incoming Calls
Transferring Calls
Muting the microphone
Make sure the HS is fully charged and charging cable disconnected from it before
pairing starts. While the HS is powered off, press and hold S1 for 4 seconds. Red
and Green LEDs flashing alternately will indicate that the HS is in Pairing Mode.
Follow the operating instructions for your mobile phone to start the
pairing process. Typically, this has to be done by going to a setup or connect
menu and then selecting the options to discover devices.
may take several seconds to establish a connection.
Your phone s display should indicate that it has found the CS8060 headset
and asks if you want to pair it. You should confirm this. The phone s display
would prompt you for a passkey or PIN. Enter a sequence of 0000 .
The headset LED will flash Green every 3 seconds, indicating successful pairing.
Usually the phone will also ask whether you want to change the headset s name.
We recommend you should approve the CS8060 name and not change it. You
can pair as many headsets and devices as you wish in your mobile phone.
If pairing does not occur as expected. Turn the headset and phone off and wait for
10 seconds. Turn the headset and phone on again and repeat all steps from
beginning.
After pairing, the mobile phone will show connect then please select YES
to establish the link Now you are ready to make and answer calls on the HS
For other phones please follow the operation manual to establish the link
When an incoming call is present, the HS will ring . Pressing S1 will answer the
call. The green LED will continue to flash fast while the call is in session. (Once
every second)
(For Nokia 3650 or equivalent models)
When you are in session, calls can be transferred from the phone to the
HS and from the HS to the phone.
To transfer a call from the phone to the HS: press S1 once, the call will
be transferred to the HS.
To transfer a call from HS to the phone, please follow the operating
instructions of your phone.
Pressing both S2 and S3 buttons simultaneously for about a second, the
microphone will be muted. A periodic beep tone will be heard while the mute
function is active.
When the microphone is muted, press on both S2 and S3 buttons simultaneously
will end the mute function and the periodic beep tone will stop.
Bluetooth
Bluetooth Bluetooth
Bluetooth
Bluetooth
Bluetooth
Bluetooth
To mute the microphone during an active call
To end the mute function
'“”
'
“”
'
“”
,“”
..
,.
Bluetooth
!
7
TM
CS8060
Bluetooth®Headset
User Manual
http://www.abe-hk.com
Benutzerhandbuch
User Manual
D
E
1
Benutzerhandbuch
Inhalt
Abbildungen des Headsets.....................
Laden des Akkus ............................... ................................ ...... .......1
Einschalten des Headsets ................................................... ...... ......1
Ausschalten des Headsets ................................................... .... .......1
Bluetooth-Verbindung herstellen........................................... .... . .......2
Anrufe annehmen..................................................................... ........2
Anrufe weiterleiten....................................................... .......... ..........2
Stummschalten des Mikrofons.............................................. .... . .......2
Anrufe beenden............................................................ ......... ..... ....3
Anpassen der Hörerlautstärke..............................................................................3
Aufladeverbindungsdiagramme.............................. ........5
.............................................................1
........ ............
........ ............
........ ............
Headset in den Pairing Mode (Verbindungsmodus) bringen.....................................2
... .... ............
...................
. ..................
.... ............ ....
.... ............ ....
Anruf über Sprachanwahl starten..........................................................................3
Wahlwiederholung der letzten Nummer.................................................................3
...................................................................................................3
.......................................................................................3
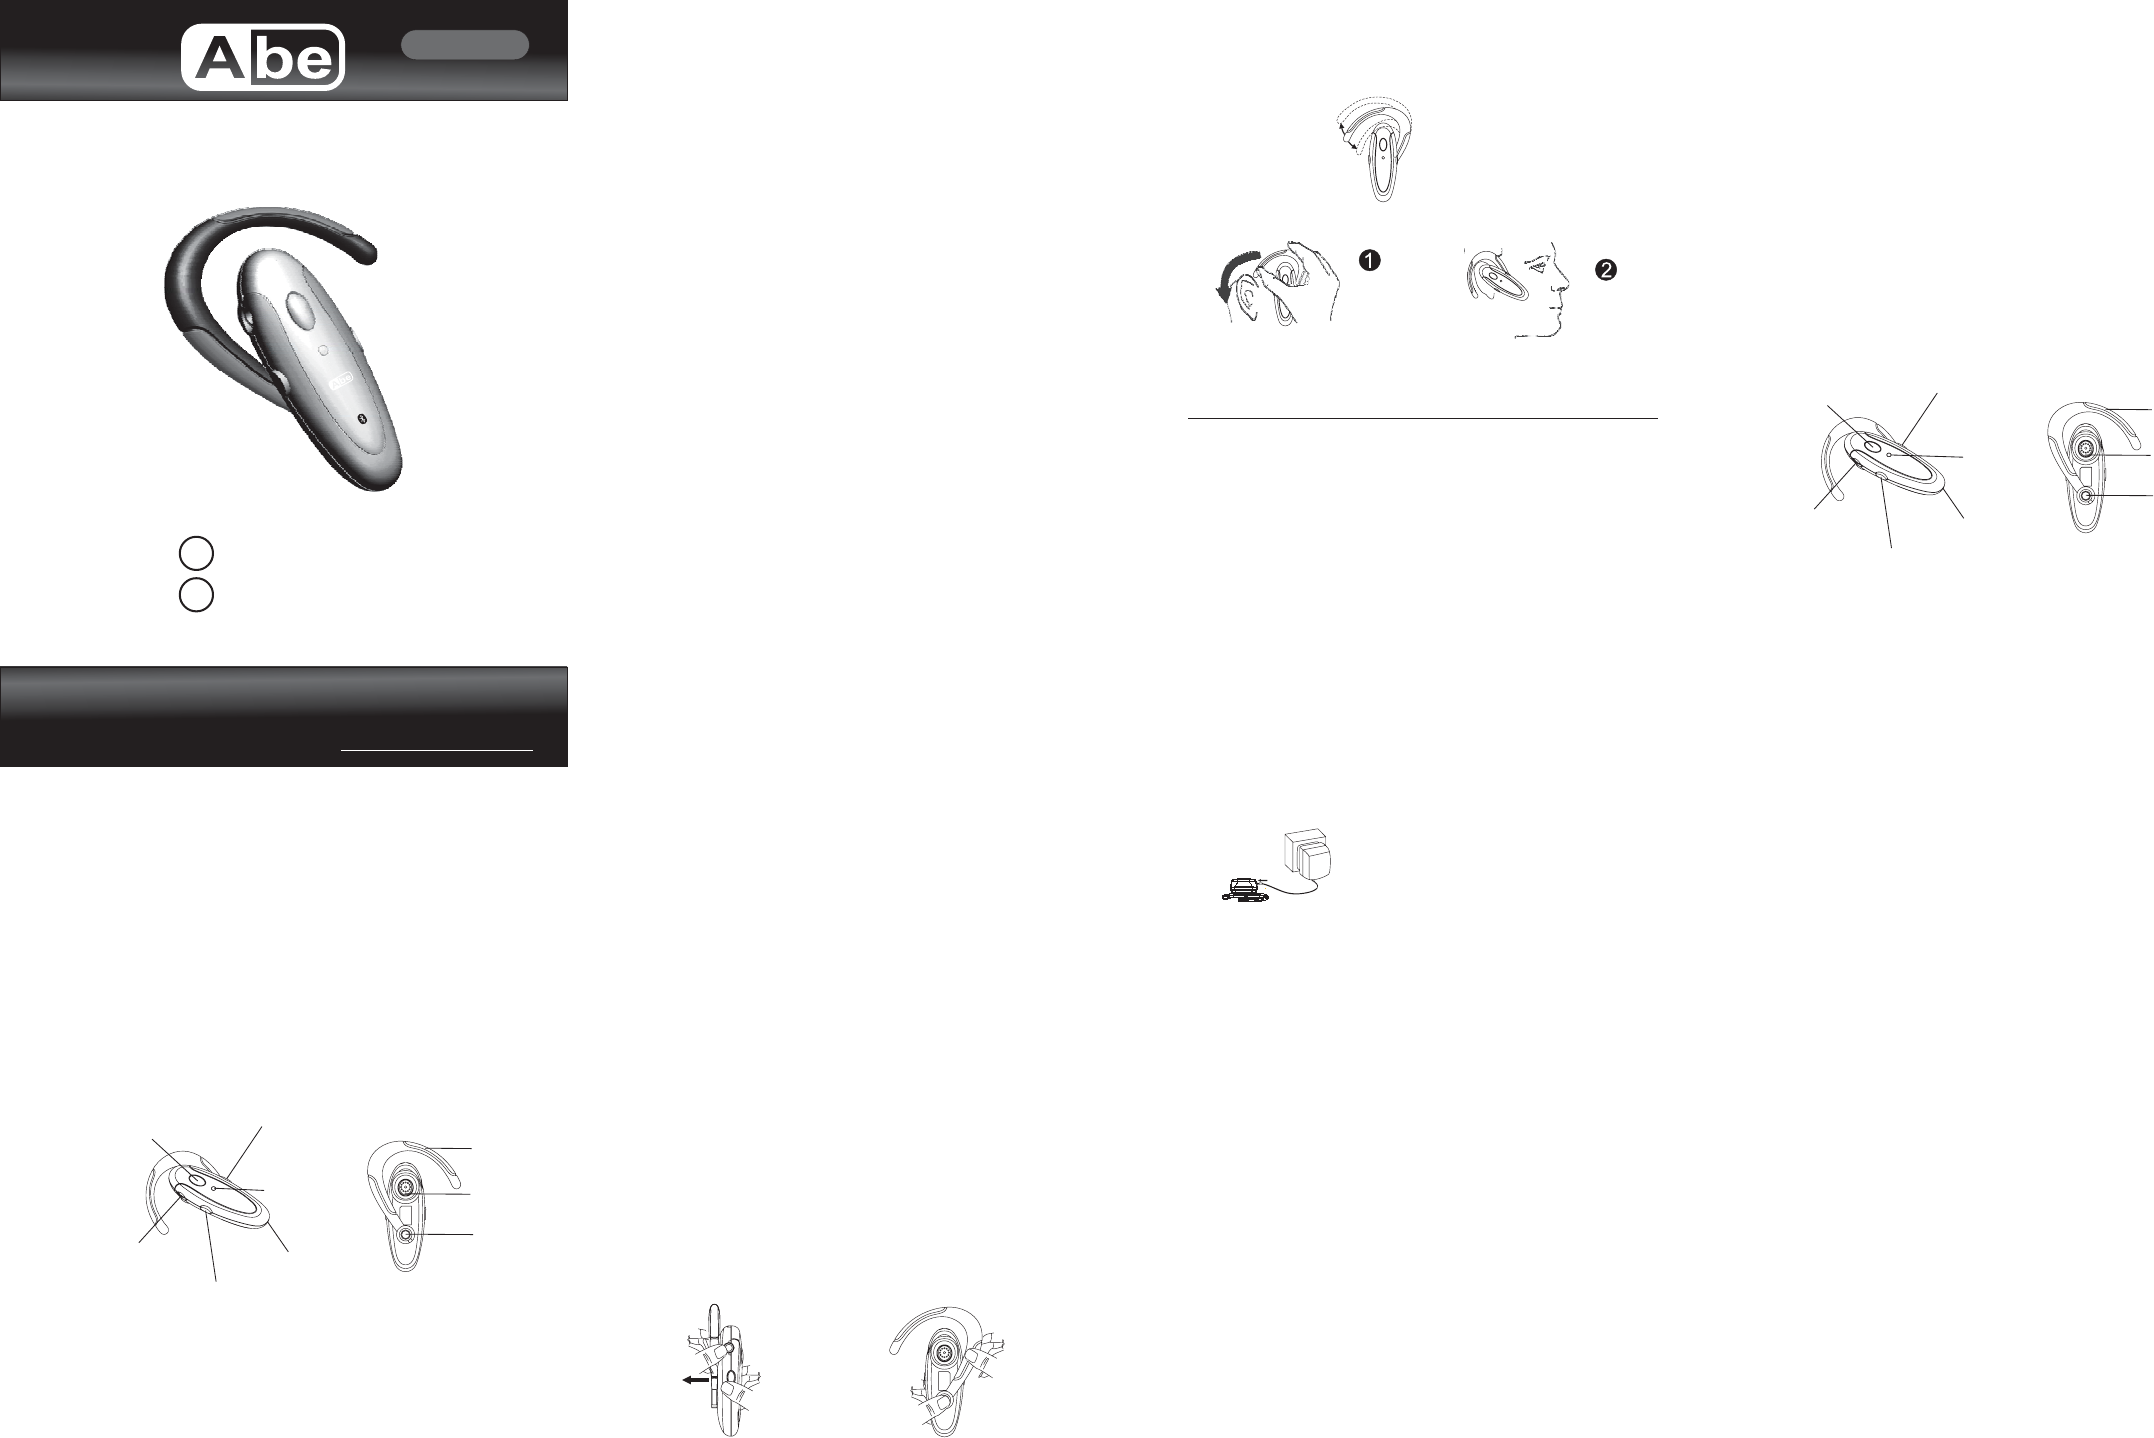
Anpassen des HS ans Ohr....................................................................................4
Trageweise.........................................................................................................4
Anzeige Akku leer................................................................................................4
.....................................................................................4
......................................
Voice over Internet Protocol (VoIP) Anwendung.....................................................5
Anruf abweisen
Ohrhaken Orientierung
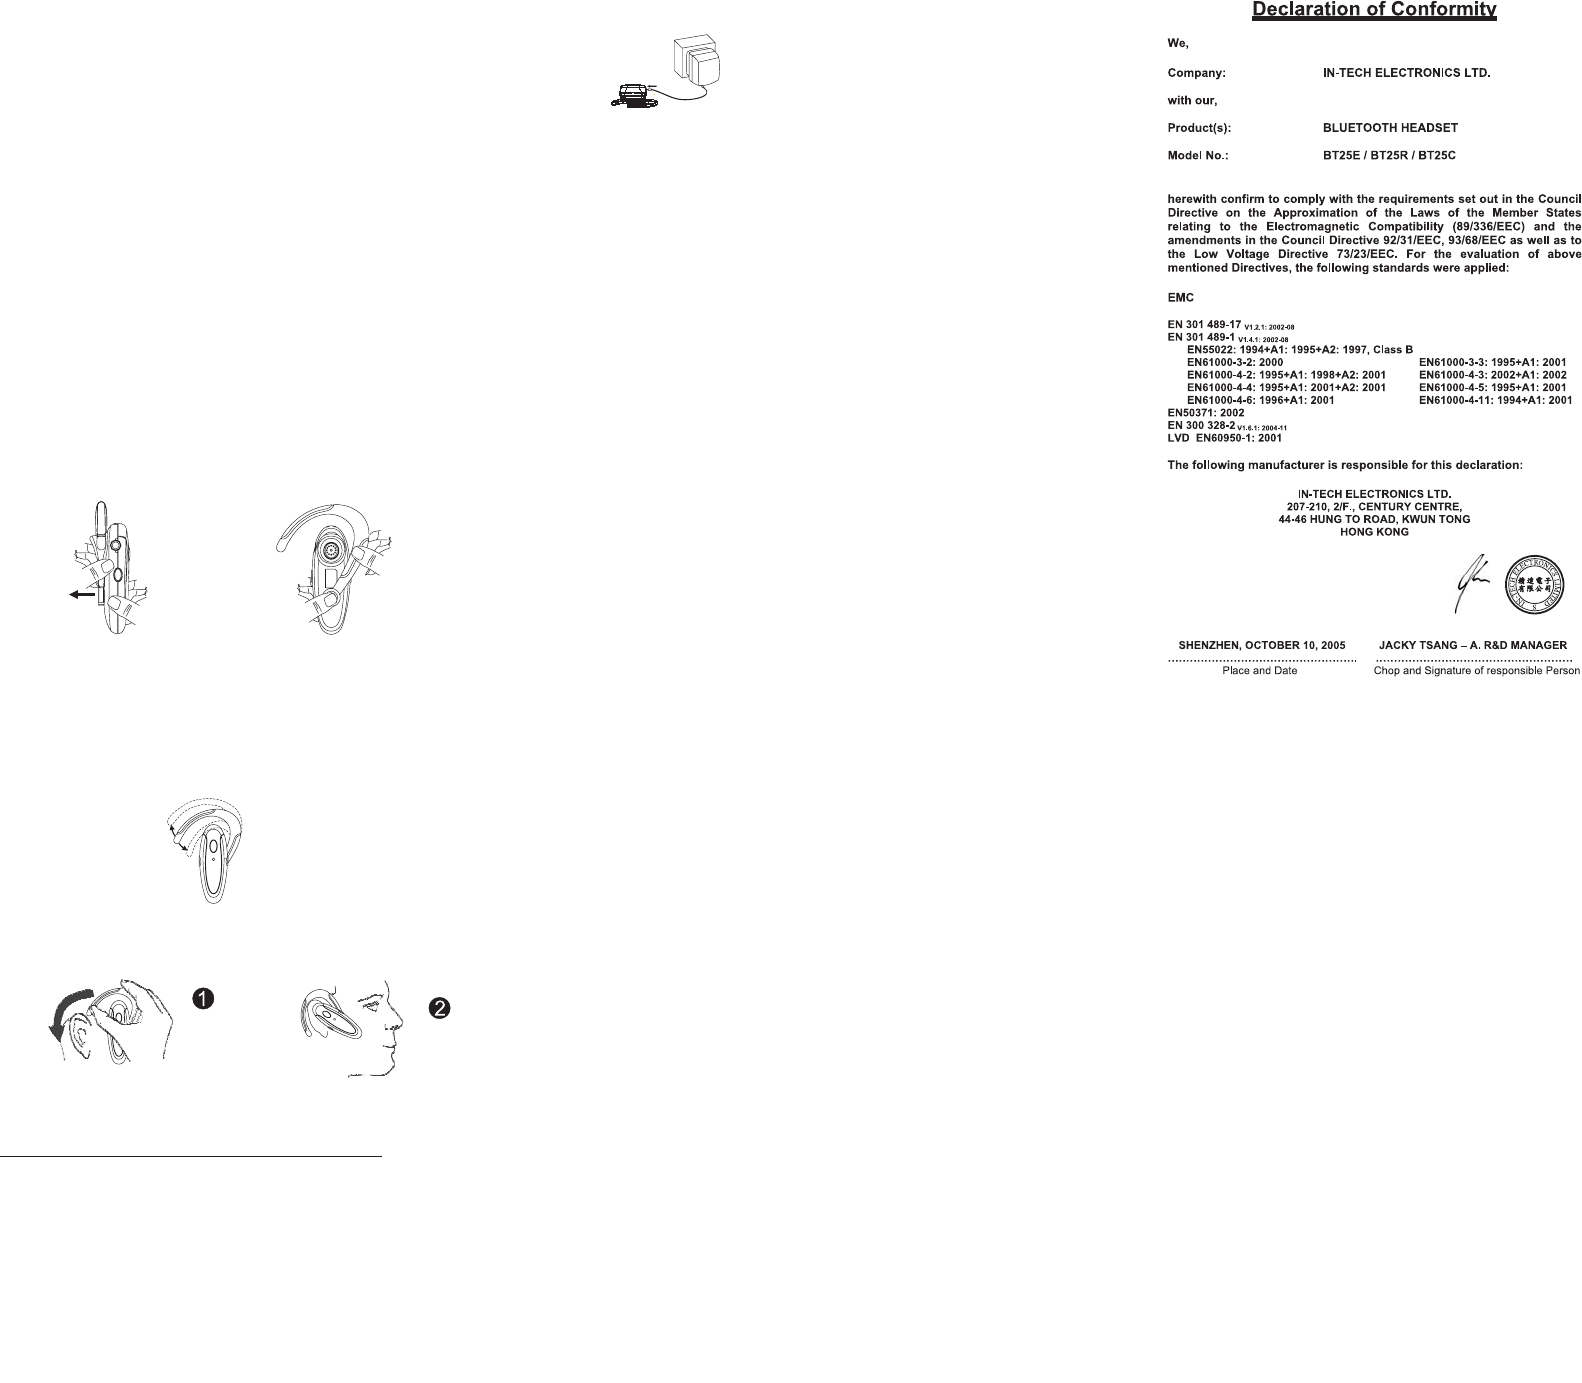
Anschliessen und Laden
!
!
!
Laden des Akkus
Vielen Dank für den Kauf des neuen Abe Headsets. Vor der ersten
Benutzung muss der Akku 12 Stunden aufgeladen werden.
Bei ausgeschaltetem Headset (HS), 2 Sekunden lang S1 gedrückt halten. Ein leiser
Ton, gefolgt von einem lauten Ton signalisieren, dass das HS angeschaltet ist. Die
grüne LED-Anzeige leuchtet 2 Sekunden lang auf. Danach blinkt die grüne LED-
Anzeige im Abstand von 3 Sekunden.
Bei eingeschaltetem HS, 3 Sekunden lang S1 gedrückt halten. Ein lauter Ton, gefolgt
von einem leisen Ton signalisieren, dass das HS ausgeschaltet ist. Daraufhin leuchtet
die rote LED-Anzeige auf bis Sie S1 loslassen.
BluetoothCS8060
Einschalten des Headsets
Ausschalten des Headsets
Schloss
Ein Ausschalter S1-/ ()
Leiser Taste S3-()
Hrer
ö
Mikrofon
Ohrbügel
LED Anzeige-
Lauter Taste (S2)-
Anschluss für das Ladegerät
User Manual
!
!
Charging the battery
Turning on the Headset
Turning off the Headset
Thank you for buying new Abe CS8060 Headset. Before first time use, it is
important to charge the battery for 12 hours.
While the Headset ( HS ) is powered down, press and hold S1 for 2 seconds. A low
tone followed by a high tone will indicate that the HS is powered up. Green LED will
turn on for 1 second. Afterward, green LED will flash every 3 seconds.
While the HS is powered up, press and hold S1 for 3 seconds. A high tone followed
by a low tone will indicate that the HS is powered down. And the LED will keep on
Red until S1 is released.
Bluetooth
!
6
Headset pictures..............................................................................................................6
Charging the battery.........................................................................................................6
Turning on the Headset....................................................................................................6
Turning off the Headset....................................................................................................6
Putting Headset in Pairing Mode......................................................................................7
Establishing Link..............................................................................................7
Answering incoming calls.................................................................................................7
Transferring calls..............................................................................................................7
Muting the microphone.....................................................................................................7
Ending calls.....................................................................................................................8
To make a new call using voice dialing.............................................................................8
Redialing last dialed number............................................................................................8
Rejecting incoming call.....................................................................................................8
Adjusting speaker volume................................................................................................8
Ear Hook orientation........................................................................................................8
Bend the ear hook to fit your ear.......................................................................................9
Putting way.......................................................................................................................9
Low-battery indication......................................................................................................9
Charging and recharging the battery.................................................................................9
Charging Connection Diagrams....................................................................................10
Voice Over Internet Protocol (VOIP) Application.............................................................10
FCC Interference Statement...........................................................................................11
Declaration of Conformity...............................................................................................12
Bluetooth
On Off S1/()
Volume Up (S2)
Volume Down S3()
LED
DC Socket Microphone
Speaker
Ear hook
Lock
3
!
!
!
!
!
Anrufe beenden
Anruf über Sprachanwahl starten
Wahlwiederholung der letzten Nummer
Um einen aktuellen Anruf auf dem Headset zu beenden, drücken Sie S1. Danach ist
der Anruf beendet und die grüne LED-Anzeige blinkt normal.
1. Stellen Sie sicher, dass die Sprachanwahl-Funktion im Mobiltelefon korrekt
eingerichtet ist und dass Sie sich in Reichweite des Headsets befinden. Drücken
Sie am Headset kurz S1.
2. Sprechen Sie nach Ertönen des Pieptons per Sprachanwahl den Namen der
betreffenden Person in das Headset. Der Anruf wird innerhalb weniger Sekunden
aufgebaut.
1. Stellen Sie sicher, dass die Sprachanwahl-Funktion im Mobiltelefon korrekt
eingerichtet ist und dass Sie sich in Reichweite des Headsets befinden. Drücken Sie
am Headset kurz S1.
2. Betätigen Sie nach Ertönen des Pieptons wie gewöhnlich die Sprachanwahl und
nach wenigen Sekunden entsteht eine Verbindung.
(Für Nokia 3650, Siemens S55, oder
ähnliche Modelle)
Um die letzte gewählte Nummer neu anzuwählen, halten Sie S3 2 Sekunden
gedrückt. Ein leiser Ton zeigt einen erneuten Wahlversuch an.
Während eines Anrufs, drücken Sie kurz auf S2, um die Lautstärke des Hörers auf
dem HS zu erhöhen und auf S3, um die Lautstärke zu verringern. Das Erhöhen und
Verringern der Lautstärke wird durch einen Ton signalisiert. In jedem Fall ertönt ein
Warnsignal, wenn das Lautstärkemaximum oder-minimum erreicht wird.
Bei Mobiltelefonen mit Bluetooth-Technologie:
Wenn Sie ein Mobiltelefon benutzen, das über keine eingebaute Bluetooth-
Technologie verfügt oder einen Bluetooth Dongle benötigt:
Anruf abweisen
Anpassen der Hörerlautstärke
(Für Nokia 3650, Siemens S55, oder ähnliche Modelle)
Wenn es einen Anruf gibt, den Sie abweisen moechten, druecken Sie bitte den Knopf
S1 und halten es bis Sie eine langen Beepton Hoeren, und dann koennen Sie es
freilassen.
4
!Trageweise
!Anpassen des HS ans Ohr
1. Befestigen Sie das Headset mit dem Ohrbügel hinter Ihrem Ohr.
2. Biegen Sie den Ohrbügel vorsichtig, um ihn an Ihr Ohr anzupassen.
Anmerkung:vergewissern Sie sich, dass das Mikrofon zum Mund hin gerichtet ist.
!
!
Anzeige Akku leer
Die HS LED-Anzeige blinkt rot anstatt grün, wenn der Akku fast leer ist.
Außerdem ertönt alle paar Minuten ein kurzer Signalton. Wenn der Akku
vollkommen leer ist, wird das HS automatisch ausgeschaltet. Es kann solange
nicht wieder eingeschaltet werden, bis das Ladegerät angeschlossen oder der
Akku ausreichend aufgeladen ist.
Um den Akku zu laden verbinden Sie bitte die Ladungskabel mit HS. Waehrend
der Ladung blinkt die LED Lampe stabil im Rot. Die Lampe schaltet sich aus wenn
der Akku voll geladen ist.
Anschliessen und Laden
Anmerkung: Die Gesprächszeiten des Abe Headsets können je nach
Handymodell, variieren und sind daher nur Annaeherungswerte.
BluetoothCS8060
ACAdaptor
AC Mains
!Aufladeverbindungsdiagramme
(1) A/C Aufladen
ANMERKUNG:
BQB, CE und FCC genehmigt.
Abe UB 20S USB Dongle und Cs8060 Headset
Voice over Internet Protocol (VoIP) Anwendungmöglichkeit
Bluetooth BluetoothAbe
Den Abe UB 20S USB Dongle (separater Kauf) in die USB Buchse am PC stecken
Installieren Sie IVT BlueSoleil Bluetooth Applikation von der im UB 20S Paket
mitgelieferten CD-ROM. Achtung die CD-ROM ist nicht im Lieferumfang vom
CS8060.
Download von der entsprechenden Website und installieren von MSN messenger,
Netmeeting, Yahoo messenger oder ICQ Anwendungs Software auf den PC
Pairing: Bringen Sie das Headset CS8060, wie in der
Bedienungsanleitung des CS8060 beschrieben, in den Pairing-Mode. Starten Sie
das Anwenderprogramm BlueSolei und pairen den UB 20S Dongle mit dem CS8060
Headset. Die Headset PIN ist 0000 .
Verbindungsaufbau und beendigung: Der UB 20S Dongle klingelt das CS8060
Headset an. Bitte drücken Sie die Taste S1, um die Verbindungsanfrage zu
bestätigen. Um die Bluetooth-Verbindung zu beenden drücken Sie die Taste S1
erneut. Wenn Sie es wünschen können Sie jetzt das CS8060 Headset mit Ihrem
Bluetooth Handy pairen oder wieder verbinden.
Überprüfen der Bluetooth-Verbindung: Nachdem der UB 20S Dongle und das
CS8060 Headset miteinander verbunden sind startet der PC automatisch den
Bluetooth Audio Treiber . Spielen Sie mit Windows Media Player oder einem
vergleichbaren Programm Musik von Ihrem PC ab; Sie müßten jetzt die Musik im
Headset hören. Falls dies nicht der Fall sein sollte gehen Sie über das Bedienfeld -
> Sound- und Audio Geräteeinstellungen -> Audio -> Klangwiedergabe wählen
Sie Bluetooth Audio um die Verbindung zu aktivieren.
Jetzt können Sie die VoIP Anwendung nutzen und kabellos über Ihr Bluetooth
Headset mit Ihren Freunden sprechen.
Um das Cs8060 wieder mit Ihrem Blustooth Handy zu verbinden, folgen Sie den
Punkten von Headset in den Pairing Mode (Verbindungsmodus) bringen bis
Herstellung einer Bluetooth-Verbindung .
.
Abe
“
-
“
“
“““
“
“
“
Bluetooth
”
”
”
”” ”
”
”
”
,
1
2
3
4
5
6
7
8
.
.
.
.
.
.
.
.
!
.
Ohrhaken Orientierung
Um die Orientierung des Ohrhakens zu aendern folgen Sie bitte die Schritte
(1)Trennen Sie das Haken von dem Telefon los
(2)Waehlen Sie die Richtung (links oder rechts) und dann befestigen das Ohrhaken
und schliessen es zu.
11
Federal Communication Commission Interference Statement
-
-
-
-
This equipment has been tested and found to comply with the limits for a Class B
digital device, pursuant to Part 15 of the FCC Rules. These limits are designed to
provide reasonable protection against harmful interference in a residential
installation. This equipment generates, uses and can radiate radio frequency energy
and, if not installed and used in accordance with the instructions, may cause harmful
interference to radio communications. However, there is no guarantee that
interference will not occur in a particular installation. If this equipment does cause
harmful interference to radio or television reception, which can be determined by
turning the equipment off and on, the user is encouraged to try to correct the
interference by one of the following measures:
Reorient or relocate the receiving antenna.
Increase the separation between the equipment and receiver.
Connect the equipment into an outlet on a circuit different from that to which the
receiver is connected.
Consult the dealer or an experienced radio/TV technician for help.
This device complies with Part 15 of the FCC Rules. Operation is subject to the
following two conditions: (1) This device may not cause harmful interference, and (2)
this device must accept any interference received, including interference that may
cause undesired operation.
FCC Caution: Any changes or modifications not expressly approved by the party
responsible for compliance could void the user's authority to operate this equipment.
IMPORTANT NOTE:
FCC Radiation Exposure Statement:
This equipment complies with FCC radiation exposure limits set forth for an
uncontrolled environment. This equipment should be installed and operated with
minimum distance 20cm between the radiator & your body.
This transmitter must not be co-located or operating in conjunction with any other
antenna or transmitter.
!
!
Ending Calls
To make a new call using voice dialing
Redialing last dialed number
Rejecting incoming call
Adjusting Speaker Volume
While a call is in session on the Headset, pressing S1 will disconnect the call.
After the call is disconnected, the green LED will flash normally.
1.Make sure the voice dialing function is probably set up in the Mobile phone and
it is within the range of the HS. Press S1 on the HS shortly.
2.After the beep tone on the HS, make a voice dial as you normally would by
saying the name of the person on the HS. The call will be connected in a few
seconds.
1.Make sure the voice dialing function is probably set up in the mobile phone and
it is within the range of the HS. Press S1 on the HS shortly.
2.After the beep tone on the mobile phone, make a voice dial as you normally
would and the call will be connected in a few seconds.
(Support handsfree profile mobile only. For Nokia
3650, Siemens S55, or equivalent models)
To redial the last dialed number, press and hold S3 for 2 seconds. short low tones
will indicate an attempt to redial.
(Support handsfree profile mobile only. For Nokia
3650, Siemens S55, or equivalent models)
When there is an incoming call and you want to reject it, press the buttons S1 and
hold it until you hear a long beep tone, then release it.
While a call is in session pressing and releasing S2 will increase the
speaker volume; pressing and releasing S3 will decrease the speaker volume
on the HS There is a key tone to indicate volume increase or decrease
However a warning tone will be heard when the volume level reaches its
maximum or minimum
When using a Bluetooth mobile phone:
When using a mobile phone without Bluetooth built-in and requiring a Bluetooth
dongle:
,
. .
,
.
!
!
!
!Ear Hook orientation
If you want to change the orientation of ear hook, please follow the following steps.
1) Detach the ear hook from the phone
2) Select the orientation you want (left or right), and attach the ear hook and lock it
8
!Bend the ear hook to
fit your ear
!
!
Low-battery indication
Charging and recharging the battery
The HS LED will flash red instead of green when the battery is low.
There will also be a short beep every few minutes. When the battery level is too
low, the HSwill automatically power off. It cannot be powered on again unless
the charger is connected.
To recharge the battery, connect the charger cable to the HS. During recharging,
the LED shows a steady red light.When the battery is fully charged, the indicators
of red will be off.
1. Put on the headset with the ear hook behind your ear.
2. Bend the ear hook gently to fit your ear.
Notice: Make sure the microphone is pointing towards your mouth.
9
DISCLAIMER: Talk time and stand-by time of the Abe CS 060 Headset will vary depending
on mobile phone model being used
Bluetooth8
!Putting way
ACAdaptor
AC Mains
!Charging Connection
(1) A/C charging
NOTE
BQB CE and FCC approved
:
,.
Abe UB 20S USB Dongle and Abe Cs8060 Headset
Voice Over Internet Protocol (VOIP) Application
Bluetooth Bluetooth
Plug the Abe UB 20S USB Dongle (purchased separately) into the USB
socket of a PC.
Install IVT BlueSoleil application from the CD-ROM provided in the UB 20S
package. Note that the CD-ROM is not available in the CS8060 package.
Download from the corresponding websites and install MSN messenger, Netmeeting,
Yahoo messenger, or ICQ application software in the PC.
Pairing: Put the CS8060 Headset into "pairing" mode by following the
steps in the CS8060 User Manual, start the BlueSoleil application and pair the UB 20S
Dongle with the CS8060 Headset. The Headset passkey is "0000
Connecting and Disconnecting: The UB 20S Dongle will ring the CS8060 Headset.
Please press the S1 key on the headset to confirm the connection request. To
disconnect the link, press the S1 key again. You can now pair and
reconnect your CS8060 Headset to your mobile phone, if you desire.
Testing the Link: After the UB 20S Dongle is paired with the CS8060
Headset, the PC audio will be automatically routed to the Audio driver.
Play some music on the PC by Windows Media Player or other music applications; you
should be able to hear the music on the Headset. If you can hear it, then go the
ontrol Panel -> ound and Audio Device Properties -> udio -> ound playback
select the Audio to activate the link.
Now you can start using the VOIP application and talk to your friend through your
headset wirelessly and freely.
Connecting CS8060 Headset back to your mobile phone. Please
follow the steps from 'Putting Headset in Pairing Mode' to Establishing Link'
on page 7.
Bluetooth
Bluetooth
Bluetooth
Bluetooth
Bluetooth
Bluetooth
luetooth
luetooth
Bluetooth Bluetooth
Bluetooth
Abe
".
""
't
"c " "S " "A " "S "
""
'
B
B
10
1.
2.
3.
4.
5.
6.
7.
8.
12
This equipment complies with FCC radiation exposure limits set forth for an uncontrolled
environment. End users must follow the specific operating instructions for satisfying RF
exposure compliance.
This transmitter must not be co-located or operating in conjunction with any other
antenna or transmitter.