Integrated Display Technology P58XXH 900MHz/5.8GHz Analog Cordless Phone w/ CID-Handset User Manual PM5821manual 21mar p65
Integrated Display Technology Ltd 900MHz/5.8GHz Analog Cordless Phone w/ CID-Handset PM5821manual 21mar p65
UserManual.wiki
>
Integrated Display Technology
>
P58XXH User Manual
User Manual
Navigation menu
Upload a User Manual
Namespaces
Wiki Guide
HTML
PDF
Info
Views
User Manual
Discussion / Help
Navigation
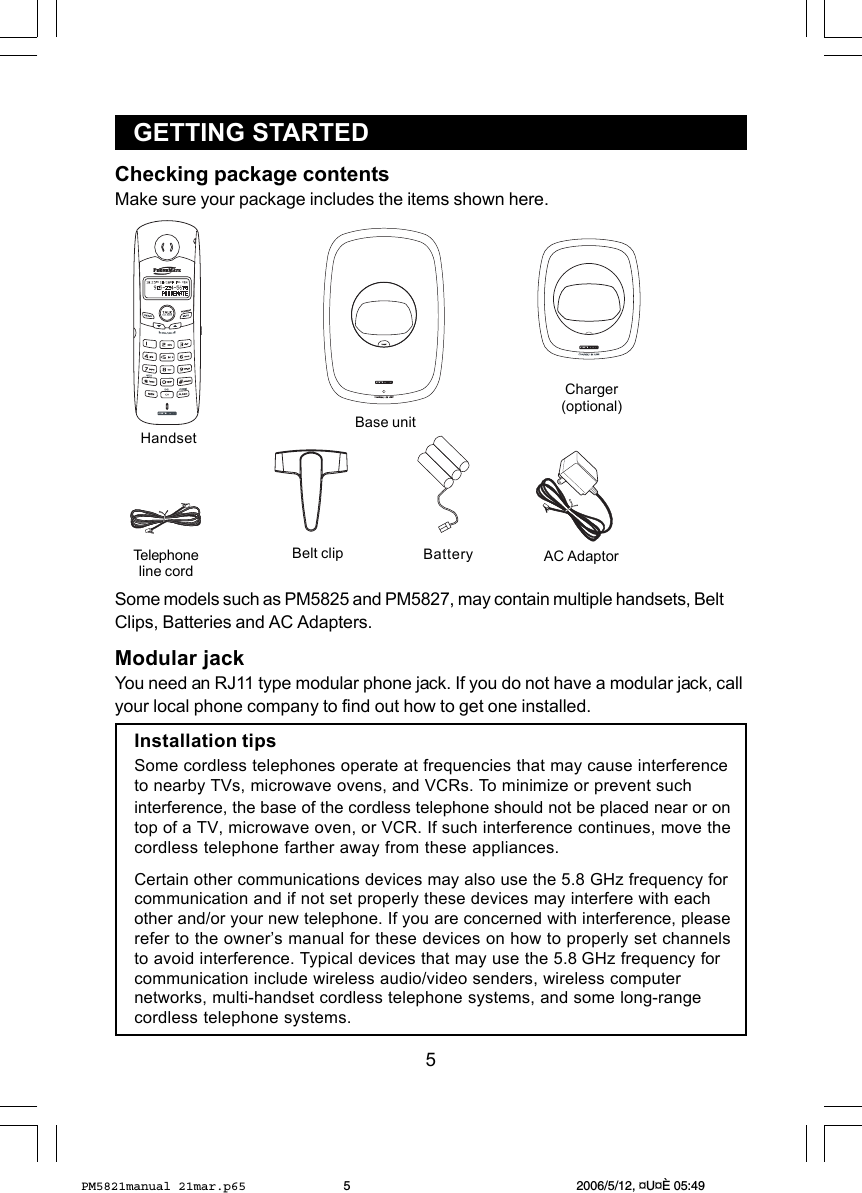

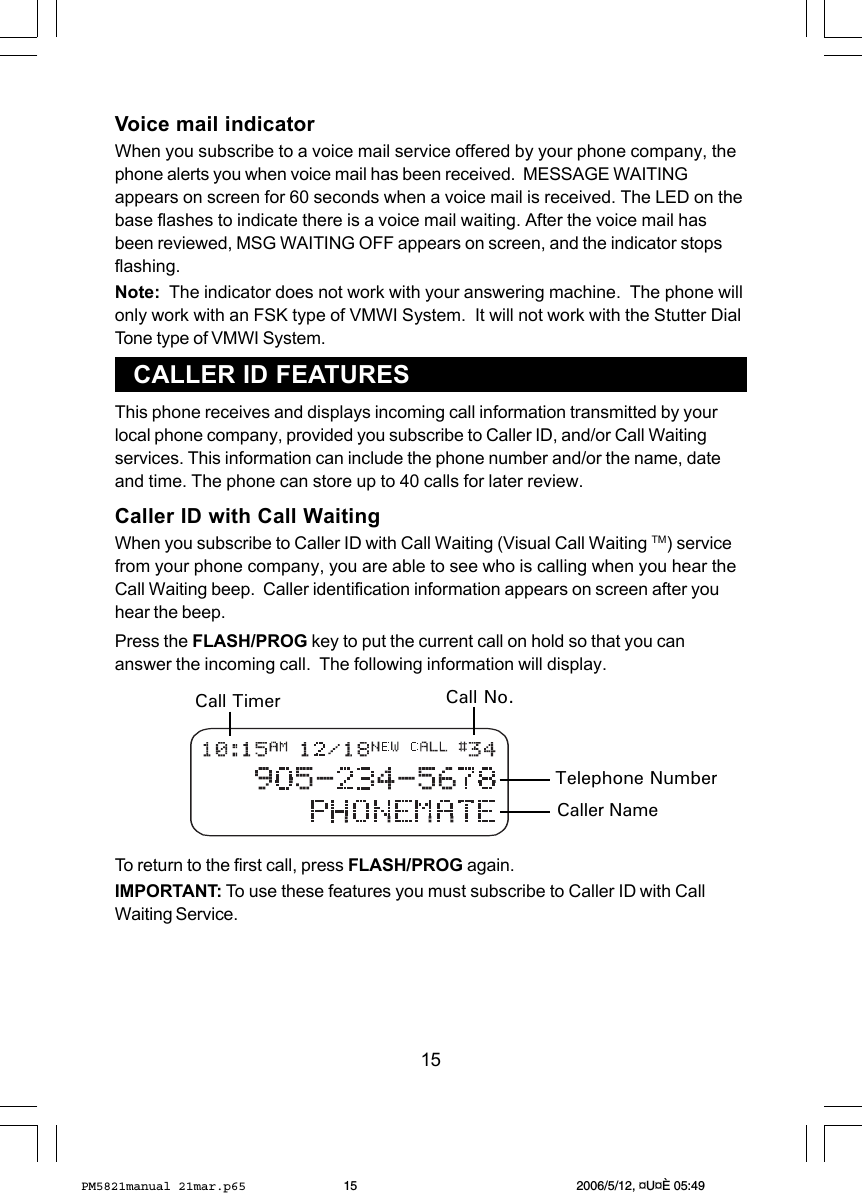


![33CONSUMER INFORMATIONThis equipment complies with Part 68of the FCC rules and the requirementsadopted by the ACTA. On the bottom ofthis equipment is a label that contains,among other information, a productidentifier in the formatUS: KT5W400BPM58XX. If requested,this number must be provided to thetelephone company.An applicable certification jack UniversalService Order Codes (USOC) for theequipment is provided (i.e., RJ11C) in thepackaging with each piece of approvedterminal equipment.A plug and jack used to connect thisequipment to the premises’ wiring andtelephone network must comply with theapplicable FCC Part 68 rules and require-ments adopted by the ACTA. A compli-ant telephone cord and modular plug isprovided with this product. It is designedto connect to a compatible modular jackthat is also compliant. See installation in-structions for details.The REN is used to determine the num-ber of devices that may be connected toa telephone line. Excessive RENs on atelephone line may result in the devicenot ringing in response to an incomingcall. In most but not all areas, the sum ofRENs should not exceed five (5.0). Tobe certain of the number of devices thatmay be connected to a line, as deter-mined by the total RENs, contact the lo-cal telephone company. [For productsapproved after July 23, 2001, the RENfor this product is part of the productidentifier that has the formatUS:KT5W400BPM58XX. The digits re-presented by 0.0B are the REN withouta decimal point (e.g., 03 is a REN of 0.3).For earlier products, the REN is sepa-rately shown on the label].If this equipment PM5821causes harmto the telephone network, the telephonecompany will notify you in advance thattemporary discontinuance of servicemay be required. But if advance noticeisn’t practical, the telephone companywill notify the customer as soon aspossible. Also, you will be advised ofyour right to file a complaint with the FCCif you believe it is necessary.The telephone company may makechanges in its facilities, equipment, op-erations or procedures that could affectthe operation of this equipment. If thishappens the telephone company willprovide advance notice in order for youto make necessary modifications to main-tain uninterrupted service.Should you experience trouble with thisequipment, please contact:www.phonemate.comMinneapolis Service Center10901 Louisiana Ave. So.Bloomington, MNUSA55438for repair or warranty information. Ifthe equipment is causing harm to thetelephone network, the telephonecompany may request that youPM5821manual 21mar.p65 2006/5/12, ¤U¤È 05:4933](https://usermanual.wiki/Integrated-Display-Technology/P58XXH/User-Guide-673615-Page-33.png)