Intel AZ510 ANDROID SMART PHONE User Manual
Intel Corporation ANDROID SMART PHONE
UserManual.wiki
>
Intel
>
AZ510 User Manual
User Manual
Navigation menu
Upload a User Manual
Namespaces
Wiki Guide
HTML
PDF
Info
Views
User Manual
Discussion / Help
Navigation


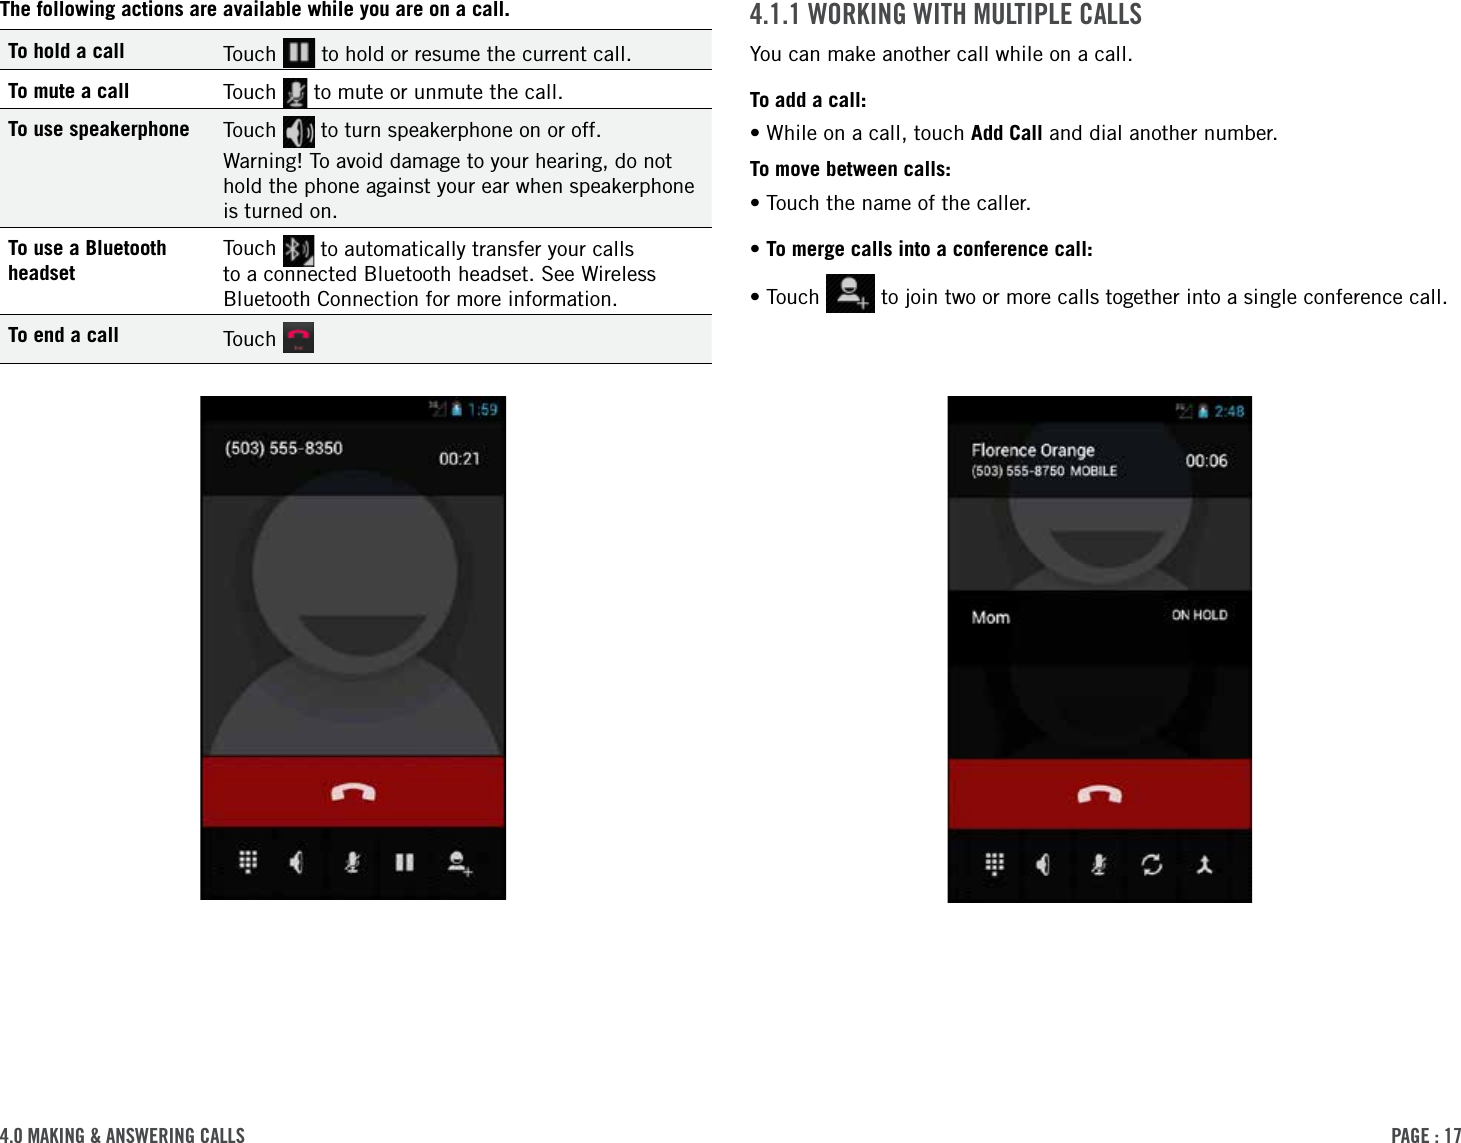
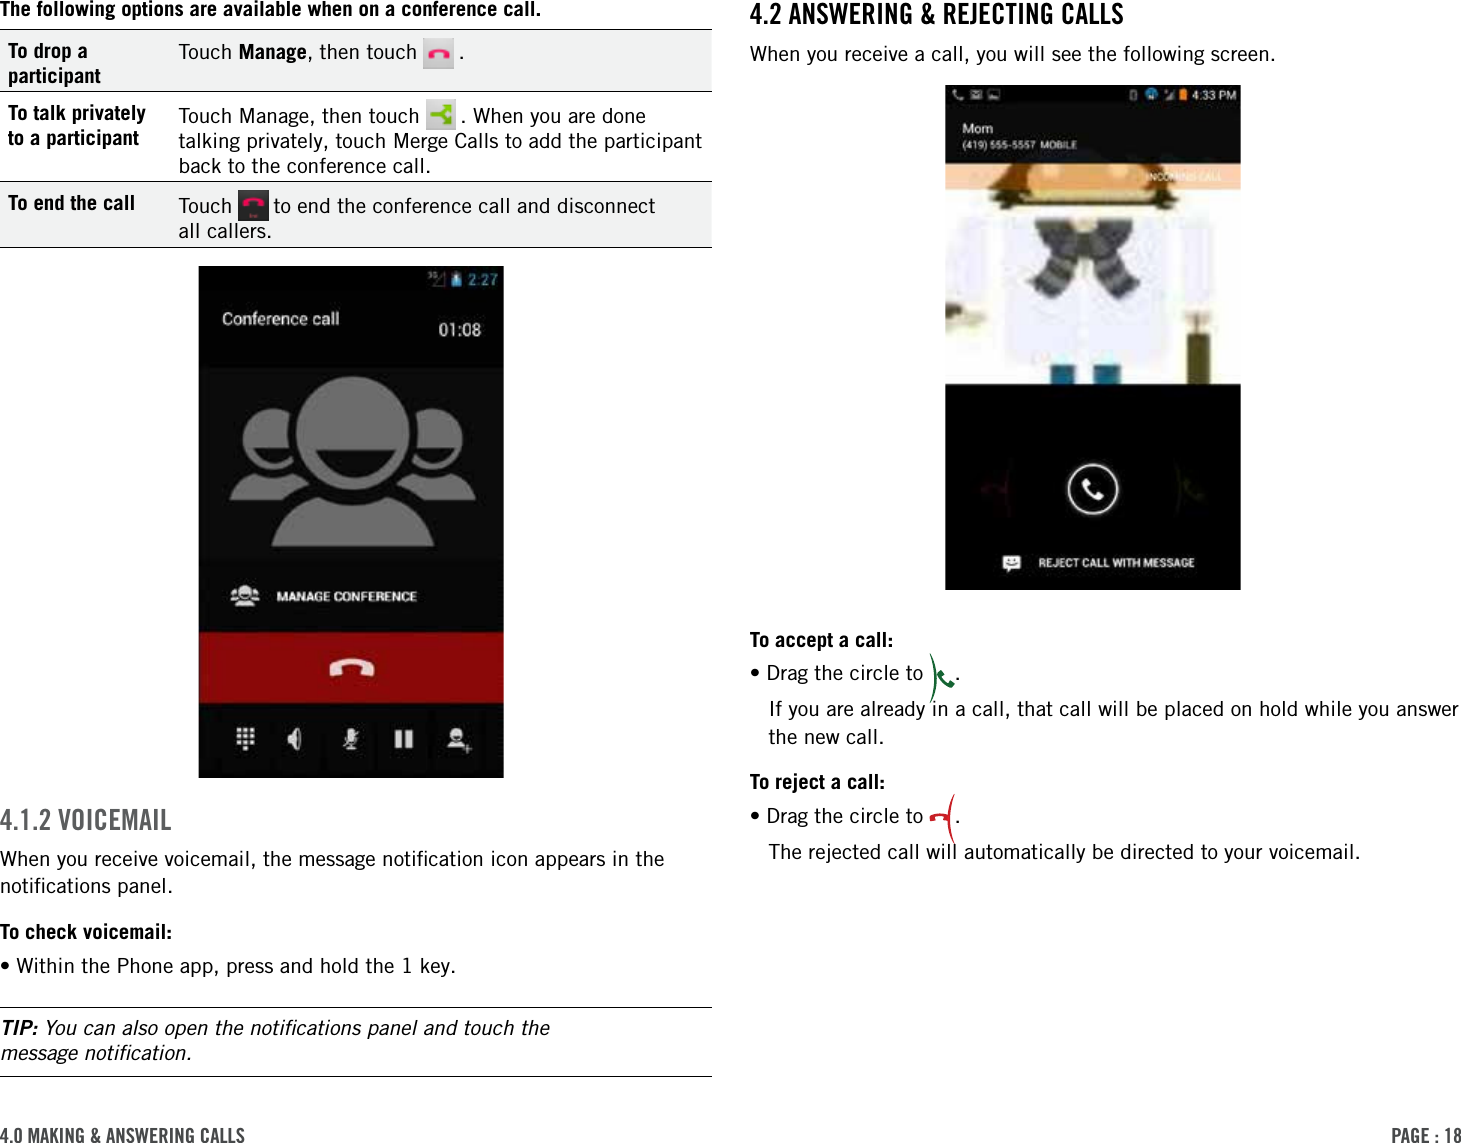


![PAge : 5315.0 chAnging Phone settingsTouch More... to access the following options.Airplane mode Disable all wireless connections, including Bluetooth wireless technology and 3G. Activating airplane mode greys out some other settings.VPN Configure your Virtual Private Network.Tethering & portable hotspotConfigure your phone for tethering or for use as a portable hotspot with the following settings.•USB tethering: Share your phone’s mobile data network connection with your computer via a USB connection. •Portable Wi-Fi hotspot: Share your phone’s mobile data network connection as a portable Wi-Fi hotspot. •Bluetooth tethering: Share your phone’s mobile data network connection via a Bluetooth connection.NFC Touch to enable Near Field Communications, which allows you to exchange information with other nearby smart phones and similar devices.Android Beam Allows you to transmit app content via NFC.15 chAnging Phone settingsThe settings window displays all of the settings that affect how your phone looks and works. To open the settings window:•From the Home screen, press System settings.15.1 Wireless & netWorksThe Wireless & networks section configures your phone’s connections, such as Wi-Fi and Bluetooth wireless technology. Support for Wi-Fi Direct lets you connect directly to nearby peer devices over Wi-Fi, for more reliable, higher-speed communication. No internet connection or tethering is needed. Through third-party apps, you can connect to compatible devices to take advantage of new features such as instant sharing of files, photos, or other media; streaming video or audio from another device; or connecting to compatible printers or other devices.Wi-Fi Turn on Wi-Fi and configure any desired settingsunder Advanced Wi-Fi.For information on using Wi-Fi, see Using Wi-Fi.Advanced Wi-Fi From Settings, touch Wi-Fi press selectAdvanced. • Network notification: Receive a notification when an open Wi-Fi network becomes available.•Keep Wi-Fi on during sleep: Choose when to keep Wi-Fi turned on.•MAC address: Displays your current MAC address.•IP address: Displays your current IP address.Bluetooth Turn on Bluetooth wireless technology. To see available devices, touch Bluetooth. From this Bluetooth screen, press [Menu key] for options: Rename phone, Visibility timeout, and Show received files. For more information on pairing your phone with a Bluetooth wireless technology-enabled product, see Wireless Bluetooth Connection.Data usage Turn Mobile data on to see your phone’s datausage. You can also turn on Set mobile data limit.](https://usermanual.wiki/Intel/AZ510/User-Guide-1839394-Page-53.png)