InterLogix Nx8Ecfib05 NX 8E CF CONTROL PANEL User Manual
2017-03-14
User Manual: InterLogix Nx8Ecfib05
Open the PDF directly: View PDF ![]() .
.
Page Count: 60
- GENERAL DESCRIPTION
- ORDERING INFORMATION
- BOARD INSTALLATION
- NX-8E-CF WIRING DIAGRAM
- TERMINAL DESCRIPTIONS
- BATTERY CALCULATION WORKSHEET
- UNDERWRITERS LABORATORIES INFORMATION
- GLOSSARY
- PROGRAMMING THE CONTROL
- ENROLLING MODULES AND KEYPADS
- QUICK START INSTALLATION
- PROGRAMMING LOCATIONS
- DEFAULT ZONE TYPES (Configurations)
- LOCATION 25 - ZONES 1-8 ZONE TYPE (8 segments, numerical da
- LOCATION 27 - ZONES 9-16 ZONE TYPE (8 segments, numerical
- LOCATION 29 - ZONES 17-24 ZONE TYPE (8 segments, numerical
- LOCATION 31 - ZONES 25-32 ZONE TYPE GROUP (8 segments, num
- LOCATION 33 - ZONES 33-40 ZONE TYPE (8 segments, numerical
- LOCATION 35 - ZONES 41-48 ZONE TYPE (8 segments of numeric
- LOCATION 37 - SIREN AND SYSTEM SUPERVISION (7 segments, fe
- LOCATION 38 - SWINGER SHUTDOWN COUNT
- LOCATION 39 - KEYPAD SOUNDER CONTROL (1 segment, feature se
- LOCATION 40 - SYSTEM TIMERS (14 segments, numerical data)
- LOCATION 42 - GO TO PROGRAM CODE (6 segments, numerical data
- LOCATION 44 - DURESS CODE (6 segments, numerical data)
- LOCATION 51 - AUTOTEST CONTROL (4 segments, numerical data)
- LOCATION 170 - ZONES 49-56 ZONE TYPE (8 segments, numerica
- LOCATION 172 - ZONES 57-64 ZONE TYPE (8 segments, numerica
- LOCATION 174 - ZONES 65-72 ZONE TYPE (8 segments, numerica
- LOCATION 176 - ZONES 73-80 ZONE TYPE (8 segments, numerica
- LOCATION 178 - ZONES 81-88 ZONE TYPE (8 segments, numerica
- LOCATION 180 - ZONES 89-96 ZONE TYPE (8 segments, numerica
- LOCATION 182 - ZONES 97-104 ZONE TYPE (8 segments, numeric
- LOCATION 184 - ZONES 105-112 ZONE TYPE (8 segments, numeri
- LOCATION 186 - ZONES 113-120 ZONE TYPE (8 segments, numeri
- LOCATION 188 - ZONES 121-128 ZONE TYPE (8 segments, numeri
- LOCATION 190 - ZONES 129-136 ZONE TYPE (8 segments, numeri
- LOCATION 192 - ZONES 137-144 ZONE TYPE (8 segments, numeri
- LOCATION 194 - ZONES 145-152 ZONE TYPE (8 segments, numeri
- LOCATION 196 - ZONES 153-160 ZONE TYPE (8 segments, numeri
- LOCATION 198 - ZONES 161-168 ZONE TYPE (8 segments, numeri
- LOCATION 200 - ZONES 169-176 ZONE TYPE (8 segments, numeri
- LOCATION 202 - ZONES 177-184 ZONE TYPE (8 segments, numeri
- LOCATION 204 - ZONES 185-192 ZONE TYPE (8 segments, numeri
- LOCATION 25 - ZONES 1-8 ZONE TYPE (8 segments, numerical da
- PROGRAMMING WORKSHEETS
- APPENDIX 1
- APPENDIX 2
- APPENDIX 3
- APPENDIX 4
- TELEPHONE C
- NOTICES
- SPECIFICATIONS

NetworX™ Series
NX-8E-CF Control Panel
Installation and Startup
© 2005 GE Security
All rights reserved. NetworX™ is a trademark of the GE companies.
These instructions do not purport to cover all details or variations in equipment nor to provide every possible contingency to
be met during installation, operation, and maintenance. If further information is desired or if particular problems arise that
are not covered sufficiently for the purchaser’s purpose, the matter should be referred to GE Security.
This document contains proprietary information of GE Security and is furnished to its customer solely to assist that
customer in the installation, testing, operations, and/or maintenance of the equipment described. This document shall not
be reproduced in whole or in part nor shall its contents be disclosed to any third party without the written approval of GE
Security.
Please refer to the current GE Security product catalog for detailed warranty information.
Main 800-727-2339 Technical Support 888-437-3287
Outside the US 903-845-6941 Sales & Literature 800-547-2556
Main Fax 903-845-6811 Web: www.gesecurity.com
SAFETY SYMBOL LEGEND
Warning
Indicates a procedure, practice, condition, or statement that, if not strictly observed, could result
in personal injury.
* This symbol indicates electrical warnings and cautions.
Caution
Indicates a procedure, practice, condition, or statement that, if not strictly observed, could result
in damage to or destruction of equipment or property.
** This symbol indicates general warnings and cautions.
Note
Indicates an essential or important procedure, instruction, condition, or statement.
Tip
Indicates a user tip. Provides helpful information that is not normally defined in regular use, but
from an experienced user.

Table of Contents
I. GENERAL DESCRIPTION................................................................................................................................................................................................................4
II. ORDERING INFORMATION...........................................................................................................................................................................................................4
III. BOARD INSTALLATION ..................................................................................................................................................................................................................4
IV. NX-8E-CF WIRING DIAGRAM......................................................................................................................................................................................................6
V. TERMINAL DESCRIPTIONS............................................................................................................................................................................................................7
KEYPAD MAXIMUM WIRE RUN ......................................................................................................................................................................................7
VI. BATTERY CALCULATION WORKSHEET....................................................................................................................................................................................8
VII. UNDERWRITERS LABORATORIES INFORMATION...............................................................................................................................................................9
VIII. GLOSSARY .......................................................................................................................................................................................................................................10
IX. PROGRAMMING THE CONTROL..............................................................................................................................................................................................13
ENTERING THE PROGRAM MODE..............................................................................................................................................................................13
SELECTING THE MODULE TO PROGRAM................................................................................................................................................................13
PROGRAMMING A LOCATION .....................................................................................................................................................................................13
EXITING A LOCATION......................................................................................................................................................................................................14
EXITING THE PROGRAM MODE...................................................................................................................................................................................14
X. LOADING FACTORY DEFAULTS...............................................................................................................................................................................................14
XI. ENROLLING MODULES AND KEYPADS ................................................................................................................................................................................15
XII. L QUICK START INSTALLATION ..................................................................................................................................................................................... 150
XIII. PROGRAMMING LOCATIONS ................................................................................................................................................................................................... 15
Table XIII-1 COMMUNICATOR FORMAT SELECTIONS......................................................................................................................................15
REPORTING EVENTS TO PHONE NUMBER 1.........................................................................................................................................................15
REPORTING EVENTS TO PHONE NUMBER 2.........................................................................................................................................................16
REPORTING EVENTS TO PHONE NUMBER 3.........................................................................................................................................................17
XIV. DEFAULT ZONE TYPES (Configurations)..............................................................................................................................................................................19
Table XIV-1 AUXILIARY OUTPUT EVENT SELECTION .........................................................................................................................................24
XV. PROGRAMMING WORKSHEETS .............................................................................................................................................................................................. 37
XVI. APPENDIX 1.....................................................................................................................................................................................................................................54
XVII. APPENDIX 2.....................................................................................................................................................................................................................................55
XVIII. APPENDIX 3.....................................................................................................................................................................................................................................56
XIX. APPENDIX 4.....................................................................................................................................................................................................................................57
XX. APPENDIX 5.....................................................................................................................................................................................................................................58
XXI. TELEPHONE COMPANY INTERFACE INFORMATION.......................................................................................................................................................58
XXII. NOTICES ...........................................................................................................................................................................................................................................59
XXIII. SPECIFICATIONS .....................................................................................................................................................................................................................BACK
NX-8E-CF CONTROL
4
I. GENERAL DESCRIPTION
The NetworX NX-8E-CF represents a new approach to security systems design. Drawing on our experience in the world market as the
largest exporter of USA manufactured controls, we have developed the most flexible, durable, and user-friendly control ever seen in our
industry. Featuring sophisticated software, which allows up to 240 users to interface with 192 zones, 8 partitions, and a host of integrated
fire, access, verification, and input/output modules, all reported with the most comprehensive and fast SIA and Contact ID formats. The
NetworX design allows a fully loaded system to be housed in one single metal enclosure, establishing for the first time, a logical solution
and design response to modular systems. Up to 32 modules can be added to expand the capabilities of the NX-8E-CF. For product
warranty information, please refer to the GE Security Product Catalog.
II. ORDERING INFORMATION
MINIMUM SYSTEM CONFIGURATION for local and central station protected premise unit UL Commercial Fire applications includes
these individual modules:
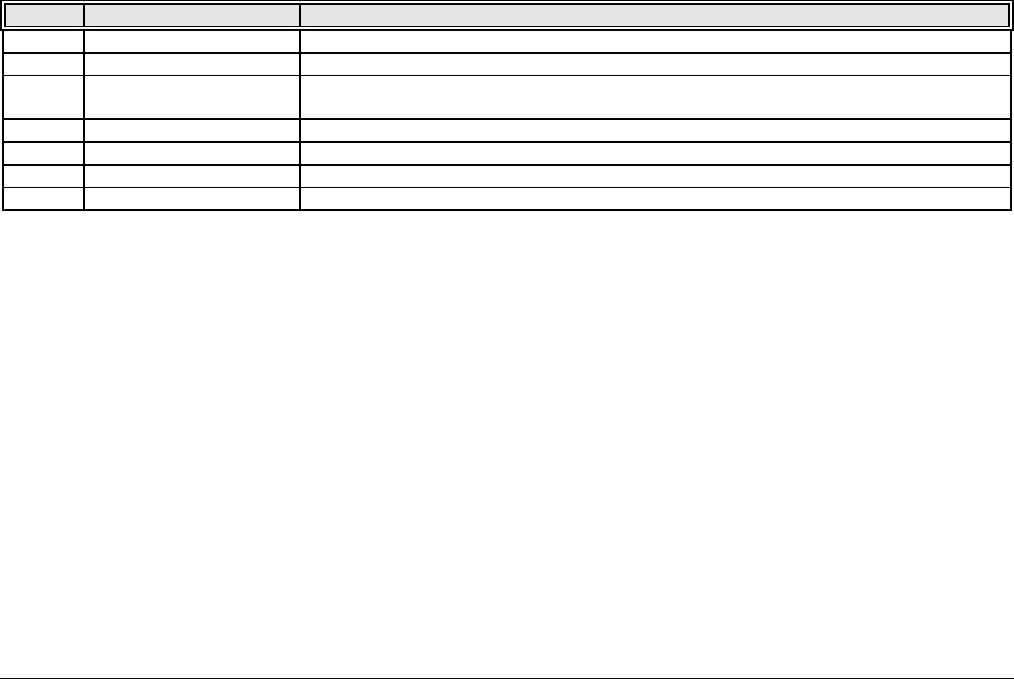
PART # DESCRIPTION MIN QTY
NX-8E-CF NX-8E-CF Control Only 1 ea
NX-148E-CF Alphanumeric LCD Keypad for Commercial Fire applications (red plastic) 2 ea
NX-870E Fire Supervision Module 1 ea
PART # DESCRIPTION
NX-8E-CF-KIT-7 NX-8E-CF COMMERCIAL FIRE KIT
Includes NX-8E-CF Control, (2) NX-148E-CF LCD Keypads, NX-870E Fire Supervision & 16.5V, 50VA Transformer
Other available NetworX modules:
NX-208E 2 Wire Smoke Loop Expander NX-508E — Eight Output Module
NX-216E 16 Zone Expander Module NX-540E — "Operator" Telephone Interface Module
NX-320E Smart Power Supply and Buss Extender NX-591E — Cellemetry Interface Module
NX-507E Seven Relay Module NX-2192E PinPoint ID Module
P-0003 RS232 Adapter Cable 8920 4-Wire Cable (For use on AUX 1-4)
— These products have not been tested and approved by Underwriters Laboratories, Inc.
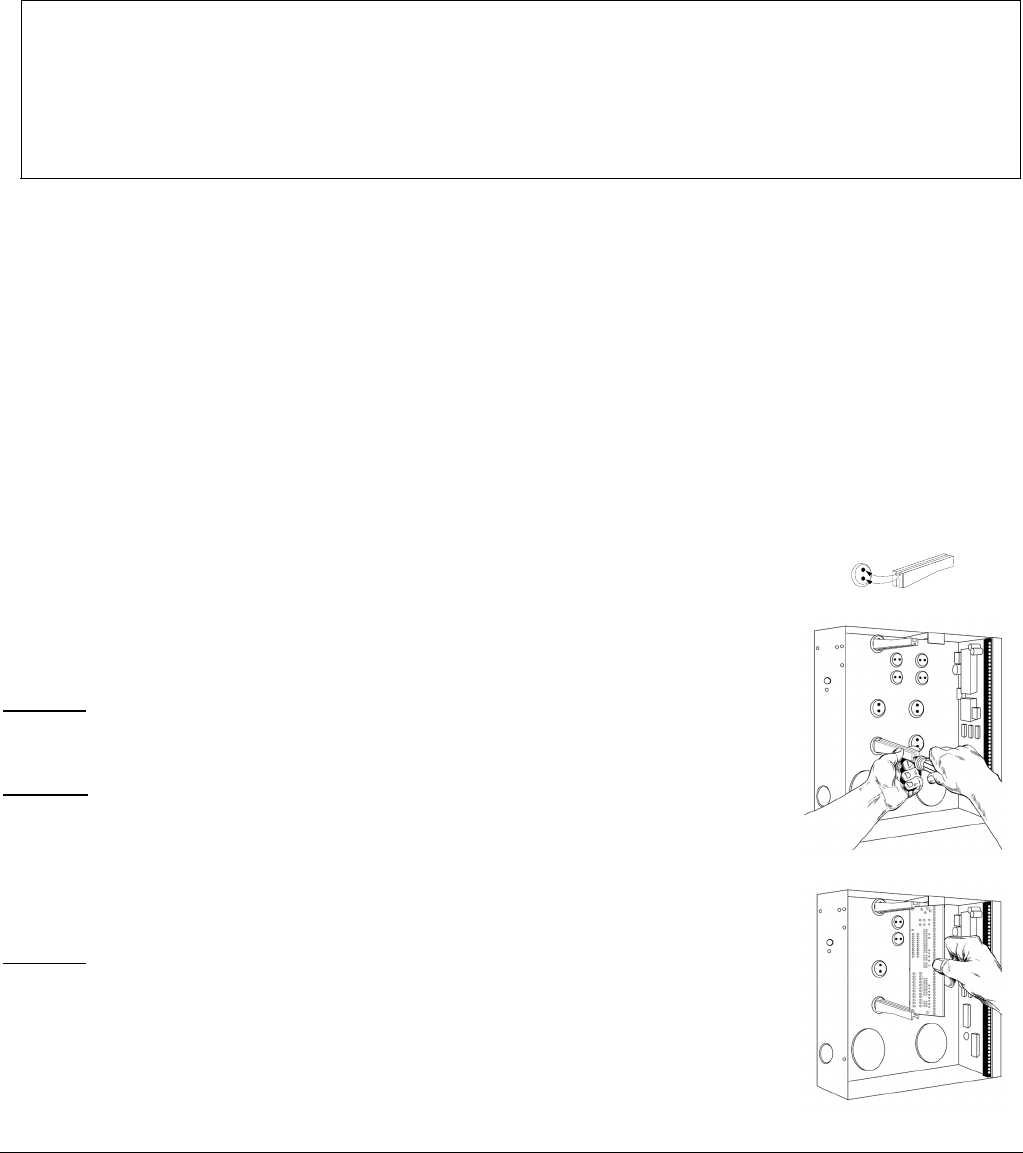
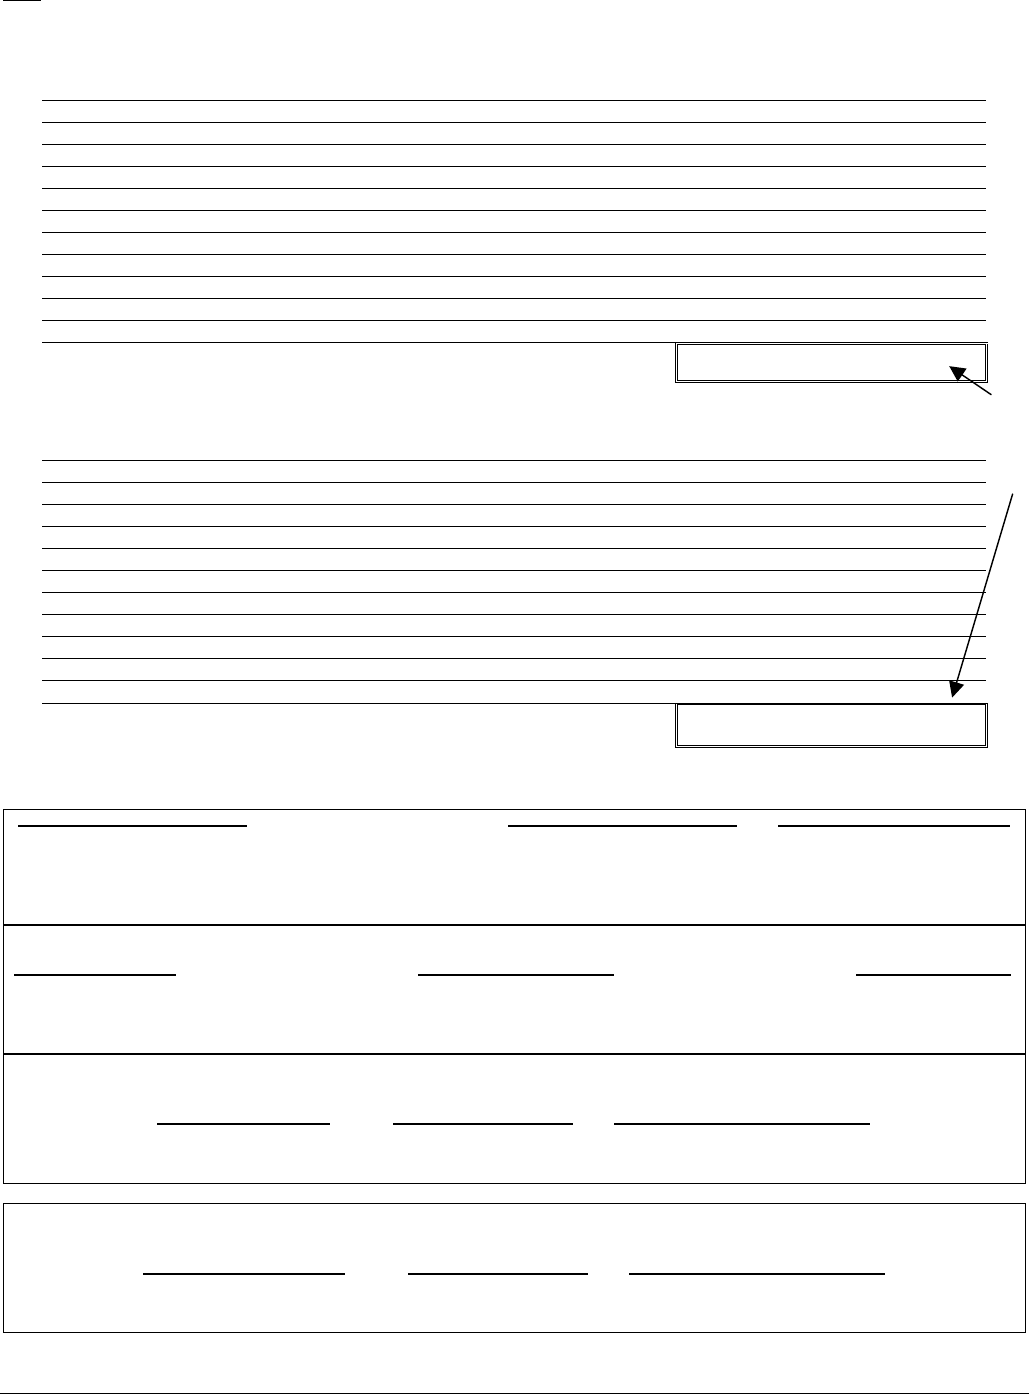
III. BOARD INSTALLATION
Inside the can, several 2-holed insertion points have been constructed. This allows for either
vertical or horizontal placement of the modules. Notice that each insertion point has two sizes of
holes -a larger hole and a smaller hole.
Diagram 1: The black plastic PCB guides are grooved on one edge where the PC board will be
seated. The end with the half-moon protrusion fits into the larger hole. The smaller hole is for the
screw.
Diagram 2: Place the first black plastic PCB guide in the top insertion point, grooved edge
downward. The half-moon protrusion will be in the large hole. It does not require force. Insert one
of the provided screw into the smaller hole (from inside the can) to secure it in place. A
screwdriver should reach through the notch that runs the length of the guide to tighten the screw.
The second PBC guide should be positioned opposite the first (grooved edge up) and placed in the
lower insertion point, using the same procedures described above. Once mounted, screw it in
securely.
Diagram 3: The PC Board should slide freely in the grooves of both guides.
NX-8E-CF CONTROL 5
K IMPORTANT!
1. If separate power supplies are necessary to accommodate additional devices, safety standards require that each
power supply be prominently marked with adequate instructions for removing all power from the unit.
2. Dispose of used batteries according to the manufacturer’s instructions and/or local government authorities.
3. Installation personnel should thoroughly read and understand the installation instructions and the users manuals for
the panel and all the accessories to be included with the system before attempting to install a security system.
WARNING!
Suggested replacement batteries: Power Sonic #PS-12180 or Yuasa #NP4-18 battery. Observe polarity when installing a
new battery. Installing the battery backwards may cause damage to the panel. There is a risk of explosion if the battery is
replaced with an incorrect type.
NOTE
Electrical codes will vary depending upon the country and city where the system is installed. It is the installer’s
responsibility to ensure that the electrical installation is safe and conforms to all applicable codes, laws, or regulations. Only
qualified persons should connect this device to the mains supply.
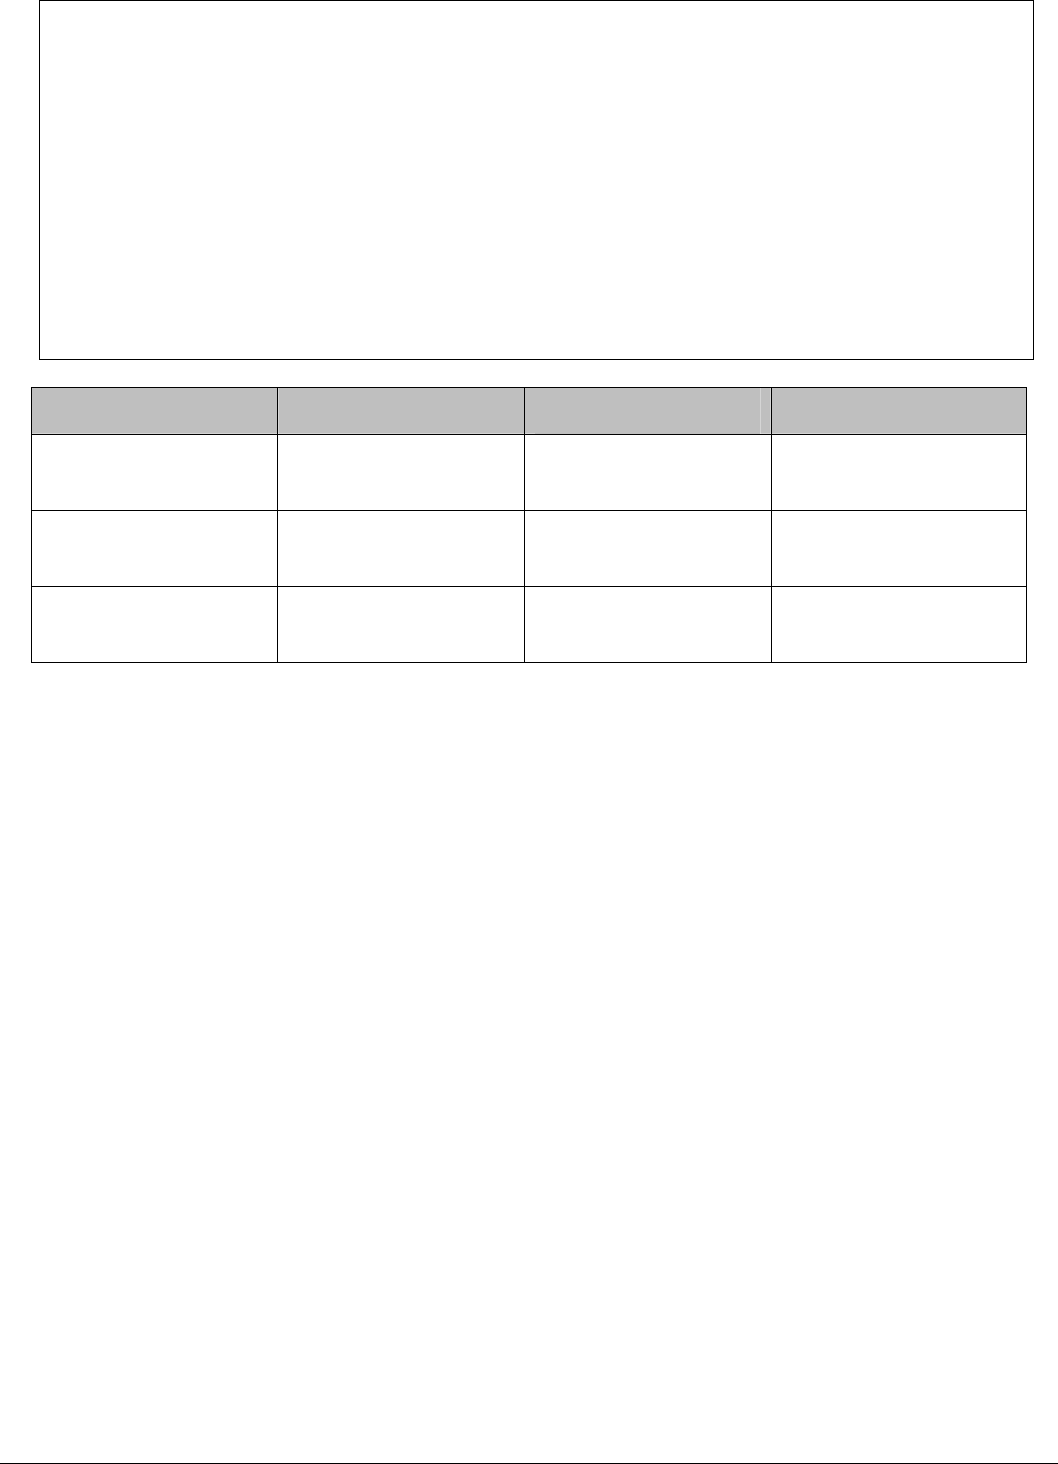
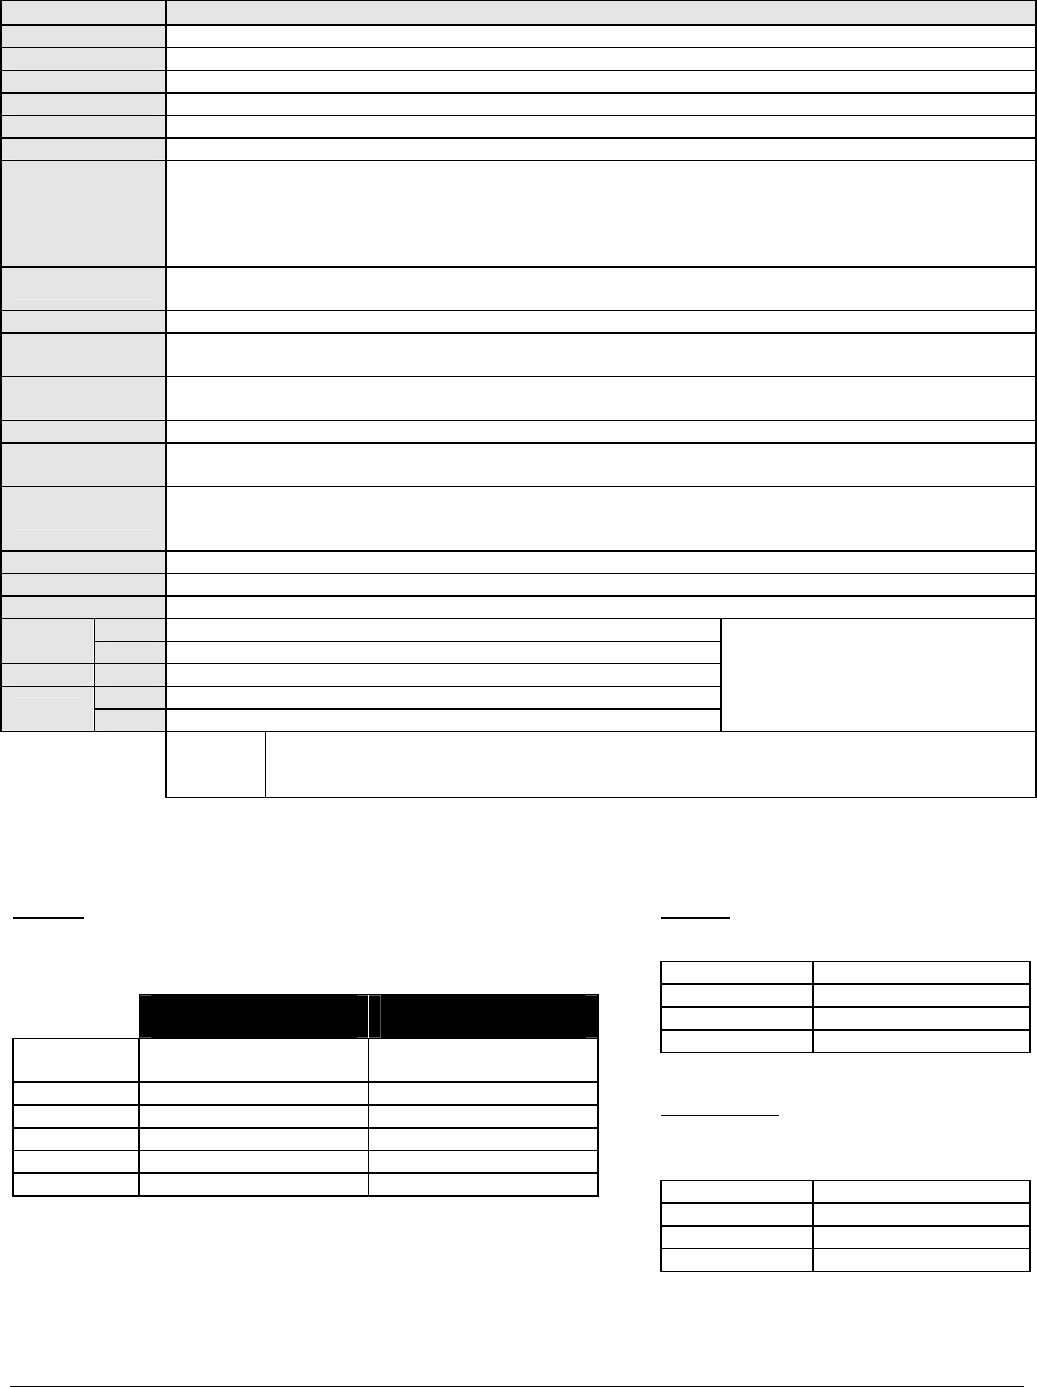
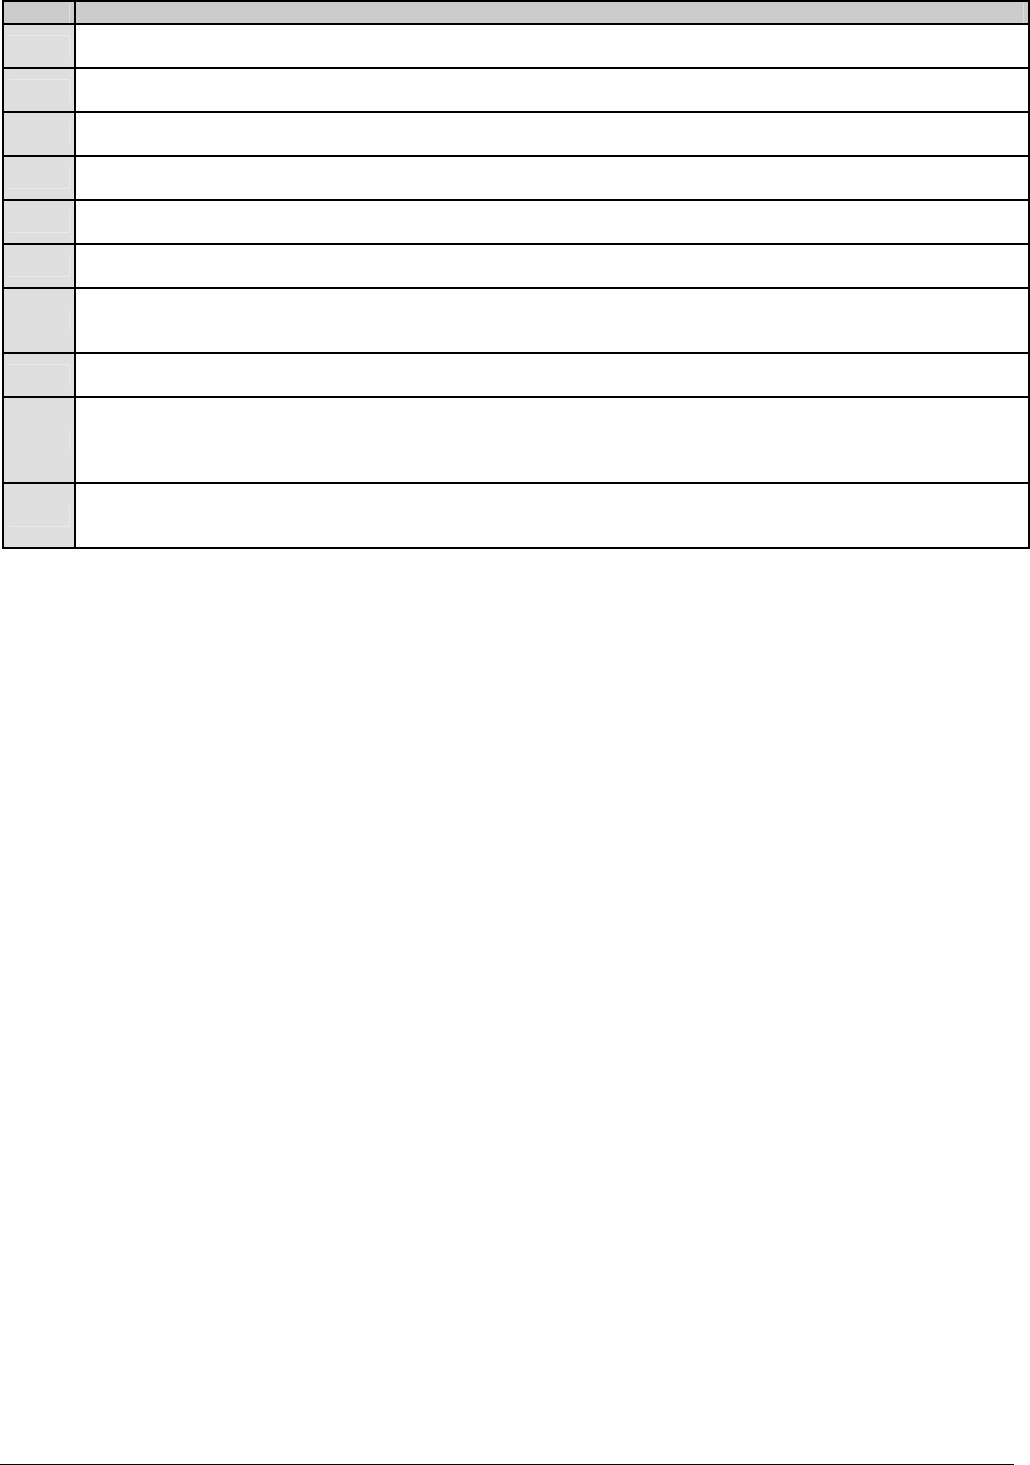
STANDBY TIME TOTAL AUXILIARY CURRENT STANDBY BATTERY
CAPACITY
ALARM CURRENT
24 hours 1.9 Amps 51 AH 600 mA
1.25 Amps 34 AH 1 Amp
600 mA 17 AH 1 Amp
48 hours 900 mA 51 AH 1 Amp
600 mA 34 AH 1 Amp
300 mA 17 AH 1 Amp
72 hours 600 mA 51 AH 1 Amp
400 mA 34 AH 1 Amp
200 mA 17 AH 1 Amp
! Calculations based on three 17-Amp batteries.
NX-8E-CF CONTROL
6
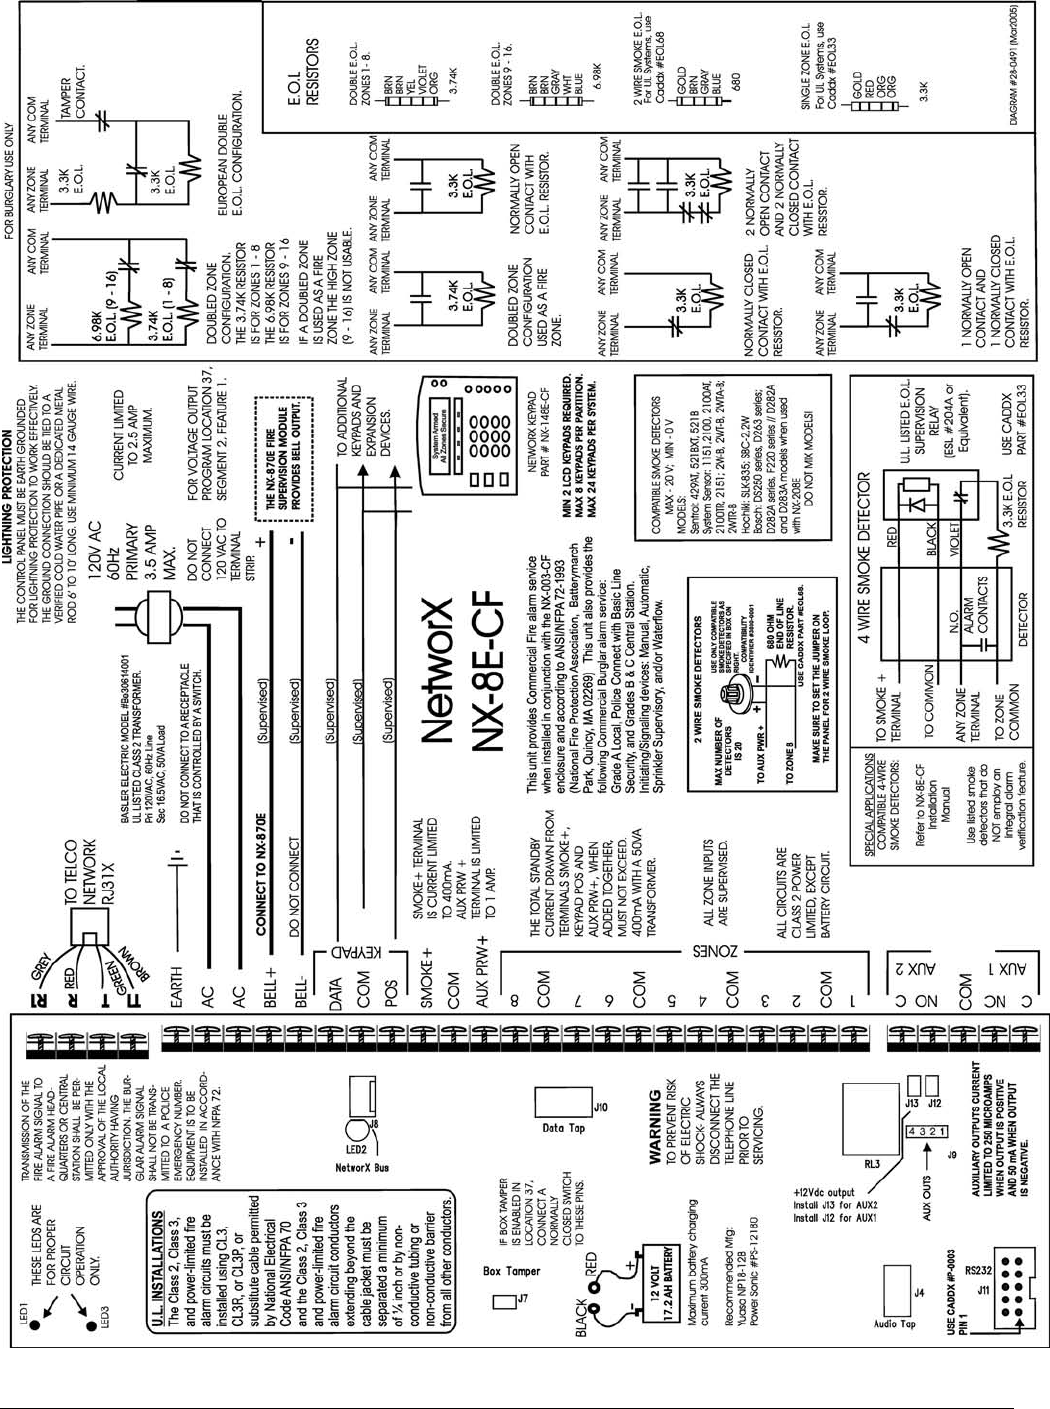
IV. NX-8E-CF WIRING DIAGRAM
NX-8E-CF CONTROL 7
V. TERMINAL DESCRIPTIONS
TERMINAL DESCRIPTION
R1 House Telephone Ring (Grey).
R Telephone Ring (Red).
T Telephone Tip (Green).
T1 House Telephone Tip (Brown).
EARTH Earth Ground. Connect to a cold water pipe or a 6 to 10 foot driven rod.
AC AC input. Connect to a 16.5V, 40VA or 50 VA Class ll U.L. approved transformer.
BELL + & BELL -
If used as a siren output (default), the speaker rating should be 15 watt at 8 or 16 ohm, or 30/40 watt at 4, 8, or 16
ohms. If voltage output is selected in location 37, this output becomes voltage output, 12VDC, 1 Amp maximum
load. NOTE: A 3.3K ohm resistor may be required across the bell terminals when a 12 VDC siren is used. If no
resistor is used, you may experience voltage leakage into the siren, which will cause these devices to output a
small signal.
KP DATA Connect to the data terminal on the keypads and the expanders. Maximum number of devices (keypads +
expanders) is 32. See “Maximum Wire Run” chart below.
KP COM Connect to the Common terminal on the keypads and the expanders.
KP POS Connect to the POS terminal on the keypads and the expanders. Individually, this terminal is limited to 1 Amp.
Combined, this terminal and AUX PWR + are limited to 2 amps total current.
SMOKE+ Smoke detector power 12VDC, 1.5 amps maximum (For those jurisdictions which allow the Priority zone to be used
with smoke detectors.)
COM Connect negative wire of powered devices such as motion detectors and smoke detectors.
AUX PWR+ Connect positive wire of all powered devices except smoke detectors and keypads. Individually, this terminal is
limited to 1 Amp. Combined, this terminal and KP POS are limited to 2 amps total current.
ZONE 8
Connect to one side of zone 8 loop. Connect the other side to com terminal. Open or short causes alarm. Zone 8
may be used for a two-wire smoke detector using a 680 E.O.L. resistor. Connect one side to AUX PWR+ ONLY if
using 2-wire smoke. Refer to wiring diagram. Program location 37, segment 6, option 1.
COM Common (-) terminal for zones 7 & 8. (See the wiring diagram for examples.)
ZONE 7 Connect to one side of zone 7 loop. Connect the other side to COM terminal. Open or short causes alarm.
ZONE 6 - ZONE 1 Connect as described for zones 7 & 8. Only zone 8 can be a two-wire zone. (See the wiring diagram for examples.)
C Closed dry contact rated 1 Amp at 30 Volts.
RELAY2 NO Normally open dry contact rated 1 Amp at 30 Volts.
COM Common used to ground any devices connected to relays.
NC Normally closed dry contact rated 1 Amp at 30 Volts
RELAY1 C Closed dry contact rated 1 Amp at 30 Volts
NOTE: These terminals can be set for
12VDC. Install J12 for AUX1 and J13
for AUX2 (See terminal drawing.)
(See terminal
drawing)
AUX 1-
AUX 4
Connect negative lead of low current device [relay, LED (install 1K ohm resistor in series with LED), etc.].
Connect positive lead of device to AUX PWR +. Current is limited to 50mA when output is negative, and
250
µ
A when output is positive. Part number #8920 is 4-wire cable.
MAXIMUM WIRE RUNS
KEYPADS
(Note: These numbers are for one keypad at the end of the wire. When
connecting more than one keypad to the end of the wire, a higher gauge wire
will be required.)
IF CONNECTED TO
NX-8E-CF
IF CONNECTED TO
NX320-E
Length in
feet Wire Gauge (AWG) Wire Gauge (AWG)
250 24 22
500 20 18
1000 18 16
1500 16 14
2500 14 12
BATTERY
(when located external to the case)
Length in feet Wire Gauge (AWG)
2.5 20
4.5 18
11.5 14
TRANSFORMER
(Maximum line impedance from panel to mains
transformer <= 20 ohms)
Length in feet Wire Gauge (AWG)
3,000 14
6,000 12
10,000 10
NX-8E-CF CONTROL
8
VI. BATTERY CALCULATION WORKSHEET
Note: The Total Standby or Total Alarm Current cannot exceed 1.2 Amps. Current for the smoke loop must be deducted from the overall
available 1.2 Amps.
TOTAL STANDBY CURRENT
System Component Qty Standby Current TOTAL STANDBY CURRENT
NX-8E-CF 1 X 60mA = 60mA
NX-870E 1 X 20mA = 20mA
NX-148E X 75mA =
NX-208E Aux+ X 13mA =
NX-208E DCIN X 31mA =
NX-216E X 30mA =
NX-320E X 10mA =
NX-507E X 10mA =
NX-1700E X 40mA =
NX-2192E X 170mA =
OTHER (sensors, etc.)
TOTAL =
TOTAL ALARM CURRENT
System Component Qty Device Alarm Current TOTAL ALARM CURRENT
NX-8E-CF 1 X 210mA = 210mA
NX-870E 1 X 110mA = 110mA
NX-148E X 110mA =
NX-208E Aux+ X 53mA =
NX-208E DCIN X 31mA =
NX-216E X 60mA =
NX-320E X 10mA =
NX-507E X 310mA =
NX-1700E X 110mA =
NX-2192E X 170mA =
OTHER (sensors, etc.)
TOTAL =
STANDBY AMP HOURS
mA .001 Amp/mA Hrs Ah
Total Standby Current
(Step 1)
X Conversion Factor X Required Hours in
Standby
= Standby Amp Hours
ALARM HOURS
mA .001 Amp/mA Mins .0167 Hr/Min Ah
Total Alarm
Current (Step 2)
X Conversion Factor X Required Minutes in
Standby
X Conversion Factor = Alarm Hours
MINIMUM BATTERY POWER REQUIRED
mA Ah
Standby Amp
hours (Step 3)
+ Alarm Amp Hours
(Step 4)
= Minimum Battery Power
Required
TOTAL STANDBY BATTERY POWER
1.15
Minimum Battery
Power (Step 5)
X Battery Derating
Factor
= Total Standby Battery Power
Should no
t
exceed 1.
2
A
mps
each
NX-8E-CF CONTROL 9
VII. UNDERWRITERS LABORATORIES INFORMATION
The NetworX NX-8E-CF holds the following listings from Underwriters Laboratories (US and Canadian):
Type Type Service Type Signaling Model
L A, M, SS, WF NC NX-8E-CF
RS A, M, SS, WF NC NX-8E-CF
CS (protected premise unit) A, M, SS, WF NC NX-8E-CF
UL294 Access Control System Units (* requires the NX-1700E module)
UL365 Police Station Connected Burglar Alarm Units and Systems
UL609 Local Grade A Mercantile, Police Station Connect with Basic Line Security
(* requires #NX-003-C enclosure)
UL864 Control Units for Fire-Protective Signaling Systems
UL985 Household Fire Warning Systems & Units
UL1023 Household Burglary Alarm Systems & Units
UL1610 Grade B & C Central Station Burglar Alarm Unit
UL1637 Home Health Care Signaling Equipment
CAN/ULC-S303 Local Burglar Alarm Units and Systems
CAN/ULC-S304 Central and Monitoring Station Burglar Alarm Units
CAN/ULC-S545 Standard for Residential Fire Warning System Control Units
MINIMUM SYSTEM CONFIGURATION for UL 864 applications includes these individual modules:
PART # DESCRIPTION MIN QTY
NX-8E-CF NX-8E-CF Control Only 1 ea
NX-148E-CF Alphanumeric LCD Keypad for Commercial Fire applications (red plastic) 2 ea
NX-870E Fire Supervision Module 1 ea
All UL installations require the following:
At least one NX-8E-CF control panel.
At least two NX-148E-CF LCD keypads. Connect one to DATA/COM/POS and the other to DATA/COM/AUX+.
At least one NX-870E Fire Supervision module.
At least one NX-003-CF Commercial Fire metal enclosure. Supplied screws to be used.
At least one bell fixture is required for all applications, except Grade C Central Station. For Grade A Local, the AD10-12 bell and
Grade A bell housing shall be used.
Initiating and indicating devices must be rated at 11.5 to 12.4 V DC residential, 12.0 V DC commercial.
When using partitioning in Commercial Burglary applications, the main control must be protected by a 24-hour alarm circuit.
Force Arming and Auto Arming shall not be enabled.
For residential fire applications, the indicating devices shall be a Wheelock 34T-12 or equivalent.
The "Listen-In" feature shall not be enabled.
The Siren/Bell Test shall be enabled. The auxiliary outputs controlling the audible device require a minimum cutoff time of 15
minutes for commercial burglary, 4 minutes for residential applications, or 30 minutes for Commercial Burglary for Canada.
The Dynamic Battery Test time cannot exceed four (4) hours.
Ringback shall be enabled.
The DACT shall be enabled.
On commercial burglary installations, the fire initiating circuits shall not be connected.
The Entry-Guard feature shall be disabled.
Swinger Shutdown shall be disabled.
Group Bypassing shall be disabled.
Delay before dial seizure shall be set to "0".
Total current draw from aux power connections at terminal positions POS, AUX PWR, and SMOKE PWR must not exceed 400 mA.
The keyswitch option shall not be used.
The telephone line monitor shall be enabled.
The Telephone Line Cut delay shall not exceed 200 seconds maximum.
24-hour communicator test transmission is required.
For 24 hours of standby power using a 7.0 AH battery, limit auxiliary power load to 140 mA.
For 24 hours of standby power using a 17.2 AH battery, limit auxiliary power load to 400 mA.
The silent keypad option shall not be enabled.
NX-8E-CF CONTROL
10
UL has only verified compatibility with the following listed DACRs and formats: Sure-Gard SG-MLR2-DG: 2,9,10,12,13,14; Silent Knight
9000 - 2,12; FBI - CP220FBI, 13; and Ademco 685: 2,11,12, and 13.
For burglary installations, cross-zoned detectors shall overlap 100 percent in the area of coverage and similar coverage areas must be
used. For example, interior protection is cross-zoned with interior protection, and so on.
Expander trouble must activate the siren (Loc. 37, Seg 2)
For UL 1637, expander trouble must activate keypad sounder (Loc. 39, Seg 1)
If the Late to Close/Early to Open feature is enabled, the Opening and Closing reports shall be enabled (Loc. 23, Seg. 4, Option 1 and
Loc. 23, Seg. 3, Option 1).
Use type FPL, FPLR, or FPLR cables as required by Article 760 of the National Electrical Code.
Compatible listed devices (Special Applications – Commercial Fire):
• Bell Output (Sirens): Wheelock models NS-1215W, NS-121575W, NS4-1215W, NS4-121575W, AS-1215W, AS-121575W
• Horn / Strobe: System Sensor: S1224MC Strobe series; 1224MC Horn/Strobe series; H12/24 Horn series
• Smoke Output (4 wire detectors):
o ESL: 500N series; 449CTE series; 521 series; 541 series
o System Sensor models: 2112/24R; 2112/24TR; 2112/24AT; 2112/ATR; 2112/24AITR; 4WTA-B; 4WTR-B; 4WTAR-B;
4WITAR-B.
o Detection Systems: F220-B6C; D273 series
o Hochiki: SBC-4/12, 4/12W
o The 4-wire smoke detector employed shall be rated to operate over the voltage range of 11.5 to 12.4V
• Smoke Output (2-wire detectors): ESL 429 series, 521 series, 711U/UT, 721U/UT
For Canadian installations, the class II transformer secure tab shall not be employed.
VIII. GLOSSARY
TERM DESCRIPTION LOC PG
ABORT If enabled, the NX-8E-CF will wait the programmed number of seconds in location 40 prior
to sending an alarm. To abort the report, type in a code and press CANCEL. “Dialer Delay”
must be enabled in the “Characteristic Select” of locations 110-169.
40
110-169
22
28-31
AC FAIL
LOW BATTERY
REPORT/WARNING
The NX-8E-CF can be programmed to report AC failure and/or Low Battery conditions to
the central station. It can also be programmed to sound the keypad immediately upon
detection of the condition. The AC failure report/warning can be delayed.
37 & 39 21-22
AC POWER
LOW BATTERY
SOUNDER ALERT
If enabled, the NX-8E-CF will beep the keypad sounder upon arming or disarming if the
AC power is missing or a low battery has been detected.
For UL Commercial Fire installations, this feature must be ENABLED.
23 18
ARM / DISARM
CODES
The NX-8E-CF can have 240 four-digit codes or 160 six-digit codes to arm/disarm the
control. All codes must have the same number of digits. The factory default for User #1
is 1234 when using a 4-digit code, or 123456 for a 6-digit code. This code can
then be used to enter the new arm/disarm codes.
41 23
AUTO CANCEL / ABORT
If enabled, the Cancel and/or Abort features will be automatic (pressing the CANCEL
button is not required). The Cancel and Abort features, in locations 23 and 40
respectively, must be enabled to permit this Auto feature to work. For proper operation of
these features, “Dialer Delay” must be enabled in the “Characteristic Select” of locations
110-169 Zone Types. Default is OFF.
For UL Commercial Fire installations, this feature must be DISABLED.
41 23
AUTO TEST This feature will cause the panel to call the central station to report a communicator test
at a specified interval. Default is ON.
51 24
AUTOMATIC ARMING If programmed, the NX-8E-CF will Auto Arm at a specified time. At this time, the keypad
will beep for 50 seconds before the panel arms. The arming process will be stopped if a
code is entered on the keypad. The NX-8E-CF will attempt to arm after every 45 minutes
of inactivity until the next “opening” time (loc. 52), or until the system is armed. The 45-
minute timer will be extended when there is activity in the building. The Auto Arming of a
partition can be programmed to be silent. If closing reports are sent, the user code will be
97.
For UL Commercial Burglary installations, this feature must be DISABLED.
23,
52-55
18
24
AUTOMATIC BYPASS
INSTANT ARMING
When enabled, the control panel can automatically bypass interior follower zones if an
exit is not detected during the exit delay time. Entry delay zones can also be made
instant.
23
Seg 1 & 3
18
AUXILIARY OUTPUTS There are four programmable outputs that can be used to activate relays, LEDs, etc. 45-50
Diagram
23-24
7
AUXILIARY POWER
OVERCURRENT
The control panel will display a "Service Required" message on the keypad when too
much current is drawn from any device powered by the system. This condition can be
reported to the central station.
37 21
NX-8E-CF CONTROL 11
TERM DESCRIPTION LOC PG
BOX TAMPER The control panel has an input for a normally closed tamper switch (see terminal
drawing). The Box Tamper can be programmed to report and/or sound the siren and/or
the keypad. These terminals can be enabled or disabled in programming.
37,
39
21
BUILT IN SIREN DRIVER The NX-8E-CF has a built-in 112db siren driver. When desired, this built-in driver can be
easily converted to a 1-amp voltage output through programming.
37 21
BYPASS TOGGLE This feature will enable the end user to toggle (turn on or off) the bypass of an interior
zone with the system armed by pressing BYPASS.
23 18
CANCEL If enabled, the control panel will send a "Cancel" report if when the system is disarmed
and the CANCEL button is pressed within 5 minutes of an alarm. “Dialer Delay” must be
enabled in the “Characteristic Select” of locations 110-169.
23 18
COMMUNICATION
FORMATS
The NX-8E-CF can report in Contact ID or SIA formats. Appendix 1 54
CROSS ZONING This feature requires two or more trips on a zone or zones programmed as "cross zones"
within a specified time before reporting an alarm. During the time between trips, the
control panel can be programmed to sound the keypad and/or the siren. The control
panel can also be programmed to report an alarm after two or more trips on the same
zone.
37,39,40,
110-169
21,22
28-31
DUAL / SPLIT /
MULTIPLE REPORTS
The NX-8E-CF can send communication reports to three different phone numbers for
dual, split or multiple reports selectable by event or partition.
4, 10,
16
16,171
8
DURESS CODE If a duress code is programmed the control panel will send a duress signal whenever the
panel is armed or disarmed with this code. If open/close reports are sent, the user code
will be 254.
44 23
DYNAMIC BATTERY
TEST
The control panel can be programmed to perform a Dynamic Battery Test for a selected
duration the first time the panel is armed or disarmed every day. If the panel is not
disarmed during the day it will perform the test at midnight. The control panel can also
be programmed to perform a missing battery test every 12 seconds.
37, 40 21 and
22
EARLY TO OPEN / LATE
TO CLOSE
If an opening occurs before the opening and closing times, the NX-8E-CF will send an “Early
Open” report. If it fails to close on or before the designated closing time, the NX-8E-CF will
send a “Late to Close” report.
23 18
END OF LINE RESISTOR
DEFEAT
The NX-8E-CF can be programmed to make zones 1-8 for normally closed operation only,
eliminating the need for the end of line resistors on these zones. When a zone is
programmed for normally closed operation, a short on that zone will not change the loop
condition, and an open on that zone will produce a faulted condition. This feature will be
ignored by any Priority zone.
For UL installations, all zones must be programmed as supervised.
111-169 28-31
ENTRY-GUARD This unique low-level arming mode has been developed to reduce the most common
source of false alarms. When armed as “Instant”, the opening of any zones designated as
"Entry Guard zone" will initiate the keypad sounder and start the entry delay before
creating an alarm. All other zones will function as normal. This arming mode will
encourage system owners to use their system more frequently when the premises are
occupied.
For UL installations, this feature must be DISABLED.
111-169 28-31
EXIT ERROR If this feature is not enabled, the siren will sound if any entry/exit zone is faulted at the
instant the exit delay expires. If enabled, the NX-8E-CF will send an "Exit Error Report" if
an entry/exit zone is faulted at the instant the exit delay expires. This report will be sent
along with the user number that armed the system, if the panel is not disarmed before
the entry delay expires. The alarm report will also be sent.
23 18
EXPANDER TROUBLE The control panel will report expander trouble to the central station if enabled. This
condition will display the "Service Required" message on the keypad even if not reported.
The keypads are considered expanders. The number of the expansion devices reported
can be found on page 57.
37 21
FAIL TO COMMUNICATE
The control panel will display the "Service Required" message if a report fails to reach the
central station. If enabled, when the next report is successfully communicated, a Fail to
Communicate code will be reported. Default is ON.
37 21
FIRE ALARM
VERIFICATION
When enabled, the control panel will verify a Fire alarm by requiring more than one trip
on a smoke detector within a specified time before creating an alarm.
This feature is not approved for residential use in California.
40
FORCE ARMING When enabled, the NX-8E-CF can be Force Armed with zones violated. At the end of the
exit delay, these zones will become bypassed. If these zones become secured any time
during the arming cycle, they will be unbypassed and active in the system. If "Bypass
Report" is enabled, the force arming zones can be programmed to report bypass when
they are Force Armed (default), or to not report bypass even if "Bypass Report" is enabled.
For UL installations, this feature must be DISABLED.
37 and
111-149
21 &
28-31
GROUND FAULT If the NX-870E is used, a fault of the earth ground can be reported to the central station. If
it is not reported, this condition will display the "Service" message on the keypad.
37 21
NX-8E-CF CONTROL
12
TERM DESCRIPTION LOC PG
GROUP BYPASS A designated group of zones can be programmed to bypass by pressing [Bypass]- [0]-
[Bypass]- [Bypass] prior to arming.
For UL installations, this feature must be DISABLED.
111-169 28-31
IMMEDIATE RESTORE
BY ZONE
The NX-8E-CF can be programmed to send alarm and restore reports as soon as they
occur, or wait until the siren time has expired.
37 21
INTERNAL EVENT LOG Up to 512 events can be stored in memory along with the date and time of the event. All
reportable events report to the log.
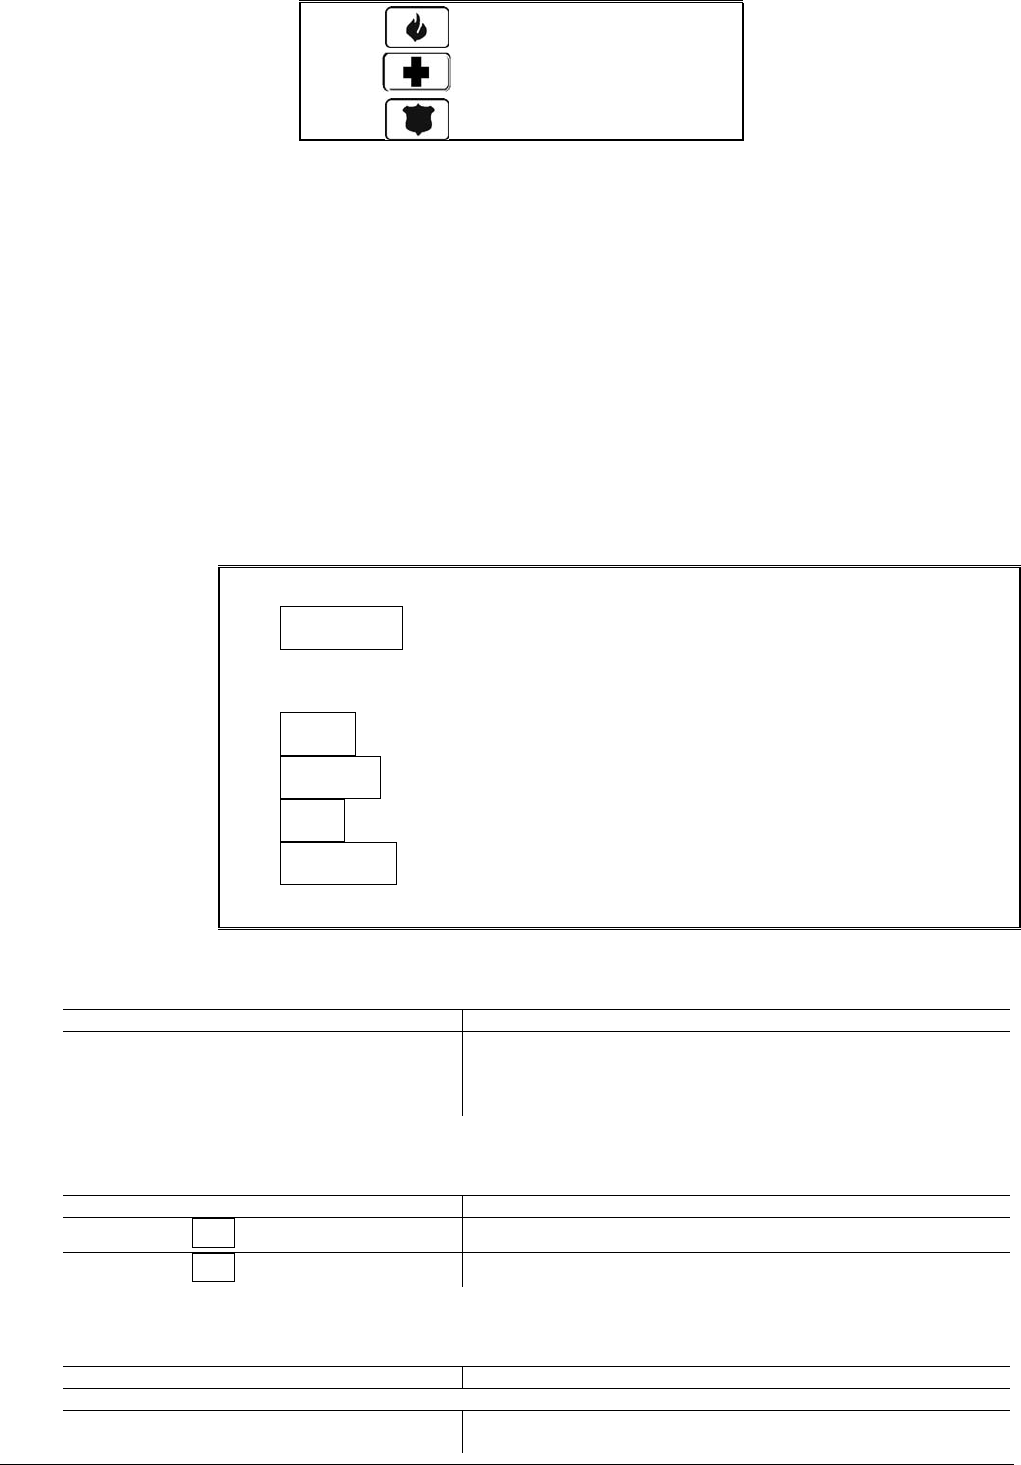
KEYPAD ACTIVATED
PANICS
The NX-8E-CF has three keypad activated panics that will send reports to the central
station: Auxiliary 1 (Fire), Auxiliary 2 (Medical), and Keypad Panic. Auxiliary 1 will activate
the steady (Fire) siren, Auxiliary 2 will sound the keypad, and the Keypad Panic can be
programmed to be silent or audible (sound siren).
23 18
KEYPAD SOUNDER
CONTROL
The NX-8E-CF can be programmed to sound the keypad sounder for certain events. 39 22
KEYPAD TAMPER If enabled, the NX-8E-CF will disable the keypad for 60 seconds and communicate a
tamper signal to the central station if 30 keypresses are entered without producing a
valid code.
23 18
KEYSWITCH
ARM/DISARM
Any zone on the NX-8E-CF can be programmed as a keyswitch zone. If this is done, a
momentary short on this zone will arm/disarm the control. If opening/closing reports are
sent, the user code will be 99.
"Default
Zone Types"
19
LED EXTINGUISH This feature will extinguish all LEDs on the keypad, except the "Power" LED, after 60
seconds without a keypress. Pressing any numeric key will illuminate all LEDs.
23 18
LOG FULL REPORT A report can be sent to the central station when the event log is full. 37 21
LOST CLOCK SERVICE
LIGHT
The NX-8E-CF can be programmed to illuminate the "Service" LED when the internal clock
has an invalid time due to power loss.
37 21
MANUAL TEST The NX-8E-CF can be programmed to perform a bell and/or communicator test when
[]-[4]-[4] is entered while the system is in the disarmed state.
37 21
NIGHT MODE (Applies to NX1208E / NX1248E keypads) In this mode, the control panel will bypass all
zones that have the Entry Guard feature enabled.
23 18
ON BOARD ZONE
DISABLE
The eight zones on the NX-8E-CF panel can be disabled in order to have a completely
wireless alarm system.
37 21
PARTITIONS The NX-8E-CF can be partitioned into a maximum of eight separate systems with distinct
reporting codes, user codes, and operating features for each system.
26 - 36 20-21
PROGRAM CODE The factory default for the "Go To Program" code is [9]-[7]-[1]-[3] when using a 4-digit
code or, if the 6-digit option is used, the default is [9]-[7]-[1]-[3]-[0]-[0]. The program code
can also be used as an Arm/Disarm code. If used as an Arm/Disarm code, and
open/close reports are sent, the user code will be 255.
43 23
QUICK ARM FEATURE The NX-8E-CF has a one-button "Quick Arm" feature which can be used to arm the
system by pressing the [Exit] key or the [Stay] key on the keypad. If closing reports are
sent, the user code will be 98.
23 18
RECENT CLOSING If enabled, the NX-8E-CF will send a "Recent Closing Report" to the central station if an
alarm occurs within 5 minutes after the panel is armed. The user number that armed the
system will also be sent.
23 18
RE-EXIT The NX-8E-CF has the ability to restart the exit delay for a quick exit without disarming
the system by pressing the [Exit] key while the system is armed.
23 18
SIREN BLAST FOR
ARMING
The NX-8E-CF can be programmed to give a one-second siren blast when the panel is
armed, at the end of the exit delay, or when the central station receiver acknowledges
the closing report. It can also give one blast for remote (keyswitch) arming and two blasts
for remote disarming.
37 21
SIREN SUPERVISION The NX-8E-CF has a “Siren Supervision” circuit that will constantly monitor the siren on
the NX-8E-CF and can be programmed to report if the wires are cut.
37 21
SILENT EXIT OPTION The exit delay can be silenced by pressing []-[Exit] before arming the control panel or
when using the re-exit feature. The exit delay can also be silenced permanently in all
partitions.
37 21
START / END
PROGRAMMING
A report can be sent when local programming is started and ended 37 21
SWINGER SHUTDOWN This feature allows a zone or zones to be automatically bypassed after a specified
number of alarms. When a zone is tripped, the alarm ‘counter’ reflects “1” in memory. If a
new (first) alarm is detected in a different zone, the counter remains at “1”. If an alarm is
detected on a previously tripped zone, the count increments to “2”. The ‘counter’ will
increment each time an alarm is detected on a zone with multiple trips. Bypassing will
occur on the zone that causes the count to equal the number programmed in location 38;
the ‘counter’ will reset to zero (0); and begin a new trip count where the next alarm will set
the ‘counter’ to 1. If immediate restore is enabled in location 37, the alarms (and restores,
if enabled) will be sent as they occur. If immediate restore is not enabled, a second or
subsequent alarm will not be sent until the siren times out.
For UL installations, this feature must be DISABLED.
37 & 38 21-22
NX-8E-CF CONTROL 13
TERM DESCRIPTION LOC PG
TELEPHONE LINE
MONITOR
The NX-8E-CF has a Telephone Line Monitor that monitors the voltage and current of the
telephone line for a detection of a faulted phone line. This condition can also be reported
to the central station. If the report is enabled, only the Telephone Line Restore will be
reported unless the NX-870E is being used.
37, 39, & 40 21-22
TEMPORAL SIREN
DISABLE
If disabled, the Fire Siren will be steady and Fire Voltage Out will be the same as Burglary
(continuous). Otherwise, the Fire Siren will be temporal.
For UL installations, this feature must be ENABLED.
37 21
WALK-TEST MODE If enabled, entering [] [Chime] followed by a user code will allow a walk-through zone
test where all zones become silent and local (non-reporting). During this test the chime
light will flash on the LED keypad. Each time a zone is faulted, the zone light on the LED
keypad will illuminate and the chime will sound. The number of the faulted zone(s) will be
displayed on the LCD keypad. It will also be entered into alarm memory and the internal
log. To exit at any time during this mode, enter a user code. Otherwise the “Walk-Test
Mode” will automatically exit after 15 minutes.
41 23
WIRELESS SENSOR
MISSING /
LOW BATTERY
The NX-8E-CF will send a report to the central station when a wireless sensor has
detected a low battery or has not reported to the receiver. The "Service" LED will
illuminate when either condition exists.
37 21
ZONE ACTIVITY
MONITOR
This feature will send a report to the central station when a particular zone does not
change conditions within the specified number of days programmed.
40,
110-169
22,
28-31
ZONE BYPASSED
SOUNDER ALERT
If this feature is enabled, the NX-8E-CF will beep the keypad sounder upon arming if a
zone is bypassed.
23 18
ZONE TYPES
(CONFIGURATIONS)
The NX-8E-CF has 30 programmable Zone Types that determine how each zone will
function and report. The default Zone Types are listed on page 19.
If any zone is programmed as a Fire Zone, that zone will be a Fire Zone in all
partitions. (Example: If zone 2 is a Fire Zone in partition 1, then zone 2 will be a Fire
Zone in all partitions.)
111-169 28-31
IX. PROGRAMMING THE CONTROL
ENTERING THE PROGRAM MODE
Action Result
8 Enters the Program Mode.
Prompts for the programming code.
[Go To Program Code]
Factory Default is 9713
If the "Go To Program Code" is valid, the LCD screen will prompt for the
device address to program. You are now in the Program Mode and
ready to select the module.
SELECTING THE MODULE TO PROGRAM
Since all modules connected to the NX-8-CF are programmed through the keypad, the module you are programming should
be the first entry.
Action Result
0 # Programs the NX-8E-CF Commercial Fire Panel
is the module number of the control and # is the entry key. Other
module entry numbers can be found in their corresponding manuals.
PROGRAMMING A LOCATION
Once the number of the module to be programmed has been entered, the LCD screen will prompt you for a location number. Any location
can be accessed by directly entering the desired programming location followed by #. If the location entered is a valid location, the top
line of the LCD screen will display the location number on the left and the segment number on the right. The bottom line of the display will
show the current data. This data will be displayed and entered according to the type of data used (numerical, binary, or character data).
NUMERICAL DATA
The top line of the display will show the current location number on the left and the segment number on the right. The data will be
displayed on the bottom line. The hex equivalent will be shown in parenthesis. To change the data in the current location, enter the
number followed by . The data will be entered and the segment will be incremented by 1. The data for this segment will now be
displayed. Continue this process until the last segment is programmed. When the last segment is reached, the keypad will prompt you for
the next location. If you wish to exit this location before the last segment is reached, press #. This keypress will not save the changes
made to current segment, but will exit the location.
NX-8E-CF CONTROL
14
Shortcut keys: Previous location.
Same location.
Next sequential location.
BINARY DATA
The top line of the display will show the current location number on the left and the segment number on the right. The data will be
displayed on the bottom line with the numbers 1-8 in the first 8 characters. If the number appears, this binary switch is on. If a minus sign
(-) appears where the number should be, this switch is off. Toggle numbers on or off using the corresponding number digit (1 to toggle 1; 8
to toggle 8). When the numbers are in the desired state, enter . The data will be entered and the segment will be incremented by 1. The
data for this segment will now be displayed. Continue this process until the last segment is programmed. When the last segment is
reached, the keypad will prompt for the next location. If you wish to exit this location before the last segment is reached, press #. This
keypress will not save the changes made to current segment, but will exit the location. “Shortcut Keys” shown in Numerical Data can also
be used for Binary Data.
CHARACTER DATA
Character Data is used to enter LCD text when programming. (Refer to the NX-148ECF instruction manual for custom messages
feature.) Custom zone descriptions and messages are stored character or ASCII data type. This information is programmed using the
bottom line of the display as a text editor. Once a character location has been entered, the current data will be displayed on the bottom
line. As is always the case, the top line will display the current location and segment number. The five (5) function keys, as well as the up
and down arrow to the right of the display, are now used to edit the message prior to saving it back to the location storage. An underscore
(_) in the display indicates the current cursor location.
Shortcut keys: Saves character or word; moves cursor to right
CANCEL Moves cursor to left.
S or T Scrolls through available characters.
(In Library Mode) Scrolls through available words.
Tip: Refer to the NX-148ECF instructions for more details.
STAY Inserts blank space.
CHIME Deletes characters.
EXIT Accesses the Library
Tip: Refer to the NX-148ECF instructions for more details.
BYPASS Makes the character “flash”.
(In Library Mode) Makes the entire word “flash”.
# Exits the edit mode.
EXITING A LOCATION
Action Result
Saves the data and exits that location.
Tip: The
must be pressed or the data will not be saved. To
exit before the last segment, press #.
You are now ready to program another location.
EXITING THE PROGRAM MODE
Action Result
EXIT Exits this program level. Advances to “Select a Module”.
EXIT Exits the programming mode entirely.
LOADING FACTORY DEFAULTS
Action Result
Follow procedures on page 13 to enter the Program Mode.
910# Keypad will beep 3 times (loading is in progress). The loading takes
about 6 seconds.
NX-8E-CF CONTROL 15
X. ENROLLING MODULES AND KEYPADS
For supervision purposes, the control panel has the ability to automatically find and store in its memory, the presence of all keypads, zone
expanders, wireless receivers, and any other module connected to the data terminal. This allows these modules to be supervised by the
control panel. To enroll the modules, enter the Program Mode of the control panel as described on page 13. When the Program Mode is
exited, the control panel will automatically enroll the devices. The enrolling process takes about 12 seconds, during which time the
"Service" LED will illuminate. User codes will not be accepted during the enrolling process. If a speaker is attached to the control panel, it
will click at this time. If a siren or bell is attached to the control panel, it will sound for about 1 second. Once a module is enrolled, if it is not
detected by the control, the "Service" LED will illuminate.
XI. L QUICK START INSTALLATION
For most routine installations, the "Quick Start" option will allow for enabling a majority of the options available with the NX-8E-CF, when
communicating in Contact ID or SIA formats and without partitioning. The "Quick Start" locations can be identified by the L symbol.
XII. PROGRAMMING LOCATIONS
L LOCATION 0 - PHONE NUMBER 1 (20 segments, numerical data)
The first telephone number is programmed in location 0. A "14" indicates the end of the phone number. Delays of four seconds can be
programmed at any point in the phone number by programming a "13" in the appropriate segment. If tone dialing is desired, program a
"15" in the segment where tone dialing should begin. If the entire number should be tone dialing, program a "15" in the first segment.
Program an “11" for a “r”, and a “12" for a “#”.
L LOCATION 1 - ACCOUNT CODE FOR THE PHONE #1 (6 segments, numerical data)
The account code sent when Phone #1 is dialed is programmed in location 1. Program a A10" in the segment immediately after the last
digit of the account code. If the account code is 6 digits long, program all 6 segments.
L LOCATION 2 - COMMUNICATOR FORMAT FOR PHONE #1 (1 segment, numerical data)
Location 2 contains the communicator format used to transmit to the receiver connected to Phone #1. Consult the instructions for your
central station receiver to determine which format is compatible. Select a format from Table XII-1 COMMUNICATOR FORMAT SELECTIONS.
If this location contains a "0", the built-in communicator will be disabled, and the NX-8E-CF will function as a local only control.
Table XII-1 COMMUNICATOR FORMAT SELECTIONS
DATA FORMAT DESCRIPTION
0 Local Communicator is disabled
1 - 6 Reserved Reserved
7 SIA with Area Modifier Sends the area modifier with events associated with a partition. The receiver must be able to
accept this modifier.
8 - 12 Reserved Reserved
13 Contact ID DTMF (see pages 54 & 55)
14 SIA FSK (see pages 54 & 55)
15 Reserved
L LOCATION 3 - DIAL ATTEMPTS/BACKUP CONTROL FOR PHONE # 1 (2 segments, numerical data)
Segment 1- Dial attempts: Location 3, Segment 1 is used to enter the number of dial attempts (1 to 15 Attempts) the communicator will
make to Phone #1 before ending the notification process. Factory default is "8" and the communicator will make eight (8) attempts to the
first number.
Segment 2- Phone #1 Backup Control: Programming a "0" in Segment 2 of this location will cause the NX-8E-CF to make the designated
number of attempts to Phone #2 before setting the "Fail To Communicate" condition and stop reporting. Programming a "1" in this
segment will cause the NX-8E-CF to stop trying to communicate after the designated number of attempts have been made to Phone #1.
If a "2" is programmed in this segment, it will cause the NX-8E-CF to make the dial attempts in increments of two. The first two attempts
will be made to Phone #1, the next two attempts to Phone #2, then repeating until the total number of attempts designated in Segment 1
is completed.
REPORTING EVENTS TO PHONE NUMBER 1
Phone #1 has two programming locations that are used to select which events are reported to this phone number. Location 4 is used to
select which events are reported to Phone #1. Location 5 is used to select which partitions are reported to Phone #1. If dual or split
reporting is not desired, location 4 should be used to select all events to Phone #1 and location 5 should be left at the factory default of
"0". If dual or split reporting is desired, and the split is based on the event type (such as alarm, open/close, etc.), location 4 should be used
to select only those events that should be reported to Phone #1 and location 5 should be left at the factory default of "0". If dual or split
reporting is desired, and the split is based on partition, location 4 should be programmed as a "0" and location 5 should be used to select

NX-8E-CF CONTROL
16
those partitions that should be reported to Phone #1. If no events should be reported to Phone #1, both locations should be programmed
as "0" (disabling all options).
LOCATION 4 - EVENTS REPORTED TO PHONE # 1 (2 segments, feature selection data)
Segment 1: 1 = Alarms and Alarm Restores.
2 = Opening and Closings.
3 = Zone Bypass and Bypass Restores.
4 = Zone Trouble and Trouble Restores.
5 = Power Fail, Low Battery, Power Restore, and Low Battery Restore.
6 = Bell Cut, Telephone Line Cut, Bell Cut Restore, Telephone Line Restore.
7 = Test Reports.
8 = Start and End programming.
Segment 2: 1 = Zone and Box Tamper and Tamper Restore.
2 = Auxiliary Power Overcurrent, Ground Fault, and Restore for both.
3 = Wireless Sensor Missing and Restore.
4 = Wireless Sensor Low Battery and Restore.
5 = Expander Trouble and Restore.
6 = Fail To Communicate.
7 = Zone Activity Monitor.
8 = Reserved.
LOCATION 5 - PARTITIONS REPORTED TO PHONE #1 (1 segment, feature selection data)
Location 5 is used when events to be reported to a phone number are based upon the partition regardless of the event. If this location is
used, location 4 should be programmed as "0".
Segment 1:
1 = Partition #1 3 = Partition #3 5 = Partition #5 7 = Partition #7
2 = Partition #2 4 = Partition #4 6 = Partition #6 8 = Partition #8
L LOCATION 6 - PROGRAMMING PHONE #2 (20 segments, numerical data)
Phone #2 is programmed in location 6. A "14" indicates the end of the phone number. Delays of four seconds can be programmed at any
point in the phone number by programming a "13" in the appropriate segment. If tone dialing is desired, program a "15" in the segment
where tone dialing should begin. If the entire number should be tone dialing, program a "15" in the first segment. Program an “11" for a
“r”, and a “12" for a “#”.
L LOCATION 7 - ACCOUNT CODE FOR THE PHONE #2 (6 segments of numerical data)
The account code sent when Phone #2 is dialed is programmed in location 7. Program a A10" in the segment immediately after the last
digit of the account code. If the account code is 6 digits long, program all 6 segments. If this location is left unprogrammed, account
code 1 will be used when the second phone number is dialed.
L LOCATION 8 - COMMUNICATOR FORMAT FOR PHONE # 2 (1 segment, numerical data)
Location 8 contains the communicator format used to transmit to the receiver connected to Phone #2. Consult the instruction manual for
your central station receiver to determine which format is compatible, and select from Table XII-1 COMMUNICATOR FORMAT SELECTIONS
on page 15. If this location contains a "0", format 1 will be used when Phone #2 is dialed.
LOCATION 9 - DIAL ATTEMPTS/BACKUP CONTROL FOR PHONE #2 (2 segments, numerical data)
Segment 1, Dial attempts: Segment 1 of Location 9 is used to enter the number of dial attempts (1 to 15 attempts) the communicator will
make to Phone #2 before ending the notification process. Factory default is "8" and the communicator will make the same number of
attempts as those programmed in location 3.
Segment 2, Phone #2 Backup Control: Programming a "0" in Segment 2 of this location will cause the NX-8E-CF to make the designated
number of attempts to Phone #1 before setting the "Fail To Communicate" condition and stop reporting. Programming a "1" in this
segment will cause the NX-8E-CF to stop trying to communicate after the designated number of attempts have been made to Phone #2.
If a "2" is programmed in this segment, it will cause the NX-8E-CF to make the dial attempts in increments of two. The first two attempts
will be made to Phone #2, the next two attempts to Phone #1, then repeating until the total number of attempts designated in Segment 1
is completed.
REPORTING EVENTS TO PHONE NUMBER 2
Phone #2 can be used to back up Phone #1 or for a second receiver to multi-report or split report events. Phone #2 has two programming
locations that are used to select which events are reported to this phone number. Location 10 is used to select which events are reported
to Phone #2, and location 11 is used to select which partitions are reported to Phone #2. If dual or split reporting is not desired, location
10 and location 11 should be left at the factory default of "0". If multi-reporting or split reporting is desired, and the split is based on the
event type (such as alarm, open close etc.), location 10 should be used to select only those events that should be reported to Phone #2,
and location 11 should be left at the factory default of "0". If dual or split reporting is desired, and the split is based on partition, then
location 10 should be programmed as "0", and location 11 should be used to select those partitions that should be reported to the Phone
#2. If no events should be reported to Phone #2, both locations should be "0".

NX-8E-CF CONTROL 17
LOCATION 10 - EVENTS REPORTED TO PHONE #2 (2 segments of feature selection data)
Segment 1: 1 = Alarms and Alarm Restores.
2 = Opening and Closings.
3 = Zone Bypass and Bypass Restores.
4 = Zone Trouble and Trouble Restores.
5 = Power Fail, Low Battery, Power Restore, and Low Battery Restore.
6 = Bell Cut, Telephone Line Cut, Bell Cut Restore, Telephone Line Restore.
7 = Test Reports.
8 = Start and End programming.
Segment 2: 1 = Zone and Box Tamper and Tamper Restore.
2 = Auxiliary Power Overcurrent and Ground Fault and Restore for both.
3 = Sensor Missing and Restore.
4 = Sensor Low Battery and Restore.
5 = Expander Trouble and Restore.
6 = Fail To Communicate.
7 = Zone Activity Monitor.
8 = Reserved.
LOCATION 11 - PARTITIONS REPORTED TO PHONE #2 (1 segment, feature selection data)
Location 11 is used when events to be reported to a phone number are based upon the partition regardless of the event. If this location is
used, location 10 should be "0".
Segment 1:
1 = Partition #1 3 = Partition #3 5 = Partition #5 7 = Partition #7
2 = Partition #2 4 = Partition #4 6 = Partition #6 8 = Partition #8
LOCATION 12 - PROGRAMMING PHONE #3 (20 segments, numerical data)
Phone #3 is programmed in location 12. A "14" indicates the end of the phone number. Delays of four seconds can be programmed at
any point in the phone number by programming a "13" in the appropriate segment. If tone dialing is desired, program a "15" in the
segment where tone dialing should begin. If the entire number should be tone dialing, program a "15" in the first segment. Program an
“11" for a “r”, and a “12" for a “#”.
LOCATION 13 - ACCOUNT CODE FOR PHONE #3 (6 segments, numerical data)
The account code sent when Phone #3 is dialed is programmed in location 13. Program a A10" in the segment immediately after the last
digit of the account code. If the account code is 6 digits long, program all 6 segments. If location 6 is left unprogrammed, account code 1
will be used when the Phone #3 is dialed.
LOCATION 14 - COMMUNICATOR FORMAT FOR PHONE #3 (1 segment, numerical data)
Location 14 contains the communicator format used to transmit to the receiver connected to phone #3. Consult the instruction manual
for your central station receiver to determine which format is compatible, and select from Table XII-1 COMMUNICATOR FORMAT
SELECTIONS on page 15. If you require a format other than those listed, review the override options described in Location 18 to build the
appropriate format. A "15" must be programmed in location 14 in addition to the entries in location 18 in order to create a special format.
If this location contains a "0", format 1 will be used when Phone #3 is dialed.
LOCATION 15 - DIAL ATTEMPTS/BACKUP CONTROL FOR PHONE #3 (2 segments, numerical data)
Segment 1, Dial Attempts: Segment 1 of Location 15 is used to enter the number of dial attempts (1 to 15 attempts) the communicator
will try to Phone #3 before ending the notification process. Factory default is "8" and the communicator will make the same number of
attempts as those programmed in location 3.
Segment 2, Phone # 3 Backup Control: Programming a "0" in Segment 2 of this location will cause the NX-8E-CF to make the designated
number of attempts to Phone #2 before setting the "Fail To Communicate" condition and stop reporting. Programming a "1" in this
segment will cause the NX-8E-CF to stop trying to communicate after the designated number of attempts have been made to Phone #3.
If a "2" is programmed in this segment, it will cause the NX-8E-CF to make the dial attempts in increments of two. The first two attempts
will be made to Phone #3, the next two attempts to Phone #2, then repeating until the total number of attempts designated in Segment 1
is completed.
REPORTING EVENTS TO PHONE NUMBER 3
Phone #3 can be used for a third receiver to multi-report or split report events. Phone #3 has two programming locations that are used to
select which events are reported to this phone number. Location 16 is used to select which events are reported to Phone #3, and Location
17 is used to select which partitions are reported to Phone #3. If dual or split reporting is not desired, location 16 and location 17 should
be left at the factory default of "0". If multi-reporting or split reporting is desired and the split is based on the event type (such as alarm,
open/close, etc.), then location 16 should be used to select only those events that should be reported to Phone #3 and location 17 should
be left at the factory default of "0". If dual or split reporting is desired, and the split is based on partition, then location 16 should be
programmed to "0" and location 17 should be used to select those partitions that should be reported to Phone #3. If no events should be
reported to Phone #3, both locations should be "0".

NX-8E-CF CONTROL
18
LOCATION 16 - EVENTS REPORTED TO PHONE #3 (2 segments, feature selection data)
Segment 1: 1 = Alarms and Alarm Restores.
2 = Opening and Closings.
3 = Zone Bypass and Bypass Restores.
4 = Zone Trouble and Trouble Restores.
5 = Power Fail, Low Battery, Power Restore, and Low Battery Restore.
6 = Bell Cut, Telephone Line Cut, Bell Cut Restore, Telephone Line Restore.
7 = Test Reports.
8 = Start and End programming.
Segment 2: 1 = Zone and Box Tamper and Tamper Restore.
2 = Auxiliary Power Overcurrent and Ground Fault and Restore for both.
3 = Sensor Missing and Restore.
4 = Sensor Low Battery and Restore.
5 = Expander Trouble and Restore.
6 = Fail To Communicate.
7 = Zone Activity Monitor.
8 = Reserved.
LOCATION 17 - PARTITIONS REPORTED TO PHONE #3 (1 segment, feature selection data)
Location 17 is used when events to be reported to a phone number are based upon the partition regardless of the event. If this location is
used, location 16 should be "0".
Segment 1:
1 = Partition #1 3 = Partition #3 5 = Partition #5 7 = Partition #7
2 = Partition #2 4 = Partition #4 6 = Partition #6 8 = Partition #8
LOCATIONS 18 – 22 RESERVED
L LOCATION 23 - PARTITION 1, FEATURE AND REPORT SELECTIONS (5 segments, feature selection data)
Location 23 is used to enable certain features that can be accessed or are visible to the user from the keypad of the system. In addition,
certain communicator reports are enabled in location 23. Each of these features can be enabled by partition. For additional partition
information see locations 88-109 on pages 25-27. If the feature selection location for any partition is left blank, that partition will use
this location for the feature selection.
This location contains 3 segments of 8 features each. (See the feature definitions beginning on page 3.)
Segment 1: 1 - On enables the Quick Arm feature.
2 - On enables the Re-exit feature.
3 - On enables the Automatic Bypass feature.
4 - On enables the Silent Keypad Panic feature (overrides the audible panic selection).
5 - On enables the Audible Keypad Panic feature.
6 - On enables the Keypad Aux 1 feature (FIRE).
7 - On enables the Keypad Aux 2 feature (MEDICAL).
8 - On enables the Keypad Multiple Code Attempt Tamper feature.
Segment 2: 1 - On enables the LED Extinguish feature.
2 - On enables the Require Code for Bypassing feature.
3 - On enables the Zone Bypassed Sounder Alert feature.
4 - On enables the AC Power/Low Battery Sounder Alert feature.
5 - On enables Bypass toggle.
6 - On enables Silent Auto Arm.
7 - On enables the Automatic Instant feature.
8 – On enables Instant mode. (Applies to NX1208E / NX1248E)
Segment 3: 1 - On enables Opening and Closing reports.
2 - On enables Zone Bypass reporting.
3 - On enables Zone Restore reporting.
4 - On enables Zone Trouble reporting.
5 - On enables Zone Tamper reporting.
6 - On enables the Cancel reporting.
7 - On enables the Recent Closing report.
8 - On enables the Exit Error report.
Segment 4: 1 – On enables Late to Close / Early to Open.
2 – On enables Auto Arm in Stay Mode.
3 – On disables the door delays in Night mode. (Applies to NX1208E / NX1248E)
4 - 8 Reserved.
Segment 5: Reserved

NX-8E-CF CONTROL 19
L LOCATION 24 - ENTRY / EXIT TIMERS (6 segments, numerical data)
Location 24 is used to program the Entry/Exit times. There are 2 separate Entry/Exit times.
Segment 1, Entry time 1: This is the entry time that will be used when a delay 1 zone type initiates an entry delay. Valid entries
are 10-255 seconds.
Segment 2, Exit time 1: This is the exit time that will be used for all zones designated as delay 1. Valid entries are 10-255
seconds.
Segment 3, Entry time 2: This is the entry time that will be used when a delay 2 zone type initiates an entry delay. Valid entries
are 10-255 seconds.
Segment 4, Exit time 2: This is the exit time that will be used for all zones designated as delay 2. Valid entries are 10-255
seconds.
Segments 5 & 6 Reserved.
XIII. DEFAULT ZONE TYPES (Configurations)
Zones can be programmed to be one of thirty different zone types (configurations). Zone types # 17 - 20 can be used for wireless or
hardwired zones using European double EOL configuration. The default zone types are listed below. These zone types can be customized
by programming locations 110-169.
DATA DESCRIPTION OF DEFAULT ZONE TYPES
1 DAY ZONE - Instant when system is armed trouble zone when system is disarmed.
2 24-HOUR AUDIBLE - Creates an instant yelping siren alarm regardless of the armed state of the control panel.
3 ENTRY/EXIT DELAY 1- A trip will start entry delay 1. The lack of a trip during exit delay will enable the Automatic Bypass or
Instant mode if so programmed.
4
FOLLOWER WITH AUTO- BYPASS DISABLED - This zone will be instant when the system is armed and no entry or exit delays are
being timed. It is delayed during entry and exit delay 1 times. This zone will not automatically bypass even if enabled in Segment
1 of Location 23.
5
INTERIOR FOLLOWER WITH AUTO- BYPASS ENABLED - This zone will be instant when the system is armed and no entry or exit
delay is being timed. It is delayed during entry and exit delay 1 times. This zone will automatically bypass if enabled in Segment 1
of Location 23.
6 INSTANT - This zone creates an instant alarm whenever it is tripped and the Armed LED is on.
7 24-HOUR SILENT - Creates an instant silent alarm regardless of the armed state of the control panel. It will not display on the
keypad.
8 FIRE - This zone will light the Fire LED and sound the temporal siren each time the zone is shorted. It will also rapidly flash the Fire
LED indicating a trouble if the zone is open.
9 ENTRY/EXIT DELAY 2- A trip will start entry delay 2. The lack of a trip during exit delay will enable the Automatic Bypass or
Instant mode if so programmed.
10 24-HOUR SILENT SUPERVISED- Creates an instant silent alarm regardless of the armed state of the control panel. It will display
on the keypad.
11 KEYSWITCH ZONE - This zone type will arm and disarm the partition or partitions of the control panel that it resides in each time
the zone is shorted. Keyswitch arming will report as user #99.
12
INTERIOR FOLLOWER WITH "CROSS ZONE" ENABLED - This zone will be instant when the system is armed and no entry or exit
delay is being timed. It is delayed during entry and exit delay times. If a "Cross Zone" is not being timed it will start a "Cross Zone"
timer. If a "Cross Zone" is being timed it will create an instant alarm. This zone will automatically bypass when enabled in
Segment 1 of Location 23.
13 INSTANT ENTRY GUARD - This zone creates an instant alarm whenever it is tripped and the Stay LED is off. It will start an entry
delay time 2 if it is tripped and the system is armed and the Stay LED is on.
14
ENTRY/EXIT DELAY 1 WITH GROUP BYPASS ENABLED - A trip will start entry delay 1. This zone will bypass when the "Group
Bypass" command is entered at the keypad. The lack of a trip during exit delay will enable the Automatic Bypass or Instant
mode if so programmed.
15
INTERIOR FOLLOWER WITH GROUP BYPASS ENABLED - This zone will be instant when the system is armed and no entry or exit
delays are being timed. It is delayed during entry/exit delay times. This zone will bypass when the "Group Bypass" command is
entered at the keypad. This zone will automatically bypass if enabled in Segment 1 of Location 23.
16 SUPERVISORY - This zone creates an instant Sprinkler Supervisory report.
17 ENTRY/EXIT DELAY 1 WITH TAMPER ENABLED- A trip will start entry delay 1. The lack of a trip during exit delay will enable the
Automatic Bypass or Instant mode if so programmed. This zone type can be used to enable tamper on a wireless transmitter.
18
INTERIOR FOLLOWER WITH TAMPER AND AUTO-BYPASS ENABLED - This zone will be instant when the system is armed and no
entry or exit delay is being timed. It is delayed during entry and exit delay times. This zone will automatically bypass if enabled in
Segment 1 of Location 23. This zone type can be used to enable tamper on a wireless transmitter.
19 INSTANT WITH TAMPER ENABLED - This zone creates an instant alarm whenever it is tripped and the Armed LED is on. This zone
type can be used to enable tamper on a wireless transmitter.
20 ENTRY/EXIT DELAY 2 WITH TAMPER ENABLED-A trip will start entry delay 2. The lack of a trip during exit delay will enable the
Automatic Bypass or Instant mode if so programmed. This zone type can be used to enable tamper on a wireless transmitter.
NX-8E-CF CONTROL
20
DATA DESCRIPTION OF DEFAULT ZONE TYPES
21 GAS DETECTION- Creates an instant alarm regardless of the armed state of the control panel. It will display on the keypad and
activate the keypad sounder.
22 LOW TEMP DETECTION- Creates an instant silent alarm regardless of the armed state of the control panel. It will display on the
keypad and activate the keypad sounder.
23 HIGH TEMP DETECTION- Creates an instant silent alarm regardless of the armed state of the control panel. It will display on the
keypad and activate the keypad sounder.
24 MANUAL FIRE - This zone will illuminate the Fire LED and sound the temporal siren each time the zone is shorted. It will also
rapidly flash the Fire LED indicating a trouble if the zone is open.
25 CHIME ONLY - Creates no alarm regardless of the armed state of the control panel. It will chime anytime it is faulted and will
display on the keypad. Local only.
26 INTERIOR FOLLOWER DELAY 2 - This zone will be instant when the system is armed and no entry or exit delay is being timed. It is
delayed during entry and exit delay 2 times. This zone will automatically bypass if enabled in Segment 1 of Location 23.
27
INTERIOR FOLLOWER FORCE ARMABLE - This zone will be instant when the system is armed and no entry or exit delay is being
timed. It is delayed during entry and exit delay 1 times. This zone will automatically bypass if enabled in Segment 1 of Location
23.
28 ENTRY/EXIT FORCE ARMABLE DELAY 2 - A trip will start entry delay 2. The lack of a trip during exit delay will enable the
Automatic Bypass or Instant mode if so programmed.
29
INTERIOR FOLLOWER WITH ACTIVITY SUPERVISION ENABLED - This zone will be instant when the system is armed and no entry
or exit delay is being timed. It is delayed during entry and exit delay times. It will send a report if the zone activity time is reached
without a change of state. Refer to Location 40 / Segment 11. This zone will automatically bypass if enabled in Segment 1 of
Location 23.
30
ENTRY/EXIT WITH ACTIVITY SUPERVISION ENABLED- A trip will start entry delay 1. It will send a report if the zone activity time is
reached without a change of state. Refer to Location 40 / Segment 11. The lack of a trip during exit delay will enable the
Automatic Bypass or Instant mode if so programmed.
L LOCATION 25 - ZONES 1-8 ZONE TYPE (8 segments, numerical data)
Location 25 contains the Zone Type for zones 1-8. Segment 1 is for zone 1, and Segment 8 is for zone 8. Default Zone Types are found in
the table on page 19. To customize a Zone Type, see page 28.
LOCATION 26 - PARTITION SELECT, ZONES 1-8 (8 segments, feature selection data)
Location 26 is used to select the partition(s) that zones 1 - 8 reside in. A zone may reside in any combination of the 8 partitions. If a
burglary zone resides in more than 1 partition, it will only be active when all partitions are armed. A zone that resides in more than
1 partition will be reported to its lowest partition number. Location 26 has 8 segments. Segment 1 corresponds to zone 1, and Segment
8 corresponds to zone 8.
Segments 1 - 8:
1 = Partition #1 3 = Partition #3 5 = Partition #5 7 = Partition #7
2 = Partition #2 4 = Partition #4 6 = Partition #6 8 = Partition #8
L LOCATION 27 - ZONES 9-16 ZONE TYPE (8 segments, numerical data)
Location 27 contains the Zone Type for zones 9 -16. Segment 1 is for zone 9; Segment 8 is for zone 16. Default Zone Types are found in
the table on page 19. To customize a Zone Type, see page 28.
LOCATION 28 - PARTITION SELECT, ZONES 9-16 (8 segments, feature selection data)
Location 28 is used to select the partition(s) that zones 9-16 reside in. A zone may reside in any combination of the 8 partitions. If a
burglary zone resides in more than 1 partition, it will only be active when all partitions are armed. A zone that resides in more than
1 partition will be reported to its lowest partition. Location 28 has 8 segments. Segment 1 corresponds to zone 9 and Segment 8
corresponds to zone 16.
Segments 1 - 8:
1 = Partition #1 3 = Partition #3 5 = Partition #5 7 = Partition #7
2 = Partition #2 4 = Partition #4 6 = Partition #6 8 = Partition #8
L LOCATION 29 - ZONES 17-24 ZONE TYPE (8 segments, numerical data)
Location 29 contains the Zone Type for zones 17-24. Segment 1 is for zone 17; Segment 8 is for zone 24. Default Zone Types are found in
the table on page 19. To customize a Zone Type, see page 28.
LOCATION 30 - PARTITION SELECT, ZONES 17-24 (8 segments, feature selection data)
Location 30 is used to select the partition(s) that zones 17-24 reside in. A zone may reside in any combination of the 8 partitions. If a
burglary zone resides in more than 1 partition, it will only be active when all partitions are armed. A zone that resides in more than
1 partition will be reported to its lowest partition. Location 30 has 8 segments. Segment 1 corresponds to zone 17 and Segment 8
corresponds to zone 24.
Segments 1 - 8:
1 = Partition #1 3 = Partition #3 5 = Partition #5 7 = Partition #7
2 = Partition #2 4 = Partition #4 6 = Partition #6 8 = Partition #8

NX-8E-CF CONTROL 21
L LOCATION 31 - ZONES 25-32 ZONE TYPE GROUP (8 segments, numerical data)
Location 31 contains the Zone Type for zones 25-32. Segment 1 is for zone 25; Segment 8 is for zone 32. Default Zone Types are found in
the table on page 19. To customize a Zone Type, see page 28.
LOCATION 32 - PARTITION SELECT, ZONES 25-32 (8 segments, feature selection data)
Location 32 is used to select the partition(s) that zones 25-32 reside in. A zone may reside in any combination of the 8 partitions. If a
burglary zone resides in more than 1 partition it will only be active when all partitions are armed. A zone that resides in more than 1
partition will be reported to its lowest partition. Segment 1 corresponds to zone 25 and Segment 8 corresponds to zone 32.
Segments 1 - 8:
1 = Partition #1 3 = Partition #3 5 = Partition #5 7 = Partition #7
2 = Partition #2 4 = Partition #4 6 = Partition #6 8 = Partition #8
L LOCATION 33 - ZONES 33-40 ZONE TYPE (8 segments, numerical data)
Location 33 contains the Zone Type for zones 33-40. Segment 1 is for zone 33 Segment 8 is for zone 40. Default Zone Types are found in
the table on page 19. To customize a Zone Type, see page 28.
LOCATION 34 - PARTITION SELECT, ZONES 33-40 (8 segments of feature selection data)
Location 34 is used to select the partition(s) that zones 33-40 reside in. A zone may reside in any combination of the 8 partitions. If a
burglary zone resides in more than 1 partition, it will only be active when all partitions are armed. A zone that resides in more than
1 partition will be reported to its lowest partition. Segment 1 corresponds to zone 33 and Segment 8 corresponds to zone 40.
Segments 1 - 8:
1 = Partition #1 3 = Partition #3 5 = Partition #5 7 = Partition #7
2 = Partition #2 4 = Partition #4 6 = Partition #6 8 = Partition #8
L LOCATION 35 - ZONES 41-48 ZONE TYPE (8 segments of numerical data)
Location 35 contains the Zone type for zones 41-48. Segment 1 is for zone 41 Segment 8 is for zone 48. Default Zone Types are found in
the table on page 19. To customize a Zone Type, see page 28.
LOCATION 36 - PARTITION SELECT, ZONES 41-48 (8 segments, feature selection data)
Location 36 is used to select the partition or partitions that zones 41-48 reside in. A zone may reside in any combination of the 8 partitions.
If a burglary zone resides in more than 1 partition it will only be active when all partitions are armed. A zone that resides in more
than 1 partition will be reported to its lowest partition. Location 36 has 8 segments. Segment 1 corresponds to zone 41 and Segment 8
corresponds to zone 48.
Segments 1 - 8:
1 = Partition #1 3 = Partition #3 5 = Partition #5 7 = Partition #7
2 = Partition #2 4 = Partition #4 6 = Partition #6 8 = Partition #8
L LOCATION 37 - SIREN AND SYSTEM SUPERVISION (7 segments, feature selection data)
Location 37 is used to enable various system feature and reporting options. (Refer to the feature definitions.)
Segment 1: 1 - On if siren sounds for "Telephone Line Cut" when armed.
2 - On if siren sounds for "Telephone Line Cut" when disarmed.
3 - On if siren blast at arming.
4 - On if siren blast at exit expiration.
5 - On if siren blast at closing kissoff.
6 - On if siren sounds during a "Cross Zone" verification time.
7 - On if siren sounds for a Zone or Box Tamper.
8 - On if siren blasts 1 time for keyswitch or wireless arming; 2 times for disarming.
Segment 2: 1 - On if siren driver should be a voltage output. Off if on board siren driver enabled.
2 - On if siren sounds for expander trouble. (required for UL installations)
3 - On for Immediate Restore by zone. Off for zones to restore only when siren is off.
4 - Reserved
5 - On if Battery Missing Test is performed every 12 seconds.
6 - On if Manual Bell Test performed during []-[4]-[4] test function.
7 - On if Manual Communicator Test performed during []-[4]-[4] test function.
8 - On if Box Tamper terminals on the control panel are enabled.
Segment 3: 1 - On if Box Tamper report enabled.
2 - On if AC Fail reporting enabled.
3 - On if Low Battery reporting enabled.
4 - On if Aux. Power Overcurrent report enabled.
5 - On if Siren Supervision report enabled.
6 - On if Telephone Line Cut report enabled.
7 - On if Ground Fault Detection report enabled.
8 - On if Expander Trouble reporting enabled.

NX-8E-CF CONTROL
22
Segment 4: 1 - On if Fail To Communicate report enabled.
2 - On if Log Full report enabled.
3 - On if Autotest report enabled.
4 - On if Start/End programming report enabled.
5 - Reserved.
6 - On if Sensor Low Battery report enabled.
7 - On if Sensor Missing report enabled.
8 - Reserved.
Segment 5: 1 = On enable Lost Clock service light.
2 = On enables NX-870E siren output to activate for FIRE ONLY.
3 = On disables On-Board 8 zones.
4 = On will allow two trips on same cross-zone to activate an alarm.
5 = On will not allow zones that are force armed to report bypass.
6 = On enables Silent Exit option.
7 = Use internal crystal for clock.
8 = Disable Temporal Siren on Fire. NOTE: Do NOT disable for UL listed systems.
Segment 6: 1 = Enable 2 wire smoke.
2 = Reserved.
3 = Enable for Zone Activity in Hours (not Days)
4 = Enable Daylight Savings Time (DST)
5 = Reserved
6 = On to disable Clean Me report (Clean Me report is enabled at default)
7-8 = Reserved.
Segment 7: Reserved
L LOCATION 38 - SWINGER SHUTDOWN COUNT
Location 38 contains the number of trips during an arming cycle that the control panel will allow before bypassing a zone. The count
determination is described in the feature definitions beginning on page 3. NOTE: For UL installations, this feature shall be disabled.
L LOCATION 39 - KEYPAD SOUNDER CONTROL (1 segment, feature selection data)
Segment 1: 1 - On if keypad sounds for Telephone Line Cut when the system is armed.
2 - On if keypad sounds for Telephone Line Cut when disarmed.
3 - On if keypad sounds upon AC Power Failure.
4 - On if keypad sounds when a Low Battery is detected.
5 - On if keypad sounds during Cross Zone trip time.
6 - On if keypad sounds for zone and box tampers.
7 - Reserved.
8 - On if keypad sounds for expander trouble (required for UL installations).
L LOCATION 40 - SYSTEM TIMERS (14 segments, numerical data)
Location 40 contains the duration of various system timing functions. Example: If you desire the duration of the Dynamic Battery Test to
be 30 minutes, you should program [3]-[0]-[r] in segment 1 of this location. The [3]-[0] is the number of minutes, and the [r] stores the
data and moves to the next segment of this location.
Segment 1 - Dynamic Battery Test duration in minutes 0-255 minutes (0 = no test) UL requires the Dynamic Battery Test cannot
exceed 4 hours.
Segment 2 - AC Fail report delay in minutes 0-255 hours.
Segment 3 - Power Up Delay in seconds 0-60 seconds (0 = no power up delay).
Segment 4 - Siren Time in minutes 1-255 minutes.
Segment 5 - Telephone Line Cut delay in seconds 10-175 seconds (0 = no TLM).
Segment 6 - Cross Zone time in minutes 0-255 (0 = no cross zoning).
Segment 7 - Chime time in 50 mS (1/20th second) increments from 0-12 seconds (0 = follows zone 255 latched).
Segment 8 - Dial delay in seconds 0-255 seconds (0 = no abort delay). UL requires the Dial Delay shall be set to –0-.
Segment 9 - Fire Alarm Verification time in seconds 120-255 seconds (0 = no fire alarm verification). NOTE: This feature is not
approved for residential use in California.
Segment 10 - Reserved
Segment 11 – Zone Activity Monitor feature timed in days 0 – 255 (0 = disabled)
Segments 12-14 Reserved.

NX-8E-CF CONTROL 23
LOCATION 41 - SPECIAL FEATURES (1 segment, feature selection data)
Segment 1:
1 - On enables the 6-digit code option. If 6-digit option is enabled, all arm/disarm codes and the "Go To Program Code" are 6 digits.
If this option is enabled, the default user 1 code is [1]-[2]-[3]-[4]-[5]-[6]. NOTE: IF YOU ENABLE THIS OPTION, VERIFY THAT THE
"GO TO PROGRAM CODE" IS A SIX-DIGIT CODE BEFORE EXITING PROGRAMMING.
2 - Reserved.
3 - Enable Auto Cancel / Abort Not for Commercial Fire use.
4 - Enable Walk-Test Mode
5-8 Reserved.
L LOCATION 42 - GO TO PROGRAM CODE (6 segments, numerical data)
Location 42 contains the "Go To Program Code". This location contains either a 4 or 6-digit code. If the 6-digit code option is enabled in
Location 41, THIS CODE MUST CONTAIN SIX (6) DIGITS. If this option is not enabled in location 41, the last 2 segments (digits) will be
ignored. With the NX-8E-CF disarmed, the "Go To Program Code" can be used to enter the Program Mode.
LOCATION 43 - GO TO PROGRAM CODE PARTITION AND AUTHORIZATION (2 segments, feature selection)
The "Go To Program Code" can be used as a standard arm/disarm code. When using the code to arm or disarm, the user ID is 255. (This
code may not be changed in the Run Mode.)
Segment 1: 1 - Reserved.
2 - On enables "Go To Program Code" as an arm only code.
3 - On enables "Go To Program Code" as an arm only after closing.
4 - On enables "Go To Program Code" as a master arm/disarm code (can change user codes)
5 - On enables "Go To Program Code" as an arm/disarm code.
6 - On enables "Go To Program Code" to bypass zones.
7 - On enables "Go To Program Code" opening and closing reports.
8 - Reserved.
Segment 2: 1 - On enables the "Go To Program Code" for Partition #1.
2 - On enables the "Go To Program Code" for Partition #2.
3 - On enables the "Go To Program Code" for Partition #3.
4 - On enables the "Go To Program Code" for Partition #4.
5 - On enables the "Go To Program Code" for Partition #5.
6 - On enables the "Go To Program Code" for Partition #6.
7 - On enables the "Go To Program Code" for Partition #7.
8 - On enables the "Go To Program Code" for Partition #8.
L LOCATION 44 - DURESS CODE (6 segments, numerical data)
Location 44 contains the "Duress" code. This Location contains either 4 or 6 digits. If the 6-digit code option is enabled in Location 41, THIS
CODE MUST CONTAIN SIX (6) DIGITS. If the 6-digit option is not enabled in location 41, the last 2 digits will be ignored. If the duress code is
programmed, it will work for all partitions.
LOCATION 45 - AUXILIARY OUTPUT 1-4 PARTITION SELECTION (4 segments, feature selection data)
Location 45 is used to select which partition(s) the events must occur in before the output will activate. Location 45 has 4 segments.
Segment 1 corresponds to output 1, and Segment 4 corresponds to output 4.
Segment 1 (Aux 1) Segment 2 (Aux 2) Segment 3 (Aux 3) Segment 4 (Aux 4)
1= Partition #1 1= Partition #1 1= Partition #1 1= Partition #1
2= Partition #2 2= Partition #2 2= Partition #2 2= Partition #2
3= Partition #3 3= Partition #3 3= Partition #3 3= Partition #3
4= Partition #4 4= Partition #4 4= Partition #4 4= Partition #4
5= Partition #5 5= Partition #5 5= Partition #5 5= Partition #5
6= Partition #6 6= Partition #6 6= Partition #6 6= Partition #6
7= Partition #7 7= Partition #7 7= Partition #7 7= Partition #7
8= Partition #8 8= Partition #8 8= Partition #8 8= Partition #8
LOCATION 46 - AUXILIARY OUTPUT 1-4 SPECIAL TIMING (4 segments, feature selection data)
Location 46 contains special timing feature activation for the four auxiliary outputs. Segment 1 corresponds to output 1; Segment 4
corresponds to output 4.
Segments 1 - 4: 1 = On if output should be timed in minutes; Off if timed in seconds.
2 = On if output should latch; Off if output should be timed.
3 = On if output should stop timing upon code entry; Off if the output should continue to time upon code entry.
4 = On if output should only activate between the closing and opening time in loc. 52 and 53.
5 = On if output should only activate between the opening and closing time in loc. 52 and 53.
6 = On if output should be inverted (0 volts going to 12 volts when activated).
7 = Reserved.
8 = Reserved.
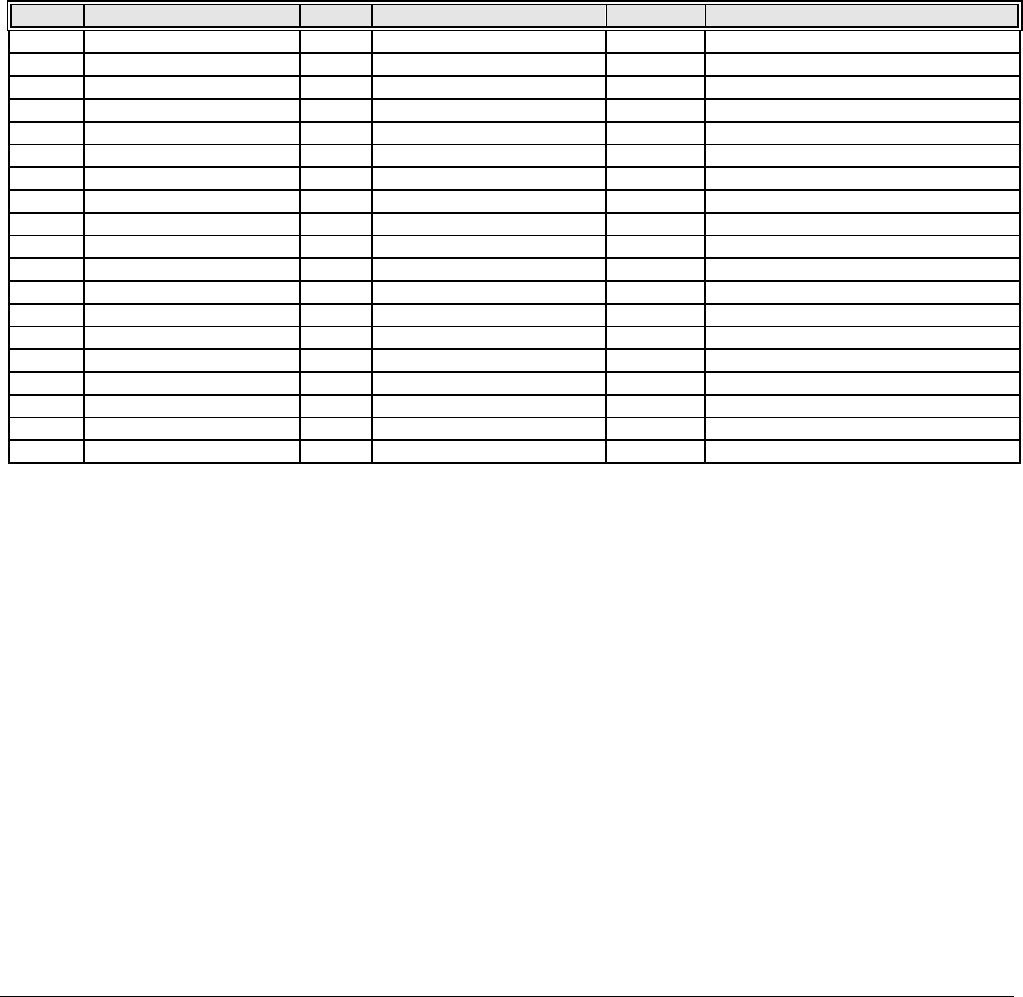
NX-8E-CF CONTROL
24
LOCATION 47 - AUXILIARY OUTPUT #1, EVENT AND TIME (2 segments, numerical data)
Segment 1: Use the chart on page 24 to select the event that will activate Auxiliary Output 1.
Segment 2: Program the timing from 0-255 (minutes or seconds, depending on data programmed in Segment 1, Location 46).
Programming a "0" makes the output follow the event.
LOCATION 48 - AUXILIARY OUTPUT #2, EVENT AND TIME (2 segments, numerical data)
Segment 1: Use the chart on page 24 to select the event that will activate Auxiliary Output 2.
Segment 2: Program the timing from 0-255 (minutes or seconds, depending on data programmed in Segment 2, Location 46).
Programming a "0" makes the output follow the event.
LOCATION 49- AUXILIARY OUTPUT #3, EVENT AND TIME (2 segments, numerical data)
Segment 1: Use the chart on page 24 to select the event that will activate Auxiliary Output 3.
Segment 2: Program the timing from 0-255 (minutes or seconds, depending on data programmed in Segment 3, Location 46).
Programming a "0" makes the output follow the event.
LOCATION 50- AUXILIARY OUTPUT #4, EVENT AND TIME (2 segments, numerical data)
Segment 1: Use the chart on page 24 to select the event that will activate Auxiliary Output 4. .
Segment 2: Program the timing from 0-255 (minutes or seconds, depending on data programmed in Segment 4, Location 46).
Programming a "0" makes the output follow the event.
Table XIII-1 AUXILIARY OUTPUT EVENT SELECTION
DATA EVENT DATA EVENT DATA EVENT
0 / Burglary Alarm 19 Exit 38 Download In Process
1 / Fire Alarm 20 Entry or Exit 39 Ground Fault
2 / 24 Hour Alarm 21 Armed State 40 Short Circuit (Over-current)
3 / Trouble Alarm 22 Disarmed State 41 Box Tamper
4 / Tamper Alarm 23 Ready 42 Siren Tamper
5 Yelping Siren (Burglary) 24 Not Ready 43 Any Open
6 Temporal Siren (Fire) 25 Fire 44 Any Short
7 Any Siren 26 Fire Trouble 45 Any Fault (Open/ Short on Non-Fire Zone)
8 Any Bypass 27 Chime 46 / Any Alarm
9 AC Fail 28 / Expander Trouble 47 Beeping Keypad
10 Low Battery 29 Dynamic Battery Test Time 48 / Code Entry (See note below)
11 / Duress 30
Open Period 49 ˜ / Key FOB Function 1
12 / Aux 1 Keypad Zone 31 Closed Period 50 ˜ / Key FOB Function 2
13 / Aux 2 Keypad Zone 32 Listen-In 51 Always ON
14 / Panic Keypad Zone 33 Line Seizure 52 Alarm Flash
15 Keypad Tamper 34 Ground Start 53 Armed Away
16 / Autotest 35 Fail To Communicate 54 Armed Stay
17 Alarm Memory 36 Telephone Line Fault 55 Aux Comm Fail
18 Entry 37 Program Mode
˜ Events 49 & 50 require NX-408E, NX-416E, or NX-448E wireless receivers to operate.
/ If set to follow condition, these events will be 1 second.
Notes: When Event 48 is programmed, it is possible to program a user code's authorization to select which output(s) a particular code will
activate. (Refer to “Assigning User Authority” in the NX-148ECF installation manual)
L LOCATION 51 - AUTOTEST CONTROL (4 segments, numerical data)
Segment 1: Program a "1" if the interval is to be in hours; Program a "0" if in days. Add a A2" to suppress the daily test or a A3" to
suppress the hourly test if any report has been sent. (Default = 1)
Segment 2: Program the Autotest interval from 1-255 hours/days. (Default = 24)
Segment 3: Program the Autotest report hour in 24-hour format (if the interval is in hours, this segment is ignored). (Default = 2)
Segment 4: Program the Autotest report time, number of minutes after the hour. (Default = 0)
LOCATION 52 - OPENING TIME (2 segments, numerical data)
Location 52 contains the time in 24 hour format the NX-8E-CF enables codes designated as arm only after closing. This time is only valid
on those days programmed in location 54. Note: Opening time must be earlier than closing time for Auto Arm, Aux. Outputs, or Code
Authorization to function properly.
Segment 1: Program the hour of the opening time.
Segment 2: Program the minutes after the hour of the opening time.

NX-8E-CF CONTROL 25
LOCATION 53 - CLOSING TIME/AUTOMATIC ARMING TIME (2 segments, numerical data)
Location 53 contains the time in 24 hour format the NX-8E-CF disables the disarm capability for codes designated as arm only after
closing. This is also the time the Automatic Arming sequence will begin (if enabled in location 55).
Segment 1: Program the hour of the closing / auto arm time.
Segment 2: Program the minutes after the hour of the closing / auto arm time.
LOCATION 54 - DAYS OF THE WEEK EACH PARTITION IS OPEN (8 Segments, feature selection data)
Location 54 selects which days of the week each partition is open. On these days, “arm only after close window” codes will be able to arm
and disarm during open window. NOTE: If any partition is not programmed to be opened and is programmed to Auto-Arm (Location
55), the NX-8E-CF will try to arm every 45 minutes for the duration of the closed period unless Auto Retry is disabled in location 55.
On days not selected here, Aarm only after close window@ codes will not disarm. Segment 1 is for partition 1, and segment 8 is for
partition 8. (See locations 52 and 53 for the opening and closing times for the open days.)
Segment 1-8: 1 - Open on Sunday.
2 - Open on Monday.
3 - Open on Tuesday.
4 - Open on Wednesday.
5 - Open on Thursday.
6 - Open on Friday.
7 - Open on Saturday.
8 – Reserved.
LOCATION 55 - DAYS OF THE WEEK FOR AUTO ARMING IN PARTITIONS 1 THRU 8 (8 Segments, feature selection data)
Location 55 selects which days each partition will auto arm. Segment 1 is for partition 1, and segment 8 is for partition 8. If a zone is
faulted when the panel tries to auto arm, the zone will be bypassed.
Segments 1-8: 1 - Auto Arming on Sunday.
2 - Auto Arming on Monday.
3 - Auto Arming on Tuesday.
4 - Auto Arming on Wednesday.
5 - Auto Arming on Thursday.
6 - Auto Arming on Friday.
7 - Auto Arming on Saturday.
8 - Disable 45 minute retry timer.
LOCATION 56 - 87 RESERVED
LOCATIONS 88-109 ARE FOR PROGRAMMING DIFFERENT ACCOUNT CODES AND/OR FEATURES FOR EACH PARTITION. IF A LOCATION
IS LEFT UNPROGRAMMED, THE FEATURE FOR PARTITION 1 AND ACCOUNT CODE FOR THE PHONE NUMBER WILL BE USED.
LOCATION 88 - ACCOUNT CODE FOR PARTITION 1 (6 segments, numerical data)
Location 88 contains the account code sent when partition 1 is reported. If location 88 is left unprogrammed (all “10"s), then the
account code corresponding to the Phone number dialed will be used. If the account code is less than six digits, program a “10" in the
segment immediately after the last digit of the account code. If the account code is 6 digits long, program all 6 segments.
LOCATION 89 - ACCOUNT CODE FOR PARTITION 2 (6 segments, numerical data)
Location 89 contains the account code sent when partition 2 is reported. If location 89 is left unprogrammed (all “10"s), then the
account code corresponding to the Phone number dialed will be used. If the account code is less than six digits, program a “10" in the
segment immediately after the last digit of the account code. If the account code is 6 digits long program all 6 segments.
LOCATION 90 - PARTITION 2 FEATURE AND REPORTING SELECTIONS (5 segments, feature selection data)
Location 90 is used to enable certain features that can be accessed or are visible to the user from the keypad of the system. In addition,
certain communicator reports are enabled in this location. Each of these features can be enabled by partition. This location contains 5
segments, with eight possible features per segment. Refer to Location 23 (page 18) for the feature selections. If all segments are blank
(nothing enabled), the features for partition 1 will be used.
LOCATION 91 - PARTITION 2 ENTRY EXIT TIMERS (6 segments, numerical data)
Location 91 is used to enter in seconds the Entry and Exit times. There are 2 separate entry and exit times. Valid entries are 10-255
seconds. If all segments are A0", the entry and exit times for partition 1 will be used.
Segment 1, Entry time 1: Entry time that will be used when a Delay 1 zone type initiates an entry delay.
Segment 2, Exit time 1: Exit time that will be used for all zones designated as Delay 1.
Segment 3, Entry time 2: Entry time that will be used when a Delay 2 zone type initiates an entry delay.
Segment 4, Exit time 2: Exit time that will be used for all zones designated as Delay 2.
Segments 5 & 6: Reserved

NX-8E-CF CONTROL
26
LOCATION 92 - ACCOUNT CODE FOR PARTITION 3 (6 segments, numerical data)
The account code sent when partition 3 is reported is programmed in location 92. If location 92 is left unprogrammed (all “10") then the
account code corresponding to the Phone number dialed will be used. If the account code is less than six digits, program a “10" in the
segment immediately after the last digit of the account code. If the account code is 6 digits long program all 6 segments.
LOCATION 93 - PARTITION 3 FEATURE AND REPORTING SELECTIONS (5 segments, feature selection data)
Location 93 is used to enable certain features that can be accessed or are visible to the user from the keypad of the system. In addition,
certain communicator reports are enabled in this location. Each of these features can be enabled by partition. This location contains 5
segments, with eight possible features per segment. Refer to Location 23 (page 18) for the feature selections. If all segments are blank
(nothing enabled), the features for partition 1 will be used.
LOCATION 94 - PARTITION 3 ENTRY EXIT TIMERS (6 segments, numerical data)
Location 94 is used to enter in seconds the Entry and Exit times. There are 2 separate entry and exit times. Valid entries are 10-255
seconds. If all segments are A0", the entry and exit times for partition 1 will be used.
Segment 1, Entry time 1: Entry time that will be used when a Delay 1 zone type initiates an entry delay.
Segment 2, Exit time 1: Exit time that will be used for all zones designated as Delay 1.
Segment 3, Entry time 2: Entry time that will be used when a Delay 2 zone type initiates an entry delay.
Segment 4, Exit time 2: Exit time that will be used for all zones designated as Delay 2.
Segments 5 & 6: Reserved
LOCATION 95 - ACCOUNT CODE FOR PARTITION 4 (6 segments, numerical data)
The account code sent when partition 4 is reported is programmed in location 95. If location 95 is left unprogrammed (all “10") then the
account code corresponding to the Phone number dialed will be used. If the account code is less than six digits, program a “10" in the
segment immediately after the last digit of the account code. If the account code is 6 digits long, program all 6 segments.
LOCATION 96 - PARTITION 4 FEATURE AND REPORTING SELECTIONS (5 segments, feature selection data)
Location 96 is used to enable certain features that can be accessed or are visible to the user from the keypad of the system. In addition,
certain communicator reports are enabled in this location. Each of these features can be enabled by partition. This location contains 5
segments, with eight possible features per segment. Refer to Location 23 (page 18) for the feature selections. If all segments are blank
(nothing enabled), the features for partition 1 will be used.
LOCATION 97 - PARTITION 4 ENTRY EXIT TIMERS (6 segments, numerical data)
Location 97 is used to enter in seconds the Entry and exit times. There are 2 separate entry and exit times. Valid entries are 10-255
seconds. If all segments are A0", the entry and exit times for partition 1 will be used.
Segment 1, Entry time 1: Entry time that will be used when a Delay 1 zone type initiates an entry delay.
Segment 2, Exit time 1: Exit time that will be used for all zones designated as Delay 1.
Segment 3, Entry time 2: Entry time that will be used when a Delay 2 zone type initiates an entry delay.
Segment 4, Exit time 2: Exit time that will be used for all zones designated as Delay 2.
Segments 5 & 6: Reserved
LOCATION 98 - ACCOUNT CODE FOR PARTITION 5 (6 segments, numerical data)
The account code sent when partition 5 is reported is programmed in location 98. If location 98 is left unprogrammed (all “10") then the
account code corresponding to the Phone number dialed will be used. If the account code is less than six digits, program a “10" in the
segment immediately after the last digit of the account code. If the account code is 6 digits long, program all 6 segments.
LOCATION 99 - PARTITION 5 FEATURE AND REPORTING SELECTIONS (5 SEGMENTS, NUMERICAL DATA)
Location 99 is used to enable certain features that can be accessed or are visible to the user from the keypad of the system. In addition,
certain communicator reports are enabled in this location. Each of these features can be enabled by partition. This location contains 5
segments, with eight possible features per segment. Refer to Location 23 (page 18) for the feature selections. If all segments are blank
(nothing enabled), the features for partition 1 will be used.
LOCATION 100 - PARTITION 5 ENTRY EXIT TIMERS (6 segments, numerical data)
Location 100 is used to enter in seconds the Entry and exit times. There are 2 separate entry and exit times. Valid entries are 10-255
seconds. If all segments are “0", the entry and exit times for partition 1 will be used.
Segment 1, Entry Time 1: Entry time that will be used when a delay 1 zone type initiates an entry delay.
Segment 2, Exit Time 1: Exit time that will be used for all zones designated as delay 1.
Segment 3, Entry Time 2: Entry time that will be used when a delay 2zone type initiates an entry delay.
Segment 4, Exit Time 2: Exit time that will be used for all zones designated as delay 2.
Segments 5 & 6: Reserved
LOCATION 101 - ACCOUNT CODE FOR PARTITION 6 (6 segments, numerical data)
The account code sent when partition 6 is reported is programmed in location 101. If location 101 is left unprogrammed (all “10") then
the account code corresponding to the Phone number dialed will be used. Program the account code is less than six digits, program a
“10" in the segment immediately after the last digit of the account code. If the account code is 6 digits long, program all 6 segments.

NX-8E-CF CONTROL 27
LOCATION 102 - PARTITION 6 FEATURE AND REPORTING SELECTIONS (5 segments, feature selection data)
Location 102 is used to enable certain features that can be accessed or are visible to the user from the keypad of the system. In
addition, certain communicator reports are enabled in this location. Each of these features can be enabled by partition. This location
contains 5 segments, with eight possible features per segment. Refer to Location 23 (page 18) for the feature selections. If all segments
are blank (nothing enabled), the features for partition 1 will be used.
LOCATION 103 - PARTITION 6 ENTRY EXIT TIMERS (6 segments, numerical data)
Location 103 is used to enter in seconds the Entry and Exit times. There are 2 separate entry and exit times. Valid entries are 10-255
seconds. If all segments are “0", the entry and exit times for partition 1 will be used.
Segment 1, Entry Time 1: Entry time that will be used when a Delay 1 zone type initiates an entry delay.
Segment 2, Exit Time 1: Exit time that will be used for all zones designated as Delay 1.
Segment 3, Entry Time 2: Entry time that will be used when a Delay 2 zone type initiates an entry delay.
Segment 4, Exit Time 2: Exit time that will be used for all zones designated as Delay 2.
Segments 5 & 6: Reserved
LOCATION 104 - ACCOUNT CODE FOR PARTITION 7 (6 segments, numerical data)
The account code sent when partition 7 is reported is programmed in location 104. If location 104 is left unprogrammed (all “10") then
the account code corresponding to the Phone number dialed will be used. If the account code is less than six digits, program a “10" in
the segment immediately after the last digit of the account code. If the account code is 6 digits long, program all 6 segments.
LOCATION 105 - PARTITION 7 FEATURE AND REPORTING SELECTIONS (5 segments, feature selection data)
Location 105 is used to enable certain features that can be accessed or are visible to the user from the keypad of the system. In addition,
certain communicator reports are enabled in this location. Each of these features can be enabled by partition. This location contains 5
segments, with eight possible features per segment. Refer to Location 23 (page 18) for the feature selections. If all segments are blank
(nothing enabled), the features for partition 1 will be used.
LOCATION 106 - PARTITION 7 ENTRY EXIT TIMERS (6 segments, numerical data)
Location 106 is used to enter in seconds the Entry and Exit times. There are 2 separate entry and exit times. Valid entries are 10-255
seconds. If all segments are “0", the entry and exit times for partition 1 will be used.
Segment 1, Entry Time 1: Entry time that will be used when a Delay 1 zone type initiates an entry delay.
Segment 2, Exit Time 1: Exit time that will be used for all zones designated as Delay 1.
Segment 3, Entry Time 2: Entry time that will be used when a Delay 2 zone type initiates an entry delay.
Segment 4, Exit Time 2: Exit time that will be used for all zones designated as Delay 2.
Segments 5 & 6: Reserved
LOCATION 107 - ACCOUNT CODE FOR PARTITION 8 (6 segments, numerical data)
The account code sent when partition 8 is reported is programmed in location 107. If location 107 is left unprogrammed (all “10") then
the account code corresponding to the Phone number dialed will be used. If the account code is less than six digits, program a “10" in
the segment immediately after the last digit of the account code. If the account code is 6 digits long, program all 6 segments.
LOCATION 108 - PARTITION 8 FEATURE AND REPORTING SELECTIONS (5 segments, feature selection data)
Location 108 is used to enable certain features that can be accessed or are visible to the user from the keypad of the system. In addition,
certain communicator reports are enabled in this location. Each of these features can be enabled by partition. This location contains 5
segments, with eight possible features per segment. Refer to Location 23 (page 18) for the feature selections. If all segments are blank
(nothing enabled), the features for partition 1 will be used.
LOCATION 109 - PARTITION 8 ENTRY EXIT TIMERS (6 segments, numerical data)
Location 109 is used to enter in seconds the Entry and Exit times. There are 2 separate entry and exit times. Valid entries are 10-255
seconds. If all segments are “0", the entry and exit times for partition 1 will be used.
Segment 1, Entry Time 1: Entry time that will be used when a Delay 1 zone type initiates an entry delay.
Segment 2, Exit Time 1: Exit time that will be used for all zones designated as Delay 1.
Segment 3, Entry Time 2: Entry time that will be used when a Delay 2 zone type initiates an entry Delay.
Segment 4, Exit Time 2: Exit time that will be used for all zones designated as Delay 2.
Segments 5 & 6: Reserved

NX-8E-CF CONTROL
28
LOCATIONS 110-169 ARE USED TO CHANGE THE ZONE TYPES (Configurations) AS LISTED IN THE TABLE ON PAGE 19. THESE
LOCATIONS ARE CONSIDERED ADVANCED PROGRAMMING AND SHOULD ONLY BE CHANGED WITH A THOROUGH
UNDERSTANDING OF THE OPERATION OF EACH BIT.
IMPORTANT: FIRE ZONE CHARACTERISTICS ARE PRESET AND CANNOT BE CHANGED IN UL LISTED SYSTEMS.
(LOCATIONS 111-149)
LOCATION 110 - ZONE TYPE 1 ALARM EVENT CODE (1 segment, numerical data)
Location 110 contains the event code sent for a Contact ID or SIA report. The desired event code should be chosen from the list on page
55. The zone ID will be that zone that is in alarm.
4+2 Format Note: If 4+2 format is being used, the number programmed in this location will be sent as the upper hex digit. The digit in
location 110 should be from 1 to 15 when using 4+2 formats. The zone ID or user ID will be the lower hex digit of the zone that is in alarm.
LOCATION 111 - ZONE TYPE 1 CHARACTERISTIC SELECT (5 segments, feature selection data)
Segment 1: 1 = Fire (turn on if this is a fire zone).
2 = 24 hour (turn on for non-fire 24 hour zones).
3 = Keyswitch zone. (normally open switch)
4 = Follower (turn on for burglary zones that are Instant during non-entry times).
5 = Delay 1 zone (follows timer 1 entry and exit times).
6 = Delay 2 zone (follows timer 2 entry and exit times).
7 = Interior (turn on if this zone should Automatically Bypass or Bypass for Stay Arming).
8 = Local only (turn on if this zone should not be reported).
Segment 2: 1 = On if Zone Type will beep the keypad for alarm.
2 = On if Zone Type will sound the yelping siren for alarm.
3 = On if Zone Type will sound the temporal siren for alarm.
4 = On if Zone Type will chime.
5 = On if Zone Type can be bypassed.
6 = On if Zone Type is included in the group shunt.
7 = On if Zone Type is force armable.
8 = On if Zone Type is entry guard.
Segment 3: 1 = On enables Sprinkler Supervisory.
2 = On enables Double End Of Line Tamper zone. (Mainly used for tamper on wireless zones)
3 = On enables Trouble Reporting zone. (Day zone and Fire zones)
4 = On if Zone Type is a Cross Zone.
5 = On enables Dialer Delay zone. (See location 40, page 22)
6 = On if Zone Type will swinger shutdown. (See location 38, page 22)
7 = On enables Restore reporting.
8 = Reserved
Segment 4: 1 = On enables Zone Activity Monitor. (See location 40, page 22)
2 = On enables End of Line Resistor Defeat on Non-Fire/Non-Keyswitch zones.
3 = On delays alarm activation 60 seconds (Do not enable unless configured with Access Control.)
4 = On enables zone to act as request to exit input / disables for alarm activation.
5-8 = Reserved.
Segment 5: Reserved.
LOCATION 112 - ZONE TYPE 2 ALARM EVENT CODE (1 segment, numerical data)
Location 112 contains the event code sent for a Contact ID or SIA report. The desired event code should be chosen from the list on page
55. The zone ID will be that zone that is in alarm. If 4+2 format is being used, refer to Location 110 on page 28 for details.
LOCATION 113 - ZONE TYPE 2 CHARACTERISTIC SELECT (5 segments, feature selection data)
Use "Zone Type Characteristic Selections" described in Location 111, page 28.
LOCATION 114 - ZONE TYPE 3 ALARM EVENT CODE (1 segment, numerical data)
Location 114 contains the event code sent for a Contact ID or SIA report. The desired event code should be chosen from the list on page
55. The zone ID will be that zone that is in alarm. If 4+2 format is being used, refer to Location 110 on page 28 for details.
LOCATION 115 - ZONE TYPE 3 CHARACTERISTIC SELECT (5 segments, feature selection data)
Use "Zone Type Characteristic Selections" described in Location 111, page 28.
LOCATION 116 - ZONE TYPE 4 ALARM EVENT CODE (1 segment, numerical data)
Location 116 contains the event code sent for a Contact ID or SIA report. The desired event code should be chosen from the list on page
55. The zone ID will be that zone that is in alarm. If 4+2 format is being used, refer to Location 110 on page 28 for details.

NX-8E-CF CONTROL 29
LOCATION 117 - ZONE TYPE 4 CHARACTERISTIC SELECT (5 segments, feature selection data)
Use "Zone Type Characteristic Selections" described in Location 111, page 28.
LOCATION 118 - ZONE TYPE 5 ALARM EVENT CODE (1 segment, numerical data)
Location 118 contains the event code sent for a Contact ID or SIA report. The desired event code should be chosen from the list on page
55. The zone ID will be that zone that is in alarm. If 4+2 format is being used, refer to Location 110 on page 28 for details.
LOCATION 119 - ZONE TYPE 5 CHARACTERISTIC SELECT (5 segments, feature selection data)
Use "Zone Type Characteristic Selections" described in Location 111, page 28.
LOCATION 120 - ZONE TYPE 6 ALARM EVENT CODE (1 segment, numerical data)
Location 120 contains the event code sent for a Contact ID or SIA report. The desired event code should be chosen from the list on page
55. The zone ID will be that zone that is in alarm. If 4+2 format is being used, refer to Location 110 on page 28 for details.
LOCATION 121 - ZONE TYPE 6 CHARACTERISTIC SELECT (5 segments, feature selection data)
Use "Zone Type Characteristic Selections" described in Location 111, page 28.
LOCATION 122 - ZONE TYPE 7 ALARM EVENT CODE (1 segment, numerical data)
Location 122 contains the event code sent for a Contact ID or SIA report. The desired event code should be chosen from the list on page
55. The zone ID will be that zone that is in alarm. If 4+2 format is being used, refer to Location 110 on page 28 for details.
LOCATION 123 - ZONE TYPE 7 CHARACTERISTIC SELECT (5 segments, feature selection data)
Use "Zone Type Characteristic Selections" described in Location 111, page 28.
LOCATION 124 - ZONE TYPE 8 ALARM EVENT CODE (1 segment, numerical data)
Location 124 contains the event code sent for a Contact ID or SIA report. The desired event code should be chosen from the list on page
55. The zone ID will be that zone that is in alarm. If 4+2 format is being used, refer to Location 110 on page 28 for details.
LOCATION 125 - ZONE TYPE 8 CHARACTERISTIC SELECT (5 segments, feature selection data)
Use "Zone Type Characteristic Selections" described in Location 111, page 28.
LOCATION 126 - ZONE TYPE 9 ALARM EVENT CODE (1 segment, numerical data)
Location 126 contains the event code sent for a Contact ID or SIA report. The desired event code should be chosen from the list on page
55. The zone ID will be that zone that is in alarm. If 4+2 format is being used, refer to Location 110 on page 28 for details.
LOCATION 127 - ZONE TYPE 9 CHARACTERISTIC SELECT (5 segments, feature selection data)
Use "Zone Type Characteristic Selections" described in Location 111, page 28.
LOCATION 128 - ZONE TYPE 10 ALARM EVENT CODE (1 segment, numerical data)
Location 128 contains the event code sent for a Contact ID or SIA report. The desired event code should be chosen from the list on page
55. The zone ID will be that zone that is in alarm. If 4+2 format is being used, refer to Location 110 on page 28 for details.
LOCATION 129 - ZONE TYPE 10 CHARACTERISTIC SELECT (5 segments, feature selection data)
Use "Zone Type Characteristic Selections" described in Location 111, page 28.
LOCATION 130 - ZONE TYPE 11 ALARM EVENT CODE (1 segment, numerical data)
Location 130 contains the event code sent for a Contact ID or SIA report. The desired event code should be chosen from the list on page
55. The zone ID will be that zone that is in alarm. If 4+2 format is being used, refer to Location 110 on page 28 for details.
LOCATION 131 - ZONE TYPE 11 CHARACTERISTIC SELECT (5 segments, feature selection data)
Use "Zone Type Characteristic Selections" described in Location 111, page 28.
LOCATION 132 - ZONE TYPE 12 ALARM EVENT CODE (1 segment, numerical data)
Location 132 contains the event code sent for a Contact ID or SIA report. The desired event code should be chosen from the list on page
55. The zone ID will be that zone that is in alarm. If 4+2 format is being used, refer to Location 110 on page 28 for details.
LOCATION 133 - ZONE TYPE 12 CHARACTERISTIC SELECT (5 segments, feature selection data)
Use "Zone Type Characteristic Selections" described in Location 111, page 28.
LOCATION 134 - ZONE TYPE 13 ALARM EVENT CODE (1 segment, numerical data)
Location 134 contains the event code sent for a Contact ID or SIA report. The desired event code should be chosen from the list on page
55. The zone ID will be that zone that is in alarm. If 4+2 format is being used, refer to Location 110 on page 28 for details.
LOCATION 135 - ZONE TYPE 13 CHARACTERISTIC SELECT (5 segments, feature selection data)
Use "Zone Type Characteristic Selections" described in Location 111, page 28.
LOCATION 136 - ZONE TYPE 14 ALARM EVENT CODE (1 segment, numerical data)
Location 136 contains the event code sent for a Contact ID or SIA report. The desired event code should be chosen from the list on page
55. The zone ID will be that zone that is in alarm. If 4+2 format is being used, refer to Location 110 on page 28 for details.

NX-8E-CF CONTROL
30
LOCATION 137 - ZONE TYPE 14 CHARACTERISTIC SELECT (5 segments, feature selection data)
Use "Zone Type Characteristic Selections" described in Location 111, page 28.
LOCATION 138 - ZONE TYPE 15 ALARM EVENT CODE (1 segment, numerical data)
Location 138 contains the event code sent for a Contact ID or SIA report. The desired event code should be chosen from the list on page
55. The zone ID will be that zone that is in alarm. If 4+2 format is being used, refer to Location 110 on page 28 for details.
LOCATION 139 - ZONE TYPE 15 CHARACTERISTIC SELECT (5 segments, feature selection data)
Use "Zone Type Characteristic Selections" described in Location 111, page 28.
LOCATION 140 - ZONE TYPE 16 ALARM EVENT CODE (1 segment, numerical data)
Location 140 contains the event code sent for a Contact ID or SIA report. The desired event code should be chosen from the list on page
55. The zone ID will be that zone that is in alarm. If 4+2 format is being used, refer to Location 110 on page 28 for details.
LOCATION 141 - ZONE TYPE 16 CHARACTERISTIC SELECT (5 segments, feature selection data)
Use "Zone Type Characteristic Selections" described in Location 111, page 28.
LOCATION 142 - ZONE TYPE 17 ALARM EVENT CODE (1 segment, numerical data)
Location 142 contains the event code sent for a Contact ID or SIA report. The desired event code should be chosen from the list on page
55. The zone ID will be that zone that is in alarm. If 4+2 format is being used, refer to Location 110 on page 28 for details.
LOCATION 143 - ZONE TYPE 17 CHARACTERISTIC SELECT (5 segments, feature selection data)
Use "Zone Type Characteristic Selections" described in Location 111, page 28.
LOCATION 144 - ZONE TYPE 18 ALARM EVENT CODE (1 segment, numerical data)
Location 144 contains the event code sent for a Contact ID or SIA report. The desired event code should be chosen from the list on page
55. The zone ID will be that zone that is in alarm. If 4+2 format is being used, refer to Location 110 on page 28 for details.
LOCATION 145 - ZONE TYPE 18 CHARACTERISTIC SELECT (5 segments, feature selection data)
Use "Zone Type Characteristic Selections" described in Location 111, page 28.
LOCATION 146 - ZONE TYPE 19 ALARM EVENT CODE (1 segment, numerical data)
Location 146 contains the event code sent for a Contact ID or SIA report. The desired event code should be chosen from the list on page
55. The zone ID will be that zone that is in alarm. If 4+2 format is being used, refer to Location 110 on page 28 for details.
LOCATION 147 - ZONE TYPE 19 CHARACTERISTIC SELECT (5 segments, feature selection data)
Use "Zone Type Characteristic Selections" described in Location 111, page 28.
LOCATION 148 - ZONE TYPE 20 ALARM EVENT CODE (1 segment, numerical data)
Location 148 contains the event code sent for a Contact ID or SIA report. The desired event code should be chosen from the list on page
55. The zone ID will be that zone that is in alarm. If 4+2 format is being used, refer to Location 110 on page 28 for details.
LOCATION 149 - ZONE TYPE 20 CHARACTERISTIC SELECT (5 segments, feature selection data)
Use "Zone Type Characteristic Selections" described in Location 111, page 28.
LOCATION 150 - ZONE TYPE 21 ALARM EVENT CODE (1 segment, numerical data)
Location 150 contains the event code sent for a Contact ID or SIA report. The desired event code should be chosen from the list on page
55. The zone ID will be that zone that is in alarm. If 4+2 format is being used, refer to Location 110 on page 28 for details.
LOCATION 151 - ZONE TYPE 21 CHARACTERISTIC SELECT (5 segments, feature selection data)
Use "Zone Type Characteristic Selections" described in Location 111, page 28.
LOCATION 152 - ZONE TYPE 22 ALARM EVENT CODE (1 segment, numerical data)
Location 152 contains the event code sent for a Contact ID or SIA report. The desired event code should be chosen from the list on page
55. The zone ID will be that zone that is in alarm. If 4+2 format is being used, refer to Location 110 on page 28 for details.
LOCATION 153 - ZONE TYPE 22 CHARACTERISTIC SELECT (5 segments, feature selection data)
Use "Zone Type Characteristic Selections" described in Location 111, page 28.
LOCATION 154 - ZONE TYPE 23 ALARM EVENT CODE (1 segment, numerical data)
Location 154 contains the event code sent for a Contact ID or SIA report. The desired event code should be chosen from the list on page
55. The zone ID will be that zone that is in alarm. If 4+2 format is being used, refer to Location 110 on page 28 for details.
LOCATION 155 - ZONE TYPE 23 CHARACTERISTIC SELECT (5 segments, feature selection data)
Use "Zone Type Characteristic Selections" described in Location 111, page 28.

NX-8E-CF CONTROL 31
LOCATION 156 - ZONE TYPE 24 ALARM EVENT CODE (1 segment, numerical data)
Location 156 contains the event code sent for a Contact ID or SIA report. The desired event code should be chosen from the list on page
55. The zone ID will be that zone that is in alarm. If 4+2 format is being used, refer to Location 110 on page 28 for details.
LOCATION 157 - ZONE TYPE 24 CHARACTERISTIC SELECT (5 segments, feature selection data)
Use "Zone Type Characteristic Selections" described in Location 111, page 28.
LOCATION 158 - ZONE TYPE 25 ALARM EVENT CODE (1 segment, numerical data)
Location 158 contains the event code sent for a Contact ID or SIA report. The desired event code should be chosen from the list on page
55. The zone ID will be that zone that is in alarm. If 4+2 format is being used, refer to Location 110 on page 28 for details.
LOCATION 159 - ZONE TYPE 25 CHARACTERISTIC SELECT (5 segments, feature selection data)
Use "Zone Type Characteristic Selections" described in Location 111, page 28.
LOCATION 160 - ZONE TYPE 26 ALARM EVENT CODE (1 segment, numerical data)
Location 160 contains the event code sent for a Contact ID or SIA report. The desired event code should be chosen from the list on page
55. The zone ID will be that zone that is in alarm. If 4+2 format is being used, refer to Location 110 on page 28 for details.
LOCATION 161 - ZONE TYPE 26 CHARACTERISTIC SELECT (5 segments, feature selection data)
Use "Zone Type Characteristic Selections" described in Location 111, page 28.
LOCATION 162 - ZONE TYPE 27 ALARM EVENT CODE (1 segment, numerical data)
Location 162 contains the event code sent for a Contact ID or SIA report. The desired event code should be chosen from the list on page
55. The zone ID will be that zone that is in alarm. If 4+2 format is being used, refer to Location 110 on page 28 for details.
LOCATION 163 - ZONE TYPE 27 CHARACTERISTIC SELECT (5 segments, feature selection data)
Use "Zone Type Characteristic Selections" described in Location 111, page 28.
LOCATION 164 - ZONE TYPE 28 ALARM EVENT CODE (1 segment, numerical data)
Location 164 contains the event code sent for a Contact ID or SIA report. The desired event code should be chosen from the list on page
55. The zone ID will be that zone that is in alarm. If 4+2 format is being used, refer to Location 110 on page 28 for details.
LOCATION 165 - ZONE TYPE 28 CHARACTERISTIC SELECT (5 segments, feature selection data)
Use "Zone Type Characteristic Selections" described in Location 111, page 28.
LOCATION 166 - ZONE TYPE 29 ALARM EVENT CODE (1 segment, numerical data)
Location 166 contains the event code sent for a Contact ID or SIA report. The desired event code should be chosen from the list on page
55. The zone ID will be that zone that is in alarm. If 4+2 format is being used, refer to Location 110 on page 28 for details.
LOCATION 167 - ZONE TYPE 29 CHARACTERISTIC SELECT (5 segments, feature selection data)
Use "Zone Type Characteristic Selections" described in Location 111, page 28.
LOCATION 168 - ZONE TYPE 30 ALARM EVENT CODE (1 segment, numerical data)
Location 168 contains the event code sent for a Contact ID or SIA report. The desired event code should be chosen from the list on page
55. The zone ID will be that zone that is in alarm. If 4+2 format is being used, refer to Location 110 on page 28 for details.
LOCATION 169 - ZONE TYPE 30 CHARACTERISTIC SELECT (5 segments, feature selection data)
Use "Zone Type Characteristic Selections" described in Location 111, page 28.
L LOCATION 170 - ZONES 49-56 ZONE TYPE (8 segments, numerical data)
Location 170 contains the Zone Type for zones 49 - 56. Segment 1 is for zone 49; Segment 8 is for zone 56. Default Zone Types are found
in the table on page 19. To customize a Zone Type, see page 28.
LOCATION 171 - PARTITION SELECT, ZONES 49-56 (8 segments of feature selection data)
Location 171 is used to select the partition(s) that zones 49-56 reside in. A zone may reside in any combination of the 8 partitions. If a
burglary zone resides in more than 1 partition, it will only be active when all partitions are armed. A zone that resides in more than
1 partition will be reported to its lowest partition. Segment 1 corresponds to zone 49 and Segment 8 corresponds to zone 56.
Segments 1 - 8:
1 = Partition #1 3 = Partition #3 5 = Partition #5 7 = Partition #7
2 = Partition #2 4 = Partition #4 6 = Partition #6 8 = Partition #8
L LOCATION 172 - ZONES 57-64 ZONE TYPE (8 segments, numerical data)
Location 172 contains the Zone Type for zones 57-64. Segment 1 is for zone 57; Segment 8 is for zone 64. Default Zone Types are found
in the table on page 19. To customize a Zone Type, see page 28.

NX-8E-CF CONTROL
32
LOCATION 173 - PARTITION SELECT, ZONES 57-64 (8 segments of feature selection data)
Location 173 is used to select the partition(s) that zones 57-64 reside in. A zone may reside in any combination of the 8 partitions. If a
burglary zone resides in more than 1 partition, it will only be active when all partitions are armed. A zone that resides in more than
1 partition will be reported to its lowest partition. Segment 1 corresponds to zone 57 and Segment 8 corresponds to zone 64.
Segments 1 - 8:
1 = Partition #1 3 = Partition #3 5 = Partition #5 7 = Partition #7
2 = Partition #2 4 = Partition #4 6 = Partition #6 8 = Partition #8
L LOCATION 174 - ZONES 65-72 ZONE TYPE (8 segments, numerical data)
Location 174 contains the Zone Type for zones 65 - 72. Segment 1 is for zone 65; Segment 8 is for zone 72. Default Zone Types are found
in the table on page 19. To customize a Zone Type, see page 28.
LOCATION 175 - PARTITION SELECT, ZONES 65-72 (8 segments of feature selection data)
Location 175 is used to select the partition(s) that zones 65-72 reside in. A zone may reside in any combination of the 8 partitions. If a
burglary zone resides in more than 1 partition, it will only be active when all partitions are armed. A zone that resides in more than
1 partition will be reported to its lowest partition. Segment 1 corresponds to zone 65 and Segment 8 corresponds to zone 72.
Segments 1 - 8:
1 = Partition #1 3 = Partition #3 5 = Partition #5 7 = Partition #7
2 = Partition #2 4 = Partition #4 6 = Partition #6 8 = Partition #8
L LOCATION 176 - ZONES 73-80 ZONE TYPE (8 segments, numerical data)
Location 176 contains the Zone Type for zones 73-80. Segment 1 is for zone 73; Segment 8 is for zone 80. Default Zone Types are found
in the table on page 19. To customize a Zone Type, see page 28.
LOCATION 177 - PARTITION SELECT, ZONES 73-80 (8 segments of feature selection data)
Location 177 is used to select the partition(s) that zones 73-80 reside in. A zone may reside in any combination of the 8 partitions. If a
burglary zone resides in more than 1 partition, it will only be active when all partitions are armed. A zone that resides in more than
1 partition will be reported to its lowest partition. Segment 1 corresponds to zone 73 and Segment 8 corresponds to zone 80.
Segments 1 - 8:
1 = Partition #1 3 = Partition #3 5 = Partition #5 7 = Partition #7
2 = Partition #2 4 = Partition #4 6 = Partition #6 8 = Partition #8
L LOCATION 178 - ZONES 81-88 ZONE TYPE (8 segments, numerical data)
Location 178 contains the Zone Type for zones 81-88. Segment 1 is for zone 81; Segment 8 is for zone 88. Default Zone Types are found
in the table on page 19. To customize a Zone Type, see page 28.
LOCATION 179 - PARTITION SELECT, ZONES 81-88 (8 segments of feature selection data)
Location 173 is used to select the partition(s) that zones 81 - 88 reside in. A zone may reside in any combination of the 8 partitions. If a
burglary zone resides in more than 1 partition, it will only be active when all partitions are armed. A zone that resides in more than
1 partition will be reported to its lowest partition. Segment 1 corresponds to zone 81 and Segment 8 corresponds to zone 88.
Segments 1 - 8:
1 = Partition #1 3 = Partition #3 5 = Partition #5 7 = Partition #7
2 = Partition #2 4 = Partition #4 6 = Partition #6 8 = Partition #8
L LOCATION 180 - ZONES 89-96 ZONE TYPE (8 segments, numerical data)
Location 180 contains the Zone Type for zones 89 - 96. Segment 1 is for zone 89; Segment 8 is for zone 96. Default Zone Types are found
in the table on page 19. To customize a Zone Type, see page 28.
LOCATION 181 - PARTITION SELECT, ZONES 89-96 (8 segments of feature selection data)
Location 181 is used to select the partition(s) that zones 89 - 96 reside in. A zone may reside in any combination of the 8 partitions. If a
burglary zone resides in more than 1 partition, it will only be active when all partitions are armed. A zone that resides in more than
1 partition will be reported to its lowest partition. Segment 1 corresponds to zone 89 and Segment 8 corresponds to zone 96.
Segments 1 - 8:
1 = Partition #1 3 = Partition #3 5 = Partition #5 7 = Partition #7
2 = Partition #2 4 = Partition #4 6 = Partition #6 8 = Partition #8
L LOCATION 182 - ZONES 97-104 ZONE TYPE (8 segments, numerical data)
Location 182 contains the Zone Type for zones 97-104. Segment 1 is for zone 97; Segment 8 is for zone 104. Default Zone Types are
found in the table on page 19. To customize a Zone Type, see page 28.

NX-8E-CF CONTROL 33
LOCATION 183 - PARTITION SELECT, ZONES 97-104 (8 segments of feature selection data)
Location 183 is used to select the partition(s) that zones 97-104 reside in. A zone may reside in any combination of the 8 partitions. If a
burglary zone resides in more than 1 partition, it will only be active when all partitions are armed. A zone that resides in more than
1 partition will be reported to its lowest partition. Segment 1 corresponds to zone 97 and Segment 8 corresponds to zone 104.
Segments 1 - 8:
1 = Partition #1 3 = Partition #3 5 = Partition #5 7 = Partition #7
2 = Partition #2 4 = Partition #4 6 = Partition #6 8 = Partition #8
L LOCATION 184 - ZONES 105-112 ZONE TYPE (8 segments, numerical data)
Location 184 contains the Zone Type for zones 105-112. Segment 1 is for zone 105; Segment 8 is for zone 112. Default Zone Types are
found in the table on page 19. To customize a Zone Type, see page 28.
LOCATION 185 - PARTITION SELECT, ZONES 105-112 (8 segments of feature selection data)
Location 185 is used to select the partition(s) that zones 105-112 reside in. A zone may reside in any combination of the 8 partitions. If a
burglary zone resides in more than 1 partition, it will only be active when all partitions are armed. A zone that resides in more than
1 partition will be reported to its lowest partition. Segment 1 corresponds to zone 105 and Segment 8 corresponds to zone 112.
Segments 1 - 8:
1 = Partition #1 3 = Partition #3 5 = Partition #5 7 = Partition #7
2 = Partition #2 4 = Partition #4 6 = Partition #6 8 = Partition #8
L LOCATION 186 - ZONES 113-120 ZONE TYPE (8 segments, numerical data)
Location 186 contains the Zone Type for zones 113-120. Segment 1 is for zone 113; Segment 8 is for zone 120. Default Zone Types are
found in the table on page 19. To customize a Zone Type, see page 28.
LOCATION 187 - PARTITION SELECT, ZONES 113-120 (8 segments of feature selection data)
Location 187 is used to select the partition(s) that zones 113-120 reside in. A zone may reside in any combination of the 8 partitions. If a
burglary zone resides in more than 1 partition, it will only be active when all partitions are armed. A zone that resides in more than
1 partition will be reported to its lowest partition. Segment 1 corresponds to zone 113 and Segment 8 corresponds to zone 120.
Segments 1 - 8:
1 = Partition #1 3 = Partition #3 5 = Partition #5 7 = Partition #7
2 = Partition #2 4 = Partition #4 6 = Partition #6 8 = Partition #8
L LOCATION 188 - ZONES 121-128 ZONE TYPE (8 segments, numerical data)
Location 188 contains the Zone Type for zones 121-128. Segment 1 is for zone 121; Segment 8 is for zone 128. Default Zone Types are
found in the table on page 19. To customize a Zone Type, see page 28.
LOCATION 189 - PARTITION SELECT, ZONES 121-128 (8 segments of feature selection data)
Location 189 is used to select the partition(s) that zones 121-128 reside in. A zone may reside in any combination of the 8 partitions. If a
burglary zone resides in more than 1 partition, it will only be active when all partitions are armed. A zone that resides in more than
1 partition will be reported to its lowest partition. Segment 1 corresponds to zone 121 and Segment 8 corresponds to zone 128.
Segments 1 - 8:
1 = Partition #1 3 = Partition #3 5 = Partition #5 7 = Partition #7
2 = Partition #2 4 = Partition #4 6 = Partition #6 8 = Partition #8
L LOCATION 190 - ZONES 129-136 ZONE TYPE (8 segments, numerical data)
Location 190 contains the Zone Type for zones 129-136. Segment 1 is for zone 129; Segment 8 is for zone 136. Default Zone Types are
found in the table on page 19. To customize a Zone Type, see page 28.
LOCATION 191 - PARTITION SELECT, ZONES 129-136 (8 segments of feature selection data)
Location 191 is used to select the partition(s) that zones 129-136 reside in. A zone may reside in any combination of the 8 partitions. If a
burglary zone resides in more than 1 partition, it will only be active when all partitions are armed. A zone that resides in more than
1 partition will be reported to its lowest partition. Segment 1 corresponds to zone 129 and Segment 8 corresponds to zone 136.
Segments 1 - 8:
1 = Partition #1 3 = Partition #3 5 = Partition #5 7 = Partition #7
2 = Partition #2 4 = Partition #4 6 = Partition #6 8 = Partition #8
L LOCATION 192 - ZONES 137-144 ZONE TYPE (8 segments, numerical data)
Location 192 contains the Zone Type for zones 137-144. Segment 1 is for zone 137; Segment 8 is for zone 144. Default Zone Types are
found in the table on page 19. To customize a Zone Type, see page 28.

NX-8E-CF CONTROL
34
LOCATION 193 - PARTITION SELECT, ZONES 137-144 (8 segments of feature selection data)
Location 193 is used to select the partition(s) that zones 137-144 reside in. A zone may reside in any combination of the 8 partitions. If a
burglary zone resides in more than 1 partition, it will only be active when all partitions are armed. A zone that resides in more than
1 partition will be reported to its lowest partition. Segment 1 corresponds to zone 137 and Segment 8 corresponds to zone 144.
Segments 1 - 8:
1 = Partition #1 3 = Partition #3 5 = Partition #5 7 = Partition #7
2 = Partition #2 4 = Partition #4 6 = Partition #6 8 = Partition #8
L LOCATION 194 - ZONES 145-152 ZONE TYPE (8 segments, numerical data)
Location 194 contains the Zone Type for zones 145-152. Segment 1 is for zone 145; Segment 8 is for zone 152. Default Zone Types are
found in the table on page 19. To customize a Zone Type, see page 28.
LOCATION 195 - PARTITION SELECT, ZONES 145-152 (8 segments of feature selection data)
Location 195 is used to select the partition(s) that zones 145-152 reside in. A zone may reside in any combination of the 8 partitions. If a
burglary zone resides in more than 1 partition, it will only be active when all partitions are armed. A zone that resides in more than
1 partition will be reported to its lowest partition. Segment 1 corresponds to zone 145 and Segment 8 corresponds to zone 152.
Segments 1 - 8:
1 = Partition #1 3 = Partition #3 5 = Partition #5 7 = Partition #7
2 = Partition #2 4 = Partition #4 6 = Partition #6 8 = Partition #8
L LOCATION 196 - ZONES 153-160 ZONE TYPE (8 segments, numerical data)
Location 196 contains the Zone Type for zones 153-160. Segment 1 is for zone 153; Segment 8 is for zone 160. Default Zone Types are
found in the table on page 19. To customize a Zone Type, see page 28.
LOCATION 197 - PARTITION SELECT, ZONES 153-160 (8 segments of feature selection data)
Location 197 is used to select the partition(s) that zones 153-160 reside in. A zone may reside in any combination of the 8 partitions. If a
burglary zone resides in more than 1 partition, it will only be active when all partitions are armed. A zone that resides in more than
1 partition will be reported to its lowest partition. Segment 1 corresponds to zone 153 and Segment 8 corresponds to zone 160.
Segments 1 - 8:
1 = Partition #1 3 = Partition #3 5 = Partition #5 7 = Partition #7
2 = Partition #2 4 = Partition #4 6 = Partition #6 8 = Partition #8
L LOCATION 198 - ZONES 161-168 ZONE TYPE (8 segments, numerical data)
Location 198 contains the Zone Type for zones 161-168. Segment 1 is for zone 161; Segment 8 is for zone 168. Default Zone Types are
found in the table on page 19. To customize a Zone Type, see page 28.
LOCATION 199 - PARTITION SELECT, ZONES 161-168 (8 segments of feature selection data)
Location 199 is used to select the partition(s) that zones 161-168 reside in. A zone may reside in any combination of the 8 partitions. If a
burglary zone resides in more than 1 partition, it will only be active when all partitions are armed. A zone that resides in more than
1 partition will be reported to its lowest partition. Segment 1 corresponds to zone 161 and Segment 8 corresponds to zone 168.
Segments 1 - 8:
1 = Partition #1 3 = Partition #3 5 = Partition #5 7 = Partition #7
2 = Partition #2 4 = Partition #4 6 = Partition #6 8 = Partition #8
L LOCATION 200 - ZONES 169-176 ZONE TYPE (8 segments, numerical data)
Location 200 contains the Zone Type for zones 169-176. Segment 1 is for zone 169; Segment 8 is for zone 176. Default Zone Types are
found in the table on page 19. To customize a Zone Type, see page 28.
LOCATION 201 - PARTITION SELECT, ZONES 169-176 (8 segments of feature selection data)
Location 201 is used to select the partition(s) that zones 169-176 reside in. A zone may reside in any combination of the 8 partitions. If a
burglary zone resides in more than 1 partition, it will only be active when all partitions are armed. A zone that resides in more than
1 partition will be reported to its lowest partition. Segment 1 corresponds to zone 169 and Segment 8 corresponds to zone 176.
Segments 1 - 8:
1 = Partition #1 3 = Partition #3 5 = Partition #5 7 = Partition #7
2 = Partition #2 4 = Partition #4 6 = Partition #6 8 = Partition #8
L LOCATION 202 - ZONES 177-184 ZONE TYPE (8 segments, numerical data)
Location 202 contains the Zone Type for zones 177-184. Segment 1 is for zone 177; Segment 8 is for zone 184. Default Zone Types are
found in the table on page 19. To customize a Zone Type, see page 28.
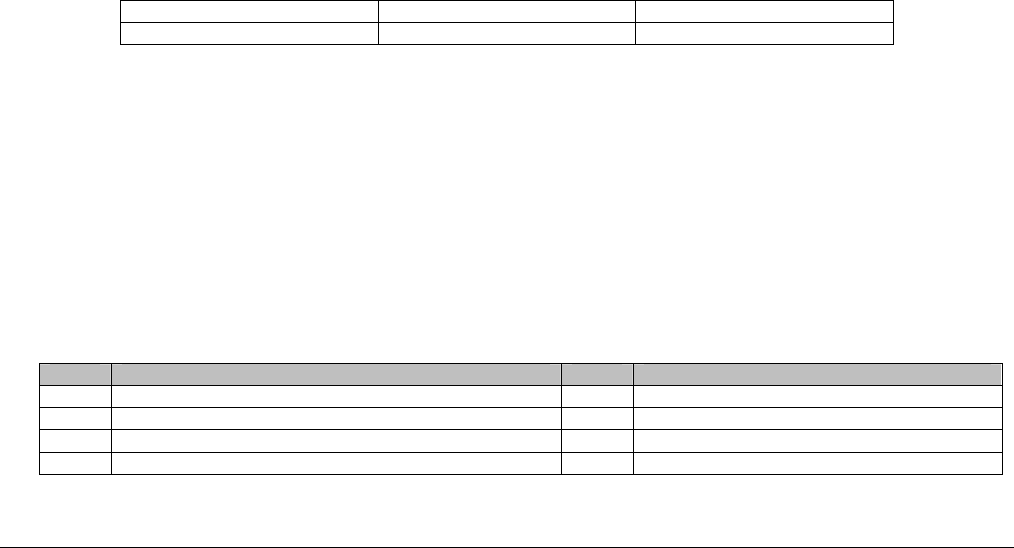
NX-8E-CF CONTROL 35
LOCATION 203 - PARTITION SELECT, ZONES 177-184 (8 segments of feature selection data)
Location 203 is used to select the partition(s) that zones 177-184 reside in. A zone may reside in any combination of the 8 partitions. If a
burglary zone resides in more than 1 partition, it will only be active when all partitions are armed. A zone that resides in more than
1 partition will be reported to its lowest partition. Segment 1 corresponds to zone 177 and Segment 8 corresponds to zone 184.
Segments 1 - 8:
1 = Partition #1 3 = Partition #3 5 = Partition #5 7 = Partition #7
2 = Partition #2 4 = Partition #4 6 = Partition #6 8 = Partition #8
L LOCATION 204 - ZONES 185-192 ZONE TYPE (8 segments, numerical data)
Location 204 contains the Zone Type for zones 185-192. Segment 1 is for zone 185; Segment 8 is for zone 192. Default Zone Types are
found in the table on page 19. To customize a Zone Type, see page 28.
LOCATION 205 - PARTITION SELECT, ZONES 185-192 (8 segments of feature selection data)
Location 205 is used to select the partition(s) that zones 185-192 reside in. A zone may reside in any combination of the 8 partitions. If a
burglary zone resides in more than 1 partition, it will only be active when all partitions are armed. A zone that resides in more than
1 partition will be reported to its lowest partition. Segment 1 corresponds to zone 185 and Segment 8 corresponds to zone 192.
Segments 1 - 8:
1 = Partition #1 3 = Partition #3 5 = Partition #5 7 = Partition #7
2 = Partition #2 4 = Partition #4 6 = Partition #6 8 = Partition #8
LOCATION 206 – AUTO DISARM DAY SELECTOR (8 segments of feature selection data)
Location 206 selects which days each partition will auto disarm. Segment 1 is for partition 1, and segment 8 is for partition 8. If a zone is
faulted when the panel tries to auto disarm, the zone will be bypassed.
Segments 1-8: 1 - Auto Disarming on Sunday.
2 - Auto Disarming on Monday.
3 - Auto Disarming on Tuesday.
4 - Auto Disarming on Wednesday.
5 - Auto Disarming on Thursday.
6 - Auto Disarming on Friday.
7 - Auto Disarming on Saturday.
8 - Reserved.
LOCATION 207 – SERIAL PORT SELECTOR (1 segment of feature selection data)
Location 206 enables the serial port operations. There is one segment
“0” = Disabled (Default) “1” = NX584 enabled “2” = Serial Printer Enabled.
LOCATION 208 – BAUD RATE TABLE (1 segment of numerical data)
The NX584 can operate on a number of different baud rates. Consult the home automation application information to determine the best
baud rate for your application and program it in Location 208. The default is “2” – 9600 Baud or the serial printer baud rate.
0 = 2400 Baud (2.4K) 2 = 9600 Baud (9.6K) 4 = 38400 Baud (38.4K)
1 = 4800 Baud (4.8K) 3 = 19200 Baud (19.2K) 5-7 = Reserved
LOCATION 209 – PROGRAMMING THE NX-8E-CF HOME AUTOMATION PROTOCOL (1 segment of numerical data)
The NX-8E-CF home automation protocol can operate in one of two possible modes - binary or ASCII. Consult the home automation
application information to determine the proper mode for your application and program it in Location 209. The default is “Off” – Binary.
Option 1 LED 0ff = Binary LED On = ASCII
Options 2 - 8 Reserved
LOCATION 210 – ENABLING THE NX-8E-CF TRANSITION-BASED BROADCASTS (2 segments of feature selection data)
The NX-8E-CF can be programmed to automatically send information to the home automation system whenever there has been a
change in this information. This is referred to as ‘transition-based broadcasting’. Which information packets use ‘transition-based
broadcasting’ is dependent upon the application and the capabilities of the home automation system. Location 210 is used to enable and
disable the appropriate transition based broadcasts. Consult the home automation application information and enable the appropriate
transition based broadcasts in Location 210.
Segment 1:
DATA ENABLES TRANSITION DATA ENABLES TRANSITION
1 Reserved 6 Zones Snapshot Message
2 Interface Configuration at power-up / program mode 7 Partition Status Message
3-4 Reserved 8 Partitions Snapshot Message
5 Zone Status Message
NX-8E-CF CONTROL
36
Segment 2:
DATA ENABLES TRANSITION DATA ENABLES TRANSITION
1 System Status Message 4 Keypad Message Received
2 X-10 Message Received 5 - 8 Reserved
3 Log Event Message
LOCATION 211 - PROGRAMMING THE COMMAND/REQUEST ENABLES (4 segments of feature selection data)
The NX-8E-CF has the ability to perform a variety of commands asked of it by the home automation system. For example, it is possible to
allow arming and disarming of the security system, programming of the security system, or bypassing of zones by the home automation
system. Location 211 is used to select which commands, if any you wish the home automation system to have access. Consult the home
automation application information and enable the appropriate commands for your application. CAUTION: IT IS IMPORTANT TO
UNDERSTAND THE CAPABILITES OF THE HOME AUTOMATION SYSTEM TO AVOID COMPROMISING THE SECURITY OF YOUR SYSTEM
WHEN PROGRAMMING THIS LOCATION.
Segment 1: Segment 2:
DATA SUPPORTED REQUEST / COMMAND DATA SUPPORTED REQUEST / COMMAND
1 Reserved 1 System Status Request
2 Interface Configuration Request 2 Send X-10 Message
3 Reserved 3 Log Event Request
4 Zone Name Request 4 Send Keypad Text Message
5 Zone Status Request 5 Keypad Terminal Mode Request
6 Zones Snapshot Request 6 - 8 Reserved
7 Partition Status Request
8 Partitions Snapshot Request
Segment 3: Segment 4:
DATA SUPPORTED REQUEST / COMMAND DATA SUPPORTED REQUEST / COMMAND
1 Program Data Request 1 Reserved
2 Program Data Command 2 Reserved
3 User Information Request with PIN 3 Store Communication Event Command
4 User Information Request without PIN 4 Set Clock / Calendar Command
5 Set User Code Command with PIN 5 Primary Keypad Function with PIN
6 Set User Code Command without PIN 6 Primary Keypad Function without PIN
7 Set User Authorization Command with PIN 7 Secondary Keypad Function
8 Set User Authorization Command without PIN 8 Zone Bypass Toggle
LOCATION 212 - PROGRAMMING THE LCD KEYPAD ADDRESS (1 segment of numerical data)
Certain commands in the NX-8E-CF require it to know the location of at least 1 LCD keypad (if one exists in the system). If your system has
an LCD keypad it is recommended that it be placed in partition 1 keypad 1. This will allow location 212 to be left at the factory default. If
the LCD keypad is selected as something other than partition 1/ keypad 1 program the appropriate address in location 212. Select the
address from the following chart.
KEYPAD PART 1 PART 2 PART 3 PART 4 PART 5 PART 6 PART 7 PART 8
1 192 193 194 195 196 197 198 199
2 200 201 202 203 204 205 206 207
3 208 209 210 211 212 213 214 215
4 216 217 218 219 220 221 222 223
5 224 225 226 227 228 229 230 231
6 232 233 234 235 236 237 238 239
7 240 241 242 243 244 245 246 247
8 248 249 250 251 252 253 254 255

NX-8E-CF CONTROL 37
XIV. PROGRAMMING WORKSHEETS
(Factory defaults for segments are in bold italics text and "Quick Start" locations are identified with the L symbol.)
LOC PG DESCRIPTION DEFAULT PROGRAMMING DATA
L 0 15 PHONE #1 14-14-14-14-14-14-14-14-14-14-14-
14-14-14-14-14-14-14-14-14
__ __ __ __ __ __ __ __ __ __
__ __ __ __ __ __ __ __ __ __
L 1 15 PHONE #1, ACCOUNT CODE 10 - 10 - 10 - 10 - 10 - 10 _ _ _ _ _ _
L 2 15 PHONE #1, REPORTING FORMAT 0 _
L 3 15 PHONE #1, DIAL ATTEMPTS
BACKUP CONTROL
8
0
_
_
PHONE #1, SELECTING EVENTS TO REPORT TO PHONE #1
Segment #1 (Circle Numbers To Program) Segment #2 (Circle Numbers To Program)
4 16
1 = Alarms and Restores
2 = Open/Close
3 = Bypass
4 = Zone Trouble
5 = Power Trouble (AC Failure or Low Battery)
6 = Siren & Telephone Fault
7 = Test Reports
8 = Program / Log Full
1 = Tampers
2 = Short Circuit & Ground Fault
3 = Sensor Lost
4 = Sensor Low Battery
5 = Expander Trouble
6 = Failure To Communicate
7 = Zone Activity Monitor
8 = Reserved
PHONE #1, SELECTING WHICH PARTITIONS REPORT TO PHONE #1
Segment #1 (Circle Numbers To Program)
5 16
1 = Partition #1
2 = Partition #2
3 = Partition #3
4 = Partition #4
5 = Partition #5
6 = Partition #6
7 = Partition #7
8 = Partition #8
L 6 16 PHONE #2 14-14-14-14-14-14-14-14-14-14-14-
14-14-14-14-14-14-14-14-14
__ __ __ __ __ __ __ __ __ __
__ __ __ __ __ __ __ __ __ __
L 7 16 PHONE #2, ACCOUNT CODE 10 - 10 - 10 - 10 - 10 - 10 _ _ _ _ _ _
L 8 16 PHONE #2, REPORTING FORMAT 0 _
9 16 PHONE #2, DIAL ATTEMPTS
BACKUP CONTROL
8
0
_
_
PHONE #2, SELECTING EVENTS TO REPORT TO PHONE #2
Segment #1 (Circle Numbers To Program) Segment #2 (Circle Numbers To Program)
10 17
1 = Alarms and Restores
2 = Open/Close
3 = Bypass
4 = Zone Trouble
5 = Power Trouble (AC Failure or Low Battery)
6 = Siren & Telephone Fault
7 = Test Reports
8 = Program / Log Full
1 = Tampers
2 = Short Circuit & Ground Fault
3 = Sensor Lost
4 = Sensor Low Battery
5 = Expander Trouble
6 = Failure To Communicate
7 = Zone Activity Monitor
8 = Reserved
PHONE #2, SELECTING WHICH PARTITIONS REPORT TO PHONE #2
Segment #1 (Circle Numbers To Program)
11 17
1 = Partition #1
2 = Partition #2
3 = Partition #3
4 = Partition #4
5 = Partition #5
6 = Partition #6
7 = Partition #7
8 = Partition #8
12 17 PHONE #3 14-14-14-14-14-14-14-14-14-14-14-
14-14-14-14-14-14-14-14-14
__ __ __ __ __ __ __ __ __ __
__ __ __ __ __ __ __ __ __ __
13 17 PHONE #3, ACCOUNT CODE 10 - 10 - 10 - 10 - 10 - 10 _ _ _ _ _ _
14 17 PHONE #3, REPORTING FORMAT 0 _
15 17 PHONE #3, DIAL ATTEMPTS
BACKUP CONTROL
8
0
_
_
16 18 PHONE #3, SELECTING EVENTS TO REPORT TO PHONE #3
Segment #1 (Circle Numbers To Program) Segment #2 (Circle Numbers To Program)
1 = Alarms and Restores
2 = Open/Close
3 = Bypass
4 = Zone Trouble
5 = Power Trouble (AC Failure or Low Battery)
6 = Siren & Telephone Fault
7 = Test Reports
8 = Program / Log Full
1 = Tampers
2 = Short Circuit & Ground Fault
3 = Sensor Lost
4 = Sensor Low Battery
5 = Expander Trouble
6 = Failure To Communicate
7 = Zone Activity Monitor
8 = Reserved
17 18 PHONE #3, SELECTING WHICH PARTITIONS REPORT TO PHONE #3
Segment #1 (Circle Numbers To Program)
1 = Partition #1
2 = Partition #2
3 = Partition #3
4 = Partition #4
5 = Partition #5
6 = Partition #6
7 = Partition #7
8 = Partition #8
18 - 22 RESERVED
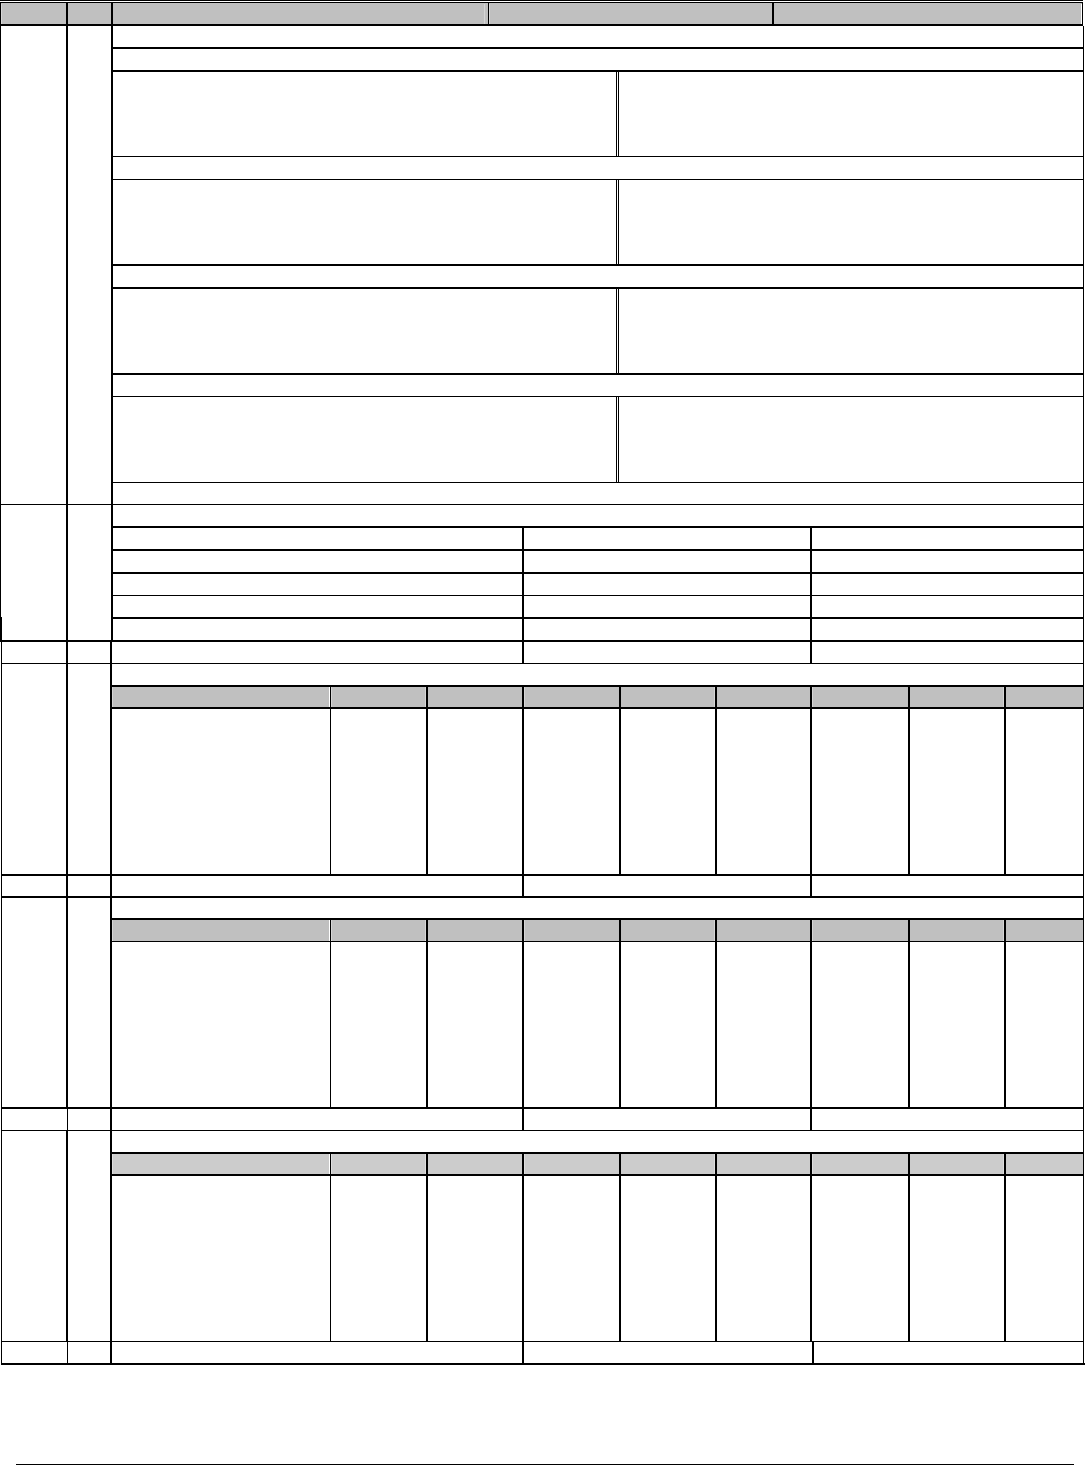
NX-8E-CF CONTROL
38
LOC PG DESCRIPTION DEFAULT PROGRAMMING DATA
L23 18 PARTITION #1, FEATURE SELECTION
Segment #1
1 = Quick Arm
2 = Re-Exit
3 = Auto Bypass
4 = Silent Panic
5 = Audible Panic
6 = Auxiliary 1
7 = Auxiliary 2
8 = Multi Keypress Tamper
Segment #2
1 = LED extinguish enable
2 = Require user code for bypassing zones
3 = Bypass sounder alert
4 = AC power/low battery sounder alert
5 = Enables bypass toggle
6 = Enables silent auto arm
7 = Enables automatic instant
8 = Enables Instant Mode toggle
Segment #3
1 = Open/Close
2 = Bypass
3 = Restore
4 = Trouble
5 = Tamper
6 = Cancel
7 = Recent Closing
8 = Exit Error
Segment #4
1 = Late to Close / Early to Open
2 = Auto Arm in Stay Mode
3 = Reserved
4 = Disables door delay in Night Mode
5 = Reserved
6 = Reserved
7 = Reserved
8 = Reserved
Segment #5 RESERVED
L
24 19 ENTRY/EXIT TIMERS
Segment #1 (Entry Time #1) 30
Segment #2 (Exit Time #1) 60
Segment #3 (Entry Time #2) 30
Segment #4 (Exit Time #2) 60
Segments #5 & #6 Reserved
L 25 20 ZONES 1-8, ZONE TYPES 3-5-6-6-6-6-6-6 _ _ _ _ _ _ _ _
ZONES 1-8, PARTITION SELECTION (Segment 1=Zone 1 thru Segment 8=Zone 8)
Segments 1 2 3 4 5 6 7 8
26 20
Partition #1
Partition #2
Partition #3
Partition #4
Partition #5
Partition #6
Partition #7
Partition #8
1
2
3
4
5
6
7
8
1
2
3
4
5
6
7
8
1
2
3
4
5
6
7
8
1
2
3
4
5
6
7
8
1
2
3
4
5
6
7
8
1
2
3
4
5
6
7
8
1
2
3
4
5
6
7
8
1
2
3
4
5
6
7
8
L 27 20 ZONES 9-16, ZONE TYPES 6-6-6-6-6-6-6-6 _ _ _ _ _ _ _ _
ZONES 9-16, PARTITION SELECTION (Segment 1=Zone 9 thru Segment 8=Zone 16)
Segments 1 2 3 4 5 6 7 8
28 20
Partition #1
Partition #2
Partition #3
Partition #4
Partition #5
Partition #6
Partition #7
Partition #8
1
2
3
4
5
6
7
8
1
2
3
4
5
6
7
8
1
2
3
4
5
6
7
8
1
2
3
4
5
6
7
8
1
2
3
4
5
6
7
8
1
2
3
4
5
6
7
8
1
2
3
4
5
6
7
8
1
2
3
4
5
6
7
8
L 29 20 ZONES 17-24, ZONE TYPES 6-6-6-6-6-6-6-6 _ _ _ _ _ _ _ _
ZONES 17-24, PARTITION SELECTION (Segment 1=Zone 17 thru Segment 8=Zone 24)
Segments 1 2 3 4 5 6 7 8
30 20
Partition #1
Partition #2
Partition #3
Partition #4
Partition #5
Partition #6
Partition #7
Partition #8
1
2
3
4
5
6
7
8
1
2
3
4
5
6
7
8
1
2
3
4
5
6
7
8
1
2
3
4
5
6
7
8
1
2
3
4
5
6
7
8
1
2
3
4
5
6
7
8
1
2
3
4
5
6
7
8
1
2
3
4
5
6
7
8
L 31 21 ZONES 25-32, ZONE TYPES 6-6-6-6-6-6-6-6 _ _ _ _ _ _ _ _
NX-8E-CF CONTROL 39
LOC PG DESCRIPTION DEFAULT PROGRAMMING DATA
ZONES 25-32, PARTITION SELECTION (Segment 1=Zone 25 thru Segment 8=Zone 32)
Segments 1 2 3 4 5 6 7 8
32 21
Partition #1
Partition #2
Partition #3
Partition #4
Partition #5
Partition #6
Partition #7
Partition #8
1
2
3
4
5
6
7
8
1
2
3
4
5
6
7
8
1
2
3
4
5
6
7
8
1
2
3
4
5
6
7
8
1
2
3
4
5
6
7
8
1
2
3
4
5
6
7
8
1
2
3
4
5
6
7
8
1
2
3
4
5
6
7
8
L 33 21 ZONES 33-40, ZONE TYPES 6-6-6-6-6-6-6-6 _ _ _ _ _ _ _ _
ZONES 33-40, PARTITION SELECTION (Segment 1=Zone 33 thru Segment 8=Zone 40)
Segments 1 2 3 4 5 6 7 8
34 21
Partition #1
Partition #2
Partition #3
Partition #4
Partition #5
Partition #6
Partition #7
Partition #8
1
2
3
4
5
6
7
8
1
2
3
4
5
6
7
8
1
2
3
4
5
6
7
8
1
2
3
4
5
6
7
8
1
2
3
4
5
6
7
8
1
2
3
4
5
6
7
8
1
2
3
4
5
6
7
8
1
2
3
4
5
6
7
8
L 35 21 ZONES 41-48, ZONE TYPES 6-6-6-6-6-6-6-6 _ _ _ _ _ _ _ _
ZONES 41-48, PARTITION SELECTION (Segment 1=Zone 41 thru Segment 8=Zone 48)
Segments 1 2 3 4 5 6 7 8
36 21
Partition #1
Partition #2
Partition #3
Partition #4
Partition #5
Partition #6
Partition #7
Partition #8
1
2
3
4
5
6
7
8
1
2
3
4
5
6
7
8
1
2
3
4
5
6
7
8
1
2
3
4
5
6
7
8
1
2
3
4
5
6
7
8
1
2
3
4
5
6
7
8
1
2
3
4
5
6
7
8
1
2
3
4
5
6
7
8
L 37 21 SIREN AND SYSTEM SUPERVISION
Segment #1 (Circle numbers to program)
1 = Siren sounds for telephone line cut while armed.
2 = Siren sounds for telephone line cut while disarmed.
3 = Siren blast at arming.
4 = Siren blast at exit delay expiration.
5 = Siren blast at closing kissoff.
6 = Siren sounds during a cross-zone verification time.
7 = Siren sounds for a tamper.
8 = Siren blast one time for keyswitch arming, two times for
disarming.
Segment #2 (Circle numbers to program)
1 = Convert siren driver to voltage out.
2 = Siren sounds for expander trouble (required for U.L.).
3 = Immediate Restore by zone.
4 = Reserved.
5 = Battery missing test performed every 12 seconds.
6 = Manual bell test performed during [
r
]-[4]-[4] test
function.
7 = Manual communicator test performed during [r]-[4]-[4]
test function.
8 = Box tamper enabled.
Segment #3 (Circle numbers to program)
1 = Box Tamper report enabled.
2 = AC Fail report enabled.
3 = Low Battery report enabled.
4 = Auxiliary power over current report enabled.
5 = Siren supervision report enabled.
6 = Telephone Line Cut report enabled.
7 = Ground Fault Detection report enabled.
8 = Expander trouble report enabled.
Segment #4 (Circle numbers to program)
1 = Failure To Communicate report enabled.
2 = Log Full report enabled.
3 = Autotest report enabled. (required for UL installations)
4 = Start and End Programming report enabled.
5 = Reserved.
6 = Sensor Low Battery report enabled.
7 = Sensor Missing report enabled.
8 = Reserved.
L 37 21 Segment #5 (Circle numbers to program)
1 = Lost Clock service LED enable.
2 = Enables NX-870E siren output to activate for FIRE ONLY.
3 = Disable on-board eight zones.
4 = Enables two trips on the same cross-zone to activate the
alarm.
5 = Disables bypass reports for force armed zones
6 = Silent exit.
7 = Clock uses internal crystal.
8 = Disable Temporal Siren on Fire (Do not disable on UL
listed systems)
Segment #6
1 = Enable 2-wire Smoke Detector.
2 = Reserved.
3 = Enable Zone Activity in Hours (not Days)
4 = Enable Daylight Savings Time (DST)
5 = Reserved
6 = Disable Clean Me report.
7 = Reserved.
8 = Reserved.
Segment #7 - RESERVED
NX-8E-CF CONTROL
40
LOC PG DESCRIPTION DEFAULT DATA
L 38 22 SWINGER SHUTDOWN COUNT 0 _
L 39 22 KEYPAD SOUNDER CONTROL
1 = Keypad sounds for Telephone Line Cut when in the Armed state.
2 = Keypad sounds for Telephone Line Cut when in the Disarmed state.
3 = Keypad sounds upon AC Power Failure.
4 = Keypad sounds upon Low Battery Detection.
5 = Keypad sounds during Cross Zone Trip Time.
6 = Keypad sounds for Tamper Alarm.
7 = Reserved.
8 = Keypad sounds for expander trouble (required for UL).
L 40 22 SYSTEM TIMERS
Segment #1 Dynamic Battery Test duration (0-255 minutes) 0 _
Segment #2 AC Failure report delay (0-255 minutes) 5 _
Segment #3 Power Up Delay (0-60 seconds) 0 _
Segment #4 Siren Time (1-254 minutes) 8 _
Segment #5 Telephone Line Cut delay (0-255 seconds) 0 _
Segment #6 Cross Zone Time (0-255 minutes) 5 _
Segment #7 Chime Time in 50 mS increments (0-255) 3 _
Segment #8 Dialer delay (0-255 seconds) 0 _
Segment #9 Fire Alarm Verification Time (120-255 sec.) 0 _
Segment #10 Listen-In Time (0-255 seconds) 0 _
Segment #11 Zone Monitor Timer (0-255 Days)
Segment #12 – 14 Reserved
41 23 SPECIAL FEATURES
1 = Enables 6-digit code option. All arm/disarm/Go To Program codes require six digits
2 = Reserved.
3 = Enable Auto Cancel / Abort.
4 = Enable Walk-Test Mode.
5 = Reserved.
6 = Reserved.
7 = Reserved.
8 = Reserved.
L 42 23 GO TO PROGRAM CODE 9-7-1-3-0-0 _ _ _ _ _ _
43 23 GO TO PROGRAM CODE PARTITION AND AUTHORIZATION
Segment #1 (Circle numbers to program)
1 = Reserved.
2 = Enables "Go To Program Code" as an arm only code.
3 = Enables "Go To Program Code" as an arm only after closing.
4 = Enables "Go To Program Code" as a master arm/disarm code
(can change user codes)
5 = Enables "Go To Program Code" as an arm/disarm code.
6 = Enables "Go To Program Code" to bypass zones.
7 = Enables "Go To Program Code" opening and closing reports.
8 = Reserved.
Segment #2 (Circle numbers to program)
1 = Enables "Go To Program Code" for partition #1.
2 = Enables "Go To Program Code" for partition #2.
3 = Enables "Go To Program Code" for partition #3.
4 = Enables "Go To Program Code" for partition #4.
5 = Enables "Go To Program Code" for partition #5.
6 = Enables "Go To Program Code" for partition #6.
7 = Enables "Go To Program Code" for partition #7.
8 = Enables "Go To Program Code" for partition #8.
L 44 23 DURESS CODE 15-15-15-15-15-15 _ _ _ _ _ _
45 23 AUXILIARY OUTPUTS 1-4 PARTITION SELECTION
Segments 1 2 3 4
Partition #1
Partition #2
Partition #3
Partition #4
Partition #5
Partition #6
Partition #7
Partition #8
1
2
3
4
5
6
7
8
1
2
3
4
5
6
7
8
1
2
3
4
5
6
7
8
1
2
3
4
5
6
7
8
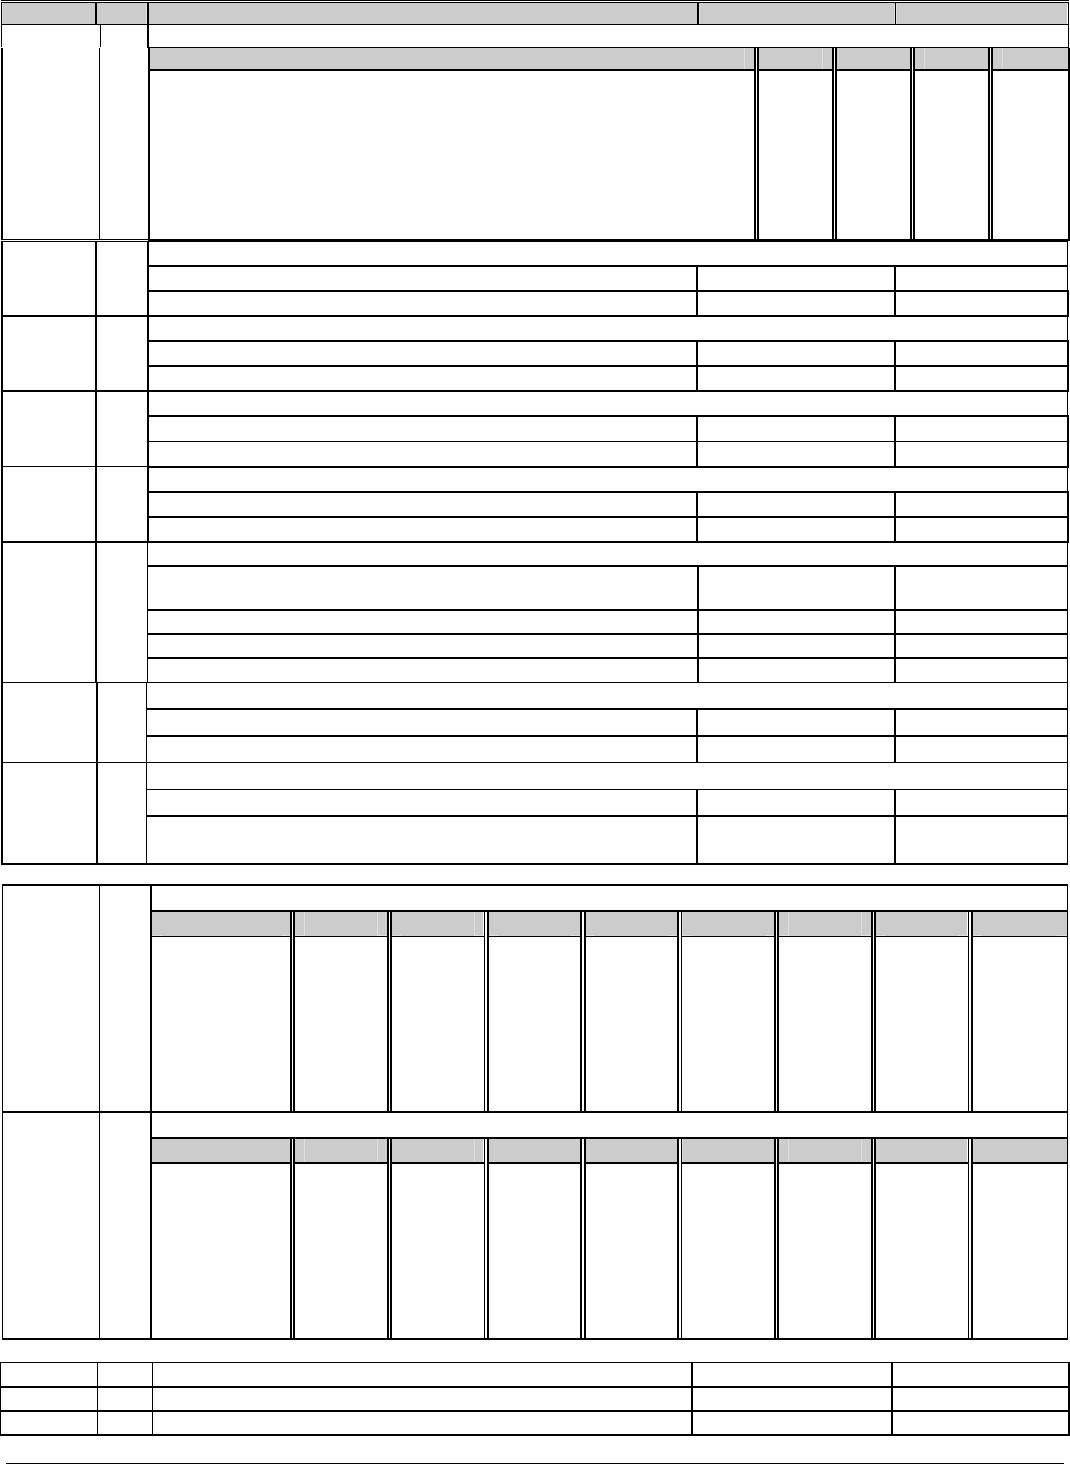
NX-8E-CF CONTROL 41
LOC PG DESCRIPTION DEFAULT DATA
46 23 AUXILIARY OUTPUTS 1-4 SPECIAL TIMING
Segments 1 2 3 4
Auxiliary output timed in minutes.
Auxiliary output to latch.
Auxiliary output to stop timing upon user code entry.
Auxiliary output to activate only between closing and opening time.
Auxiliary output to activate only between opening and closing time.
Invert auxiliary output (0 volts going to 12 volts when activated).
Reserved
Reserved
1
2
3
4
5
6
7
8
1
2
3
4
5
6
7
8
1
2
3
4
5
6
7
8
1
2
3
4
5
6
7
8
AUXILIARY OUTPUT #1, EVENT & TIME
Segment #1: Program the event number for output #1 here. 0=Burglary alarm
47
24
Segment #2: Program the timing for output #1 here. 10 seconds
AUXILIARY OUTPUT #2, EVENT & TIME
Segment #1: Program the event number for output #2 here. 1=Fire alarm
48 24
Segment #2: Program the timing for output #2 here. 10 seconds
AUXILIARY OUTPUT #3, EVENT & TIME
Segment #1: Program the event number for output #3 here. 2= 24 Hour Alarm
49 24
Segment #2: Program the timing for output #3 here. 10 seconds
AUXILIARY OUTPUT #4, EVENT & TIME
Segment #1: Program the event number for output #4 here. 21-Armed State
50 24
Segment #2: Program the timing for output #4 here. 0=Follow condition
AUTOTEST CONTROL
Segment #1: Program a "1" if the interval is hours, a "0" if in days. Add a
A2" to suppress the daily test or a A3" to suppress the hourly test.
1
Segment #2: Program the autotest interval from 1-255 days or hours. 24
Segment #3: Program the autotest report in 24-hour time format. 2
L 51
24
Segment #4: Program the autotest report time, minutes after the hour. 0
OPENING TIME
Segment #1: Program the hour of the opening time. 8
52 24
Segment #2: Program the minutes after the hour of the opening time. 0
CLOSING TIME / AUTO ARMING TIME
Segment #1: Program the hour of the closing time / auto arming time. 20
53 25
Segment #2: Program the minutes after hour of closing / auto arming
time.
0
DAYS OF THE WEEK EACH PARTITION IS OPEN
Segments 1 2 3 4 5 6 7 8
54 25
Sunday
Monday
Tuesday
Wednesday
Thursday
Friday
Saturday
Reserved
1
2
3
4
5
6
7
8
1
2
3
4
5
6
7
8
1
2
3
4
5
6
7
8
1
2
3
4
5
6
7
8
1
2
3
4
5
6
7
8
1
2
3
4
5
6
7
8
1
2
3
4
5
6
7
8
1
2
3
4
5
6
7
8
DAYS OF THE WEEK "AUTO ARMING" WILL OCCUR IN PARTITIONS 1-8
Segments 1 2 3 4 5 6 7 8
55 25
Sunday
Monday
Tuesday
Wednesday
Thursday
Friday
Saturday
Disable Retry
1
2
3
4
5
6
7
8
1
2
3
4
5
6
7
8
1
2
3
4
5
6
7
8
1
2
3
4
5
6
7
8
1
2
3
4
5
6
7
8
1
2
3
4
5
6
7
8
1
2
3
4
5
6
7
8
1
2
3
4
5
6
7
8
56-87 25 RESERVED 0-0-0-0 Reserved
88 25 PARTITION 1, ACCOUNT CODE 10-10-10-10-10-10 _ _ _ _ _
89 25 PARTITION 2, ACCOUNT CODE 10-10-10-10-10-10 _ _ __ _ _
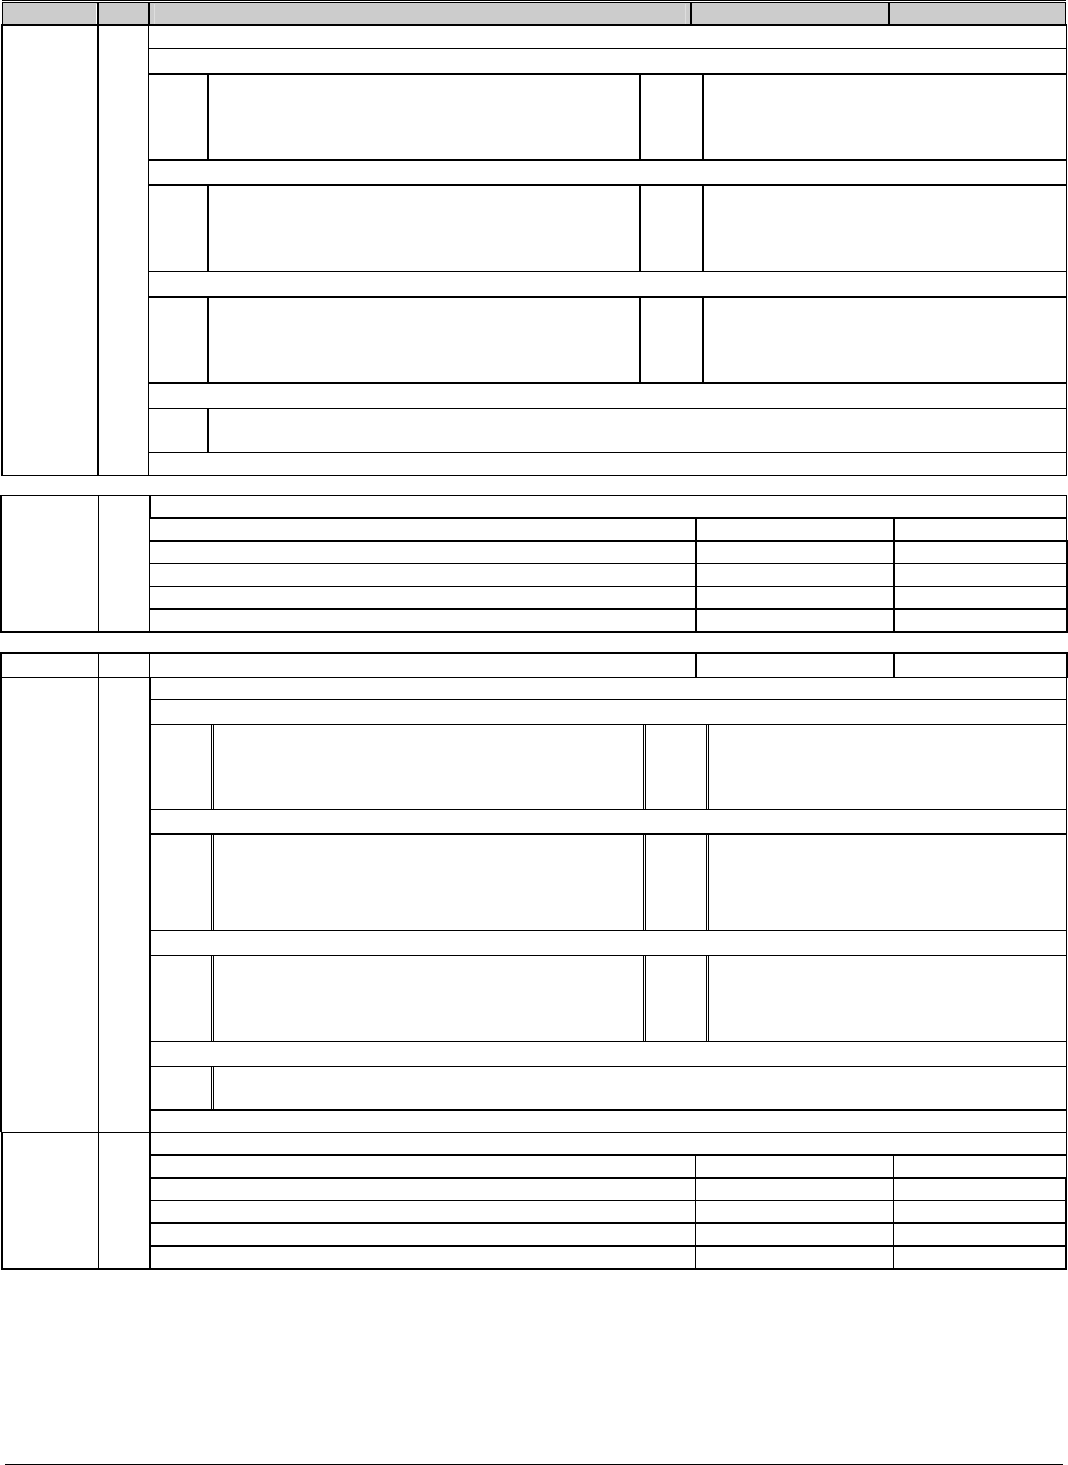
NX-8E-CF CONTROL
42
LOC PG DESCRIPTION DEFAULT DATA
PARTITION 2, FEATURE AND REPORTING SELECTION
Segment #1
1
2
3
4
Quick Arm
Re-Exit
Auto Bypass
Silent Panic
5
6
7
8
Audible Panic
Auxiliary 1
Auxiliary 2
Multi Keypress Tamper
Segment #2
1
2
3
4
LED extinguish enable
Require user code for bypassing zones
Bypass sounder alert
AC power/low battery sounder alert
5
6
7
8
Enables bypass toggle
Enables silent auto arm
Enables automatic instant
Reserved
Segment #3
1
2
3
4
Open/Close
Bypass
Restore
Trouble
5
6
7
8
Tamper
Cancel
Recent Closing
Exit Error
Segment #4
1
2-8
Late to Close / Early to Open
Reserved
90 25
Segment #5 RESERVED
PARTITION 2 ENTRY/EXIT TIMERS
Segment #1 (Entry Time #1) 0 _
Segment #2 (Exit Time #1) 0 _
Segment #3 (Entry Time #2) 0 _
Segment #4 (Exit Time #2) 0 _
91
25
Segment #5 & #6 RESERVED
92 26 PARTITION 3, ACCOUNT CODE 10-10-10-10-10-10 _ _ _ _ _ _
PARTITION 3, FEATURE AND REPORTING SELECTION
Segment #1
1
2
3
4
Quick Arm
Re-Exit
Auto Bypass
Silent Panic
5
6
7
8
Audible Panic
Auxiliary 1
Auxiliary 2
Multi Keypress Tamper
Segment #2
1
2
3
4
LED extinguish enable
Require user code for bypassing zones
Bypass sounder alert
AC power/low battery sounder alert
5
6
7
8
Enables bypass toggle
Enables silent auto arm
Enables automatic instant
Reserved
Segment #3
1
2
3
4
Open/Close
Bypass
Restore
Trouble
5
6
7
8
Tamper
Cancel
Recent Closing
Exit Error
Segment #4
1
2-8
Late to Close / Early to Open
Reserved
93 26
Segment #5 RESERVED
PARTITION 3 ENTRY/EXIT TIMERS
Segment #1 (Entry Time #1) 0 _
Segment #2 (Exit Time #1) 0 _
Segment #3 (Entry Time #2) 0 _
Segment #4 (Exit Time #2) 0 _
94 26
Segment #5 & #6 RESERVED
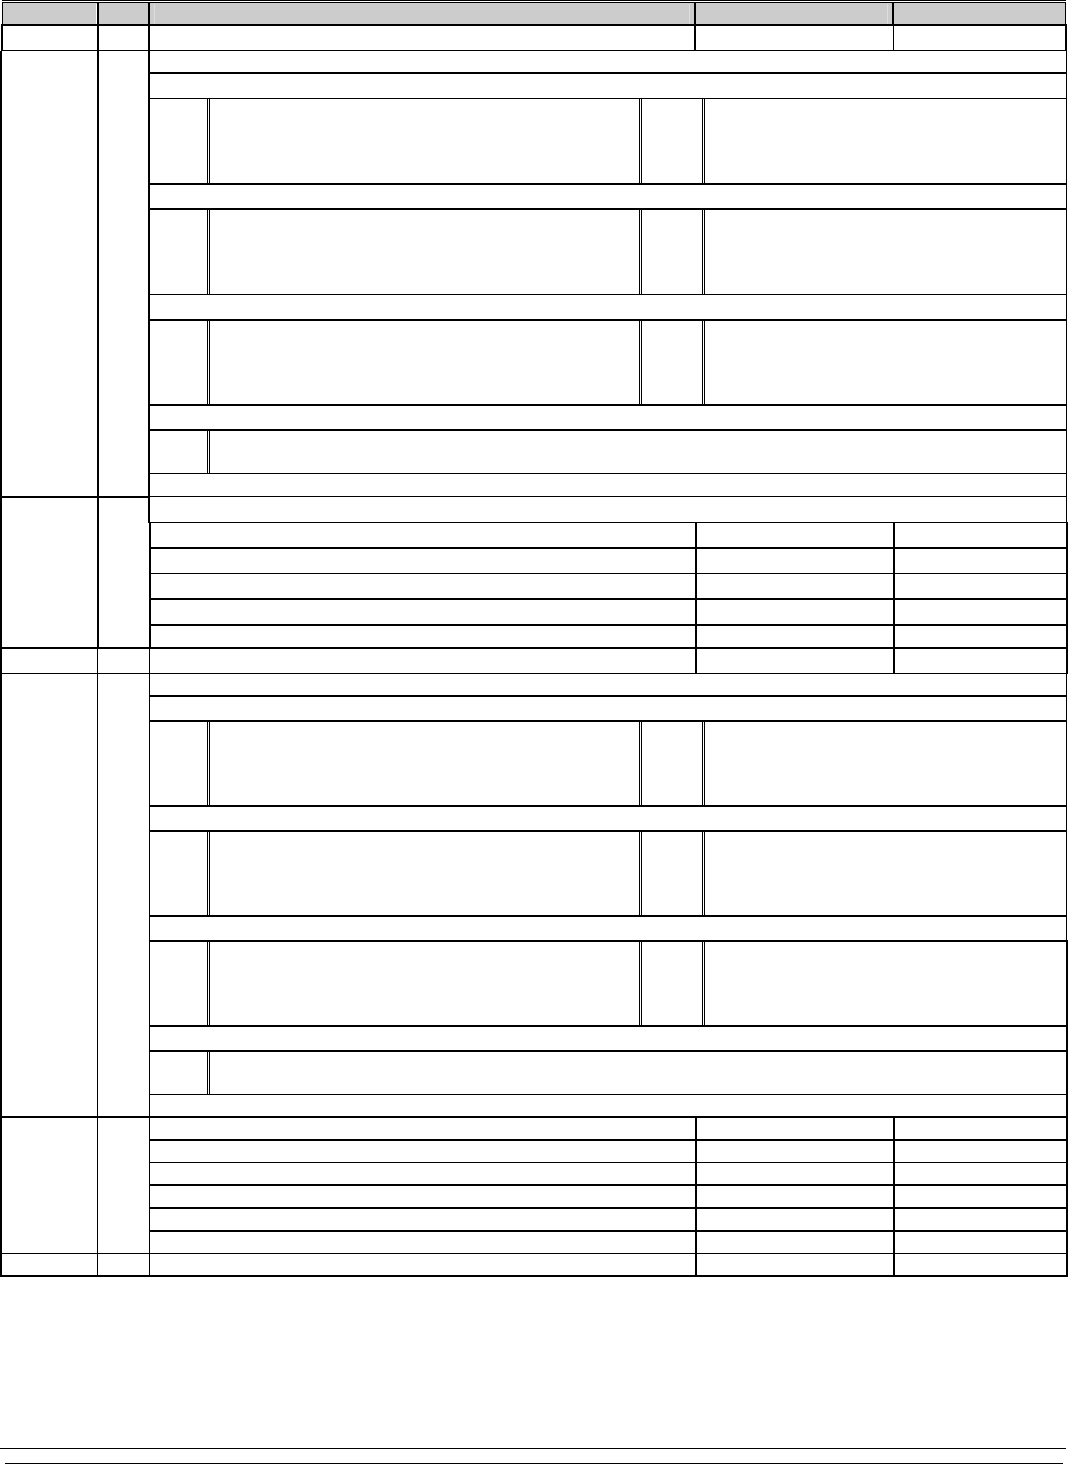
NX-8E-CF CONTROL 43
LOC PG DESCRIPTION DEFAULT DATA
95 26 PARTITION 4, ACCOUNT CODE 10-10-10-10-10-10 _ _ _ _ _ _
PARTITION 4, FEATURE AND REPORTING SELECTION
Segment #1
1
2
3
4
Quick Arm
Re-Exit
Auto Bypass
Silent Panic
5
6
7
8
Audible Panic
Auxiliary 1
Auxiliary 2
Multi Keypress Tamper
Segment #2
1
2
3
4
LED extinguish enable
Require user code for bypassing zones
Bypass sounder alert
AC power/low battery sounder alert
5
6
7
8
Enables bypass toggle
Enables silent auto arm
Enables automatic instant
Reserved
Segment #3
1
2
3
4
Open/Close
Bypass
Restore
Trouble
5
6
7
8
Tamper
Cancel
Recent Closing
Exit Error
Segment #4
1
2-8
Late to Close / Early to Open
Reserved
96 26
Segment #5 RESERVED
97 26 PARTITION 4, ENTRY/EXIT TIMERS
Segment #1 (Entry Time #1) 0 _
Segment #2 (Exit Time #1) 0 _
Segment #3 (Entry Time #2) 0 _
Segment #4 (Exit Time #2) 0 _
Segment #5 & #6 RESERVED
98 26 PARTITION 5, ACCOUNT CODE 10-10-10-10-10-10 _ _ _ _ _ _
PARTITION 5, FEATURE AND REPORTING SELECTION
Segment #1
1
2
3
4
Quick Arm
Re-Exit
Auto Bypass
Silent Panic
5
6
7
8
Audible Panic
Auxiliary 1
Auxiliary 2
Multi Keypress Tamper
Segment #2
1
2
3
4
LED extinguish enable
Require user code for bypassing zones
Bypass sounder alert
AC power/low battery sounder alert
5
6
7
8
Enables bypass toggle
Enables silent auto arm
Enables automatic instant
Reserved
Segment #3
1
2
3
4
Open/Close
Bypass
Restore
Trouble
5
6
7
8
Tamper
Cancel
Recent Closing
Exit Error
Segment #4
1
2-8
Late to Close / Early to Open
Reserved
99 26
Segment #5 RESERVED
PARTITION 5, ENTRY/EXIT TIMERS
Segment #1 (Entry Time #1) 0 _
Segment #2 (Exit Time #1) 0 _
Segment #3 (Entry Time #2) 0 _
Segment #4 (Exit Time #2) 0 _
100 26
Segment #5 & #6 RESERVED
101 26 PARTITION 6, ACCOUNT CODE 10-10-10-10-10-10 _ _ _ _ _ _
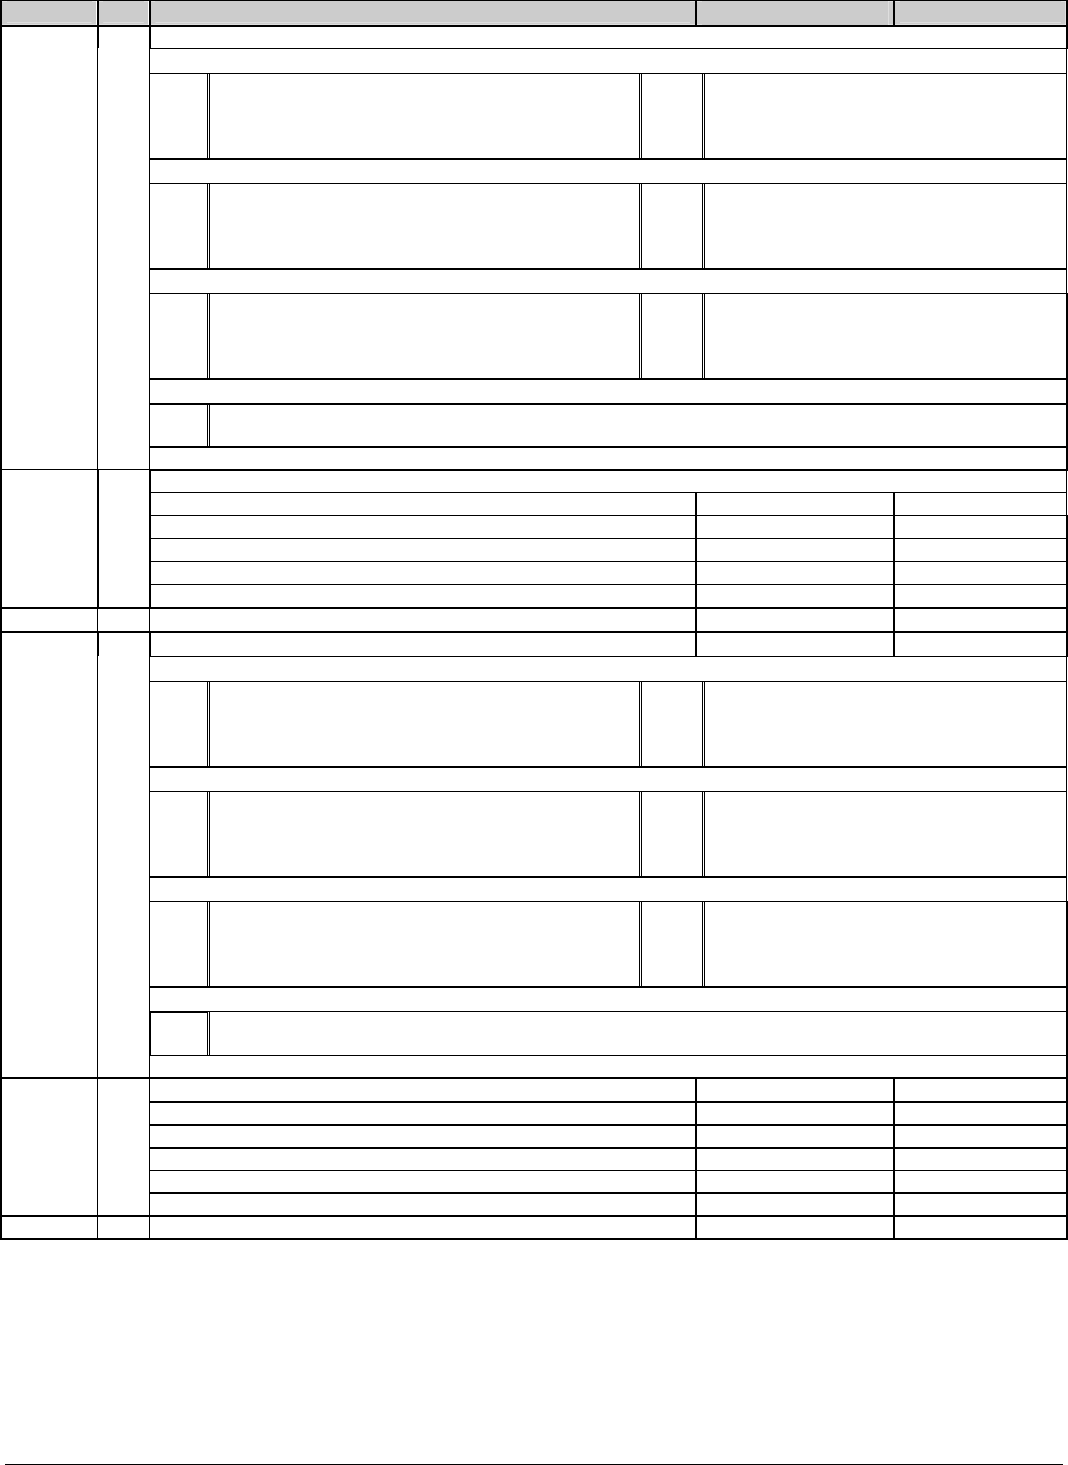
NX-8E-CF CONTROL
44
LOC PG DESCRIPTION DEFAULT DATA
102 27 PARTITION 6, FEATURE AND REPORTING SELECTION
Segment #1
1
2
3
4
Quick Arm
Re-Exit
Auto Bypass
Silent Panic
5
6
7
8
Audible Panic
Auxiliary 1
Auxiliary 2
Multi Keypress Tamper
Segment #2
1
2
3
4
LED extinguish enable
Require user code for bypassing zones
Bypass sounder alert
AC power/low battery sounder alert
5
6
7
8
Enables bypass toggle
Enables silent auto arm
Enables automatic instant
Reserved
Segment #3
1
2
3
4
Open/Close
Bypass
Restore
Trouble
5
6
7
8
Tamper
Cancel
Recent Closing
Exit Error
Segment #4
1
2-8
Late to Close / Early to Open
Reserved
Segment #5 RESERVED
PARTITION 6, ENTRY/EXIT TIMERS
Segment #1 (Entry Time #1) 0 _
Segment #2 (Exit Time #1) 0 _
Segment #3 (Entry Time #2) 0 _
Segment #4 (Exit Time #2) 0 _
103 27
Segment #5 & #6 RESERVED
104 27 PARTITION 7, ACCOUNT CODE 10-10-10-10-10-10 _ _ _ _ _ _
105 27 PARTITION 7, FEATURE AND REPORTING SELECTION
Segment #1
1
2
3
4
Quick Arm
Re-Exit
Auto Bypass
Silent Panic
5
6
7
8
Audible Panic
Auxiliary 1
Auxiliary 2
Multi Keypress Tamper
Segment #2
1
2
3
4
LED extinguish enable
Require user code for bypassing zones
Bypass sounder alert
AC power/low battery sounder alert
5
6
7
8
Enables bypass toggle
Enables silent auto arm
Enables automatic instant
Reserved
Segment #3
1
2
3
4
Open/Close
Bypass
Restore
Trouble
5
6
7
8
Tamper
Cancel
Recent Closing
Exit Error
Segment #4
1
2-8
Late to Close / Early to Open
Reserved
Segment #5 RESERVED
PARTITION 7, ENTRY/EXIT TIMERS
Segment #1 (Entry Time #1) 0 _
Segment #2 (Exit Time #1) 0 _
Segment #3 (Entry Time #2) 0 _
Segment #4 (Exit Time #2) 0 _
106 27
Segment #5 & #6 RESERVED
107 27 PARTITION 8, ACCOUNT CODE 10-10-10-10-10-10 _ _ _ _ _ _
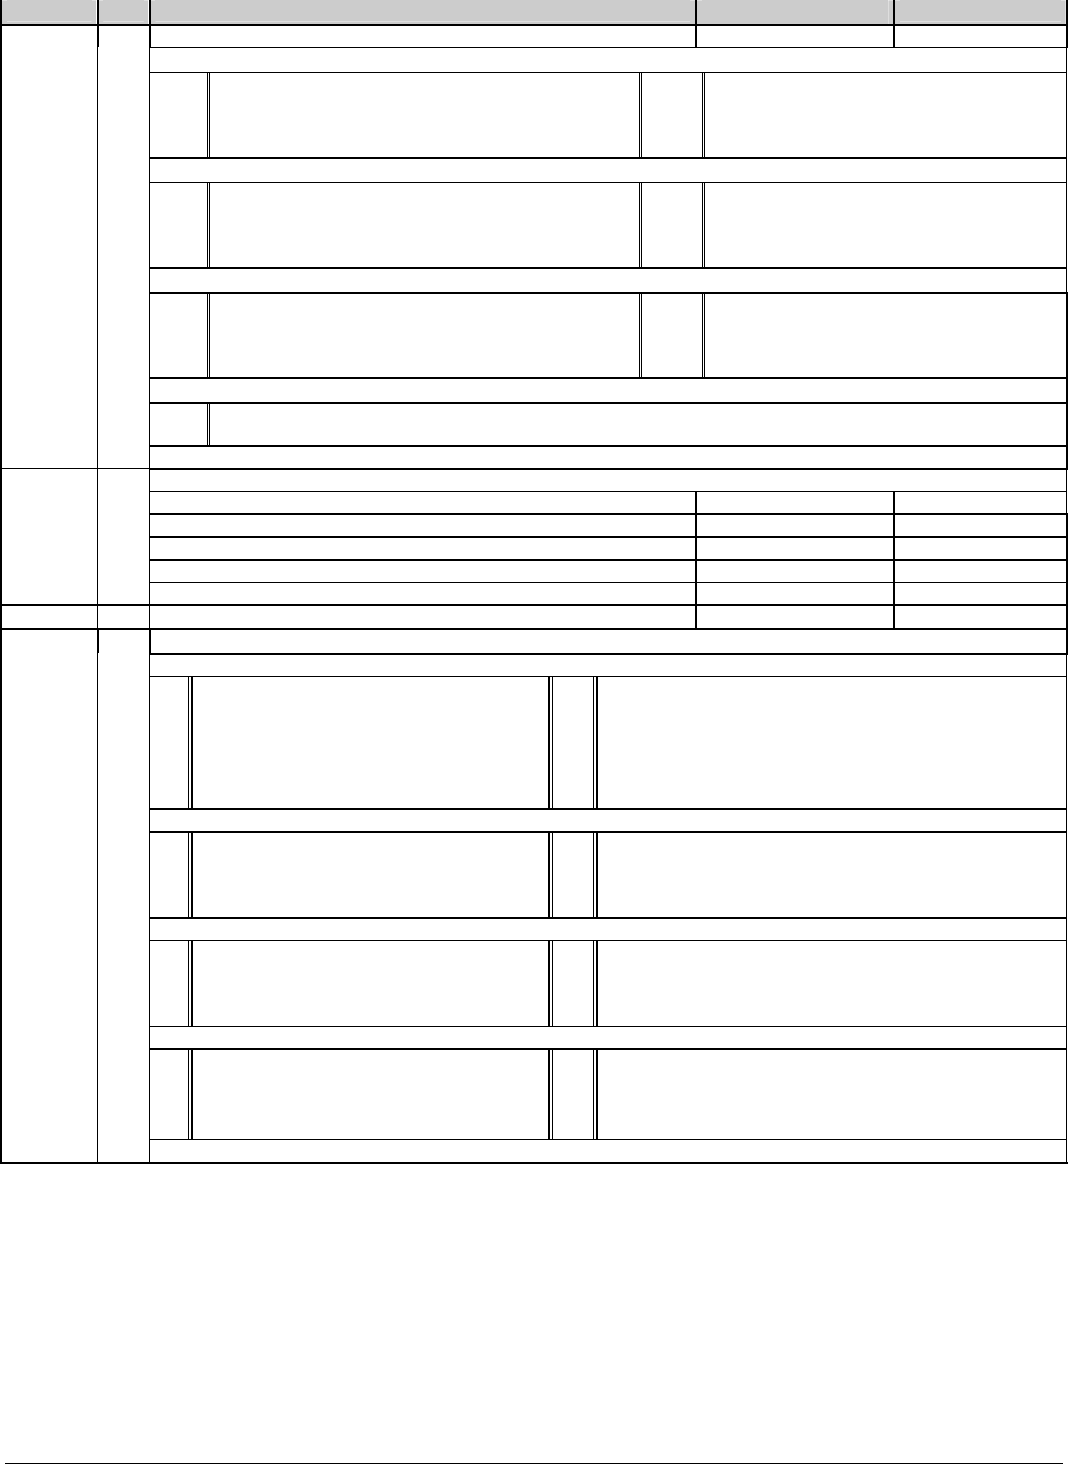
NX-8E-CF CONTROL 45
LOC PG DESCRIPTION DEFAULT DATA
108 27 PARTITION 8, FEATURE AND REPORTING SELECTION
Segment #1
1
2
3
4
Quick Arm
Re-Exit
Auto Bypass
Silent Panic
5
6
7
8
Audible Panic
Auxiliary 1
Auxiliary 2
Multi Keypress Tamper
Segment #2
1
2
3
4
LED extinguish enable
Require user code for bypassing zones
Bypass sounder alert
AC power/low battery sounder alert
5
6
7
8
Enables bypass toggle
Enables silent auto arm
Enables automatic instant
Reserved
Segment #3
1
2
3
4
Open/Close
Bypass
Restore
Trouble
5
6
7
8
Tamper
Cancel
Recent Closing
Exit Error
Segment #4
1
2-8
Late to Close / Early to Open
Reserved
Segment #5 RESERVED
PARTITION 8, ENTRY/EXIT TIMERS
Segment #1 (Entry Time #1) 0 _
Segment #2 (Exit Time #1) 0 _
Segment #3 (Entry Time #2) 0 _
Segment #4 (Exit Time #2) 0 _
109 27
Segment #5 & #6 RESERVED
110 28 ZONE TYPE 1 ALARM EVENT CODE 8 _
111 28
ZONE TYPE 1 CHARACTERISTIC SELECT
Segment #1 (Circle numbers to program)
1
2
3
4
Fire (enable for fire zone).
24 Hour (enable for non-fire 24 hour
zone).
Keyswitch zone.
Follower (enable for burg zones that are
instant during non-entry times).
5
6
7
8
Delay 1 zone (enable to follow Timer 1 Entry/Exit times).
Delay 2 zone (enable to follow Timer 2 Entry / Exit times).
Interior (Enable for auto bypass or stay arming).
Local Only (enable if zone is not to be reported).
Segment #2 (Circle numbers to program)
1
2
3
4
Keypad audible on alarm.
Yelping siren on alarm.
Temporal siren on alarm.
Chime.
5
6
7
8
Bypassable.
Group Shunt.
Force armable.
Entry Guard.
Segment #3 (Circle numbers to program)
1
2
3
4
Sprinkler Supervisory
Double End of Line Tamper zone.
Trouble zone (Day zone).
Cross Zone.
5
6
7
8
Dialer Delay zone.
Swinger zone.
Restore reporting.
Reserved
Segment #4 (Circle numbers to program)
1
2
3
4
Zone Activity Monitor.
End of Line Resistor Defeat.
Delays alarm activation 60 seconds.
Zone acts as request to exit input.
5
6
7
8
Reserved.
Reserved.
Reserved.
Reserved.
Segment #5 - Reserved

NX-8E-CF CONTROL
46
THE DEFAULTS LISTED IN THE ODD NUMBERED LOCATIONS 112-169 BELOW REPRESENT THE THREE SEGMENTS OF EACH OF THOSE
LOCATIONS. USE THE THREE SEGMENT CHARTS FROM LOCATION 111 TO UNDERSTAND THESE DEFAULTS.
LOC PG DESCRIPTION DEFAULT DATA
112 28 ZONE TYPE 2 ALARM EVENT CODE 2 __
113 28 ZONE TYPE 2 CHARACTERISTIC SELECT 2-125-78-0-0 __ __ __ __ __
114 28 ZONE TYPE 3 ALARM EVENT CODE 7 __
115 28 ZONE TYPE 3 CHARACTERISTIC SELECT 5-1245-5678-0-0 __ __ __ __ __
116 28 ZONE TYPE 4 ALARM EVENT CODE 5 __
117 29 ZONE TYPE 4 CHARACTERISTIC SELECT 45-125-5678-0-0 __ __ __ __ __
118 29 ZONE TYPE 5 ALARM EVENT CODE 5 __
119 29 ZONE TYPE 5 CHARACTERISTIC SELECT 457-125-5678-0-0 __ __ __ __ __
120 29 ZONE TYPE 6 ALARM EVENT CODE 4 __
121 29 ZONE TYPE 6 CHARACTERISTIC SELECT 0-1245-5678-0-0 __ __ __ __ __
122 29 ZONE TYPE 7 ALARM EVENT CODE 0 __
123 29 ZONE TYPE 7 CHARACTERISTIC SELECT 2-0-78-0-0 __ __ __ __ __
124 29 ZONE TYPE 8 ALARM EVENT CODE 1 __
125 29 ZONE TYPE 8 CHARACTERISTIC SELECT 1-13-378-0-0 __ __ __ __ __
126 29 ZONE TYPE 9 ALARM EVENT CODE 7 __
127 29 ZONE TYPE 9 CHARACTERISTIC SELECT 6-1245-5678-0-0 __ __ __ __ __
128 29 ZONE TYPE 10 ALARM EVENT CODE 2 __
129 29 ZONE TYPE 10 CHARACTERISTIC SELECT 24-5-78-0-0 __ __ __ __ __
130 29 ZONE TYPE 11 ALARM EVENT CODE 3 __
131 29 ZONE TYPE 11 CHARACTERISTIC SELECT 3-0-0-0-0 __ __ __ __ __
132 29 ZONE TYPE 12 ALARM EVENT CODE 5 __
133 29 ZONE TYPE 12 CHARACTERISTIC SELECT 457-125-45678-0-0 __ __ __ __ __
134 29 ZONE TYPE 13 ALARM EVENT CODE 4 __
135 29 ZONE TYPE 13 CHARACTERISTIC SELECT 0-12458-5678-0-0 __ __ __ __ __
136 29 ZONE TYPE 14 ALARM EVENT CODE 7 __
137 30 ZONE TYPE 14 CHARACTERISTIC SELECT 5-12456-5678-0-0 __ __ __ __ __
138 30 ZONE TYPE 15 ALARM EVENT CODE 5 __
139 30 ZONE TYPE 15 CHARACTERISTIC SELECT 457-1256-5678-0-0 __ __ __ __ __
140 30 ZONE TYPE 16 ALARM EVENT CODE Not Used __
141 30 ZONE TYPE 16 CHARACTERISTIC SELECT 2-15-17 __ __ __ __ __
142 30 ZONE TYPE 17 ALARM EVENT CODE 7 __
143 30 ZONE TYPE 17 CHARACTERISTIC SELECT 5-1245-25678-0-0 __ __ __ __ __
144 30 ZONE TYPE 18 ALARM EVENT CODE 5 __
145 30 ZONE TYPE 18 CHARACTERISTIC SELECT 457-125-25678-0-0 __ __ __ __ __
146 30 ZONE TYPE 19 ALARM EVENT CODE 4 __
147 30 ZONE TYPE 19 CHARACTERISTIC SELECT 0-1245-25678-0-0 __ __ __ __ __
148 30 ZONE TYPE 20 ALARM EVENT CODE 7 __
149 30 ZONE TYPE 20 CHARACTERISTIC SELECT 6-1245-25678-0-0 __ __ __ __ __
150 30 ZONE TYPE 21 ALARM EVENT CODE 15 __
151 30 ZONE TYPE 21 CHARACTERISTIC SELECT 24-15-78 __ __ __ __ __
152 30 ZONE TYPE 22 ALARM EVENT CODE 20 __
153 30 ZONE TYPE 22 CHARACTERISTIC SELECT 24-15-78 __ __ __ __ __
154 30 ZONE TYPE 23 ALARM EVENT CODE 21 __
155 30 ZONE TYPE 23 CHARACTERISTIC SELECT 24-15-78 __ __ __ __ __
156 31 ZONE TYPE 24 ALARM EVENT CODE 22 __
157 31 ZONE TYPE 24 CHARACTERISTIC SELECT 1-13-378 __ __ __ __ __
158 31 ZONE TYPE 25 ALARM EVENT CODE 14 __
159 31 ZONE TYPE 25 CHARACTERISTIC SELECT 248-45-0-0-0 __ __ __ __ __
160 31 ZONE TYPE 26 ALARM EVENT CODE 5 __
161 31 ZONE TYPE 26 CHARACTERISTIC SELECT 467-125-5678-0-0 __ __ __ __ __
162 31 ZONE TYPE 27 ALARM EVENT CODE 5 __
163 31 ZONE TYPE 27 CHARACTERISTIC SELECT 457-1257-5678-0-0 __ __ __ __ __
164 31 ZONE TYPE 28 ALARM EVENT CODE 7 __
165 31 ZONE TYPE 28 CHARACTERISTIC SELECT 6-12457-5678-0-0 __ __ __ __ __
166 31 ZONE TYPE 29 ALARM EVENT CODE 5 __
167 31 ZONE TYPE 29 CHARACTERISTIC SELECT 457-125-5678-1-0 __ __ __ __ __
168 31 ZONE TYPE 30 ALARM EVENT CODE 7 __
169 31 ZONE TYPE 30 CHARACTERISTIC SELECT 5-1245-5678-1-0 __ __ __ __ __
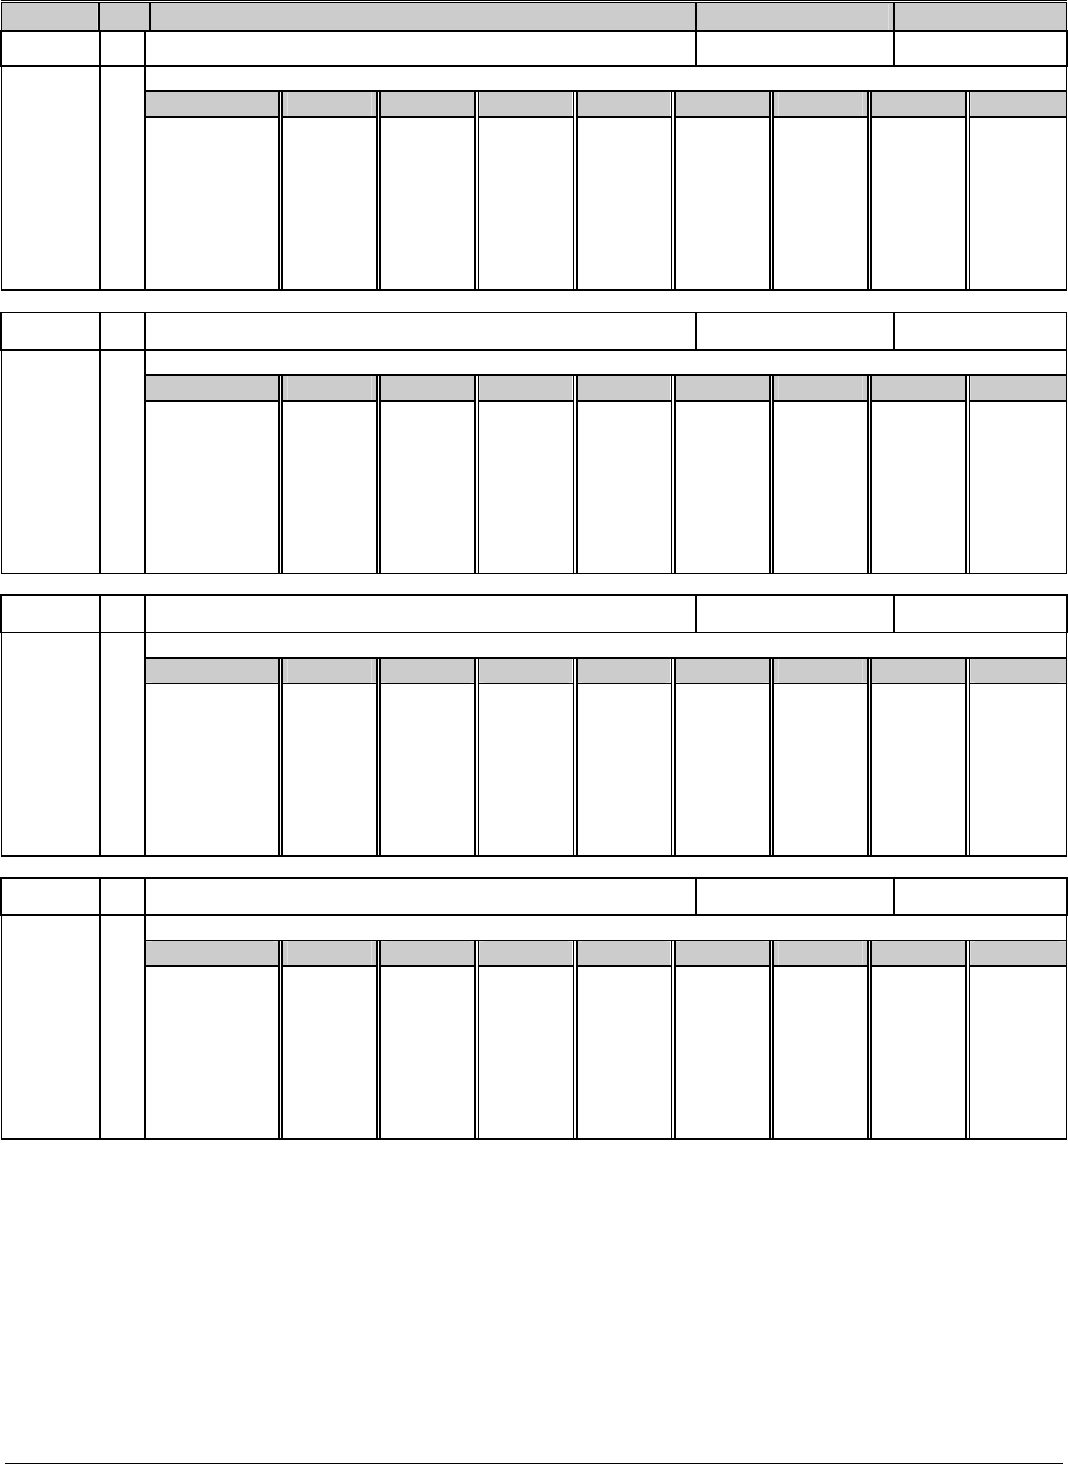
NX-8E-CF CONTROL 47
LOC PG DESCRIPTION DEFAULT DATA
L 170 31 ZONES 49-56, ZONE TYPES 6-6-6-6-6-6-6-6 _ _ _ _ _ _ _ _
ZONES 49-56, PARTITION SELECTION (Segment 1=Zone 49 thru Segment 8=Zone 56)
Segments 1 2 3 4 5 6 7 8
171 31
Partition #1
Partition #2
Partition #3
Partition #4
Partition #5
Partition #6
Partition #7
Partition #8
1
2
3
4
5
6
7
8
1
2
3
4
5
6
7
8
1
2
3
4
5
6
7
8
1
2
3
4
5
6
7
8
1
2
3
4
5
6
7
8
1
2
3
4
5
6
7
8
1
2
3
4
5
6
7
8
1
2
3
4
5
6
7
8
L172 31 ZONES 57-64, ZONE TYPES 6-6-6-6-6-6-6-6 _ _ _ _ _ _ _ _
ZONES 57-64, PARTITION SELECTION (Segment 1=Zone 57 thru Segment 8=Zone 64)
Segments 1 2 3 4 5 6 7 8
173 32
Partition #1
Partition #2
Partition #3
Partition #4
Partition #5
Partition #6
Partition #7
Partition #8
1
2
3
4
5
6
7
8
1
2
3
4
5
6
7
8
1
2
3
4
5
6
7
8
1
2
3
4
5
6
7
8
1
2
3
4
5
6
7
8
1
2
3
4
5
6
7
8
1
2
3
4
5
6
7
8
1
2
3
4
5
6
7
8
L174 32 ZONES 65-72, ZONE TYPES 6-6-6-6-6-6-6-6 _ _ _ _ _ _ _ _
ZONES 65-72, PARTITION SELECTION (Segment 1=Zone 65 thru Segment 8=Zone 72)
Segments 1 2 3 4 5 6 7 8
175 32
Partition #1
Partition #2
Partition #3
Partition #4
Partition #5
Partition #6
Partition #7
Partition #8
1
2
3
4
5
6
7
8
1
2
3
4
5
6
7
8
1
2
3
4
5
6
7
8
1
2
3
4
5
6
7
8
1
2
3
4
5
6
7
8
1
2
3
4
5
6
7
8
1
2
3
4
5
6
7
8
1
2
3
4
5
6
7
8
L176 32 ZONES 73-80, ZONE TYPES 6-6-6-6-6-6-6-6 _ _ _ _ _ _ _ _
ZONES 73-80, PARTITION SELECTION (Segment 1=Zone 73 thru Segment 8=Zone 80)
Segments 1 2 3 4 5 6 7 8
177 32
Partition #1
Partition #2
Partition #3
Partition #4
Partition #5
Partition #6
Partition #7
Partition #8
1
2
3
4
5
6
7
8
1
2
3
4
5
6
7
8
1
2
3
4
5
6
7
8
1
2
3
4
5
6
7
8
1
2
3
4
5
6
7
8
1
2
3
4
5
6
7
8
1
2
3
4
5
6
7
8
1
2
3
4
5
6
7
8
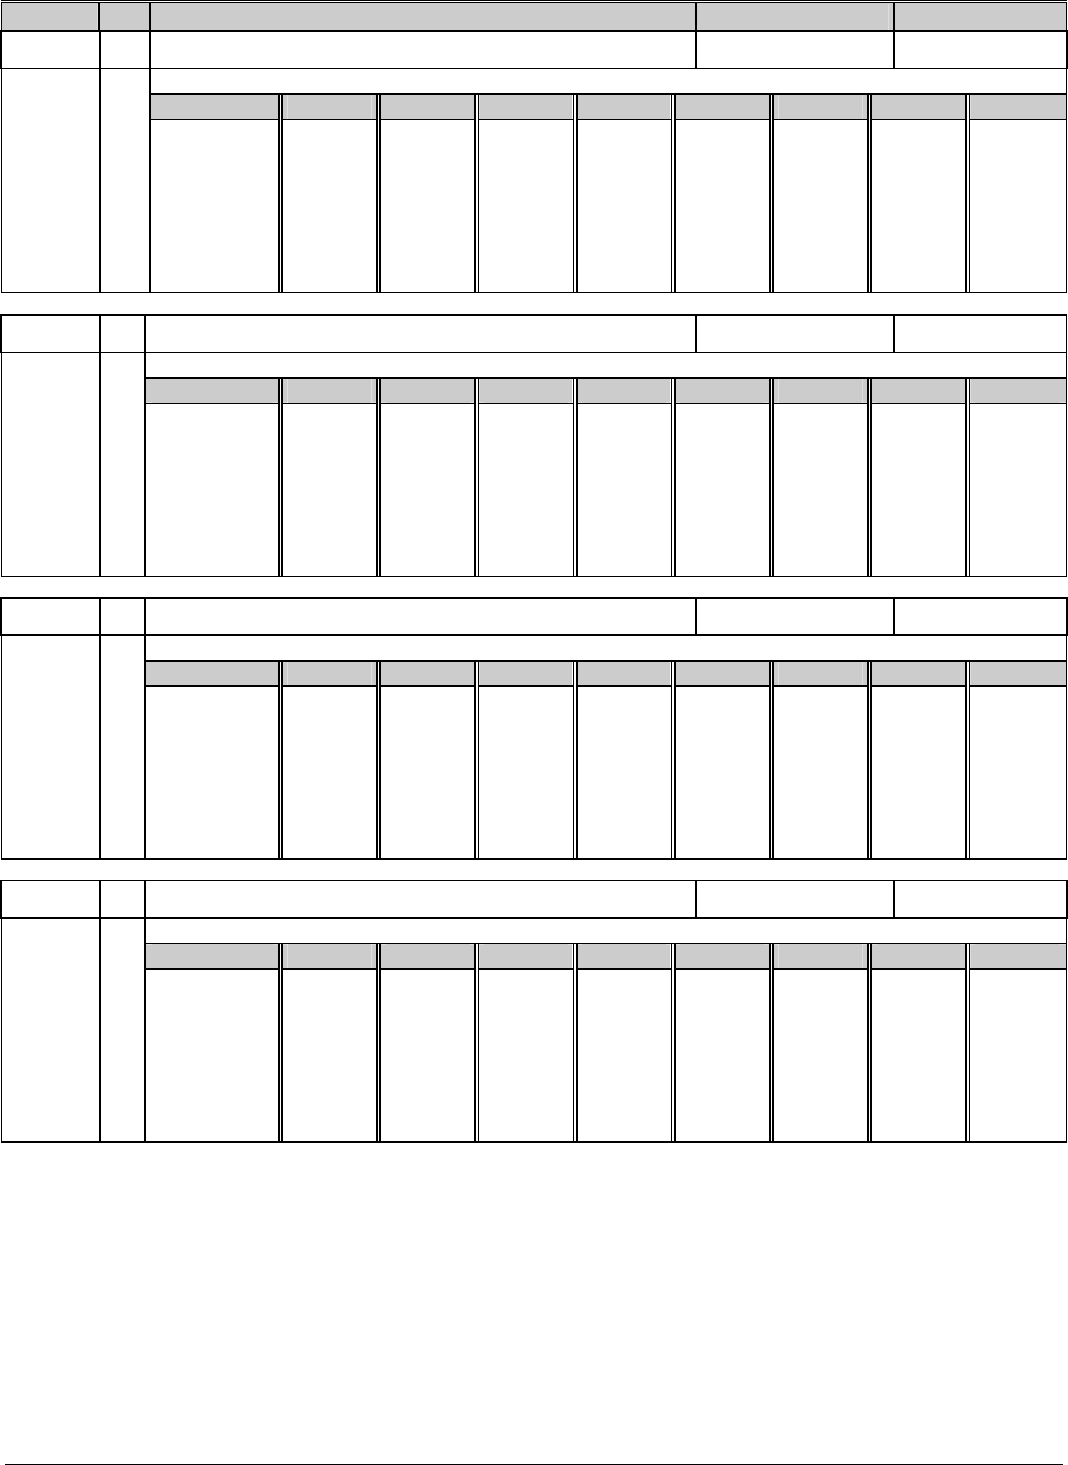
NX-8E-CF CONTROL
48
LOC PG DESCRIPTION DEFAULT DATA
L178 32 ZONES 81-88, ZONE TYPES 6-6-6-6-6-6-6-6 _ _ _ _ _ _ _ _
ZONES 81-88, PARTITION SELECTION (Segment 1=Zone 81 thru Segment 8=Zone 88)
Segments 1 2 3 4 5 6 7 8
179 32
Partition #1
Partition #2
Partition #3
Partition #4
Partition #5
Partition #6
Partition #7
Partition #8
1
2
3
4
5
6
7
8
1
2
3
4
5
6
7
8
1
2
3
4
5
6
7
8
1
2
3
4
5
6
7
8
1
2
3
4
5
6
7
8
1
2
3
4
5
6
7
8
1
2
3
4
5
6
7
8
1
2
3
4
5
6
7
8
L180 32 ZONES 89-96, ZONE TYPES 6-6-6-6-6-6-6-6 _ _ _ _ _ _ _ _
ZONES 89-96, PARTITION SELECTION (Segment 1=Zone 89 thru Segment 8=Zone 96)
Segments 1 2 3 4 5 6 7 8
181 32
Partition #1
Partition #2
Partition #3
Partition #4
Partition #5
Partition #6
Partition #7
Partition #8
1
2
3
4
5
6
7
8
1
2
3
4
5
6
7
8
1
2
3
4
5
6
7
8
1
2
3
4
5
6
7
8
1
2
3
4
5
6
7
8
1
2
3
4
5
6
7
8
1
2
3
4
5
6
7
8
1
2
3
4
5
6
7
8
L182 32 ZONES 97-104, ZONE TYPES 6-6-6-6-6-6-6-6 _ _ _ _ _ _ _ _
ZONES 97-104, PARTITION SELECTION (Segment 1=Zone 97 thru Segment 8=Zone 104)
Segments 1 2 3 4 5 6 7 8
183 33
Partition #1
Partition #2
Partition #3
Partition #4
Partition #5
Partition #6
Partition #7
Partition #8
1
2
3
4
5
6
7
8
1
2
3
4
5
6
7
8
1
2
3
4
5
6
7
8
1
2
3
4
5
6
7
8
1
2
3
4
5
6
7
8
1
2
3
4
5
6
7
8
1
2
3
4
5
6
7
8
1
2
3
4
5
6
7
8
L184 33 ZONES 105-112, ZONE TYPES 6-6-6-6-6-6-6-6 _ _ _ _ _ _ _ _
ZONES 105-112, PARTITION SELECTION (Segment 1=Zone 105 thru Segment 8=Zone 112)
Segments 1 2 3 4 5 6 7 8
185 33
Partition #1
Partition #2
Partition #3
Partition #4
Partition #5
Partition #6
Partition #7
Partition #8
1
2
3
4
5
6
7
8
1
2
3
4
5
6
7
8
1
2
3
4
5
6
7
8
1
2
3
4
5
6
7
8
1
2
3
4
5
6
7
8
1
2
3
4
5
6
7
8
1
2
3
4
5
6
7
8
1
2
3
4
5
6
7
8
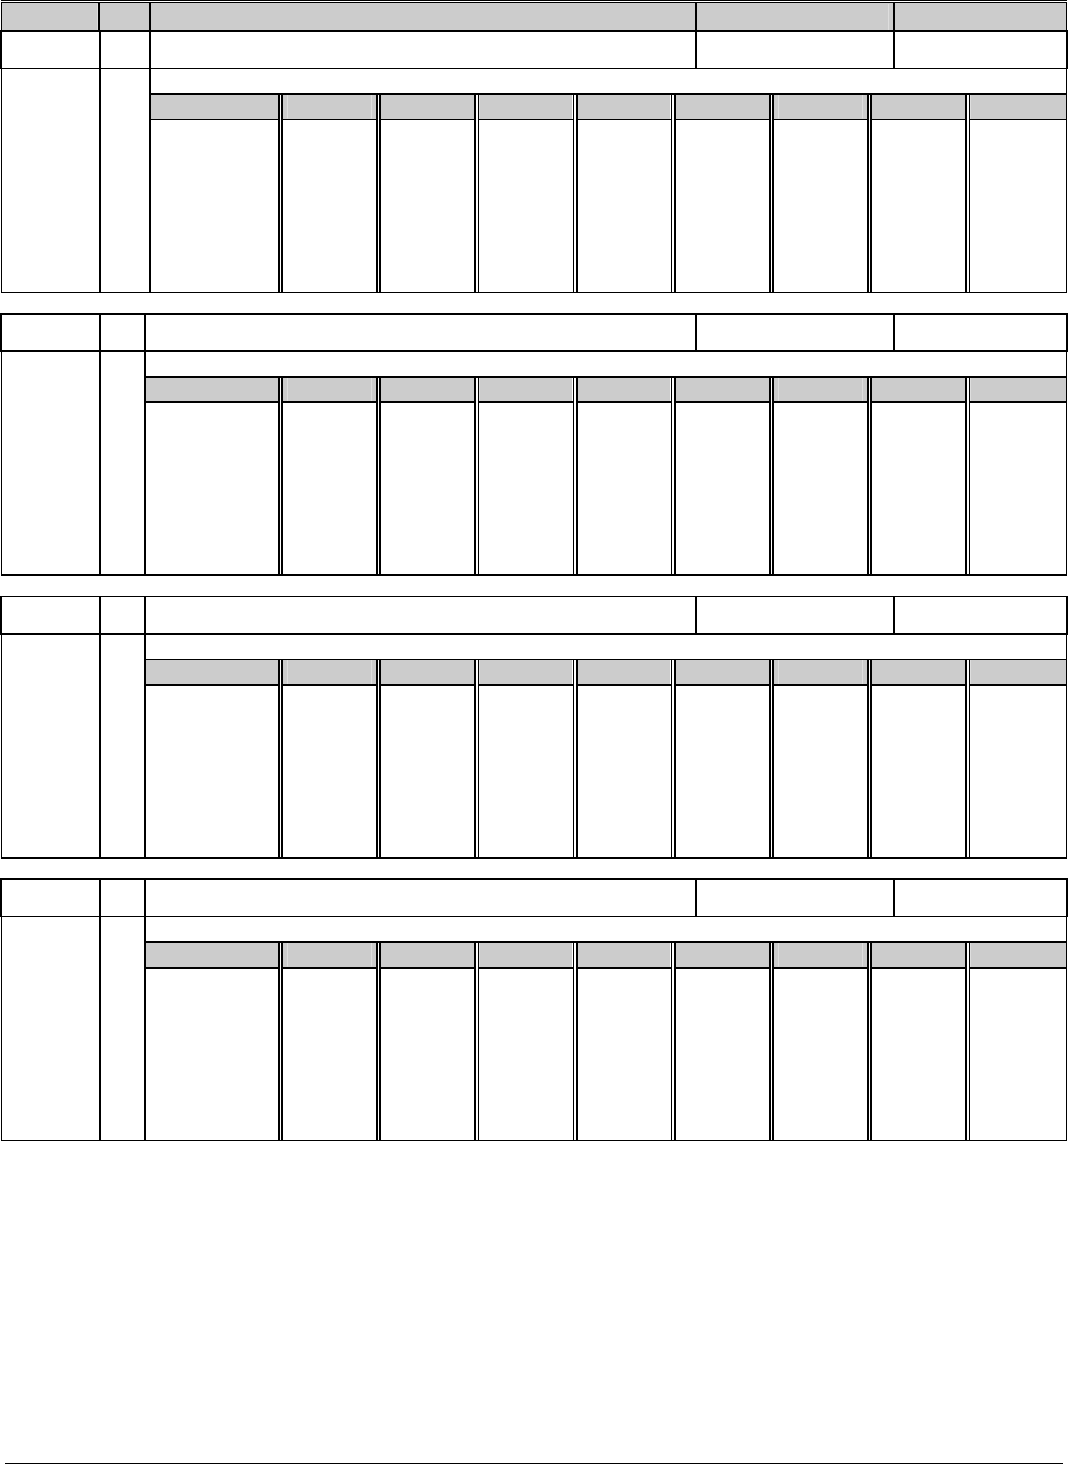
NX-8E-CF CONTROL 49
LOC PG DESCRIPTION DEFAULT DATA
L186 33 ZONES 113-120, ZONE TYPES 6-6-6-6-6-6-6-6 _ _ _ _ _ _ _ _
ZONES 113-120, PARTITION SELECTION (Segment 1=Zone 113 thru Segment 8=Zone 120)
Segments 1 2 3 4 5 6 7 8
187 33
Partition #1
Partition #2
Partition #3
Partition #4
Partition #5
Partition #6
Partition #7
Partition #8
1
2
3
4
5
6
7
8
1
2
3
4
5
6
7
8
1
2
3
4
5
6
7
8
1
2
3
4
5
6
7
8
1
2
3
4
5
6
7
8
1
2
3
4
5
6
7
8
1
2
3
4
5
6
7
8
1
2
3
4
5
6
7
8
L188 33 ZONES 121-128, ZONE TYPES 6-6-6-6-6-6-6-6 _ _ _ _ _ _ _ _
ZONES 121-128, PARTITION SELECTION (Segment 1=Zone 121 thru Segment 8=Zone 128)
Segments 1 2 3 4 5 6 7 8
189 33
Partition #1
Partition #2
Partition #3
Partition #4
Partition #5
Partition #6
Partition #7
Partition #8
1
2
3
4
5
6
7
8
1
2
3
4
5
6
7
8
1
2
3
4
5
6
7
8
1
2
3
4
5
6
7
8
1
2
3
4
5
6
7
8
1
2
3
4
5
6
7
8
1
2
3
4
5
6
7
8
1
2
3
4
5
6
7
8
L190 33 ZONES 129-136, ZONE TYPES 6-6-6-6-6-6-6-6 _ _ _ _ _ _ _ _
ZONES 129-136, PARTITION SELECTION (Segment 1=Zone 129 thru Segment 8=Zone 136)
Segments 1 2 3 4 5 6 7 8
191 33
Partition #1
Partition #2
Partition #3
Partition #4
Partition #5
Partition #6
Partition #7
Partition #8
1
2
3
4
5
6
7
8
1
2
3
4
5
6
7
8
1
2
3
4
5
6
7
8
1
2
3
4
5
6
7
8
1
2
3
4
5
6
7
8
1
2
3
4
5
6
7
8
1
2
3
4
5
6
7
8
1
2
3
4
5
6
7
8
L192 33 ZONES 137-144, ZONE TYPES 6-6-6-6-6-6-6-6 _ _ _ _ _ _ _ _
ZONES 137-144, PARTITION SELECTION (Segment 1=Zone 137 thru Segment 8=Zone 144)
Segments 1 2 3 4 5 6 7 8
193 34
Partition #1
Partition #2
Partition #3
Partition #4
Partition #5
Partition #6
Partition #7
Partition #8
1
2
3
4
5
6
7
8
1
2
3
4
5
6
7
8
1
2
3
4
5
6
7
8
1
2
3
4
5
6
7
8
1
2
3
4
5
6
7
8
1
2
3
4
5
6
7
8
1
2
3
4
5
6
7
8
1
2
3
4
5
6
7
8
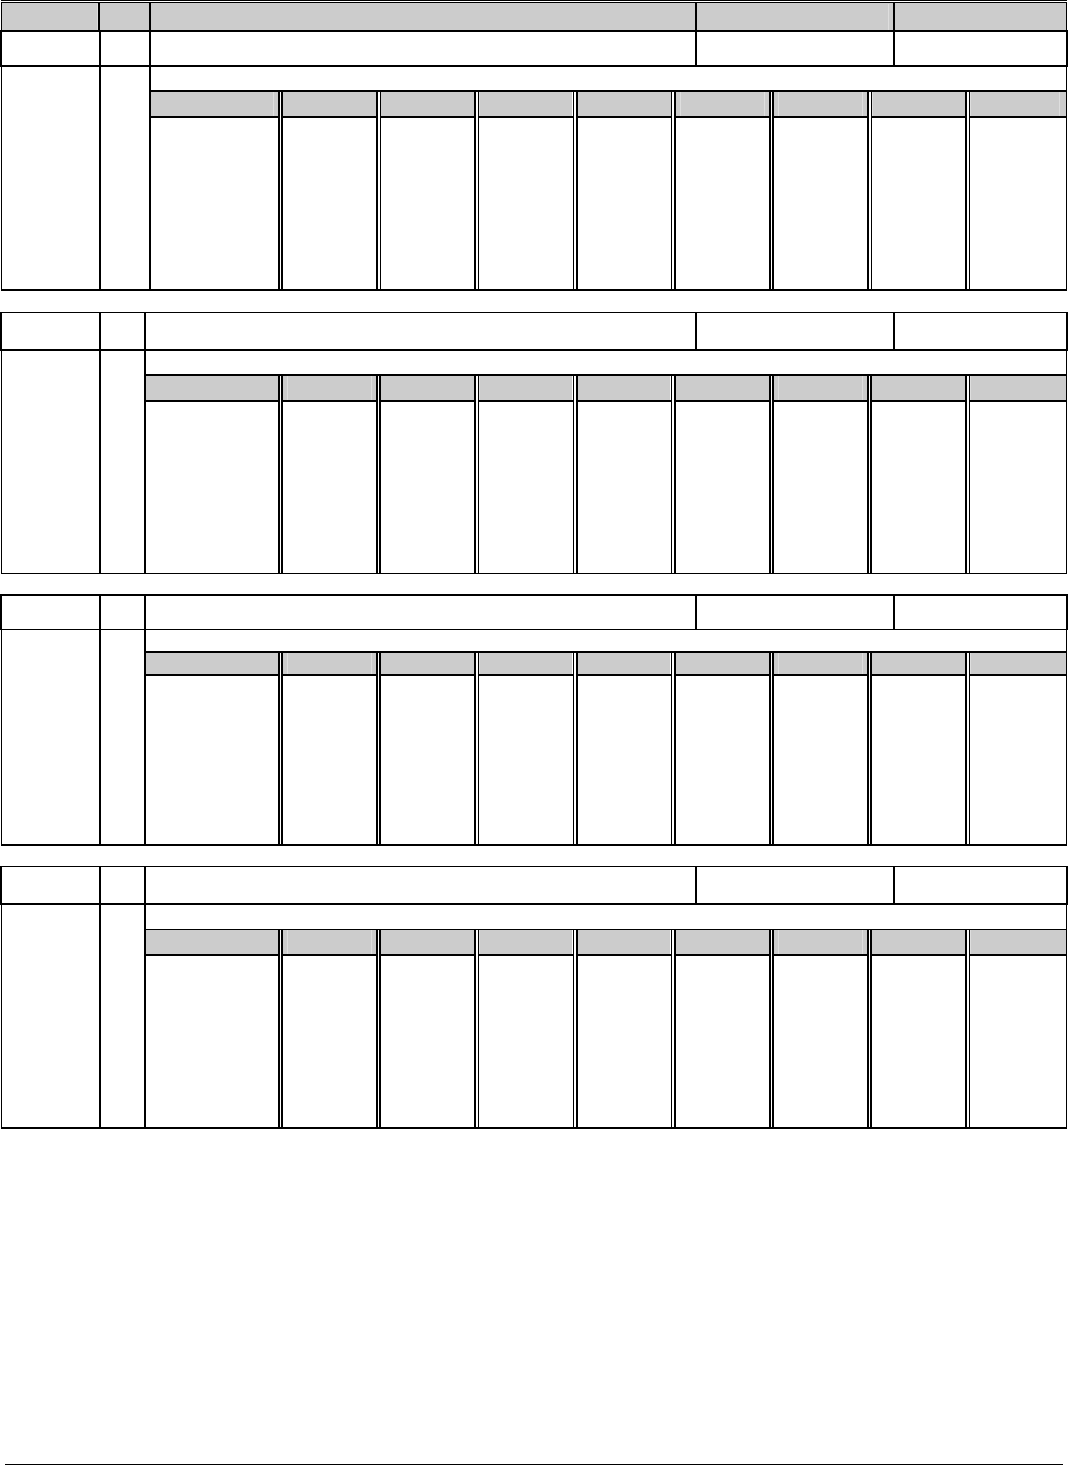
NX-8E-CF CONTROL
50
LOC PG DESCRIPTION DEFAULT DATA
L194 34 ZONES 145-152, ZONE TYPES 6-6-6-6-6-6-6-6 _ _ _ _ _ _ _ _
ZONES 145-152, PARTITION SELECTION (Segment 1=Zone 145 thru Segment 8=Zone 152)
Segments 1 2 3 4 5 6 7 8
195 34
Partition #1
Partition #2
Partition #3
Partition #4
Partition #5
Partition #6
Partition #7
Partition #8
1
2
3
4
5
6
7
8
1
2
3
4
5
6
7
8
1
2
3
4
5
6
7
8
1
2
3
4
5
6
7
8
1
2
3
4
5
6
7
8
1
2
3
4
5
6
7
8
1
2
3
4
5
6
7
8
1
2
3
4
5
6
7
8
L196 34 ZONES 153-160, ZONE TYPES 6-6-6-6-6-6-6-6 _ _ _ _ _ _ _ _
ZONES 153-160, PARTITION SELECTION (Segment 1=Zone 153 thru Segment 8=Zone 160)
Segments 1 2 3 4 5 6 7 8
197 34
Partition #1
Partition #2
Partition #3
Partition #4
Partition #5
Partition #6
Partition #7
Partition #8
1
2
3
4
5
6
7
8
1
2
3
4
5
6
7
8
1
2
3
4
5
6
7
8
1
2
3
4
5
6
7
8
1
2
3
4
5
6
7
8
1
2
3
4
5
6
7
8
1
2
3
4
5
6
7
8
1
2
3
4
5
6
7
8
L198 34 ZONES 161-168, ZONE TYPES 6-6-6-6-6-6-6-6 _ _ _ _ _ _ _ _
ZONES 161-168, PARTITION SELECTION (Segment 1=Zone 161 thru Segment 8=Zone 168)
Segments 1 2 3 4 5 6 7 8
199 34
Partition #1
Partition #2
Partition #3
Partition #4
Partition #5
Partition #6
Partition #7
Partition #8
1
2
3
4
5
6
7
8
1
2
3
4
5
6
7
8
1
2
3
4
5
6
7
8
1
2
3
4
5
6
7
8
1
2
3
4
5
6
7
8
1
2
3
4
5
6
7
8
1
2
3
4
5
6
7
8
1
2
3
4
5
6
7
8
L200 34 ZONES 169-176, ZONE TYPES 6-6-6-6-6-6-6-6 _ _ _ _ _ _ _ _
ZONES 169-176, PARTITION SELECTION (Segment 1=Zone 169 thru Segment 8=Zone 176)
Segments 1 2 3 4 5 6 7 8
201 34
Partition #1
Partition #2
Partition #3
Partition #4
Partition #5
Partition #6
Partition #7
Partition #8
1
2
3
4
5
6
7
8
1
2
3
4
5
6
7
8
1
2
3
4
5
6
7
8
1
2
3
4
5
6
7
8
1
2
3
4
5
6
7
8
1
2
3
4
5
6
7
8
1
2
3
4
5
6
7
8
1
2
3
4
5
6
7
8
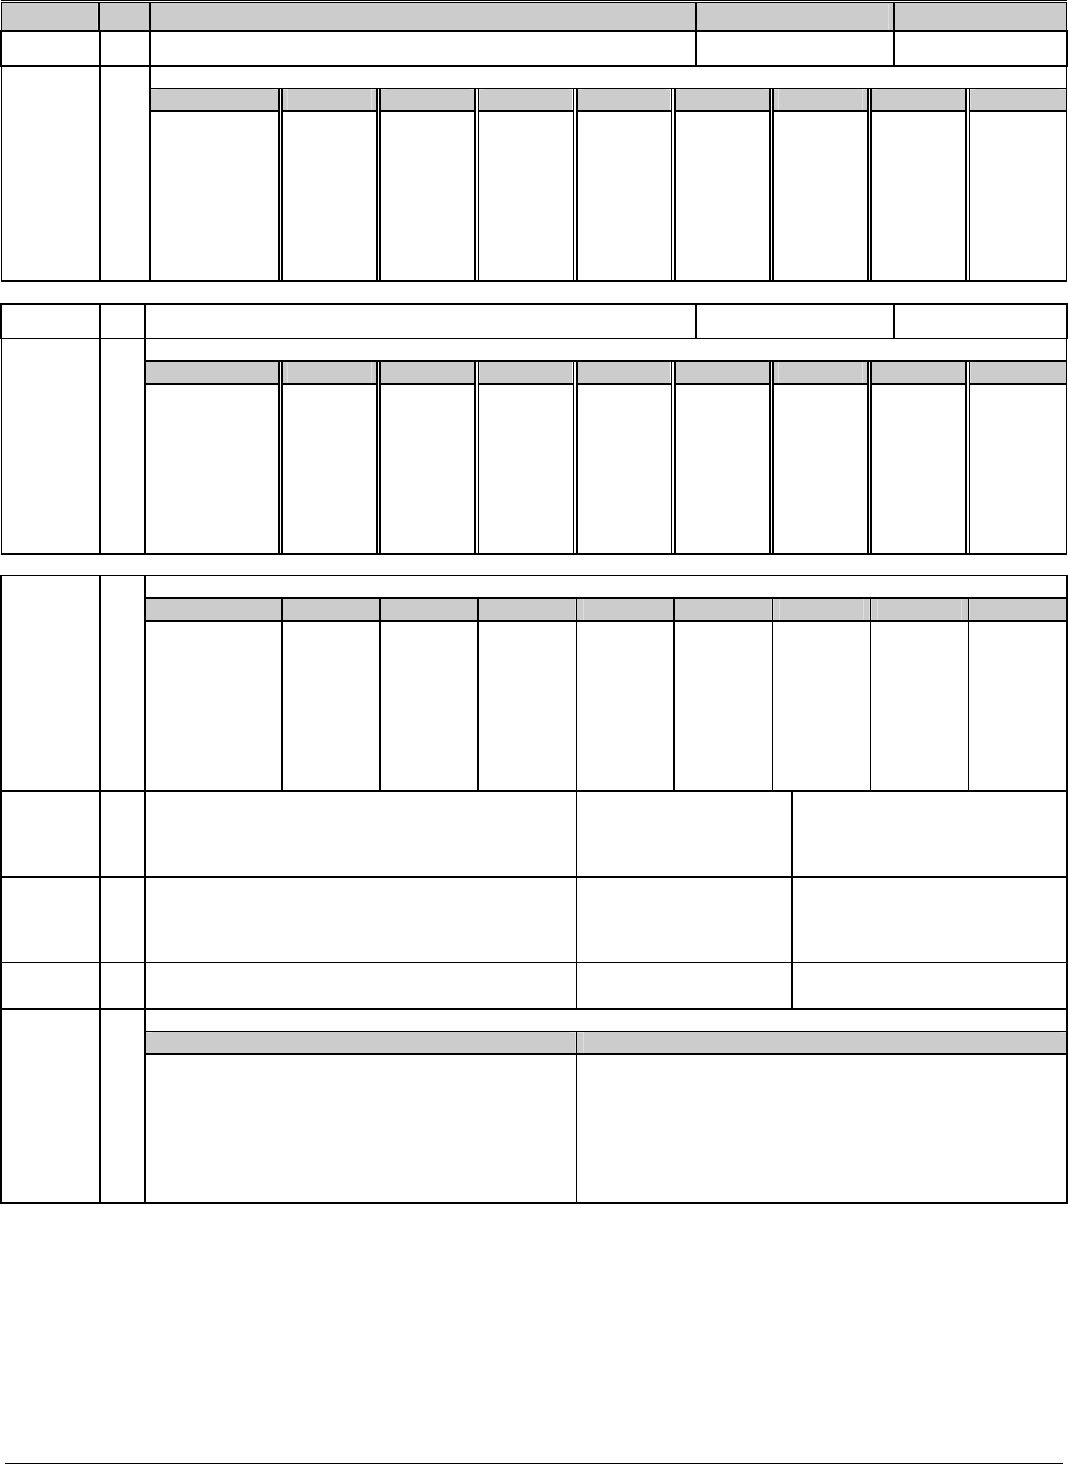
NX-8E-CF CONTROL 51
LOC PG DESCRIPTION DEFAULT DATA
L202 34 ZONES 177-184, ZONE TYPES 6-6-6-6-6-6-6-6 _ _ _ _ _ _ _ _
ZONES 177-184, PARTITION SELECTION (Segment 1=Zone 177 thru Segment 8=Zone 184)
Segments 1 2 3 4 5 6 7 8
203 35
Partition #1
Partition #2
Partition #3
Partition #4
Partition #5
Partition #6
Partition #7
Partition #8
1
2
3
4
5
6
7
8
1
2
3
4
5
6
7
8
1
2
3
4
5
6
7
8
1
2
3
4
5
6
7
8
1
2
3
4
5
6
7
8
1
2
3
4
5
6
7
8
1
2
3
4
5
6
7
8
1
2
3
4
5
6
7
8
L204 35 ZONES 185-192, ZONE TYPES 6-6-6-6-6-6-6-6 _ _ _ _ _ _ _ _
ZONES 185-192, PARTITION SELECTION (Segment 1=Zone 185 thru Segment 8=Zone 192)
Segments 1 2 3 4 5 6 7 8
205 35
Partition #1
Partition #2
Partition #3
Partition #4
Partition #5
Partition #6
Partition #7
Partition #8
1
2
3
4
5
6
7
8
1
2
3
4
5
6
7
8
1
2
3
4
5
6
7
8
1
2
3
4
5
6
7
8
1
2
3
4
5
6
7
8
1
2
3
4
5
6
7
8
1
2
3
4
5
6
7
8
1
2
3
4
5
6
7
8
DAYS OF THE WEEK "AUTO DISARMING" WILL OCCUR IN PARTITIONS 1-8
Segments 1 2 3 4 5 6 7 8
206 35
Sunday
Monday
Tuesday
Wednesday
Thursday
Friday
Saturday
Reserved
1
2
3
4
5
6
7
8
1
2
3
4
5
6
7
8
1
2
3
4
5
6
7
8
1
2
3
4
5
6
7
8
1
2
3
4
5
6
7
8
1
2
3
4
5
6
7
8
1
2
3
4
5
6
7
8
1
2
3
4
5
6
7
8
SERIAL PORT ENABLE 0 _ 207 35
0 = Disabled
1 = Home Automation Protocol Enabled
2 = Serial Printer Mode
SERIAL PORT BAUD RATE 2 208 35
0 = 2400 (2.4K)
1 = 4800 (4.8K)
2 = 9600 (9.6K)
3 = 19200 (19.2K)
4 = 38400 (38.4K)
5-7 = Reserved
HOME AUTOMATION PROTOCOL Off 209 35
LED Off = Binary LED On = ASCII
NX8E TRANSITION-BASED BROADCASTS
Segment #1 Segment #2
210 35
1 = Reserved
2 = Interface Configuration
3-4 = Reserved
5 = Zone Status Message
6 = Zones Snapshot Message
7 = Partition Status Message
8 = Partitions Snapshot Message
1 = System Status Message
2 = X-10 Message Received
3 = Log Event Message
4 = Keypad Message Received
5 –8 = Reserved
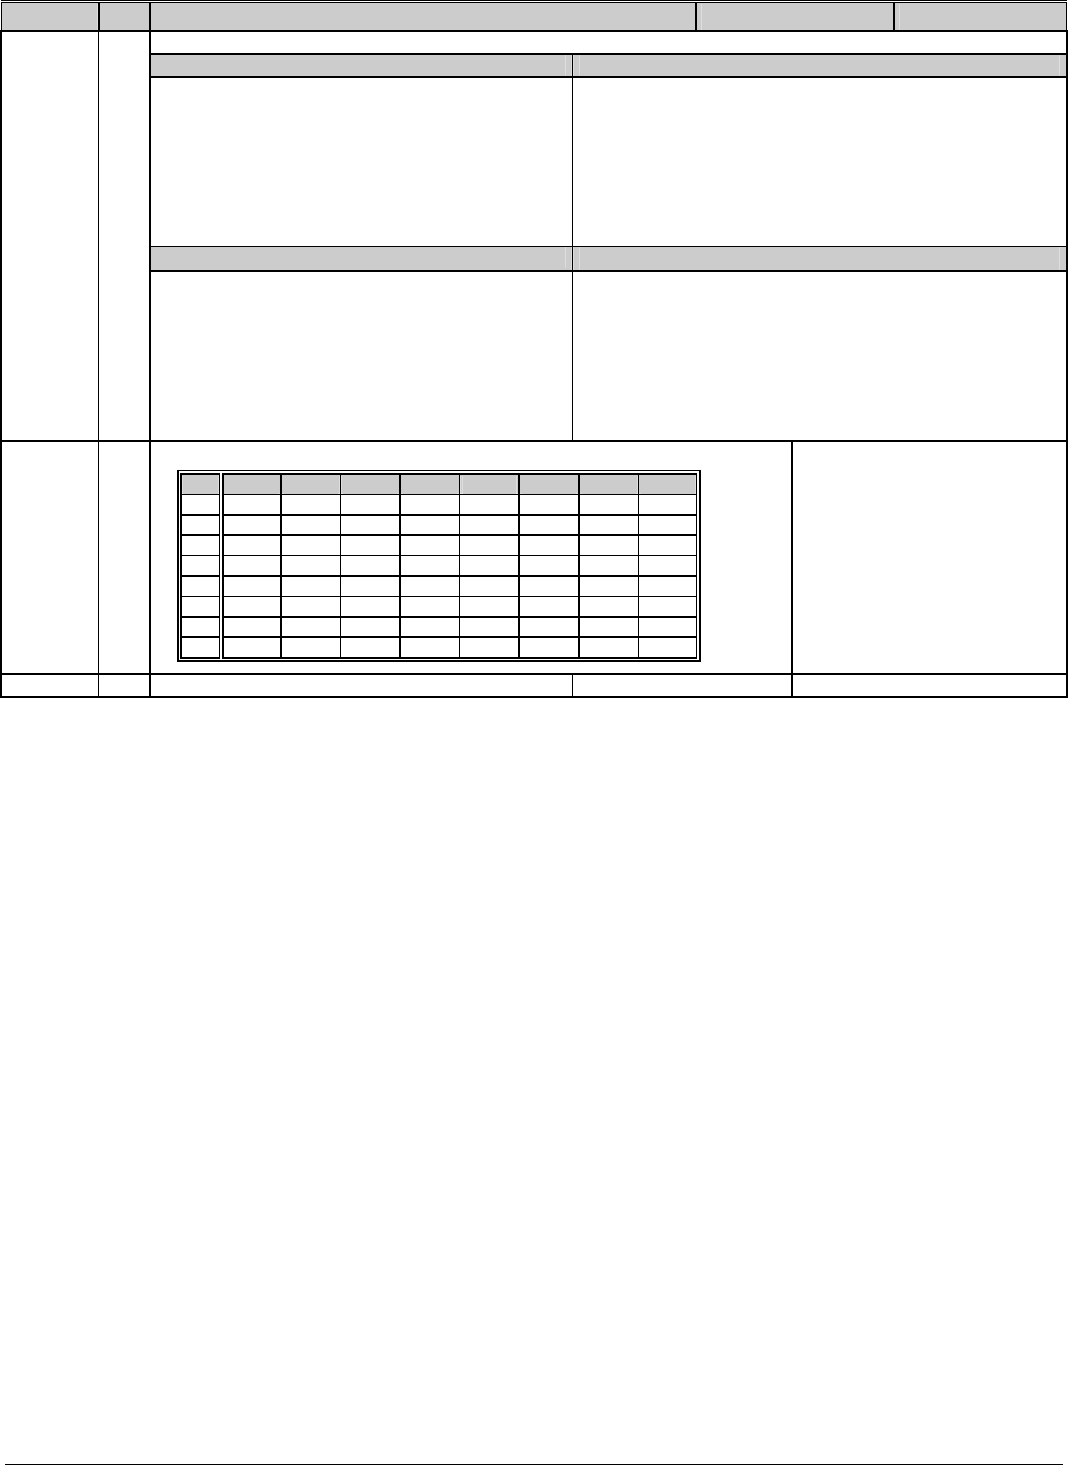
NX-8E-CF CONTROL
52
LOC PG DESCRIPTION DEFAULT DATA
NX-584 COMMAND/REQUEST ENABLE
Segment #1 Segment #2
1 = Reserved
2 = Interface Configuration Request
3 = Reserved
4 = Zone Name Request
5 = Zone Status Request
6 = Zones Snapshot Request
7 = Partition Status Request
8 = Partitions Snapshot Request
1 = System Status Request
2 = Send X-10 Message
3 = Log Event Request
4 = Send Keypad Text Message
5 = Keypad Terminal Mode Request
6-8 = Reserved
Segment #3 Segment #4
211 36
1 = Program Data Request
2 = Program Data Command
3 = User Information Request with PIN
4 = User Information Request without PIN
5 = Set User Code Command with PIN
6 = Set User Code Command without PIN
7 = Set User Authorization Comm with PIN
8 = Set User Authorization Comm without PIN
1-2 = Reserved
3 = Store Communication Event Command
4 = Set Clock / Calendar Command
5 = Primary Keypad Function with PIN
6 = Primary Keypad Function without PIN
7 = Secondary Keypad Function
8 = Zone Bypass Toggle
212 36 LCD KEYPAD ADDRESS FOR NX-584
192
213 RESERVED
KP PART 1 PART 2 PART 3 PART 4 PART 5 PART 6 PART 7 PART 8
1 192 193 194 195 196 197 198 199
2 200 201 202 203 204 205 206 207
3 208 209 210 211 212 213 214 215
4 216 217 218 219 220 221 222 223
5 224 225 226 227 228 229 230 231
6 232 233 234 235 236 237 238 239
7 240 241 242 243 244 245 246 247
8 248 249 250 251 252 253 254 255
NX-8E-CF CONTROL 53
ZONE WORKSHEET
1 49 97 145
2 50 98 146
3 51 99 147
4 52 100 148
5 53 101 149
6 54 102 150
7 55 103 151
8 56 104 152
9 57 105 153
10 58 106 154
11 59 107 155
12 60 108 156
13 61 109 157
14 62 110 158
15 63 111 159
16 64 112 160
17 65 113 161
18 66 114 162
19 67 115 163
20 68 116 164
21 69 117 165
22 70 118 166
23 71 119 167
24 72 120 168
25 73 121 169
26 74 122 170
27 75 123 171
28 76 124 172
29 77 125 173
30 78 126 174
31 79 127 175
32 80 128 176
33 81 129 177
34 82 130 178
35 83 131 179
36 84 132 180
37 85 133 181
38 86 134 182
39 87 135 183
40 88 136 184
41 89 137 185
42 90 138 186
43 91 139 187
44 92 140 188
45 93 141 189
46 94 142 190
47 95 143 191
48 96 144 192

NX-8E-CF CONTROL
54
XV. APPENDIX 1
REPORTING FIXED CODES IN CONTACT ID AND SIA
The table lists the event codes sent for the following reports (if enabled) when using CONTACT ID or SIA formats.
REPORT CONTACT ID SIA
MANUAL TEST............................................................................................................................... 601 ..................................................................RX
AUTOTEST.......................................................................................................................................602..................................................................RP
AUTOTEST – OFF NORMAL ......................................................................................................608..................................................................RY
OPEN (user number)...................................................................................................................401..................................................................OP
CLOSE (user number).................................................................................................................401..................................................................CL
CANCEL (user number) .............................................................................................................406..................................................................OC
START PROGRAM.........................................................................................................................627..................................................................LB
END PROGRAM.............................................................................................................................628..................................................................LX
GROUND FAULT...........................................................................................................................310..................................................................GF
GROUND FAULT RESTORE.......................................................................................................310..................................................................GK
RECENT CLOSE (user number)...............................................................................................401..................................................................CR
EXIT ERROR (user number) ......................................................................................................457 ..................................................................EE
EVENT LOG FULL .........................................................................................................................605..................................................................JL
FAIL TO COMMUNICATE ...........................................................................................................354..................................................................RT
EXPANDER TROUBLE (device number)...............................................................................333..................................................................ET
EXPANDER RESTORE (device number) ...............................................................................333..................................................................ER
TELEPHONE FAULT .....................................................................................................................351..................................................................LT
TELEPHONE RESTORE................................................................................................................351..................................................................LR
SIREN TAMPER (device number) ...........................................................................................321..................................................................YA
SIREN RESTORE (device number) .........................................................................................321..................................................................YH
AUX POWER OVER CURRENT (device number)...............................................................312..................................................................YP
AUX POWER RESTORE (device number) ............................................................................312..................................................................YQ
LOW BATTERY (device number) ............................................................................................309..................................................................YT
LOW BATTERY RESTORE (device number) ........................................................................309..................................................................YR
AC FAIL (device number)..........................................................................................................301..................................................................AT
AC RESTORE (device number)................................................................................................301..................................................................AR
BOX TAMPER (device number)...............................................................................................137 ..................................................................TA
BOX TAMPER RESTORE (device number)........................................................................... 137 ..................................................................TR
KEYPAD TAMPER..........................................................................................................................137..................................................................TA
KEYPAD PANIC (audible)...........................................................................................................120..................................................................PA
KEYPAD PANIC (silent) ...............................................................................................................121..................................................................HA
DURESS............................................................................................................................................121..................................................................HA
KEYPAD AUXILIARY 1 .................................................................................................................110..................................................................FA
KEYPAD AUXILIARY 2 .................................................................................................................100..................................................................MA
RF SENSOR LOST (zone number) ..........................................................................................381 ..................................................................*T
RF SENSOR RESTORE (zone number)..................................................................................381..................................................................*R
SENSOR LOW BATTERY (zone number)..............................................................................384..................................................................XT
SENSOR BATTERY RESTORE (zone number)..................................................................... 384 ..................................................................XR
ZONE SPRINKLER SUPERVISORY...........................................................................................200..................................................................SS
ZONE SPRINKLER SUPERVISORY RESTORE.......................................................................200..................................................................SR
ZONE TROUBLE (zone number).............................................................................................380..................................................................*T
ZONE TROUBLE RESTORE (zone number).........................................................................380..................................................................*R
ZONE TAMPER (zone number)................................................................................................137..................................................................TA
ZONE TAMPER RESTORE (zone number)............................................................................137..................................................................TR
ZONE BYPASS (zone number).................................................................................................570..................................................................*B
BYPASS RESTORE (zone number) .........................................................................................570 ..................................................................*U
THE NUMBER IN PARENTHESES FOLLOWING THE EVENT IS THE NUMBER THAT WILL BE REPORTED AS THE ZONE NUMBER. IF THERE
ARE NO PARENTHESES, THE ZONE WILL BE A0". SEE PAGE 57 FOR THE DEVICE NUMBERS.
* The character transmitted in this slot will be the first character from the event code of the zone that is bypassed or in trouble. (See
locations 110 - 141)

NX-8E-CF CONTROL 55
XVI. APPENDIX 2
REPORTING ZONE CODES IN SIA OR CONTACT ID
The NX-8E-CF has the ability to report SIA level 1 transmissions to either or both phone numbers. Each report in SIA consists of an Event Code
and a Zone or User ID. The Zone ID will be the zone number that is in alarm. The event code will come from the chart below and be programmed
in the zone type event code.
Programmed Event Code SIA Code Description
0................................................................................................HA ..........................................................Holdup Alarm
1................................................................................................FA ...........................................................Fire Alarm
2................................................................................................PA...........................................................Panic alarm
3................................................................................................BA...........................................................Burglary Alarm
4 ........................................................................................BA...........................................................Burglary Alarm
5 .........................................................................................BA...........................................................Burglary Alarm
6 .........................................................................................UA ..........................................................Untyped Alarm
7 .........................................................................................BA...........................................................Burglary Alarm
8 .........................................................................................BA...........................................................Burglary Alarm
9 .........................................................................................UA ..........................................................Untyped Alarm
10 ........................................................................................HA ..........................................................Holdup Alarm
11 .............................................................................................MA..........................................................Medical Alarm
12 .............................................................................................PA...........................................................Panic alarm
13 .............................................................................................TA ...........................................................Tamper Alarm
14 .............................................................................................RP...........................................................Periodic Test
15 .............................................................................................GA ..........................................................Gas Alarm
16 .............................................................................................KA...........................................................Heat Alarm
17 .............................................................................................WA .........................................................Water Alarm
18 .............................................................................................QA ..........................................................Emergency Alarm
19 .............................................................................................SA...........................................................Sprinkler Alarm
20 .............................................................................................ZA...........................................................Freeze Alarm
21 ..............................................................................................KH ..........................................................High Temp Alarm
22 ..............................................................................................FA ...........................................................Manual Fire Alarm
23 ..............................................................................................AT / AR..................................................AC Fail / AC Restore
24 ..............................................................................................YT / YR ..................................................Low Battery / Restore
25 ..............................................................................................UT / UR.................................................System Trouble / Restore
26 ..............................................................................................ET / ER..................................................Expander Trouble / Restore

NX-8E-CF CONTROL
56
XVII. APPENDIX 3
REPORTING ZONE CODES IN CONTACT ID
The NX-8E-CF has the ability to report Ademco Contact ID transmissions. Each report in Contact ID consists of an Event Code and a Zone ID. The
zone ID is the zone that created the alarm. The event code will come from the chart below and be programmed in the zone type event code.
Programmed Event Code Contact ID Code Description
0........................................................................................122................................................................Silent Panic
1........................................................................................110................................................................Fire Alarm
2........................................................................................120................................................................Panic alarm
3........................................................................................130................................................................Burglary Alarm
4........................................................................................131................................................................Perimeter Alarm
5........................................................................................132................................................................Interior Alarm
6........................................................................................133................................................................24 Hour Burglary
7........................................................................................134................................................................Entry Alarm
8........................................................................................135................................................................Day/Night Alarm
9........................................................................................150................................................................Non Burglary 24 Hour
10 ......................................................................................121................................................................Duress Alarm
11 ......................................................................................100................................................................Medical Alarm
12 ......................................................................................123................................................................Audible Panic Alarm
13 ......................................................................................137................................................................Tamper Alarm
14 ......................................................................................602................................................................Periodic Test
15 ......................................................................................151................................................................Gas Detected
16 ......................................................................................158................................................................High Temp
17 ......................................................................................154................................................................Water Leakage
18 ......................................................................................140................................................................General Alarm
19 ......................................................................................140................................................................General Alarm
20 ......................................................................................159................................................................Low Temp
21 ......................................................................................158................................................................High Temp Alarm
22 ......................................................................................115................................................................Manual Fire Alarm
23 ......................................................................................301................................................................AC Fail / AC Restore
24 ......................................................................................302................................................................Low Battery / Restore
25 ......................................................................................300................................................................System Trouble / Restore
26 ......................................................................................330................................................................Expander Trouble / Restore
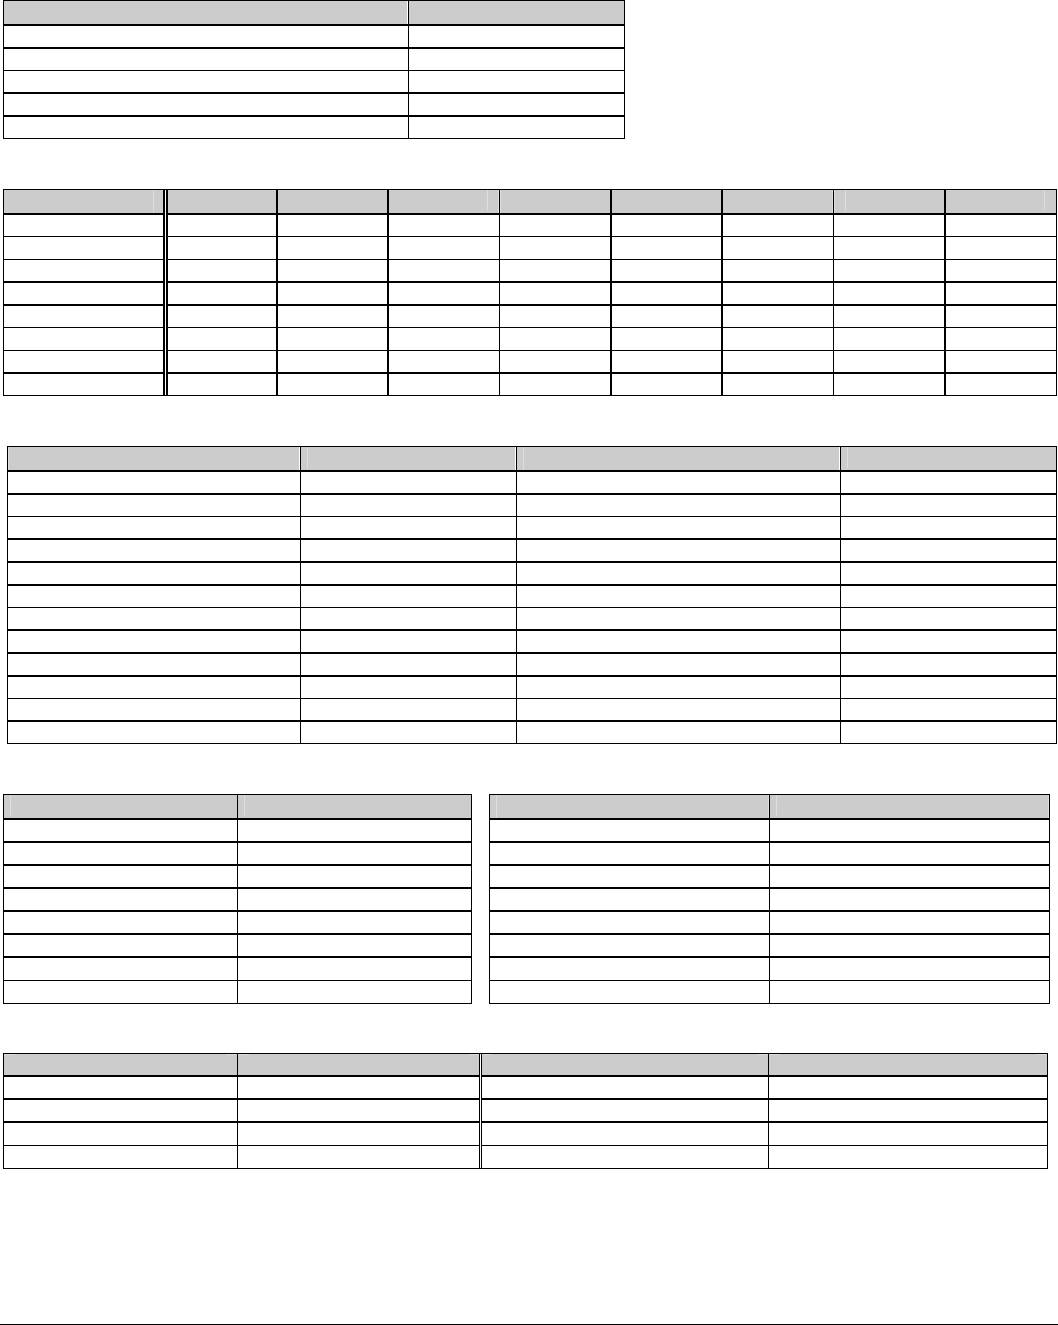
NX-8E-CF CONTROL 57
XVIII. APPENDIX 4
EXPANDER NUMBERS FOR REPORTING EXPANDER TROUBLE
The tables below list the device numbers that will be reported for trouble conditions.
Device Device # reported
NX-8E-CF Control Panel 0 See page 54 for possible report codes.
NX-534E Two Way Listen-In 64
NX-540E “Operator” 40
NX-591E Cellemetry Interface 76
NX-870E Fire Supervision 9
KEYPADS
KEYPAD PART 1 PART 2 PART 3 PART 4 PART 5 PART 6 PART 7 PART 8
1 192 193 194 195 196 197 198 199
2 200 201 202 203 204 205 206 207
3 208 209 210 211 212 213 214 215
4 216 217 218 219 220 221 222 223
5 224 225 226 227 228 229 230 231
6 232 233 234 235 236 237 238 239
7 240 241 242 243 244 245 246 247
8 248 249 250 251 252 253 254 255
HARDWIRE EXPANDER (NX-216E)
Starting zone number Expander # reported Starting zone number Expander # reported
Zone 09 (All switches off) 22 Zone 97 (Switches 3 & 4 on) 100
Zone 09 (Switch 1 on) 23 Zone 105 (Switches 1, 3 & 4 on) 101
Zone 17 (Switch 2 on) 16 Zone 113 (Switches 2, 3 & 4 on) 102
Zone 25 (Switches 1 & 2 on) 17 Zone 121 (Switches 1, 2, 3 & 4 on) 103
Zone 33 (Switch 3 on) 18 Zone 129 (Switch 5 on) 104
Zone 41 (Switches 1 & 3 on) 19 Zone 137 (Switches 1 & 5 on) 105
Zone 49 (Switches 2 & 3 on) 20 Zone 145 (Switches 2 & 5 on) 106
Zone 57 (Switches 1, 2 & 3 on) 21 Zone 153 (Switches 1, 2 & 5 on) 107
Zone 65 (Switch 4 on) 96 Zone 161 (Switches 3 & 5 on) 108
Zone 73 (Switches 1 & 4 on) 97 Zone 169 (Switches 1, 3 & 5 on) 109
Zone 81 (Switches 2 & 4 on) 98 Zone 177 (Switches 2, 3 & 5 on) 110
Zone 89 (Switches 1, 2 & 4 on) 99 Zone 185 (Switches 1, 2, 3 & 5 on) 111
REMOTE POWER SUPPLY (NX-320E) WIRELESS RECEIVER (NX-448E)
Switch Setting Address Switch Setting Expander # reported
All switches off 84 All switches off 35
Switch 1 on 85 Switch 1 on 36
Switch 2 on 86 Switch 2 on 37
Switch 1 & 2 on 87 Switches 1 & 2 on 38
Switch 3 on 88 Switch 3 on 39
Switch 1 & 3 on 89 Switches 1 & 3 on 32
Switch 2 & 3 on 90 Switches 2 & 3 on 33
Switches 1, 2, & 3 on 91 Switch 1, 2 & 3 on 34
OUTPUT MODULE (NX-508E)
Switch Setting Address Switch Setting Address
Switch 1 & 2 on 24 Switch 1,2,&3 on 28
Switch 3 on 25 All switches off 29
Switch 1 & 3 on 26 Switch 1 on 30
Switch 2 & 3 on 27 Switch 2 on 31

NX-8E-CF CONTROL
58
XIX. TELEPHONE COMPANY INTERFACE INFORMATION
TELEPHONE CONNECTION REQUIREMENTS
Except for telephone company provided ringers, all connections to the telephone network shall be made through standard plugs and
standard telephone company provided jacks or equivalent in such a manner as to allow for immediate disconnection of the terminal
equipment. Standard jacks shall be so arranged that if the plug connected thereto is withdrawn, no interference to the operation of the
equipment at the customer’s premises, which remains connected to the telephone network, shall occur by reason of such withdrawal.
INCIDENCE OF HARM
Should terminal equipment or protective circuitry cause harm to the telephone network, the telephone company shall, where
practical, notify the customer that temporary discontinuance of service may be required. However, where prior notice is not
practical, the telephone company may temporarily discontinue service if such action is deemed reasonable in the
circumstances. In the case of such temporary discontinuance, the telephone company shall promptly notify the customer
who will be given the opportunity to correct the situation. The customer also has the right to bring a complaint to the FCC if he
feels the disconnection is not warranted.
CHANGES IN TELEPHONE COMPANY EQUIPMENT OR FACILITIES
The telephone company may make changes in its communications facilities, equipment, operations, or procedures where
such action is reasonably required and proper in its business. Should any such change render the customers terminal
equipment incompatible with the telephone company facilities, the customer shall be given adequate notice to make
modifications to maintain uninterrupted service.
GENERAL
The FCC prohibits customer-provided terminal equipment to be connected to party lines.
IMPORTANCE OF THE RINGER EQUIVALENCE NUMBER
The Ringer Equivalence Number (REN) of this device is 0.1B. This number is a representation of the electrical load that it applies to your
telephone line.
MALFUNCTION OF THE EQUIPMENT
In the event that the device should fail to operate properly, the customer shall disconnect the equipment from the telephone
line to determine if it is the customers’ equipment that is not functioning properly. If the problem is with the device, the
customer shall discontinue use until it is repaired.
EQUIPMENT INFORMATION
MANUFACTURER OF CONNECTING EQUIPMENT: CADDX CONTROLS, INC.
FCC REGISTRATION NUMBER: GCQUSA-31771-AL-T, RINGER EQUIVALENCE: 0.1 B
INDUSTRY CANADA INFORMATION
NOTICE: The Industry Canada label identifies certified equipment. This certification means that the equipment meets telecommunications
network protective, operational and safety requirements as prescribed in the appropriate Terminal Equipment Technical Requirements
document(s). The Department does not guarantee the equipment will operate to the user’s satisfaction.
Before installing this equipment, users should ensure that it is permissible to be connected to the facilities of the local telecommunications
company. The equipment must also be installed using an acceptable method of connection. The customer should be aware that compliance
with the above conditions might not prevent degradation of service in some situations.
Repairs to certified equipment should be coordinated by a representative designated by the supplier. Any repairs or alternations made by the
user to this equipment, or equipment malfunctions, may give the telecommunications company cause to request the user to disconnect the
equipment.
Users should ensure for their protection that the electrical ground connections of the power utility, telephone lines and internal
metallic water pipe system, if present, are connected together. This precaution may be particularly important in rural areas.
Caution: Users should not attempt to make such connections themselves, but should contact the appropriate electrical inspection authority, or
electrician, as appropriate.
The Ringer Equivalence Number (REN) of this device is 0.1B. This number is a representation of the electrical load that it applies to your
telephone line. NOTICE: The Ringer Equivalence Number (REN) assigned to each terminal device provides an indication of the maximum number
of terminals allowed to be connected to a telephone interface. The termination on an interface may consist of any combination of devices
subject only to the requirement that the sum of the Ringer Equivalence Numbers of all the devices does not exceed 5.
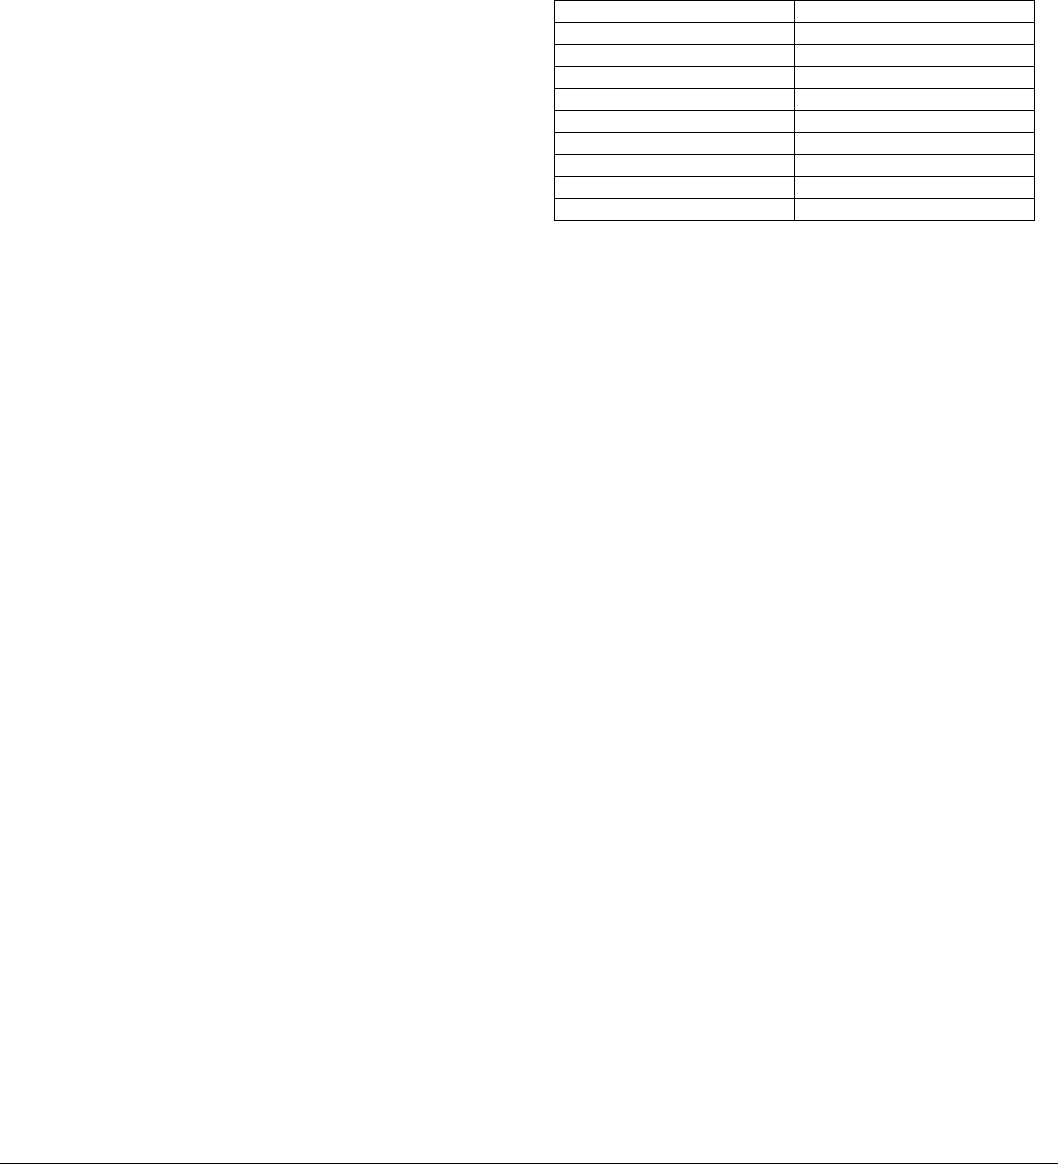
NX-8E-CF CONTROL 59
XX. NOTICES
(Applies to products which have the CE mark attached)
DECLARATION OF CONFORMITY
Manufacturer’s Name: Caddx Controls
Manufacturer’s Address: 1420 North Main Street
Gladewater Texas 75647
EU Representative: Interlogix Europe
Product Identification
Product: NetworX
Model Numbers: NX-8E-CF
Brand: CADDX
R&TTE Directive
See EMC and LVD tests below
EMC Directive
EN50081-1
EN50130-4
EN55022
EN60950
EN61000-3-2
EN61000-3-3
LVD Directive
EN 60950: 1999-4 3rd edition
Means of Conformity
We declare under our sole responsibility that this product is
in conformity with Directive 1999/5/EC (R&TTE); Directive
73/23/EEC (LVD); and Directive 89/336/EEC (EMC) and based
on test results using (non)-harmonized standards in
accordance with the Directives mentioned.
Additional Tests
This equipment has been tested and found to comply with
the following standards (which are no longer required for
compliance).
Network Compatibility Declaration
We declare under our sole responsibility that this product is
designed to work with the networks in the countries marked
with a check () and may have interworking problems with
the countries that are not checked. Due to the inherent
differences in the individual PSTNs, certain software settings
may need to be adjusted on a country-to-country basis. If it
is desired to use this equipment on a network other than the
one on which it was originally installed, you should contact
your equipment supplier.
() Austria (_) Liechtenstein
() Belgium () Luxembourg
() Denmark () Netherlands
() Finland () Norway
() France () Poland
() Germany () Portugal
() Greece () Spain
() Iceland () Sweden
() Ireland () Switzerland
() Italy () United Kingdom
Telecom Approval Notice
This equipment has been approved in accordance with the
Council Decision 98/482/EC for pan-European, single
terminal connection to the public switched telephone
network (PSTN). However, due to the differences between
the individual PSTNs provided in different countries, the
approval does not, of itself, give an unconditional assurance
of successful operation on every PSTN network termination
point. In the event of problems, you should contact your
equipment supplier in the first instance.
Electrical Requirements
This device automatically adjusts to voltages within the range of
230 V 50/60 Hz.
Fuse: Type T 200mA 250 VAC

XXI. SPECIFICATIONS
OPERATING POWER 16.5 VAC, 50 VA Transformer
AUXILIARY POWER
w/ 50 VA Transformer 12 VDC Special Applications 1.2 AMPS
w/NX-320E Power Supply 12 VDC Special Applications 2 AMPS
+ Control Panel Power
LOOP RESISTANCE
Standard Loop 300 Ohms Maximum
2-Wire Smokes 30 Ohms Maximum
BUILT-IN SIREN DRIVER 2-tone (Temporal and Yelp)
LOOP RESPONSE Selectable 50mS or 500mS
OPERATING TEMPERATURE 32 to 120 degrees F
NX148E-CF LCD KEYPAD
Current Draw 110 mA max.
w/o Sounder 75 mA
Dimensions 6.4" Wide
5.3" High
1.0" Deep
METAL ENCLOSURE DIMENSION 15.50" Wide
18.50" High
4.50" Deep
SHIPPING WEIGHT 20 lbs. approx.
Main 800-727-2339 Technical Support 888-437-3287
Outside the US 903-845-6941 Sales & Literature 800-547-2556
Main Fax 903-845-6811 Web: www.gesecurity.com
NX-8E-CF INSTALLATION MANUAL
NX8ECFIB05 REV. B (FEB 2005)
