Intermec Technologies 1015CP01SX1 1015CP01S User Manual CN51 Mobile Computer DRAFT
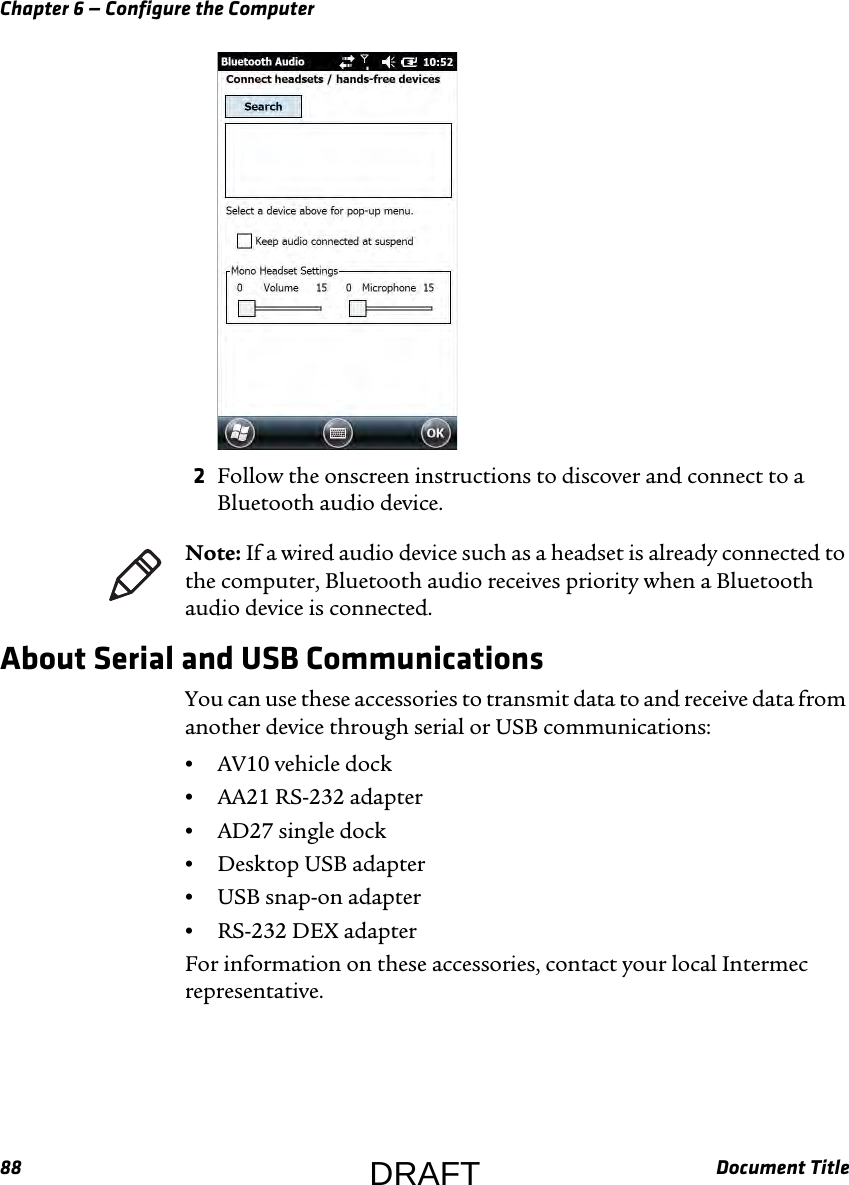
Intermec Technologies Corporation 1015CP01S CN51 Mobile Computer DRAFT
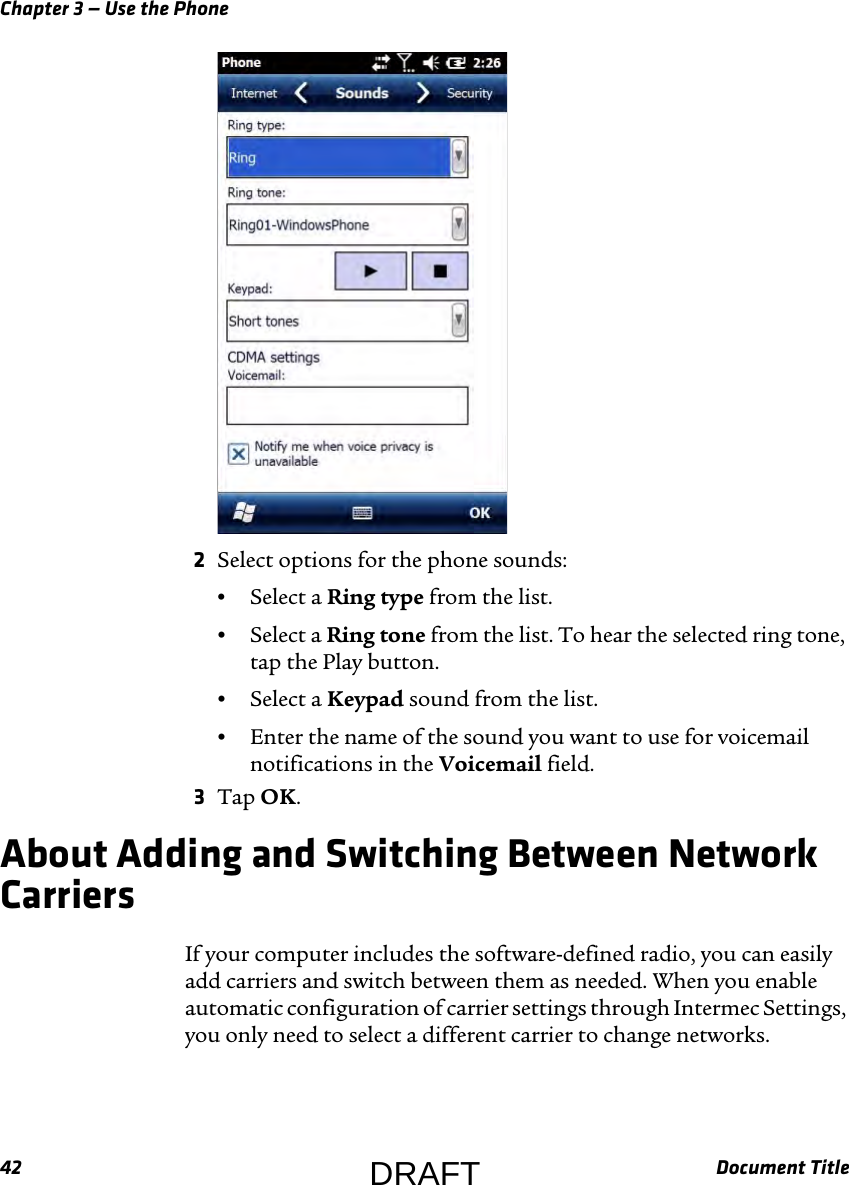
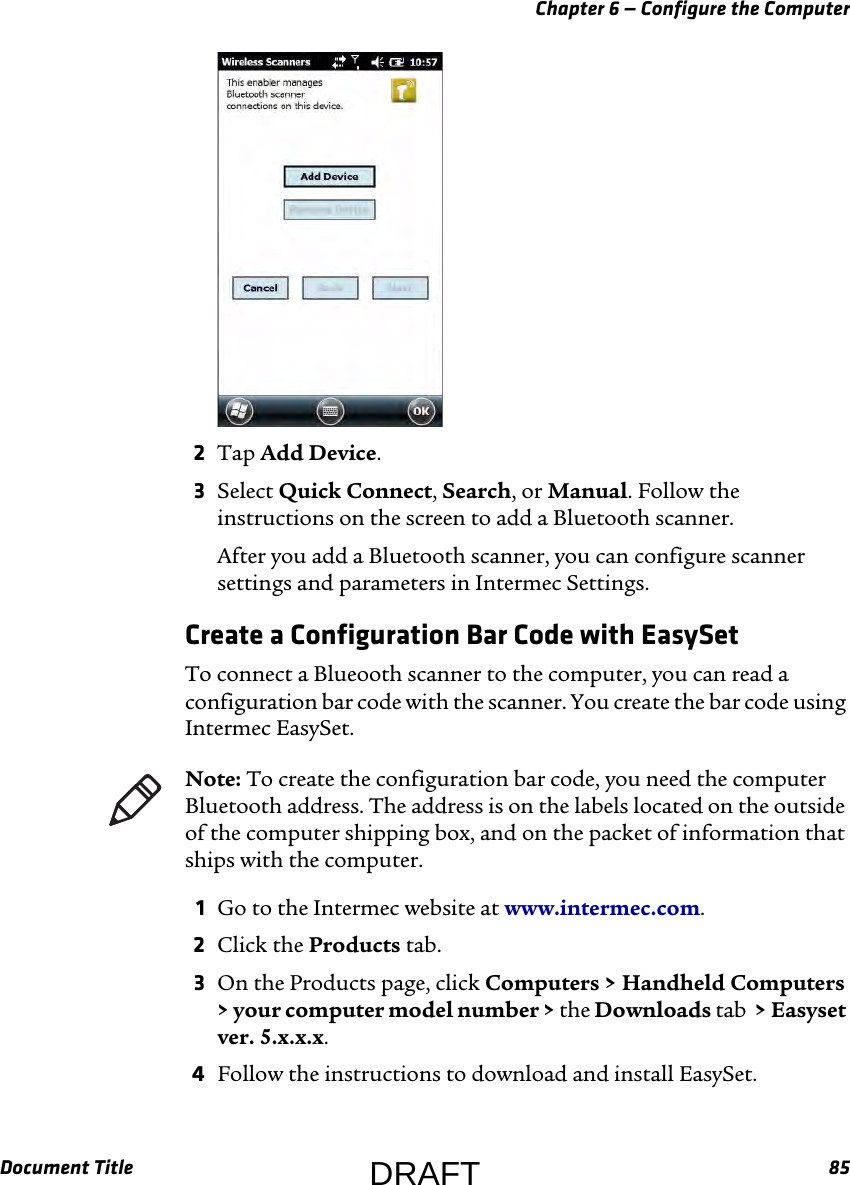
UserManual.wiki
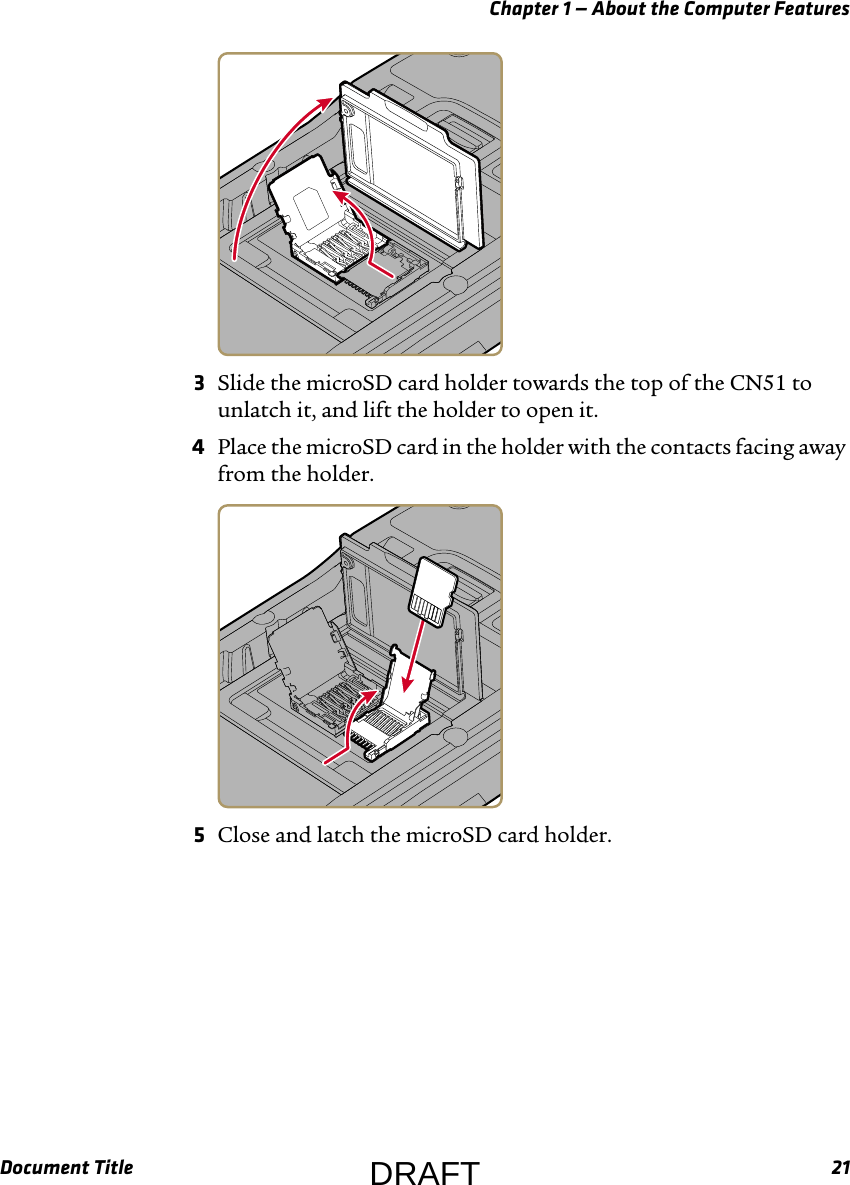
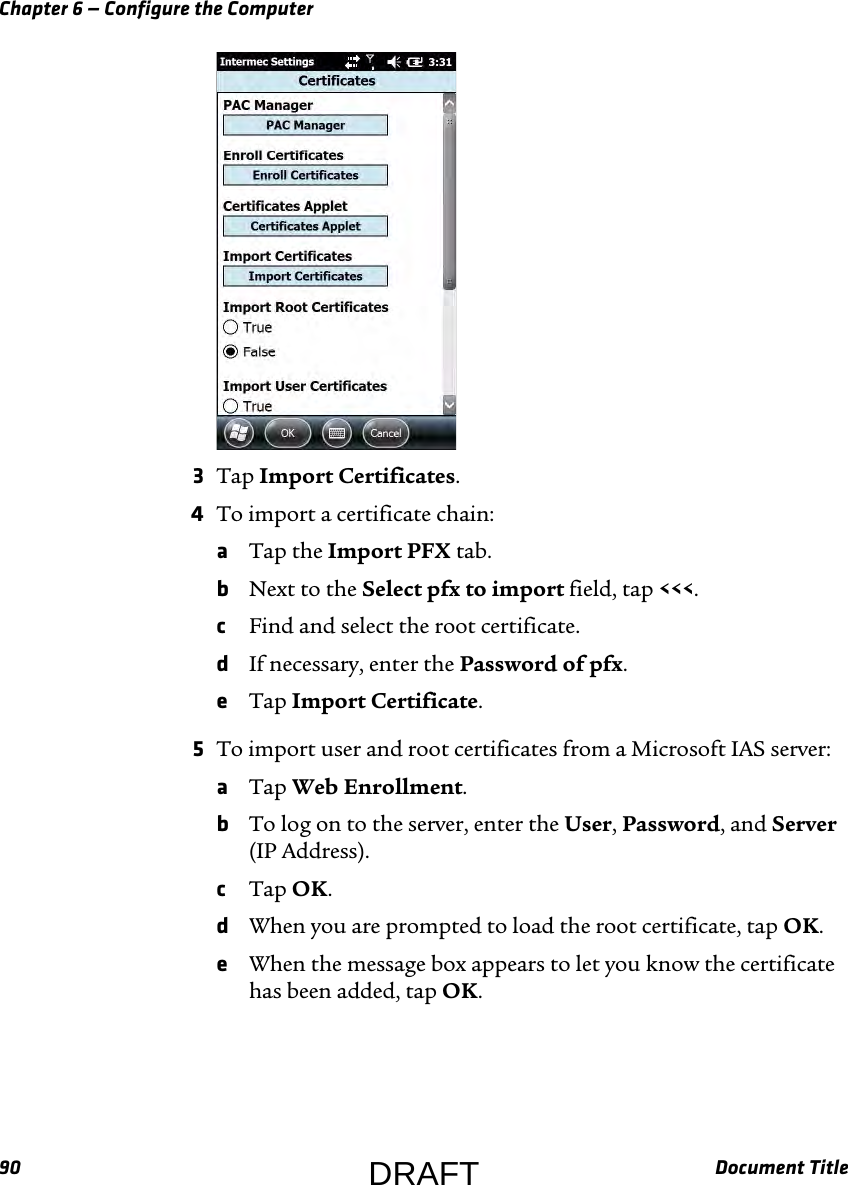
>
Intermec Technologies
>
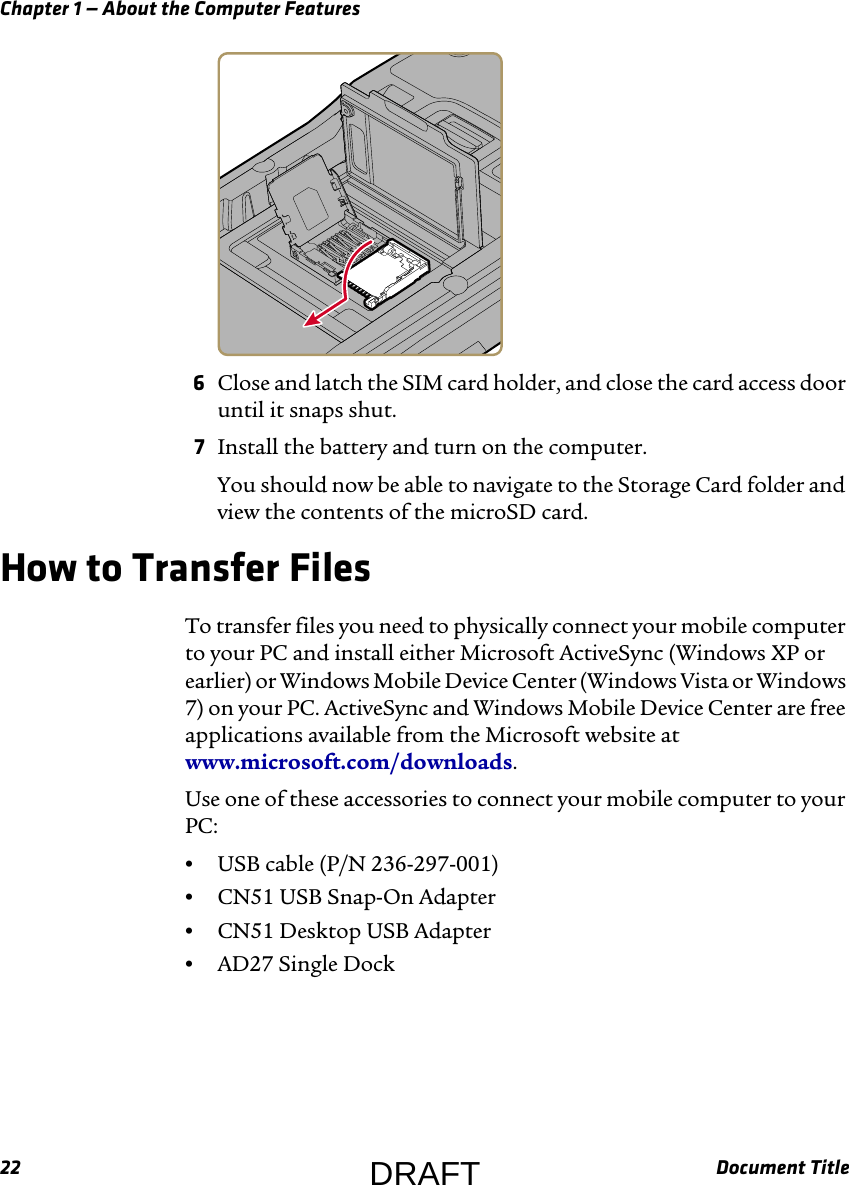
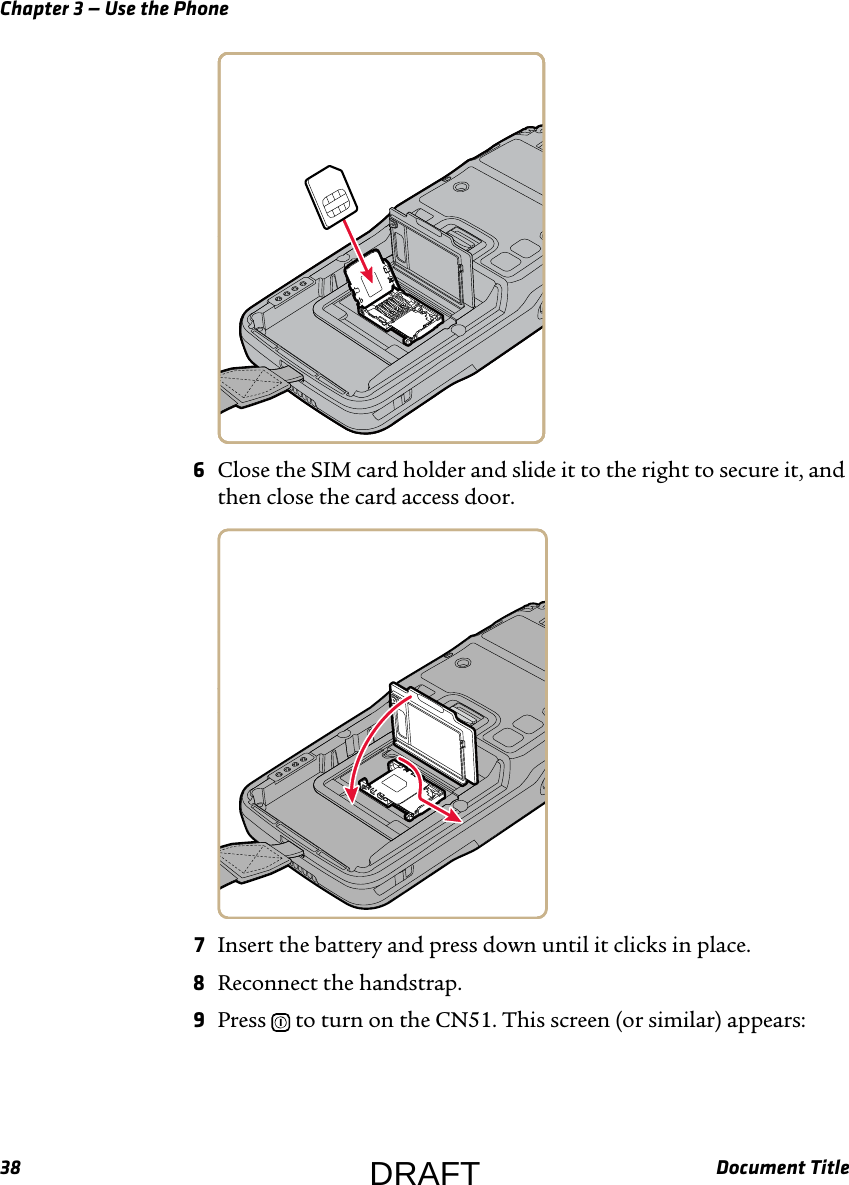
1015CP01SX1 User Manual
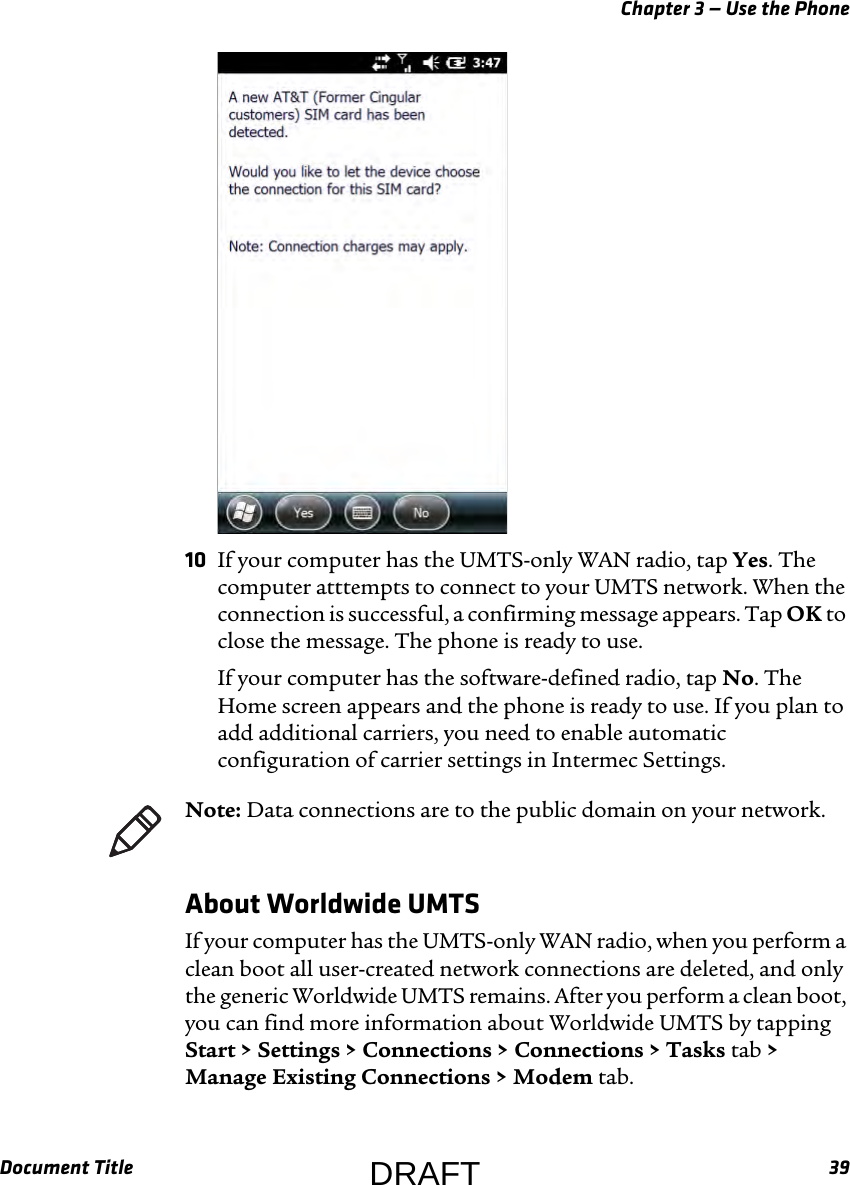
>
User Manual
Contents
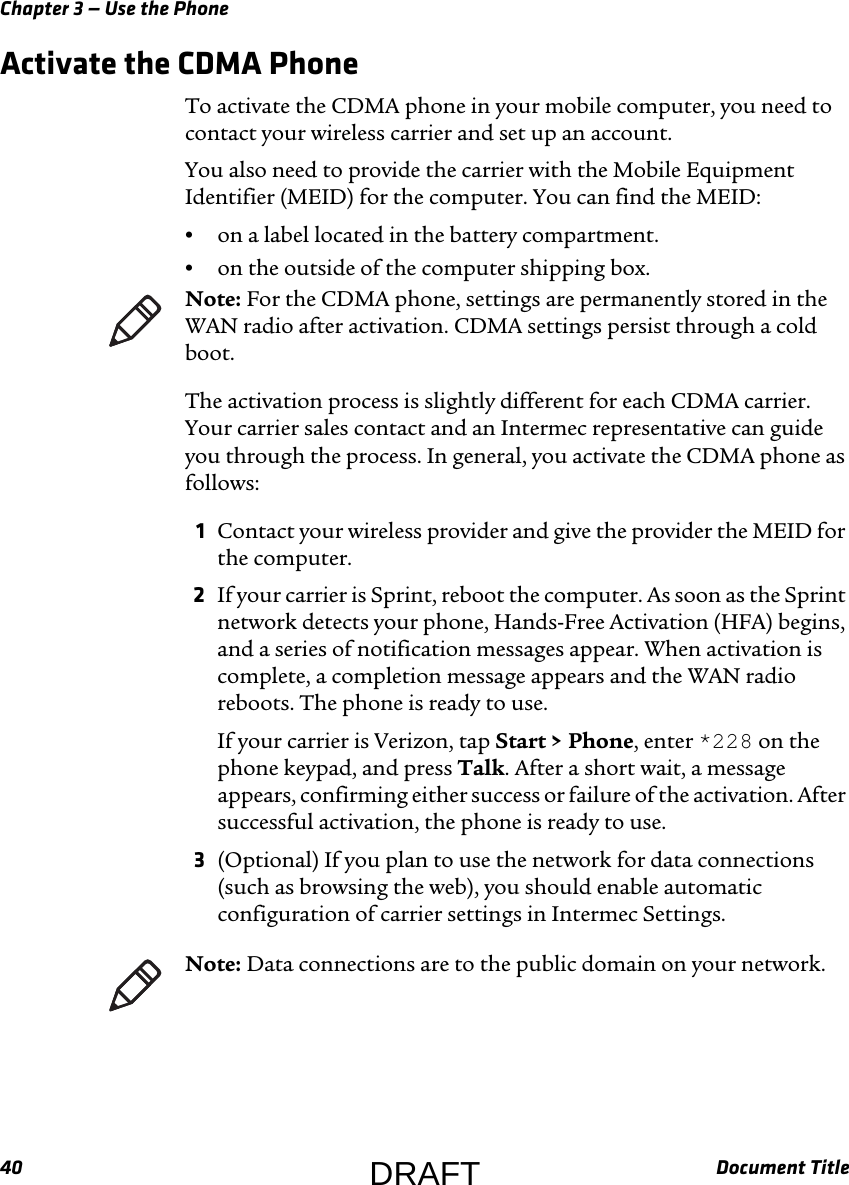
1.
Compliance Insert
2.
User Manual
User Manual
Navigation menu
Upload a User Manual
Namespaces
Wiki Guide
HTML
PDF
Info
Views
User Manual
Discussion / Help
Navigation


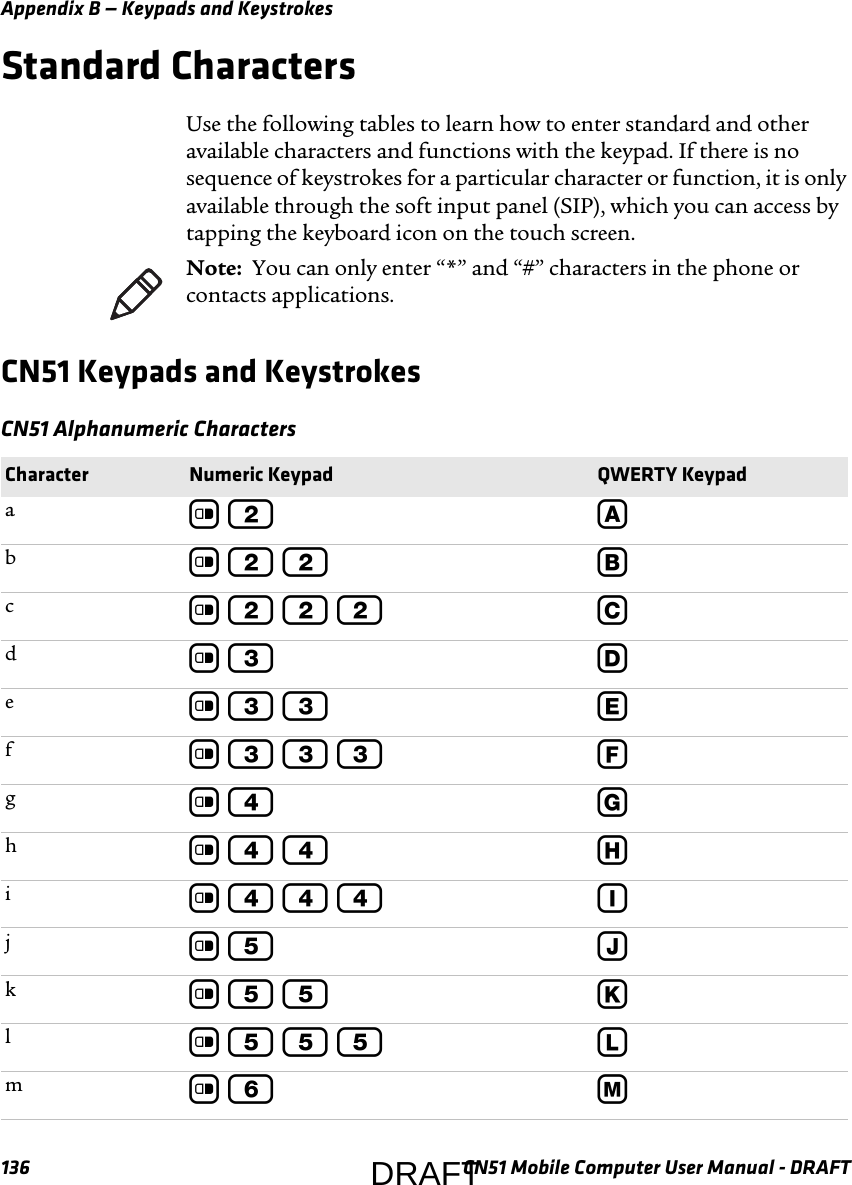
![Appendix B — Keypads and KeystrokesCN51 Mobile Computer User Manual - DRAFT 137nc 6 6 Noc 6 6 6 Opc 7 Pqc 7 7 Qrc 7 7 7 Rsc 7 7 7 7 Stc 8 Tuc 8 8 Uvc 8 8 8 Vwc 9 Wxc 9 9 Xyc 9 9 9 Yzc 9 9 9 9 ZAc 1 2 ] ABc 1 2 2 ] BCc 1 2 2 2 ] CDc 1 3 ] DEc 1 3 3 ] EFc 1 3 3 3 ] FGc 1 4 ] GHc 1 4 4 ] HCharacter Numeric Keypad QWERTY KeypadDRAFT](https://usermanual.wiki/Intermec-Technologies/1015CP01SX1.User-Manual/User-Guide-2066502-Page-148.png)
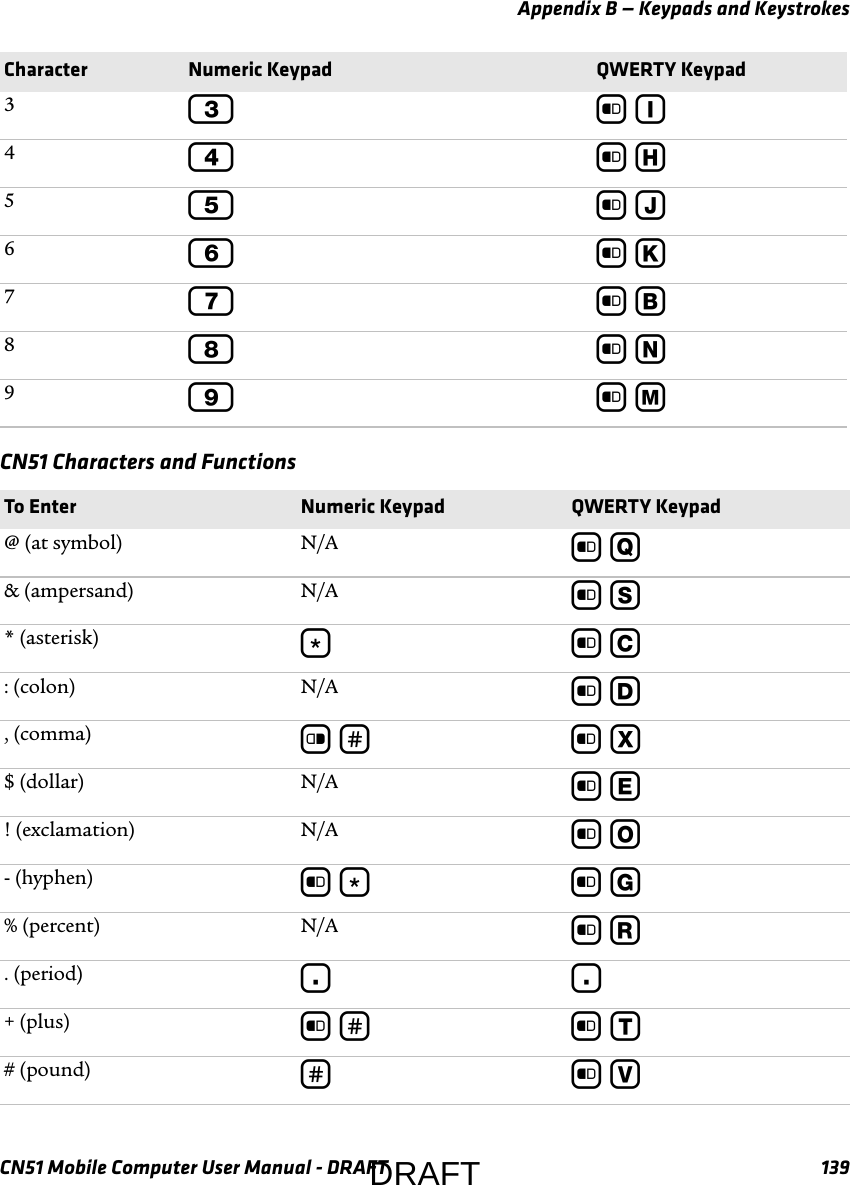
![Appendix B — Keypads and Keystrokes138 CN51 Mobile Computer User Manual - DRAFTIc 1 4 4 4 ] IJc 1 5 ] JKc 1 5 5 ] KLc 1 5 5 5 ] LMc 1 6 ] MNc 1 6 6 ] NOc 1 6 6 6 ] OPc 1 7 ] PQc 1 7 7 ] QRc 1 7 7 7 ] RSc 1 7 7 7 7 ] STc 1 8 ] TUc 1 8 8 ] UVc 1 8 8 8 ] VWc 1 9 ] WXc 1 9 9 ] XYc 1 9 9 9 ] YZc 1 9 9 9 9 ] Z00b 11b Y22b UCharacter Numeric Keypad QWERTY KeypadDRAFT](https://usermanual.wiki/Intermec-Technologies/1015CP01SX1.User-Manual/User-Guide-2066502-Page-149.png)
![Appendix B — Keypads and Keystrokes140 CN51 Mobile Computer User Manual - DRAFT? (question mark) N/A b A‘ (apostrophe) N/A b ZBackslash c * b PForward Tab jjBackspace { {Up Arrow uuDown Arrow ddLeft Arrow llRight Arrow rrCapsLock c 1 b ] ]Enter eeShift b or cb or ]Space c 0 sStart (Windows) b m or c m b mEsc ||Intermec Dashboard mmTo Enter Numeric Keypad QWERTY KeypadDRAFT](https://usermanual.wiki/Intermec-Technologies/1015CP01SX1.User-Manual/User-Guide-2066502-Page-151.png)