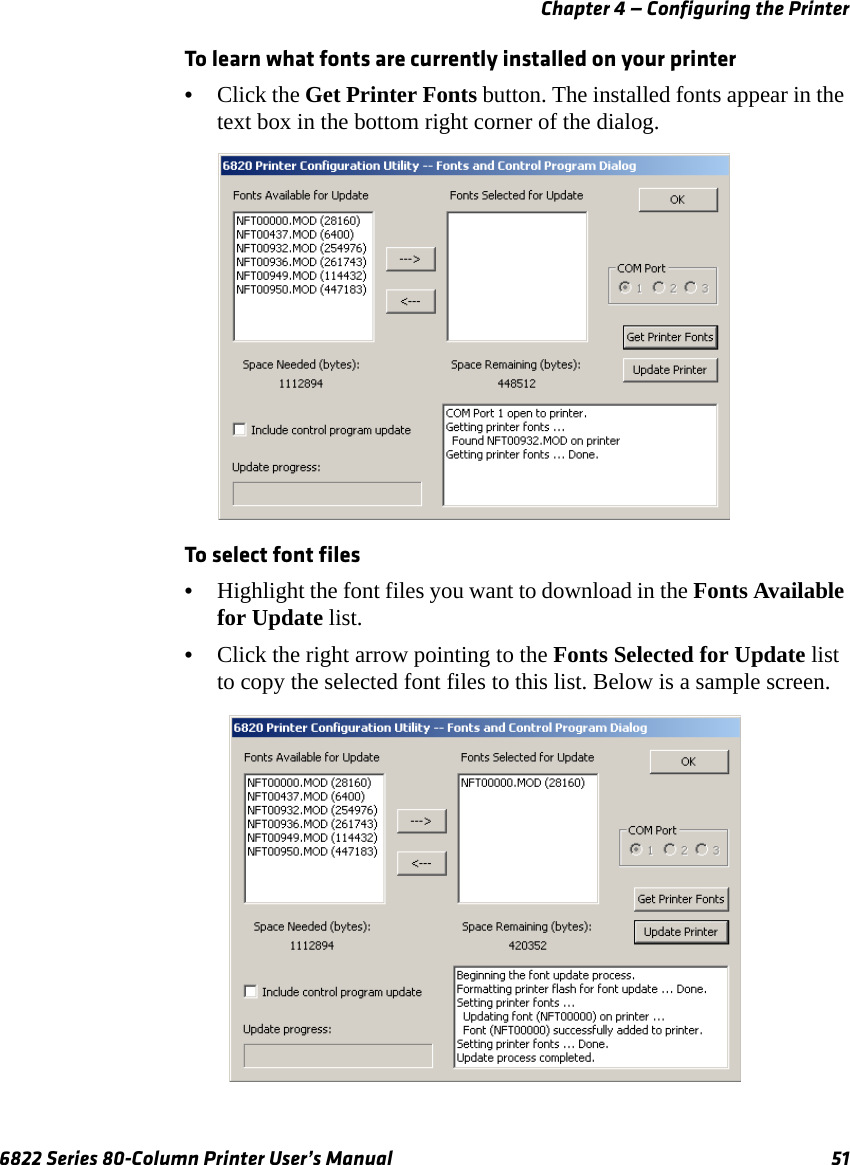
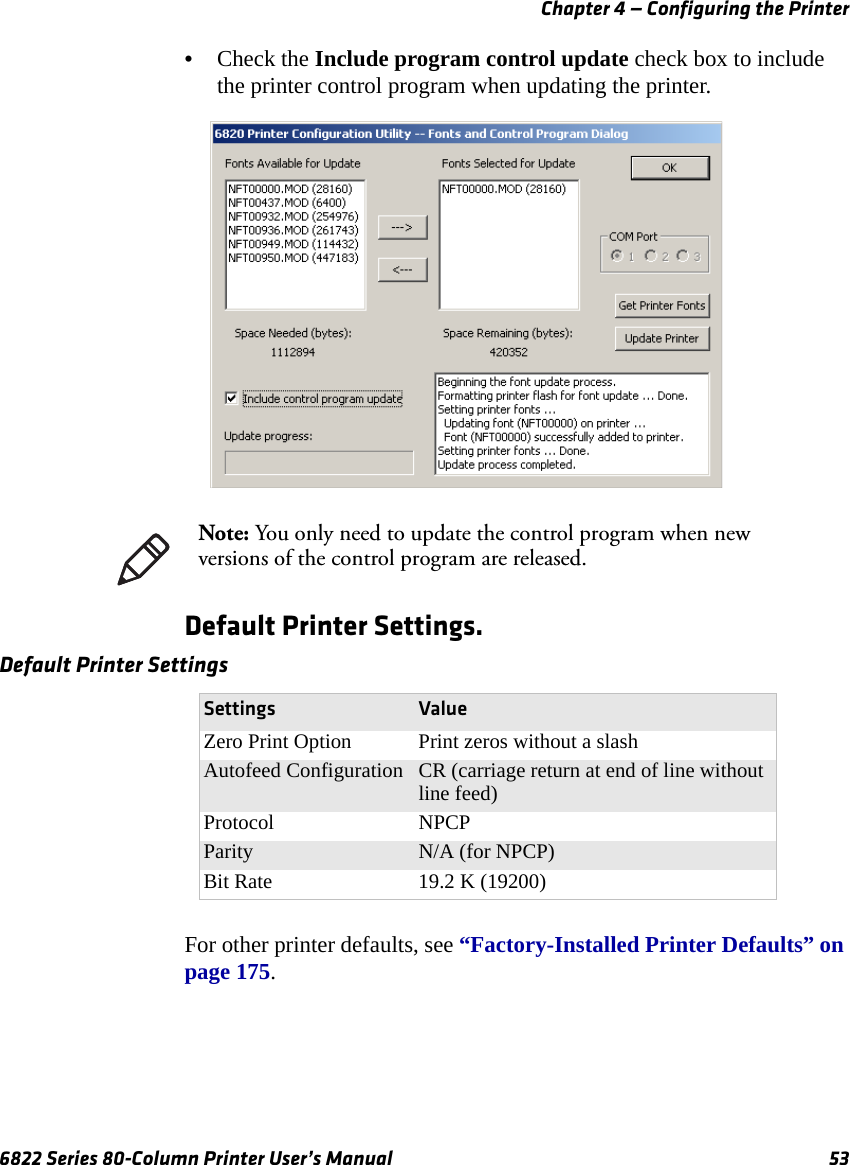
Intermec Technologies BTS080-1 6820 Printer with Bluetooth Transmitter User Manual part 2
Intermec Technologies Corporation 6820 Printer with Bluetooth Transmitter part 2
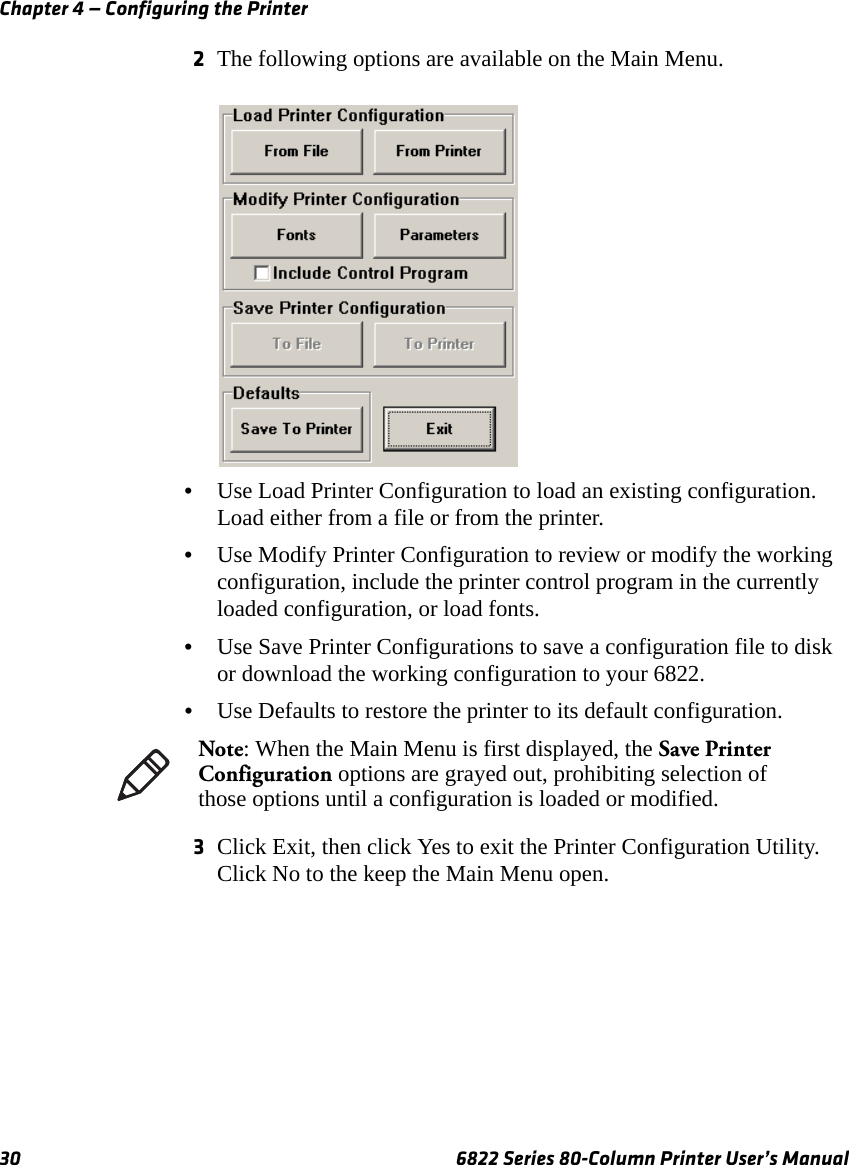
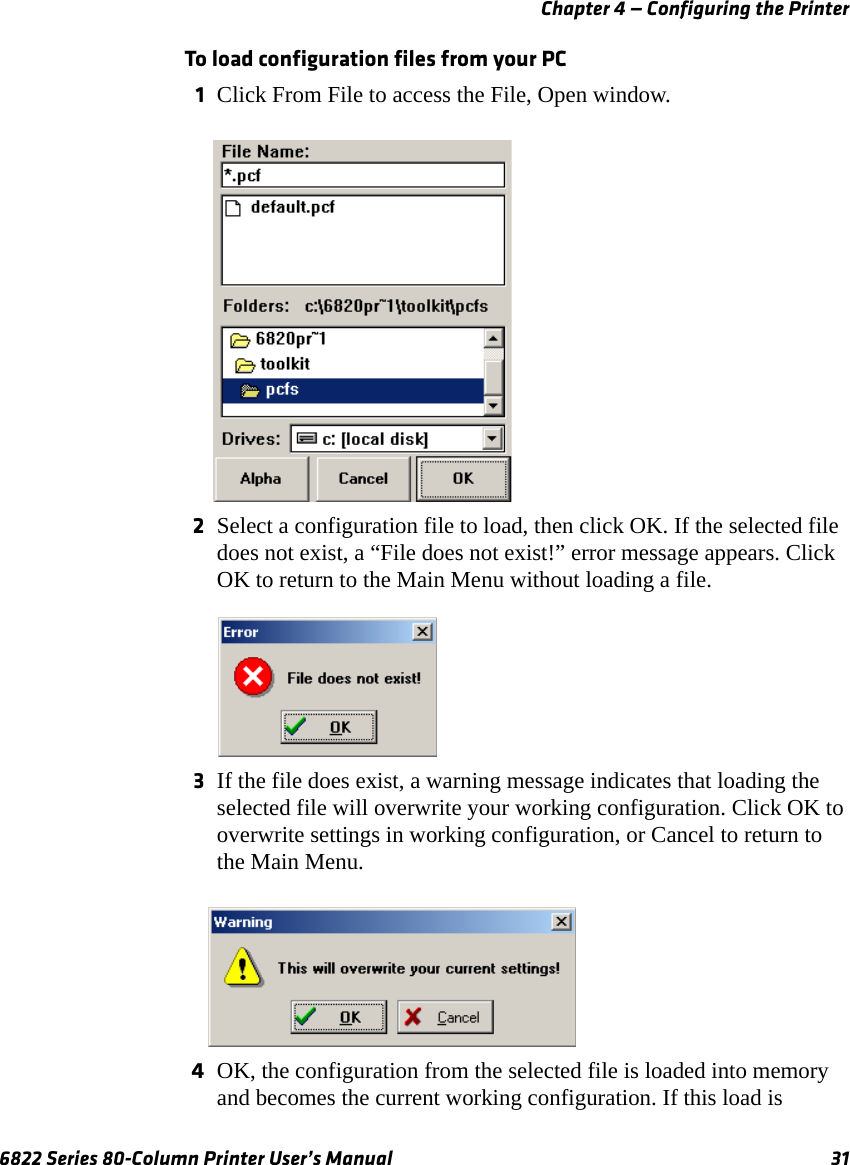
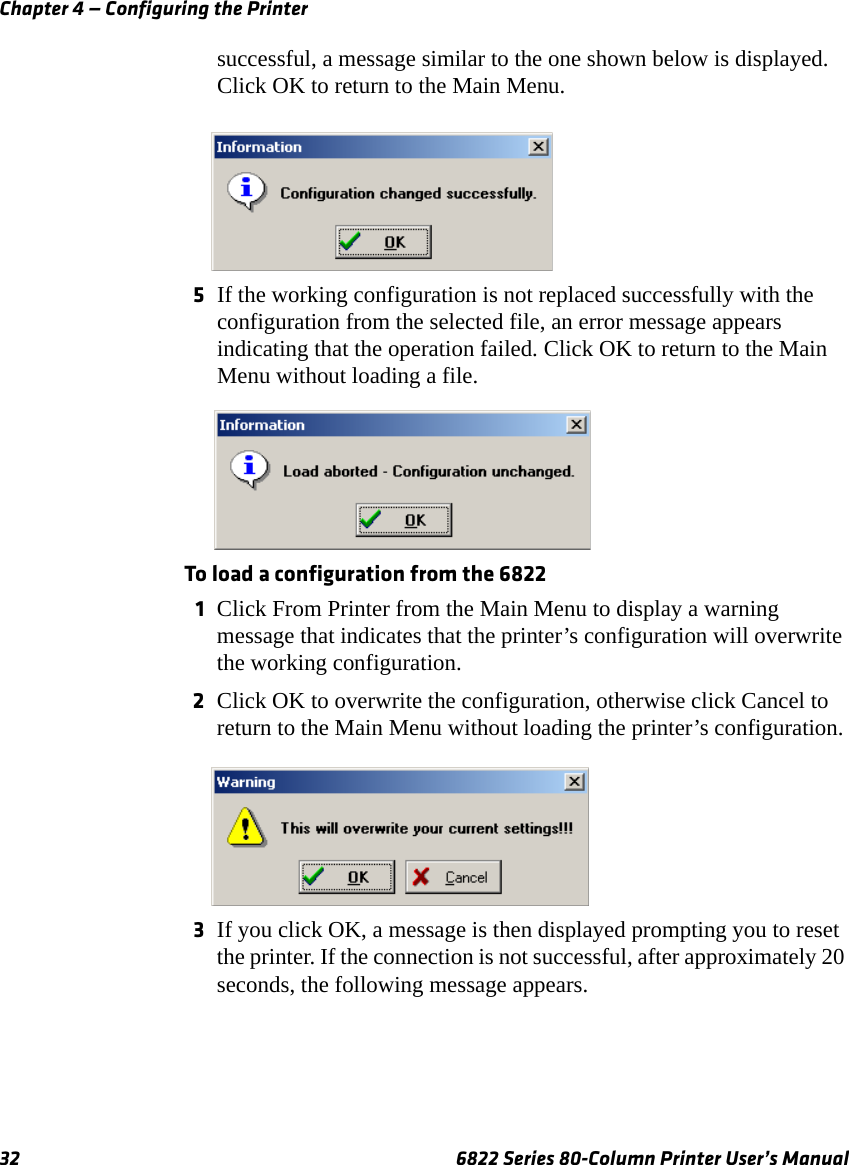
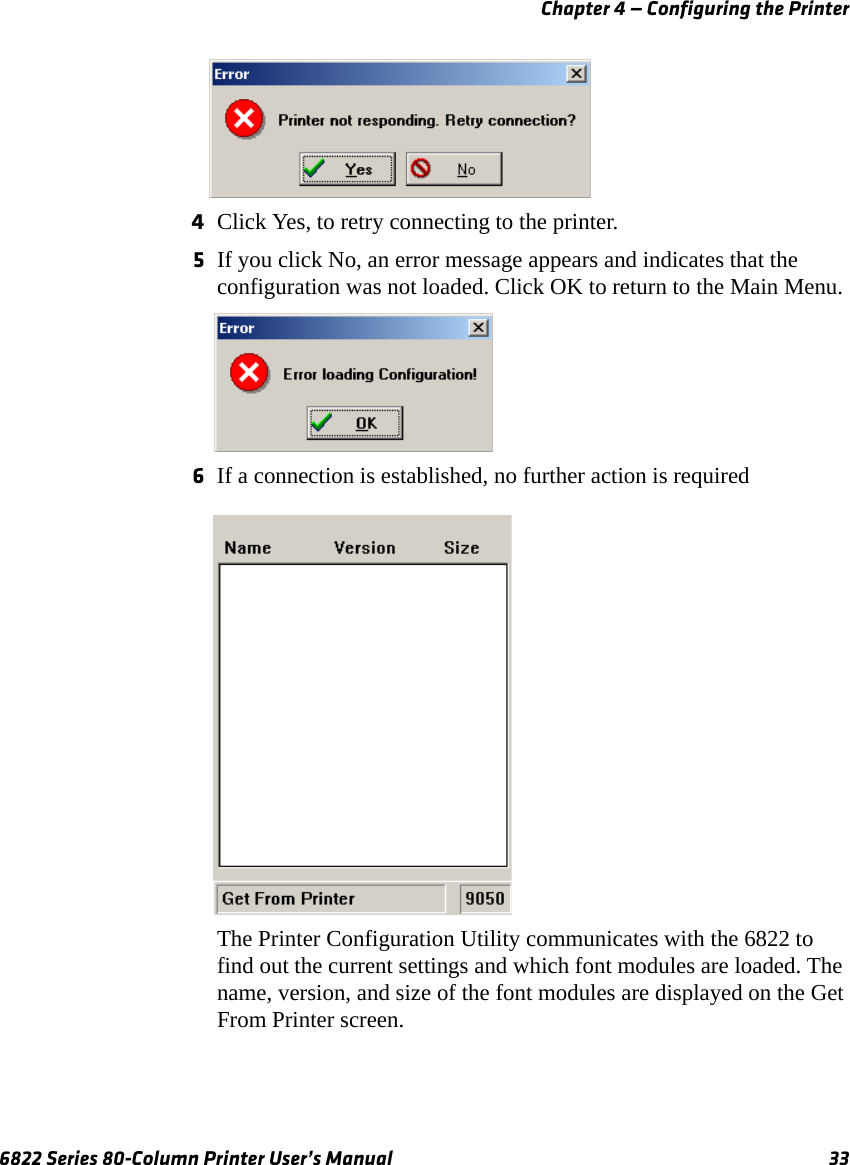
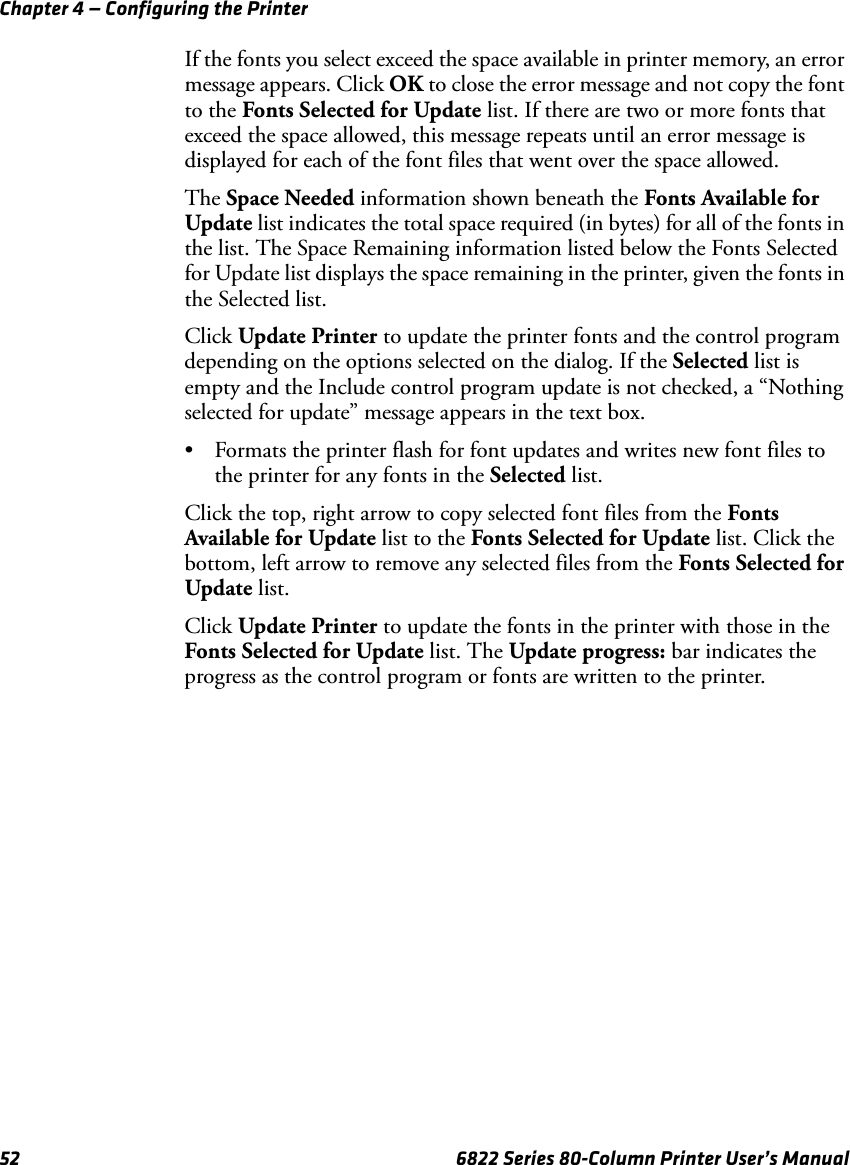
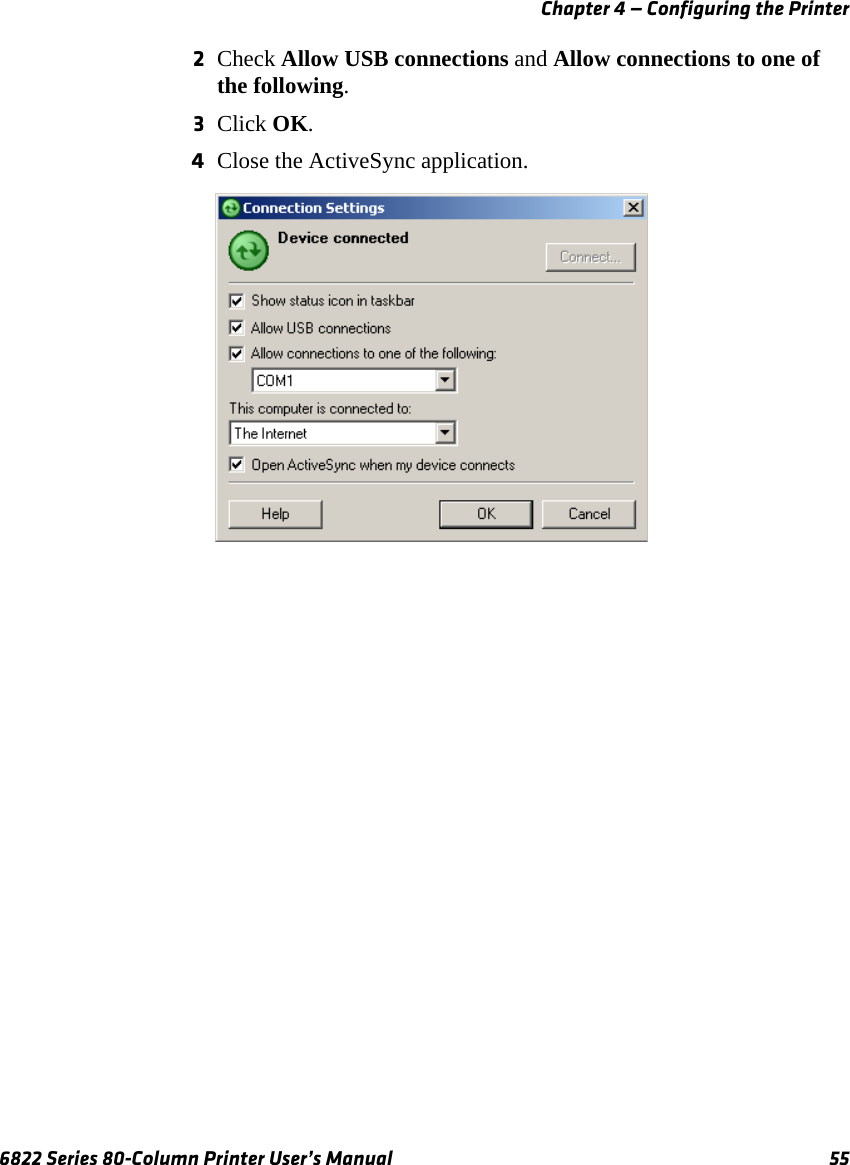
UserManual.wiki
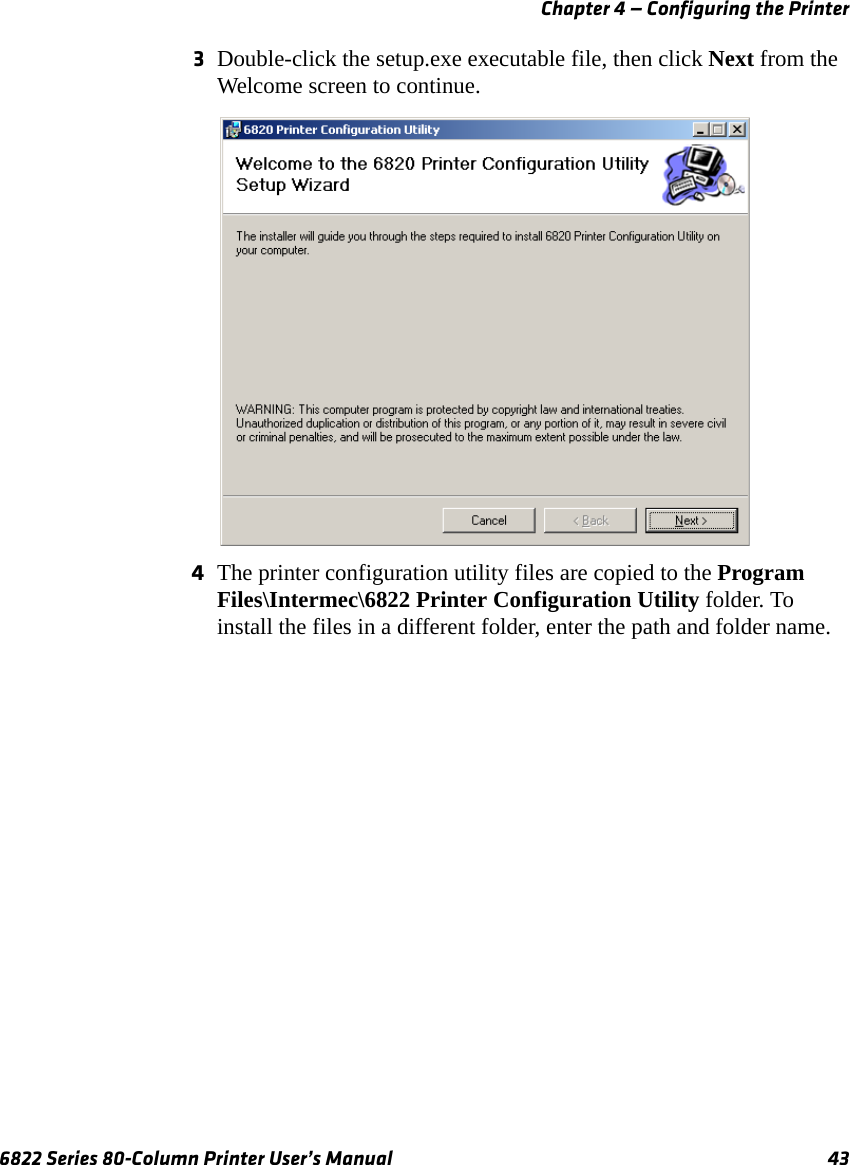
>
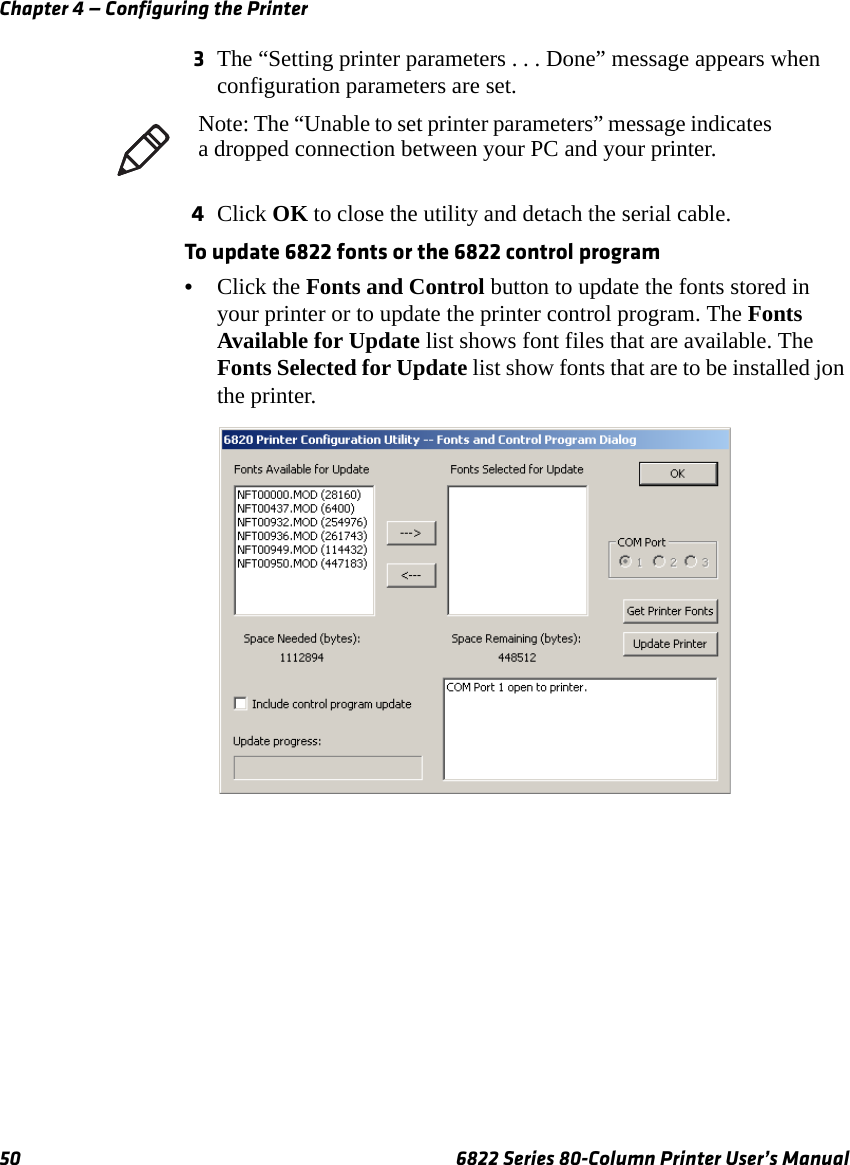
Intermec Technologies
>
BTS080-1 User Manual
>
User Manual part 2
Contents
1.
New Manual Page Wireless Network Support
2.
User Manual 1 of 2
3.
User Manual 2 of 2
4.
User Manual
5.
Radio info
6.
Compliance Insert
7.
User Manual part 1
8.
User Manual part 2
9.
User Manual part 3
10.
User Manual part 4
User Manual part 2
Navigation menu
Upload a User Manual
Namespaces
Wiki Guide
HTML
PDF
Info
Views
User Manual
Discussion / Help
Navigation
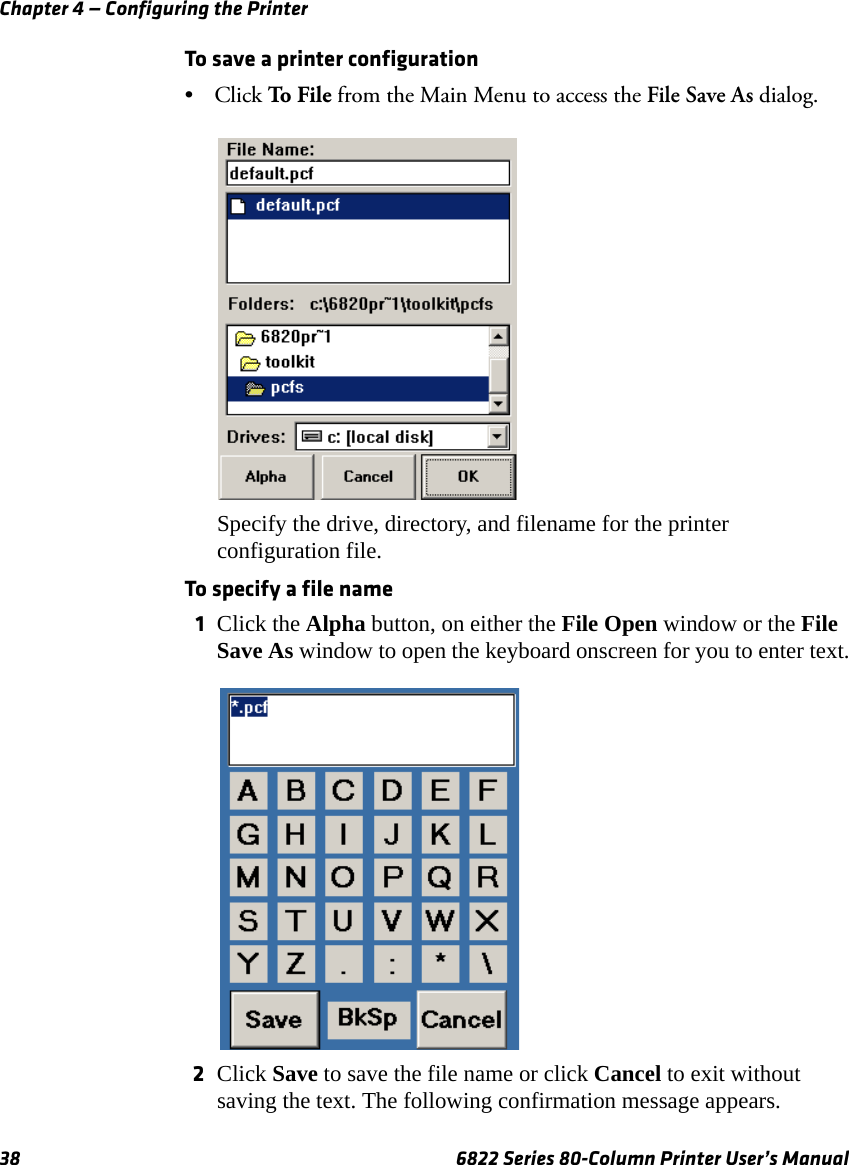
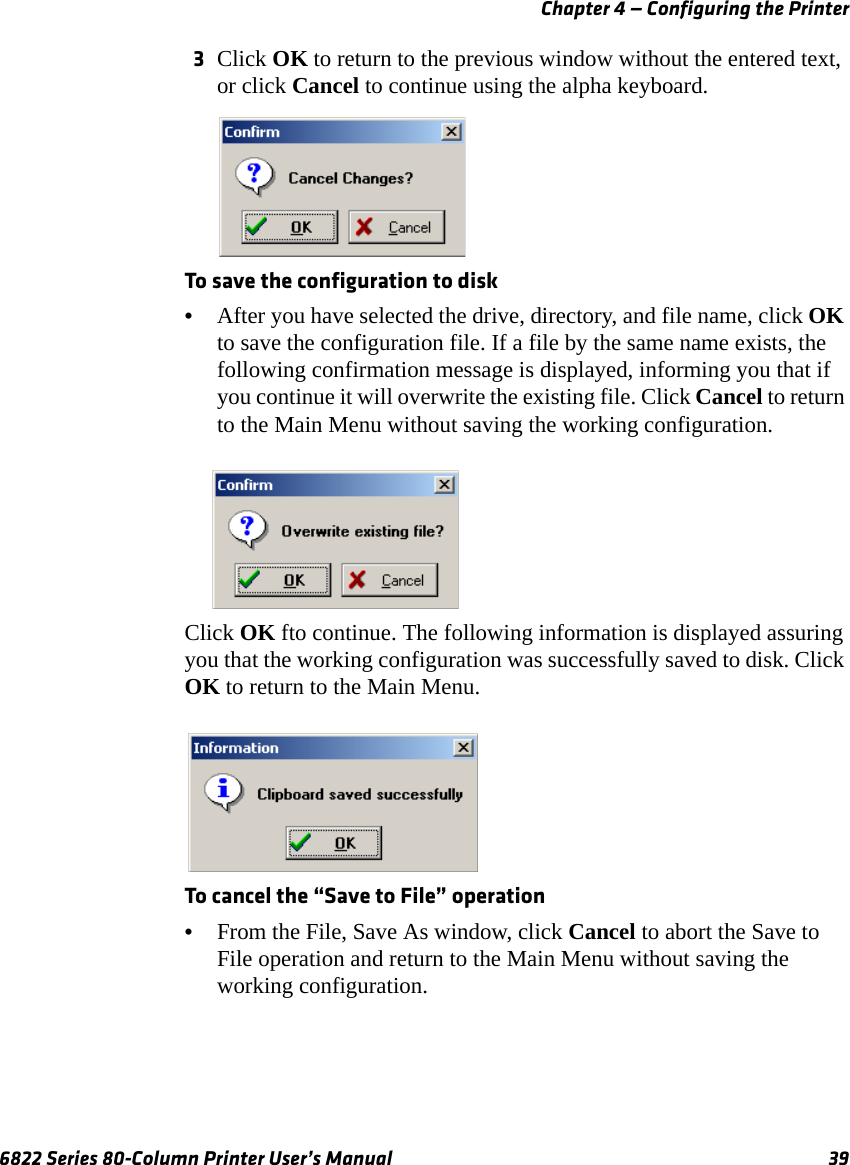
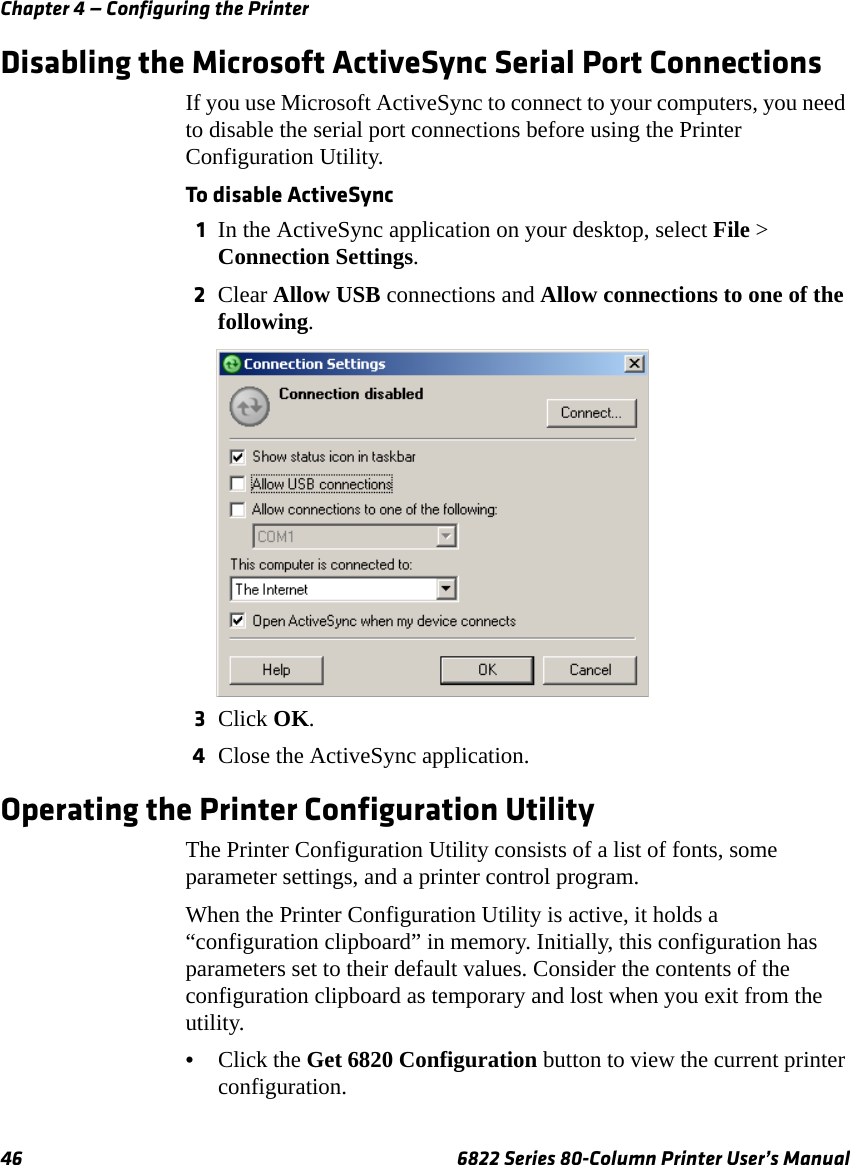

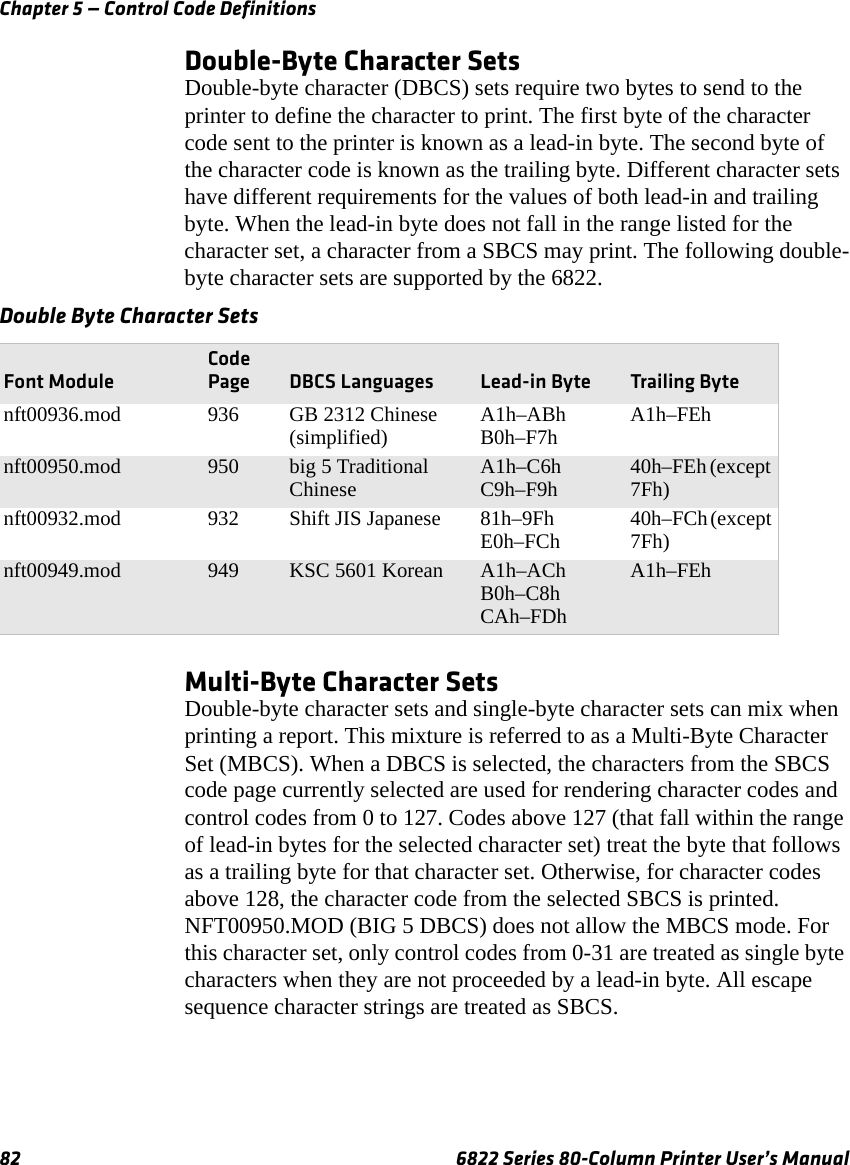
![Chapter 5 — Control Code Definitions6822 Series 80-Column Printer User’s Manual 83Select National Character SetBy default, code page 0 is selected by the printer at reset. Use the following escape sequence to select international character support. Escape sequence codes can only be used for code page 0. All other code pages use direct character code mapping to select the appropriate font for rendering.n is 0-14 and is the country code, as shown in the International Character Sets table on the next page. The default value for n is zero (USA).A full 256 character set is not provided for these sets. There are 64 international characters stored in ROM, 32 in Roman and 32 in Italic. They are stored as codes 0-31 and 128-255. These are normally not accessible. The ESC “R” command makes these codes available, but only 12 characters at a time. These 12 are available in these positions of the ASCII character table: 35, 36, 64, 91, 92, 93, 94, 96, 123, 124, 125, and 126, as shown in the International Character Sets table.FormatDecimal Hex ASCII27 82 n 1B 52 n ESC “R” nInternational Character Sets Country Country Number 35 36 64 91 92 93 94 96 123 124 125 126USA 0 # $ @ [ \ ] ^ ‘ { | } ~France 1 # $ à º ç § ^ ‘ é ù è ¨Germany 2 #$§ÄÖÜ^‘ ä ö übEngland (UK) 3 £ $ @ [ \ ] ^ ‘ { | } ~Denmark 1 4 # $ @ Æ Ø Å ^ ‘ æ ø å ~Sweden 5 # ¤ É Ä Ö Å Ü é ä Ö å üItaly 6 # $ @ º \ é ^ ù à è ìSpain 1 7 P $ @ ¡ Ñ ¿ ^ ‘ ¨ ñ } ~Japan 8 # $ @ [ ¥ ] ^ ‘ { | } ~Norway 9 # ¤ É Æ Ø Å Ü é æ ø å üDenmark 2 10 # $ É Æ Ø Å Ü é æ ø å üSpain 2 11 # $ á ¡ Ñ ¿ é ‘ í ñ ó úLatin America 12 # $ á ¡ Ñ ¿ é ü í ñ ó ú](https://usermanual.wiki/Intermec-Technologies/BTS080-1.User-Manual-part-2/User-Guide-935874-Page-61.png)