Intermec Technologies CK30MIG2 802MIG2 User Manual 3
Intermec Technologies Corporation 802MIG2 3
UserManual.wiki
>
Intermec Technologies
>
CK30MIG2 User Manual
>
User Manual 3
Contents
1.
User Manual 1
2.
User Manual 2
3.
User Manual 3
4.
User Manual 4
5.
User Manual 5
User Manual 3
Navigation menu
Upload a User Manual
Namespaces
Wiki Guide
HTML
PDF
Info
Views
User Manual
Discussion / Help
Navigation
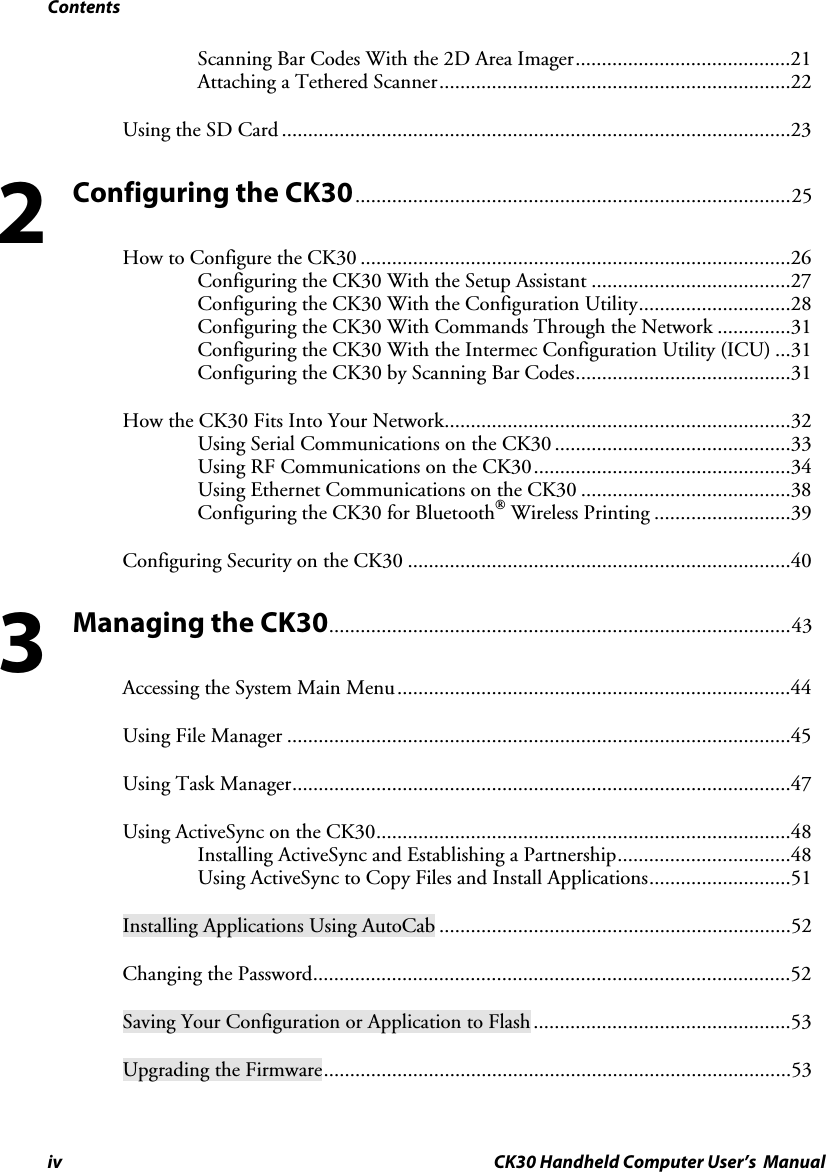
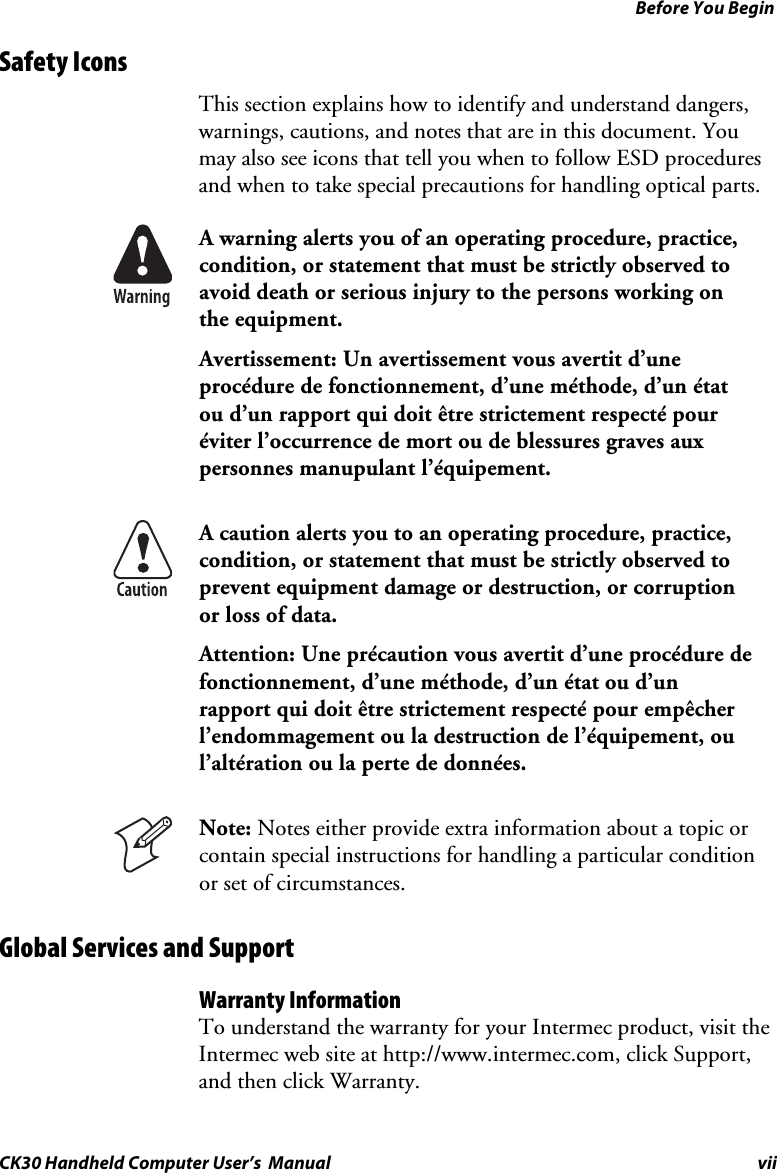

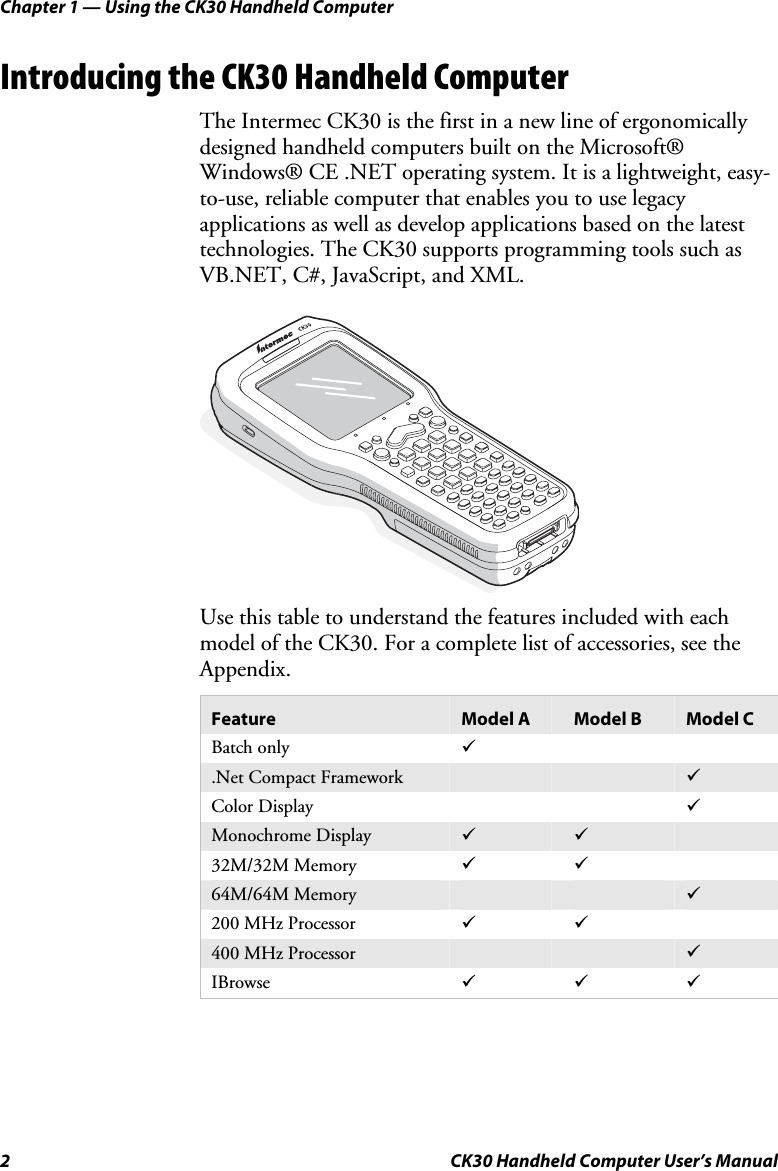
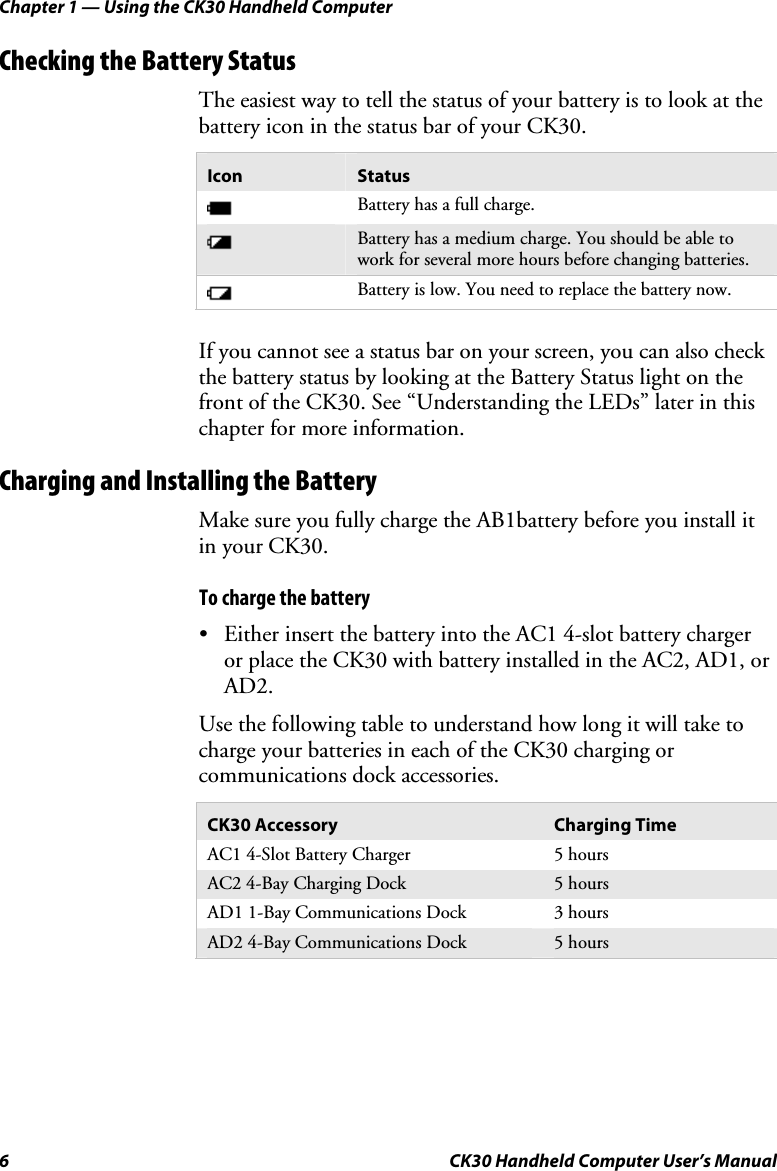

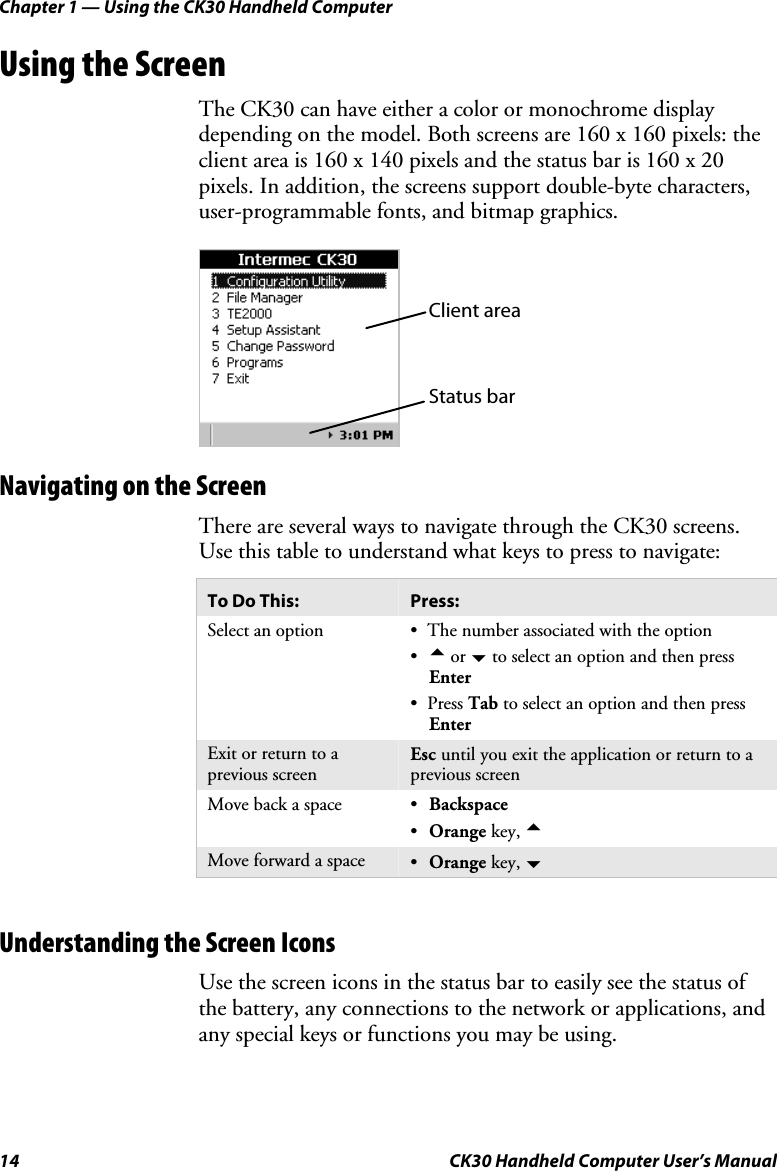
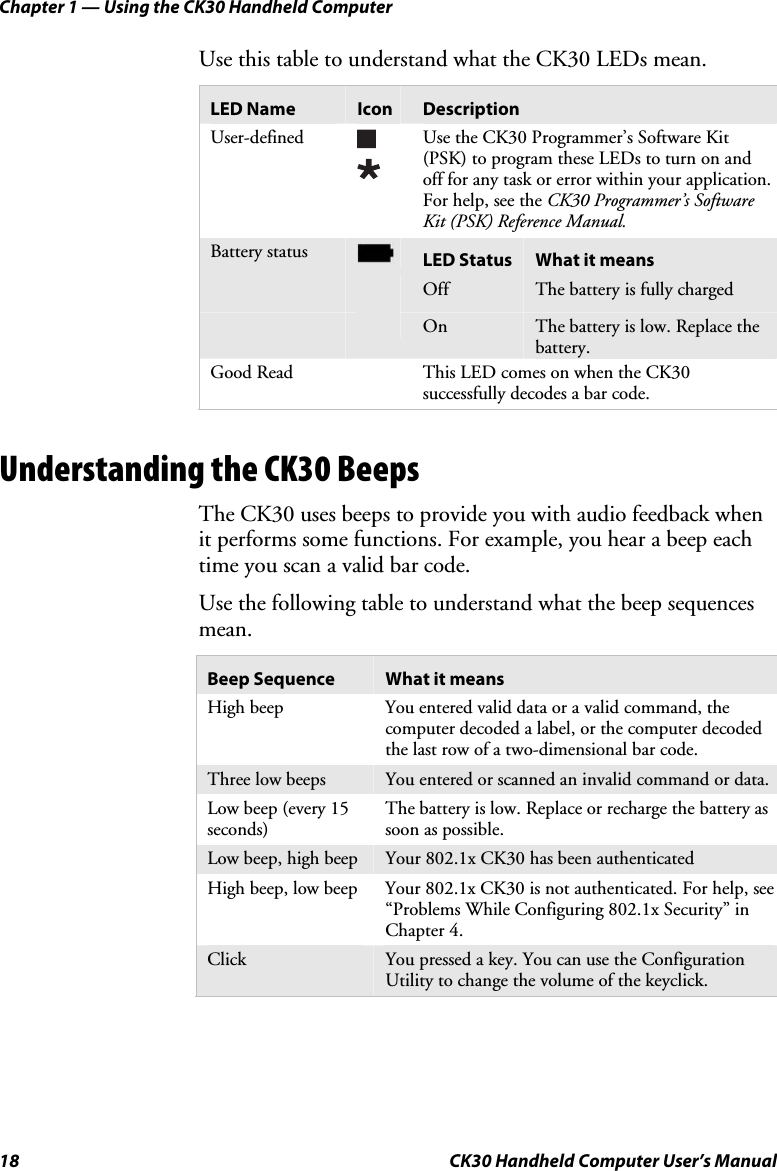
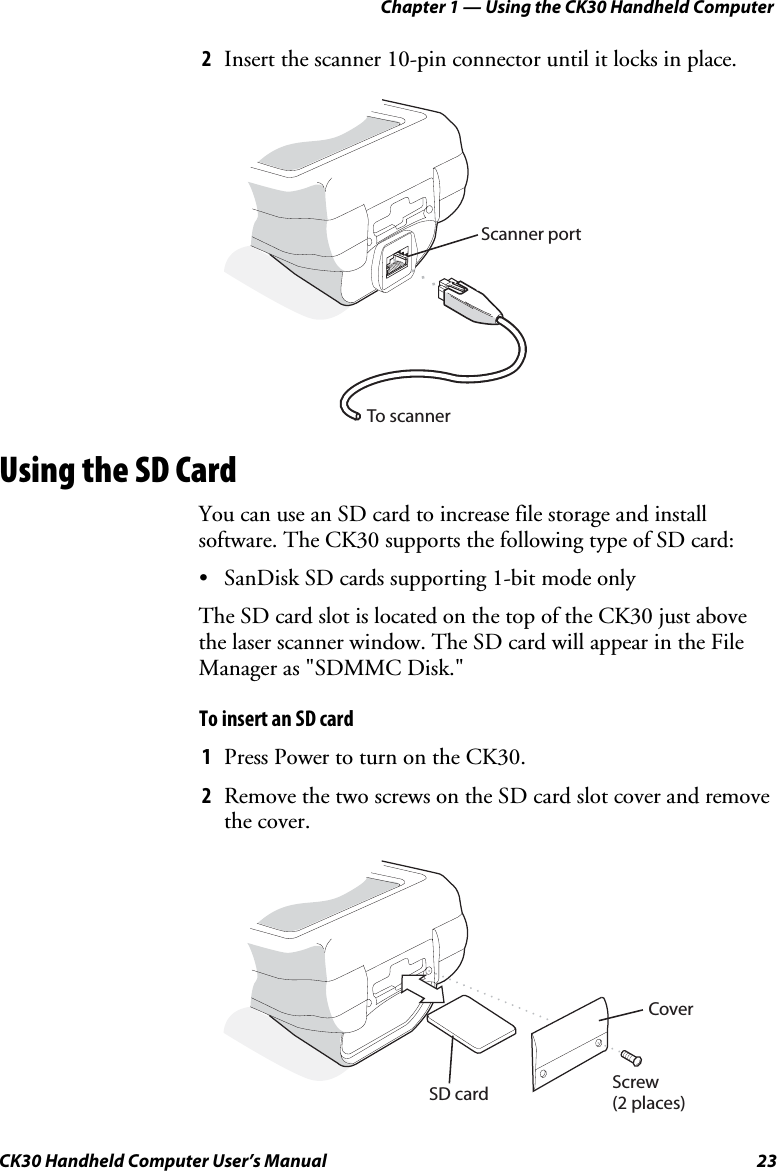
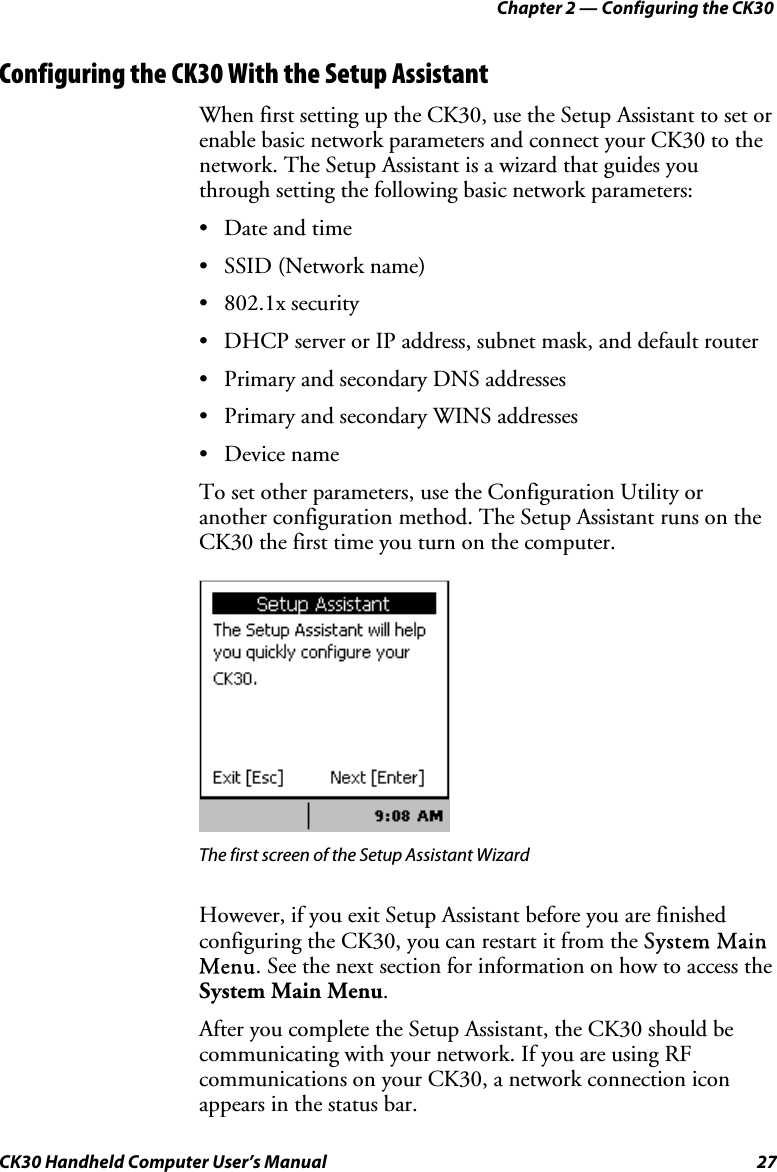
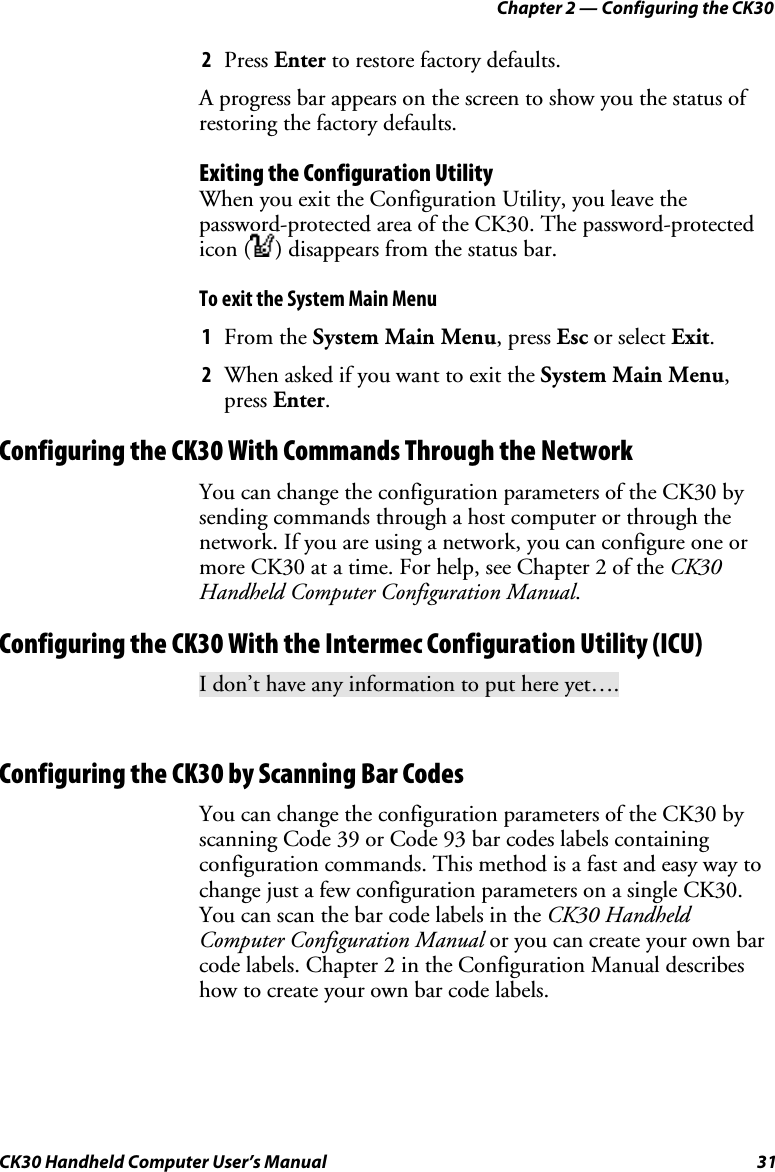
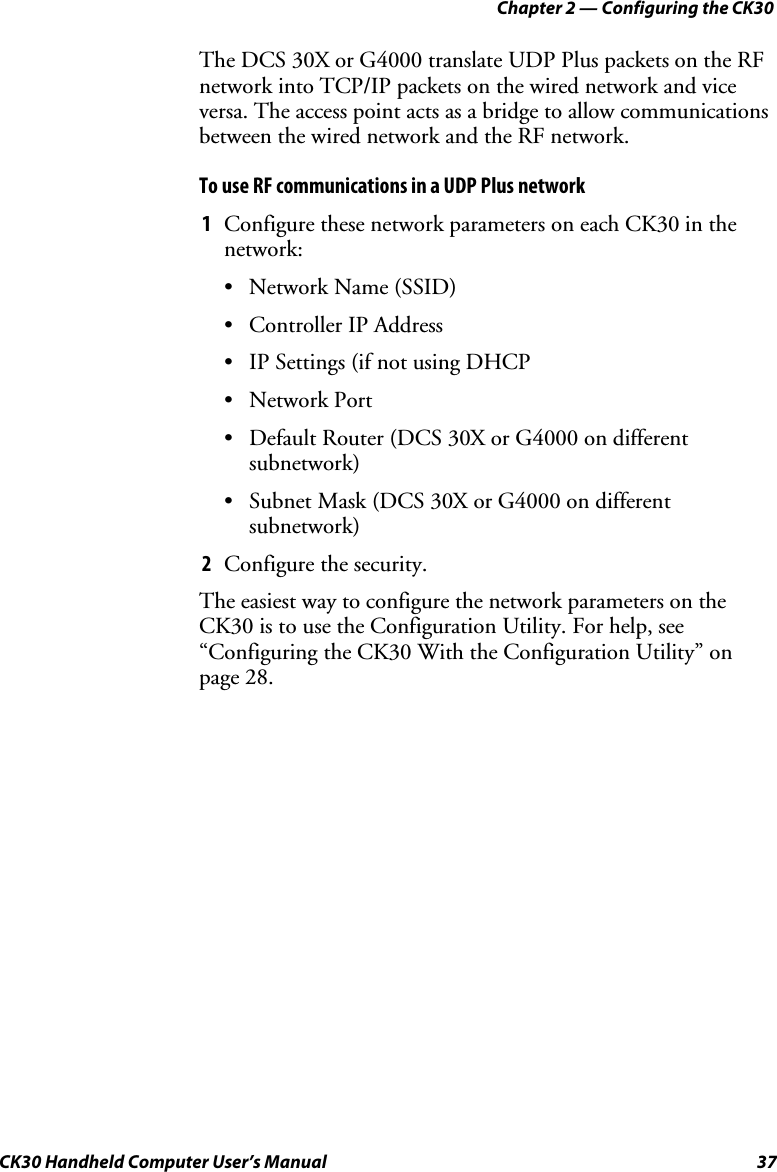
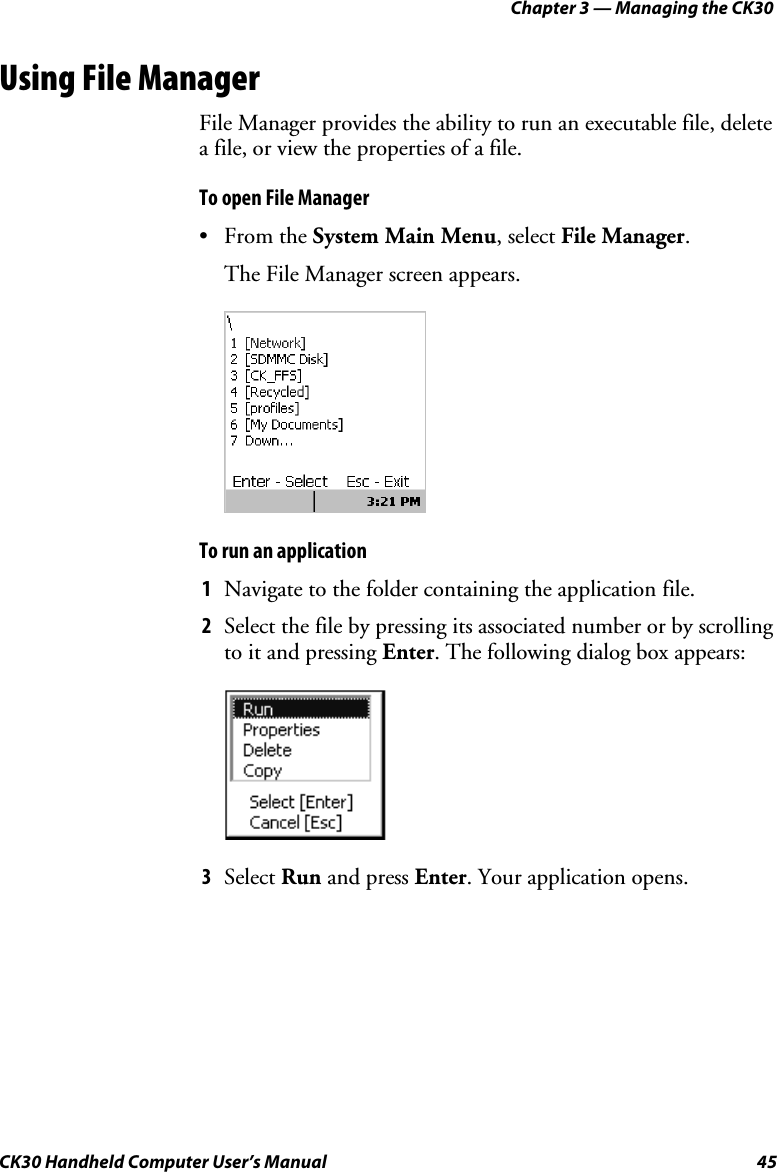
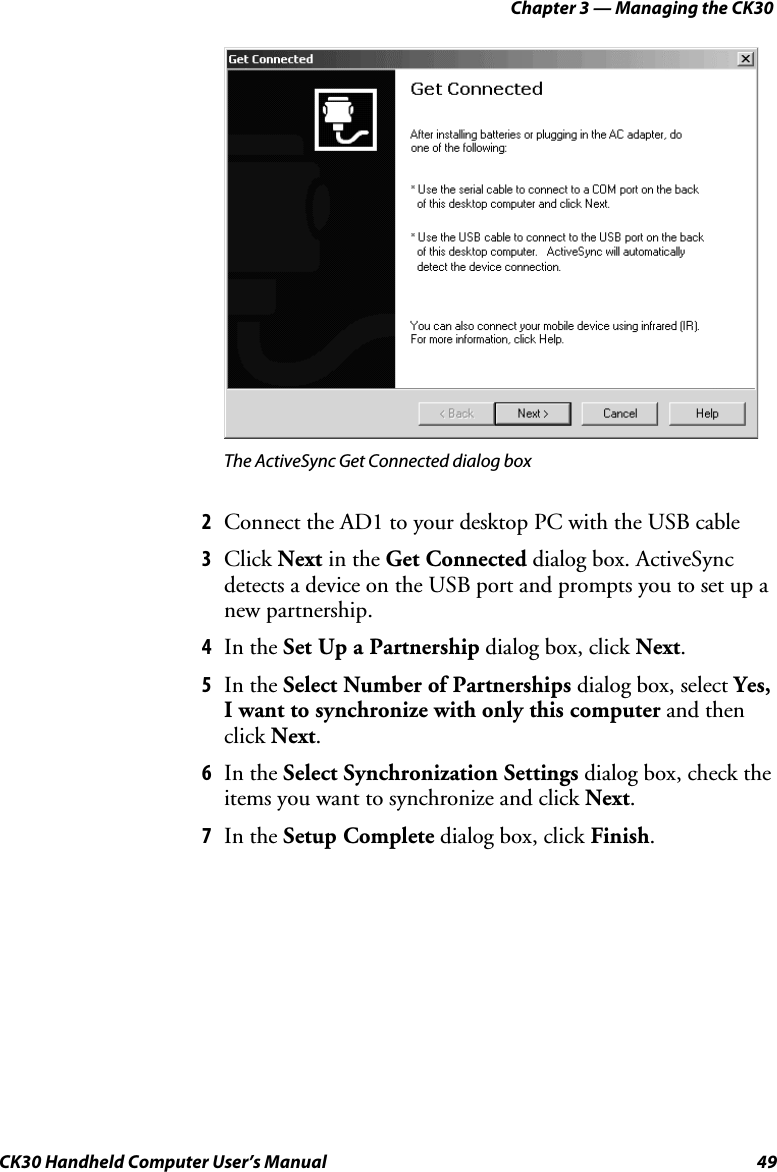
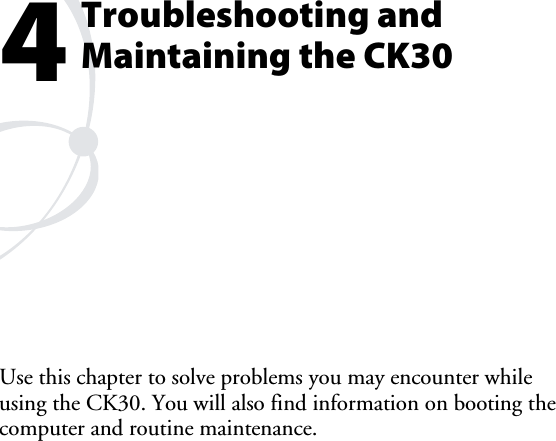
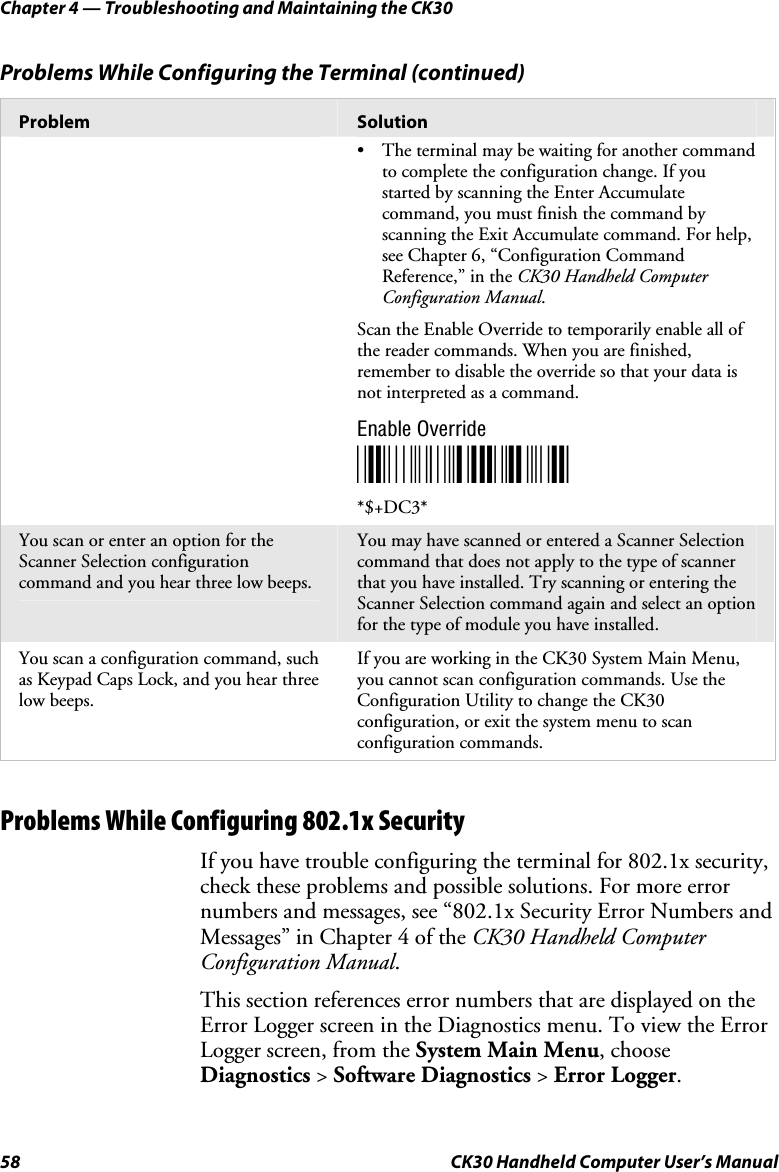
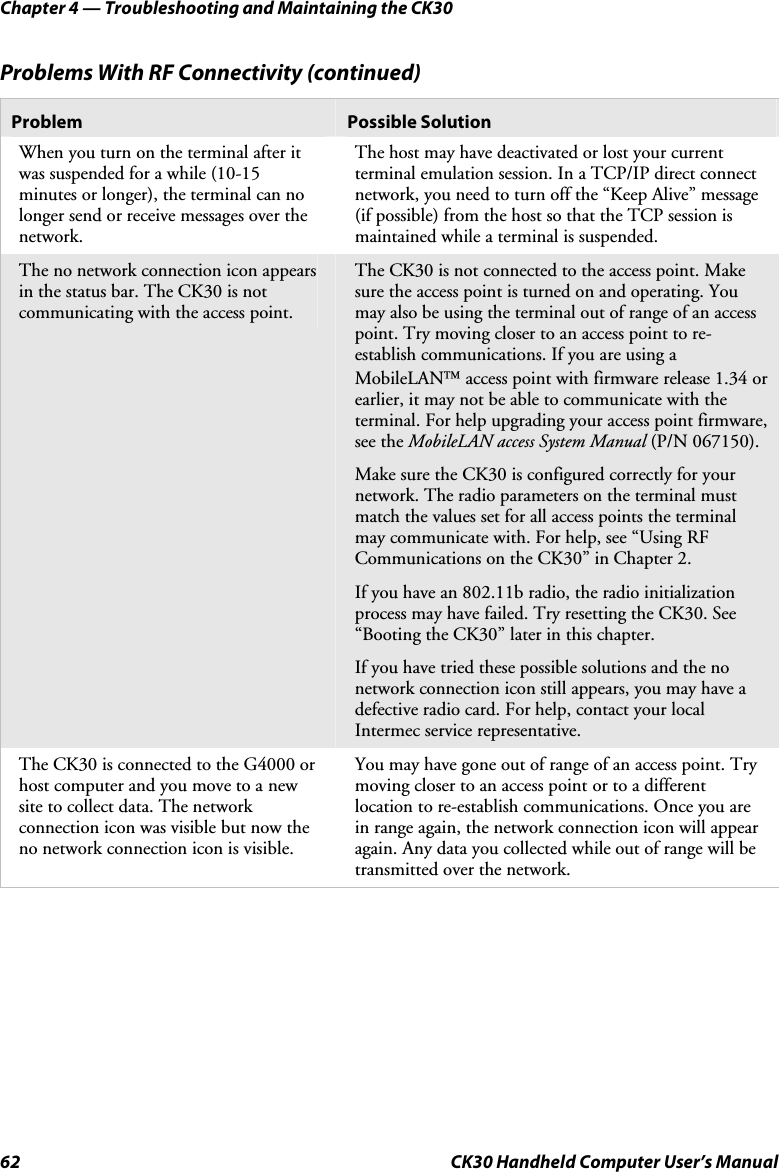
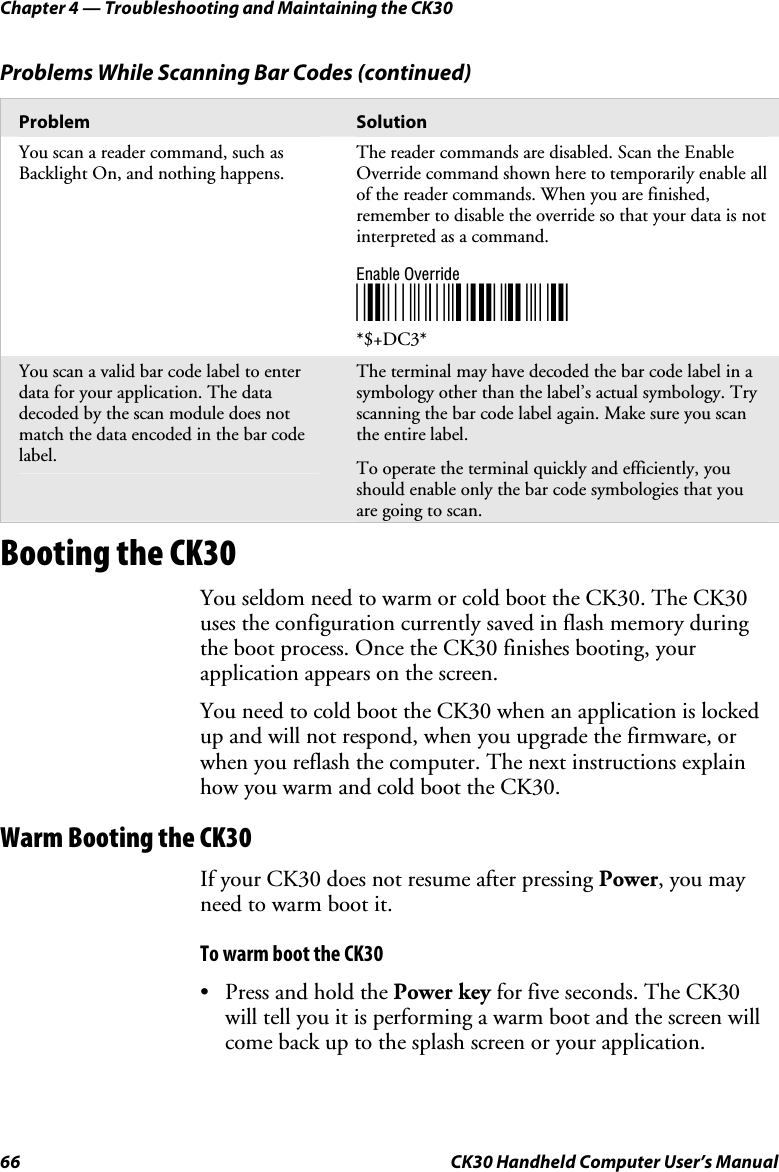
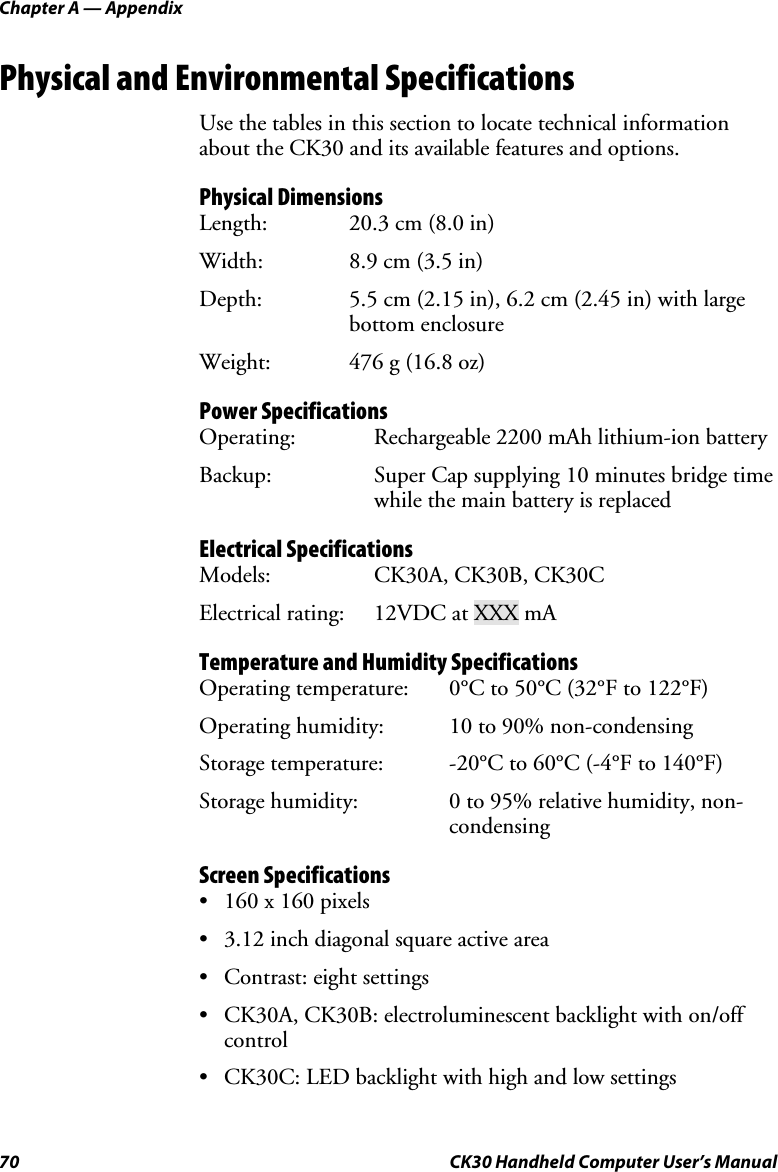
![Chapter 1 — Using the CK30 Handheld Computer 8 CK30 Handheld Computer User’s Manual Using the 42-Key Large Numeric and Function Keypad EnterEnterHome\/CAPSSpDel[<]>InsPROGGreen key Orange keyPower key Backlight keyScan button 42-key large numeric and function keypad: Use this keypad to easily print numbers (0-9) and access function keys F1 through F12. You can also print the entire alphabet and special characters by pressing color-coded key sequences.](https://usermanual.wiki/Intermec-Technologies/CK30MIG2.User-Manual-3/User-Guide-352875-Page-18.png)
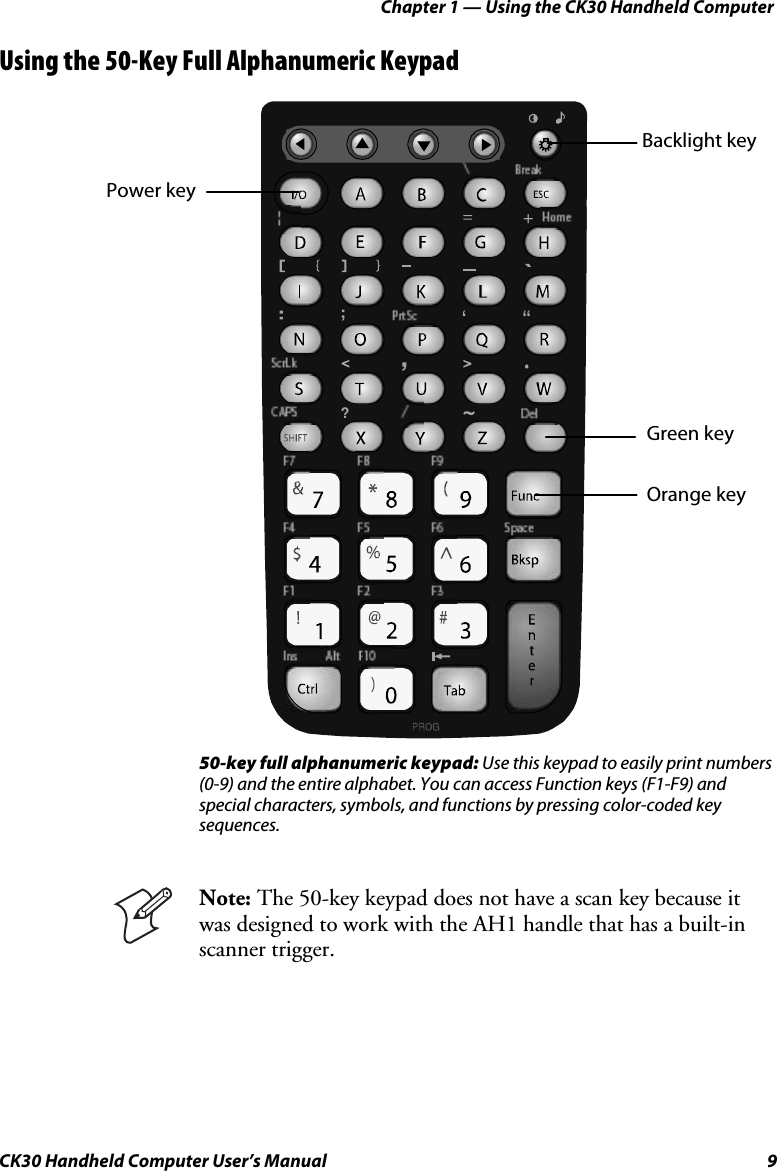
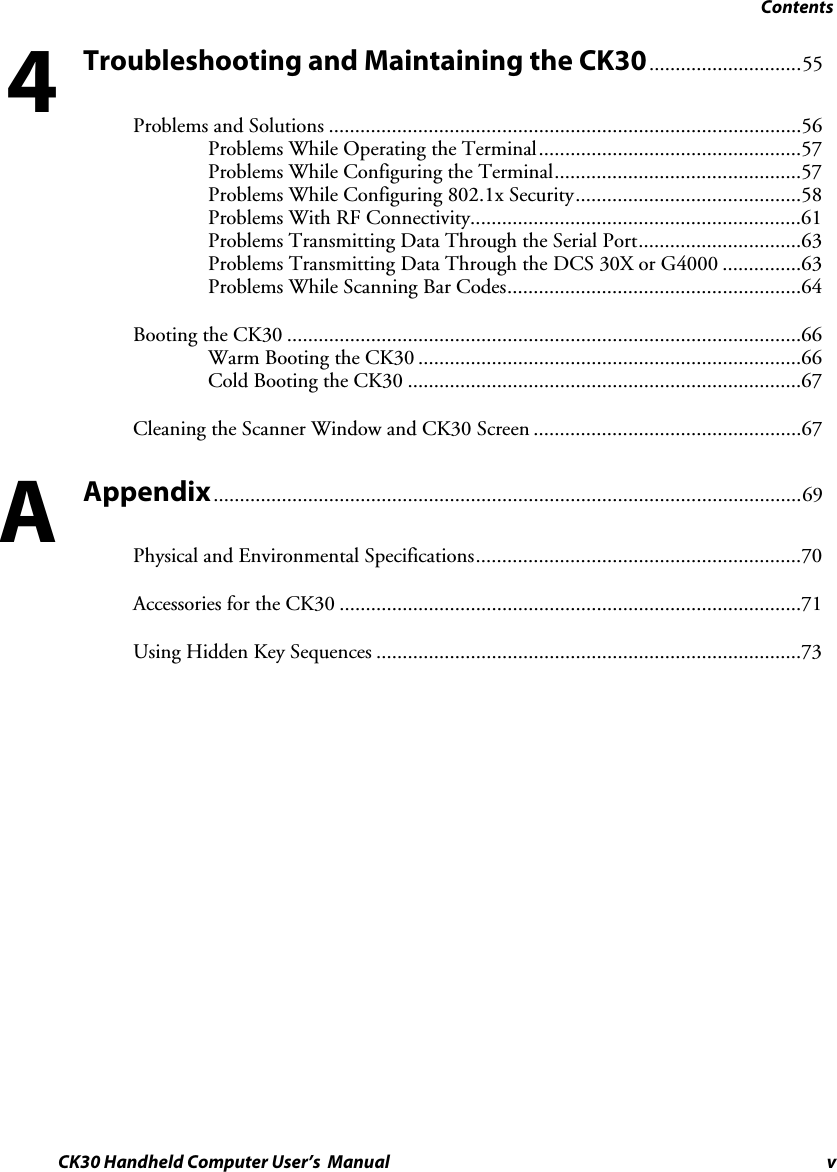
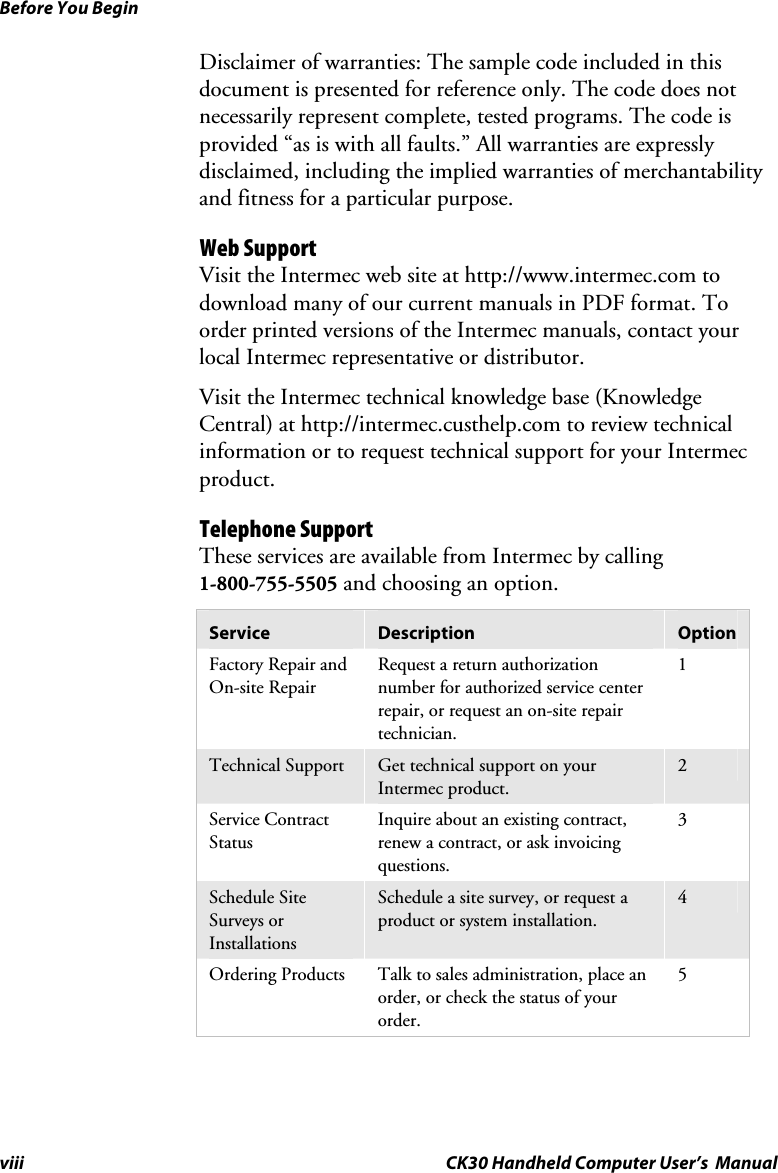
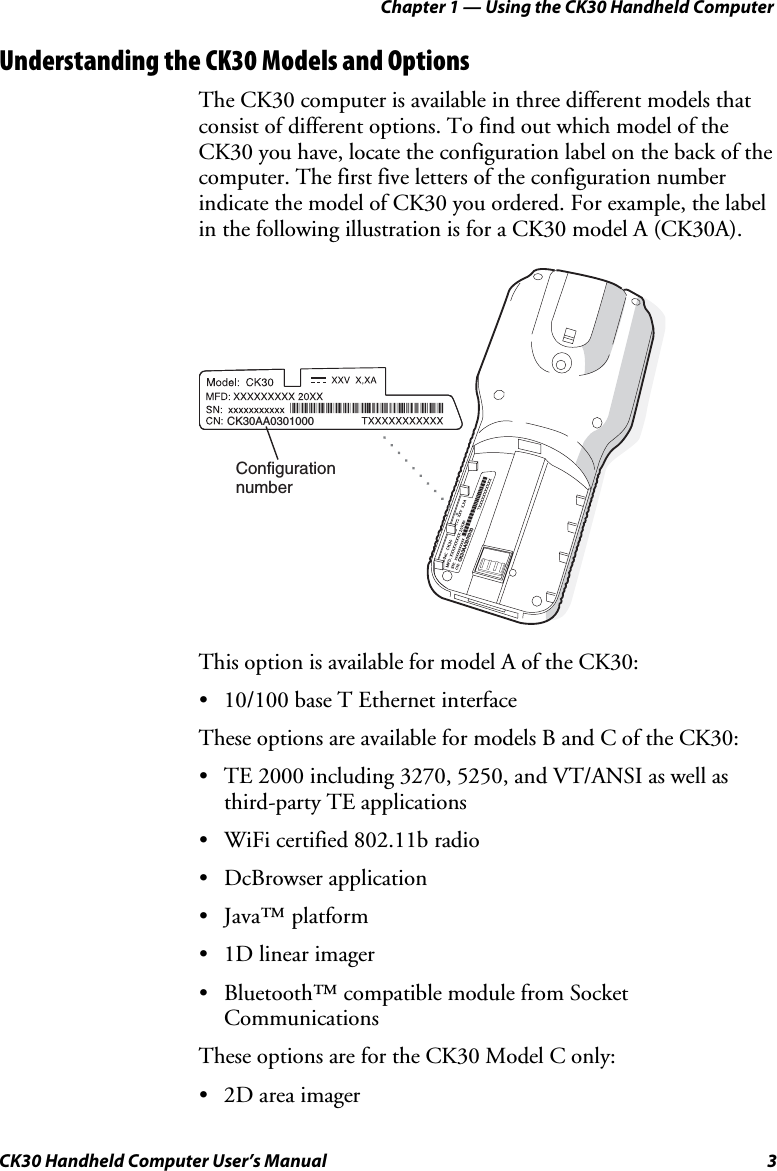
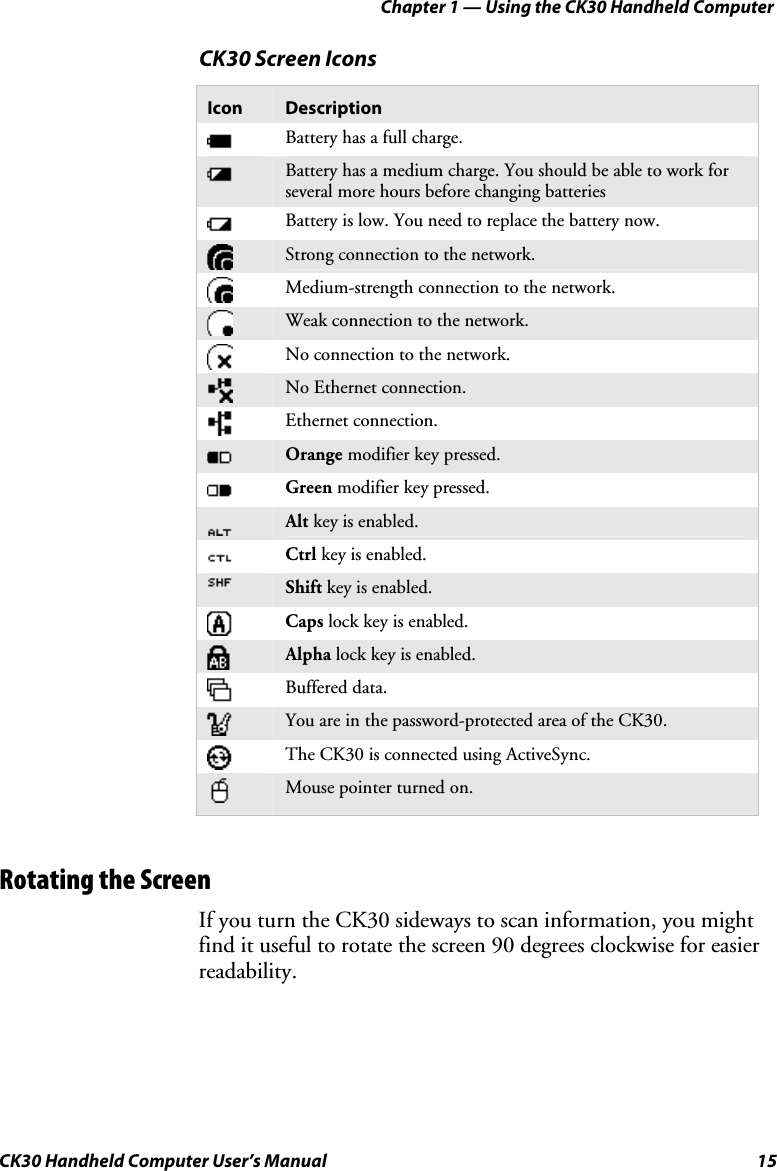
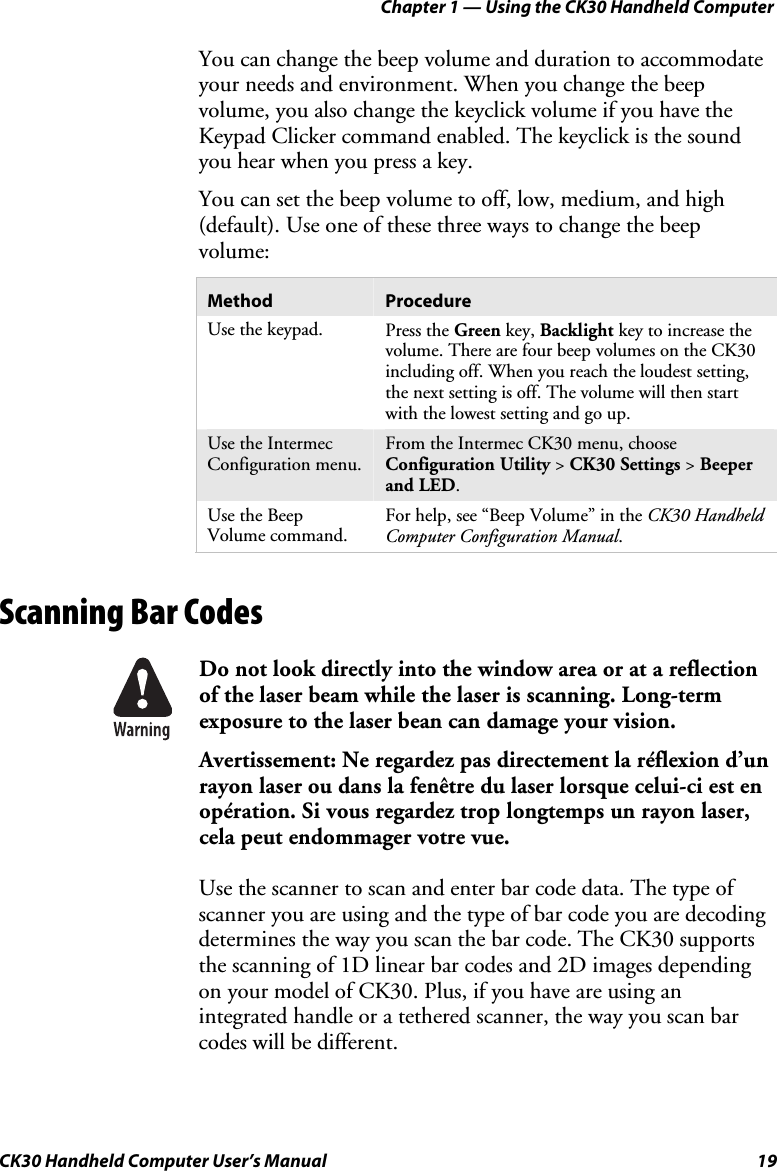
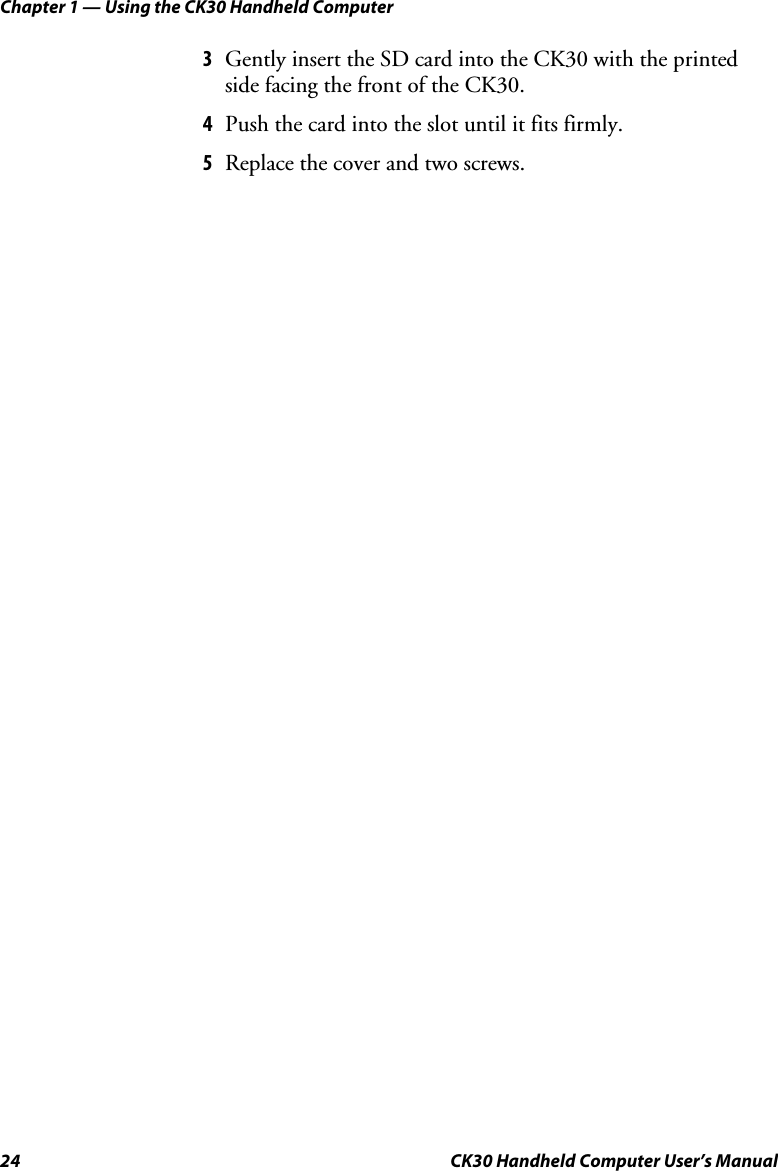
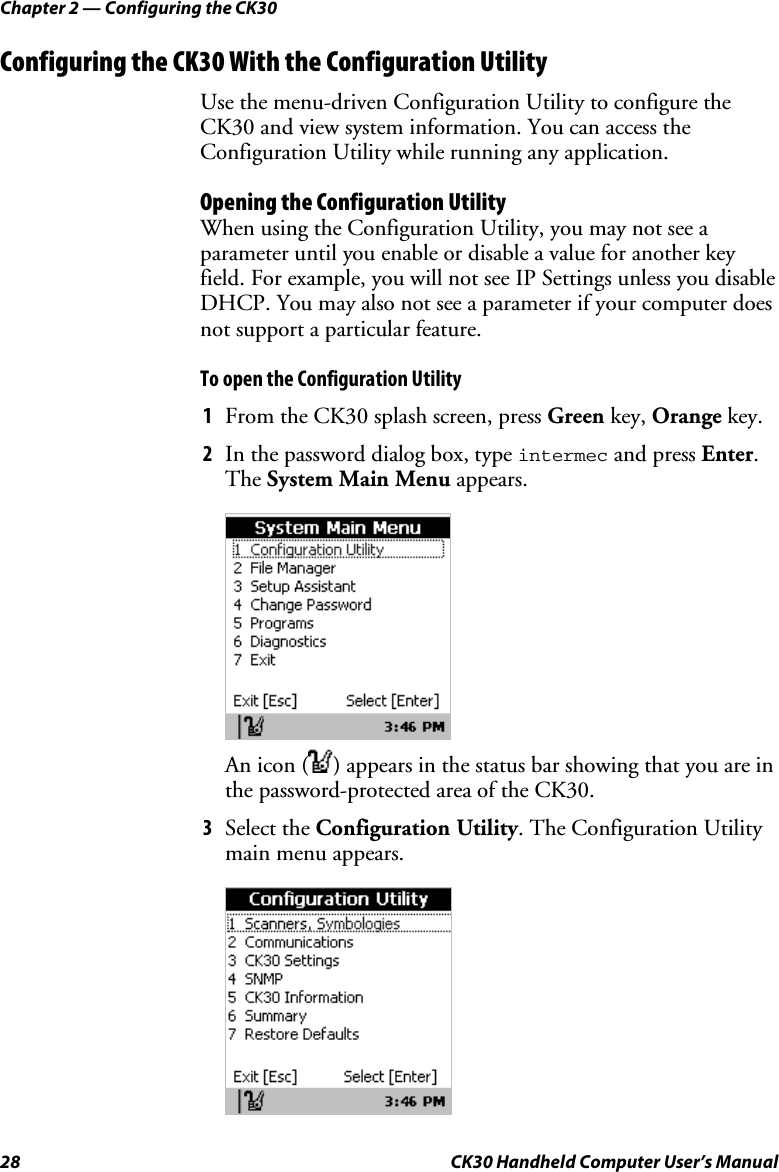
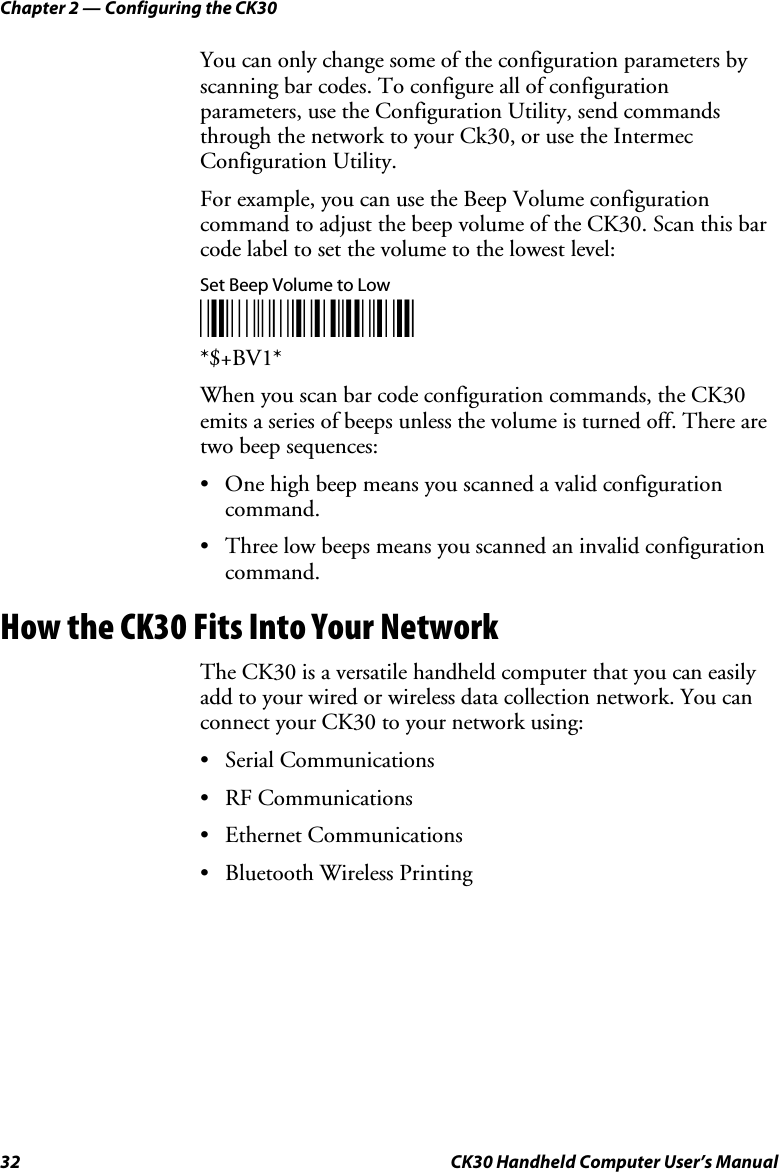
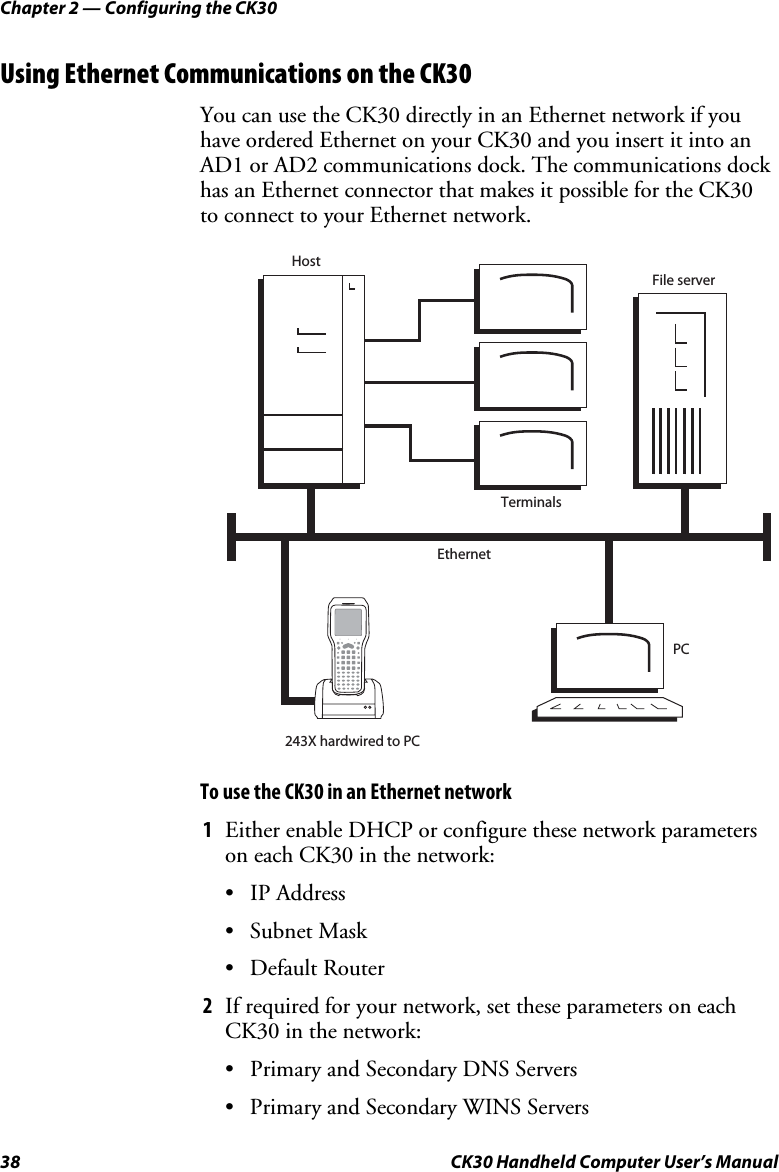
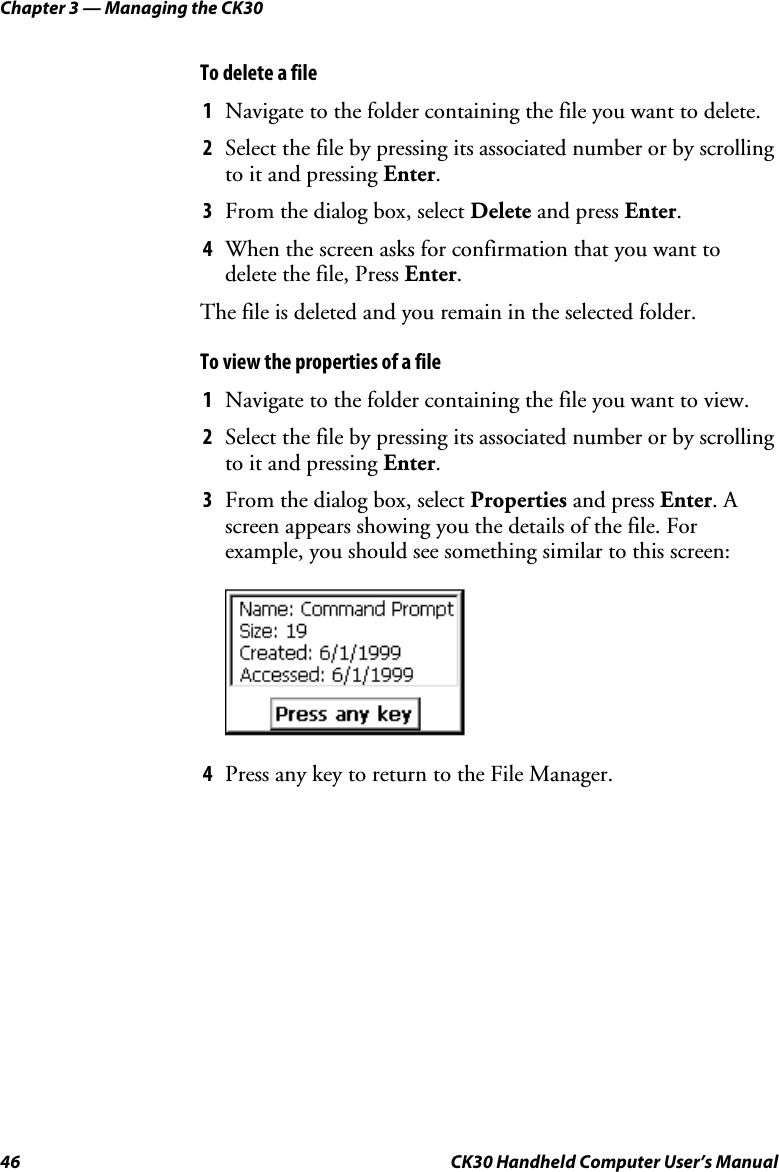
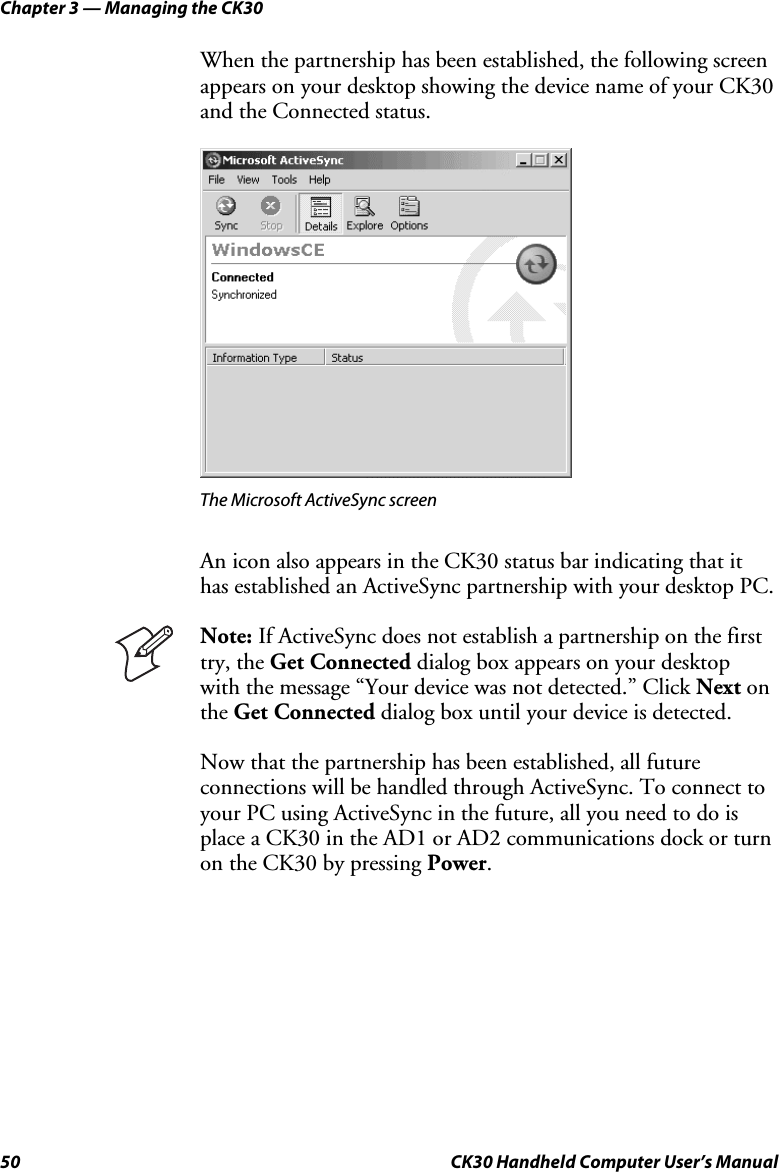
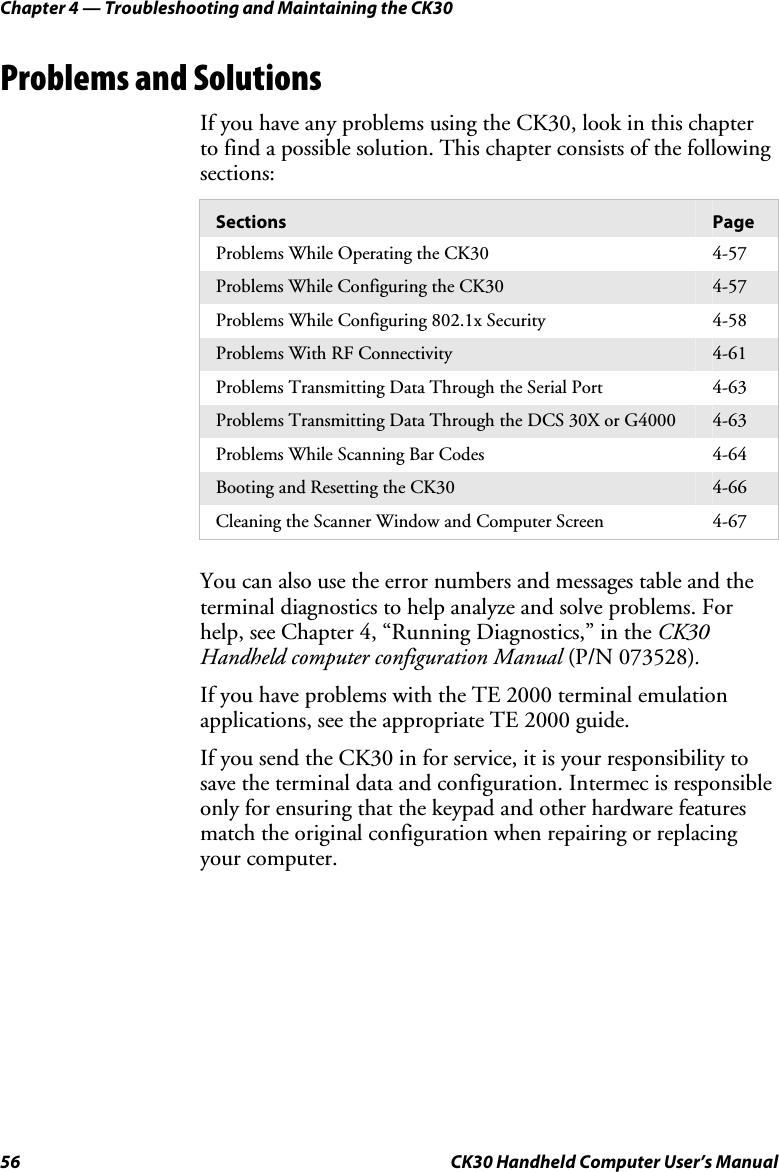
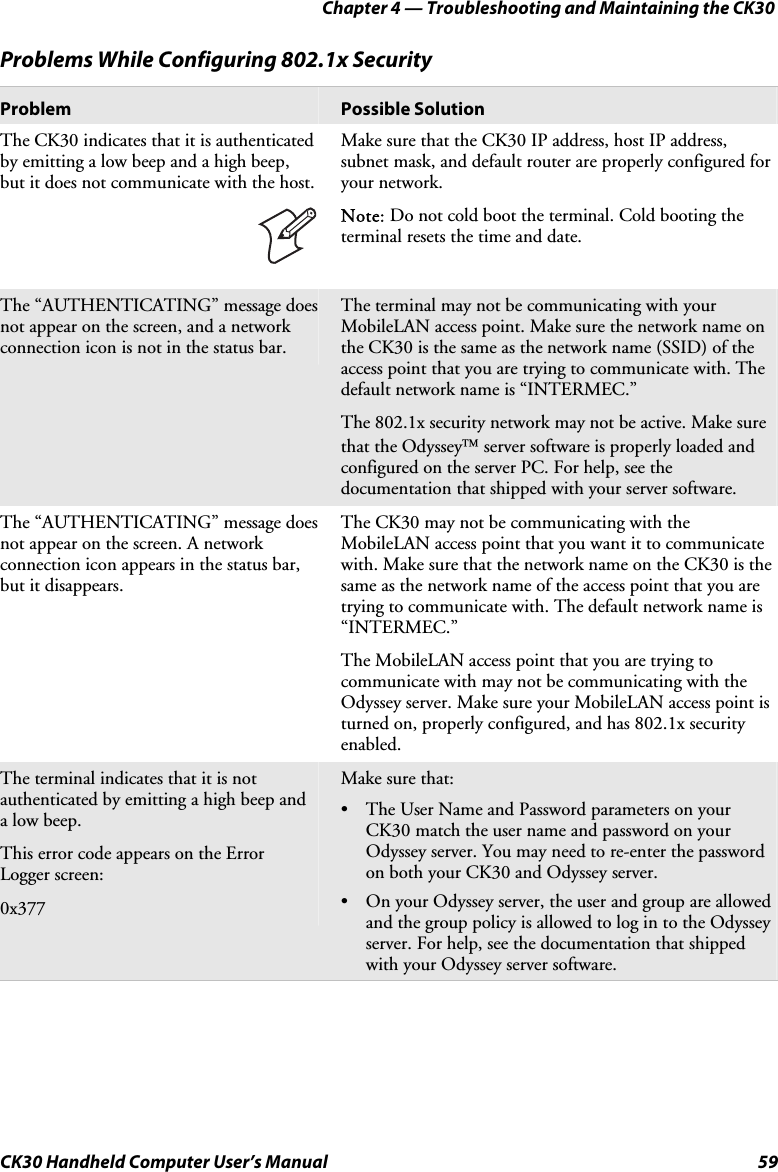
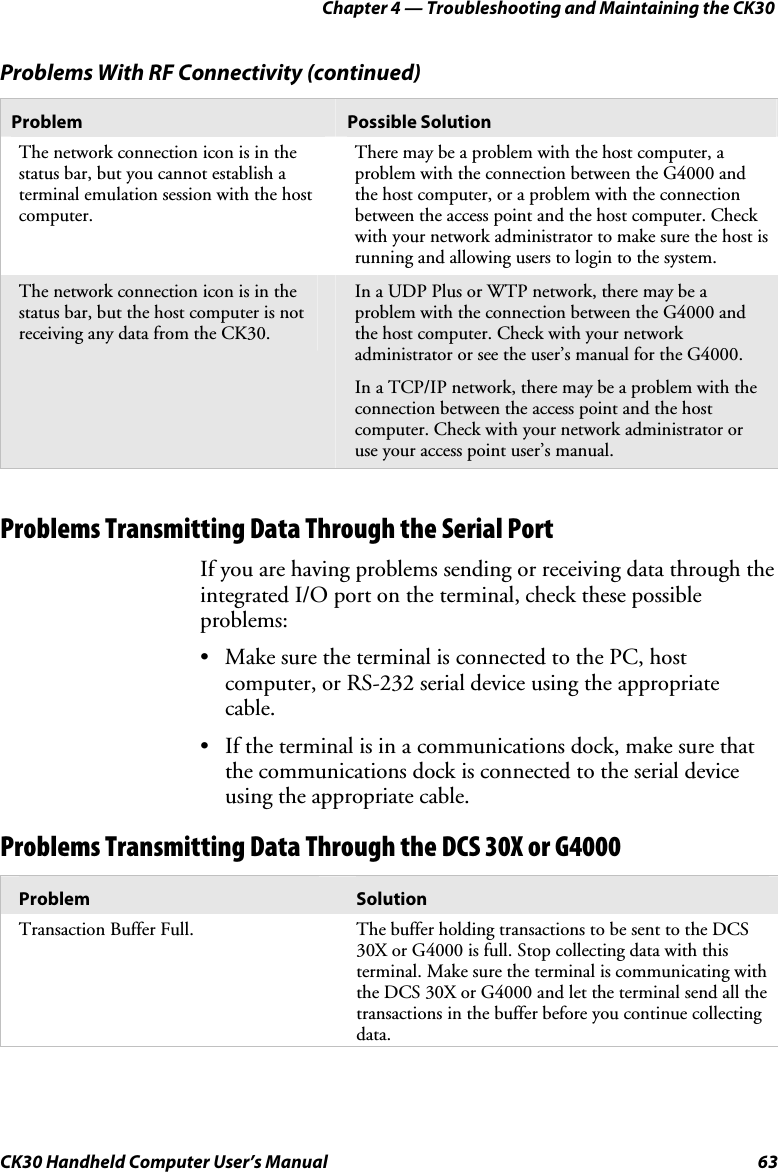
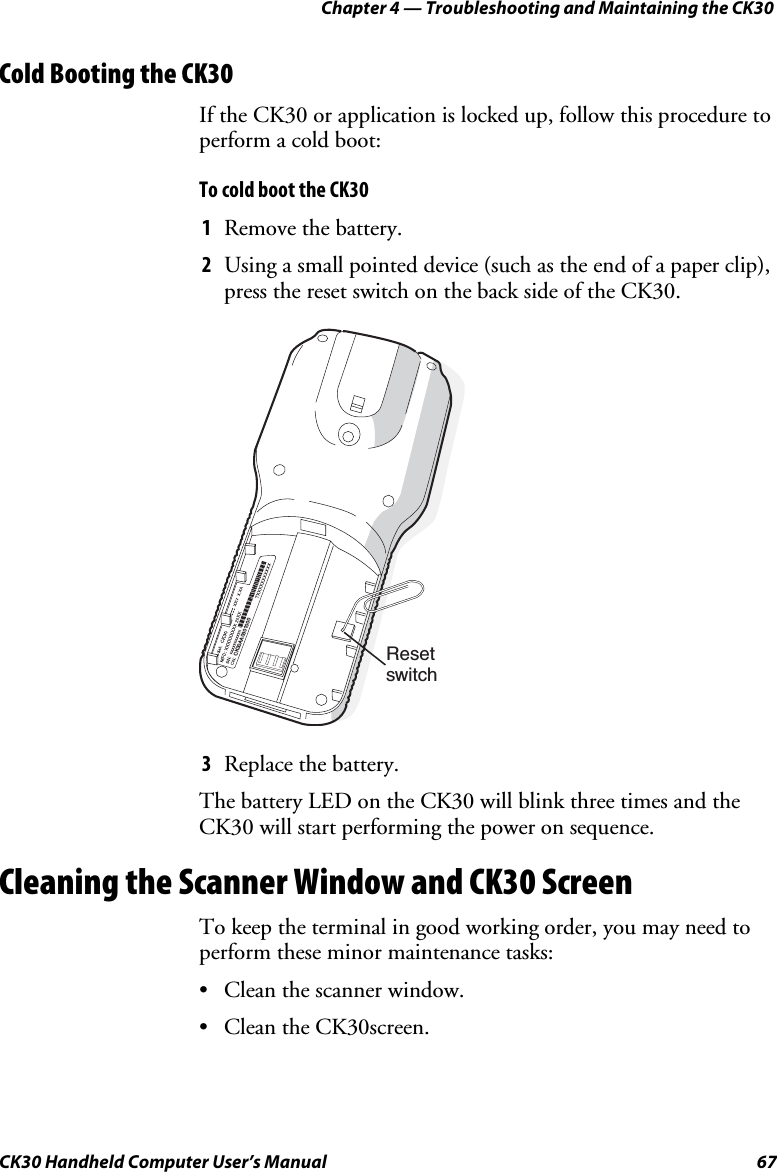
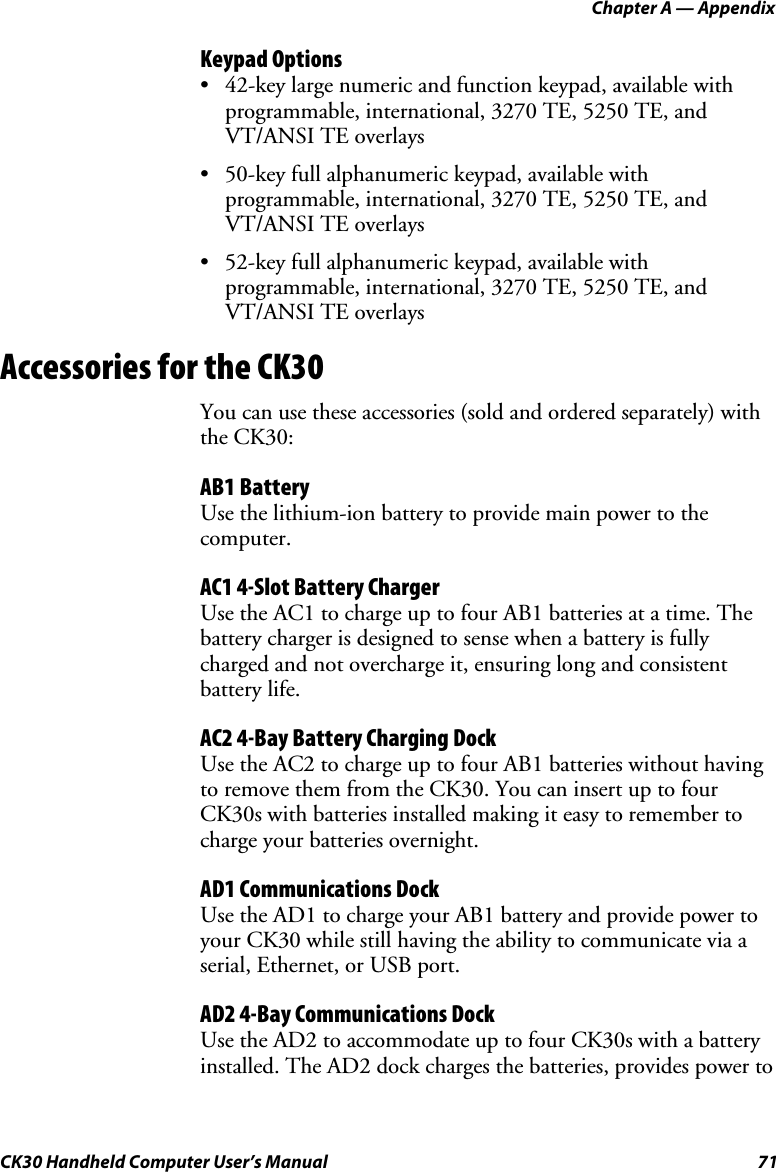
![Chapter 1 — Using the CK30 Handheld Computer 10 CK30 Handheld Computer User’s Manual Using the 52-key Full Alphanumeric Keypad AltTabEnterEnterHome+&^\/[],*F9F10 F11 F12F7F8F5F6ShiftCAPSSpXZCtl DelIns><F21 F23F17 F18 F19F14F15 F16F13F22F20 F24Power key Green key Orange key Backlight key Scan button 52-key full alphanumeric keypad: Use this keypad to easily print numbers (0-9) and the entire alphabet. You can access Function keys (F5-F24) and special characters, symbols, and functions by pressing color-coded key sequences.](https://usermanual.wiki/Intermec-Technologies/CK30MIG2.User-Manual-3/User-Guide-352875-Page-20.png)
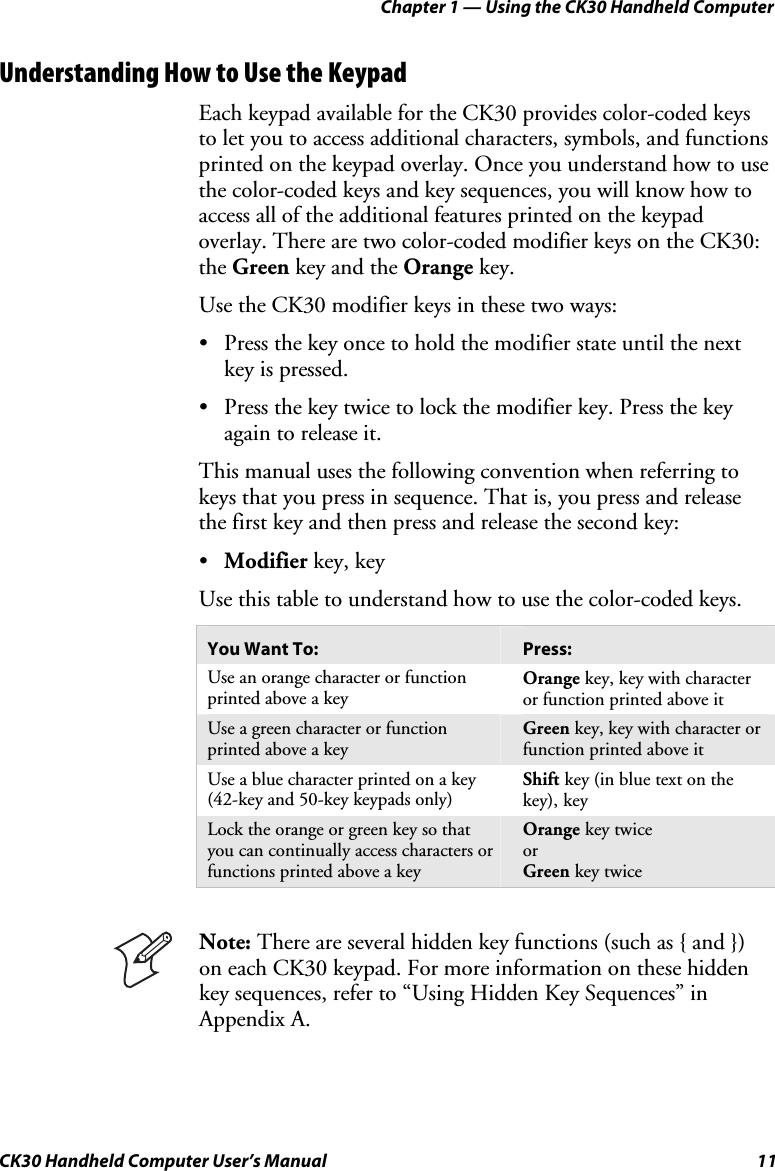

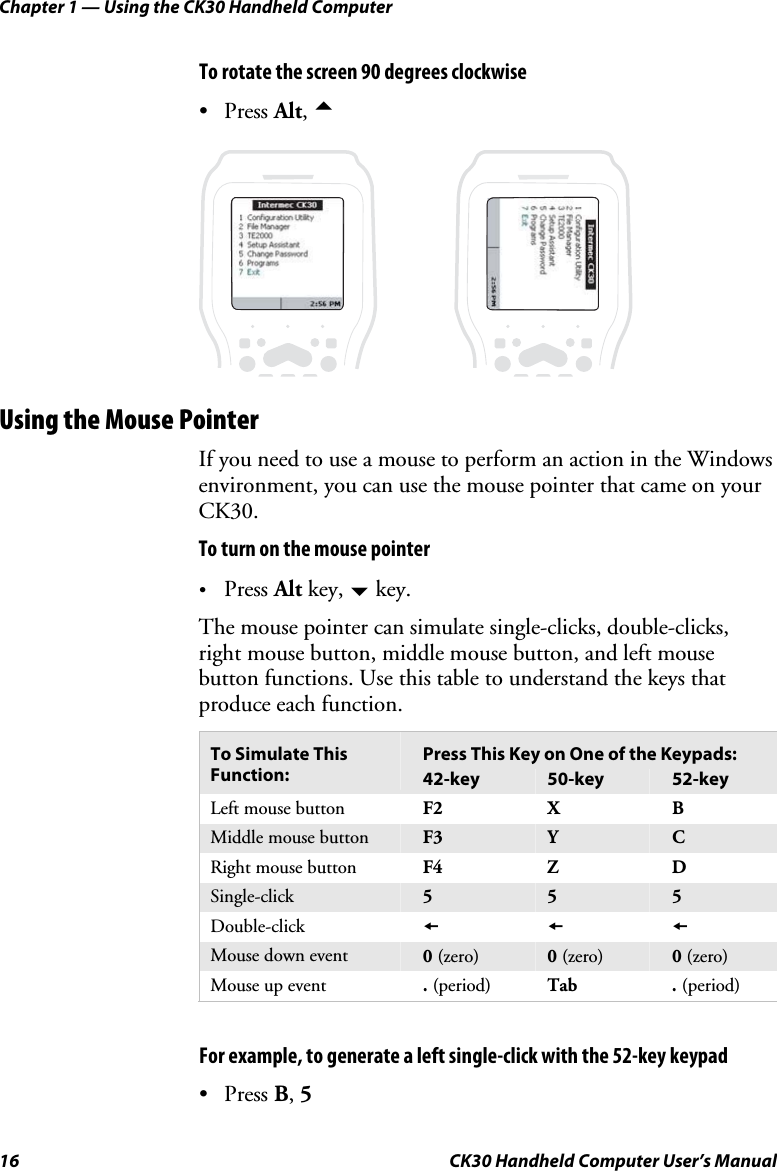
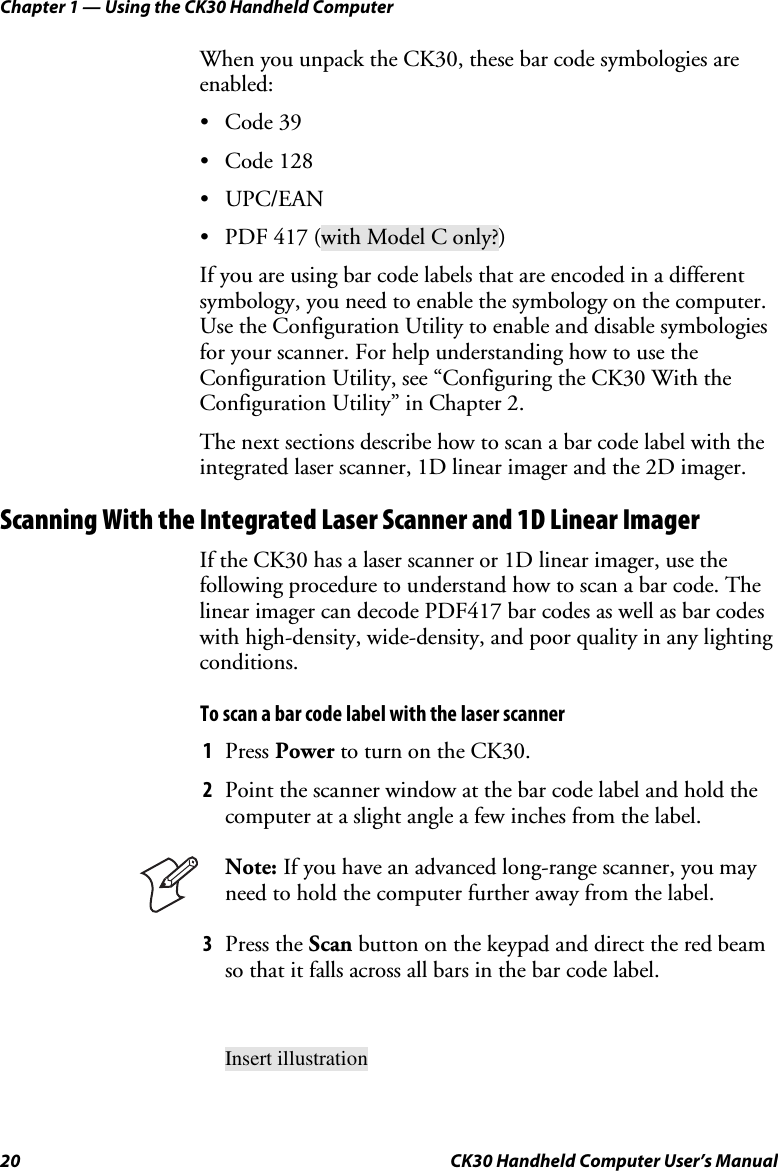

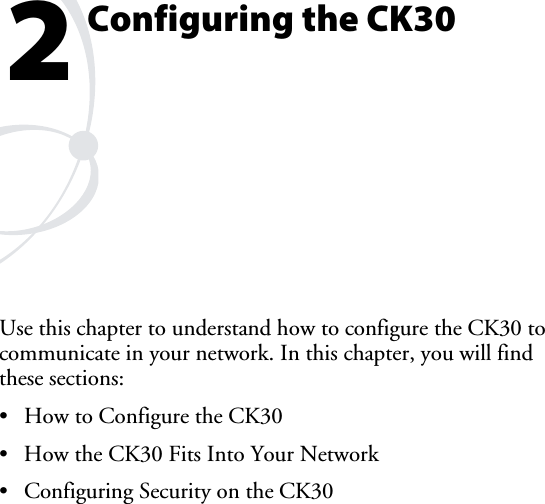
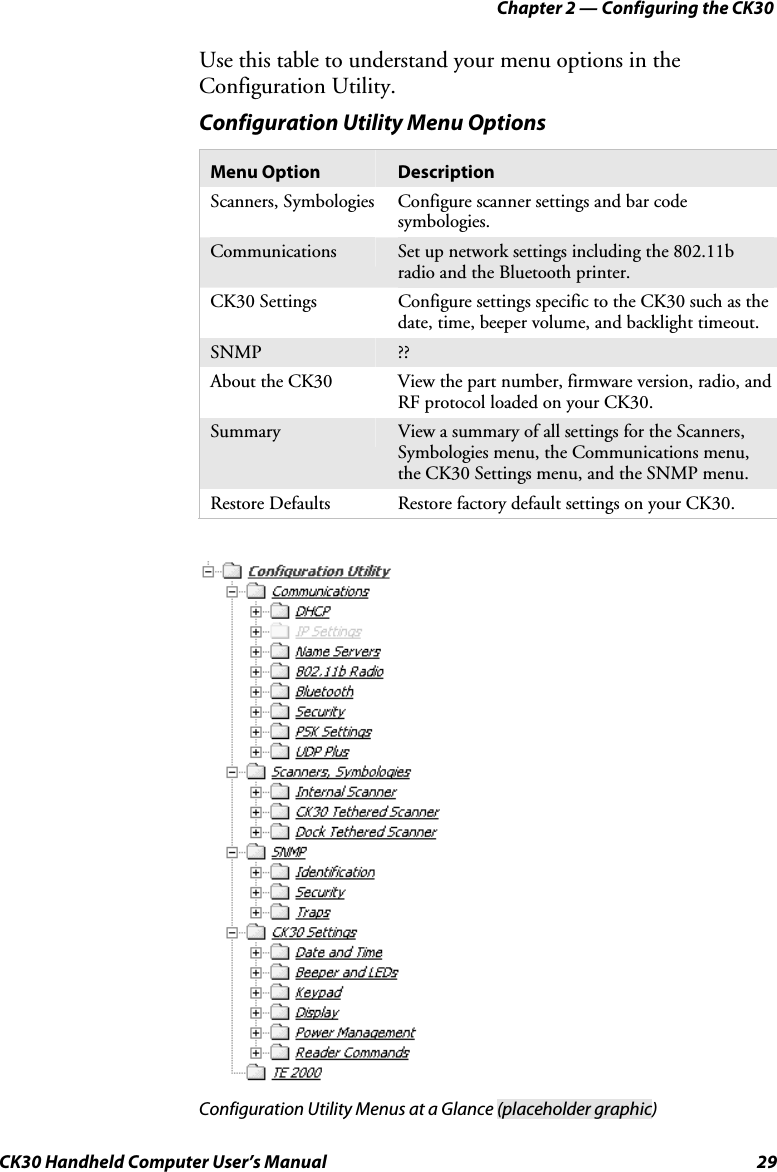

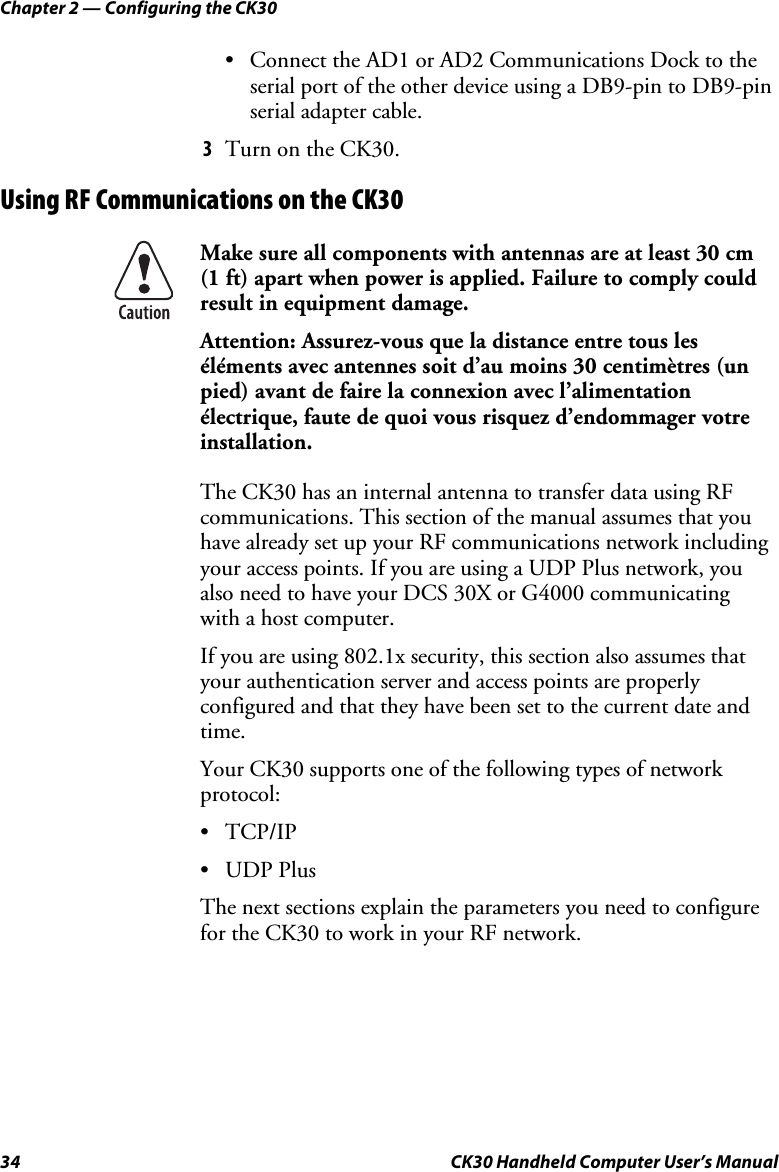

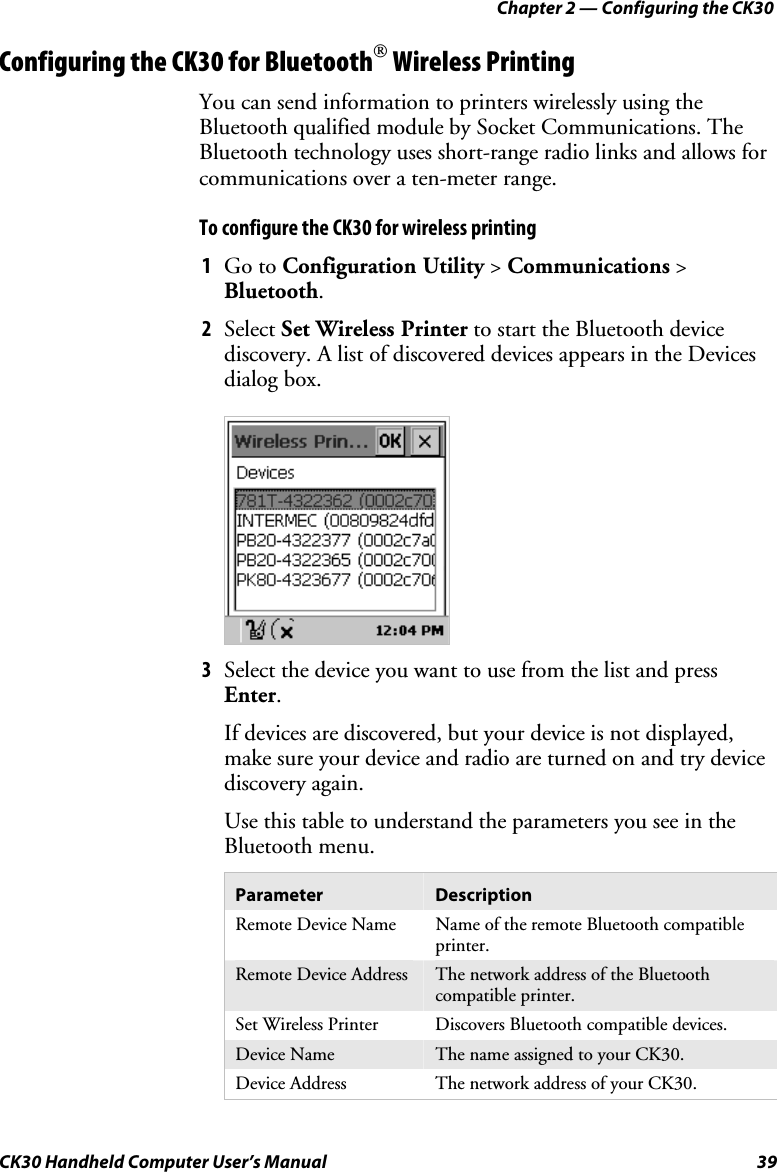
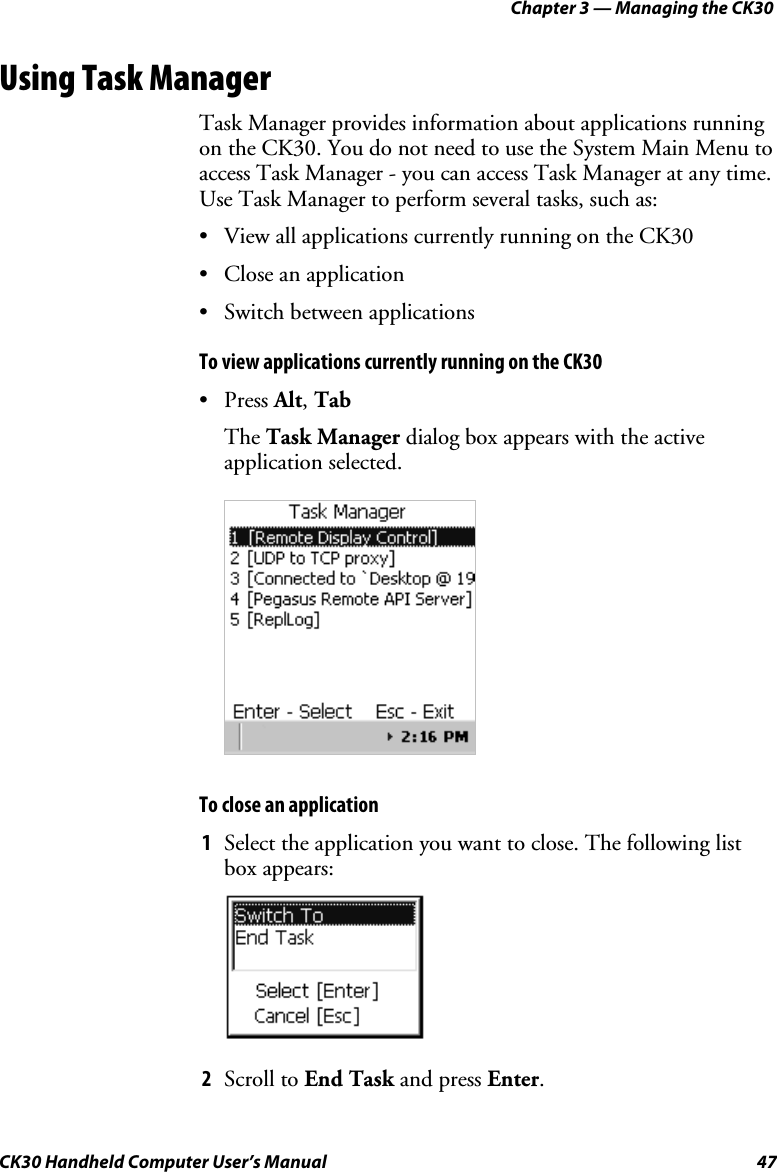
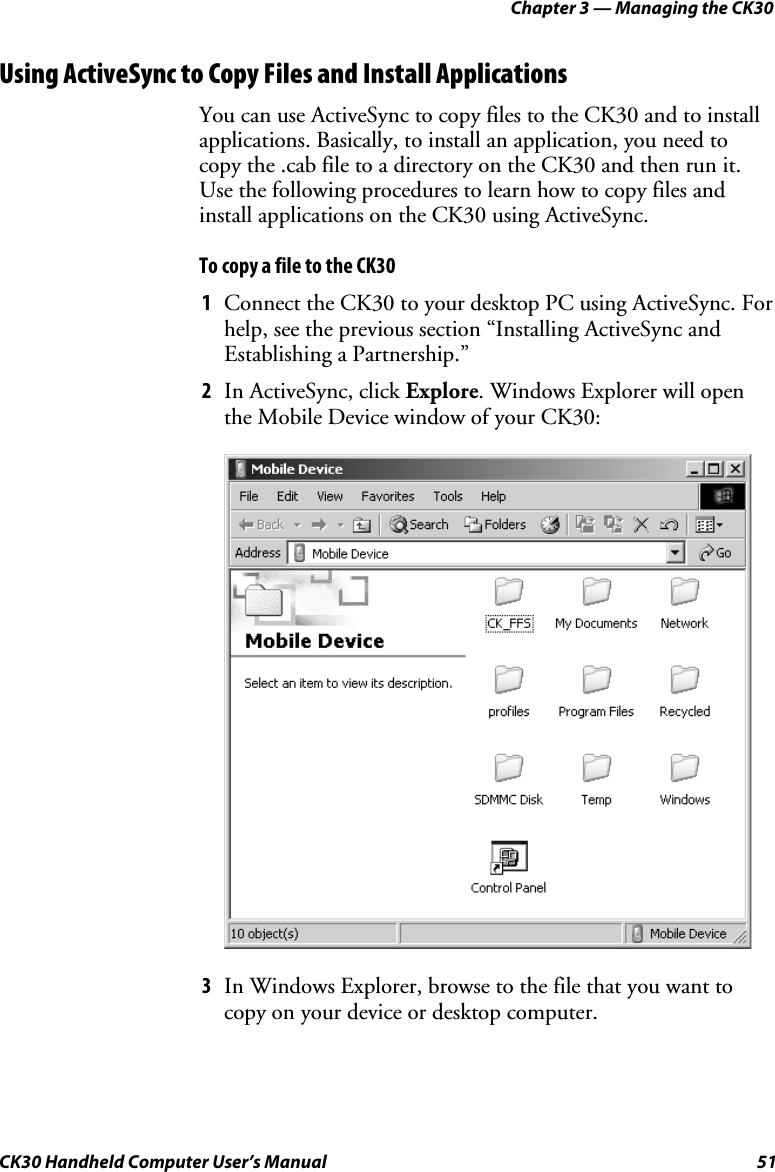

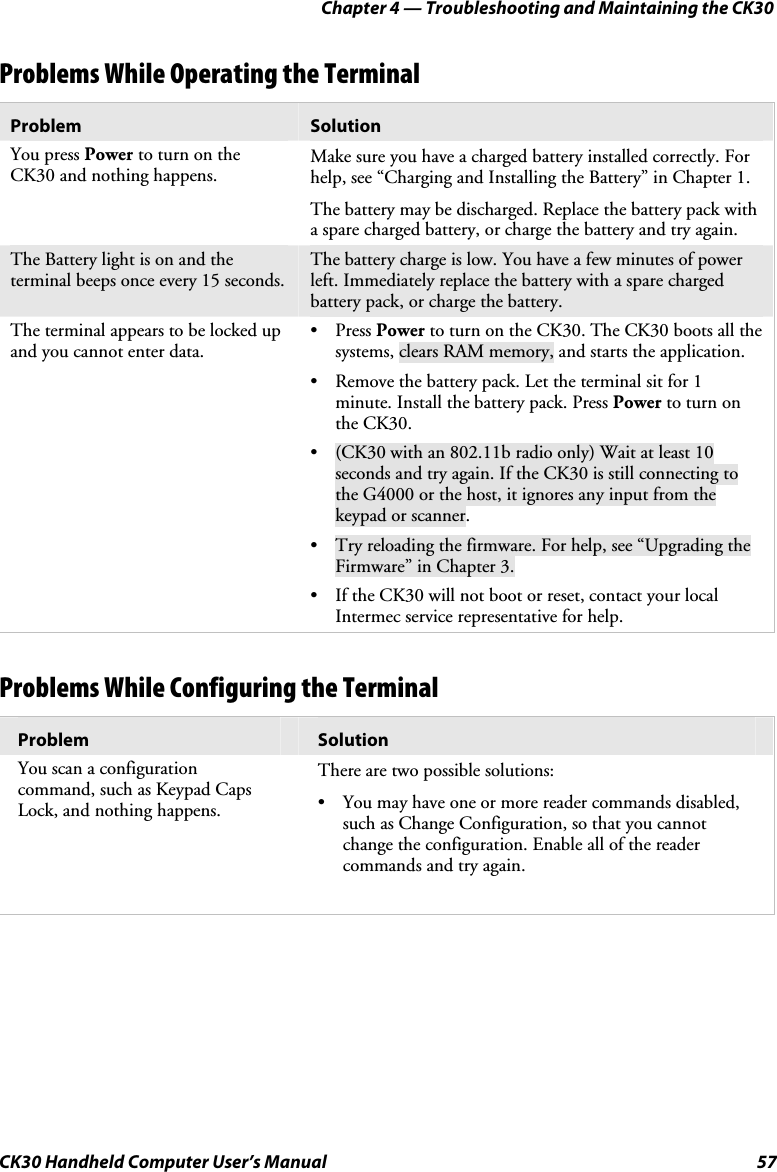
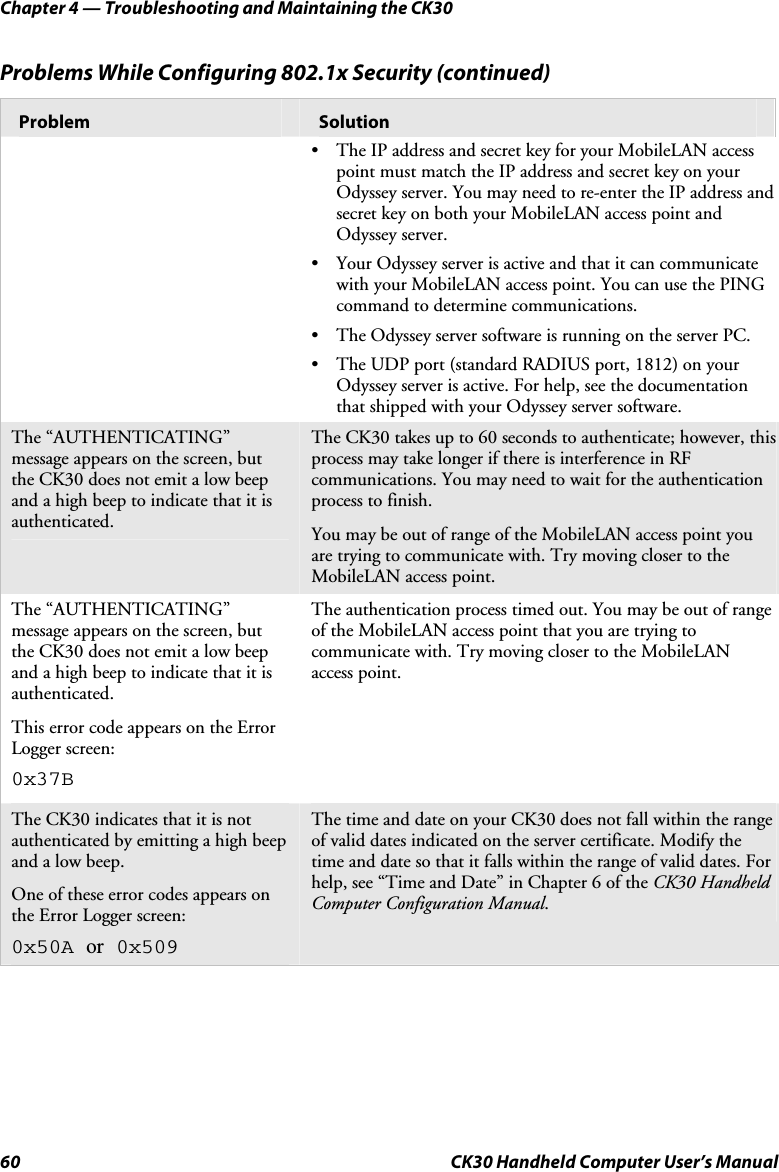
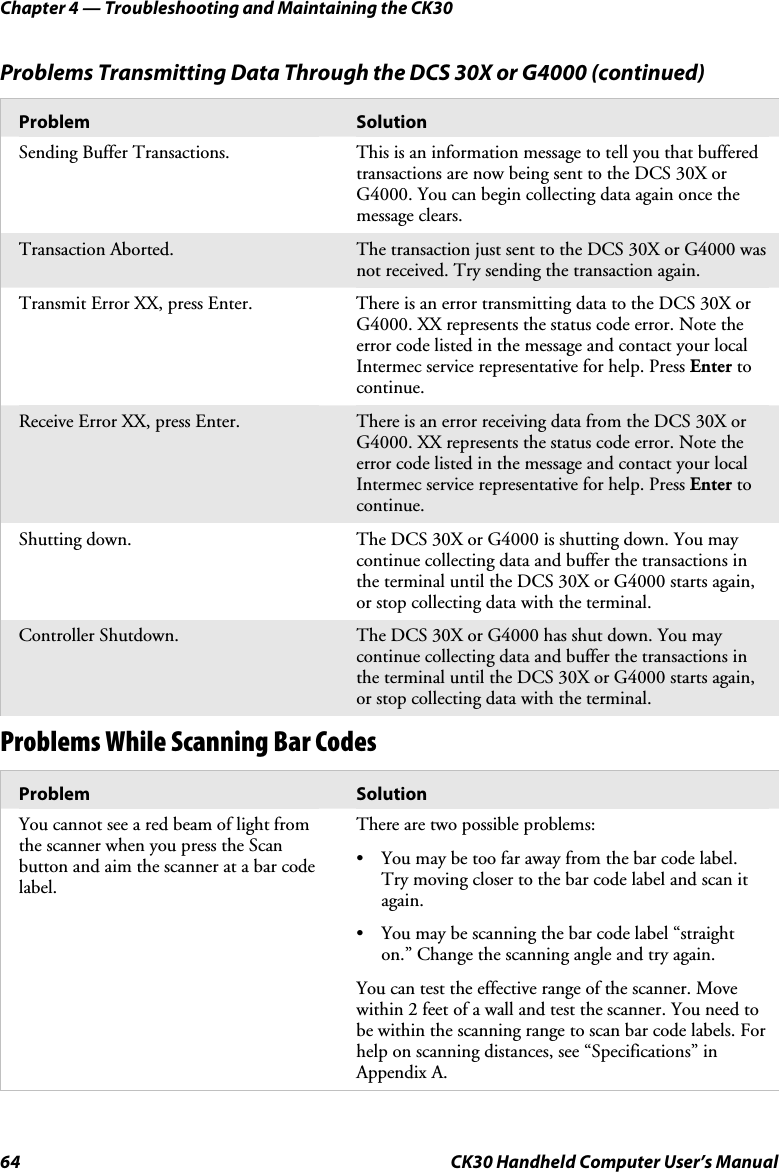
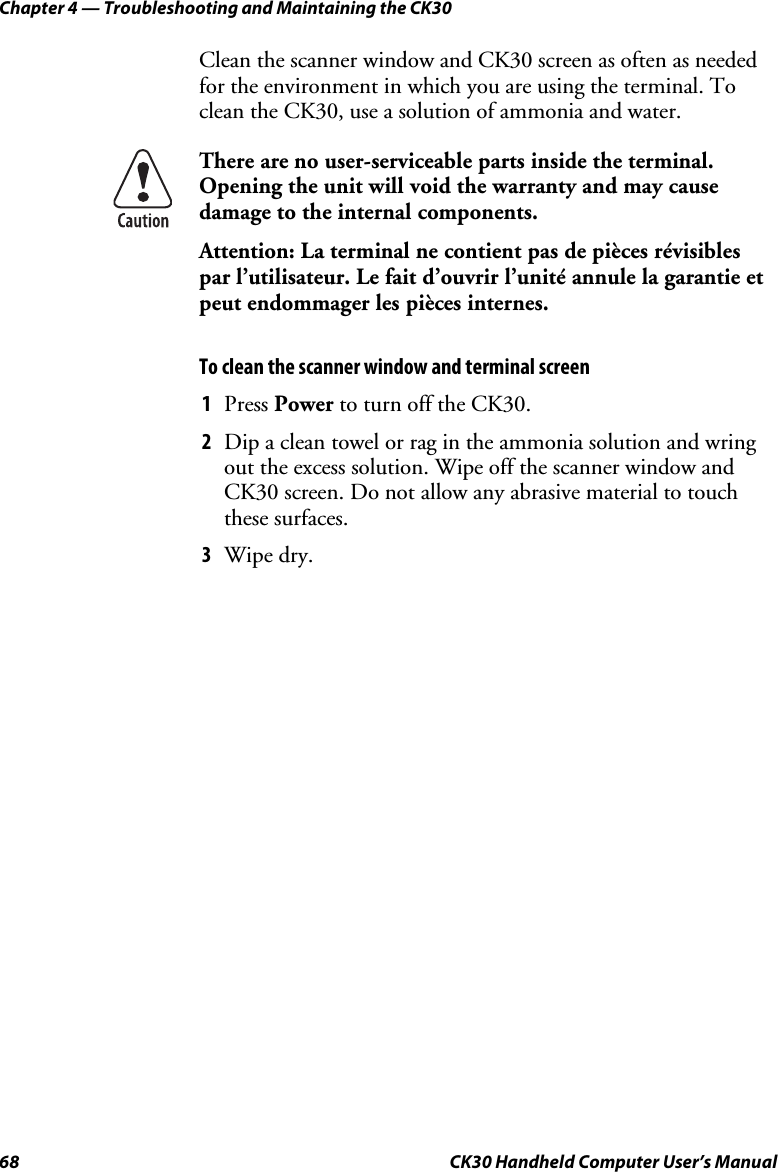
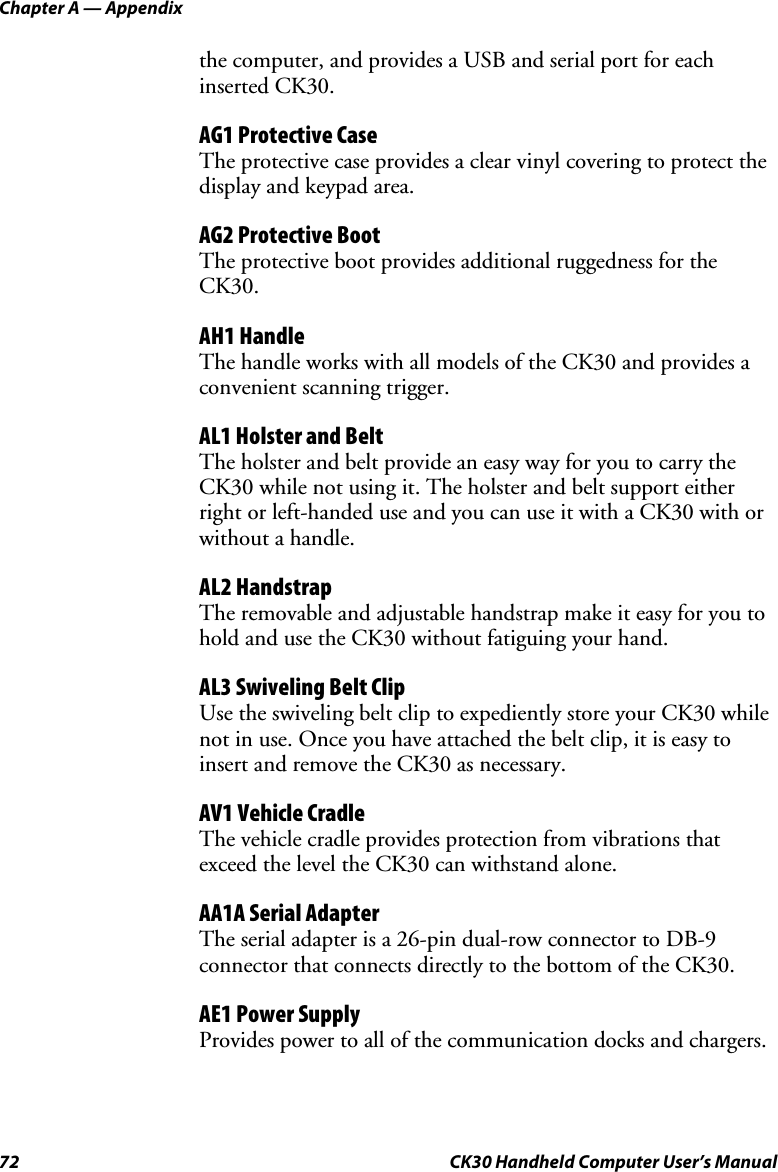
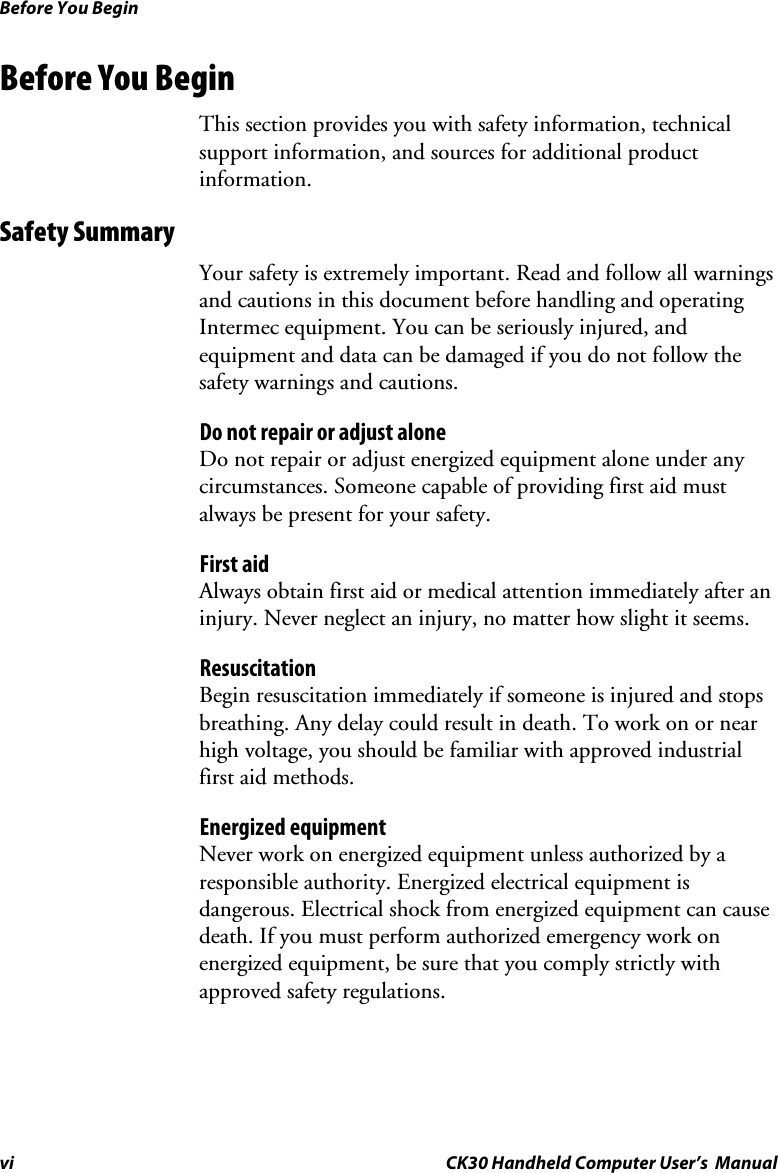
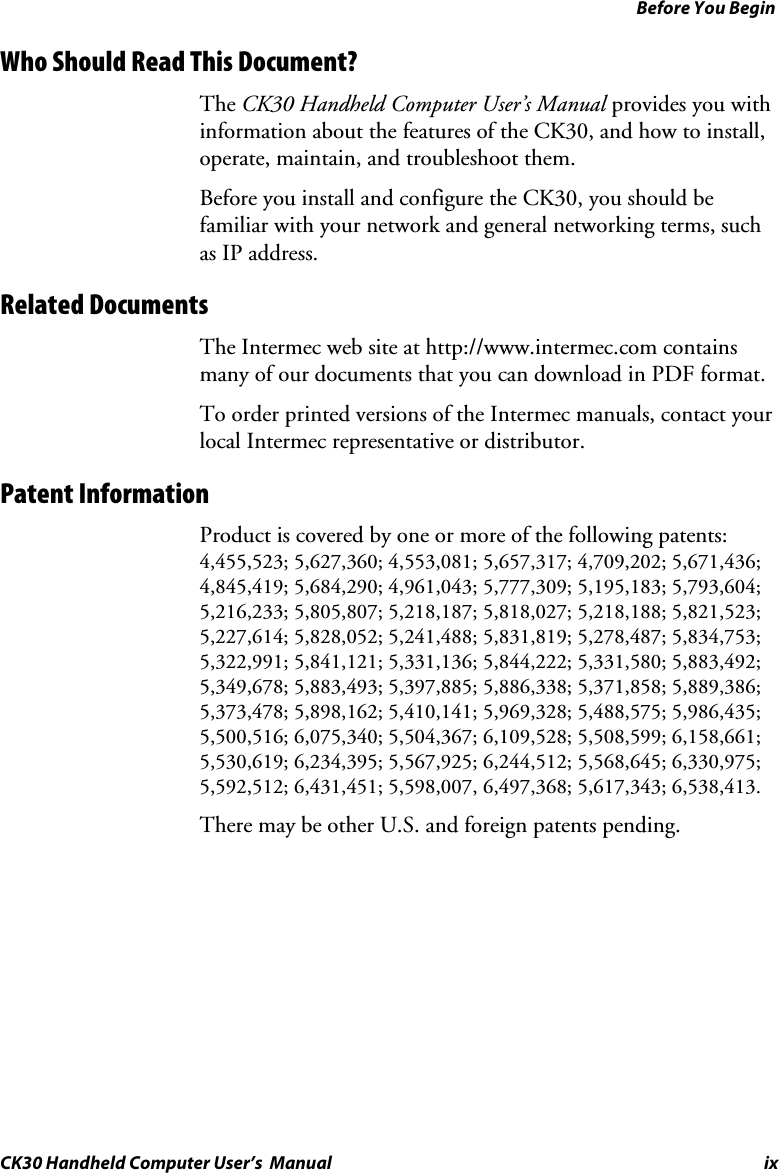
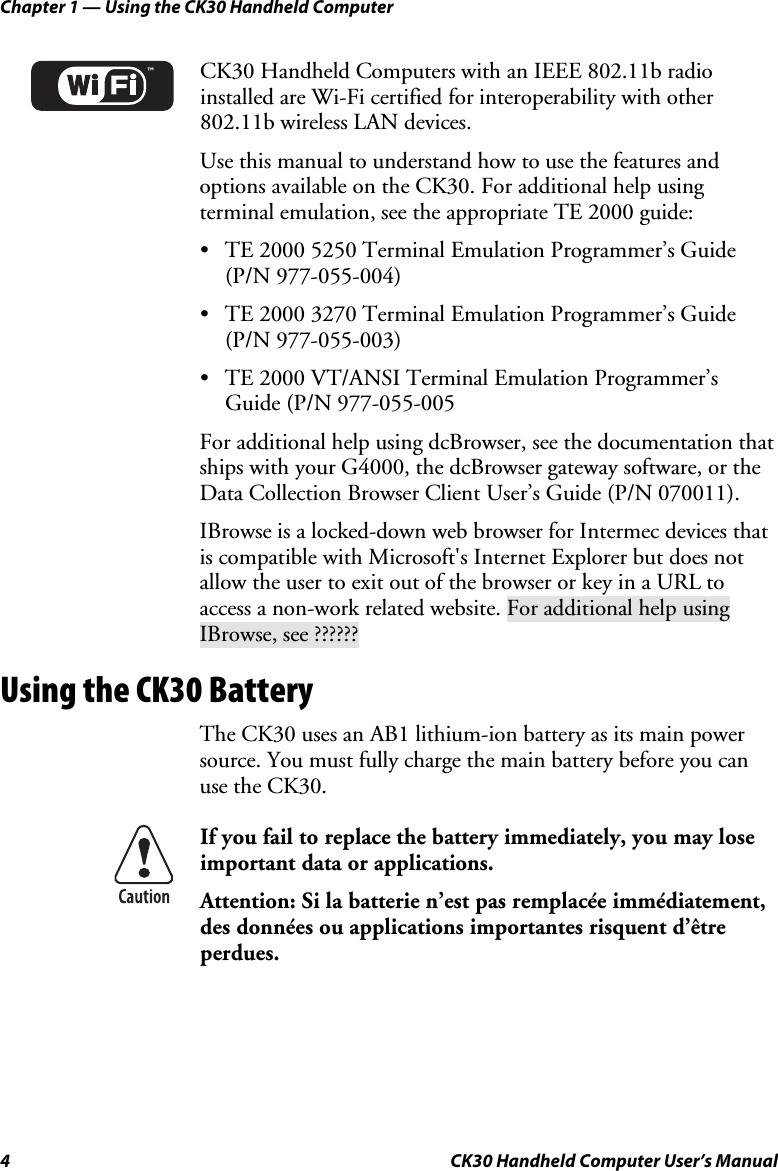
![Chapter A — Appendix CK30 Handheld Computer User’s Manual 73 Using Hidden Key Sequences Both the standard and international keypads have hidden key sequences to access special characters not printed on the keypad overlay. Use the following tables to understand how to access these hidden functions on the different versions of the keypads. Hidden Key Sequences on the Standard Keypads Press This Key Sequence on One of the Keypads: To Type: 42-Key 50-Key 52-Key $ Green key, 6`Green key, F9 Green key, G! Green key, I"Green key, F6 Green key, K'Green key, F7 Green key, L{Green key, F11 Green key, N}Green key, F12 Green key, O:Green key, F3 Green key, P;Green key, F4 Green key, Q|Green key, F8 Green key, R? Green key, S~Green key, F10 Green key, T Hidden Key Sequences on the International Keypads Press This Key Sequence on One of the Keypads: To Type: 42-Key 50-Key 52-Key $ Green key, 6{Green key, aGreen key, SGreen key, 9}Green key, bGreen key, T Green key, 0<Green key, _>Green key, `]Green key, 9[Green key, Tab](https://usermanual.wiki/Intermec-Technologies/CK30MIG2.User-Manual-3/User-Guide-352875-Page-83.png)