Inventec Appliances FW320001 Dual Band GSM Desktop Phone User Manual UPMFW320001 Rev2
Inventec Appliances (Jiangning) Corporation Dual Band GSM Desktop Phone UPMFW320001 Rev2
Manual

Page 1 of 33
z Please read this manual before using your phone.
z All illustrations in this user manual are for illustration only and may not accurately
depict the actual phone.
z We operate a policy of continuous development and reserve the right to make
changes and improvements to any of the products described in this manual without
prior notice.

Page 2 of 33
Table of Contents
1. Safety information ......................................................................................................... 4
2. General information..................................................................................................... 10
2.1 Checking the phone and accessories ................................................................ 10
2.2 Illustrations of the phone and function ............................................................... 10
2.3 Idle mode display ............................................................................................... 13
2.4 Technical specifications...................................................................................... 13
2.5 SIM card & battery ............................................................................................. 13
2.5.1 Installing SIM card & battery .................................................................... 14
2.5.2 Removing SIM card & battery .................................................................. 14
2.6 Charging the battery .......................................................................................... 14
2.7 Power the phone on/off...................................................................................... 15
2.8 Idle mode operations ......................................................................................... 15
3. Basic Operations......................................................................................................... 15
3.1 Making a call ...................................................................................................... 15
3.1.1 Making a call from idle ............................................................................. 15
3.1.2 Inserting a pause sign when dialing......................................................... 16
3.1.3 Speed dialing ........................................................................................... 16
3.1.4 Redialing.................................................................................................. 16
3.2 Answering/rejecting a call .................................................................................. 16
3.3 Missed calls ....................................................................................................... 17
3.4 During a call ....................................................................................................... 17
3.4.1 Muting a call............................................................................................. 17
3.4.2 Handsfree earpiece.................................................................................. 17
3.4.3 Adjusting earpiece volume ....................................................................... 17
3.4.4 Searching for a number from the contacts ............................................... 17
3.4.5 DTMF....................................................................................................... 17
3.5 Call Metering...................................................................................................... 17
3.5.1 Enter Pre-Paid Amount ............................................................................ 17
3.5.2 View Calls ................................................................................................ 18
3.5.3 Set Call Metering ..................................................................................... 18
3.5.4 CM Settings ............................................................................................. 18
3.6 Charge summary ............................................................................................... 18
4. Entering text................................................................................................................ 19
4.1 Keypad mapping ................................................................................................ 19
4.2 ABC/abc input .................................................................................................... 20
4.3 123 input ............................................................................................................ 20
4.4 Entering symbols ............................................................................................... 20
5. The menus .................................................................................................................. 20
5.1 Menu Tree.......................................................................................................... 20
5.2 Contacts............................................................................................................. 22
5.2.1 Search Entry ............................................................................................ 22

Page 3 of 33
5.2.2 Add New Entry ......................................................................................... 22
5.2.3 View ......................................................................................................... 22
5.2.4 Edit........................................................................................................... 22
5.2.5 Delete ...................................................................................................... 23
5.2.6 Copy ........................................................................................................ 23
5.2.7 Move........................................................................................................ 23
5.2.8 Delete All.................................................................................................. 23
5.2.9 Copy All.................................................................................................... 24
5.2.10 Owner Number ...................................................................................... 24
5.2.11 Speed dialing ......................................................................................... 24
5.2.12 Memory Status....................................................................................... 24
5.3 Messages........................................................................................................... 24
5.3.1 Write Message......................................................................................... 24
5.3.2 Inbox ........................................................................................................ 25
5.3.3 Outbox ..................................................................................................... 25
5.3.4 Template .................................................................................................. 25
5.3.5 Message Settings .................................................................................... 25
5.3.6 Voice Mail ................................................................................................ 26
5.4 Call History......................................................................................................... 26
5.4.1 Missed /Dialed /Received ........................................................................ 26
5.4.2 Delete Log ............................................................................................... 26
5.4.3 Call Time.................................................................................................. 26
5.5 Settings.............................................................................................................. 27
5.5.1 Phone Setup ............................................................................................ 27
5.5.2 Call Setup ................................................................................................ 28
5.5.3 Network Setup ......................................................................................... 30
5.5.4 Security Setup ......................................................................................... 30
5.5.5 Restore Factory Settings ......................................................................... 31
5.6 Games ............................................................................................................... 31
5.7 Organizer ........................................................................................................... 31
5.7.1 To Do List................................................................................................. 31
5.7.2 Alarm........................................................................................................ 32
5.7.3 Calculator................................................................................................. 32
5.8 Services ............................................................................................................. 32
6. Troubleshooting........................................................................................................... 33
Page 4 of 33
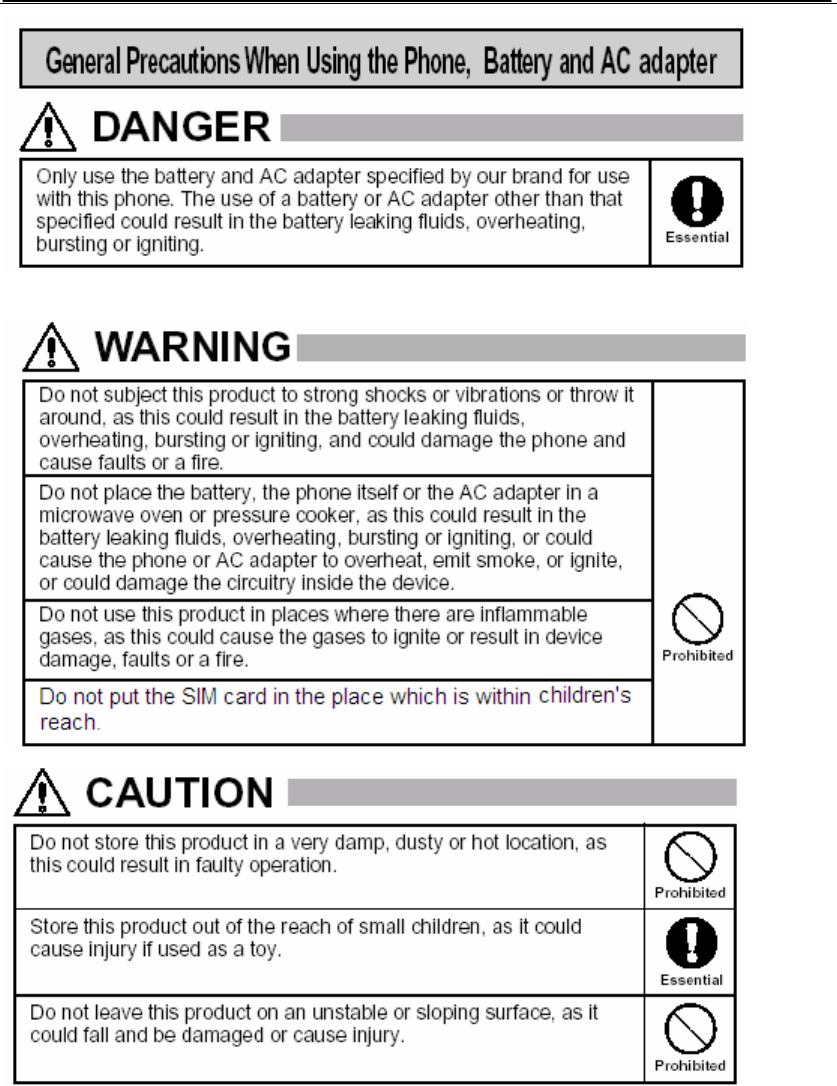
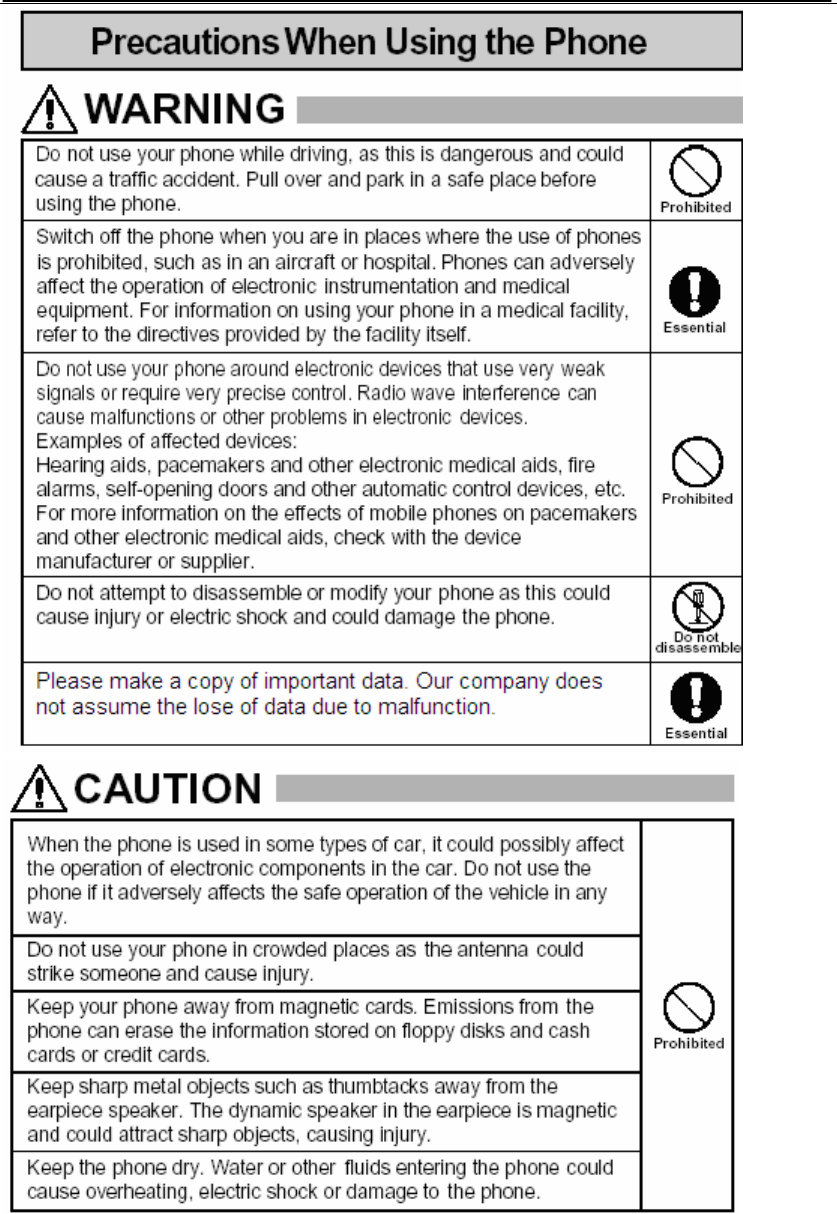
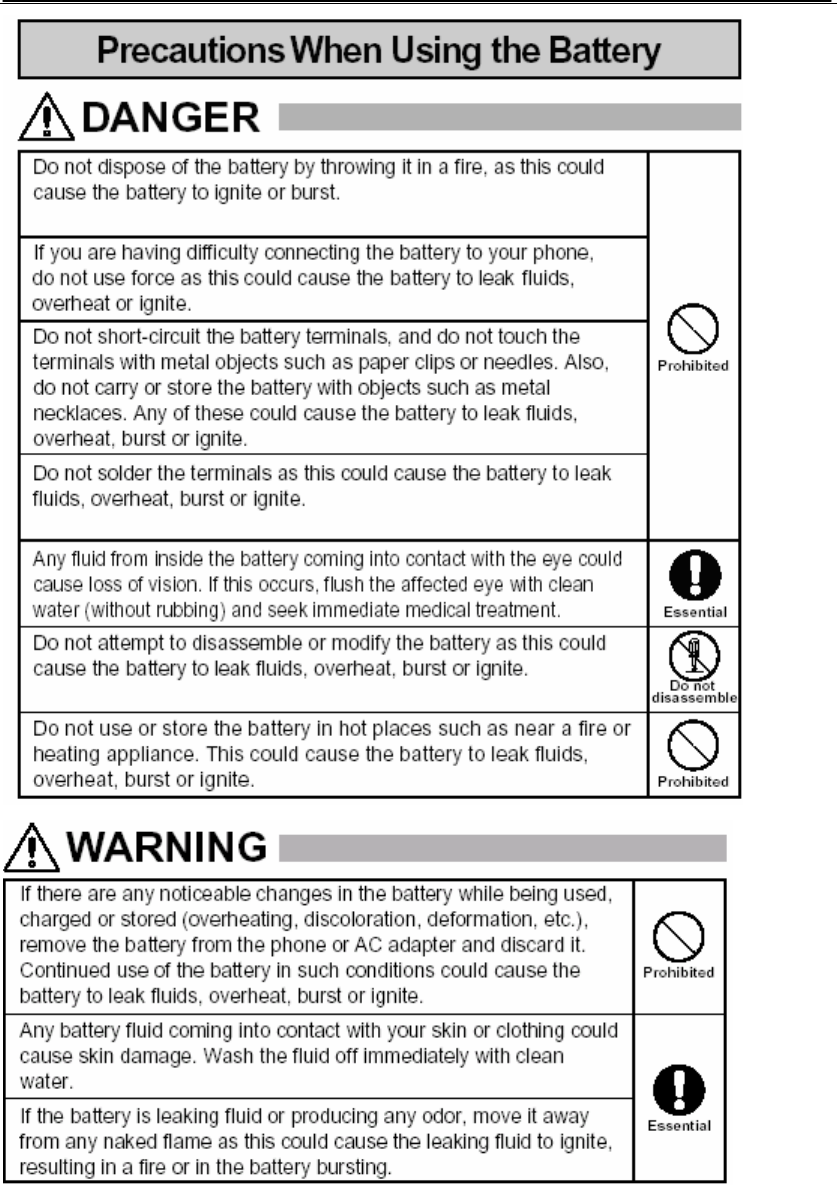
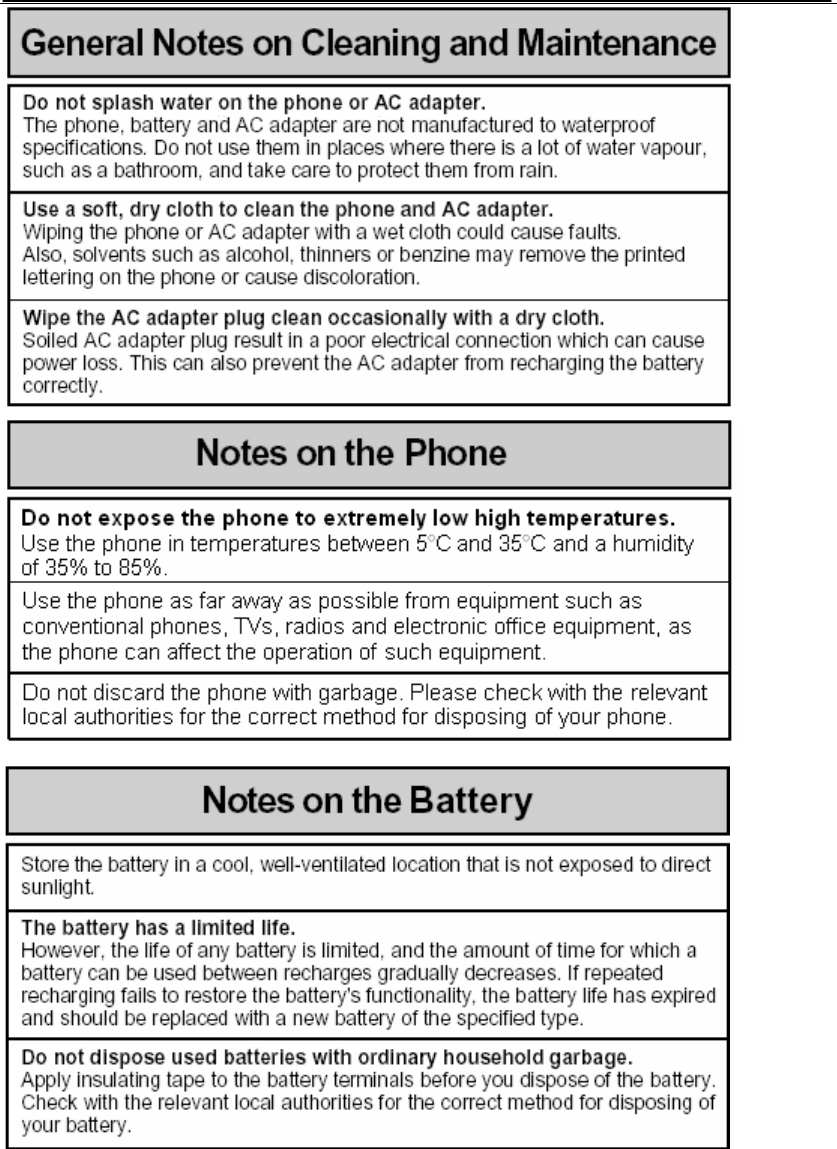
1. Safety information
Read these precautions carefully before using to ensure that you use the phone safely
and correctly.
The precautions listed here are intended to prevent injury to the phone user and to others,
and to prevent unintended damage to property.
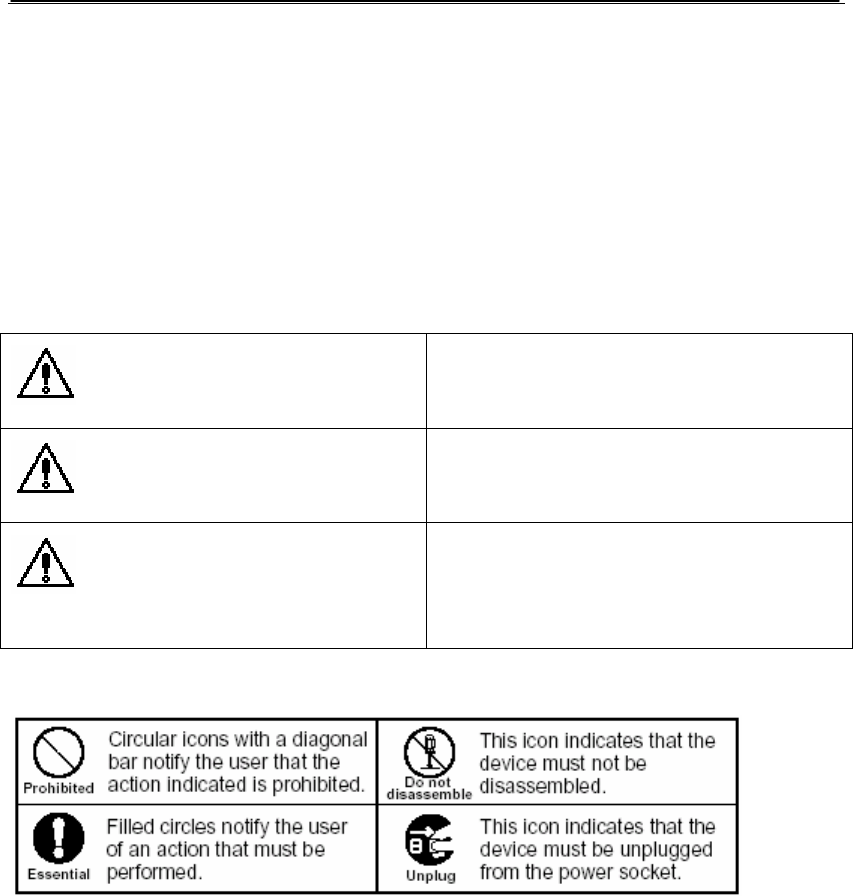
z The designations below Indicates the severity of the injury or damage that may be
incurred if the designated precautions are not followed and the product is used
incorrectly.
DANGER
Indicates that, if this warning is ignored,
improper handling of the product is likely to
result in death or serious injury.
WARNING
Indicates that, if this warning is ignored,
improper handling of the product could
result in death or serious injury.
CAUTION
Indicates that, if this warning is ignored,
improper handling of the product could
result in personal injury or material
damage.
The icons shown below are used to indicate instructions that should be observed.
To comply with FCC RF exposure compliance requirements, this device is applicable in
Mobile Configurations. The antennas used for this transmitter must be installed to provide
a separation distance of at least 20 cm from all persons and must not be co-located or
operating in conjunction with any other antenna or transmitter.
This device complies with Part 15 of the FCC Rules. Operation is subject to the condition
that this device does not cause harmful interference.
Any changes or modifications not expressly approved by the party responsible for
compliance could void the user's authority to operate the equipment.
Some electronic devices are susceptible to electromagnetic interference sent by phone if
inadequately shielded. Please use phone at least 20cm or as far as you can from TV set,
radio and other automated office equipement so as to avoid interference.
Page 5 of 33
Page 6 of 33
Page 7 of 33

Page 8 of 33
Page 9 of 33
Page 10 of 33
2. General information
2.1 Checking the phone and accessories
After unpacking, please check the accessories. If there is anything missing or there are
pages lost in the user’s manual, which cause it unreadable, please contact the local seller
that you purchased the phone from.
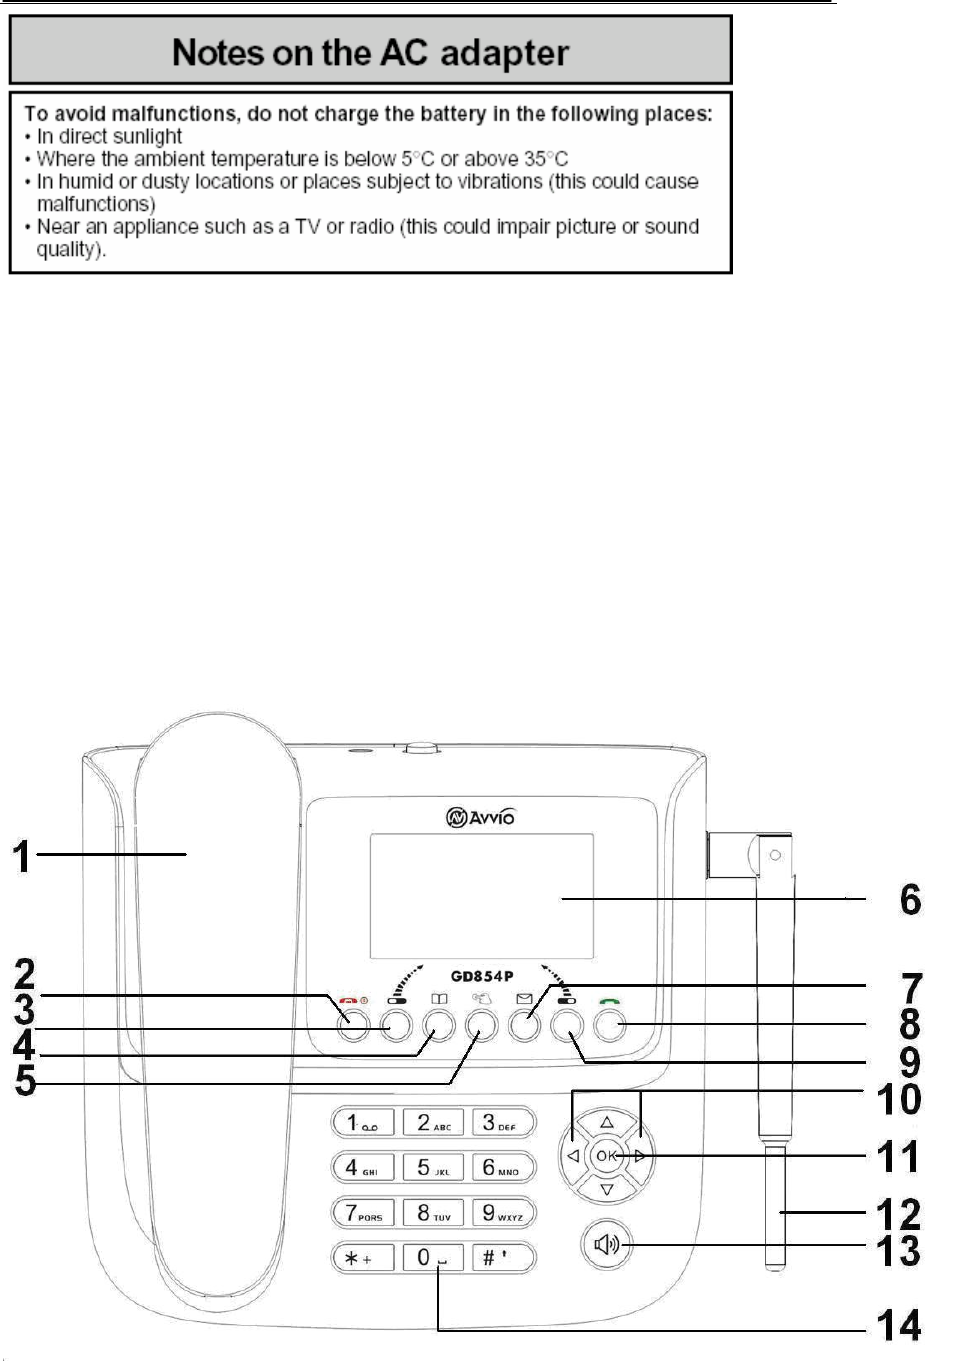
2.2 Illustrations of the phone and function
Page 11 of 33

Page 12 of 33
1 Handset
2 End key
z Press and hold to power the phone on when the phone
is off
z Press and hold to power the phone off when the phone
is in idle
z End or reject a call
z Return to idle display
3 Left Soft key
z Enter the CM in idle
z Execute the function shown at the bottom left of the
display
4 Shortcut key for
Contacts z Enter the Contacts in idle
5 Redial key z Not support
6 Display
7 Shortcut key for SMS z Enter the Message in idle
8 Send key z Make or answer a call
z List the dialed calls in idle
9 Right Soft key
z Enter View in idle
z Execute the function shown at the bottom right of the
display
10 Arrow key
z Move the cursor
z Press Up/Down arrow key to decrease/increase the
earpiece and ring volume
11 Mute key z To muffle the sound of microphone.
12 Dual Band ANT
13 Handfree key
14 Dial button
(Numeric key)
z Enter phone numbers, characters or select the
function
15 Charger connector
16 Power key z Shut off the power supply
17 SIM card slot
18 SIM card
19 Battery
20 Battery cover
21 Jack for handset
22 Base
Page 13 of 33
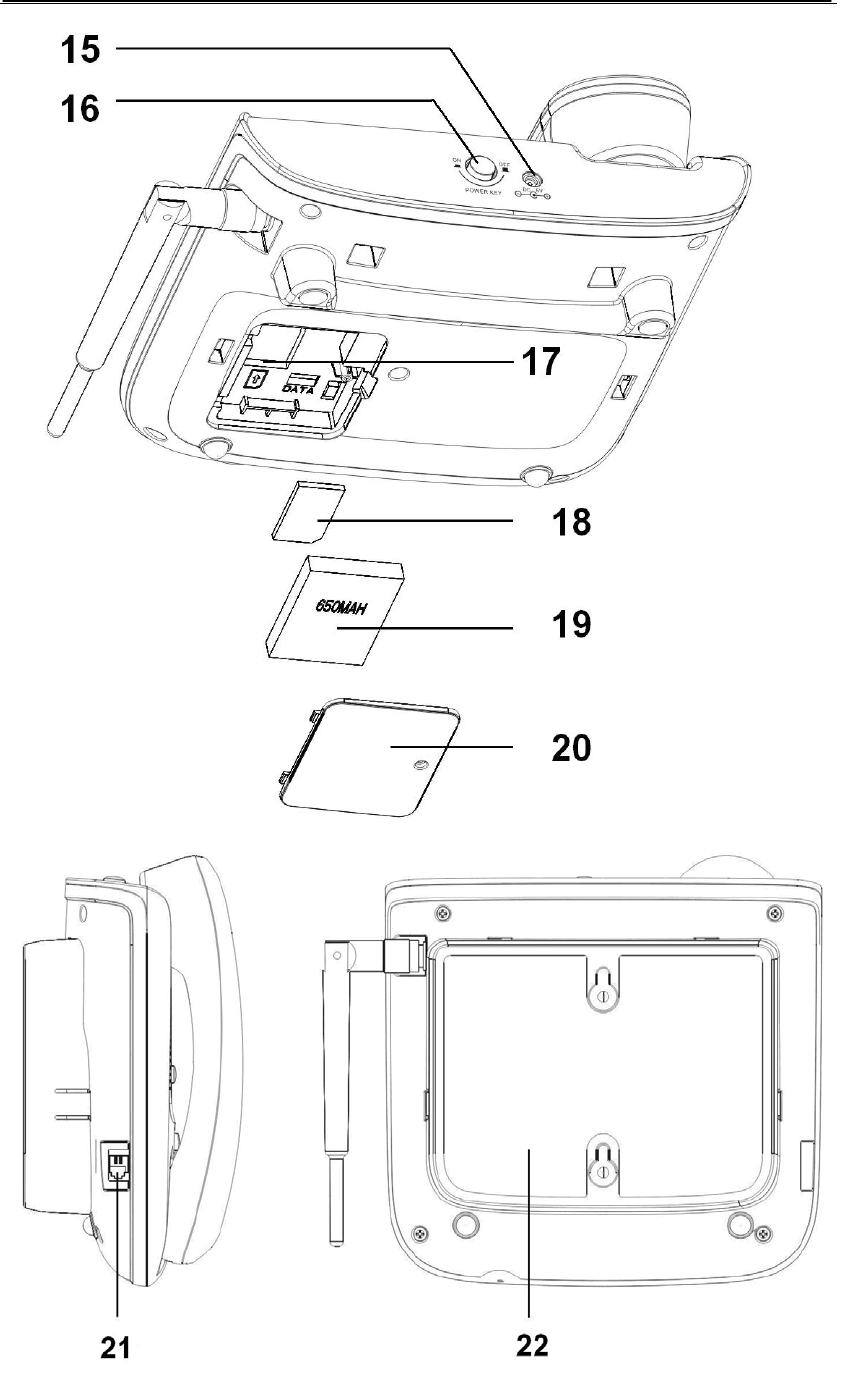
2.3 Idle mode display
This picture shows icons in the display.
2.4 Technical specifications
Battery Li-Ion battery 3.7v 650MAH
Charger Input: 90 - 300V ~ 50/60Hz 200mA
Output: DC +5V/400mA
Dimensions 189 x 191 x 90(mm)
Weight 665 g
Standby time* About 162 hours
Talk time* 156 - 354 minutes
* The idle time and call time depend on the network.
2.5 SIM card & battery
z Keep all SIM cards out of the reach of small children.
z The SIM card and its contacts can be easily damaged by scratches or bending, so be
careful while handling, inserting or removing the card.
z Power off the phone before installing or removing the SIM card to prevent damage to
the phone.
Icon Descriptions
1. Indicates signal strength level and more bars means better signal
2. Indicates the phone is in the connecting or connected status
3. Indicates the keypad is locked
4. Roam
5. Indicates you have unread messages
6. Fixed dial is set on
7. Silent Activated
8. Indicates the alarm is set on
9. Indicates battery power
10. Display date and time, Owner number and so on
Page 14 of 33
Notice: You can only use the authorized SIM card. If there is anything you doubt, please
contact the local seller.
2.5.1 Installing SIM card & battery
1. Place the SIM card into the slot with the metal contact facing down.
2. Attach the battery.
3. Push the battery cover upwards until it clicks into place.
2.5.2 Removing SIM card & battery
1. Power off the phone.
2. Push the battery cover latch upwards.
3. Remove the battery.
4. Slide the SIM card.
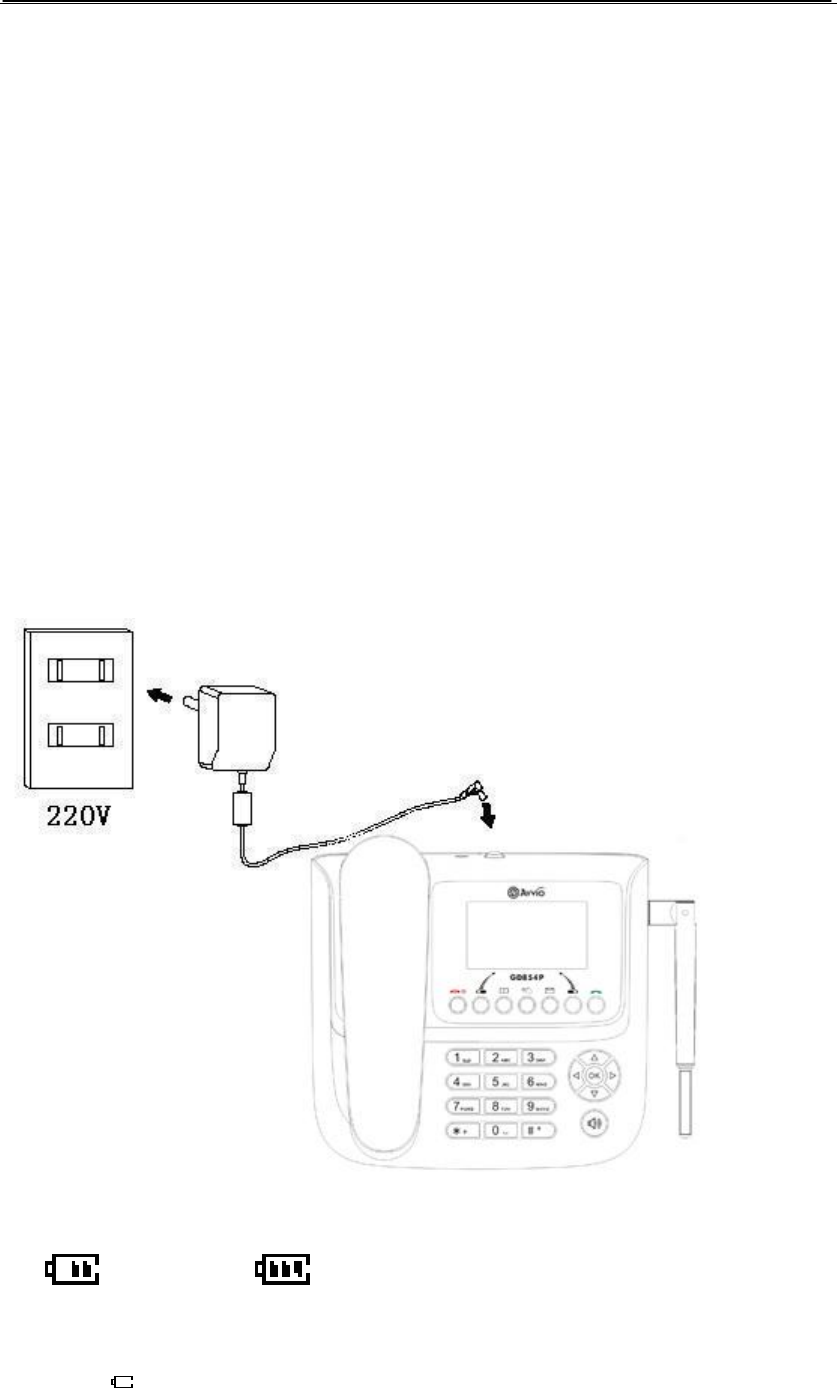
2.6 Charging the battery
1. Plug the connector of the charger into the jack at the top of the phone, and plug the
charger into a standard AC wall outlet. During charging, the battery icon is flashing.
2. When charging is completed, the battery icon stops flashing.
Charging……. Fully Charged
Notice:
z When is shown in the screen, it indicates that there is not enough power, please

Page 15 of 33
charge the phone.
z You must fully charge the battery before using the phone for the first time. It is
recommended you charge the battery for four hours for the first time.
z If the phone is turned on during charging, you can still make or answer calls, but this
will consume battery power, thus extend the charging time of the phone.
z It is recommended you charge the battery when it runs out to enhance the battery life.
2.7 Power the phone on/off
To power the phone on, press and hold End key when it is off.
z If phone lock is set on, you are required to enter the password. The phone password
is preset to “1122” at the factory. See “5.5.4 Security Setup”.
z If SIM lock is set on, you are required to enter the PIN. See “5.5.4 Security Setup”. If
you enter wrong PIN three times in a row, you need the PUK to unlock it. PIN and
PUK are both provided by the network operator.
To power the phone off, press and hold End key when it is in idle.
2.8 Idle mode operations
In idle
z Press Left soft key (CM) to enter the Call Metering. Press Up/Down keys to select
the desired one and press Left soft key (Select) to enter.
z Press Contacts and enter Master PIN to enter the main menu. Press Up/Down keys
to select the desired one and press Left soft key (Select) to enter.
z Press Right soft key (View) to enter the Charge Summary.
z Press Messages to enter Messages.
3. Basic Operations
3.1 Making a call
You can make or receive calls within the service area and with sufficient signal strength.
Notice: The signal strength affects the quality of your call.
3.1.1 Making a call from idle
1. Making a call in the normal way
Pick up the handset or press the Handfree key, the “online” indicator turns on. Enter
the phone numbers you want to call, it will be dialed automatically if no number is
entered after the time you set. Press the End key or put down the handset or press the
Handfree key to cancel the dialing operation and return to idle.
2 Making a call beforehand

Page 16 of 33
z Enter the number in idle and pick up the handset or press the Handfree key or press
the Send key. The number is dialed.
z When enter the number, press Right soft key (clear)to erase the number, press
Left soft key (save) to save it to the phonebook, and press End key return to idle.
3 No matter whether the handset is picked up or the Handfree key is pressed, press
Send key in idle to enter the dialed call list.
When the number is dialed, put down the handset or press the Handfree key or press the
End key to cancel the dialing operation.
3.1.2 Inserting a pause sign when dialing
You can use the pause sign to dial an extension number automatically or manually.
In an automatic way
1. Enter the phone number.
2. Press * key continuously three times to insert a “P”.
3. Enter the extension number.
4. Dial the number before “P”. After the line is connected, the phone will dial the number
after “P” automatically.
Notice: The suspending time depends on the number of the “P” you entered.
In a manual way
1. Enter the phone number.
2. Press * key continuously four times to insert a “W”.
3. Enter the extension number.
4. Dial the number before “W”. After the line is connected, the phone will ask you
whether to dial the number after “W”.
3.1.3 Speed dialing
After you have activated the Speed Dial function and assigned the phone number to the
relevant numeric key, you can press and hold the key to call the number quickly in idle.
3.1.4 Redialing
In idle you press the Redial key display “No support”.
3.2 Answering/rejecting a call
When you selecte Don’t Allowed in CM Settings can not answer a call.
When you select Allow With PIN in CM Settings there is an incoming call, you must enter
CM PIN then you can answer the call.
When you select Always Allow in CM Settings there is an incoming call:
1. Pick up the handset or press the Handfree key or press the Send key to answer a
call. If the handset has been picked up or the Handfree key has been pressed, you
can just press the Send key to answer the call.
2. Press End key or Right soft key (Reject) to reject it.

Page 17 of 33
3.3 Missed calls
The missed calls are displayed in the display. Press Left soft key (Read) to enter missed
calls list to check.
3.4 During a call
3.4.1 Muting a call
You can mute the call during the conversation, and then the other party would not hear
your voice.
1. During the call press Mute key to mute the call.
2. To unmute the call, press Mute key again.
3.4.2 Handsfree earpiece
1. Press Handfree key to activate handsfree earpiece.
2. To deactivate handsfree earpiece, press the key again.
3.4.3 Adjusting earpiece volume
During a call press Up arrow key or Down arrow key to adjust earpiece volume.
On the input screen during a call, press and hold the up or down key to display the volume
adjustment screen, and then press these two keys to adjust the volume.
3.4.4 Searching for a number from the contacts
During a call, press Left soft key (Option) and select Contacts.
3.4.5 DTMF
When DTMF is turned off, the entered numbers will not be responded as DTMF signals
during a call.
1. During the call press Left soft key (Option) and select DTMF. Press Left soft key
(Off) to deactivate DTMF.
2. To activate DTMF, select DTMF and press Left soft key (On) in the Option display.
3.5 Call Metering
When you select CM on you can press the CM to entry Call Metering in idle.
3.5.1 Enter Pre-Paid Amount
1. Press Select entry Enter Pre-Paid Amount.
2. Enter CM PIN.

Page 18 of 33
3. Enter Pre-Paid Amount.
You can enter six numbers or four decimal fractions at most.
Notice: You can use this function after you have decided Pre- Paid.
3.5.2 View Calls
You can select the Current Session, Current Shift, View All Calls or Delete All Calls.
z Select Current Session you can view the Charge Summation.When the Pre-Paid
Amount changed the information of Current Session also change.
z Select the Current Shift, you should enter Master PIN. You can view Calls Made and
Total C o st.
z Select the View All Calls, you should enter CM PIN.You can view Call logs.
z Select the Delete All Calls, you should enter Master PIN.
3.5.3 Set Call Metering
1. Press Select entry Set Call Metering.
2. Enter Master PIN.
3. Select one mode you want.
3.5.4 CM Settings
3.5.4.1 Set Post-Paid Limit
Select CM→CM Settings→Set Post-Paid Limit.
Set Post-Paid max costs.
3.5.4.2 Change CM PIN
Select CM→CM Settings→Change CM PIN.
3.5.4.3 Change Master
Select CM→CM Settings→Change Master PIN.
3.5.4.4 Incomings Calls Allowed
Select CM→CM Settings→Incomings Calls Allowed.
3.5.4.5 View Table Vision
Select CM→CM Settings→Incomings Calls Allowed.
3.6 Charge summary
Press View in idle. You can view the Charge Summation.When the Pre-Paid Amount
changed the information of Curent Session also change.
Page 19 of 33
4. Entering text
The phone provides several input methods including ABC input, abc input, 123 input.
Press # key to switch input methods.
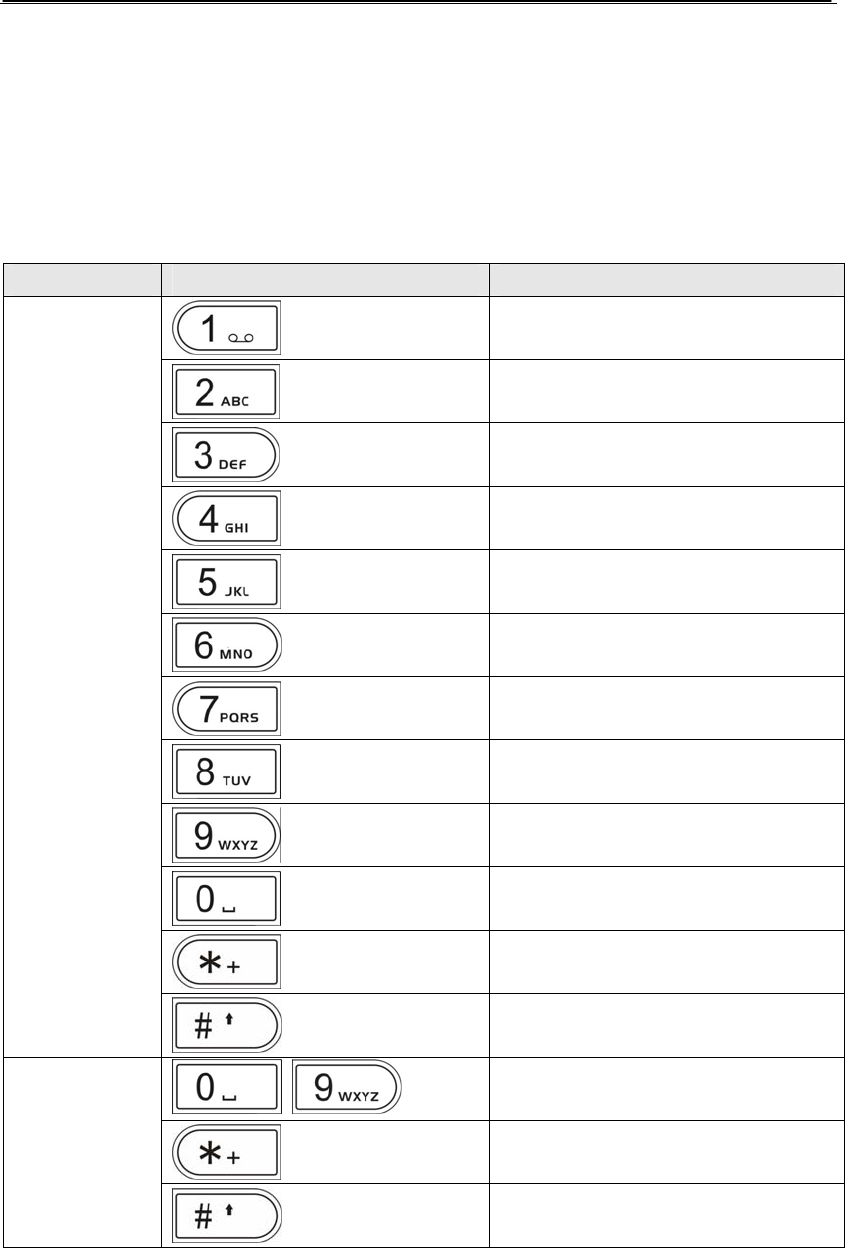
4.1 Keypad mapping
Input method key Characters or functions
Display frequently used symbols
a/b/c/2 (A/B/C/2)
d/e/f/3 (D/E/F/3)
g/h/i/4 (G/H/I/4)
j/k/l/5 (J/K/L/5)
m/n/o/6 (M/N/O/6)
p/q/r/s/7 (P/Q/R/S/7)
t/u/v/8 (T/U/V/8)
w/x/y/z/9 (W/X/Y/Z/9)
space, 0
Display symbols
abc/ABC
Switch input methods
~
0~9
Display symbols
123
Switch input methods

Page 20 of 33
4.2 ABC/abc input
1. Press # key to switch to abc/ABC input.
2. Press the numeric key. For example, press 2 key three times for “c/C”.
3. Press Left soft key (Select) to save and exit.
4.3 123 input
1. Press # key to switch to 123 input. Press the numeric key directly to enter the
number.
4.4 Entering symbols
1. Press * key to display symbols. Press Arrow keys for the desired one and press Left
soft key (Select). Press Right soft key (Back) to exit the symbol display.
2. In abc/ABC input method, press 1 key repeatedly for the frequently used symbols.
5. The menus
5.1 Menu Tree
Main menu Sub-menu Sub-menu Sub-menu
1 Contacts 1 Search Entry
2 Add New Entry
3 Delete All
4 Copy All
5 Owner Number
6 Speed Dial
7 Memory Status
2 Messages 1 Write Message
2 Inbox
3 Outbox
4 Template
5 Message Settings 1 Profile Setting
2 Common Setting
3 Memory
6 Voice Mail
3 Call History 1 Missed
2 Dialed
3 Received

Page 21 of 33
4 Delete Log
5 Call Time
4 Settings 1 Phone Setup 1 Customize 1 CM Status
2Tone Setup
3 Volume
4 Ring Type
5 Extra Tone
6 LCD Backlight
2 Time and Date
3 Input Method
4 Display
5 Contrast
6 Greeting
2 Call Setup 1 Caller ID
2 Call Waiting
3 Call Divert
4 Call Barring
5 Line Switching
6 Call Time Reminder
7 Auto Dial Time
3 Network Setup 1 Network Selection 1 New Search
2 Select Network
3 Selection Mode
2 GPRS Connection
4 Security Setup 1 SIM Lock
2 Phone Lock
3 Auto Keypad Lock
4 Fixed Dial
5 Change Password
5 Restore Factory Settings
5 Games 1 Puzzle 1 Start Game
2 Game Level
3 Best Grades
4 Game Help
2 Memory 1 Start Game
2 Game Level
3 Bingo Ratio
4 Game Help
6 Organizer 1 To Do List
2 Alarm
3 Calculator
7 Services

Page 22 of 33
5.2 Contacts
You can store names and phone numbers in the memory of the phone or SIM card.
z Phone memory stores up to 100 entries.
z The storage of SIM card memory depends on its type. To check your sim card
memory please check with your telecom operator.
z In idle, press Contacts to enter Contacts list. The storage location of entries is
indicated by different icons.
5.2.1 Search Entry
1. Select Shortcut key for Contacts→enter master PIN→Contacts.
2. Select Search Entry and press Left soft key (Select).
3. Enter characters (up to 5 characters), the phone lists matched entries. Press Right
soft key (Clear) to erase the characters entered and press # key to switch the input
methods.
Notice:
—As characters entered, the entries matched are listed accordingly.
—You cannot find the entries which name is empty.
5.2.2 Add New Entry
If the handset has not been picked up or the Handfree key has not been pressed, you
can enter phone numbers in idle and press Left soft key (Save). Select To Phone or To
SIM to store it.
Or
1. Select Shortcut key for Contacts→enter master PIN→Contacts.
2. Select Add New Entry and press Left soft key (Select).
3. Select To Phone or To SIM, then press Left soft key (Select).
4. Select Name and press Left soft key (Edit). Enter the name and press Left soft key
(OK).
5. Select Number and press Left soft key (Edit). Enter the number and press Left soft
key (OK)
6. Press Left soft key (Yes) to save.
5.2.3 View
1. In Contacts list select the entry you want to view.
2. Press Left soft key (Option) and select View.
3. Press Left soft key (Select) to view.
5.2.4 Edit
1. In Contacts list select the entry you want to edit.

Page 23 of 33
2. Press Left soft key (Option) and select Edit, then press Left soft key (Select).
4. Press Right soft key (Done) to save.
5.2.5 Delete
There are two ways to delete entries.
1. In Contacts list
z Select the entry you want to delete, press Left soft key (Option) and select Delete.
Press Left soft key (Select).
z The message “Delete?” appears in the display.
z Press Left soft key (Yes) to confirm and press Right soft key (No) to cancel the
message.
2. Select Shortcut key for Contacts→enter master PIN→Contacts. Select Delete All and
press Left soft key (Select).
z From SIM: Delete all entries stored in the SIM card memory.
z From Phone: Delete all entries stored in the phone memory.
5.2.6 Copy
There are two ways to copy entries between the phone and the SIM card memory
1. In Contacts list
z Select the entry you want to copy, press Left soft key (Option) and select Copy.
Press Left soft key (Select).
z The message “Copy?” appears in the display.
z Press Left soft key (Yes) to confirm and press Right soft key (No) to cancel the
message.
2. Select Shortcut key for Contacts→enter master PIN→Contacts. Select Copy All and
press Left soft key (Select).
z From SIM: Copy all entries stored in the SIM card to the phone memory.
z From Phone: Copy all entries stored in the phone memory to the SIM card.
5.2.7 Move
Move entries between the phone and the SIM card memory.
1. In Contacts list, select the entry you want to move, press Left soft key (Option) and
select Move. Press Left soft key (Select).
2. The message “Move?” appears in the display.
3. Press Left soft key (Yes) to confirm and press Right soft key (No) to cancel the
message.
5.2.8 Delete All
1. Select Shortcut key for Contacts→enter master PIN→Contacts→Delete All.

Page 24 of 33
2. You can select delete From SIM or From Phone.
5.2.9 Copy All
1. Select Shortcut key for Contacts→enter master PIN→Contacts→Copy All.
2. You can select copy From SIM or From Phone.
5.2.10 Owner Number
Set the own number for the different lines. After the own number is set and Show Owner
Number function (see 5.5.1.5 Display: Show Owner Number) is activated, the number is
shown in the idle display.
1. Select one and press Left soft key (Option).
z Edit: Edit the name and number.
z Erase: Erase the selected number.
5.2.11 Speed dialing
After you have activated the Speed Dial function and assigned the phone number to the
relevant numeric key, you can press and hold the key to call the number quickly in idle.
5.2.12 Memory Status
Select Shortcut key for Contacts→enter master PIN→Contacts→Memory Status. The
memory status of the SIM card and phone memory is shown in the display.
5.3 Messages
You can store up to 50 messages in the phone and SIM card memory. The SMS memory
in phone varies with the capacity of SIM card.
5.3.1 Write Message
1. Select Shortcut key for Contacts→enter master PIN→Messages→Write Message.
2. Write down the message you want. Press Left soft key (Option) for the following
options.
z Done: Complete editing and enter the Send Option display.
z Template: Enter template to select one.
3. In the Send Option display, there are for the following options:
z Send Only: You can enter recipient’s phone number directly or press Left soft
key (Search) to select one entry from the Contacts. Press Left soft key (OK) to
send the message.
z Save and Send: You can enter recipient’s phone number directly or press Left
soft key (Search) to select one entry from the Contacts. Press Left soft key (OK)
to send the message. After the message is sent, it will be saved to Outbox.

Page 25 of 33
z Save: Save the message to Outbox.
z Send To Many: You can send up to 10 recipients at one time.
5.3.2 Inbox
1. Select Shortcut key for Contacts →enter master PIN →Messages →Inbox. The
messages you have read and unread are listed here.
z Indicates the message is unread.
z Indicates the message is read.
2. When view a detailed message, press Left soft key (Option) for the following options:
z Reply: Reply to the message.
z Forward: Forward the message to other person.
z Edit: Edit the message.
z Delete: Delete the message.
z Delete All: Delete all messages in Inbox.
z Use Number: List the number of the sender as well as contained in the message
for you to dial or store to the Contacts.
5.3.3 Outbox
1. Select Shortcut key for Contacts→enter master PIN→Messages→Outbox. Messages
sent unsuccessfully or select save and send are listed here. Press Left soft key
(Select) to read the selected message.
2. When view a detailed message, press Left soft key (Option) for the following options:
z Send: Send the message again or to others.
z Edit: Edit the message.
z Delete: Delete the selected message.
z Delete All: Delete all messages in Outbox.
z Use Number: List the number of the recipient as well as contained in the
message for you to dial or store to the Contacts.
5.3.4 Template
The phone has preset 10 templates for you to use when write the message. These
templates can be modified
1. Select Shortcut key for Contacts→enter master PIN→Messages→Templ a te.
2. Select a template, press Left soft key (Option) for the following options:
z Edit: Edit the selected template.
z Erase: Clear the contents of the selected template.
5.3.5 Message Settings
Select Shortcut key for Contacts→enter master PIN→Messages→Message Settings.
Profile Setting
z Edit the number of the message service center. With the SIM card inserted, the phone
automatically searches for the number. You need to make sure the number is correct

Page 26 of 33
before sending and receiving the message.
z Select the period for the message saved. It is the time the service center’s attempt to
send the message. Please contact the network operator for more information.
z Select the format of the message to be sent. Please contact the network operator for
more information.
Common Setting
z Delivery Report: Get the delivery report when the message is successfully delivered to
the recipient.
z Reply Path: Whether to use the service center which send the message to reply.
Memory
z Check the message memory status of the SIM and the phone.
5.3.6 Voice Mail
Select Shortcut key for Contacts→enter master PIN→Messages→Voice Mail. Set the
voice mail numbers. When connecting, you can call and listen to the voice mail.
Notice: If you have set the voice mail number, press and hold 1 key in idle to dial the
corresponding number.
5.4 Call History
5.4.1 Missed /Dialed /Received
The phone registers the phone numbers of missed, dialed and received calls (up to 20
records each).
Below takes Missed Calls for example.
1. Select Shortcut key for Contacts→enter master PIN→Call History.
2. Select “Missed”, press Left soft key (Select) to view the selected record.
3. Press Left soft key (Option) for the following options:
z Delete: Delete the record.
z Save: Save the phone number to Contacts.
5.4.2 Delete Log
Select Shortcut key for Contacts→enter master PIN→Calls History→Delete Log. You can
choose to delete records of missed calls, dialed calls or received calls respectively or
delete them at one time.
5.4.3 Call Time
Select Shortcut key for Contacts→enter master PIN→Calls History→Call Time. You can
view last call time, total sent time, total received time and reset all time.

Page 27 of 33
5.5 Settings
5.5.1 Phone Setup
5.5.1.1 Customize
1. CM Status
You can select CM on or CM off.
2. Tone Setup
z Incoming Call: The phone has 25 preset rings. Press Up/Down arrow keys to
select the ring and press Left soft key (Select) to save.
z Alarm: Select a ring when alarm time reaches. See “Incoming Call” for detailed
operations.
z Power On: Select a ring when the phone is powered on. Press Up/Down arrow
Keys to select the ring and press Left soft key (Select) to save.
z Power Off: Select a ring when the phone is powered off. See “Power On” for detailed
operations.
z Message Tone: Select a tone when a message has been received. See “Power On”
for detailed operations.
z Keypad Tone: Select a tone when the key is pressed. The options include Silent,
Click and Tone.
3. Volume
Set the volume level for ring and key tones. Press Up/Down arrow keys to adjust the
volume and press Left soft key (Select) to save.
4. Ring Type
Set the ring type to Single, Repeat, or Ascending. Press Left soft key (Select) to save.
5. Extra Tone
Press Left soft key (On / Off) to tick it and press Right soft key (Done) to save.
6. LCD Backlight
1. Select Shortcut key for Contacts →enter master PIN→Settings→Phone
Setup→Customize→LCD Backlight.
2. Press Up/Down arrow keys to select LCD Backlight.
3. Press Left soft key to save.
5.5.1.2 Time and Date
1. Select Shortcut key for Contacts→enter master PIN→Settings→Phone Setup→Time
and Date.
2. Set the home city, time/date and the format.
3. Press Left soft key to save.
5.5.1.3 Input Method
Set a language for the display language. The preset language is English.
1. Select Shortcut key for Contacts→enter master PIN→Settings→Phone Setup→Input

Page 28 of 33
Method.
2. Select the desired one and press Left soft key (Select) to save.
5.5.1.4 Display
Select Shortcut key for Contacts→enter master PIN→Settings→Phone Setup→Display.
z Off: Hide date, time and owner number in idle display.
z Show Date and Time: Show date and time in idle display.
z Show Owner Number: Show the own number in idle display. To show the number,
you should first store the own number in the Contacts.
5.5.1.5 Contrast
1. Select Shortcut key for Contacts →enter master PIN→Settings→Phone
Setup→Contrast.
2. Press Left/Right arrow keys to adjust the contrast
3. Press Left soft key to save.
5.5.1.6 Greeting
Select Shortcut key for Contacts→enter master PIN→Settings→Phone Setup→Greeting.
If you edit the text and activate the function, the text is shown in the display each time you
power the phone on.
Set the status on or off. Enter the greeting texts. Press Right soft key (Done) to save.
5.5.2 Call Setup
5.5.2.1 Caller ID
Select Shortcut key for Contacts→enter master PIN→Settings→Call Setup→Caller ID.
Decide whether to send the phone number to the person you are calling. This needs to be
supported by the network.
z Set by Network: Send or hide the phone number depending on the network.
z Hide Id: Hide the phone number to the person you are calling. You may fail to make a
call with this function in some areas. Please contact the network operator for more
information.
z Send Id: Send the phone number to the person you are calling.
Select the desired one and press Left soft key (Select) to save.
5.5.2.2 Call Divert
Select Shortcut key for Contacts→enter master PIN→Settings→Call Setup→Call Divert.
With this function you can divert the incoming calls to a specified number.
z Divert All Voice Calls: Divert all voice incoming calls.
z Divert If Unreachable: Divert incoming calls when the phone is outside the network
service area.
z Divert If No Answer: Divert incoming calls when they are not answered.

Page 29 of 33
z Divert If Busy: Divert incoming calls when the phone is busy.
z Divert All Data Calls: Divert all data incoming calls.
z Cancel All Divert: Cancel all divert calls.
Press Left soft key (Select) when done.
5.5.2.3 Call Barring
Select Shortcut key for Contacts→enter master PIN→Settings→Call Setup→Call Barring.
Call barring is a network-dependant service. Please contact your network operator for
more information.
z Outgoing Calls
All Calls: Bar all outgoing calls except the emergency call.
International Calls: Bar outgoing international calls.
International Except Home: Bar outgoing international calls except calls to the home
country.
z Incoming Calls
All Calls: Bar all incoming calls.
When Roaming: Bar incoming calls when roaming.
Press Left soft key (Select) to save.
z Cancel All
Cancel all setup. You must input the password at first.
z Change Barring PW
You are required to enter the old password before changing it.
5.5.2.4 Line Switching
Select Shortcut key for Contacts →enter master PIN→Settings→Call Setup→Line
Switching. Select to use Line 1 or Line 2.
Press Left soft key (Select) to save.
5.5.2.5 Call Time Reminder
Select Shortcut key for Contacts→enter master PIN→Settings→Call Setup→Call Time
Reminder.
z Off: Deactivate the reminder.
z Single: Remind you only once during the period you set.
z Periodic: Remind you XX seconds per minute during the period you set.
Press Left soft key (Select) to save.
5.5.2.6 Auto Dial Time
Select Shortcut key for Contacts→enter master PIN→Settings→Call Setup→Auto Dial
Time. The default can be modified.
When you make a call in the normal way, you can enter the number and it will be dialed
automatically if none is entered within the time you set.

Page 30 of 33
5.5.3 Network Setup
The phone should access the network before making and receiving calls.
5.5.3.1 Network Selection
Select Shortcut key for Contacts→enter master PIN→Settings→Network Setup→Network
Selection.
z New Search: Search a new Network again.
z Select Network: You can select a Network you want.
z Selection Mode: Select a mode you want.
5.5.3.2 GPRS Connection
Select Shortcut key for Contacts→enter master PIN→Settings→Network Setup→GPRS
Connection.
5.5.4 Security Setup
Select Shortcut key for Contacts→enter master PIN→Settings→Security Setup.
5.5.4.1 SIM Lock
Select Shortcut key for Contacts→enter master PIN→Settings→Security Setup→SIM
Lock. You are required to enter the PIN before changing its status.
With this function activated, the phone asks for a PIN each time you power the phone on.
If the PIN is entered incorrectly three times in a row, you need to unblock it using the PUK.
The PIN and PUK are provided by the network operator.
Notice: The phone supports Auto SIM PIN. If this function is available, the SIM PIN will be
changed automatically when the phone is powered on. Please contact with the local seller
for details.
5.5.4.2 Phone Lock
Phone lock protects the phone from being unauthorized use. With this function activated,
you need the password of the phone to unlock it.
You are required to enter the password before changing its status. The preset password is
“1234”.
Select Shortcut key for Contacts→enter master PIN→Settings→Security Setup→Phone
Lock. Enter the password and press Left soft key (Ok).
5.5.4.3 Auto Keypad Lock
Select Shortcut key for Contacts→enter master PIN→Settings→Security Setup→Auto
Keypad Lock. Select the time for the auto keylock and press Left soft key (Select).
When the keypad is locked on, press any key and then input the phone’s password.

Page 31 of 33
5.5.4.4 Fixed Dial
If the SIM card supports fixed dial function, you can set limitations on the numbers you can
call. PIN2 is required to activate it.
Select Shortcut key for Contacts→enter master PIN→Settings→Security Setup→Fixed
Dial. You can activate or deactivate the fixed dial. PIN2 is required to change the mode.
Press Left soft key (OK) to save.
Notice:
- The amount of the fixed dial you can set depends on the type of the SIM card.
- Emergency call is allowed with this function activated.
5.5.4.5 Change Password
You can change the PIN, PIN2 and the phone password. Select Shortcut key for Contacts
→enter master PIN→Settings→Security Setup→Change Password.
You need to activate the SIM Lock before changing the PIN. First enter the old PIN to
verity then enter the new PIN.
When change the password, you need to enter the new password and enter it again to
confirm it.
The password should be 4~8 digits from 0 to 9. Press Left soft key (Select) when done.
Notice: You cannot change the SIM PIN when Auto SIM PIN is available, because the
SIM PIN will be changed automatically to one not known to the User. Please contact with
the local seller for details.
5.5.5 Restore Factory Settings
Reset some settings to factory default.
Select Shortcut key for Contacts→enter master PIN→Settings→Restore Factory Settings.
Notice: The phone’s password is also required when restore to the factory settings. The
preset password is “1234”. If you forget your password, please contact the local service
provider’s service center.
5.6 Games
The phone comes with two games: memory and puzzle. Before starting the game, you
can view the game rules.
5.7 Organizer
5.7.1 To Do List
This function allows you to keep a list of up to 3 tasks that you need to do.
1. Select Shortcut key for Contacts→enter master PIN→Organizer→To Do List.
2. In the task list, press Left soft key (Option) for the following options:

Page 32 of 33
z View:View the task.
z Add: Add a new task. Enter date, time, note and so on. Press Right soft key
(Done) to save.
z Edit Task: Edit the selected task.
z Delete Task: Delete the selected task.
z Delete All: Delete all tasks.
When the alarm is set on and the alarm time reaches, the phone rings. You can press Left
soft key (Select) to turn off the alarm.
5.7.2 Alarm
Set up to 5 alarm clocks.
1. Select Shortcut key for Contacts→enter master PIN→Organizer→Alarm.
2. Select one alarm and press Left soft key (Edit).
3. Set the alarm off/ on, the alarm time.
4. Press Right soft key (Done) to save.
Notice: When the alarm time reaches, the phone reminds you even when it is powered
off.
When the alarm time reaches, the phone rings.
z Press Left soft key (Stop) to turn off the alarm.
z Press Right soft key (Snooze) to turn off the alarm temporarily. It reminds you again
about 4 minutes later. If you do not handle the alarm, it by default reminds you again
about 4 minutes later.
5.7.3 Calculator
The calculated numbers cannot exceed 8 digits due to accuracy limitation.
1. Select Shortcut key for Contacts→enter master PIN→Organizer→Calculator.
2. Key definitions in the calculator function are shown below.
5.8 Services
Select Shortcut key for Contacts→enter master PIN→Services.
The content of the Services depends on the SIM card. Please contact the operator for
detailed information.
Left/ Right arrow key Select the operator
# key Decimal point
Left soft key Equal, confirm
Right soft key Erase numbers entered
Erase the result and return to the initial state
Exit the calculator
Page 33 of 33
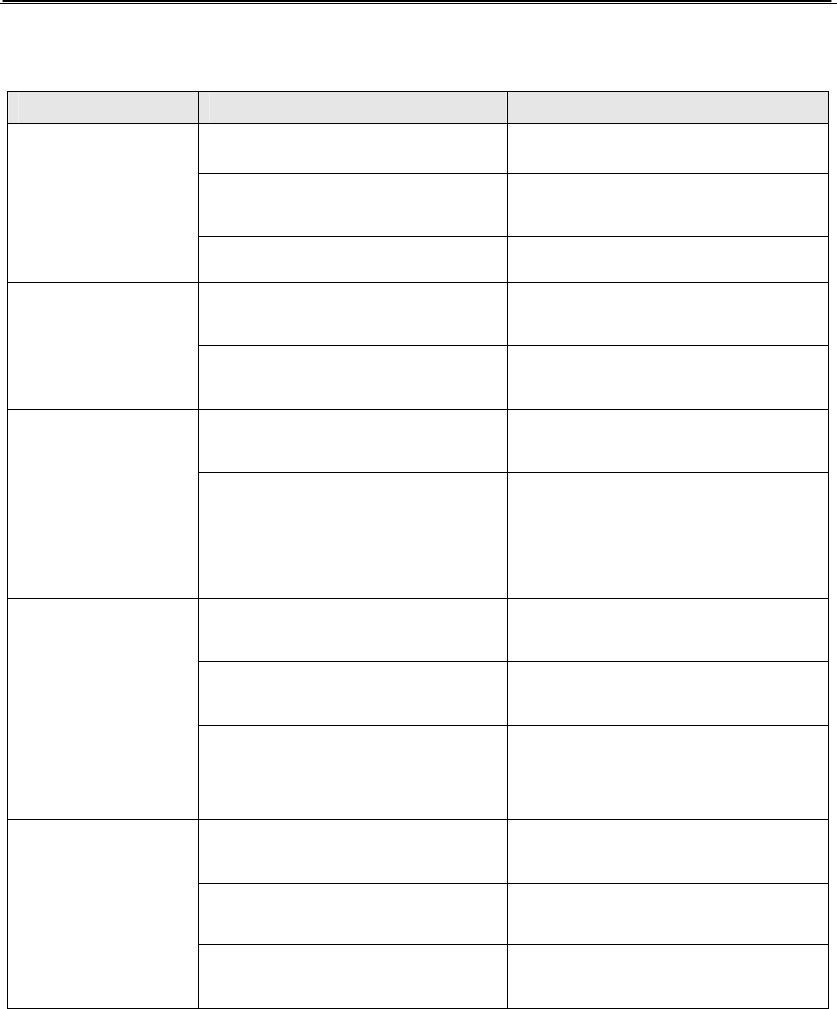
6. Troubleshooting
Problem Possible cause Solution
z Is the battery power low? z Please charge the battery.
z Do you press End key long
enough?
z Please press and hold End
key for 2 seconds or longer.
Unable to power
on
z Is the battery switch on? z Please switch on the battery.
z Is the phone outside of the
service area?
z Move to a place where signal
can be received strongly.
Unable to make
a call z Is the number you dial
correct?
z Check the number and dial
again.
z Is the phone outside of the
service area?
z Move to a place where signal
can be received strongly.
Communication
interrupted
suddenly z Are you moving in high
speed during conversation?
z The signal will interrupt when
the phone switch between 2
cell station. Please move in
low speed.
z Do you insert the SIM card
correctly?
z Please insert the SIM card
correctly.
z Is the SIM card connector
dirty?
z Please clean the SIM card.
Insert the SIM
card z Is the SIM card damaged? z Please check the SIM card
and return it to the service
provider.
z Is the charger plugged to
the phone correctly?
z Please plug the charger to
the phone correctly.
z Is the connection OK? z Please check the connection.
Unable to
charge the
battery
z Is the battery old?
z Contact the seller to replace
the phone with a new battery.