Itron FC300SR AMR transceiver device for utility meters User Manual Getting Started Guide
Itron, Inc. AMR transceiver device for utility meters Getting Started Guide
UserManual.wiki
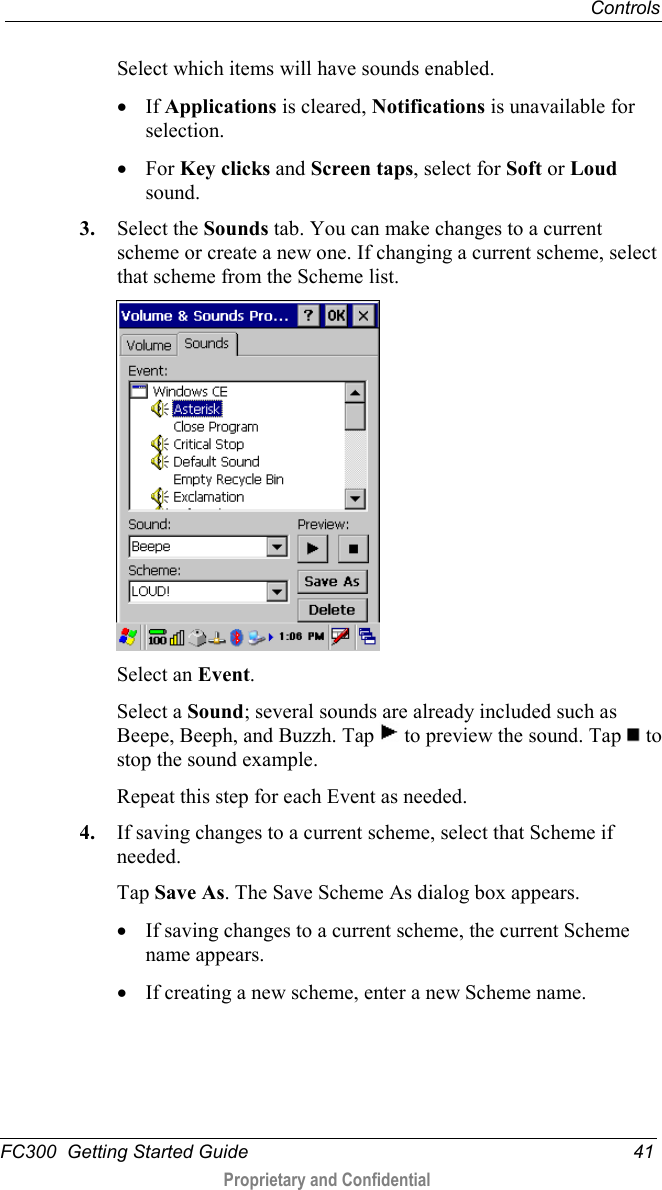
>
Itron
>
FC300SR User Manual
>
Users Manaul
Contents
1.
Users Manaul
2.
Users Manual
Users Manaul
Navigation menu
Upload a User Manual
Namespaces
Wiki Guide
HTML
PDF
Info
Views
User Manual
Discussion / Help
Navigation

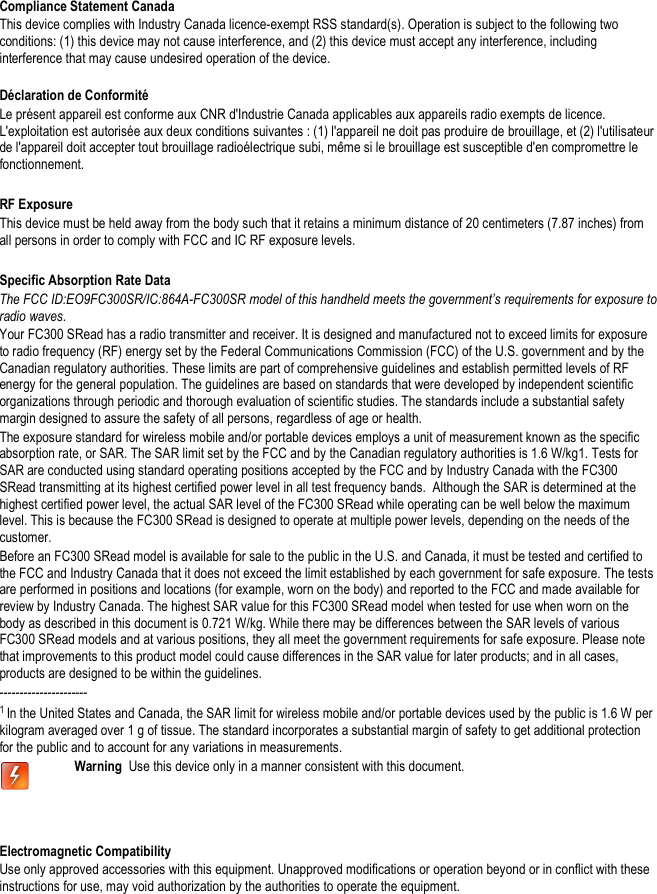

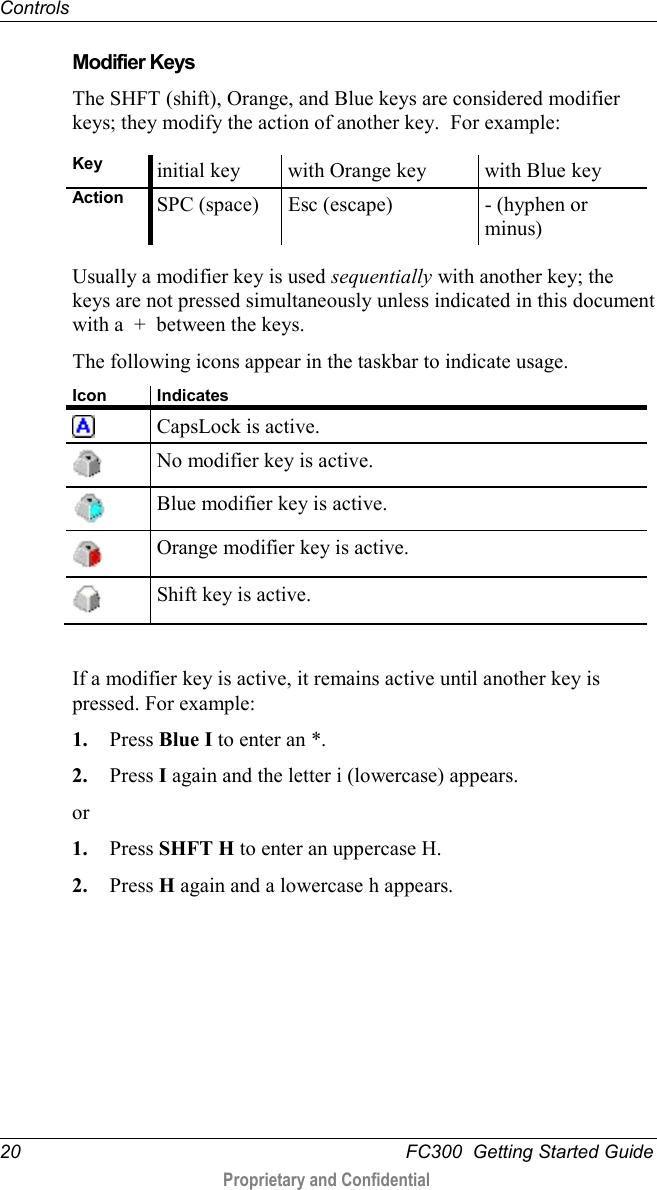
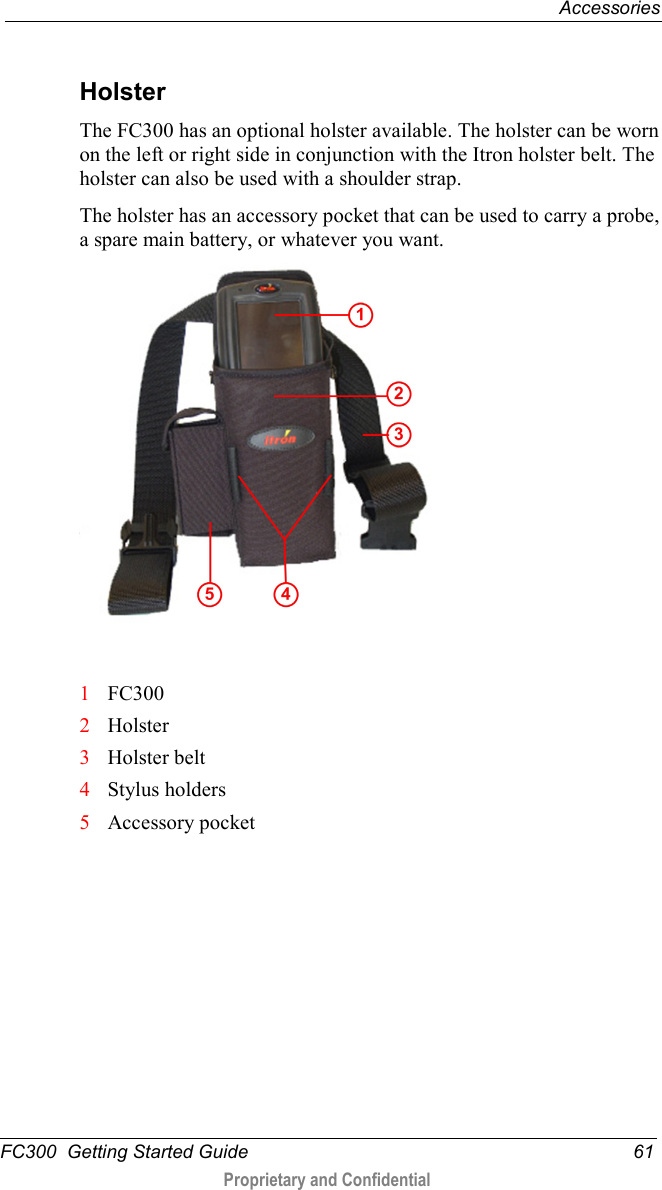
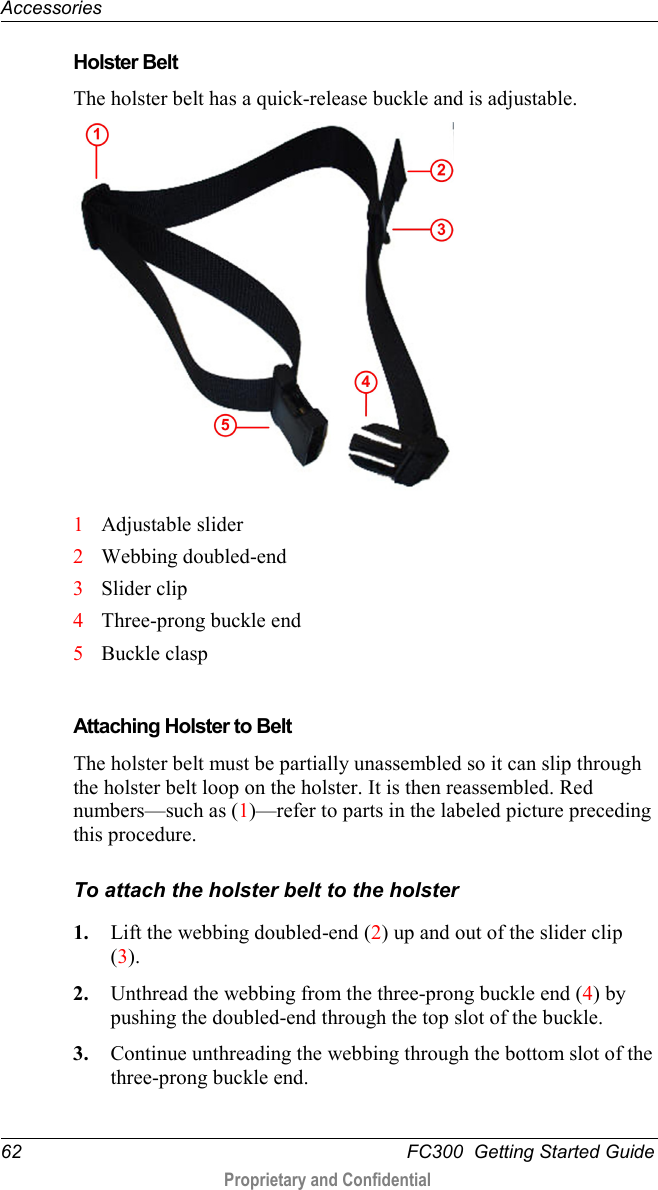
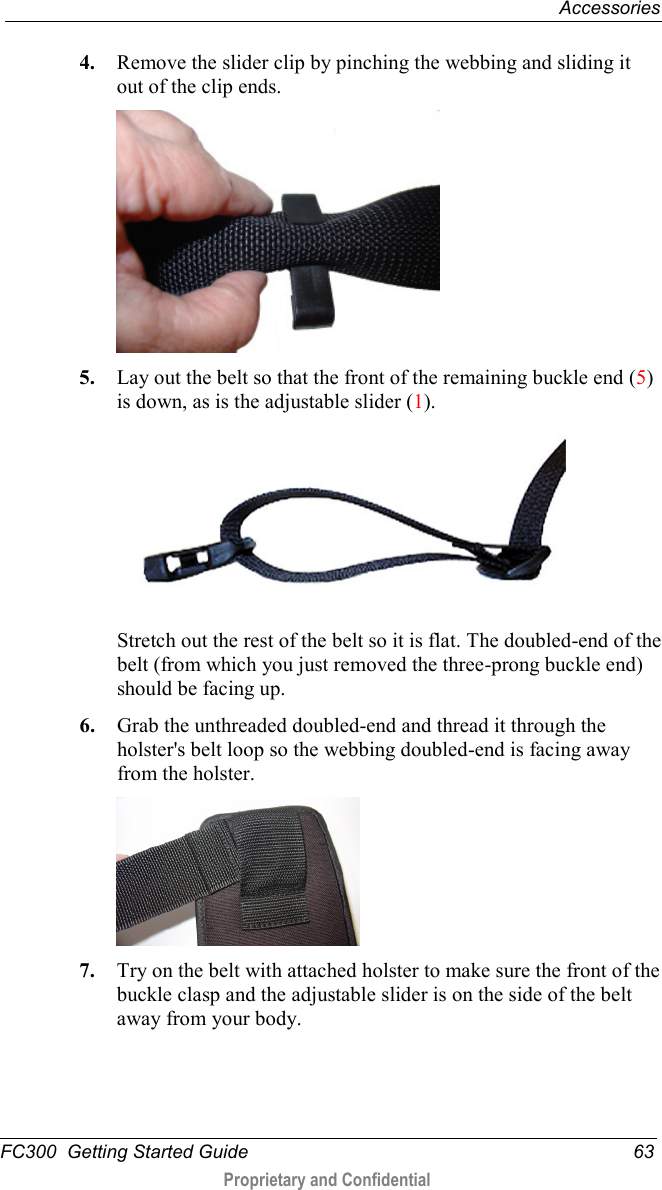
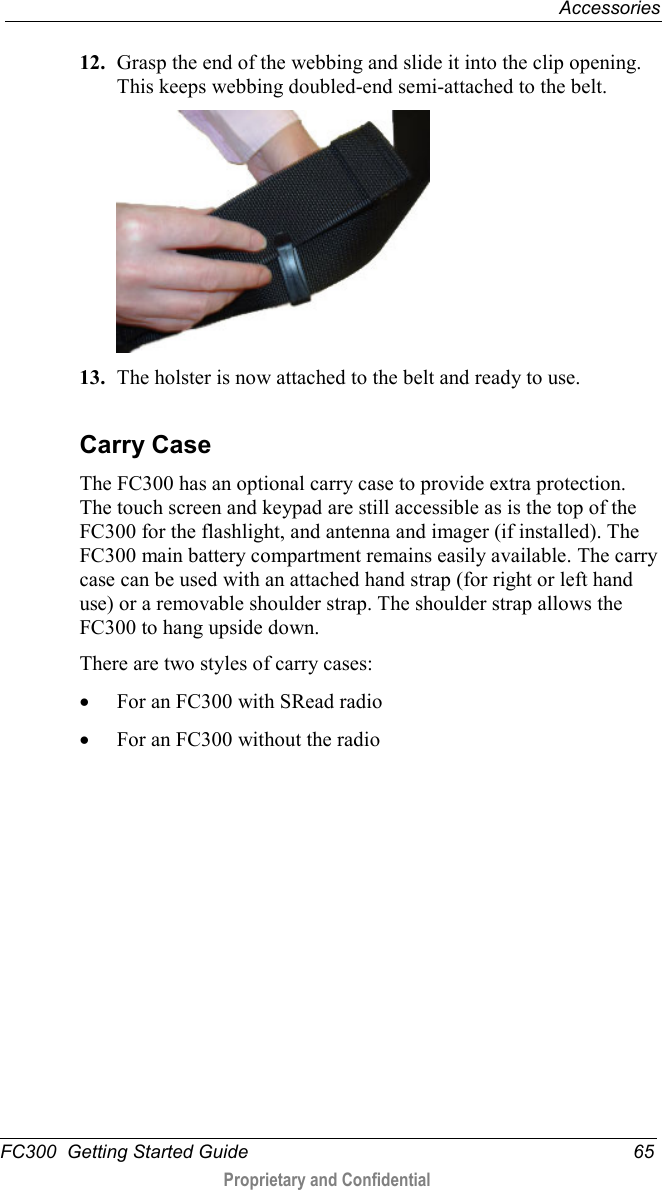
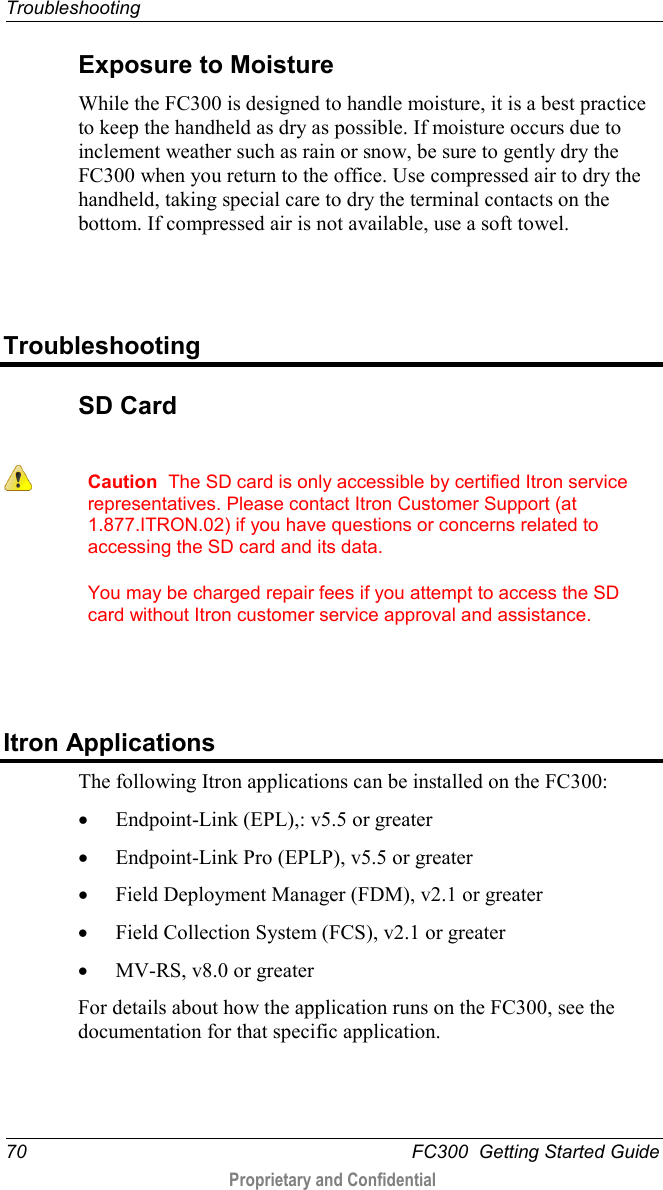
![Controls FC300 Getting Started Guide 23 Proprietary and Confidential To get this function Press keys in this order Results/comments ; (semicolon) Blue F Semicolon : (colon) Blue D Colon ! (exclamation) Blue Q Exclamation point ? (question mark) Blue L Question mark ( (left parenthesis) Blue O (letter) Left or open parenthesis ) (right parenthesis) Blue P Right or close parenthesis _ (underscore) Blue M Underscore or horizontal bar / (forward slash) Blue J Forward slash \ (back slash) Blue S Backward slash ` (grave accent) Blue A Grave accent @ (at) Blue W At sign # (number) Blue E Number sign $ (dollar) Blue R Dollar sign % (percent) Blue X Percent sign ^ (caret) Blue C Caret & (ampersand) Blue U Ampersand * (asterisk) Blue I (letter) Asterisk | (pipe) Orange R Pipe or vertical bar < (less than) Blue 7 Less than sign > (greater than) Orange 7 Greater than sign - (hyphen or minus) Blue SPC Hyphen, dash, or minus sign + (plus) Blue BKSP Plus sign = (equal) Blue T Equal sign [ (left bracket) Blue Y Left square bracket ] (right bracket) Blue Z Right square bracket { (left curly bracket) Orange S Left curly bracket } (right curly bracket Orange T Right curly bracket € (Euro) Orange 3 Euro sign £ (British pound) Blue 3 British pound sign](https://usermanual.wiki/Itron/FC300SR.Users-Manaul/User-Guide-1617106-Page-31.png)