Iwatsu America ADIX-PS UPCS Handset User Manual 4
Iwatsu America Inc UPCS Handset 4
UserManual.wiki
>
Iwatsu America
>
ADIX PS User Manual
Users Manual
Navigation menu
Upload a User Manual
Namespaces
Wiki Guide
HTML
PDF
Info
Views
User Manual
Discussion / Help
Navigation


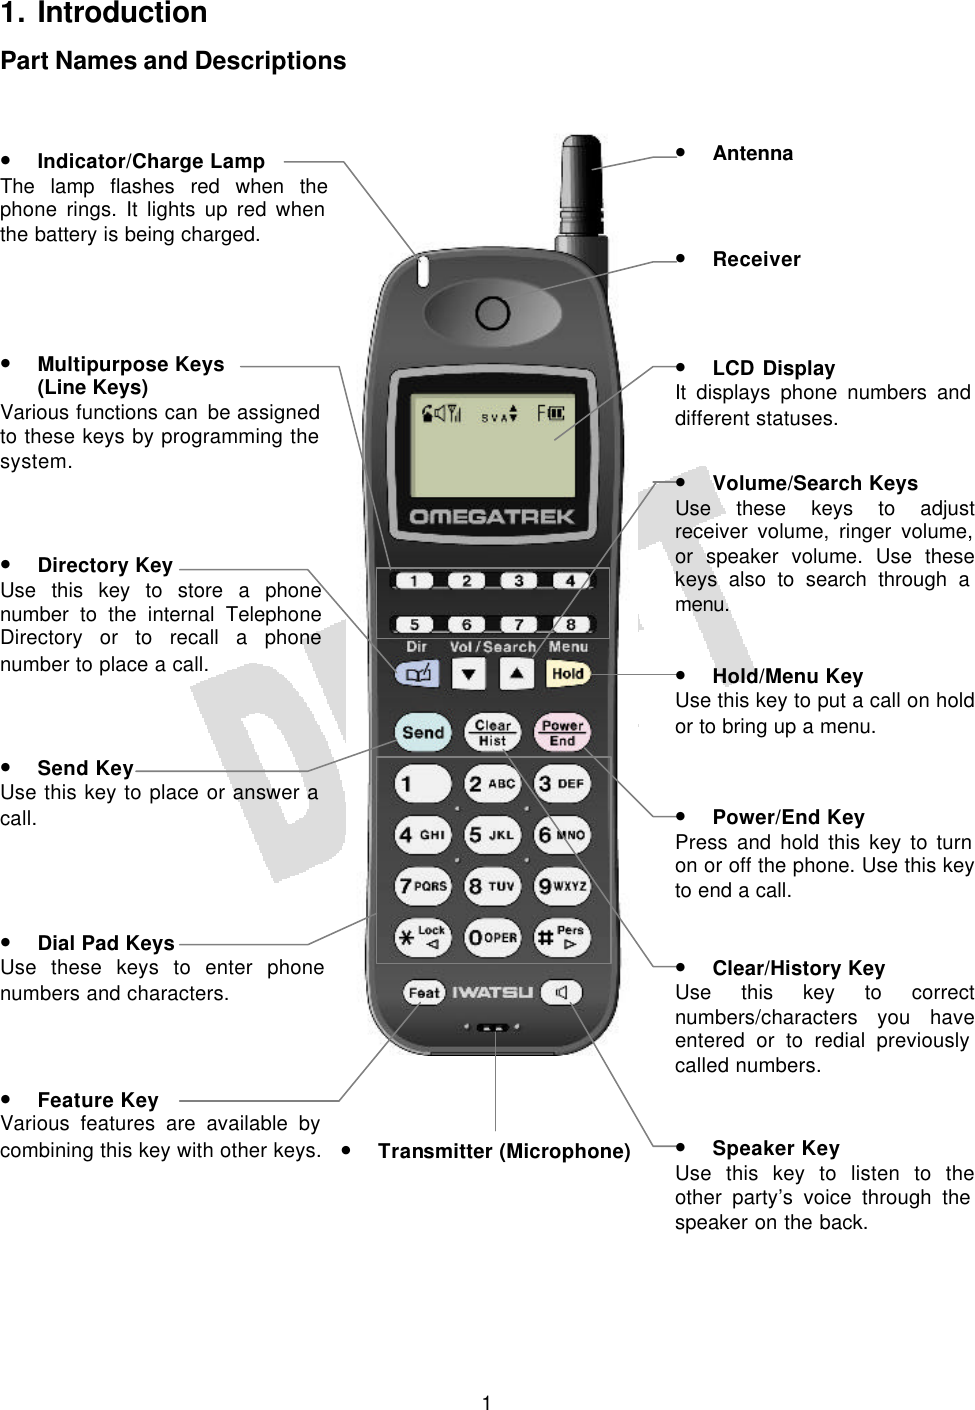
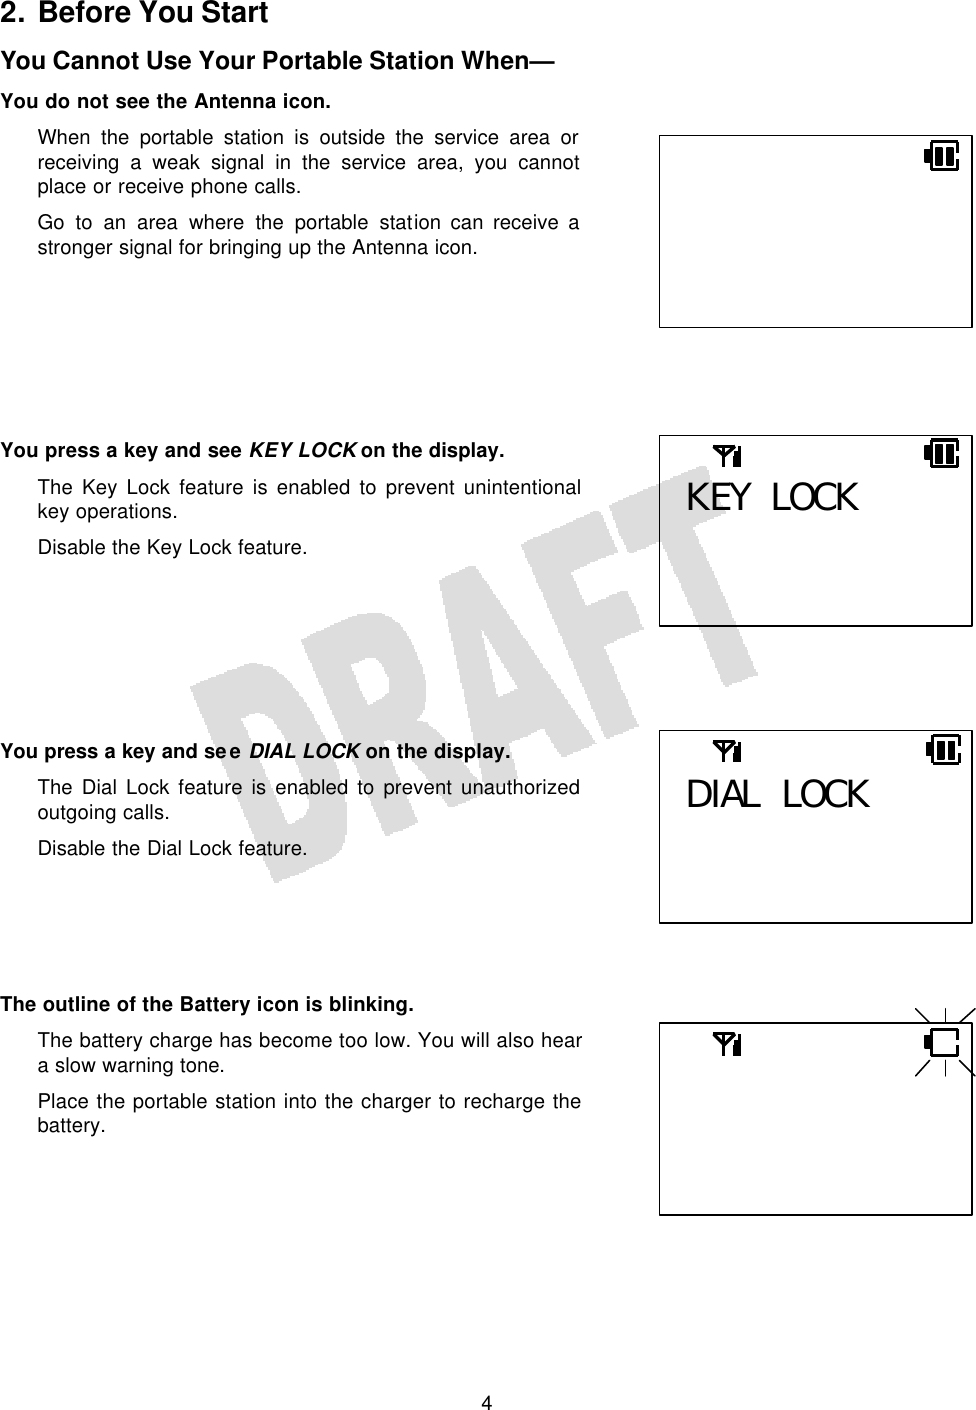
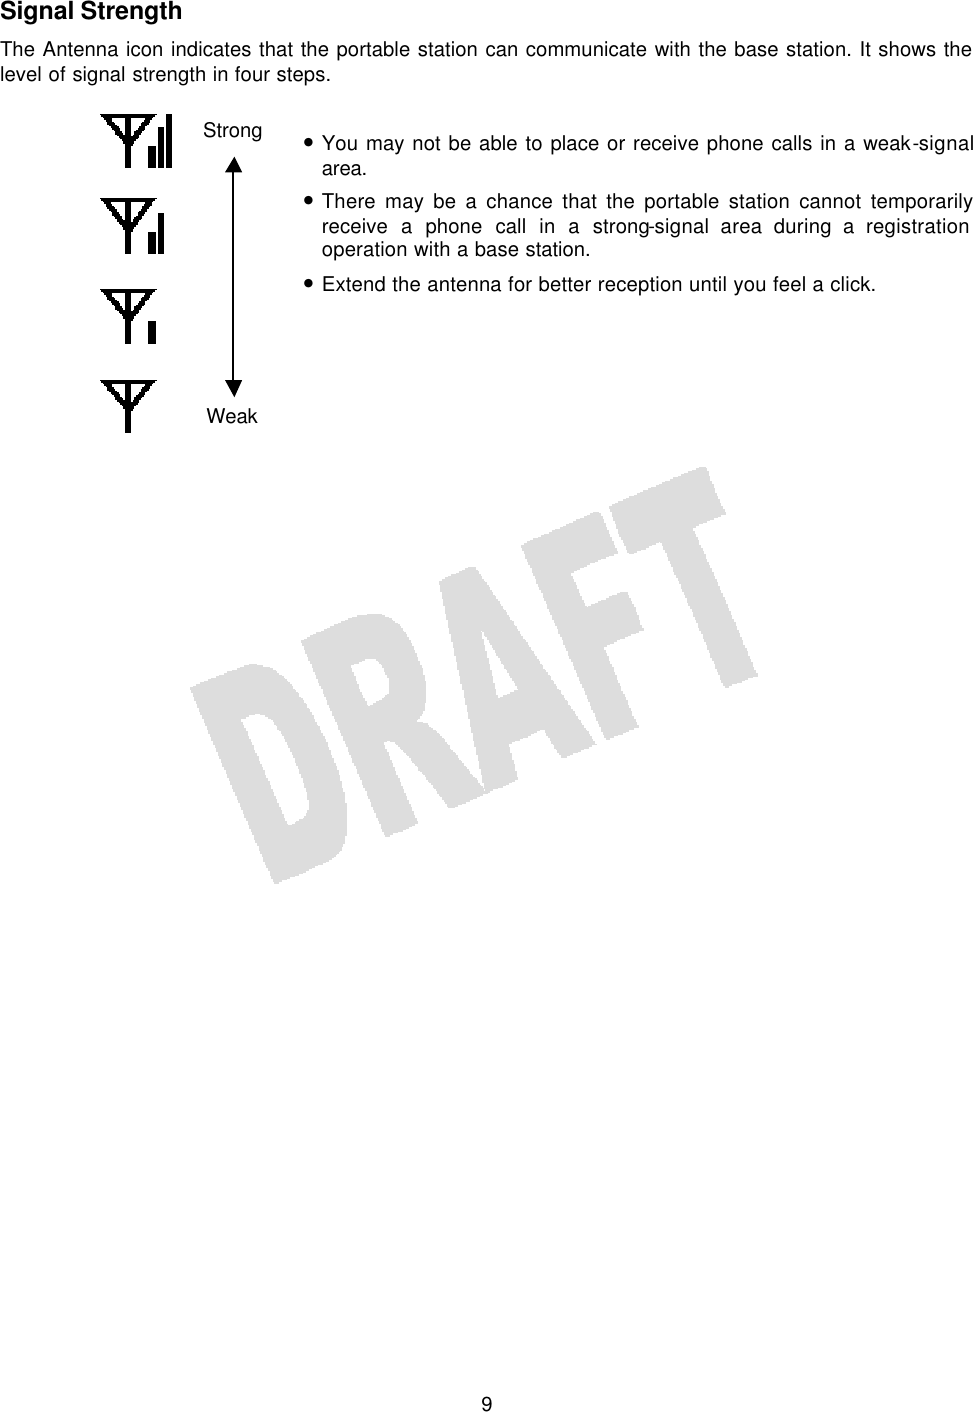
![2 LCD Display 1 Telephone Blinks while the personal station is trying to establish a communication with a base station and stays on once it is established. 2 Speaker Indicates that the speaker is on. 3 Antenna Indicates that the portable station can communicate with the base station. 4 Signal Strength Shows the strength of the signal received from the base station. Make sure that you see at least two bars to place a call. 5 Scroll Indicates that you can scroll the screen with [] or []. 6 Feature Indicates that you are using a feature with the Feature key. 7 Battery Shows the level of battery charge. When you see only the outline of the Battery icon, start recharging the battery immediately. The outline starts blinking when the battery charge becomes too low. 8 Silent Indicates that the portable station will not ring when it receives a call. 9 Vibration Indicates that the portable station will vibrate when it receives a call. 10 Alarm Indicates that alarm is set. 11 Dot Matrix Area Displays phone numbers and different statuses. 1 2 3 4 5 6 7 8 9 10 11](https://usermanual.wiki/Iwatsu-America/ADIX-PS/User-Guide-128514-Page-6.png)

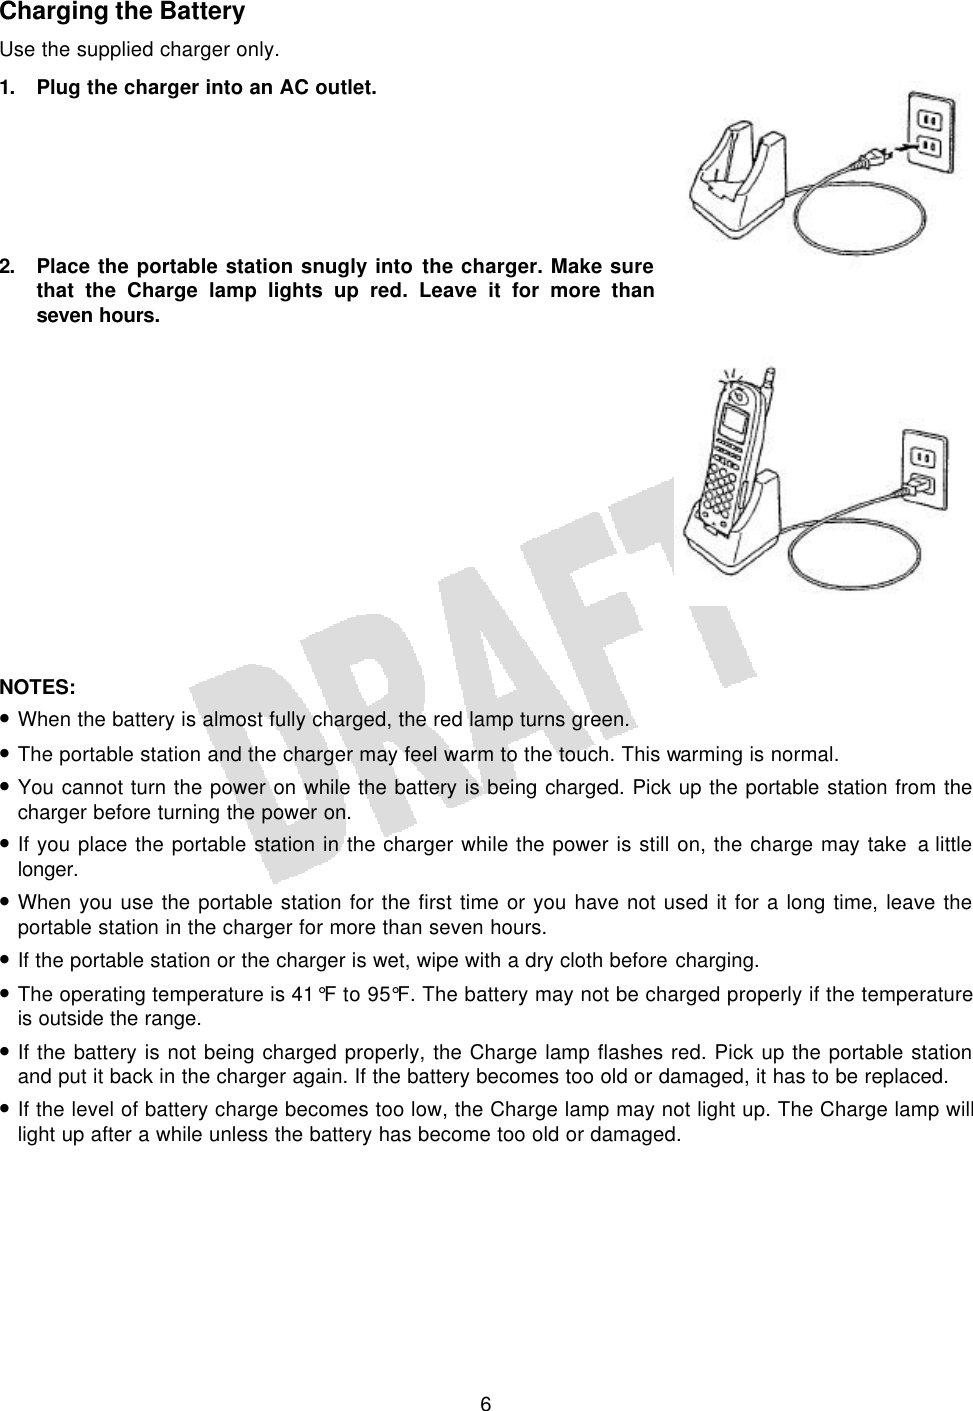
![5 Battery Installation 1. Plug the battery into the connector. 2. Place the battery snugly into the compartment. 3. Place the battery cover. 4. Press and hold [Power] for more than two seconds. All icons will come up on the display for a moment. You will hear a beep at the same time. • The characters on the top line can be set in database programming. • The characters on the middle line can be changed by programming the portable station. NOTE: • Press and hold [Power] for more than two seconds again to turn the power off. G System 1George 10 FR 12:34PBlack (–) Red (+)](https://usermanual.wiki/Iwatsu-America/ADIX-PS/User-Guide-128514-Page-9.png)

![8 Extension Number Display You can verify your own extension number. 1. When the portable station is idle, press [Menu] [0]. 2. Press [Menu]. The display shows the extension number. 3. Press [End] to go back to the idle state. NOTES: • The prompt MENU TO PROG tells you to press [MENU] to program (or to go one step further into menu item). • Press [End] to exit from any menu screen to the idle state. • You can see your extension number also by pressing [Menu] three times. Battery Charge Level The Battery icon shows the approximate level of battery charge. MENU:0 EXT. NO. MENU TO PROG EXT. NO. 2200The battery is sufficiently charged. The battery can still be used. The battery charge level is becoming low. Place the portable station in the charger as soon as possible.](https://usermanual.wiki/Iwatsu-America/ADIX-PS/User-Guide-128514-Page-12.png)
![10Clock and Calendar The system clock information will automatically be sent to the portable station. However, you can also program clock and calendar yourself as follows. 1. When the portable station is idle, press [Menu] [5] [1]. 2. Press [Menu]. 3. Enter the current time. Enter Month à Date à Year à Time. Use [* ] to move the cursor to the left, and [# ] to the right. Hours are denoted in military time (24-hour cycle). 4. Press [Menu]. When the programming is complete, you will hear two quick beeps. The portable station goes back to the idle state. NOTES: • When you turn the power off and back on again in the service area, or when you walk into the service area from outside, the manual setting will be replaced by the system clock information. • When the battery is replaced or too drained, the portable station will lose the manual setting. MENU:51 TIME MENU TO PROG 01/01/2000 12:00 MENU TO PROG 01/01/2000 15:30 MENU TO PROG TIME COMPLETED](https://usermanual.wiki/Iwatsu-America/ADIX-PS/User-Guide-128514-Page-14.png)
![11Operating Menus You can find the desired menu by either entering the menu number or searching through the menus. The following examples are for selecting the PS Quick mode (Menu 52). Entering the menu number 1. Press [Menu] [5] [2] [Menu]. The setup menu for the PS Quick mode will be displayed. 2. When the setup is complete, press [Menu]. The portable station goes back to the idle state. Searching through the menus 1. Press [Menu]. 2. Press [] or [] to select the first digit of the desired menu number. 3. Press [Menu]. 4. Press [] or [] to bring up the desired menu. 5. Press [Menu]. The setup menu for the PS Quick mode will be displayed. 6. When the setup is complete, press [Menu]. The portable station goes back to the idle state. NOTES: • Press [Clear] to go back to the previous menu screen. • Press [End] to exit from any menu screen to the idle state. • Refer to List of Available Programming Items for all the available menus and their settings. QUICK MODE ON OFF Menu 0 Menu 5 Menu Menu Menu 51 Menu 55 Menu 58 Menu Menu Menu 9](https://usermanual.wiki/Iwatsu-America/ADIX-PS/User-Guide-128514-Page-15.png)
![123. Basic Features Placing a CO Call 1. Lift the portable station from the charger and press [Send]. The [Send] key flashes green. 2. Press a line key. Wait for the dial tone. The line key flashes green. 3. Dial the phone number. You will hear a ring back tone in a moment. 4. Talk on the portable station when the call is answered. Elapsed time of the call is displayed on the bottom line. 5. When you finish talking, press [End] and place the portable station back into the charger. NOTES: • You can also access a line by dialing the Line Access number or the Line Group Access number, instead of pressing a line key. • If the System Quick-Mode Operation is programmed in the system database, you can access a CO line just by pressing a line key. • If Prime Line to Optimized is programmed in the system database, you can access a CO line just by pressing [Send]. • If the phone number exceeds 12 digits, the display will show only the last 12 digits you have dialed. The leftmost digit will blink to tell you the number you have entered is more than 12 digits. Send Clear Hist Power End 1 2 3 4 5 6 7 8 ICM OPTIMIZED CO#1 GP.1 2015558580CO#1 GP.1 0:05](https://usermanual.wiki/Iwatsu-America/ADIX-PS/User-Guide-128514-Page-16.png)
![13Receiving a CO Call When a line receives a CO call, the corresponding line key on your portable station flashes red. If the portable station is specified in database programming to ring for incoming calls on that particular line, the Indicator lamp will flash and a ringer will go off. 1. A line key flashes red. If the portable station is programmed to ring for incoming calls on that particular line, the Indicator lamp will flash and a ringer will go off. 2. Lift the portable station from the charger and press the flashing line key. The line key turns green and intermittently blinks. 3. Press [Send]. 4. Talk on the portable station. 5. When you finish talking, press [End] and place the portable station back into the charger. NOTES: • If the portable station is specified in database programming to ring for incoming calls received on a particular line, you can also answer incoming calls just by pressing [Send] (without pressing the line key). • When the Any Key Answer feature (Menu 54) is ON, you can answer incoming calls by pressing any dial pad key. The portable station needs to be specified in database programming to ring for that line. • If the portable station is specified in database programming to ring for incoming calls on a particular line, it can display the phone number of a caller who has called in that line. • When the PS Quick mode (Menu 52) is ON and the portable station is in the charger, you can answer incoming calls by lifting the portable station from the charger. • If you press [End] while the portable station is ringing (or vibrating), you can stop the ringing (or vibrating) for that incoming call. 1 2 3 4 5 6 7 8 1 2 3 4 5 6 7 8 0:01 #1](https://usermanual.wiki/Iwatsu-America/ADIX-PS/User-Guide-128514-Page-17.png)
![14Exclusive Hold You can place an outside call on hold that cannot be picked up by another extension. 1. Tell the other party to hold. 2. Press the Feature key twice. The letter F appears as you press the Feature key once, and it disappears as you press the Feature key for the second time. 3. Press [Hold]. The other party will hear a holding tone. The line key slowly flashes green. The [Send] key lights up and intermittently blinks. 4. Press the line key to retrieve the call and talk again. The line key lights up green and intermittently blinks. NOTES: • If you do not press the Feature key for the second time within six seconds in Step 2, the operation will become invalid. • When you place a call on Exclusive Hold, the corresponding line keys on the other phones indicate “busy.” 0:23 97255510800:24 97255510800:53 97255510801 2 3 4 5 6 7 8 Send Clear Hist Power End 1 2 3 4 5 6 7 8 ICM](https://usermanual.wiki/Iwatsu-America/ADIX-PS/User-Guide-128514-Page-18.png)
![15Group Park By placing a call on Group Park, all extensions with the appearance of that Group Park key will have a flashing indication and be able to pick up that call. The Group Park key needs to be assigned to a line key in database programming. 1. Press the Group Park key. The other party will hear a holding tone. The Group Park key ( 6 in this example) slowly flashes green. The line key ( 1 in this example) lights up red. The [Send] key intermittently flashes green. 2. Press the line key to pick up the call and talk again. The line key lights up green and intermittently blinks. Call Park By placing a call on Call Park, you can retrieve the call from another extension. The Call Park key needs to be assigned to a line key in database programming. 1. Press the Call Park key. The other party will hear a holding tone. The Call Park key ( 2 in this example) slowly flashes green. The line key ( 1 in this example) lights up red. The [Send] key intermittently flashes green. 2. Press the line key to pick up the call and talk again. The line key lights up green and intermittently blinks. Send Clear Hist Power End ICM 1 2 3 4 5 6 7 8 0:23 97255510801 2 3 4 5 6 7 8 Send Clear Hist Power End ICM 1 2 3 4 5 6 7 8 0:23 97255510801 2 3 4 5 6 7 8](https://usermanual.wiki/Iwatsu-America/ADIX-PS/User-Guide-128514-Page-19.png)
![16Transferring a Call to Another Extension You can transfer a CO call or an intercom call to another extension. (The TRAN key needs to be assigned to a line key in database programming.) 1. Tell the other party to hold. 2. Press the TRAN key. The other party will hear a holding tone. The line key ( 1 in this example) slowly flashes green. The [Send] key lights up and intermittently blinks. The TRAN key ( 5 in this example) rapidly flashes red. 3. Dial the desired extension number. 4. When the call is answered, tell the party on the extension that you are transferring a call. Press [End] and place the portable station back in the charger. NOTE: • If you do not dial an extension number after you press the TRAN key, the display will say RECALL and you will hear a ringer. If this happens, press [Send] to speak with the party again. ICM 2100 Send Power End ICM 1 2 3 4 5 6 7 8 Clear Hist](https://usermanual.wiki/Iwatsu-America/ADIX-PS/User-Guide-128514-Page-20.png)
![17Placing an Intercom Call 1. Lift the portable station from the charger and press [Send]. The [Send] key lights up and intermittently blinks. 2. Dial the desired extension number. You will hear a ring back tone in a moment. You can press [#] and call to that party with your voice instead. 3. Talk on the portable station when the call is answered. 4. When you finish talking, press [End] and place the portable station back in the charger. NOTE: • Depending on the type of the phone on the other end, you may not be able to call to the party. Receiving an Intercom Call 1. A ringer goes off. The Indicator lamp and the [Send] key flash. 2. Lift the portable station from the charger and press [Send]. The [Send] key lights up and intermittently blinks. 3. Talk on the portable station. 4. When you finish talking, press [End] and place the portable station back in the charger. Send Clear Hist Power End ICM CALLING 2100 KATHY ICM 2100 KATHY Send Clear Hist Power End](https://usermanual.wiki/Iwatsu-America/ADIX-PS/User-Guide-128514-Page-21.png)
![18Hands-Free Answerback on Intercom When you receive a call from another extension, you can answer the call with your voice with the microphone turned on. The microphone can be turned on or off when the portable station is idle or when you are receiving an intercom call. (The MIC OFF key needs to be assigned to a line key in database programming.) The microphone is on by default. When the microphone is on, the light on the MIC OFF key is off. 1. To turn off the microphone, press the MIC OFF key (or press [Feat] [Feat] + [0] [6] [1]. The light on the MIC OFF key goes out. 2. To turn on the microphone again, press the MIC OFF key (or press [Feat] [Feat] + [6] [1]. The MIC OFF key lights up. NOTE: Press [Feat] [Feat] + [6] [5] to toggle between voice and tone signaling.](https://usermanual.wiki/Iwatsu-America/ADIX-PS/User-Guide-128514-Page-22.png)
![19Additional Features By combining the Feature key and a code, you can access an advanced feature that is not assigned to an individual key. Press [Feat] [Feat] + Code to access a feature. The list of codes is shown below. Code Feature 12 Short Flash 34 Park Pick-up 35 Meet-Me Page Answer 36 Universal Night Answer 61 Microphone ON 061 Microphone OFF 65 Tone/Voice Calling (for Called Extension) 99 Extension Number Display #9 Feature Button Display Idle State Indicators Your portable station may display M or G in the idle state, depending on the status or the condition the portable station is in. M: Message/Forward Indicator When M is on the display, Message Waiting or Flexible Call Forwarding is enabled. Press the Message/Forward Status key to see what is enabled. (The Message/Forward Status key needs to be assigned to a line key in database programming.) If both are enabled, you will see MESSAGE first and then FORWARD as you press the Message/Forward Status key twice. G: Group Indicator When G is on the display, the portable station is within the area of the sub cell group it belongs to. An example of the Idle State indications is shown on the right. NOTES: • When only one indication (M or G) is on, it will be left justified. • The Group Area indication (G) can be disabled by database programming. MG SYSTEM 1 George 7 FR 3:45PMG SYSTEM 1 MESSAGE 7 FR 3:45PMG SYSTEM 1 FORWARD 7 FR 3:45P](https://usermanual.wiki/Iwatsu-America/ADIX-PS/User-Guide-128514-Page-23.png)
![20Flexible Call Forwarding (for CO Line and Intercom) This feature allows you to send incoming calls to another extension or external line (using Personal Speed Dial numbers 90–99). You can also separate call forward destinations for intercom calls and CO calls. For instance, you could set all intercom calls to your cell phone, and all CO calls to be forwarded to your voice mail. (The FWD key needs to be assigned to a line key in database programming.) 1. Press [Send] or press the Speaker key for more than one second. 2. Press [FWD]. 3. Enter the Call Type you wish to forward. 1 = All calls (CO/Intercom) 2 = CO calls only 3 = Intercom calls only 4. Enter the Flexible Call Forward Mode. 1 = All calls to another extension or hunt group 2 = Busy/No Answer calls to another extension or hunt group 3 = No Answer calls to another extension or hunt group 4 = All Calls forward to an external number (using Personal Speed Dial Codes 90–99) In the example on the right, Call Type 1 and Flexible Call Forward Mode 1 are selected. 5. Do one of the following • If you chose Mode 1, 2, or 3, enter the extension or hunt group number. • If you chose Mode 4, enter the Personal Speed Dial Code (90–99). In the example on the right, the extension number 2100 is entered. 6. Wait for a confirmation tone. 7. Press [End]. Forward Cancel You may cancel the forwarding of All calls, CO calls only, or Intercom calls only. 1. Press [Send] or press the Speaker key for more than one second. 2. Press [FWD] [*]. 3. Enter the Call Type number you wish to cancel. 1 = All calls (CO/Intercom) 2 = CO calls only 3 = Intercom calls only The display will show FWD CANCEL momentarily. 4. Wait for a confirmation tone. 5. Press [End]. CO A ICM ACO EXT2100A ICM EXT2100A](https://usermanual.wiki/Iwatsu-America/ADIX-PS/User-Guide-128514-Page-24.png)
![21Optimized Routing (for CO Line Only) With the use of a one-touch optimize key, you can allow the system to automatically select the least expensive way to make an outgoing call. When a one-touch optimized key [FLT00] is allocated on your portable station enabled for optimized routing, you can make an optimized call by simply pressing [FLT00]. 1. Press [FLT00]. The [FLT00] key flashes green. 2. Dial the phone number. 4. Talk on the portable station when the call is answered. Elapsed time of the call is displayed on the bottom line. 1 2 3 4 5 6 7 8 OPTIMIZED OPTIMIZED 2015558580CO#1 GP.1 0:05](https://usermanual.wiki/Iwatsu-America/ADIX-PS/User-Guide-128514-Page-25.png)
![22Prime Line to Optimized (for CO Line Only) When you place a CO call, an open line can automatically be accessed. (Prime Line to Optimized needs to be configured in database programming.) 1. When the portable station is idle, press [Send]. A line key lights up green and intermittently blinks. 2. Dial the phone number. NOTE: • If there is no open line for the moment, you cannot place a CO call. Try again later. OPTIMIZED 1 2 3 4 5 6 7 8 9725550242](https://usermanual.wiki/Iwatsu-America/ADIX-PS/User-Guide-128514-Page-26.png)
![23Conference Call (for CO Line and Intercom) When you are on a call, you can have one or two extensions join you in a three-party call or a four-party call. (The [TRAN] and [ADD] keys need to be assigned to line keys in database programming.) Adding Another Extension to a CO call 1. When you are on a CO call, press [TRAN]. Wait for the intercom dial tone. The line key slowly flashes green. The [Send] key lights up and intermittently blinks. 2. Dial the desired extension number. 3. When the call is answered, tell the party to join you in a conference call. 4. Press [ADD]. The outside line caller and the extension caller will hear a notification tone. Repeat Steps 1–4 to add another extension to the conference call. CALLING 2100 KATHY ICM 2100 KATHY CO#1 GP.1 1:43 ICM 1 2 3 4 5 6 7 8 Send Clear Hist Power End](https://usermanual.wiki/Iwatsu-America/ADIX-PS/User-Guide-128514-Page-27.png)
![24Adding Another Extension to an Intercom Call 1. When you are on an intercom call, press [TRAN]. 2. Dial the desired extension number. 3. When the call is answered, tell the party to join you in a conference call. 4. Press [ADD]. The outside line caller and the extension caller will hear a notification tone. Repeat Steps 1–4 to add another extension to the conference call. CALLING 2100 KATHY ICM 2100 KATHY CNF GEORGE KATHYICM 1 2 3 4 5 6 7 8 Send Clear Hist Power End](https://usermanual.wiki/Iwatsu-America/ADIX-PS/User-Guide-128514-Page-28.png)
![25Paging (for Intercom Only) You can make an announcement through the speakers in the key telephones or the external paging speakers. 1. When the portable station is idle, press [Send]. Wait for the intercom dial tone. The [Send] key lights up and intermittently blinks. 2. Enter the access code. Enter the All Call access code to page through the speakers in the key telephones and the external paging speakers. Enter a Group Call access code to page through the speakers in the key telephones in a group. Enter a Zone access code to page through the external paging speakers in a group. 3. Make an announcement. NOTES: • The key telephones and the external paging speakers to be accessed are determined in database programming. • In the Group Call paging, there may be 30 groups with a maximum of 64 key telephones per group. • In the Zone paging, there may be 30 groups with a maximum of 64 external paging speakers per group. • The All Call, Group Call, and Zone access codes need to be assigned in database programming.](https://usermanual.wiki/Iwatsu-America/ADIX-PS/User-Guide-128514-Page-29.png)
![264. Advanced Features System Select This portable station can be used as an intercom telephone with line keys, communicating with the base station connected to the key service unit of the system. The portable station can be registered to up to nine systems. If you move from one system to another, the portable station switches over automatically. If the service areas of two or more systems overlap, you can select one of them as follows. 1. When the portable station is idle, press [Menu] [1] [2] to bring up the System Select menu. 2. Press [Menu]. The display shows the currently selected system. 3. Press [] or [] until the desired system is selected. 4. Press [Menu]. You will hear two quick beeps to indicate that the system has been successfully changed. MENU:12 SYS. SELECT MENU TO PROG SYS. SELECT AUTO System 1 SYS. SELECT System 1 System 2 System 2 SELECTED](https://usermanual.wiki/Iwatsu-America/ADIX-PS/User-Guide-128514-Page-30.png)

![28The following features are shared by all operation modes. Character Entry You can enter alphabet, numbers, and symbols. Use the dial pad to enter the desired characters. 1. Enter characters. To enter George, press [4GHI] once, [3DEF ] five times, [6MNO] six times, [7PQRS] seven times, [4GHI] four times, and [3DEF] five times. 2. Press [Menu] to finalize the entry. NOTES: • To enter a character, press the dial pad key (repeatedly, if necessary) on which the character is printed, until the desired character is displayed. When the character is displayed, press another dial pad key. If you would like to enter another character that is printed on the same key you have just pressed, press [# ] to move the cursor to the right. • If you have incorrectly entered a character, press [Clear] to delete it. The cursor will move back by one character. Press and hold [Clear] for more than one second to delete the whole line. • To change a character, use [* ] or [# ] to move the cursor over that character, press [Clear] to delete it, and then enter a different character. • You can insert characters to the cursor position. If the number of characters exceeds the limit, the rightmost character will disappear. ENTER NAME B ENTER NAME George](https://usermanual.wiki/Iwatsu-America/ADIX-PS/User-Guide-128514-Page-32.png)
![29Available characters and operations are listed below. Key Characters [1 ] 1 [2ABC] A B C a b c 2 [3DEF ] D E F d e f 3 [4GHI] G H I g h I 4 [5JKL] J K L j k l 5 [6MNO] M N O m n o 6 [7PQRS] P Q R S p q r s 7 [8TUV] T U V t u v 8 [9WXYZ] W X Y Z w x y z 9 [0OPER] – . & / [ ] # * (Space) ” ! ? 0 [* ] Moves the cursor to the left. [# ] Moves the cursor to the right. [Clear] Deletes one character. [Clear] for 1 sec Deletes all the characters.](https://usermanual.wiki/Iwatsu-America/ADIX-PS/User-Guide-128514-Page-33.png)
![30Making an Entry in Directory You can register up to 500 phone numbers in the Directory. One entry includes a name (12 characters) and a phone number (24 digits). You can also select a group to store the entry in. 1. When the portable station is idle, press [Menu] and [Dir]. The display prompts you to enter a name. Pressing [Dir] for more than one second also takes you to this menu. 2. Enter a name. 3. Press [Menu]. You will be prompted to enter a number. 4. Enter a phone number. As you enter the phone number, the digits will move from right to left. ENTER NUMBER 9725551080ENTER NAME B ENTER NAME George](https://usermanual.wiki/Iwatsu-America/ADIX-PS/User-Guide-128514-Page-34.png)
![315. Press [Menu]. The display shows the Group Selection menu. 6. Press [] or [] to bring up the desired group. You can also use the dial pad (0–9) to select a group. 7. Press [Menu]. The display prompts you to confirm the selection. 8. Press [] or [] to select ENTRY or EDIT, and then press [Menu]. You will hear two quick beeps when the entry has been successfully made. Selecting EDIT will take you back to Step 2. Press [End] if you have no more entries to make. NOTES: • To place a CO call, you may have to add a digit for accessing a CO line and a pause before the phone number. • If you have incorrectly entered a digit, press [Clear] to delete it. The cursor will move back by one digit every time you press [Clear]. Press and hold [Clear] for more than one second to delete the whole line. • Pressing [Clear] when the middle line shows no digits takes you back to the previous menu screen. • You can insert a pause when you register a phone number. 1. Press [Feat], [Menu], and a digit (1–9) to register a pause time in seconds. 2. You can register more than one pause. 3. One pause is counted as two digits. • You can also register a remote access code. 1. Press [Feat], [Menu], and the digit 0, followed by a remote access code. 2. Once you dial the main number, using the Directory, and become connected to a service, press [Send] to dial out the remote access code. • You can register a group name to a Directory group. • If you try to make an entry when 500 entries are already registered, you will hear a warning tone and the portable station displays, ENTRY FAILED: MEMORY FULL. The portable station will go back to the idle state in two seconds. SELECT GROUP Group 0 ENTRY SAVED 499 FREE REGISTER? ENTRY EDIT](https://usermanual.wiki/Iwatsu-America/ADIX-PS/User-Guide-128514-Page-35.png)
![32Editing an Entry in Directory You can edit a selected entry in the Directory. 1. Search and select an entry you wish to edit. 2. Press [Menu]. 3. Press [Menu]. The previously entered name will be displayed. If you do not have to edit the name, skip to Step 5. 4. Use [* ] or [# ] to move the cursor over a character and then insert another character on the left. You can also move the cursor over a character and then press [Clear] to delete it. 5. Press [Menu]. The previously entered phone number will be displayed. If you do not have to edit the phone number, skip to Step 7. 6. Press [Clear] once to delete one digit from the right. Delete as many digits as necessary and enter new digits to the right. You can also press and hold [Clear] to delete all digits and then enter a whole number. (This may be easier in most cases.) ENTER NAME IATTSU IATTSU EDIT DELETE IATTSU 9725550242 ENTER NAME IWATSU 9725550242](https://usermanual.wiki/Iwatsu-America/ADIX-PS/User-Guide-128514-Page-36.png)
![337. Press [Menu]. The previously selected group number will be displayed. If you do not have to change the group number, skip to Step 9. 8. Press [] or [] to select a different group number. 9. Press [Menu]. The display asks you if you would like to overwrite the previous entry with new changes. 10. Press [] or [] to select YES, SAVE AS NEW, or EDIT. 11. Press [Menu]. If you select YES or SAVE AS NEW, you will hear two quick beeps to indicate that the entry has been saved. Selecting EDIT will take you back to Step 3. SELECT GROUP Group 0 OVERWRITE? YES SAVE AS NEW ENTRY SAVED 499 FREE](https://usermanual.wiki/Iwatsu-America/ADIX-PS/User-Guide-128514-Page-37.png)
![34Deleting an Entry in Directory You can delete a selected entry in the Directory. 1. Search and select an entry you wish to delete. 2. Press [Menu]. 3. Press [] or [] to select DELETE. 4. Press [Menu]. 5. Press [] or [] to select YES or NO. 6. Press [Menu]. If you select YES, you will hear two quick beeps to indicate that the entry has been deleted. If you select NO, you will see NOT DELETED on the display. DELETE? YES NO IWATSU EDIT DELETE IWATSU EDIT DELETE IWATSU 9725550242 DELETED 051 FREE](https://usermanual.wiki/Iwatsu-America/ADIX-PS/User-Guide-128514-Page-38.png)
![35Deleting All Entries in Directory You can delete all entries in the Directory. 1. When the portable station is idle, press [Menu] [2] [3] to bring up the Delete All Directory menu. 2. Press [Menu]. If a password is not registered, you will hear a warning tone and see NOT REGIST on the display. You cannot delete all entries in that case. 3. Enter the four-digit password. If the password you entered is incorrect, you will hear a warning tone and see INCORRECT on the display. 4. Press [] or [] to select YES or NO. 5. Press [Menu]. If you select YES, the display shows DELETING for a while and you will hear a confirmation tone to indicate that all entries have been deleted when it is done. Then the portable station will go back to the idle state. If you select NO, the Delete All Directory operation will be canceled and see NOT DELETED on the display. Then the portable station will go back to the idle state. DELETE ALL YES NO MENU:23 DEL. ALL DIRC MENU TO PROG PASSWORD PASSWORD ****DELETED](https://usermanual.wiki/Iwatsu-America/ADIX-PS/User-Guide-128514-Page-39.png)
![36Directory Group Name You can name a directory group. 1. When the portable station is idle, press [Menu] [5] [8] to bring up the Directory Group Name menu. 2. Press [Menu]. 3. Press [] or [] to select a directory group. 4. Press [Menu]. 5. Edit the directory group name and press [Menu]. You will hear a confirmation tone to indicate that the change has been successfully made. GROUP0 Group 0 MENU TO PROG MENU:58 DIR. GRP. NAME MENU TO PROG ENTER G. NAME Group 0 ENTER G. NAME Customers GROUP NAME SAVED](https://usermanual.wiki/Iwatsu-America/ADIX-PS/User-Guide-128514-Page-40.png)
![37Registering a Phone Number from Call History to Directory You can register phone numbers recorded in the Call History into the Directory. 1. Select the data you wish to register. 2. Press [Menu]. 3. Press [] or [] to select SAVE. 4. Press [Menu]. You will be prompted to enter a name. The rest of the procedure is the same as in Making an Entry in Directory. If five hundred entries are already in the memory, you will hear a warning tone and the message shown on the right will appear on the display. Then the portable station will go back to the idle state. 9725550242DELETE SAVE 9725550242 DELETE SAVE OUT: 1 12:34P9725550242ENTER NAME B ENTRY FAILED MEMORY FULL](https://usermanual.wiki/Iwatsu-America/ADIX-PS/User-Guide-128514-Page-41.png)
![38Dialing a Phone Number in Directory with an Access Code 1. Dial the access code (e.g., 0) you wish to combine with a phone number in the Directory. 2. Press [Dir]. 3. Search and select the phone number from the Directory. 4. Press [Send] the combined numbers. 9CO#1 GP.1 99725550242IWATSU 9725550242](https://usermanual.wiki/Iwatsu-America/ADIX-PS/User-Guide-128514-Page-42.png)
![39Dialing a Phone Number in Directory with an Additional Number 1. Press [Dir]. 2. Search and select the phone number from the Directory 3. Press [*]. 4. Enter the number (e.g., 201) you wish to add to the phone number. 5. Press [Send] to dial the combined numbers. IWATSU 9725550242 97255502429 725550242201CO#1 GP.1 725550242201](https://usermanual.wiki/Iwatsu-America/ADIX-PS/User-Guide-128514-Page-43.png)
![40Redialing Previously Dialed Phone Numbers (Outgoing Call History) The 10 most recent phone numbers you dialed are recorded. You can select and redial a phone number from the list. (Up to 24 digits can be recorded as a phone number.) 1. When the portable station is idle, press [Hist]. If no outgoing phone numbers are recorded, the Incoming Call History will be displayed. If no outgoing or incoming phone numbers are recorded, the display will show the word EMPTY and the portable station will go back to the idle state. 2. Press [] or [] to select the phone number you wish to dial. Up to ten most recent phone numbers will be displayed successively. 3. Press [Send]. The currently displayed phone number will be dialed. NOTES: • The phone numbers recorded in the Outgoing Call History will not be lost even when you turn off the portable station. • To place a CO call, you need to press a line key (after you press [Hist]) to access a CO line. • If a recorded phone number is already registered in the Directory, the name is also displayed. • Press [Hist] while the Outgoing Call History is displayed to switch to the Incoming Call History. OUT: 1 12:34P 9725550242OUT/IN EMPTY OUT: 2 10:00A 9725558919CO#1 GP.1 9725558919](https://usermanual.wiki/Iwatsu-America/ADIX-PS/User-Guide-128514-Page-44.png)
![41Deleting an Item from Outgoing Call History 1. Select the item you wish to delete from the Outgoing Call History. 2. Press [Menu]. Confirm that DELETE is selected. 3. Press [Menu] again. You will hear a confirmation tone to indicate that the selected item has been deleted. The portable station will go back to the idle state. OUT: 1 12:34P 9725550242DELETED 9725550242DELETE IN DIRECTRY](https://usermanual.wiki/Iwatsu-America/ADIX-PS/User-Guide-128514-Page-45.png)
![42Deleting All Items from Outgoing Call History 1. Bring up the Outgoing Call History. 2. Press [Menu]. 3. Press [] or [] to select ALL CLEAR. 4. Press [Menu]. 5. Press [] or [] to select YES or NO. 6. Press [Menu]. If you select YES, you will hear a confirmation tone to indicate that all the items in the Outgoing Call History have been deleted. The portable station will go back to the idle state. If you select NO, the operation will be canceled and the portable station will go back to the idle state. 9725550242 IN ONE TOCH ALL DELETE OUT: 1 12:34P 97255502429725550242DELETE IN DIRECTRY DELETE? YES NO DELETED](https://usermanual.wiki/Iwatsu-America/ADIX-PS/User-Guide-128514-Page-46.png)
![43Dialing Phone Numbers of Previously Received Calls (Incoming Call History) When you receive an incoming call along with the caller’s phone number, the phone number is recorded in the Incoming Call History. Up to 10 most recent phone numbers can be recorded. (Up to 24 digits can be recorded as a phone number.) 1. When the portable station is idle, press [Hist]. If any outgoing phone numbers are recorded, the Outgoing Call History will be displayed. Press [Hist] again to bring up the Incoming Call History. If no outgoing or incoming phone numbers are recorded, the display will show the word EMPTY and the portable station will go back to the idle state. 2. Press [] or [] to select the phone number you wish to dial. Up to ten most recent phone numbers will be displayed successively. 3. Press [Send]. The currently displayed phone number will be dialed. NOTE: • The phone numbers recorded in the Incoming Call History will not be lost even when you turn off the portable station. IN: 2 11:22A 2015558580OUT/IN EMPTY IN:12 10:00A2015552075CO#1 GP.1 2015552075](https://usermanual.wiki/Iwatsu-America/ADIX-PS/User-Guide-128514-Page-47.png)
![44• If you did not answer an incoming call that contained the caller’s phone number, the ringing phone symbol shown on the right will be displayed in the idle state. • In the Incoming Call History, a call you did not answer is indicated with the letter A (for Abandoned Call) on the left side of the date. • To place a CO call, you need to press a line key (after you press [Hist]) to access a CO line. • If a recorded phone number is already registered in the Directory, the name is also displayed. • Press [Hist] while the Incoming Call History is displayed to switch to the Outgoing Call History. SYSTEM 1George 12:34PIN:A 5 1:45P 2015558580](https://usermanual.wiki/Iwatsu-America/ADIX-PS/User-Guide-128514-Page-48.png)
![45Deleting an Item from Incoming Call History 1. Select the item you wish to delete from the Incoming Call History. 2. Press [Menu]. Confirm that DELETE is selected. 3. Press [Menu] again. You will hear a confirmation tone to indicate that the selected item has been deleted. The portable station will go back to the idle state. IN: 1 12:34P 20155585802015558580DELETE IN DIRECTRY DELETED](https://usermanual.wiki/Iwatsu-America/ADIX-PS/User-Guide-128514-Page-49.png)
![46Deleting All Items from Incoming Call History 1. Bring up the Incoming Call History. 2. Press [Menu]. 3. Press [] or [] to select ALL CLEAR. 4. Press [Menu]. 5. Press [] or [] to select YES or NO. 6. Press [Menu]. If you select YES, you will hear a confirmation tone to indicate that all the items in the Incoming Call History have been deleted. The portable station will go back to the idle state. If you select NO, the operation will be canceled and the portable station will go back to the idle state. IN: 1 12:34P 20155585802015558580DELETE IN DIRECTRY 2015558580 IN ONE TOCH ALL DELETE DELETE? YES NO DELETED](https://usermanual.wiki/Iwatsu-America/ADIX-PS/User-Guide-128514-Page-50.png)
![47One-Touch Dial If the one-touch dial feature is assigned to a line key, etc., up to 24 digits (including a telephone number, [Send], etc.) can be registered to the key for one-touch dialing. (The One-Touch Dial key needs to be assigned to a line key, if necessary, in data settings of the portable station.) 1. When the portable station is idle, press the One-Touch Dial key ( 5 in this example). The line key lights up green and intermittently blinks. You will hear a ring back tone in a moment. 2. Talk on the portable station when the call is answered. NOTES: • The key combinations [Feat] + 0–9 are predefined as One-Tocuh Dial keys. • To place a CO call, you need to have registered a Line Access number or a Line Group Access number before the phone number. Registering a Phone Number to One-Touch Dial Key 1. When the portable station is idle, press [Menu] [7]. 2. Press [Menu]. A list of available keys and key combinations will be displayed. A key or a key combination with a Speed Dial number already registered has an asterisk on the right side. MENU:7 ONE TOUCH MENU TO PROG ONE TOUCH FEAT+9 EAR–MIC 1 2 3 4 5 6 7 8 CO#1 GP.1 2015552075](https://usermanual.wiki/Iwatsu-America/ADIX-PS/User-Guide-128514-Page-51.png)
![483. Press [] or [] to select a Speed Dial key/key combination. Then press [Menu]. If you select EAR-MIC, you can register a phone number to the switch on the earpiece microphone. 4. Enter the name you wish to register. 5. Press [Menu]. 6. Enter the phone number you wish to register. The entered digits will show up from bottom-right. 7. Press [Menu]. You will hear a confirmation tone to indicate that the registration has been successfully made. The portable station will go back to the idle state. NOTES: • You can register pauses and [Send] to a Speed Dial key/key combination. • You need to register [Send] following the phone number in order to dial by just pressing a Speed Dial key/key combination. • Press [Feat], [Menu], and a digit (1–9) to register a pause time in seconds. • One pause is one to nine seconds long. If you need longer pause duration, program two or more consecutive pauses. • You can also register a remote access code. 1. Press [Feat], [Menu], and the digit 0, followed by a remote access code. 2. Once you dial the main number (using the Directory) and become connected to a service, press [Send] to dial out the remote access code. ENTER NAME P ENTER NUMBER 2015558580EAR–MIC SAVED](https://usermanual.wiki/Iwatsu-America/ADIX-PS/User-Guide-128514-Page-52.png)
![49Deleting a Phone Number from a Speed Dial Key 1. When the portable station is idle, press [Menu] [7]. 2. Press [Menu]. 3. Press [] or [] to select a Speed Dial key/key combination from which you wish to delete a phone number. Press [Menu] again or wait two seconds to go to the next menu screen. 4. Press [] or [] to select DELETE, and then press [Menu]. MENU:7 ONE TOUCH MENU TO PROG IWATSU 9725550242EAR–MIC DELETED ONE TOUCH FEAT+9 *EAR–MIC IWATSU EDIT DELETE IWATSU EDIT DELETE](https://usermanual.wiki/Iwatsu-America/ADIX-PS/User-Guide-128514-Page-53.png)
![50Registering a Phone Number from Call History to a Speed Dial Key You can register phone numbers recorded in the Call History into the Speed Dial keys. 1. Select the data you wish to register from the Incoming Call History or the Outgoing Call History. 2. Press [Menu]. 3. Press [] or [] to select Speed Registration, and then press [Menu]. 4. Press [] or [] to select a Speed Dial key/key combination to which you wish to register the phone number, and then press [Menu]. NOTE: • If the Speed Dial key/key combination you selected is already in use, the display will show OCCUPIED and go back to Step 4. IWATSU DELETE IN DIRECTRY IWATSU IN DIRECTRY IN ONE TOCH OUT: 1 12:34P IWATSU ONE TOUCH FEAT+0 FEAT+1 FEAT+0 SAVED](https://usermanual.wiki/Iwatsu-America/ADIX-PS/User-Guide-128514-Page-54.png)
![51Registering a Phone Number from Directory to Speed Dial Key 1. Select the data you wish to register from the Directory. 2. Press [Menu]. 3. Press [] or [] to select Speed Registration, and then press [Menu]. 4. Press [] or [] to select a Speed Dial key/key combination to which you wish to register the phone number, and then press [Menu]. NOTE: • If the Speed Dial key/key combination you selected is already in use, the display will show OCCUPIED and go back to Step 4. IWATSU 9725550242FEAT+0 ENTRY SAVED IWATSU EDIT DELETE IWATSU DELETE IN ONE TOCH ONE TOUCH FEAT+0 FEAT+1](https://usermanual.wiki/Iwatsu-America/ADIX-PS/User-Guide-128514-Page-55.png)
![52Listening to Ring Back Tone and Called Party’s Voice on Speaker 1. Dial the phone number. 2. Press and hold the Speaker key for more than one second. 3. Press the Speaker key again to speak to the called party. NOTES: • The called party will not hear your voice when the speaker is on. • If you want to turn the speaker on during a phone conversation, press the Speaker key. (The Speaker key toggles on/off the speaker.) • Press [] or [] to adjust the speaker volume. 2015558580CO#1 GP.1 2015558580CO#1 GP.1 2015558580](https://usermanual.wiki/Iwatsu-America/ADIX-PS/User-Guide-128514-Page-56.png)
![53Receiver Volume Control You can adjust the receiver volume in five steps. 1. Press [] or [] during a phone conversation. 2. Press [] to increase the volume, or press [] to decrease the volume. 3. The portable station goes back to the idle state in two seconds after you release the key. NOTE: • The receiver volume setting will not change after the phone conversation. RECEIVE VOL. Louder Softer RECEIVE VOL. RECEIVE VOL. RECEIVE VOL. RECEIVE VOL.](https://usermanual.wiki/Iwatsu-America/ADIX-PS/User-Guide-128514-Page-57.png)
![54Speaker Volume Control You can adjust the speaker volume in five steps. 1. Press [] or [] during a phone conversation (while using the speaker). 2. Press [] to increase the volume, or press [] to decrease the volume. 3. The portable station goes back to the idle state in two seconds after you release the key. NOTE: • The speaker volume setting will not change after you turn off the speaker. Louder Softer SPEAKER VOL. SPEAKER VOL. SPEAKER VOL. SPEAKER VOL. SPEAKER VOL.](https://usermanual.wiki/Iwatsu-America/ADIX-PS/User-Guide-128514-Page-58.png)
![55Ringer Volume Control You can adjust the ringer volume in three steps. You can also turn off the ringer. 1. When the portable station is idle or receiving a call, press [] or []. 2. Press [] to increase the volume, or press [] to decrease the volume. 3. The portable station goes back to the idle state in two seconds after you release the key. NOTES: • The ringer volume setting will not change after you turn off the portable station. • The letter S (for Silent) appears when the ringer is turned off. • If the portable station is set to vibrate upon receiving a call, the Step Tone setting makes the portable station vibrate first and then ring (soft à medium à loud). • When the portable station is in the Personal Ringing mode, it will operate in accordance with the Personal Ringing settings. RINGER VOL. STEP TONE RINGER VOL. RINGER VOL. RINGER VOL. Louder Softer RINGER VOL. OFF](https://usermanual.wiki/Iwatsu-America/ADIX-PS/User-Guide-128514-Page-59.png)
![56Ring Option 1. When the portable station is idle, press [Menu] [3] [2] to bring up the Ring Option menu. 2. Press [Menu]. 3. Press [] or [] to select a ringer type or Alarm, and then press [Menu]. You will hear the currently selected tone. 4. Press [] or [] to select a tone type. Every time you press [] or [], you will hear the current tone indicated on the display. 5. Press [Menu]. You will hear a confirmation tone to indicate that the tone has been successfully selected. NOTES: • You can select a tone for the following ringer types, etc. Intercom Ringer CO Call Ringer PBX/CEX Ringer Alarm Doorphone Ringer • The following tones are available. Options 1–6 Doorphone 1–2 Melody 1 = The Entertainer (by Scott Joplin) Melody 2 = The Four Seasons: Spring (by Antonio Vivaldi) Melody 3 = Military March No. 1 in D (by Franz Schubert) Melody 4 = Sur le pont d’Avignon (French Folksong) Melody 5 = Comin’ Thro’ The Rye (Scottish Folksong) MENU:32 RING OPTION MENU TO PROG ICM RING OPTION2 OPTION3 RING OPTION ICM CO RING OPTION SELECTED](https://usermanual.wiki/Iwatsu-America/ADIX-PS/User-Guide-128514-Page-60.png)
![57Vibrate Alert You can set the Vibration Alert feature to notify you of all incoming calls. 1. When the portable station is idle, press [Menu] [3] [1] to bring up the Vibrate menu. 2. Press [Menu]. 3. Press [] or [] to select ON or OFF. 4. Press [Menu]. You will hear a confirmation tone to indicate that the change has been successfully made. MENU:31 VIBRATE MENU TO PROG VIBRATE ON OFF VIBRATE ON](https://usermanual.wiki/Iwatsu-America/ADIX-PS/User-Guide-128514-Page-61.png)
![58Personal Ringing Mode To minimize the inconvenience to people around you, you can temporarily change the settings for the ringer, confirmation/warning tones, and vibration to the ones programmed in the Personal Ringing settings. 1. When the portable station is idle, press and hold [# Pers] for one second. The confirmation tone may or may not sound, depending on the Personal Ringing setting. NOTES: • When the portable station is idle and the Personal Ringing mode is ON, PRS appears on the display. • The Personal Ringing settings will be preserved even if you turn off the portable station. • The letter S (for Silent) and the letter V (for Vibration) may appear in the Personal Ringing mode, depending on the Personal Ringing settings. • The Personal Ringing mode cannot be turned on or off while the Key Lock feature is ON. Disabling Personal Ringing Mode 1. When the portable station is in the Personal Ringing mode, press and hold [# Pers] for one second. You will hear a confirmation tone to indicate that the Personal Ringing mode has been successfully disabled. The portable station will go back to the idle state. Personal Ringing Settings 1. When the portable station is idle, press [Menu] [1] [4] to bring up the Personal Ringing menu. 2. Press [Menu]. 3. Press [] or [] to select from Ringer ON, OFF, or Ring Timeout, and then press [Menu]. PERSONAL RNG ON SYSTEM 1George PRS 12:34P PERSONAL RNG OFF MENU:14 PERSONAL RNG MENU TO PROG RING OFF RNG TIMEOUT](https://usermanual.wiki/Iwatsu-America/ADIX-PS/User-Guide-128514-Page-62.png)
![594. Press [] or [] to select Confirmation Tone/Warning Tone ON or OFF. 5. Press [] or [] to select Vibration ON or OFF. 6. Press [Menu]. You will hear a confirmation tone to indicate that the Personal Ringing settings have been successfully made. The portable station will go back to the idle state. NOTES: • When vibration is ON, the portable station will vibrate regardless of the ringer volume setting. If ringer is not turned OFF, the portable station will ring and vibrate at the same time upon receiving a call. • If the portable station is set to vibrate upon receiving a call, the Step Tone setting makes the portable station vibrate first for ten seconds and then ring (soft à medium à loud). • The portable station may or may not vibrate in the Personal Ringing mode, depending on the Personal Ringing setting. • The Auto OFF setting makes the portable station ring for 30 seconds upon receiving a call. If a second call is received right after the first ring stops, the portable station will ring for another 30 seconds. • The portable station will not vibrate while it is placed in the charger. PERSONAL RNG SAVED CONF. TONE ON OFF VIBRATE ON OFF](https://usermanual.wiki/Iwatsu-America/ADIX-PS/User-Guide-128514-Page-63.png)
![60Key Lock The Key Lock feature keeps you from inadvertently operating the portable station by hitting a key while carrying the portable station. 1. When the portable station is idle, press and hold [* Lock] for one second. You will hear a confirmation tone to indicate that Key Lock has been successfully activated. The portable station will go back to the idle state. NOTES: • Key Lock will be disabled once you turn off the portable station. • When you receive a call while the Key Lock feature is ON, you can answer it by pressing [Send] for more than one second. The Key Lock feature will temporarily be disabled throughout the call. • Even if the Any Key Answer feature is ON, the Key Lock feature supersedes it. • You cannot turn on of off Key Lock during a call. • Even if the Key Lock feature is ON, you can quickly stop alarm or ringer by pressing [End]. • The LCD or the keys will not be lit while Key Lock is ON. • When you press a key while the Key Lock feature is ON, the words KEY LOCK will appear on the display for a short period. Disabling Key Lock 1. When the Key Lock feature is ON, press and hold [* Lock] for one second. You will hear a confirmation tone to indicate that Key Lock has been successfully deactivated. The portable station will go back to the idle state. KEY LOCK ON KEY LOCK OFF](https://usermanual.wiki/Iwatsu-America/ADIX-PS/User-Guide-128514-Page-64.png)
![61Registering/Changing Password To activate/deactivate Dial Lock or Directory Lock, you need to register a four-digit password in advance. 1. When the portable station is idle, press [Menu] [5] [5] to bring up the Password menu. 2. Press [Menu]. 3. If a password is already registered, enter the four-digit password (0000–9999). 4. Enter a new four-digit password. 5. Reenter the new four-digit password. You will hear a confirmation tone to indicate that the new password has been successfully saved. MENU:55 PASSWORD MENU TO PROG PASSWORD PASSWORD ***PASSWORD NEW: ***PASSWORD AGAIN: ***PASSWORD SAVED](https://usermanual.wiki/Iwatsu-America/ADIX-PS/User-Guide-128514-Page-65.png)
![63Dial Lock If you activate the Dial Lock feature, you can prevent other people from making unauthorized phone calls using your portable station. While the Dial Lock feature is activated— • You cannot place outgoing calls (except for 911). • You can receive incoming calls. • You can turn on or off the portable station. • You cannot activate/deactivate features except for the Key Lock feature. 1. When the portable station is idle, press [Menu] [2] [1] to bring up the Dial Lock menu. 2. Press [Menu]. If a password is not registered, you will hear a warning tone to indicate that you cannot activate the Dial Lock feature. 3. Enter the four-digit password. MENU:21 DIAL LOCK MENU TO PROG PASSWORD PASSWORD NOT REGIST PASSWORD ****](https://usermanual.wiki/Iwatsu-America/ADIX-PS/User-Guide-128514-Page-67.png)
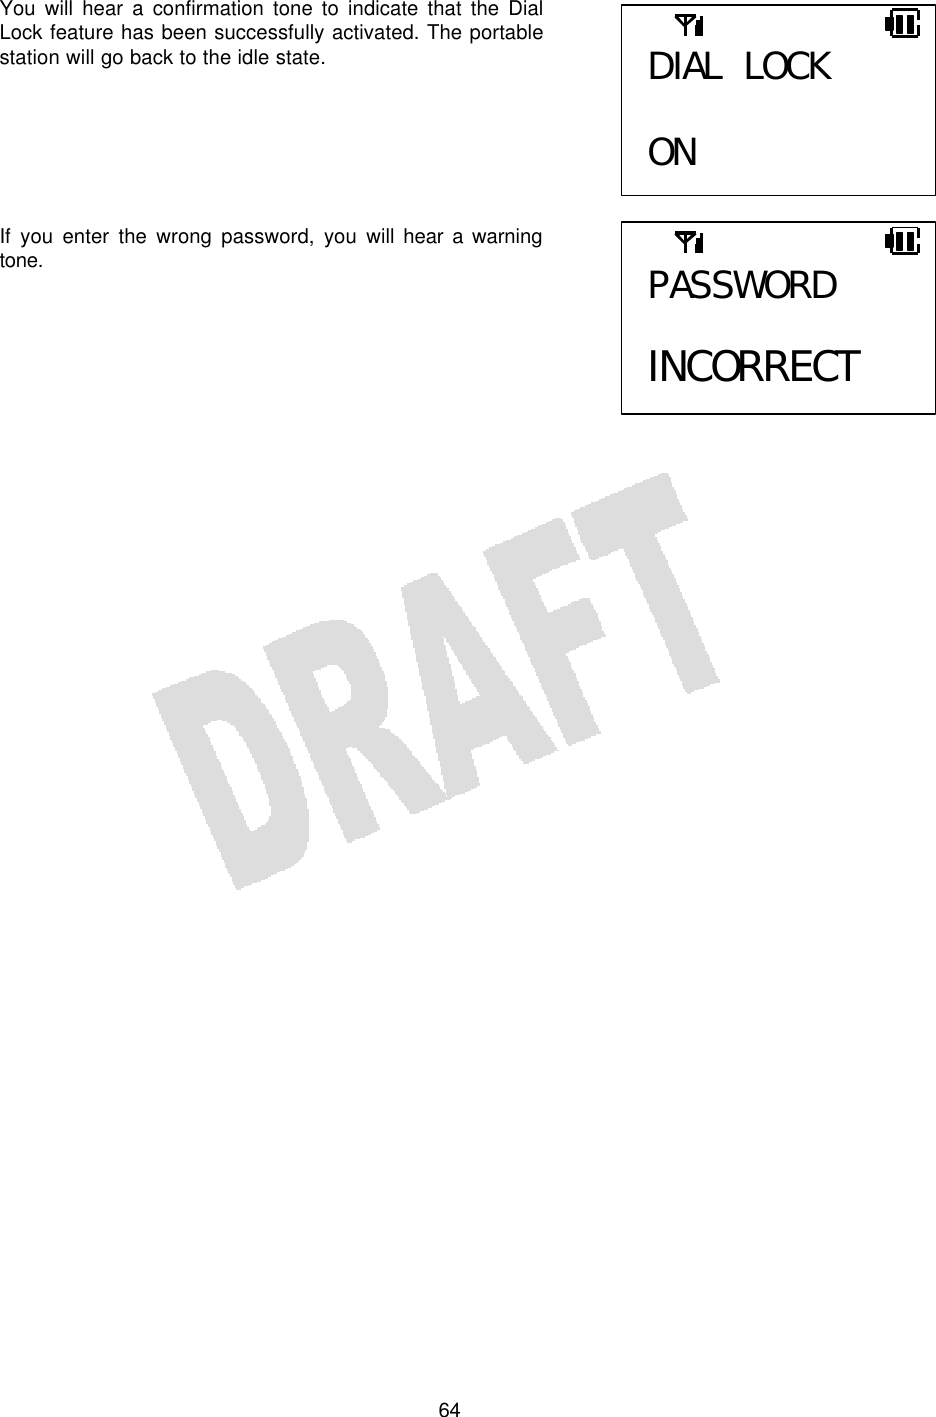
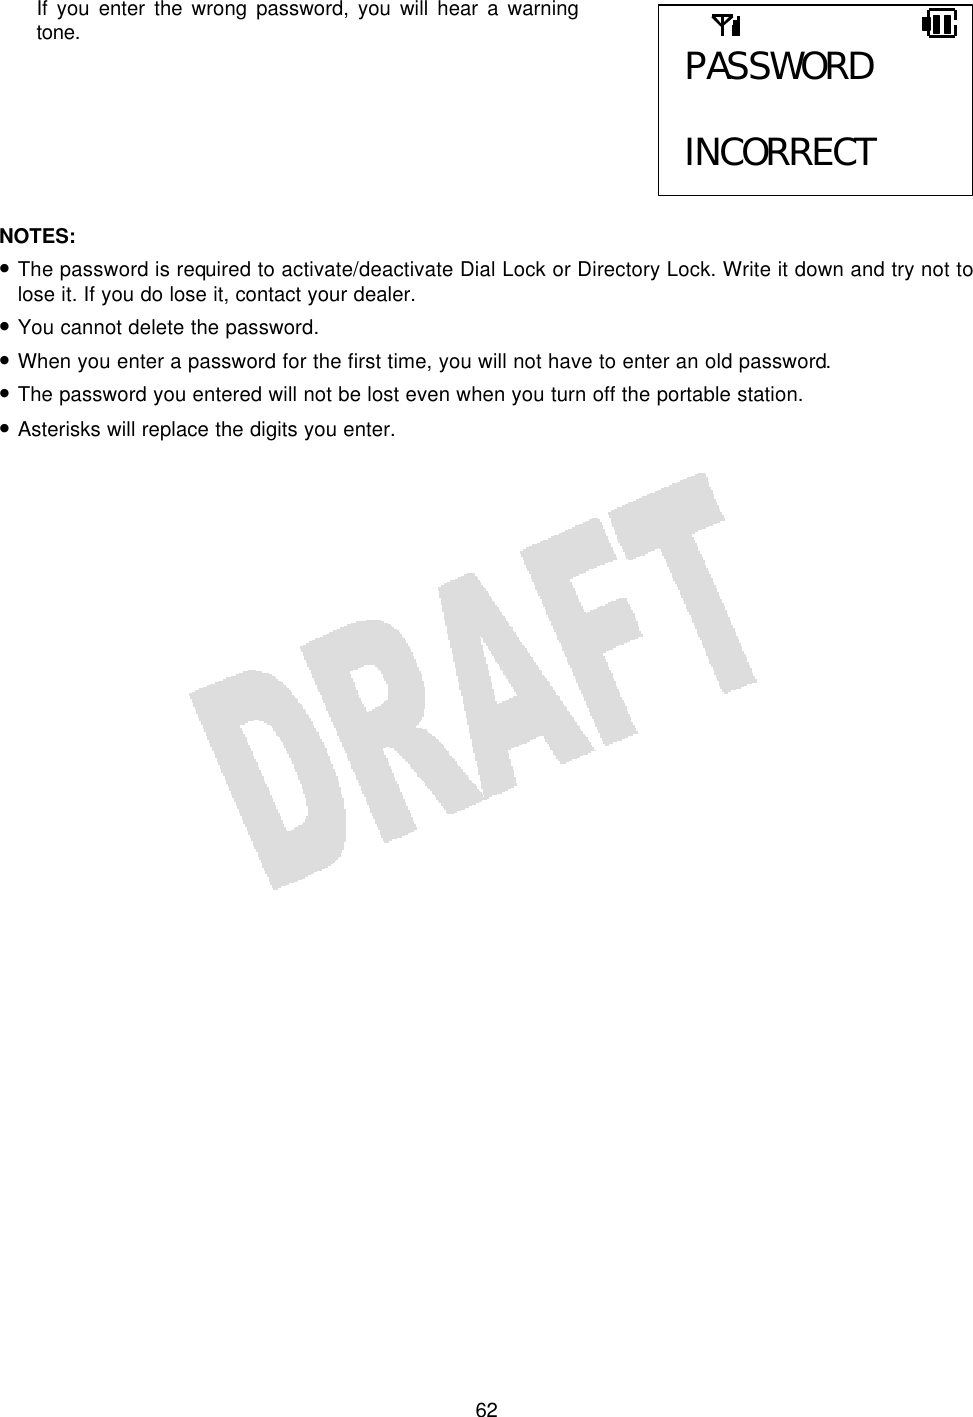
![65Disabling Dial Lock 1. Enter the four-digit password. 2. Press [Menu]. You will hear a confirmation tone to indicate that the Dial Lock feature has been successfully disabled. If you enter the wrong password, you will hear a warning tone. NOTES: • Press [End] if you would like to stop disabling the Dial Lock feature. • If you press an invalid key while the Dial Lock feature is ON, the words DIAL LOCK will appear on the display. • The Dial Lock setting will not be lost even if you turn off the portable station. • If the Key Lock and Dial Lock features are both activated, you need to deactivate the Key Lock feature first before deactivating the Dial Lock feature. • The password is required to activate/deactivate the Dial Lock feature or the Directory Lock feature. Write it down and try not to lose it. If you do lose it, contact your dealer. DIAL LOCK ****DIAL LOCK OFF PASSWORD INCORRECT](https://usermanual.wiki/Iwatsu-America/ADIX-PS/User-Guide-128514-Page-69.png)
![66Directory Lock If you activate the Directory Lock feature, you can prevent other people from looking in your Directory. While the Directory Lock feature is activated— • You cannot look in your Directory. • You can still place or receive calls. • You can turn on or off the portable station. 1. When the portable station is idle, press [Menu] [2] [2] to bring up the Lock Directory menu. 2. Press [Menu]. If a password is not registered, you will hear a warning tone to indicate that you cannot activate the Directory Lock feature. 3. Enter the four-digit password. If you enter the wrong password, you will hear a warning tone to indicate that you cannot activate the Directory Lock feature. MENU:22 DRCTRY LOCK MENU TO PROG PASSWORD PASSWORD NOT REGIST PASSWORD ****PASSWORD INCORRECT](https://usermanual.wiki/Iwatsu-America/ADIX-PS/User-Guide-128514-Page-70.png)
![674. Press [] or [] to select ON or OFF. 5. Press [Menu]. You will hear a confirmation tone to indicate that the Directory Lock feature has been successfully turned on or off. The portable station will go back to the idle state. If the Directory Lock feature is turned on, the word ON appears on the display. If the Directory Lock feature is turned off, the word OFF appears on the display. NOTES: • Press [End] if you would like to stop disabling the Directory Lock feature. • If you press [Dir] while the Directory Lock feature is ON, the words DIRCTRY LOCK will appear on the display. • If the Key Lock feature or the Dial Lock feature is activated along with the Directory Lock feature, you need to deactivate the Key Lock feature or the Dial Lock feature first before deactivating the Directory Lock feature. • The password is required to activate/deactivate the Dial Lock feature or the Directory Lock feature. Write it down and try not to lose it. If you do lose it, contact your dealer. DRCTRY LOCK ON DRCTRY LOCK OFF DRCTRY LOCK ON OFF](https://usermanual.wiki/Iwatsu-America/ADIX-PS/User-Guide-128514-Page-71.png)
![68Alarm Clock 1. When the portable station is idle, press [Menu] [1] [1] to bring up the Alarm Clock menu. 2. Press [Menu]. 3. Press [] or [] to select ON or OFF. 4. Press [Menu]. If you have selected OFF, you will hear a confirmation tone. The portable station will go back to the idle state. 5. Set the alarm time. 6. Press [Menu]. 7. Press [] or [] to select ONE TIME or EVERY DAY. 8. Press [Menu]. MENU:11 ALARM CLOCK MENU TO PROG ALARM CLOCK ON OFF ALARM CLOCK OFF ALARM CLOCK 12:00 MENU TO PROG ALARM CLOCK ONE TIME DAILY ALARM CLOCK SAVED](https://usermanual.wiki/Iwatsu-America/ADIX-PS/User-Guide-128514-Page-72.png)
![69NOTES: • The letter A (for Alarm) appears on the display when alarm is set. • You will hear the tone selected in Tone Selection. • The alarm tone volume is the same as the ringer volume. An alarm tone may or may not be heard in the Personal Ringing mode, depending on the Personal Ringing setting. • An alarm tone lasts one minute. • Press [End] to stop an alarm tone (even while the Key Lock feature is ON). • The Alarm setting will not be lost even if you turn off the portable station.](https://usermanual.wiki/Iwatsu-America/ADIX-PS/User-Guide-128514-Page-73.png)
![70Placing a Call with Earpiece Microphone With an optional earpiece microphone attached to your portable station, you can place or receive calls by pressing the switch on the earpiece microphone. If you have registered a phone number to the switch on the earpiece microphone, you can call that number by pressing the switch on the earpiece microphone. 1. Connect an earpiece microphone to the portable station. Insert the plug of the earpiece microphone into the earpiece microphone jack on the portable station. 2. Hold down the switch on the earpiece microphone until you hear two quick beeps. The registered number will be dialed out. 3. Talk on the portable station. 4. Hold down the switch on the earpiece microphone until you hear two quick beeps to end the call. You can press [End] on the portable station instead to end the call. Receiving a Call with Earpiece Microphone 1. Connect a earpiece microphone to the portable station. Insert the plug of the earpiece microphone into the earpiece microphone jack on the portable station. 2. When you receive a phone call, you will hear the ringer from the speaker and the earpiece microphone. 3. Hold down the switch on the earpiece microphone until you hear two quick beeps to answer the call. You can also answer the call by pressing [Send] on the portable station. 4. Talk on the portable station. 5. Hold down the switch on the earpiece microphone until you hear two quick beeps to end the call. You can press [End] on the portable station instead to end the call. NOTE: • Refer to Registering a Phone Number to Speed Dial Key.](https://usermanual.wiki/Iwatsu-America/ADIX-PS/User-Guide-128514-Page-74.png)
![71Programming the Portable Station You can program the portable station to your liking with various menus. • Press [End] to exit from any menu screen to the idle state. • If you do not press a key during an operation for 30 seconds, the portable station will go back to the idle state. Start the operation over from the beginning. Press [Clear] to go back to the previous menu screen. • If you receive a call during an operation, the operation will be canceled and the portable station will ring. Start the operation over from the beginning after finishing the call.](https://usermanual.wiki/Iwatsu-America/ADIX-PS/User-Guide-128514-Page-75.png)
![72Disabling Keypad Tone 1. When the portable station is idle, press [Menu] [4] [1] to bring up the Keypad Tone menu. 2. Press [Menu]. 3. Press [] or [] to select ON or OFF. 4. Press [Menu]. You will hear a confirmation tone, and the portable station will go back to the idle state. MENU:41 KEYPAD TONE MENU TO PROG KEYPAD TONE ON OFF KEYPAD TONE ON](https://usermanual.wiki/Iwatsu-America/ADIX-PS/User-Guide-128514-Page-76.png)
![73PS Quick Mode (Charger Unit) If the PS Quick mode is ON, you can pick up the portable station from the charger to answer a call and put it back to the charger to hang up the call. 1. When the portable station is idle, press [Menu] [5] [2] to bring up the Quick Mode menu. 2. Press [Menu]. 3. Press [] or [] to select ON or OFF. 4. Press [Menu]. You will hear a confirmation tone, and the portable station will go back to the idle state. NOTE: • The PS Quick mode can be configured in database programming so that you get a dial tone (right after you pick up the portable station from the charger) without pressing [Send]. MENU:52 QUICK MODE MENU TO PROG QUICK MODE ON OFF QUICK MODE ON](https://usermanual.wiki/Iwatsu-America/ADIX-PS/User-Guide-128514-Page-77.png)
![74User Name 1. When the portable station is idle, press [Menu] [5] [7] to bring up the User Name menu. 2. Press [Menu]. 3. The currently registered user name will be displayed. Use [* ] or [# ] to move the cursor, and enter a new name. 4. Press [Menu]. You will hear a confirmation tone to indicate that the registration has been successfully made. The portable station will go back to the idle state. NOTES: • The registered user name is displayed on the middle line when the portable station is idle. • The display function of the key service unit overrides the display. MENU:57 USER NAME MENU TO PROG USER NAME George](https://usermanual.wiki/Iwatsu-America/ADIX-PS/User-Guide-128514-Page-78.png)
![75Any Key Answer When the Any Key Answer feature is ON, you can answer a call by pressing any key (including 0–9, *, and #). 1. When the portable station is idle, press [Menu] [5] [4] to bring up the Any Key Answer menu. 2. Press [Menu]. 3. Press [] or [] to select ON or OFF. 4. Press [Menu]. You will hear a confirmation tone, and the portable station will go back to the idle state. NOTE: • If the Key Lock feature is ON, you cannot answer a call by pressing any key. You must press and hold [Send] for more than two seconds. MENU:54 ANYKEY ANS. MENU TO PROG ANYKEY ANS. ON OFF ANYKEY ANS. ON](https://usermanual.wiki/Iwatsu-America/ADIX-PS/User-Guide-128514-Page-79.png)
![76Modem Connection When the Modem Connection feature is ON, you can engage in data communications by connecting a commercially available modem to the earpiece microphone jack. 1. When the portable station is idle, press [Menu] [1] [5] to bring up the Modem menu. 2. Press [Menu]. 3. Press [] or [] to select ON or OFF. 4. Press [Menu]. You will hear a confirmation tone, and the portable station will go back to the idle state. NOTES: • To use the portable station with an earpiece microphone, disable the Modem Connection feature. MENU:15 MODEM MENU TO PROG MODEM ON OFF MODEM ON](https://usermanual.wiki/Iwatsu-America/ADIX-PS/User-Guide-128514-Page-80.png)
![77Range Notify If you walk out of the service area with the portable station while the Range Notify feature is ON, the portable station will give off a warning tone. 1. When the portable station is idle, press [Menu] [4] [2] to bring up the Range Notify menu. 2. Press [Menu]. 3. Press [] or [] to select ON or OFF. 4. Press [Menu]. You will hear a confirmation tone, and the portable station will go back to the idle state. MENU:42 RANGE NOTIFY MENU TO PROG RANGE NOTIFY ON OFF RANGE NOTIFY ON](https://usermanual.wiki/Iwatsu-America/ADIX-PS/User-Guide-128514-Page-81.png)
![78Charger Tone The charger tone lets you know that the portable station has been properly placed in the charger. 1. When the portable station is idle, press [Menu] [4] [3] to bring up the Charger Tone menu. 2. Press [Menu]. 3. Press [] or [] to select ON or OFF. 4. Press [Menu]. You will hear a confirmation tone, and the portable station will go back to the idle state. MENU:43 CHARGER TONE MENU TO PROG CHARGER TONE ON OFF CHARGER TONE ON](https://usermanual.wiki/Iwatsu-America/ADIX-PS/User-Guide-128514-Page-82.png)
![79Quick Mode Guard The PS Quick mode can be configured in database programming so that you get a dial tone (right after you pick up the portable station from the charger) without pressing [Send]. However, the line will be automatically disconnected if Quick Mode Guard is ON and if you do not press any key for 30 seconds after you pick up the portable station from the charger. 1. When the portable station is idle, press [Menu] [5] [3] to bring up the Quick Mode Guard menu. 2. Press [Menu]. 3. Press [] or [] to select ON or OFF. 4. Press [Menu]. You will hear a confirmation tone, and the portable station will go back to the idle state. MENU:53 Q. MODE GUARD MENU TO PROG Q. MODE GUARD ON OFF Q. MODE GUARD ON](https://usermanual.wiki/Iwatsu-America/ADIX-PS/User-Guide-128514-Page-83.png)
![80Help Display Browse this list if you have forgotten how to operate Omegatrek. When an item is displayed, press [Menu] to change the setting. 1. When the portable station is idle, press [Menu] [9] to bring up the Help Display menu. 2. Press [Menu]. 3. Press [] or [] to select a programming item. MENU:9 HELP DISPLAY MENU TO PROG DATA REVIEW MENU TO PROG ALT. CALL REC Hist](https://usermanual.wiki/Iwatsu-America/ADIX-PS/User-Guide-128514-Page-84.png)
![815. General Information List of Available Programming Items Press [Menu] and enter the desired menu number. You can also press [Menu] and press [] or [] repeatedly to bring up the desired menu. Programming Item Menu Number Description Default Setting Extension Number 0 Verify your own extension number. — Alarm Clock 11 Set an alarm time. — System Select 12 Change system manually. — Personal Ringing Settings 14 Change settings for the Personal Ringing mode. Ringer: OFF Confirmation/Warning Tones: OFF Vibration: ON Modem Connection 15 Enable or disable the Modem Connection feature. OFF Dial Lock 21 Activate or deactivate the Dial Lock feature. OFF Directory Lock 22 Activate or deactivate the Directory Lock feature. OFF Delete All Directory 23 Delete all entries in the Directory. — Vibrate Alert 31 Enable or disable the Vibration Alert feature. OFF Ring Option 32 Select a tone type. — Keypad Tone 41 Enable or disable the keypad tone. ON Range Notify 42 Enable or disable the Range Notify feature. OFF Charger Tone 43 Enable or disable the charger tone. ON Time 51 Program time and calendar. — PS Quick Mode 52 Enable or disable the PS Quick mode. OFF Quick Mode Guard 53 Enable or disable Quick Mode Guard. OFF Any Key Answer 54 Enable or disable the Any Key Answer feature. OFF Registering Password 55 Register a password. — User Name 57 Register a user name. — Directory Group Name 58 Name a Directory group. — One Touch 7 Register a phone number to a Speed Dial key. Edit or delete a phone number assigned to a Speed Dial key. — Help Display 9 Browse a list of programming items. —](https://usermanual.wiki/Iwatsu-America/ADIX-PS/User-Guide-128514-Page-85.png)
![82Replacing Battery The life of the battery in the portable station varies with usage, but is generally about one year. If the battery cannot be recharged by the battery charger included with the portable station, or if it drains quickly after a full recharge, it should be replaced with a new battery. 1. If the portable station is on, press and hold [Power] for more than two seconds to turn it off. 2. Remove the battery cover. 3. Unplug the connector and remove the old battery. 4. Plug the new battery into the connector and place the battery snugly into the compartment. 5. Replace the battery cover. 6. Place the portable station in the charger and charge the battery for more than seven hours. NOTES: • Be sure to turn off the portable station before replacing the battery. • Do not use other than specified battery charger. • Do not dispose of the battery in fire. Do not heat up the battery. • Do not use the battery in other than Omegatrek.](https://usermanual.wiki/Iwatsu-America/ADIX-PS/User-Guide-128514-Page-86.png)
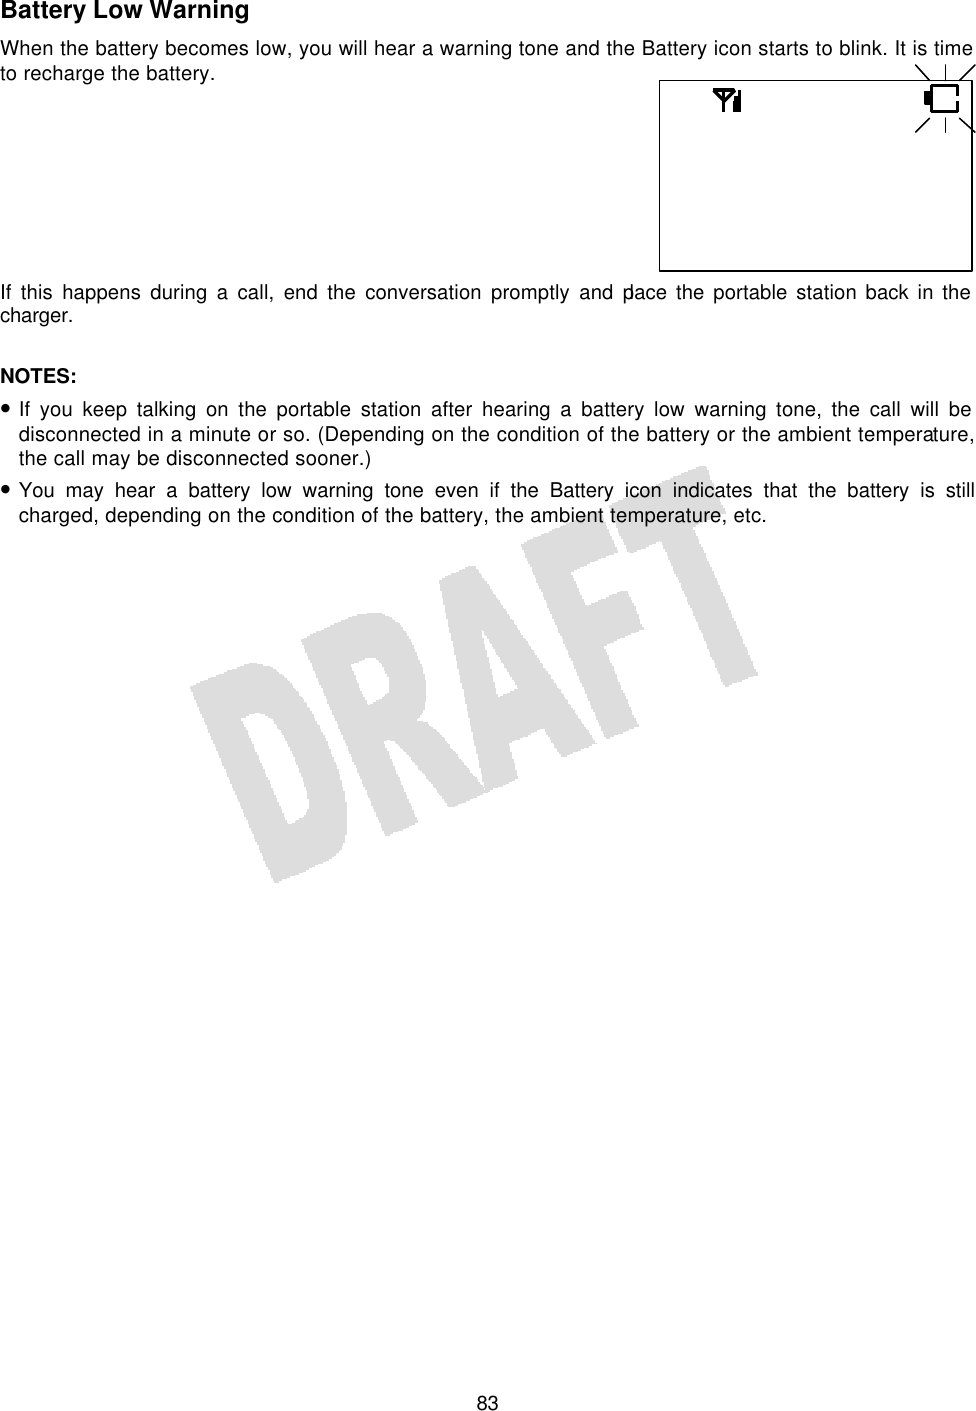
![84Out of Area If you walk outside of the service area while the portable station is in the idle state, the Antenna icon on the display will disappear. If this happens, go to an area where you can see the Antenna icon again to receive or place a call. If you walk outside of the service area while you are talking on the portable station, you will lose the voice of the other party or start hearing a Range Notify tone. If this happens, go to an area where the signal is stronger (or where you no longer hear the warning tone). NOTES: • You cannot place a call in the service area when you hear a busy tone and see the words CHANNEL BUSY on the display. This is because other portable stations are using all available channels and there is no open channel left. Try again later. • Sometimes [Send] and dial pad keys may not work while you are in the service area. This is because the portable station is automatically communicating with the base station. Try again later. • You get better reception if you extend the antenna. • If you walk outside of the service area while you are talking on the portable station, the call may be disconnected after you hear a warning tone. • The building structure (concrete panels, etc.) may reduce the size of the service area. • You cannot talk on the portable station while you are hearing a Range Notify tone.](https://usermanual.wiki/Iwatsu-America/ADIX-PS/User-Guide-128514-Page-88.png)
![85Troubleshooting Check the items listed below before sending the portable station for repair. Basic Operation Symptom Probable Cause Remedy You are not pressing [Power] long enough. Press and hold [Power] for more than two seconds. The battery is exhausted. Recharge the battery. You cannot turn on the portable station. The battery is not connected properly. Connect the battery properly. The portable station does not operate. Power Failure The portable station is not at fault. You are outside of the service area. Go back in the service area. The Key Lock feature is enabled. Disable the Key Lock feature. The Dial Lock feature is enabled. Disable the Dial Lock feature. All lines are busy. Wait awhile and try again. You are in a fast-moving vehicle. Stop and try again. You cannot place a call. The Directory Lock feature is enabled. Disable the Directory Lock feature. You cannot use the Directory. You walked out of the service area. Go back to the service area and try again. The battery is running out. Recharge the battery and try again. The call has been suddenly disconnected. You are in a weak-signal area. Move to receive a stronger signal. The call is noisy and intermittent. You are close to a household appliance or office equipment that generates noise. Move away from such equipment.](https://usermanual.wiki/Iwatsu-America/ADIX-PS/User-Guide-128514-Page-89.png)