JFK Electronic TCB-H703 SPORT DV User Manual V3 2
Shenzhen JFK Electronic Co., Ltd SPORT DV V3 2
Manual

快速使用指南
H703 QUICK GUIDE
立式全景相机 SPORT DV
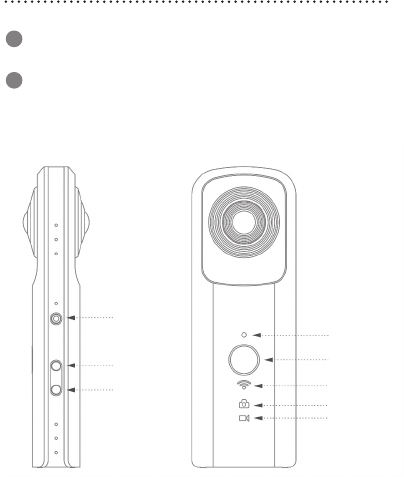
Insert the SD card, press the power key for 3s to turn on,
blue power light is on, buzzer hints two beeps.
1
Click on the WiFi key, the blue WiFi light is flashing and
enter the pairing mode
2
1.Power On and Connect Camera
-14-
Power
WIFI
Mode switch
Shutter light
Shutter
WIFI light
Photo light
Video light
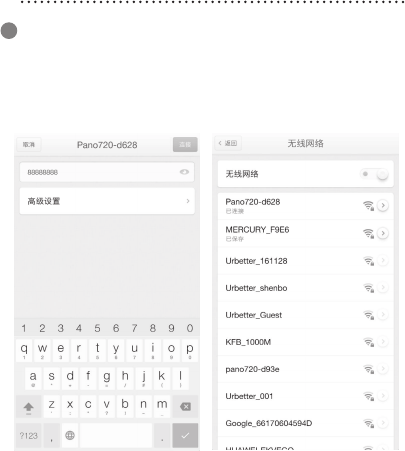
Turn on WiFi, in the WiFi list find find SSID: pano720-XXXX,
input default password: 88888888, the telephone will show
that the WiFi is already connected when it successes, and
the camera’s WiFi light become bright from flashing.
3
Android System
-15-
1.Power On and Connect Camera

IOS System
-16-
1.Power On and Connect Camera
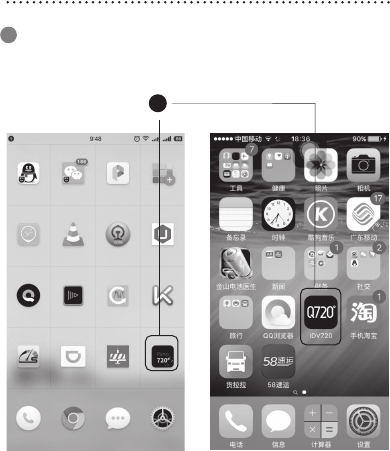
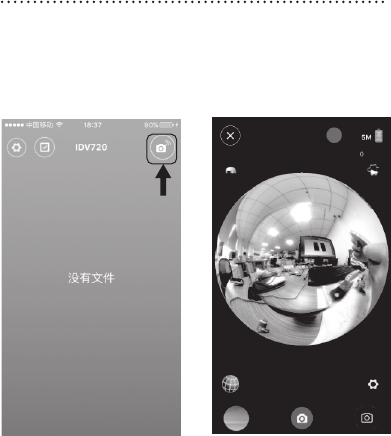
Open an application:
4
Android System IOS System
-17-
1.Power On and Connect Camera
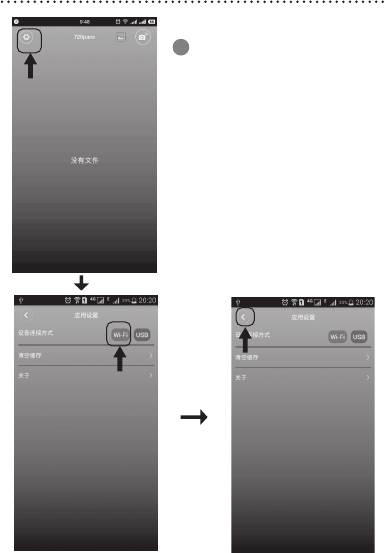
For Android system, click on
the “Setting” button to set up
the connection as “WIFI”, and
click on the Back button on
the upper left.
For IOS system, connecting
to WIFI is defaulted without
setting up.
5
-18-
1.Power On and Connect Camera
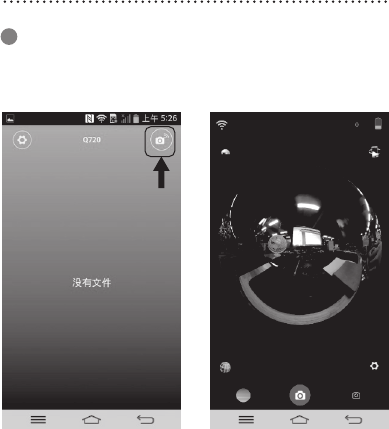
6Click On “Start Previewing” icon at the upper right:
Android System
-19-
1.Power On and Connect Camera
IOS System
-20-
1.Power On and Connect Camera
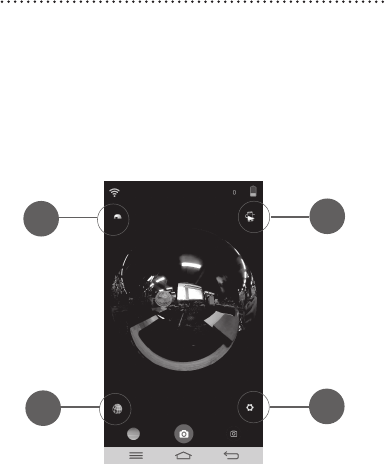
On the previewing interface, ① Turnover, ② Rotation,
③ Multi-mode preview display, ④ Setting
12
34
-21-
1.Power On and Connect Camera
From the following interface, operations for Android and
IOS systems are almost the same.
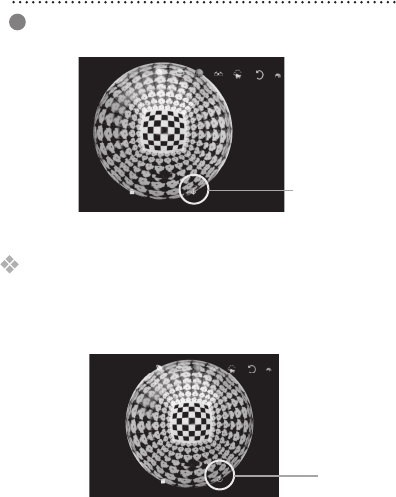
zoom screen by gestures, dray the screen to
rotate pictures.
Note:The USB port is only used for charging,
Cannot be used for data transmitting.
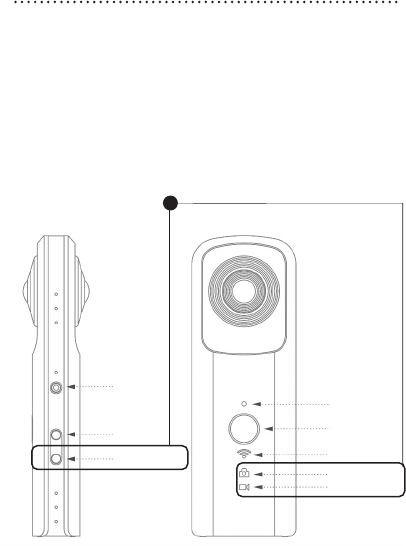
Power
WIFI
Mode switch
Shutter light
Shutter
WIFI light
Photo light
Video light
2 Click on the mode switch button to switch to the video mode,
the video light is on, click on the shutter key, and the camera
will start recording, when the shutter light is flashing, the buzzer
prompts, click on the shutter key, the camera will stop recording
and save the video in the SD card.
1 Click on the mode switch button to switch to the photo mode,
the photo light is on, click on the shutter key, and the camera
will take a photo, when the shutter light flashes for once, the
buzzer prompts and the photo will be saved in the SD card.
-22-
2.Photo and Video
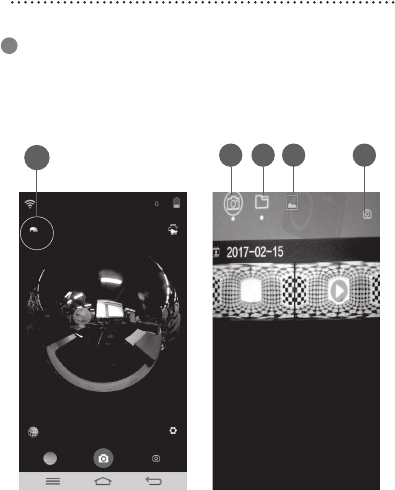
Click on “preview picture” ①, the interface containing
“local camera” ②, “local phone” ③, “mobile album”
④ and “Back” ⑤ displays
1
12 3 4 5
-23-
3.Photo & Video Sharing
2Select a video or picture to be shared, when the interface
is as follow:
click on the “Download” icon, following the pop-up
notice: Download, until the notice: Download successes,
click on the upper left to return to the document browsing
interface, click on “local phone”, select the new document
downloaded, and the following interface shows:
Download
Upload
-24-
3.Photo & Video Sharing
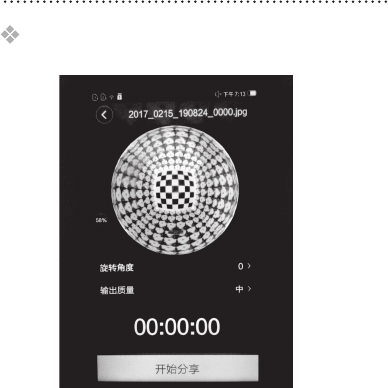
click on the “upload” icon, and the following interface
shows:
Then you can set up rotation angle and output quality
according to your requirements, after which click the
“Share” icon to share them to wherever you want.
-25-
3.Photo & Video Sharing
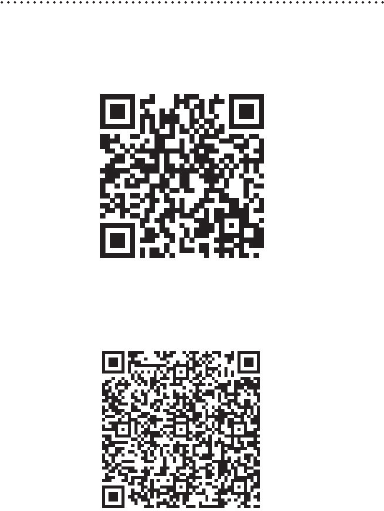
Android QR Code
IOS QR Code
-26
3.Photo & Video Sharing
FCC Statement
This equipment has been tested and found to comply with the limits for a Class B digital device,
pursuant to Part 15 of the FCC Rules. These limits are designed to provide reasonable
protection against harmful interference in a residential installation. This equipment generates
uses and can radiate radio frequency energy and, if not installed and used in accordance with
the instructions, may cause harmful interference to radio communications. However, there is
no guarantee that interference will not occur in a particular installation. If this equipment does
cause harmful interference to radio or television reception, which can be determined by turning
the equipment off and on, the user is encouraged to try to correct the interference by one or
more of the following measures:
-- Reorient or relocate the receiving antenna.
-- Increase the separation between the equipment and receiver.
-- Connect the equipment into an outlet on a circuit different from that to which the receiver is
connected.
-- Consult the dealer or an experienced radio/TV technician for help.
This device complies with part 15 of the FCC Rules. Operation is subject to the following two
conditions:(1) This device may not cause harmful interference, and (2) this device must accept
any interference received, including interference that may cause undesired operation.
Changes or modifications not expressly approved by the party responsible for compliance
could void the user's authority to operate the equipment.
The device has been evaluated to meet general RF exposure requirement. The device can be
used in portable exposure condition without restriction.