JVC KENWOOD 475500 UHF DIGITAL TRANSCEIVER User Manual
JVC KENWOOD Corporation UHF DIGITAL TRANSCEIVER Users Manual
UserManual.wiki
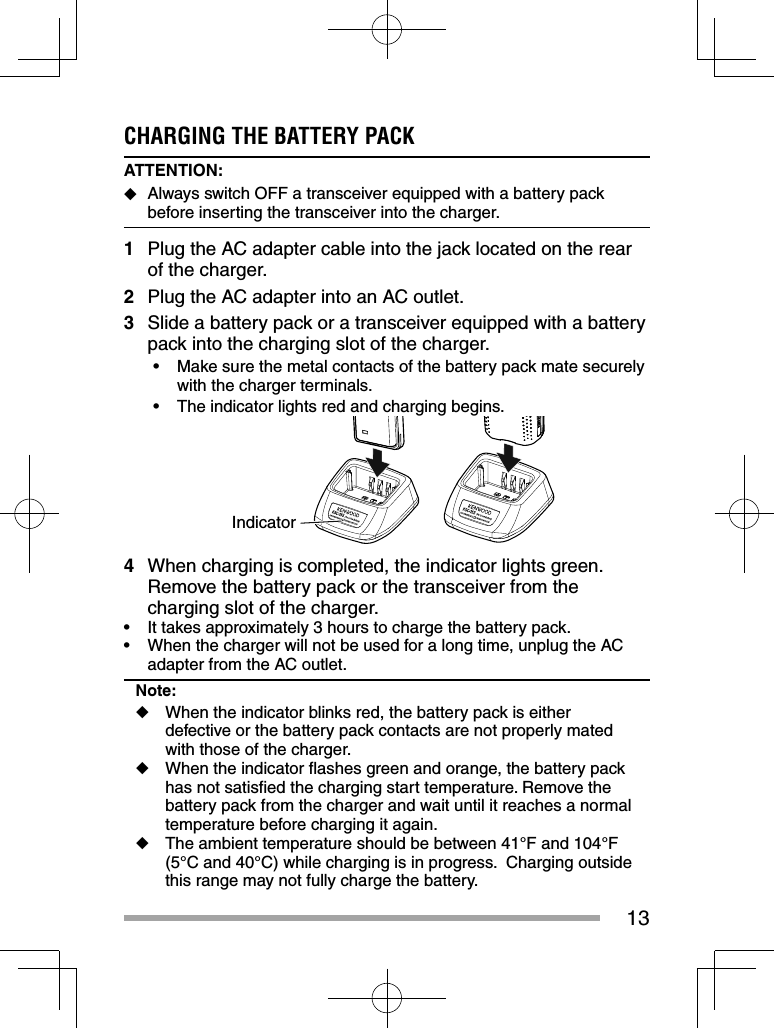
>
JVC KENWOOD
>
475500 User Manual
Users Manual
Navigation menu
Upload a User Manual
Namespaces
Wiki Guide
HTML
PDF
Info
Views
User Manual
Discussion / Help
Navigation

![17BASIC OPERATIONSSWITCHING POWER ON/OFFTurn the Power switch/ Volume control clockwise to switch the transceiver ON.Turn the Power switch/ Volume control counterclockwise fully to switch the transceiver OFF.ADJUSTING THE VOLUMERotate the Power switch/ Volume control to adjust the volume. Clockwise increases the volume and counterclockwise decreases it.SELECTING A ZONE AND CHANNEL1 Select the desired zone using the key programmed as [Zone Up] or [Zone Down].• Each zone contains a group of channels.2 Select the desired channel using the Selector knob (default). • Each channel is programmed with settings for transmitting and receiving.TRANSMITTING1 Select the desired zone and channel.2 Press the key programmed as [Monitor] or [Squelch Off] to check whether or not the channel is free.• If the channel is busy, wait until it becomes free.3 Press the PTT switch and speak into the microphone. Release the PTT switch to receive.• For best sound quality, hold the transceiver approximately 1.5 inches (3 ~ 4 cm) from your mouth.](https://usermanual.wiki/JVC-KENWOOD/475500/User-Guide-2779261-Page-19.png)