JVCKENWOOD VCB008 POWERED WOOFER CD SYSTEM User Manual RV NB90 J indd
JVC KENWOOD Corporation POWERED WOOFER CD SYSTEM RV NB90 J indd
UserManual.wiki
>
JVCKENWOOD
>
VCB008 User Manual
>
User Manual 1
Contents
1.
User Manual 1
2.
User Manual 2
User Manual 1
Navigation menu
Upload a User Manual
Namespaces
Wiki Guide
HTML
PDF
Info
Views
User Manual
Discussion / Help
Navigation
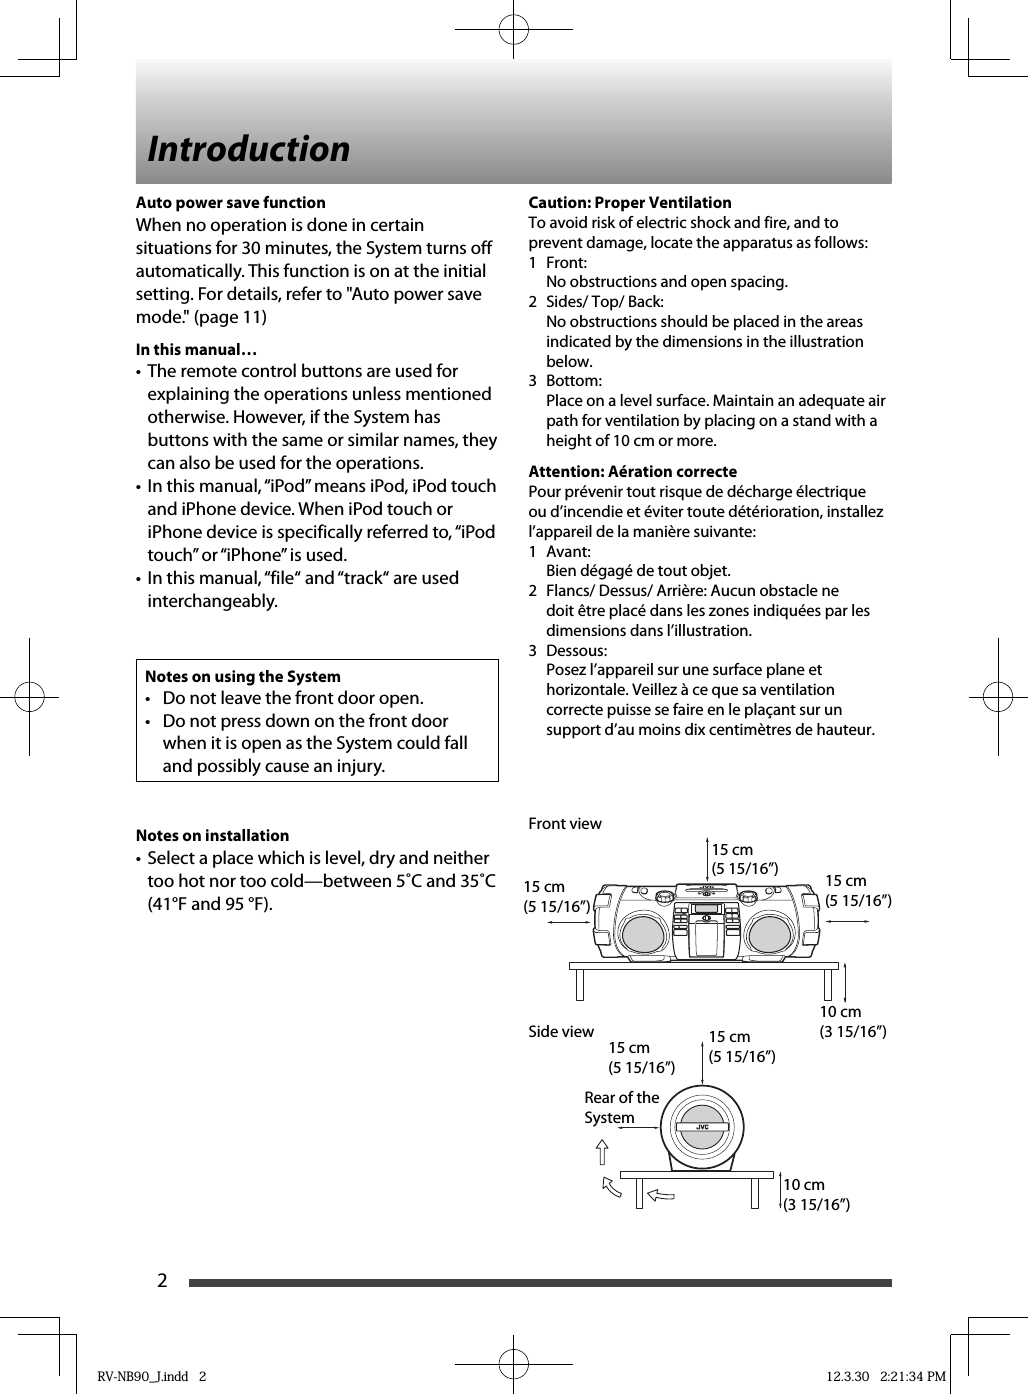
![POWERED WOOFER CD SYSTEMRV-NB90BLVT2347-002A[J]INSTRUCTIONS For customer use:Enter below the Model No. and Serial No. which are located either on the rear, bottom or side of the cabinet. Retain this information for future reference.Model No.Serial No.RV-NB90_J.indd 1RV-NB90_J.indd 1 12.3.30 2:21:34 PM12.3.30 2:21:34 PM](https://usermanual.wiki/JVCKENWOOD/VCB008.User-Manual-1/User-Guide-1678653-Page-1.png)