JVCKENWOOD VCB008 POWERED WOOFER CD SYSTEM User Manual RV NB90 J indd
JVC KENWOOD Corporation POWERED WOOFER CD SYSTEM RV NB90 J indd
Contents
- 1. User Manual 1
- 2. User Manual 2
User Manual 1
POWERED WOOFER CD SYSTEM
RV-NB90B
LVT2347-002A
[J]
INSTRUCTIONS
For customer use:
Enter below the Model No.
and Serial No. which are
located either on the rear,
bottom or side of the cabinet.
Retain this information for
future reference.
Model No.
Serial No.
RV-NB90_J.indd 1RV-NB90_J.indd 1 12.3.30 2:21:34 PM12.3.30 2:21:34 PM
2
Front view
Side view
Introduction
Auto power save function
When no operation is done in certain
situations for 30 minutes, the System turns off
automatically. This function is on at the initial
setting. For details, refer to "Auto power save
mode." (page 11)
In this manual…
The remote control buttons are used for •
explaining the operations unless mentioned
otherwise. However, if the System has
buttons with the same or similar names, they
can also be used for the operations.
In this manual, “iPod” means iPod, iPod touch •
and iPhone device. When iPod touch or
iPhone device is specifically referred to, “iPod
touch” or “iPhone” is used.
In this manual, “file“ and “track“ are used •
interchangeably.
Notes on using the System
• Do not leave the front door open.
• Do not press down on the front door
when it is open as the System could fall
and possibly cause an injury.
Notes on installation
Select a place which is level, dry and neither •
too hot nor too cold—between 5˚C and 35˚C
(41°F and 95 °F).
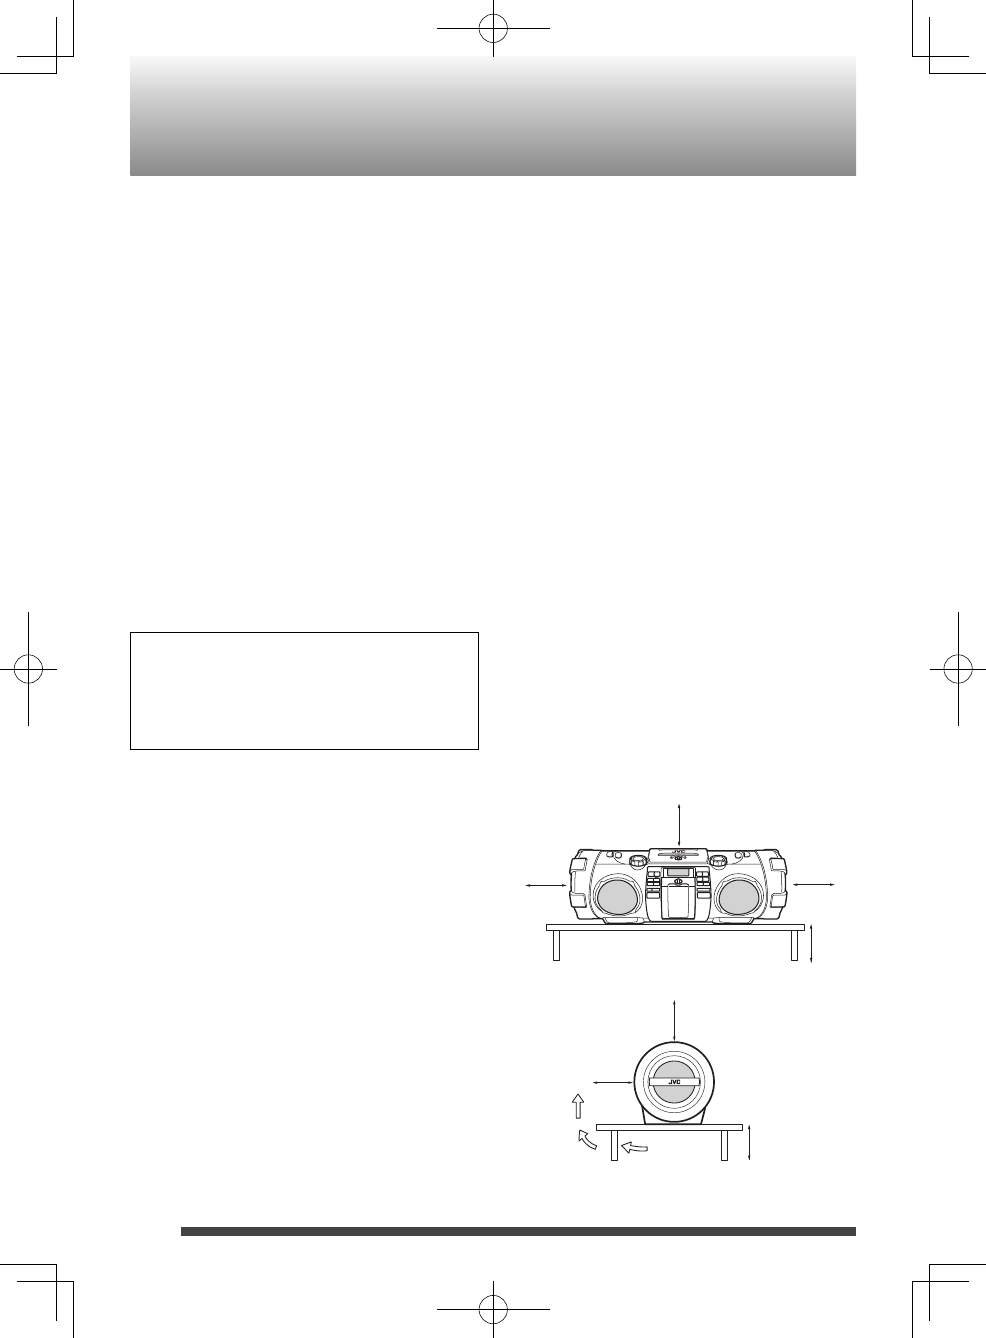
Caution: Proper Ventilation
To avoid risk of electric shock and fire, and to
prevent damage, locate the apparatus as follows:
1 Front:
No obstructions and open spacing.
2 Sides/ Top/ Back:
No obstructions should be placed in the areas
indicated by the dimensions in the illustration
below.
3 Bottom:
Place on a level surface. Maintain an adequate air
path for ventilation by placing on a stand with a
height of 10 cm or more.
Attention: Aération correcte
Pour prévenir tout risque de décharge électrique
ou d’incendie et éviter toute détérioration, installez
l’appareil de la manière suivante:
1 Avant:
Bien dégagé de tout objet.
2 Flancs/ Dessus/ Arrière: Aucun obstacle ne
doit être placé dans les zones indiquées par les
dimensions dans l’illustration.
3 Dessous:
Posez l’appareil sur une surface plane et
horizontale. Veillez à ce que sa ventilation
correcte puisse se faire en le plaçant sur un
support d’au moins dix centimètres de hauteur.
Rear of the
System
15 cm
(5 15/16”)
15 cm
(5 15/16”)
15 cm
(5 15/16”)
15 cm
(5 15/16”)
15 cm
(5 15/16”)
10 cm
(3 15/16”)
10 cm
(3 15/16”)
RV-NB90_J.indd 2RV-NB90_J.indd 2 12.3.30 2:21:34 PM12.3.30 2:21:34 PM

3
Contents
Introduction ............................................... 2
Preparation ................................................ 4
Accessories .........................................................4
Inserting batteries ...........................................4
Carrying this System .......................................5
Index of parts and controls ....................... 6
Front of the System .........................................6
Rear of the System ...........................................7
Display window ................................................7
Remote control .................................................8
Connections ............................................... 9
Connecting a monitor display ....................9
Connecting headphones ..............................9
Connecting the power cord .........................9
Basic operations ....................................... 10
Turning on the System ................................. 10
Setting the Clock ........................................... 10
Displaying the clock ...................................... 10
Getting started .............................................. 10
FM .............................................................. 12
Listening to FM stations .............................. 12
Playing back a disc/USB device .............. 13
Preparation ..................................................... 13
Playback ........................................................... 13
Program playback ......................................... 14
Random playback ......................................... 15
Repeat playback ............................................ 15
iPod ........................................................... 16
Connecting iPod ........................................... 16
Playback ........................................................... 17
Shuffle playback ............................................ 17
Repeat playback ............................................ 17
iPod menu operation .................................. 17
Viewing video/picture of iPod .................. 17
External device ......................................... 18
Listening to an external device ............... 18
Metronome ............................................... 19
Using the metronome function ............... 19
Bluetooth .................................................. 20
Registering a Bluetooth device for the
first time ........................................................... 20
Registering other Bluetooth devices ..... 21
Connecting a microphone/guitar ........... 22
Microphone/guitar mixing ........................ 22
Adding a distortion effect ......................... 22
Recording on a USB device ...................... 23
Recording discs ............................................. 23
Recording other sources ............................ 24
Deleting a track .............................................. 24
Using the timer ........................................ 25
Setting the sleep timer ............................... 25
Setting the daily timer ................................ 25
Setting the recording timer ...................... 26
Maintenance ............................................. 27
Trademarks ............................................... 27
About discs/files ...................................... 28
Playable discs/files ........................................ 28
Important for USB mass storage class
devices .............................................................. 28
Checking the type of your iPod ............... 29
About SCMS (Serial Copy Management
System) ............................................................. 29
Troubleshooting ...................................... 30
Specifications ........................................... 32
Precautions .............................................. 34
RV-NB90_J.indd 3RV-NB90_J.indd 3 12.3.30 2:21:34 PM12.3.30 2:21:34 PM
4
Accessories
Check that you have all the following items,
which are supplied for the system.
Power cord (1)•
Remote control (1)•
Shoulder strap (1)•
Buckle (2)•
Stopper (2)•
If any of these items are missing, contact your
dealer immediately.
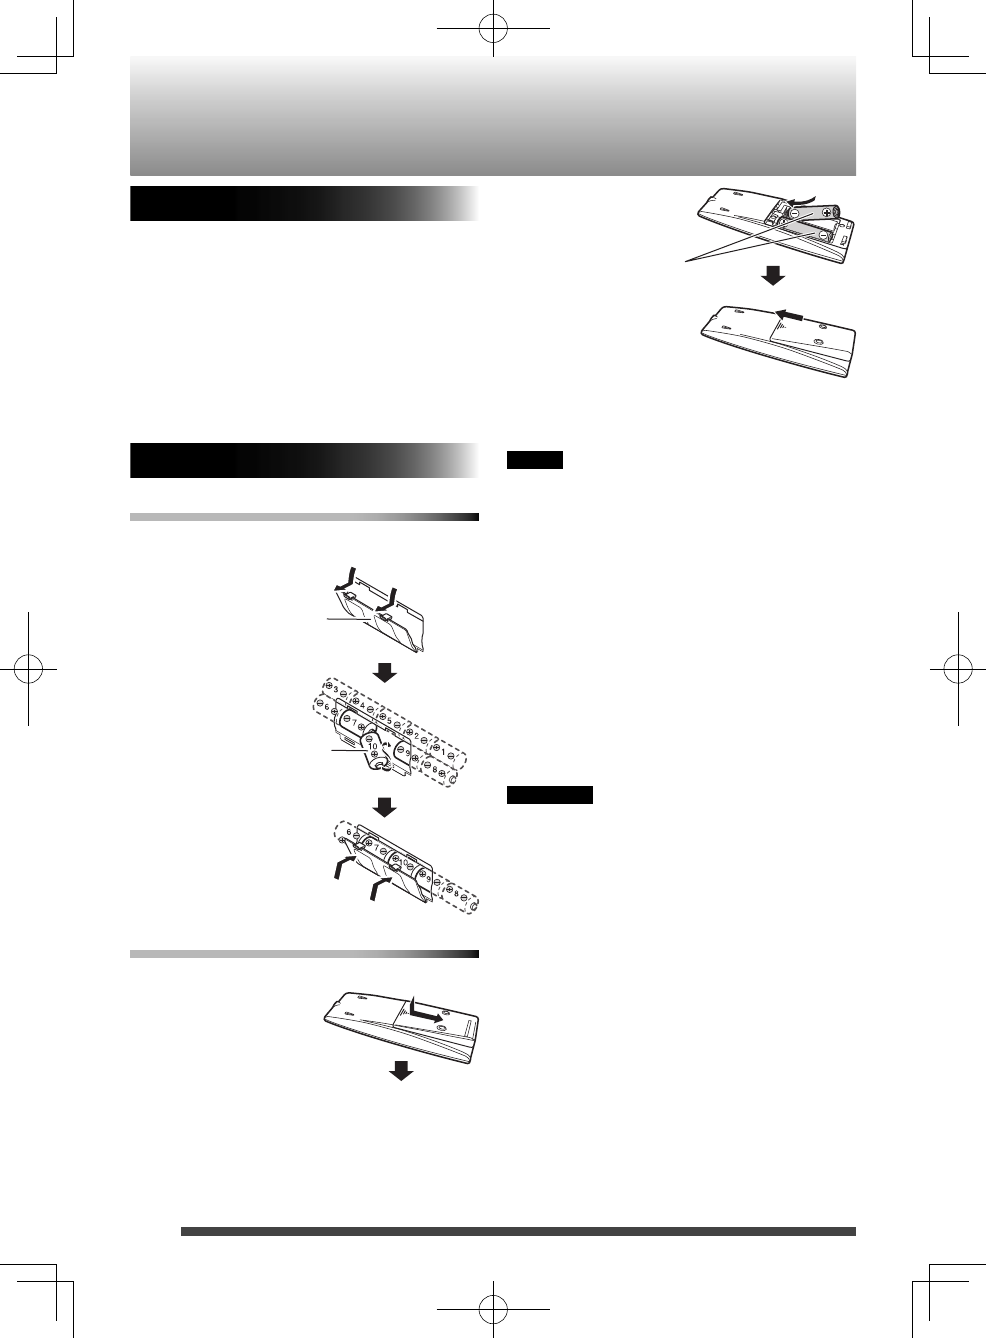
Inserting batteries
Main unit
Match the polarities (+ and –) of the batteries.
Remote control
Match the polarities (+ and –) of the batteries.
Preparation
• If the range or effectiveness of the remote
control decreases, replace the batteries.
NOTE
• Store the battery in a place where children
cannot reach. If a child accidentally
swallows the battery, consult a doctor
immediately.
• The power will not be supplied through
the batteries when the power is supplied
through the AC outlet on the System.
• The battery is consumed more quickly
than usual when operating the System
continuously or operating it in a cold place.
• When the power is supplied using the
batteries, the display will be blank and
STANDBY indicator will turn off when the
System is turned off (on standby).
CAUTION
To avoid battery leakage or explosion, handle
batteries properly.
• If you are not going to use this System for a
month or more, remove the batteries from
the battery compartment.
• Dispose of batteries in the proper manner,
according to federal, state, and local
regulations.
• Do not mix with batteries of different types
or with new and old ones.
• Do not attempt to charge any batteries
other than rechargeable ones.
• Discard leaky batteries immediately. Battery
leakage can cause skin burns or other
personal injuries.
• If chemicals leak onto the System, clean the
System completely.
Battery compartment
R20 (SUM-1)/D (13D) x 10
(not supplied)
R6P (SUM-3)/AA (15F)
(not supplied)
RV-NB90_J.indd 4RV-NB90_J.indd 4 12.3.30 2:21:35 PM12.3.30 2:21:35 PM
5
Carrying the System
Using the carrying handles
Be sure to hold both handles when you carry
the System.
If you carry the System by only one handle,
the other end may drag on the ground and be
damaged.
NOTE
• Remove a disc, USB device or iPod from the
System.
• Disconnect all the cords from the System.
• The System is not waterproof or dust proof.
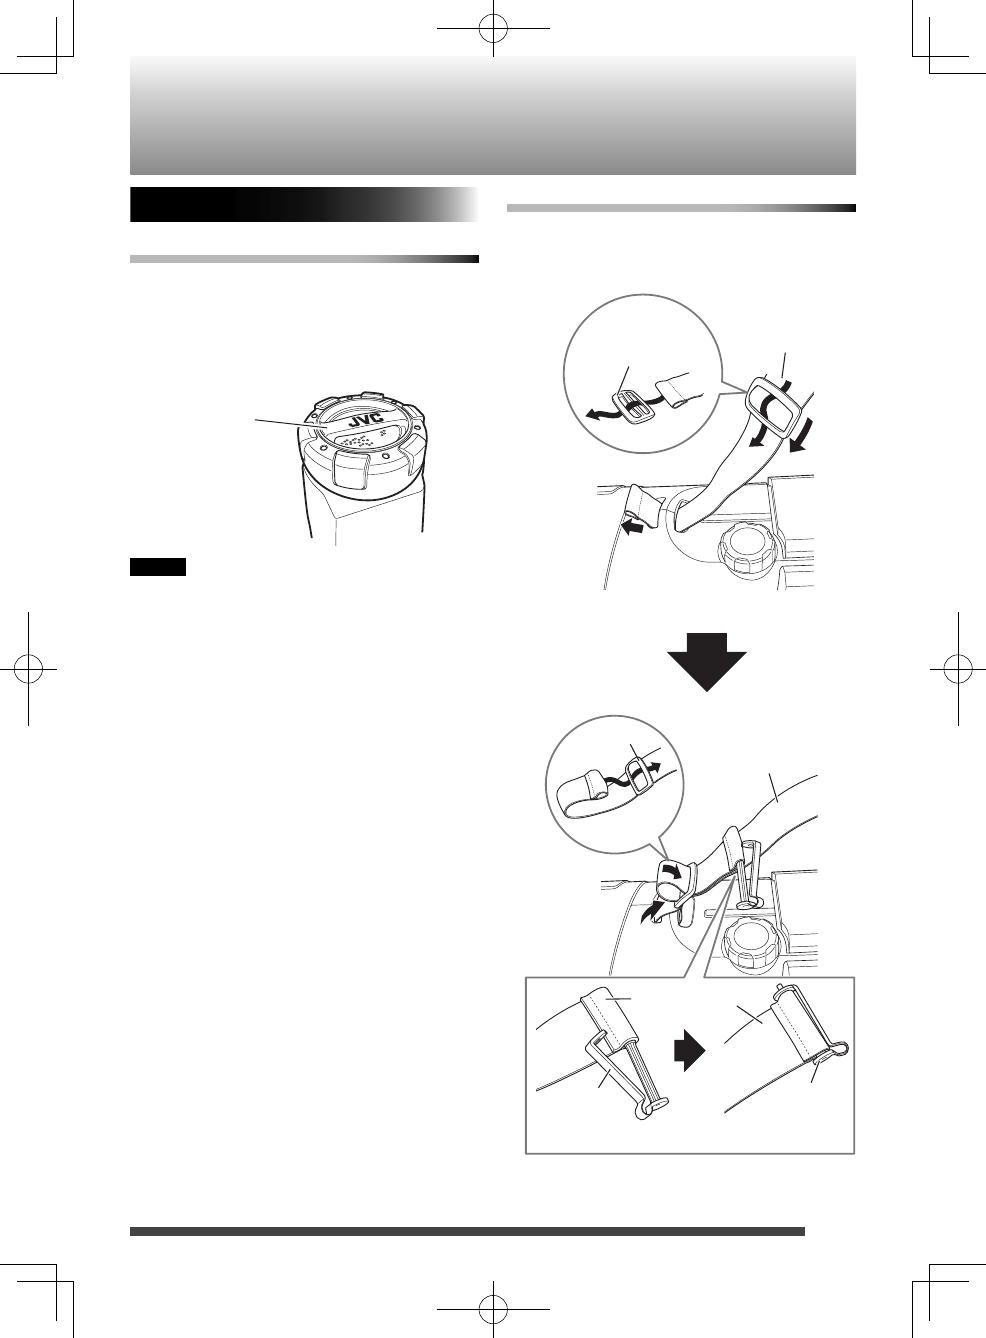
Using the shoulder strap
Attach the supplied shoulder strap (adjustable
in length) to each end of the System as
illustrated below.
Stopper
Stopper
(supplied)
Shoulder strap
Shoulder strap
Buckle
Shoulder strap
(supplied)
Buckle
(supplied)
Front side
Carrying handle
RV-NB90_J.indd 5RV-NB90_J.indd 5 12.3.30 2:21:35 PM12.3.30 2:21:35 PM
6
Index of parts and controls
~
~
@
@
$
$
%
%
!
!
#
#
1
1
2
2
3
3
4
4
5
5
6
6
7
7
8
8
9
9
0
0
-
-
=
=
^
^
&
&
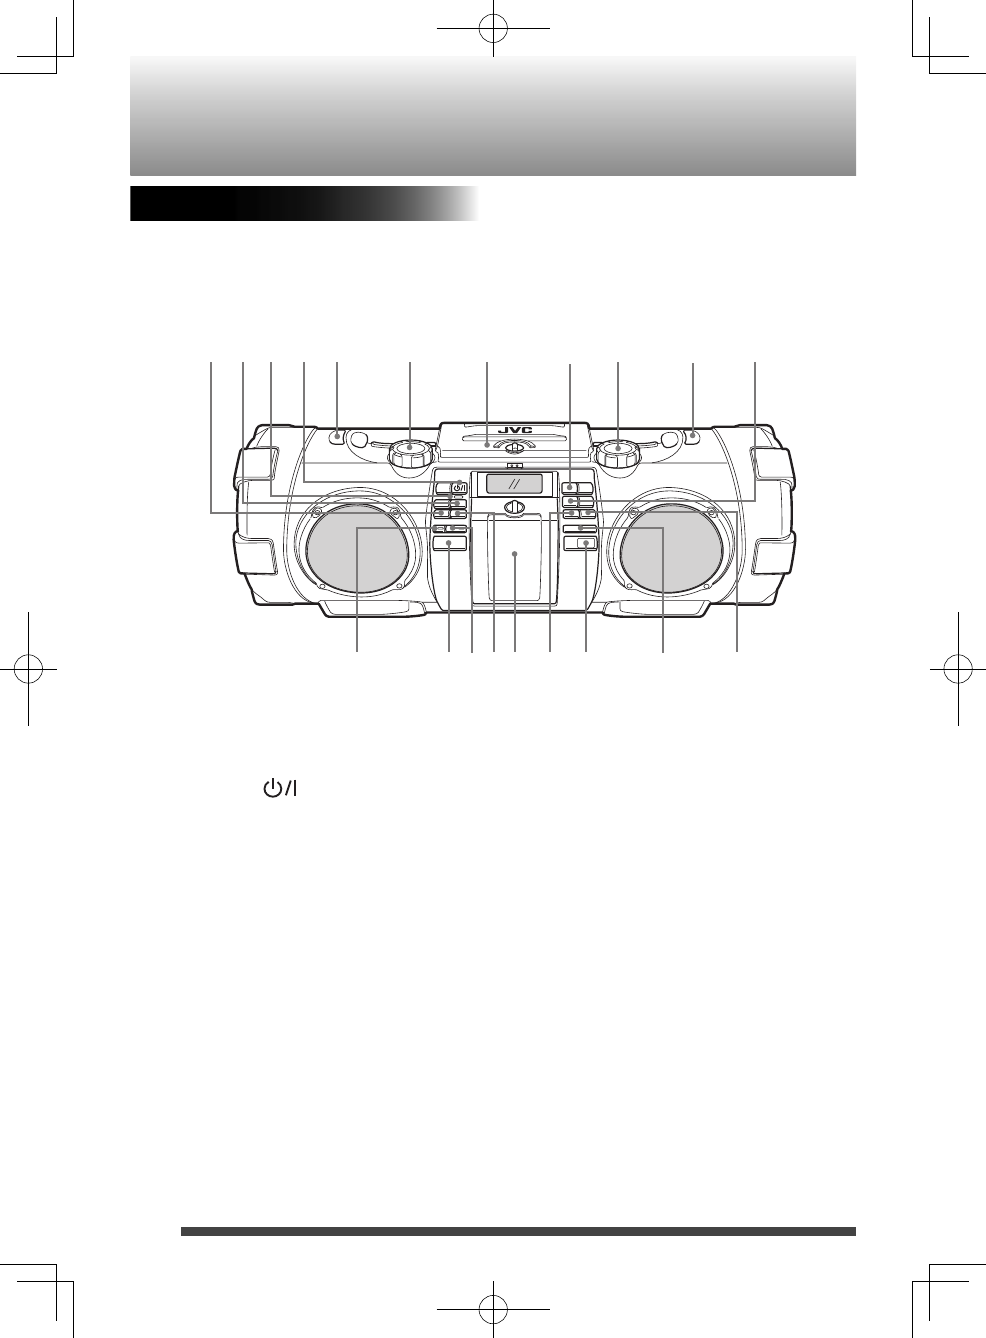
1 TUNER/AUDIO IN button
2 USB 6 button
3 STANDBY indicator
4 STANDBY/ON button
5 Shoulder strap hook
6 SUPER WOOFER VOLUME +/−
DISTORTION LEVEL +/−
7 Disc compartment door
8 iPod 6 button
9 VOLUME +/−
0 Shoulder strap hook
- CD 6 button
= REC button/REC indicator
~ USB connector/cover
! Bluetooth PAIRING button/Bluetooth
indicator
@ METRONOME 6 button
# Connector for iPod/Front door
$ 4/TEMPO − button
% Remote control sensor
^ 7 button
& ¢/TEMPO + button
Front of the System
RV-NB90_J.indd 6RV-NB90_J.indd 6 12.3.30 2:21:35 PM12.3.30 2:21:35 PM
7
HIGH
A.P.S.
1
1
1
1
2
2
2
2
3
3
3
3
4
4
4
4
5
5
5
5
6
6
6
6
7
7
7
7
8
8
8
8
9
9
9
9
0
0
-
-
=
=
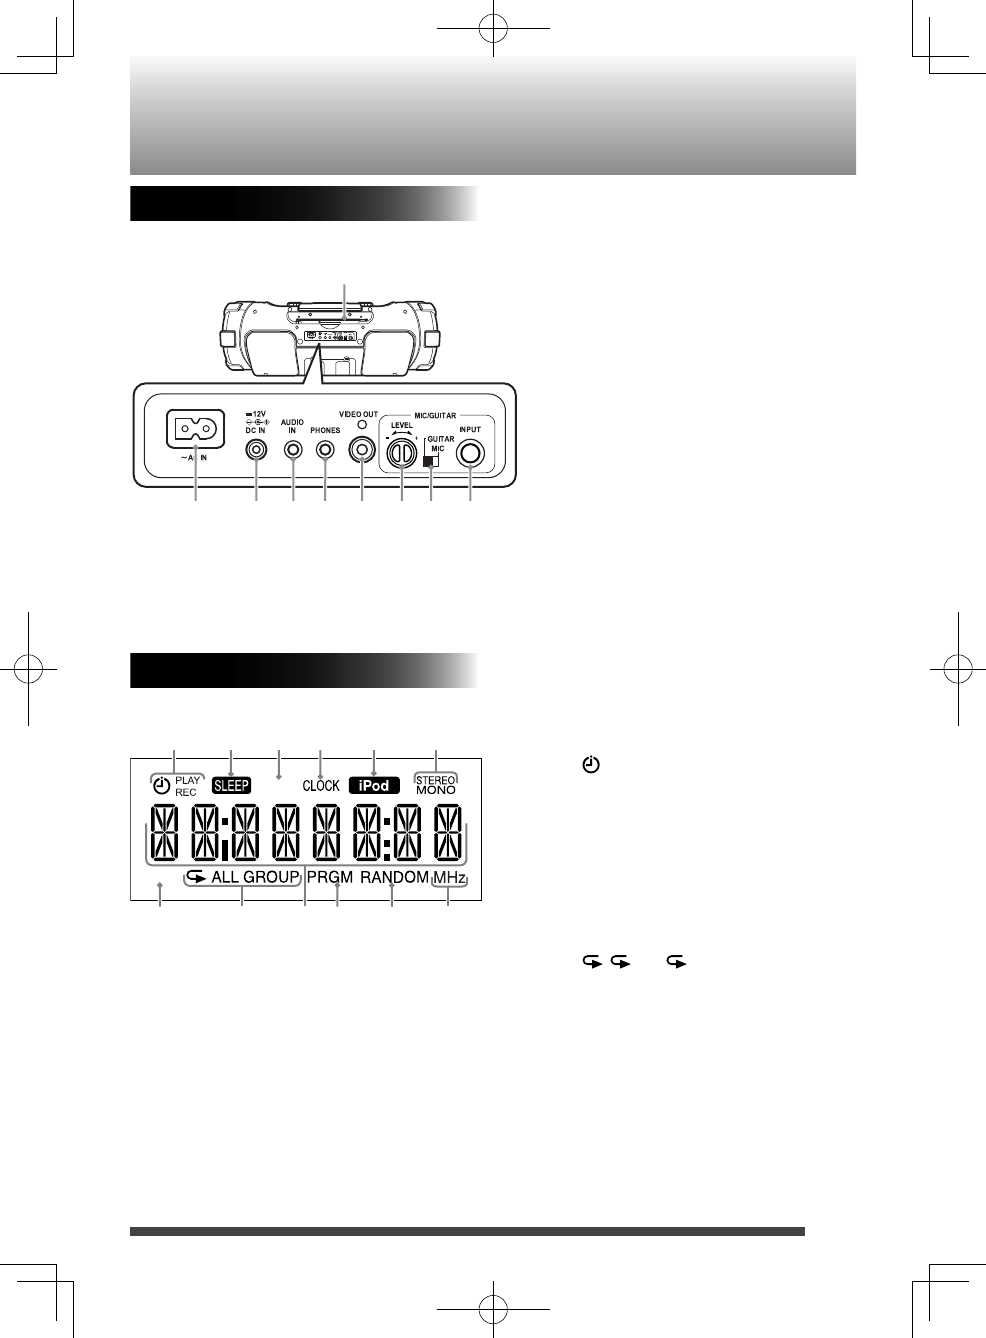
1 Timer indicators
(timer), PLAY, REC
2 SLEEP indicator
3 A.P.S. (auto power save) indicator
4 CLOCK indicator
5 iPod indicator
6 FM mode indicators
STEREO, MONO
7 HIGH indicator
8 Repeat indicators
, ALL, GROUP
9 Main display
0 PRGM (program) indicator
- RANDOM indicator
= Frequency unit indicator
1 AC IN jack
2 DC IN jack
3 AUDIO IN jack
4 PHONES jack
5 VIDEO OUT jack
6 LEVEL +/−
7 GUITAR/MIC switch
8 INPUT jack
9 FM telescopic antenna
Rear of the System
Display window
RV-NB90_J.indd 7RV-NB90_J.indd 7 12.3.30 2:21:35 PM12.3.30 2:21:35 PM
8
Index of parts and controls
Remote control
1
1
2
2
3
3
4
4
5
5
6
7
8
9
9
0
-
=
~
!
@
#
$
%
^
&
*
(
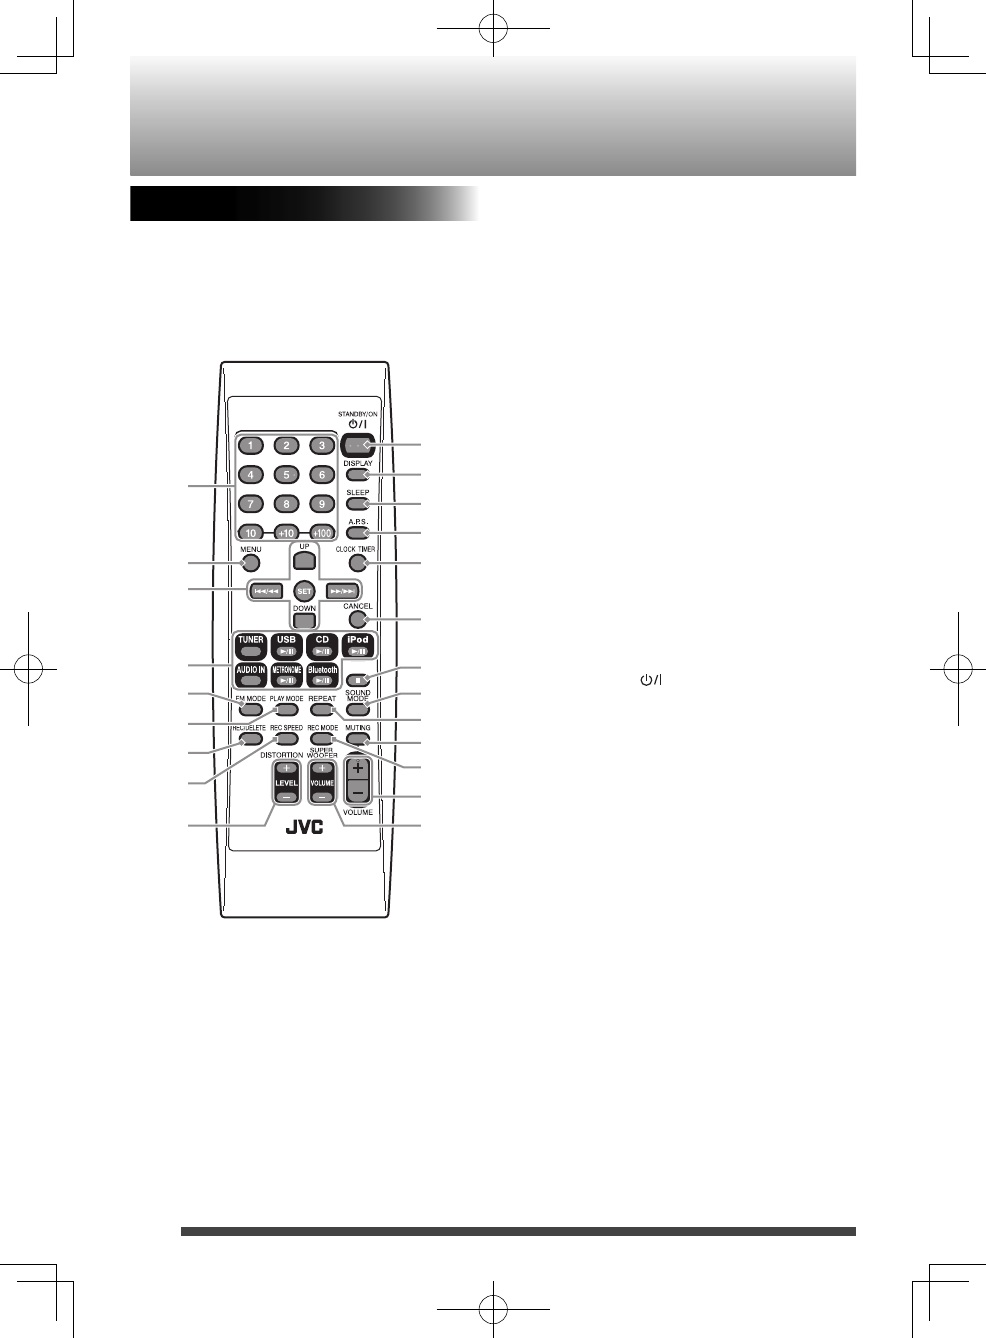
1 Number buttons (pages 12, 13)
2 MENU button (page 17)
3 Multi control buttons (pages 12-21, 23-25)
UP, DOWN •
• 4/1, SET, ¡/¢
4 Source buttons (pages 12-21, 23)
TUNER, USB • 6, CD 6, iPod 6,
AUDIO IN, METRONOME 6,
Bluetooth 6
5 FM MODE button (page 12)
6 PLAY MODE button (pages 15, 17)
7 REC/DELETE button (pages 23, 24)
8 REC SPEED button (page 23)
9 DISTORTION LEVEL +/− buttons (page 22)
0 STANDBY/ON button (page 10)
- DISPLAY button (page 11)
= SLEEP button (page 25)
~ A.P.S. (auto power saving) button
(page 11)
! CLOCK/TIMER button (pages 10, 25, 26)
@ CANCEL button (pages 10, 15, 25, 26)
# 7 button (pages 15, 21-23)
$ SOUND MODE button (page 11)
% REPEAT button (pages 15, 17)
^ MUTING button (page 11)
& REC MODE button (page 23)
* VOLUME +/− buttons (page 10)
( SUPER WOOFER VOLUME +/− buttons
(page 10)
RV-NB90_J.indd 8RV-NB90_J.indd 8 12.3.30 2:21:35 PM12.3.30 2:21:35 PM
9
Connections
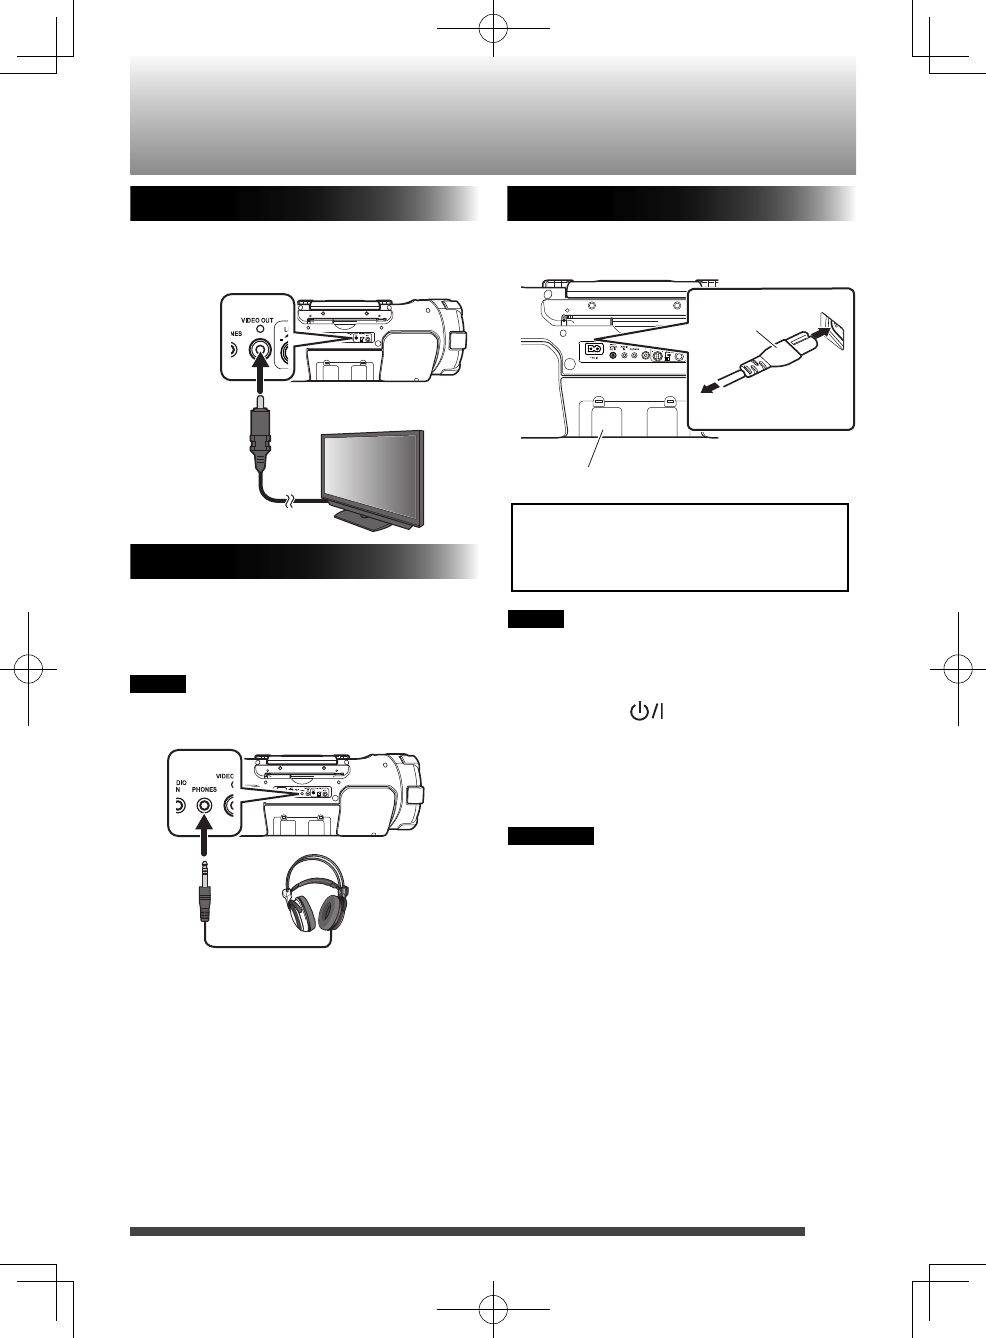
Connecting a monitor display
In order to view picture/video from iPod on
a monitor display, connect a monitor display
using a composite video cord (page 17).
NOTE
• The power can also be supplied through the
batteries (page 4).
• When the System is turned off using the
STANDBY/ON button, the standby
mode is activated and the STANDBY lamp
lights in red.
• A small amount of power is always
consumed even while on standby.
CAUTION
• Only use JVC power cord provided for this
System to avoid malfunction or damage to
the System.
• Remove all the batteries when using the
power cord.
• Be sure to unplug the power cord from the
outlet when going out or when the System
is not in use for an extended period of time.
Unplug the AC power cord from the System
to supply the power through the batteries
in the battery compartment; otherwise, the
System does not work.
Battery compartment
Power cord
(supplied)
AC outlet
Connecting headphones
Be sure to turn down the volume before
connecting or putting on the headphones.
• Connecting the headphones deactivates the
speakers.
NOTE
If iPod is selected as the source, no sound is
heard from headphones.
Headphones
(not supplied)
Stereo
mini
plug
Monitor
(not supplied)
Composite
video cord
(not supplied)
Connecting the power cord
Connect the power cord to a wall outlet only
after all other connections have been made.
RV-NB90_J.indd 9RV-NB90_J.indd 9 12.3.30 2:21:36 PM12.3.30 2:21:36 PM
10
NOTE
• About two hours after you disconnect the
AC power cord, the set time will be reset.
• When the power is supplied through the
batteries, the clock does not appear on the
display when the System is turned off.
Getting started
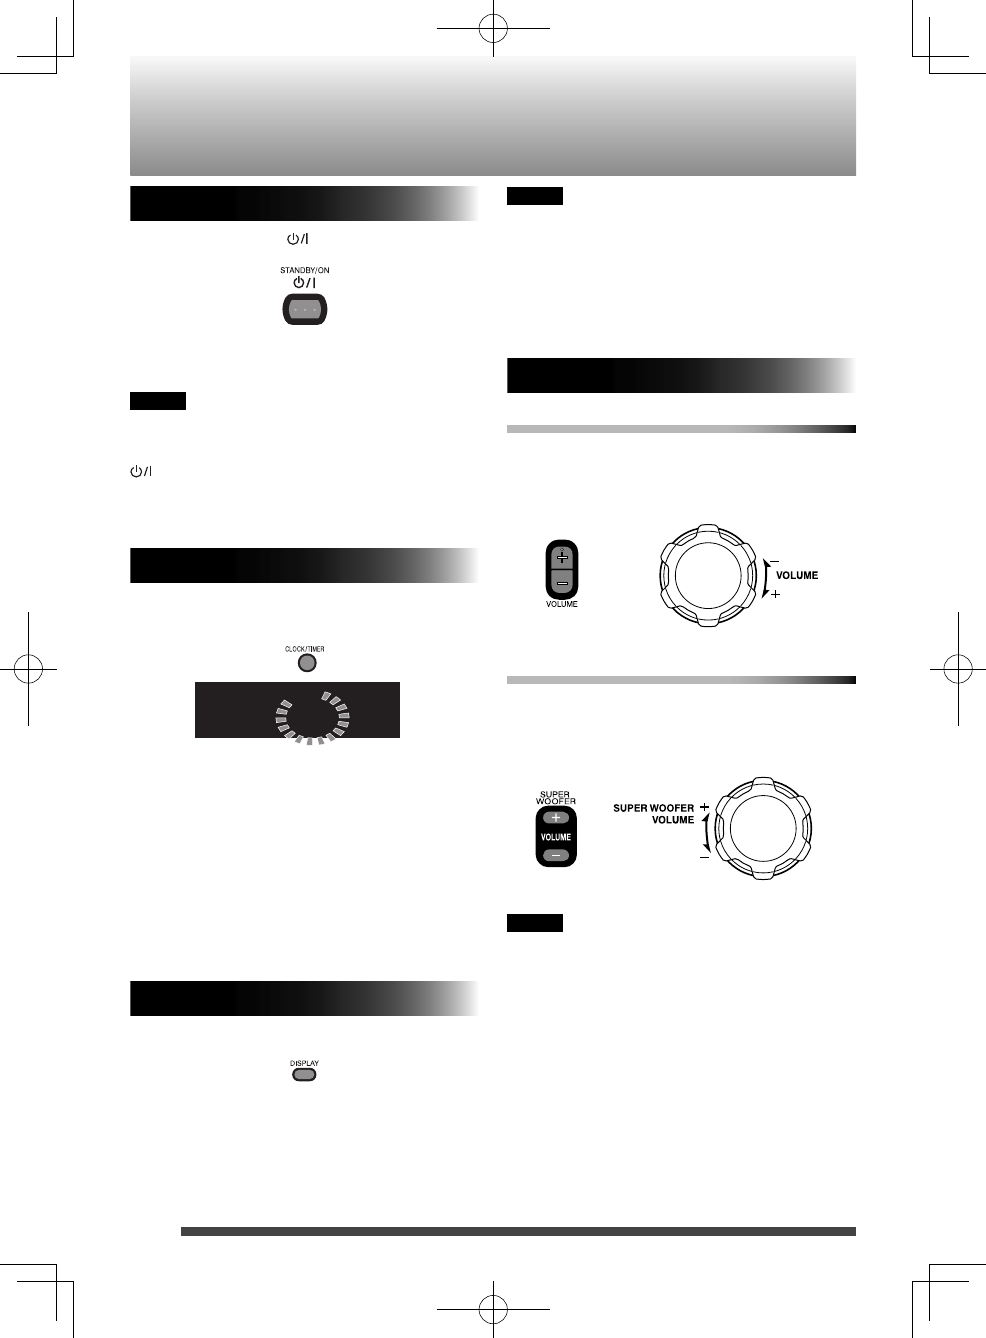
To adjust the volume
You can adjust the volume level between MIN,
1 to 29, MAX.
To adjust the super woofer volume
You can adjust the super woofer volume level
between BASS 1 and BASS 6.
NOTE
If you have adjusted the distortion effect
before, press and hold 7 to change to super
woofer volume adjustment (page 22).
Basic operations
Main unit
Remote control
Main unit
Remote control
Turning on the System
Press STANDBY/ON .
The STANDBY lamp goes off.
Press the button again to turn off the System.
NOTE
When the power is supplied using the
batteries, the System is turned on by pressing
or source buttons on the main unit. You
cannot turn on the System using the remote
control.
Setting the Clock
1. Press CLOCK/TIMER repeatedly* to
select the clock.
AM 12:00
CLOCK
When setting for the first time, press CLOCK/*
TIMER once.
2. Press UP or DOWN to adjust the hour.
• When you press and hold the button,
the hour digit changes continuously.
3. Press SET.
4. Repeat 2 and 3 to adjust the minute.
• To go back to the hour setting, press
CANCEL.
Displaying the clock
Press DISPLAY.
• Each time you press the button, the
clock and normal indicator changes
alternately.
RV-NB90_J.indd 10RV-NB90_J.indd 10 12.3.30 2:21:36 PM12.3.30 2:21:36 PM
11
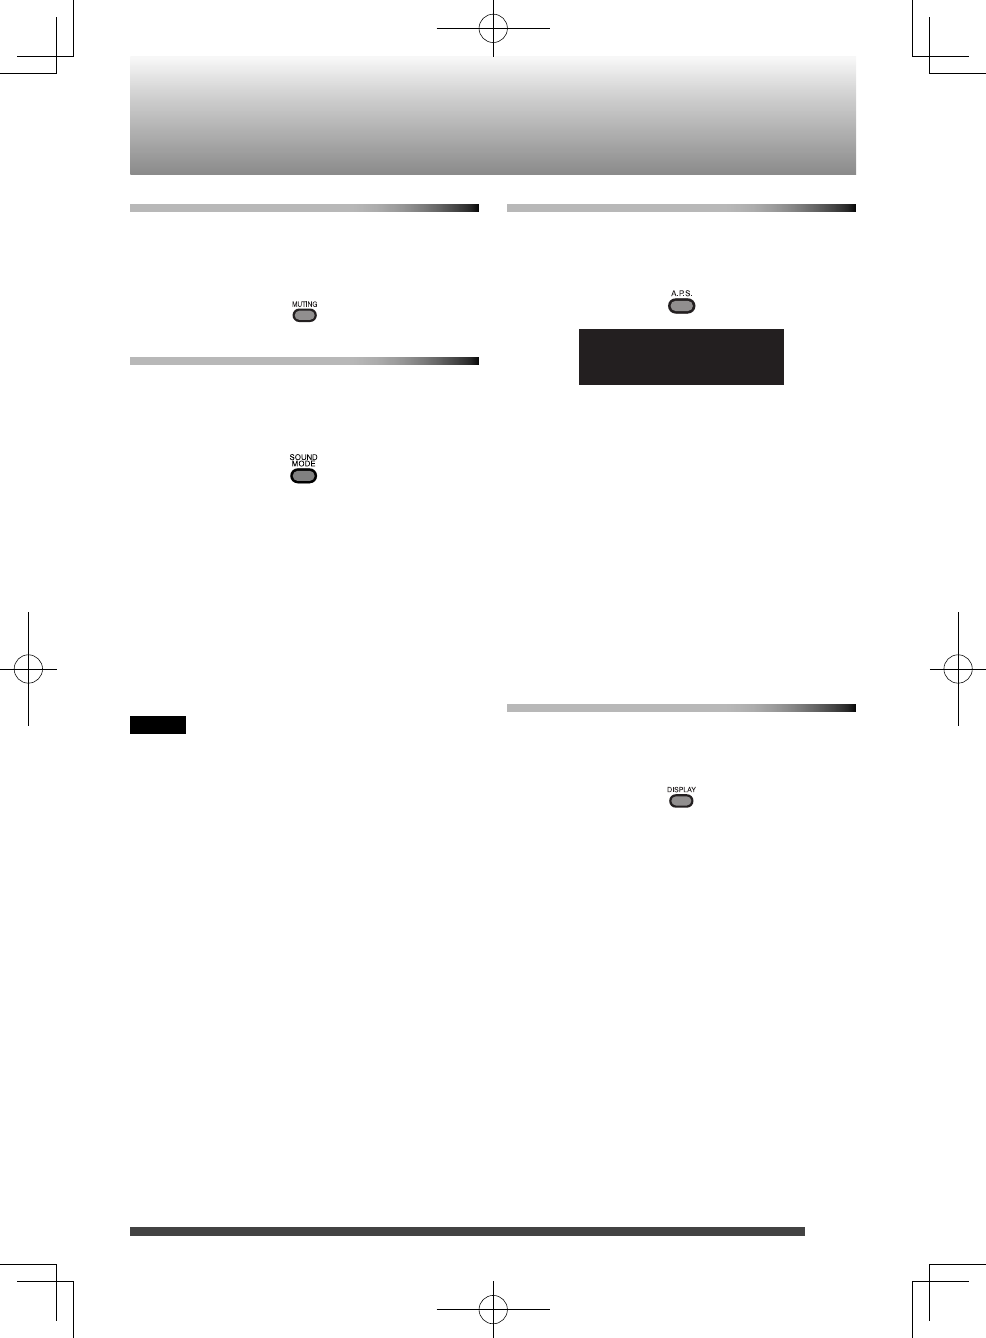
To turn o the sound temporarily
Press MUTING.
To restore the sound, press MUTING again or
adjust the volume.
Sound mode
Sound modes can be selected to enhance the
type of music being played.
Press SOUND MODE to select the sound
mode.
Each time you press the button, the sound
mode changes as follows:
BEAT: Select this for music with a heavy
beat, such as rock and dance music.
POP: Select this for light music including
popular and vocal music.
CLEAR: Select this for crisp and clear sounding
music.
FLAT: Select this to cancel the sound mode.
NOTE
The sound mode setting also affects the
sound through the headphones.
Auto power save mode
Each time you press A.P.S., the auto power
save function switches on and off.
This function is on at the initial setting.
A.P.S.
If no operation is performed for 30 minutes
in the following situations, the System turns
off automatically. Before the System turns off,
“A.P.S.” blinks on the display.
The volume level is set to MIN or Muting is •
activated.
CD, USB or METRONOME is selected as •
the source, playback is stopped, and no
microphone or guitar is connected.
iPod, Bluetooth or USB is selected as the •
source, no device is connected, and no
microphone or guitar is connected.
Display information
Each time you press the button, the display
information switches depending on the
source.
RV-NB90_J.indd 11RV-NB90_J.indd 11 12.3.30 2:21:37 PM12.3.30 2:21:37 PM
12
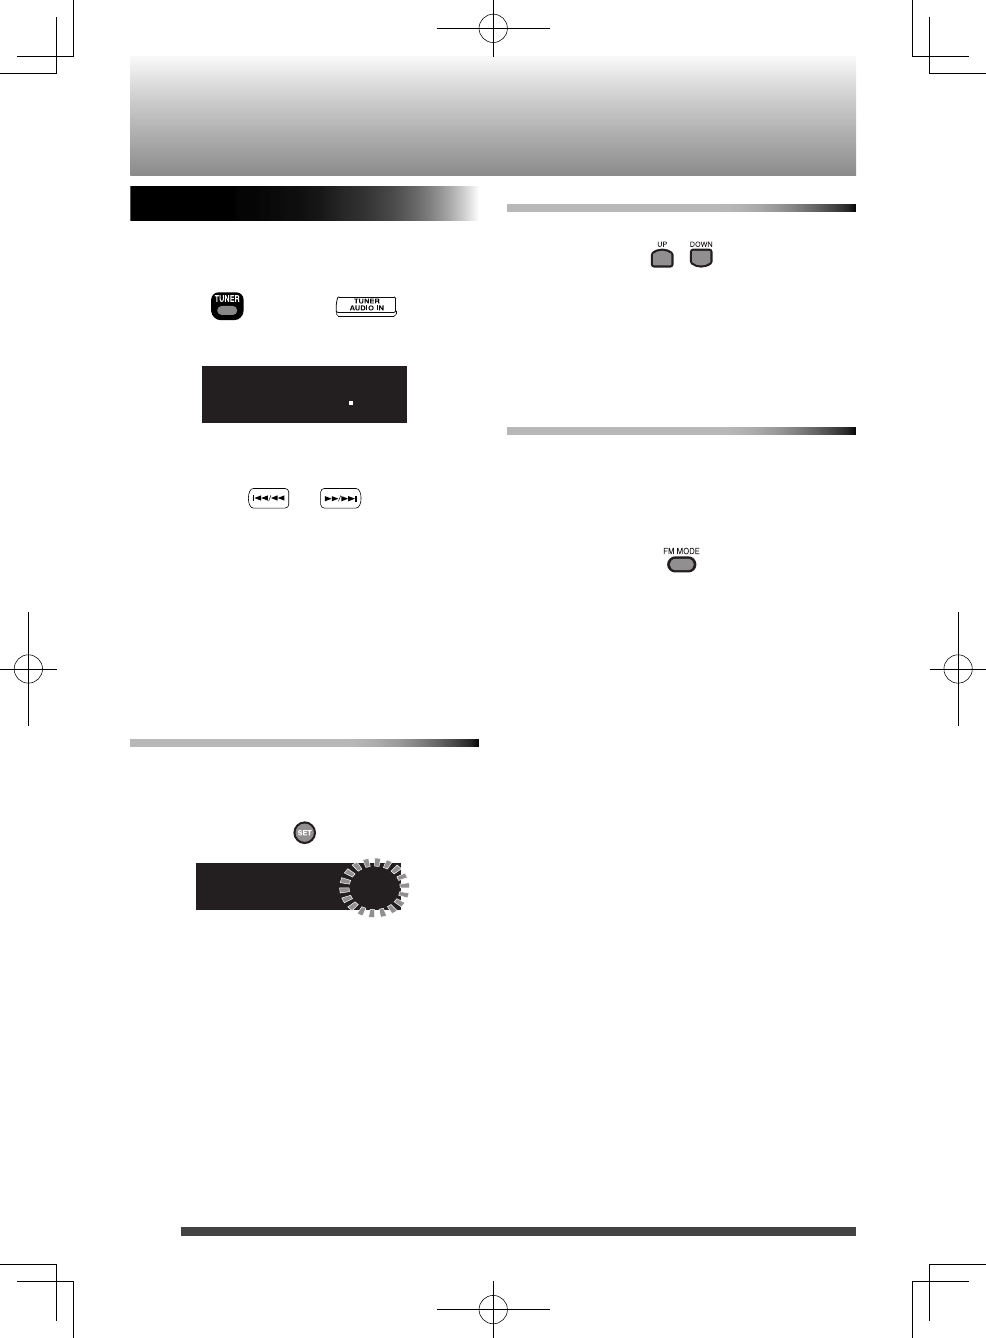
Listening to FM stations
1. Press TUNER repeatedly to select “FM.”
FM 875
MHz
2. Select the station.
• Press and hold 4/1 or ¡/¢ to
change the frequency continuously until
a station of sufficient signal strength is
tuned in.
Adjusting the antenna
Adjust the FM telescopic antenna’s length,
angle and direction until the best reception is
obtained.
To preset stations
You can preset up to 30 FM stations manually.
1. Tune in to a station you want to preset.
2. Press SET.
FM P-01
3. Use the number buttons to select the
preset number you want to store.
4. Press SET to store the station.
Main unit
Remote control
FM
To tune in to a preset station
Each time you press the button, you can select
a preset station.
You can select the preset station directly •
using the number buttons.
To improve the FM reception
When an FM stereo (FM) broadcast is hard to
receive or noisy, select the monaural reception
(MONO) mode.
Press FM MODE.
• To restore stereo reception, press FM MODE
again.
(Press repeatedly)
RV-NB90_J.indd 12RV-NB90_J.indd 12 12.3.30 2:21:37 PM12.3.30 2:21:37 PM
13
Playing back a disc/USB device
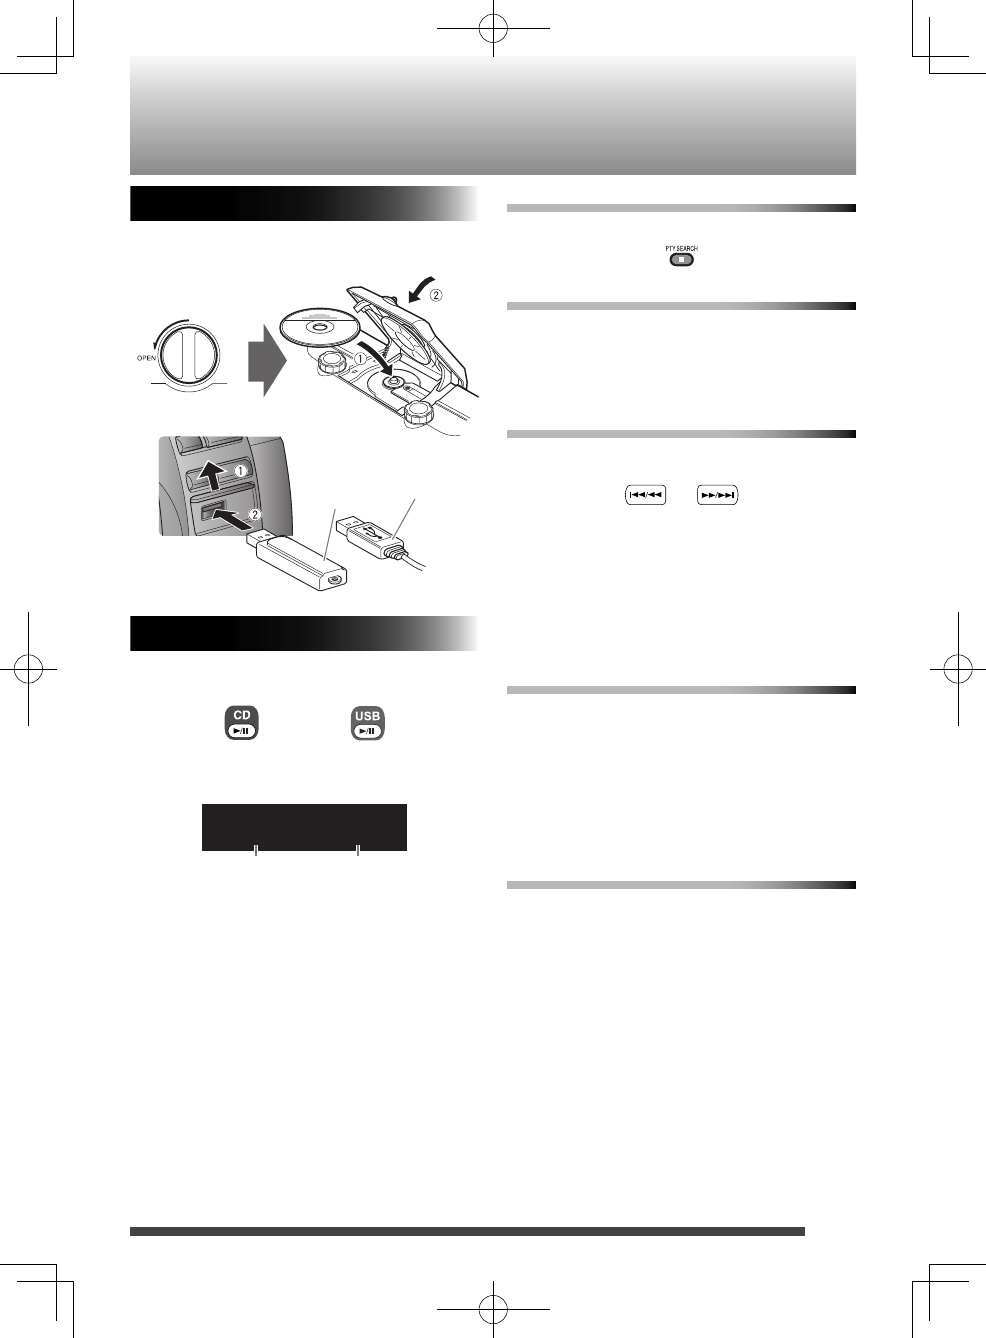
Preparation
Load a disc or connect a USB device.
Playback
Press CD 6 or USB 6.
or
Display during playback
10 0:45
Disc
USB device
or
To stop playback
Press 7.
To pause
Press CD 6 or USB 6.
To cancel pause, press the button again. •
Playback continues from the point where it
was paused.
To select a track
Press 4/1 or ¡/¢ .
Press • ¡/¢ once to skip to the beginning
of the next track.
Press • 4/1 to skip to the beginning of
the track being played.
Press 4/1 twice quickly to skip to the
beginning of the previous track.
To select a track using the remote control
Examples:
To select number 5, press 5.•
To select number 15, press +10 then 5.•
To select number 20, press +10 once, then •
10.
To select number 125, press +100, +10, +10 •
then 5.
To fast forward/reverse
Press and hold 4/1 or ¡/¢ during
playback.
Current track number Playback time
USB cord
(not supplied)
USB memory
(not
supplied)
RV-NB90_J.indd 13RV-NB90_J.indd 13 12.3.30 2:21:37 PM12.3.30 2:21:37 PM

14
To select a group (for MP3/WMA)
Press UP or DOWN.
Press UP to skip to the next group.•
Press DOWN to skip to the previous group.•
NOTE
• When you have stopped playback of an
MP3/WMA file by pressing 7, pressing 6
will start playback from the beginning of
the stopped file (Resume playback).
• To cancel the Resume playback, press 7
when playback is stopped.
• Resume playback is canceled in the
following situations:
- when program playback is activated
- when the disc compartment door is
opened
- when another source is selected
Program playback
You can program up to 32 tracks from a disc
or a USB device in any desired order including
the same tracks.
NOTE
• While making a program, you cannot
specify a group number to select a track.
1. Press CD 6 or USB 6.
2. Press 7 to stop playback.
3. Press PLAY MODE.
‒ ‒ P‒01
PRGM
4. Press the number buttons to select the
track to program.
5. Press SET.
6. Repeat step 4 and 5 to select other
tracks for the program.
7. Press CD 6 or USB 6.
Playback starts.
Playing back a disc/USB device
RV-NB90_J.indd 14RV-NB90_J.indd 14 12.3.30 2:21:38 PM12.3.30 2:21:38 PM
15
To con rm the programmed tracks
While program playback is stopped, press UP
or DOWN repeatedly.
The tracks in the program will successively
appears on the display in the programmed order.
To add a track to the end of the program, •
press the number buttons to select the track
and then press SET.
To delete tracks in the program
While
program playback is
stopped, press
CANCEL.
Each time you press the button, the last track •
in the program is erased.
The program is cleared in the following •
situations:
- when the power is turned off
- when the disc compartment door is
opened
- when the USB device is disconnected
- when another source is selected
- when program mode is exited
To exit from the program playback
While stopped, press PLAY MODE.
The “PRGM” indicator goes off.
Random playback
You can play all the tracks, on the disc or USB
device in random order.
Press PLAY MODE to select “RANDOM”
during playback.
10 0:45
RANDOM
• During random playback, you cannot go
back to the previous track even by pressing
4/1 repeatedly.
To exit from the random mode
Press PLAY MODE during random playback.
The “RANDOM” indicator goes off.
Random playback is also canceled when you •
stop playback.
Repeat playback
You can repeat a track or tracks on the disc or
USB device as many times as you like.
Press REPEAT.
Each time you press the button, the play mode
changes as follows:
NOTE
• If pressed during random playback, random
playback is canceled.
For CD:
\ ALL \ canceled \ (back to the beginning)
• : Repeats the current track.
• ALL: Repeats all the tracks on the
disc.
For MP3/WMA files:
\ GROUP \ ALL \
canceled
\
(back to
the beginning)
• : Repeats the current track.
• GROUP: In normal play mode,
repeats all the tracks in a
group.
• ALL: Repeats all the tracks on
the disc or USB device.
NOTE
• During program playback, only and ALL
can be selected.
RV-NB90_J.indd 15RV-NB90_J.indd 15 12.3.30 2:21:38 PM12.3.30 2:21:38 PM
16
You can operate iPod through the System.
See page 29 for playable iPod devices.
NOTE
• JVC is not responsible for any loss of or
damage to iPod that might result from the
use of this System.
• Do not connect or disconnect iPod when
the System is turned on.
• Do not carry the System with iPod
connected. It might cause damage to the
dock or you might drop iPod.
• iPod is charged through the dock when
the System is turned on. (When the power
is supplied through the batteries, iPod is
charged only when iPod is selected as the
source.)
• Depending on the type of iPod, iPod may
operate differently.
• Depending on the type of iPod, you can
operate the menu only on the screen of
iPod.
• Operate iPhone or iPod touch itself in the
following cases:
– When operating the home button.
– When selecting application icons on the
home screen.
– When dragging the slider.
• Sound distortion may occur when
playing back audio sources with high
recording levels. If distortion occurs, it is
recommended to turn off the equalizer of
iPod.
• For information on operating iPod, see the
instruction manual for iPod.
• Take the protect case of iPod off before
connecting.
• Connect iPod firmly.
• Keep iPod in a straight position while
connecting/disconnecting it.
• Do not touch or hit the terminal pins of
iPod or connector pins in the dock for iPod
directly. Doing so might cause damage to
the connector pins.
• You cannot send any data to iPod from the
System.
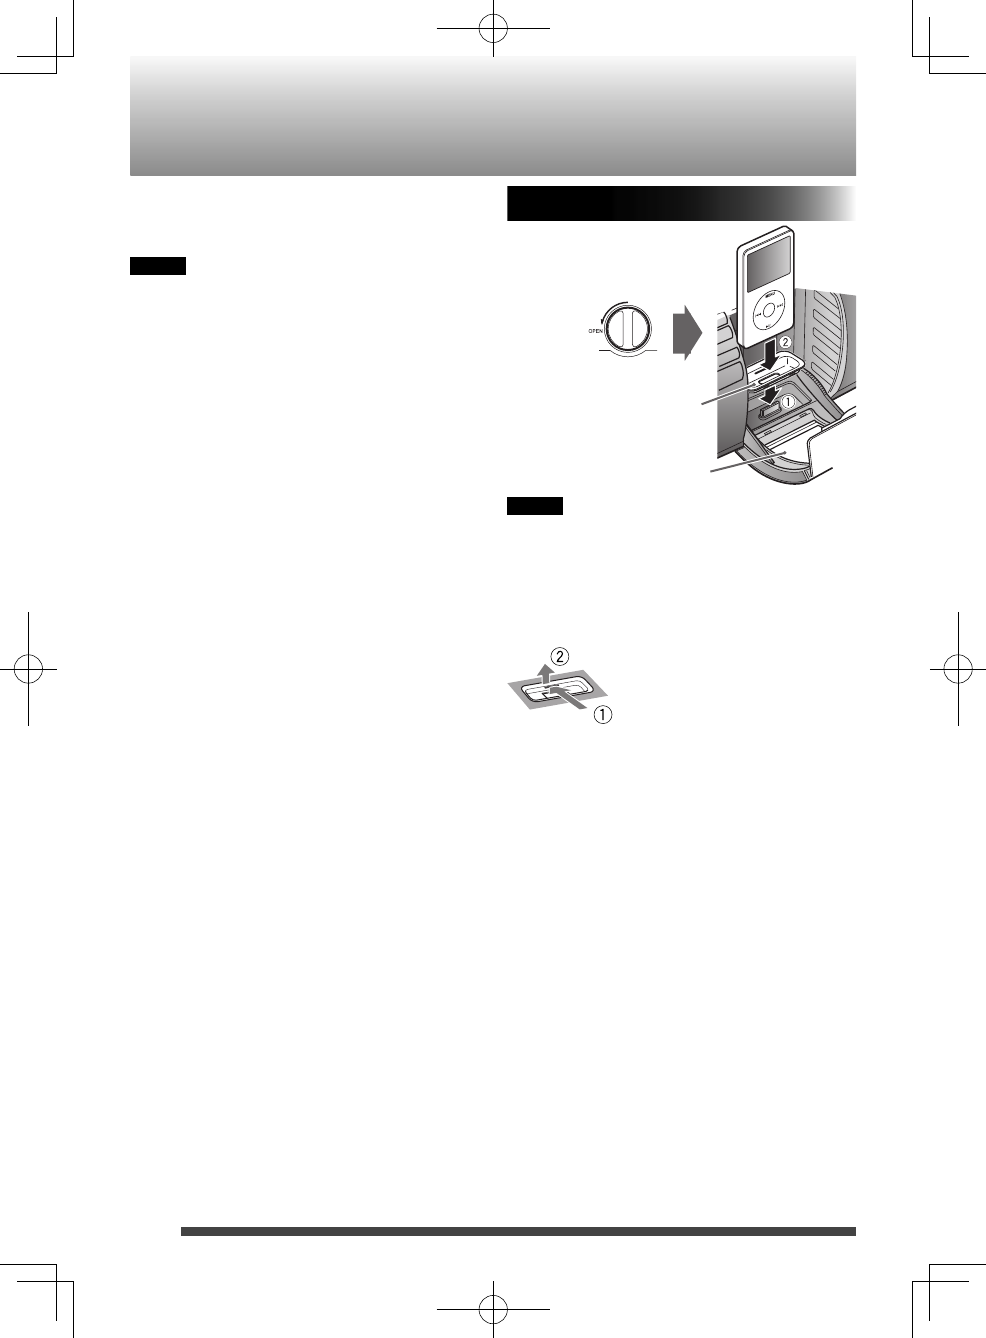
Connecting iPod
NOTE
• It is not necessary to use the dock adaptor
for some iPod models (iPod nano 6th
generation, etc.).
To detach the dock adaptor
Pull up the dock adaptor with your fingernail
or a sharp pointed tool inserted to the slot.
• Be careful not to injure your fingertips or
damage the terminal of the dock.
Front door
Open the front door
Dock adaptor
(supplied with iPod
or sold by Apple
Inc.)
iPod
RV-NB90_J.indd 16RV-NB90_J.indd 16 12.3.30 2:21:38 PM12.3.30 2:21:38 PM
17
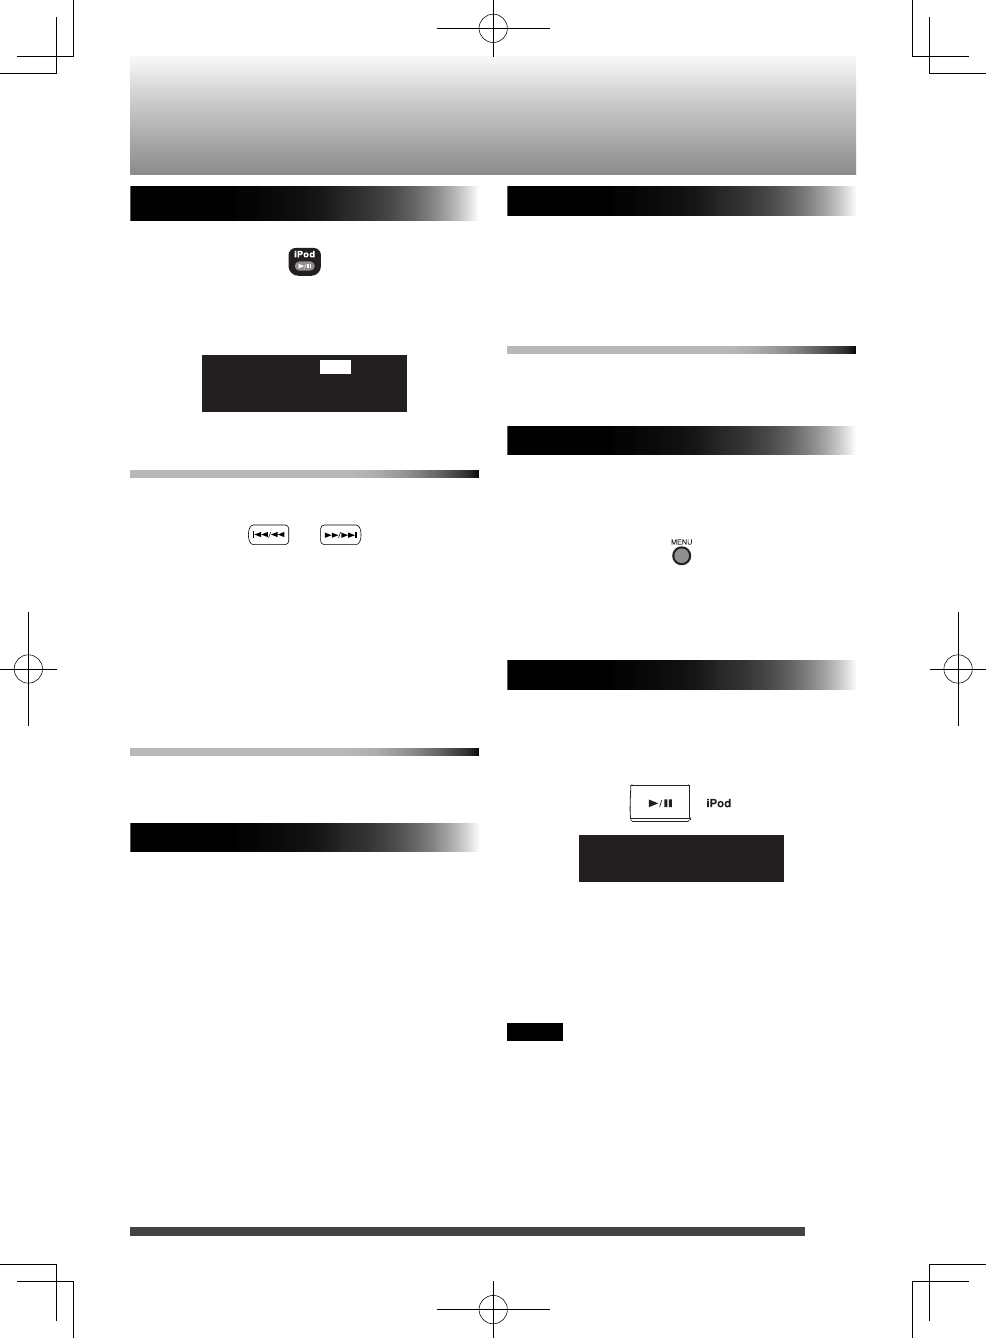
Playback
Press iPod 6.
Each time you press the button, playback is
started/paused.
iPod
iPod
To select a track
Press 4/1 or ¡/¢.
Press • ¡/¢ once to skip to the beginning
of the next track.
Press • 4/1 to skip to the beginning of
the track being played.
Press 4/1 twice quickly to skip to the
beginning of the previous track.
To fast forward/reverse
Press and hold 4/1 or ¡/¢ during
playback.
Shuffle playback
You can play the tracks on iPod in random
order.
Press PLAYMODE.
Each time you press the button, the shuffle
mode turns on/off.
Repeat playback
Press REPEAT.
Each time you press the button, the repeat
mode changes.
To exit from the repeat mode
Press REPEAT repeatedly until the repeat
mode is cancelled.
iPod menu operation
1. Press MENU to display the menu.
Each time you press the button, the
previous menu is displayed.
2. Press UP or DOWN to select an item.
3. Press SET.
Viewing video/picture of iPod
While the System is turned off...
Press and hold iPod 6.
VOUT OFF
Each time you press the button, the indicator
changes alternately as follows:
VOUT ON: View video/picture from iPod on •
the monitor.
VOUT OFF: View video/picture on iPod.•
NOTE
• You can change the setting only on the main
unit.
• You cannot change the setting when the
power is supplied through the batteries.
Main unit
RV-NB90_J.indd 17RV-NB90_J.indd 17 12.3.30 2:21:38 PM12.3.30 2:21:38 PM
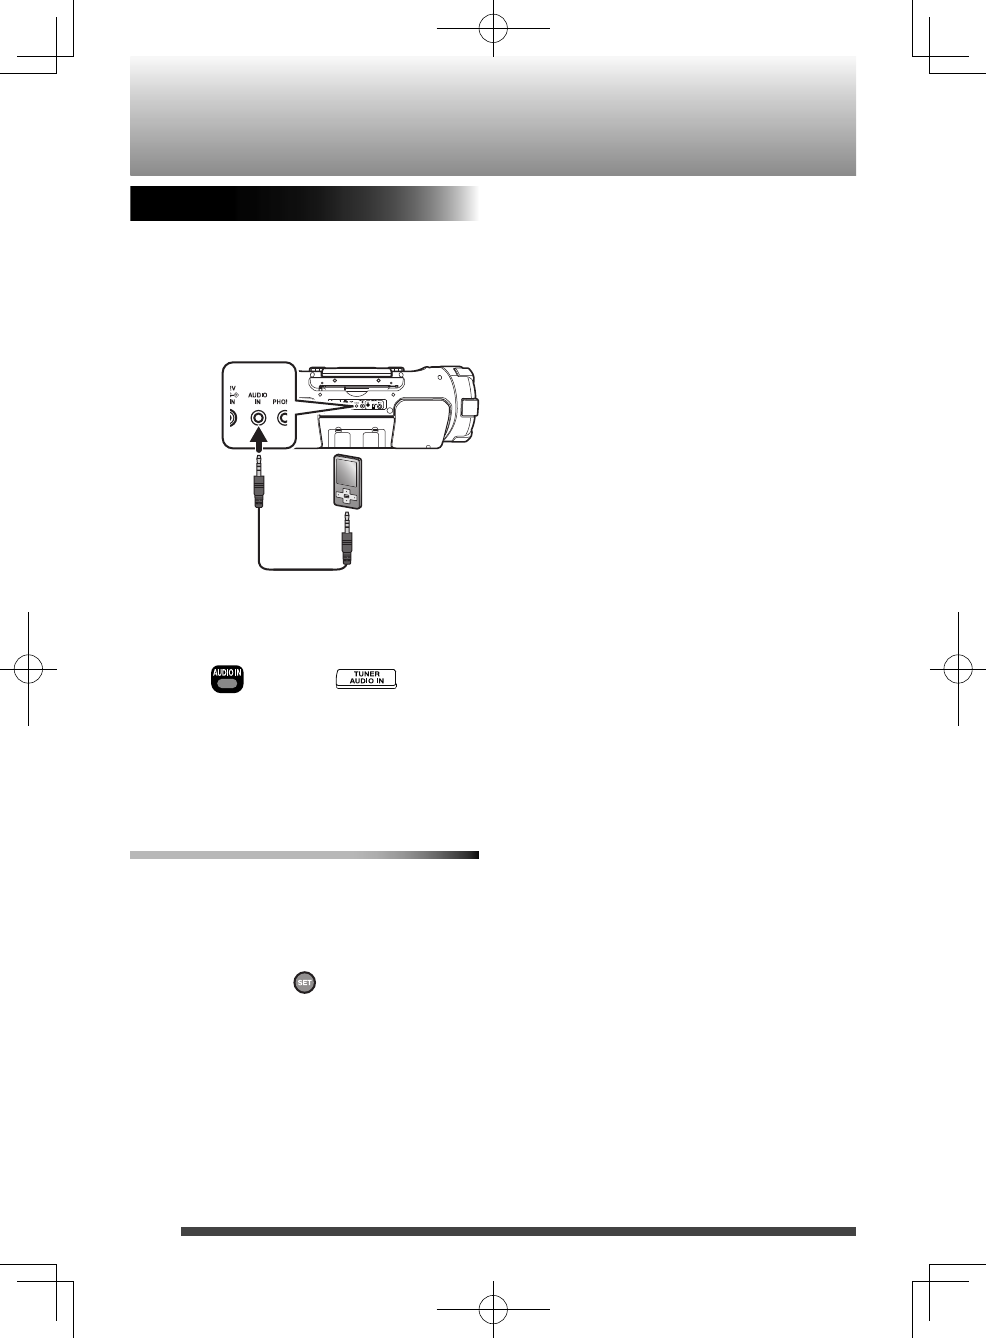
18
Listening to an external device
1. Set the volume level of the System to
minimum.
2. Connect the external device.
Refer also to the instruction manual for the
external device.
3. Press AUDIO IN to select ”AUDIO IN.”
4. Start playback of the external device.
5. Adjust the volume of the System and of
the external device.
Adjusting the audio input level
Adjust the audio input level when the volume
of the external device is too low compared to
other sources.
When AUDIO IN is selected as the source,
press SET.
Each time you press the button, the input level
changes as follows:
LEVEL1 \ LEVEL2 \ LEVEL3 \ (back to the
beginning)
A higher number indicates a greater increase
in input level.
The initial setting is "LEVEL 3."
Main unit
(Press repeatedly)
Remote control
External device
External
device(not
supplied)
Headphone
jack, etc.
Stereo mini
plug cord
(not
supplied)
RV-NB90_J.indd 18RV-NB90_J.indd 18 12.3.30 2:21:39 PM12.3.30 2:21:39 PM
19
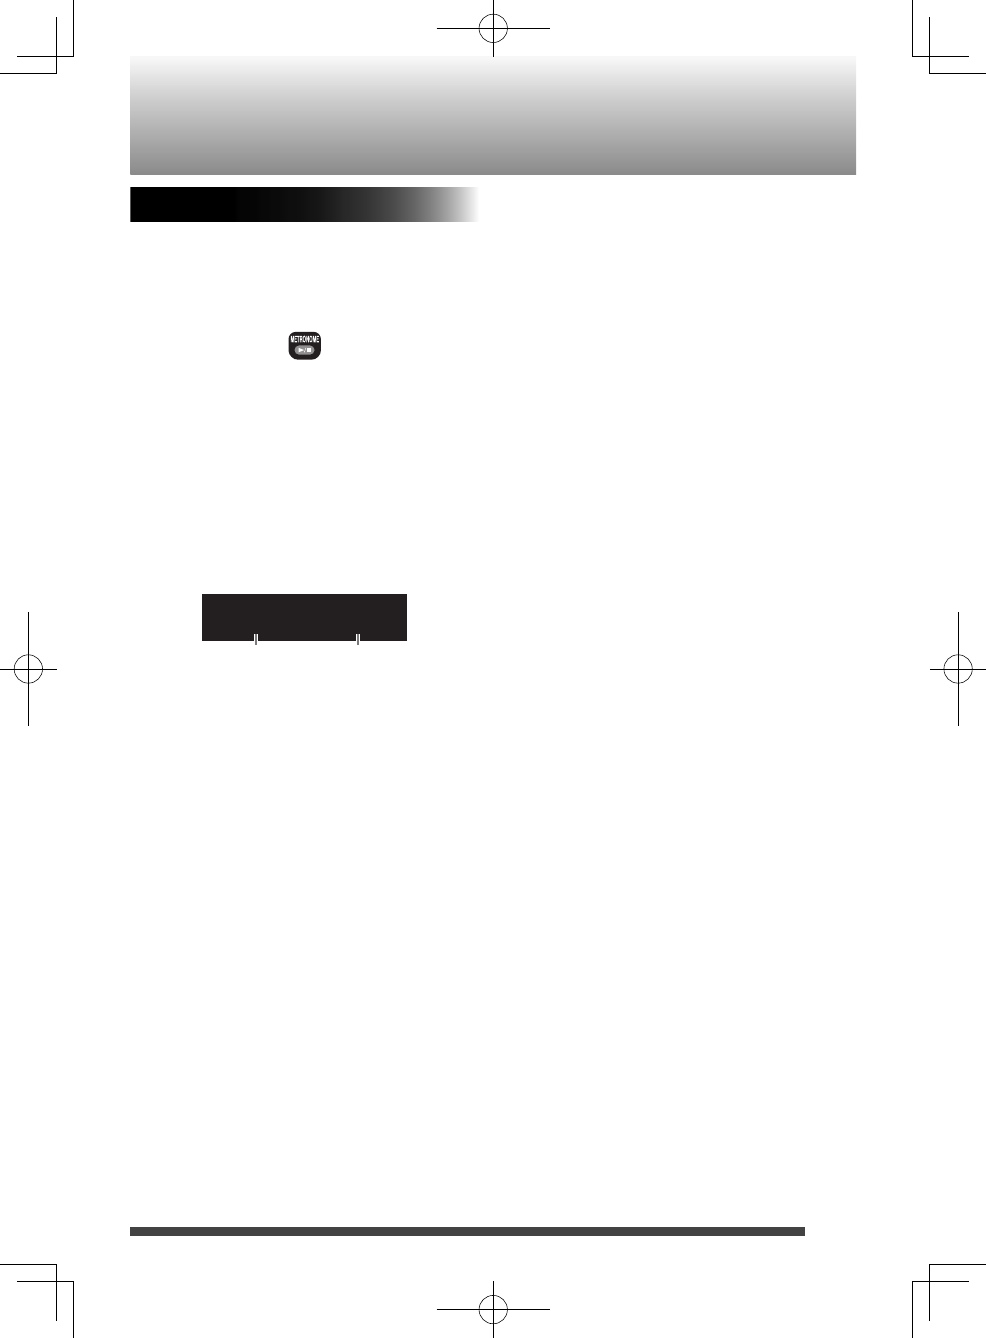
Using the metronome function
You can use the System as a metronome. You
can set the tempo and rhythm separately for
your guitar practice, etc.
1. Press METRONOME 6.
Rhythmical beeps are emitted from the
speakers.
Each time you press the button, beeps are
started/paused.
The beeps are also canceled when you
press 7.
2. Press 4/1 or ¡/¢ to select the
tempo.
• You can select the tempo from 30 to
250.
T120 B4
3. Press UP or DOWN to select the rhythm.
• You can select from 1 to 7 beat.
Metronome
tempo beat
RV-NB90_J.indd 19RV-NB90_J.indd 19 12.3.30 2:21:39 PM12.3.30 2:21:39 PM
20
You can listen to music from a Bluetooth
device through the System.
NOTE
• In order to use these functions, the device
must be compatible with AVRCP and A2DP
profiles.
• Some Bluetooth devices may not be
available to the System.
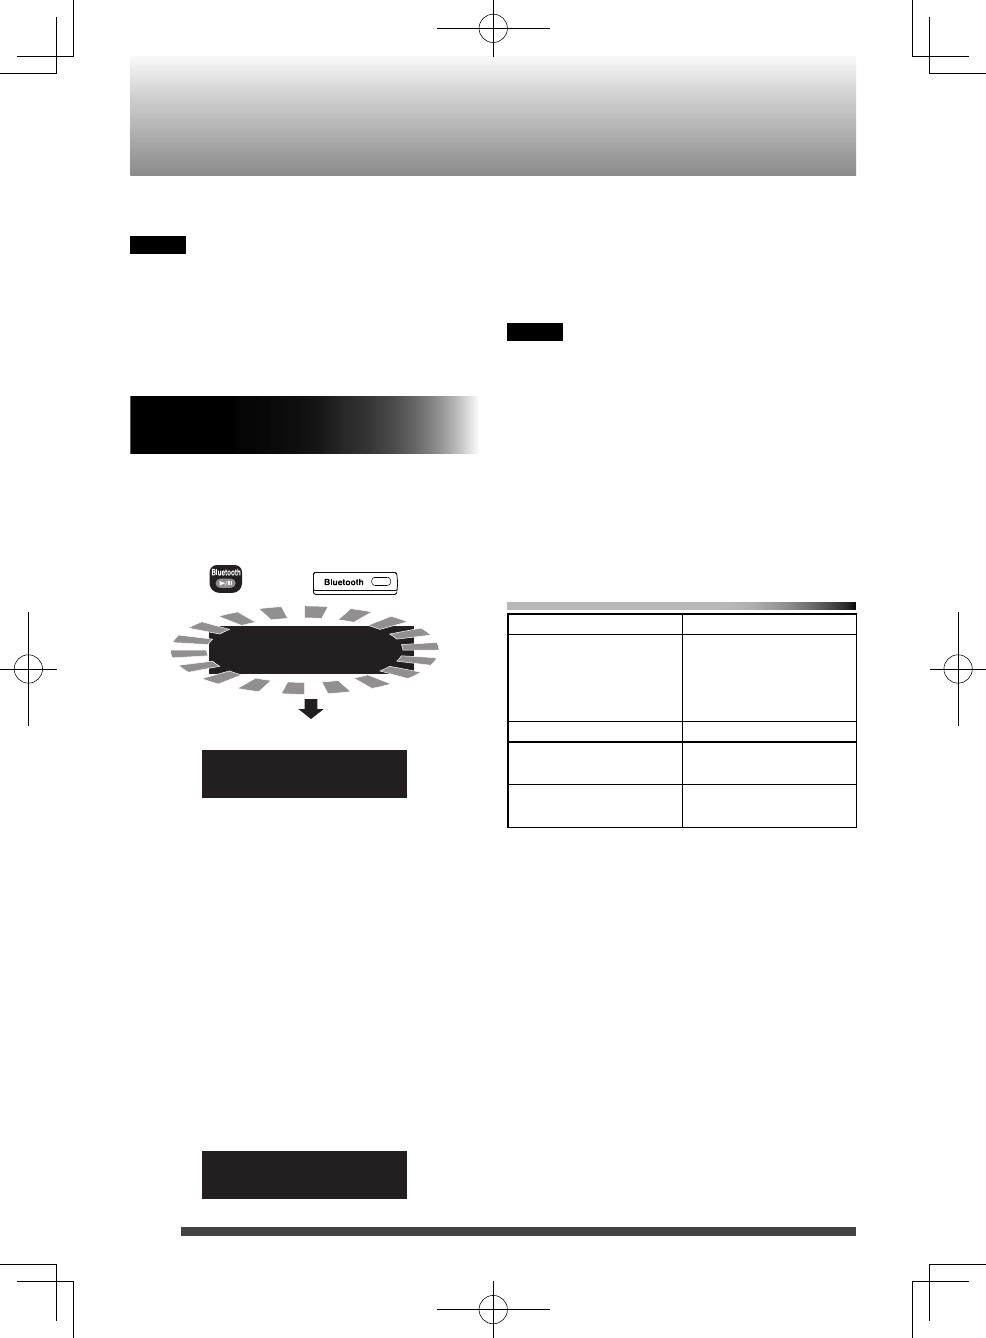
Registering a Bluetooth device for
the first time
1. Turn the System on.
2. Press Bluetooth 6.
PAIRING
CONNECT
BT READY
•
While "CONNECT" is blinking, you cannot
perform any operations the System
except for turning the System off.
3. Perform the pairing operation on the
target Bluetooth device.
For information on operating the target
Bluetooth device, see the instruction manual
for the Bluetooth device.
Select “RV-NB90” from the list.
When the target device requests the
passkey during pairing operation, enter
“0000.”
The pairing is completed and the target
Bluetooth device is connected to the System
automatically. The Bluetooth indicator lights.
B T
Main unit
Remote control
(after 5 to10 seconds)
*
Bluetooth
4. Start playback of the target Bluetooth
device.
The sound from the Bluetooth device is
emitted from the System.
Playback may start automatically with
some Bluetooth devices.
NOTE
• The pairing is necessary only when
connecting for the first time.
* The Bluetooth device last used will be
connected automatically by turning on
the Bluetooth function of the device while
"CONNECT" blinks on the display window.
To re-connect another Bluetooth device,
operate the device to connect while "BT
READY" appears on the display window.
To control the Bluetooth device from
the System
operation button
Play/Pause Press Bluetooth 6.
Each time you press
the button, playback
is started/paused.
Stop Press 7.
Skip Press 4/1 or
¡/¢.
Fast Forward/Fast
Rewind
Press and hold
4/1 or ¡/¢.
RV-NB90_J.indd 20RV-NB90_J.indd 20 12.3.30 2:21:40 PM12.3.30 2:21:40 PM
21
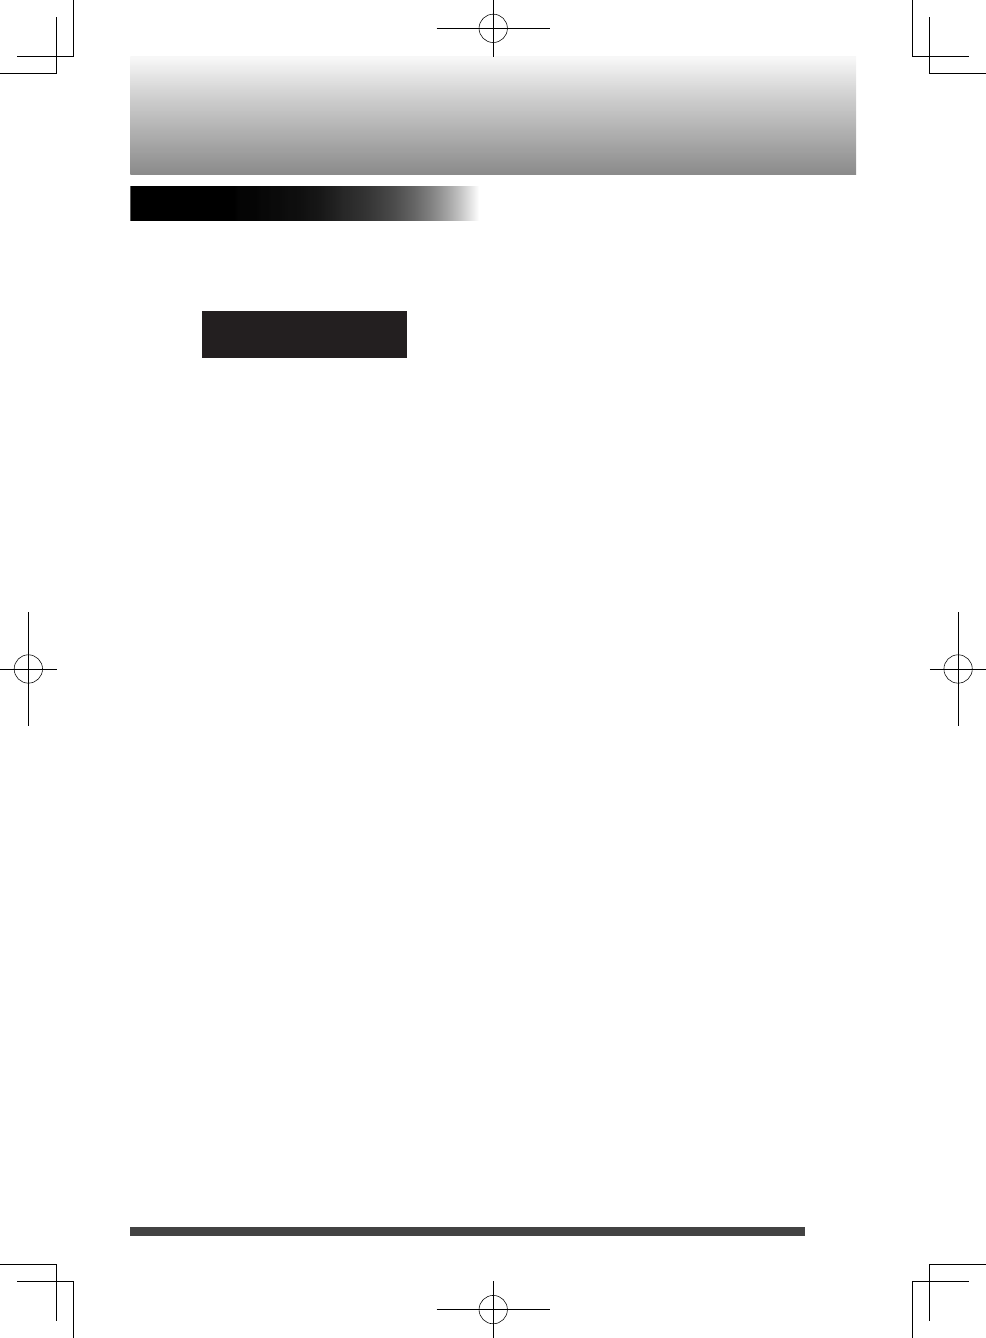
Registering other Bluetooth devices
1. Press and hold Bluetooth for more than
2 seconds.
Canceling of connection starts.
DISCNECT
"BT READY" appears when the connection
has been canceled.
2. Perform the pairing operation on the
target Bluetooth device.
For information on operating the
Bluetooth device, see the instruction
manual for the Bluetooth device.
Select “RV-NB90” from the list.
When the target device requests the
passkey during pairing operation, enter
“0000.”
The pairing is completed and the
Bluetooth device is connected
automatically. The Bluetooth indicator
lights.
RV-NB90_J.indd 21RV-NB90_J.indd 21 12.3.30 2:21:40 PM12.3.30 2:21:40 PM
22
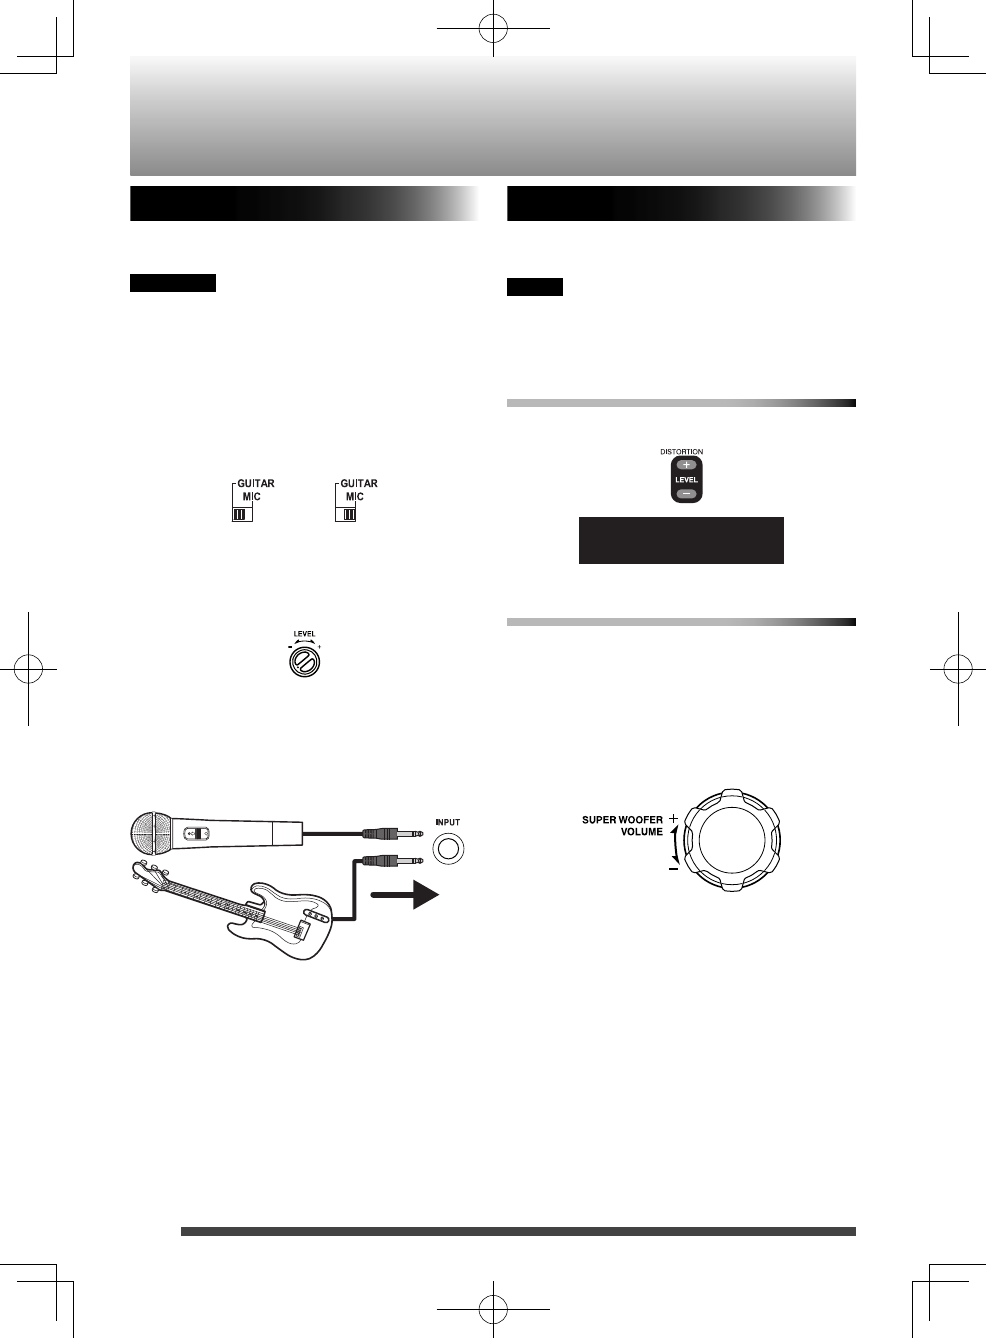
Connecting a microphone/guitar
Microphone/guitar mixing
Using a microphone or a guitar, you can mix
its sound with a source sound.
CAUTION
DO NOT connect a bass guitar to the MIC/
GUITAR INPUT jack, as it may damage the
System.
1. Make sure the MIC/GUITAR selector
switch on the rear of the System is
properly set.
2. Turn the MIC/GUITAR LEVEL control
fully counterclockwise.
3. Connect a microphone or a guitar to the
MIC/GUITAR INPUT jack on the rear of
the System.
4. Start playback of the source.
5. Turn the MIC/GUITAR LEVEL control to
adjust the volume.
Adding a distortion effect
You can add a distortion effect for a guitar.
You can select the level from 0 (OFF) to 8.
NOTE
When you increase the level, the amount
of noise also increases. This is due use of an
analog circuit, and is not malfunction.
Using the remote control
Press DISTORTION LEVEL + or DISTORTION
LEVEL -.
D LVL 1
Using the main unit
1. Press and hold 7 to select "D LVL".
Each time you press and hold 7, the
function changes between super woofer
level ("SW VOL" appears on the display
window) and distortion level ("D LVL"
appears on the display window).
2.
Guitar Microphone
(Turn)
Microphone or guitar
(not supplied)
φ 6.3 monaural cable
(not supplied)
RV-NB90_J.indd 22RV-NB90_J.indd 22 12.3.30 2:21:40 PM12.3.30 2:21:40 PM
23
Recording on a USB device
You cannot record sound while the sleep timer
(page 25) is activated.
Recording discs
You can record a CD to a USB device in two
ways, digital recording and analog recording.
Generally, you can obtain better sound quality
by using digital recording than by using
analog recording.
However, by using analog recording, you can
record sound from a microphone or guitar
connected to the System at the same time
(mixing recording).
Before recording, connect the USB device to
the System.
NOTE
Discs other than audio CD such as MP3/WMA •
discs cannot be recorded.
The volume setting and sound mode have •
no effect on recording.
You can not activate random playback or •
repeat playback during recording.
The file is stored in MP3 format (bitrate: 192 •
kbps).
Do not shake the System during the •
recording; otherwise the tracks might not be
recorded properly.
To record an audio CD
1. Press CD 6.
2. Press 7 to stop playback.
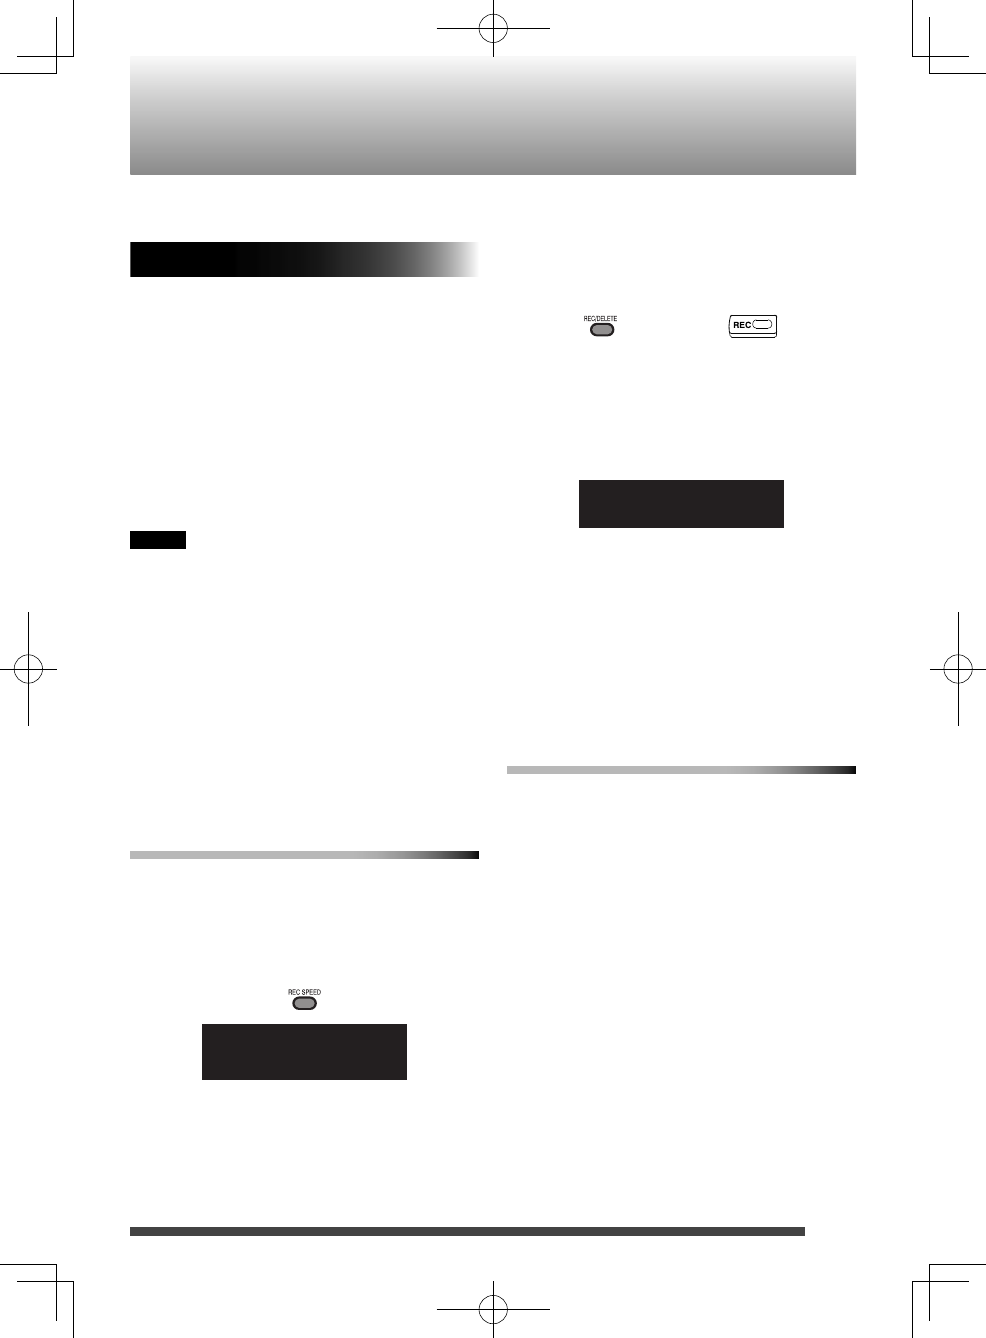
3. Press REC SPEED to select the recording
speed.
HIGH
HIGH
Each time you press the button, the
speed switches between normal speed
(NORMAL) and double speed (HIGH).
If you want to listen to the music during
recording, select normal speed.
• When you perform analog recording,
this step is not necessary. (The songs are
recorded at normal speed.)
4. Press REC/DELETE.
Digital recording starts from the first track
to the last track.
• When you perform analog recording,
press and hold REC/DELETE. "ANLG REC"
blinks. While blinking, press REC/DELETE
to start recording.
RECSTART
The REC indicator lights during the
recording.
In the “CD” folder in the “MUSIC” folder, a •
folder such as “CD001” is created where the
music files are stored.
Recording stops automatically when •
playback stops.
To stop recording manually, press • 7.
Other recording
To record from the current track to the last •
track, press 4/1 or ¡/¢ while
stopped to select the track and then press
REC/DELETE.
To record only the current track, press REC/•
DELETE (for digital recording) or press and
hold REC/DELETE (for analog recording)
during playback.
To record tracks in the programmed order, •
stop program playback (page 14) and then
press REC/DELETE (for digital recording)
or press and hold REC/DELETE (for analog
recording).
Main unit
Remote control
RV-NB90_J.indd 23RV-NB90_J.indd 23 12.3.30 2:21:40 PM12.3.30 2:21:40 PM
24
Recording other sources
You can record an FM broadcast, metronome
or an external device.
You can divide a file according to the marking
setting (see below).
You can record sound from a microphone or
guitar connected to the System at the same
time.
The music files are stored in the appropriate •
folder ( “FM”, “AUDIO IN” and “METRONOME”
folder) in the “MUSIC” folder.
Recording stops automatically when the file •
size exceeds 2 GB (about 20 hours).
To select the marking setting
You can select the way files are divided.•
Select the setting before recording.•
Press REC MODE when TUNER (FM), AUDIO
IN or METRONOME is selected as the
source.
Each time you press the button, the setting
changes.
MANUAL divides a file when you press SET.
TIME divides a file automatically every
5 minutes.
To record FM stations
1. Press TUNER.
2. Tune into the station you want to
record.
3. Press REC/DELETE.
RECSTART
Recording starts.
The REC indicator lights while recording.
4. Press 7 to stop recording.
To record an external device
1. Press AUDIO IN.
Before recording, connect the external
device to the System.
2. Press REC/DELETE.
Recording starts.
3. Start playback of the external device.
The REC indicator lights while recording.
4. Press 7 to stop recording.
To record the metronome
1. Press METRONOME.
Adjust the tempo and rhythm if necessary
(page 19).
2. Press REC/DELETE.
Recording starts.
The REC indicator lights while recording.
3. Press 7 to stop recording.
Deleting a track
You can delete a track recorded on a USB •
device.
You can not restore deleted files.•
1. Start playback of the track you want to
delete.
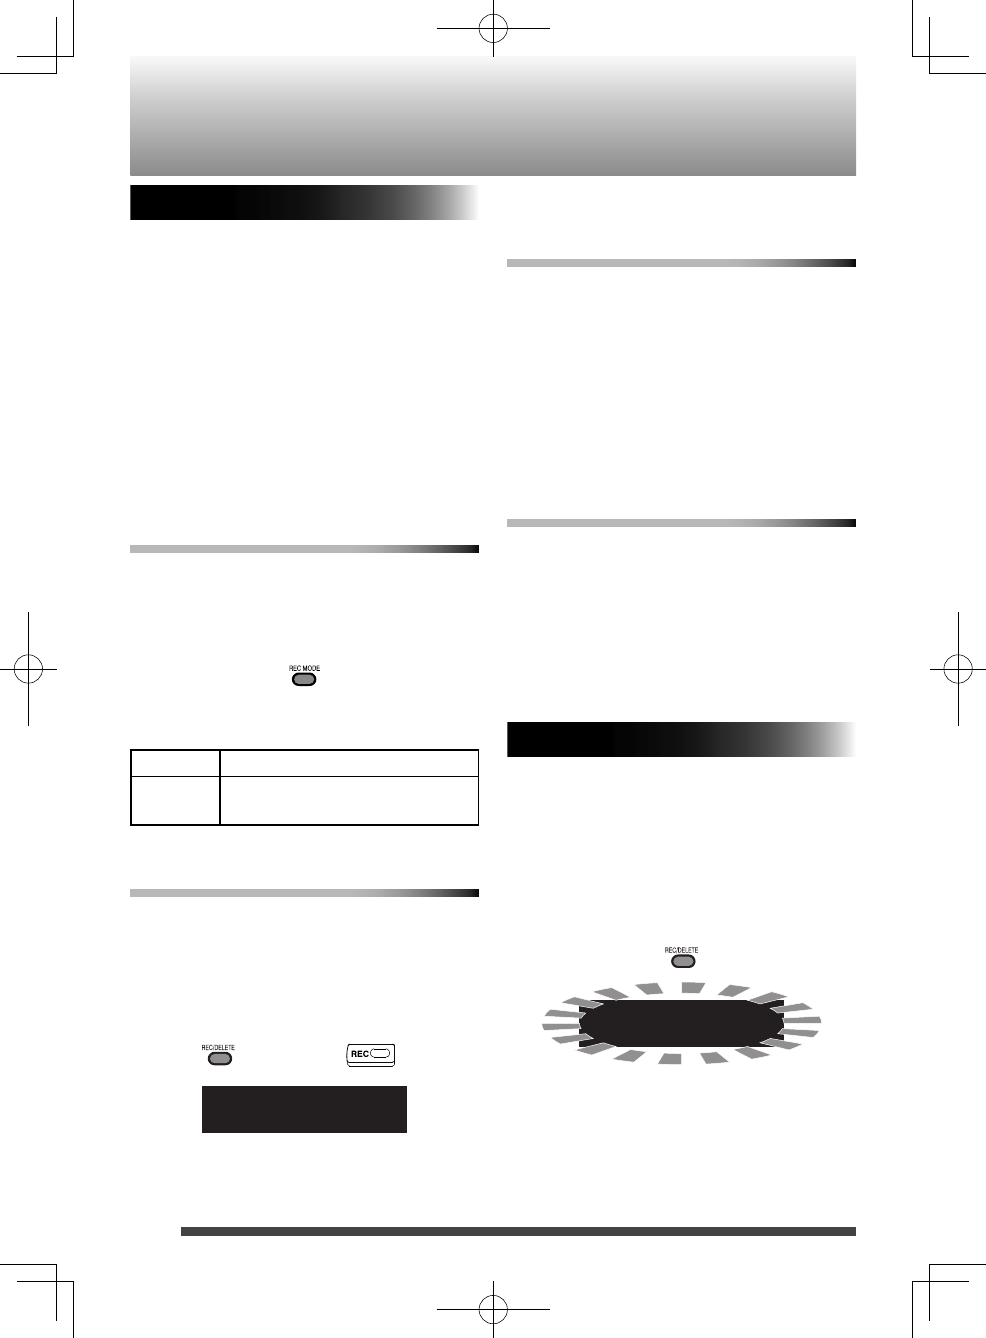
2. Press REC/DELETE.
PUSH SET
3. Press SET.
“DELETE” appears on the display window,
and deleting starts.
“FINISH” appears when deleting is
complete.
Recording on a USB device
Main unit
Remote control
RV-NB90_J.indd 24RV-NB90_J.indd 24 12.3.30 2:21:40 PM12.3.30 2:21:40 PM
25
Using the timer
Setting the sleep timer
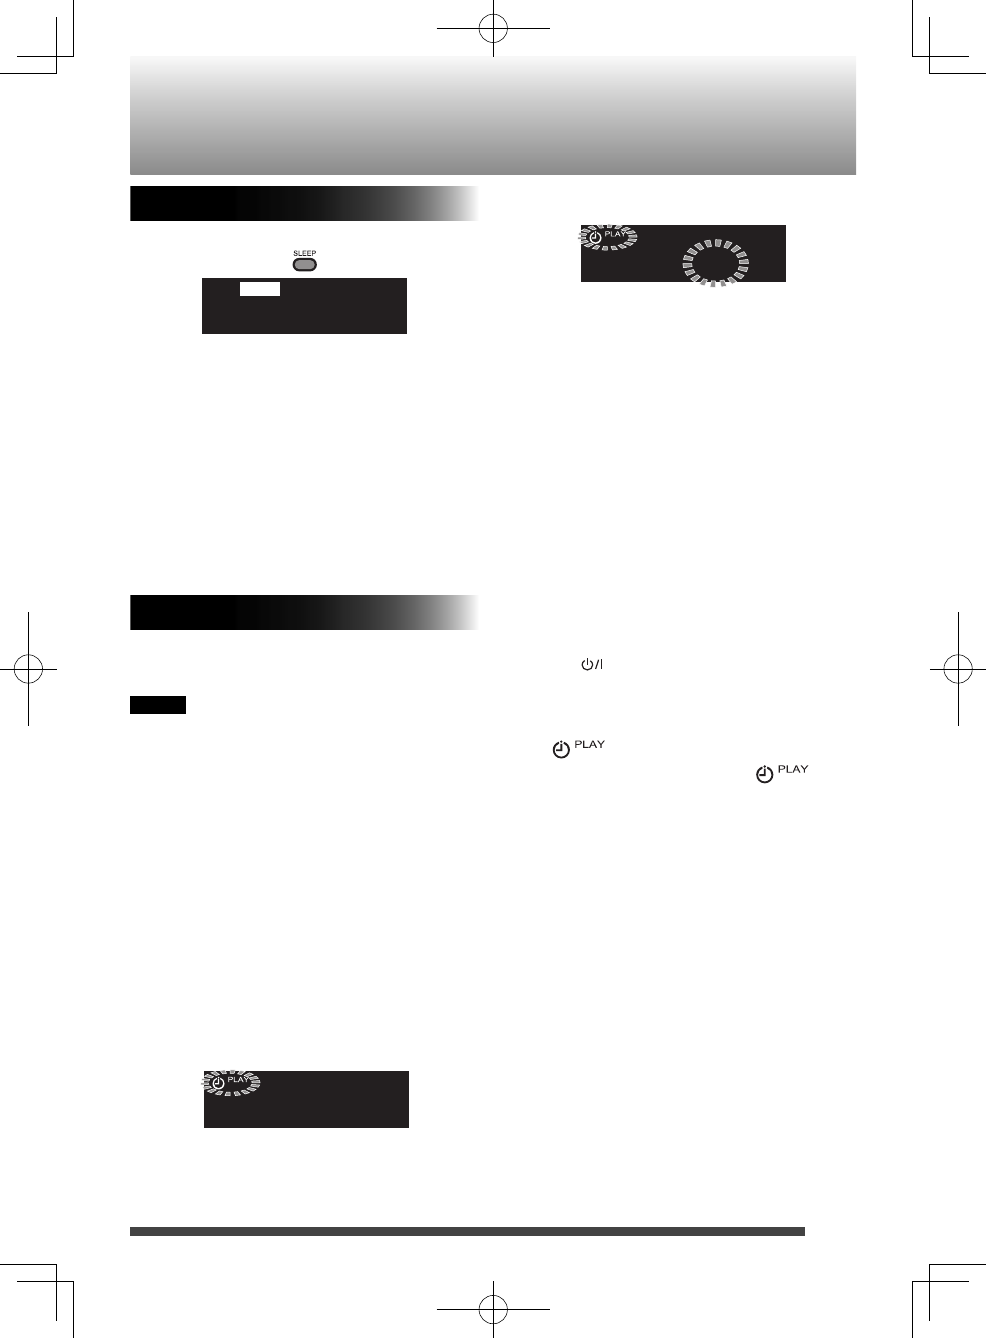
Press SLEEP.
SLEEP 10
SLEEP
Each time you press the button, the shut-
off time (in minute) changes as follows:
10 \ 20 \ 30 \ 60 \ 90 \ 120 \ 150
\ 180 \OFF \ (back to the beginning)
To check the remaining time until the
System shuts off, press SLEEP once.
To cancel the sleep timer, press SLEEP
repeatedly to select “OFF.”
Setting the daily timer
Using the daily timer (Playback timer), you can
wake up with your favorite music.
NOTE
• Set the clock before setting the daily timer
(page 10).
• Tune into an FM station, load a disc, or
connect a USB device/iPod to the System,
and make sure that the source works
properly beforehand.
• Preset the desired FM station before setting
the daily timer (page 12).
• Daily timer does not work when the power
is supplied through the batteries. Supply
the power through an AC outlet.
1. Press CLOCK/TIMER repeatedly until
the “PLAY TMR” appears on the display
window.
PLAY TMR
2. Press CLOCK/TIMER again.
ONAM12:00
3. Press UP or DOWN to adjust the hour of
the starting time.
• When you press and hold the button,
the hour digit changes continuously.
4. Press SET.
5. Repeat 3 and 4 to adjust the minute of
the starting time, the hour and minute
of the finish time, and select the source
and the volume.
• When FM tuner is selected as the source,
select a preset number using UP or
DOWN and then press SET.
• When CD or USB is selected as the
source, select a track number using UP
or DOWN and then press SET.
6. Press to turn off the System.
• The daily timer works only when the
System is turned off.
• While the timer is set, the timer indicator
lights up.
• While the timer is working,
flashes.
• Once set, the daily timer works every
day.
• You can not set the same time for the
starting time and finish time.
To go back to the previous step, press
CANCEL.
To cancel the daily timer, press CANCEL after
performing step 1.
To set the daily timer with the same
settings again after canceling, press SET
after performing step 1.
RV-NB90_J.indd 25RV-NB90_J.indd 25 12.3.30 2:21:41 PM12.3.30 2:21:41 PM
26
Setting the recording timer
You can set the recording timer for FM stations
or an external device.
NOTE
• Set the clock before setting the recording
timer (page 10).
• Check the reception of the FM station
and the connection of the external device
before setting the recording timer.
• Preset the desired FM station before setting
the recording timer (page 12).
• Connect the USB device to the unit before
setting the recording timer.
• The recording timer does not work when
the power is supplied through the batteries.
Supply the power through an AC outlet.
1. Press CLOCK/TIMER.
The “REC TMR” appears on the display
window.
REC TMR
2. Press CLOCK/TIMER again.
ONAM12:00
3. Press UP or DOWN to adjust the hour of
the starting time.
• When you press and hold the button,
the hour digit changes continuously.
4. Press SET.
5. Repeat 3 and 4 to adjust the minute of
the starting time, the hour and minute
of the finish time, and select the source
and the volume.
• When FM tuner is selected as the source,
select a preset number using UP or
DOWN and then press SET.
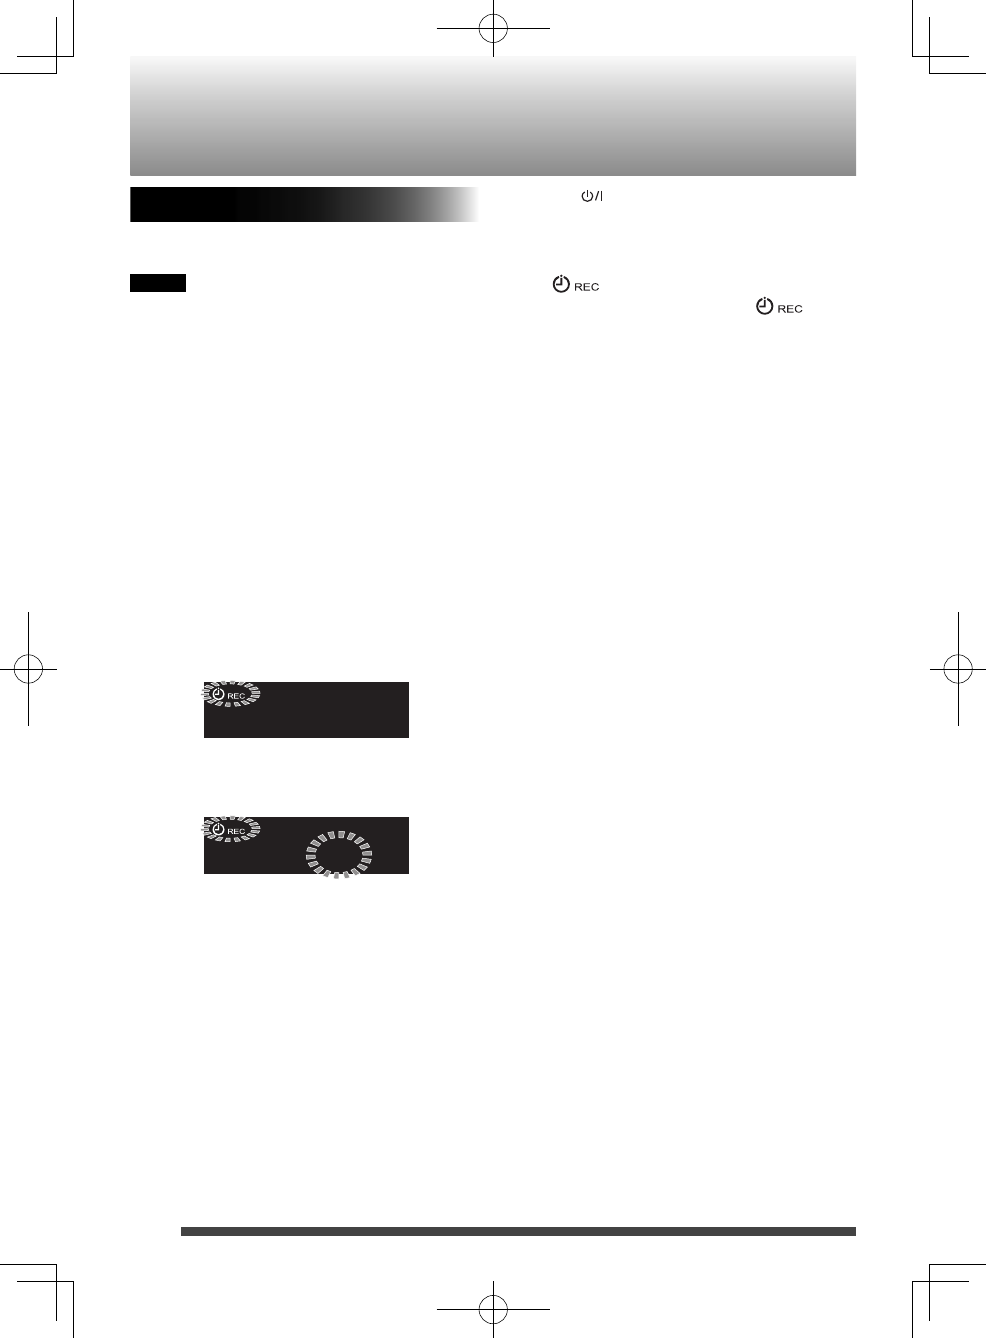
6. Press to turn off the System.
• The recording timer works only when
the System is turned off.
• While the timer is set, the timer indicator
lights up.
• While the timer is working,
flashes.
• The recording timer works only once.
(However, the settings are stored on the
System.)
• You can not set the same time for the
starting time and finish time.
To go back to the previous step, press
CANCEL.
To cancel the recording timer, after
performing step 1.
To set the recording timer using the same
setting again, after performing step 1.
Using the timer
RV-NB90_J.indd 26RV-NB90_J.indd 26 12.3.30 2:21:41 PM12.3.30 2:21:41 PM

27
Microsoft and Windows Media are either •
registered trademarks or trademarks of
Microsoft Corporation in the United States
and/or other countries.
“Made for iPod” and “Made for iPhone” •
mean that an electronic accessory has
been designed to connect specifically
to iPod or iPhone, respectively, and has
been certified by the developer to meet
Apple performance standards. Apple is not
responsible for the operation of this device
or its compliance with safety and regulatory
standards. Please note that the use of this
accessory with iPod or iPhone may affect
wireless performance.
iPhone, iPod, iPod classic, iPod nano and •
iPod touch are trademarks of Apple Inc.,
registered in the U.S. and other countries.
The Bluetooth® word mark and logos are •
registered trademarks owned by Bluetooth
SIG, Inc. and any use of such marks by JVC
KENWOOD Corporation is under license.
Other trademarks and trade names are those
of their respective owners.
Trademarks
To get the best performance of the System,
keep your discs and mechanism clean.
Handling discs
• Remove the disc from its case by holding it
at the edge while pressing the center hole
lightly.
• Do not touch the shiny surface of the disc, or
bend the disc.
• Put the disc back in its case after use.
• Be careful not to scratch the surface of the
disc when placing it back in its case.
• Avoid exposure to direct sunlight,
temperature extremes, and moisture.
Cleaning discs
• Wipe the disc with a soft cloth in a straight
line from center to edge.
Cleaning the System
• Stains should be wiped off with a soft cloth.
If the System is heavily stained, wipe it with
a cloth soaked in water-diluted neutral
detergent and wrung well, then wipe clean
with a dry cloth.
• Since the System may deteriorate in quality,
become damaged or get its paint peeled off,
be careful about the following:
– DO NOT wipe it hard.
– DO NOT wipe it with thinner or benzine.
– DO NOT apply any volatile substances
such as insecticides to it.
– DO NOT allow any rubber or plastic to
remain in contact for a long time.
Cleaning the CD pickup lens
• Keep the CD pickup lens clean, or the sound
may be degraded. Use a blower (available at
a camera store, etc.) to blow dust off the lens.
Blower
Lens
Maintenance
RV-NB90_J.indd 27RV-NB90_J.indd 27 12.3.30 2:21:41 PM12.3.30 2:21:41 PM
28
About Discs/Files
Playable discs/files
Discs AUDIO CD CD-R CD-RW
Files MP3/WMA
• Some MP3/WMA files may not be played
back and will be skipped. This results from
their recording processes and conditions.
• When making MP3/WMA discs, use ISO 9660
Level 1 for the disc format.
• This system can play back MP3/WMA
recorded at the following sampling
frequency and bitrate.
Bitrate: MP3
WMA
32 kbps – 320
kbps
32 kbps – 320
kbps
Sampling frequency:
32 / 44.1 / 48 kHz
• This System cannot play “packet write” discs.
• This System cannot show the Tag data of
MP3/WMA.
• This System can recognize up to 99 folders
and 999 files on a disc, and up to 300 folders
and 999 files on a USB device.
Important for USB mass storage
class devices
For connecting/disconnecting:
• Disconnect the USB device after stopping
playback. Disconnecting the USB device
during recording/playback may cause some
problem of the USB device and its files.
• When connecting with a USB cable, use a
USB 2.0 cable less than 1 m in length.
• You cannot connect a computer to the USB
MEMORY terminal of the System.
• Do not use a USB hub.
• When the power is supplied through the
AC outlet and USB is selected as the source,
the USB device is charged through the USB
MEMORY terminal.
• Deactivate the security function of the USB
device before connecting.
For playing back:
• The playing order of MP3/WMA files
– Groups are played in creation order. In
a group, tracks are played in recording
order.
– The playing order may change if you
change a folder name or file name on the
PC.
• You cannot play back a file larger than 2
Gigabytes.
• It is recommended to use USB mass storage
class devices with 4 GB or less storage
capacity.
• If your USB device is partitioned, only the
first partition is recognized.
• Some USB devices may not be recognized or
may not work properly.
• Copyrighted tracks (WMA-DRM tracks)
cannot be played back on the System.
• Electrostatic shock at connecting a USB
device may cause abnormal playback of
the device. In this case, disconnect the USB
device then reset this System and the USB
device.
• JVC bears no responsibility for any loss of
data on the USB mass storage class device
while using this System.
RV-NB90_J.indd 28RV-NB90_J.indd 28 12.3.30 2:21:42 PM12.3.30 2:21:42 PM
29
Checking the type of your iPod
• Compatible iPod:
Made for Audio Video
iPod nano (6th generation) *
iPod nano (5th generation)
iPod nano (4th generation)
iPod nano (3rd generation)
iPod nano (2nd generation) –
iPod touch (4th generation)
iPod touch (3rd generation)
iPod touch (2nd generation)
iPod touch*2
iPod classic
iPhone 4S
iPhone 4
iPhone 3GS
iPhone 3G
* Only for still pictures
*2 Only for software version 2.0.0 or later
• If iPod does not play correctly, update the
software of iPod to the latest version.
• For details about updating iPod, check on
the Apple web site <http://www.apple.
com/>.
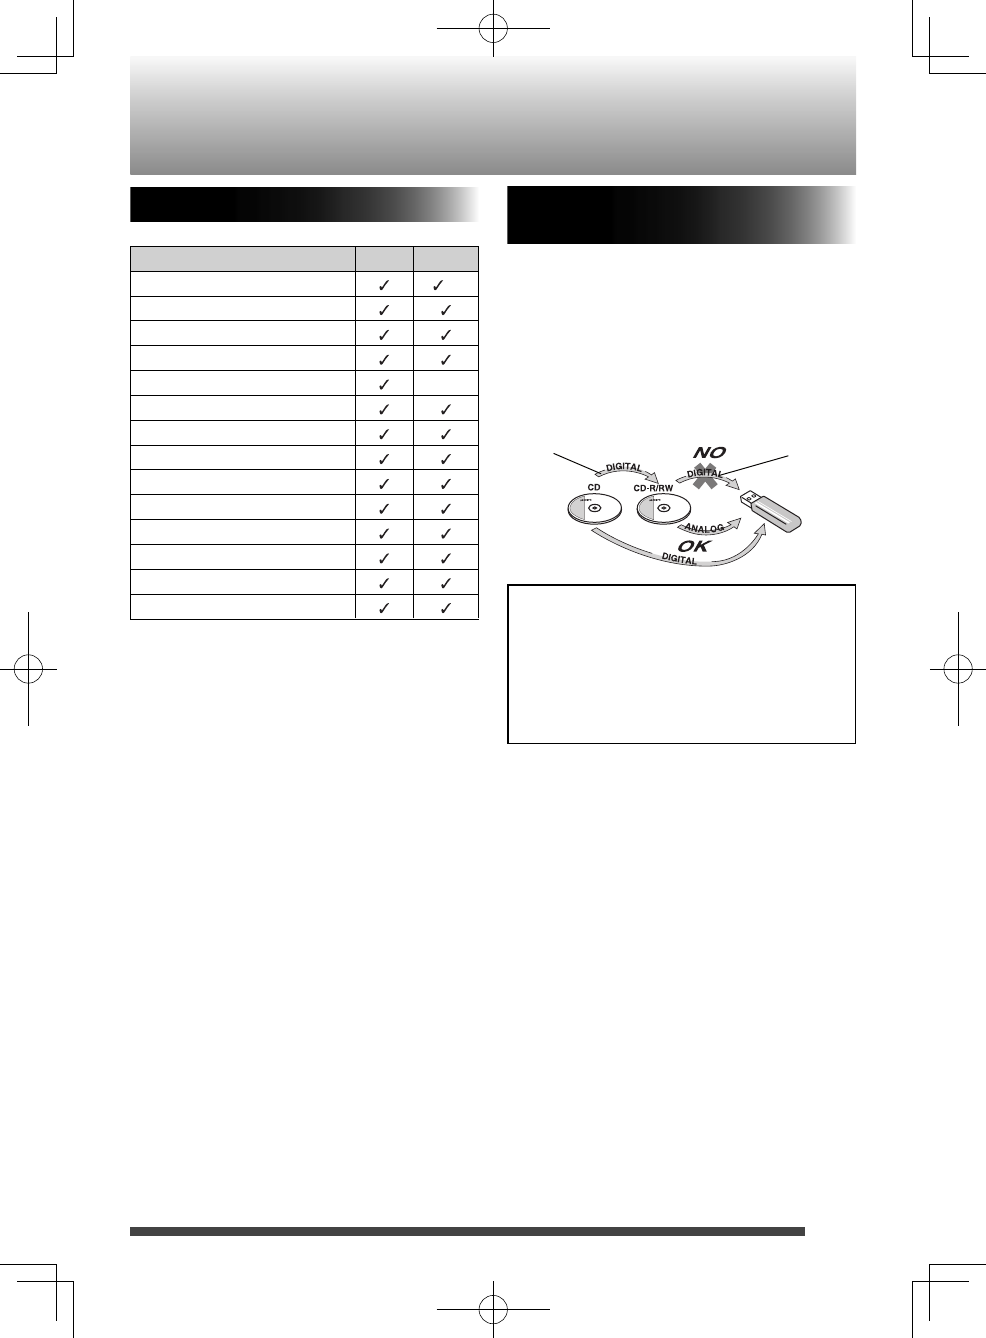
About SCMS (Serial Copy
Management System)
The System uses the Serial Copy Management
System which allows only first-generation
digital copies to be made of premastered
software such as regular CDs.
If you try to record from a duplicated CD-R or
CD-RW onto a USB device, “SCMS ERR” appears
on the display.
It should be noted that it may be unlawful
to re-record pre-recorded tapes, records, or
discs without the consent of the owner of
copyright in the sound or video recording,
broadcast or cable programme and any
literary, dramatic, musical, or artistic work
embodied therein.
1st generation 2nd generation
RV-NB90_J.indd 29RV-NB90_J.indd 29 12.3.30 2:21:42 PM12.3.30 2:21:42 PM

30
Troubleshooting
If you are having a problem with your System,
check this list for a possible solution before
calling for service.
General
Power does not come on.
\ No power is supplied. Check the power cord
connection or change the batteries.
The System turns off automatically.
\ Auto power save function is working.
Adjustments or settings are suddenly
canceled before you finish.
\ There is a time limit. Repeat the procedure.
While the power is supplied using the
batteries, sound from the speakers is
distorted or too quiet.
\ Batteries are exhausted. Change the
batteries.
Unable to operate the System from the
remote control.
\ The path between the remote control and
the remote sensor on the System is blocked.
\ The batteries are exhausted.
No sound is heard.
\ Adjust the volume.
\ Headphones are connected.
Disc/USB Mass Storage Class Device
Operations
The disc/USB device does not play.
\ The disc is placed upside down. Place the
disc with the label side facing up.
\ The disc is scratched or dirty.
\ The disc is recorded with the “packet
writing (UDF file unit).” It cannot be played.
Check the files you want to play back.
\ The USB device is not connected properly.
MP3/WMA groups and tracks are not
played back as you expect.
\ Playing order may change if you edit a file
name on the PC.
The disc sound is discontinuous.
\ The disc is scratched or dirty.
Sounds from USB device are interrupted.
\ Noise and static electricity may stop the
sound. In this case, disconnect and connect
the USB device again after turning off the
System.
iPod Operations
iPod does not play.
\Check the type of your iPod (page29).
\ The battery of iPod is low or exhausted.
Charge the battery of iPod.
Radio Operations
Hard to listen to broadcasts because of
noise.
\ The FM antenna is not properly extended
and positioned.
Timer Operations
Daily timer does not start working.
\ The System is turned on when the on-time
comes. Timer starts working only when the
System is turned off.
RV-NB90_J.indd 30RV-NB90_J.indd 30 12.3.30 2:21:42 PM12.3.30 2:21:42 PM
31
Bluetooth Operations
Unable to connect a Bluetooth device.
\The device does not support A2DP.
A2DP profile is necessary to stream music
data. Refer to the instruction manual of
the Bluetooth device.
Unable to operate a Bluetooth device.
\The device does not support AVRCP.
AVRCP profile is necessary to control
the device though the System. Refer to
the instruction manual of the Bluetooth
device.
If the System does not work correctly after
these procedures…
The System works using a built-in
microprocessor. If buttons are not operative,
disconnect the AC power cord from the wall
outlet, wait for a while, then connect the
cord again.
RV-NB90_J.indd 31RV-NB90_J.indd 31 12.3.30 2:21:42 PM12.3.30 2:21:42 PM
32
Specifications
Disc player
CD capacity: 1CD
Signal-to-noise ratio: 85 dB
Dynamic range: 90 dB
Tuner
FM tuning range: 87.5 MHz –
108.0 MHz
Antenna: Telescopic antenna
Bluetooth
Bluetooth version: Bluetooth 2.1 + EDR
certified
Output power: Bluetooth power
class 2
Service area: max. 10 m (33 ft)*
* Communication range may vary
depending on the environmental conditions.
Frequency band: 2.4 GHz (2.4000 GHz –
2.4835 GHz)
Bluetooth profile: A2DP (Advanced
Audio Distribution
Profile), AVRCP
(Audio/Video Remote
Control Profile)
General
Speakers:
• Full range:
• Super woofer:
8 cm (3 3/16”) cone
x 2
Speaker impedance:
16 Ω
13 cm (5 1/8”) cone
x 2
Speaker impedance:
7 Ω
Output power: 40 W
Input terminal
• USB MEMORY: Playable files:
MP3, WMA
• Compatible with
USB 2.0 Full-Speed.
• Compatible device:
Mass storage class
• Compatible system:
FAT16, FAT32
• Output power:
DC 5 V 500 mA
• Dock for iPod:
• AUDIO IN:
Input Sensitivity /
Impedance (1 kHz):
• MIC/GUITAR:
• DC IN:
DC 5 V 1 A
φ3.5
• LEVEL 1: 500 mV /
47 kΩ
• LEVEL 2: 250 mV /
47 kΩ
• LEVEL 3: 125 mV /
47 kΩ
Switchable
• MIC: 200 Ω - 2 kΩ
(φ6.3)
• GUITAR: 100 kΩ - 1
MΩ (φ6.3)
DC 12 V, 2 A
Output terminal
• PHONES:
• VIDEO OUT
(For iPod):
φ3.5
32 Ω - 1 kΩ
15 mW / ch output
into 32 Ω
Composite
Power supply
• AC:
• DC:
AC 120 V , 60 Hz
DC 15 V (R20 (SUM-
1)/D (13D)-size
batteries x 10)
External DC 12 V
RV-NB90_J.indd 32RV-NB90_J.indd 32 12.3.30 2:21:43 PM12.3.30 2:21:43 PM
33
Power consumption: When using an AC
outlet
28 W (at operation)
Less than 0.50 W (on
standby)
When using DC IN
2 A (power on
mode)
Dimensions: 666 mm (26 1/4”) x
235 mm (9 5/16”)
x 240 mm (9 1/2”)
(W/H/D)
Mass: Approx. 7.2 kg (15.9
lbs) (without batteries
stored in the battery
compartment)
Design and speci cations are subject to
change without notice.
RV-NB90_J.indd 33RV-NB90_J.indd 33 12.3.30 2:21:43 PM12.3.30 2:21:43 PM
34
This equipment complies with FCC/IC
radiation exposure limits set forth for an
uncontrolled environment and meets
the FCC radio frequency (RF) Exposure
Guidelines in Supplement C to OET65 and
RSS-102 of the IC radio frequency (RF)
Exposure rules. This equipment has very
low levels of RF energy that it deemed
to comply without maximum permissive
exposure evaluation (MPE). But it is
desirable that it should be installed and
operated keeping the radiator at least 20cm
or more away from person’s body (excluding
extremities: hands, wrists, feet and ankles).
Cet équipement est conforme aux
limites d’exposition aux rayonnements
énoncées pour un environnement
non contrôlé et respecte les règles les
radioélectriques (RF) de la FCC lignes
directrices d'exposition dans le Supplément
C à OET65 et d'exposition aux fréquences
radioélectriques (RF) CNR-102 de l'IC. Cet
équipement émet une énergie RF trés faible
qui est considérée conforme sans évaluation
de l'exposition maximale autorisée.
Cependant, cet équipement doit être
installé et utilisé en gardant une distance de
20 cm ou plus entre le dispositif rayonnant
et le corps (à l'exception des extrémités :
mains, poignets, pieds et chevilles).
(For Canada)
This device complies with Industry Canada
license-exempt RSS standard(s). Operation
is subject to the following two conditions:
(1) this device may not cause interference,
and (2) this device must accept any
interference, including interference that
may cause undesired operation of the
device.
(Pour le Canada)
Le présent appareil est conforme aux CNR
d'Industrie Canada applicables aux appareils
radio exempts de licence. L'exploitation est
autorisée aux deux conditions suivantes: (1)
l'appareil ne doit pas produire de brouillage,
et (2) l'utilisateur de l'appareil doit accepter
tout brouillage radioélectrique subi,
même si le brouillage est susceptible d'en
compromettre le fonctionnement.
(For U.S.A.) (Pour les États-Unis)
This transmitter must not be co-located
or operated in conjunction with any other
antenna or transmitter.
Precautions
RV-NB90_J.indd 34RV-NB90_J.indd 34 12.3.30 2:21:43 PM12.3.30 2:21:43 PM
35
MEMO
RV-NB90_J.indd 35RV-NB90_J.indd 35 12.3.30 2:21:43 PM12.3.30 2:21:43 PM

© 2012 JVC KENWOOD Corporation 0412SKYMDWBET
EN
POWERED WOOFER CD SYSTEMRV-NB90B
RV-NB90_J.indd 36RV-NB90_J.indd 36 12.3.30 2:21:43 PM12.3.30 2:21:43 PM