JVC CU VD40AG VD40 User Manual LYT1752 013A
CU-VD40AA CU-VD40AA LYT1752-013A English, DVD Save Sheet
CU-VD40ER CU-VD40ER LYT1752-013A nglish, DVD Save Sheet
CU-VD40EK CU-VD40EK LYT1752-013A nglish, DVD Save Sheet
CU-VD40TW CU-VD40TW LYT1752-013A English, DVD Save Sheet
CU-VD40UE CU-VD40UE LYT1752-013A nglish, DVD Save Sheet
User Manual: JVC CU-VD40AG CU-VD40AG English, DVD Save Sheet
Open the PDF directly: View PDF ![]() .
.
Page Count: 2

CU-VD40
Easy and correct way of copying to a DVD
(See overleaf on playing back the DVD)
1. Get ready a recommended disc
Please use the recommended discs stated below.
Using discs other than those recommended may cause problem when copying to the DVD
and when playing back the DVD.
Recommended discs
DVD-R DVD-RW DVD-R DL
(single-sided double layer)
Brand JVC
TDK
Verbatim
SONY
JVC JVC
Verbatim
Caution
Only DVD-R and DVD-RW discs can be used.
DVD-R DL (single-sided double layer) discs can only be used for High definition Everio.
Recording and playback may not function properly if the recording side is scratched or dirty.
•
•
•
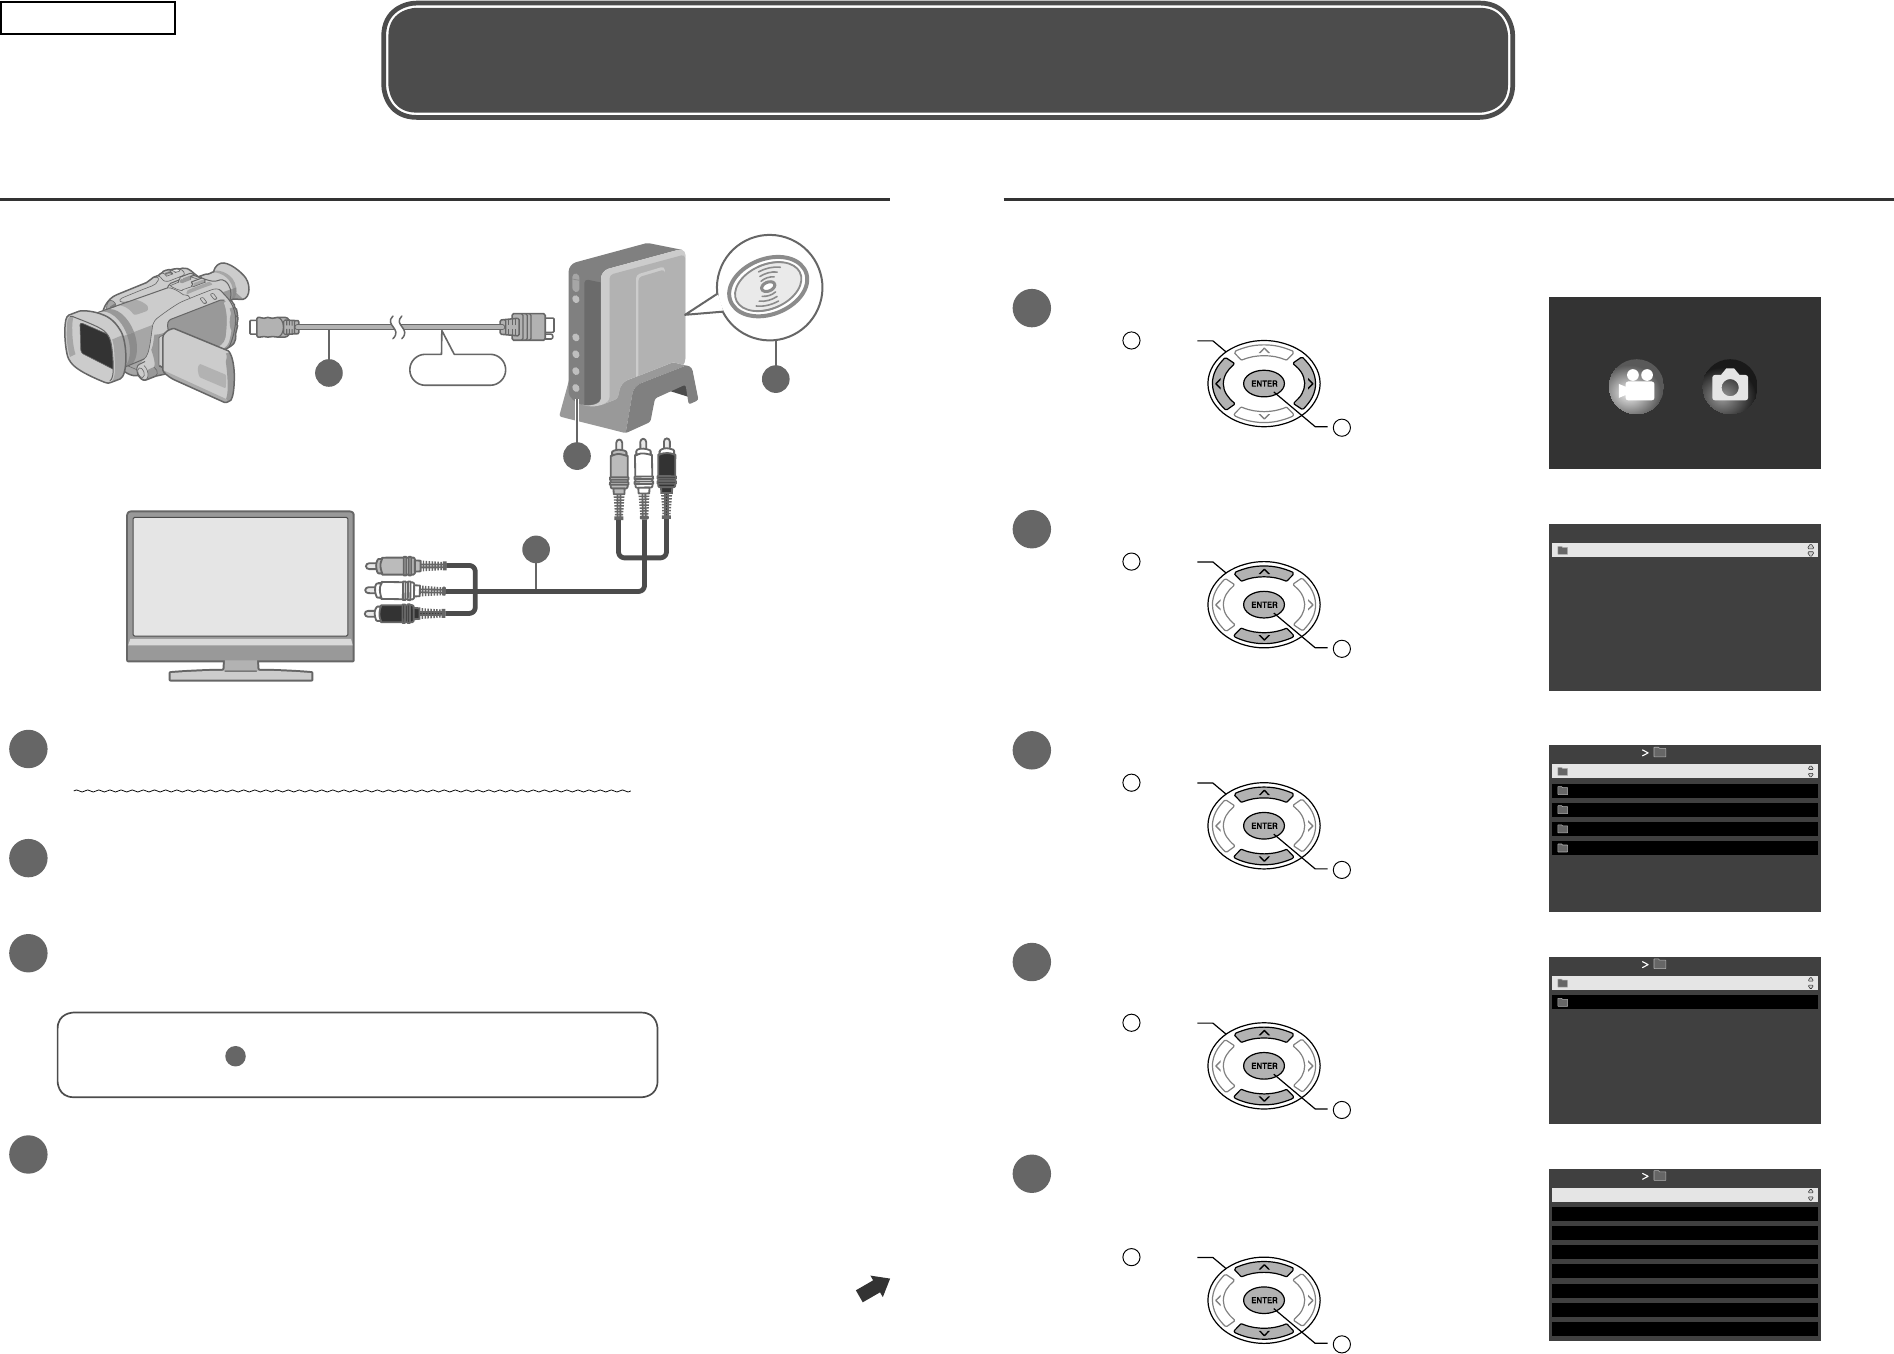
2. Set up each device before copying
High definition
Everio
CU-VD40
3
2
14
Dedicated USB cable
1Connect the USB cable
2Turn on CU-VD40
After turning on the power, wait for approximately 20 seconds before
proceeding to step 3.
The burner may not function properly within this 20 seconds.
3Turn on the Everio
The power lamp of CU-VD40 turns from orange light to green light.
•
4Insert a new recommended disc into CU-VD40
Next, operate the Everio. Proceed to step 3.
3. Copy all images to the DVD
Perform operations on the Everio.
(Everio LCD screen display)
1
Confirm that the display on the right
appears on the Everio LCD screen.
2Select “NORMAL BACK-UP”
1 Select
(move up and down)
2 Confirm
(press down)
3Select “ALL”
1 Select
(move up and down)
2 Confirm
(press down)
4Select “EXECUTE AND FINALIZE”
1 Select
(move up and down)
2 Confirm
(press down)
Playback is not possible if the disc is not
finalized.
Wait for the “copy in progress” screen on the
right and the “hourglass” mark to disappear,
then turn off the power and disconnect the
USB cable.
•
•
5Exit
Confirm
(press down)
Copying completed!
“Copy in progress” screen
LYT1752-013A
0707MNH-SW-BJ
IMPORTANT
Please read carefully before use.
Note
There are other ways of copying which includes copying only the desired files.
For details, refer to the instruction manual of Everio.
•
SHEET_LYT1752-013A.indd 1 2007/07/09 10:04:44
1. Set up each device before playback
3
2
14
CU-VD40
Dedicated USB cable
disconnect
High definition
Everio
TV
Audio/Video cable
1Disconnect the USB cable then turn off CU-VD40
It is not possible to switch to play mode if the power is not turned off.
•
2Connect CU-VD40 to the TV
3Turn on CU-VD40
Confirm that the power lamp lights in orange.
•
After turning on the power, wait for approximately 20 seconds before
proceeding to step 4.
The burner may not function properly within this 20 seconds.
4Insert a finalized recommended disc
It is not possible to play back an unfinalized disc.
•
Preparations completed! Proceed to step 2.
2. Viewing videos copied to DVD on the TV
Operate using the CU-VD40 remote control.
(TV screen display)
Only a portion of the menu screen
is shown here
1Select “PLAY VIDEO”
1 Select
2 Confirm
PLAY IMAGEPLAY VIDEO
2Select “EVERIO VIDEO”
1 Select
2 Confirm
PLAY VIDEO
EVERIO VIDEO
3Select “NORMAL BACK-UP”
1 Select
2 Confirm
EVERIO VIDEO
NORMAL BACK-UP
DATE BACK-UP
EVENT BACK-UP
FILE BACK-UP
PLAYLIST BACK-UP
4Select the date when the video
was copied to the DVD
1 Select
2 Confirm
NORMAL BACK-UP
06060101
06123199
5Select the folder to be played
The files in the folder will be played sequentially
starting from the selected file.
1 Select
2 Confirm
•
06060101
PRG001
PRG002
PRG003
PRG004
PRG005
PRG006
PRG007
PRG008
Easy and correct way of playing back a DVD
(See overleaf on copying to the DVD)
IMPORTANT
Please read carefully before use.
SHEET_LYT1752-013A.indd 2 2007/07/09 10:04:45
