JVC FS B70 User Manual COMPACT COMPONENT SYSTEM Manuals And Guides L0311048
JVC Tabletop Systems Manual L0311048 JVC Tabletop Systems Owner's Manual, JVC Tabletop Systems installation guides
User Manual: JVC FS-B70 FS-B70 JVC COMPACT COMPONENT SYSTEM - Manuals and Guides View the owners manual for your JVC COMPACT COMPONENT SYSTEM #FSB70. Home:Electronics Parts:Jvc Parts:Jvc COMPACT COMPONENT SYSTEM Manual
Open the PDF directly: View PDF ![]() .
.
Page Count: 36
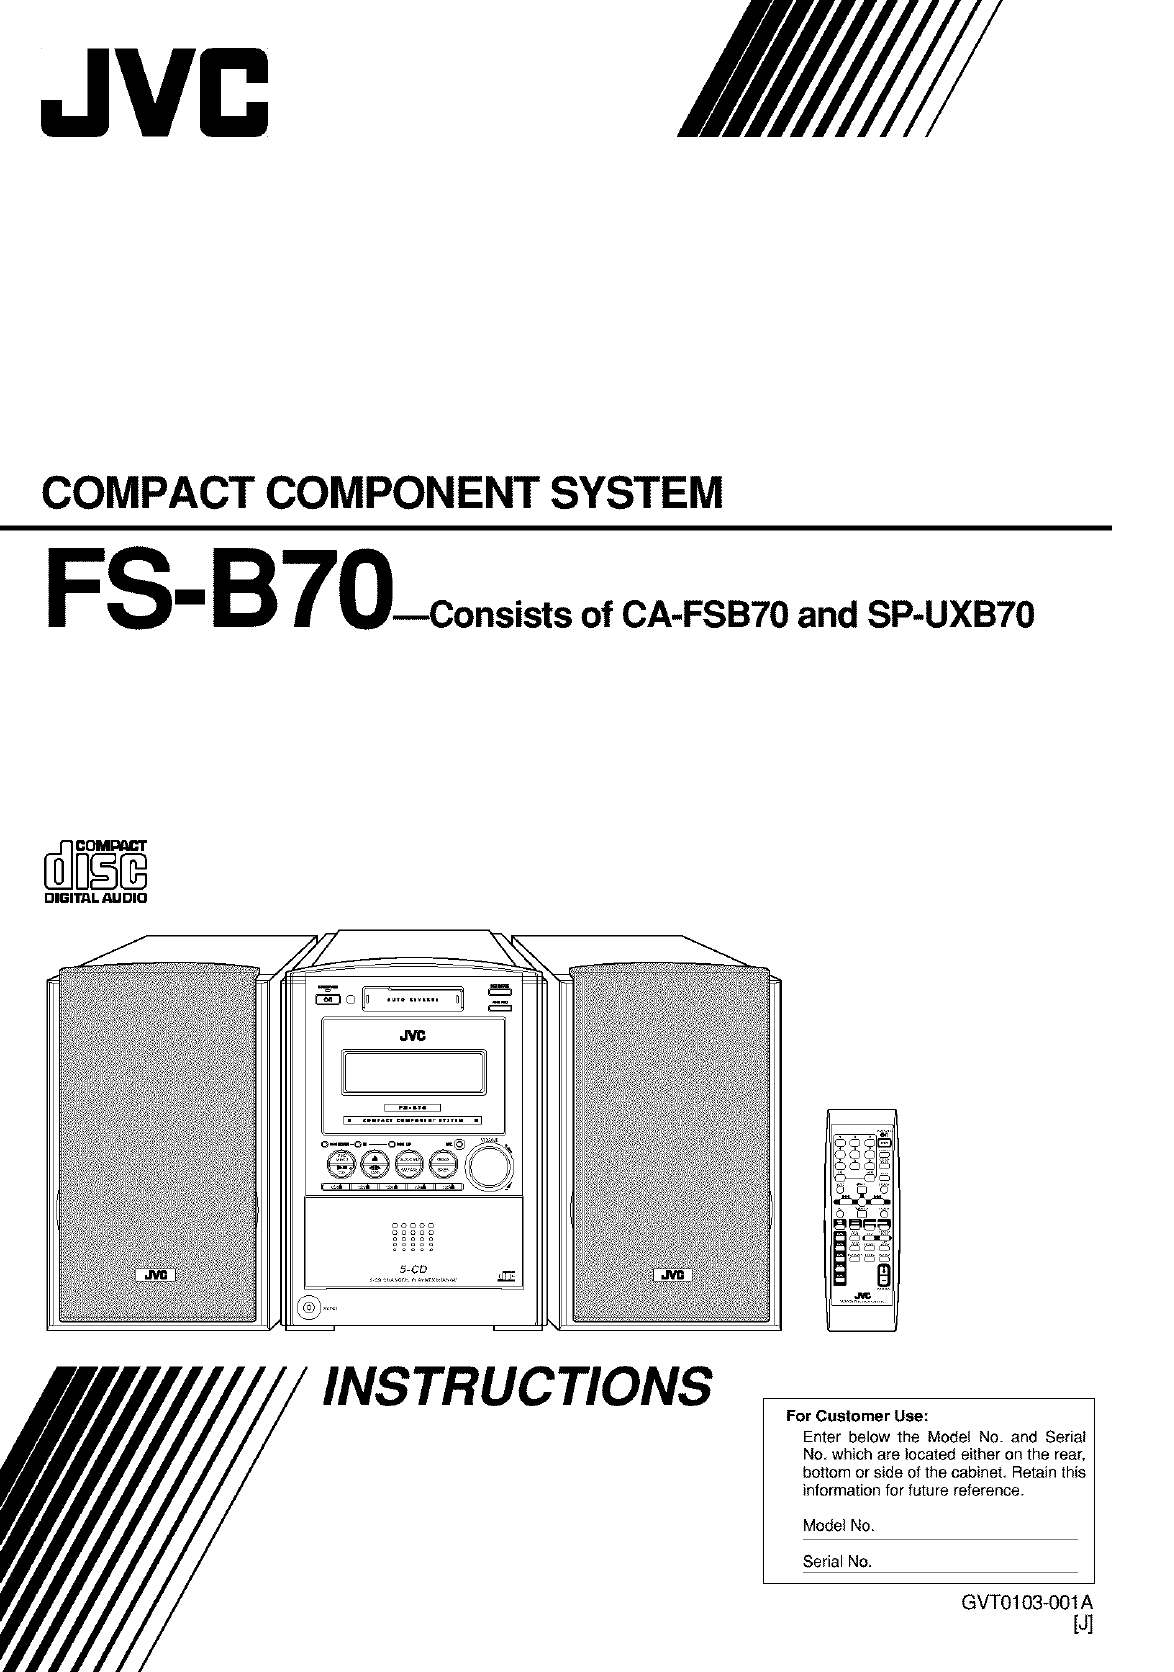
COMPACT COMPONENT SYSTEM
FS-B70_consists ofCA-FSB70 and SP-UXB70
DIGITALAUDIO
INSTRUCTIONS For Customer Use:
Enter below the Model No. and Serial
No, which are located either on the rear,
bottom or side of the cabinet, Retain this
information for future reference.
Model No.
Serial No.
GVT0103-001A
[J]
Warnings, Cautions and Others
Mises en garde, precautions et indications diverses
CAUTION: TO REDUCE THE RISK OF ELECTRIC SHOCK.
DO NOT REMOVE COVER (OR BACK)
NO USER SERVICEABLE PARTS INSIDE.
REFER SERVICING TO QUALIFIED SERVICE PERSONNEL.
The lightning flash with arrowhead symbol
within an equilateral triangle is intended to
alert the user to the presence of uninsulated
dangerous voltage within the product's
enclosure that may be of sufficient
magnitude to constitute a risk of electric
shock to persons.
The exclamation point within an equilateral
triangle is intended to alert the user to the
presence of important operating and
maintenance (servicing) instructions in the
literature accompanying the appliance.
For U.S.A.
This equipment has been tested and found to comply with the limits
for a Class B digital device, pursuant to part 15 of the FCC Rules.
These limits are designed to provide reasonable protection against
harmful interference in a residential installation.
This equipment generates, uses and can radiate radio frequency
energy and, if not installed and used in accordance with the
instructions, may cause harmful interference to radio
communications. However, there is no guarantee that interference
will not occur in a particular installation, if this equipment does cause
harmful interference to radio or television reception, which can be
determined by turning the equipment off and on, the user is
encouraged to try to correct the interference by one or more of the
following measures:
Reorient or relocate the receiving antenna.
increase the separation between the equipment and receiver.
Connect the equipment into an outlet on a circuit different from that
to which the receiver is connected.
Consult the dealer or an experienced radioFFV technician for help.
WARNING: TO REDUCE THE RISK OF FIRE
OR ELECTRIC SHOCK, DO NOT EXPOSE
THIS APPLIANCE TO RAIN OR MOISTURE.
Caution--_/I button!
Disconnect the mains plug to shut the power off completely (the
STANDBY/ON lamp goes off). The O/I button in any position
does not disconnect the mains line.
•When the unit is on standby, the STANDBY/ON lamp lights red.
• When the unit is turned on, the STANDBY/ON lamp lights
green.
The power can be remote controlled.
Attention--Commutateu r O/I !
D_connectez la prise d'alimentation secteur pour mettre I'appareil
compt_tement hors tension (le temoin STANDBY/ON s'_teint).
L'interrupteur O/I, sur n'importe quelle position, ne peut pas
d_connecter I'appareil du secteur.
• Quand I'appareil est en mode de veille, le t_moin STANDBY/ON
est allum_ en rouge.
• Quand I'appareil est sous tension, te temoin STANDBY/ON est
allum_ en vert.
L'alimentation peut _tre t_l_command_e.
6-1
CAUTION
To reduce the risk of electrical shocks, fire, etc.:
1. Do not remove screws, covers or cabinet.
2. Do not expose this appliance to rain or moisture.
ATTENTION
Afin d'_viter tout risque d'_lectrocution, d'incendie, etc.:
1. Ne pas enlever les vis ni les panneaux et ne pas ouvrir
te coffret de I'appareiL
2. Ne pas exposer I'appareil & la pluie ni & t'humidit_.
Note to CATV system installer:
This reminder is provided to call the CATV system
installer's attention to Section 820-40 of the NEC which
provides guidelines for proper grounding and, in particular,
specifies that the cable ground shall be connected to the
grounding system of the building, as close to the point of
cable entry as practical.
For Canada/pour le Canada
CAUTION: TO PREVENT ELECTRIC SHOCK, MATCH WIDE
BLADE OF PLUG TO WIDE SLOT, FULLY INSERT.
ATTENTION: POUR EVITER LES CHOCS ELECTRIQUES,
INTRODUIRE LA LAME LA PLUS LARGE DE LA FICHE DANS
LA BORNE CORRESPONDANTE DE LA PRISE ET POUSSER
JUSQUAU FOND.
For Canada/pour le Canada
THIS DIGITAL APPARATUS DOES NOT EXCEED THE CLASS
B LIMITS FOR RADIO NOISE EMISSIONS FROM DIGITAL
APPARATUS AS SET OUT IN THE INTERFERENCE-CAUSING
EQUIPMENT STANDARD ENTITLED "DIGITAL APPARATUS;'
ICES-003 OF THE DEPARTMENT OF COMMUNICATIONS.
CET APPAREIL NUMERIQUE RESPECTE LES LIMITES DE
BRUITS RADIOELECTRIQUES APPLICABLES AUX
APPAREILS NUMIRIQUES DE CLASSE B PRESCRITES DANS
LA NORME SUR LE MATERIEL BROUILLEUR: "APPAREILS
NUMERIQUES", NMB-003 EDICTEE PAR LE MINISTRE DES
COMMUNICATIONS.
6-2
Introduction
We would like to thank you for purchasing one of our JVC products.
Before operating this unit, read this manual carefully and thoroughly to
obtain the best possible performance from your unit, and retain this manual
for future reference.
AboutThis Manual
This manual is organized as follows:
• This manual mainly explains operations using the
buttons on the remote control.
You can use the buttons both on the remote control and
on the unit for the same operations if they have the
same or similar names (or marks), unless mentioned
otherwise.
•Basic and common information that is the same for many
functions is grouped in one place, and is not repeated for
each procedure. For instance, we do not repeat the
information about turning on/off the unit, setting the
volume, changing the sound effects, and odlers, which are
explained in the section "Basic and Common Operations"
on pages 9 to 12.
• The following symbols are used in this manual:
Gives you warning and caution to prevent
damage or risk of fire/electric shock.
In addition, we put information here about
conditions which will prevent getting the best
possible performance from lhe unit.
_ ives you information and hints you need to
know.
Power sources
• When unplugging the unit from the wall outlet, always pull
on the plug, not the AC power cord.
I
_2_ DO NOT handle the AC power cord with wet I
hands. I
Moisture condensation
Moisture may condense on lhe lenses inside lhe unit in die
following cases:
• After starting to heat the room.
• In a damp room.
• If the unit is brought directly from a cold to a warm place.
Should dlis occur, the unit may malfunction. In this case,
leave the unit turned on for a few hours until the moisture
evaporates, unplug die AC power cord, lhen plug it in again.
Others
• ShouM any metallic object or liquid fall into the unit,
unplug dae AC power cord and consult your dealer before
operating any further.
• If you are not going to operate the unit for an extended
period of time, unplug 1be AC power cord from the wall
outlet.
I
DO NOT disassemble the unit since there are no I
user serviceable parts inside. I
Precautions
Installation
• Install in a place which is level, dry and neither too hot nor
too cold--between 5°C (41 °F) and 35°C (95°F).
• Install the unit in a location with adequate ventilation to
prevent internal heat buildup.
• Leave sufficient distance between the unit and 1he TV.
• Keep 1he speakers away from 1he TV to avoid interference
with TV.
_t_ DO NOT install the unit in a location near heat
sources, or in a place subject to direct sunlight,
excessive dust or vibration.
If anything goes wrong, unplug the AC power cord and
consult your dealer,
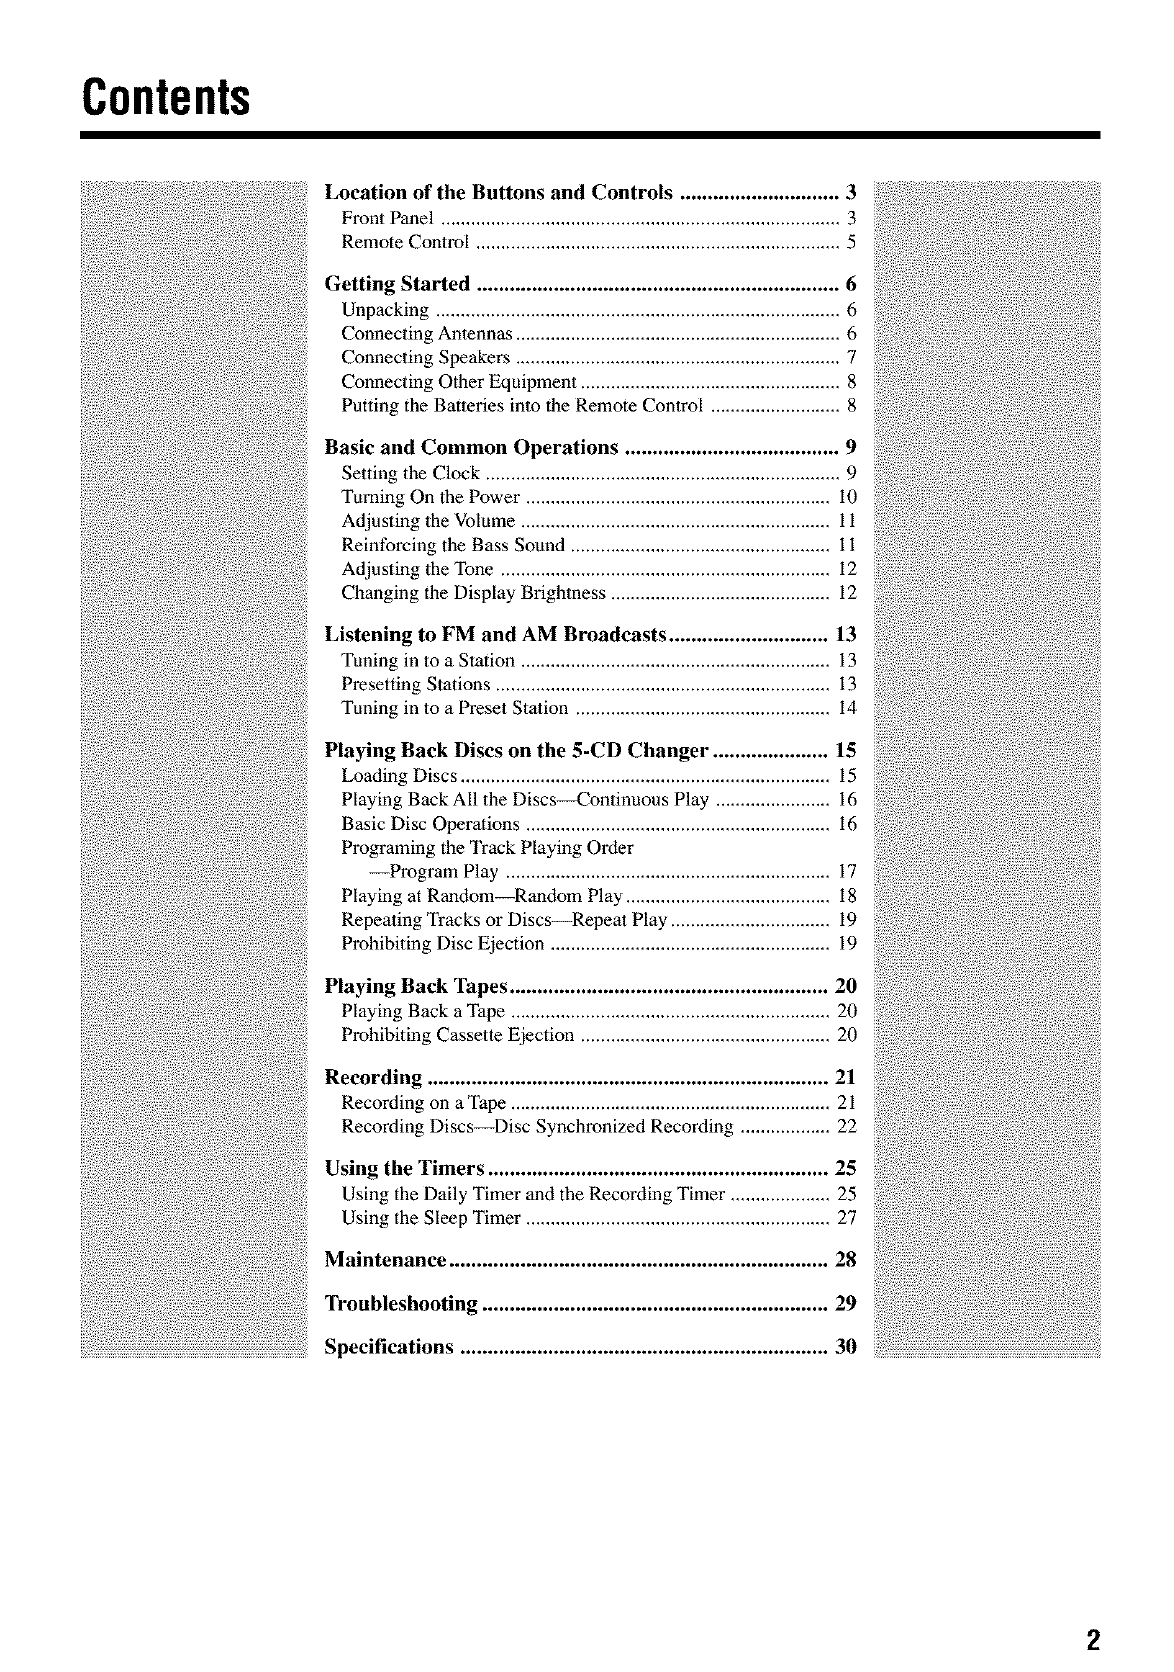
Contents
Location of the Buttons and Controls ............................. 3
Front Panel ................................................................................ 3
Remote Control ......................................................................... 5
Getting Started .................................................................. 6
Unpacking ................................................................................. 6
Connecting Antennas ................................................................. 6
Connecting Speakers ................................................................. 7
Connecting Other Equipment .................................................... 8
Putting the Batteries into the Remote Control .......................... 8
Basic and Common Operations ....................................... 9
Setting the Clock ....................................................................... 9
Turning On the Power ............................................................. i0
Adjusting the Volume .............................................................. 11
Reinforcing the Bass Sound .................................................... 11
Adjusting the Tone .................................................................. 12
Changing the Display Brightness ............................................ 12
Listening to FM and AM Broadcasts ............................. 13
Tuning in to a Station .............................................................. 13
Presetting Stations ................................................................... 13
Tuning in to a Preset Station ................................................... 14
Playing Back Discs on the 5-CD Changer ..................... 15
Loading Discs .......................................................................... 15
Playing Back All the Discs_ontinuous Play ....................... 16
Basic Disc Operations ............................................................. 16
Programing the Track Playing Order
--Program Play ................................................................. 17
Playing at Random_Random Play ......................................... 18
Repeating Tracks or Discs_Repeat Play ................................ 19
Prohibiting Disc Ejection ........................................................ 19
Playing Back Tapes .......................................................... 20
Playing Back a Tape ................................................................ 20
Prohibiting Cassette Ejection .................................................. 20
Recording ......................................................................... 21
Recording on aTape ................................................................ 21
Recording Discs_Disc Synchronized Recording .................. 22
Using the Timers .............................................................. 25
Using the Daily Timer and the Recording Timer .................... 25
Using the Sleep Timer ............................................................. 27
Maintenance ..................................................................... 28
Troubleshooting ............................................................... 29
Specifications ................................................................... 30
2
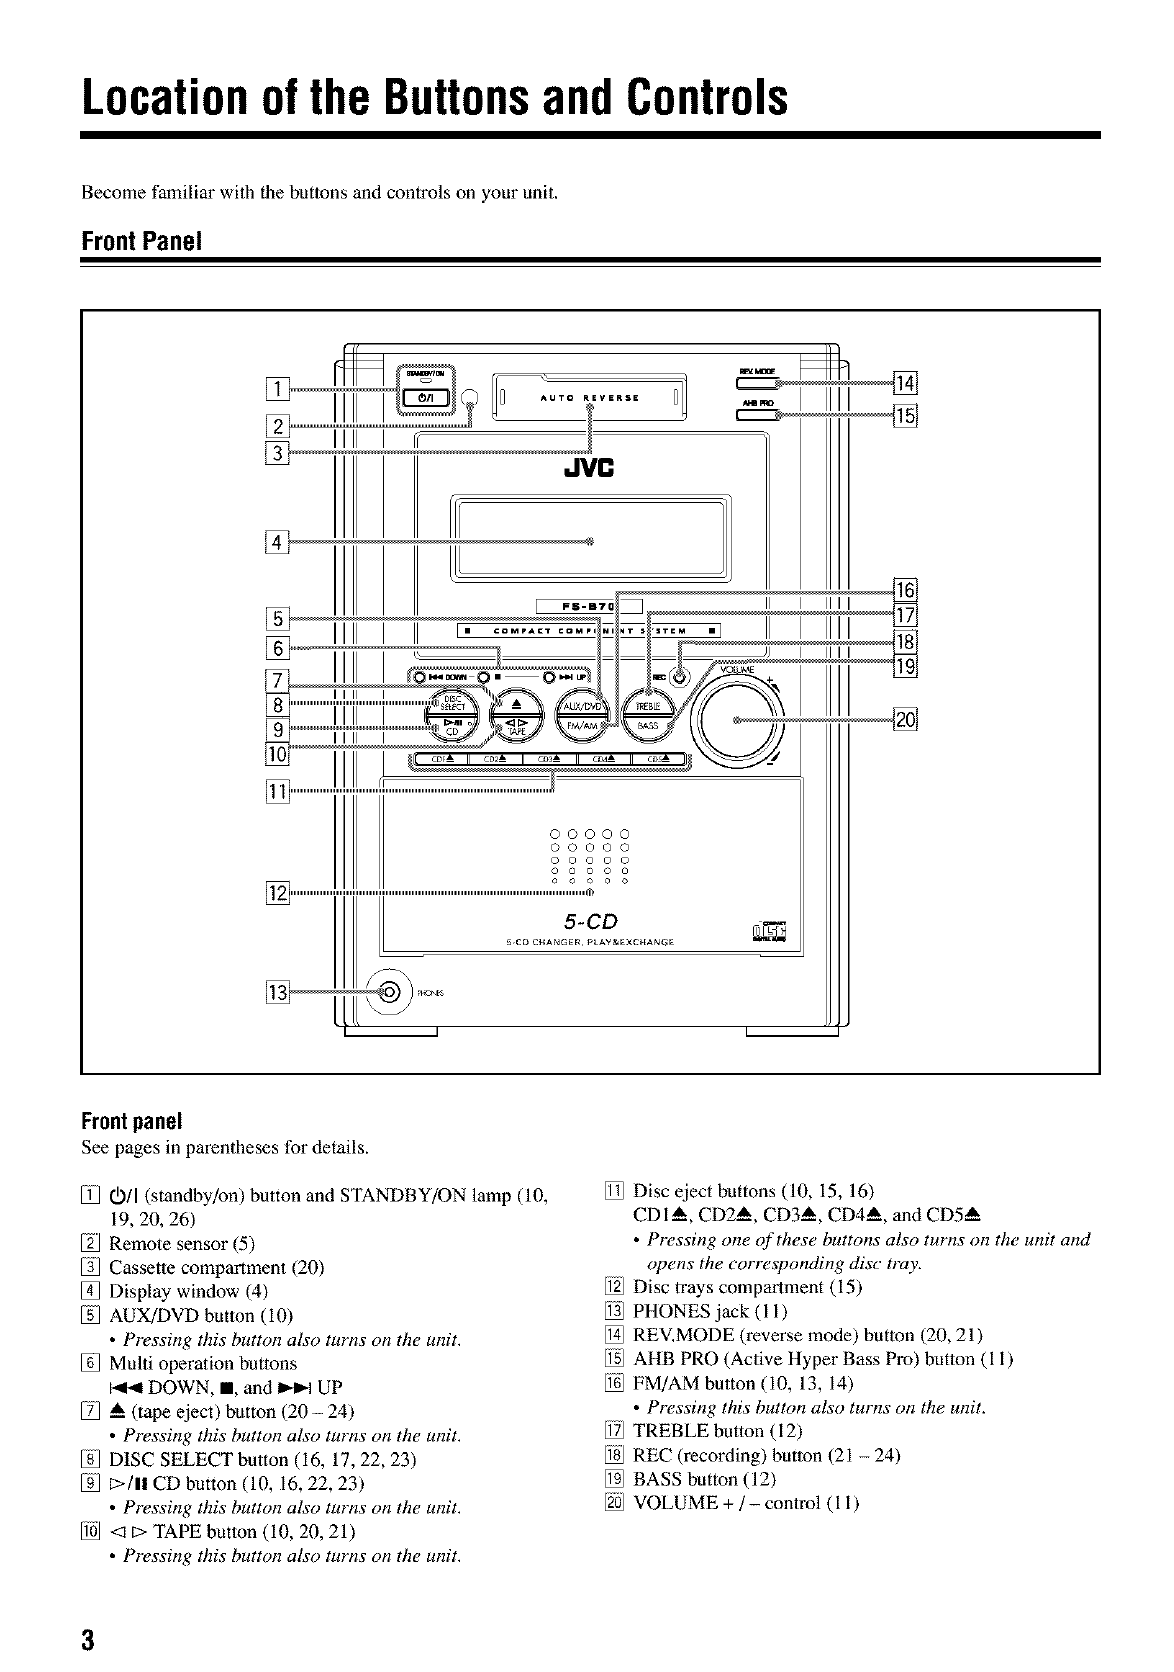
Locationofthe ButtonsandControls
Become familiar with the buttons and controls on your unit.
FrontPanel
IIII
JVC
®
L_
Frontpanel
See pages in parentheses for details.
011 (standby/on) button and STANDBY/ON lamp (10,
19, 20, 26)
Remote sensor (5)
Cassette compartment (20)
Display window (4)
AUX/DVD button (i0)
•Pressing this button also turns on the unit.
Multi operation buttons
DOWN, I, and _ UP
A (tape eject) button (20 - 24)
• Pressing this button also turns on the unit.
DISC SELECT button (16, 17, 22, 23)
E>/I! CD button (10, 16, 22, 23)
• Pressing this button also turns on the unit.
<1E>TAPE button (i0, 20, 21)
• Pressing this button also turns on the unit.
Disc eject buttons (10, 15, 16)
CDI A, CD2 A, CD3 A, CD4_, and CD5--A
• Pressing one of these buttons also turns on the unit and
opens the corresponding disc tray.
Disc trays compartment (15)
PHONES jack (i i)
REV.MODE (reverse mode) button (20, 21)
AHB PRO (Active Hyper Bass Pro) button (i i)
FM/AM button (i0, 13, 14)
• Pressing this button also turns on the unit.
TREBLE button (12)
REC (recording) button (21 - 24)
BASS button (12)
VOLUME + /- control (i i)
3
Continued I_
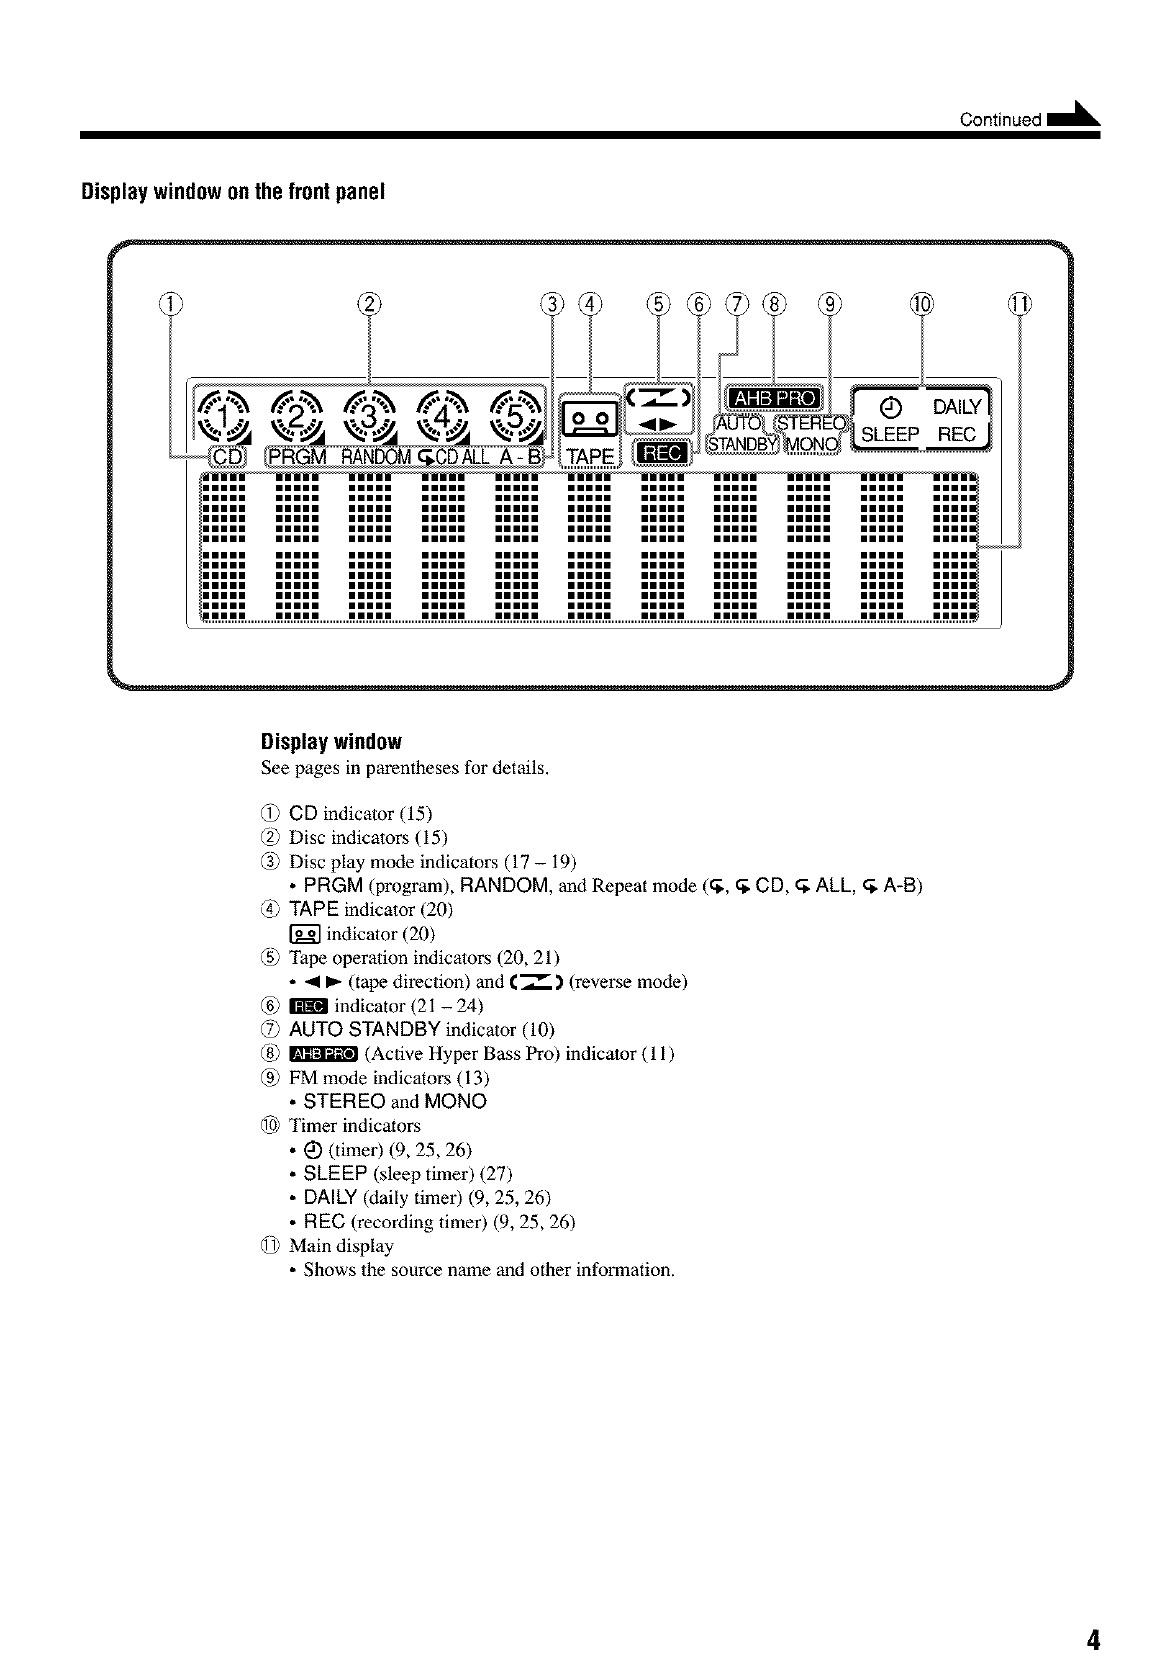
Displaywindowonthe frontpanel
Display window
See pages in parendleses for details,
@ CD indicator (15)
(2) Disc indicators (15)
@ Disc play mode indicators (17 -19)
• PRGM (program), RANDOM, and Repeat mode (_, _ CD, _ ALL, _ A-B)
@ TAPE indicator (20)
indicalor (20)
@ Tape operation indicators (20, 21)
• 41 _- (tape direction) and €._--.) (reverse mode)
@ _ indicator (21 - 24)
@AUTO STANDBY indicator (10)
@ _ (Active Hyper Bass Pro) indicator (1 i)
@ FM mode indicators (13)
• STEREO and MONO
@ Timer indicators
• I_ (timer) (9, 25, 26)
• SLEEP (sleep timer) (27)
• DALLY(daily timer) (9, 25, 26)
• REC (recording timer) (9, 25, 26)
@ Main display
• Shows the source name and other information.
4
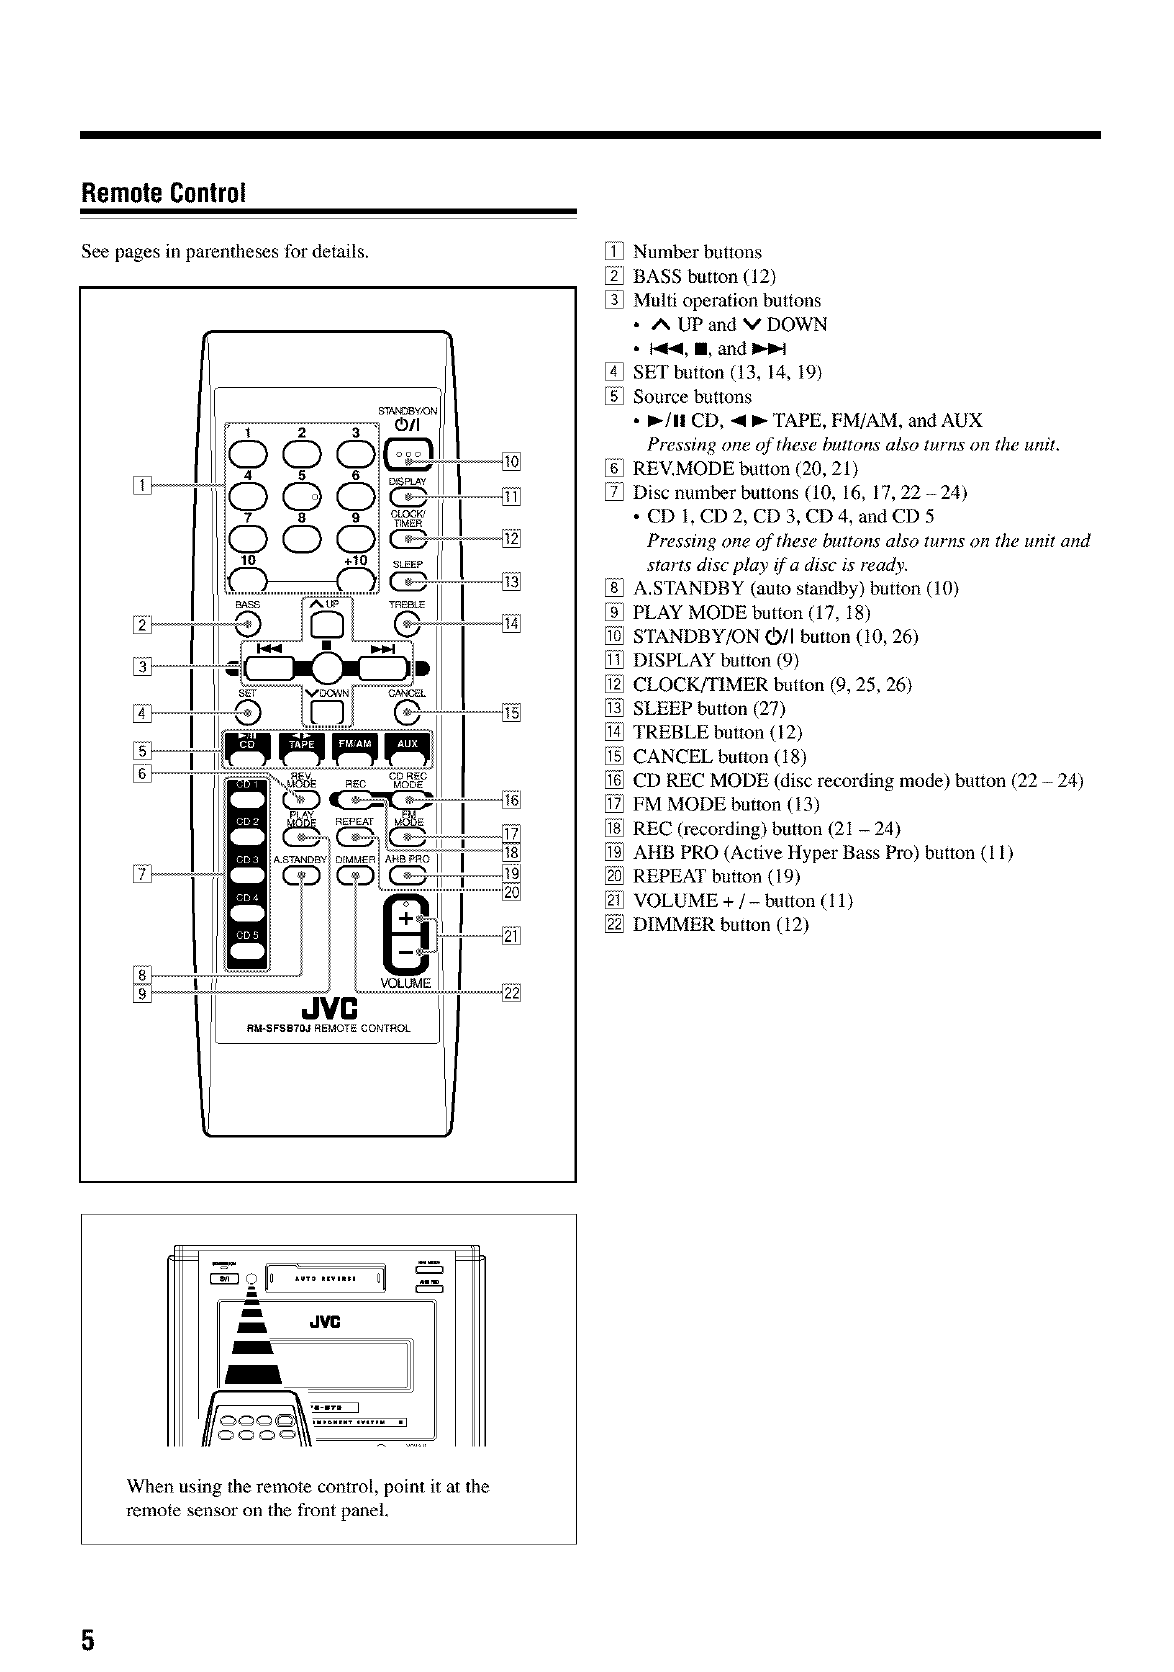
RemoteControl
See pages in parentheses for details.
JVn
R_SFSB?OJ REMOTE CONTROL
Number buttons
BASS button (12)
Multi operation buttons
• A UP and V DOWN
• I<1_, I, and I_-I
SET button (13, 14, 19)
Source buttons
• _-/1! CD, <1_- TAPE, FM/AM, and AUX
Pressing one of these buttons also turns o17the unit.
REV.MODE button (20, 21)
Disc number buttons (10, 16, 17, 22-24)
• CD I, CD 2, CD 3, CD4, andCD 5
Pressing one of these buttons also turns on the unit and
starts disc pluy if a disc is ready.
A.STANDBY (auto standby) button (10)
PLAY MODE button (17, 18)
STANDBY/ON Oil button (i0, 26)
DISPLAY button (9)
CLOCK/TIMER button (9, 25, 26)
SLEEP button (27)
TREBLE button (12)
CANCEL button (18)
CD REC MODE (disc recording mode) button (22 - 24)
FM MODE butlon (13)
REC (recording) button (21 - 24)
AHB PRO (Active Hyper Bass Pro) button (i i)
REPEAT button (19)
VOLUME +/- button (i 1)
DIMMER button (12)
dVll
When using the remote control, point it at the
remote sensor on the front panel,
5
GettingStarted Oont,nued'--
Unpacking
After unpacking, check to be sure that you have all the
following items.
The number in parentheses indicates the quantity of each
piece supplied.
• FM antenna (i)
• AM loop antenna (i)
• Remote control (i)
• Batteries (2)
If any item is missing, consult your dealer immediately.
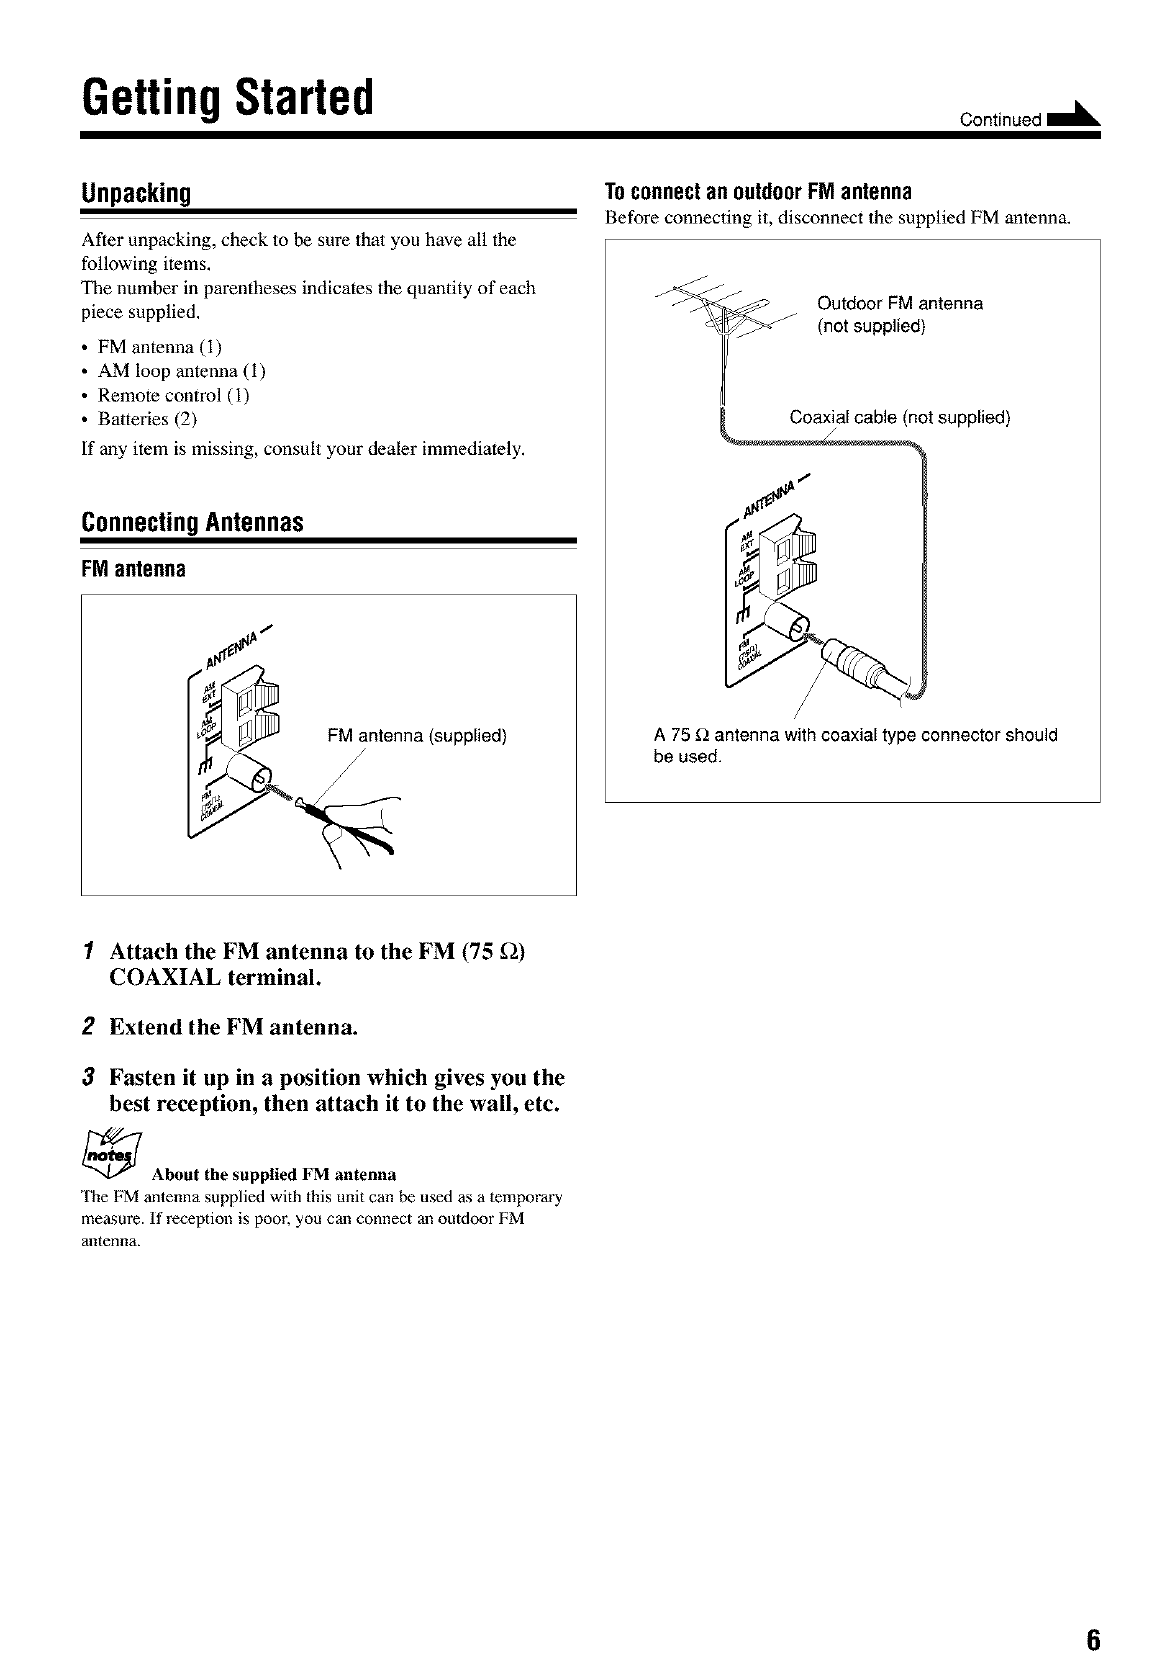
ConnectingAntennas
FMantenna
FM antenna (supplied)
/
Toconnectan outdoorFMantenna
Before connecting it, disconnect the supplied FM antenna.
Outdoor FM antenna
(not supplied)
not supplied)
I
A 75 _ antenna with coaxial type connector should
be used.
1Attach the FM antenna to the FM (75 f2)
COAXIAL terminal.
2Extend the FM antenna.
3Fasten it up in a position which gives you the
best reception, then attach it to the wail, etc.
_About the supplied FM antenna
The FM antenna supplied with this unit can be used as a temporary
measure. If reception is poor, you can connect an outdoor FM
antenna.
6

AM antenna
1
Vinyl-covered wire
(not supplied)
AM loop antenna
(supplied)
1Connect the AM loop antenna to the AM
LOOP terminals as illustrated.
2Turn the AM loop antenna until you have the
best reception.
ConnectingSpeakers
TOconnect speakers
You can connect the speakers using the speaker cords,
2 3,4
Speaker
cord
Right speaker
Speaker
cord
Left speaker
Toconnect an outdoor AMantenna
When reception is poor, connect a single vinyl-covered wire
to the AM EXT terminal and extend it horizontally, The AM
loop antenna must remain connected.
_For better reception of both FM and AM
•Make sure the antenna conductors do not touch any other
terminals or connecting cords.
• Keep the anlennas away from metallic parts of 1he unit,
connecting cords, and 1he AC power cord.
1
2
3
If the cords are covered with insulation,
remove a short section of insulation at the
end of each cord by twisting and pulling it
off.
Hold the clamp of the speaker terminal.
Insert the end of the speaker cord into the
terminal.
Match the polarity of the speaker terminals: (_ lo (_ and
@to@.
4Release your finger from the clamp.
IMPORTANT:
•Use only speakers with the same speaker impedance as
indicated by the speaker terminals on the rear of the unit.
• DO NOT connect more than one speaker to one
speaker terminal.
7
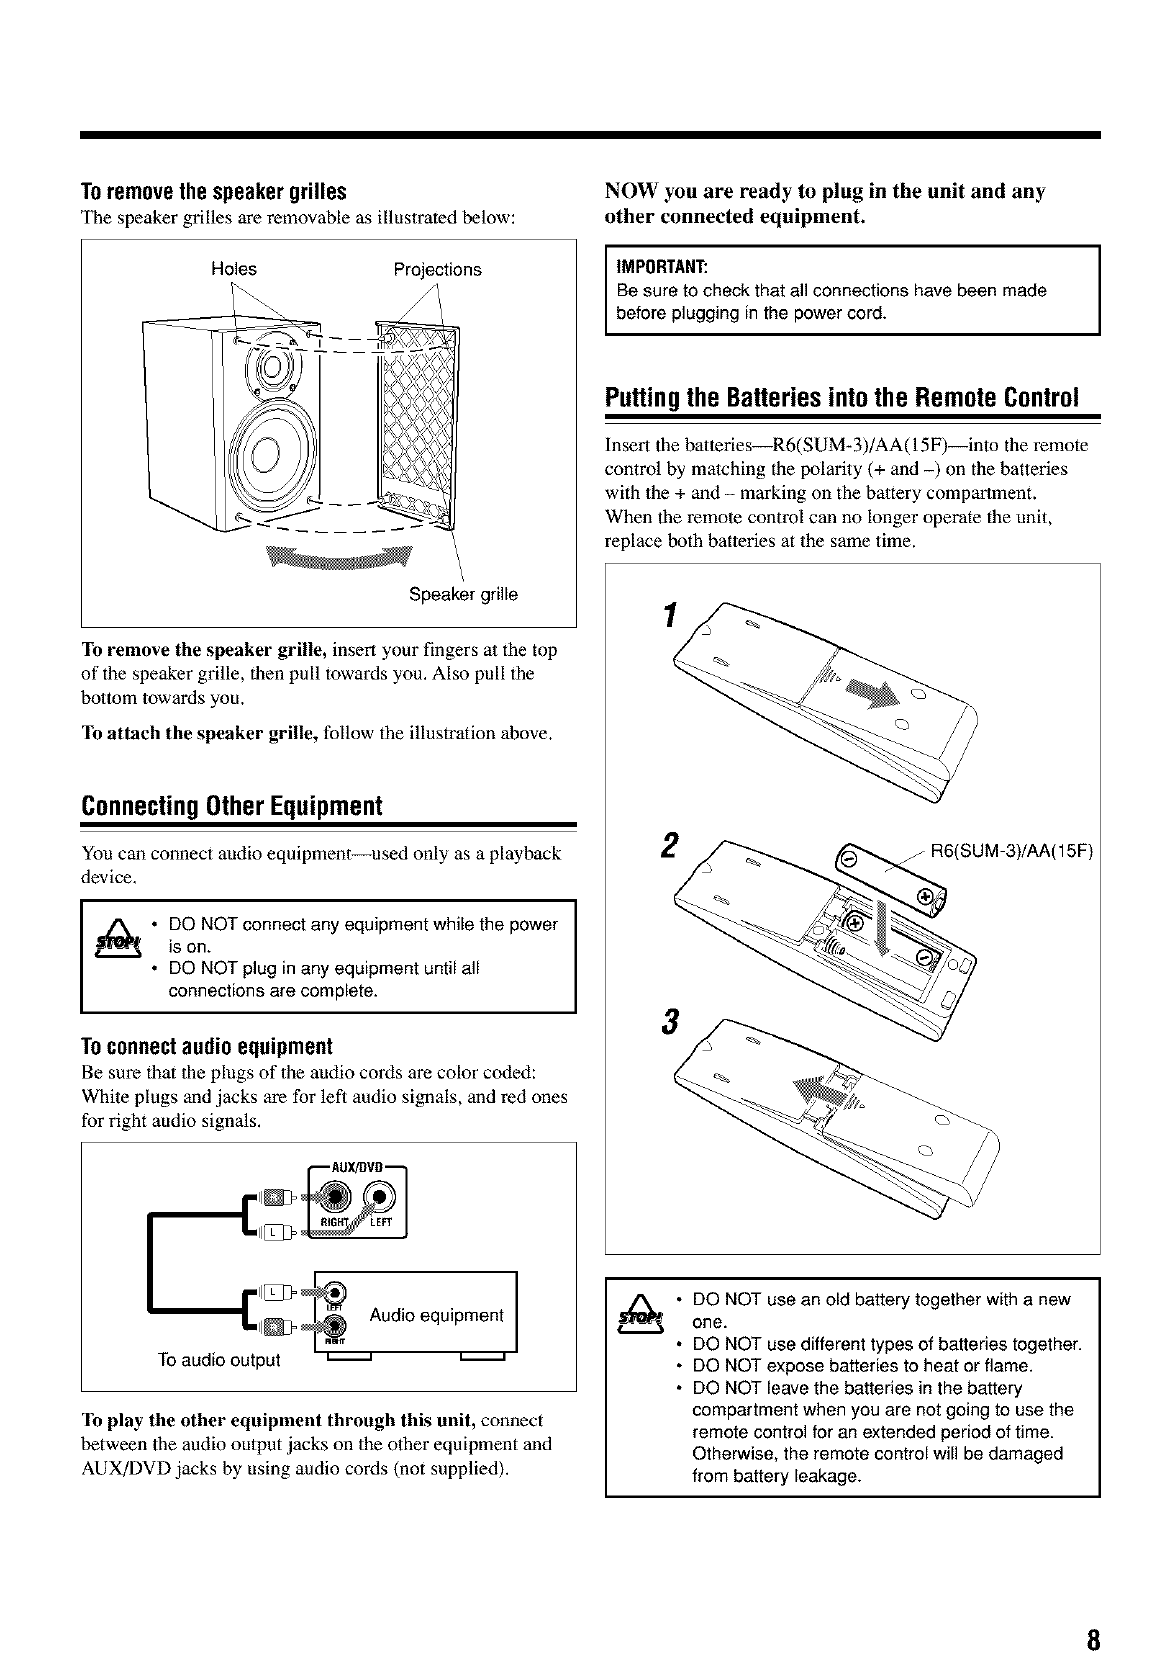
Toremovethe speakergrilles
The speaker grilles are removable as illustrated below:
Holes Projections
Speaker grille
To remove the speaker grille, insert your fingers at the top
of the speaker grille, dlen pull towards you. Also pull the
bottom towards you.
To attach the speaker grille, follow the illustration above.
ConnectingOtherEquipment
You can connect audio equipment--used only as a playback
device,
I • DO NOT connect any equipment while the power
is on.
• DO NOT plug in any equipment until all
connections are complete.
Toconnectaudioequipment
Be sure that the plugs of the audio cords are color coded:
White plugs and jacks are for left audio signals, and red ones
for right audio signals,
AUX!OVO--
"''''"_ll_ _ Audio equipment
TOaudio output _
To play the other equipment through this unit, connect
between the audio output jacks on the other equipment and
AUX/DVD jacks by using audio cords (not supplied).
NOW you are ready to plug in the unit and any
other connected equipment.
IMPORTANT: I
Be sure to check that all connections have been made
before plugging in the power cord.
Puttingthe Batteriesintothe RemoteControl
Insert the batteries_R6(SUM-3)/AA(15F)--into the remote
control by matching the polarity (+ and -) on the batteries
with the + and - marking on the battery compartment.
When the remote control can no longer operate the unit,
replace both batteries at the same time.
1
2/R6(SUM-3)/AA(15F)
3
DO NOT use an old battery together with a new
one.
DO NOT use different types of batteries together.
DO NOT expose batteries to heat or flame.
DO NOT leave the batteries in the battery
compartment when you are not going to use the
remote control for an extended period of time.
Otherwise, the remote control will be damaged
from battery leakage.
8
BasicandCommonOperations
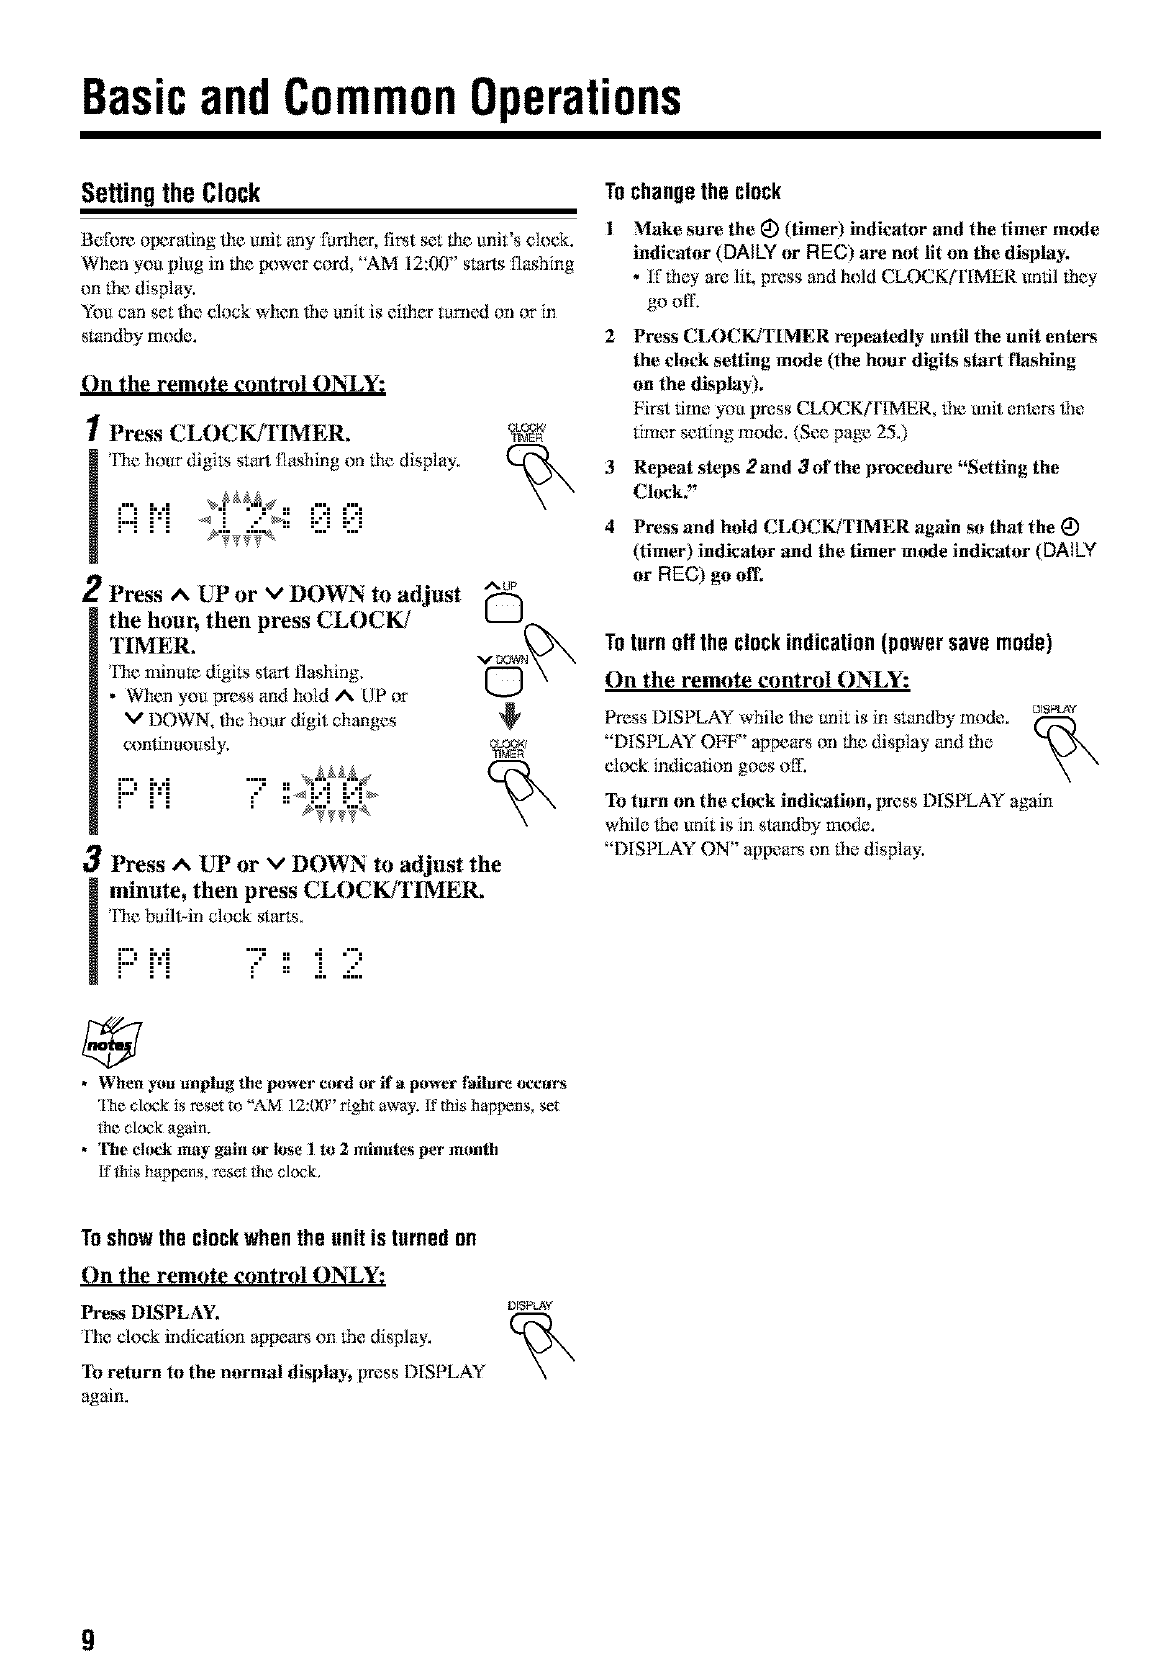
Settingthe Clock
Belbre olmrating lhe unit any furiher, fi_t set lhe unit's dock.
When you plug in lhe l×)wer cord, "AM 12:00" starts flashing
on lhe display,
You can set the dock when _*e unit is eflher turned on or in
slandby mode.
On the remote control ON_Y:
1Press CLOCK/TIMER,
! I'he hour digits start flashing on lhe display.
.....,..,
M i"i _ ">:i.-" _; i-"i i."i
.... _._v_._ ......
2Press A UP or vDOWN to adjust
the hour, then press CLOCK/
TIMER,
Fhe minute digits start flashing,
•When you press and hold AUP or
DOWN, the hou_ digit changes
continuously,
m:'M ....=..
.-' ::_i..'i :.-':_
OLO0_q
TIMER
AUP
OPress ^UP or vDOWN to adjust the
minute, then press CLOCK/TIMER.
l'he b_iltqn clock starts.
i"J i','i ":: n"i "':
i" i'i _" = .i..=::.
• When y_munplug the power cord or if apower failure occurs
The clock is reset to "?2M ]2:(g)" _[ght away, [[ this happens, set
Ne clock again.
•1_hechinkmay gain or lose I to 2 minutes per month
[fttds happens, reset tile cleck,
Tochangethe clock
1 Make sure the _) (timer) indicator and the timer mode
indicator (DAILYor REC) are not lit on the display.
•If lhey are lit, press and hold CLOCK/rIMER undl 1hEy
go off-
2 PrEss CLOCK/TIMER repeatedly until the unit ente_
the clock setting mode (the hour digits start fhkshing
on the dksphly),
First time you press CLOC,K/FIMER, 1he unit ente_ lhe
timer stating mode. (See page 25.)
3 REpEat steps 2and 3of the procedure "SEtting the
Clock,"
4PrEss and hold CLOCK/TIMER again so that the (_
(timEr) indicatar and the timer mode indicator (DAILY
or REC) go off,
Totern offthe clackindication(powersave mode)
On the remote control ON_Y:
PrEss DISPLAY while lhe unit is in standby mode, ms_v
"DISPLAY Olaf`'' appears on lhe display and the
cl¢mk indication goes off.
To turn on the clock indication, press DISPLAY again
while lhe unit is in standby mode.
"DISPLAY ON" appeam on the display.
Toshowthe clockwhenthe unit is turnedon
On the remote control ON_Y:
Press DISPLAY,
The clock indication appears on 1he display.
To return to the nornml display, press DISPLAY
again.
DfSPLA¥
9
Continued I_
TurningOnthe Power
To turn on the unit, press S FANDBY/ON 0/I s_'rA_Bv_au
(or 0/I ml the unit). 0/I
The STANDBY/ON lamp on the unit lights >,\
green.
• When you gress the st_uree butR)n--lt_/ll CD,
_111_TAPE, FM/AM and AUX (or AUX/DVD on the uni0,
the unit automatically turns on and slarts playback if the
source is ready.
• Pressing one of{he disc eject buttons (CDI_ - CDS_)
also rums on the unit. (See page 15.)
• Pressing _ (rape (_ee0 also turns on file unit. (Se_ page
200
• Pressing one offhe disc number buttons (CD 1 - CD 5) on
the remora control also turns on lhe unit and starts playback
if discs are on lhe corresponding disc frays. (See page 16.)
To turn offthe unit (standby), press STANDBY/ON 0/I (or
O/I on lhe unil) again.
'l}m STANDBY/ON lamp on the unit lights red.
• "AM 12:00" flashes on the dispIW until you set lhe bull>in
clock. After _lting the clock, lhe ehmk time will appear on
the displ W while lhe unit is on standby.
• A liUIe power is always consumed even while the unit is in
standby mode.
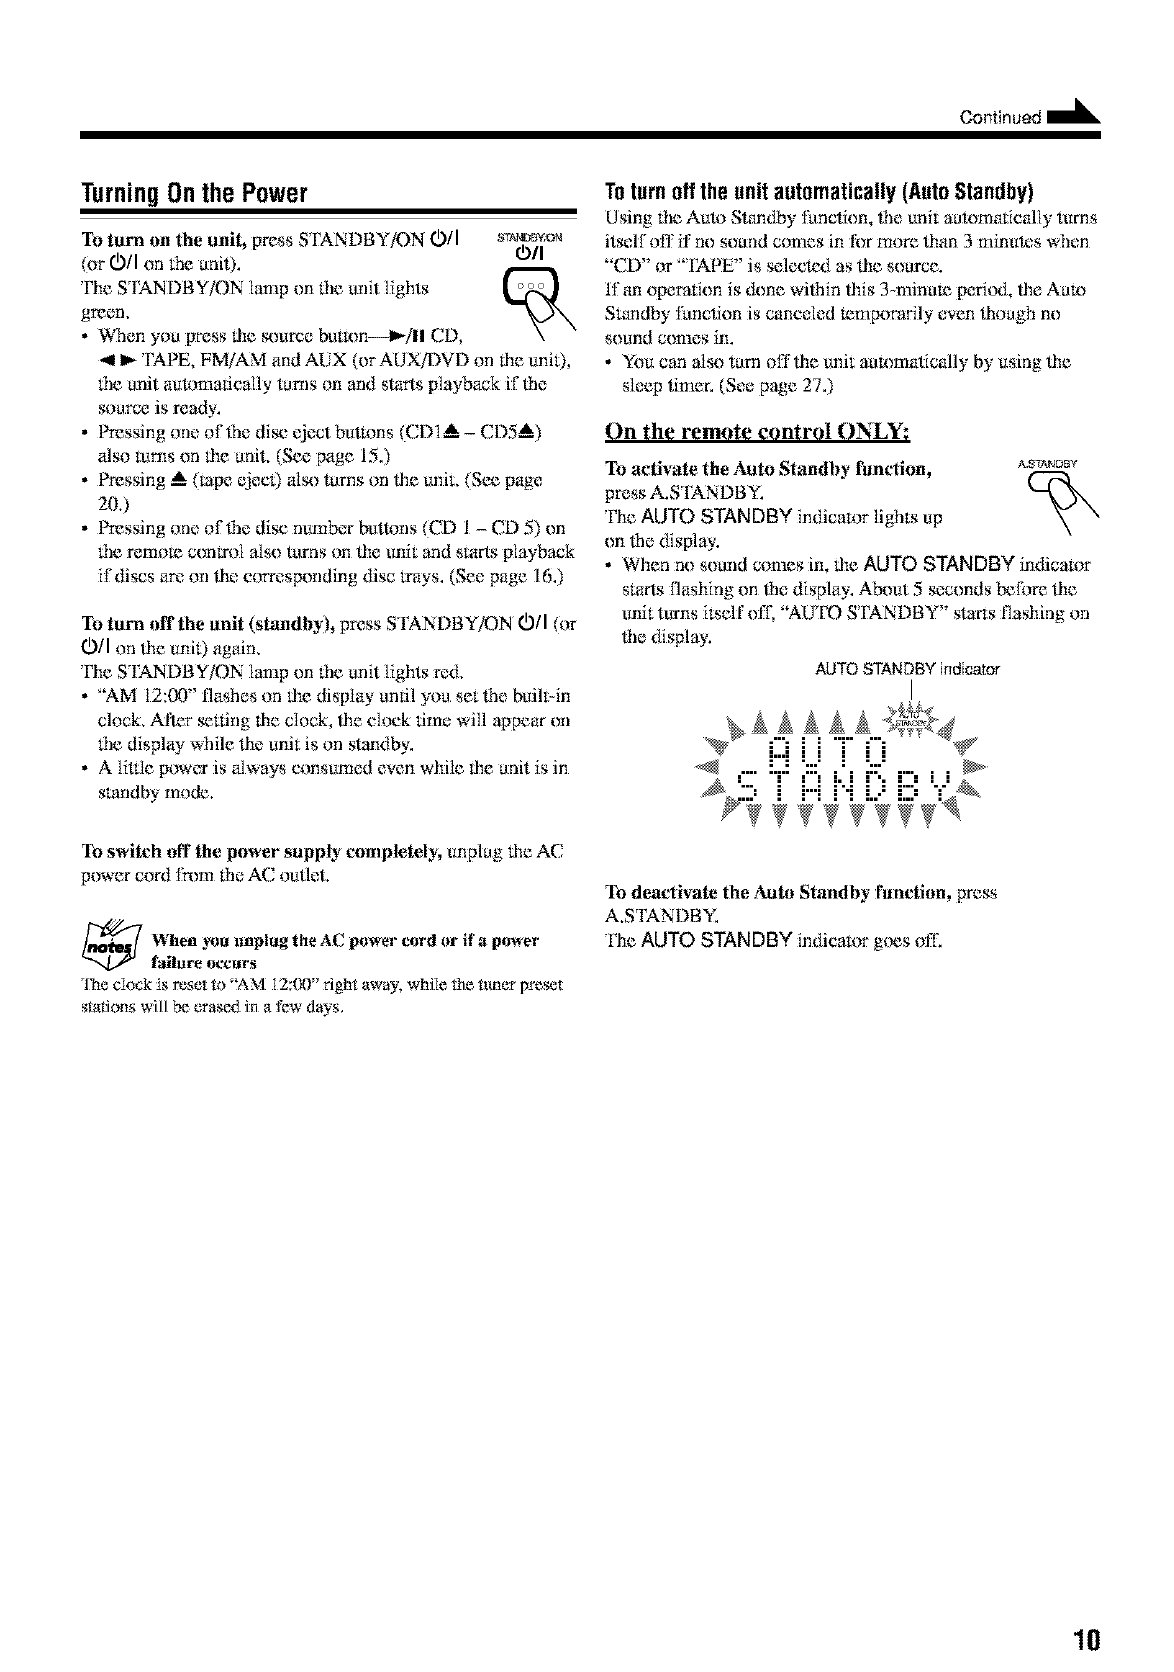
Toturn offthe unit automatically(AutoStandby)
Using the Aul*_S'mndby functkm, ffmunit automatk:ally turns
itself off if no sound comes in for more titan 3 minutes when
"CD" or "TAPE" is selected as lhe souree.
If an opera_ion is &)ne wilhin lhis 3-minum p_rril._t,lhe AuU)
Srundby function is canceled mmpomcily even lhouO* no
sound ccmaes in.
• You can also turn offlhe unit aummatic_flly by using lhe
sleep timer. (See page 27.)
On the remote control ON_Y:
To activate the Auto Standby fimcfion, _s_Dsv
press A.S'IANDBY.
'l_le AUTO STANDBY indicator lights up
on lhe display.
•When no sound comes in, the AUTO STANDBY indicator
srurts flashing on ffm display. A_ut 5 seconds before lhe
unit turns itself ofl; "AU'IID STANDBY" starts flashing on
file display,
AUTO STANDBY indicator
.... _III_ I:::I i : i ::: II ......
To switch aft the power supply completely, unplug lhe AC
power cord fh)m the AC outlet
7hen _u unplug the AC power cord or if apower
f_hzre occurs
q1_eclock is reset R_"AM 12:00" right away, while the tuner preset
stations will be erased in a few days.
To deactivate the Auto Standby fimction, press
A.STANDBY.
'llle AUTO STANDBY indicator gtms off.
10
Adjustingthe Volume
You can adjust lhe volume level only while tim anit is tu:rned
on, Fhe volume level can be adjusted betwecn
"V()LUME MIN" and "VOLUME 1" - "VOLUME 40
(V()LU ME MAX)."
• The w_lame level has no effect on recording.
On the remote control:
To increase the volume, press VOEUME +.
To decrease the volume, press VOLIJME -.
• When you press and hold eiffler button, you
can change tile volume level eonlinuously.
On the unit:
To increase the volume, turn lhe
VOLUME +/- control clockwise.
To decre_lse the relume, turn tile
VOLUME +/- control coanterelockwlse.
i...i0 i....i...ii"iE i 0
_ l,'or private listening
Connect a pair o!'headphones to the PHONES jack. No sound
comes out of the speakers, Be sore to torn down the voiome before
connecting or putting on the headphones.
DO NOT turn off (standby) the unit with the volume
set to an extremely high level; Otherwise, the
sudden blast of sound can damage your hearing,
speakers an_or headphones when you turn on the
unit or start playing any source.
REMEMBER you cannot adjust the volume level
while the unit is in standby mode.
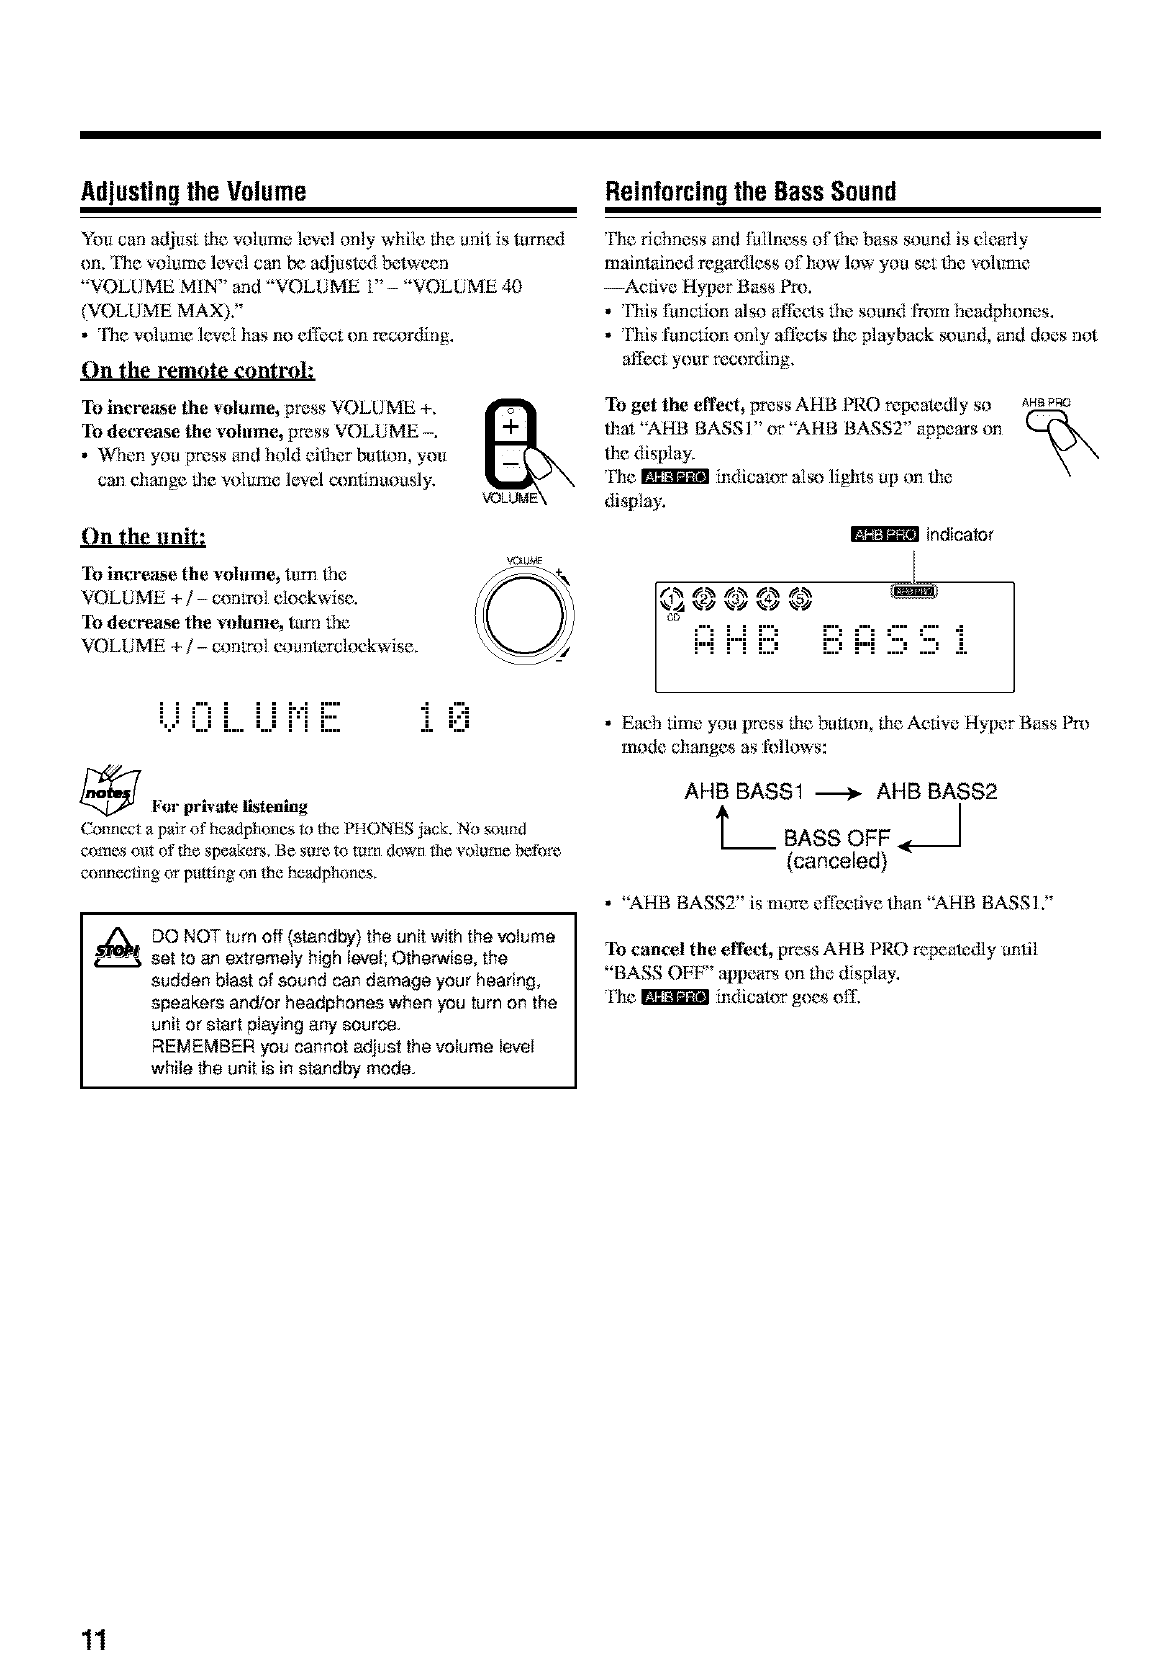
Reinforcing the BassSound
The richness and fullness of 1hebass sound is clearly
maintained regardless of how low you set _le _.olume
--Active Hyper Bass Pro.
• This function also affects tim sound l_m headphones.
•This function only affects ti_eplayback sound, and does not
affect your recording,
To get the effect, press AHB PRO repeatedly so
lhat "AHB BASSI" or "AHB BASS2" appears on
the display.
The _ indicalx_r also lights up on tile
display.
indicator
AHB PRO
., V'3 %a'3_V %s);
i:::ii...iiiii",iii?,i:::i'.iii:'.5i
• Each time you press tim button, tile Active Hyper Bass Pro
mode changes as follows:
AHB BASS1 _ AHB BASS2
t__(canceled)
• "AHB BASS2" is more effecti_.e tiara "AHB BASS 1."
To cancel the effect, press AHB PRO repeak_dly until
"BASS OFF" appears on lhe display.
The _ indicator goes oIL
11
Adjustingthe Tone
Yeu can adjust lhe bass level flow ISequency range) and lbe
treble level (high frequeney range) wflhin a range of"-5" te
"+5Y
When shipped, each level is set te "+2Y
•This function _ilso affects lhe sound I_)m headphones,
• This function only affects _le playback sound, and &)es not
affect your recor_Ymg,
• There is a time linglt in deing lhe fUIlowing steps, ff fhe
_tting is canceled before you finish, s_rt again from step 1.
On the remote control:
1Press BASS to adjust the bass level or
press TREBLE to adjust the treble
level.
Current setting
_s
n{EBLE
[!!;i:::i:!!!;S
Ex.: When you select "BASS."
2Press ^UP to increase the level or ^up
press v DOWN to decrease the
level, v _
iiii i:::iS S + 2 ©
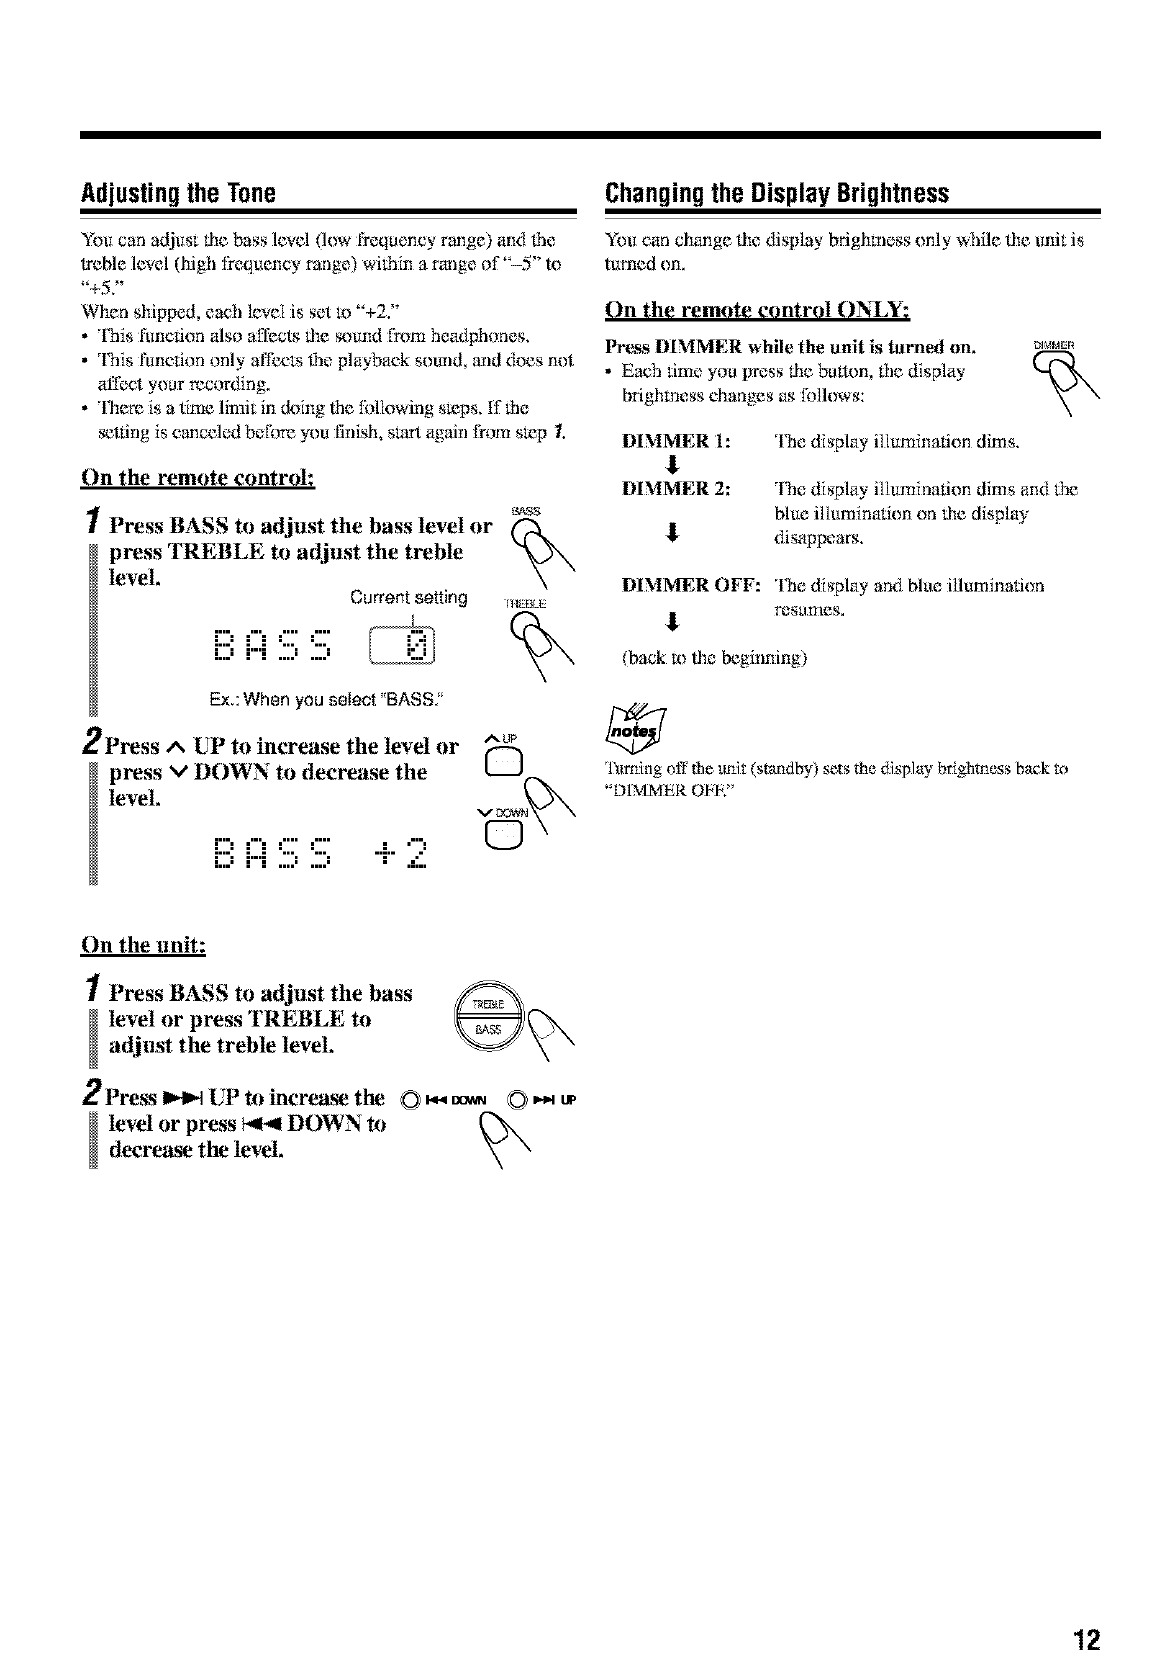
Changingthe DisplayBrightness
You can change file display brighmess only while file unit is
turned on.
On the remote control ON_Y:
Pros DIMMER while the unit is turned on.
• Each time you press lbe bulton, the display
brighmess changes as I%_llows:
DIMME_
DIMMER 1:
DIMMER 2:
The display illumination dims,
The display illuminmion dims and the
blue illumination on lbe display
disappears.
DIMMER OFF: The display and blue illumination
_. resunaeg.
(back _) lhe beginning)
lktming off the lmit (standby) sets the display brighmess back to
"D1MMER OFK"
On the unit:
1Press BASS to adjust the bass __"N
level or press TREBLE to
adjust the treble level.
2Press _UP to increa_ the (:} _ _ O '_ up
level or press _DOWN to
decrea_ the level.
12
Listeningto FM andAM Broadcasts
Tuningin toa Station
/Press FNUAM to select either "FM"
or "AM,"
Fhe unit automatically tarns on and tunes in to
lbe previously received station---eilher FM or
AM.
•Each time you wess lhe breton, tile band alternates
between FM and AM.
F::M .....,",.,.,,,.. [:::: ,',,,, j J
J,.,J i jj .,.,J ,i:,i .i"i. m':::"
2Press and hold _or
(or _ UP or _ DOWN
on the unit) for more than
I second,
•I_D,_(_1 UP):
lncrca_s lhe frequencies.
• 141.,*1(l_.,l DOWN):
L')ecTeaseslhe frequencies,
The unit starts searching Ibr stafmns and stops when a
star, on of suffident signal strenglh is tuned in.
• tf an FM program is broadcast in stereo, lbe STEREO
indicator lights up on the display (only when file
reception is good).
To stop daring searching, press _D,_ or b,ll.,ll(or _D,_ [liP or
b,ll-,4DOWN on lhe unit),
When _u repeatedly press I_1_ or _ (or I_1_ UP or
1,4-,41DOWN on the unit)
*ll-mfrequency changes step by step,
Tochangethe FM receptionmode
On the remote control ON_Y:
When an FM stereo broadcast is hard to receive M_gE
or nok_y,press FM MODE so that lhe MONO
indicator lights up on the display. Reception will
improve,
To restore the stereo effect, press EM MODE again so lha
lhe MONO indicator goes off. tn stereo mode, you can hear
sKrreo sound when a sK:reo program is broadcasL
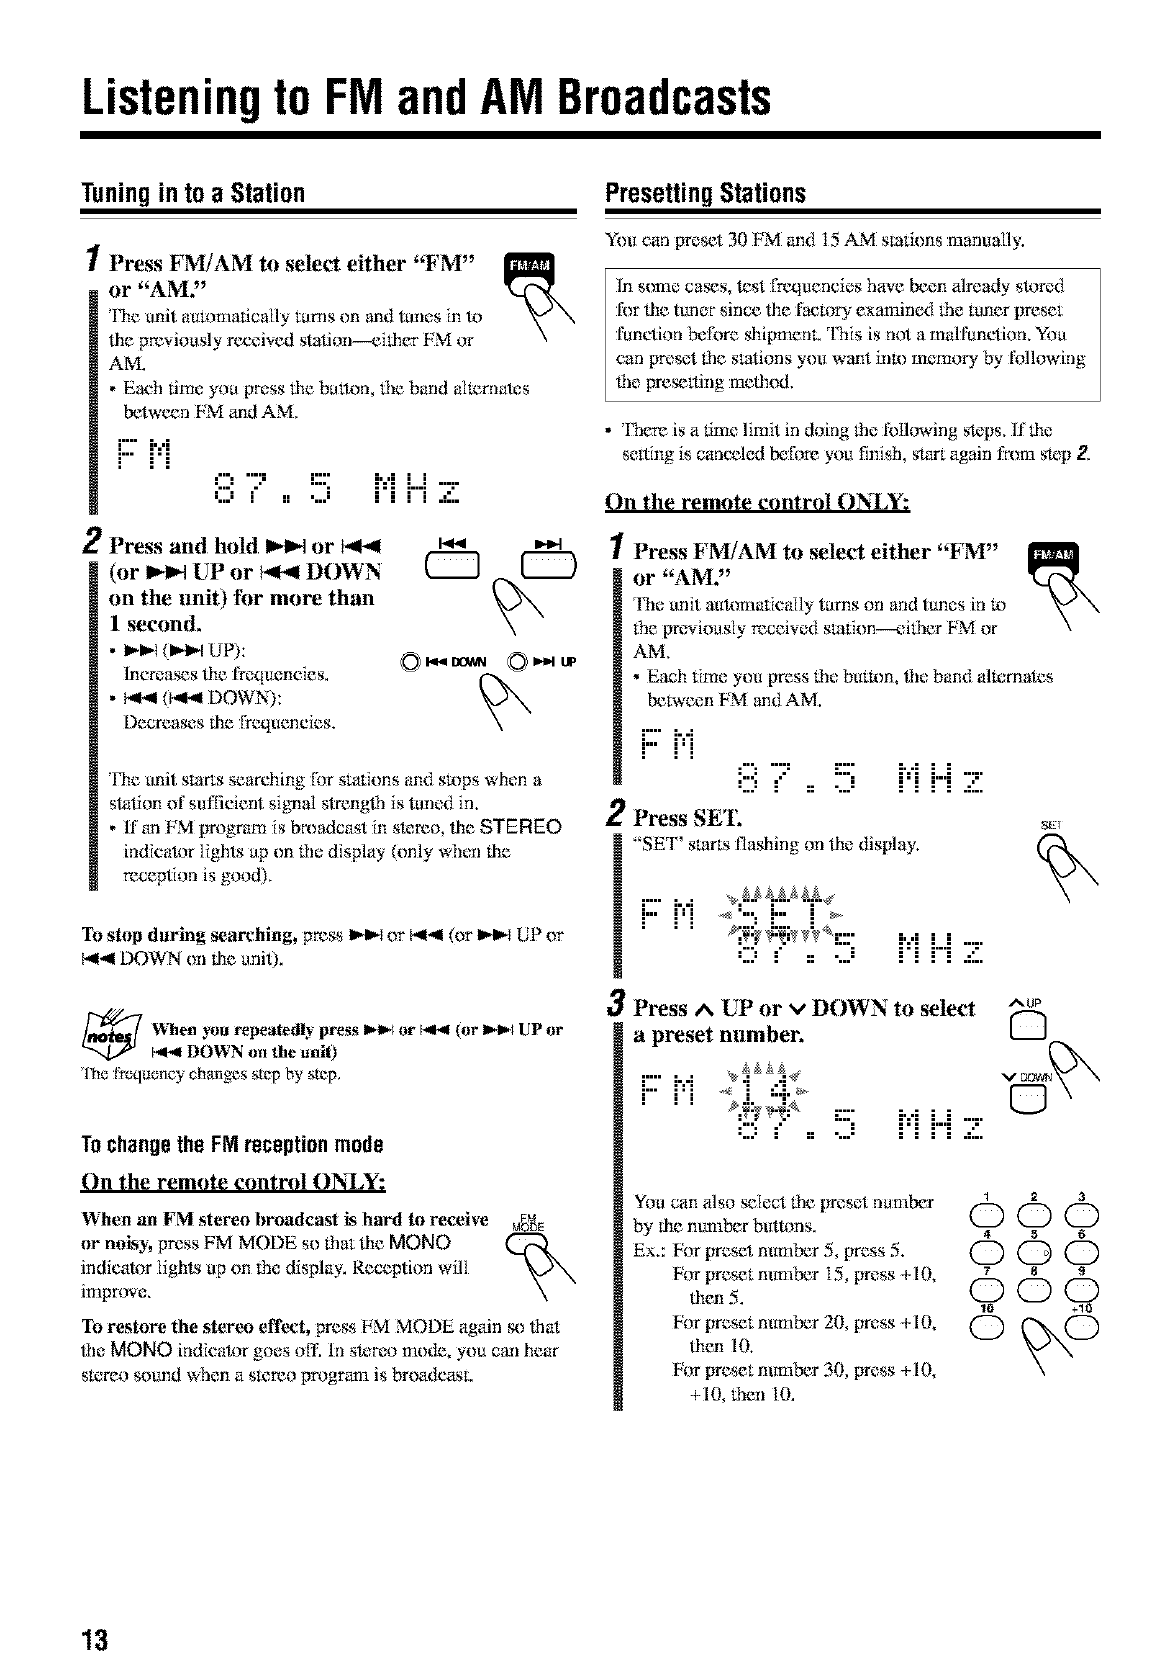
PresettingStations
You can preset 30 FM and 15 AM smfzons manually.
hl s(mm cases, test frequencies have been already stored
for lhe tuner since lhe fa_toI_" exanained tile tuner preset
function beli_re shi[maenc This is not a mN funclion. You
can [*reset lhe stations you want into memory by IUIlowing
_le presetting melhod.
• There is a time limit in doing lhe following steps, If lhe
setting is canceled before you finish, start again l:r_ynastep 2.
On the remote control ON_Y:
1Press FM/AM to select either "FM"
or "AM2'
The unit auRmlatic_i[ly turns on and ttmes in 1,_
the previously receiw_d smtion---_fither FM _r
AM.
• Each time you press lhe button, _le band altarnates
between FM and AM.
2
F'- [-.4
F" F[ 8 7, !5 ["[ ["[ '7
Press SET,
"SET' starts flashing on lhe display.
_T
r" i...i _,_._Z._p4
r" i'i <"":" :>
;, ,; ; ;
i"i H 2".i
3Press ^UP or vDOWN to select ^_
a preset number. [---J
....... v_aa_
i-'-rq _ ,:.._ 0
q{:_q_ -:::- ,.., , ,
,:::,.' ,, ...." i'i i"i Z
YOucan also select lhe preset number _ = a
by fl_emmlber buttons, (_ _
ex.:Vorpresetn*m rS,press. . C) (D (D
For preset mmaber 15, press +10, _ s s
men. . (5) C) C)
10 +10
For preset number 20, press +10, @ (_)
lben I0,
For preset mmaber 30, press +10,
+10 then 10.
13
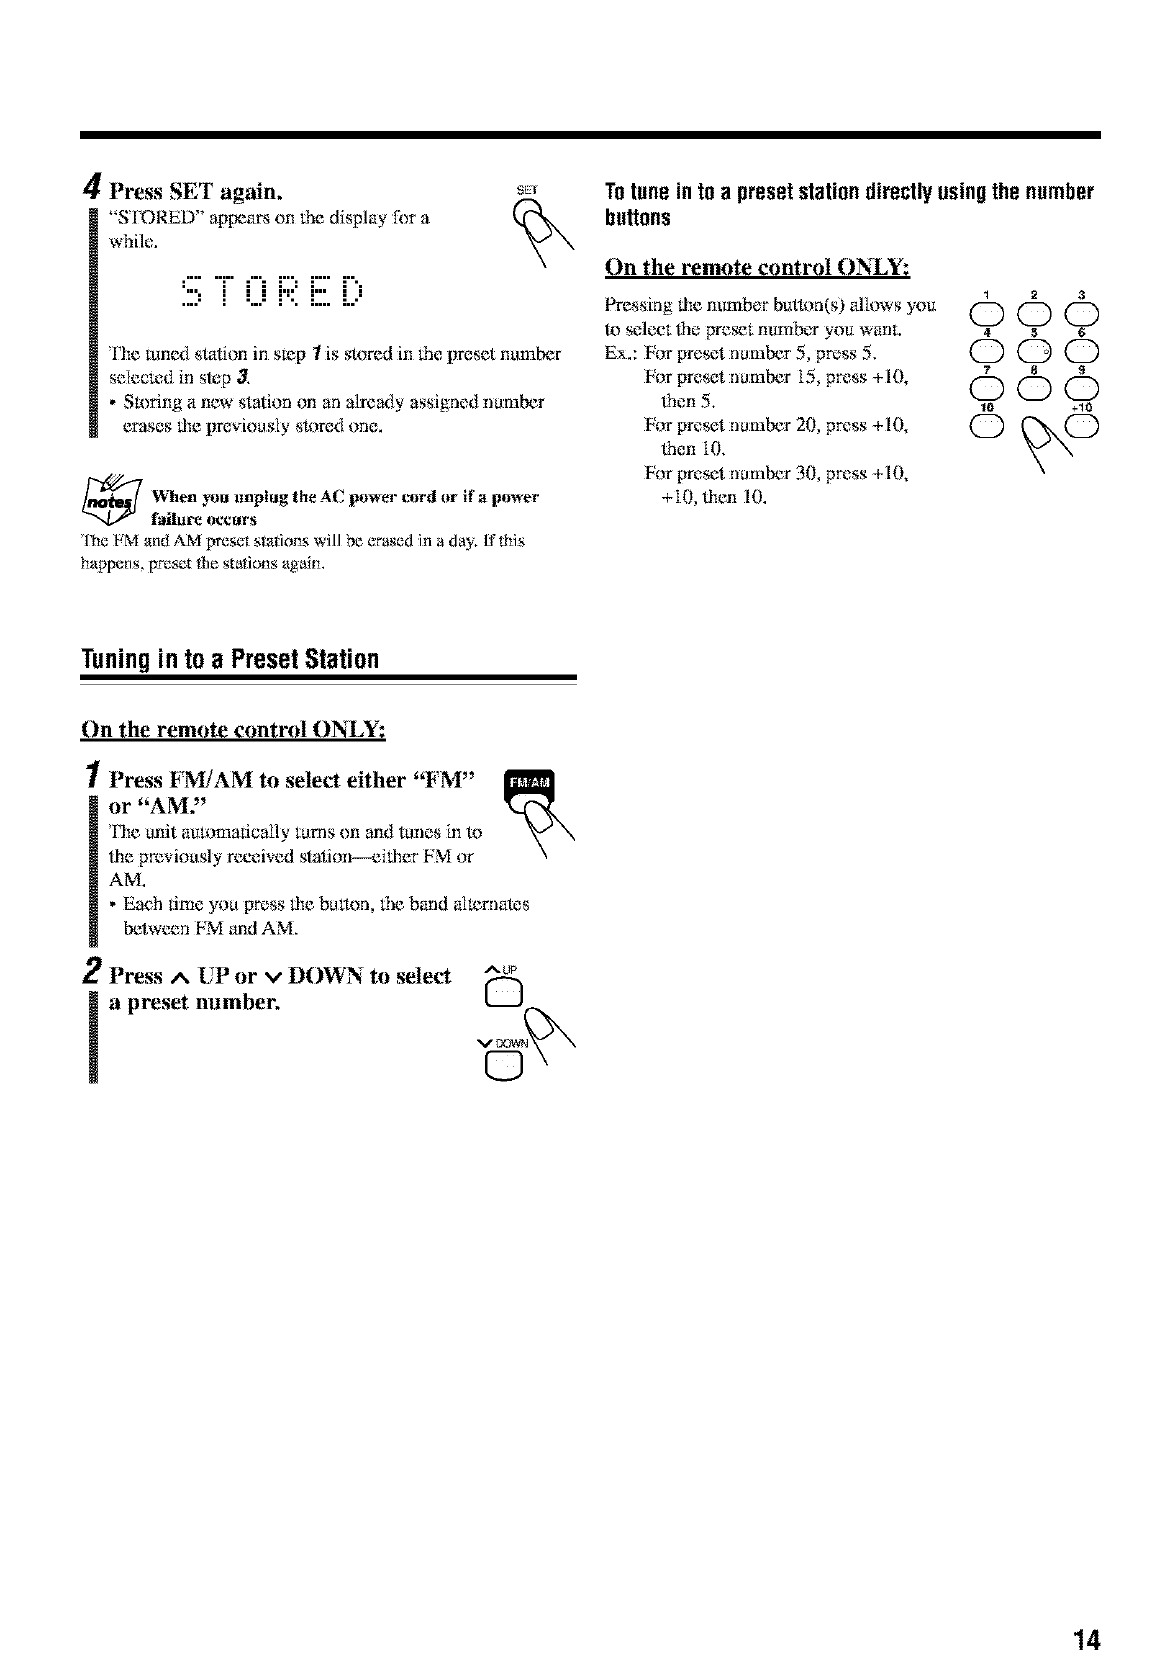
4Press SET again,
"S FORED" ap[x_a_ on lhe display [k_ra
while.
SKr
::::, i (.Ji"::i:::.5...:
The tuned station in s_p Iis stored in 1hepreset number
seIecled in step 3.
• Storing anew station on an already assigned number
erases lhe [_re_douslystored one.
_When unplug the AC cord or if a
power power
failure occm's
'lhe _M and AM preset stations will be _rased in aday, If this
happens, preset tile staions aguim
Totune in toa presetstationdirectlyusingthe number
buttons
On the remote control ONLY:
1 2 3
Pressing lhe number buthm(s) altows you OOO
to seleet lhe pre_t nurnb_ you wanL 4 5 6
Ex.: Vorpresetnu:mb_r5, p_,ss5. C) C) C)
For preset number 15, press +10, 7 8 s
lhen 5. 000
For preset number 20 press +10, @ @
lhen I0.
For preset number 30, press +10,
+10 lhen 10.
Tuningin toa PresetStation
On the remote control ONLY:
!Press FM/AM to select either "FM"
or "AMY
l'he unit automatically turns on and tunes in to
lhe previously received stafion--eilher FM or
AM.
• Eaeh time you press lhe button, the band all_rnak_s
between FM and AM.
2Press ^ UP or vDOWN to select ^up
la preset number. Q
VO0_#
©
14
PlayingBackDiscsonthe5-CD Changer
This unit has tx'en designed m play back lhe following
discs-_-;D, CD_R, and C[%I_W.
When playinga CD-Ror CD-RW
User-edited CD-Rs (C;Dq_.ecordable) and C;D-I_.Ws (C;D_
ReWritaNe) can be played only if lbey are _il:ready
"finNized."
• UsuNly you can play back your originN CD-Rs or CD-
RWs recorded in music CD fbmlat. However, sometimes
they may not play depending on their characKrristics or
recording conditions.
• Before playing CD-Rs or CDq_Ws, read their inslructions
or cautions carefully.
• Some CD-Rs or CDq_.Ws may not play" on lhis unit becau_
of fheir disc charac_wistics, damage or stain on lhem, or if
the player's lens is dirty.
• CD-RWs may require a longer readout lime. 'Ibis is
becau_ lhe reflectance of CD-RWs is lower lban for
regular discs.
Generalnotes
In general, you will have lbe best perfi_rmance by kecping
your discs and lhe mechanism clean.
• Store discs in lbeir ca_s, and keep lhCm_in cabinets or on
shelves.
• Keep lhe unit's disc trays closed when notin u_.
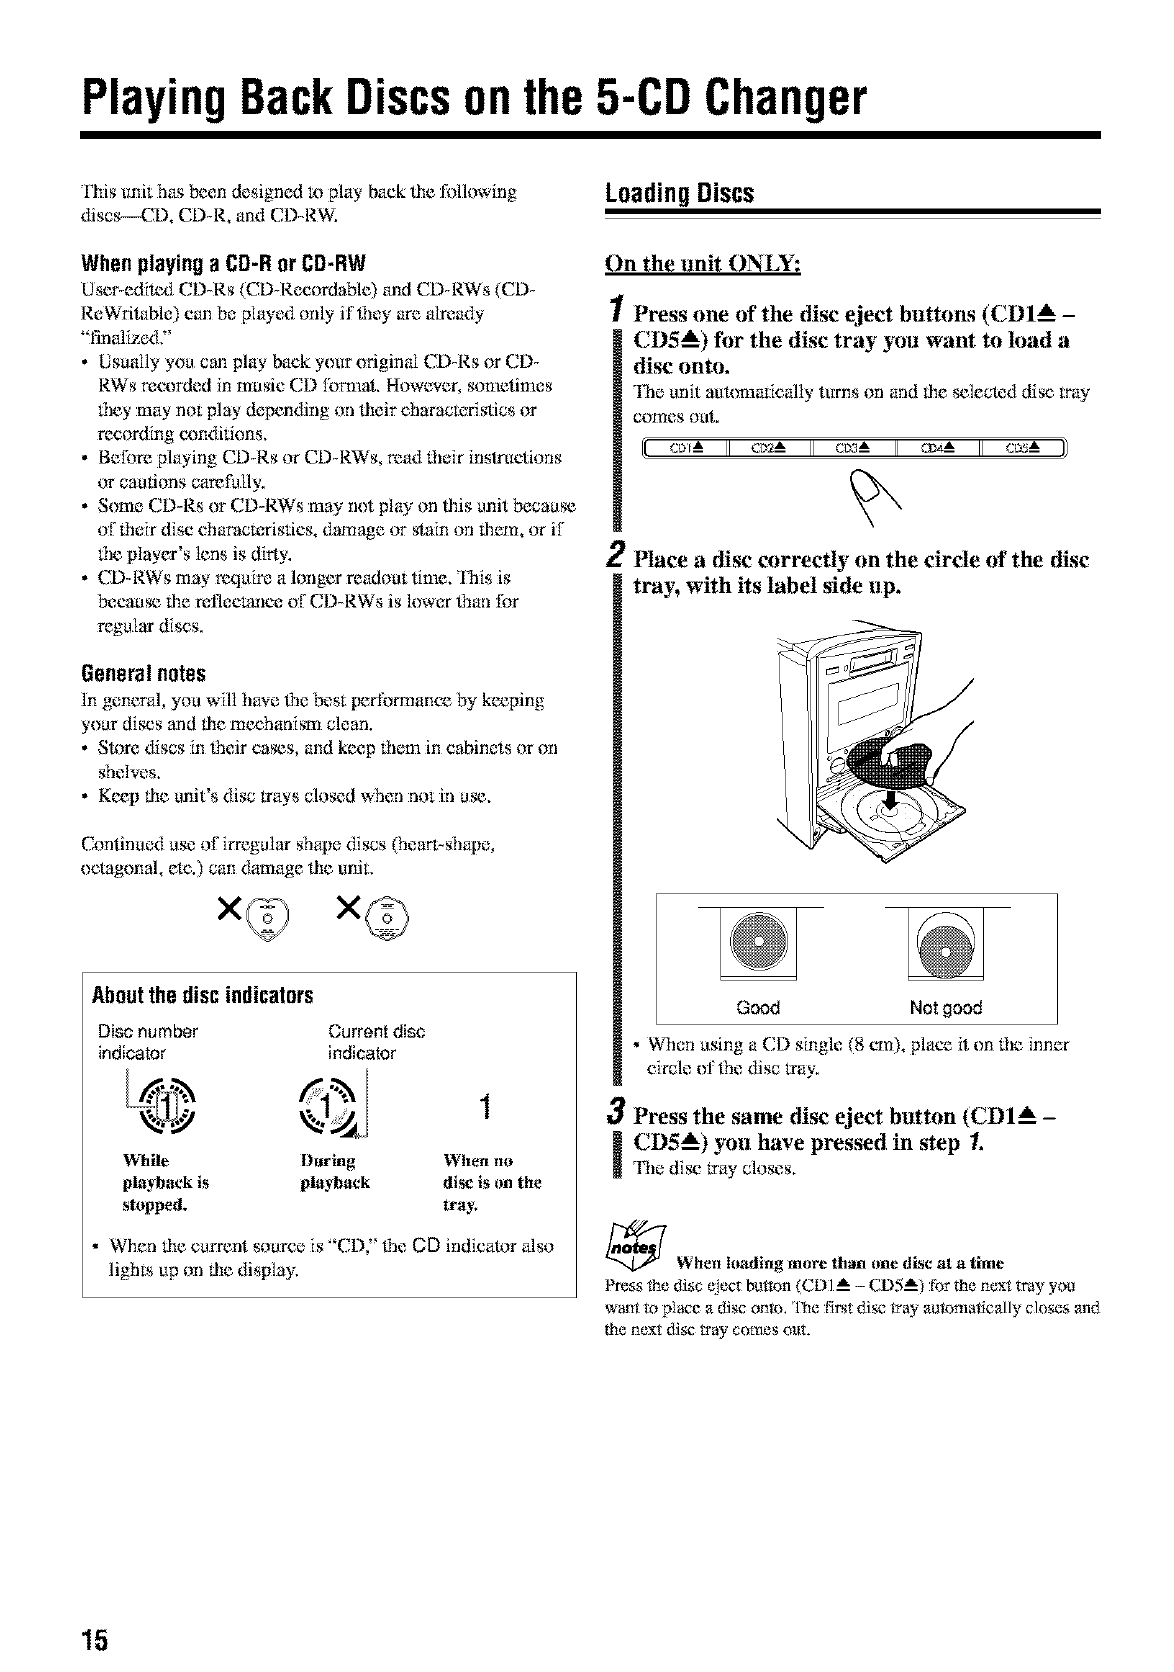
Continued use of irregular shape discs (heart-shape
octagonal, etc.) can damage lhe unit,
x©
Aboutthe disc indicators
Disc number Current disc
indicator indicator
While During When no
playback is playhax*k di_ is an the
stopped, tray,
When lhe current source is "CD" _le CD indicator also
lights tip on lhe display,
LoadingDiscs
On the unit ONLY:
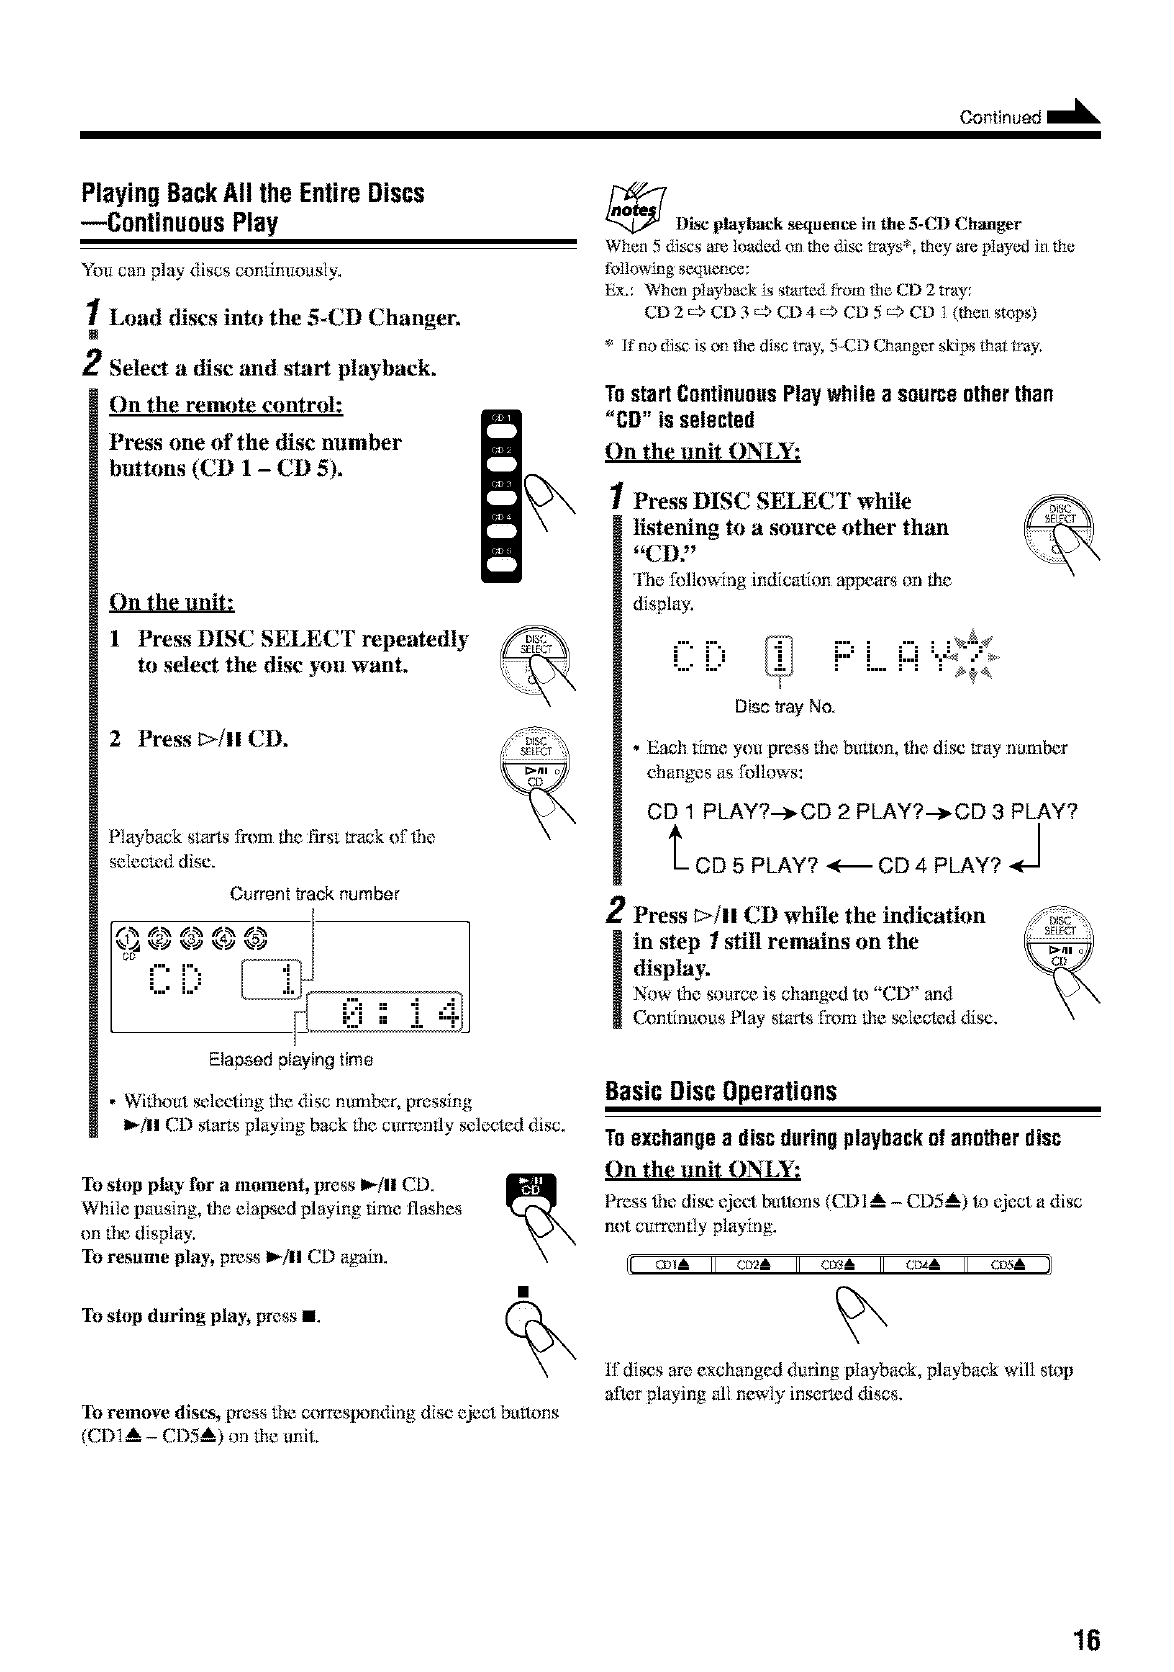
/Press one of the disc eject buttons (CDI_ -
CD5_) for the disc tray you want to load a
disc onto.
The unit aukm3afically turns on and lhe selected disc tray
comes out.
[cL_-A c_ em_ _ cL_-A ))
2Place a disc correctly on the circle of the disc
tray, with its label side up.
Good Not good
•When using a C,D single (8 cm), place it on 1he inner
circle oi'the disc tray.
3Press the same disc eject button (CDI A-
[CD5_) you have pressed in step 1.
The disc tray closes,
_When loading more than one disc at a time
_ss the disc _ect button (CDI A _ CD5 A) for the next tray you
want to place a disc onto, The first di_ tray autc_nat_cally closes and
the next di_ tray comes o_,lt.
15
Continued II_
Playing BackAll the EntireDiscs
--ContinuousPlay
Yea carl play discs continuously.
1Load discs into the 5-CD Changer,
N
2Select a disc and start playback,
On the remote control:
Press one of the disc number
buttons (CD 1 -CD 5),
On the unit:
1 Press DISC SELECT repeatedly
to select the disc you want,
2 Press I>ill CD,
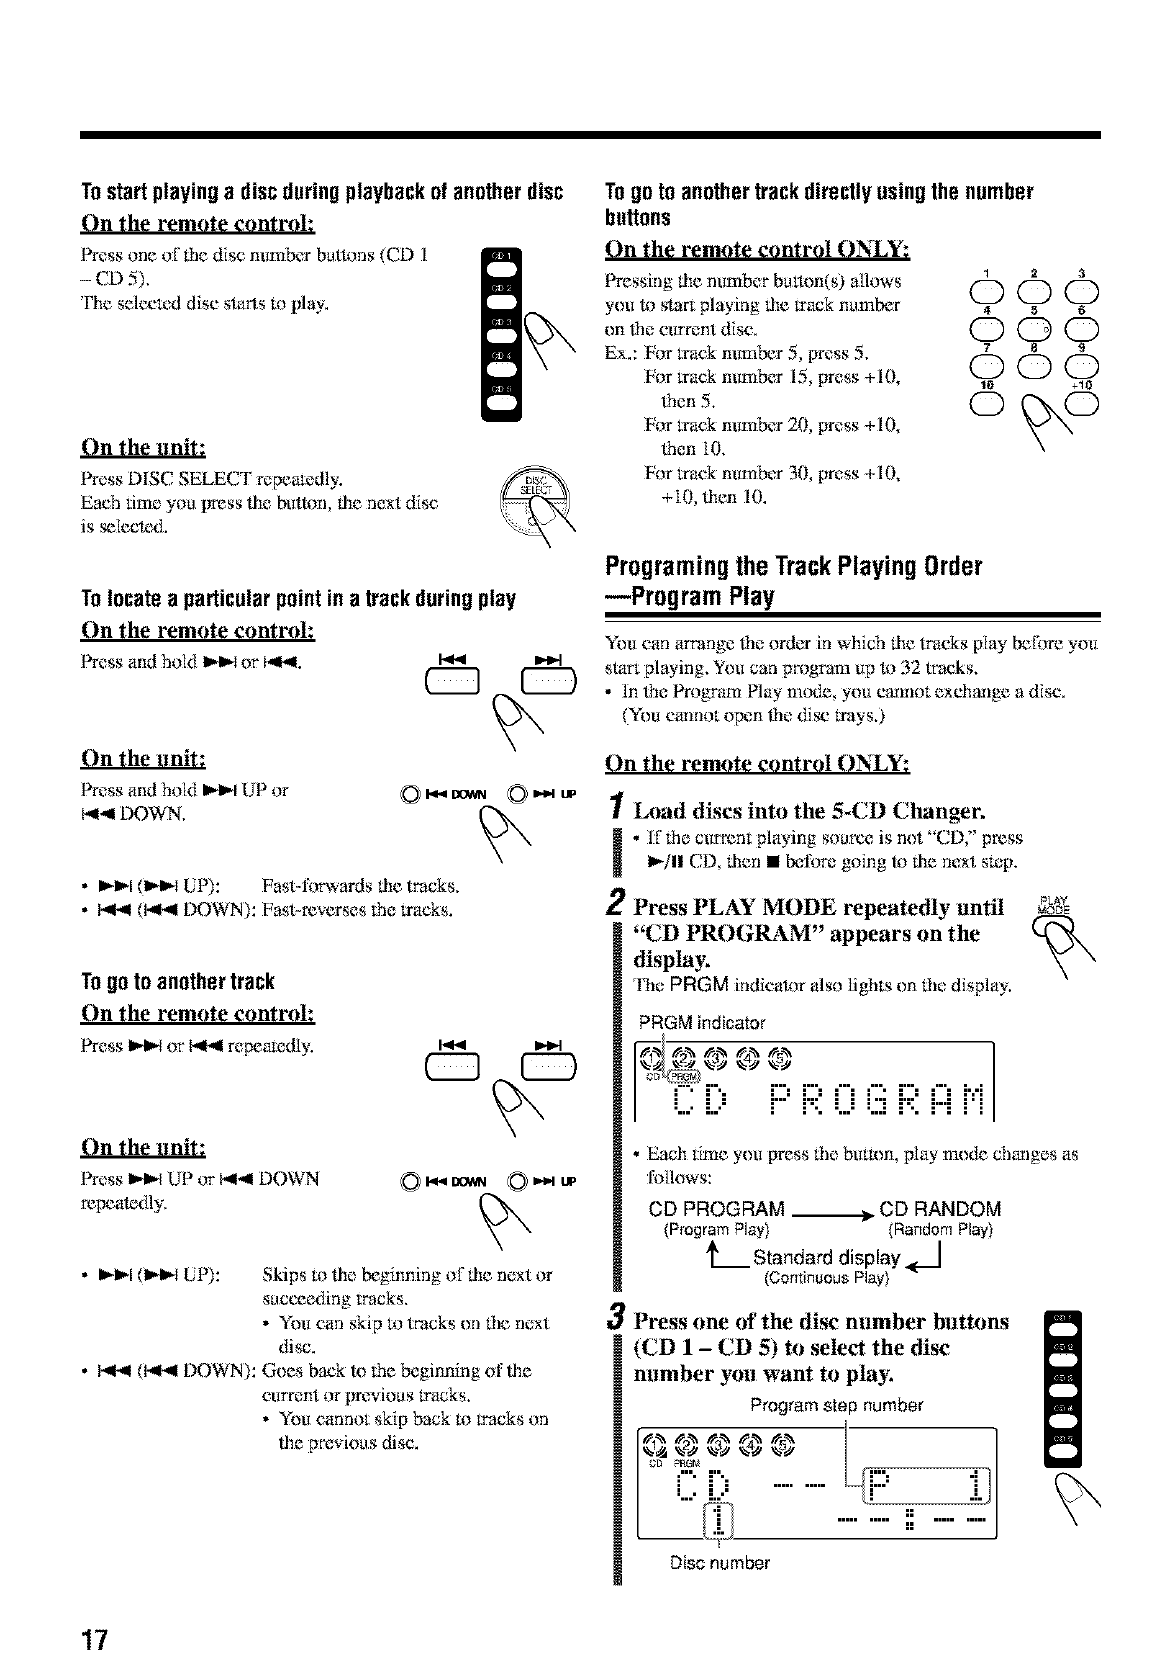
Playback starts from the first track of file
selec_:d disc,
Current track number
C [?
L l? 0 ::.i
Elapsed playing time
• Wifhout selecting the disc number, pressing
I_/|l elk) starts playing back tile ct_rrenfly selected disc.
To stop play for amoment, press II_/ll CD.
While pausing, lhe elapsed playing time flashes
on tile display.
To resame play, press I_/ll CD again.
To stop daring play_ press I
To remove discs, press fhe corresixmding disc eject bretons
(CDI_ -CDS_) on the unit,
_ l)ise playback _quence in the 5-Ct) C.haager
When 5 di_s are loaded on the di_ trays*, they are played in the
following sequence:
Ex.: When playback is started from the CD 2 tray:
CD 2 c> CD 3 c> CD 4 c> CD 5 c> CD 1 (th_n stops)
* If"no di_ is on the disc tray, 5CD Changer skips that tray.
TostartContinuousPlaywhile asourceotherthan
"CD" is selected
On the unit ONLY:
1Press DISC SELECT while
listening to a source other than
"CD,"
'lNe f_fllowing indication appears on file
display.
:"- r'-. :"" : "" : :N'_¢
"...-L-' i"" i M ":_ ."
......... _
Disc tray No.
• Each time you press file but_m, file disc tray ha:tuber
changes as Ibllows:
CD 1 PLAY?.-_CD 2 PLAY?.-_CD 3 PLAY?
t CD 5 PLAY? <-_ CD 4 PLAY? J
2Press _>/11 CD while the indication
in step Istill remains on the
display.
Now lhe source is changed to "CD" and
Continuous Play starts I_m the _leck_d disc.
BasicDiscOperations
Toexchangea discduringplaybackof anotherdisc
On the unit ONLY:
Press _le disc eject butl_ns (CDI _ -CD5_) to eject a disc
not curmmly playing.
I[ cm_A II c_-A II cm-A II c_-A II cv_A il
117discs are exchanged during playback, playback will sl*_p
after playing all newly inserted discs.
16
Tostartplayingadiscduringplaybackofanotherdisc
On the remote controh
Press one oflhe disc number buttons (CD 1
-CD 5),
The sclccled disc starts to play.
On the unit:
Press DiSC SELECT repealediy.
Each time you press lhe button, lhe next disc
is _lecte&
To locate a particularpointin a track duringplay
On the remote controh
Press and hold I_ or I_q. I.,.9 _t
On the unit:
Press and hold I_1 UP or
b11-,9DOWN, OI,,_a gOWN
• _1 (1_ LIP): Fast4orwards lhe tracks.
• I_.,II (bq.,ll DOWN): Fast-reverses fi'm tracks.
Togo to another track
On the remote control:
Press _ or _.114repeamdiy.
On the unit:
Press _,-_,'_UP or bg-_l DOWN
repealt_dly.
0I_ DOWN
•I_11-1(1_1_ [liP): Skips to lhe beginning of lhe ne×t or
succeeding tracks.
• You car*skip to Wacks on the ne×t
disc.
• I_,_l (I,4-11DOWN): Goes back to the beginning oflhe
current or previous tracks.
•You cannot skip back to tracks on
lhe pre_.ious disc.
Togo to anothertrackdirectlyusingthe number
buttons
On the remote control ONLY:
Pressinglhenumberbutton(s) aflows O Q_) (_
you to sta_ playing lhe track number 4 s 6
Ex.: For track ntmlber 5, press 5. _7 8 s
(53
For track number 15 press +I O, _ W
•e,5, O O
For track number 20, press +10,
lhen 10.
For track nurnb¢rr 30, press +10,
+lO lhen I0.
Programingthe TrackPlayingOrder
--Program Play
You can amange lhe order in which lhe lracks play before you
start playing. You can program up to 32 wa:ks.
•In ffm Program PIW m{rdc,you cannot exchange a disc.
(You cannot open {hedisc t*ays.)
On the remote control ONLY:
1
H
2
Load discs into the 5-CD Changer.
•1171hecurrent playing source is not "C.D," press
I_/11CD, lhen • Ix:fore going to lhe next stop.
Press PLAY MODE repeatedly until P_
"CD PROGRAM" appears on the k_
display,
'l%e PRGM indicator also lights on lhe display.
PRGM indicator
C ill:" i:::'R 0 (iiiR [)H
3
• Each time you [tress rim butam, play mode changes as
follows:
CD PROGRAM ._ CD RANDOM
(Program Play) (Random Play)
h Standard display _l
(Continuous Play)
Press one of the disc number buttons
(CD 1-CD 5) to select the disc
number you want to play,
Program step number
C ill: ..........
Disc number
<x
17
Continued
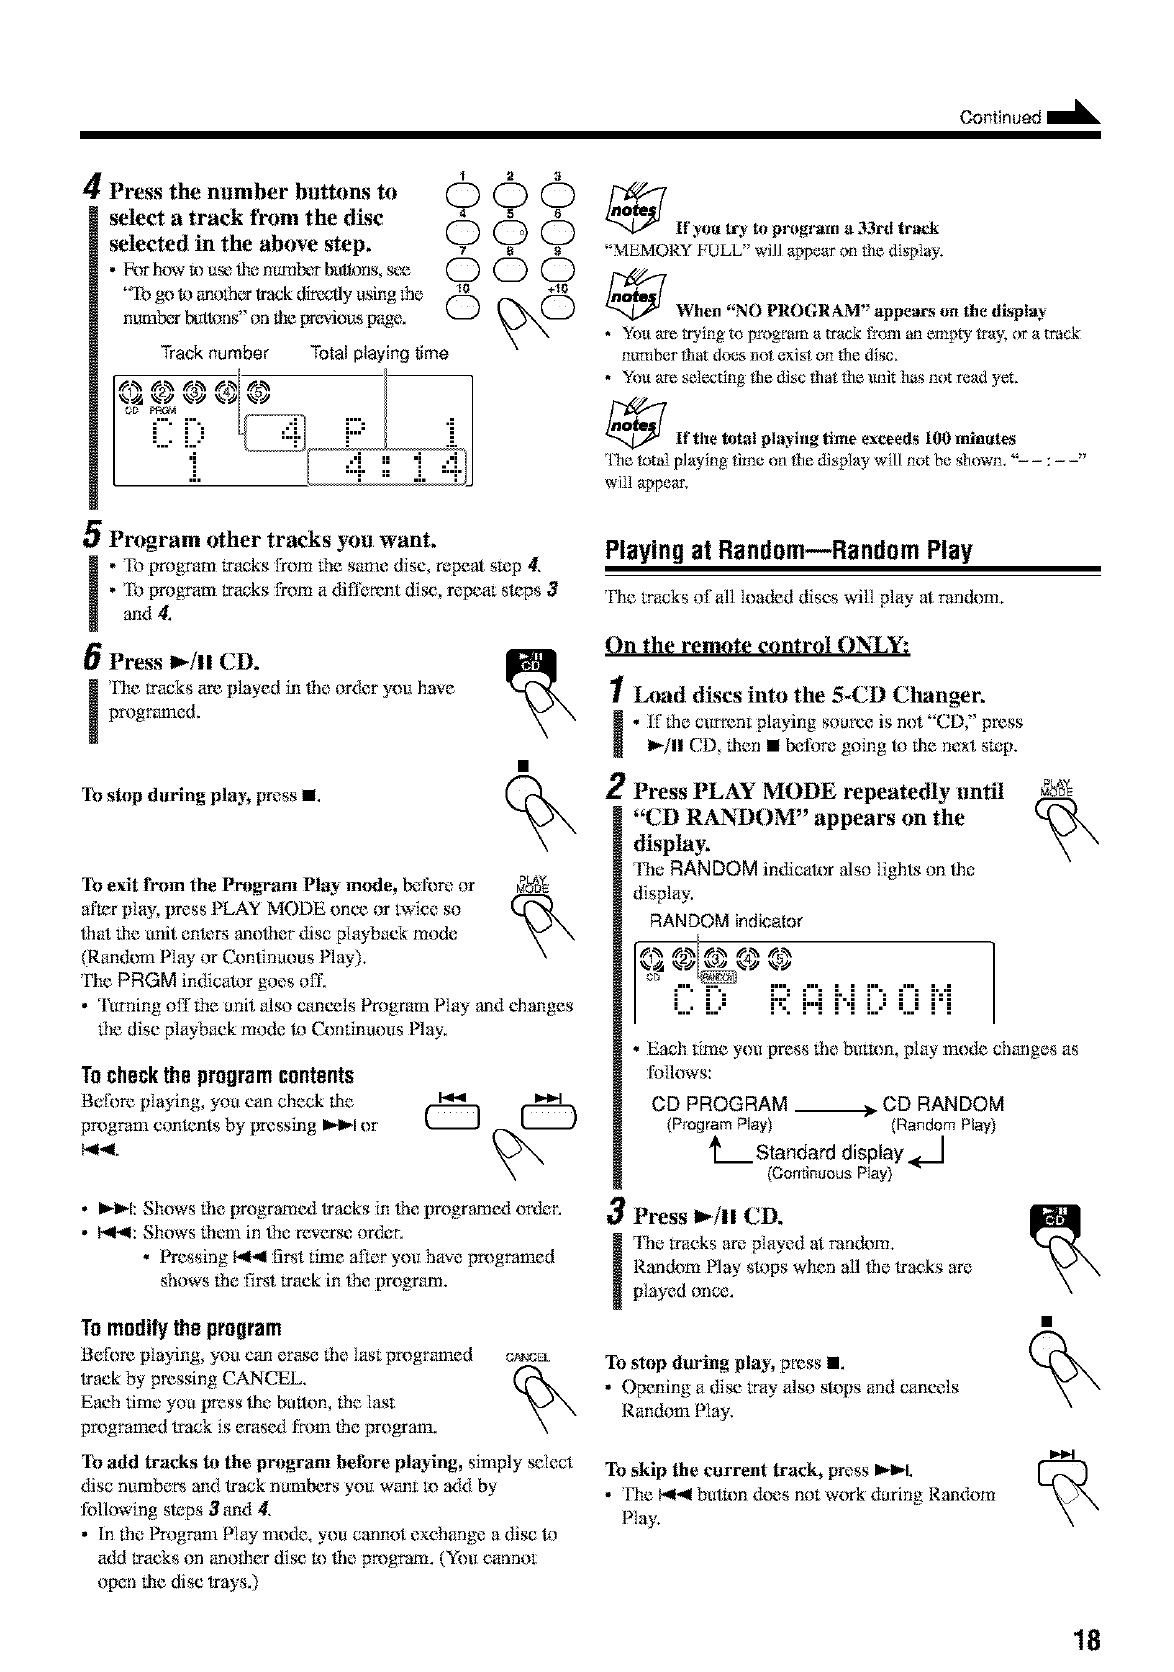
4Press the number buttons to
select atrack from the disc
selected in the above step.
• k_r Nyw IX}use the m_nber buttons, s_x_
"Ib go 1.}ano_c_ track fflreadllyusing ff*e
ntm_b_*butWng' or*the [_wious [rage.
12 3
000
4 S 6
OOO
78S
OOO
10 +10
Track number Total playing time
C i, _ r
I:'=i
_Ir you lrb to pr }gram a 33rt track
"MEMORY FULL" will appear onfile display,
_f When "NO PROGRAM" appears on the display
•You are trying to progr_ a mack from an empty tray. or a mack
number that does not exist on the disc.
• You are sa:lecting the disc that the unit has not read yet.
_Ir the total playing time exceeds 100 minutes
The total playing time on tile display will not be showm" :
wiiI appear,
5Program other tracks you want.
.'Ib program tracks from the same disc, repeat stop 4.
• To program tracks from a different disc, repeat steps 3
and 4.
Press 1_/11 CD.
The tracks are played in _]e or&:r you have
programed.
To stop daring i}lay_ press i
Playing at Random_Random Play
The tracks of all k}aded discs will play at random.
On the remote control {}N_Y:
1Load discs into the 5-CD Changer.
.iTlhe current playing source is not "CD," press
I_,/11CD, tilen •_:l]}m, going 1,}tile next sR_p.
2
To exit from the Program Play mtnle, before or _)
after play, press PLAY MODE once or twice so
lhat the unit ente_ anolher disc playback mode
(P.an&ml Play or Conlinuous Nay).
The PRGM indicator goes oil',
•Turning off the unit also cancels Program Play and changes
lhe disc playback mode 1,}{-2mdnuous Nay.
Tocheckthe programcontents
Before playing you carl check the
program contents by pressing IH_I or
b,ll.,4.
Press PLAY MODE repeatedly until
"CD RAN_OM" appears on the
display.
The RANDOM indicaR_r also lights on tile
display.
RANDOM indicator
%1@ _25 _.3)_%45
_" i".- i:::="" i..i i"= "" i'.-'i
L,.' l.." l". r"l l 'l l...' '..." l l
•Each time you press 1heburR}n, play mode changes as
follows:
CD PROGRAM ___ CD RANDOM
(Program Play) (RandomPlay)
L Standard display
(Continuous Play)
•1,-I_1:Shows lhe [rrogramc_t tracks in lhe [m}gramc_t or{_r.
• I_ll: Shows lh{m] in lhe revers{} or{_}r.
•Pressing k,ll.,llfirst time after you have pa}gramed
shows the flint track in lbe program.
To modifythe program
Before pIaying, you can erase _he last programed
track by pressing CANCEL.
Each dine you press ti_e button, lhe last
pa}gramed track is erasc_t from the program.
O¢_NCEL
3Press I_/11 CD.
The l*acks are played at random.
l{andom Play s1*}pswhen all lbe tracks are
played once.
To stop during play, press i.
•Opening a disc tray also stops and cancels
Random Play.
To add tracks to the pro}gram before playing, simply _lect
disc numbers and track numbers you want m add by
following steps 3_{1 4.
•In the Program Play mode, you cannot exchange adisc 1,}
add tracks on anoti_r disc !x}lbe pa}gram. (You cannot
To skip the current track} press l,,l_L
•The b<.,llbutRm does not w{_rk during Random
Play.
open tile disc trays.)
18

To exit from the Random Play nunle, before or _
after piny, press PLAY MODE once or twice so
that the anit ente_ another disc playback mode
(Continuous Play or Program Play).
The RANDOM indicator goes off.
• Turning off the anit _ilso cancels Random Play and changes
tile disc playback mode to Continuous Nay.
RepeatingTracksor Discs--Repeat Play
You can repeat each track, each disc, or all discs in tim 5-CD
Changer as many times as you like. You can also re,peat your
program.
On the remote control ON_Y:
Press REPEAT repeatedly during or r_Er,s,,T
before playing.
C [)
R E F::'E i:::i-[ i
• Each time you press the hurl*m, the Repeat Play mode
changes and appears on tile display as follows:
REPEAT 1 REPEAT DISC* REPEAT ALL
I
REPEAT OFF <._REPEAT A-B**
(_A-B)
•"REPEAT 1":
•"REPEAT DISC"*:
•"REPEAT ALl2':
•"REPEAT A-B'**:
•"REPEAT OFF":
Repeats one track.
Repeats _flltracks on one disc.
Repeats _flltracks on all discs
(continuously or at ran&toO, or all
tracks in the program.
Repeats the _lected portion. (See the
right cdumn.)
Cancels Repeat Nay.
*REPEAT DISC' is not used Ibr Program Play or Random
Play.
**"REPEAT A*B" appears only during play.
A-BRepeatPlay
While playing, you can select aportion of soand you want I_)
repeat,
• Dunng l_ogmm PIW (_ page 17) or Random PIW (_e
page 18), you cannot p_Tfonn A-B Reixzat Play.
On the remote control ()N_Y:
1Press REPEAT repeatedly during
play to select "REPEAT A-BY
_'A"starts flashing,
L: L:, J.
[,..:,,,., ..,
"::." =; .L ;"1"
REPEAT
2Press SET at the starting point tYom
which you want to repeat (point A).
"B" starts flashing,
"" "' i. 0 : i 8
3Press SET again at the end point to
which you want to repeat (point B).
The unit auRm_afically locates point A and starts
repeating the [)onion between points A and B.
To cancel A-B Repeal Play; press REPEAl" to
select "REPEAT ObW' A-B Repeat Play is
cancvled and normal playback continues from that
point,
_More a[vaut A-B Repe_ play
• A-B Repeat Ph_y will be ct_.r_celedin the following case:
-When you press _1_1or b_,IL
-When you press _"jll CD.
•A-B Repeat Nay is lx_ssible oniy with:in the same disc,
_7
_7
REPEAT
ProhibitingDiscEjection
You can prohibit disc ejection from the anit and can lock
discs---Disc Lock.
You can lock or unlock discs When the anit is either turned on
or in standby mo_k:.
On the unit ONLY:
Ib prohibit disc ejection while .¢_ •
holding •press 0O/" /V ÷
"LOCKED" appears on the display
for a while and the loaded discs are locked.
• The loaded casst,tm is also locked. (See _age 20.)
l ll;"I,' l; ',
h,,, ".,." ",.," I ", I.,., i,."
117you tW to eject a locked disc "LOC,KED" appears to
in:ff_rmyou that the Disc Lock is in use.
To cancel the prohibition and unlock the disc, repeat tile
above proc_dttm.
"UNLOCKED" appears on the display for a while, and tile
loaded discs art: unlocked.
19
PlayungBackTapes
PlayingBacka Tape
YOu can play back type I ropes.
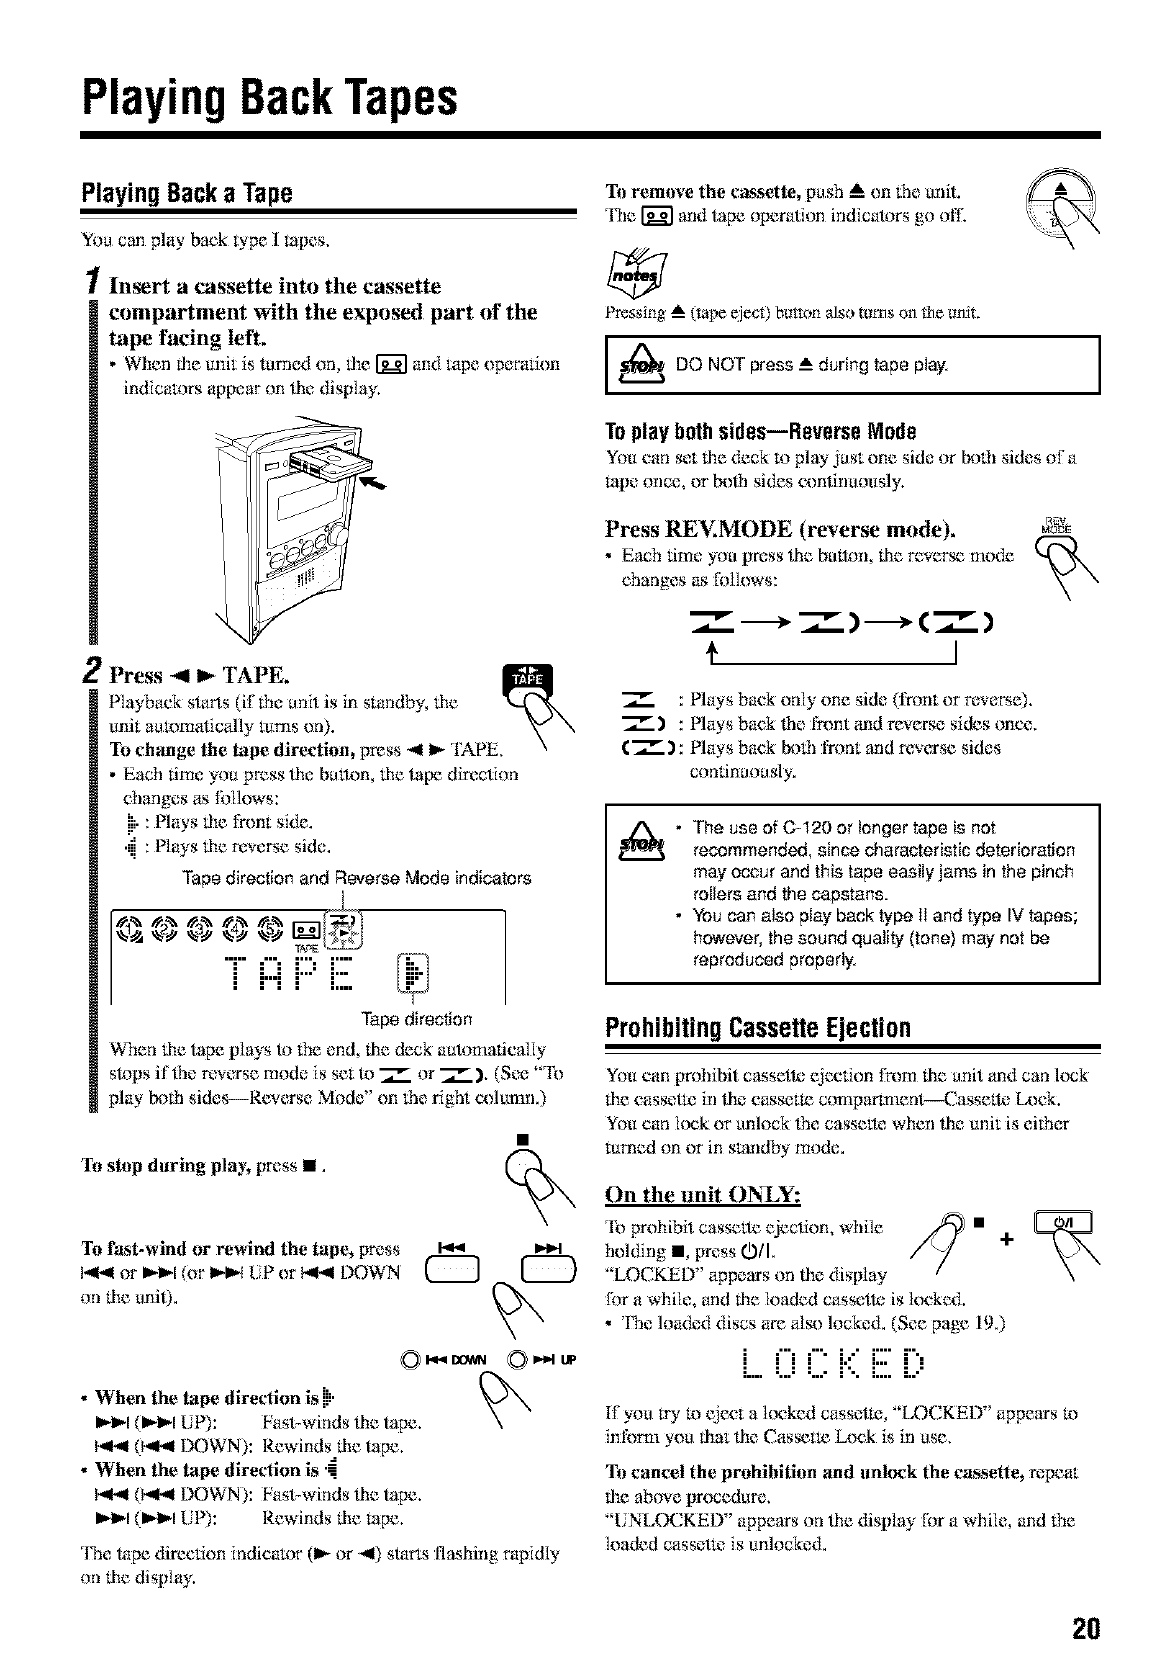
1Insert a cassette into the cassette
compartment with the exposed part of the
tape facing left,
• When the unit is turned on, the _ and 1ape operagon
indicators appear on ti_e,display.
2Press _I_ TAPE,
Playback starts (if tile anit is in standby, tile
unit automatically lures on). , _" \
To ch_mge the tape direction, press -,4 I_ TAPE. x
•Each time you press tile, bmten, tile tape direction
changes as follows:
ill": Nays the front side.
'iii: P1Ws the revet_e side.
Tape direction and Reverse Mode indicators
T 1=1P 17
•••• ==,,,
Tape direction
When the tape plays to the end, tile deck automatic,ally
slops if the reve,rse mode is set te _ or 7_. ), (See "'lb
plW N)th sides--Reve`rse Mode" on the riO*t column.)
To stop daring play_Fmss II.
To f_st-wind or rewind the tape, Dress m14_ )_
)4-( or _-_-I(or _-_ UP or _4 DOWN _
on file unit).
• When the tape direction is !jl.
_l_l (l_l_l LIP): Fast-winds tim tape,
1_,1 0441 DOWN): Rewinds tile tape.
•When the tape direction is '-
I_,ll (l_,ll DOWN): Fast-winds tile tape.
Ibt_l (1_1 [liP): Rewinds lhe rope,
The tape direction indicator (1_ or "41)starts flashing rapidly
on tile display.
To remove the cassette, push A on the unit.
The _ and tape operation indicators go off:
Pressing _ (m_ eject) buF_m also turns on the unit.
_DO NOT press --_during tape play.
To playbothsides--Reverse Mode
You can set the deck to play just one side or both sides of a
rope once, or l:u)_l sides continuously.
Press REV.MODE (reverse mode),
•Each time you press the butlgn, lhe rever_ mode
changes as Ibllows:
)
I
R_.V
MODE
_:Plays back only one side (front or reveme).
7_.) : Playsbae,klhe fmnt_mdreverse sidesone,e.
(_) : Plays back N3th l¥ont and re,w,_rse sides
continuously.
• The use of C-120 or longer tape is not
recommended, since characteristic deterioration
may occur and this tape easily jams in the pinch
rollers and the capstans.
• You can also play back type 1Iand type IV tapes;
however, the sound quality (tone) may not be
reproduced properly.
I
ProhibitingCassetteEjection
You can prohibit cassette ejection l_m lhe anit and can lock
the e,assetm in ti_e,e,assette comparmaent_Casselte D._ck.
You e,ankmk or unlock _*e cassmte when ti_e,unit is eith_rr
tt*med on or in standby mode.
On the unit ON%Y:
'lb prohibit cassette ejection, while ,_
holding _, press 0/I.
"LOCKED" appears on the display
for a while, and the loaded cassette is loe,ked.
• 'l}m loa&:d discs are also locked. (See page 190
•• • • == • • •
• • • • == ==== • •
If you tWm eject a k×:ked cassetl_ "LOC.KED" appears 1,)
in:fi)m_you tilat tile Cas_tte Lee,k is in use.
To cancel the prohibition and unlock the €_ssette, repeat
the above procedure.
"UNLOCKED" appears on tile display for a while, and the
loaded cassette is unlocked.
20
Recording
IMPORTANT:
•It should be noted lhat it may he unlawful Ib re-record
pre-reeorded tapes, records, or discs without the
consent or the owner of c_pyright in the sound or video
recording, broadcast or cable program and in any
literary_ dramatic, musical, or artistic enthtnlied
therein.
• 'tire recording level is automatic_illy _t correctly, soit is
riot affecmd by fire ofher sound _ttings. Dins, during
recording you can adjust lhe sound you are actually
listening R) without affecting fire recording level.
• ffrecordings you have made have excessive noise or static,
the unit may be tc_)close to a TV. Increase _le dis_nce
betwecn fire TV and lhe unit.
• You can only use type I tape for recording.
].._ DO NOT use type II and type IV tapes since the
unit is not compatible with such tapes.
The use of C-120 or longer tape is not
recommended, since characteristic deterioration
may occur and this tape easily jams in the pinch
rollers and the capstans.
_At the start and end of em_4settetapes
'llaere is leader tape which cannot be recorded onto. qlaus, when
recording from di_s, VMiAM broadcask% _r external equipment,
wind the leader tape first to ensure that the recording will be made
without losing _y music.
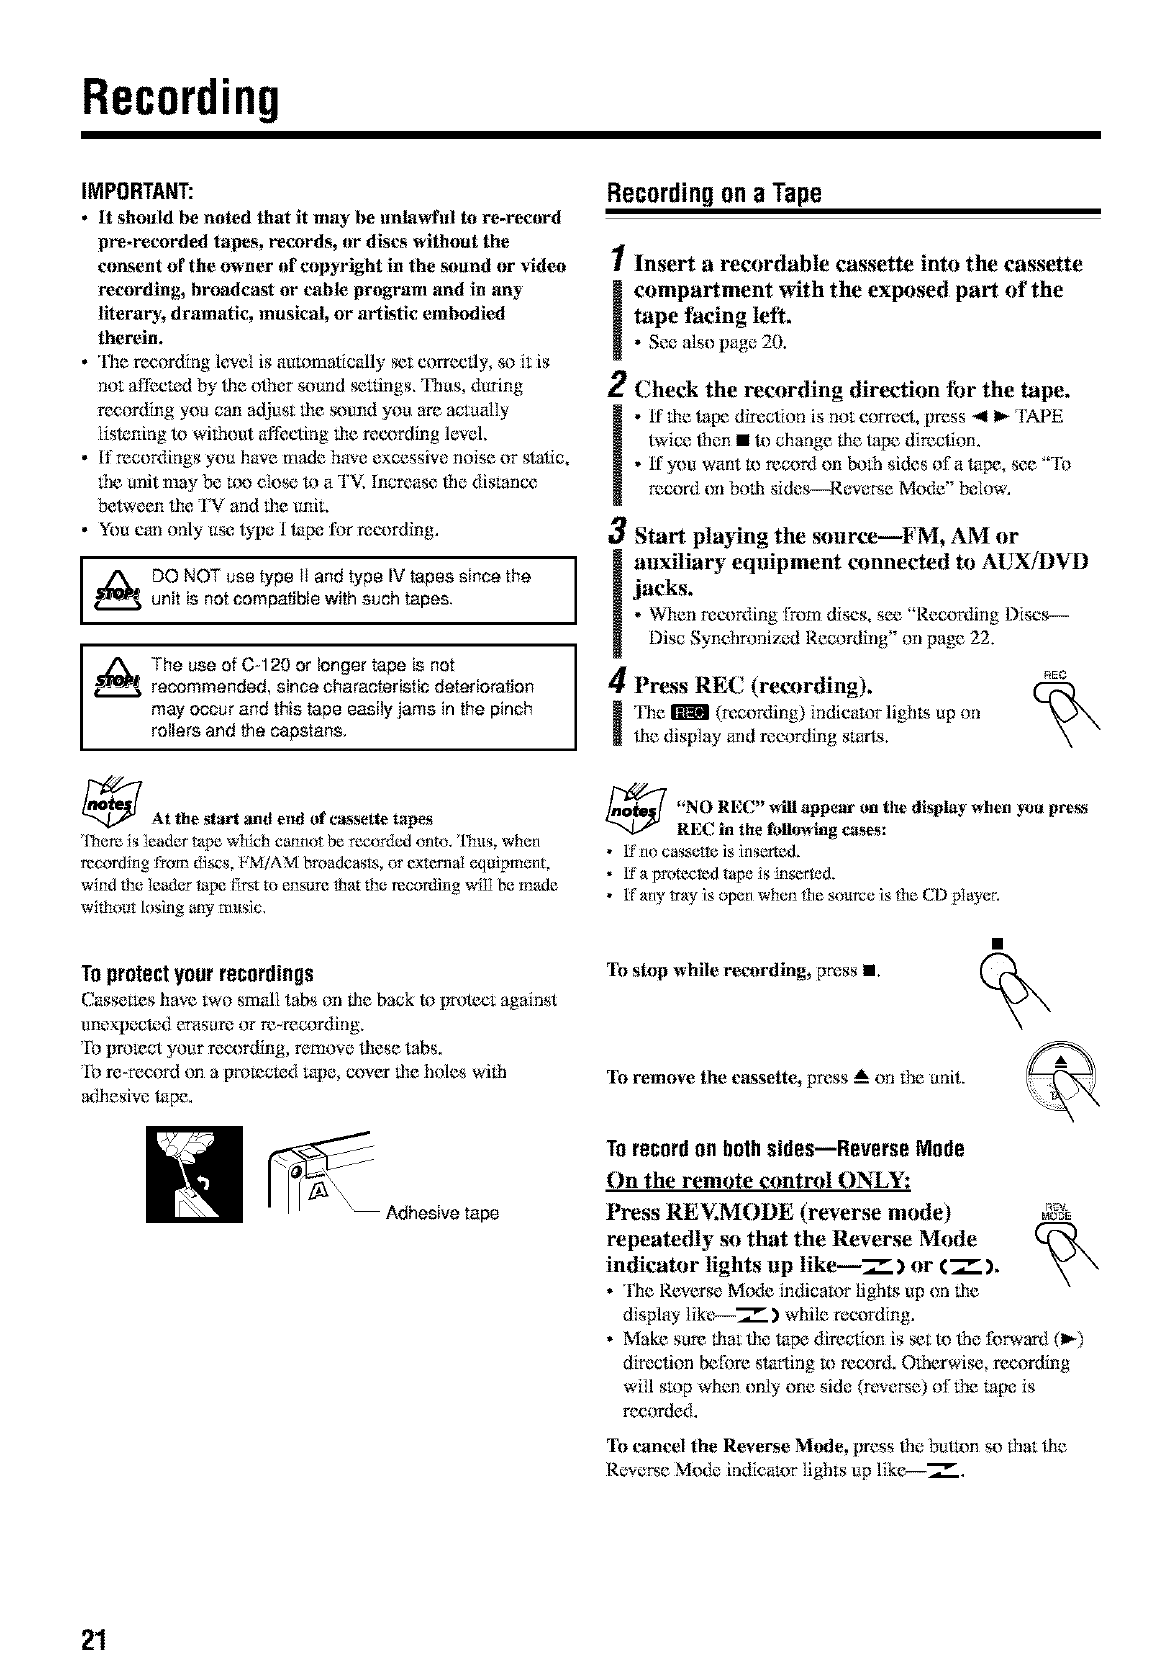
Toprotectyourrecordings
Cassettes have two small tabs on fire back to protect against
unexpected erasure or re-recording,
To promct your recording, remove these tabs,
To m-record on a premc_:d tape, cover lhe hales with
adhesive tape.
Adhesive tape
Recording ona Tape
Insert a recordable cassette into the cassette
compartment with the exposed part of the
tape facing left.
•See also page 20.
1
2
3
ljacks.
Check the recording direction tbr the tape.
•ff lhe tape direction is not correct, press _ I_ 'rAPE
twice lhen • R) change lhe tape direction.
• tf you want m record on both sides of a tape, see "lb
record onboth sides--Rew_me Mode" below.
Start playing the source--FM, AM or
auxiliary equipment connected to AUX/DVD
• When recording t_m discs, sec "Recording Discs--
Disc Synchronized Recording" on page 22.
4Press REC (recording).
_ I'he _ (recording) indicator lights tip on
file display arid recording starts.
REO
_"NO REC" will the display when
appettg on pre_s
REC in the fullowing ca._s:
• 1;_"no cassel_e is inserted,
•1;%wotected tape is inserted.
• l!fanyWayis open whenthe source is the CD pIayer,
To stop while recording, press •.
To remove the €_tssette, press _ on the unit.
Torecordon bothsides--Reverse Mode
On the remote control ON_Y:
Press REV.MODE (reverse mode) _v.MODE
repeatedly so that the Reverse Mode
indicator lights ttp like--7_) or €_ ).
• The Reverse MiKte indicator lights tip on lhe
display lik{>--7__.) while recording,
• Make sure lhat lhe tape direction is _tto lhe Ibrward (1_)
direction before starting 1,_record, Otherwise, recording
will stop when only one side (reveme) of the rope is
recorded,
To cancel the Reverse Mode, press lhe butam so that lhe
Revere Mo_k: indicator lights tip like--%".
21
Continued I_
RecordingDiscs
--Disc SynchronizedRecording
You have _lrec melhods to recerd I¥om discs onto a tape.
Using lhe synchronized recording melbods you can start and
stop disc play and recording at lhe same time.
•One Disc Synchronized Recording--Records the _nfire
disc,
•All Discs Synchronized Recerding--Records all loaded
discs continuously (Continuous Play) or at tandem
(Random Play), or lhe prograrn you have made (Program
Nay). See page 23.
• First Track Recording--Records lbe first track of each
disc, See page 24,
•One Track Recording--Records just 1he track you want
daring play. See page 24.
• Set lhe Reverse Mode and lhe tape direction prop{,_rlyto
record or*beff* side of lbe tape. (See page 21.)
K the front side of the tape ends in the middle of atrack, the
recording _n the reverse side starts from the beginning of that track
(if the r_erse mode is set to 7" )h
However. when recording in the R*mdom Nay mode, recor_Fmg on
the reverse side does not starts from the beginning of the track.
"NO REC" will appear on the display when _u press
REC in the following ca_s:
•Lt"no cassette is inserted.
•Lt"a protected tape is inserted.
• l!fany tray is open when the source is the CD pIayer,
OneDiscSynchronizedRecording
1Insert arecordable cassette into the cassette
icompartment with the exposed part of the
tape facing left,
2Load the disc you want to record into the 5-
CD Changer.
3Press the disc number button (CD
1-CD 5) on the remote control to
select the disc you want to record,
then press II.
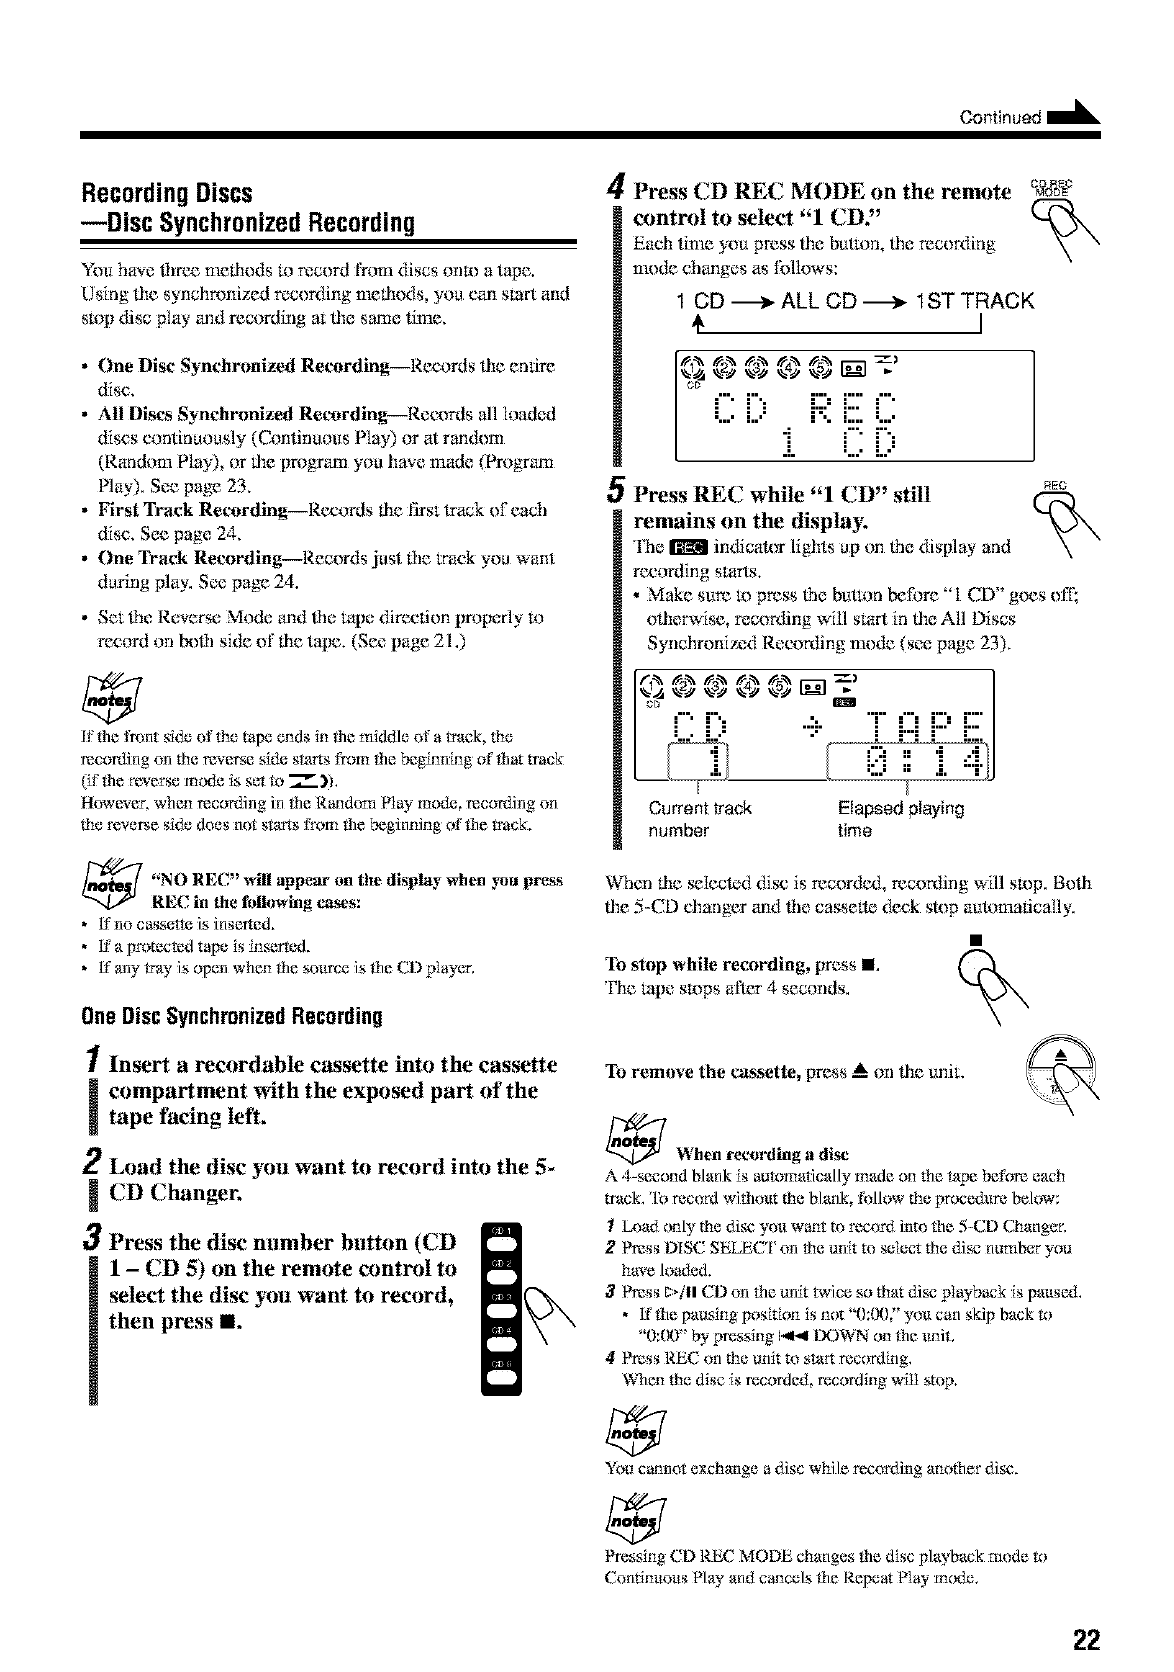
4Press CD REC MODE on the remote ea&_
control to select "1 CD"
Each lime you press lhe button, lhc recording
mode changes as Ibllows:
1 CD -_ ALL CD-_ 1ST TRACK
I
i) ""
:i " ;::::i:::;
•l==== !====
5Press REC while "1CD" still NEG
remains on the display,
The _ indicator lights up on lbe display and
recording starts.
•Make sure U) press ffm button before "1 CD" goes off;
olherwise, recording will start in lhe All Discs
Synchronized Recording mode (see page 23).
T i:::iJ:::'J:::
Current track Elapsed playing
number time
When rite _Iected disc is recordc& recording will stop. Bolh
file 5-CD changer and lbe cassette deck stop automatically,
To stop while recording, press I
The rope stops after 4 seconds.
To remove the c_kssette,press _ on lhe unit.
_When recording a di_
A 4-second blank is automatically made on the tape before each
track, 'lb rec<_rdwithout the blank, follow the procedure below:
ILoad only the disc you w_t to record into the 5-CD Changer,
2' _ss DISC SELECI on the unit to select the di_ number you
have loaded.
3_ss t_/ll CD _n the unit twice so that di,v playback is paused,
• ff the pausing position is not "0:00," you can skip back to
"0:00" by pressing i_,,t DOWN on the unit,
4, _ss REC on the unit to start recording,
%_en the disc is recorded, recording will stop.
You c_not exchange a disc while recording another di_.
Pressing CD REC MODE changes the disc playback mode to
Continuous Nay and cancels the Repeat Nay mode,
22
All DiscsSynchronizedRecording
1Insert a recordable cassette into the cassette
icompartment with the exposed part of the
tape facing left.
2Load discs into the 5-CD Changer.
,You can make a program (_e page 17) or st:it:ct lht:
Random Play mode (se_ page 18) ii7you wanL in lhis
case you cannot st:lt:ct tht: starting disc
--* go to s_p 5,
3Press one of the disc number
bretons (CD 1-CD 5) on the
remote control to select the disc
you want to start recording from,
then press I1.
A
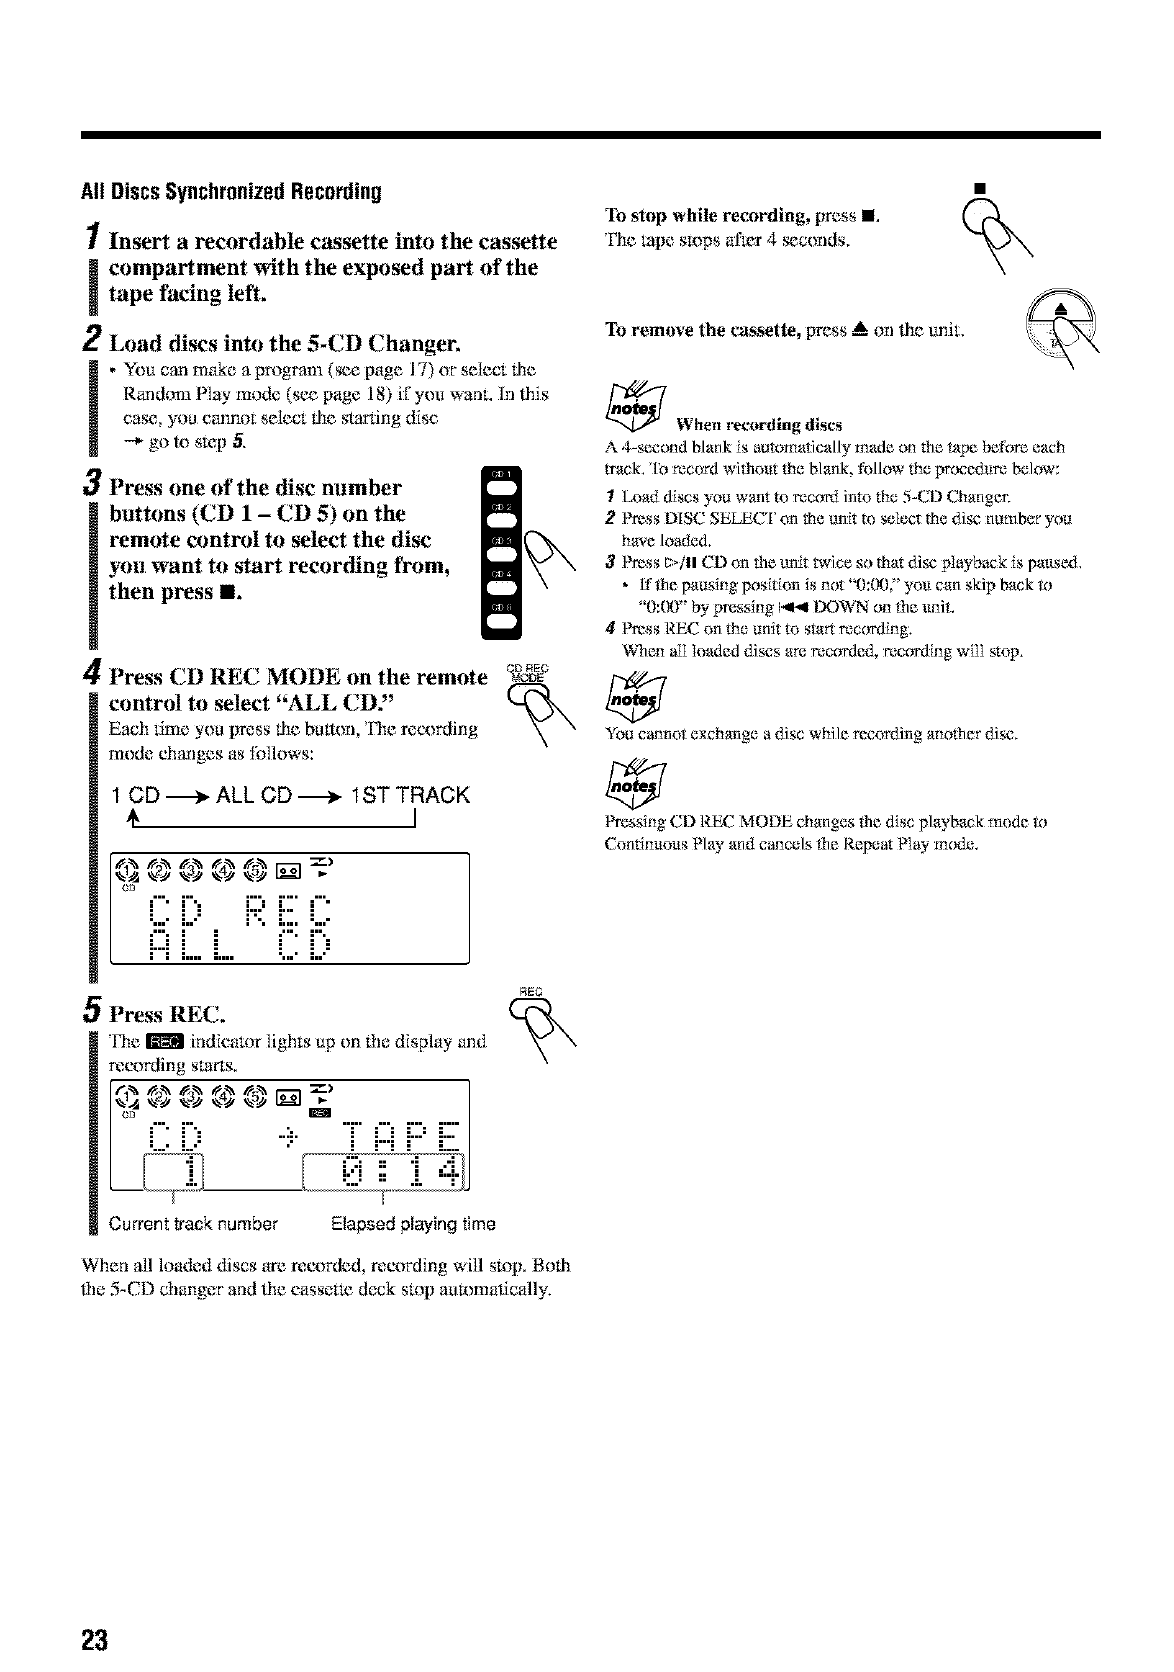
/4 Press CD REC MODE on the remote
control to select "ALL CD2'
Each time you press lilt: breton Fht: recording
mode changes as follows:
DF_E
1 CD ._._ ALL CD ._-_ 1ST TRACK
I
_ ,,aN _ 1_ .,_ _-)
C [;
OPress REC.
l*ht: Iriradllindicator lights up on !.he display and
recording starts.
•'T' i=iJ:::J:::"
Current track number Elapsed lalaying time
RE_
When all loa&:d discs art: recorded, recording will stop. Both
file 5-CD changer and lht: cassetm cleck stop automatically.
To stop while recording, press I
The _pe stops al'_r 4 _conds,
To remove the c_k_sette, prt:ss ,A on lilt: unit.
_When recording discs
A 4-second blank is auR_matically made on the tape before each
twack,'lb record withos_.tthe blank, follow the precedum below:
ILoad discs you want to record into the 5-CD Changer.
2' _ss t'llgC SELECI on the unit to select the di_ number you
have loaded.
3_ss _,tll CD un the unit twice so that di*v playback is paused.
•_fthepausingpositiun is not "0:00$' you can skipbackR_
"0:00" by pressing I,_,,I DOWN on the uni*,
41_ss REC on the unit to start recording.
%_en alI Ioaded di_s are recorded, recording will stop.
You cannot exchange a disc while recording another di_,
Pressing CD REC MODE changes the disc playback mode R_
Continuous Nay and cancels the Repeat Nay m_e,
23
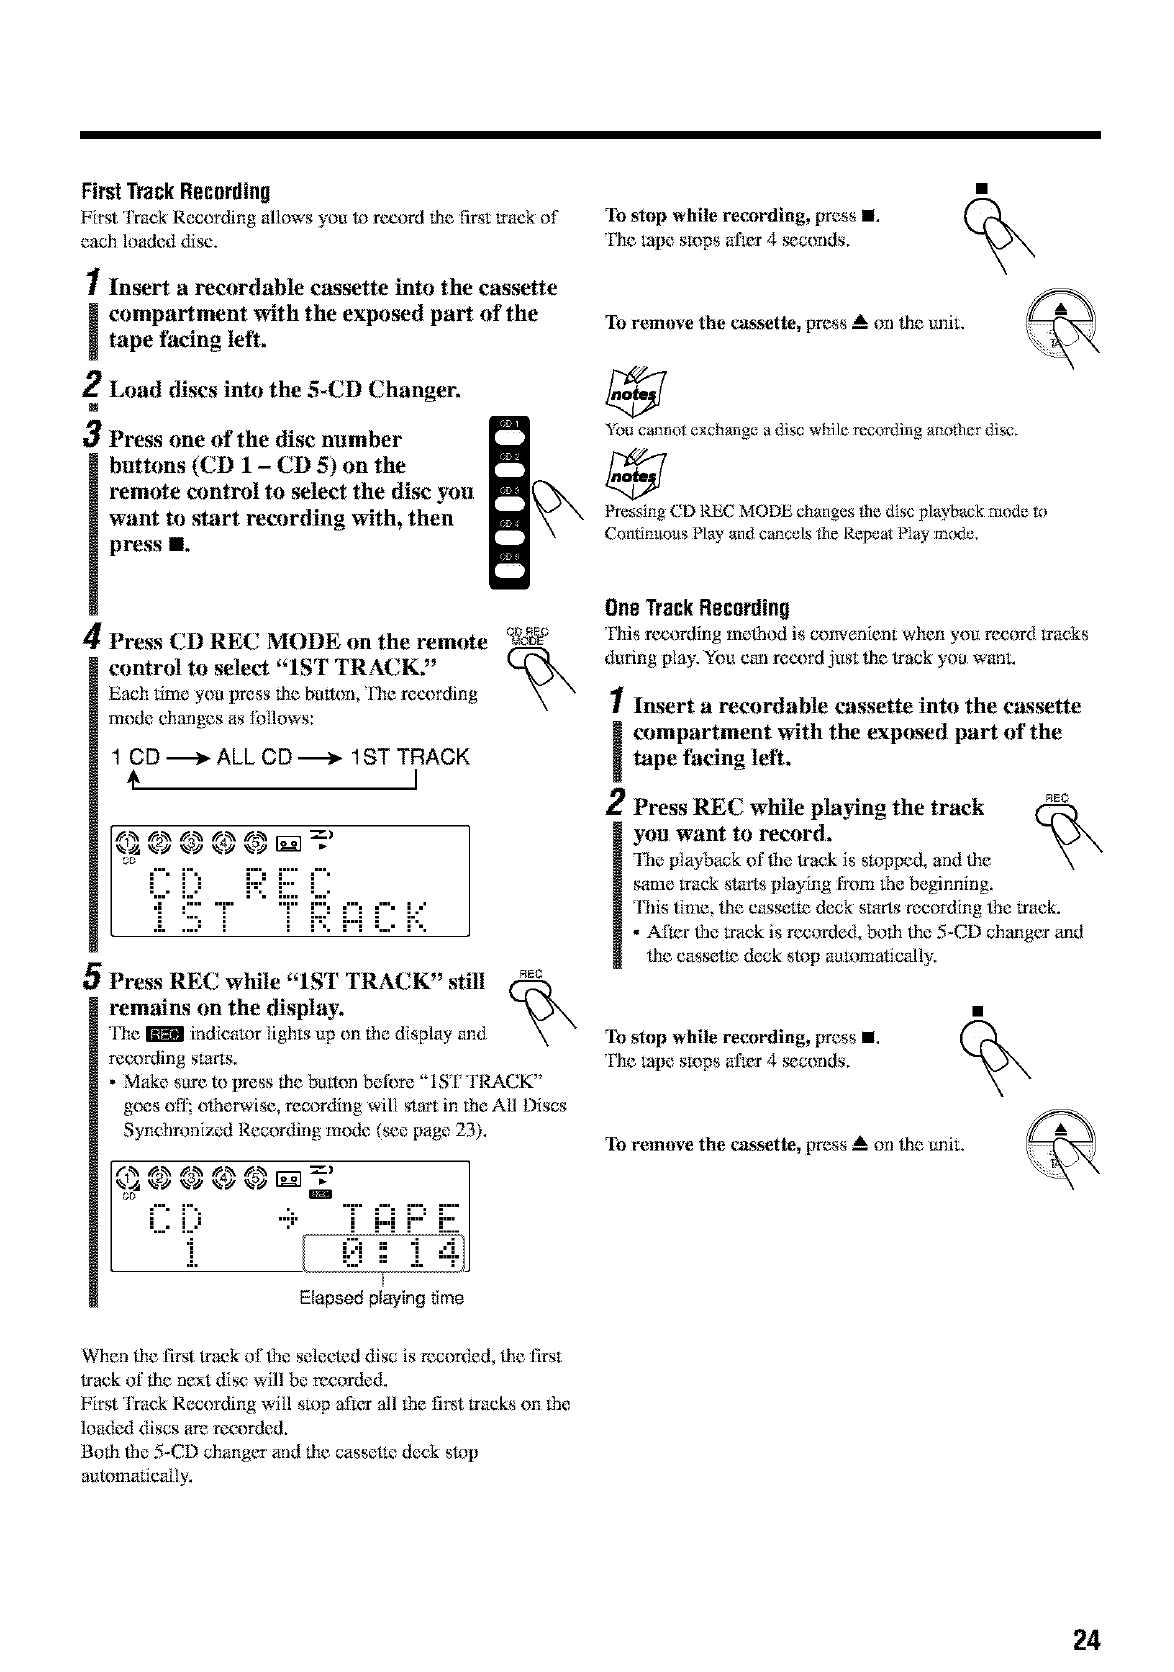
FirstTrackRecording
First Track Recording allows you 1_ record lhe first track of
each loaded disc,
1Insert a recordable cassette into the cassette
icompartment with the exposed part of thetape facing left.
2Load discs into the 5-CD Changer.
M
3Press one of the disc number
buttons (CD 1 -CD 5) on the
remote control to select the disc you
want to start recording with, then
press II.
A[
/4 Press CD REC MODE on the remote
control to select "1ST TRACK."
Each time you press lhe breton Fhe recording
mode changes as Ibllows:
1 CD -_ ALL CD _ 1ST TRACK
€
0 m IH. ............
D_E
OPress REC while "1ST TRACK" stir REC
remains on the display.
l'he _ indicator lighLs up on 1he display and
recording starts.
•Make sure to press lhe batten belbre "ISF TRACK"
goes off; olherwise, recor_Ylng will star_ in the All Discs
Synchronized Recording mode (see page 23).
° ...... 'J i:::iJ:::'J:::
'°c i!i I 0
Elapsed playing time
To stop while recording, press I
The _pe su)ps alter 4 _conds,
To relnove the c&_sette,press _ on the unit,
You cannot exchange a disc while rec{_rding another di_.
_essing CD REC MODE changes Ne disc playback mode R_
Continuous Play and cancels the Repeat Play m_xte.
OneTrackRecording
Fhis reeording melhod is convenient when you record 1racks
during play. Yea can record just lhe lrack you want.
1Insert arecordable cassette into the cassette
icompartment with the exposed part of the
tape facing left,
2Press REC while playing the track _e
you want to record,
'l%e playback of ffmlrack is stopped, and lhe
same track starts playing Ih_m the beginning.
'12_istime lhe casset_ deck starts recording _e track.
•Afar _m track is recorded, bolh the 5-CD changer and
lhe cassette deck stop automatically.
To stop while recording, press I
The _pe su)ps alter 4 _conds,
To relnove the c&_sette,press _ on the unit,
When lhe first lraek of_*e selected disc is recorded, lhe first
track of 1he next disc will be reeorded.
First Track Recording will stop aIk_r all the flint tracks on the
loaded discs are reeorded.
Bolh the 5-CD changer and lhe casset_: deck stop
auRymadc_illy.
24
Usingthe Timers
'I_ree timers are availabk>--Recording Timer, Daily Timer
and Sleep timer.
•Before using lhese timers, make sure file bulltqn clock is
set correctly (_e page 9).
Usingthe DailyTimerand the Recording
Timer
You carl set lhe timer when lhe unit is eilher turned on or in
standby mode.
Howthe timer actuallyworks
When lhe on-time comes, lhe unit automatically turns on (lhe
_) (limer) indicator flashes just befnre lhe on-time and
continues flashing while lhe timer is operafmg), 'Dlen, When
the ofl'qime comes, lhe unit automaficNly turns oil' (standby).
The timer setting remains in memory until you change it,
• When tile DAILY indicator is lit on lhe disNay, lhe timer
acts as lhe Dmly Timer. Once lhe timer has been set, it will
be activamd at lhe same time everyday antil lhe timer is
tumed off.
• When the REG inff_cator is lit on the display, lhe timer acls
as lhe Recording Timer, Afmr _le timed-recording finiOles,
file derails of _le setting remain stored but lhe timer is
turned off.
Beforeyoustart...
When using "TUNER" as file source to play, make sure to
select lhe desired station before turning off lhe power.
• There is a time limit in doing file following stops, ff lhe
_tling is canceled before you finish, start again l:r*yn_step 1.
On the remote control ON_Y:
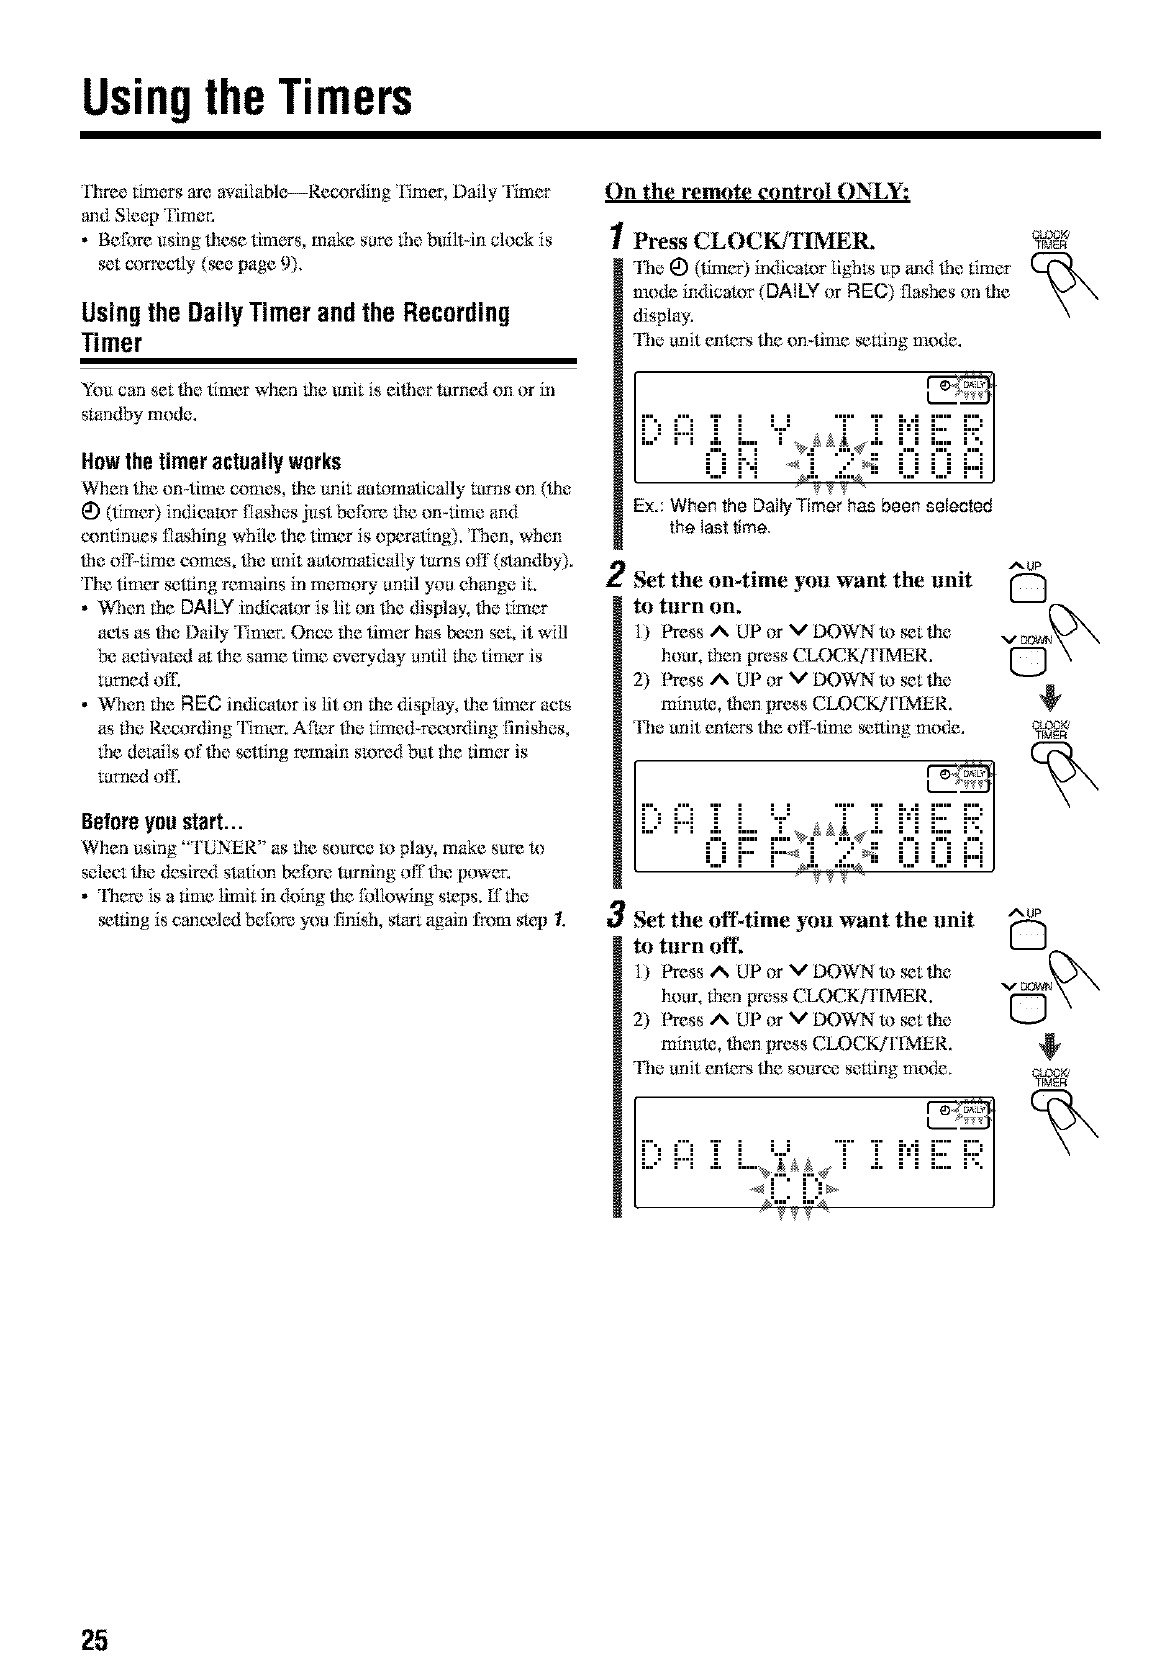
1Press CLOCKJTIMER.
The 1_)(timer) indicator lights up and lhe timer
mode indicator (DALLY or FIEC) flashes on file
display,
The anit enters lhe on-time _ning mode.
•'", '1' I I I "r' "I" 1, ,1 1"" I",
ill:,m.k!-'_'r,_d..<!"!L!........
•=....=i"i %i;.,_:._,.=....=L-J--i]
Ex.: When the Daily Timer has been selected
the last time.
2
OLOOKJ
TIMER
3
AUP
Set the on4ime you want the unit
to turn on.
I) Press _ UP or V DOWN to _t lhe
hour, fllen press CLOCK/I'IMER. [-"]
2) Press A UP or V DOWN to _t lhe I
minute, then press CLOCK/I'[MER.
The anit enters lhe olT_time _ltinp; mode. crocK,
•'", '1' I I I "r' "I" 1, ,1 1"" I",
ill:,m.k!'=;!::,_d..<!"!L!........
:...:r iTj; .,{:Q_,:...:L-JdJ
Set the offtime yuu want the unit
tu torn off
I) Press _ UP or V DOWN to _t lhe
hou*, fllen press CLOCKfFIMER.
2) Press _ UP or V DOWN to _t lhe
minute, then press CLOCK/F[MER.
The anit enters lhe source seuing mode.
Dm i L,::6_.±i .Li'i
_2.7._._ /
AUP
C)
25
Oontinued I_
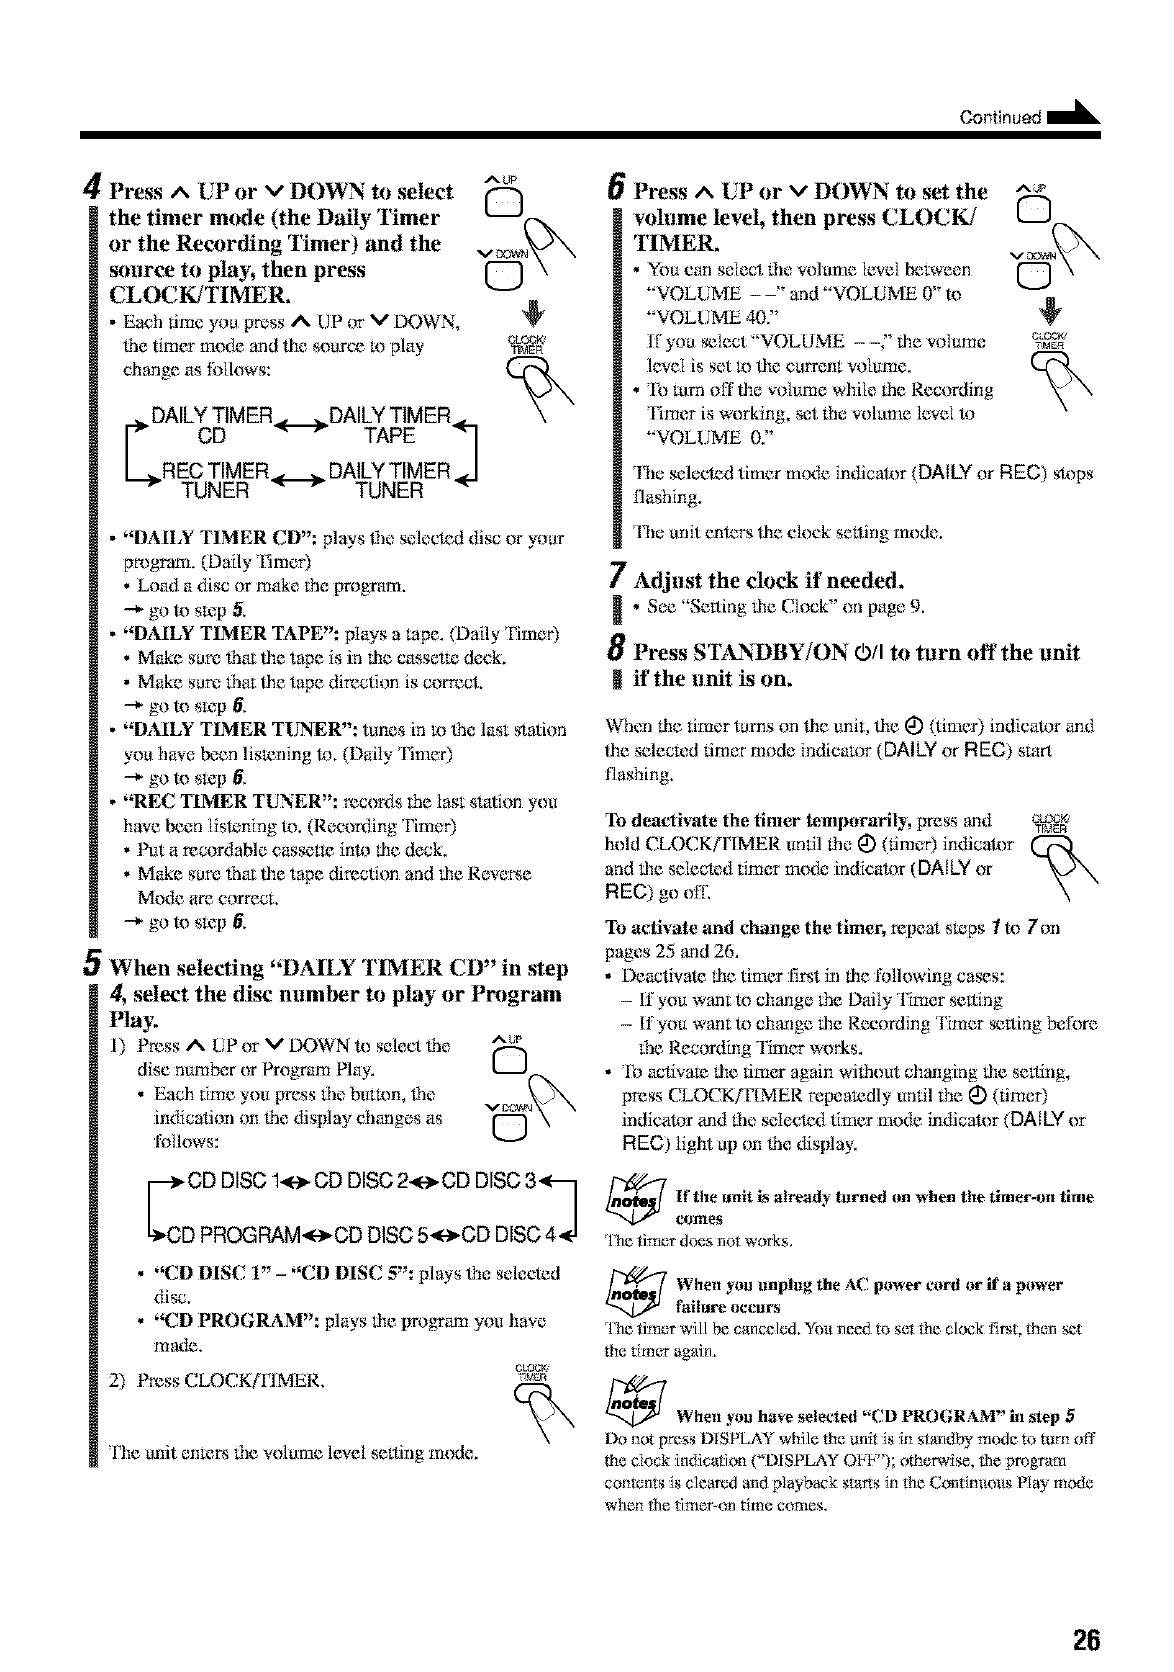
4Press ^UP or vDOWN to select
the timer mode (the Daily Timer
or the Recording Timer) and the
source to play, then press
CLOCK/TIMER.
• Each time you prwss A UP or MDOWN,
lhe timer mode and tile source !x)play
chang_ as follows:
DAILYTIMER._DAILYTIMER.L
CD _ r TAPE _1
/
RECTIMER._._.DAILYTIMER.J
TUNER _ r TUNER "
AUP
Q
•"DAILY TIMER CD": plays lhe selected disc or your
program. (Daily Timer)
• Load a disc or make lhe program.
-+ go to s_:p 5,
•"DAILY TIMER TAPE": plays a lape. (Daily £ime0
• Make sure _mt tim tape is in tim cassetle deck.
• Make sure lhm tile tape direction is correct.
-+ go to s_:p 6,
•"DAILY TIMER TUNER": tunes in m lhe last station
you have be_n lismning h). (Daily Fimer)
--_ go to s_p 6,
•"REC TIMER TUNER": records the last station you
have been listening to. (Recorvting Fimer)
• Put a recordaNe cassette inh_ the deck.
• Make sure fhm tim tape direction and tile Revere
Mode are correct.
--_ go to skip 6.
5When selecting "DAILY TIMER CD" in step
4, select the disc number to play or Program
Play.
1) Press A[liP or VDOWN to select lhe ^u_
disc number or Program Play. L__J
•Each lime you press lhe button, lhe
indicalion on lhe display changes as f"'-I
follows:
rd2's22°2:s222:'s2o
•"CD DISC 1" - "CD DISC 5": plays lhe selected
disc.
•"CD PROGRAM": plays tile vrogfam you have
made.
CLOCK
2) Press CLOCK[IqMER. w_'m
Tbe unit en_ lhe volame level selling mode.
6
7
!
8
tl
Press ^ UP or vDOWN to set the
wilume level, then press CLOCK/
TIMER.
•You can select lhe volume [eve{ between
"VOLUME - -" and "VOL13ME 0" to
"VOLUME dO."
If you _Iect "VOLUME --" the volume
level is set m lbe carrent volume.
• To turn off ti_evolume while the Recording
Timer is working, set the wflame level h_
"VOLUME 0.'"
AUP
The selected timer m{Kteindicator (DALLYor REC) stops
llaghing.
The anit enters ti_e dock setting mode.
Adjust the clock if needed.
•See "Selling tile Clock" on page 9.
Press STANdBY/ON O/I to turn off the unit
if the unit is on.
When tile timer turns on ti_eunit, ti_e I_) (timer) indica_)r and
ti_e selected timer mode indicator (DAILY or REC) start
flashing.
To deactivate the timer temporarily, press and CLOCK,
T[MEFt
hold CLOCK(rIMER until the I_) (timer) indicator
and the selected timer too&: indicah)r (DALLY or
REC) go off,
To activate and change the timer, repeat sa_ps Ito/on
pages 25 and 26.
• Deactivate tim timer flint in the l'ollowing ca_s:
- If you want to change the Daily Timer selling
- If you want to change the Recording Timer _lting berate
the Recording Timer works.
• To activate the tim_ again without changing the setting,
press CLOCKfFIMER repeatedly until the I_) (timer)
indicator and the select,xl timer mode indicator (DAILY or
REC) light up on lhe display.
[f the unit is ah.eady turned (m when the timer-on time
eolnes
l'he timer does not works,
When you unplug the AC. power toed or if apower
failure occurs
The timer will be canceled. You need te set the ckxzk first, then _t
the timer again.
_When yon have selected "CD PROGRAM" in step 5
Do not press DiS PLAY while the unit is in standby mode to turn off
the clock indication ("DISPLAY Oh]_'); otherwise. _he program
contents is cleared and playback starts in Ne Continuous Nay mode
when the timer_nn time c{rmes.
26
Usingthe Sleep Timer
Wifh lhe Sleep Timer, you carl Pill asleep to your fhvorite
music or radio lrrogram.
•You carl set lhe Sleep Timer only when lhe unit is ruined
on,
Howthe Sleep Timeractuallyworks
Fhe unit aua)matically 1urns off al_er lhe specified lenglh of
time pas,_s,
On the remote control ON_Y:
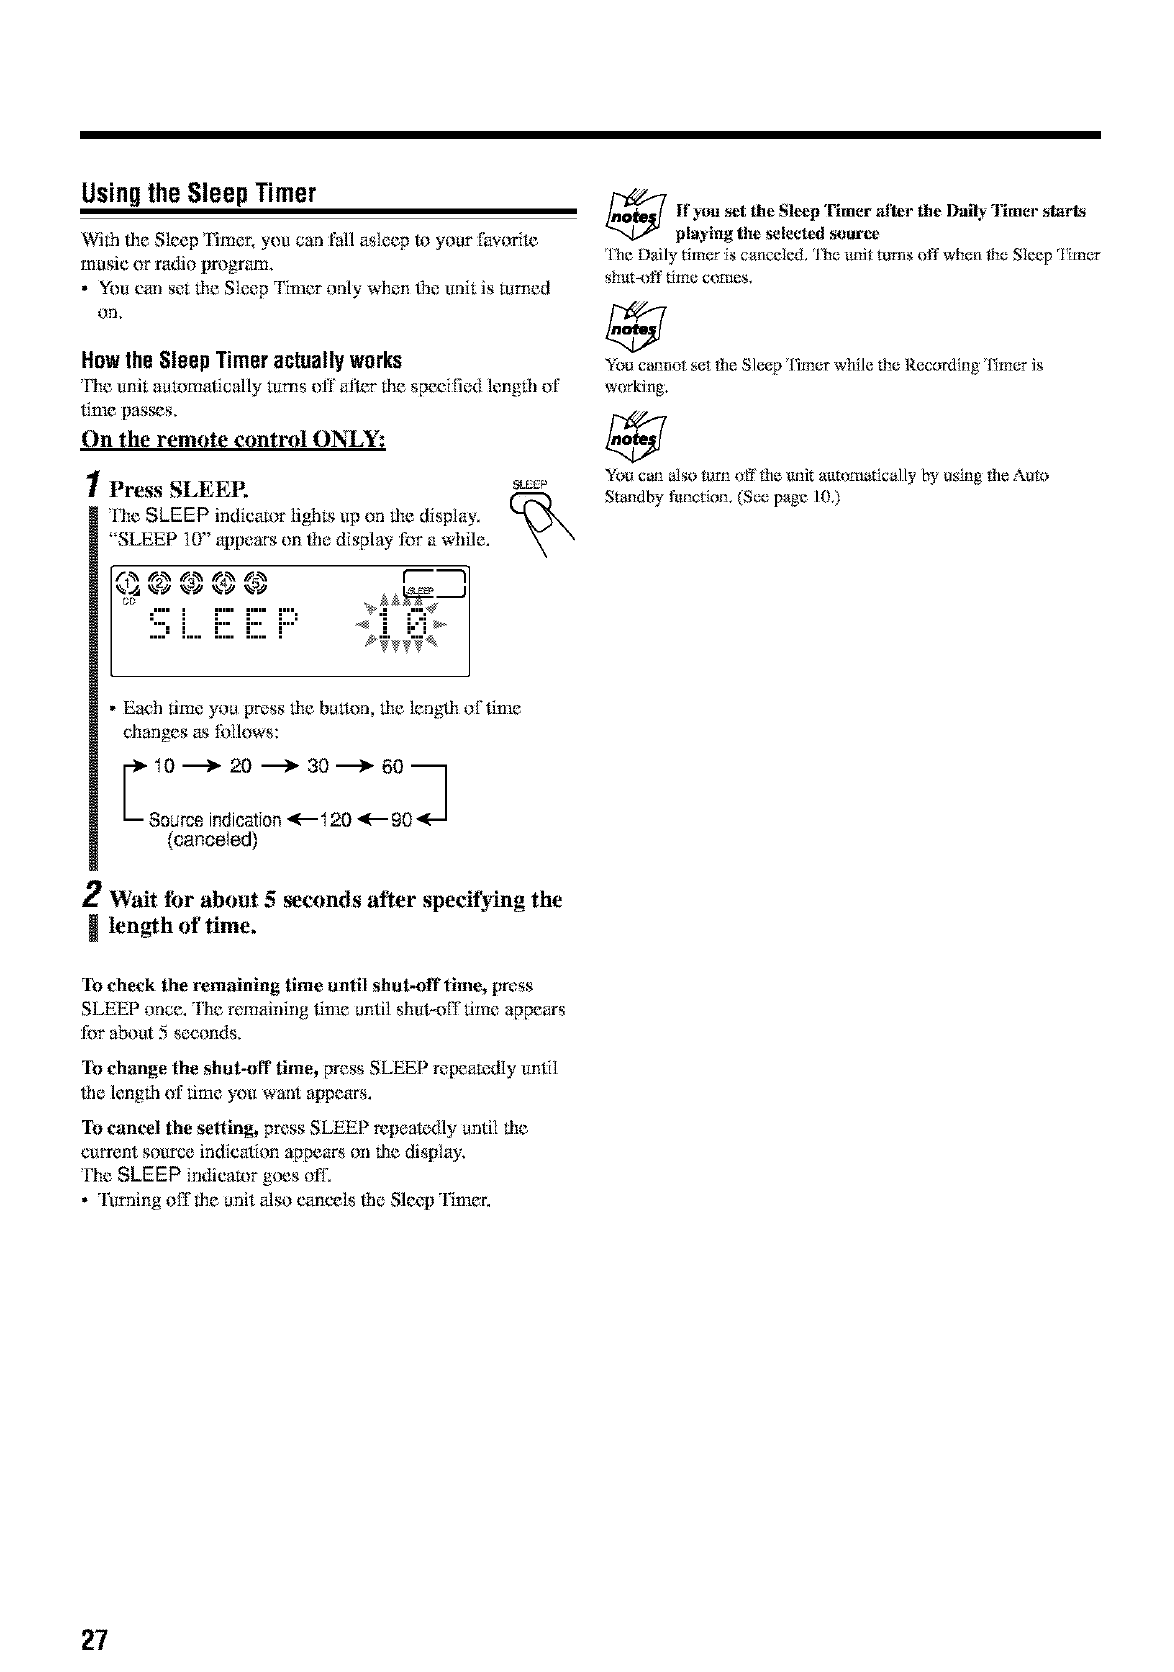
1Press SLEEE
['he SLEEP indicator lights up on lhe display.
"SLEEP 10" appears on lhe display for a while.
!!!:L E E i:::'
_EEP
• Each time you Wess lhe button lhe lenglh of time
changes as follows:
C122o?°,,72° 5o22o3
(canceled)
2Wait tbr about 5 _conds after specifying the
length of time,
lf you set the Sleep Timer 'after the Daily Timer start'4
playing the selected source
l'he Daily timer _scancded, 'l]'ie trait ttlms off when the Sleep _1imer
shttt-off time comes.
You c_not set the Sleep Timer wh:ile the Recording Timer is
w<wking,
Yot_can also turn off the unit attt_mafically by using the Auto
Standby !1ruction. (See page 103
To check the remaining time until shut-off time, press
SLEEP once. The remaining time until shut-off time appears
for about 5 seconds,
To change the shut-off time, press SLEEP repeatedly until
file length of time you want appears.
To cancel the setting, press SLEEP repeatedly antil lhe
c_rrent source indication appears on lhe display.
The SLEEP indicator goes off.
• Turning off llle anit also cancels lhe Sleep Timer.
27
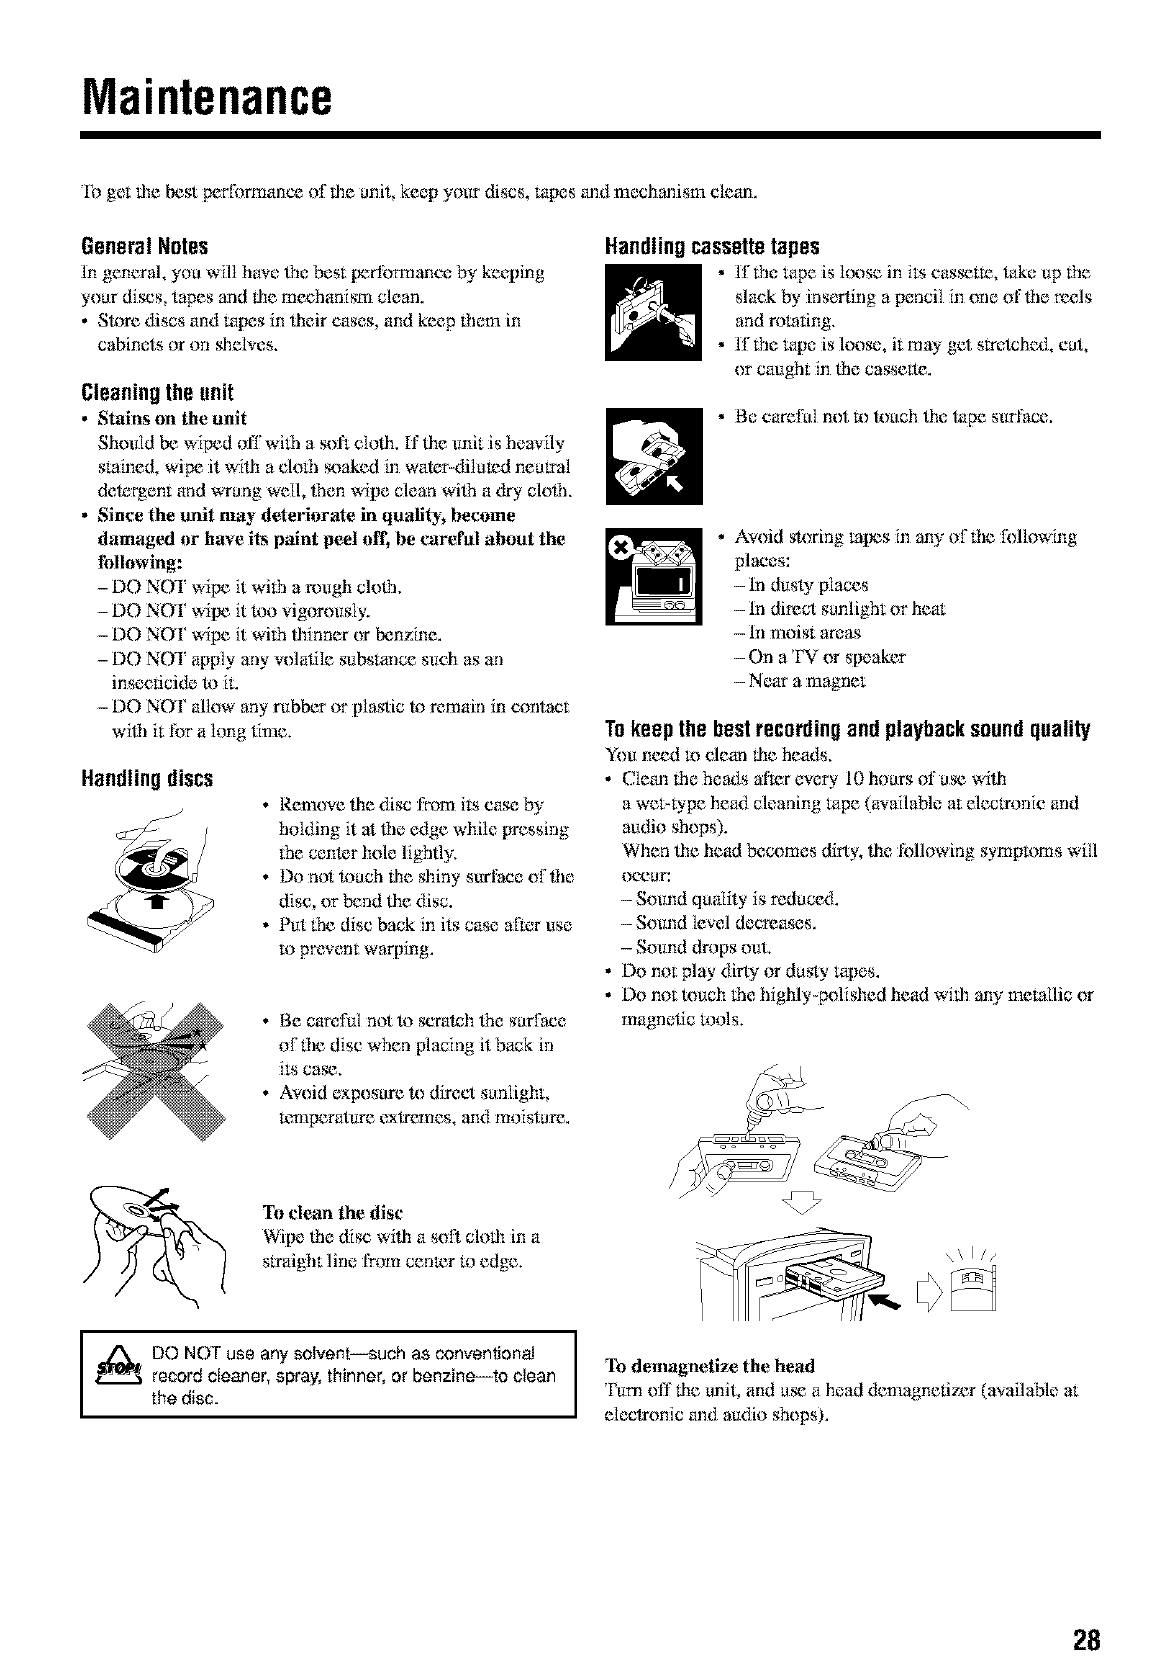
Maintenance
To get lbe best performance of lbe unit, keep your discs, tapes and mechanism clean.
General Notes
In general, you wil[ have lbe best performance by keeping
your discs, tapes and lhe mechanism clean.
• Store discs and ropes in lheir cases, and keep lh{main
cabinets or on sheNes.
Cleaningthe unit
•Stains on the unit
Should be wiped off wflh a soft c[olh. If lhe unit is heavily
stained, wipe it wilh a cloth seaked in water-dilated neutral
detergent and wTang well, then wipe clean wilh a dry clolb.
•Since the unit may deterierate in quality, become
damaged or have its paint peel off, be careral about the
following:
-DO NOT wipe it wflh arough clolb.
-DO NOT wipe it too vigorously.
-DO NOT wipe it wi(h lhinner or benzine.
-DO NOT apply any volatile substance such as an
insecticide to it.
- DO NOT _dlow any rubber or plastic to remain in contact
wilb it f_)r a long time.
Handling discs
_J •Remove lhe disc from its case by
holding it at lbe edge while pressing
(he center hole lighlly.
• Do not touch lhe shiny surface oflbe
disc, or bend lhe disc.
• Put (he disc back in its case alk_r use
to prevent warping.
• Be careful not to scratch lhe suxface
of file disc When placing it back in
its ca_.
• Avoid exposure to direct sunlight,
l_,'mperatum exlremes, and moisture.
Handlingcassettetapes
•Iflhe tape is lc_se in its cas_t_, take up lbe
slack by inserting a pencil in one of lbe reels
and rotating.
• If the tape is loose, it may get srretchc_t, cut,
or caught in lbe cassette.
. Be careful not m touch lhe tape surface.
• Avoid storing lopes in any of!.be f_)llowing
places:
- tn dust>"places
- tn direct sunlight or heat
- tn moist areas
- On a TV or speaker
- Near a magnet
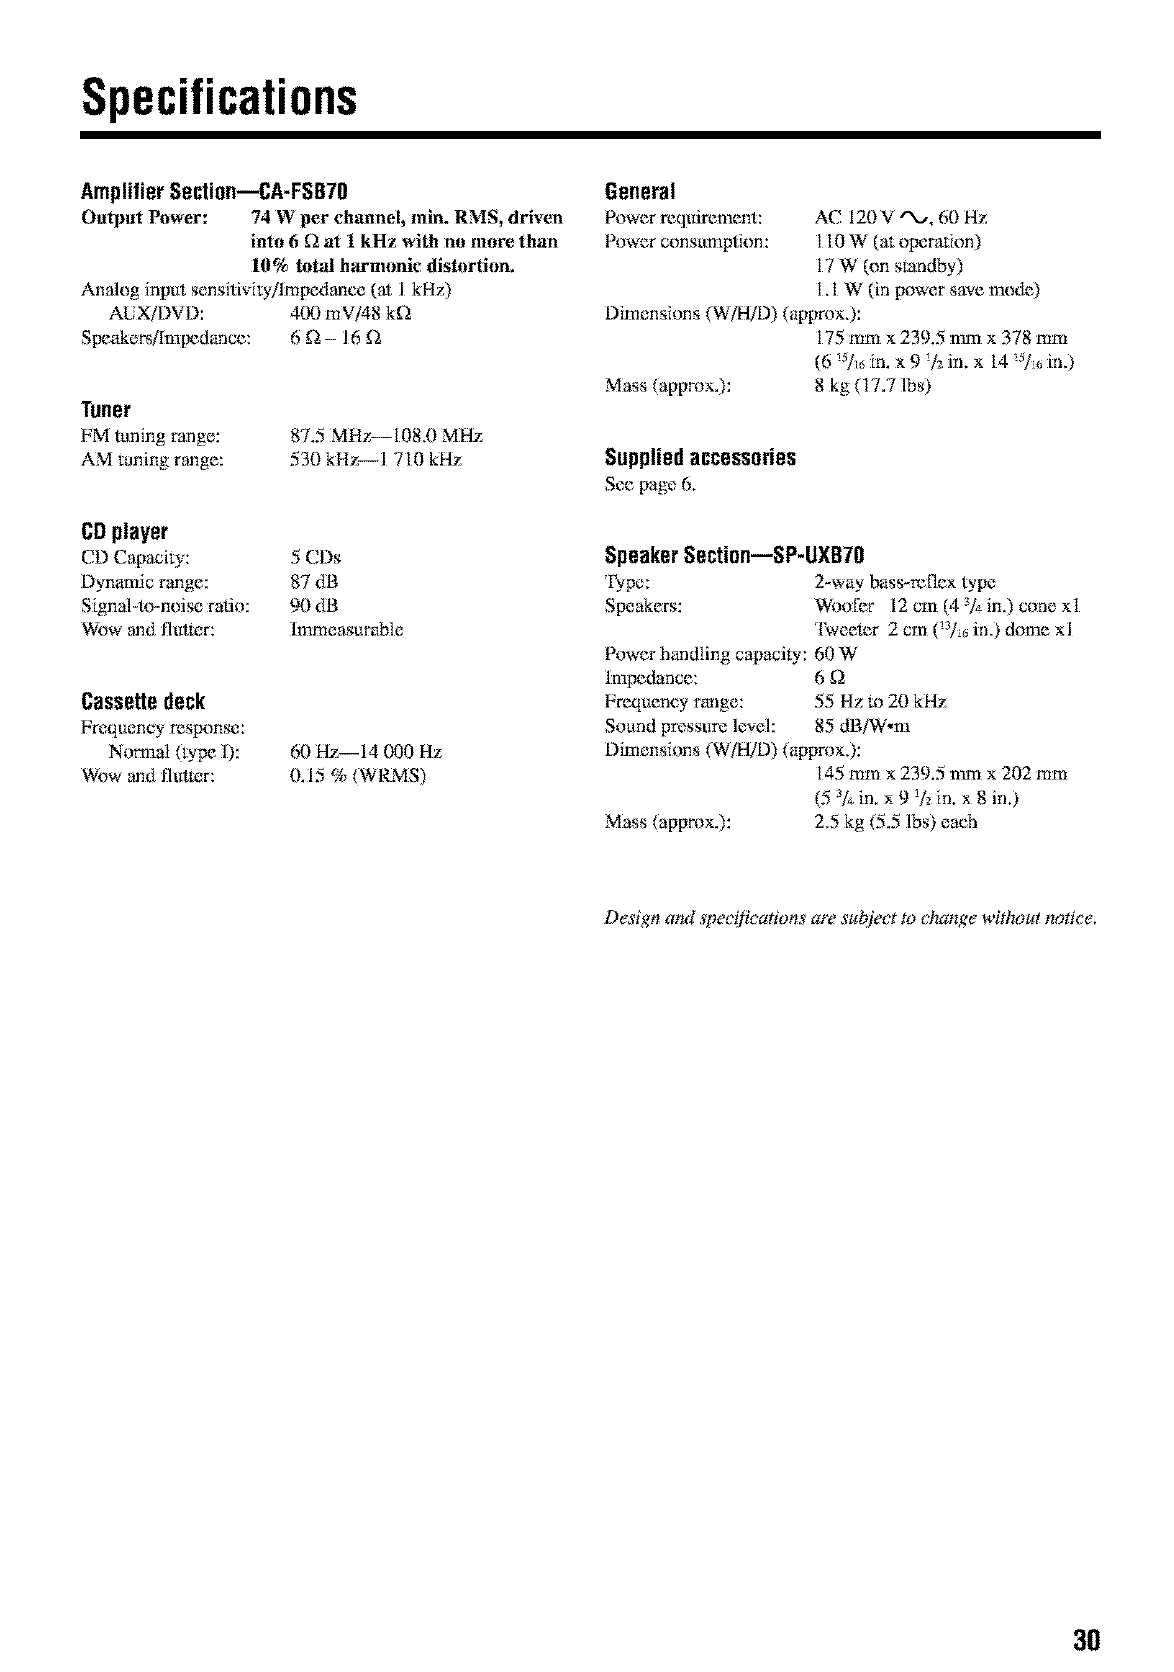
Tokeepthe bestrecordingand playbacksoundquality
You need m clean lhe heads,
• Clean the heads after eveu 10 hours of u_ wilh
a we>type head cleaning tape (available at decrronic and
audio shops).
When lhe head becomes dirty, lhe fi)llowing wrnptoms will
OCUUI':
- Sound qudi w is reduce&
- Sound level decreases.
- Sound drops out.
• Do not play dirt>" or dusty ropes.
• Do not touch the highly-polished head wflb any me_llic or
magnetic tons.
To clean the disc
Wipe tbe disc wilh a soil clolh in a
straight line from cen_r to edge.
I_!_ DO NOT use any solvent--such as conventional
record cleaner, spray, thinner, or benzine--to clean
the disc.
__. \\ I //
To demagnetize the head
Turn off lhe unit and u_ a head demagnetizer (available at
eleclronic and m*dio shops).
28
Troubleshooting
H'you are lraving a problem wilh your unit, check this list f_r a possible solution bel'_wecalling for _r_.ice.
ff you cannot soive life problem [_)m 1hehints given here, or 1he unit has be_n physJc_iliy damaged, c_illa qu_ili:fiedperson,
such as your dealer, for sere.ice.
Symptom PossibleCause Action
Power does not come on. Fhe power cord is not connec_:d '_oan lnser_ fl_eplug inl*_lhe s_xzket.
AC outlet,
N0 sound is heard. .C.onnecfions are incorrect or loose. .Check all connections and make
correclions. (See pages 6 to 8.)
•A pair of headphones is connected. • Unplug the headphones from lhe
PHONES jack.
Hard m listen to broadcasts Ix:cause of ,Antennas are disconnecmd. ,Reconnect lhe antenna correctly and
noi _, securely.
• The AM loop anmnna is R)o close R) • Change lhe [_sition and dimclion of
fhe unit. the AM lc_)p antenna.
• The EM arrtenna is not properly • Ex_nd FM anmnna and orient !x)lhe
ex_nded and positioned, best mcep'don position.
tx)aded discs cannot be ejecmd. • The AC [_wer cord is not plugged in. • Plug in lhe AC power cord.
• The Disc Lock functhm is in use. .Cancel lhe Disc Lock fu:nctkm. (See
page 19.)
I_e disc does not play. I_e disc is upside down, Put lhe disc in wilh lhe label si&: up.
ka)aded cassetm cannot be (_ecmd. I_le Casset_: Lock function is in use. Cancel lhe Casset_ Lock function. (See
page 20.)
lm possible to record. Small tabs on lhe back of lhe cassetle are Cover lhe holes wilh adhesive tape.
removed.
Opera(ions are disabled. 'l}re built-in micToprocessor has Unplug lhe AC power cord lhen plug it
mN functioned due Ix)ex_rngl electrical back in,
inmrfercnee.
Unable to operate lhe unit by lhe rmnote • The palh between lhe remote control • Remove lhe obsmmtion.
eontrIlL and lhe remoK_ sensor on lhe unit is
Nocked,
• The battcries are ex&austed. • Replace the batteries, (See page 8.)
• You are using Oreremote control too •Signds c_mnot reach Oreremote
Ihr from l}le unik sensor. Move closer R) l}le u:nit.
29
Specifications
AmplifierSection--CA-FSB70
Output Power: 74 W per ch_mnel, rain. RMS, driven
into 6[2 at 1 kHz with no more than
10% lolal h_lrtntmic dislorlitm.
Analog input sensJtivJly/lrnpedanee (at 1 kHz)
ALiX/1)VD: 400 mV/48 k_2
Speakers/Impedance: 6 _2- 16 _2
Tuner
FM tuning range:
AM tuning range:
87.5 MHz-- 108,0 M Hz
530 kHz--I 710 kHz
CDplayer
CD Capaciw: 5 CDs
Dynamic range: 87 dB
Signal-to-noise ratio: 90 dB
Wow and flut_rr: Immeasurable
Cassettedeck
Frequency response:
Nom_al (type I):
Wow and flut_rr:
60Hz 14000Hz
0.15 % (WRMS)
General
Power requirement: AC 120 V "X_, 60 Hz
Power consu:mptkm: 1 t0 W (at operation)
17 W (on standby)
t. t W (in power save nmde)
Dimensions (W/HTD) (apgrox.):
175 turn × 239.5 turn × 378 turn
(6 !_/_ in. x 9 !12in. x 14 _5/_,in.)
Mass (approx.): 8 kg (17.7 lbs)
Suppliedaccessories
See page 6.
SpeakerSection--SP-UXB70
I_pe: 2-way bass-retie× type
Speakers: Woofer 12 cm (4 _/_in.) cone xt
'l\_'eetcr 2 cm (_:_/_,in.) dome xl
Power handling capacity: 60 W
Impedance: 6 _)
Frequeney range: 55 Hz to 20 kHz
Sound pressure le_.el: 85 dB/W,m
Dimensions (W/HTD) (apgrox.):
145 mm× 239.5 turn × 202 turn
(5 _/*in. x 9 !L"in. x 8 in.)
Mass (approx.): 2.5 kg (5.5 lbs) each
Design amt speciliczaions are sul?iect to c4_angewithout notice,
30
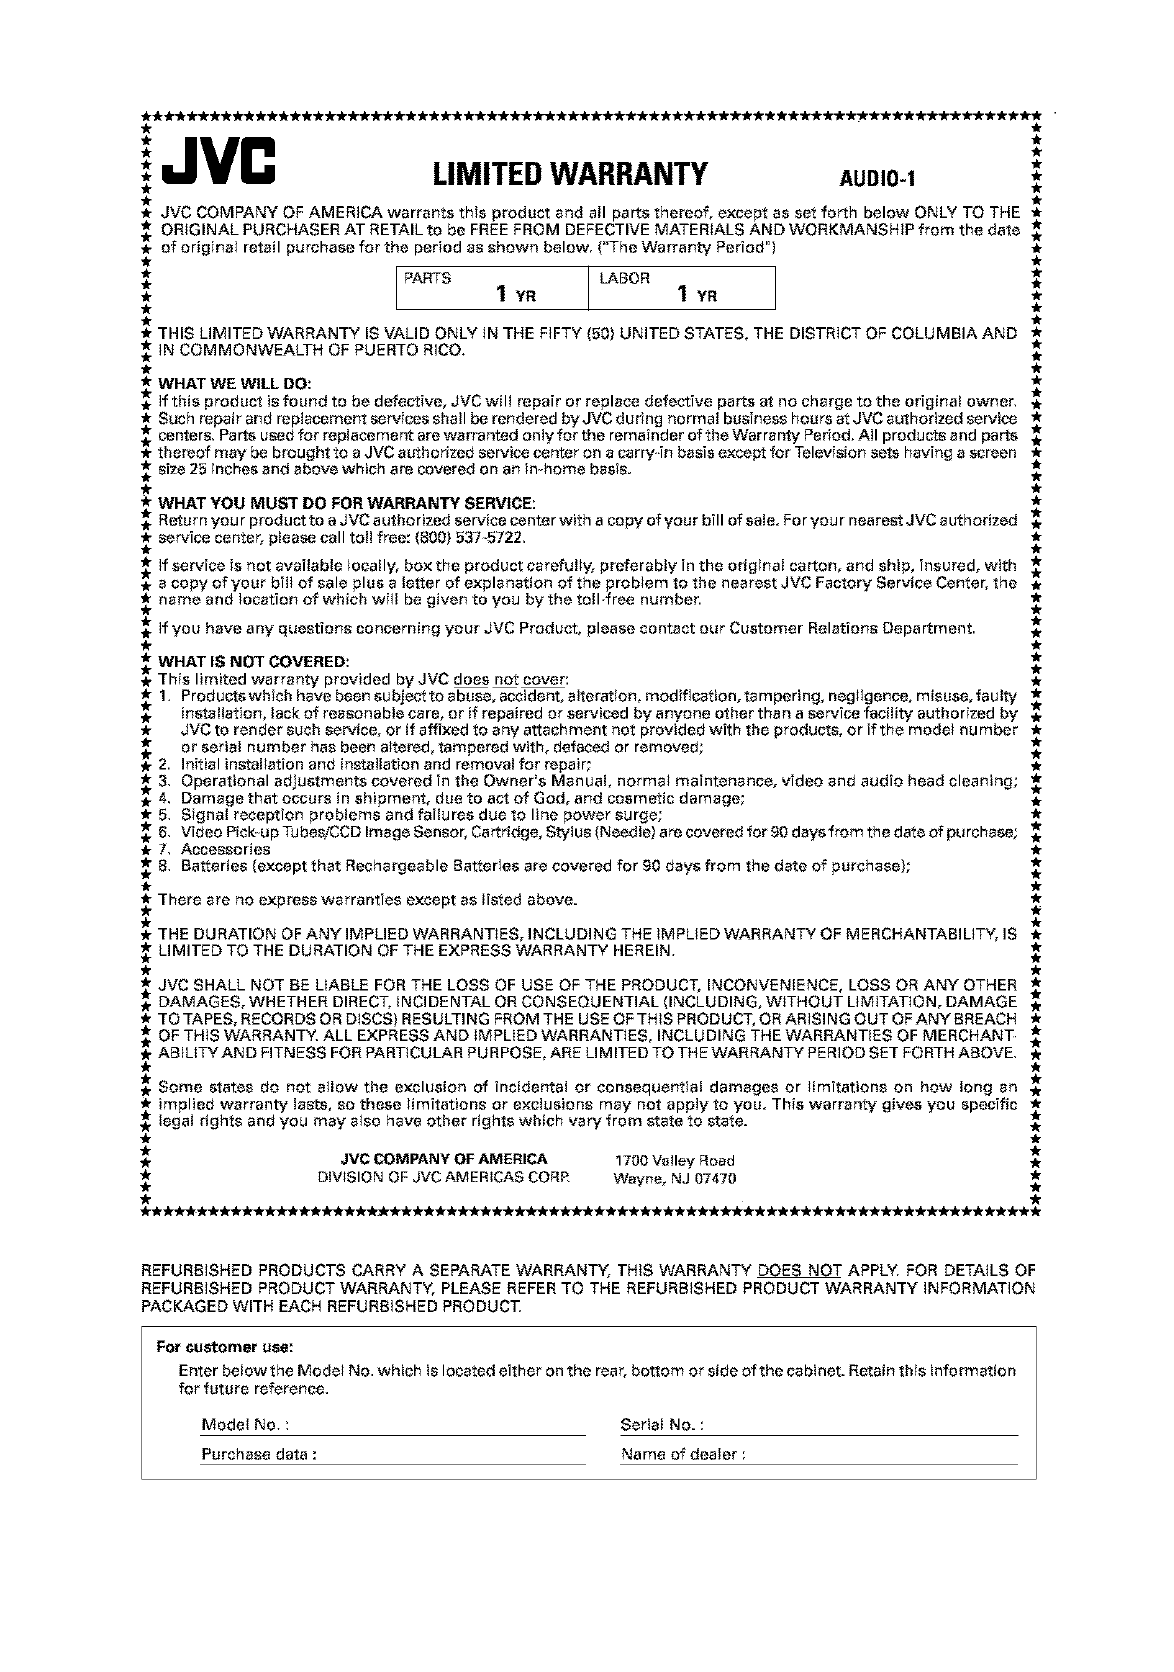
'JVC
** LIMITEDWARRANTY AUDIO-I *
*JVC COMPANY OF AMERICA warrants this product and all parts thereof, except as set forth below ONLY TO THE *
._.*ORIGINAL PURCHASER AT RETAIL to be FREE FROM DEFECTIVE MATERIALS AND WORKMANSHIP from the date _.*
of original retail purehase for the period as shown below, (*'The Warranty Period") _r
* PARTS LABOR *
* 1 YR 1 YR *
* THIS LIMITED WARRANTY IS VALID ONLY IN THE FIFTY (50) UNITED STATES, THE DISTRICT OF COLUMBIA AND *
IN COMMONWEALTH OF PUERTO RICO,
*WHAT WE WILL DO: *
*. if this product is found to be defective, JVC will repair or replace defective parts at no charge to the original owner,
* Suchrepairandrep_acementservicessha_berenderedbyJ_Cduringn_rma_businesehoursstJ_Cauth_rizedservice *
_ centers` Parts u_d f_r rep_aceme_ are warranted _n_y f_r the remainder _f the _arranty Period_ A_ pr_ducts and parts *
* thereof may be brought to a JVC acthorized service center on a carry4n basis except for Television sets having a screen _
-_ size 25 inches and above which are covered on an in-home basis.
*WHAT YOU MUST DO FOR WARRANTY SERVICE: *
*. Return your produst to a JVC authorized service center with a copy of your bill of sale. For your nearest JVC authorized
*service center, please call toll free: (800) 537_5722, *
ff service is not available {ocally, box the product carefully, preferably in the original carton, and ship, insured, with
.a copy of your bill of sale plus a letter of explanation of the problem to the nearest JVC Fastory Service Center, the .
name and location of which wil! be given to you by the to!l free number, ,_
if you have any questions concerning your JVC Product, please contact our Customer Relations Department, .
WHAT IS NOT COVERED:
.This limited warranty provided by JVC does not cover: .
1. Products which have been subject to abuse, accident, alteration, modification, tampering, neg;igenee, misuse, faulty .*
.installation, lack of reasonable care, or if repaired or serviced by anyone other than a service facility authorized by .
*JVC to render such service, or if affixed to any attachment not provided with the products, or if the model nu tuber *
_2. or serial number has been altered, tampered with, defaced or removed; .
Initial installation and installation and removal for repair; *
* 3, Operational adjustments covered in the Owner*s Manual, normal maintenance, video and audio head cleaning; *
4. Damage that occurs in shipment, due to act of God, and cosmetic damage; .
*5, Sfgnal reception problems and failures due to line power surge; *
6, Vide_Pi_kupTubes/CCD_mageSens_r,Cartridge,_ty_us(Need_e)are_veredf_r9_daysfr_mthedate_fpurchase; ,*
*7, Accessories *
8, Batteries (except that Rechargeable Batteries are covered for go days from the date of purchase);
_. There are no express warranties except as listed above.
_- THE DURATION OF ANY IMPLIED WARRANTIES, INCLUDING THE IMPLIED WARRANTY OF MERCHANTABILITY, IS _r
__ LIMITED TO THE DURATION OF THE EXPRESS WARRANTY HEREIN,
* JVC SHALL NOT BE LIABLE FOR THE LOSS OF USE OF THE PRODUCT, INCONVENIENCE, LOSS OR ANY OTHER *
DAMAGES, WHETHER DIRECT, iNCIDENTAL OR CONSEQUENTIAL (INCLUDING, WITHOUT LIMITATION, DAMAGE
* TOTAPES, RECORDSORDISCS)RESULTINGFROMTHEUSEOFTHISPRODUCT,ORARISINGOUTOFANYBREACH *
OF THIS WARRANTY, ALL EXPRESS AND IMPLIED WARRANTIES, INCLUDING THE WARRANTIES OF MERCHANT .
* ABILITY AND FITNESS FOR PARTICULAR PU BPOSE, ARE LIMITED TO THE WARRANTY PERIOD SET FORTH ABOVE, *
Some states do not allow the exclusion of incidental or consequential damages or limitations on how long an
* implied warranty lasts, so these limitations or exclusions may not apply to you. This warranty gives you specific *
._ legal rights and you may also have other rights which vary from state to state.
.JVC COMPANY OF AMERICA 1700 Valley Road .
*DIVISION OF JVC AMERICAS CORR Wayne, NJ 07470 *
**********--*****************--*--*************************************
REFURBISHED PRODUCTS CARRY A SEPARATE WARRANTY, THiS WARRANTY DOES NOT APPLY, FOR DETAILS OF
REFURBISHED PRODUCT WARRANTY, PLEASE REFER TO THE REFURBISHED PRODUCT WARRANTY iNFORMATION
PACKAGED WITH EACH REFURBISHED PRODUCT,
For customer use:
Enter below the Modet No, which is located either on the rear, bottom or side of the cabinet. Retain this information
for future reference,
Model No. :Serial No. :
Purchase data :Name of dealer :
Authorized Service Centers
JVC °
QUALITY SERVICE
HOW TO LOCATE YOUR JVC SERVICE CENTER
TOLL FREE: 1(800)537-5722
http://_.jvc.com
Dear Customer,
in order to receive the most satisfaction from your purchase,please read the instruction booklet before
operating the unit,In the event that repairs are necessary, please caIi 1 (800}537=5722 for your nearest
authorized servicer or visit our website at www,JVC,com
Remember to retain your Bill of Sale for Warranty Service.
Do not service the television yourself
Caution
To prevent electrical shock, do not open the cabinet.There are no user serviceable
parts inside.Please refer to qualified service personnel for repairs.
Accessories
To purchase accessories for your JVC product,please call toll free:l (800)882-2345 or
on the web at www.JVC.com
BT-51001 5
(0301)
"1"1
|
o
JVC
VICTOR COMPANY OF JAPAN, LIMITED
0
no
-,I
0
no
0
z
1"11
z
-,I
g9
-.-I
1"1'1
© 2003 VICTOR COMPANY OF JAPAN, LIMITED O 0303MWMMDWJEM
